

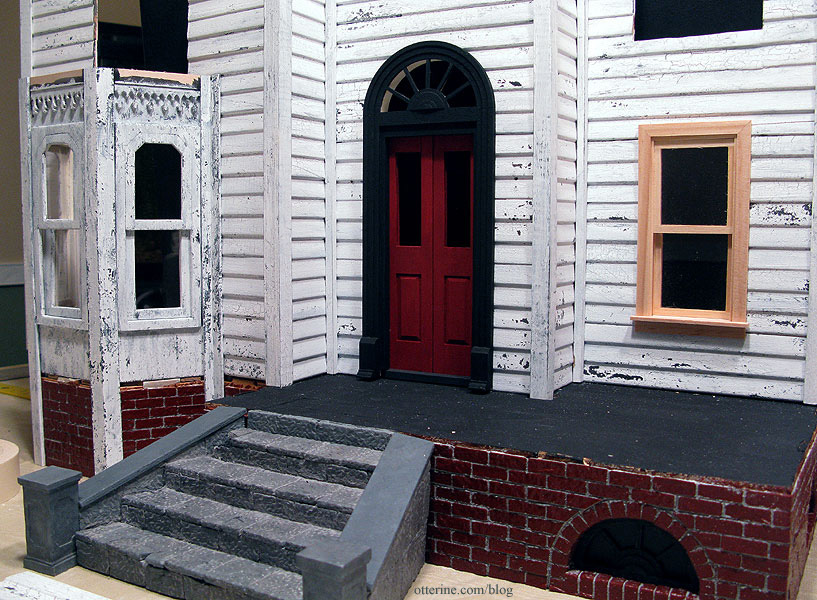
Heritage – Portico, part 1
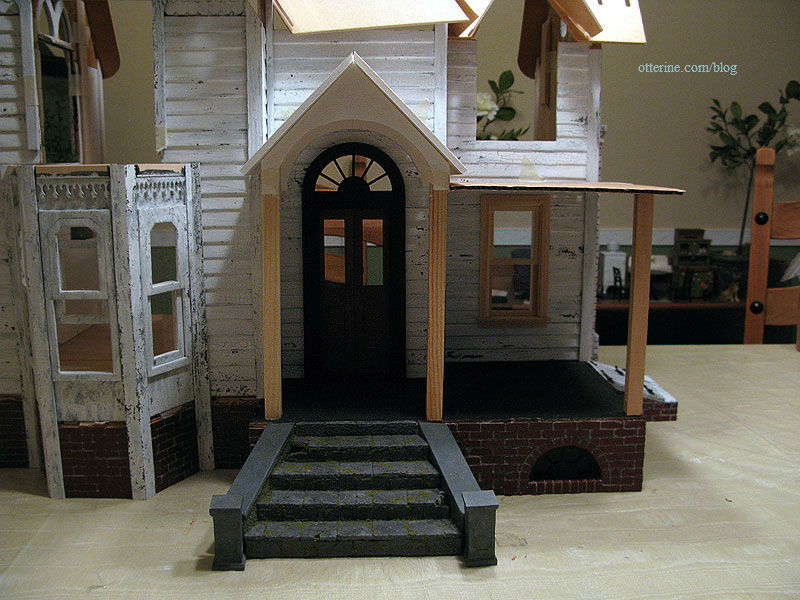
Since the Heritage has a flat porch roof but my new Palladian door has an arch top, I needed a solution to have both. I figured building a portico similar to this one would work, though my door has a half circle window above it.
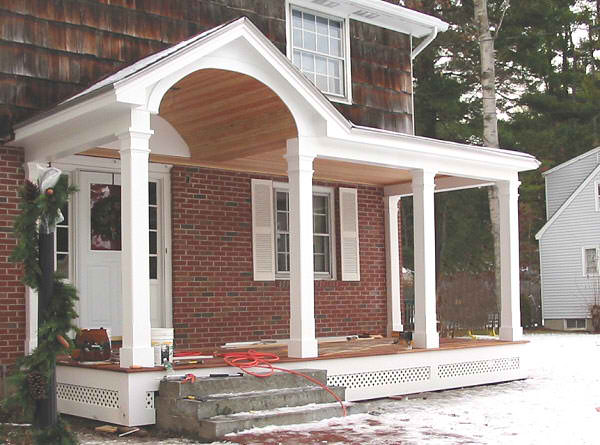
Photo from JP Works, Massachusetts Mike from One Twelfth Scale Miniatures also just made a beautiful portico, though his construction varies from mine a bit. And, his isn’t as rustic as mine.
First, I determined the width, height and basic shape of the portico in relation to the doorway using 1/4″ thick foam core board and two of the original porch posts from the kit. I’ll likely use turned posts for the final, but I didn’t want to cut them until I was certain of the height. At 12″ tall, they are too long to use for layout purposes.
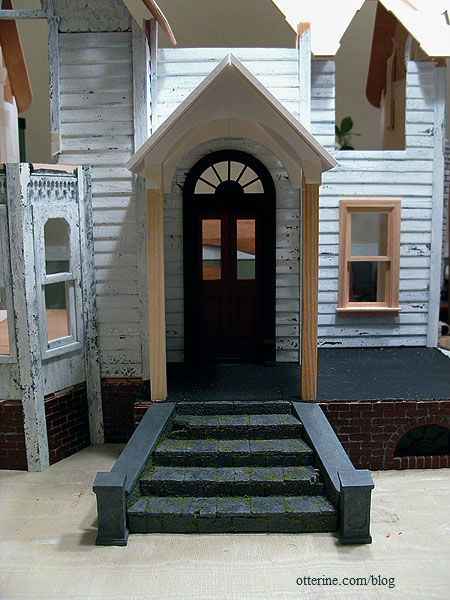
I think the portico adds just the right kind of interest that the original porch was lacking since I upgraded the front door. It also fits in better with the various roof angles.
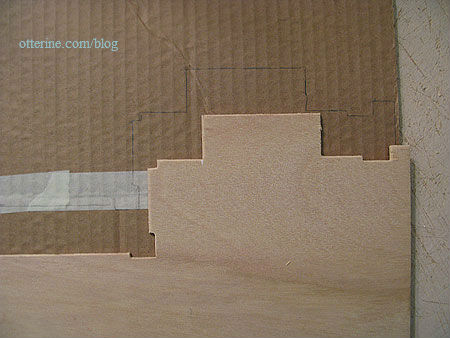
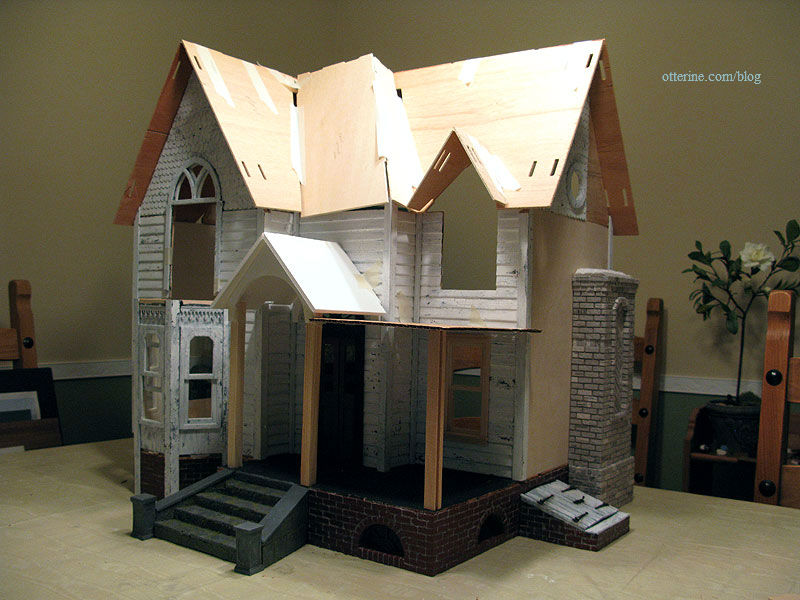
I traced the original porch roof piece onto cardboard and used this copy for the next step. I will be using the original plywood piece in the final, but this way I could cut and modify the cardboard piece without worrying about making a mistake.
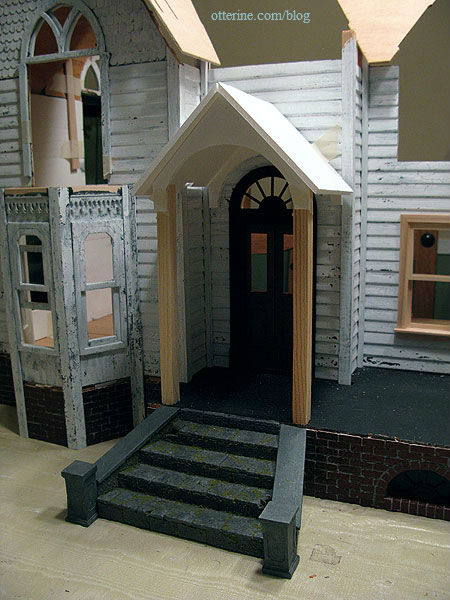
With the portico in place, I could determine the remaining porch roof. I cut the cardboard piece to fit and added a scrap (broken) connector cut to size to serve as the third porch post.
Since the house is still in dry fit, I won’t cut the final pieces until after I glue the walls together. This mockup version gives me something to work with in the meantime and helps me determine the direction I need for certain aspects of the build.
But, I am torn between a standalone portico…
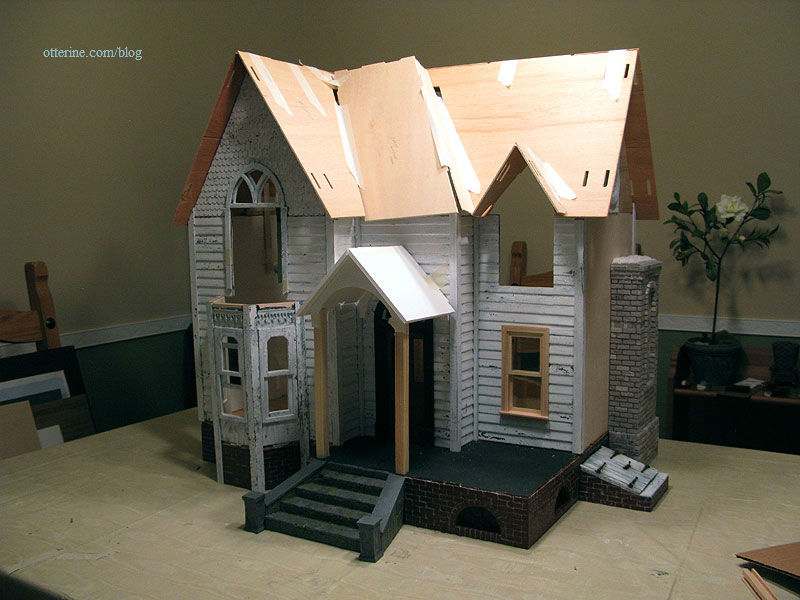
…and a portico with a flat roof on the side.
Visually, I think the lone portico is much more interesting, but I don’t know if it would make architectural sense to have most of the porch uncovered. Hmm…
Categories: The Haunted Heritage
October 8, 2011 | 0 commentsHeritage fireplace finishing
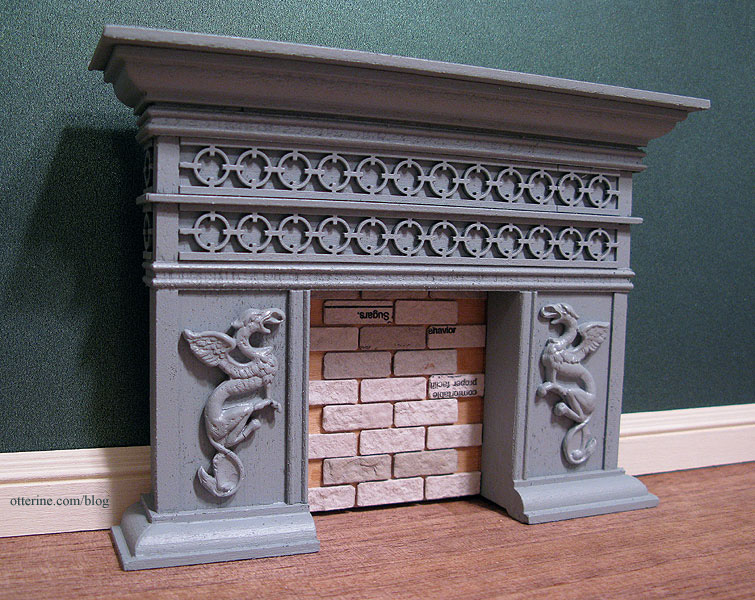
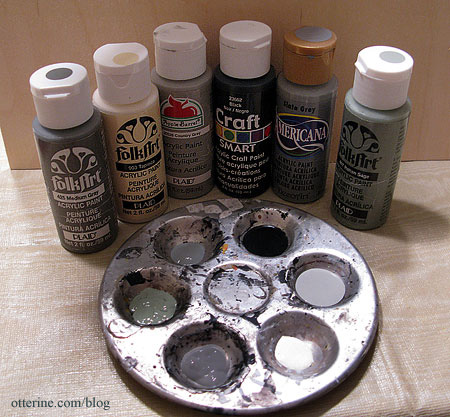
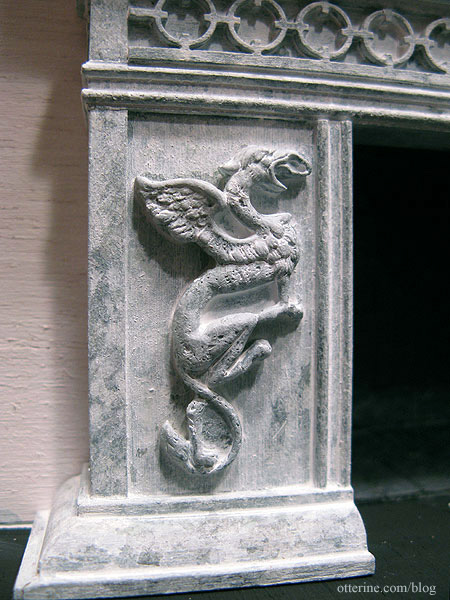
Continuing work on the fireplace, I sprayed it with grey primer. I wanted a good and even base layer for the final finishing I have planned. The griffins look more natural now that the fireplace is all one color.
I lightly sanded the roughness after the primer coat had completely dried. I then used this array of paints to create the final coloration and finish. These are: Medium Grey, Tapioca and Italian Sage by Folk Art; Country Grey by Apple Barrel; Black by Craft Smart; and Slate Grey by Americana.
I dotted on the paint in layers, starting with one of the lighter greys followed by the Tapioca, also dotted on. Uh-oh…polka dotted fireplace.
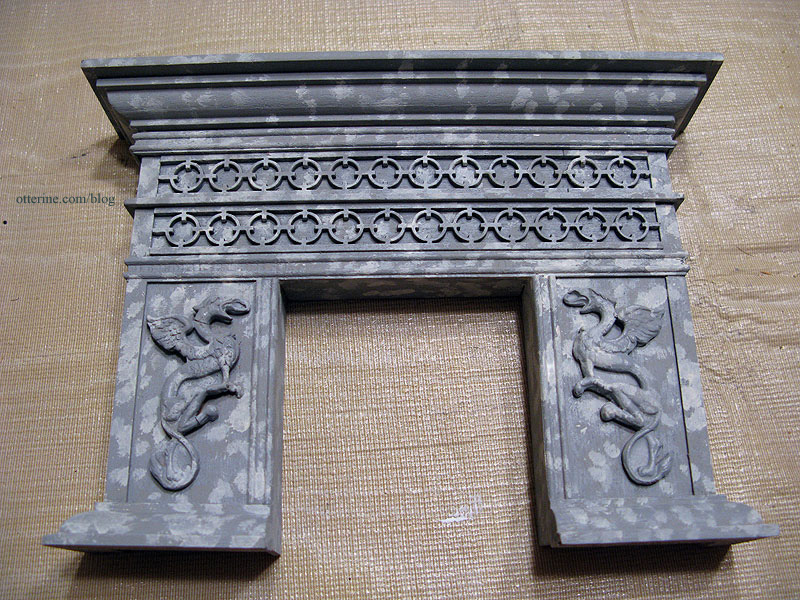
And then black, stippled in the same manner. The griffins are disappearing. Yes, it looks worse before it gets better.
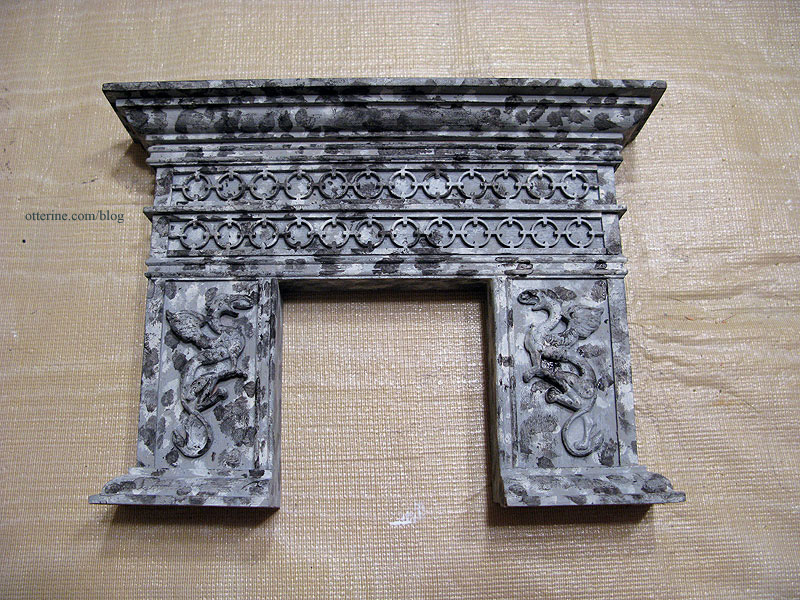
Lastly, the Italian Sage. Now it looks like camouflage! But, not to worry…

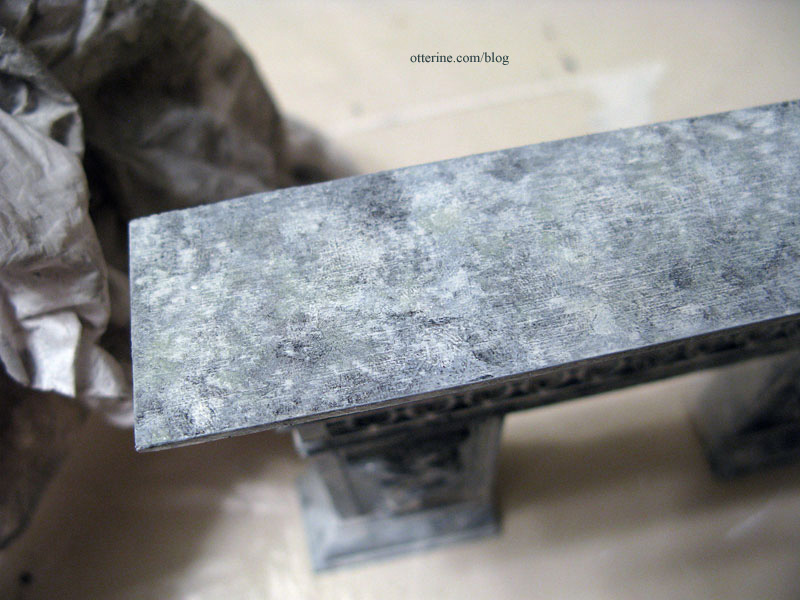
I then used heavily diluted paint washes with the paints left in the palette including the ones I had already used. I couldn’t really take photos since this part was messy. I would layer on the watery paint and then dab it off with a paper towel, so my hands got covered in paint. The last wash was Tapioca.
Yes, it is as scary as it looks. The wood swells and glue comes undone in places…nothing that can’t be fixed. It’s all part of the process. :]
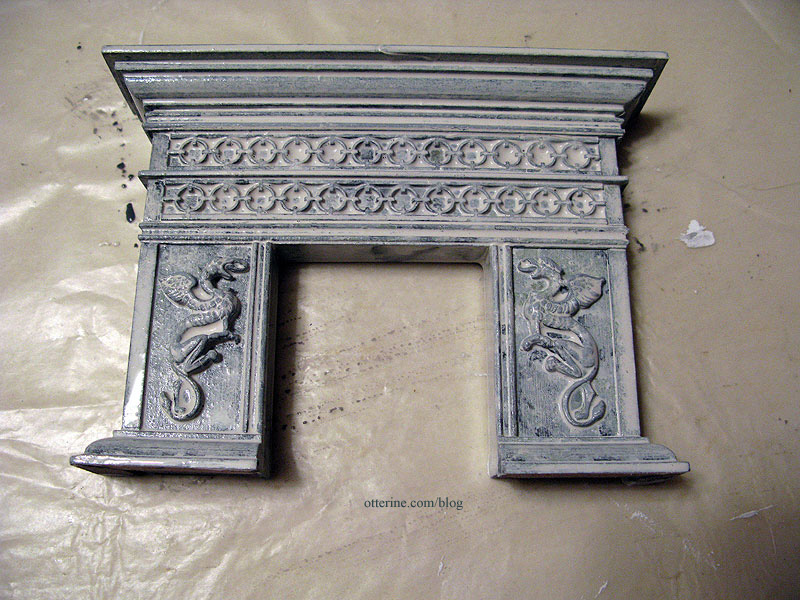
I dabbed the last wash after letting it set a minute, and I was left with a fine white stone finish with a hint of sage green.
I really like the way it turned out.
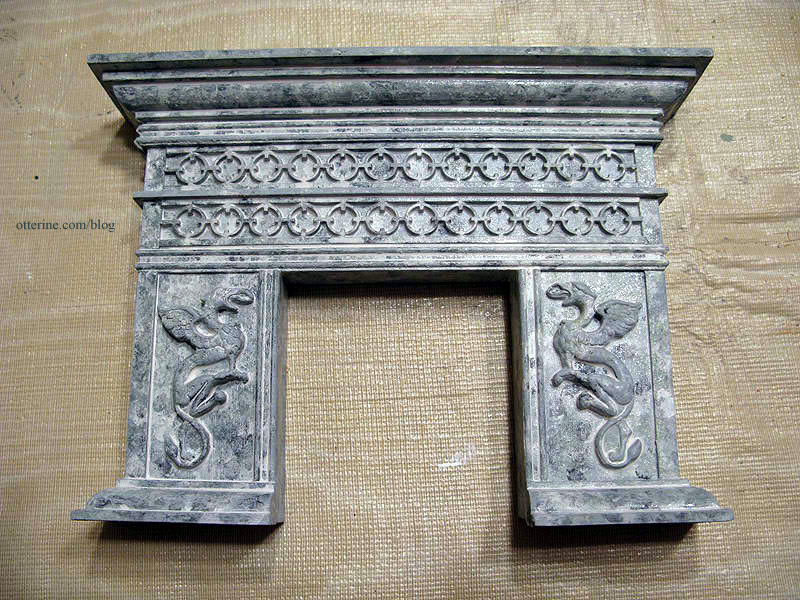
The griffins also look more like carved parts of the fireplace instead of pieces stuck on top.
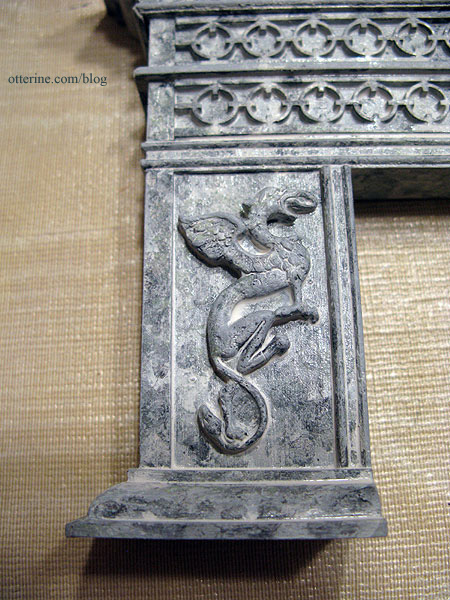
I added another white wash to the fireplace since the paint did end up duller and darker after it dried. This turned out so well, I set the finish with spray sealer.
I love the texture of it.
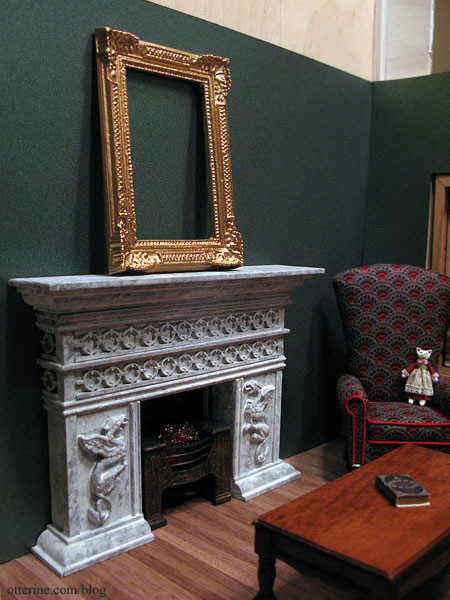
For details on the firebox, hearth and coals, see this post.
Categories: The Haunted Heritage
October 6, 2011 | 0 commentsHeritage – mossy steps
Continuing work on the stone steps. I never knew landscaping could be so much fun!!! I think I’m going to have to make a mini garden at some point in the future. :D I’ve started some leaves, more here.
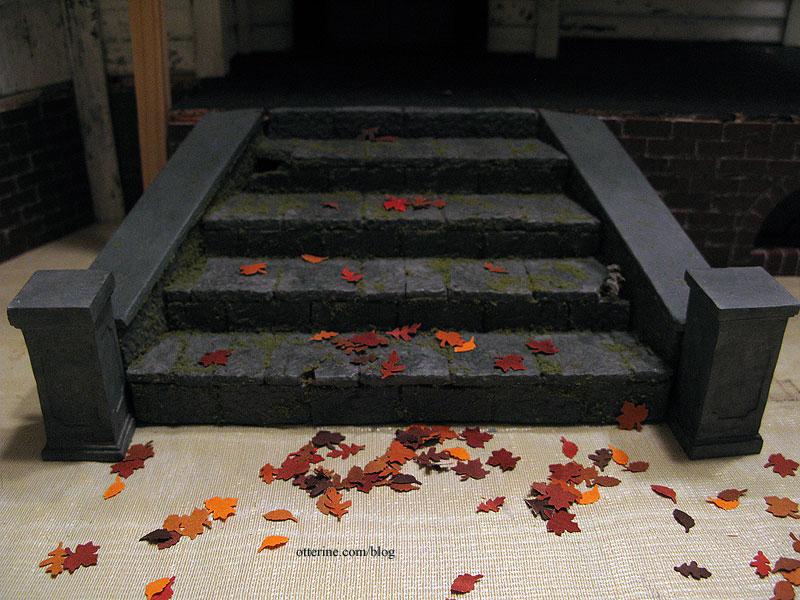
Using Aleene’s clear gel tacky glue applied with a toothpick, I glued Fine Turf, Burnt Grass by Woodland Scenics to the stone steps to serve as moss.

I love the subtle quality of this material on the painted stone. I didn’t go overboard with it, figuring I can always add more but it’s not so easy to remove the excess.
In one of the holes I had made in the steps, I glued two Extra Long Autumn Tufts “Silflorettes” and three Autumn Tone Goldenrod Weeds “Silflorettes” by MiniNatur.
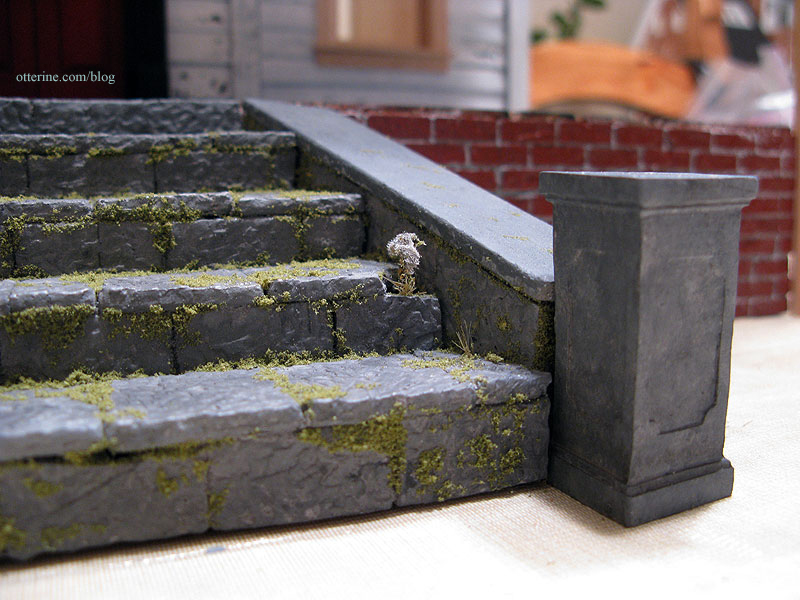
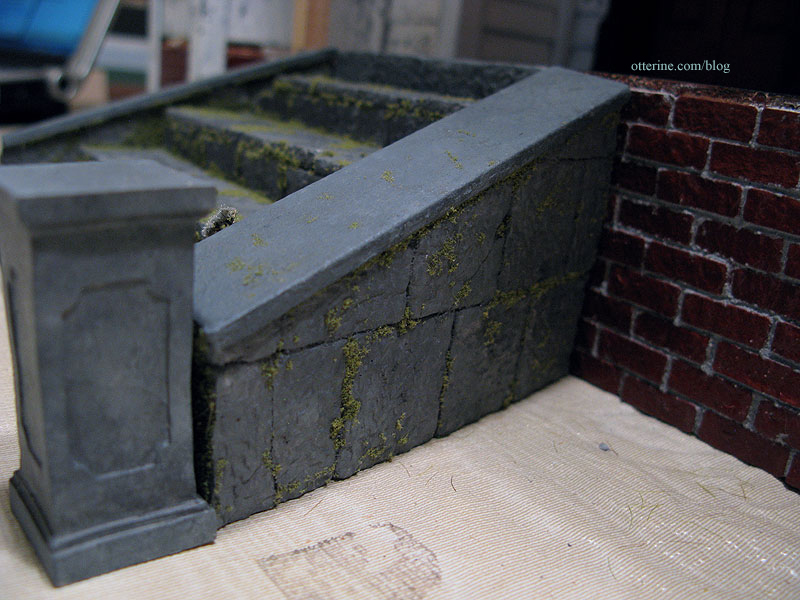
This whole process is messy, but I don’t know if that makes me love it even more. I’ll add the moss to the top riser and front pedestals when I finish the foundation. It, too, will have moss detailing.
Categories: The Haunted Heritage
October 5, 2011 | 0 commentsHeritage – First floor windows, not happening
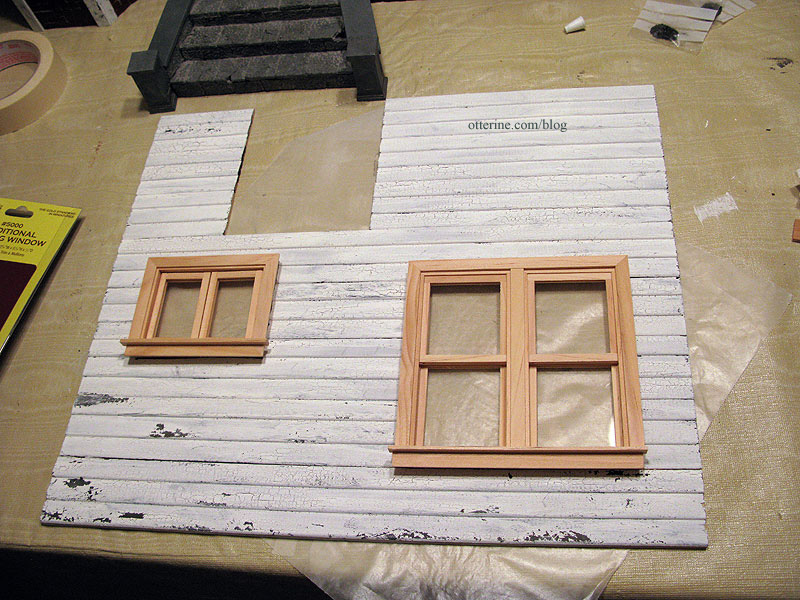
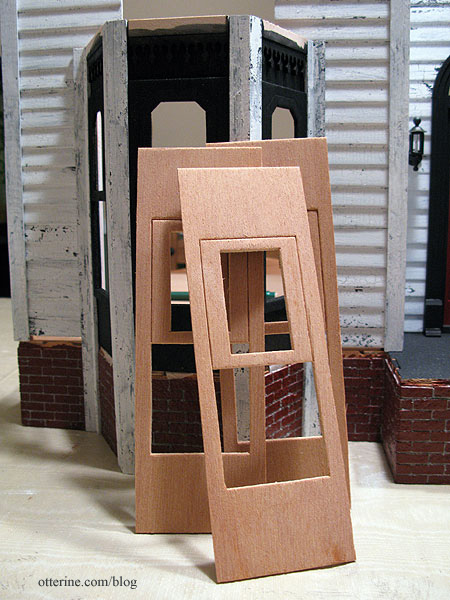
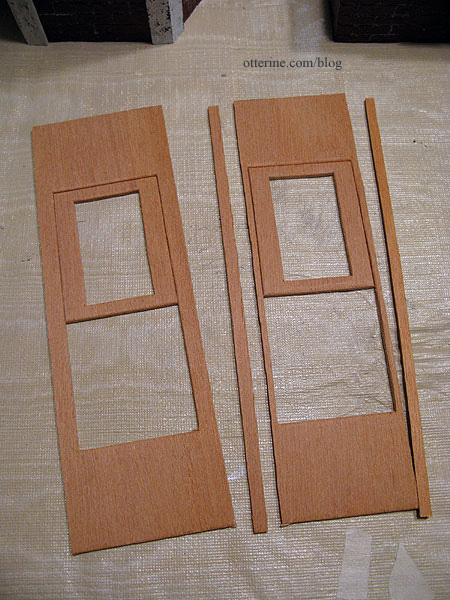
Even with the success I had getting two out of three windows working for the front bay window, the two regular first floor windows are just … errrmmm … garbage. The wood is beyond bad and the pieces just don’t fit at all. I’d be better off cutting new ones from scratch than even attempting to reshape and repair. And, if I am going to go through that sort of hassle, why not just get some ready-made components?
Enter the Houseworks traditional working window and double working window. Since these components have more depth to them than the original wall thickness, I’ll need to build up the outer frame and pad the interior walls but that’s easy to do.
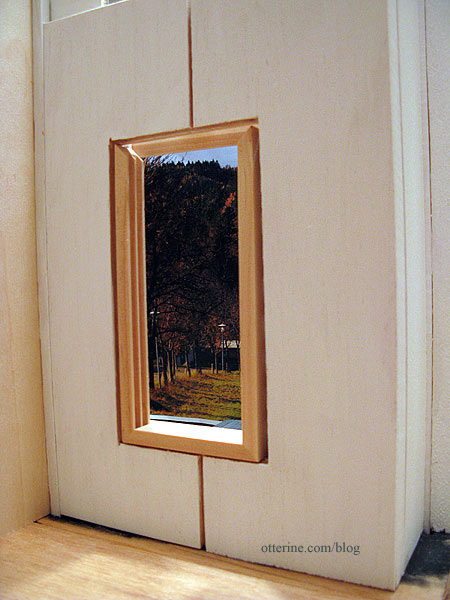
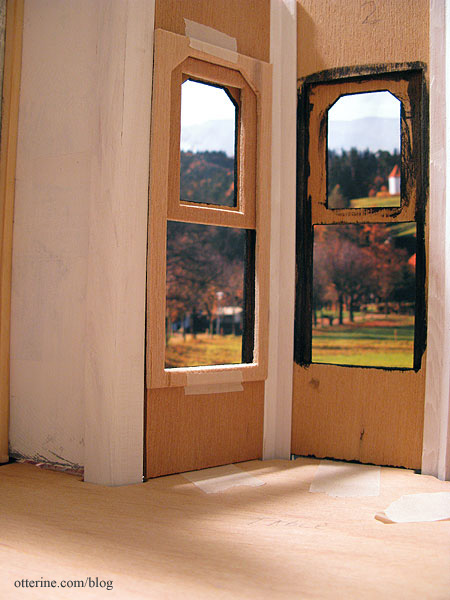
For the parlor, to get the traditional single window to work, I had to make the hole off the front porch narrower. This was made easier since I had leftover siding pieces from eliminating the side bay window. I took the original wall apart, cut new pieces from the side wall leftovers and put the wall back together. Since these pieces were already painted and aged, they didn’t need any finishing other than a few touchups.
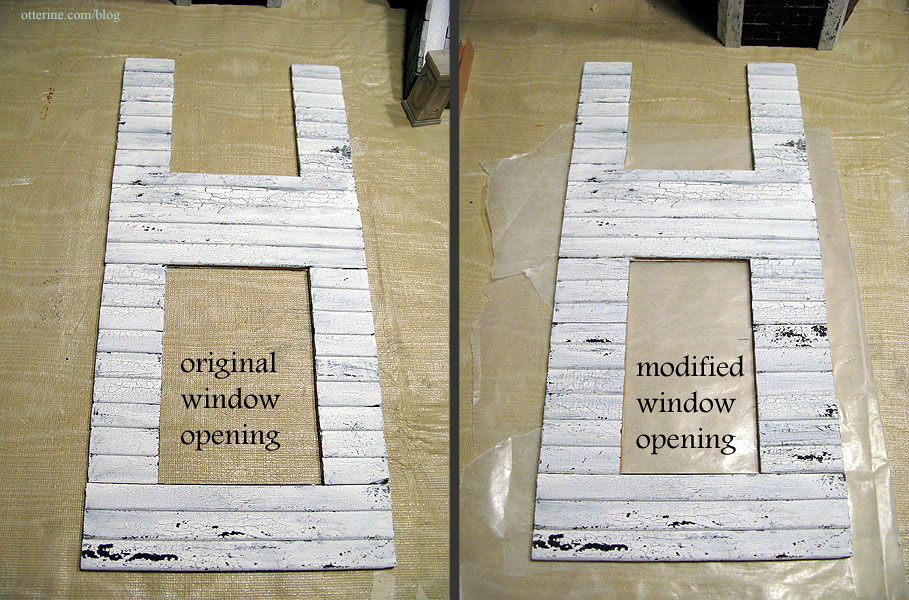
I think it looks like it belongs. :D
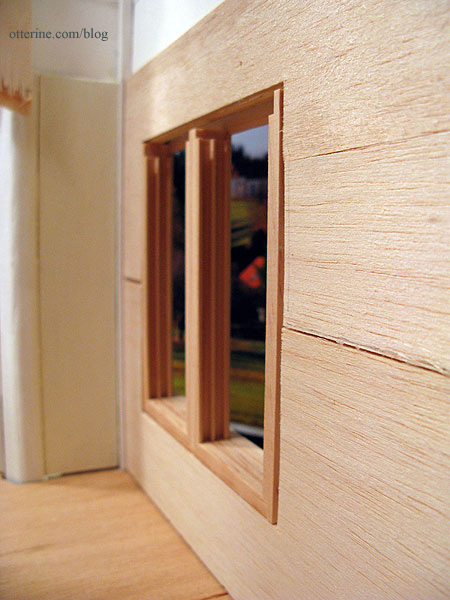
This component required a depth greater than the wall. You can see how it doesn’t fit as is.
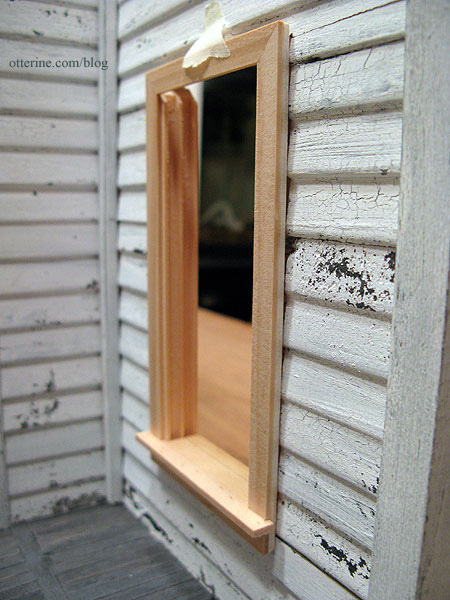
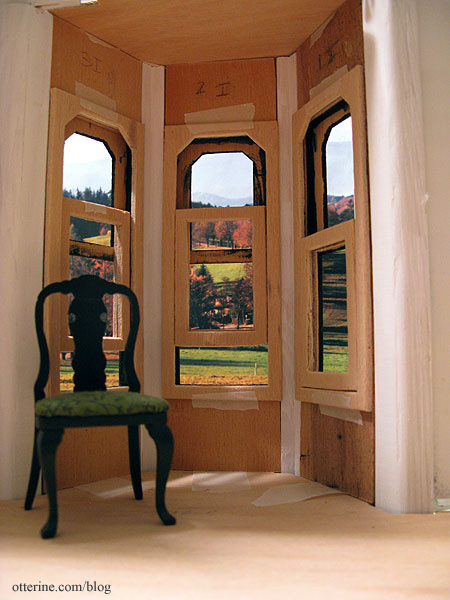
I padded the front parlor wall. This will offer support for the parlor ceiling. The gaps you see here are for potential wiring.
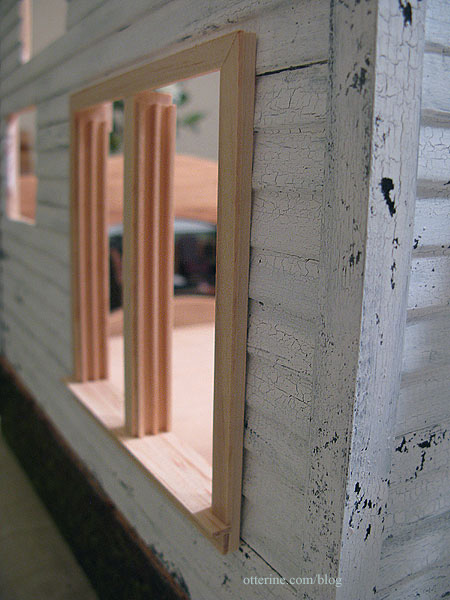
This window required some extra wood on the outer frame. I actually think this added thickness looks more realistic than the way the window looks out of the package.
For the kitchen, to get the double working window to fit, I had to make the existing hole larger.
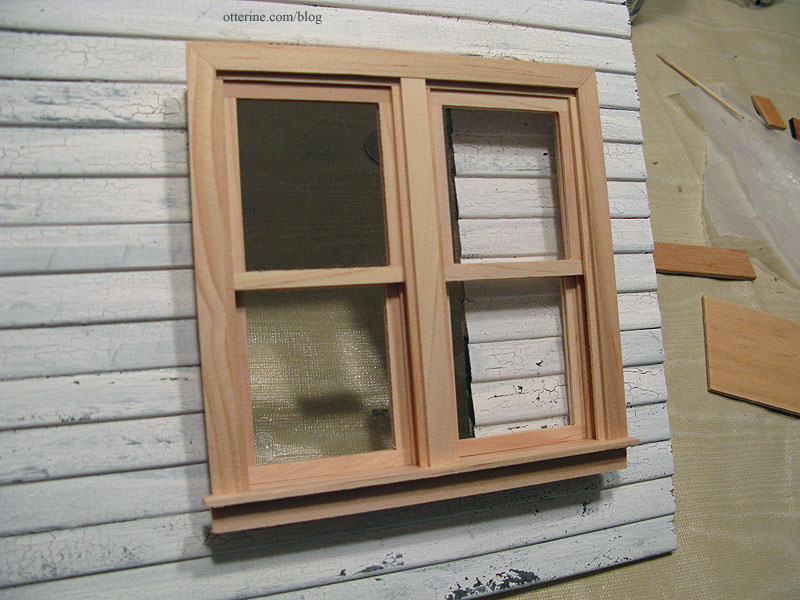
I think this was perhaps meant to be since the pieces I had removed from the front wall were the exact width I needed to get the window to fit. So, I took this wall apart, took out the existing pieces and replaced them with the narrower ones. I’ll keep the originals in my stash of spares.
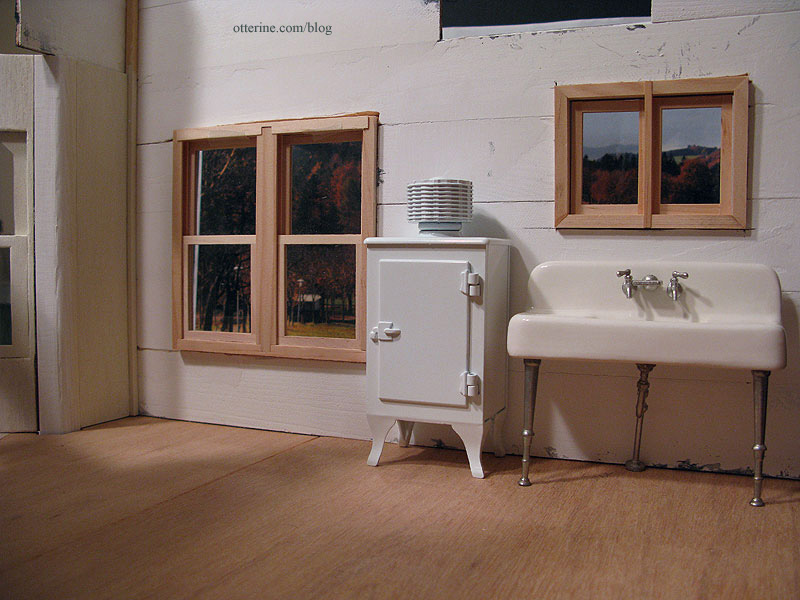
This new window matches so much better with the working casement window I already added to this wall than the original would have.
It’s a rather large window, but I remember the windows in my childhood house being large, too. I think it works, and there’s enough room for the kitchen appliances even with the added window width.
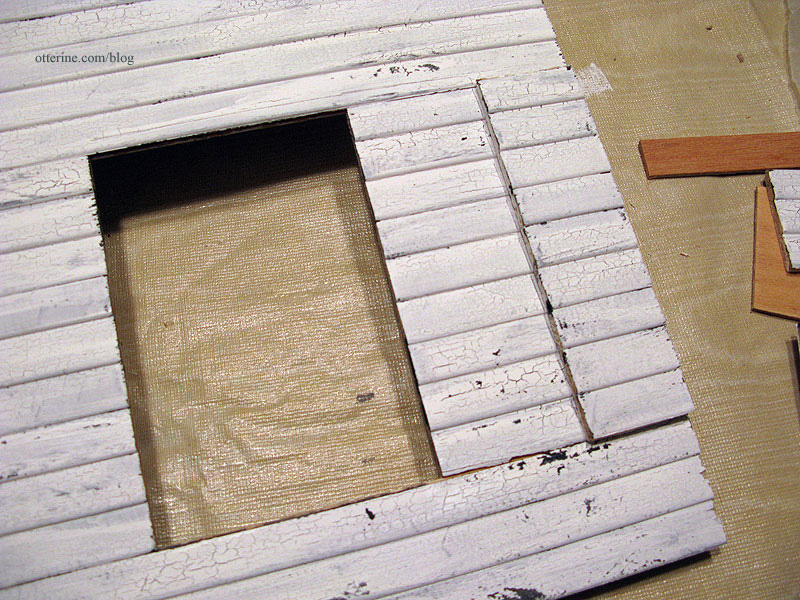
I padded the side kitchen wall for the new double working window. This will offer support for the kitchen ceiling as well as make up part of the difference in depth between the original wall and the added window. Adding this extra padding in both rooms eliminates the need for floor supports that would have otherwise shown in a very unrealistic manner.
On the outer frame, I added strip wood to make up the rest of the difference.
Categories: The Haunted Heritage
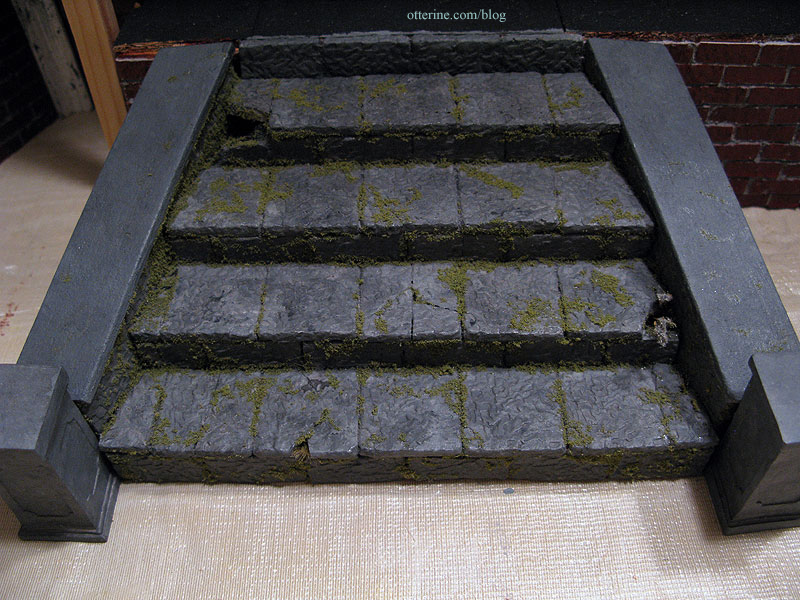
September 28, 2011 | 0 commentsHeritage – stone steps, part 2
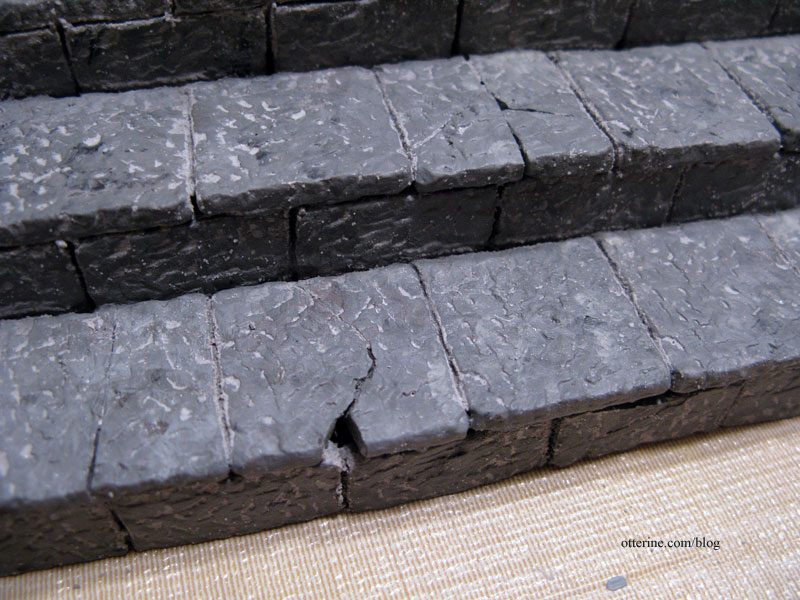
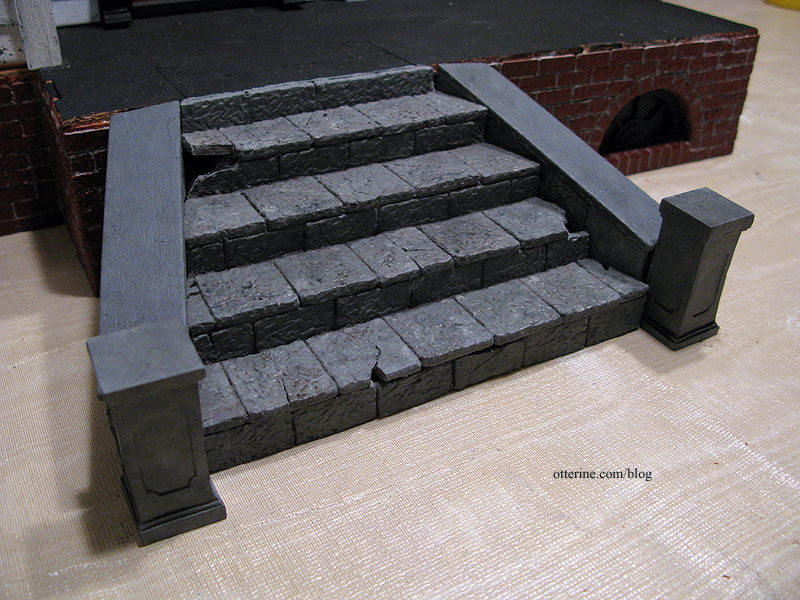
I’ve painted the stone steps in a mixture of grey and black acrylic paints to take down the shine of the original pavers and painted the purchased pillars to match. I also cut toppers for the side walls out of balsa wood.
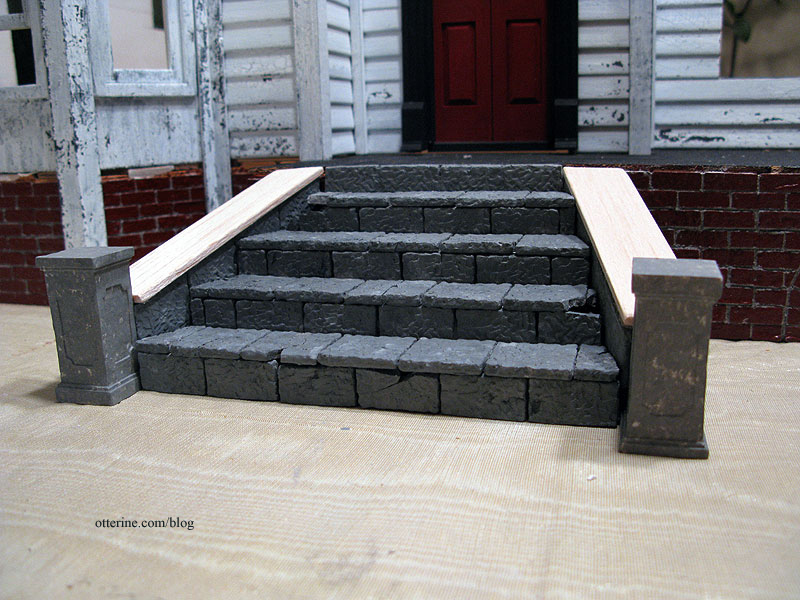
I grouted the steps, though I didn’t seal the grey paint before grouting. I wanted to make sure I didn’t have any shine on the steps. I used a sewing pin to define the grout lines since a toothpick would have been too thick to get between the pavers.
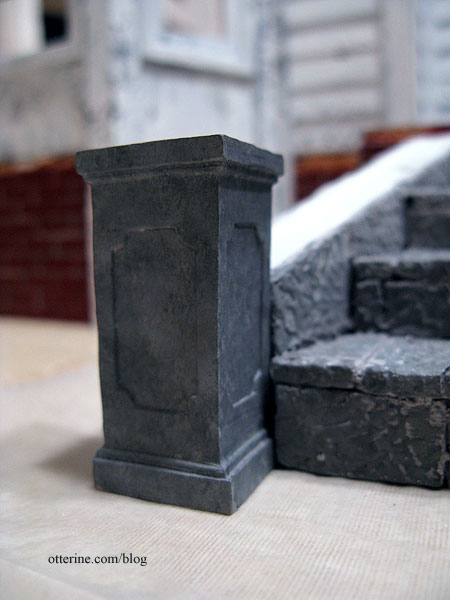
A pair of pedestals from Carol’s Bloomers finish off the front steps. The pillars needed another coat of paint to match seamlessly.
I glued the sides to the steps but the whole assembly won’t be attached permanently to the foundation until after the house is mounted to its baseboard. I painted the balsa toppers to match as well, but it took a lot of layers to remove the wood grain. I even used some grouting material to add some texture to the paint, though most of it was sanded down in the process.
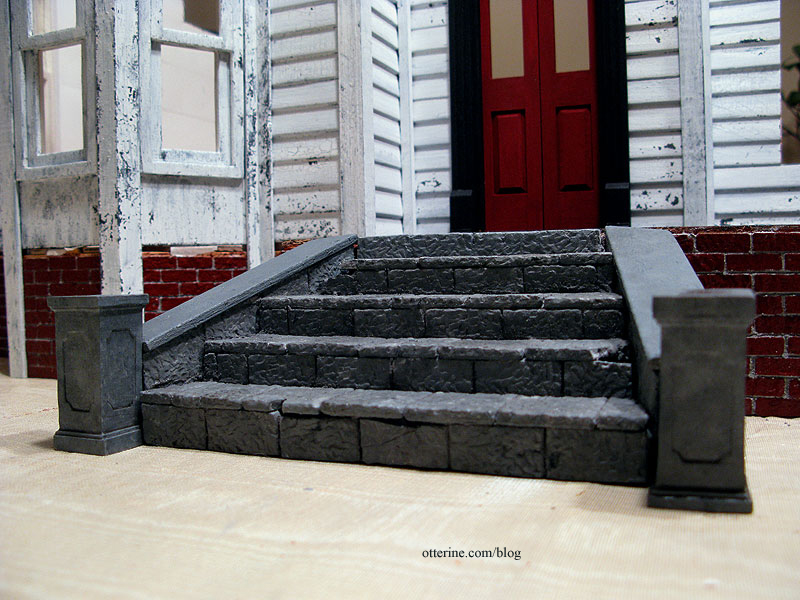
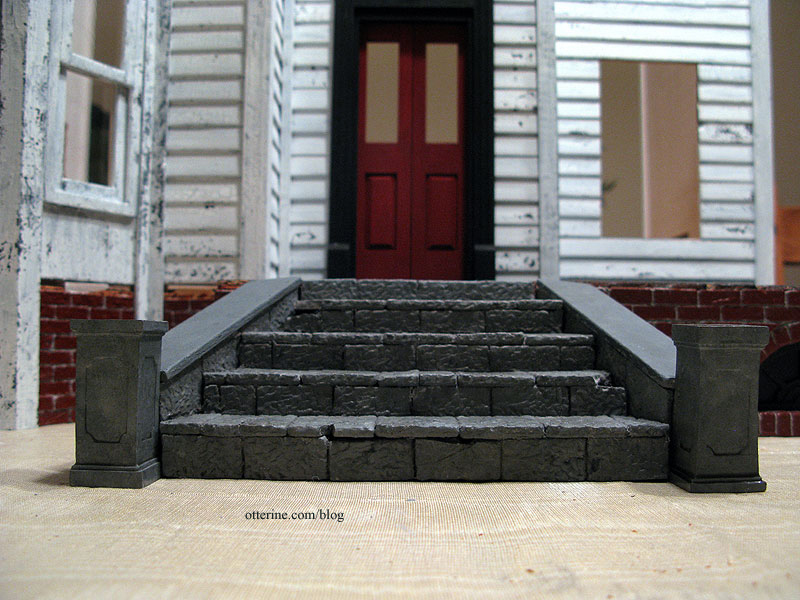
I gave the steps, sides and pedestals a quick wash of black-brown paint diluted in water to take down the brightness of the grouting. It also gives the illusion of leftover mud from a recent rain. :D
There will be some plant matter and moss added during the landscaping phase, too. I really like the visual weight of them. :D
Aging and adding moss here.
Categories: The Haunted Heritage
September 27, 2011 | 0 commentsHeritage – cellar doors
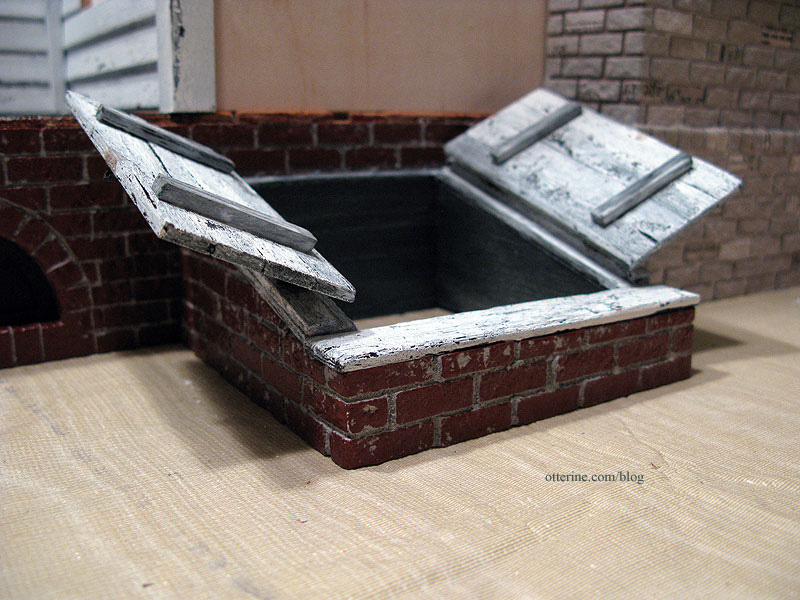
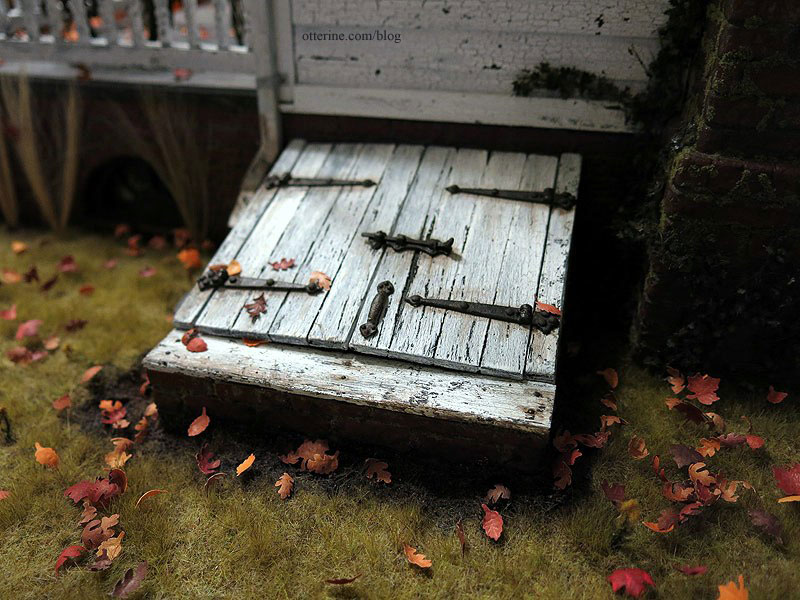
I might end up putting in a flickering unit for the cellar lights and fireplaces, so I needed to plan ahead for an accessible place to hide the circuit board just in case. :D I figured a set of working cellar doors that allow access to the unit would be just the thing. And, who doesn’t think old cellar doors are creepy?
My inspiration comes from Jeremy Paul. I studied his design for the beautiful Tudor he is currently building, though I built mine out of foam core board, wood scraps and egg carton bricks.
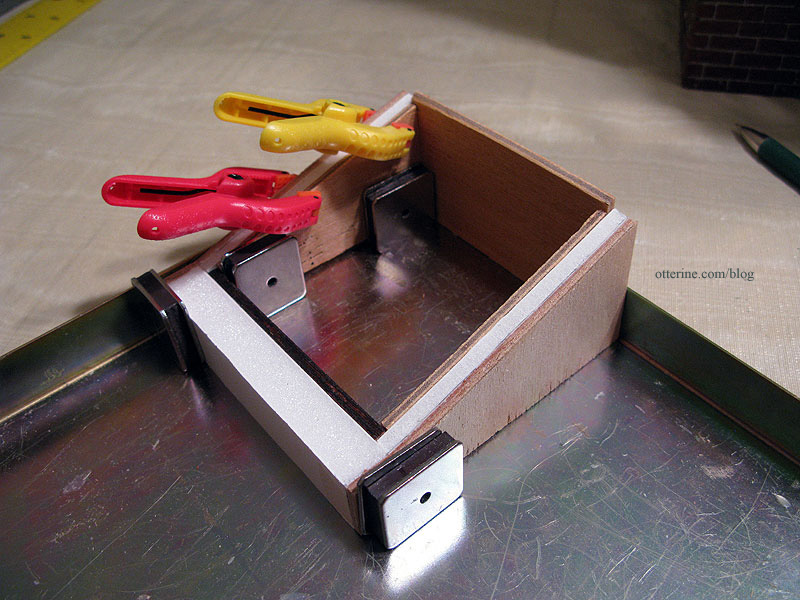
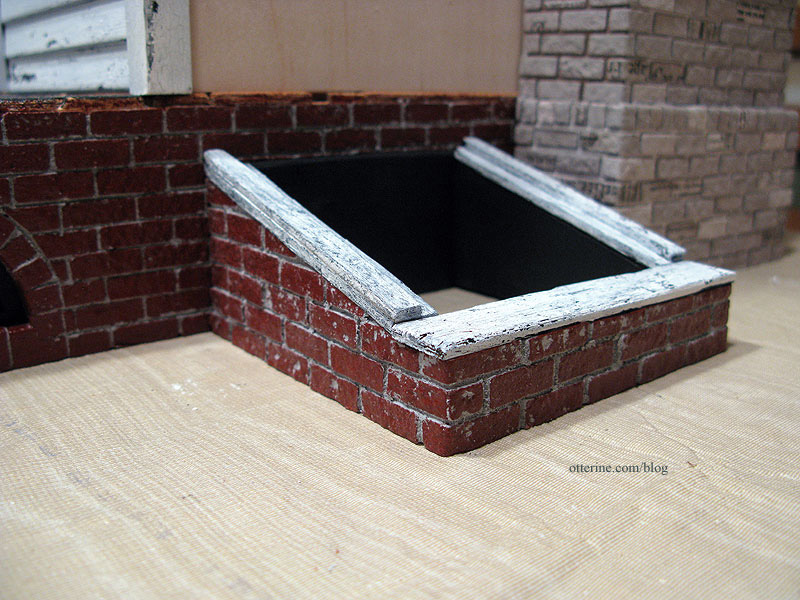
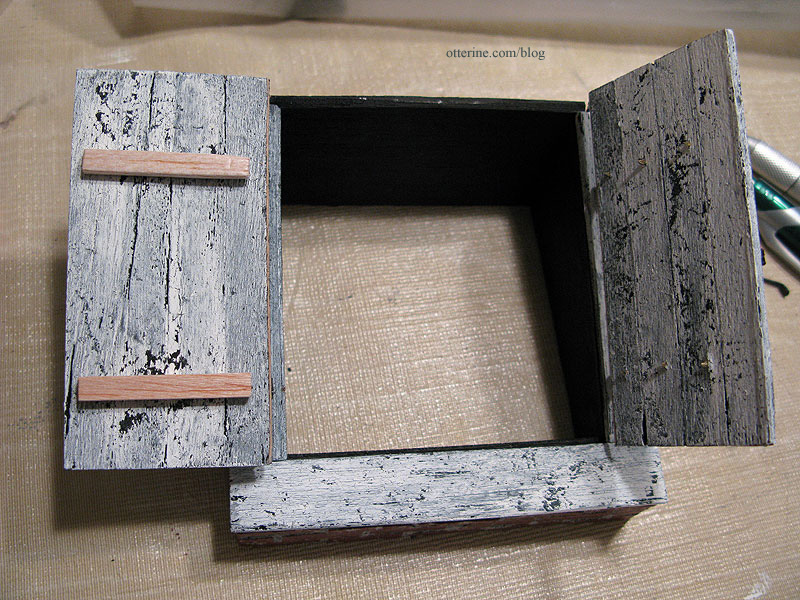
I started with a 1/4″ thick foam core board to get the general shape and size I wanted. I used 1/2″ thick foam core board for the front support and scrap wood from the Heritage kit for the back.
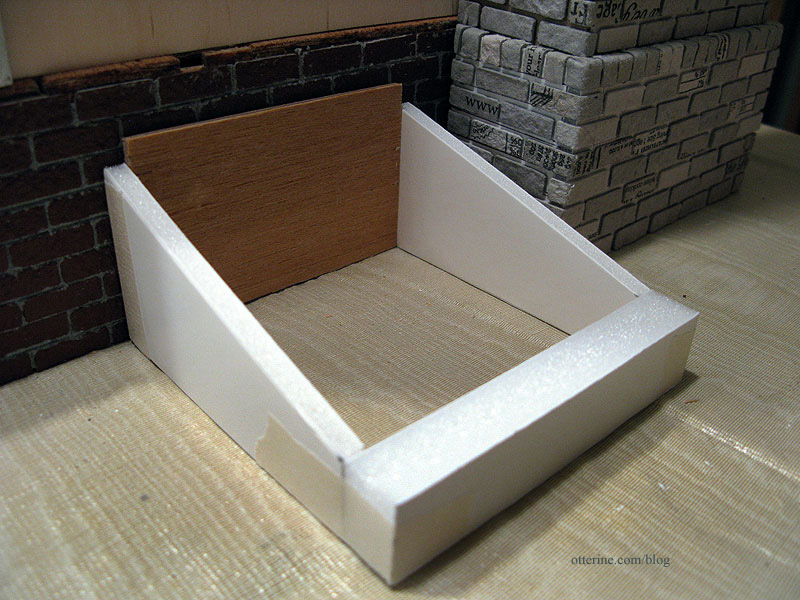
The back piece has a slight angle cut into it.
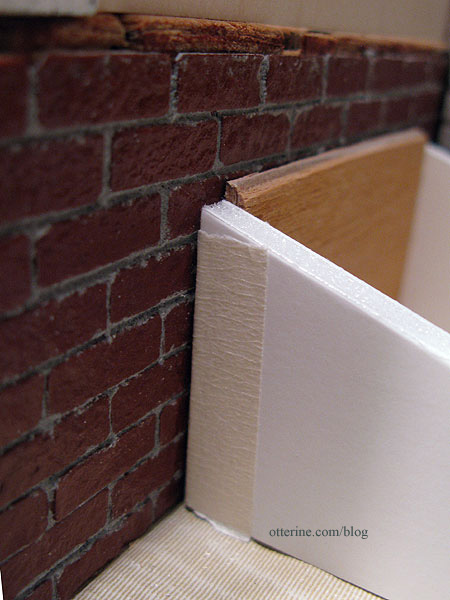
I glued more plywood scraps to the inside and outside for added stability.
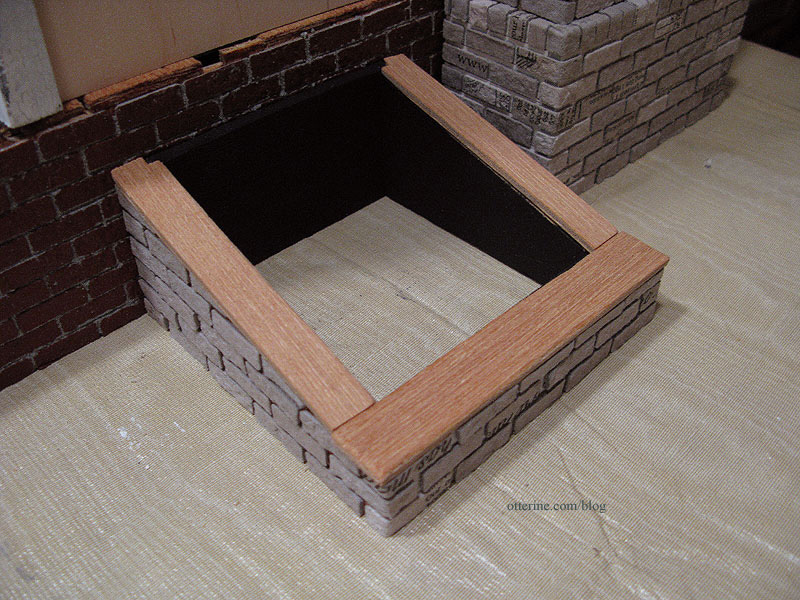
I covered the exterior with egg carton bricks painted and grouted to match the foundation. I sealed the interior wood with black paint.
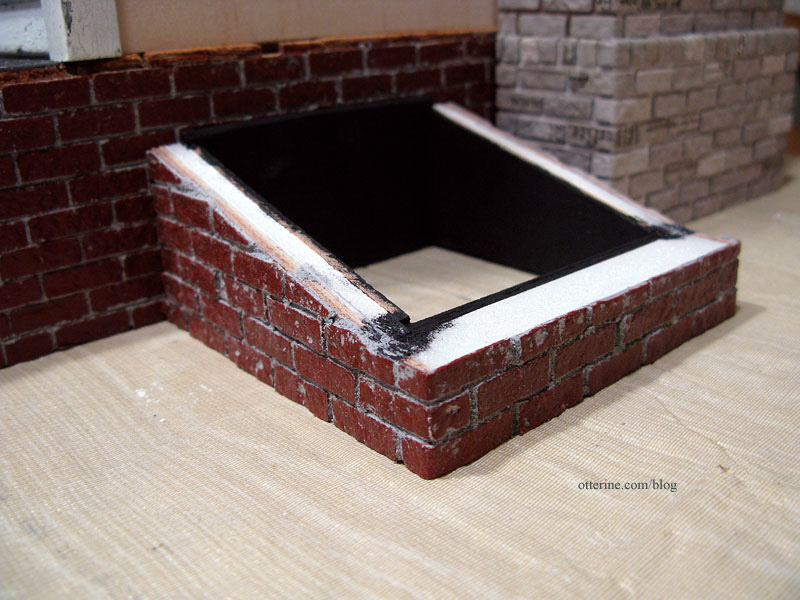
I covered the tops with plywood scraps to cover the exposed foam core centers.
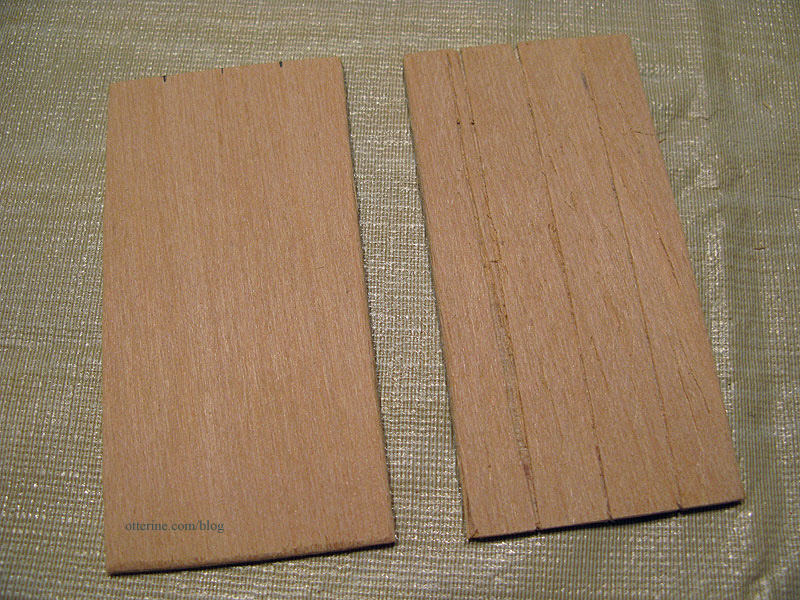
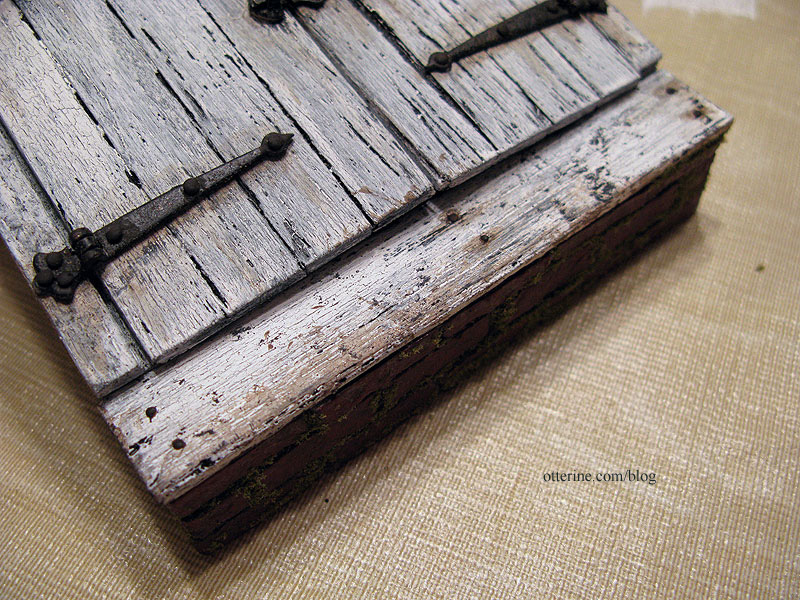
The doors are made from waste wood from the Heritage kit, scored to look like planks. It’s actually a positive that the wood is a little shoddy in this case! :D I did beat them up a bit more with an awl, though, to wear them out a bit more.
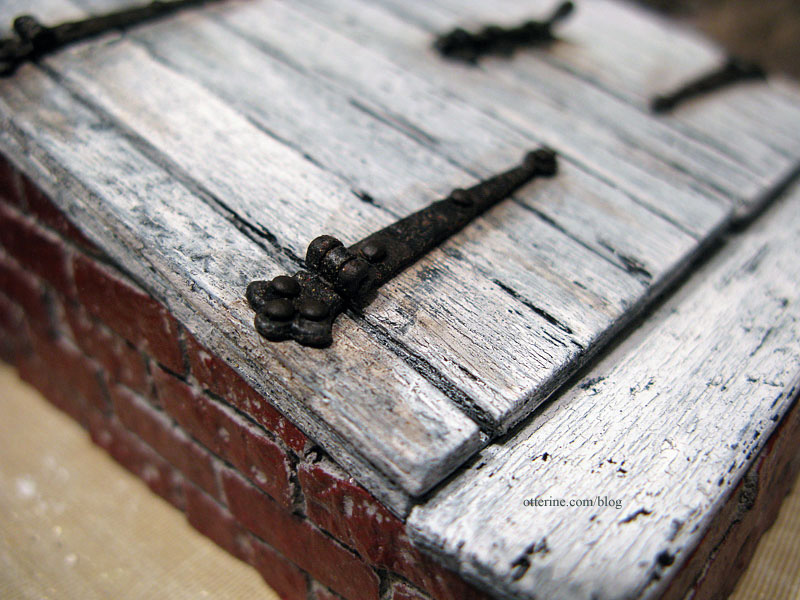
I painted and aged the wood in the same manner as the rest of the house. After fitting the doors in place, I glued another scrap of plywood to either side to hold the smaller end of the working hinges.
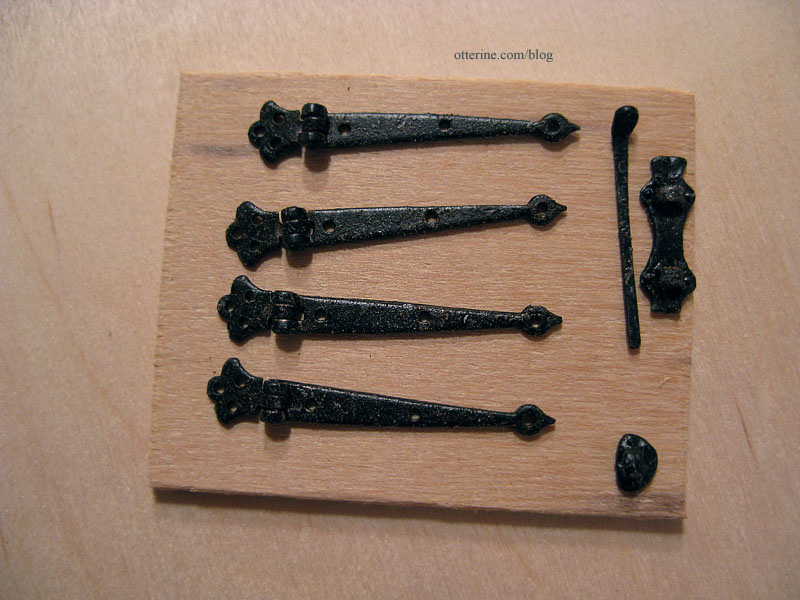
I used hinges by Dijon International and the latch is leftover from my Baslow Ranch supplies since I had built a custom wood latch for the barn door and didn’t end up using this latch. I sprayed them with Rustoleum brown paint but dabbed most of it off to keep it from binding the working parts. As it dried, I kept moving the hinges to make sure they would remain working. The paint gives it a nice rusted and corroded appearance.
To attach the hinges, I drilled pilot holes.
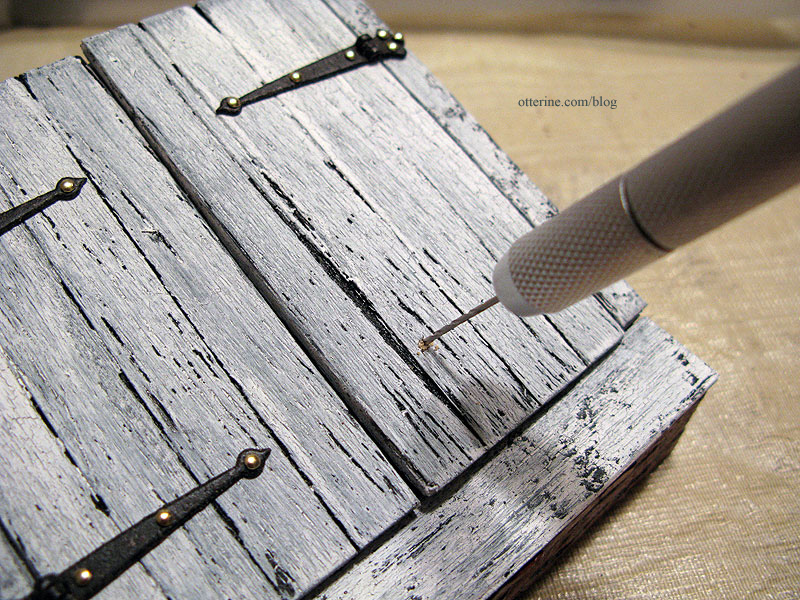
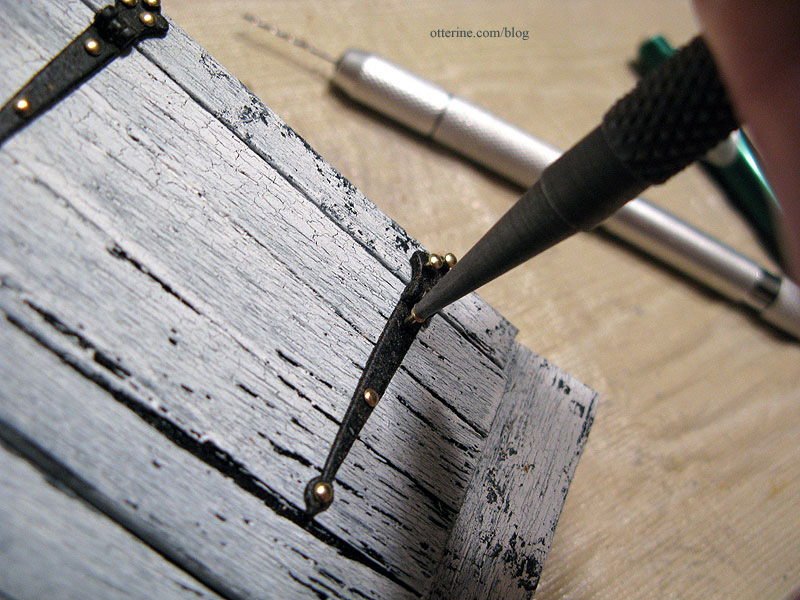
I then pushed in the nails as far as they would go by hand and followed up with a nail setter tapped with a rubber mallet.
Even though the doors are made from a single board scored to look like planks, I added cross bars on the inner portion for added realism when the doors are open. I did this after all the pieces were assembled to make sure it wouldn’t interfere with the operation of the doors. I used balsa since it was easy to press over the nails sticking out on the underside of the doors.
The hinges come with bright brass nails, though, so I dabbed paint on them after assembly. I added a rusty paint wash around the hardware to age the wood. I love the effect of the textured paint on the hardware. :D
I’ll age the bricks and add moss later in the landscaping phase. I like that the doors ended up a little warped.
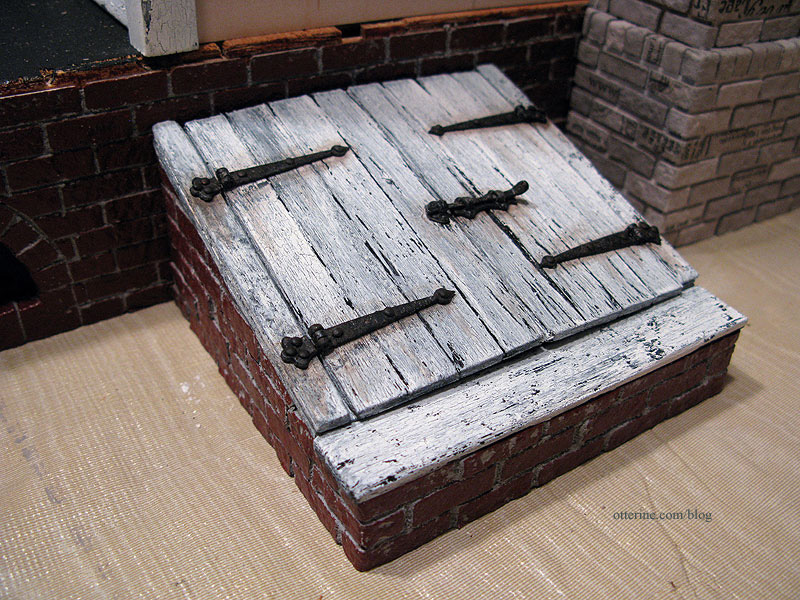
The whole assembly will be attached to the baseboard when I get to that part but for now is still removable. I’ll attach it after the chimney to make sure there’s no interference between the two.
I added old rusty nails.
I later added a handle as well.
Categories: The Haunted Heritage
September 26, 2011 | 0 commentsGriffins
Continuing work on the fireplace. I’ve had this pin for quite a long time. It’s one of my favorite pieces of jewelry. I haven’t worn it in some time, so it needs to be cleaned!

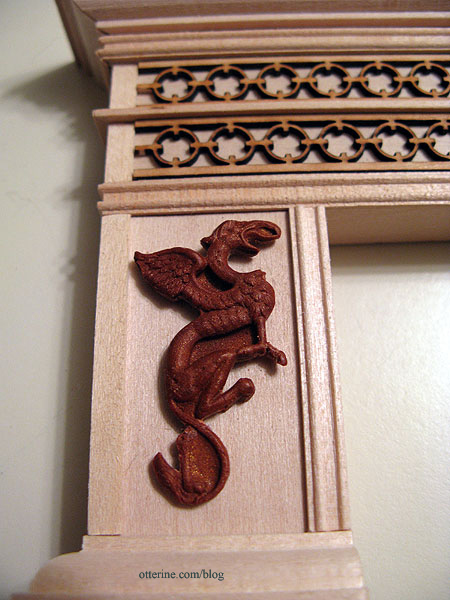
When I made the parlor fireplace, I left the two flat panels open for added designs. I really wanted to cast griffins for the areas, but as you can see, my griffin faces only one way.
I figured I might be able to find griffin earrings or pendants in mirror image in a style I liked well enough, but I never though I’d find the same griffins! They are larger than my original pin, though.
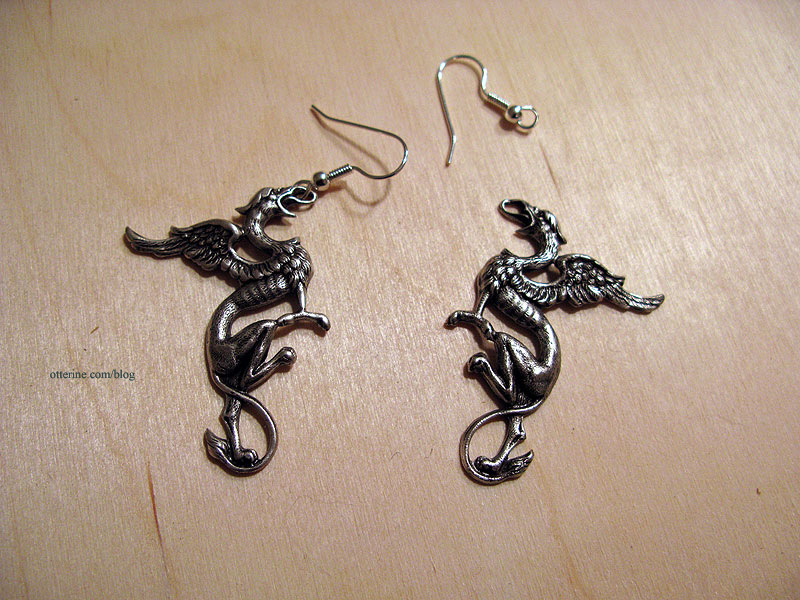
The only issue with the griffins was the fact that the wings were too big, so I planned to clip the long ends on my cast pieces. I didn’t think it would detract from the design.
Using EasyMold silicone putty, I made molds of the griffins after carefully removing the earring wires. EasyMold is a two-part putty that you mix together. I tell you, this stuff feels weird!
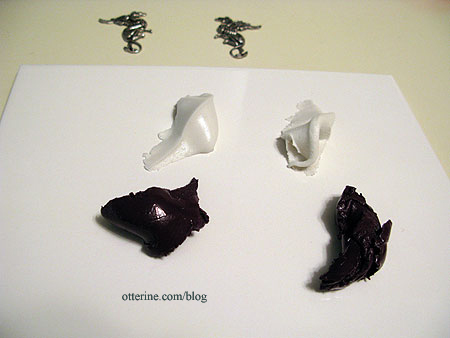
You press your original item into the mixed putty, which hardens in about 20 minutes, to make the mold. I pressed the griffins in with a board since they are thin and flat in areas. It made for a more uniform placement in the putty.
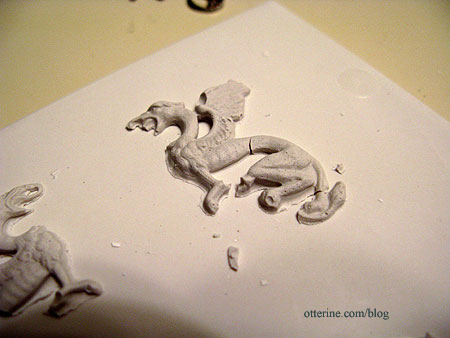
I then had to let the mold cure for 24 hours before making casts using DAP plaster of paris. Plaster is one of the few materials that requires you wait to use the mold. I had doubts that this was the proper material since the griffins are so delicate, but I gave it a try anyway. I wiped away the excess and let them set the required time. (Note: this was before I had experience with casting resin.)
While I was waiting, I noticed something amiss…a tiny spider in my fireplace. Apparently I’m not working on the fireplace fast enough. :D Do you suppose in 1:12 scale, it’d be like a giant wolf spider hanging in there?! =shudder=
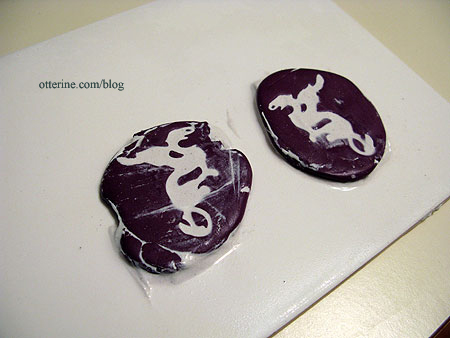
Once the time was up, I released them from the molds to find my suspicions were correct. The griffins are just too thin and fine for the plaster to work. The pieces broke, but it was nice to see the amount of detail the silicone mold had captured.
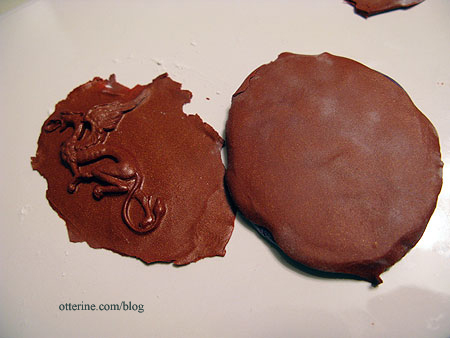
My second material was Pardo jewelry clay – pretty much just metallic polymer clay – in Tiger’s Eye, a coppery brown. I used this mainly because it was soft and the project I originally bought it for never came to fruition.
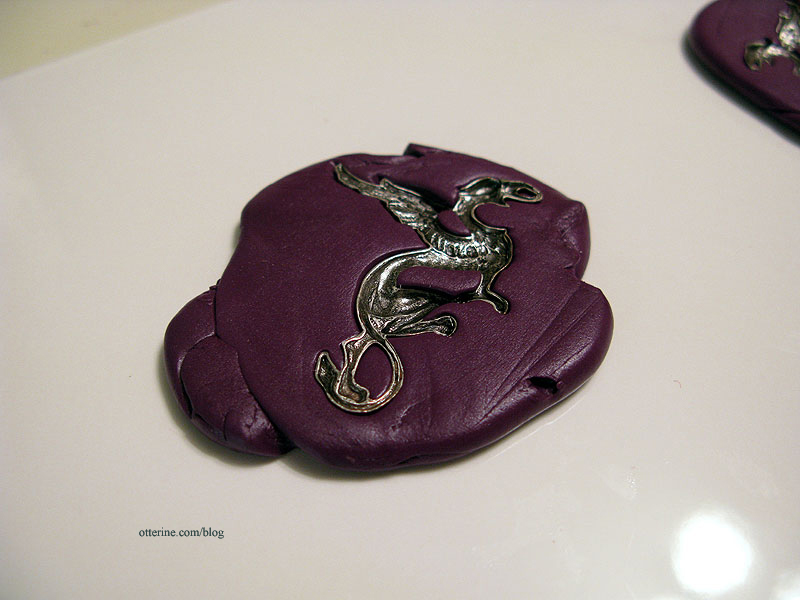
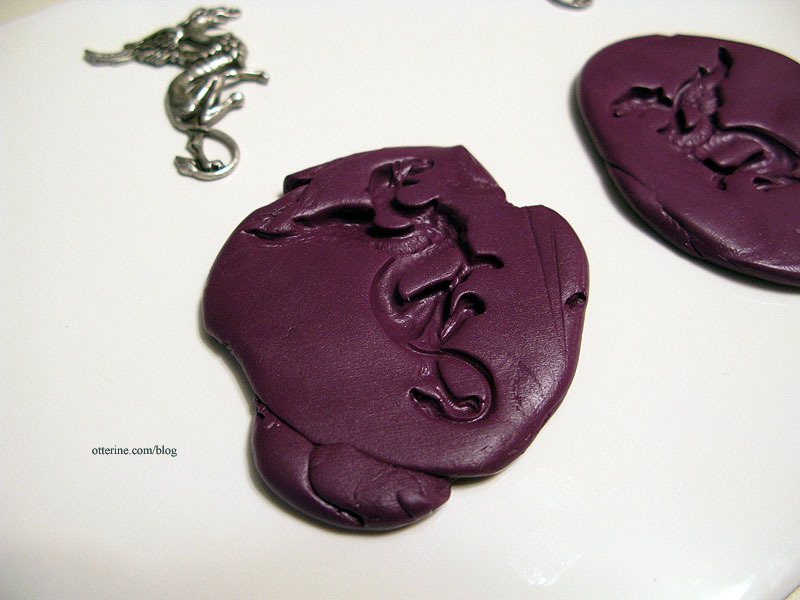
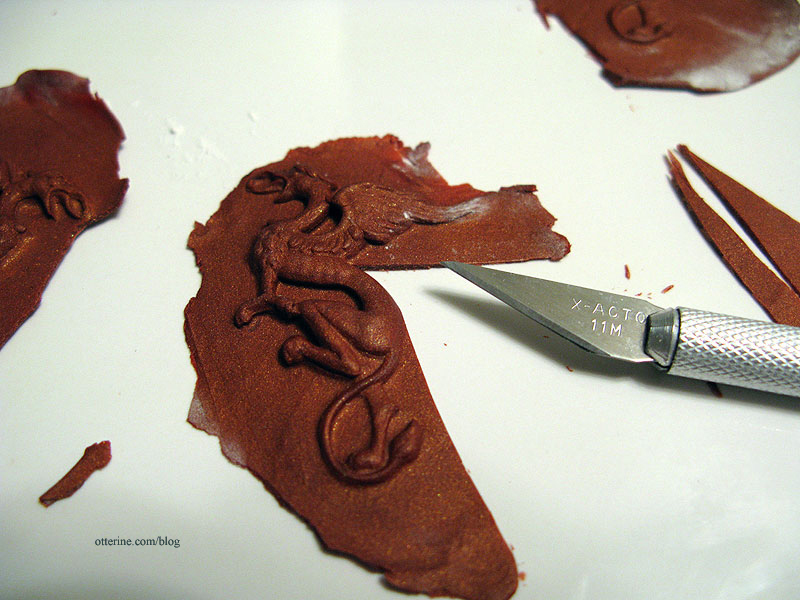
I pressed the clay into the mold and had planned to bake the clay while still in the molds. You can do that with these silicone molds, which I think is awesome. I put a bit of powder on the flat back and rolled with a rolling pin. One of the griffins came out of the mold during this process, and it was so well formed that I decided to just bake it out of the mold. I thought about cutting away the excess while the clay was pliable but I didn’t want to risk marring the design.
They turned out well.
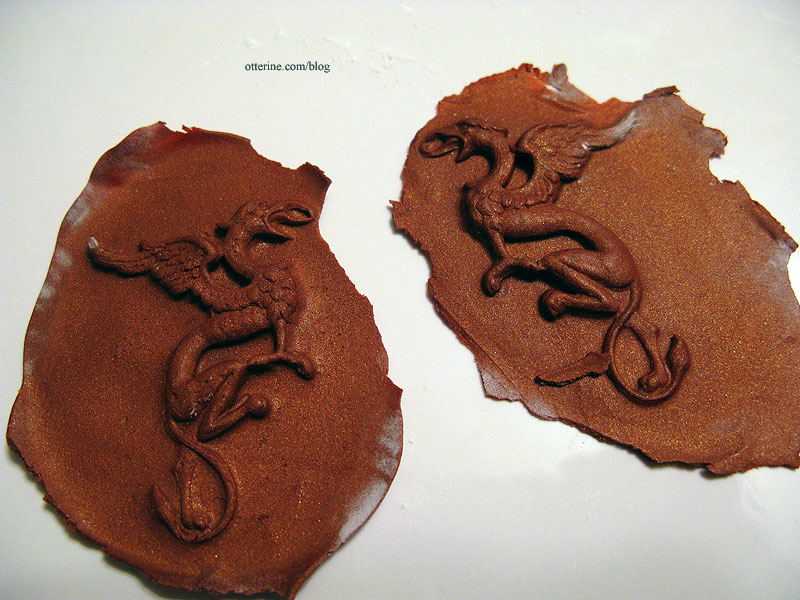
But, then I had to cut the excess off with an X-Acto knife. This was not easy, and I did end up with a few breaks.
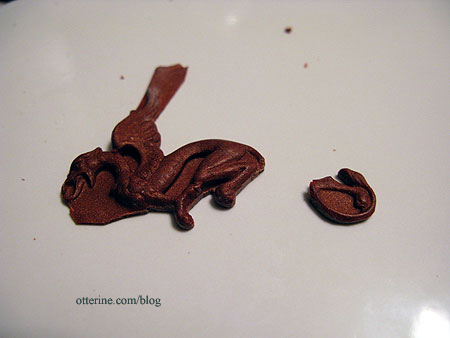
I think they turned out remarkably well, though, and I plan to use these as is.
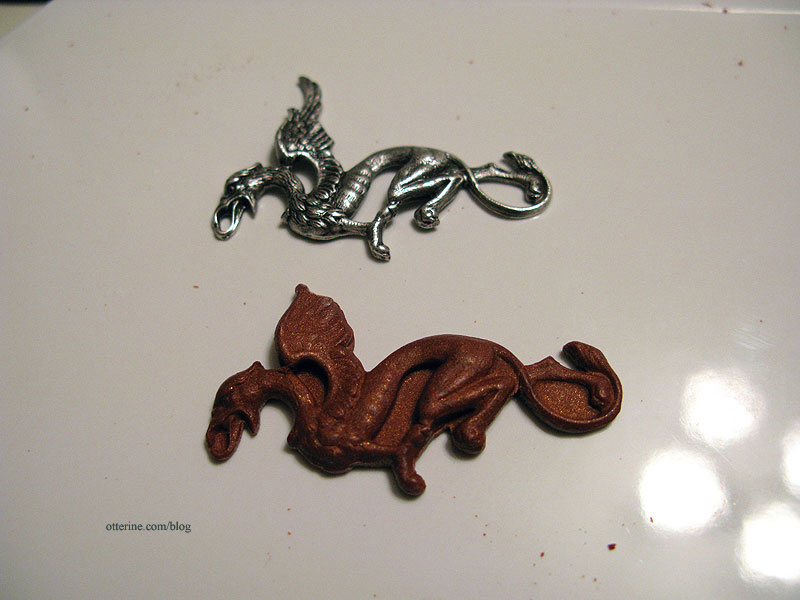
One griffin doesn’t have the same fine detail as the other (a flaw of the original silver pieces), so they do look a bit different from one another.
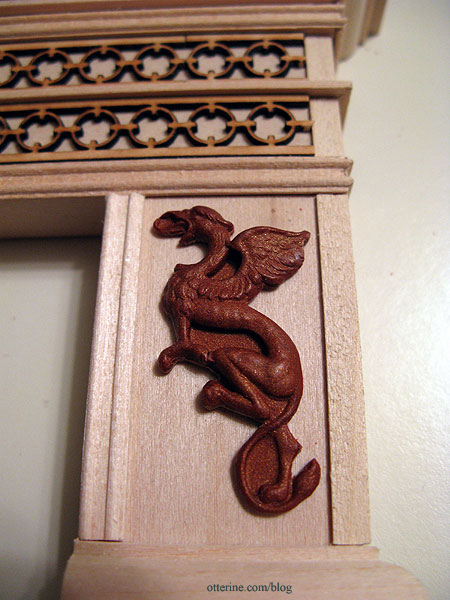
Once the whole thing is assembled and painted, I doubt these minor issues will even show anymore. Besides, a couple of imperfections on an old fireplace would hardly be out of the norm.
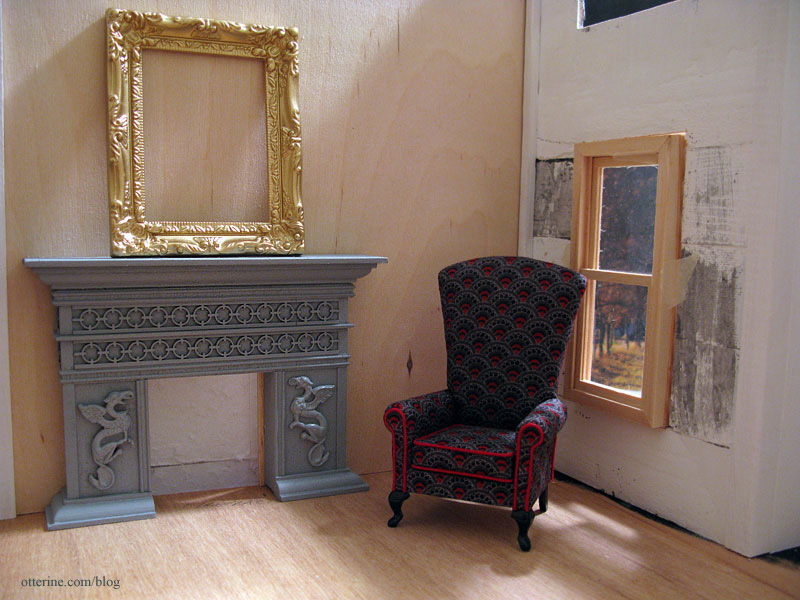
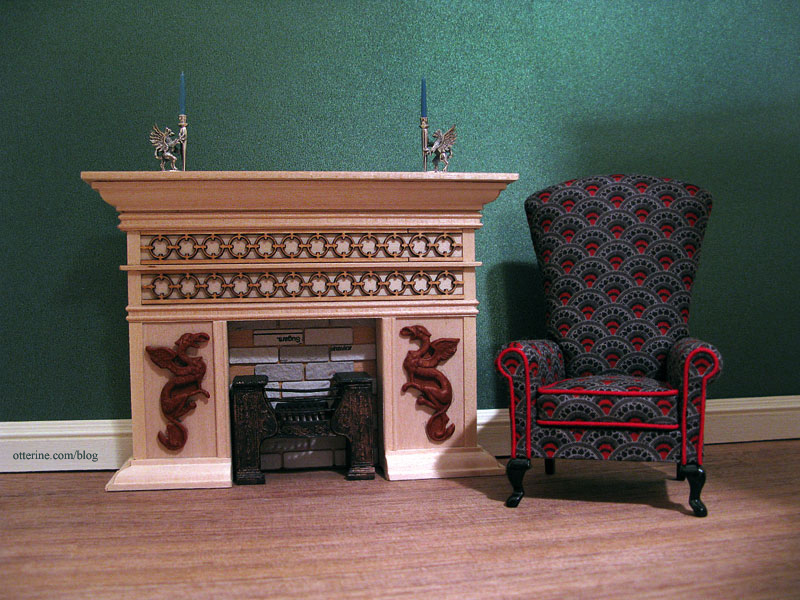
Nothing says spooky like adding a pair of mystical creatures!
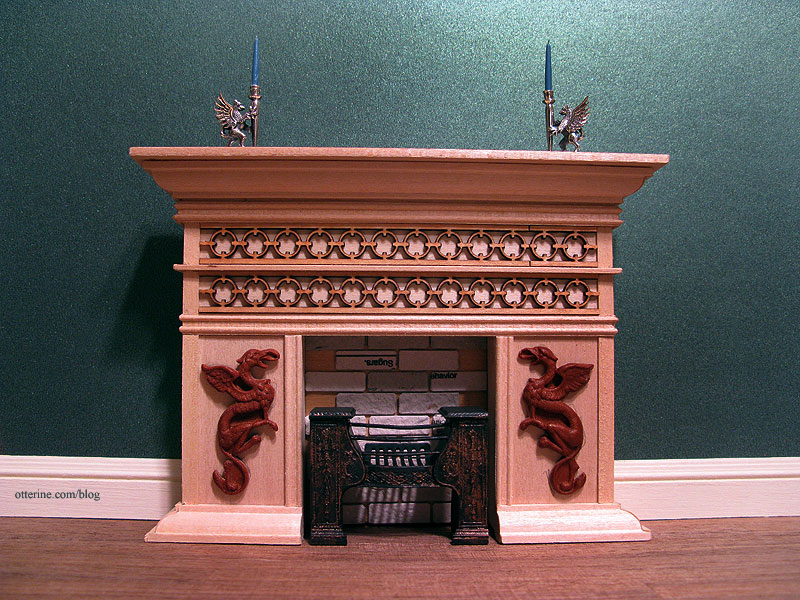
Accessories include griffin candlesticks by Don Henry, The Chair by Kris at 1 Inch Minis and the Phoenix parlour hob grate I put together and painted.
Categories: The Haunted Heritage
September 23, 2011 | 0 commentsRepairing shoddy wood
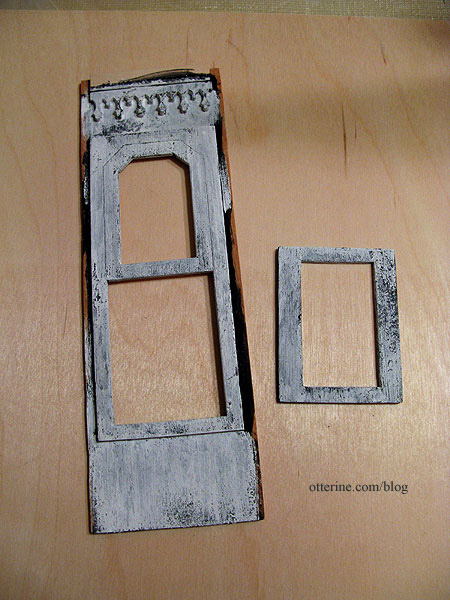
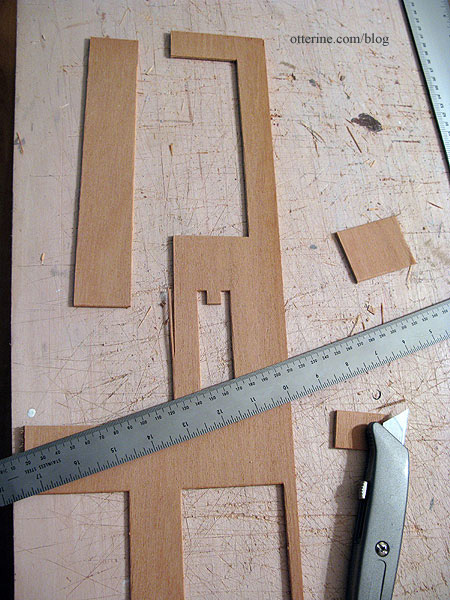
I’m guessing there are other ways to do this, but this is the method that works for me. The die-cut kit parts for the Heritage are mostly good, though a few are just plain awful. They are both dried up and poorly cut…stamped more than die-cut, actually. They are splintered and brittle.
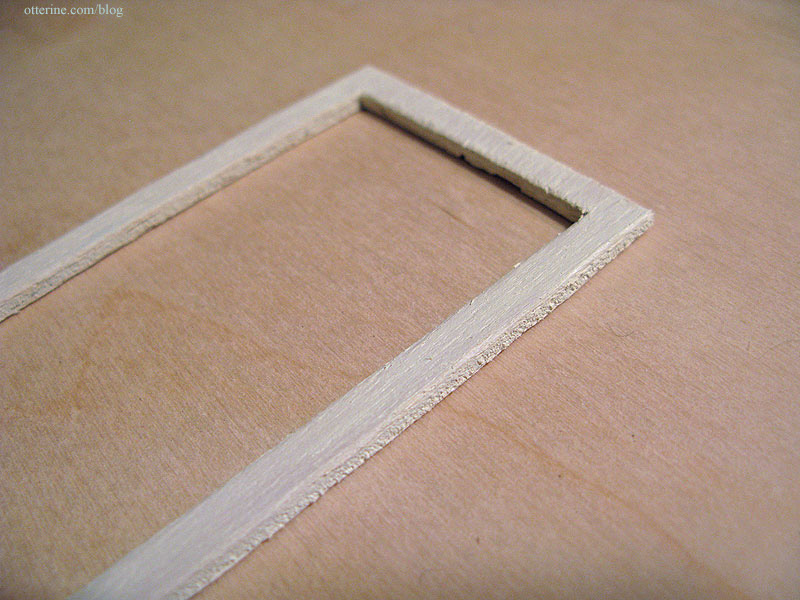
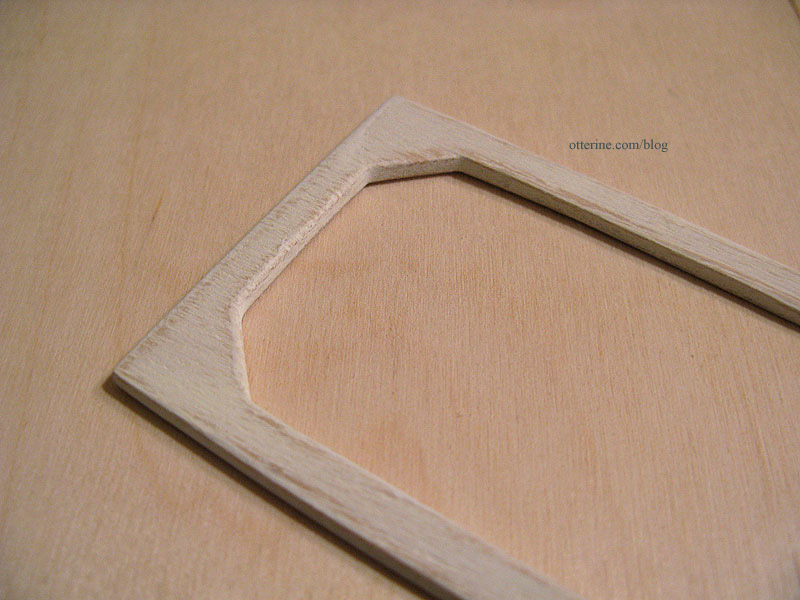
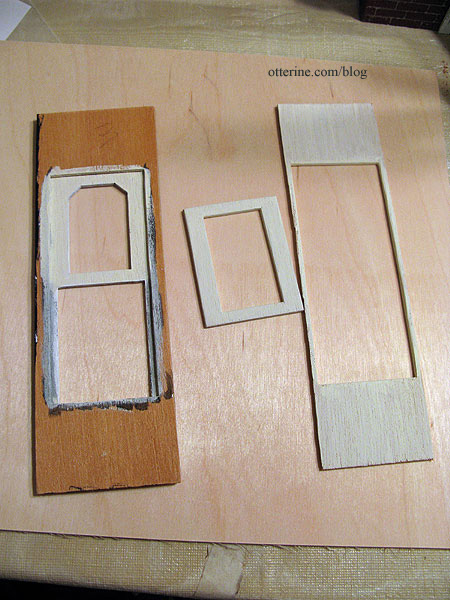
I first cut them out from the frames with a blade trying to limit the splinters and uneven edges. I then sand them lightly to remove the obvious imperfections. I use 320 grit sandpaper since I mainly want to remove the top layers and not reshape the pieces.
As you can see, the wood is still pretty lousy – especially on the edges.

I paint one coat of acrylic, keeping the layer even and thin. I also paint in the direction of the grain instead of across it. Yes, it looks worse before it gets better. :\
I let it dry completely, even overnight before doing the next bit of sanding. The paint bonds to the wood fibers and makes it easier to achieve a smooth finish. I end up taking quite a bit of this first layer of paint off with sanding. It already looks better, even with those two bad places still needing repair.
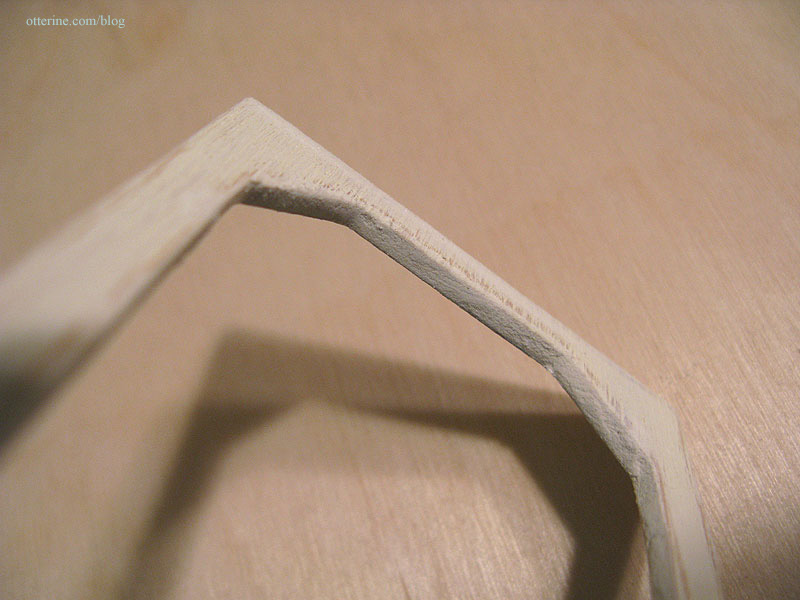
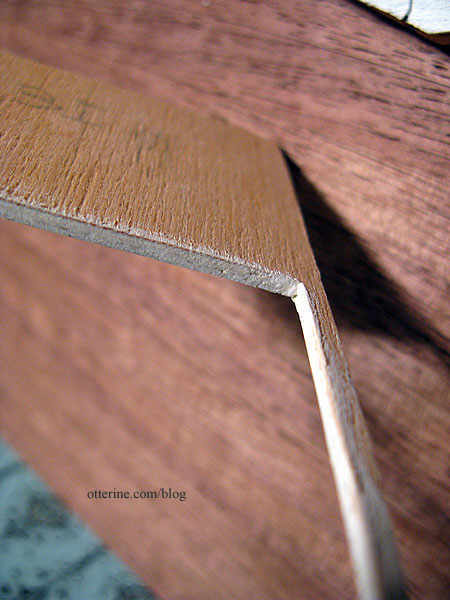
I then spackle any imperfections along the edges, applying the compound with my fingers. It’s easier than trying to use a large tool for application and the main objective is to push the spackling into the tiny gaps in the wood. Other than repairing obvious or larger flaws, I keep the spackling only on the edges. I don’t want to take away the wood grain by filling in the face of the frame.
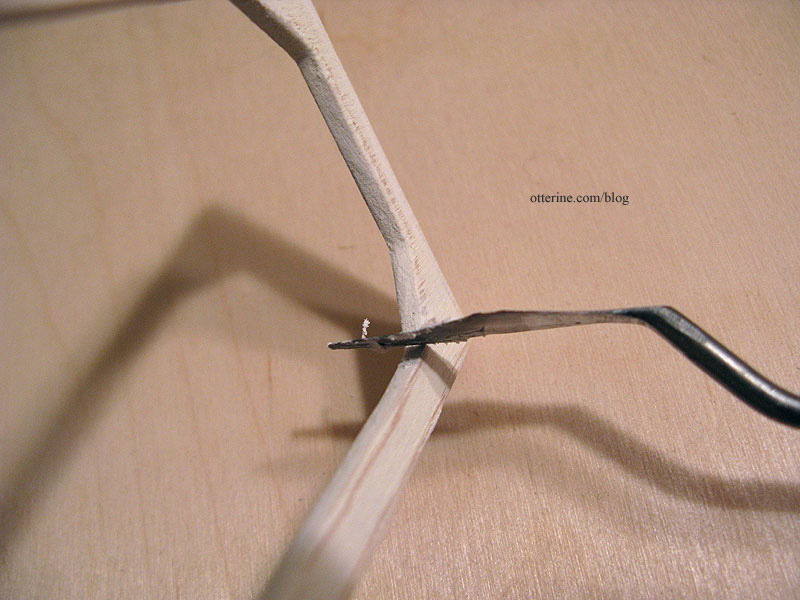
When it builds up in the angles or corners, I clear out the excess with an old painting palette knife that’s seen better days…but it’s one of the most valuable tools in my miniature making toolbox! :D
After this has dried completely, I sand again. If there are any more obvious imperfections, I spackle those and wait for it to dry again.
I wipe down the piece to remove as much dust as possible and paint, again keeping with the grain of the wood. The key is to work with light layers and use long brushstrokes. The leftover dust will make the paint gum up a bit if it’s applied too heavily or overworked.
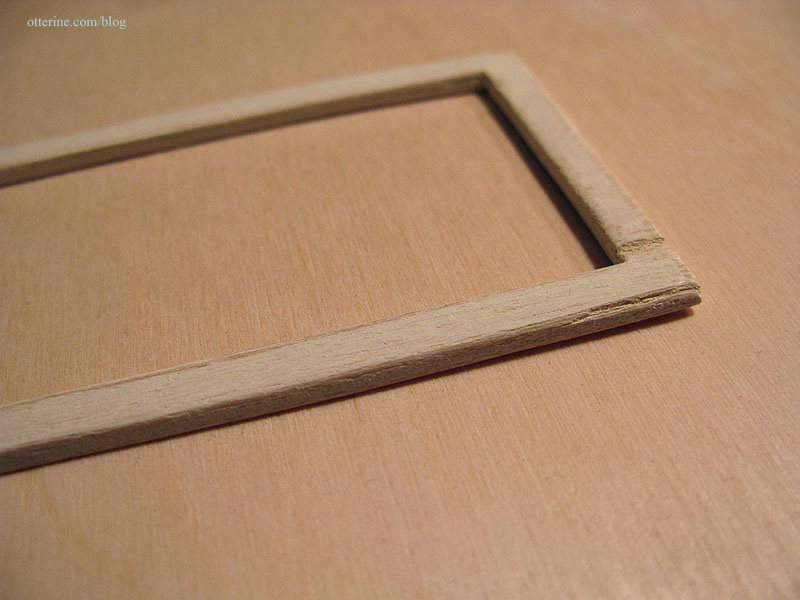
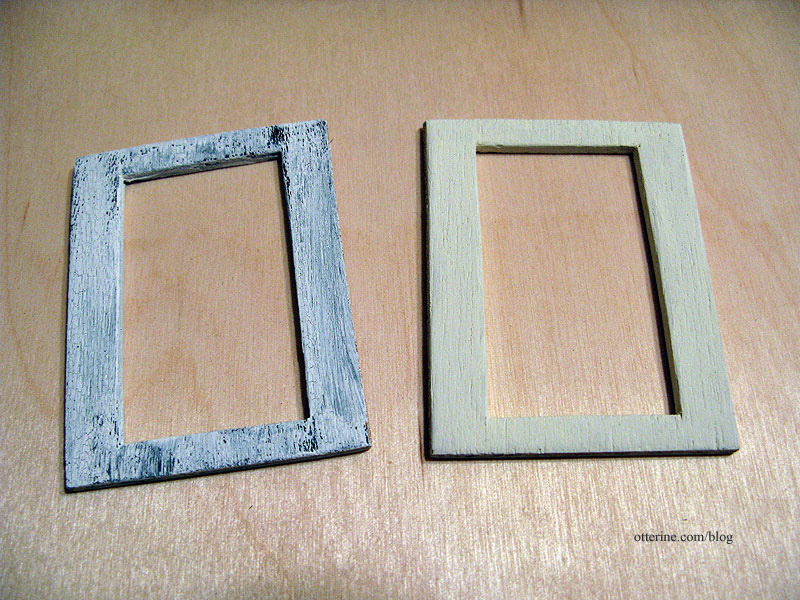
And, here we are…painted wood with a nice finish. :D
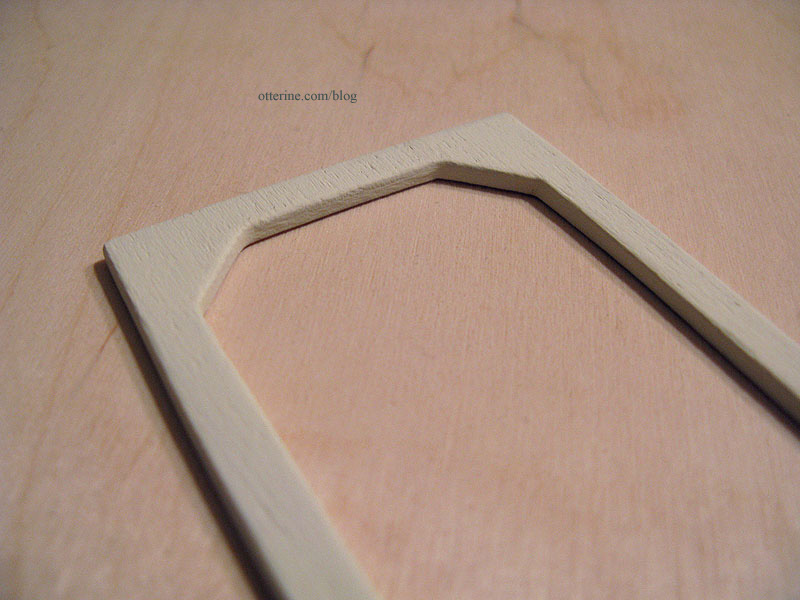
I don’t always use a sealer – depends on the type of finish I want. For interior trims, I leave them unsealed for a perfect matte finish.

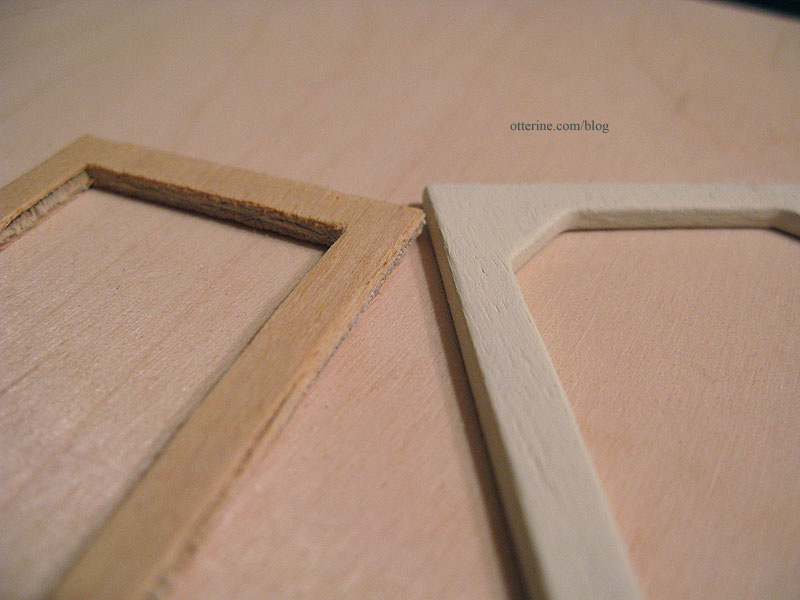
This is a part freshly cut from the frame compared to my new finished piece.
Categories: The Haunted Heritage
September 20, 2011 | 0 commentsHeritage – front bay window, part 4
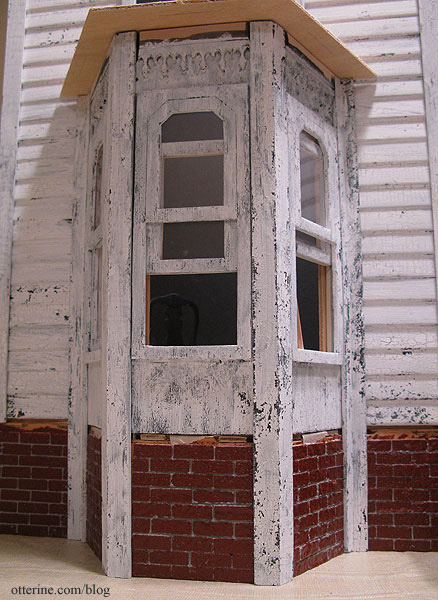
The outer bay windows have been finished with white paint crackled over the black base color.
I painted the portions of the inner and outer frames that would show on the interior with Vintage White by Folk Art. I painted the inner window sliding frames the same color. Even though the inner walls won’t show after wallpapering, I went ahead and painted those since the acrylic paint seals the wood for better wallpaper application.
For the pieces that would be on the interior, I spackled the rough die-cut edges and tried to smooth the not-so-great wood the best I could. I wanted it old not dilapidated.
I also opted to make the sliding portion of the window out of the two larger slider pieces that fit into the bay wall pieces, instead of using one bay wall large slider and one interior small slider. This might not make any sense to anyone other than a Heritage kit builder, but it worked better for what I had done with the wall padding. I eliminated the interior sliders altogether since they were just such shoddy wood and I didn’t need them to make the windows function.
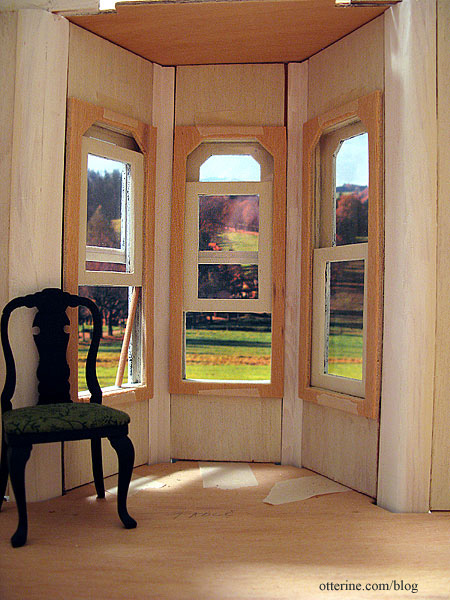
I replaced the printed acetate windows with clear acetate. In order to sandwich a thin piece of acetate between two pieces of wood, I had to leave a space around the acetate to put glue so the wood pieces would bond together. The acetate has some thickness to it, obviously, so I had to clamp it all the way around until completely dry. Quite the contraption, no? :D

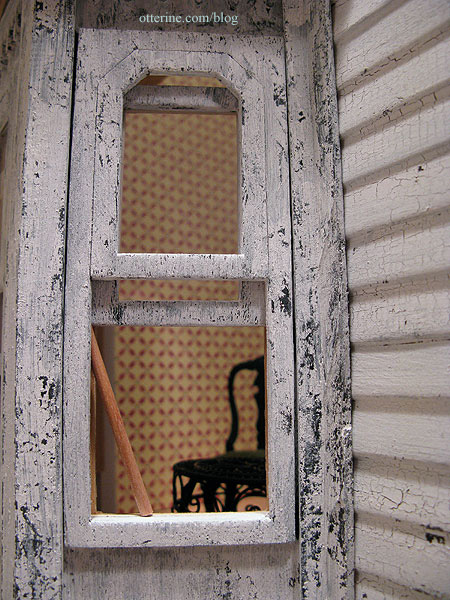
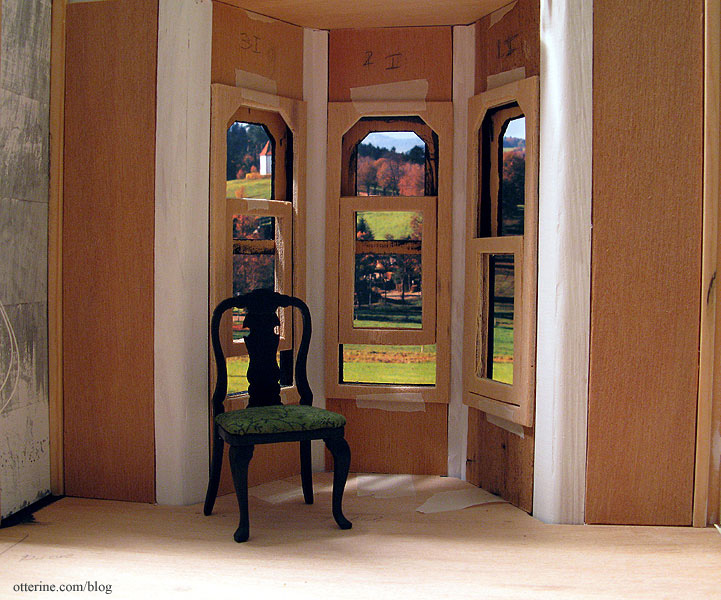
As I mentioned before, one window assembly is completely glued together and the window is shut. The wood for these pieces was beyond repair. (I love this shot!)
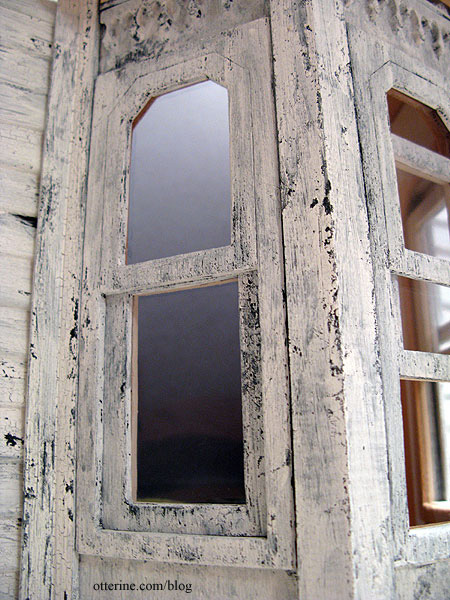
But, guess what? Two of the windows work!!!! :D The second window is set partially open, and though the window slider isn’t glued in place, the wood for this assembly is not in the best condition and doesn’t allow for very fluid raising and lowering of the window. But, it works!
The third window, however, works so well that I need a dowel to keep it propped open! :D How positively wonderful! (Love this shot, too!) It’s just like a real life old house – one window is painted shut, one window sticks and one won’t stay open!!! :D
The exterior corbels and trim still need to be added, but it’s starting to take shape, no?

I had such good luck saving some of the interior wood with spackling, sanding and painting that I am going to attempt to get these interior window trim arches to work as well.
Categories: The Haunted Heritage
September 18, 2011 | 0 commentsBeautiful umbrellas by Fran
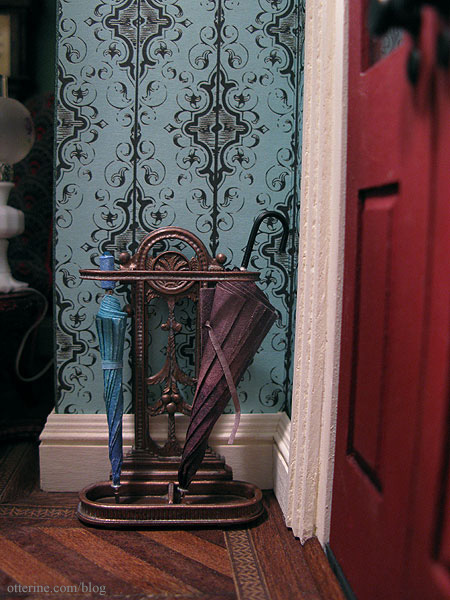
Some time back, Fran of FranMadeMinis and I started an email exchange. At that time, I discovered that she makes some of the most remarkable miniature umbrellas and luggage. I just knew I had to have one of these marvelous creations, but it ended up turning into two. :D Funny how that is.
To give her a sense of what I was looking for, I had to give her the backstory on the Heritage build. I told her I was leaning toward an old woman living in the house she’s always loved, but she can’t get around as well anymore and the place has fallen into disrepair. I didn’t want the umbrellas to be crazy tattered, just maybe a bit worn and well loved. I was thinking the umbrellas would be treasures in the house, even with – or especially because of – their age. One would be her lost love’s umbrella that didn’t feel right being anywhere else but still waiting by the door and the other would be the one he bought for her.
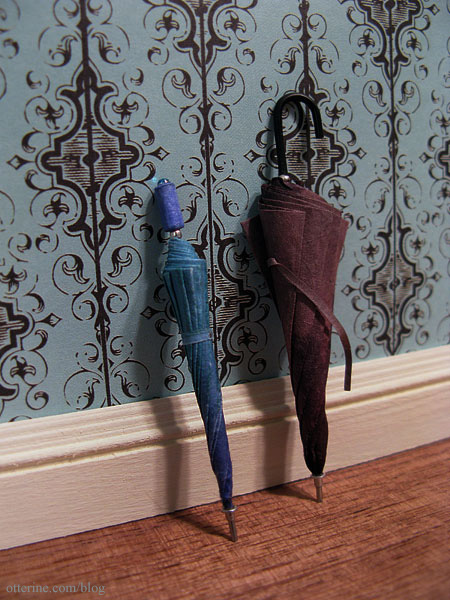
Aren’t they awesome? She completely captured what I was talking about! I love the faded classic black and the soft blues she used.

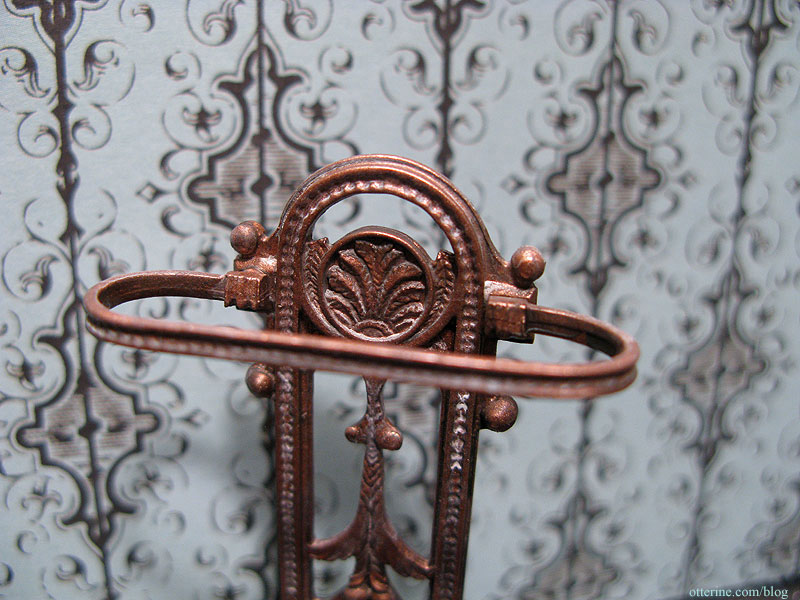
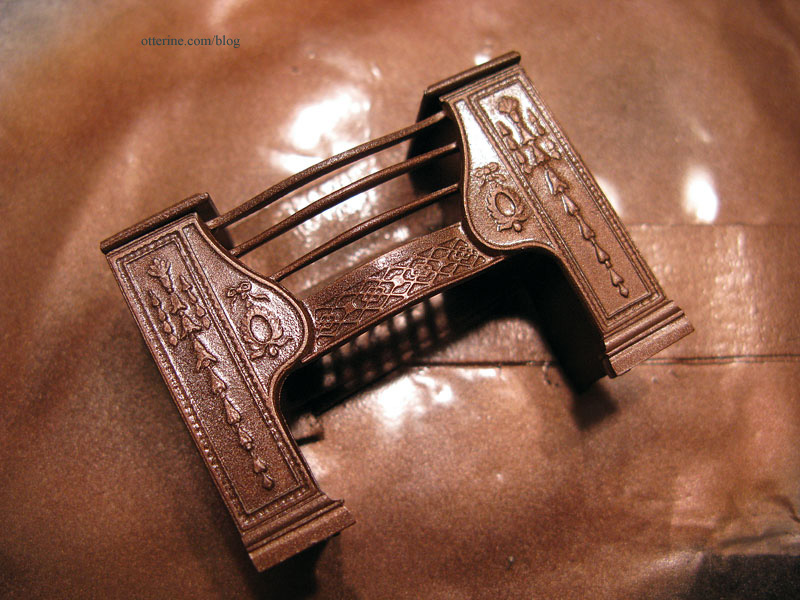
I assembled a Phoenix Model umbrella stand kit to display the umbrellas. I primed it with grey and then sprayed it Burnished Copper Metal by Rustoleum.
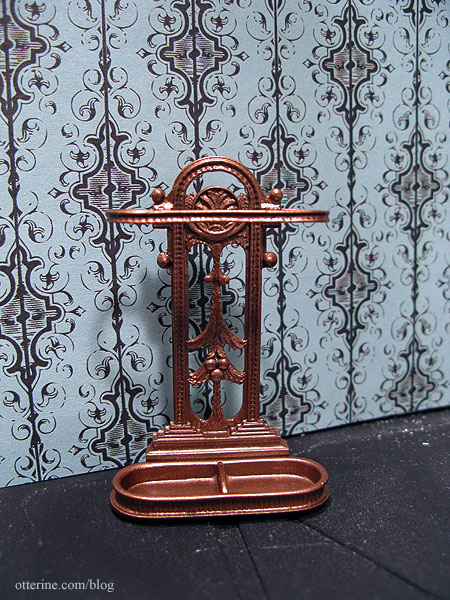
Once that was dry, I added a few paint washes. A few simple washes actually add weight to the piece, make it seem like a heavy piece you might stub your toe on if you’re not careful.
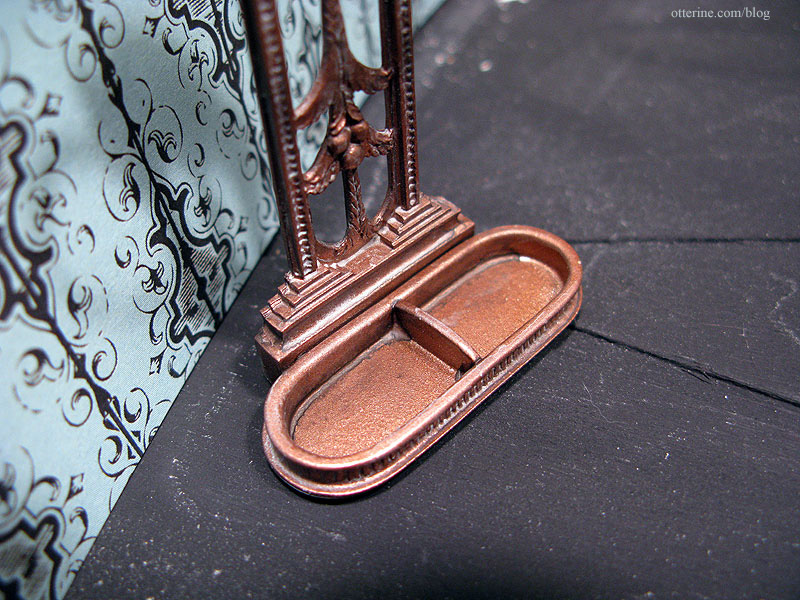
This piece has so many beautiful details – a true quality kit.
Add the beautiful umbrellas by Fran, and it’s the first vignette ready for a soon to be decorated foyer.
Categories: The Haunted Heritage
September 18, 2011 | 0 commentsHeritage – front bay window, part 3
The bay window is shaping up nicely, but I still have more changes in mind (of course). I glued the exterior frames onto the walls and began the painting process to match the rest of the house.
I decided to pad the interior walls of the bay and adjacent walls. I just find the connectors to be intrusive and a pain to wallpaper around. This meant I had to do a bit of experimenting.
It was all made much easier by the fact that I had eliminated the side bay window and therefore had twice the parts for one bay window – minus the two exterior frames that I used to build the chimney. But, it was the bay wall pieces that really mattered, and I had three extras, the exact number I needed.
I cut these wall pieces to fit inside the connectors on the interior.
I left a little wiggle room since any minor gaps will be covered by wallpaper.

The interior trim will then sit on top of these extra walls once I get to the interior. To be honest, the plywood trim is pretty shoddy, so I’ll likely end up cutting my own interior trim. For the exterior, poor wood condition works well for this particular build, but the interior wouldn’t be quite this bad.
I think the padded walls give this bay a much cleaner look.
The adjacent walls are also padded using waste wood from the die cut frames.
This evens out that entire wall. I’ll pad the wall to the left, too, but it requires thinner wood.
I’ve heard from others who have built the Heritage and other Dura-Craft houses that once you get the windows and frames painted, the windows no longer work. It’s not a terrible disappointment to me that this might be the case since I don’t plan to keep opening and closing the windows.
Besides, the kit wood is not the best for this kind of wear and tear. One of the windows needs to be glued shut simply because it’s the only thing holding the assembly together. The other two I will glue in place partially open. Who doesn’t like a bit of fresh autumn air?
Categories: The Haunted Heritage
September 17, 2011 | 0 commentsFireplace for the Heritage
I started with the Parlour Hob Grate kit. This was my first time working with a Phoenix Model kit, though I had heard of them and had seen many other miniaturists make wonderful things from them. I have to tell you, this kit went together in about five minutes! :D I used Quick Grip glue and it held very well. (Note: I now recommend epoxy for metal kits for longevity and stability.)
I spray painted the grate Burnished Copper Metal by Rustoleum, first the back and underside, then the front and top.
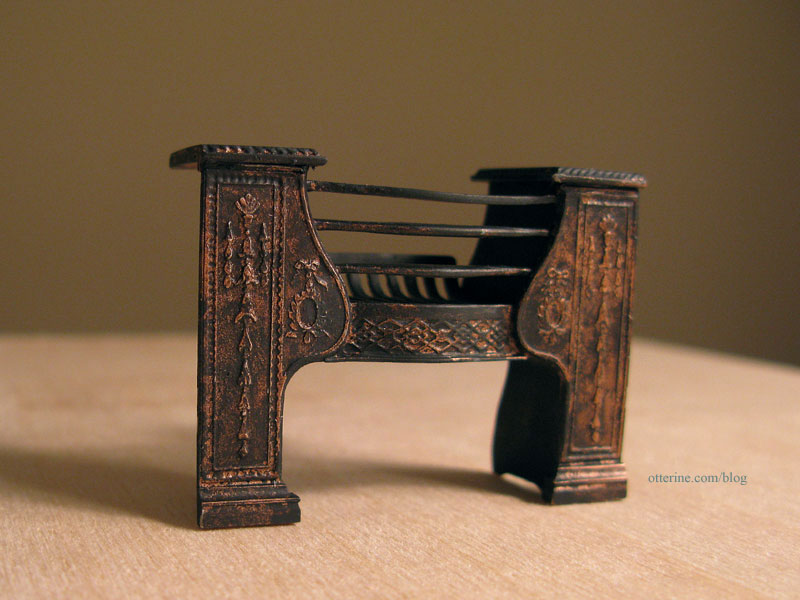
Once that was dry, I was able to wipe on layers of black and grey acrylic to get the aged look I wanted. Perhaps a shame to dirty it up so bad since it looks so pretty in the copper, but a shiny new parlor grate just won’t do in an old house. Maybe I’ll need to make another of these and leave it shiny, beautiful copper. :D
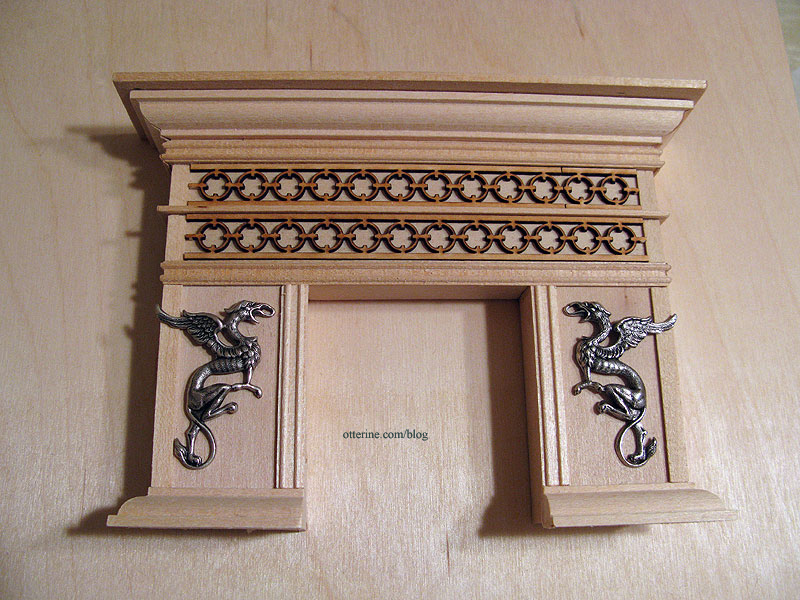
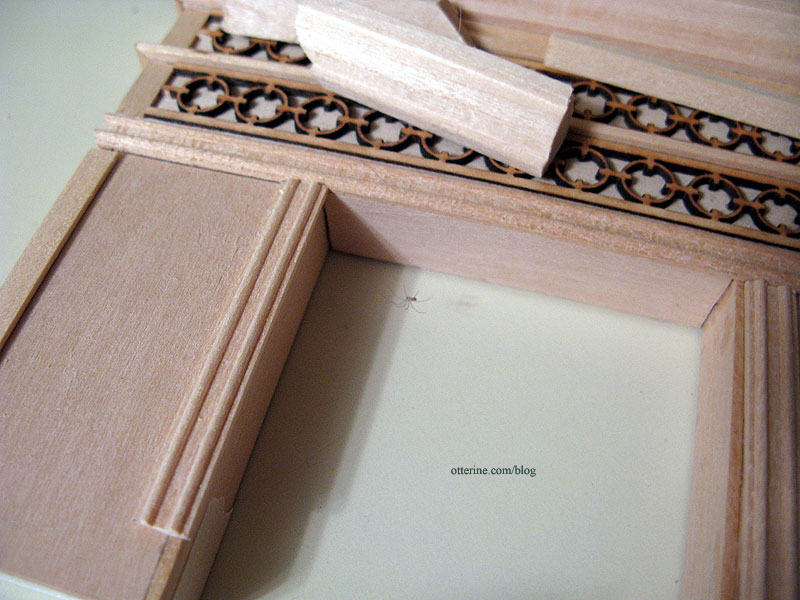
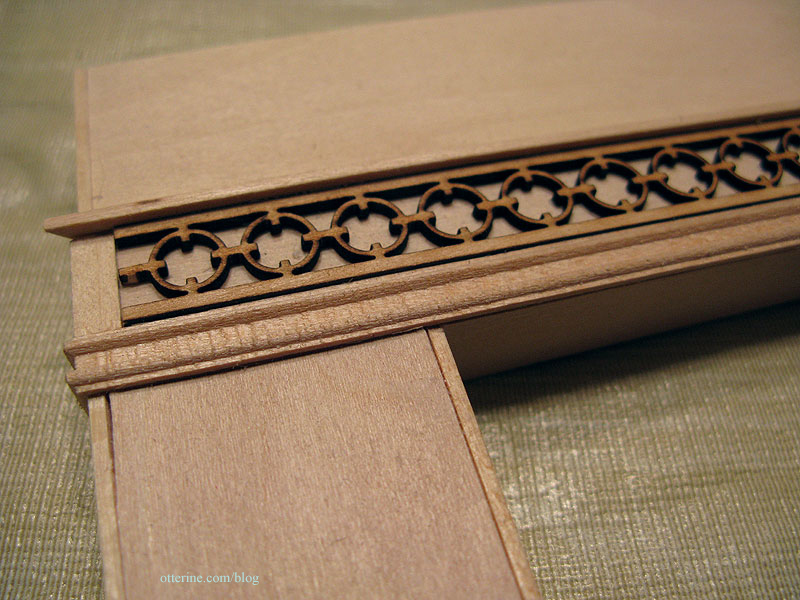
My main inspiration fireplace is this beautiful Lawbre fireplace. Even if I could afford the splurge, this piece would be too big for the parlor. So, I set out to make an interpretation of it from bass wood with a few changes in mind. I used some of this 1/2″ Alle trim from Heritage Laser Works. It’s similar to the circle link design of the original.

I’m not a huge fan of the rope detailing on the original, so I substituted other trims for that portion of the design. I made my fireplace shorter than the original and eliminated the portions of the base that angled toward the opening.
I built the structure in layers, since that seemed the easiest approach using the materials I had on hand. I started with a basic 1/2″ foam core board base with outer measurements are 4 7/8″ wide by 4 1/4″ tall.
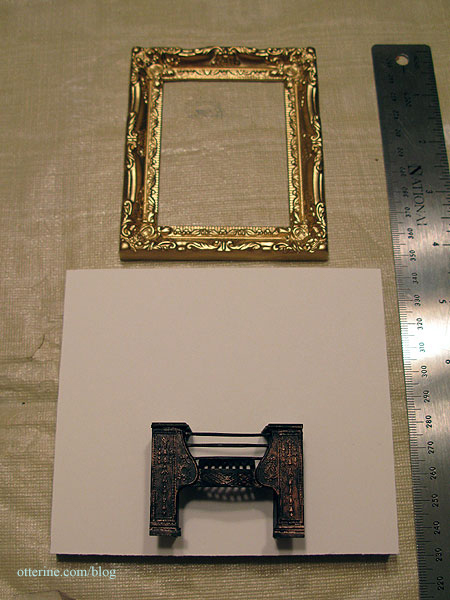
In order to figure out the size of the fireplace opening, I lined up the various trims I planned to use in order to measure accurately.
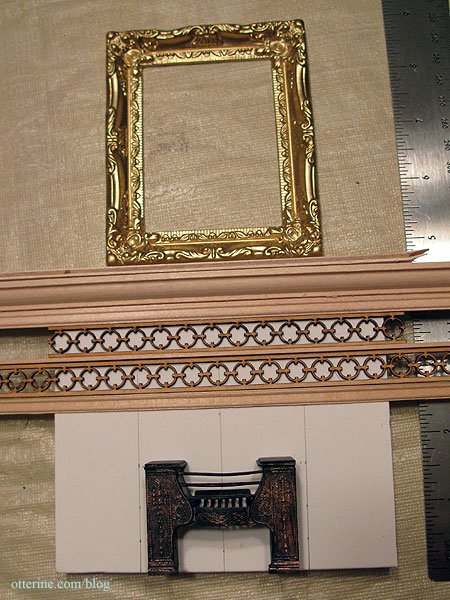
I ended up with an opening 2 3/8″ square.
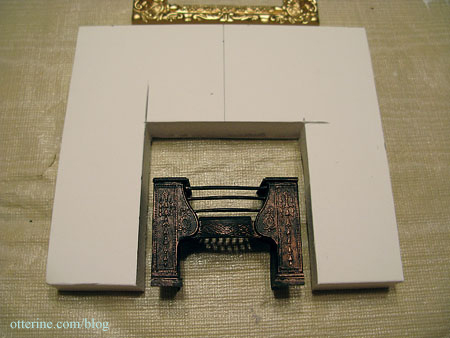
I then covered the foam core board frame with 1/16″ thick basswood on the sides and then the front.
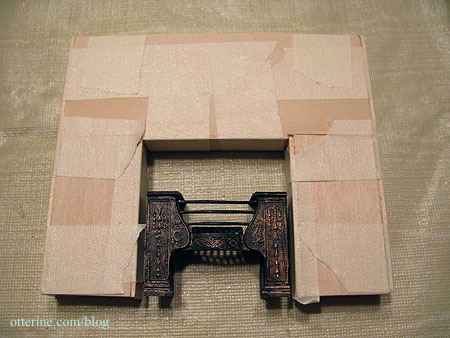
To build the top, I started with 1/4″ decorative trim, lining it up with the fireplace opening and using mitre cuts to wrap it around the sides.
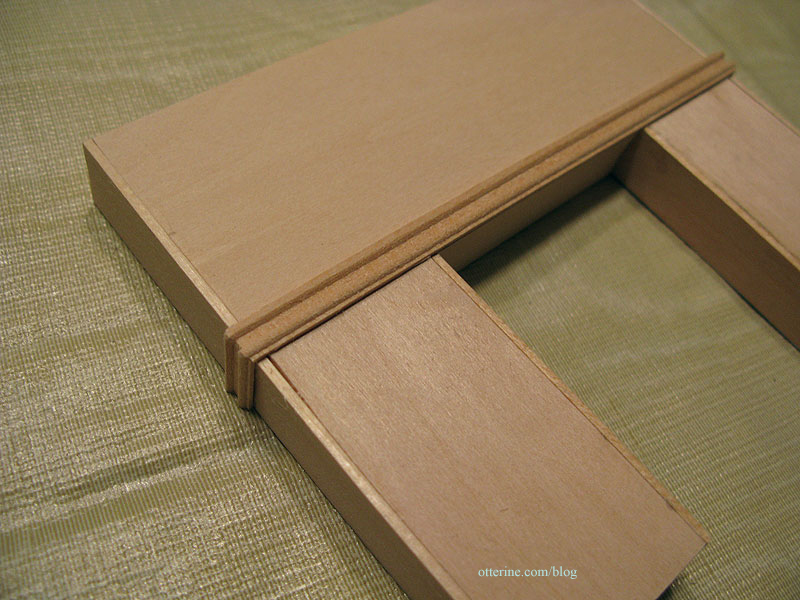
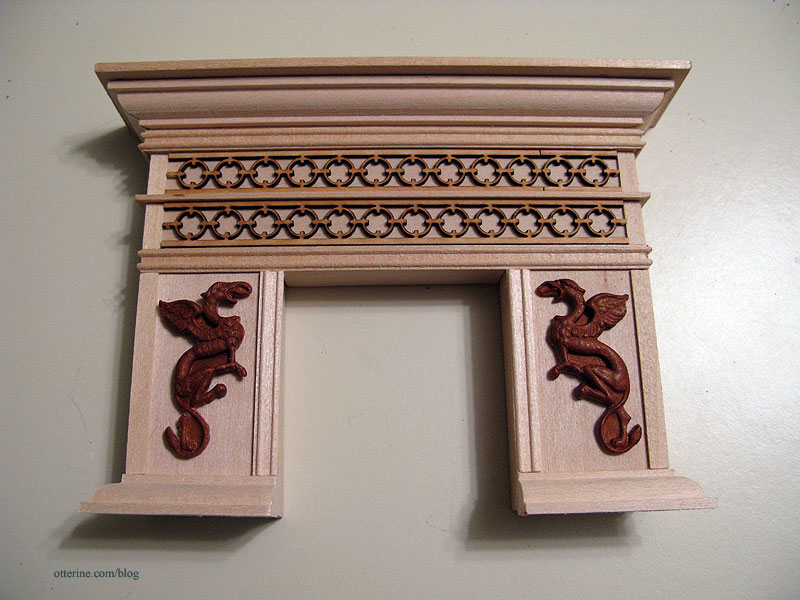
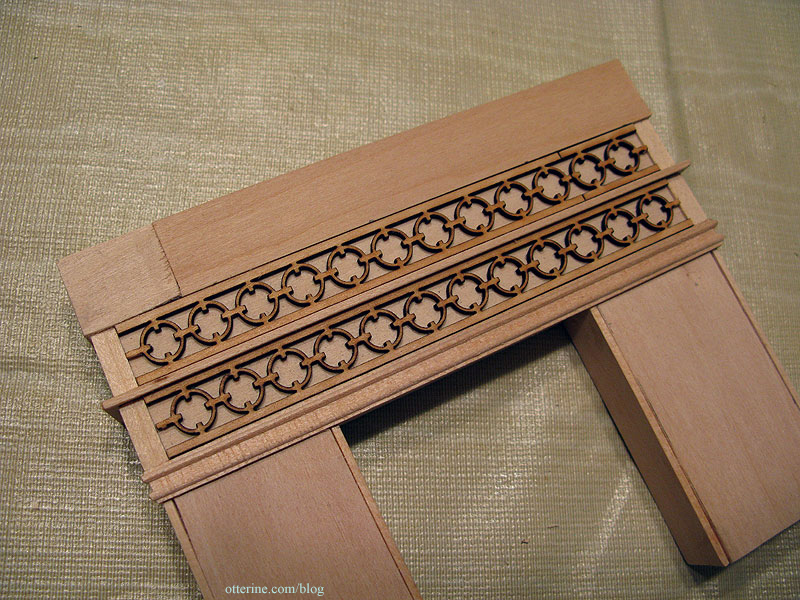
I glued on two rows of the circle link trim separated by 1/16″ x 1/8″ strip wood glued in place on its short edge. I used mitre cuts on the strip wood but the circle trim is cut straight and nestled inside 3/16″ wide corner trim since there wasn’t a good match in the circle pattern at the sides.
I added a layer of 1/16″ thick basswood to build up the surface above the circle trim. I used scraps since it wouldn’t show anyway.
Over that, I added a row of the same decorative trim that I had used below the circle trim. I then used 3/8″ routed trim to build up the top and topped it all off with a 3/32″ thick bass wood mantle (I left the mantle separate for now until I decide on a finish).
I added the front base detail to the lower edges on either side using the routed trim, though I still have the sides left to cut. On the sides of the fireplace opening, I used the same 1/4″ trim as I had on the upper portion. On either outside edge, I added the 3/16″ corner trim.
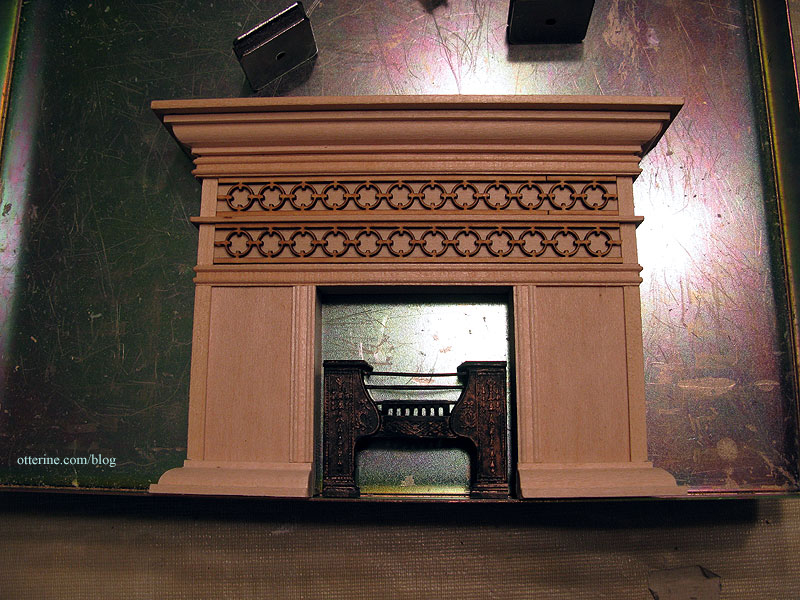
I won’t be adding the circle trim in the open areas like the original. I have other ideas. :D
I also need to think about finishing. I have a few ideas for stone and marble colorations. In the meantime, I can move on with the new parlor wall and finish the fireplace later. I’ll need a firebox soon, though. I wonder if I have any egg carton bricks around here anywhere. Ha ha! ;]
Categories: The Haunted Heritage
September 15, 2011 | 0 comments


NOTE: All content on otterine.com is copyrighted and may not be reproduced in part or in whole. It takes a lot of time and effort to write and photograph for my blog. Please ask permission before reproducing any of my content. (More on copyright)

Categories:
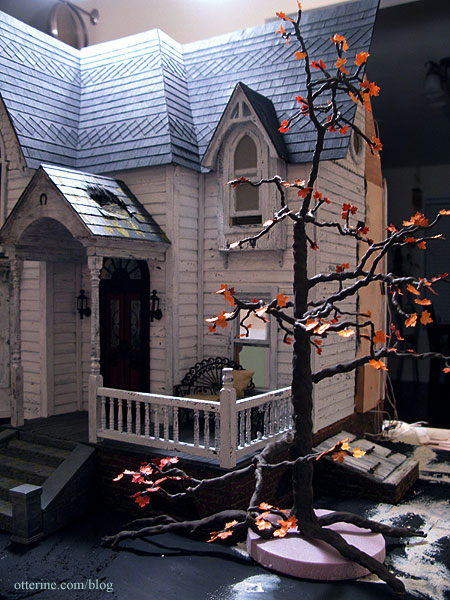
Heritage – The Tree, part 3
Continuing work on The Tree. After building the dogwood tree, with its individual leaves and flowers, I didn’t think The Tree would stand for foam foliage. Plus, I will be scattering the realistic leaves I took so much time to make, so the leaves on the ground should match those on The Tree.
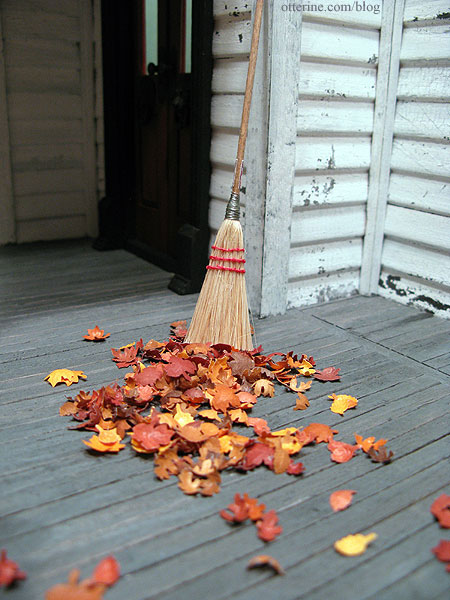
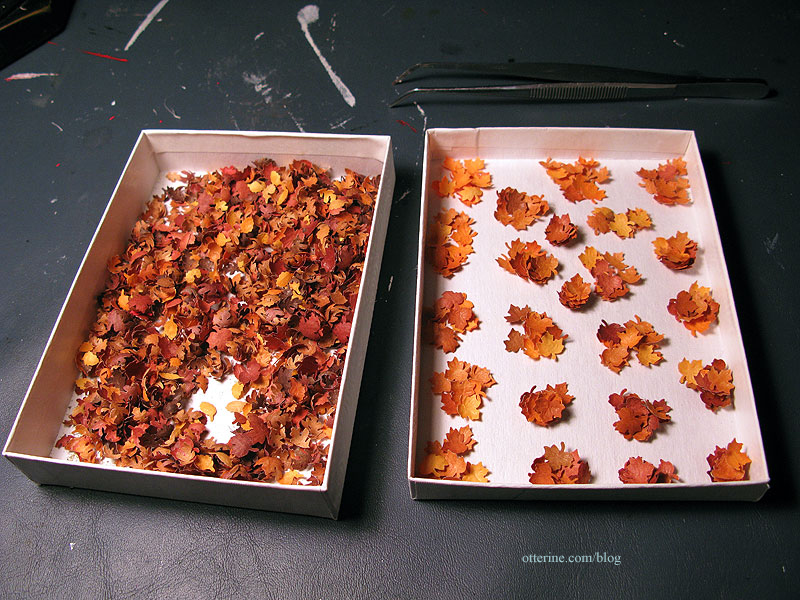
Instead of making more right from the start, I filtered out the maple leaves from the bunch I already had. There are 88 branches, so I figured 1-3 leaves per. Mid to late October often sees sparse trees with more leaves on the ground than on the branches.
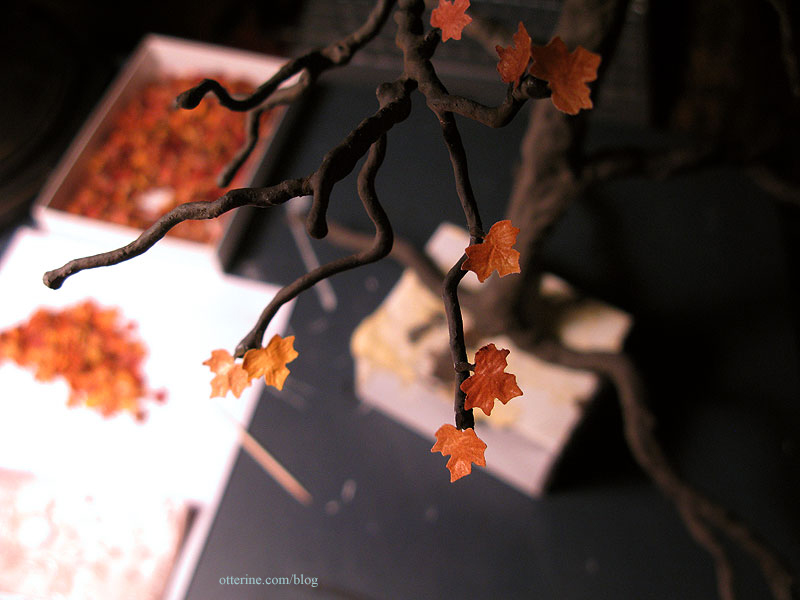
I colored the stems on these leaves with a brown marker so they would blend in more with the branches. I’ll leave the ones for the ground as is since those look better without the darker stem.

I glued them on individually, just enough to give The Tree a pop of color and some life. Having leaves on the ends of the branches also disguises the non-tapered ends resulting from the water putty process.
This old tree isn’t dead or dying by any means. It’s just ready for its winter slumber. zzzzzzzzzzzzzzzzz
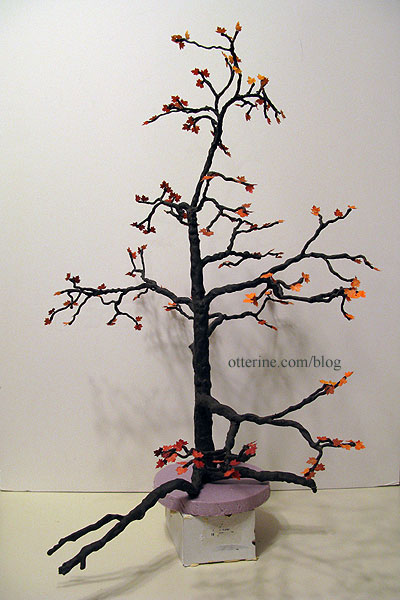
Once I have the roof finished, I’ll plant it and sculpt around the roots. :]
Categories: Flowers, plants, and trees, The Haunted Heritage
October 11, 2012 | 0 commentsHeritage – grandma’s neglected lawn, part 2
Continuing work on the lawn. I primed each foam piece with grey gesso. I had left the pieces removable since I didn’t want to risk getting gesso or paint on the brick foundation.
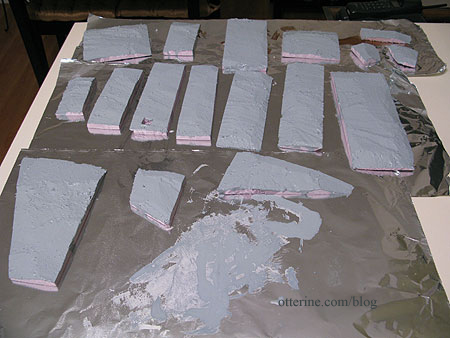
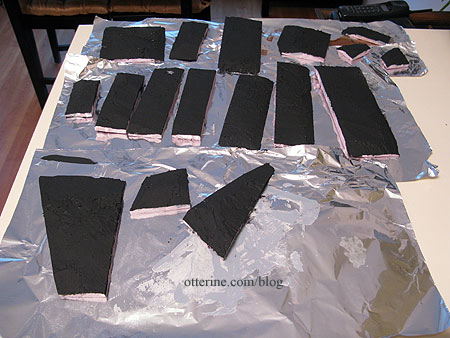
After these dried, I painted all of the pieces black. I still need to sculpt the area around the tree, but I sealed and painted all of the pieces I had cut previously.
I glued the foam to the landscaping board using Weldbond glue. I applied glue to both surfaces with a scrap of cardboard and then pressed the pieces into place.
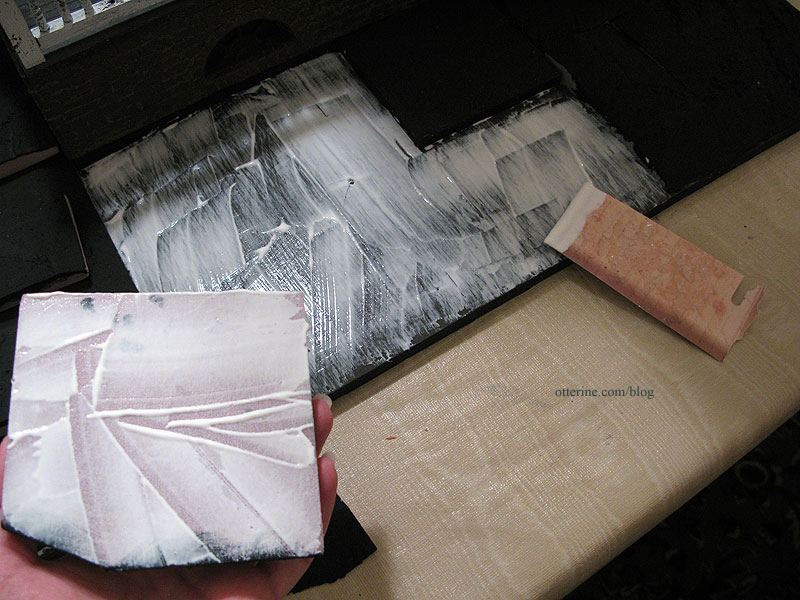
I also glued the wood bases for the stairs and cellar doors in place, though the stairs and cellar doors will stay removable for the time being.
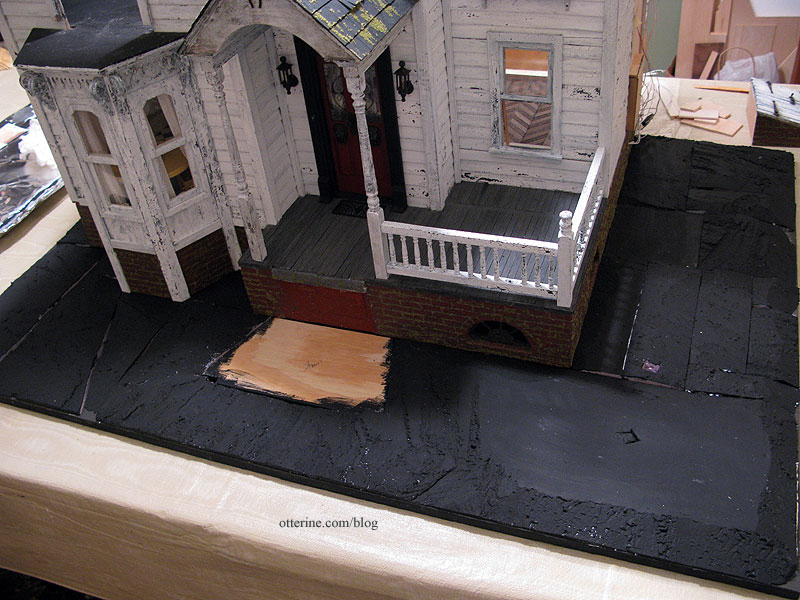
I added some leftover stucco patch to fill in the gaps between the pieces.

It will be easy enough to touch up the paint once it dries without marring the house foundation.

Categories: The Haunted Heritage
October 10, 2012 | 0 commentsHeritage – roof shingling, part 4
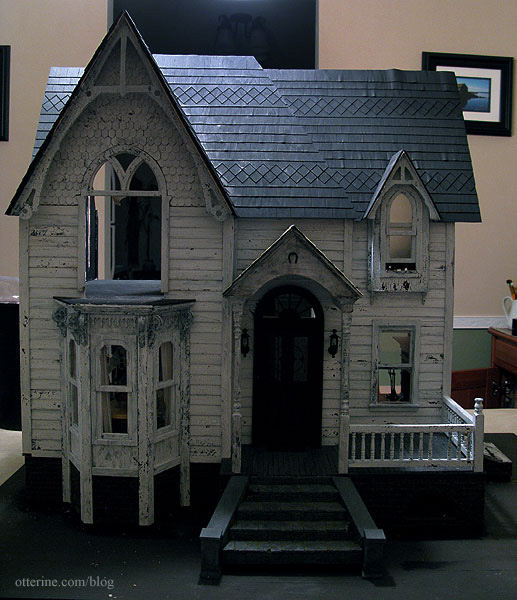
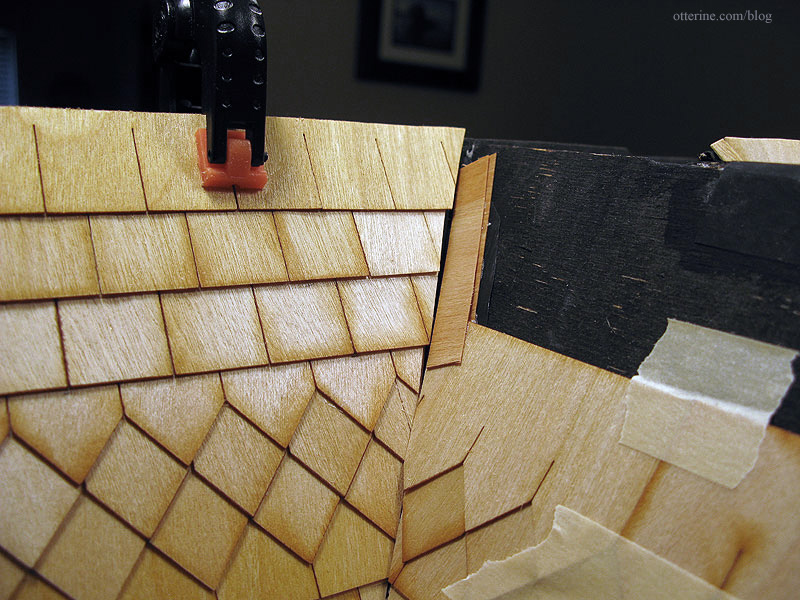
Continuing work on the roof. I finished applying shingles to the front of the house. I started with the right main front and then added shingles to the narrow piece in the middle that brings the roof forward over the portico. After those were in place, I added shingles to the center main front and then finally the right side of the front gable.
The only part remaining is the small dormer portion. I have just enough diamond shingles to finish the front, including the dormer window. I will need to order another batch to finish the back roof when I get to it.
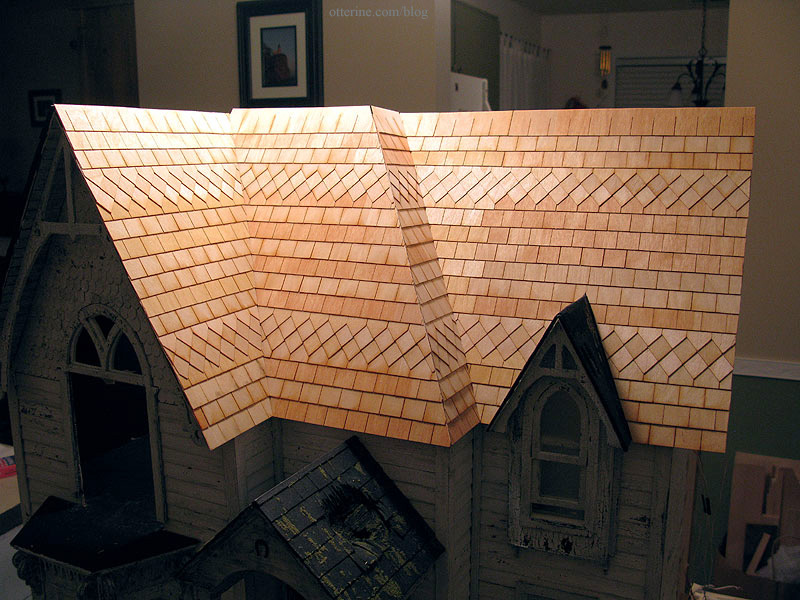
As you can see, the right side is higher than the left side and the gable. All this will be figured out once I get the top roof piece and the back roof in place. I suppose an uneven roof will work in my favor for a dilapidated house.
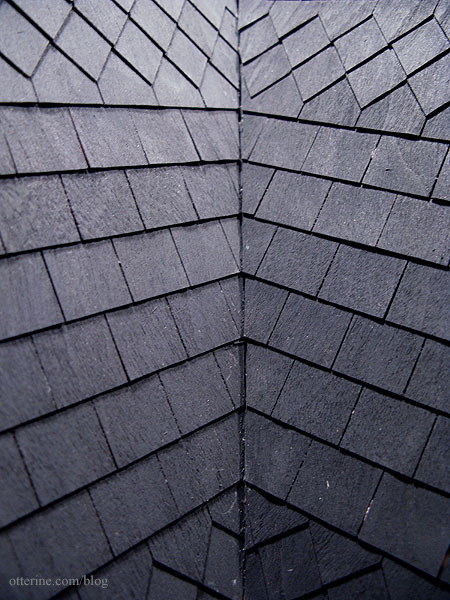
I added the black/brown/grey color wash, which seemed to cause less warping this time around. Here it is still wet from painting.
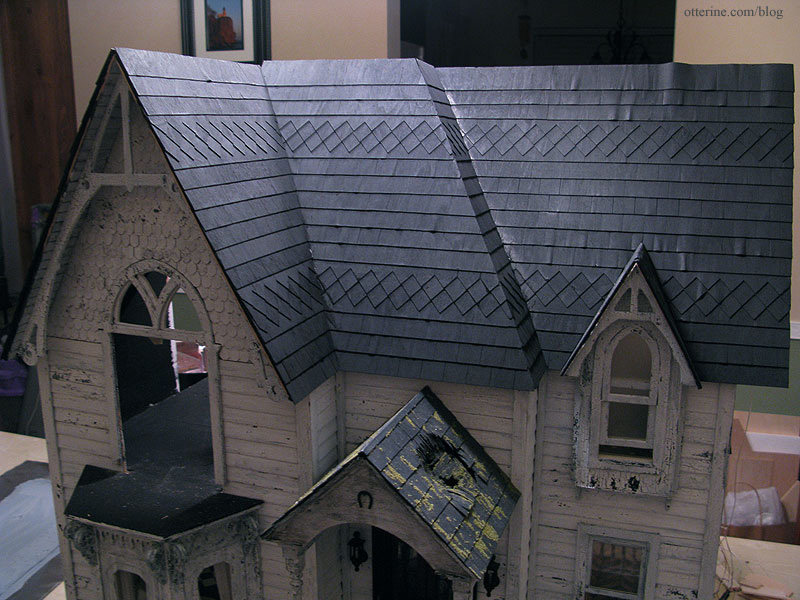
Most of the shingles from the first portion I painted have returned to their natural shape with only a few warped pieces here and there. Those, too, are acceptable for my old, rickety house. :D
Unfortunately, some of the shingles have shrunk from the inner corners, leaving gaps. I figured this might happen.
The usual dollhouse solution is to add strip wood, but I’m not sure if this would detract from the realistic illusion I have going so far. I have some very small strip wood that might blend in well enough once painted to match. It will make me feel like the roof is more polished without drawing a lot of attention.
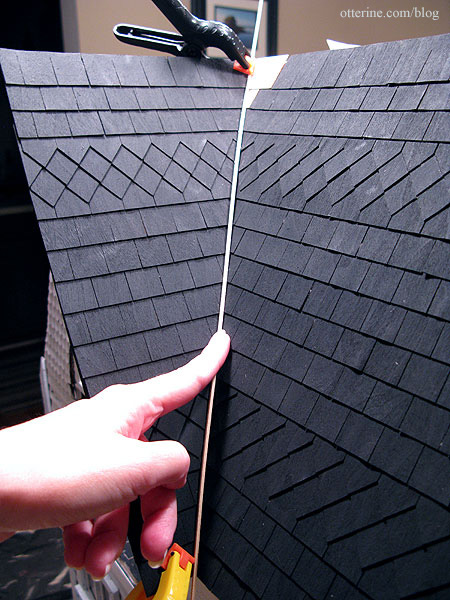
Another option would be to add a whole lot of moss in the crevices. I do plan to have a mossy old roof, after all. I could do both: add the thin strip wood and moss over it to make it less obvious.
Categories: The Haunted Heritage
October 8, 2012 | 0 commentsHeritage – roof shingling, part 3
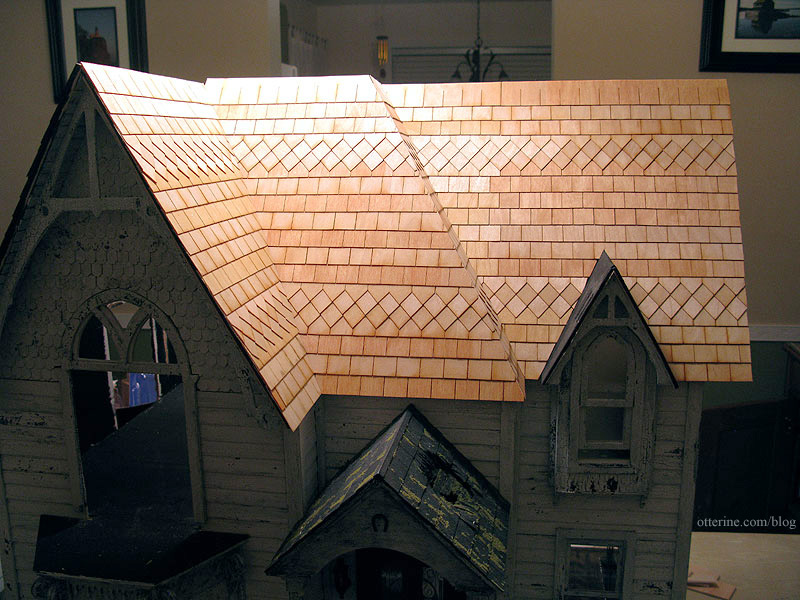
Continuing work on the roof. I started gluing the shingles onto the roof using E-6000 glue, forgetting that it doesn’t work for wood on wood, at least it doesn’t for me. I switched to Quick Grip glue, which was much better. I started with the left front and left gable to make sure the process would work before gluing on the remaining shingles.
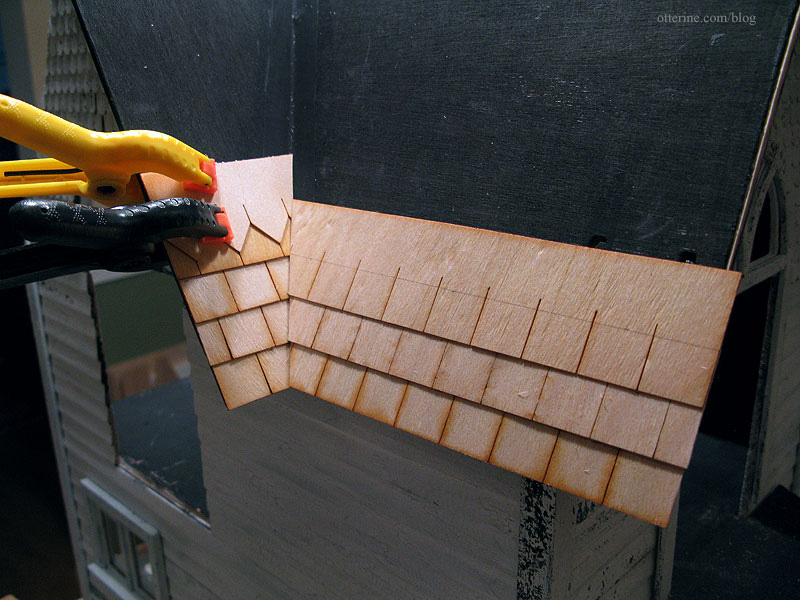
There was a little warping on the roof boards, so I took some of the shingle wood scraps to build up the area at the top.
Once the glue had dried, I used a paint wash of black, brown and grey to paint the base color on the roof. The paint buckled the shingles in some places but it wasn’t bad overall. It buckled most in the rows where I had used the E-6000 glue. I had used it on the last (top) row on the gable since I ran out of Quick Grip.
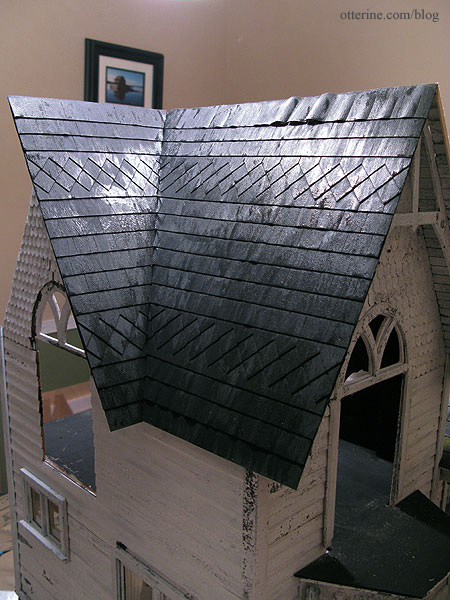
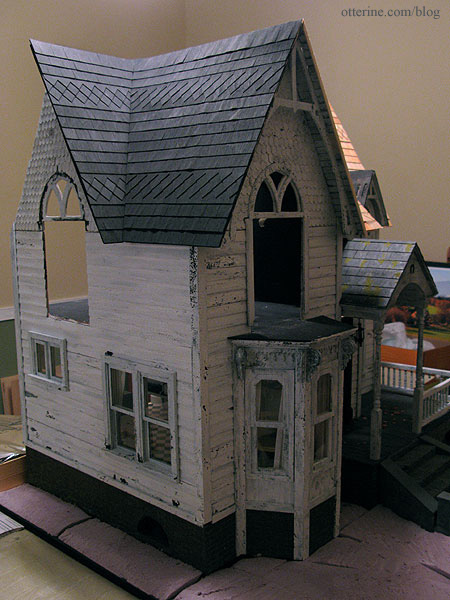
A few hours later, the buckling had calmed down. I love the look of a white house with a black roof!
I’ll let it dry while I continue with the shingle application on the rest of the roof and maybe the warped shingles will straighten out more. If not, I’ll figure something out, even if I have to iron the roof. :D
Categories: The Haunted Heritage
October 3, 2012 | 0 commentsMartha Stewart mini mice!
Last year, I bought a package of these clever mouse silhouettes for my condo. They are great fun to tape up around the house for Halloween. (No, this isn’t my condo.)

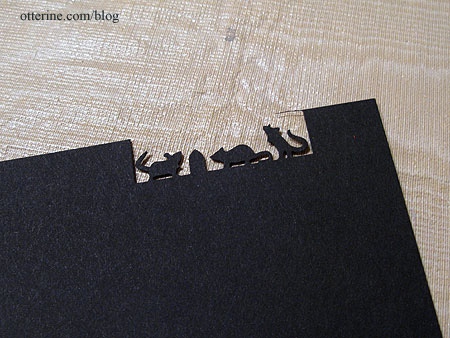
image by Martha Stewart This past week, I discovered that there was a similar Martha Stewart edge punch with some of the same mice!
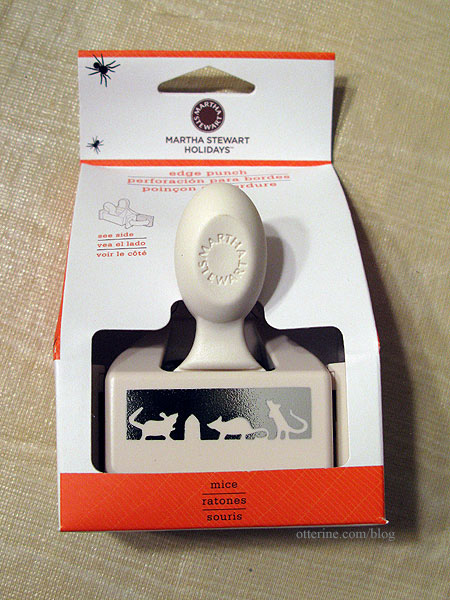
This packaging has such realistic spiders on it that it must immediately go into the recycling bin. If I half glance over and see those spiders, I will certainly jump. :O
You get three mice and one mouse hole per punch.
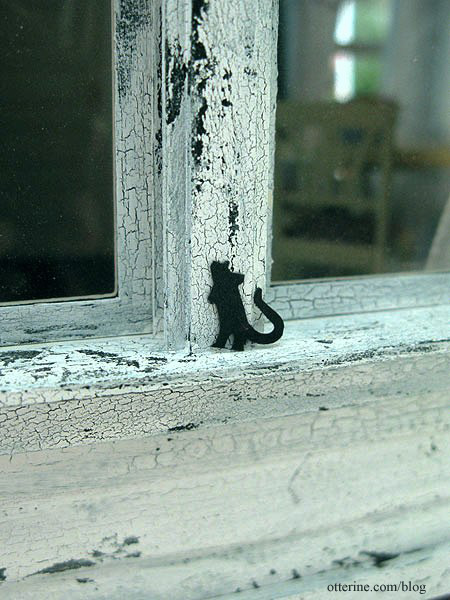
Now, I can decorate the Heritage, too! Eeeeeeeeeeeeeeeeek!
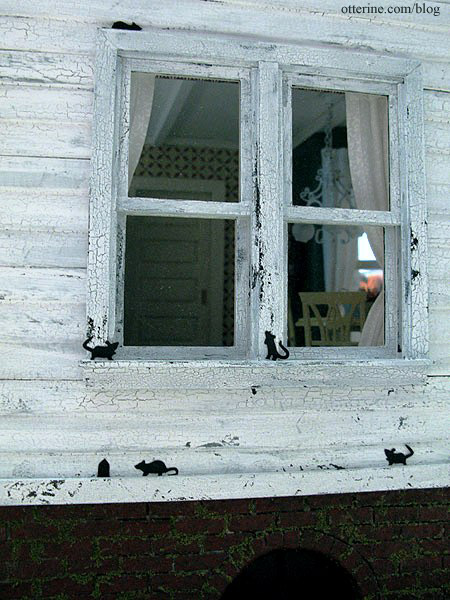
Ah, it’s the little things in life, isn’t it? :D
Categories: The Haunted Heritage
October 2, 2012 | 0 comments
NOTE: All content on otterine.com is copyrighted and may not be reproduced in part or in whole. It takes a lot of time and effort to write and photograph for my blog. Please ask permission before reproducing any of my content. (More on copyright)