

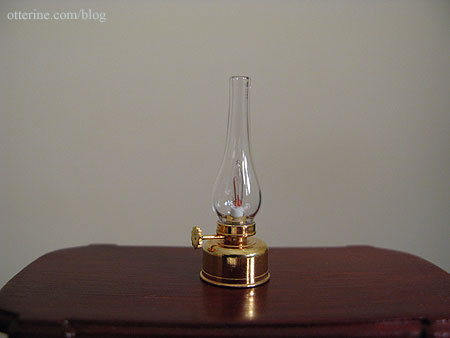
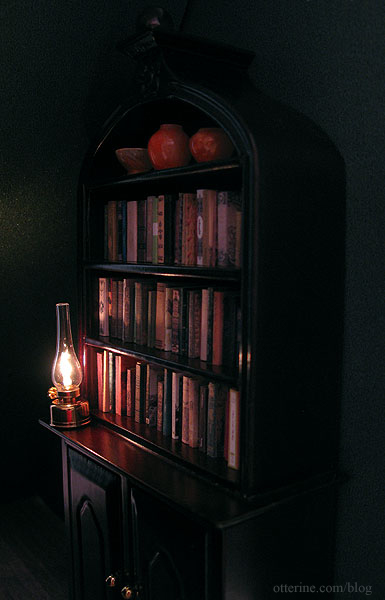
Clare Bell Brass hurricane lamp
The area under the stairs in the parlor is very dark, and I don’t want to lose the detail of the bookcase after spending all that time on making books.
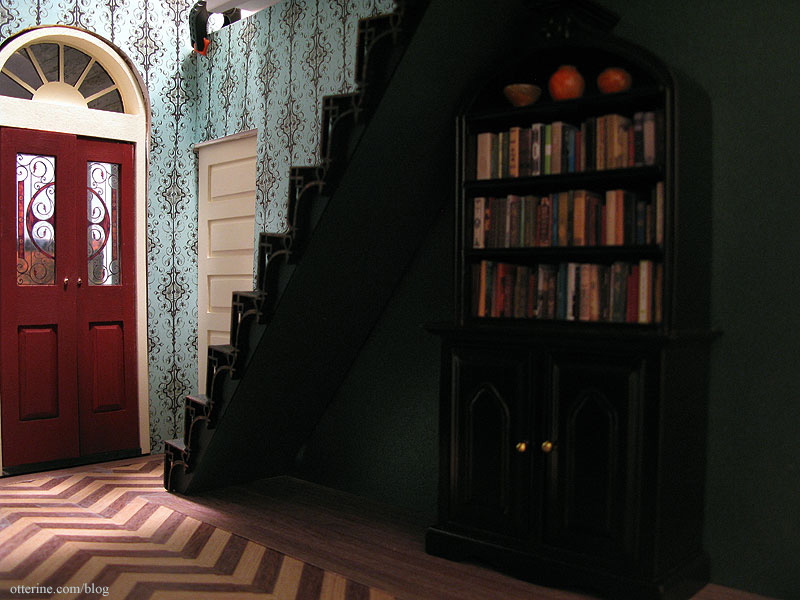
I needed a light here, but I didn’t want to clutter the space with another table or even a floor lamp. I opted instead for a Clare Bell Brass hurricane lamp. It’s one of the few brass items I find beautiful. I used one in the attic of Baslow Ranch.
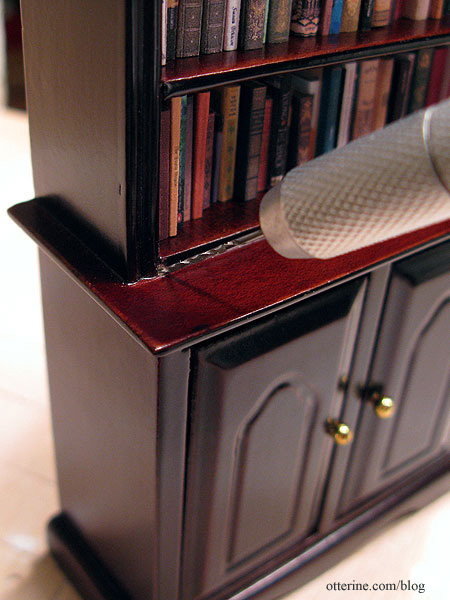
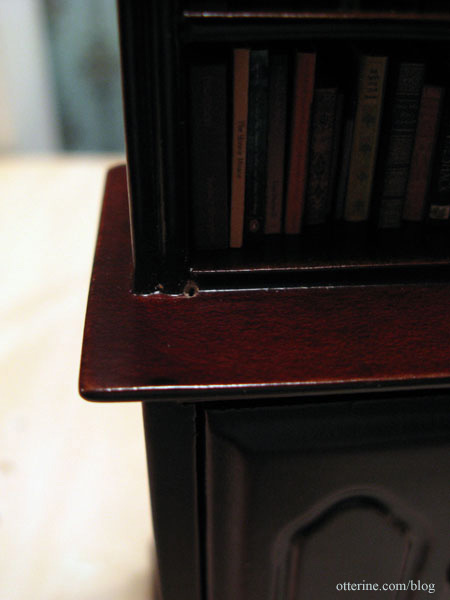
To avoid having the wire show, I drilled a tiny hole into the bookcase.
I drilled the hole in an inconspicuous place.
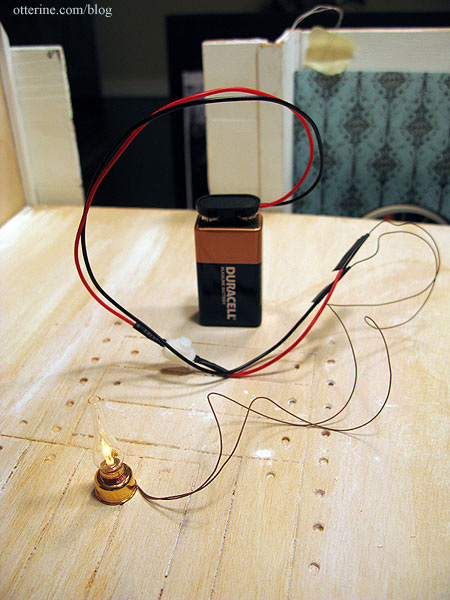
I also wished to avoid hard wiring the lamp for the ability to move the bookcase freely, so I fed the wire into the bottom cabinet portion and used a 9V battery, which fits easily inside the cabinet. A bit of mini hold wax keeps the lamp in place on the cabinet ledge.
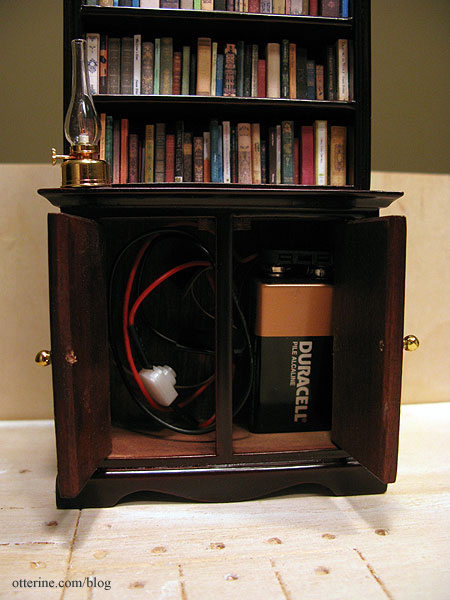
This adapter from Evan Designs has an on/off switch to easily operate the lamp without having to unplug the battery.
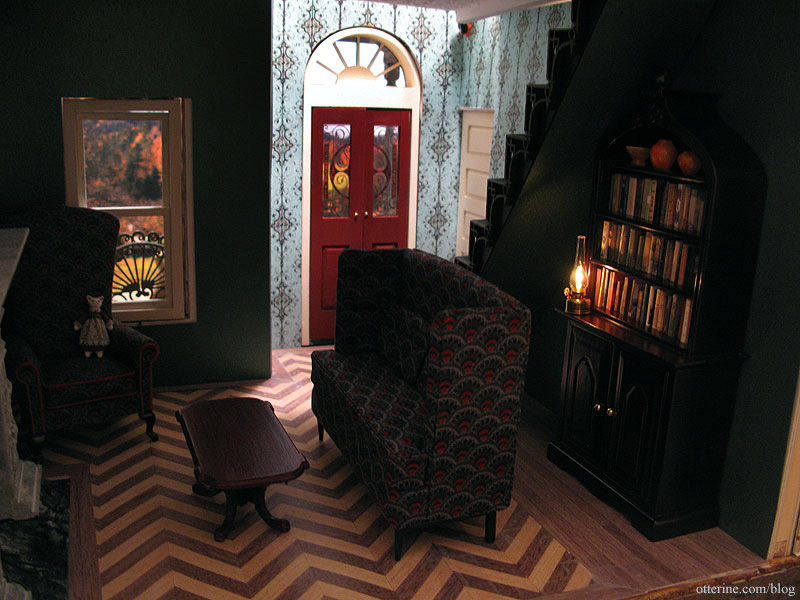
With the doors closed and the light on, you can’t tell it’s not a candle flame in miniature! :D
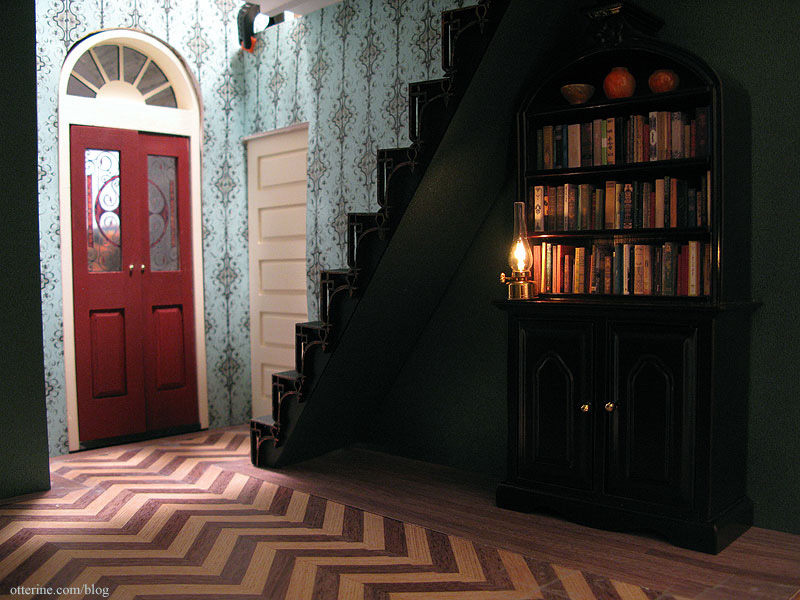
No more dark area under the stairs.
Love it!
Categories: The Haunted Heritage
January 11, 2012 | 0 commentsHeritage – kitchen accessories
I received these amazing mini Goldfish Crackers from Cindy at Snowfern Clover. Amazing doesn’t even do it justice! Everything is perfect about them, from the exact replica of the paper container with foil inside to the teeny tiny goldfish crackers. The only thing that gives them away is they leave no cheese and salt residue on your fingers!

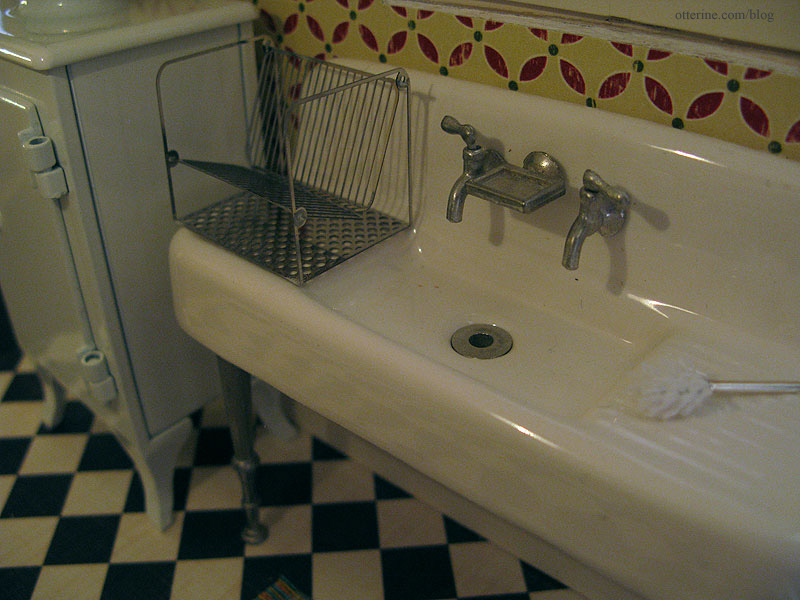
For the kitchen sink, I bought a dish drainer from The Dolls House Mall. I love this shop! The dish drainer came with a mop, too. Love, love, love! :D
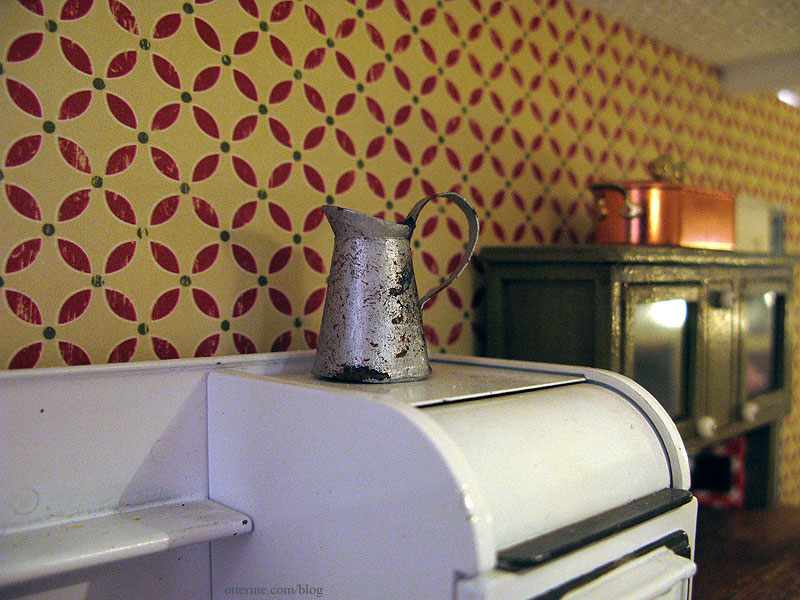
Caterina sent me a beautiful old pitcher for my kitchen. It’s made of paper but looks so much like metal. It fits right in!
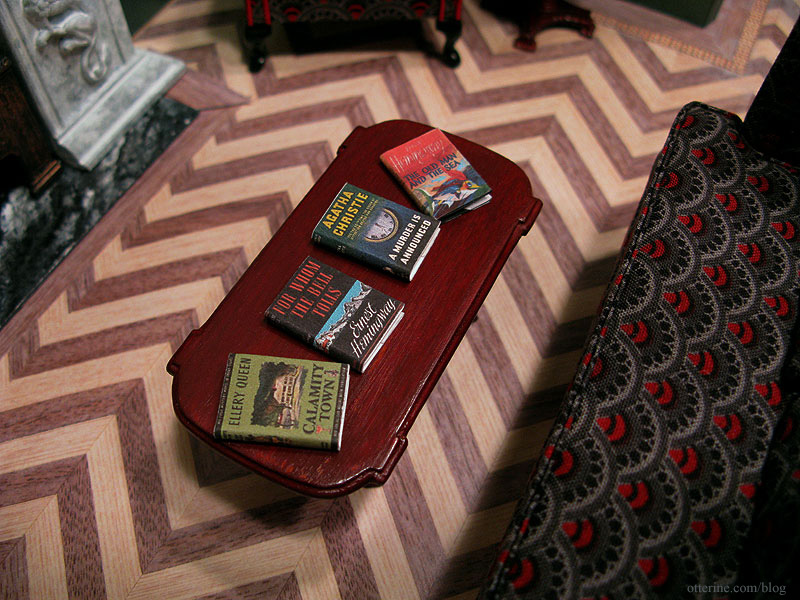
She also sent me some books. They look like real vintage hardcover books you see in used bookstores. They have dust jackets and real pages, too! These will be right at home in the Heritage. Thank you so much, Caterina!
Categories: The Haunted Heritage
January 6, 2012 | 0 commentsHeritage – Kitchen ceiling
As mentioned before, the kitchen ceiling will be lower than the parlor ceiling, which I had to raise to accommodate the new front door and the narrow stairs. The ceiling board that came with the kit is made of three different die cut pieces that you assemble to make one board that spans the entire floor.
It also had the parts for the original kit stairs that were meant to be removed and assembled in the kitchen. I’ve kept those pieces intact and reinforced them with wood glue spread over the die cuts.
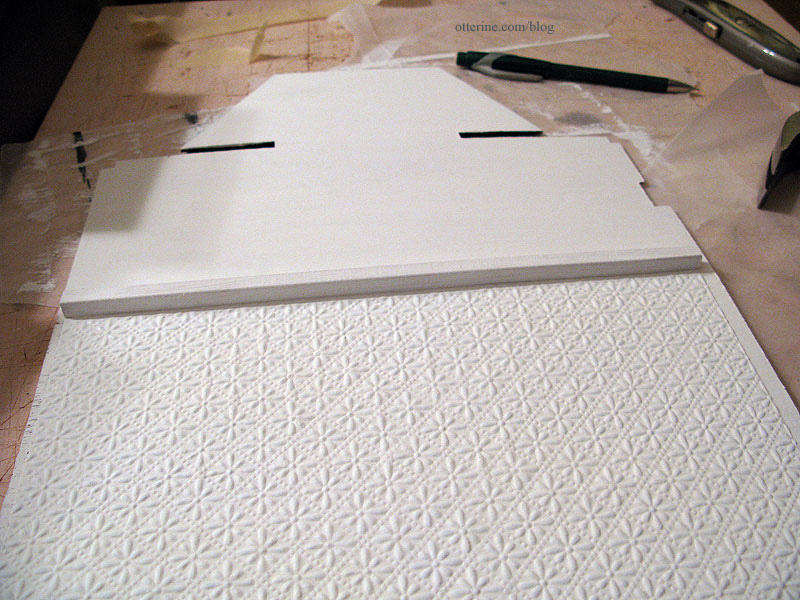
I won’t be using the piece that made the front porch since I replaced that with the portico. So, I taped the other two pieces together, measured the amount needed to make the kitchen ceiling and cut along that line.

This new board sits atop the lower portion of the pocket door wall and is supported around the rest of the room by all of the wood padding I added to build up the walls to install new working windows as well as the front bay window.
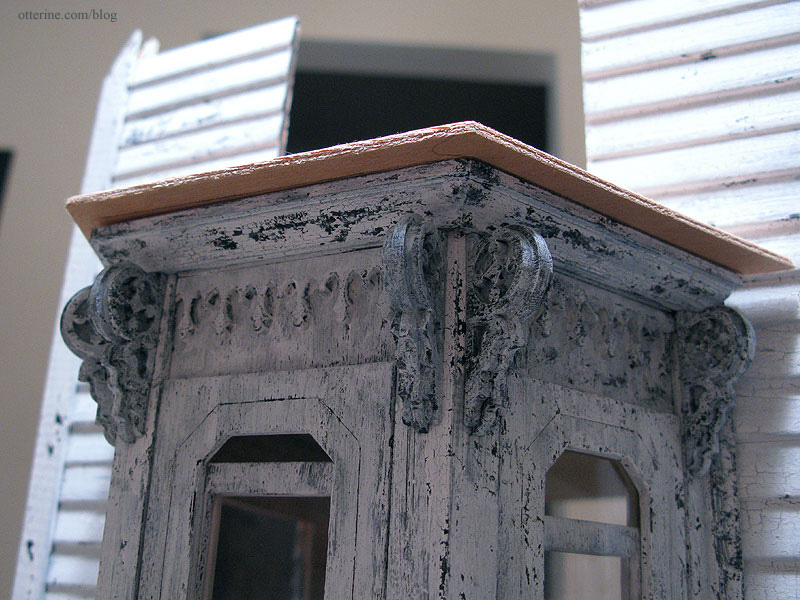
Speaking of which, I am going to trim the excess from the bay roof portion. It’s uneven to start with and second, I’ve already finished the top of the bay window. I’ll finish the new cut edge to match the finished bay window trim.
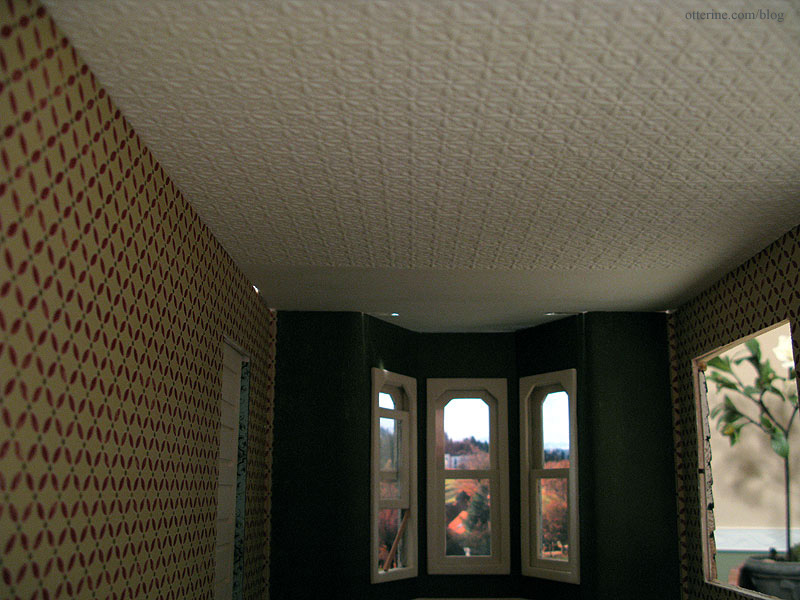
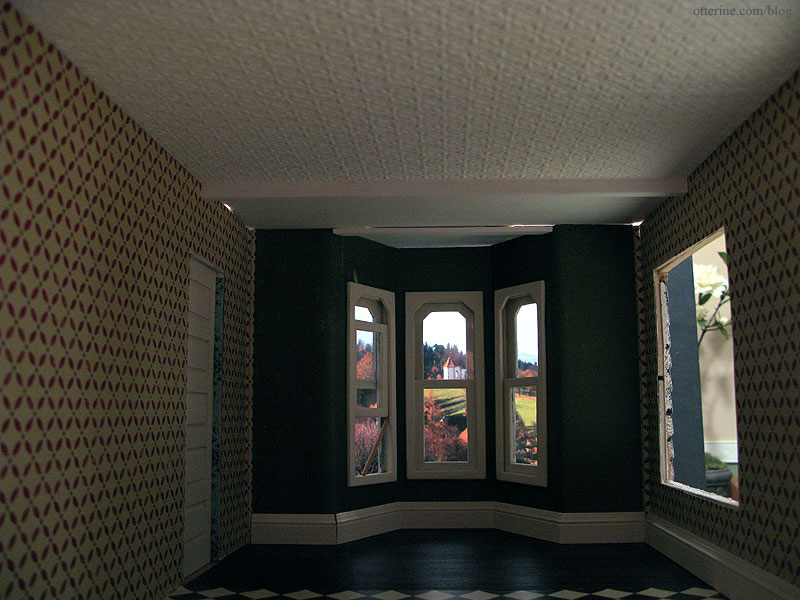
I love the way adding a ceiling changes the feel of a room in a dollhouse.
It creates inhabitable space. :D
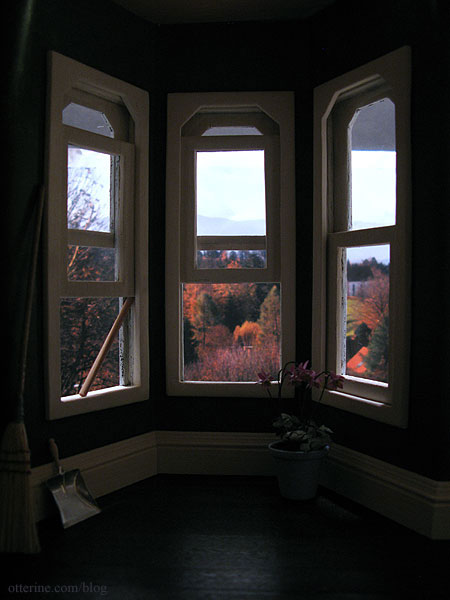
There are some gaps, part of the issue with this kit to begin with, but I’ll fill in where I need to. Plus, I have a few ideas for a faux tin ceiling or some other texture if I don’t like the look of the tin ceiling. But, you can’t beat that view! With minis, it can be beautiful autumn all year round.
As I mentioned earlier, the ceiling board is made from two separate pieces, joined together with wood glue. The original instructions called for splices or pieces of wood to be glued over these joins. It seemed ugly to me to have these odd pieces of wood glued to the ceiling, so I omitted them altogether. With the flooring added on the second floor and some ceiling paper on the first floor, I figured the wood glue would be enough to hold it together.
In addition to these issues, the board itself was too short front to back. I added a piece of strip wood to the back end to make up the difference. Once the ceiling board is finished, you won’t even know it’s there.
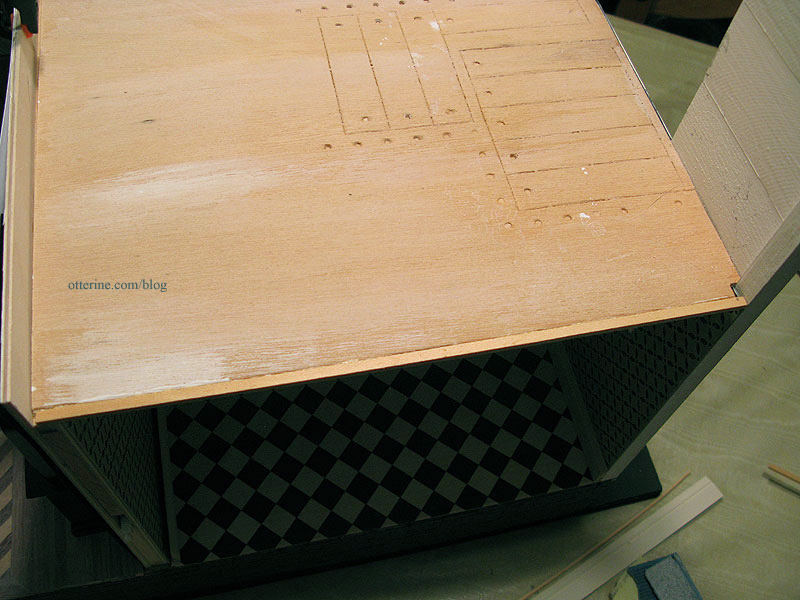
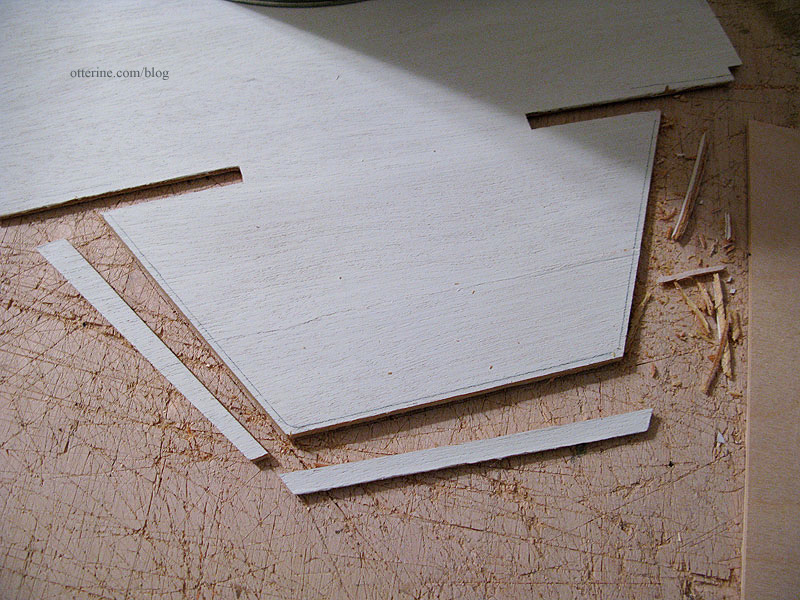
I started the finishing process by priming the ceiling with white paint. To make sure I wouldn’t mess up the interior finishes once they were in place, I next worked on the bay window roof. I marked around the existing trims and cut the excess from the ceiling board, leaving a little overhang for finishing.
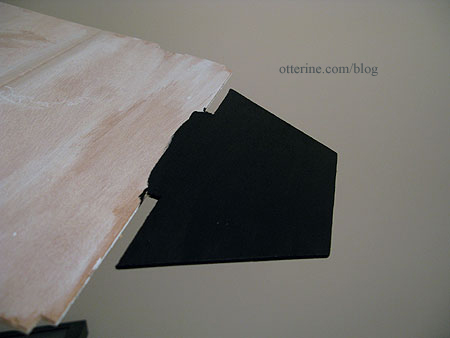
I painted the edges and top black. I will finish the rest of the bay window roof when I install the swinging window on the second floor.
To finish the kitchen portion of the ceiling, I used a piece of textured scrapbook paper called Pressed Tiles in Brown, by The Paper Studio. Love this paper!
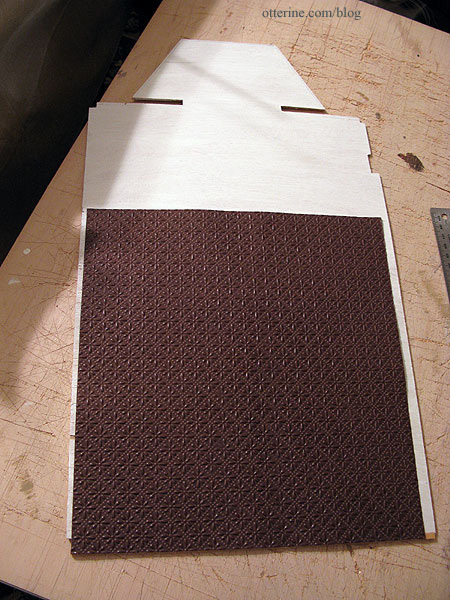
I cut a piece to cover the ceiling from the open back to just past the join. I glued it to the ceiling board and once dry, painted it with a few coats of white acrylic. The paper buckled in a few places, but I like that imperfect look to it, as though some of the tiles have popped out of place over the long years. :D
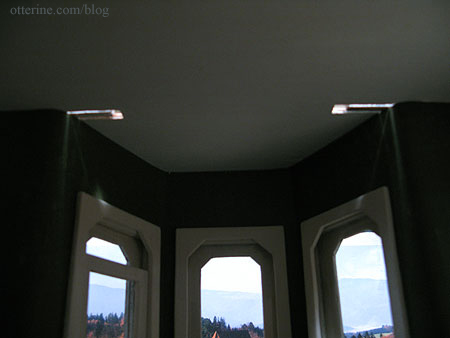
I left the original wood for the remaining kitchen and the bay window ceiling but painted it with a few coats of white acrylic to even out the tone. The wood is in good shape and the minor imperfections it does have only add to the realistic age of the house.
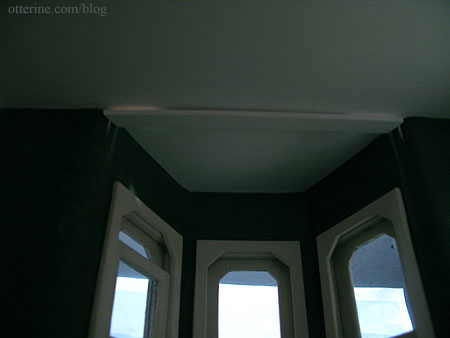
The ceiling board is cut in such a way to allow for its installation around the front wall siding. This leaves two obvious gaps on either side of the bay window.
Since I find it easier to finish a ceiling board before it is in place and this issue needs to be addressed after the ceiling board is in place, I decided to cut a piece of strip wood to bridge the gap of the bay window to add after installation. I painted it white to match the ceiling so it will look like a structural element while covering these gaps. It’s just taped in place right now, so you can still see light coming through.
Even with pressing, the ceiling board had a rather obvious warp making the center of the ceiling dip in the middle. To fix this problem, I added a solid wood beam across the width of the kitchen just beyond the ceiling tile paper. I used tacky glue, super glue and some nails hammered in from above. It should hold. haaaaaaaaaa! I then painted it white to match.
I have a few more things to work on in the kitchen before I can install the ceiling board permanently, but it is starting to take shape! There are gaps that will need to be addressed, but trim can cover these remaining problems.
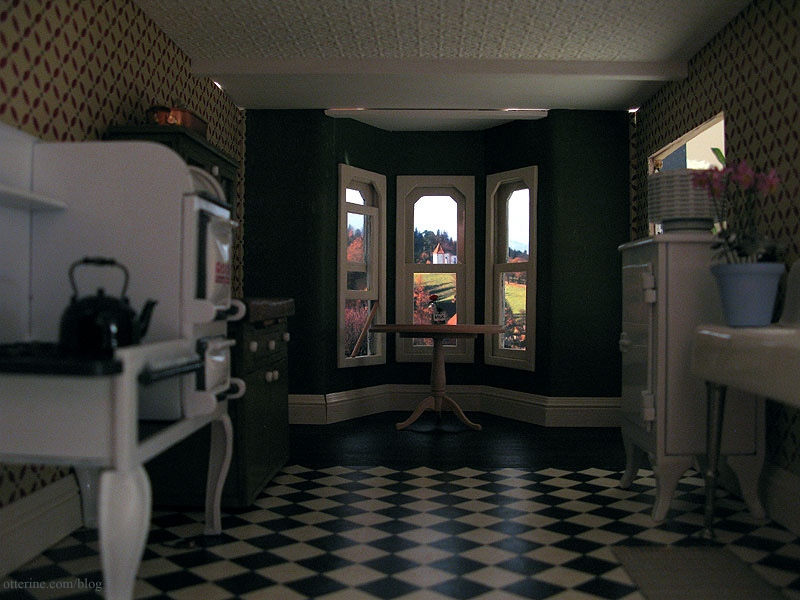
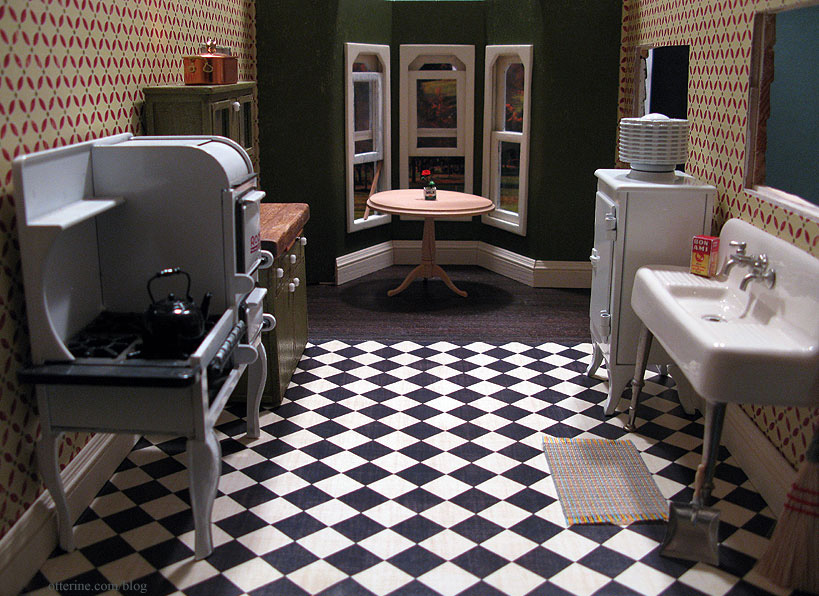
With the furnishings in place, the textured ceiling really adds that vintage feel.
Categories: The Haunted Heritage
December 23, 2011 | 0 commentsBespaq bed makeover and bedroom layout
It’s fun to take a piece of unfinished furniture and spruce it up just so. It’s even good to take a relatively inexpensive piece and change it, even paint it, to make it fit into a scene better. But, I feel as though I am going to get a collective GASP when I say I intend to redo this Bespaq bed, including the finish, which I intend to paint.
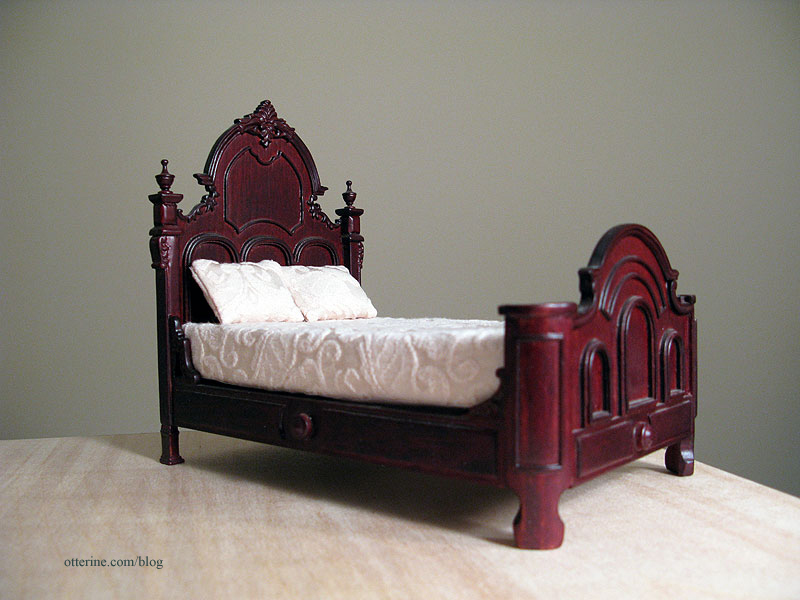
I love the bones of it, and the detailing is wonderful. But, the stain is all wrong, and the bedding is just deplorable for scale. Changing the bedding alone still wouldn’t fix the problem with the color.
As a refresher, here is the paper for the bedroom. This is by Recollections and has the macabre name of Out of Time.

To cover the varnished surface, I first sprayed the bed with grey primer. This is how it will stay until probably after the first of the year when I get a chance to paint it.
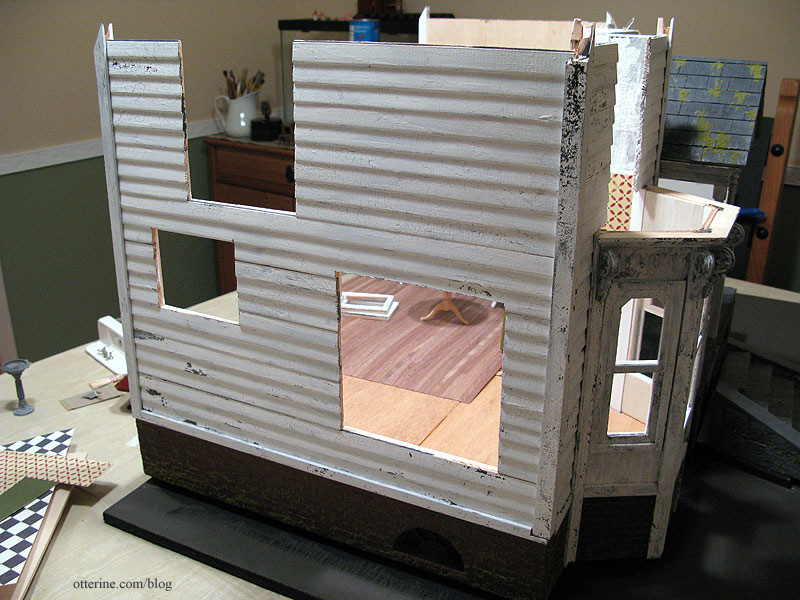
Since the kitchen is the same shape as the bedroom, I’ve used it to determine the general layout of the bedroom. You’ll need to do some imagining here with me. If you look at the top of the front and side walls, you can see where the two swinging windows will be — there won’t be a bay window up front. The rest will be solid walls.
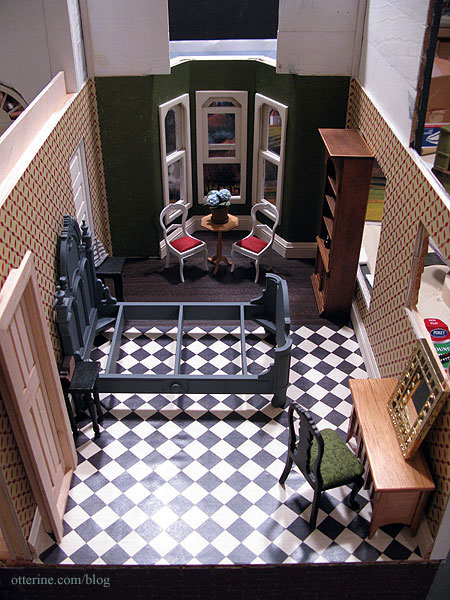
This leaves room for the big bed, one or two small nightstands on either side, and the narrow door on the inside wall. There won’t be a door where you see the pocket door, of course. I’d like to have seating, so maybe I will set up the Chrysnbon Victorian chairs and small table in front of the swinging window.
On the outer wall, there will be a wardrobe (where the bookcase is) and a vanity and chair (where the Mackintosh sideboard, Lundby mirror and black chair are).
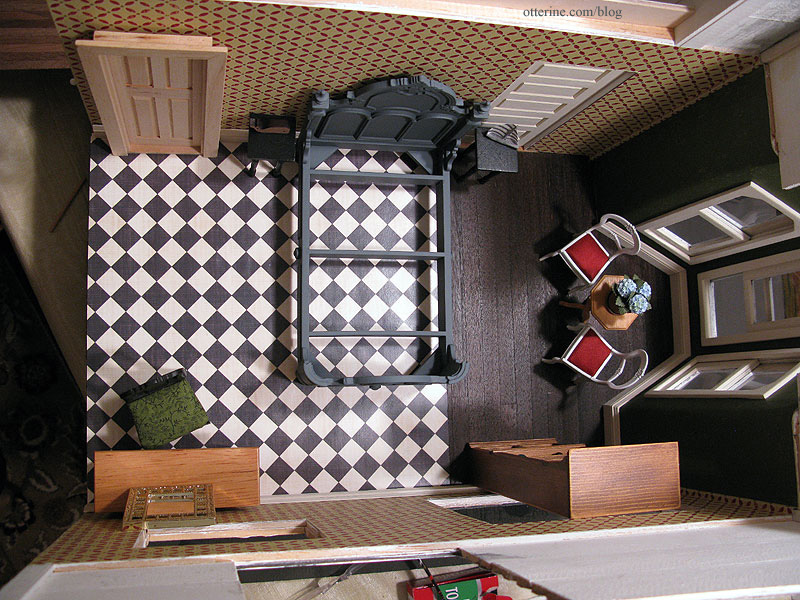
I think the layout works well, though there are the roof peaks to deal with concerning the height of the wardrobe. I might end up with a shorter dresser instead.
Categories: Furniture, The Haunted Heritage
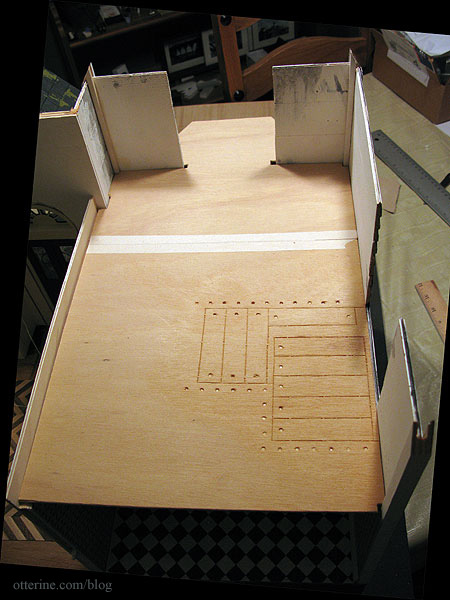
December 22, 2011 | 0 commentsFancy parlor flooring – introduction
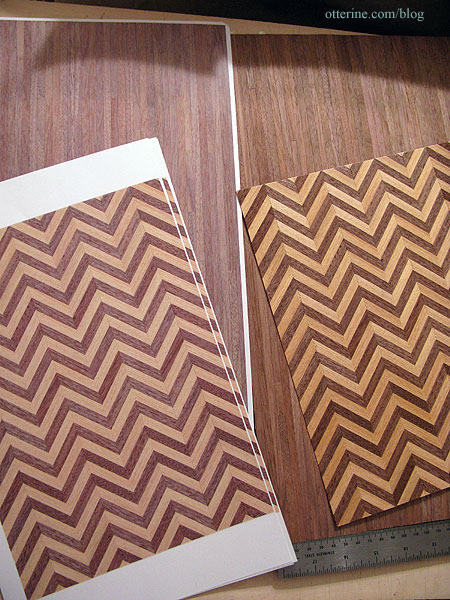
When doing wood flooring in miniature, I love using pre-made wood sheets. They are quick and easy to use, which to me makes up for their cost. I also think they look wonderful once finished and installed.
For the parlor, I wanted to make a fancier floor. I picked up two herringbone wood flooring sheets to use with the regular walnut flooring. Since I wasn’t entirely sure what I wanted to do or how things would look, I made color copies of the flooring sheets that I could cut, tape and rearrange until I figured out a good layout. I could then use the copies as a guide for cutting the real deal.
Keep in mind, the coloration of the color copies is off. I plan to stain the actual wood darker so the pattern will be more subtle than it looks in these photos. There will also be a rug for the middle of the parlor.
I’ve decided to use Houseworks narrow doors upstairs to have a more open foyer. That gives me a very precise measurement as to where the stairs need to be. This will still allow for trim around the pocket door.
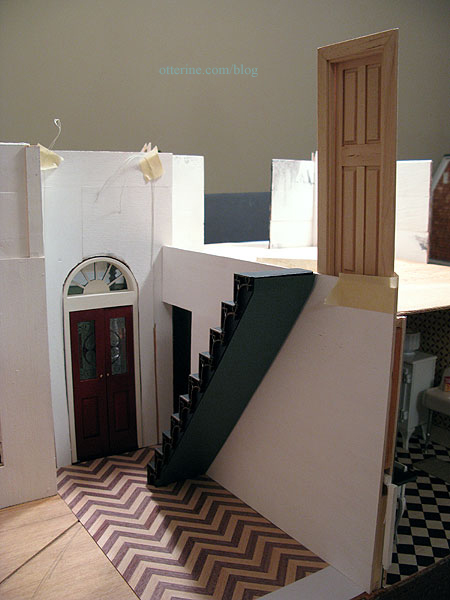
I started with the herringbone placement first since that is the main element of the floor. I taped pieces together to cover the entire area.
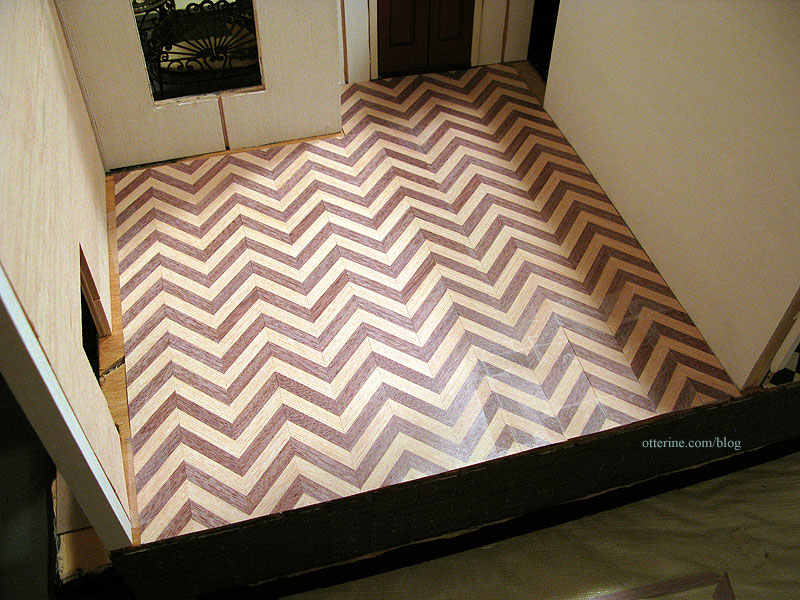
I put the wallpaper in place to see the overall look, and as I expected the herringbone is a little much all by itself.
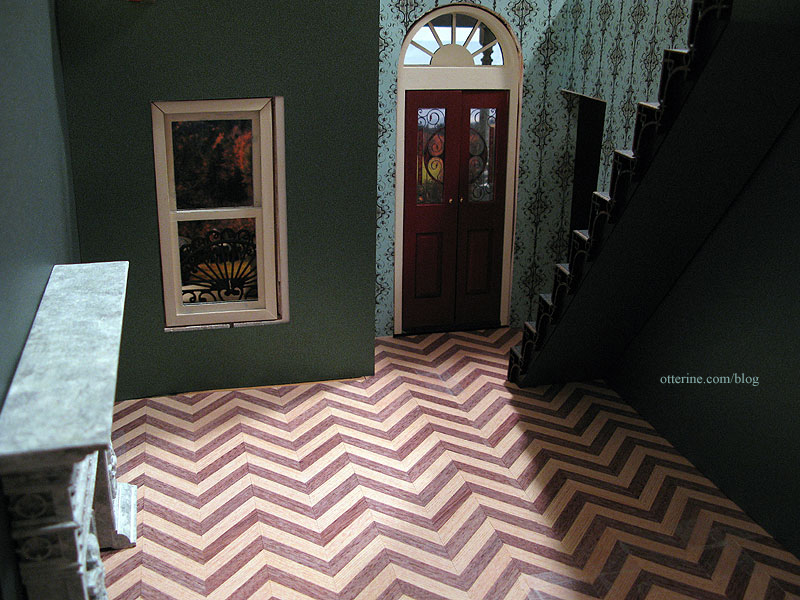
So, I continued with my original plan, adding a plain wood border around the room as well as the area under the stairs. Already better!
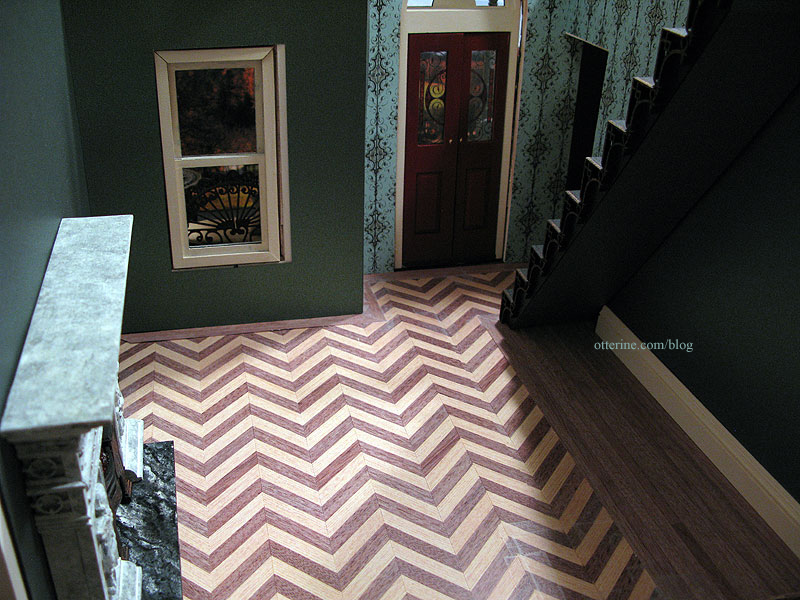
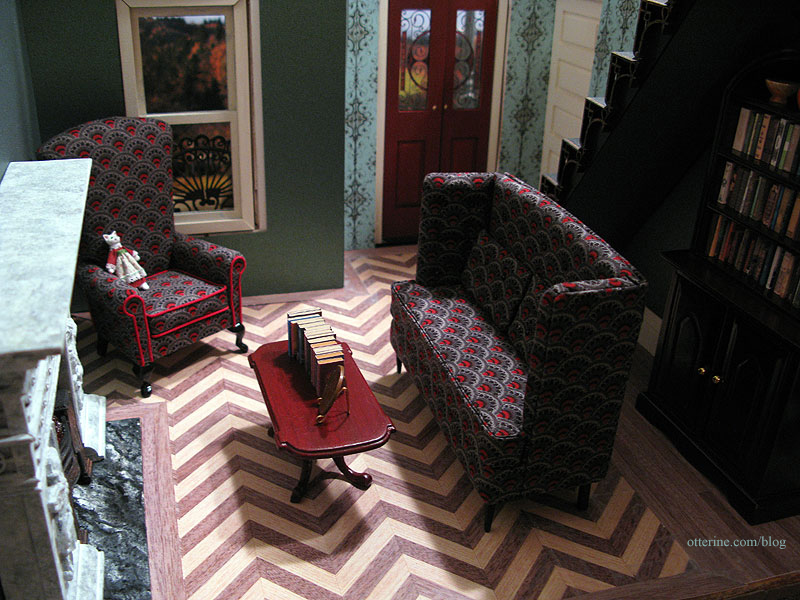
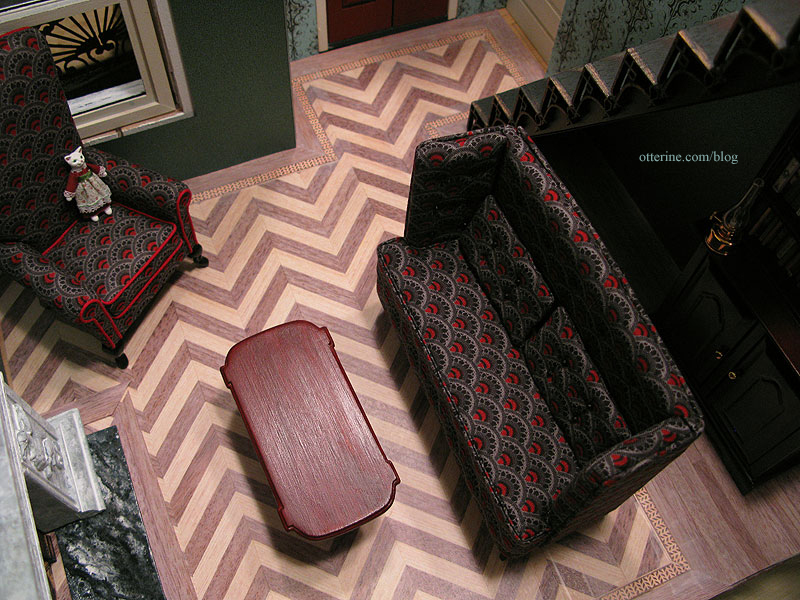
I’ve borrowed the marble hearth from the Newport and continued the border around it. I didn’t continue all the way around since I’ll need to make a hearth for the Heritage fireplace first. This just gives me a rough idea of how it will look. I then put in the furniture to see how it all looks together.
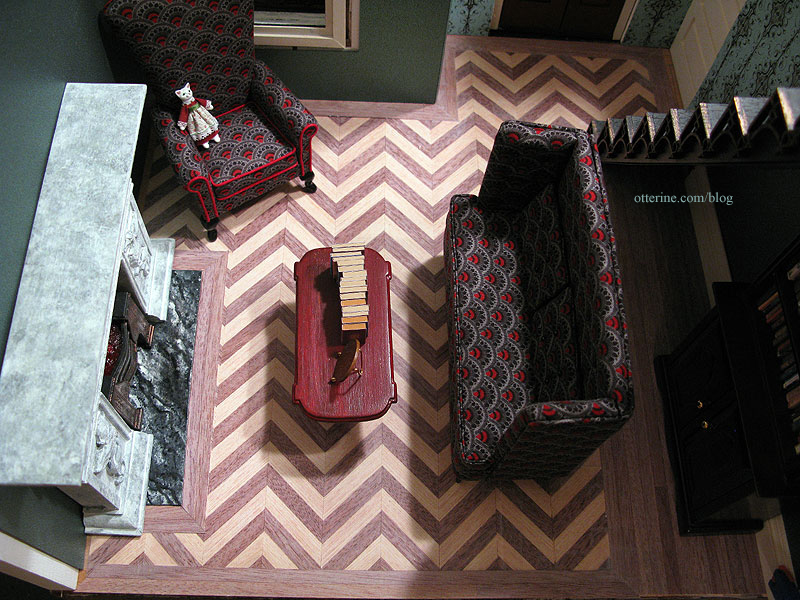
I love the way it looks in mockup, but I want to see how it will look with a thin inlay border between the outer border and the middle herringbone pattern before I make my final decision on a layout.
To figure out what type of marquetry border to add between the plain wood border and the herringbone center, I printed out paper copies from the internet and put it on my existing paper mockup before ordering. I copied the image, duplicated it and printed a sheet of them.
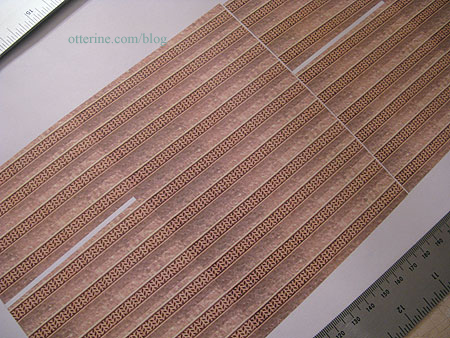
I cut and taped them into place on my parlor floor paper mockup.
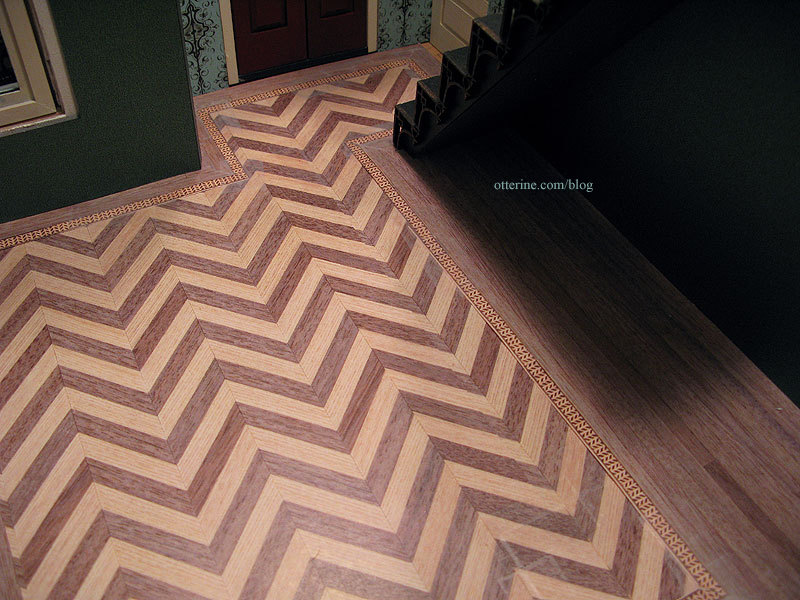
I chose this 1/4″ wide border because it has its own herringbone pattern. I think it’s unique and does a wonderful job of reflecting both the plain border and the center pattern.
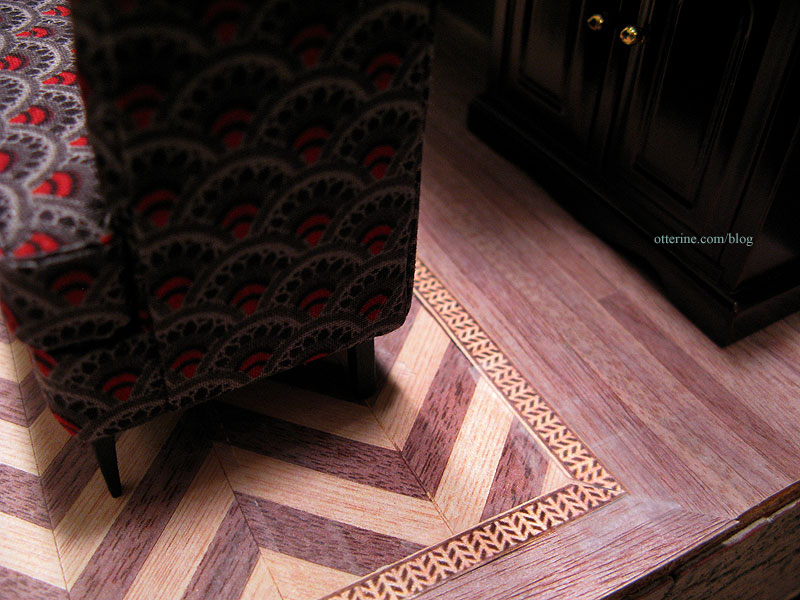
I think it adds just the right amount of detail. I didn’t add the marquetry border mockup to the fireplace wall since I was already convinced. :D
I love it! Now I just have to wait for the supplies to arrive.
Categories: The Haunted Heritage
December 14, 2011 | 0 commentsHeritage – kitchen papers and flooring, part 2
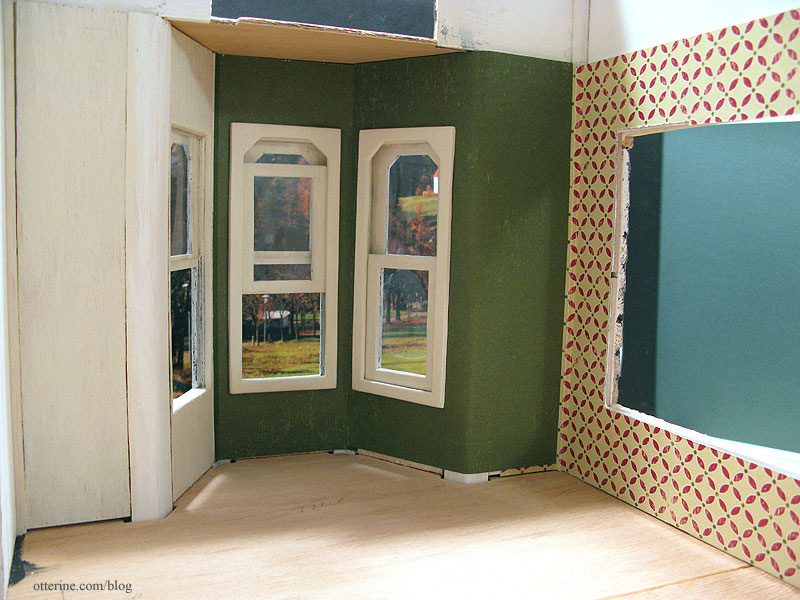
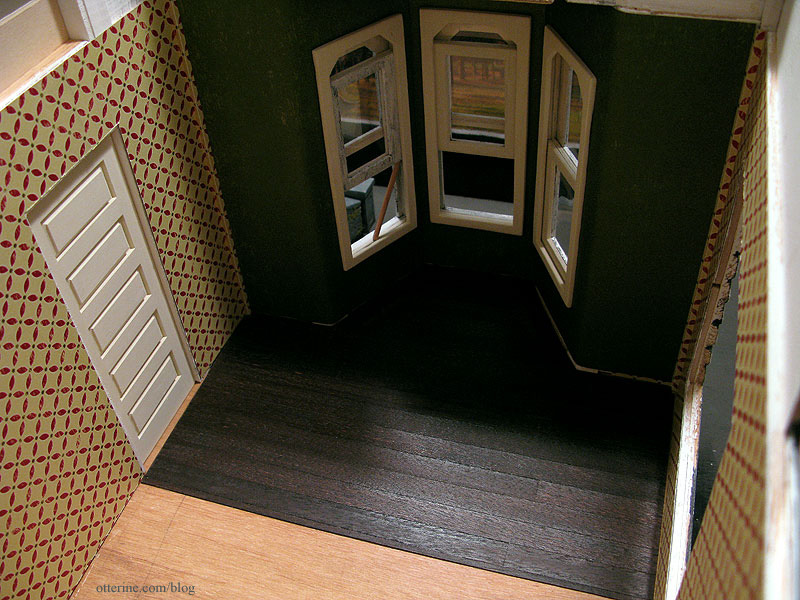
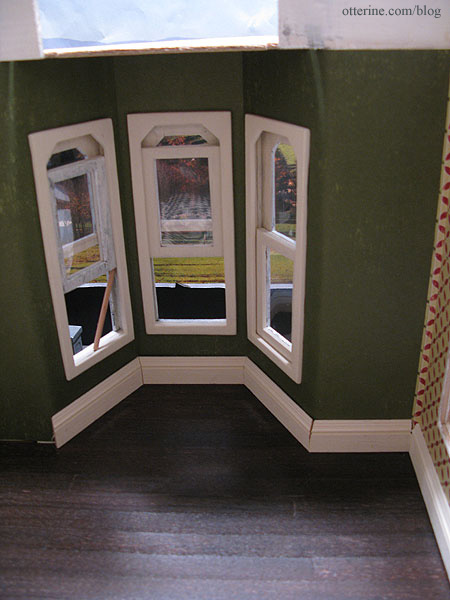
Continuing work on the kitchen papers and flooring. I started pasting the wallpaper in the front bay window as well as the newly installed kitchen side wall. With the bay window paper in place, I was able to start gluing in the window trim. I used the same super glue trick installing the trim – just a few dots to hold it in place while the white glue dried. It made it so much easier. And, the middle window still works! :D
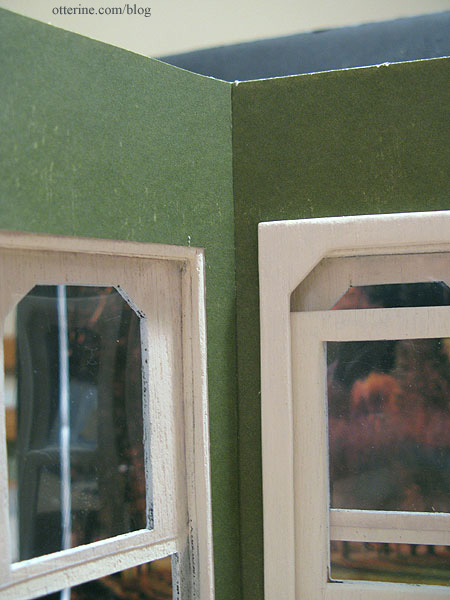
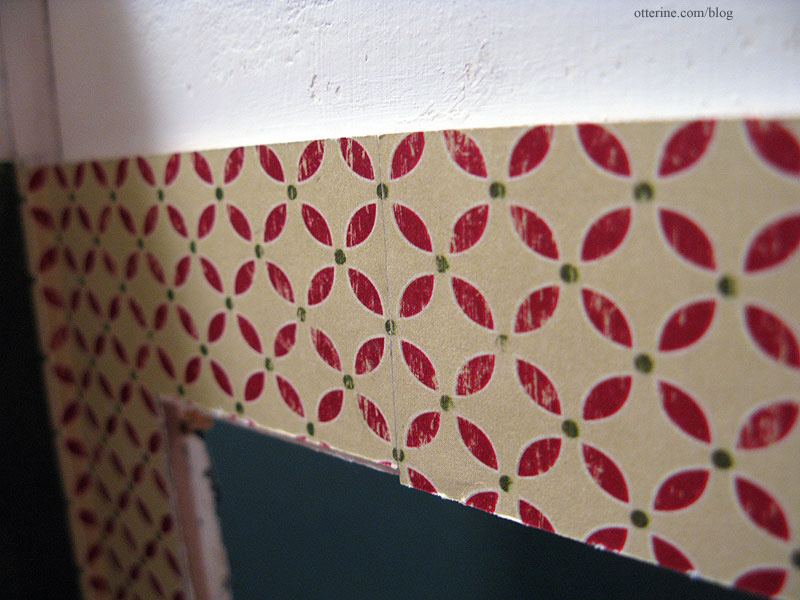
Since scrapbook paper is limited to 12 inches in length, areas needed to be pieced. It’s easiest to piece at a corner since your eye already sees this area as a dividing line and the seam will be less obvious. To get a good match in a pieced corner, I include a bit of overhang.
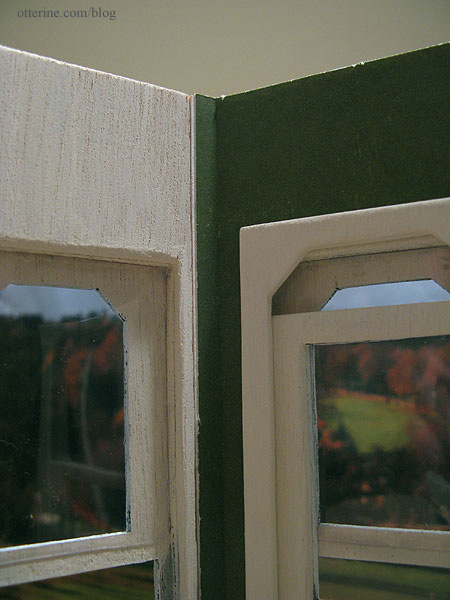
I then paste the adjacent piece over this extra paper for a nearly invisible seam.
When the paper needs to be matched on a long wall, I cut the pieces to match in pattern and paste end to end. The seam is somewhat visible, but it should blend well and not draw your eye once the room is furnished.
I finished up the pocket door and primed the two separate walls before gluing it all together. I again used super glue to hold the pieces in place while the wood glue dried. That’s fast becoming my favorite trick for building! Once dry, I glued the assembled wall into the house, being careful not to glue the door itself to the floor.
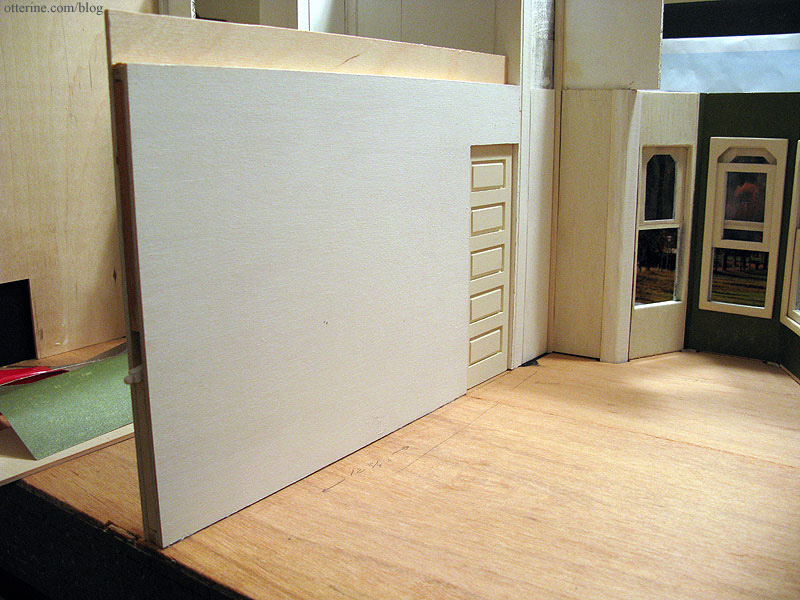
Once the glue set, I was able to paste the rest of the wallpaper.
I always use Yes! paste applied with a brush.Note: I no longer recommend Yes paste – I use Wallpaper Mucilage instead. Yes paste has problems with longevity.Up next, installing the wood floor I finished previously. I’ve built in enough clearance for wood flooring to continue under the pocket door when it is closed. This part of the floor will be installed when I work on the entry and parlor floors. And, yes, the third window is still loose enough to require a dowel to prop it open. :D (Of course, I installed the insert wrong side out and had to do a bit of trim removal to reverse it.)
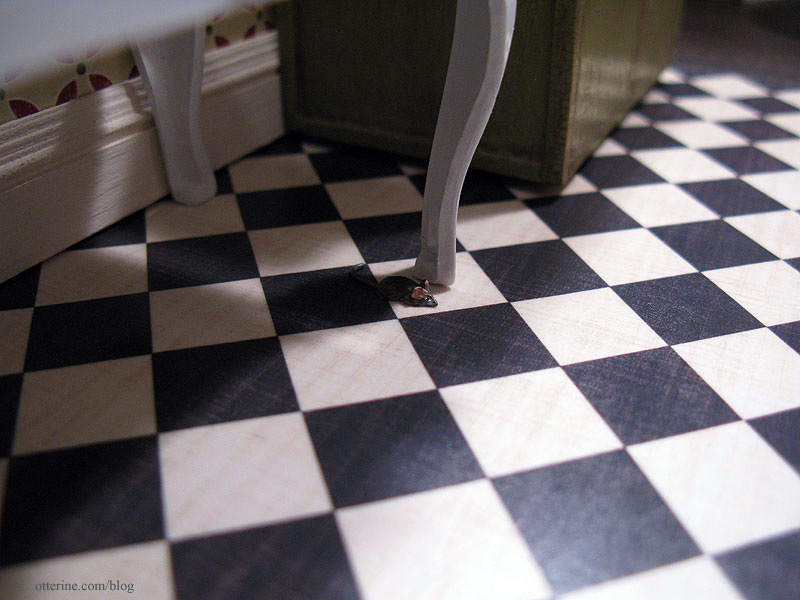
To finish the tile portion of the kitchen floor, I used spray adhesive to attach the cut piece of Cream Diamonds by The Paper Studio to a larger piece of Bristol paper to give it added weight and durability. The wood floor it will be next to is thicker than the scrapbook paper itself.
I sprayed the surface of the paper with matte sealer. I was heavy-handed with it, so parts turned out glossy and others spotted. There are even a few random imperfections. All of these things make for a perfectly aged floor! :D I just wish it showed up in the photos. At least you can see the aged pattern of the printed design.
I’ve started cutting the baseboard pieces, but they are not yet glued in place. Since the Heritage kit doesn’t lend itself to straight and square construction, I will need to do some filling where the cut pieces of baseboard meet. It’s a fairly simple fix, and I’ll detail the process in a future post.
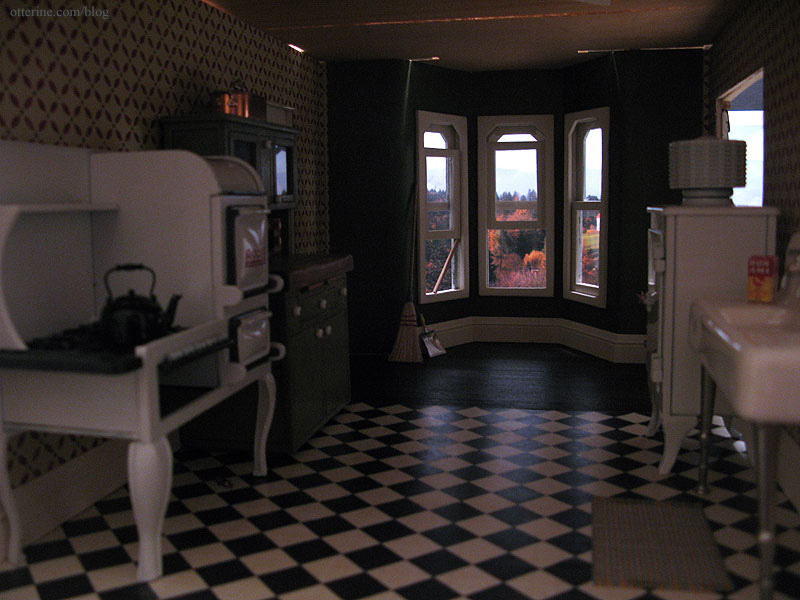
And, here is the kitchen with the pieces I plan to use for it.
I really like how it’s turning out. :D
Categories: The Haunted Heritage
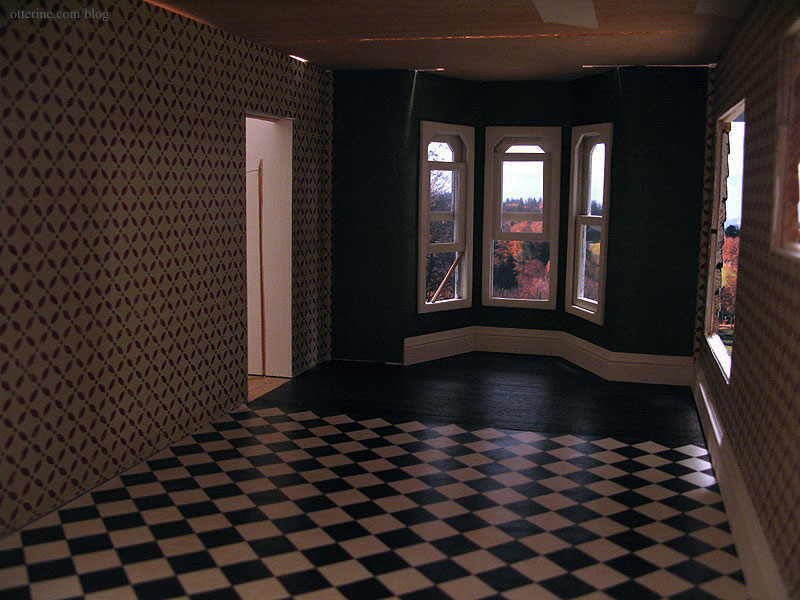
December 10, 2011 | 0 commentsHeritage – kitchen papers and flooring, part 1
I installed one of the last two outer walls – the one on the side of the kitchen. I used a trick I learned on the Greenleaf forum of putting a couple drops of super glue (I used the gel kind) to hold pieces in place while the regular glue dries. Ingenious! The wall had a bit of a warp to it, and the super glue held it better than masking tape.
The flooring is Cream Diamonds by The Paper Studio and the wallpaper is Geometric Fa La La by Making Memories, both scrapbook papers. With them is the tall baseboard molding painted Vintage White by Folk Art. I thought it might be too much, but as Lyssa informed me, ‘too much’ was the style of the day. I’m more used to subtle modern design.
The flooring paper is very thin, so I plan to use spray adhesive to attach it to a sheet of cardboard. I’ll then coat it with matte sealer (which actually has a slight sheen to it) to bring out the color and give it the look of well worn linoleum. I love that it has the weathering built right into the design.

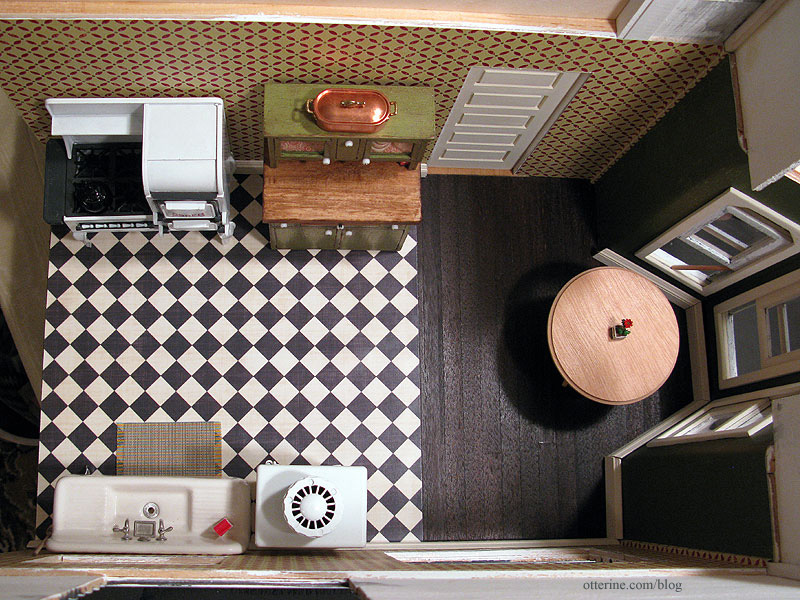
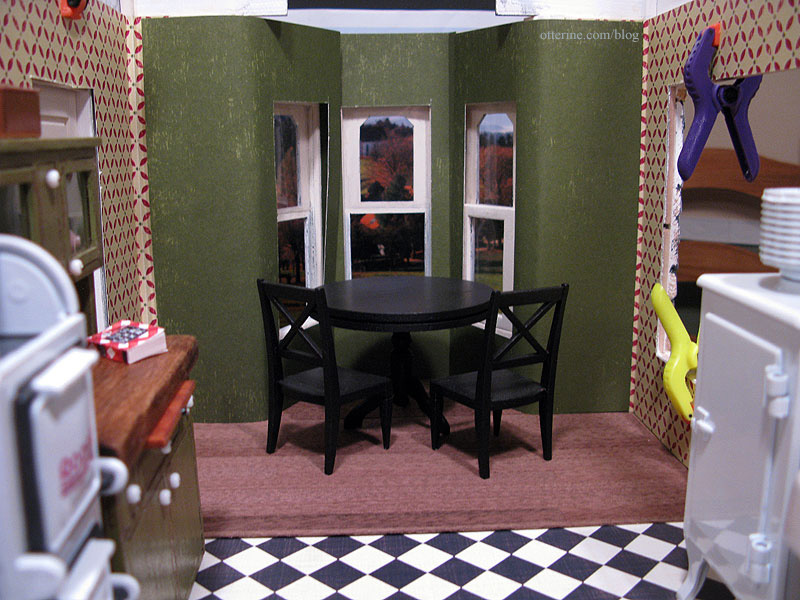
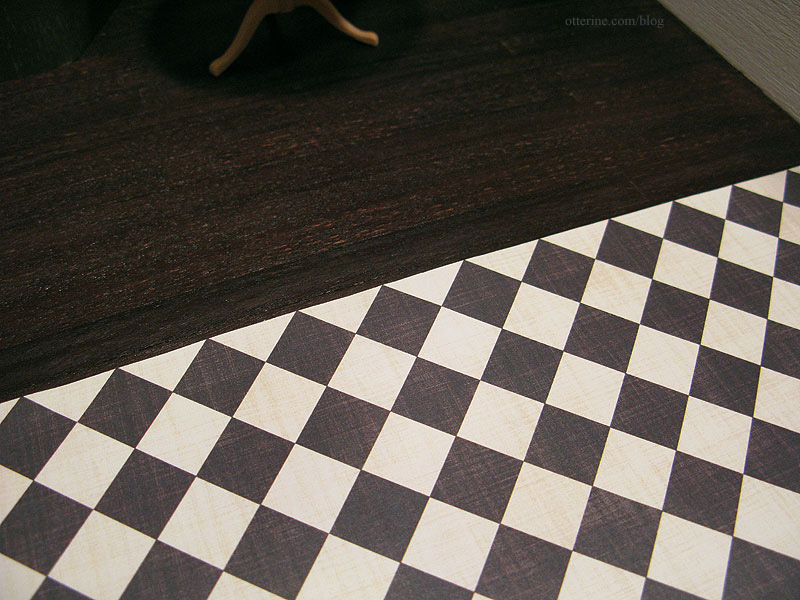
In the dining area and bay, I’ve used some scraps of walnut wood flooring left over from the Newport instead of continuing the rather busy black and cream checkered tile. It breaks up the areas and tones down all the pattern going on in this room.
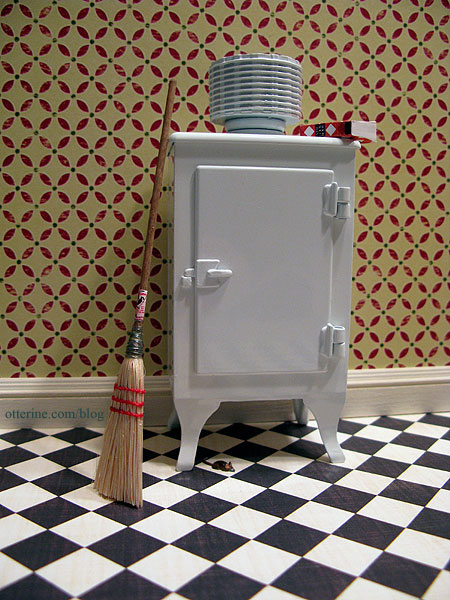
I also opted for a solid color in the bay and adjacent walls: the aged green printed on the reverse side of the Geometric Fa La La pattern used in the kitchen. It’s meant to coordinate, so the color is spot on, and it has thinned out portions printed in the design so it looks like it could use a touch up. Plus, it ties in perfectly with Keli’s Hoosier cabinet!
Here is what the flooring looked like out of the package.
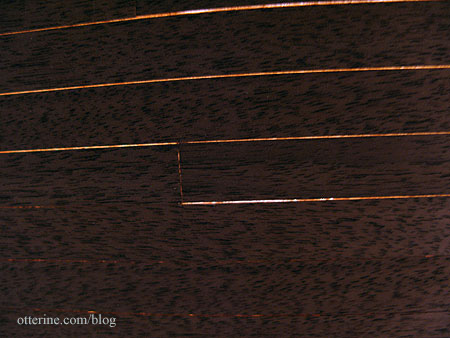
Lyssa wanted raised floorboards in my old house, so I cut the paper between a few of the pieces. This should allow for enough give for the wood to warp and lift.
I used Minwax Plantation Walnut stain on the walnut floor, and it worked well for a start.
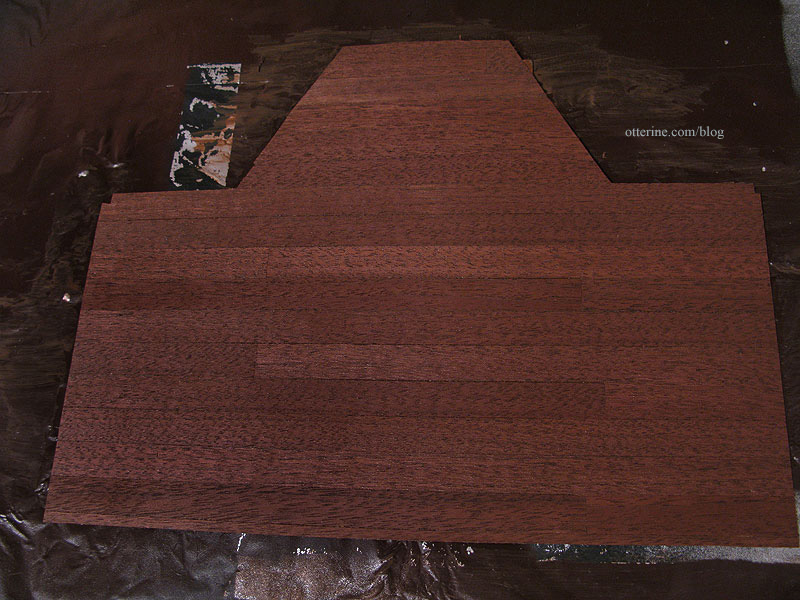
I then added a few dark washes of black and brown acrylic paint. Now we’re getting somewhere – all those years of grime. ;]
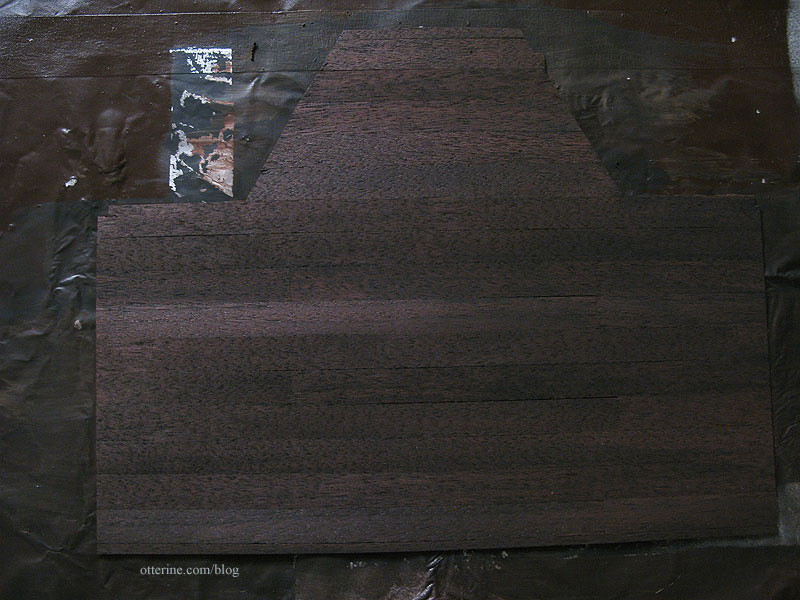
I sprayed the floor with matte sealer and once dry I sanded the hell out of it. I brushed on a thin coat of satin varnish, which I wiped away before it dried. I’ll mess with the finish more when I install it, but it is at least the basic color I was looking for. The table is a House of Miniatures kit – assembled but not yet finished. I am awaiting the chairs I hope will work with it.
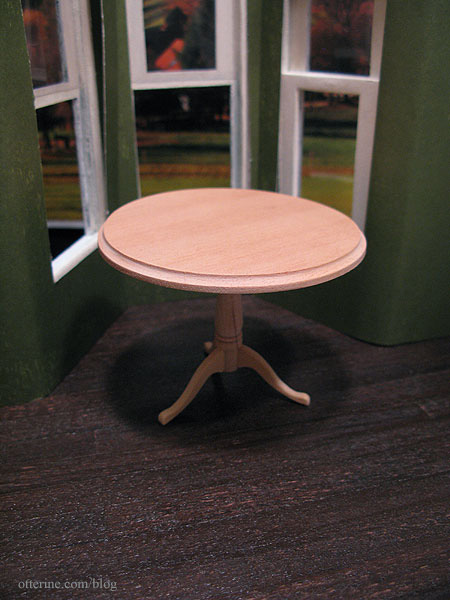
The darker floor works better with the checkered floor.
Categories: The Haunted Heritage
December 7, 2011 | 0 commentsFilled bookcase
I bought a lovely bookcase quite some time ago simply because I liked the look of it even though it wasn’t modern, the usual style I worked in for the Newport. When I started the Heritage project, it found a new home. But, I’ve made only a handful of books and those are in Baxter Pointe Villa. For the Heritage, I wanted a mix of antique and newer books – a collection built over time. I printed and cut 130 book covers with the plan to fill them with balsa wood inserts.
There ended up being a few duplicates in the 130 since there were a few books I wanted to be sure I made (I liked the covers) so I made duplicates in case I messed up my first attempt. As you can see, I made it through 30 of them in one day. Yes, there is one duplicate in there – a two volume set. Ha ha!
A few came from Carrie at A Lavender Dilly but most are just found online images. If I can’t find a full image of the spine and back for a cover I especially like, I sometimes make up the spine and back in PhotoShop. I like my books to be complete, even if the backs don’t show in most settings. I also paint my edges in an array of yellows and tans for variety in case I use any for tabletop displays.
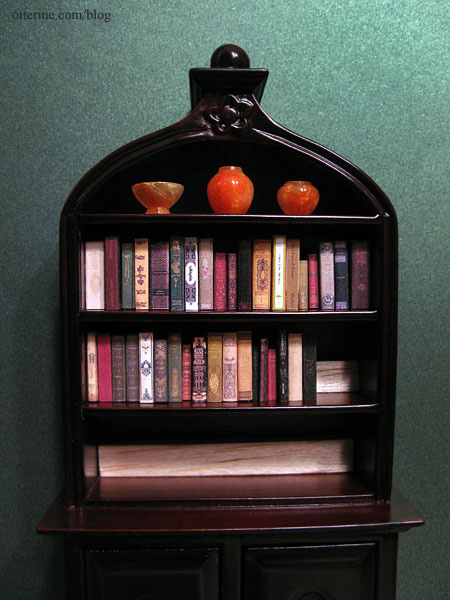
I have lined my past book covers with heavier drawing paper, but this is harder to work with. So, for the sake of ease and time involved, I used only the paper printout over the balsa for this grouping. Here are two shelves of the bookcase with my 30 books in place.
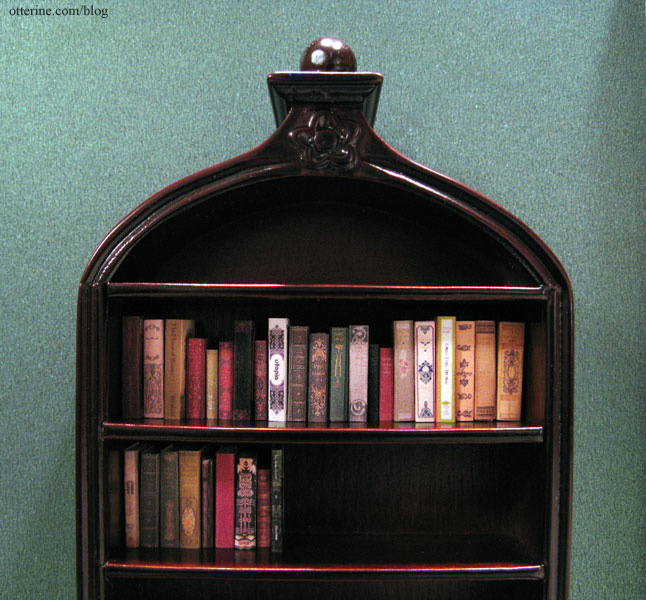
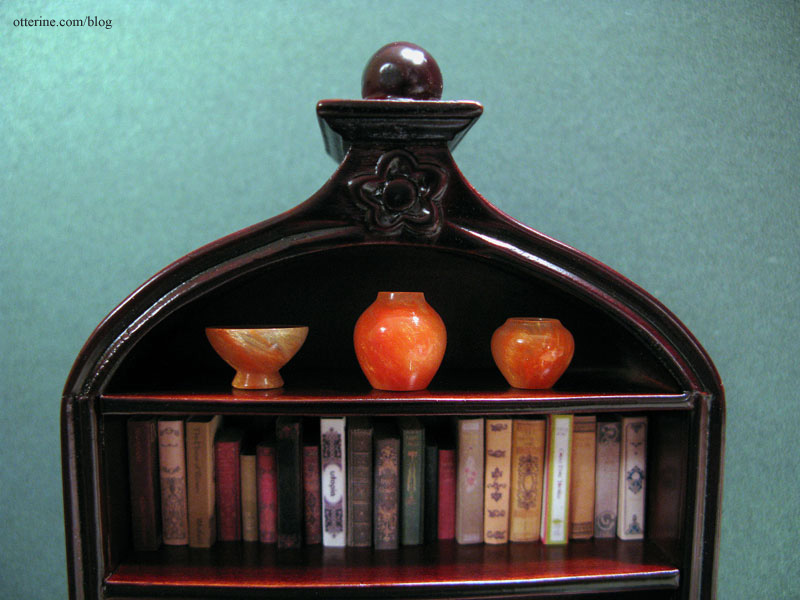
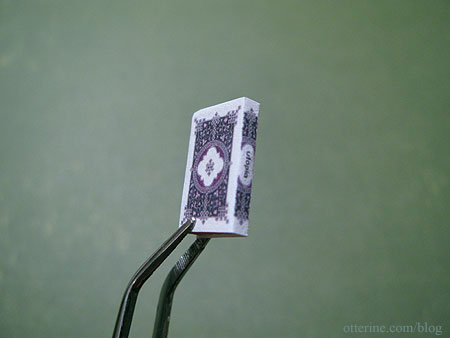
As I was finishing up the books for the bookcase, I was thinking about what to use on the top shelf. I could have put a stack of larger books on their sides, but that seemed almost too cluttered. I ended up buying a matched set of orange acrylic turned items from CW Lubin Wood Turning, two vases and a bowl. They were advertised as quarter scale or half scale items, but I often find those smaller scale items look wonderful in full scale scenes.
I arranged the two shorter items on either side of the taller vase to make the most of the space on the top shelf. Getting these in there was interesting. My normally dainty hands became giant paws inside that shelf and tweezers were no help since the pieces are so smooth. I finally managed to get them to stick to the shelf with some mini hold wax and pressed them down for a good bond. I think they’ll be there forever as long as the wax holds! :D
After a few more days of book building, the bookcase has been filled with books! :D
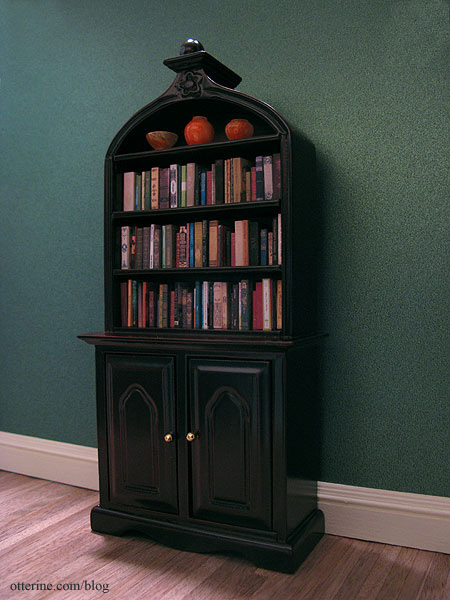
There are 79 in total, arranged in random order.
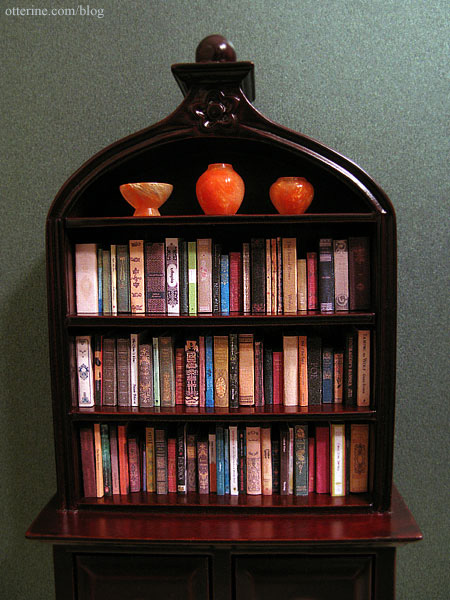
They range in thickness from 1/64″ to 3/16″ and from 1/2″ to 3/4″ in height. I think the variation in sizes, colors and design gives them that extra push toward realism.
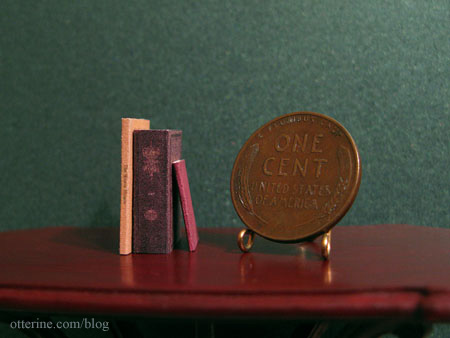
tallest, thickest and smallest To make sure they sit prominently on the shelf, I added some scrap balsa wood to the shelves. The pieces are held in place with mini hold wax in case I ever want to rearrange the shelves and remove the wood supports.
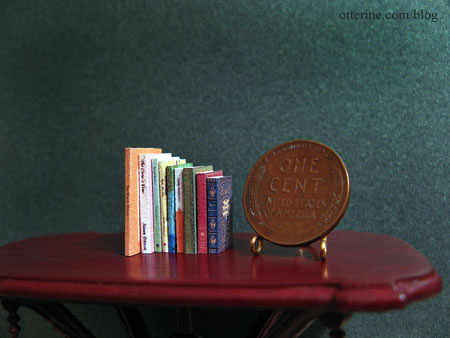
Update: I finished up another batch of books for the house, sixteen more for the collection.
I even included some coffee table books on lace making, birds and the Great Barrier Reef. :D

Categories: The Haunted Heritage
December 4, 2011 | 0 commentsBooks – a few of my favorite covers
I always judge my mini books solely by the covers, though I do occasionally add books that I like for their content in real life. As I was making up books, I figured I’d share a few of my favorite covers. Some of these might be hard to see since I am photographing the minis I made. They do lose some legibility from printing so small, but I don’t want to violate any copyright laws by posting book covers that might not be in the public domain. You can always search for the titles online if you’d like a better look.
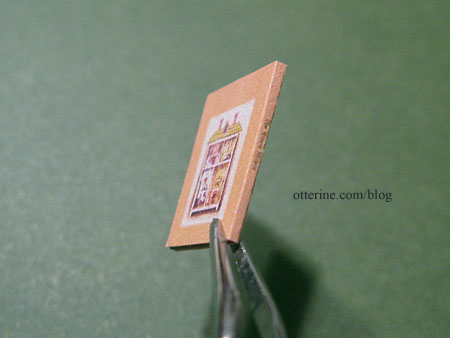
The House Mouse, by Dorothy Joan Harris and Illustrated by Barbara Cooney. This has a super cute dollhouse with a mouse occupant! I’d like to make the cover illustration as a wall hanging mini house.
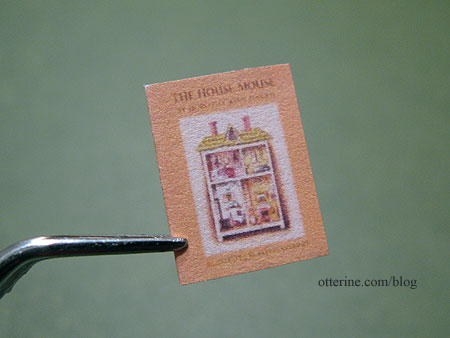
I was able to find only the cover, so I made the spine and back in Photoshop. For the back, I used the image again and eliminated the text.
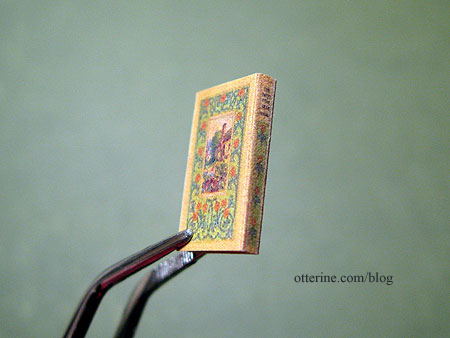
Sweet of the Year by Emily Ridgway. This came from abebooks.com, an excellent source of book covers and sometimes spines. I love the villa in the garden illustration.
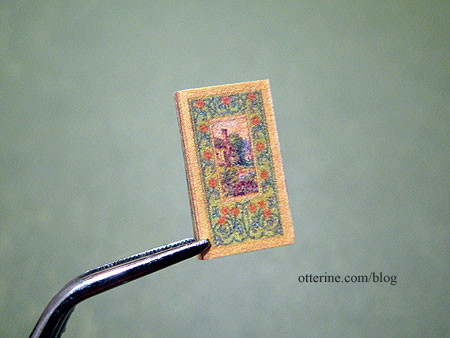
This one had the spine in the image, so I duplicated the front image for the back cover, flipping it in the opposite direction.
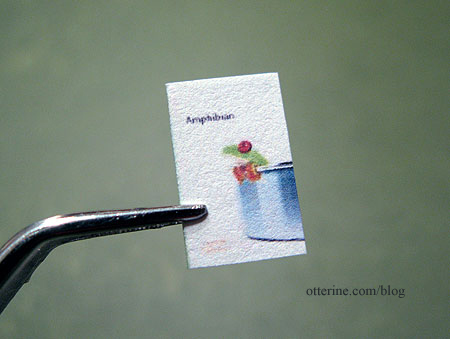
Amphibian by Carla Gunn. Froggy. Enough said. :D
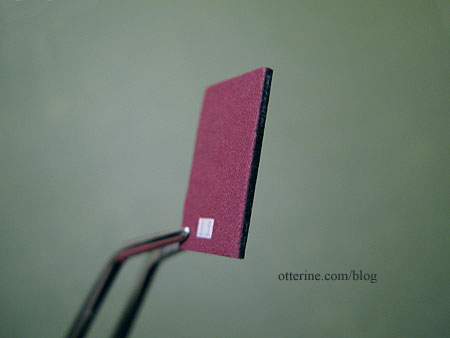
Return of the Bird Tribes by Ken Carey. Beautiful illustration.
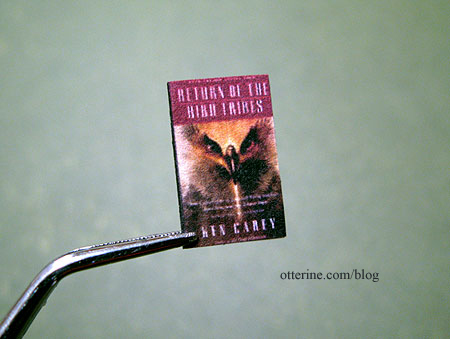
I made up the spine and back cover, this time using solid colors and dropping in a UPC box on the back cover. This is one of grandma’s many modern additions to her library. ;]
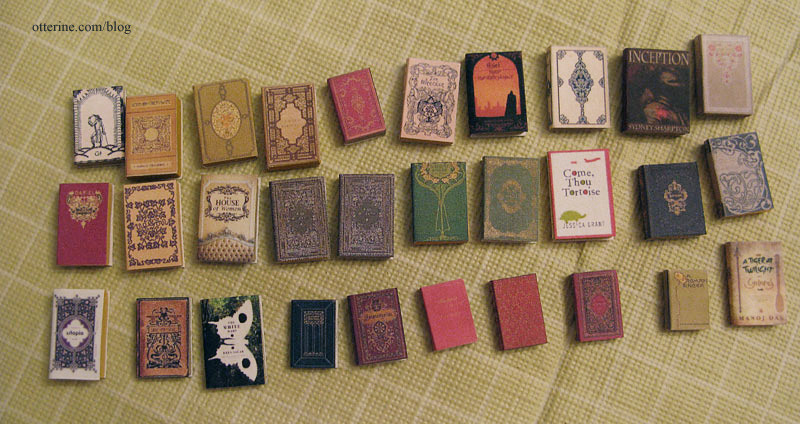
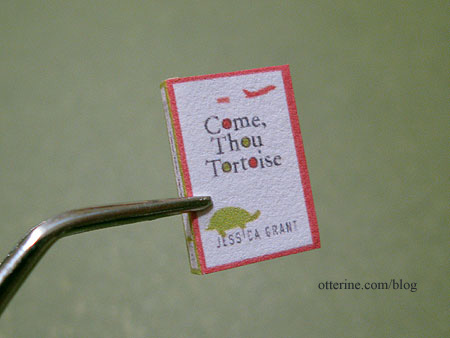
Come, Thou Tortoise by Jessica Grant. Lovely colors and graphics. This is apparently a funny book, but I’ve not read it.
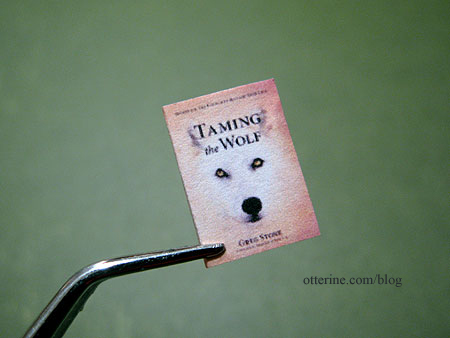
Taming the Wolf by Greg Stone. This is actually a self help book on resolving conflict, but the cover to me says adventure in the wilderness. I could see this cover being on the sequel to The Return of the Bird Tribes shown above. :D
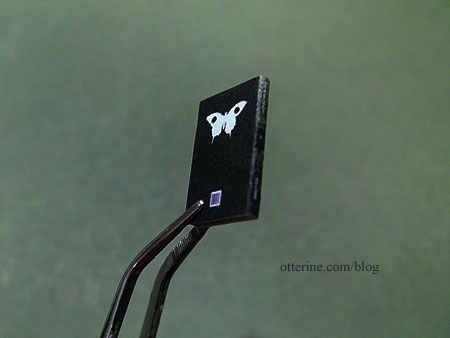
The White Mary by Kira Salak. Love this cover – the greens, the butterfly, the layout!
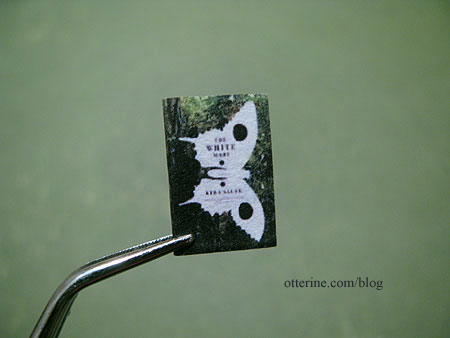
I made the back by copying the butterfly graphic, rotating it and removing the text. I made the spine by copying the green background, duplicating it in mirror image and adding text. I also added the UPC box again. I later found the actual spine and back cover, but I liked mine so well I printed it instead.
Utopia by Thomas Moore. This is a book first published in 1516, though I don’t believe this is the original cover. Ever After is one of my favorite movies for its fun take on the Cinderella story, not to mention the costumes, and this book plays a part in that movie. When I first stumbled onto the cover during my online searches, I knew I had to use it.
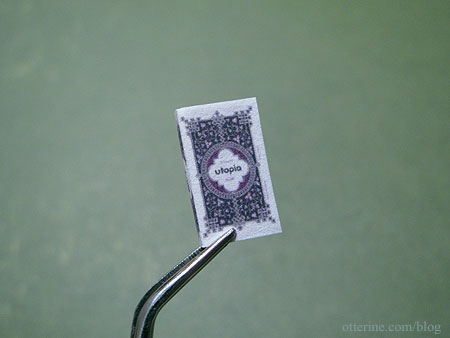
I created the back by mirroring the front, removing the text and copying some of the border design elements into the middle. The spine is a section of the front cover, with text replaced.
Obviously, I haven’t used any covers I don’t find appealing in one way or another, but these are some of the highlights.
Categories: Miniatures, The Haunted Heritage
December 3, 2011 | 0 commentsCoffee table and a birdbath
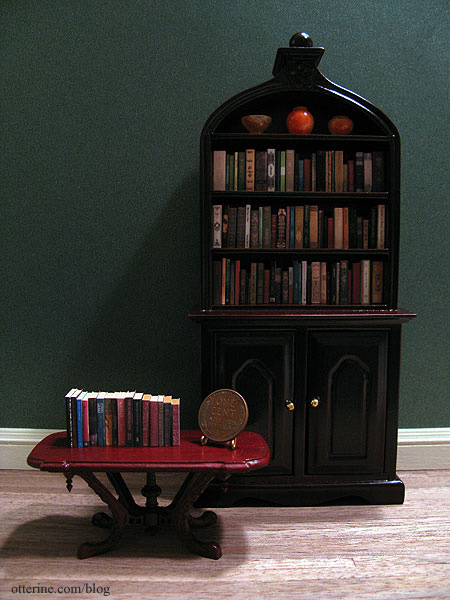
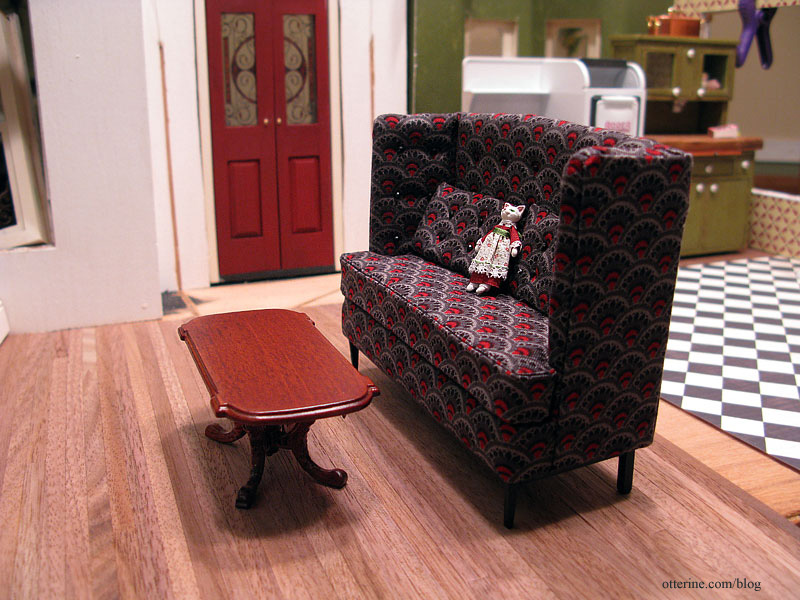
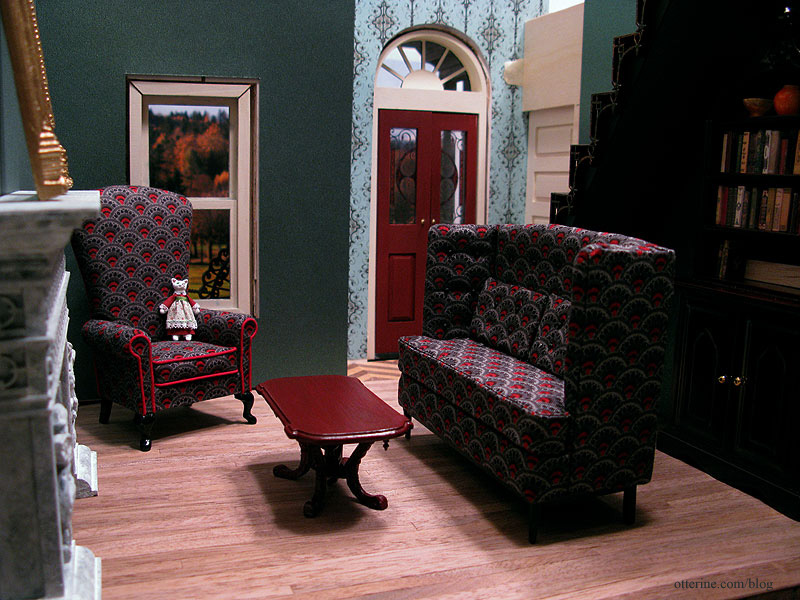
The Chair, The Sofa, the fireplace and the bookcase are such statement pieces in the parlor, as well as the fancy stairs, that I needed an equally expressive coffee table. I bought a closeout Bespaq Eddington Walnut coffee table for its lines though the color was off.
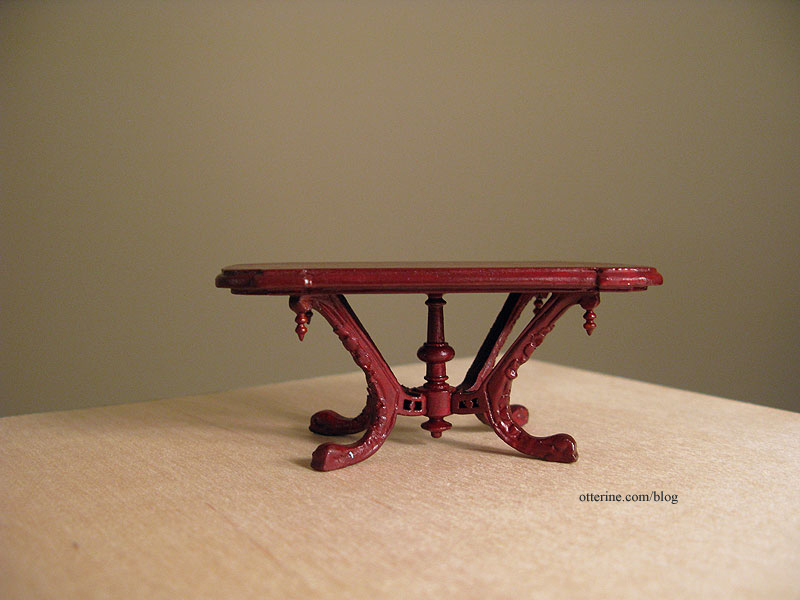
When it arrived, two of the legs had broken in shipment. The damage wasn’t so severe that it couldn’t be repaired, and it was the perfect excuse I needed to refinish the beautiful table. I don’t think I could have convinced myself to paint it otherwise. Here it is before (you can see the leg glued back together on the right).
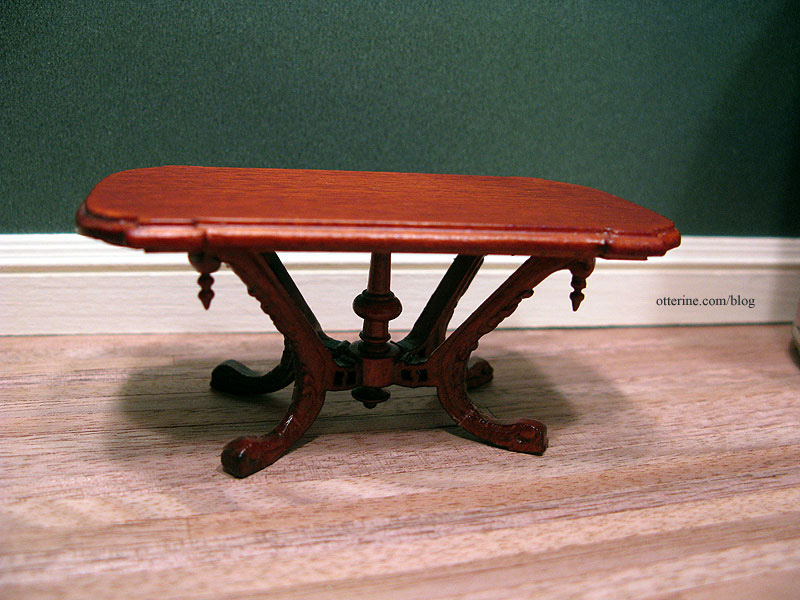
And, here it is after. I painted it Black Cherry by Folk Art then added a satin varnish. I thought about painting it black at first but figured I would lose the beautiful detail work. It’s a subtle change but it darkened the finish just enough.
The paint is rather sheer so it kept most of the beautiful wood grain. I scratched up the top just a little and added a top coat of furniture wax. Instantly, the table has a history and has seen many a visitor.
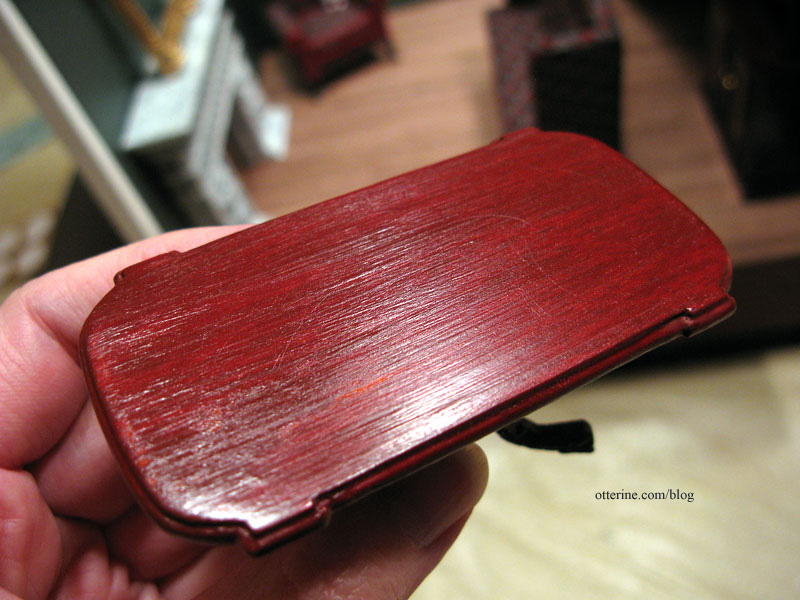
It fits in perfectly with the over the top parlor pieces! The red pulls in color from the upholstery, the front door and the slightly darker mahogany bookcase.
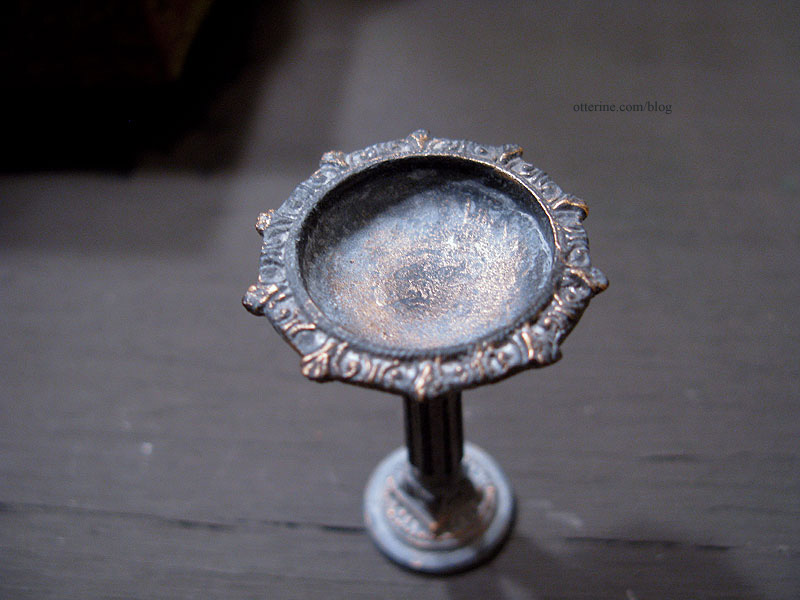
The other new item I have is this aged metal birdbath by Island Crafts & Miniatures. It’s going to look awesome in the overgrown lawn! :D
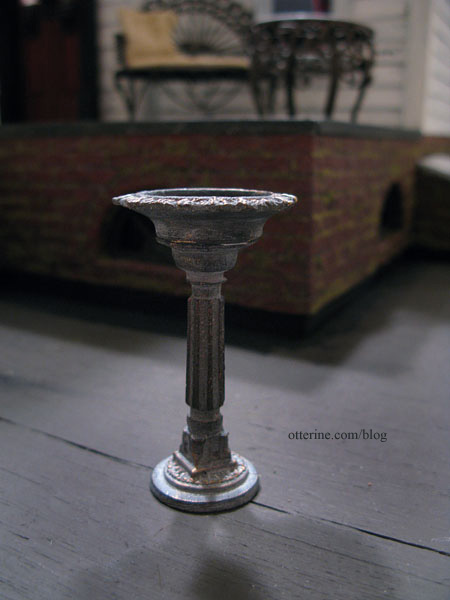
It has the perfect patina!
Both the coffee table and the birdbath are from Dejoux Miniatures.
Categories: The Haunted Heritage
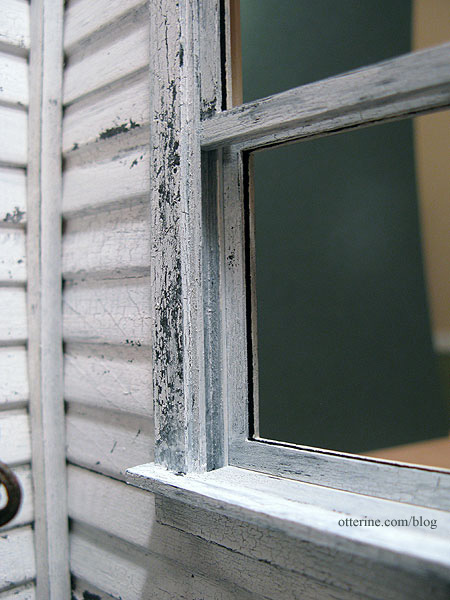
December 1, 2011 | 0 commentsHeritage – window upgrade
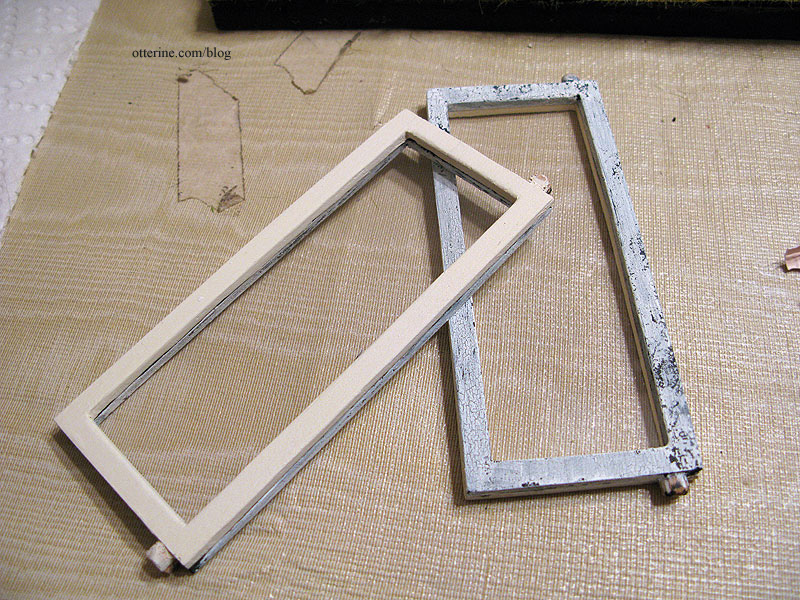
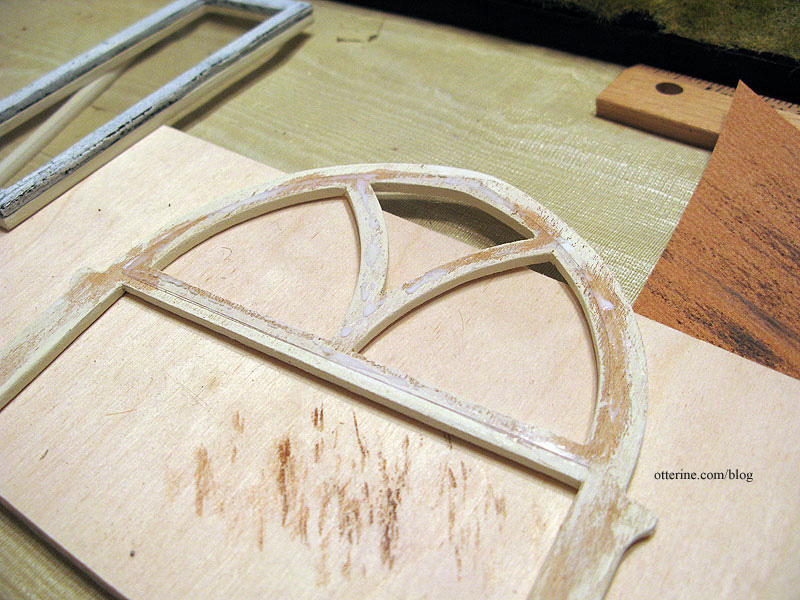
Can you call an old window in need of a paint scraper and some elbow grease a window upgrade? Well, yes, if you are familiar with old splintered die-cut window components. Ha ha. This is a Houseworks working window I am using to replace the original Dura-Craft pieces that just could not be saved. I added wood to the window and to the wall in which it sits to get the proper fit.
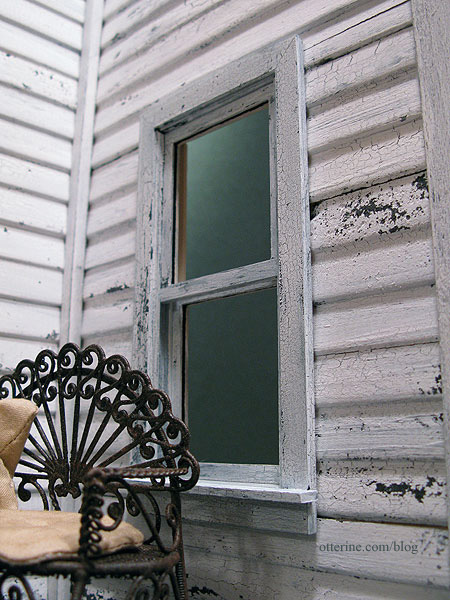
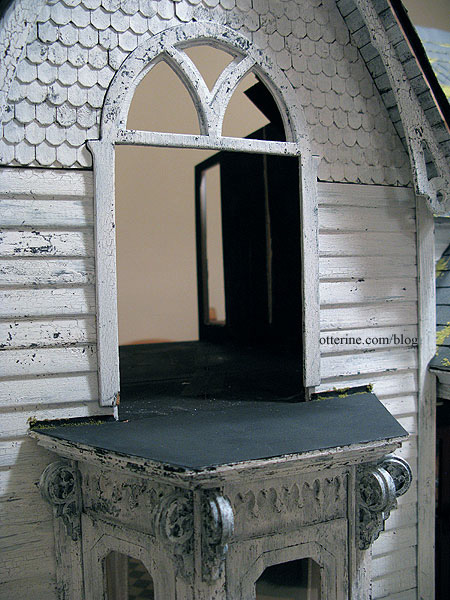
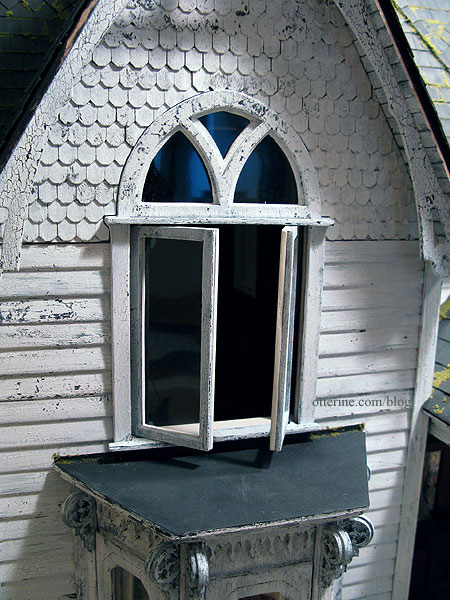
I’ve crackled white paint over a black base for the exterior portions, and the interior has its first coat of Vintage White by Folk Art. I don’t have the glass in yet since I am still working on the interior portion but I popped the main assembly into place to see how the exterior aging worked with the siding. We have a winner! :D
Categories: The Haunted Heritage
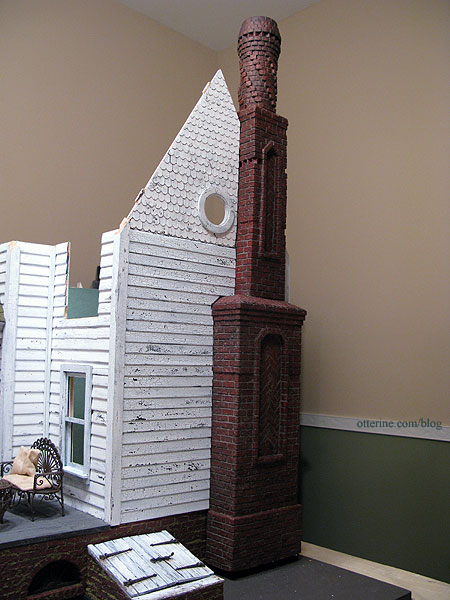
November 27, 2011 | 0 commentsHaunted Heritage chimney, part 8
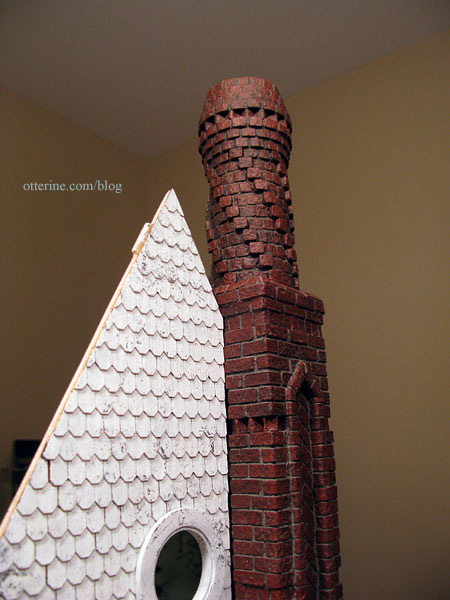
Continuing work on the chimney. After completing the chimney construction, I sealed the bricks with satin varnish to protect the paint. I then used Andi Mini Mortar to grout the chimney in the usual manner. Just this simple step already changes the feel of it and brings out the herringbone patterns and the dimensional portions. :D

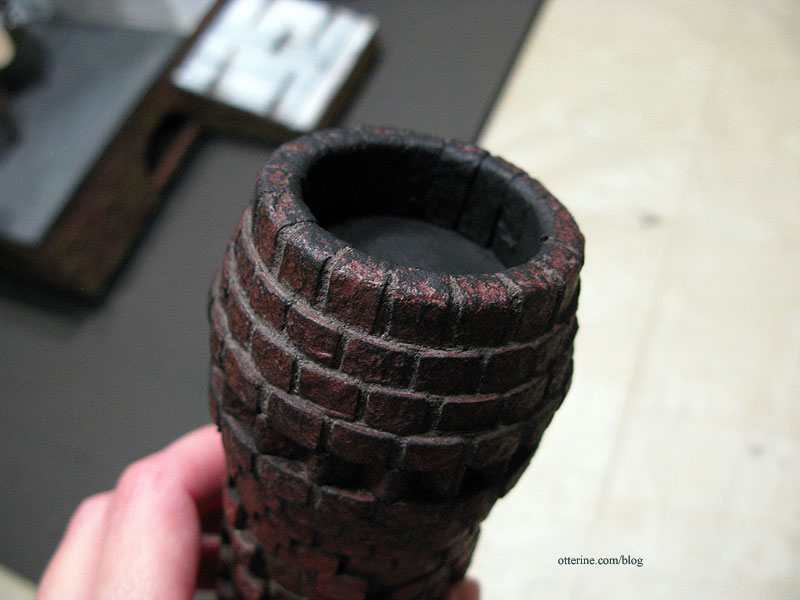
As expected, the topper was more challenging to grout but not as bad as I thought it would be. I rubbed the grout (spackling) into the spaces with my finger on the very top and on the flat surfaces between the spirals. After wiping away the excess, I went back in with a toothpick to remove any excess from the corners around the spiral bricks. I also pushed extra grout into the lines I couldn’t reach with my finger. I used a wet brush to clean the sides of the spiral bricks as well.
All in all, it worked well. There is a bit more excess grout on the topper surfaces but a dark paint wash will significantly tone down the light grey residue.
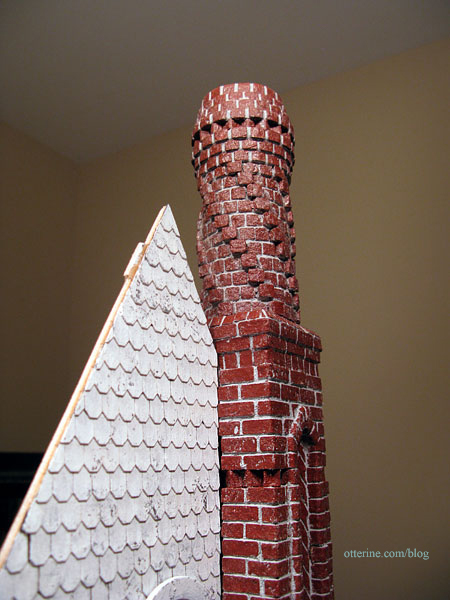
I love how much solidity the grout adds to the whole structure.
For final finishing, I first aged it with a wash of black, brown and grey paints.
It darkened the grout and gave a more realistic coloration to the brick.
I painted the inside of the topper black and dry brushed black paint on the top lip and over the upper rows of bricks. Grandma needs to call the chimney sweep! :O
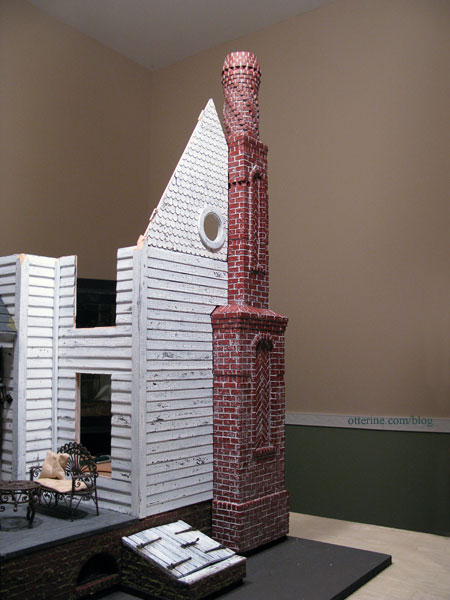
Then it was time to apply the moss: Fine Turf, Burnt Grass by Woodland Scenics. This time I used a glue syringe to apply Aleene’s clear gel tacky glue. It’s faster than applying it with a toothpick, especially when working on a larger area. I don’t apply it to all of the grout lines, just here and there, and on some portions of the face of the bricks. Makes it seem more realistic to me.
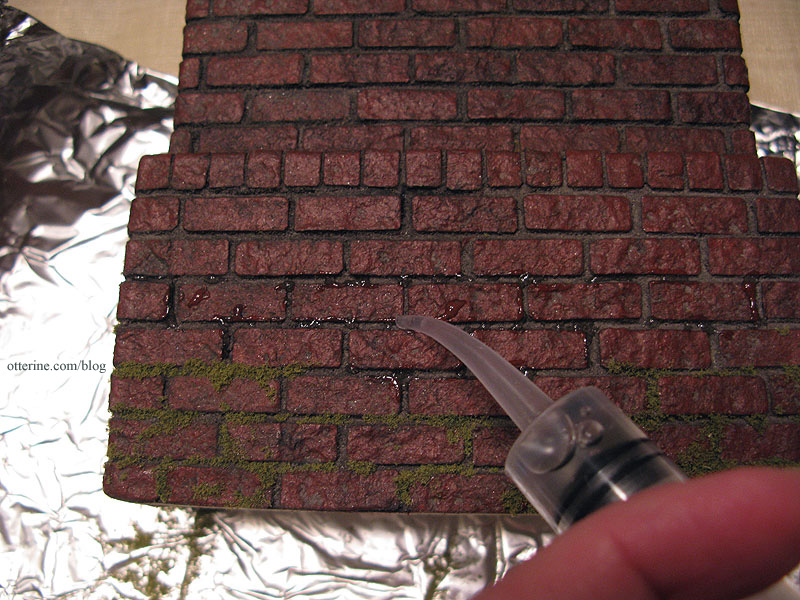
I like to use a plastic container to hold the moss as I work since the bag it comes in can create a lot of static, and you can’t really pour the excess back into the bag without making a huge mess. I also work on a sheet of foil to make it easier to catch the excess and put it in the storage container.
Using my fingers to disperse pinches of foam, I apply a liberal amount over the glue.
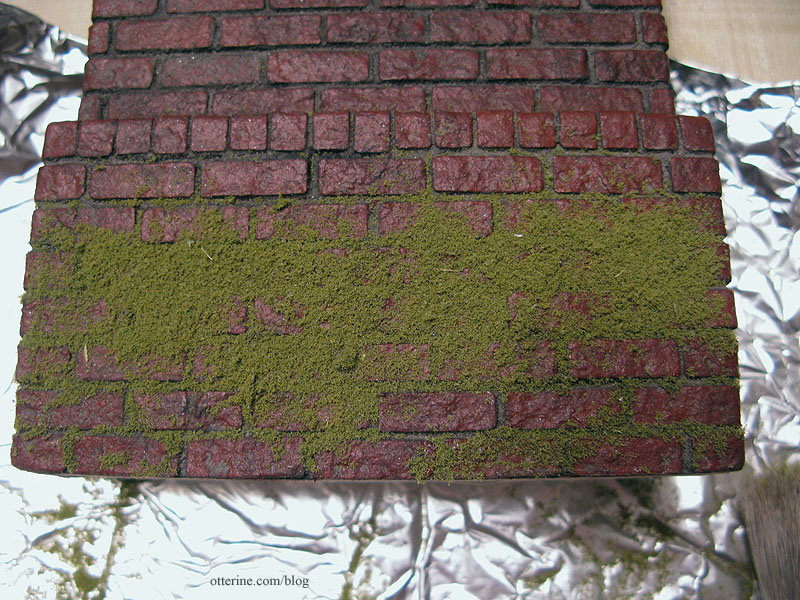
I press it in with my fingers and let it sit a few seconds before tipping the chimney and letting the excess fall back into the plastic container. I use a large soft brush to lightly remove the excess.
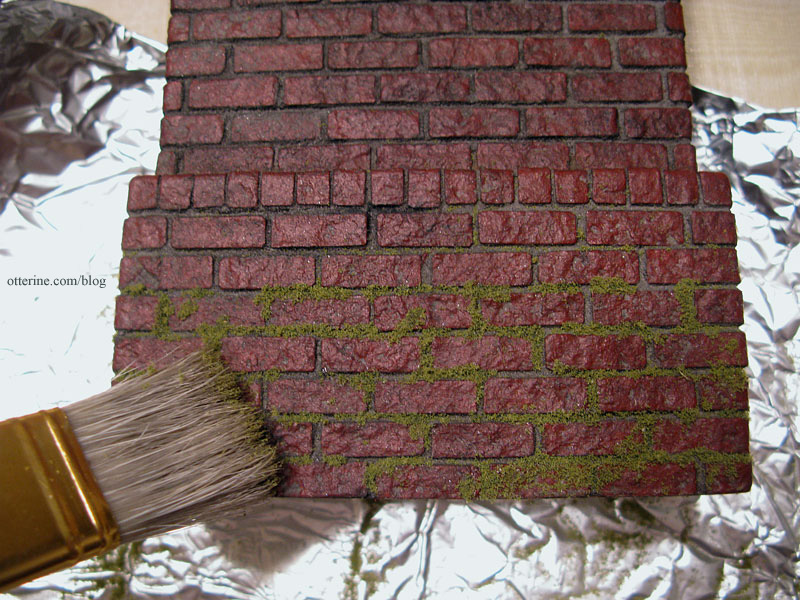
So far so good! Once the glue dries completely, I will brush the chimney more vigorously to remove more of the moss material. The plan is to also taper off the moss toward the top, with only patches here and there. Have to leave some brickwork exposed after all that work!
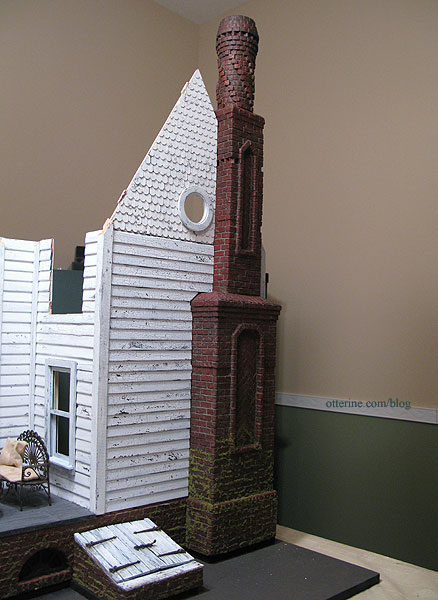
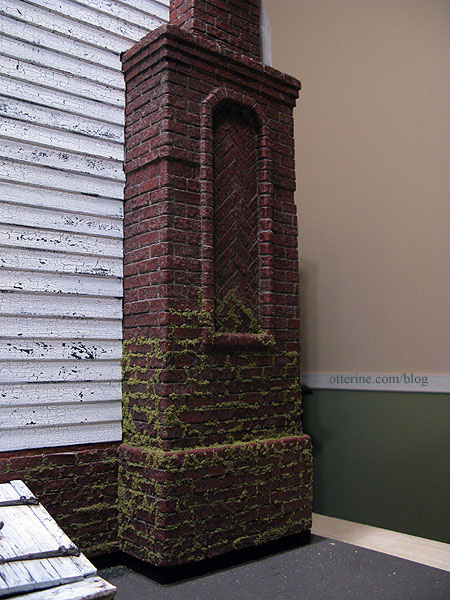
I added more moss along the connection with the house to disguise any minor gaps between the siding and the chimney. Once the chimney is permanently attached, I’ll add a bit more moss in the gaps to fill in. I’m also thinking a dried out old ivy vine would look marvelous!
Categories: The Haunted Heritage
November 26, 2011 | 0 comments


NOTE: All content on otterine.com is copyrighted and may not be reproduced in part or in whole. It takes a lot of time and effort to write and photograph for my blog. Please ask permission before reproducing any of my content. (More on copyright)

Categories:
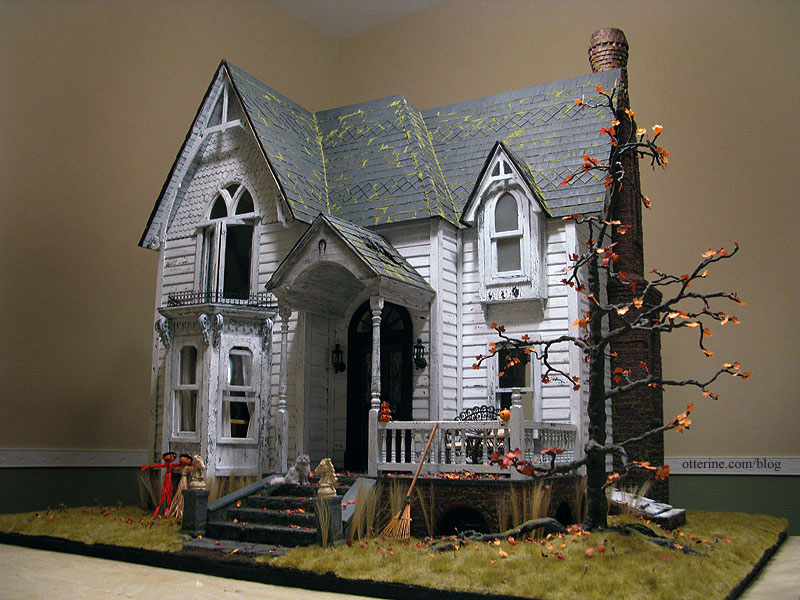
Happy Halloween 2012
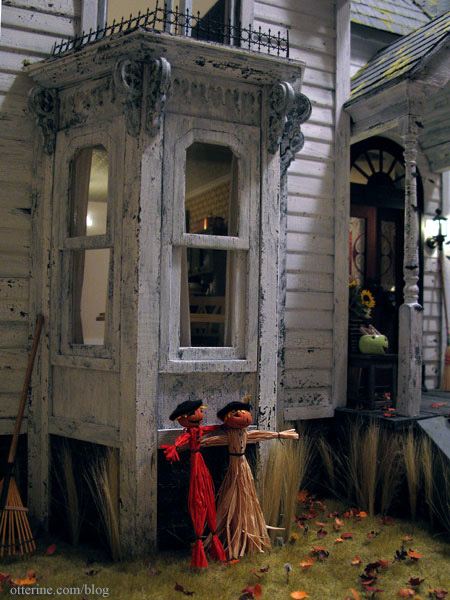
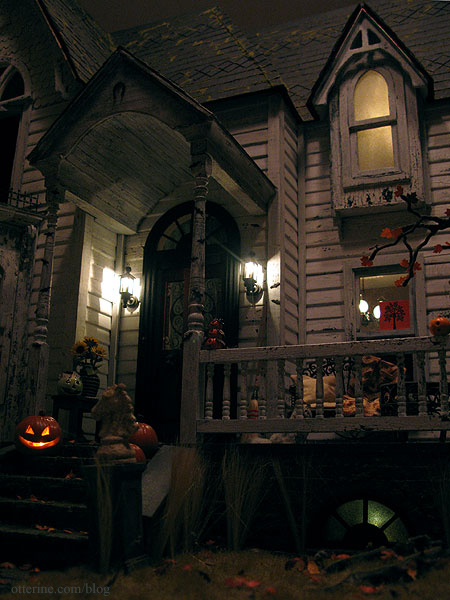
There was a challenge posted on Mini Mod Pod to make a Halloween scene. Well, even though the Heritage is incomplete, grandma is open for business on Halloween!
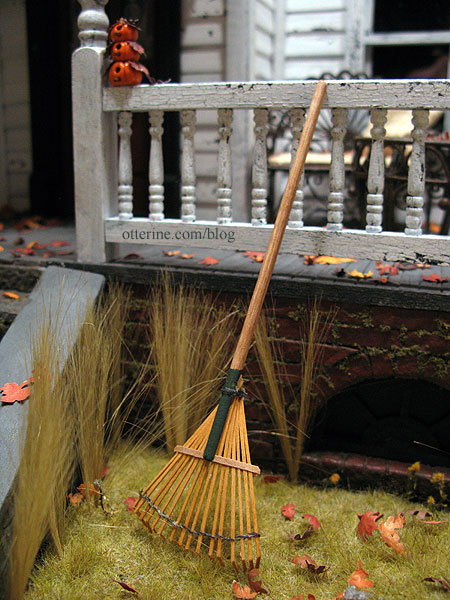
Her kitchen broom is poised by the settee, and the local children insist they’ve seen her fly around the yard on it. Grandma says she wishes it would fly around on its own and clean the leaves off the front steps. Haaaaaaaaaa!

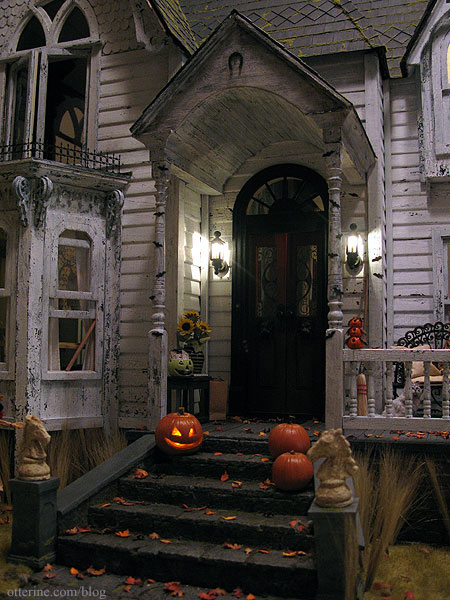
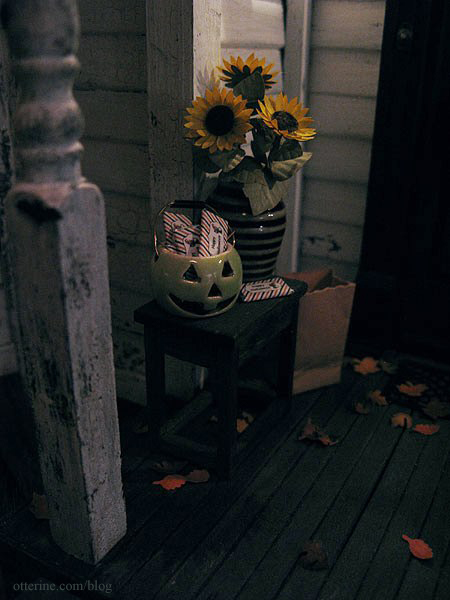
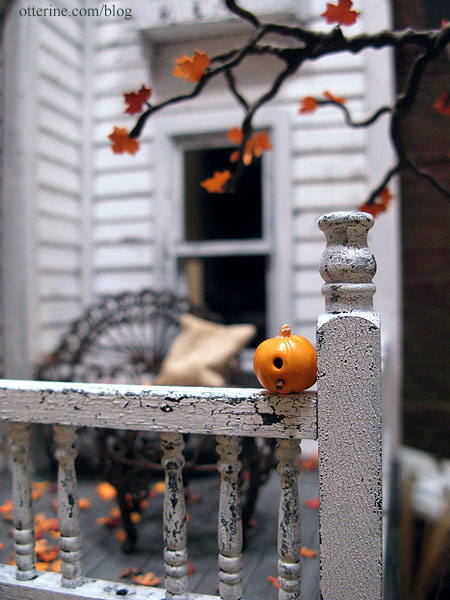
Grandma has a freshly carved jack-o’-lantern out front.
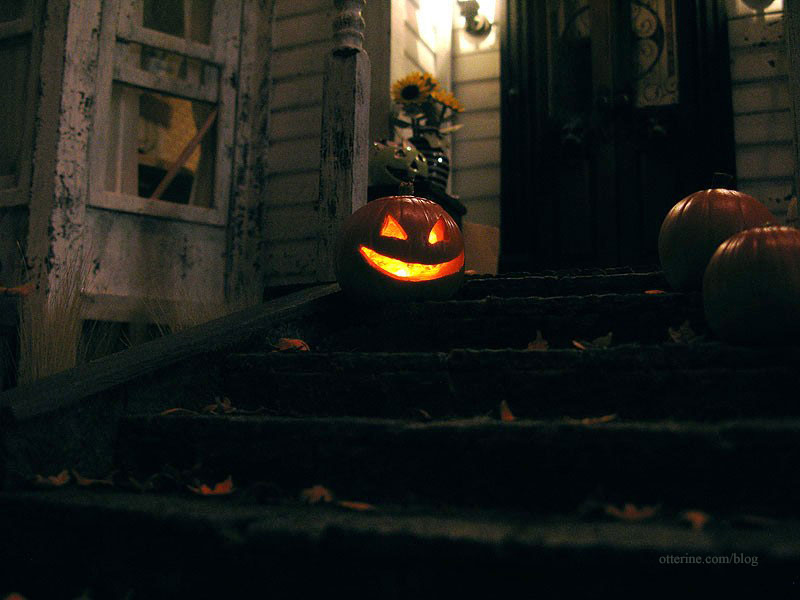
I apologize for the poor quality of the video, but it’s the best my camera will do. At least you get to see the flickering LED!
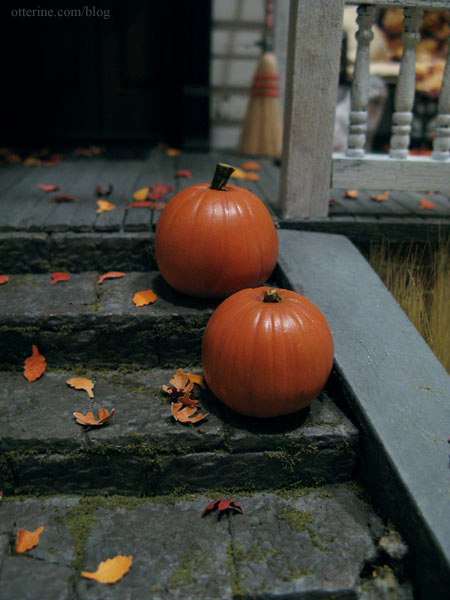
Carving one was hard enough, so she left the others whole. ;]
There are bats flying around the portico. :O
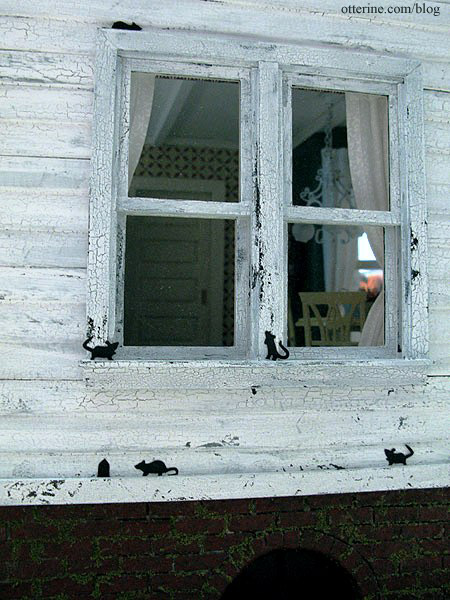
Mice are trying to break into the kitchen. :\
Mr. and Mrs. Scarecrow have stopped by to say hello. I made these for the tutorial I posted earlier.
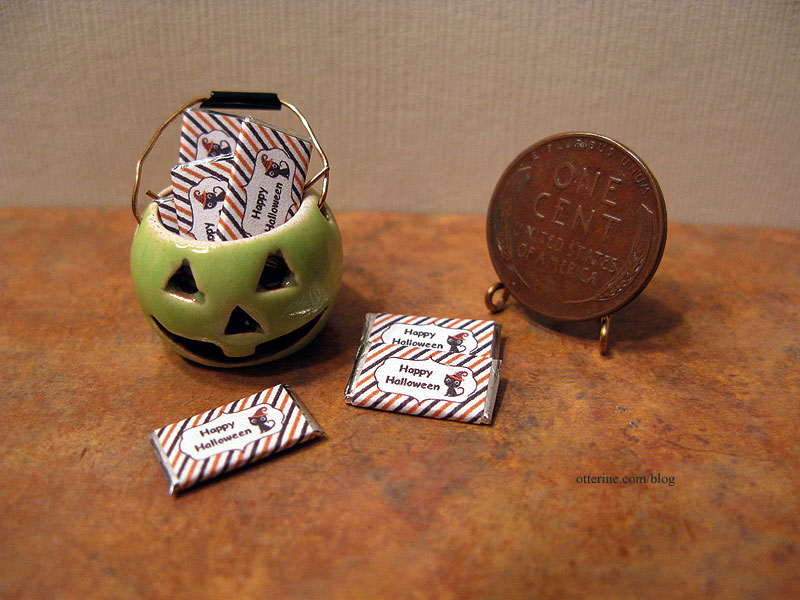
I’ve borrowed the step stool from Baslow Ranch and the sunflowers from Baxter Pointe Villa for the front porch. The ceramic pumpkin basket by Alex Meiklejohn holds candy for trick-or-treaters. Grandma gives out full sized chocolate bars! She has more in the bag in case they go fast.
The chocolate bars are made by wrapping foil around tiny pieces of cardboard (1/4″ x 1/2″) and then applying a custom made label. The candy wrapper label came from Today’s Creative Blog, but I had to change the font. The original type was illegible when printed so small. I love the vintage feel and personal touch of these wrappers. I thought about using actual candy wrapper images, but grandma is more creative than that!
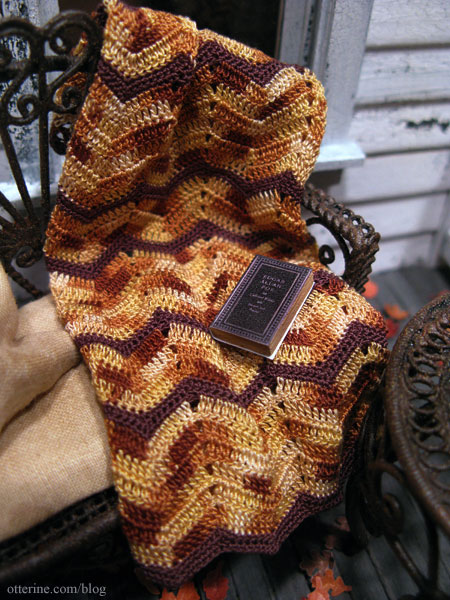
Looks like grandma has been reading Edgar Allan Poe outside while enjoying the crisp autumn air. The afghan was made by Mary of Woodland Miniatures/Roslyn Treasures. I made the book for the Heritage parlor bookcase.
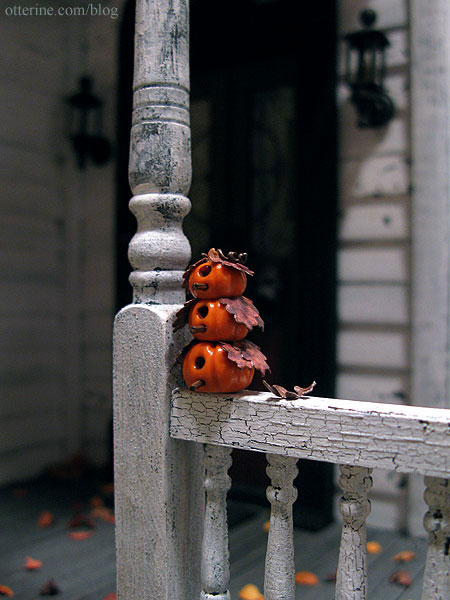
The two pumpkin birdhouses are by Whimsy Cottage Minis.
This one Lyssa bought for me. :D She also made the tree and owl picture you see in the front window by the settee.
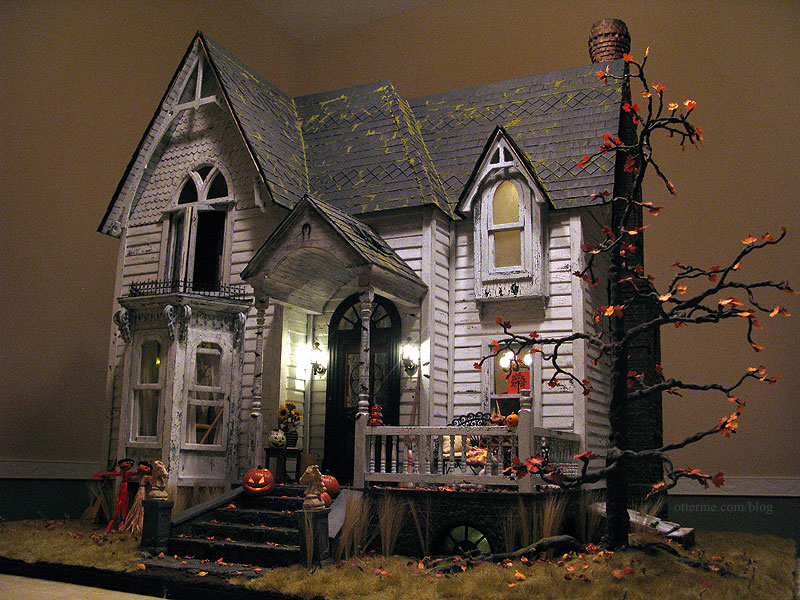
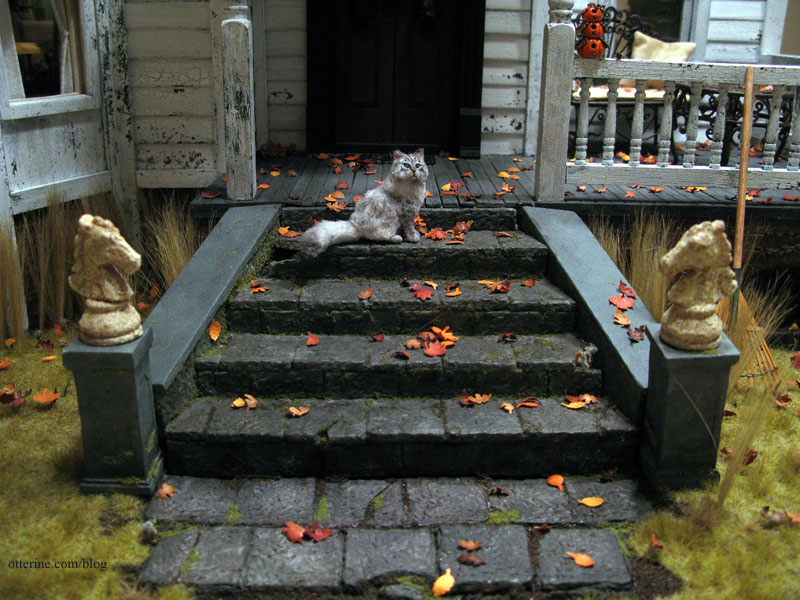
So, will you dare to climb the front steps for a full sized chocolate bar?!!

Or, are you a scaredy cat who worries about ending up in the cellar?
Boo!
Categories: The Haunted Heritage
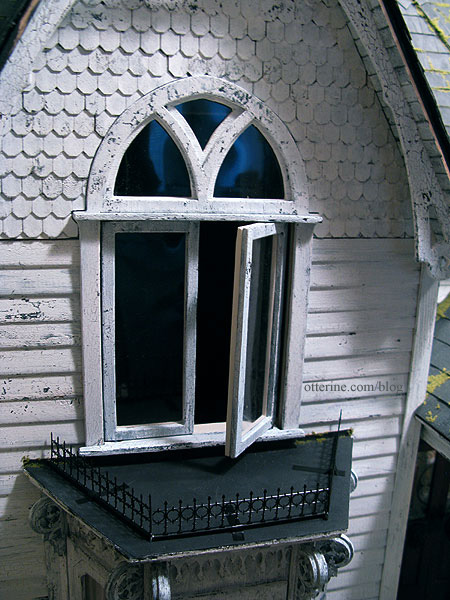
October 30, 2012 | 0 commentsHeritage – bedroom swinging windows, part 3
Continuing work on the swinging windows. I have a separate post for details on finishing the top of the bay window roof.
I crackled white paint over the outside and finished the interior with Vintage White by Folk Art. I glued in the acetate, and now the two window assemblies for the front swinging window are complete.
I tacked some acetate in place on the interior trim piece to complete the look of this portion of the window.
I touched up the white paint along the upper edges of the bay trim, added a paint wash of grey. I then glued the exterior arch window trim in place.
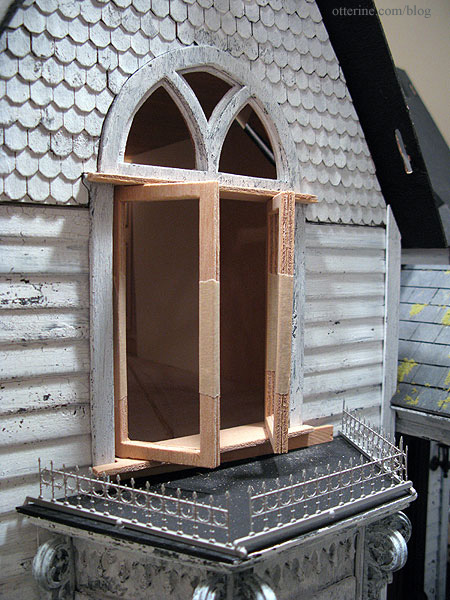
I put the swinging window together in mockup form and braced it underneath with a temporary board. This board is supposed to be painted to match the exterior, but I like the way it blends into bay roof in black so it will likely stay as is. None of it is glued in place.
Of course, even with all the careful planning, the windows don’t really close all the way…together, that is. They are too tight when both are closed. I like them partially open anyway, so it doesn’t really matter. I can close one or the other, or leave them both slightly open. At least they work and look mostly convincing.
I need to finish the bedroom wallpaper before I can install permanently.
Categories: The Haunted Heritage
October 28, 2012 | 0 commentsHeritage – grandma’s neglected lawn, part 6
Continuing work on the lawn. I added a bunch of Woodland Scenics Field Grass tufts that I made for Baxter Pointe Villa but never ended up using. These were made from two colors of grass, with the ends dipped in clear gel glue and set to dry on waxed paper.
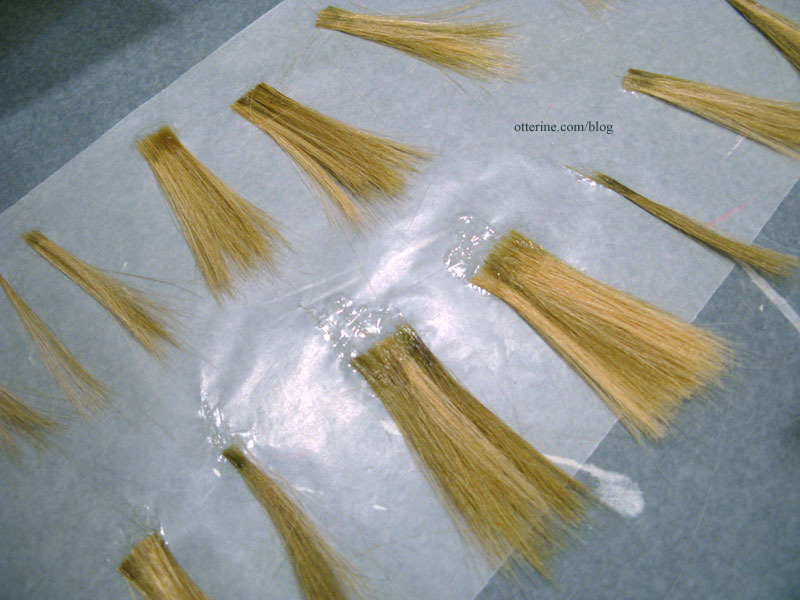
Once dry, I peeled them from the waxed paper and put them in a storage container.
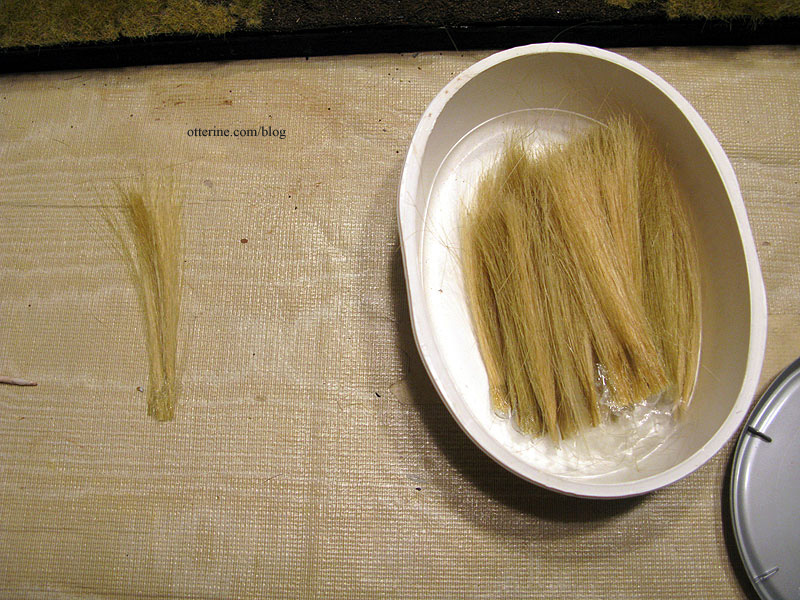
For the larger tufts, I clipped the glued portion into smaller tufts and glued them into holes made with an awl. It gives a nice overgrown appearance. I saved the rest for later when I install the chimney and fence. I still have some loose grass, too, so I can always make more if I need it.
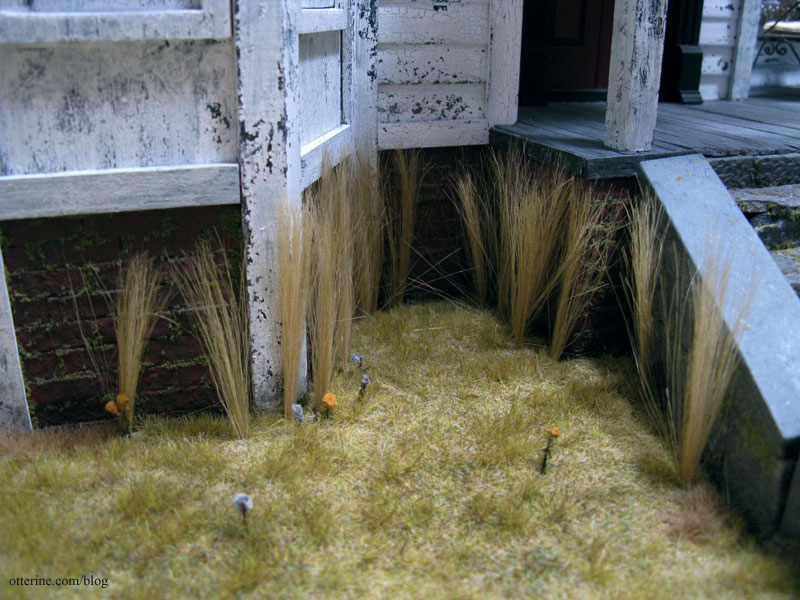
It’s time for a sprinkling of leaves. :D
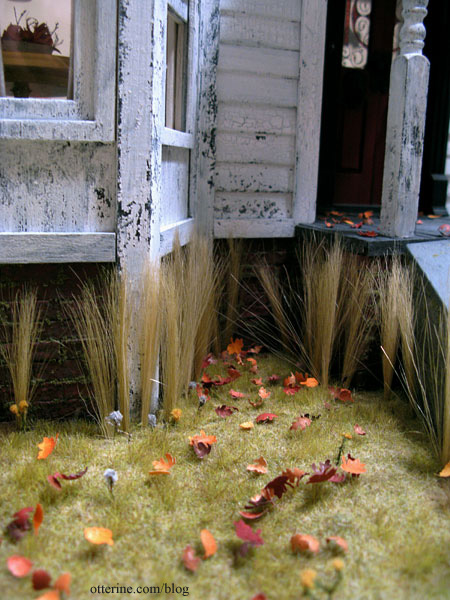
The rake is by Sir Thomas Thumb. Grandma needs a weed wacker!
I’ve started setting up a few autumn minis in preparation for my Halloween photos, though I still have a few things to make and finish up. These birdhouses are from Whimsy Cottage Minis.
This one Lyssa gave to me. :D
There’s Ophelia, as you know, and the lovely horse statues are from Katie’s Clay Corner.
I think we’re getting somewhere now.
Categories: The Haunted Heritage
October 27, 2012 | 0 commentsHeritage – front bay window, part 6
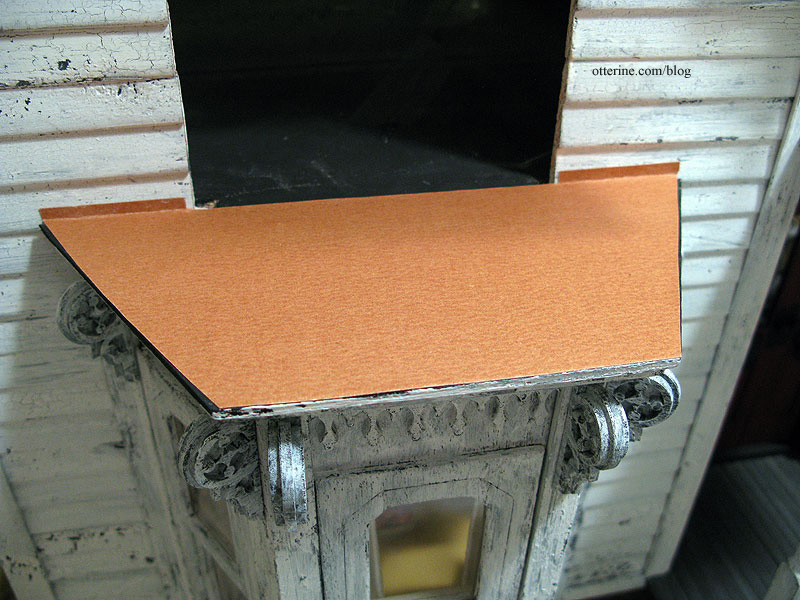
Finishing the top of the front bay window. The top of the bay window needed finishing. I had used sheet cork painted black for the parapet on Baxter Pointe Villa, but it was too thick of a material to use here. I did a test sample of 320 grit sandpaper painted black and loved it! So, I glued the sandpaper to the bay window roof first.
I then slathered on black paint.
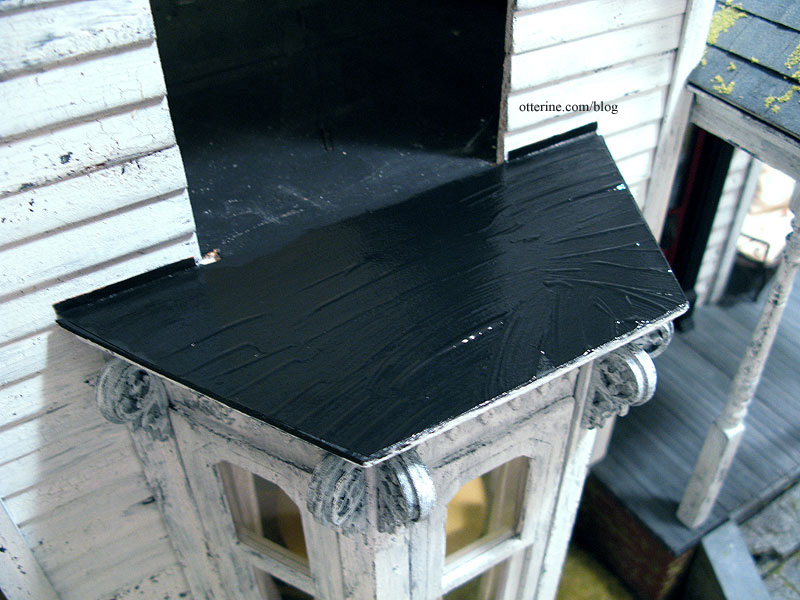
A paper towel blotted over it evened out the texture and color. Here it is still shiny from the wet paint.
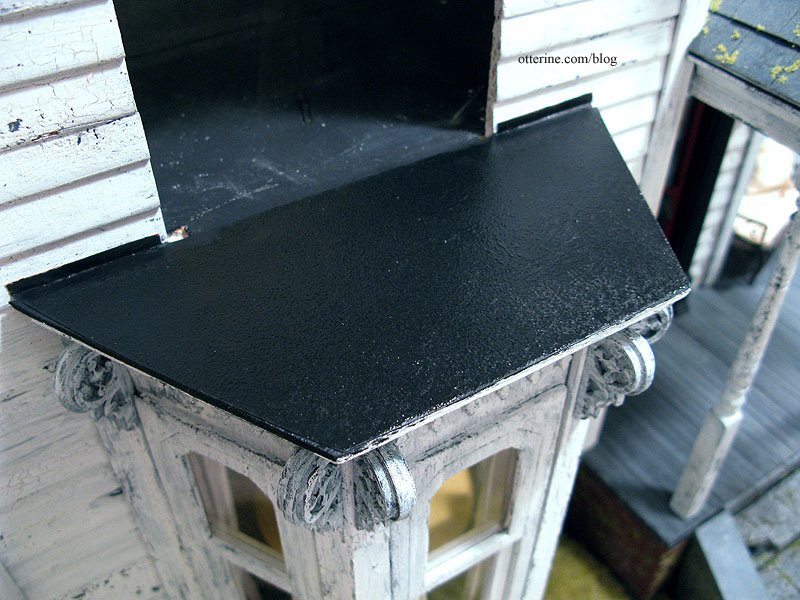
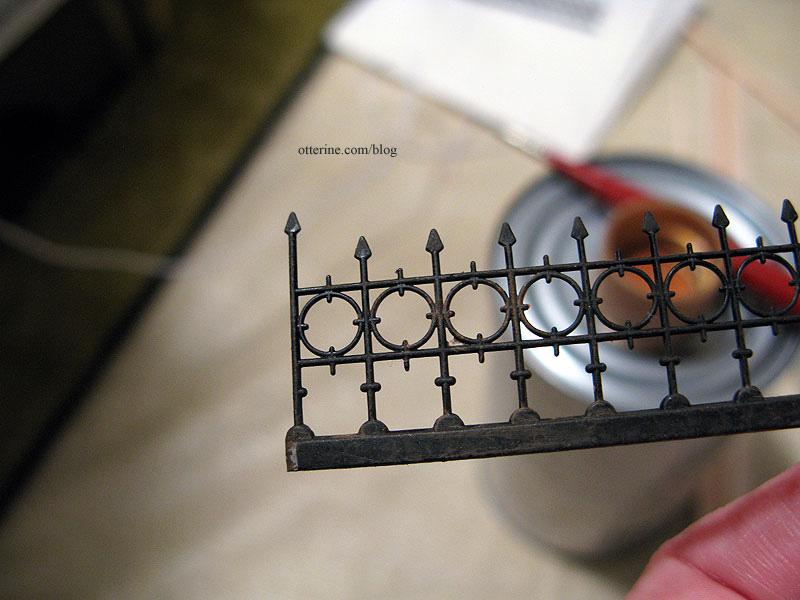
To finish the edge, I used quarter scale widow’s walk railings by Grandt Line. The railings are very delicate but look suitable in scale for the bay window.
I spray painted them flat black to start and then trimmed them to fit end to end, shown here unattached.
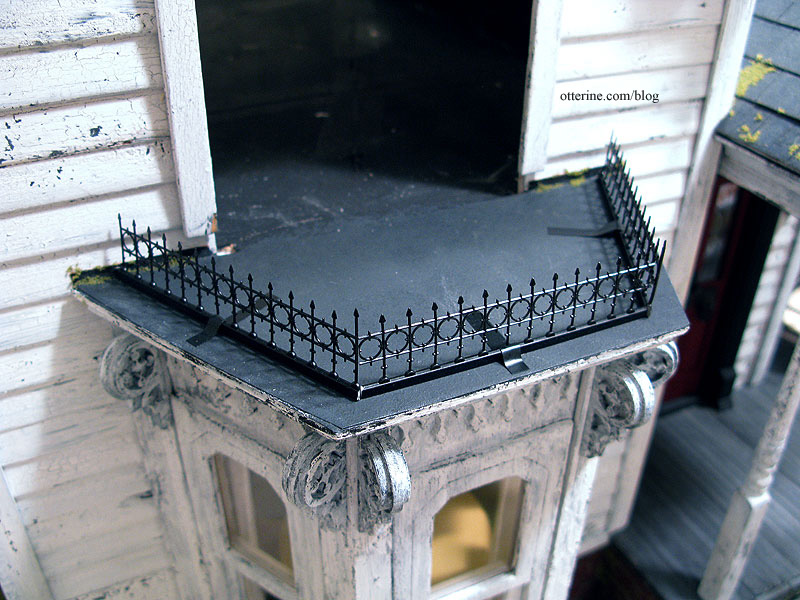
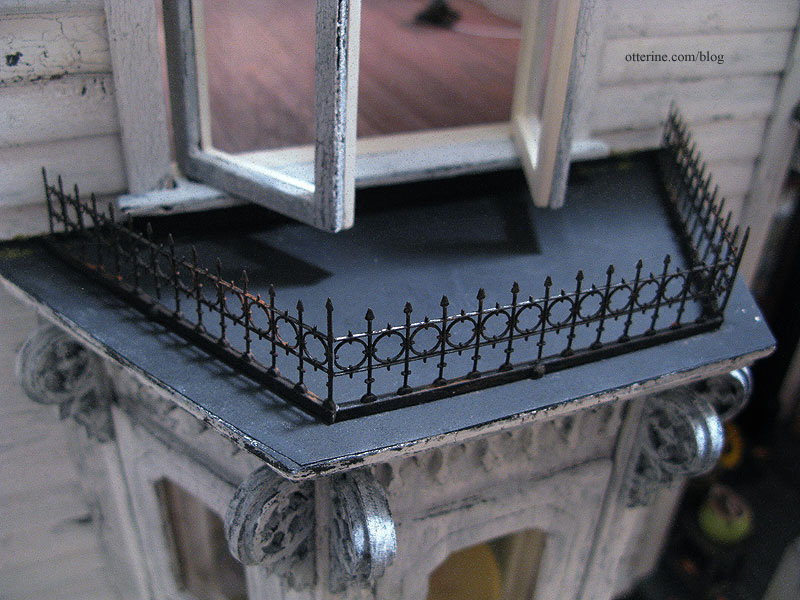
To age them, I dabbed on some Bittersweet Chocolate and Terra Cotta by Americana. Rusty old iron was created.
I attached them with a combination of super glue gel and tacky glue. These are so delicate that I am certain they will need to be repaired or replaced at some point in the future. I painted six to use three, so I’ll store the extras.
Categories: The Haunted Heritage
October 27, 2012 | 0 commentsAdding a wire after it’s too late
Well, it’s never too late to add a wire really, but sometimes it’s not worth the effort or deconstruction in order to add it after everything is already in place. But, in this instance, I was lucky.
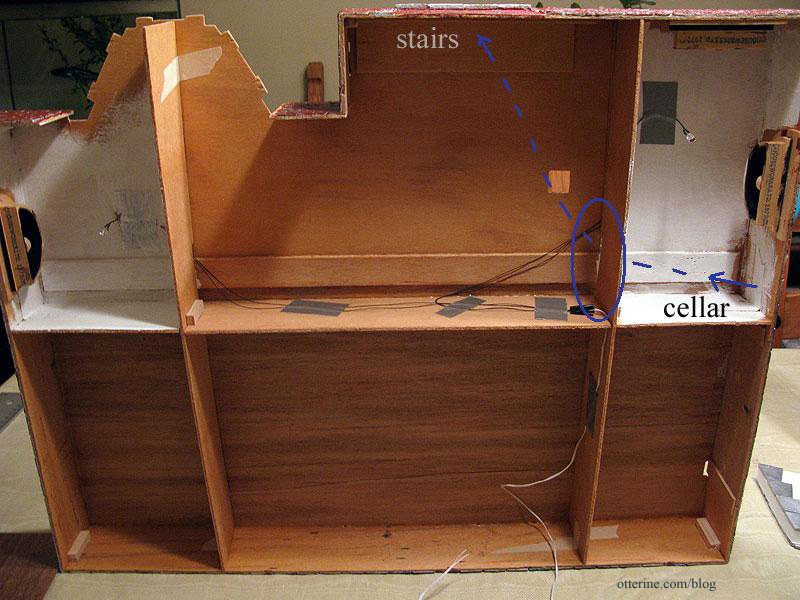
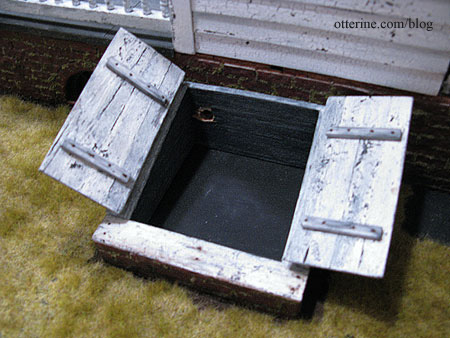
When I originally made the cellar unit with working doors, they were to hold any flickering fireplace unit I might add to the parlor at a later date. Now, I thought, it would be a great place to hide the battery switch for the light I needed on the front porch. After consulting my photos of the basement supports and lighting configuration in an earlier post, I saw that it was workable. I cut a hole in the foundation behind the stairs to access the basement. ;]
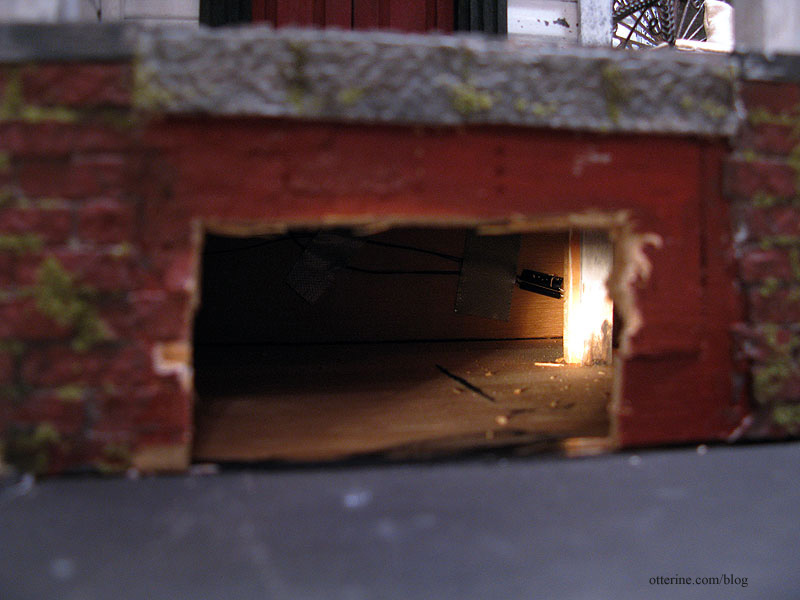
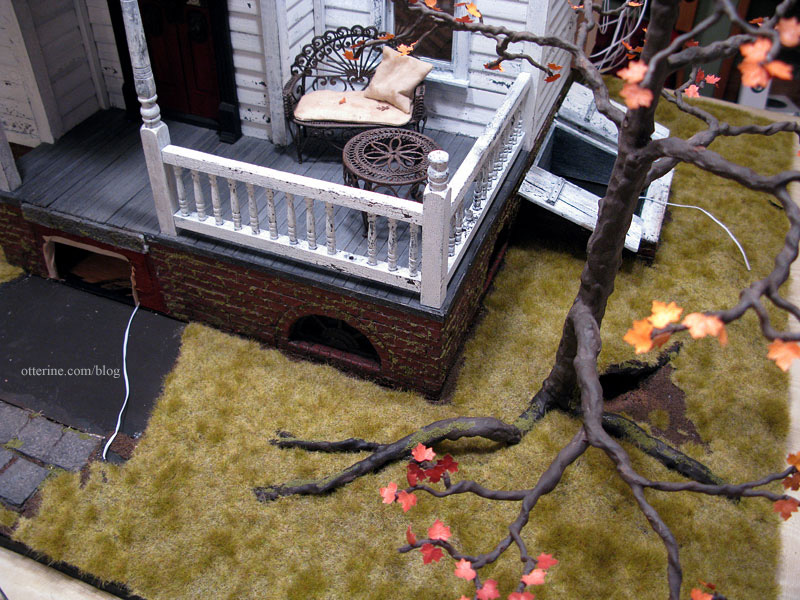
the creepy crawlspace :O I had already planned to keep the front steps removable since I might want to change the outer décor from time to time. Having a hard-wired light bulb sticking out of the stone steps isn’t ideal for that reason. Initially, I thought I would just hide the battery and its on/off switch in a crawlspace hole behind the stairs, but then I would have to remove the steps every time I wanted to turn the light on and off. The cellar is a much better solution.
Here is the path of the wire and the thin gap I needed to aim for.
A hole drilled in the back of the cellar provided access to the adjacent compartment.
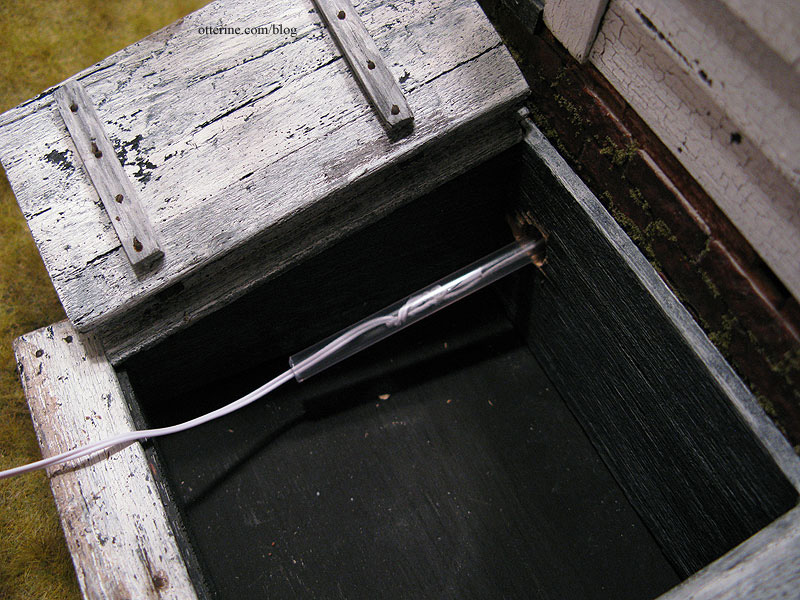
I used a bit of plastic tubing angled up toward the basement ceiling and fed a length of floral wire through it. I used floral wire since it is more rigid than electrical wire and therefore moves more easily through the tube.
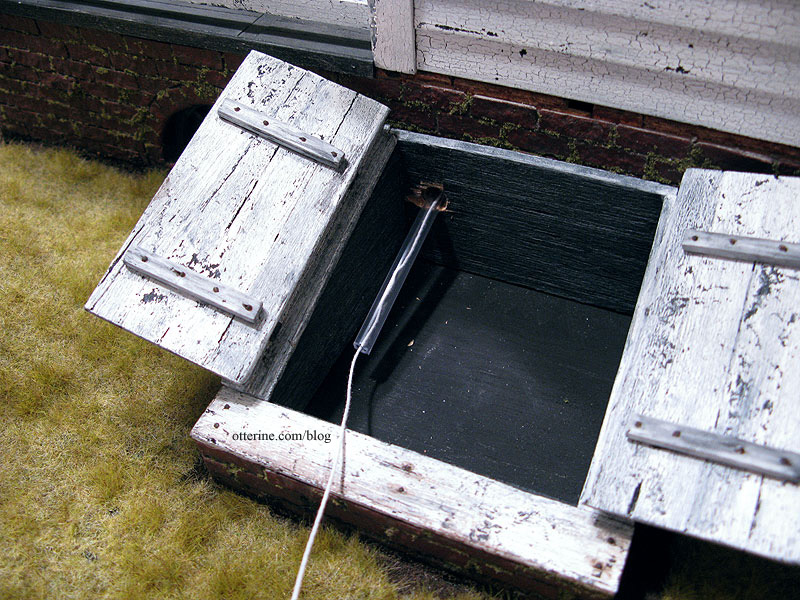
After a little fishing (and a little swearing), it broke through the gap. I tied the end of the floral lead wire to electrical wire and started the feed through the tube.
Now to retrieve the floral lead wire from inside the crawlspace.
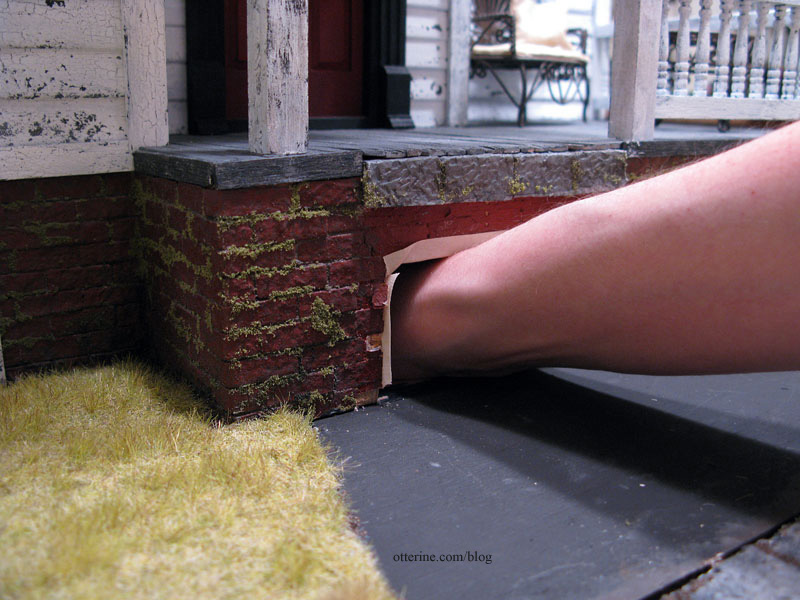
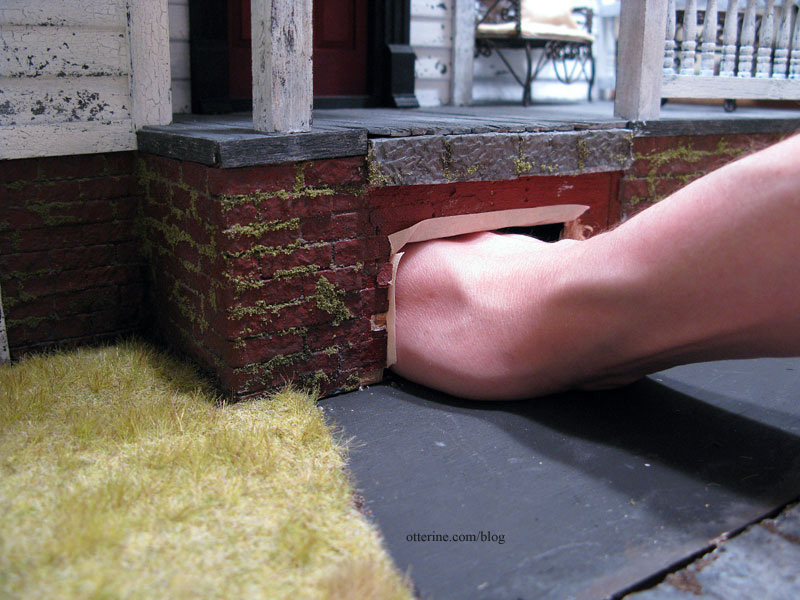
Yes, my hand fits in a hole 2 3/4″ wide x 1 1/2″ high. :D I first lined the hole with masking tape to save myself from splinters, though.
And, there it is! Hooray!
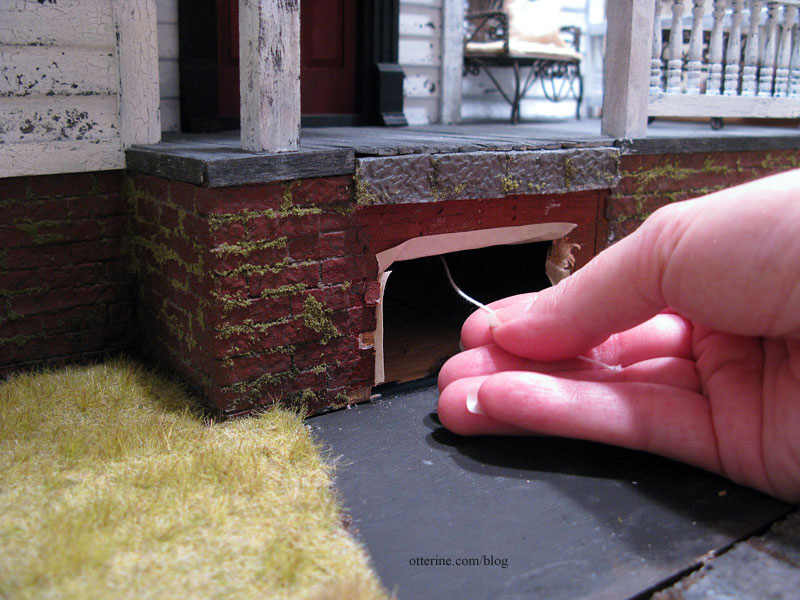
I pulled the floral wire until the electrical wire came through the crawlspace hole.
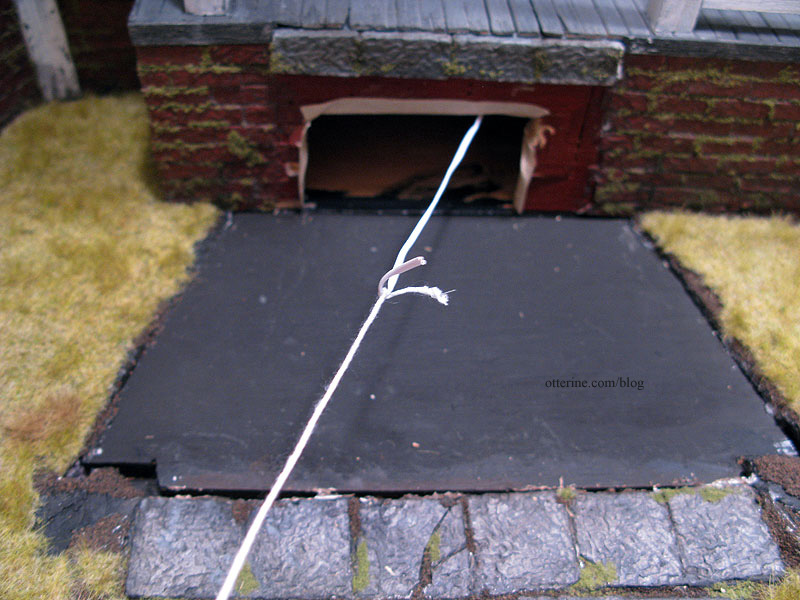
I removed the floral lead wire from the front end and the tube from the cellar end, leaving the electrical wire ready to use.
What’s the wire for? You can probably guess…but Blake and Lyssa aren’t allowed to say. :D
Categories: The Haunted Heritage
October 22, 2012 | 0 comments
NOTE: All content on otterine.com is copyrighted and may not be reproduced in part or in whole. It takes a lot of time and effort to write and photograph for my blog. Please ask permission before reproducing any of my content. (More on copyright)