

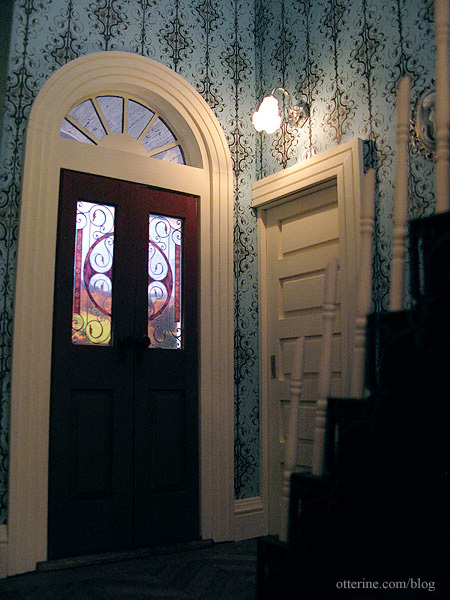
Palladian Door – installation
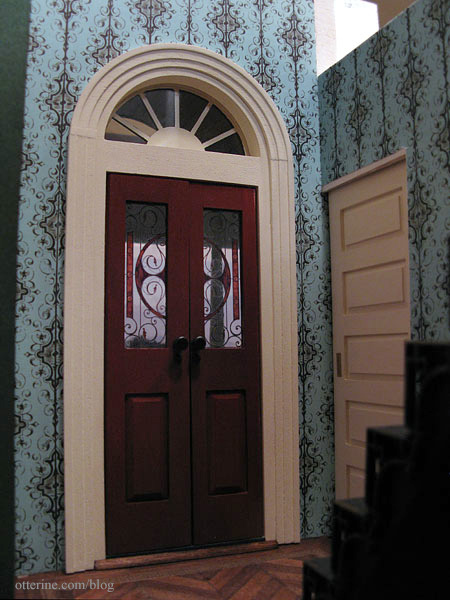
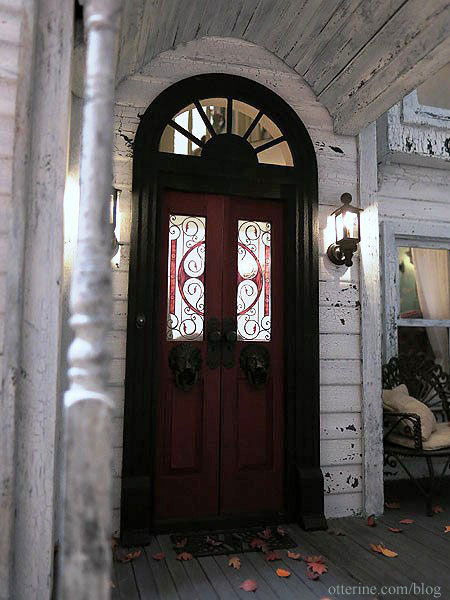
Continuing work on the front door. I glued the front door in place, making sure it was level and centered in relation to the portico. I then added the supplied interior trim, painted Vintage White by Folk Art. I used spackling to fill in any gaps and touched up the paint. To finish the threshold, I used a small piece of quarter round trim stained Minwax English Chestnut to match the floor.
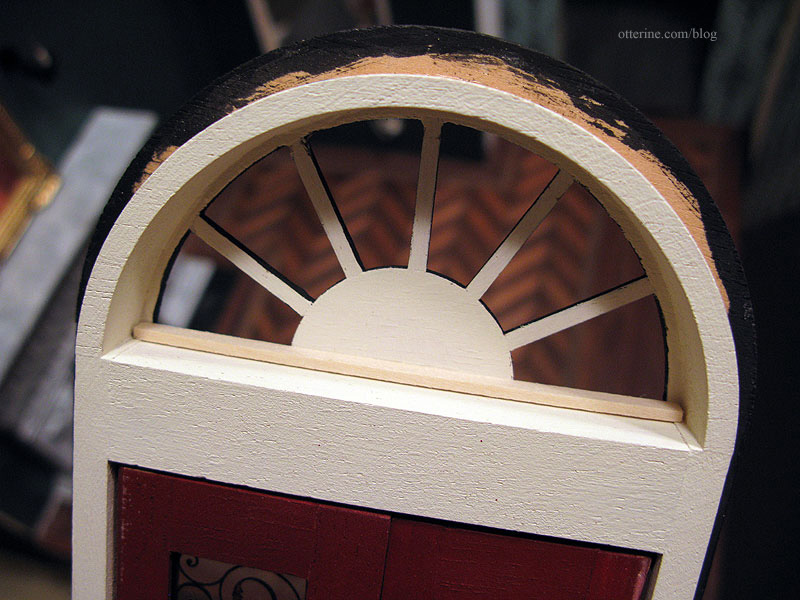
The trim had broken at some point, but I left it as is for installation. Just a hint of the break is still visible in the photo above, so I might go back and work on that some more.
To hold the acrylic insert in the upper arch, I glued in a small strip of bass wood painted to match (shown here unpainted). This should offer enough stability to keep it from falling backwards as it is apt to do.
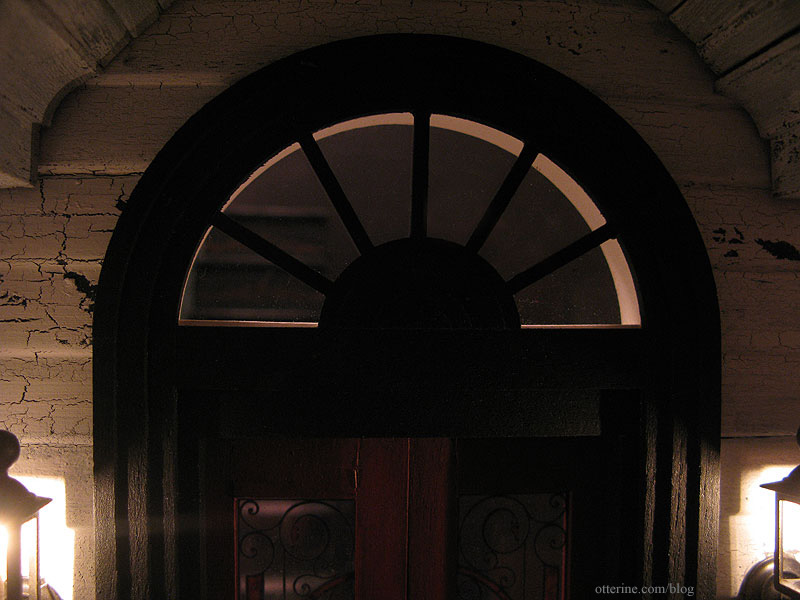
It does show a little from the outside looking in, but it’s not glaringly obvious. It just looks like a structural part of the door.
Looks rather stately.
Categories: The Haunted Heritage
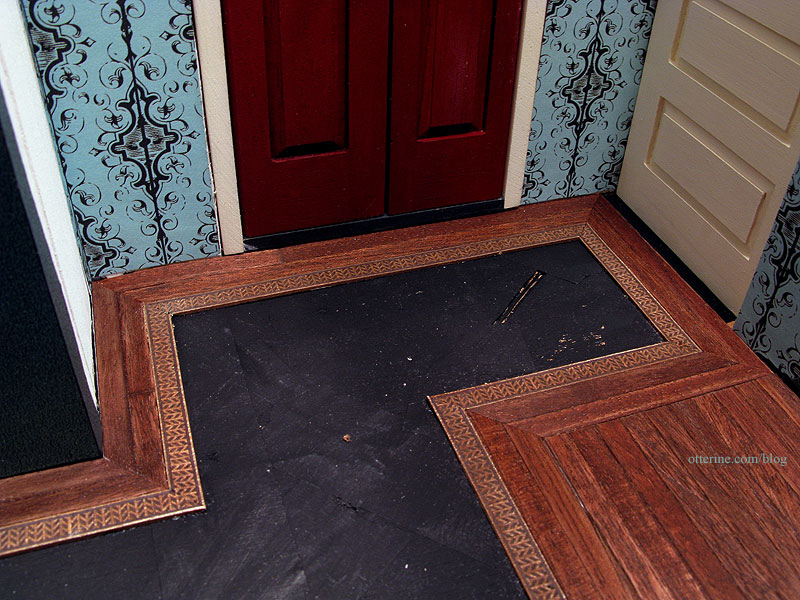
February 10, 2012 | 0 commentsFancy parlor floor – part 3
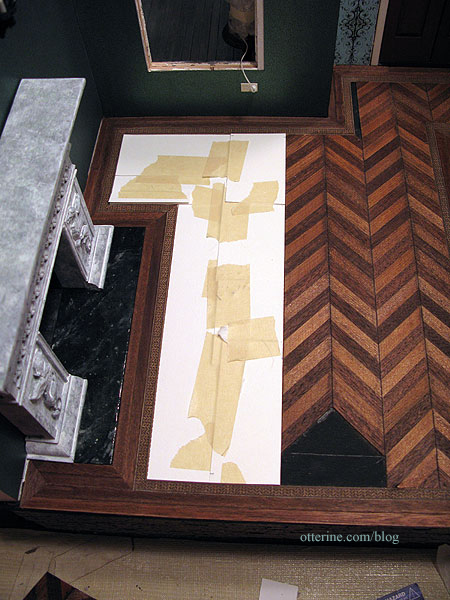
Completing work on the fancy parlor floor. I used pieces of leftover bristol paper to make a template of the area inside the marquetry border.

I started with the entryway even though it is the smaller of the two open areas because I wanted the herringbone pattern to be centered here. Furnishings will cover the larger area in the parlor so its pattern is less important. I measured to find the center and marked the line on the paper template.

I aligned the marked center with the herringbone pattern and taped the template to the herringbone flooring sheet.
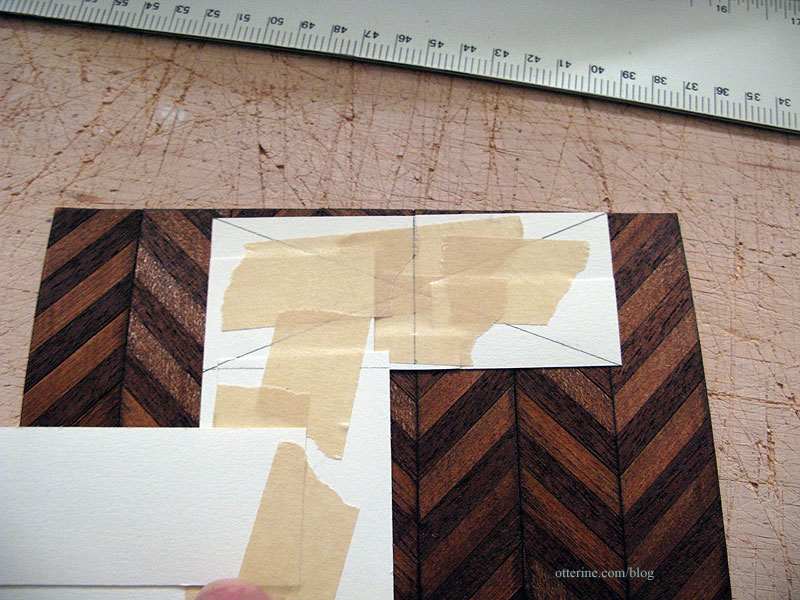
I cut the flooring using the template and then adjusted the fit using scissors to trim small areas.
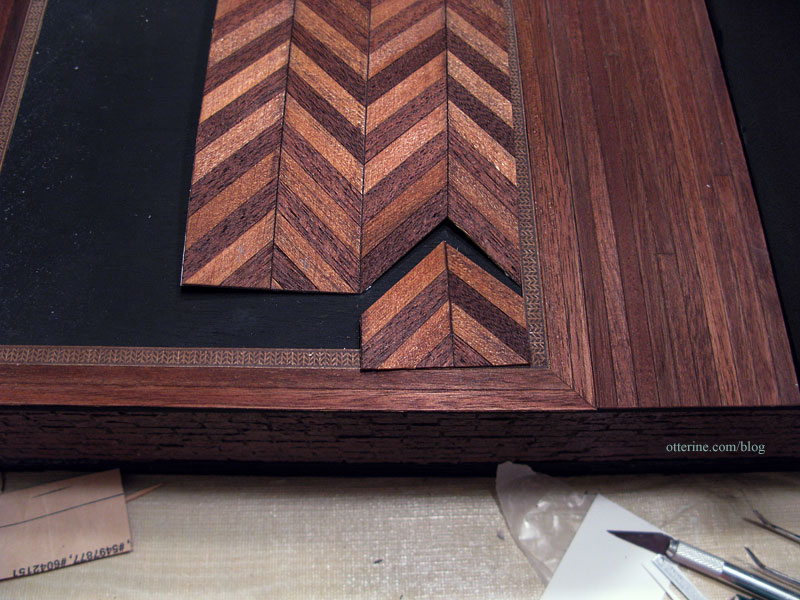
A small portion of the herringbone floor is longer than the pre-made sheets. To splice pieces together to make for longer strips, I cut the ends of the pieces following the diagonal pattern and then used those cut pieces as templates. This creates a seamless connection.
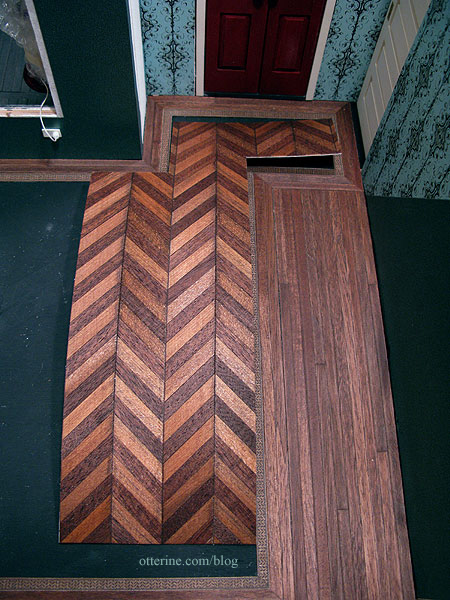
After gluing the main piece in place, I adjusted my paper template for the remaining open area.
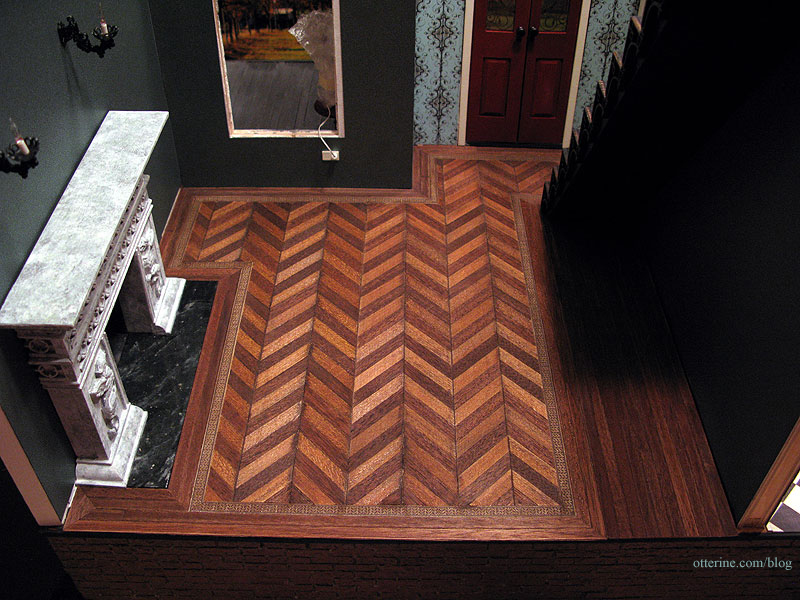
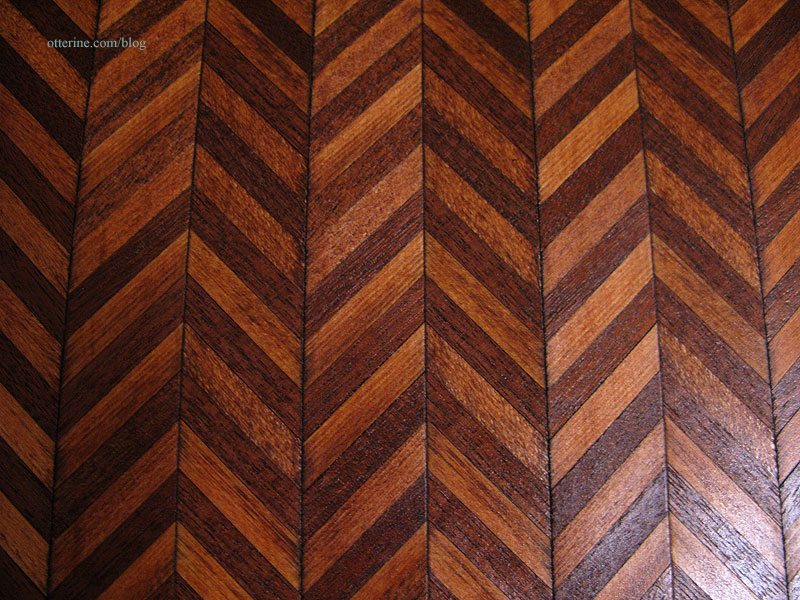
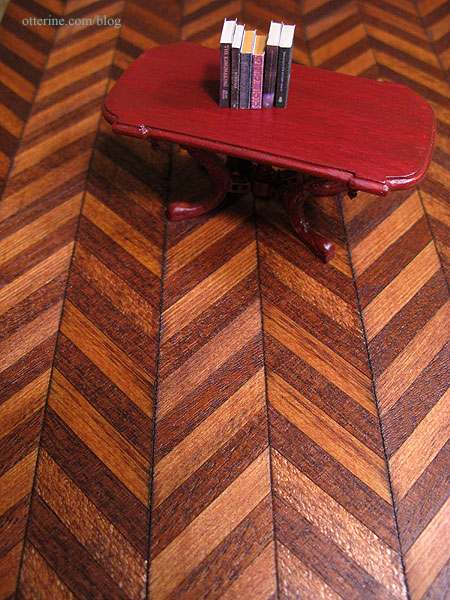
The floor is by no means perfect, but I think that’s better for my old house. :] This was a challenge, and I am very happy with the results.
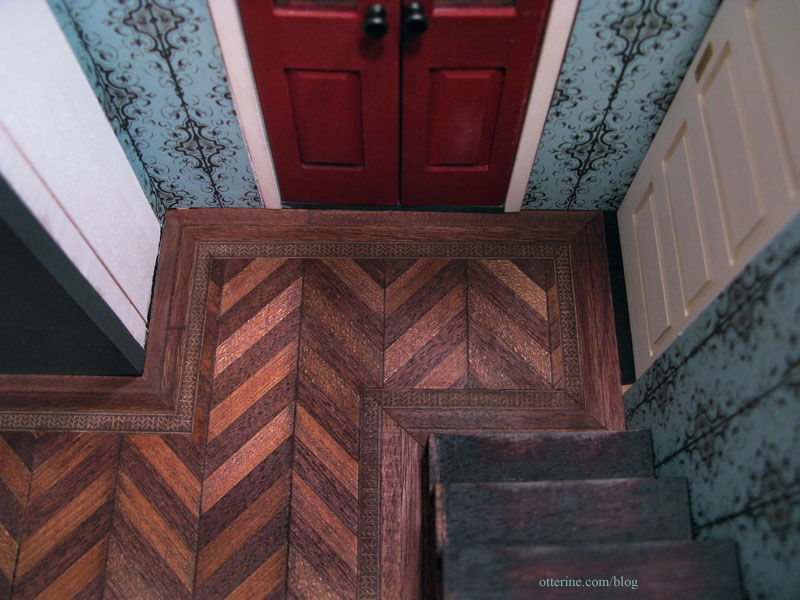
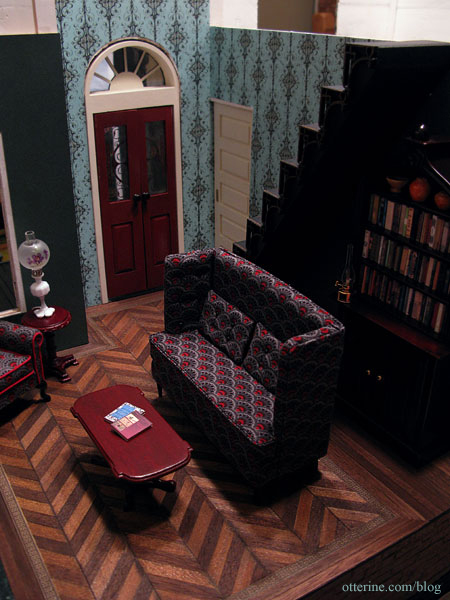
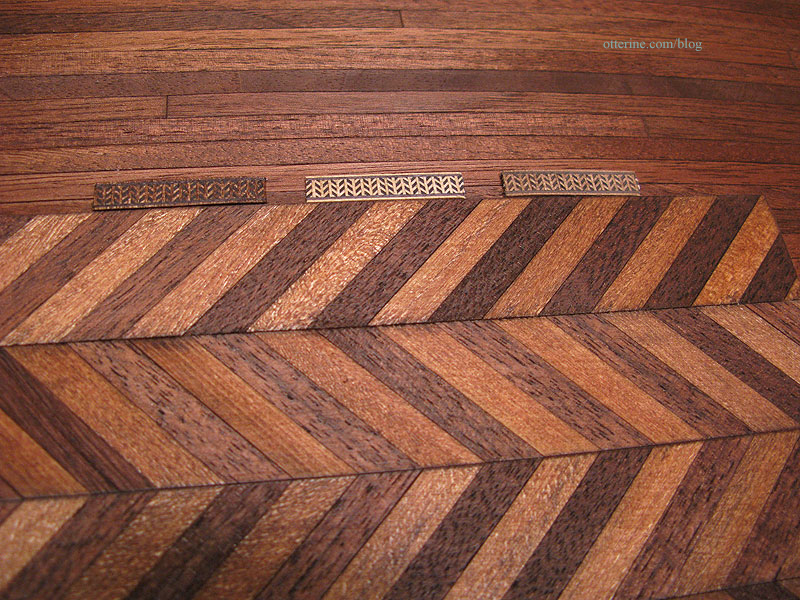
I especially like the way the pattern works in the entryway at the bottom of the stairs.
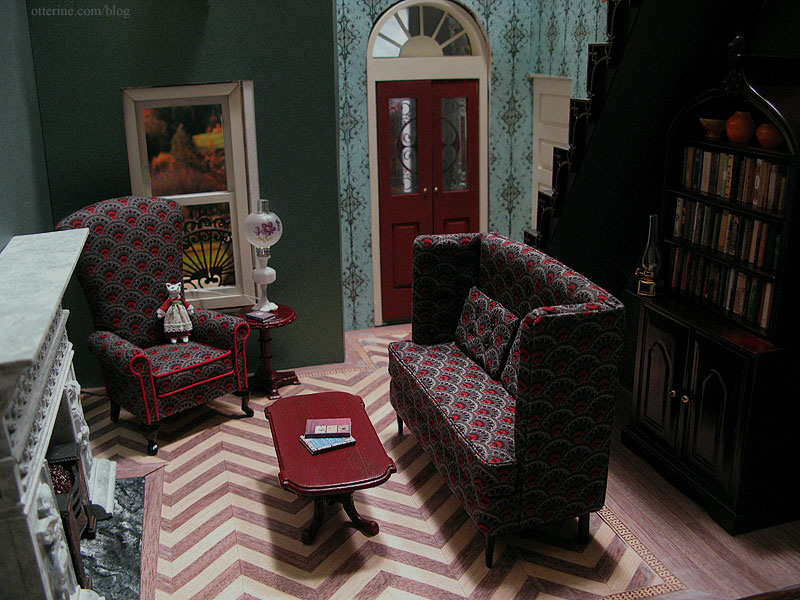
With the furniture in place, it’s really starting to look like a vintage parlor.
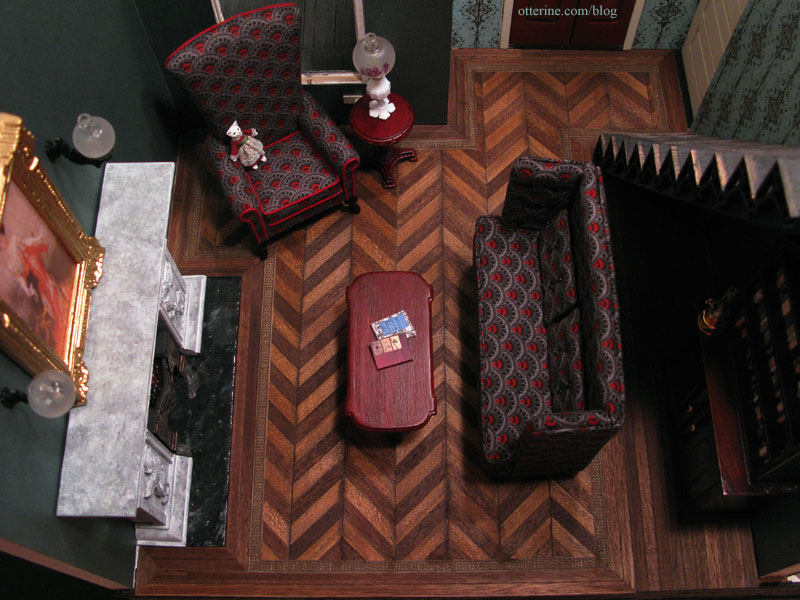
Once the baseboard trim is in place, I think it will really be striking.
I need to find or make a rug for the middle of the room, but I don’t want to cover too much of the floor I spent so much time bringing to life.
Categories: The Haunted Heritage
February 5, 2012 | 0 commentsFancy parlor floor – part 2
Continuing work on the fancy parlor floor. I accidentally got some glue on the herringbone wood surface when I was gluing it to the bristol paper backing. I sanded the area lightly and got a wonderful sheen. So, I decided to sand the entire surface of the herringbone and plain wood sheets in the same manner before starting the fancy parlor floor. A happy accident. :D I doubt I will seal the wood further since the stain I used said it also seals, and I don’t want too high of a gloss for my old house.
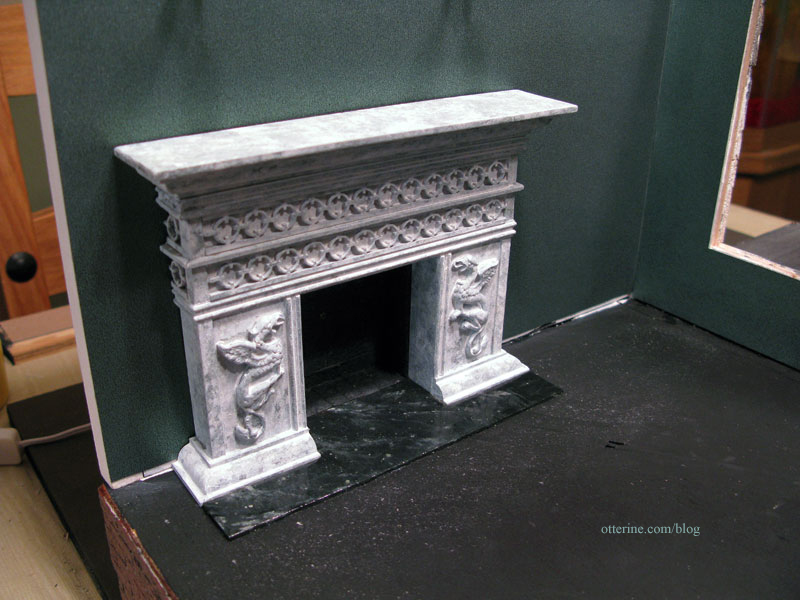
I placed my paper mockup floor in the room again and marked the areas for the fireplace and hearth. I thought this might help for reference later on.
Since the floor pattern will flow around the hearth, I glued the firebox, fireplace and hearth permanently into place.
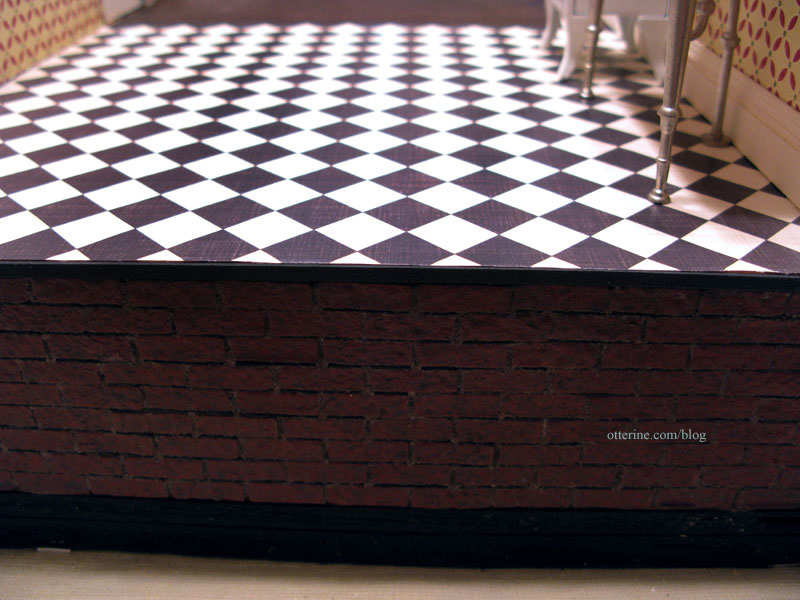
I also finished the back edge of the foundation. I opted for a long strip of bass wood painted black since I thought this would blend well with the dark floors in both the parlor and the kitchen as well as the brick foundation and not create a stark white outline across the bottom.
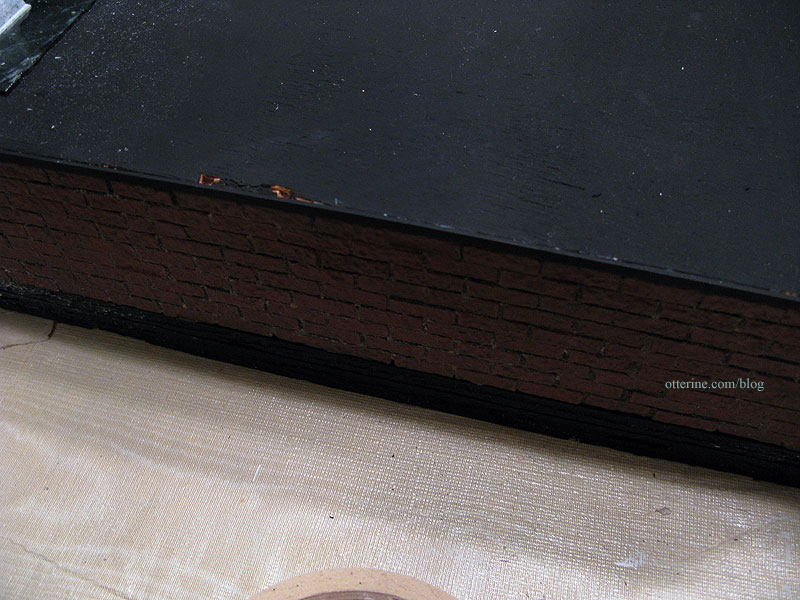
You might have noticed that I didn’t add moss to the foundation toward the back of the house. I omitted the moss here since the interior is decidedly less rundown than the exterior so I thought it matched the visual style better, and I wanted to keep the amount of moss accidentally blown into the interior of the house to a minimum.
Starting with the plain border around the room, I cut strips that were two boards wide from the flooring sheet previously stained. Since one area builds out from the placement of the previous one, I glued the pieces down as I went. I used Aleene’s Quick Dry glue with some supplemental dots of super glue gel.
In another “chicken or the egg” moment, I decided to leave the stairs out while finishing the floor. I didn’t think the added thickness of the flooring would negatively impact fitting the stairs for two reasons. First, if the second floor balcony is to have the same flooring as the parlor and entryway, the thickness of the flooring on the upper floor will make up for the bit the stairs are raised from the first floor. Second, I really wanted to keep the ability to weight the flooring down as I worked on it. Having the stairs glued in place would make that much more difficult. I did make sure there would be enough room for the narrow door at the top of the stairs by measuring where the stairs should end on the first floor.
I added the plain flooring block to the area behind where the stairs will be and continued the border around it.
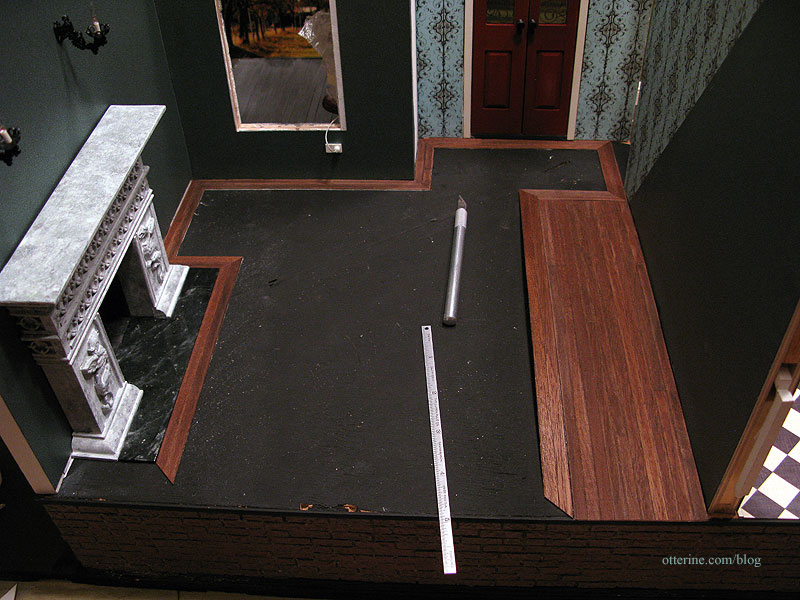
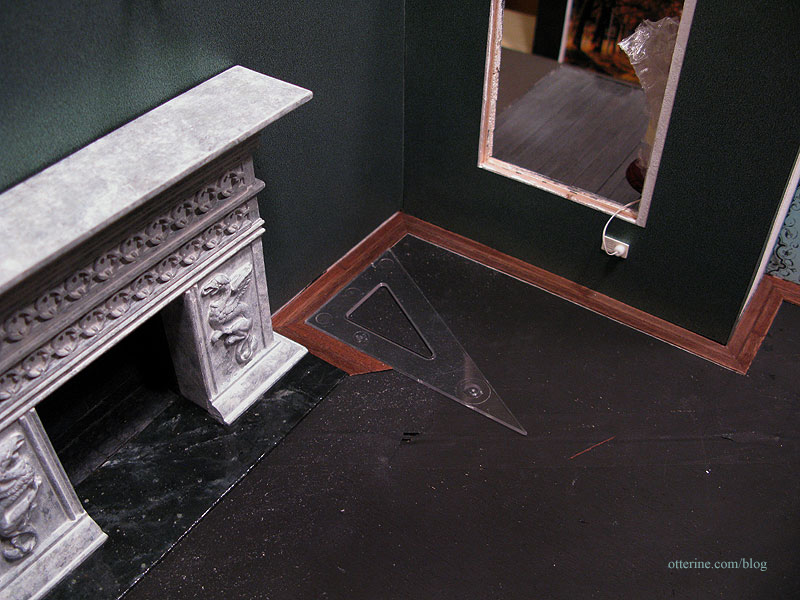
Even though the fireplace and hearth aren’t square I needed to make sure the inner edges of the plain border were, so I used triangle as a guide.
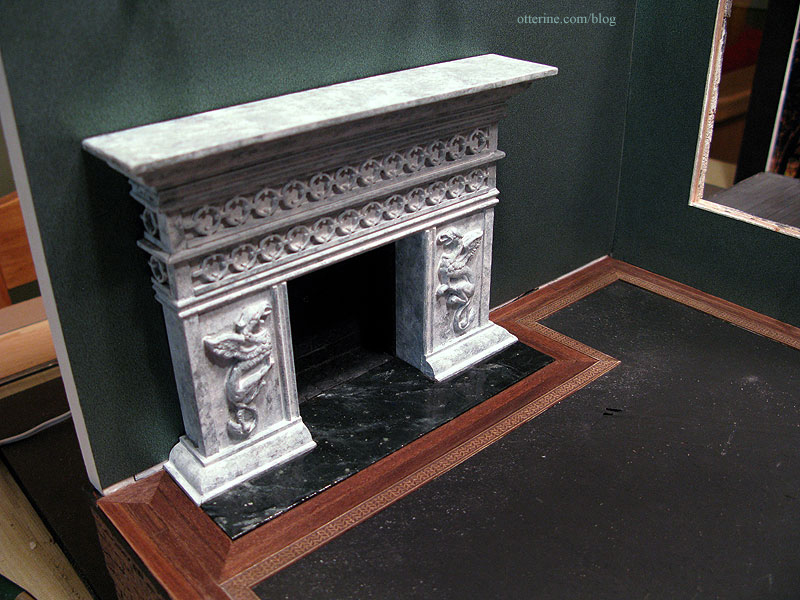
I’m not going to take credit for it, but the hearth sits exactly 4 board widths from the back edge. I won’t be able to continue the herringbone pattern here, but the even number of boards makes for a clean finish and an interesting detail.

Overall, I’ve been elated with the results so far.
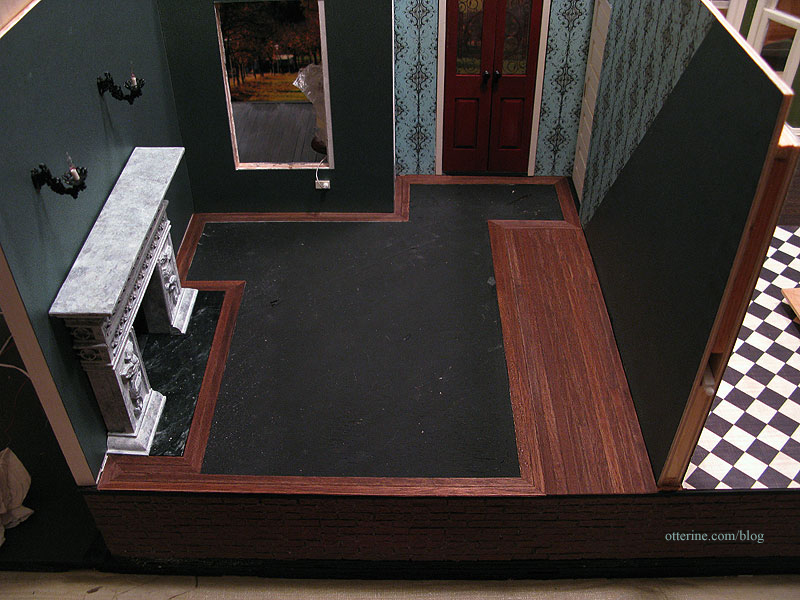
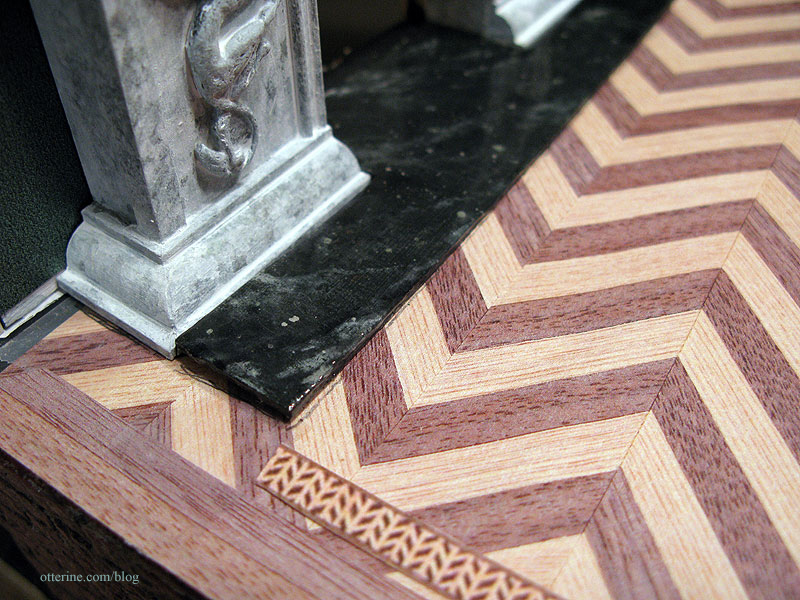
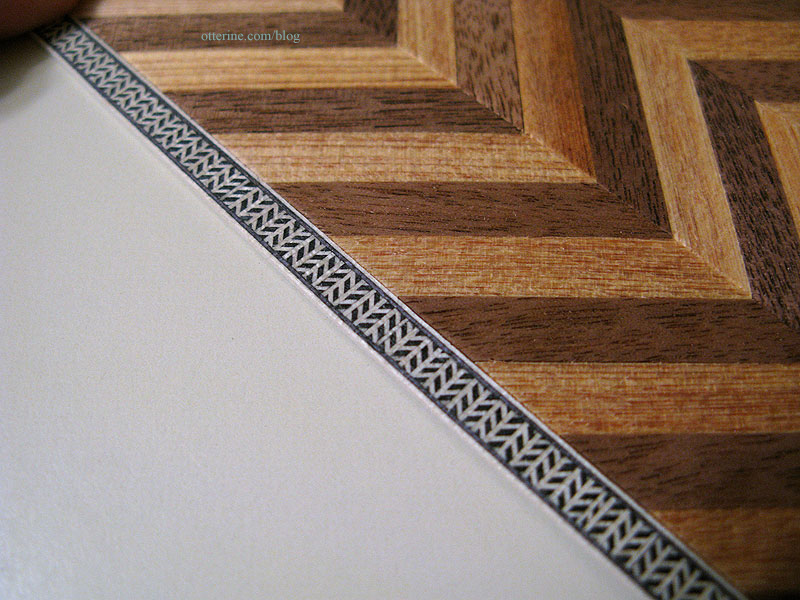
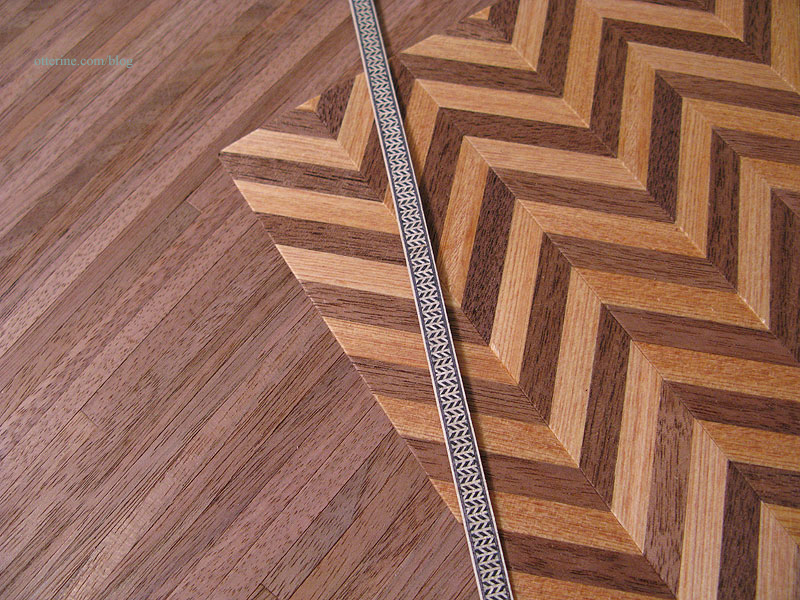
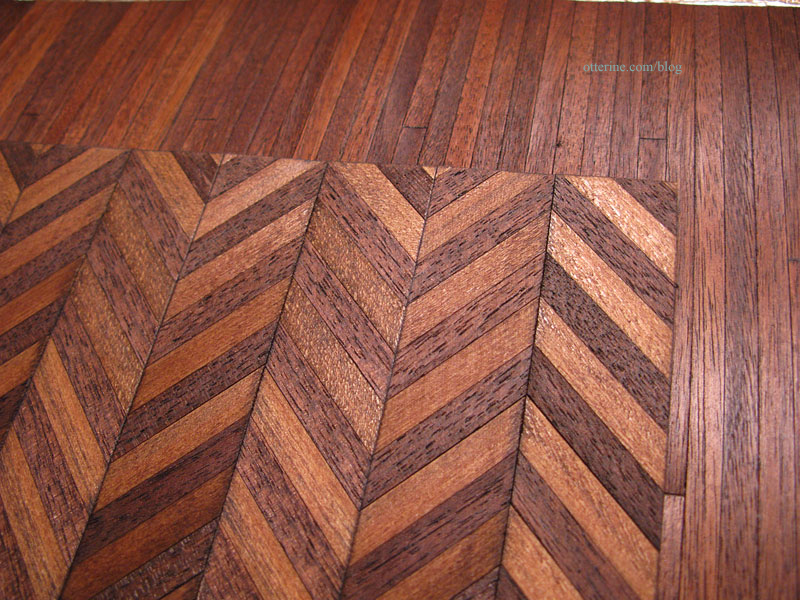
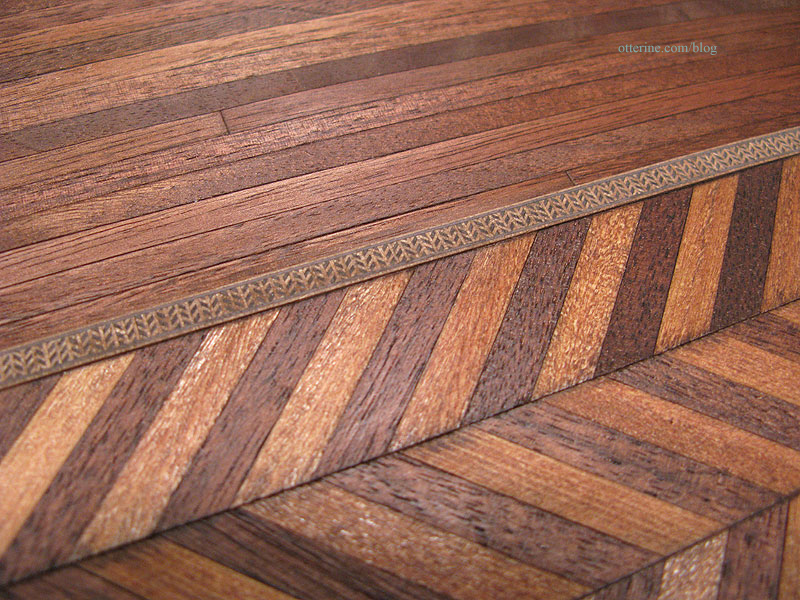
After completing the plain wood border, I added the marquetry border.

I really love the way this floor is turning out. :D
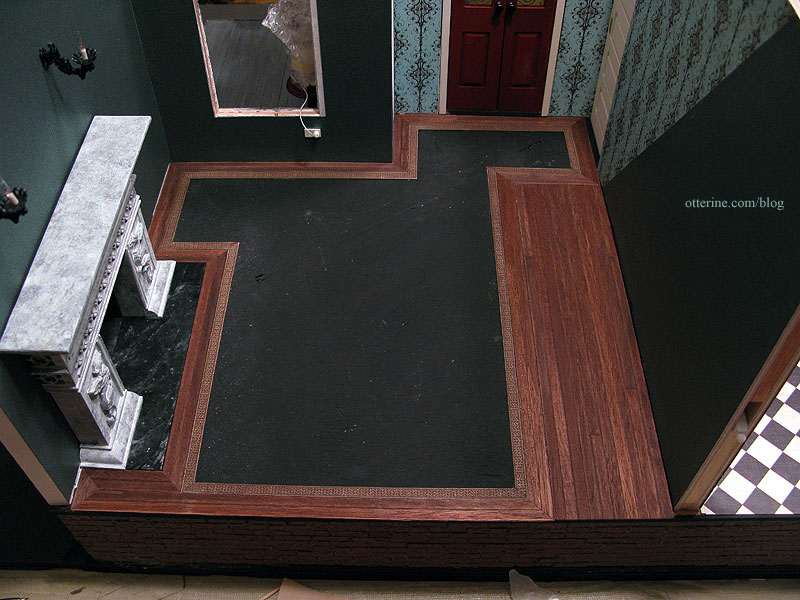
It frames the hearth so well.
I’ll be using plain wood flooring to finish the threshold under the pocket door, between the parlor and kitchen.
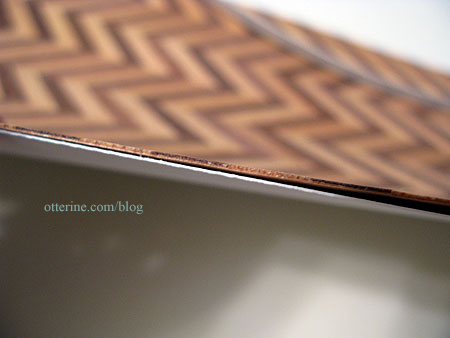
I’ve also glued the flooring sheets to the bristol paper to bulk up their thickness, leaving them under magazines until I am ready to use them, need to make sure they bond well and lay flat.
Categories: The Haunted Heritage
February 4, 2012 | 0 commentsHeritage – Kitchen working windows
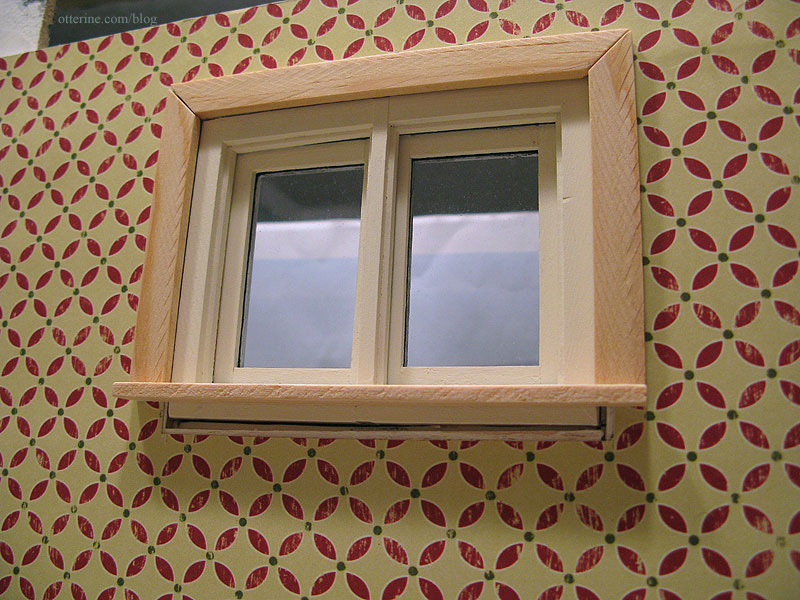
Today, I worked on the Houseworks working windows for the kitchen. I had already given them their first coat of paint and applied the crackle medium to the exterior some time ago. I can fiddle with windows and painting tiny parts only so long, then I have to move on. So, they’ve languished in the “to do box” since then.
They have their original acrylic inserts, which I will worry about aging later in the build though right now they are appropriately dusty.
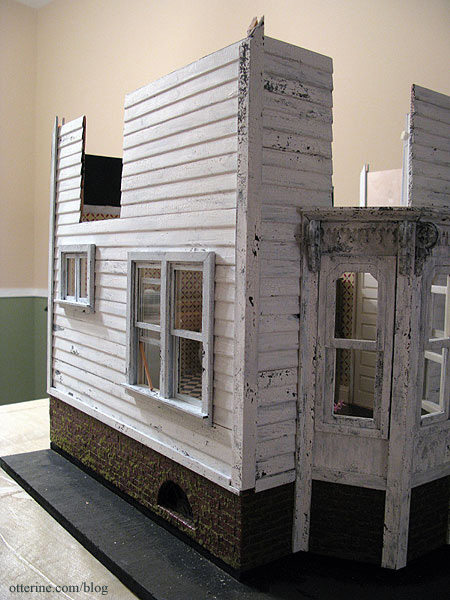
For the large double window, I glued the top window pieces in place, and the lower portions are loose enough to require dowels to prop them open. That makes three windows like that in the kitchen, the other being one of the bay windows.
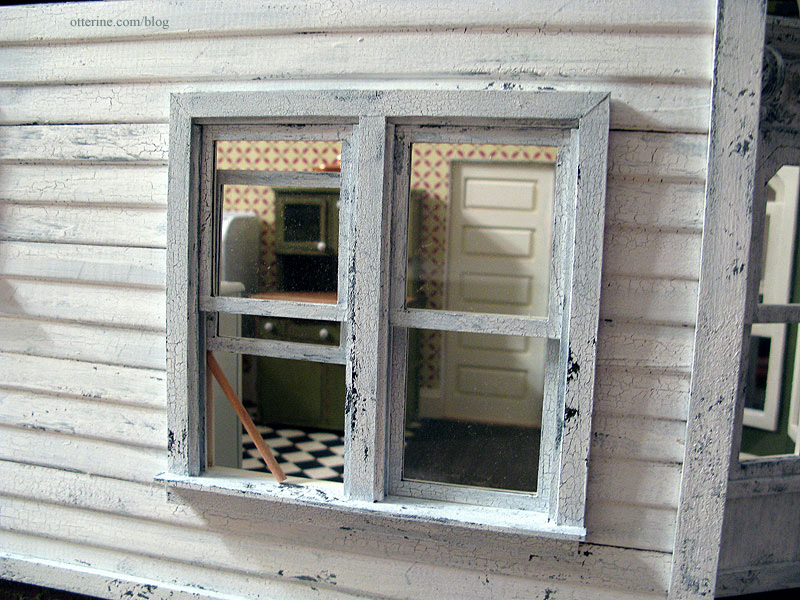
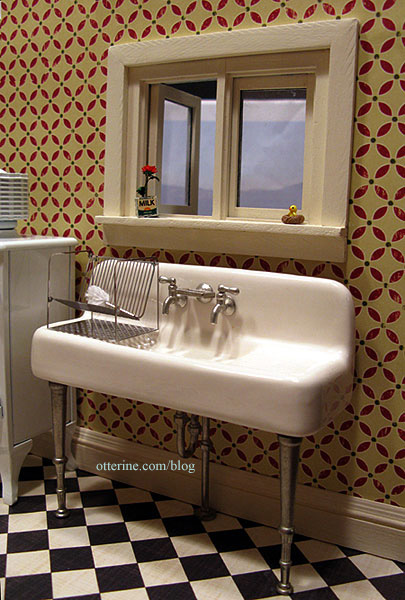
I’m so glad I added the casement window above the sink. I think it’s the perfect addition for a farmhouse.
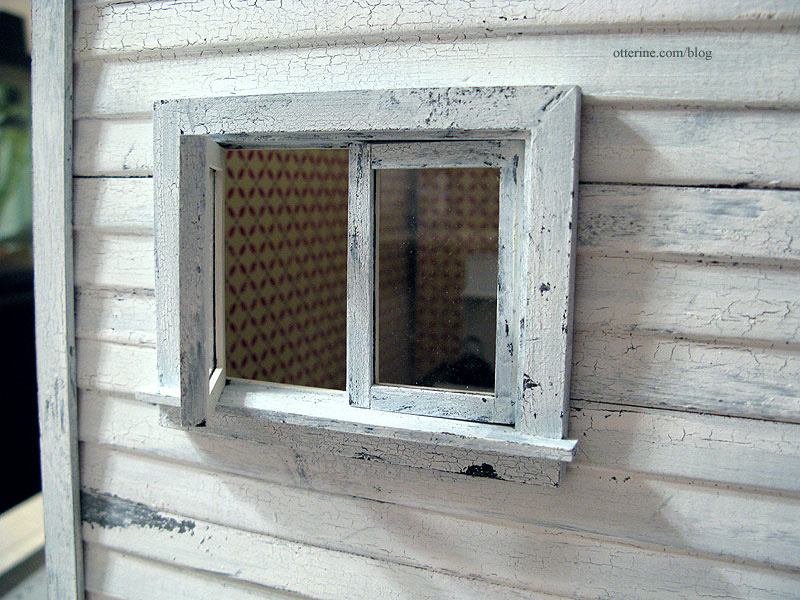
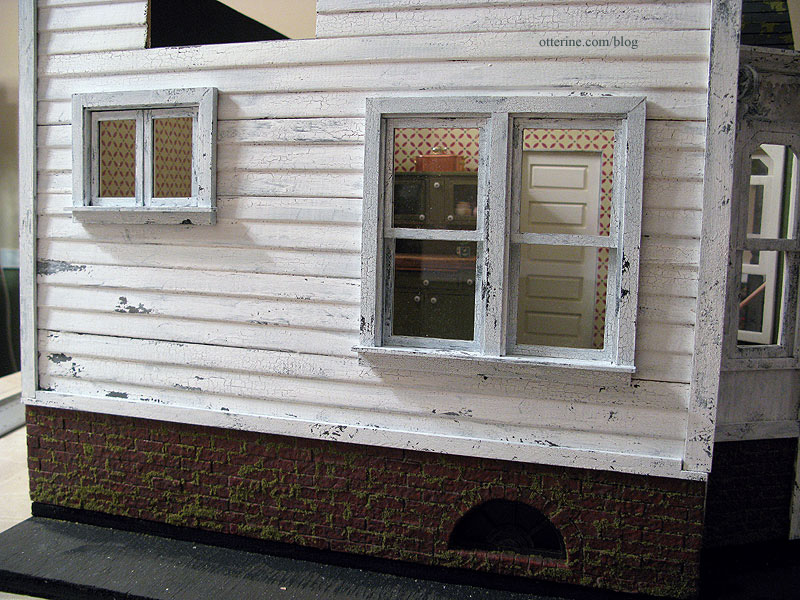
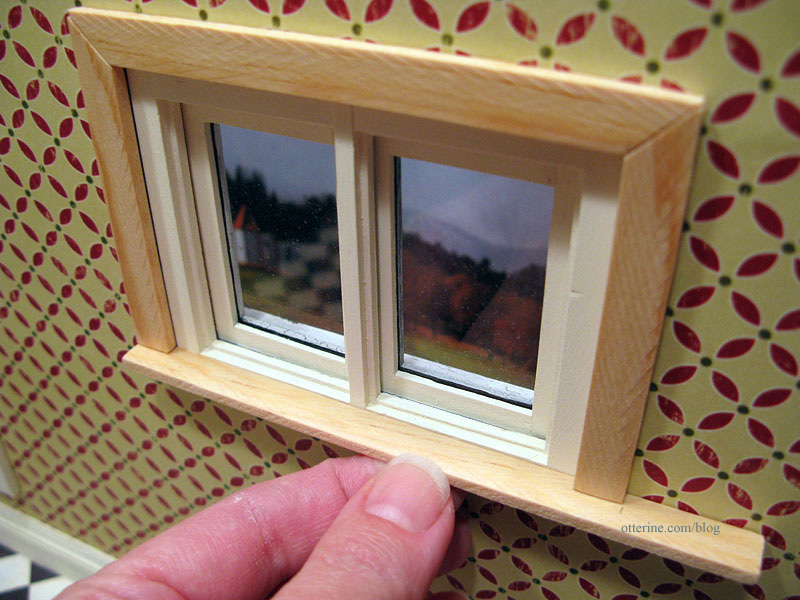
Building up the outer edges of the window trim not only helped make up some of the difference between the thickness of the wall and the depth of the working window, it also makes the windows look more realistic in construction.
The padding I added to the inside wall makes up the rest of the difference in wall thickness so the interior surfaces of the windows are flush with the wall surface. This will make adding the interior trim much easier.
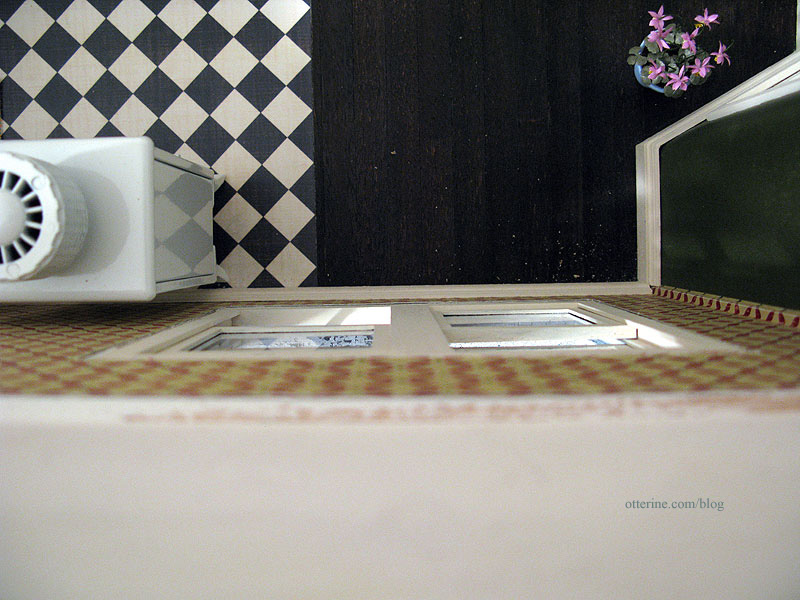
When I take photos where the open back will show through the windows, I often prop up a spare piece of matching wallpaper to make the room feel whole. Here you can it in place.
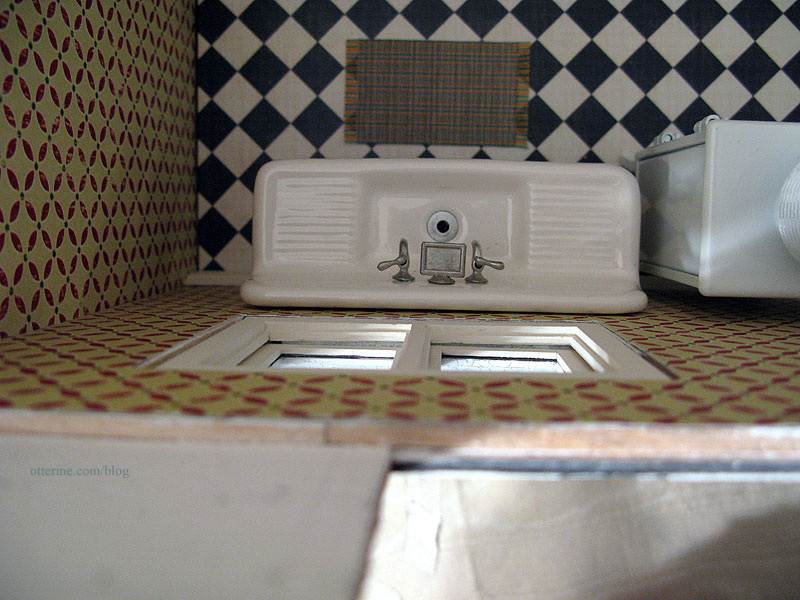
The Houseworks double working window came with pre-cut trim, so I painted and used those pieces as is. There were a few gaps, so I filled and painted just as I did for the baseboards. The flowers are by Michelle of Little Rabbit Miniatures.
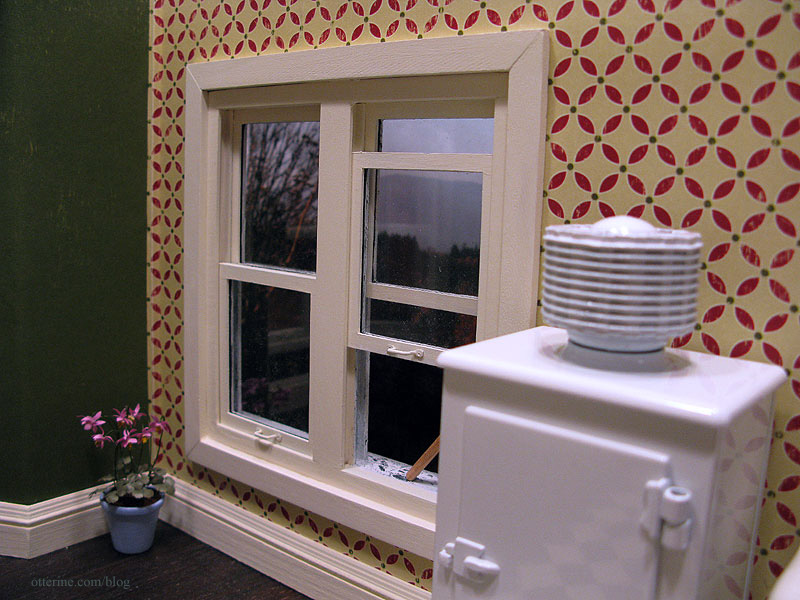
I used brass window handles but I painted them Vintage White by Folk Art to match the windows. I usually use spray paint when I change the color of brass hardware, but old houses often have painted over hardware…done by hand. My old farmhouse was like that.
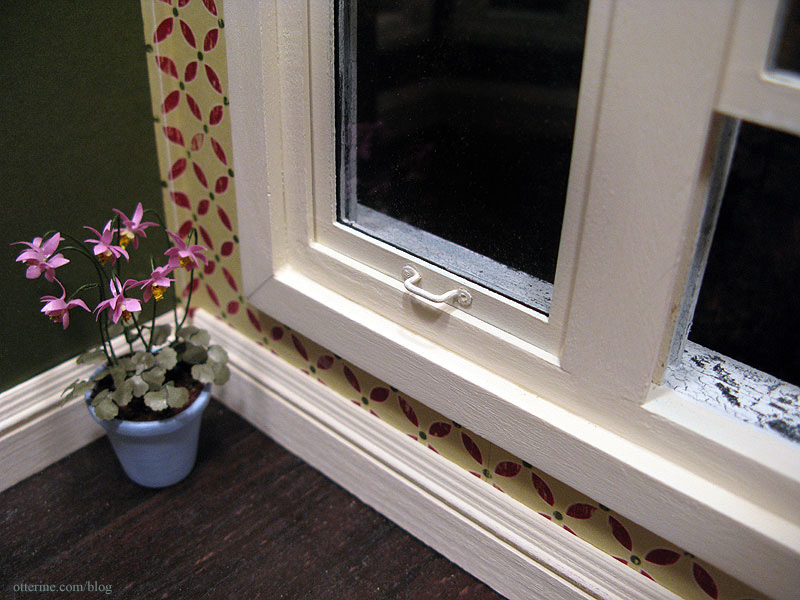
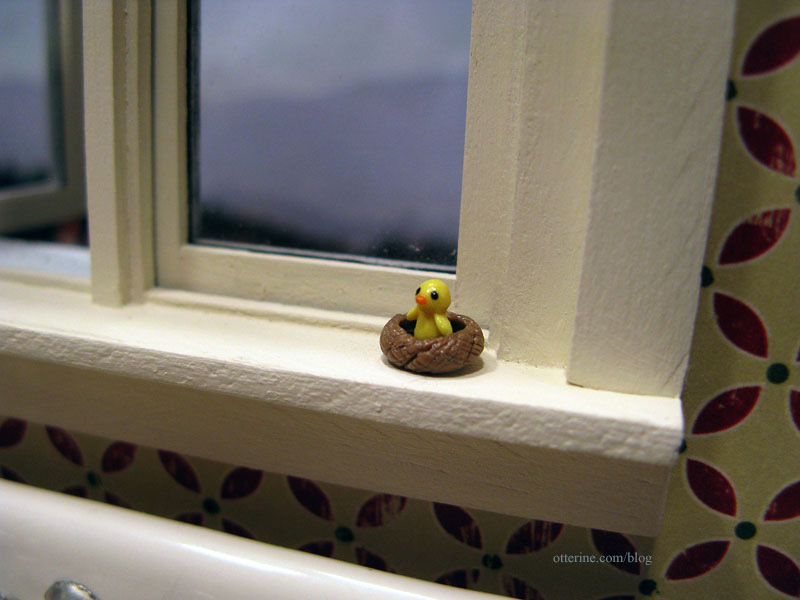
The casement window didn’t have interior trim included, so I made my own using some crappy trim wood from the Heritage kit to get a more aged look to the trim. I wanted to have a small sill for plants and knickknacks. I started with the top piece, cutting the mitred corners with an Easy Cutter. I cut the sides to end at the bottom of the window opening.
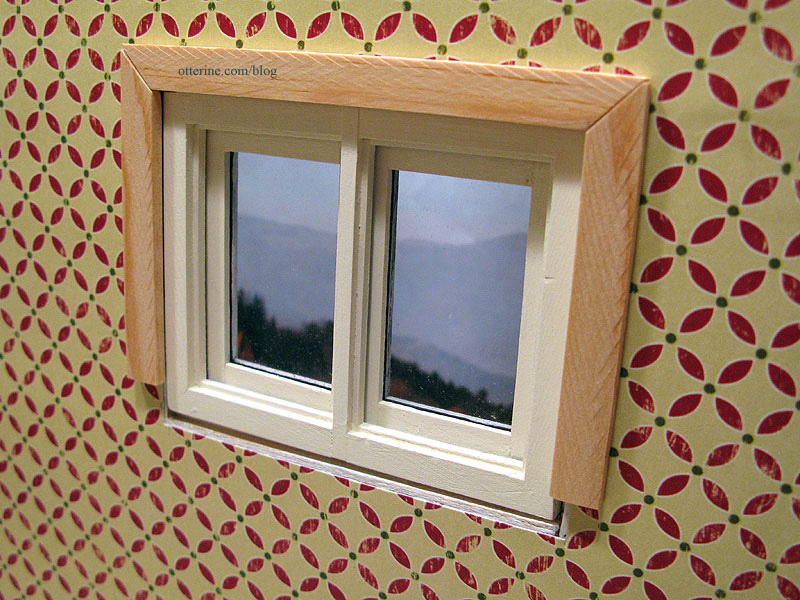
I then marked a straight board held on its side to serve as the sill.
In order to cover the gap remaining on the bottom, I cut a rectangular piece identical to the sill piece though it will sit flat against the wall.
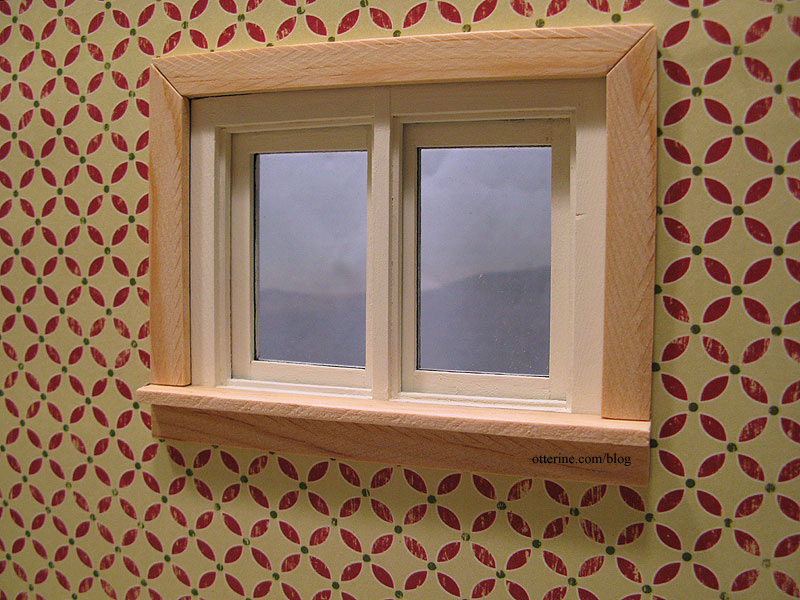
After painting, sanding, gluing, filling and touch-ups, the window trim is complete and the sill is the perfect place for the milk carton flower.
Hmm…I think I need some half-ripe tomatoes, too.
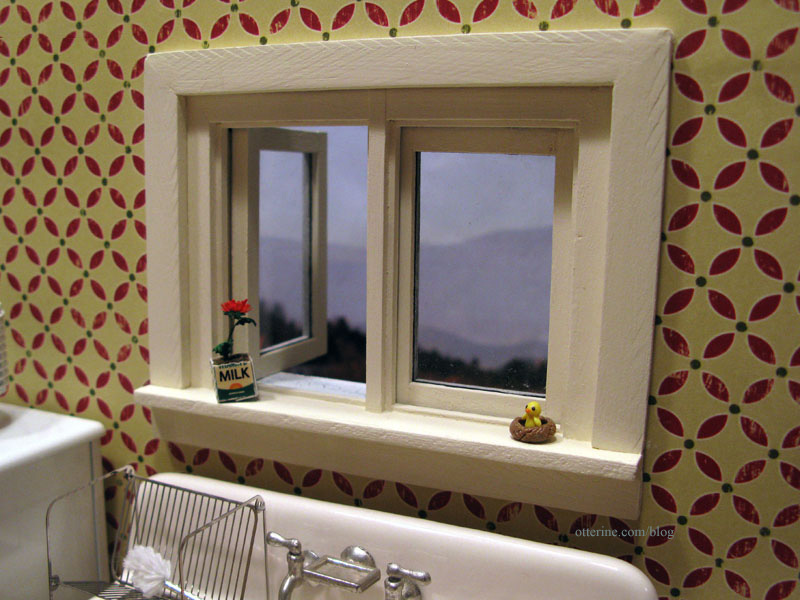
The little chick in the nest is another creation by Cathy Rohal, the same artist who made the peacock box I showed in an earlier post. Too stinkin’ cute! And, tiny! :D
Categories: The Haunted Heritage
February 3, 2012 | 0 commentsHeritage – parlor table lamp
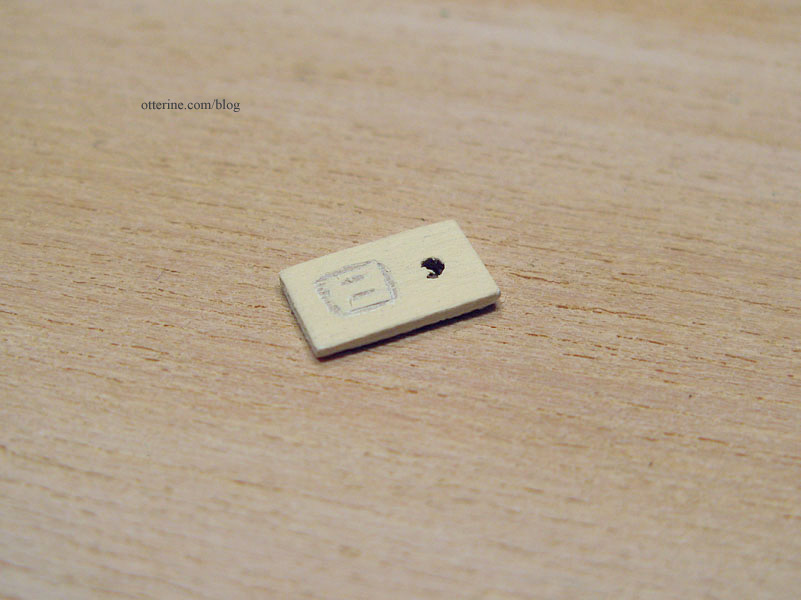
There was one more lamp to wire before I could finish the wallpaper in the parlor: the Chrysolite table lamp, which is the only Chrysolite light fixture I bought that wasn’t a kit. I used my usual faux outlet method for table lamps; I made a wall outlet. The outlet is made of wood with a hole on the side where the lamp will “plug in” and a drawn on empty outlet next to it.
I poked the wire extension through the floor from the open foundation and into the channel I made for the lamp wire. I used a white bead for the plug. Both the outlet and bead will be glued in place after the wallpaper is up so I still have the ability to adjust the positioning.
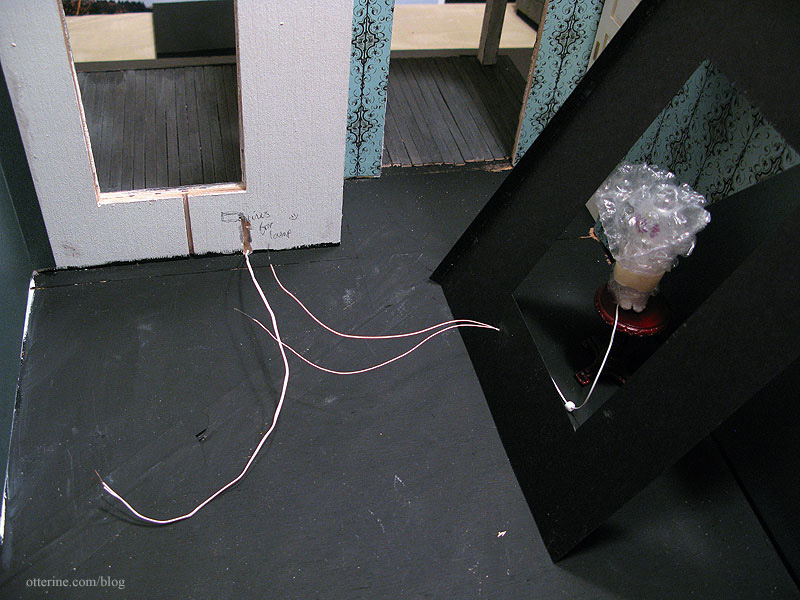
I wrapped the lamp in bubble wrap while working to keep from damaging the globe. The lamp is attached to the table with a bit of mini hold wax.
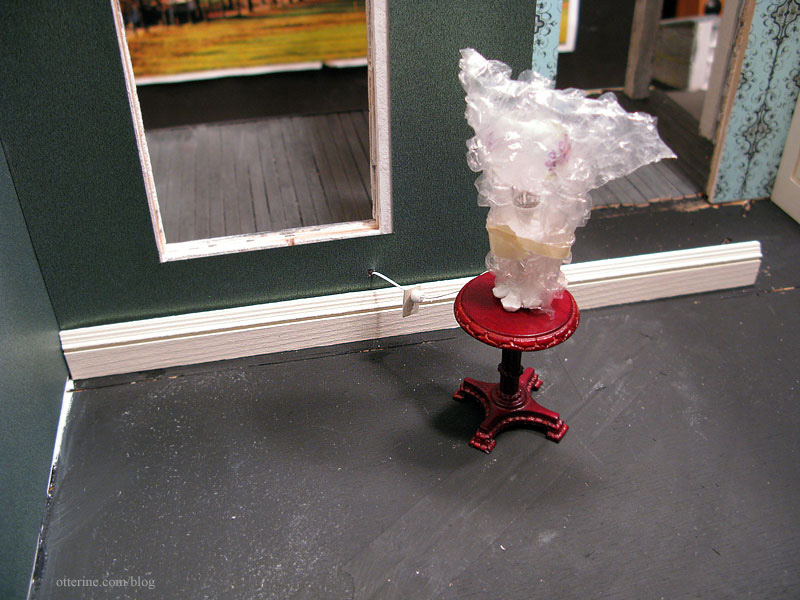
I used a scrap of baseboard and held the window trim in place to make sure I glued the outlet to the wall in the right place. I then glued the bead to the outlet.
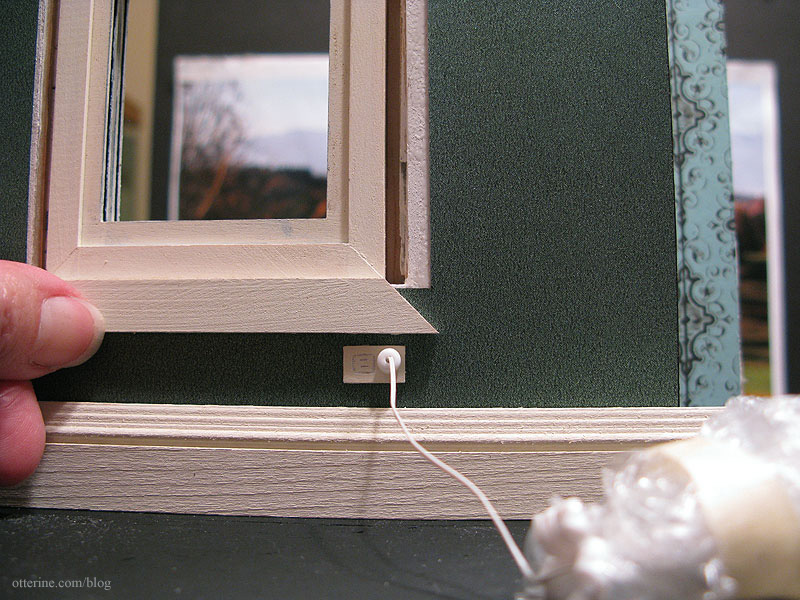
It will be mostly hidden by The Chair, but I still like the way it looks! The lamp and table will sit on the front porch while I work on getting the floor in, so I’ve left the bubble wrap in place.
I also drilled a hole in the foundation for the cellar LEDs and the lamp wire. The chimney will cover this area. Thinking about it now, I could have dropped the front door coach lamp wires into the foundation instead of making wire channels. Ah, well.
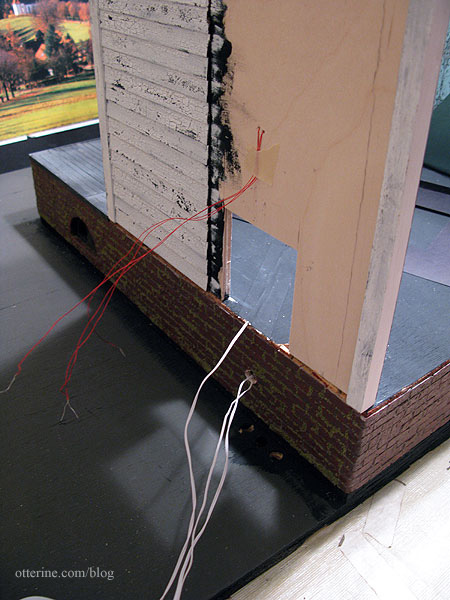
Since all other wiring will come from the second floor and higher, no more wires will run through the foundation. Well, if I decide to put in a flickering fireplace unit in the cellar doors, I might need to fish some wires through the foundation, but it would be right next to the chimney and I can figure that out later. :D So, I glued the house to the elevated base I had previously attached to the landscaping board.
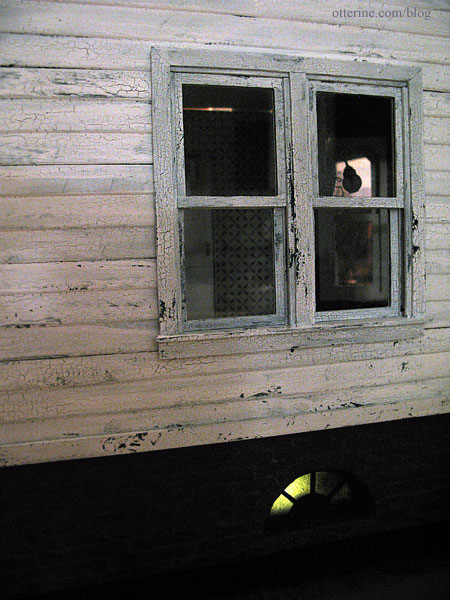
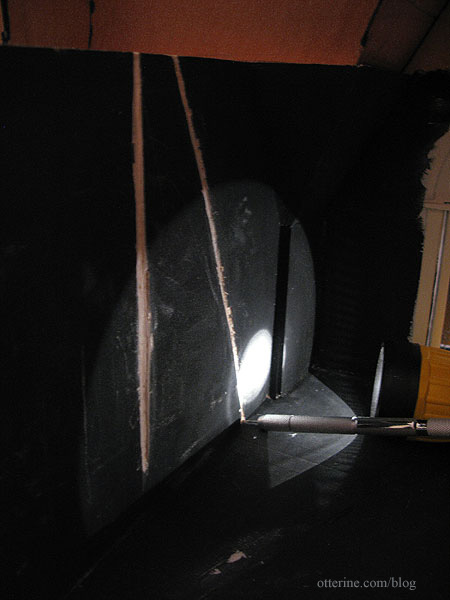
Speaking of the cellar, check out this creepy shot. :O
Categories: The Haunted Heritage
February 2, 2012 | 0 commentsHeritage – parlor sconces and wallpaper
The Chrysolite sconces had non-replaceable bulbs that I decided to swap out for replaceable ones. At first, I thought I would have to use candle sockets with thick wires, but I did some research and discovered and Cir-Kit Concepts makes candle sockets with varnished wires, the same type that came with the kits. :D
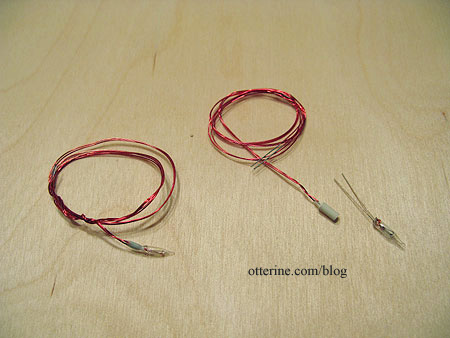
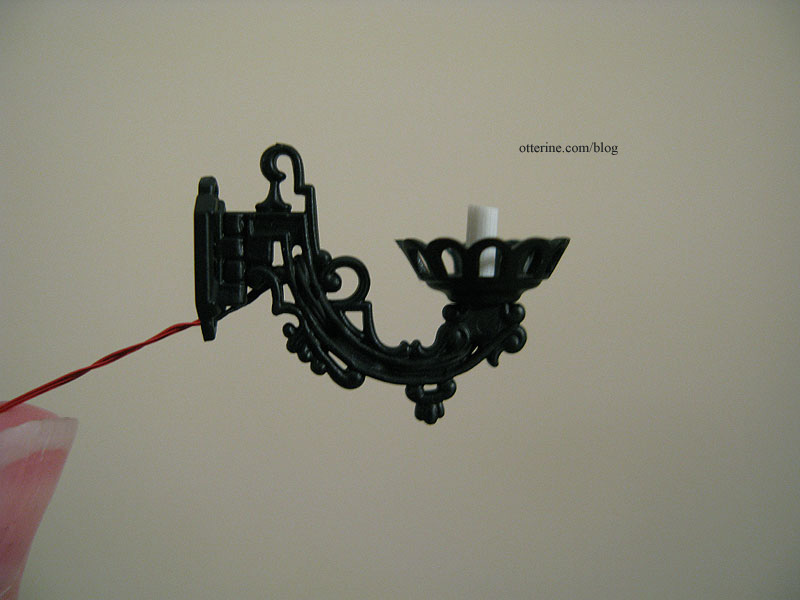
The sconces were molded in black plastic, but I still used flat black spray paint to take away the shiny plastic appearance. These fixtures have beautiful and delicate detailing only possible with plastic kits, but they don’t look at all cheap.
Threading the wires wasn’t exactly easy but there was no way I could have used regular white wire replaceable bulb sockets. The varnished wires fit perfectly.
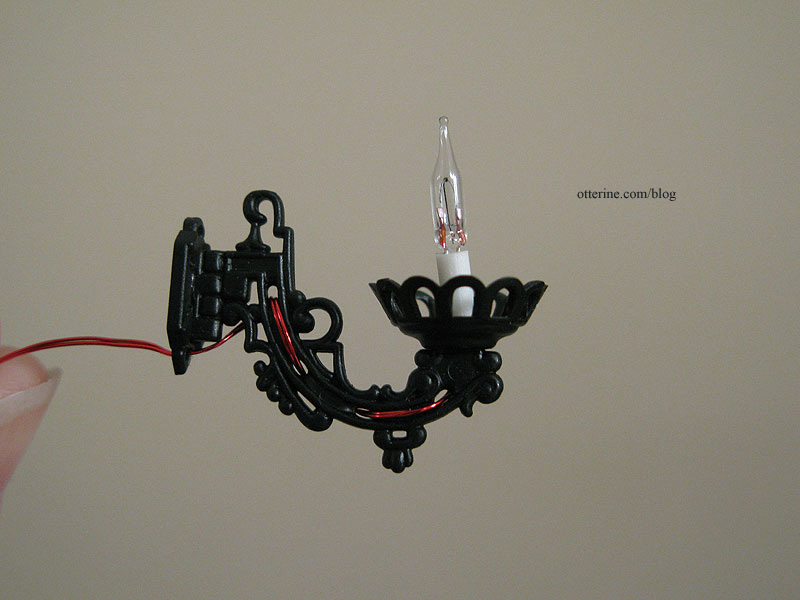
I used some black acrylic paint to cover the red wires so they wouldn’t be as noticeable.
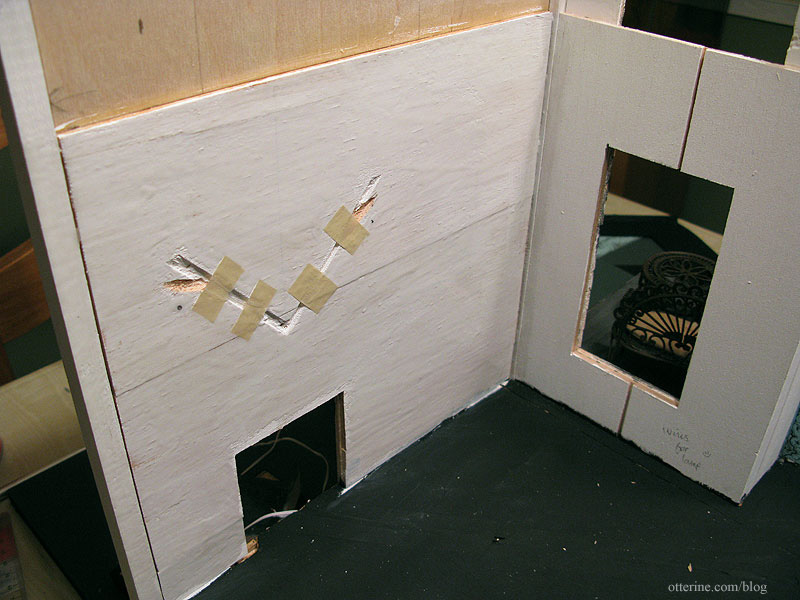
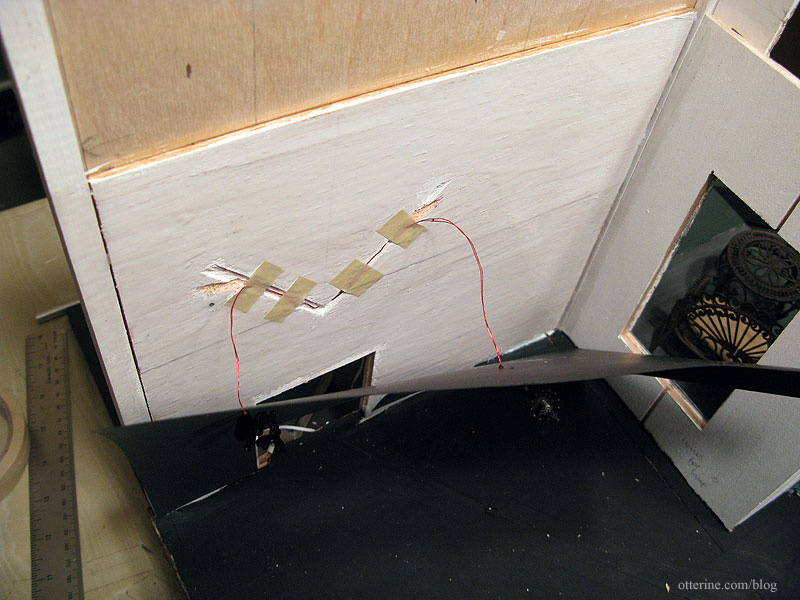
Installing these rascals involved a lot of “chicken or the egg” reasoning. I had made the channels for the wires previously. The wires will not be poked through the wall to the exterior until they reach a center point. So, part of the wires will run on the interior wall. I had to figure out how to get the sconces attached to the wallpaper, paste the wallpaper in place, and run the wires into the channels. This is why I buy extra paper! This scrapbook paper is by Recollections and is a glittery deep green with plain black on the back.

First, I made sure the wallpaper piece was cut correctly. Next, I marked where the sconce channels began behind the wallpaper. I poked holes in the wallpaper and fed the wires through, leaving the sconces loose. I did a quick dry fit, and realized I had the sconces too high. Since I didn’t want to re-cut the paper, I dropped the holes by 3/8″ (the size of the sconce back plate) so the original holes would be covered. I re-cut the channels in the wall to make up the difference.
I put a few small pieces of tape per channel to make a pocket for the wires while still allowing for movement. I figured a whole strip of tape would just stick to the wires and make it difficult to pull them through. More on that in a minute.
I then applied Yes! paste to the wall. (Note: I no longer recommend Yes paste – I use Wallpaper Mucilage instead. Yes paste has problems with longevity.)
Then came the “I hope this is going to work as well as the plan in my head” moment. I fed the wires behind the tape and out the holes in the wall. Using my third and fourth hands (bahahahaha), I somehow managed to press the wallpaper down while pulling the wires out through the holes to the outside of the wall, pausing for a second to apply some glue to the backs of the sconces so they would remain in place once the wires were pulled taut. I taped the wires on the outside of the house so they wouldn’t slip as I worked.
I then smoothed, straightened and stopped swearing. ;D I also clamped the back edge of the wallpaper to make sure it would seal tight. This was not something I wanted to have to do over. This paper doesn’t much like to stick, as I noticed when I put it on the pocket door wall.
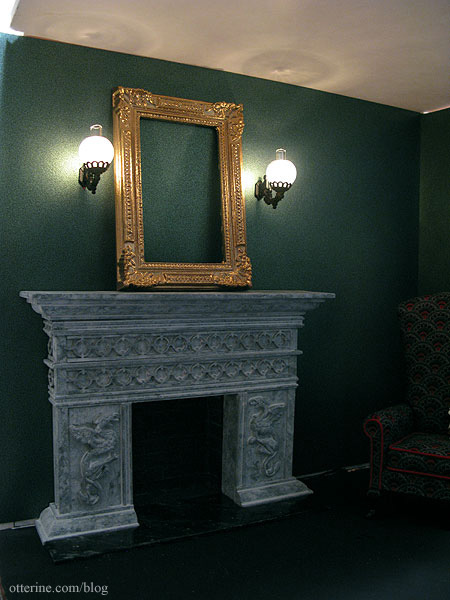
I added the glass globes, propped my mockup ceiling in place and tried out the lights with the frame (still to be aged) that will sit between them. Love!
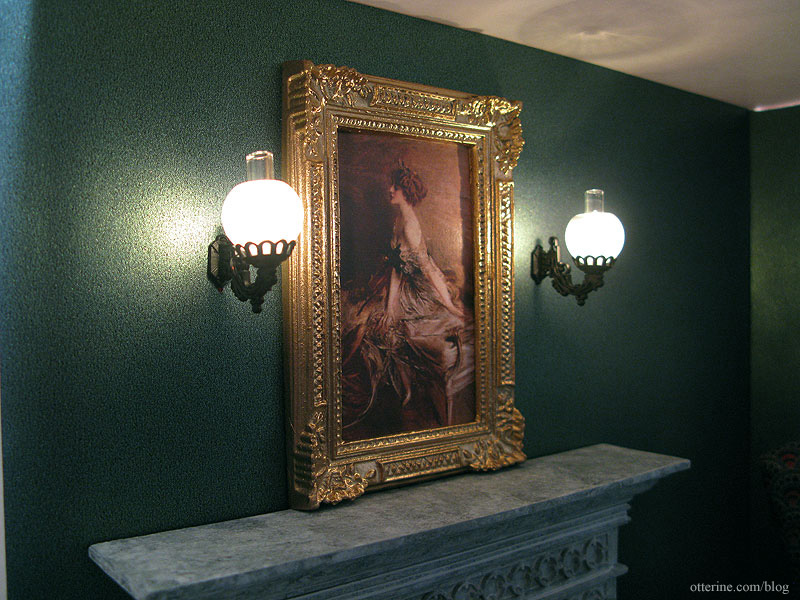
For a final treat tonight, I tried out two works of art by Giovanni Boldini. These are quick printouts on regular paper. Before using them, I will sharpen and brighten them in PhotoShop and print on Art Canvas by The Crafty PC.
The first is a 1911 portrait of Princess Marthe-Lucile Bibesco. I love this painting, though I just discovered it only two days ago when I was searching for the second painting below.
The second, and my original idea for this space, is the 1905 portrait of Elizabeth Wharton Drexel. I first saw this gorgeous painting in person during a trip to Newport, Rhode Island. It is located in The Elms, one of the magnificent mansions there. While the first painting is darker and has sharper brushstrokes, this one ties in the reds and oranges in the room and lightens the mood just a bit.
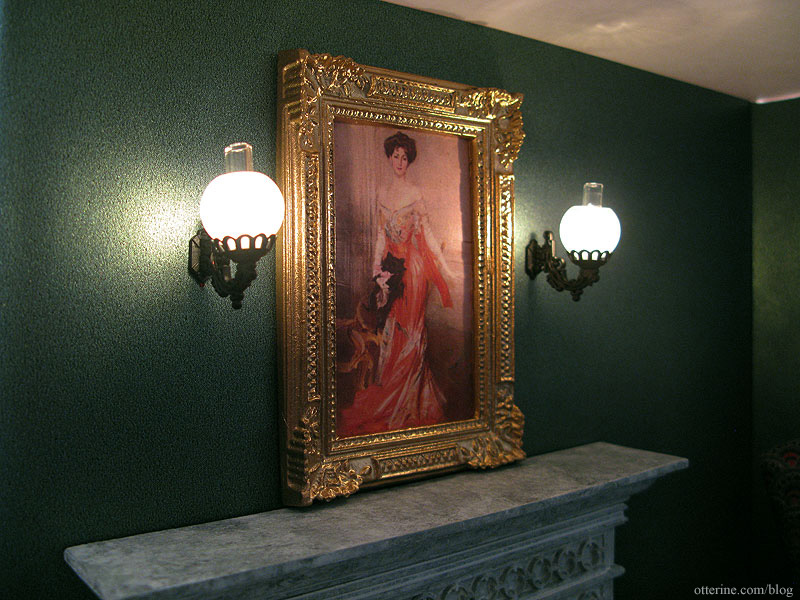
I am so torn between them. I think I’ll just have to wait until the room is all together and then try them again. Whichever painting I don’t use in the parlor can perhaps go in the bedroom, though I have another painting in mind there. (Final choice here.)
Categories: The Haunted Heritage
February 1, 2012 | 0 commentsHeritage – parlor firebox, wiring and coals
Before I could truly get to work on the parlor floor, I needed to finish up the parlor fireplace. The first order of business was gluing the final side wall into place. Before I could apply the parlor wallpaper, though, I needed to make channels for the two sconces that will sit above the fireplace.
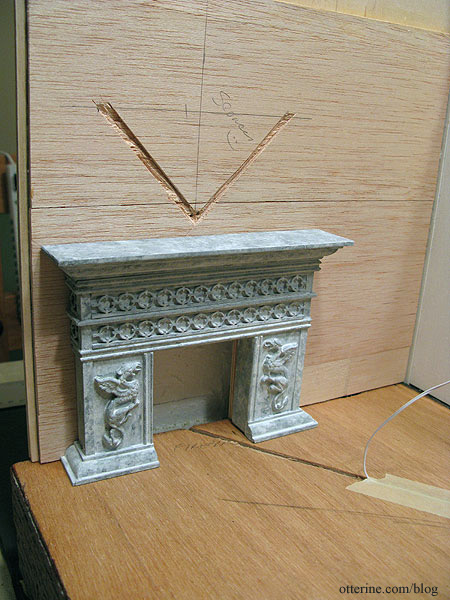
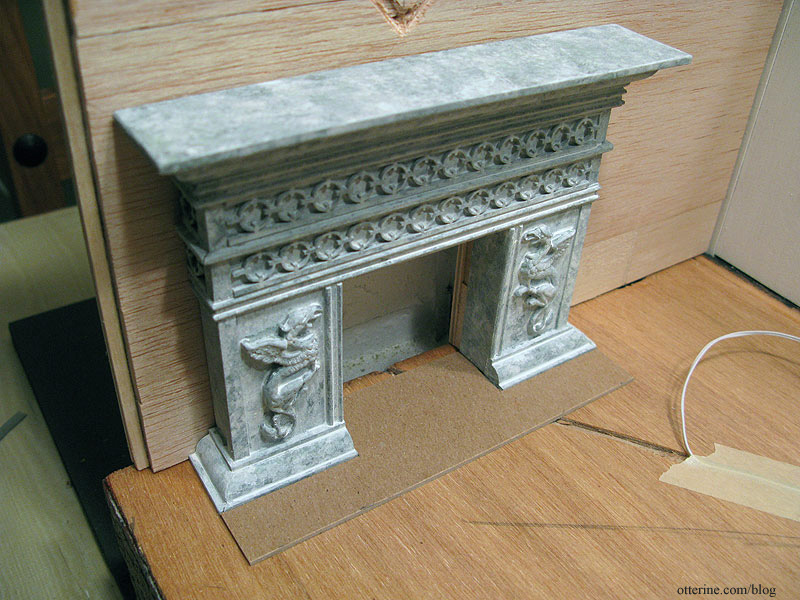
In order to know where to start the firebox, I had to make the hearth. I cut a piece of cardboard a little thicker than the parlor floor marquetry border.
Next up was building the firebox.
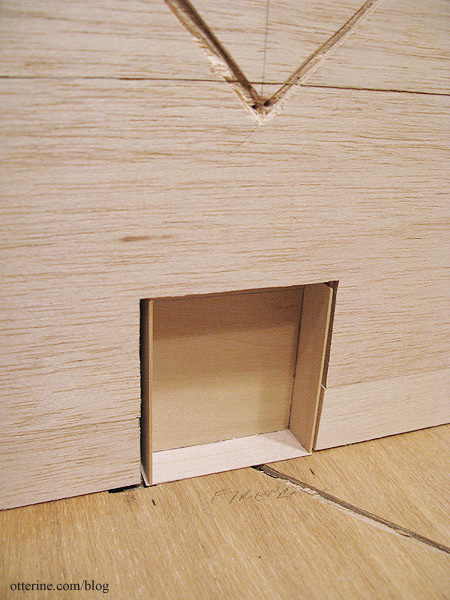
The firebox sits partially inside the chimney through a hole in the side wall.
I’m using a Phoenix Models firegrate and resin coal fire, so the box didn’t need to be very deep. The resin coal wire will exit out the back. I might end up installing a flickering unit for the fireplace, so I’ll determine the final wiring pattern later.
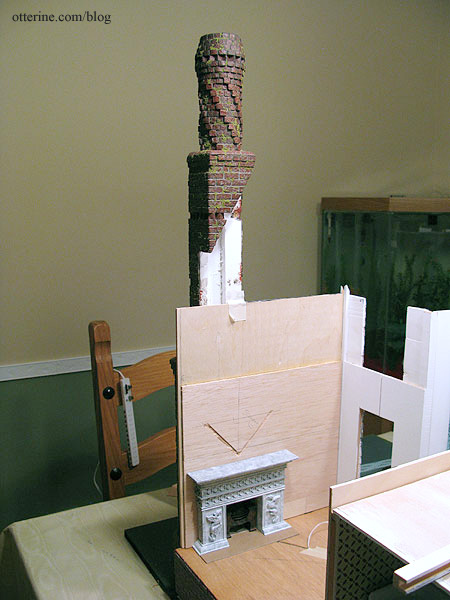
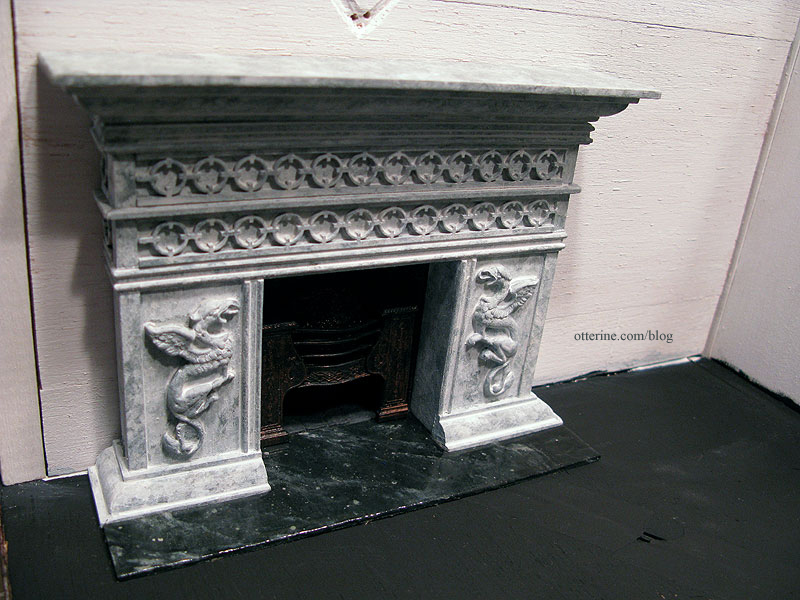
Here’s the whole set up in relation to the chimney. I don’t have the gable in place, but that’s why the back of the chimney is angled. You can really see how massive that chimney is…makes my massive fireplace look small.
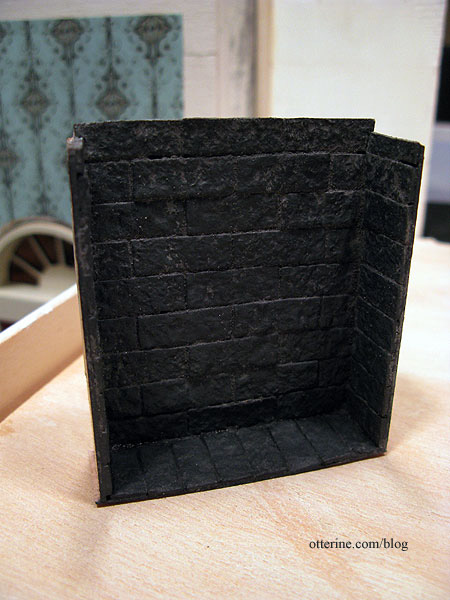
Here’s the firebox bricked, painted and grouted. It’s nice and dark from years of use.
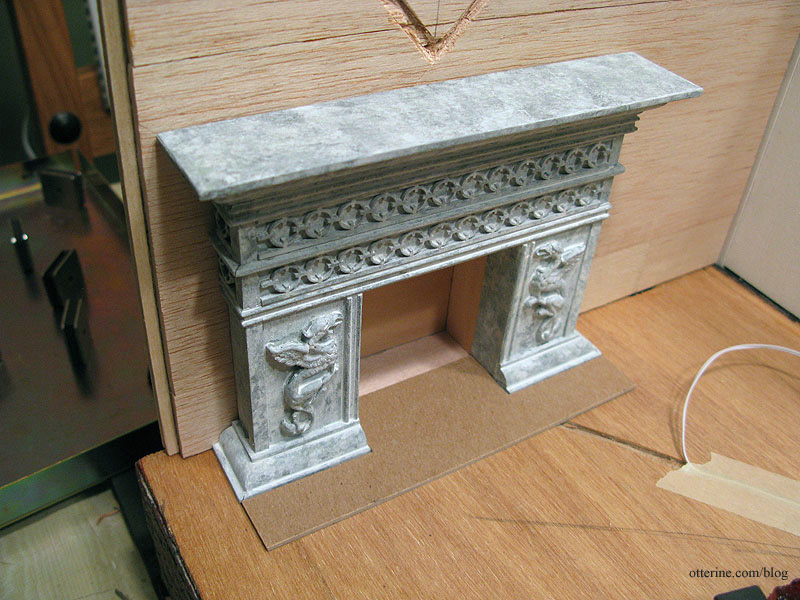
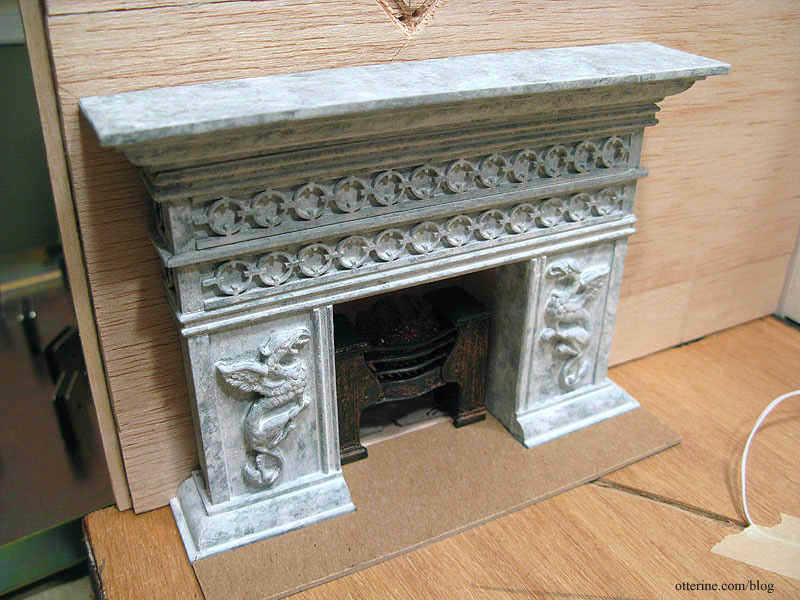
The fireplace and firebox aren’t glued in place yet, but here is how they fit together. The hearth will cover the area in front of the fireplace and into the opening to meet the firebox.
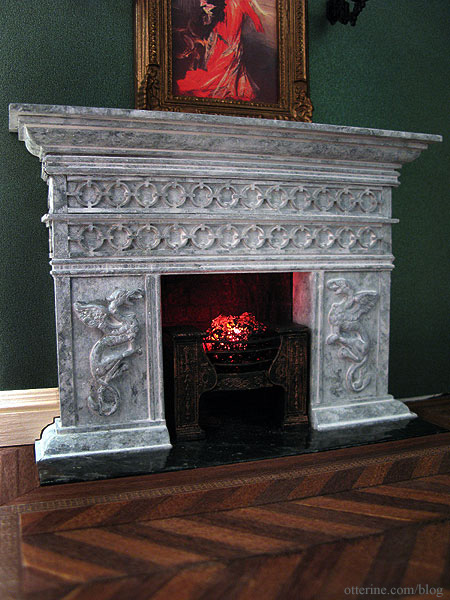
The next order of business for the parlor involved turning the cardboard hearth into marble. :D Don’t you just love alchemy?
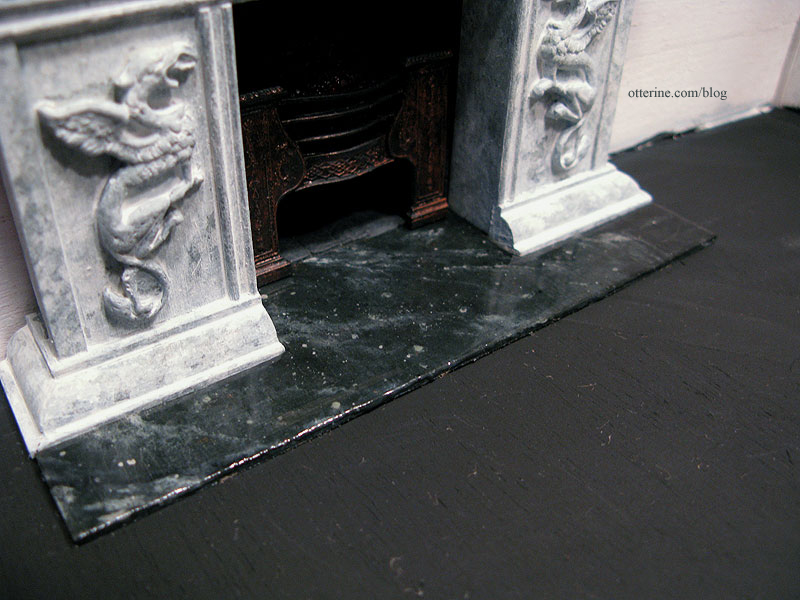
This technique is shown in the DVD by Master Miniaturists called Faux Finishes. I used a subtle dark green base with black, off-white and just a touch of metallic bronze. Once dry, I sealed with Triple Thick Glaze by Americana (so many coats I lost track). It’s by no means perfect upon close inspection, but it is rather convincing considering it started out as cardboard. :D Of course, all the painting and sealing swelled the cardboard a bit, so I had to trim it to fit again…that was scary.
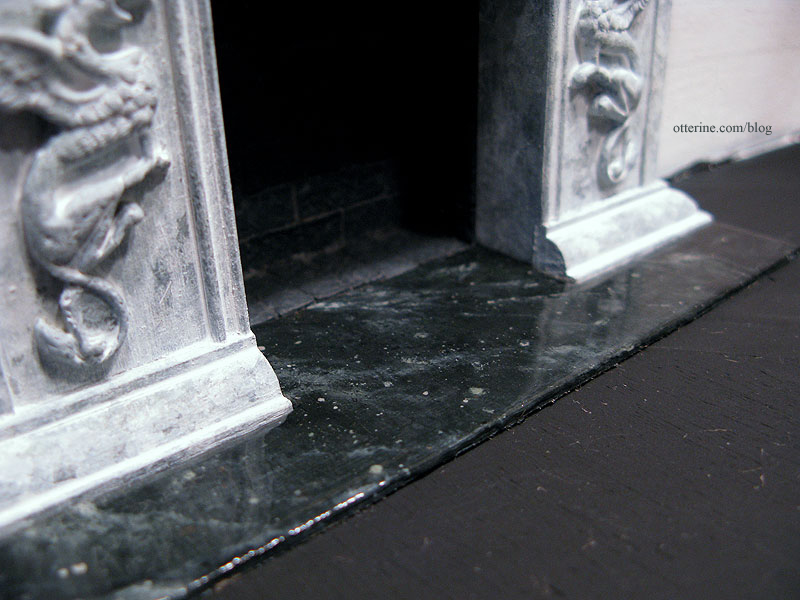
It is also only one element in a larger scene and likely won’t be the focus of the fireplace if the griffins have anything to say about it. I might also bring the hob grate forward a little more so it shows better.
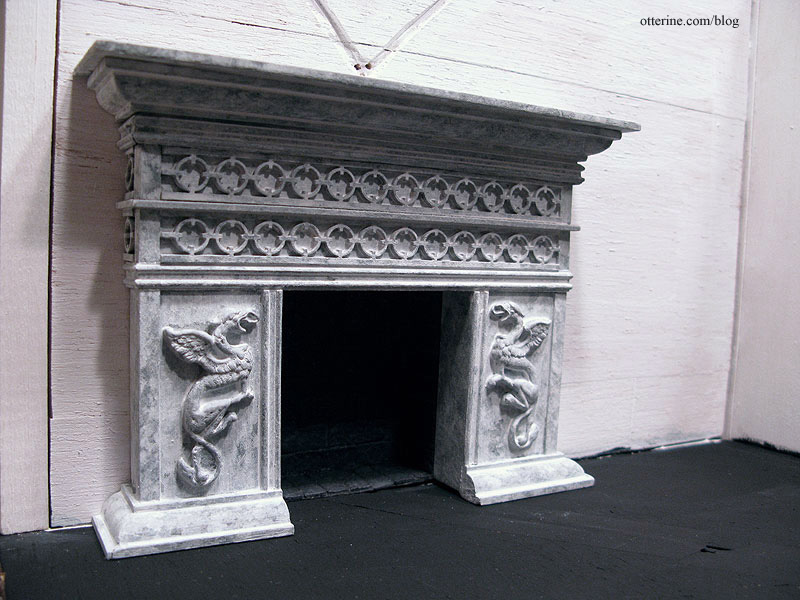
(Since the last photo, I’ve installed the wallpaper and flooring in the parlor, but I wanted to round out this post with the final detailing.) I tried out the red bulb and resin coals for the Phoenix parlor hob grate. I love the way it brings out the detailing in the fireplace, but it was a bit bright. I like the idea of sleepy embers in a warm, cozy room.
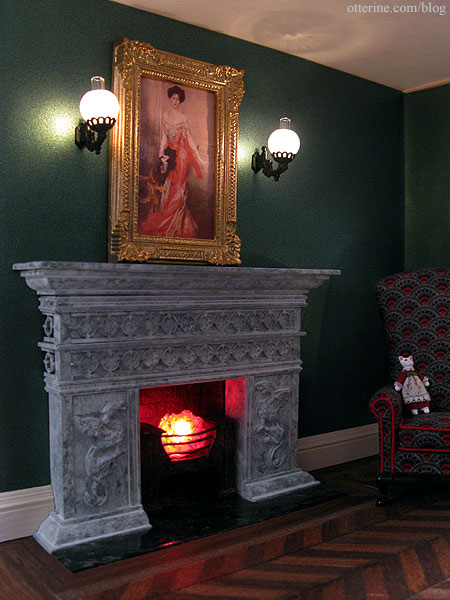
I used black acrylic paint to tone down the brightness of the resin coals. Having the light on while painting ensures you don’t overdo it and block out too much light.
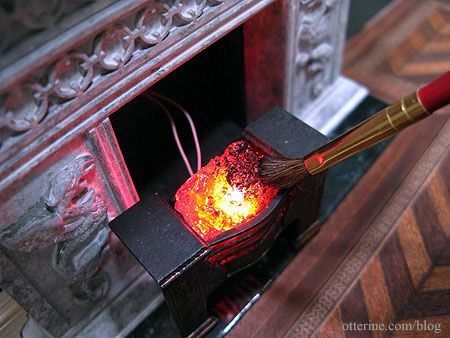
I coated the back and bottom completely so light would come only from the top and just a little from the front and sides. It’s much more realistic with a smoldering, warm glow.
Categories: The Haunted Heritage
January 29, 2012 | 0 commentsFancy parlor floor – part 1
I finally have all the supplies I need to make the parlor floor a reality. The marquetry border I am using is from eBay seller great-instruments and was advertised as being for guitar making. It is thicker than the flooring sheets, so I will need to build up the floor sheets to use with the marquetry strips.
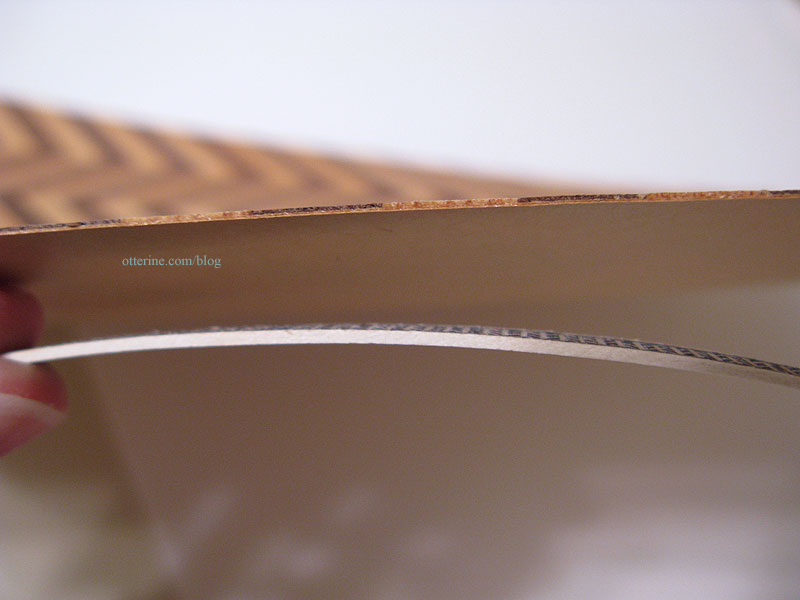
Bristol paper is 1/64″ thick and should do the trick as an underlayer for the wood sheets. I’ll work on that portion later.
This is will allow for a completely flush surface for the floor.
I usually finish my flooring before installation, so I decided to do that in this case as well even though I will be piecing it all together afterward. I just wanted to make sure I could get the coloration I was looking for before spending the time putting it all together. I also worried about getting glue on the wood surfaces which would make it harder to stain once in place.
Here are the three materials in their original states. I bought the herringbone sheets from Green Gables Dollhouse and the walnut flooring at a local mini show. These are pretty common and can be readily found from online resources.
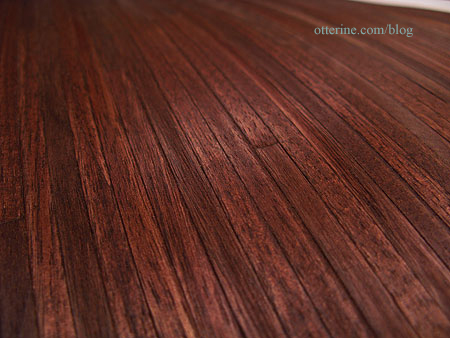
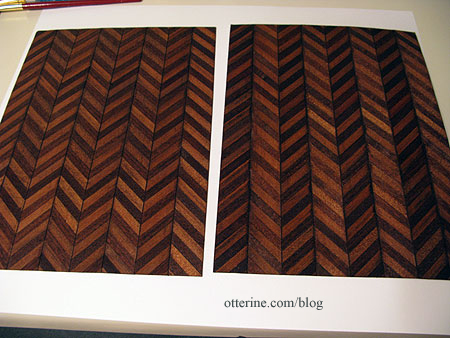
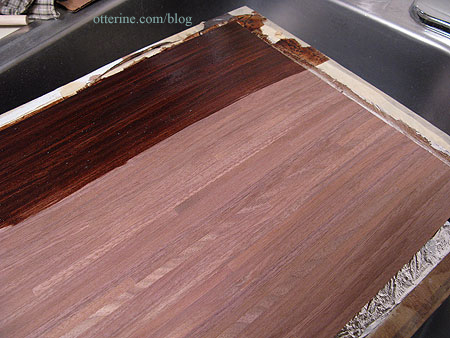
I started with the herringbone pieces first since that makes up the largest area and will set the overall tone of the room. I sanded the sheets thoroughly and then applied Minwax oil based stain in English Chestnut.
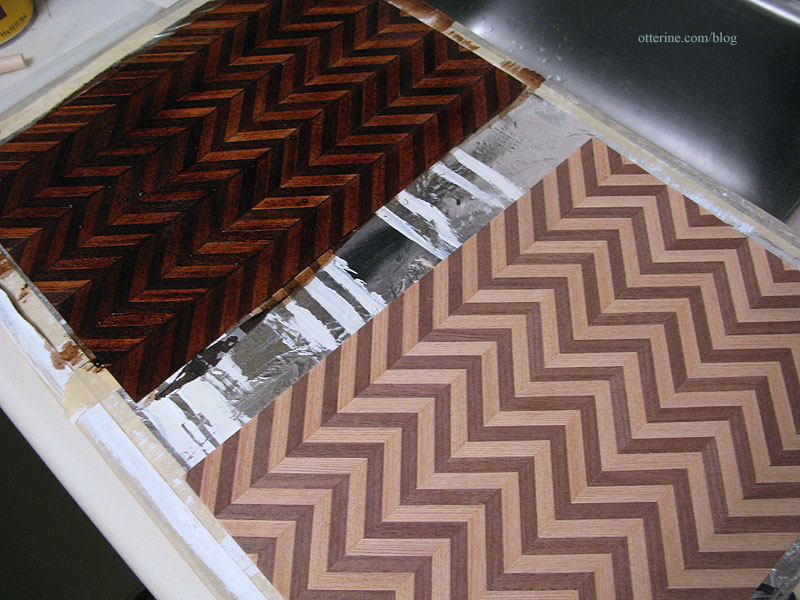
Wow, is this ever a lovely color!
I think it is going to look fabulous with the furnishings, though I’ll need to recheck it after letting it dry completely just in case the color changes as it dries.
Using the same Minwax English Chestnut as I did for the herringbone portion of the parlor floor, I stained the walnut flooring sheet to coordinate. Even though I will be cutting strips out, I made a full sheet to have consistent coloration. I can always use the leftovers for the balcony on the second floor.
Again, it turned out beautifully.
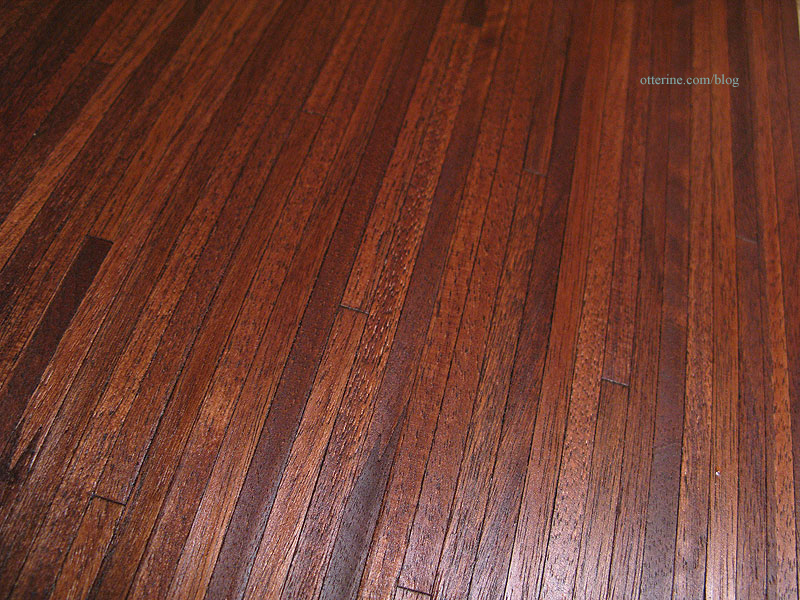
It will be the perfect frame for the herringbone center.
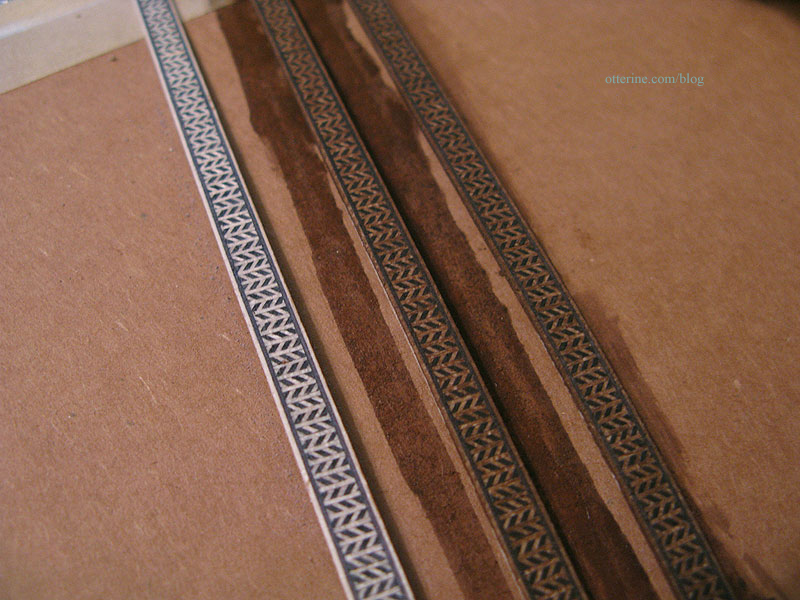
The next step in the floor finishing was staining the guitar marquetry. I wasn’t sure if the stain would take to it the same way as the flooring sheets, so I started with a small sample at the end using Minwax English Chestnut. It was too dark and lost all the beautiful marquetry detail. The original was too light, so I next tried IKEA antique stain. It warmed the color but wasn’t dark enough. So, I next tried an acrylic paint wash using Real Brown by Folk Art. It was a much better match.
Here are the results left to right.
The Real Brown warmed the marquetry without losing the detail. I like how some portions took more of the pigment; it makes it look like an old floor. :D
I bought three marquetry strips each 25″ in length and ended up using the paint was on all three (minus the small test portions I had cut). I again wanted consistent coloration and any leftovers could be used on the balcony on the second floor. It would be a nice way to tie in the floor upstairs with the fancy floor downstairs.
Now I just need to let it all dry while I finish the prep work in the parlor.
Categories: The Haunted Heritage
January 28, 2012 | 0 commentsHeritage – 1920s kitchen sink
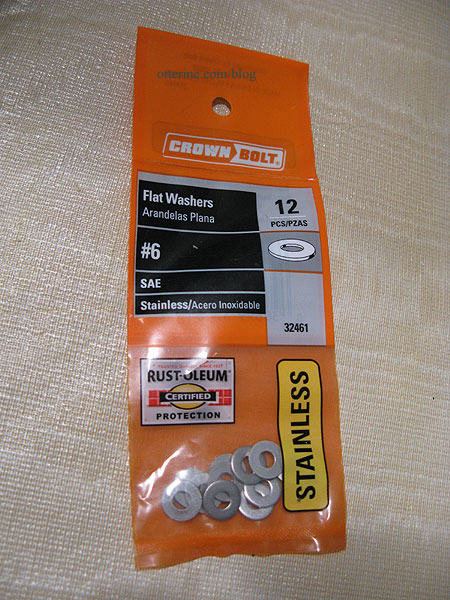
I love the 1920s porcelain Kohler kitchen sink by Jacqueline Kerr Deiber that I bought for the Heritage. But, the legs are shorter than the drain pipe, making for a rather wobbly sink that likes to tip forward…and fall down. :[
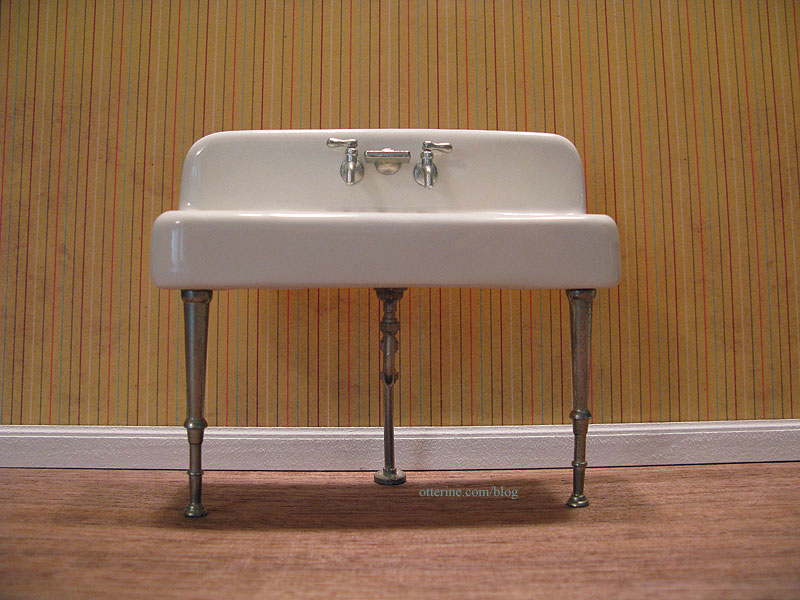
To fix this problem I bought a bag of washers from Home Depot.
I attached one washer to the sink.
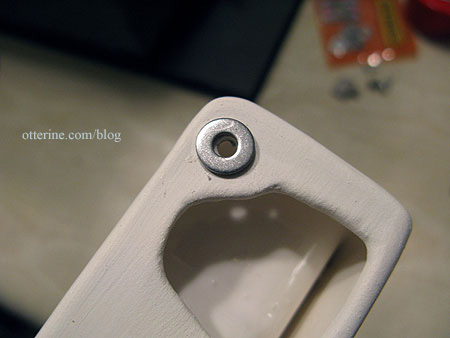
I then glued the leg into the hole. The washer blends in perfectly with the leg so it’s not noticeable as an extra piece.

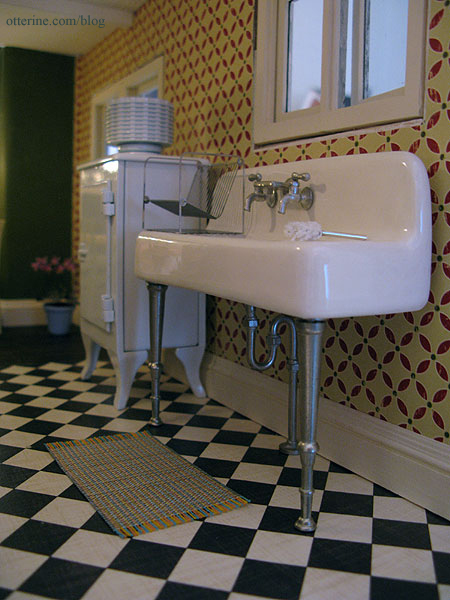
Now the sink can stand up straight. :]
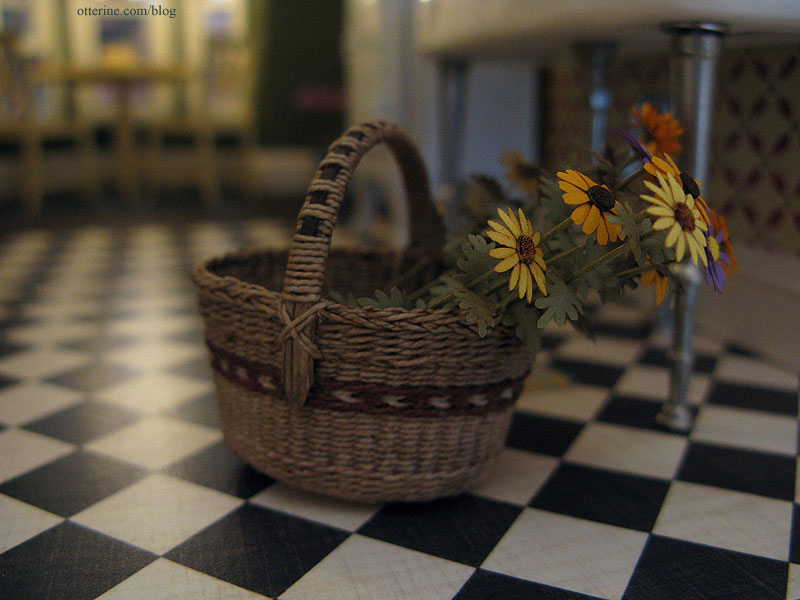
I received a beautiful basket from Lidi at Basketcase Miniatures. We did a post-holiday swap. :D
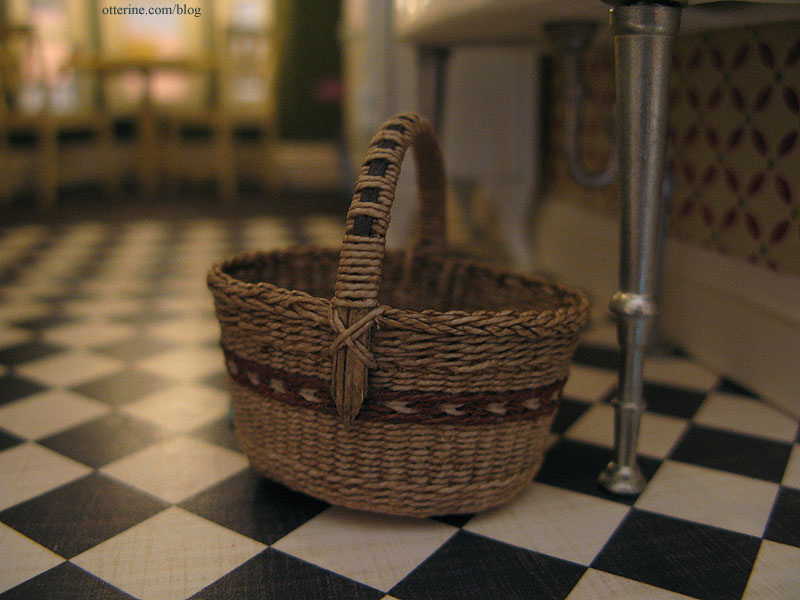
It’s so beautifully made that I just had to spend some of my mini time today playing instead of building.
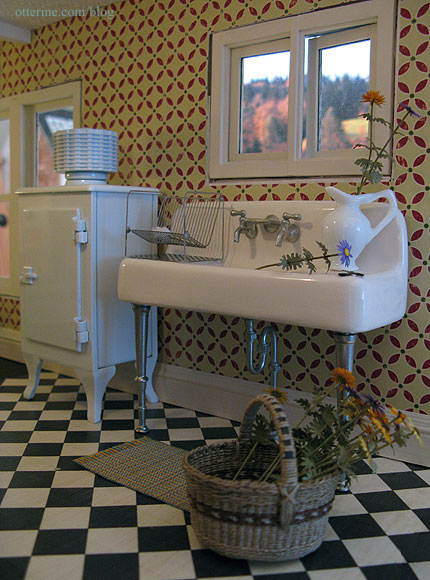
Looks like grandma has been in her garden. She picked some beautiful flowers (these were made from Bonnie Lavish kits). I love this basket!
Categories: The Haunted Heritage
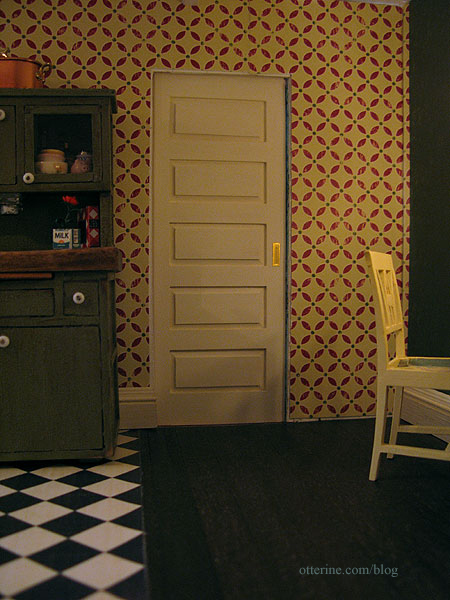
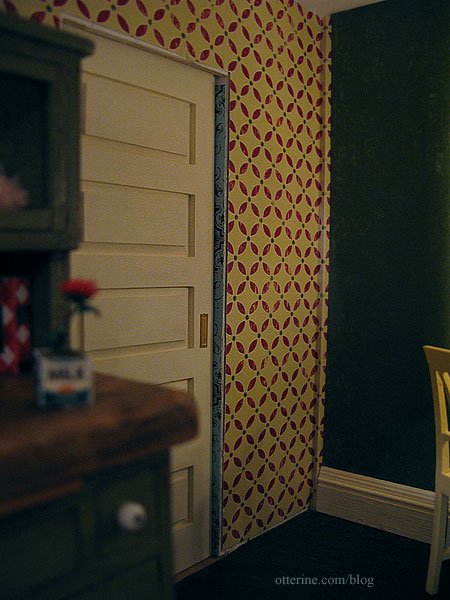
January 21, 2012 | 0 commentsFoyer to kitchen pocket door, part 3
Continuing work on the pocket door. The lever I built to open and close the pocket door is great and all for my omnipotent hands, but the mini residents need to be able to operate the door as well. ;] Putting a doorknob on it doesn’t really work since it would keep hitting the door frame. What I needed was pocket door hardware.
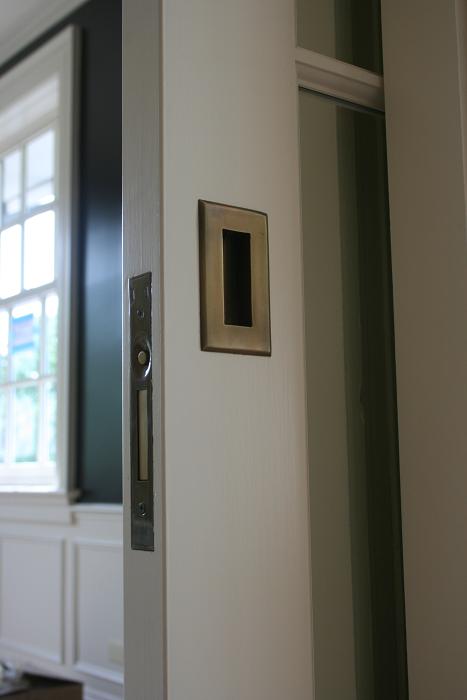
image from Wilmette Hardware Dollhouse hardware is limited to begin with, so finding scale replicas was out of the question. I liked Kathie’s idea of using paper printouts of beautiful vintage hardware, but I had another idea. Enter two 1:24 scale letter boxes, one for each side of the door. :D This is not the first time I’ve used half scale items in my full scale builds, and it won’t be the last! A special thanks to Keli for helping me track them down at The Dolls House Mall. They are a very good approximation of the original.
I’m not usually fond of brass, but considering this is a vintage house it didn’t bother me so much.
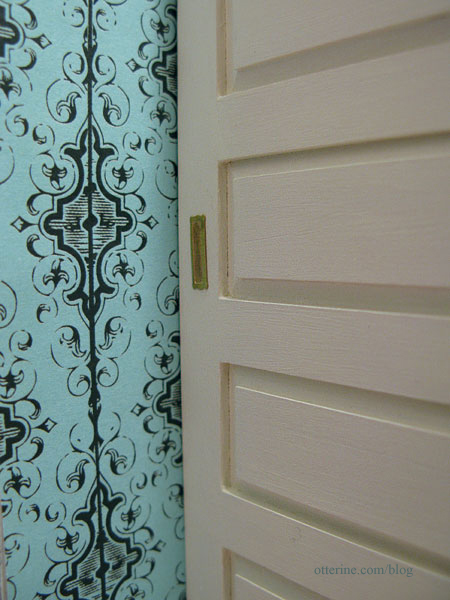
Even though they are glued to the surface and not set in, they don’t interfere with the functionality of the door since they are so thin. Once I get the rest of door and baseboard trims in place, I think they will look even more like the real thing. :D
Part 4 here.
Categories: The Haunted Heritage
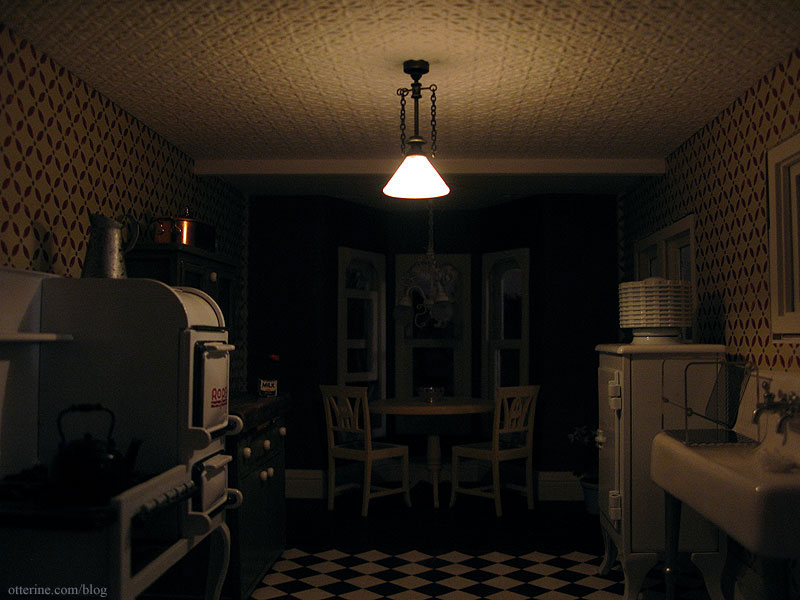
January 19, 2012 | 0 commentsHeritage – kitchen lighting
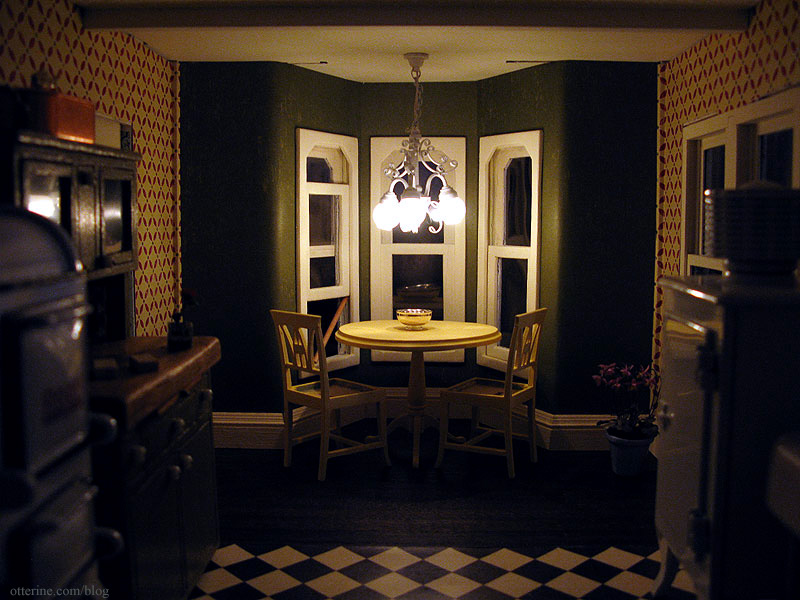
I picked up this white chandelier from Green Gables Dollhouse. I love this fixture. I used one in black for the Newport dining area. The white gives it a wonderful vintage feel without being too fussy.
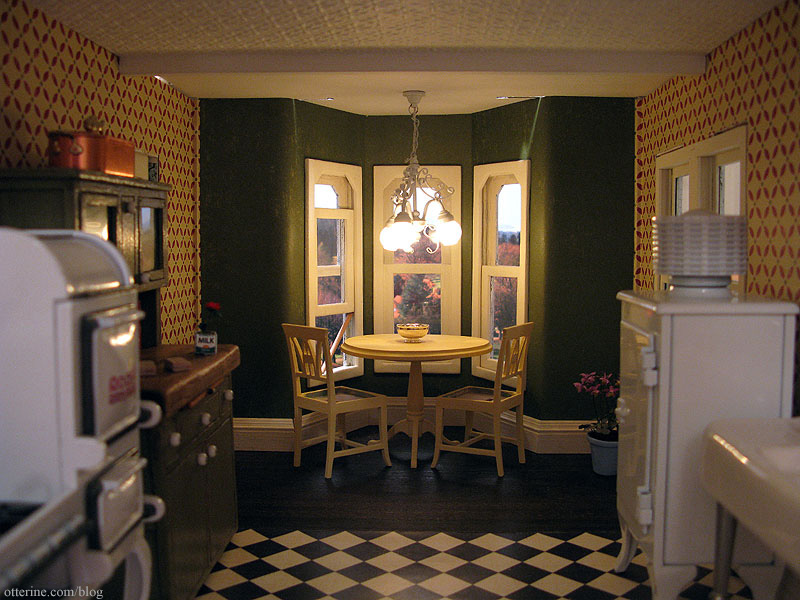
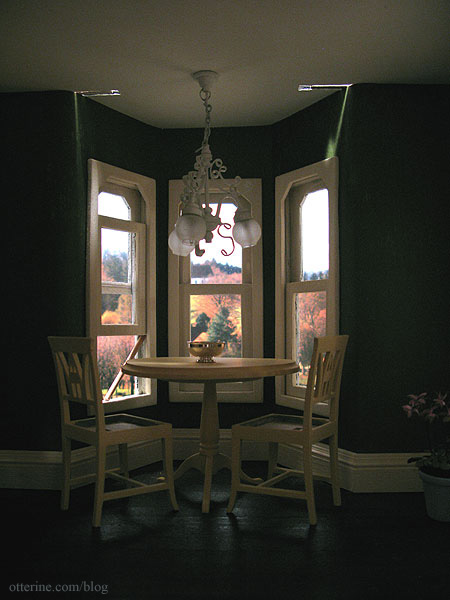
The light isn’t permanently attached. Looks like I have the positioning a little crooked. I had to shorten the chain a little since this is a shorter ceiling height than the light must be intended for. I will be covering the gaps between the ceiling and walls, as well as the holes at the bay window opening.
The light gives off the perfect amount of warm light to keep from losing the details I’m fussing over in the deep room. The silver Revere Bowl by Clare Bell Brass also came from Green Gables Dollhouse. I need to make some fruit for it.
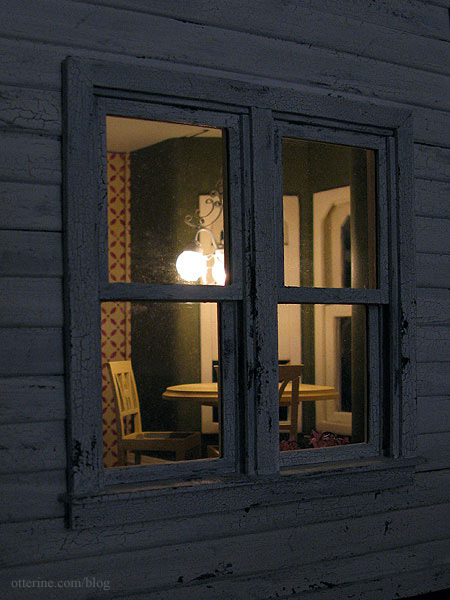
As I was sitting across the room writing this blog post, I noticed the light through the window and had to go back for one more photo.
For the cooking area, I treated myself to a lovely Ray Storey pendant gas light. If I had had a larger budget, I would have bought the matching 3-arm down light for the dining table. But, the white chandelier is still a beautiful piece.
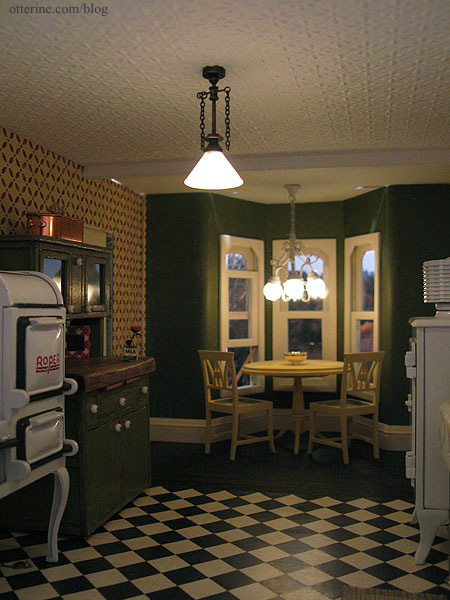
The gas light is very well made (though I neglected to straighten the top of the chain in this photo).
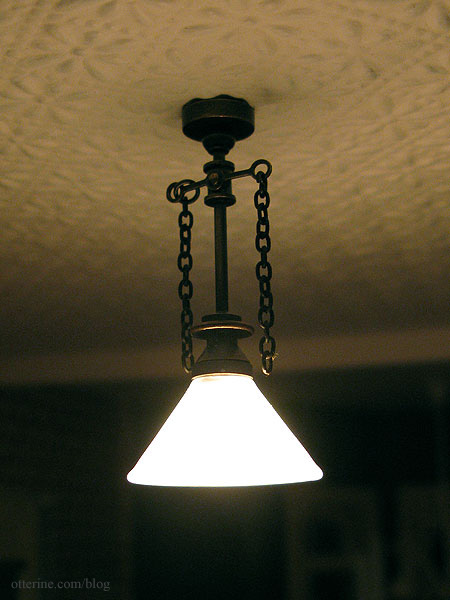
I love the way it highlights the textured ceiling. It’s the perfect vintage touch.

I don’t suppose in reality this dim fixture would do much good in the kitchen for nighttime cooking, but it casts such a wonderfully soft light over this part of the room.
Categories: The Haunted Heritage
January 18, 2012 | 0 comments3 Blind Mice show – January 2012
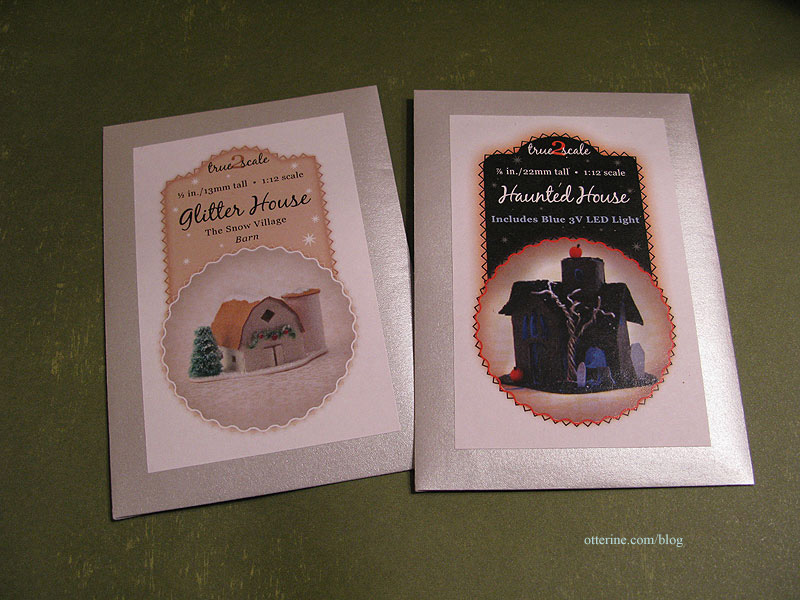
I am lucky to live in an area that has a mini show of some sort every few months as well as the larger Bishop International Show in April every year. This weekend, I attended the 3 Blind Mice show. :]
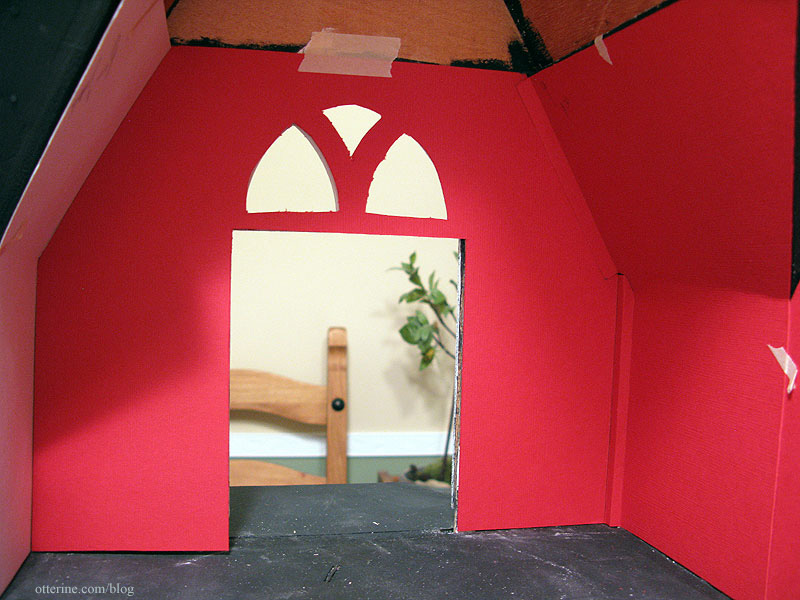
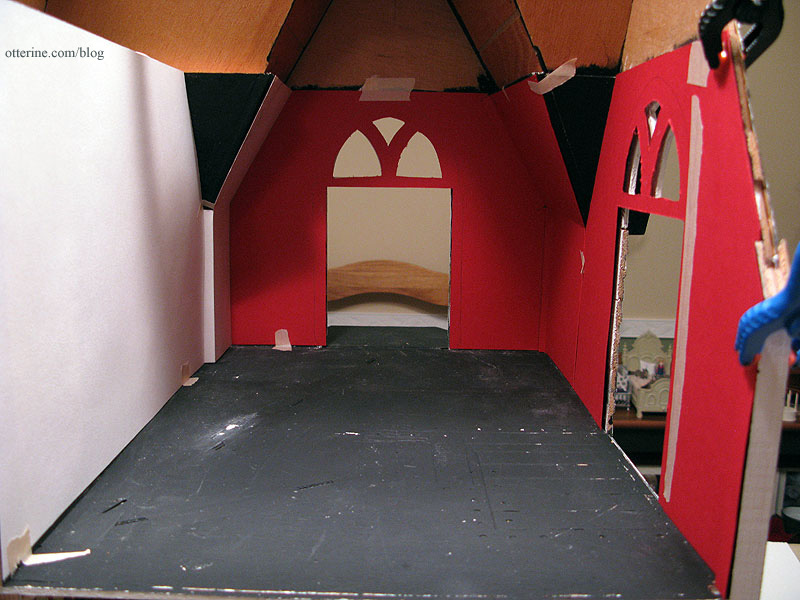
I met Carol of True 2 Scale. It was fun putting a face to a name. :D You may recall I made her milk carton flower kit for the Heritage. I picked up two of her glitter house kits – the Haunted House and the Barn. She has amazing kits, so be sure to check out her website! I already have her florist boxes and a cake box kit, though I haven’t worked with those just yet.
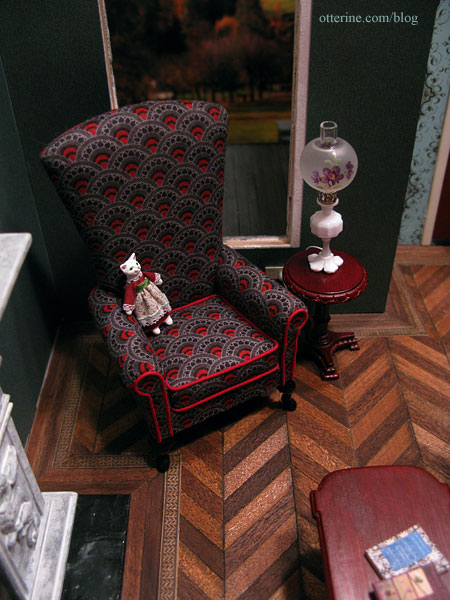
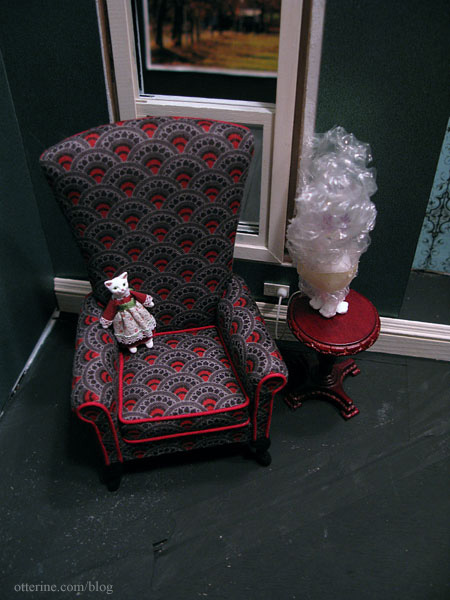
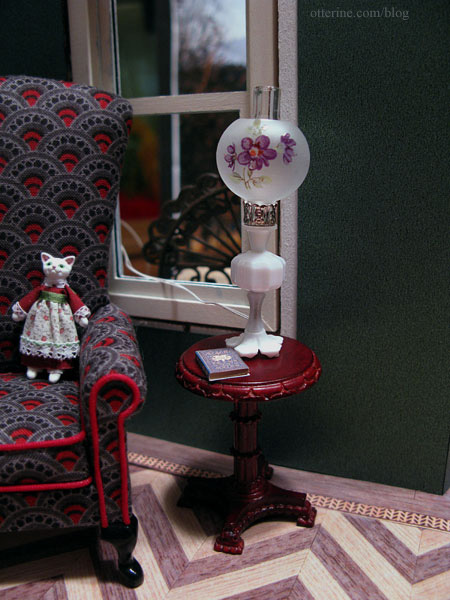
I picked up a small round side table for the Heritage parlor. I was going to make something for this space, but the color and style work well for the setting.
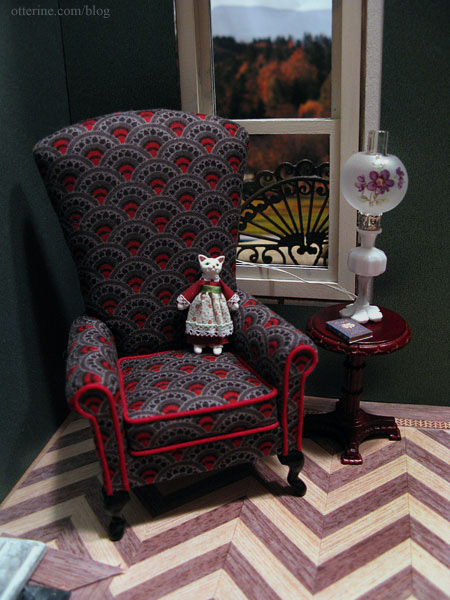
I like that it coordinates but doesn’t necessarily match the style of the coffee table. Grandma has eclectic taste like me! And, this one is the right color to start. A good buy, I must say!
The Chrysolite table lamp I bought previously fits perfectly!
I hadn’t planned to buy much since I have most of what I need for my current project, but I did pick up an online order from Missy at Green Gables Dollhouse. I figured it was just as easy to pick it up in person at the show as to have her ship it, and we got to meet in person after talking online and on the phone a number of times. :D You’ll see those items in future posts.
Categories: Miniature Shows and Shops, The Haunted Heritage
January 14, 2012 | 0 comments


NOTE: All content on otterine.com is copyrighted and may not be reproduced in part or in whole. It takes a lot of time and effort to write and photograph for my blog. Please ask permission before reproducing any of my content. (More on copyright)

Categories:
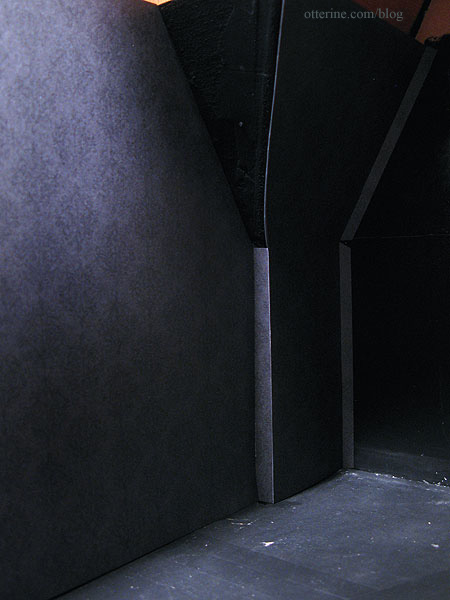
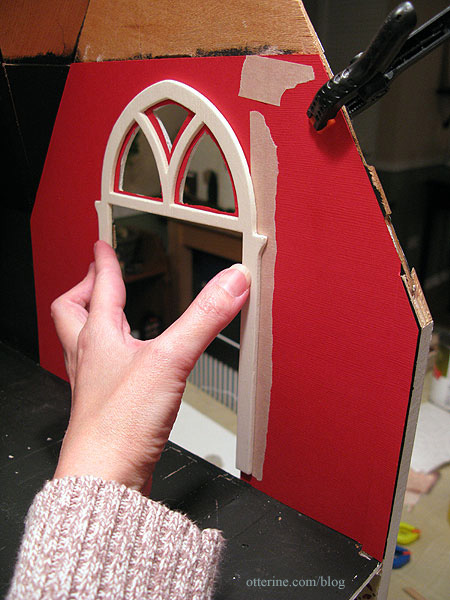
Heritage – bedroom wallpaper, part 2
Continuing work on the bedroom wallpaper. Time for a test run with photocopies of the original scrapbook paper – Out of Time by Recollections.
Using the original plain paper templates, I cut the photocopies and fit the pieces into the room. The two angled walls at the front of the room need taller pieces than the straight wall templates.
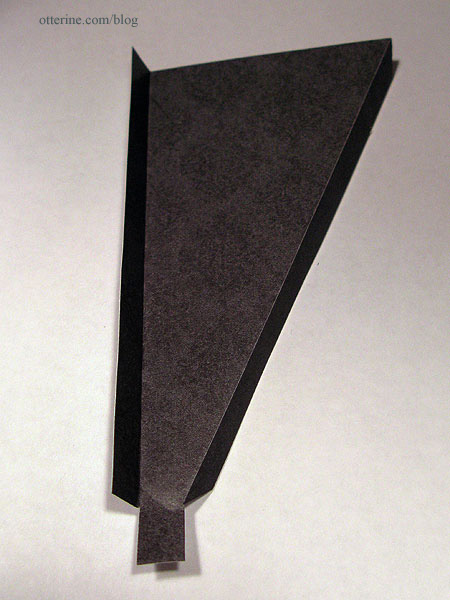
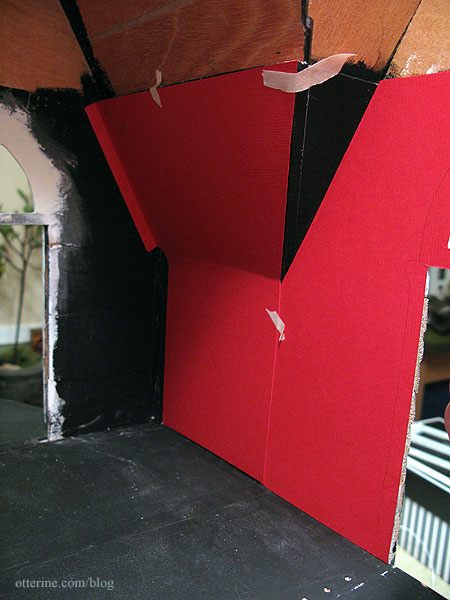
I cut the two angled templates first, using only one sheet of scrapbook paper, aligning the top of the templates with the top edge of the scrapbook paper copy.
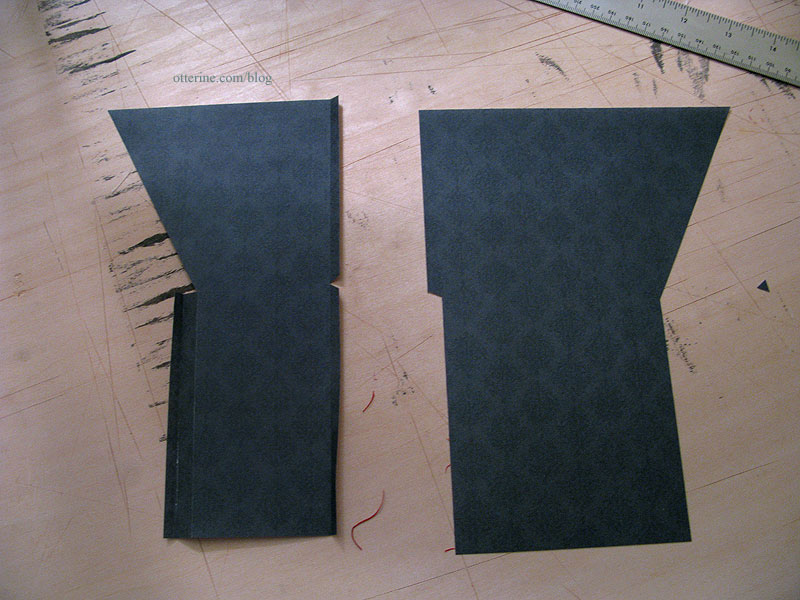
I lined up the next full sheet of paper with the left side angled piece. I had to cut about 1/4″ from the side of the full sheet to get the pattern to match.
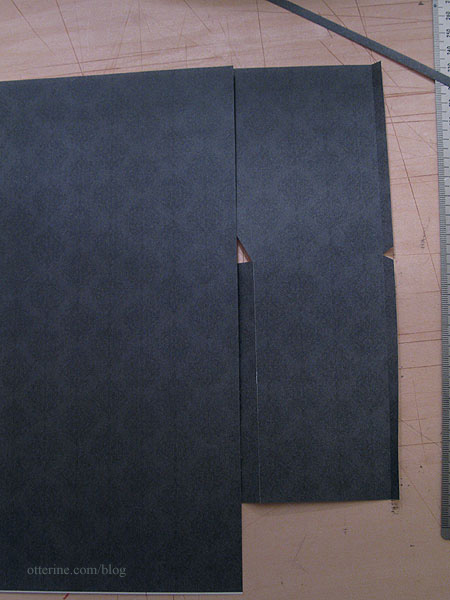
I taped the long wall template onto the printed paper copy along the bottom since this area will be cut off. The excess at the top will be removed as well, but I didn’t want to risk tearing the paper on that edge. Baseboard trim will cover any mishaps along the bottom.
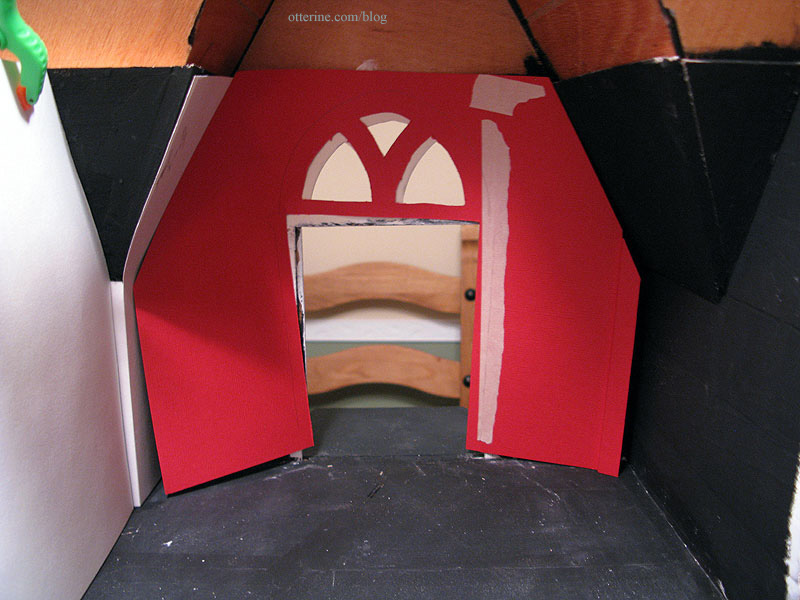
Since there is a door opening at the back end of this wall and the door trim will cover the uppermost part of the wall above the door, I just split this long piece through the middle of the doorway. For now, I will leave the two pieces whole without the door opening since larger pieces are easier to work with.
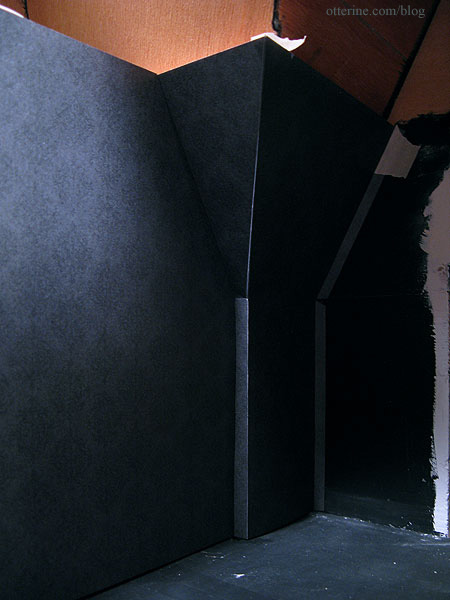
The two pieces fit well.
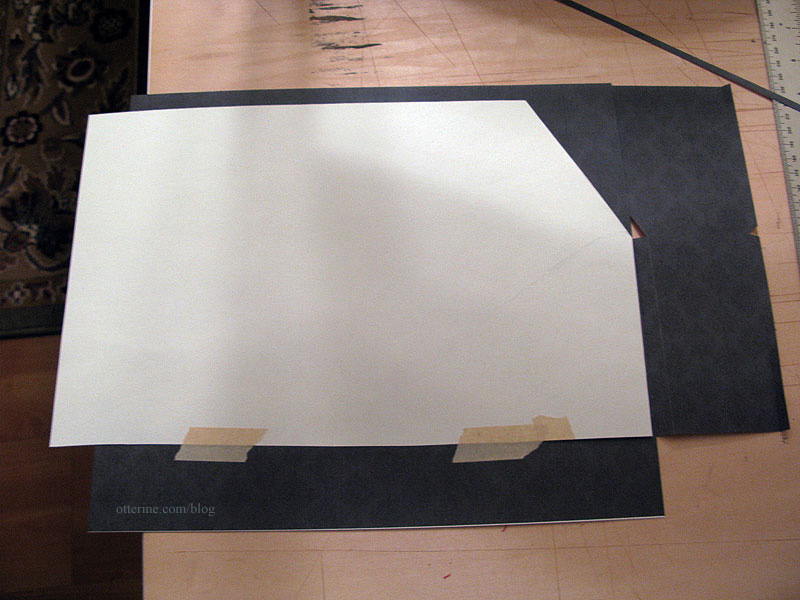
I cut the right side window wall template next. It lines up well with its adjacent angle wall piece, but I couldn’t take a photo of the pieces in place since the paper kept falling down.
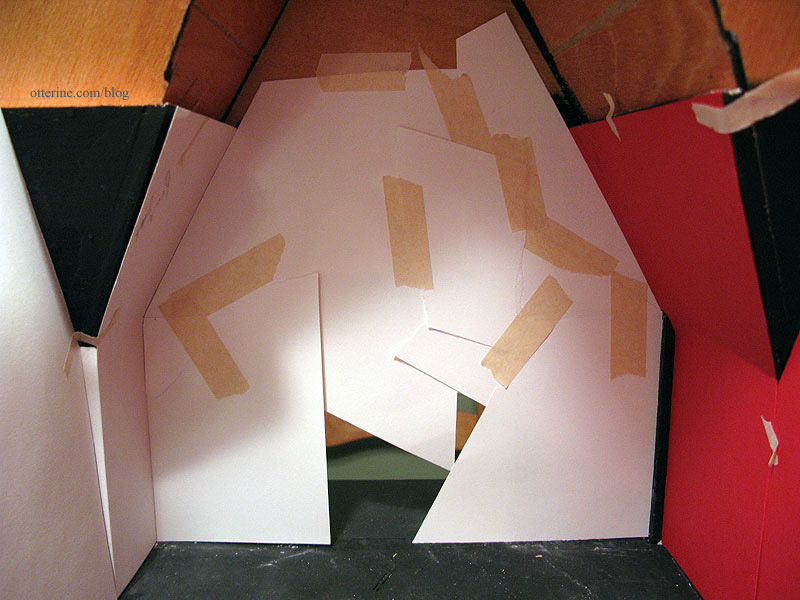
I used the waste piece from the large window opening to cut the left triangle piece that completes that wall.
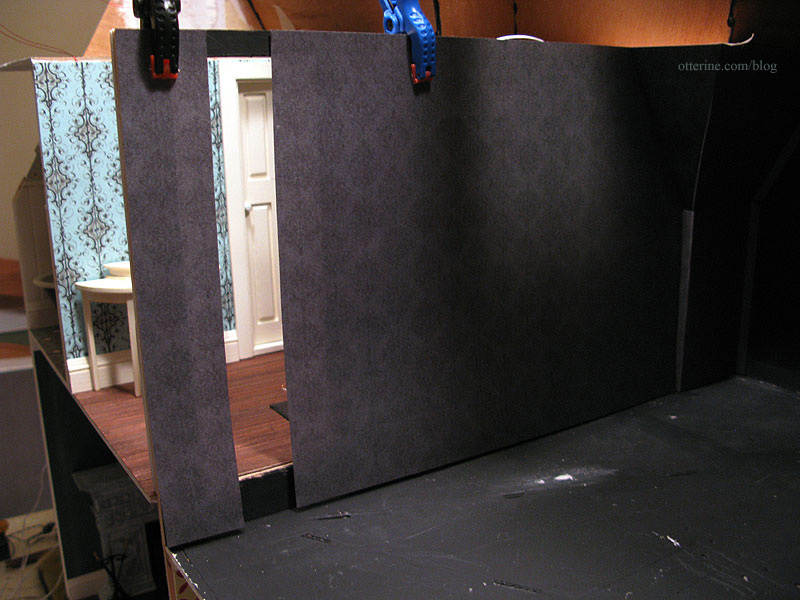
It all works! Hooray! Unlike solid cardstock papers, printed papers often have a white paper core. When you score along the paper to make a crisp edge, the white core can show. I will have to use a pencil or marker to darken these edges using scraps to test out what method will work best.
I used another waste piece to make the other triangle piece for the right wall. Again, no picture of it in place.
As noted, the two side angled pieces had to be cut from one sheet due to my limited paper supply. Since it wouldn’t be possible to have the pattern continue along the front wall and match both side walls, I decided to center the front window wall template onto its own sheet of printed paper. Visually, it will make sense and, as long as the pattern flows horizontally, you shouldn’t be able to notice the pattern doesn’t match vertically in the corners.

Of course, I’m going through all this trouble for a paper that is so dark it’s hard to even tell there’s a pattern. You can see it more readily with the paper copies since I upped the contrast to see what I was doing. :D Nevertheless, it’s great practice for other patterned papers, and I wasn’t sure how it would work over all without this test run.
I used the equivalent of four sheets of scrapbook paper, and I have five originals. This gives me a tiny bit of breathing room in case something goes wrong in the actual paper application.
With all adjustments made and these cut pieces showing the best possible fit and pattern placement, I will use these secondary templates to cut the final scrapbook paper pieces.
Continued here.
Categories: The Haunted Heritage
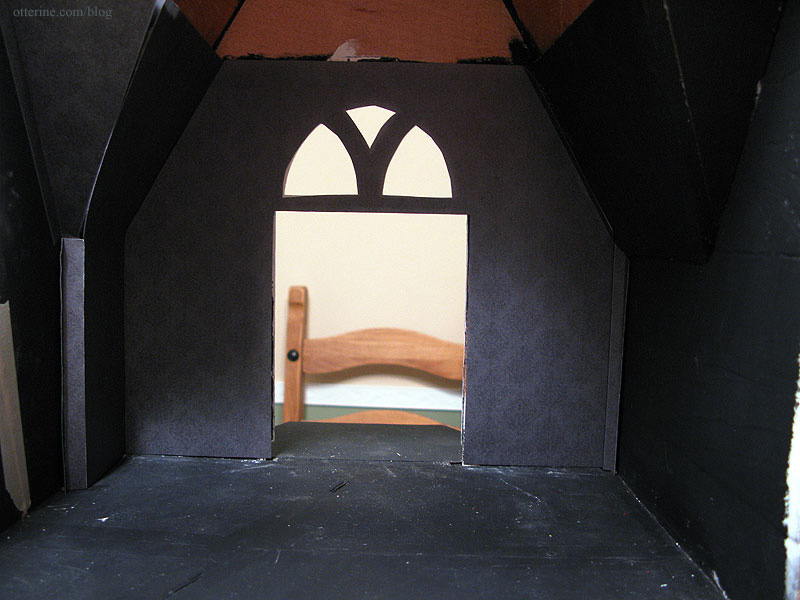
November 23, 2012 | 0 commentsGrandma’s comfy chair
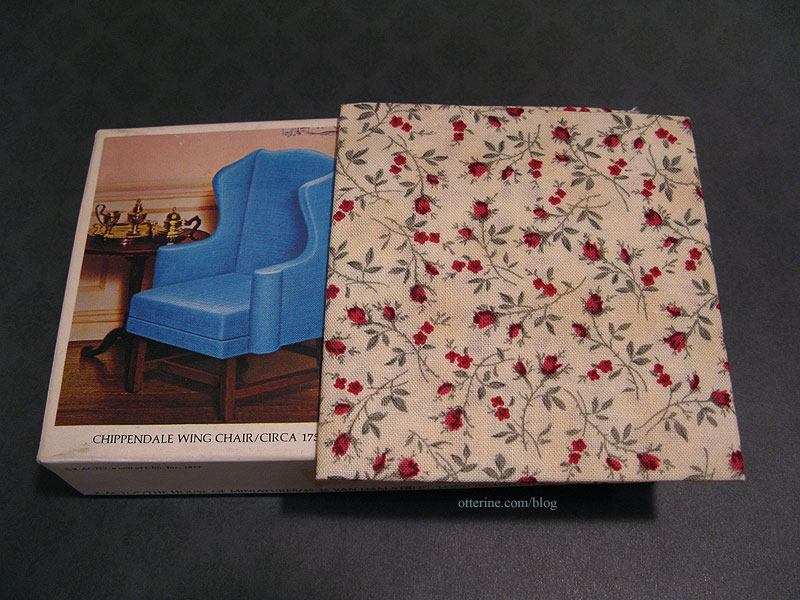
I’ve been shopping for a comfy chair for the bedroom, something light in color with a tall back. I had an ah-ha moment when I remembered I had a House of Miniatures Chippendale Wing Chair kit. This was part of a miniatures lot I bought, though I never thought I would end up using this kit.
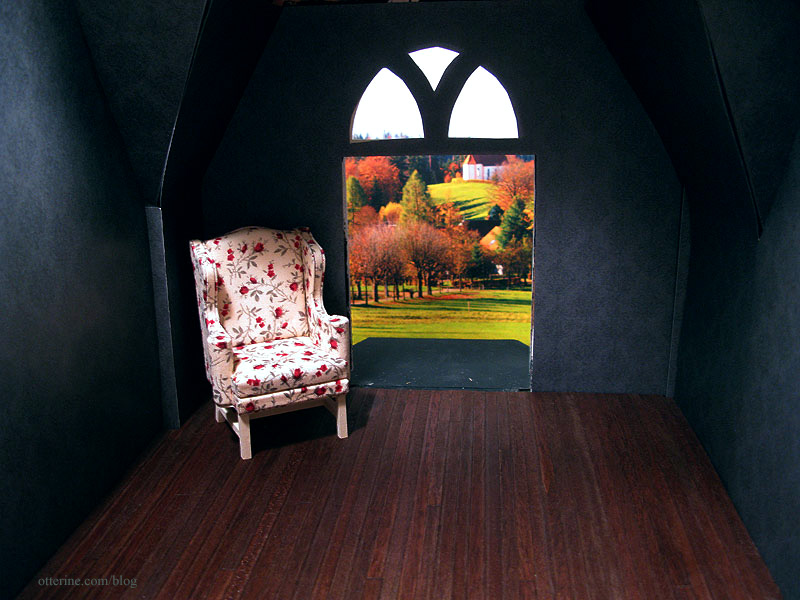
I bought this fabric some time ago, too (don’t recall from where – likely a local mini show). I love the fabric, but it’s not my usual style…it’s rather vintage. Perfect!
So, I’m going to give it a shot. If it ends up being a disaster, it can always go in the attic. Of course, an old wobbly, threadbare chair would fit so well in the Heritage.
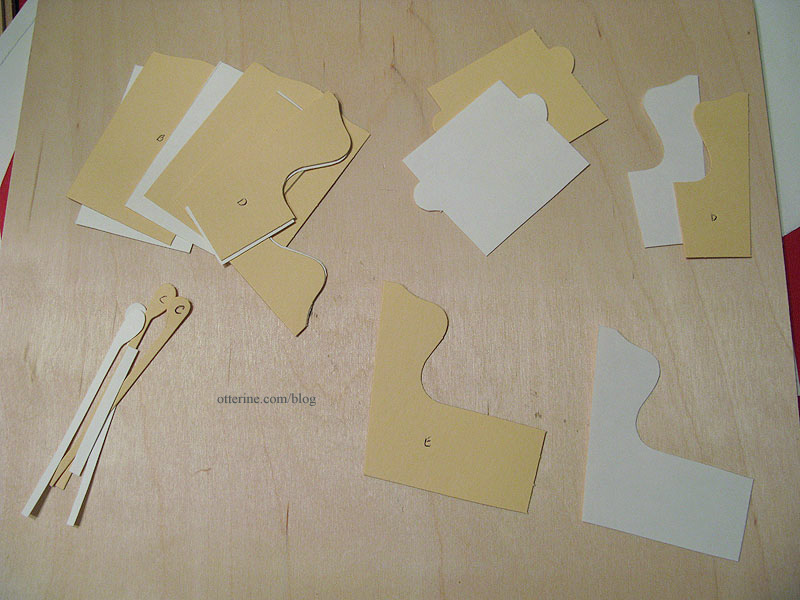
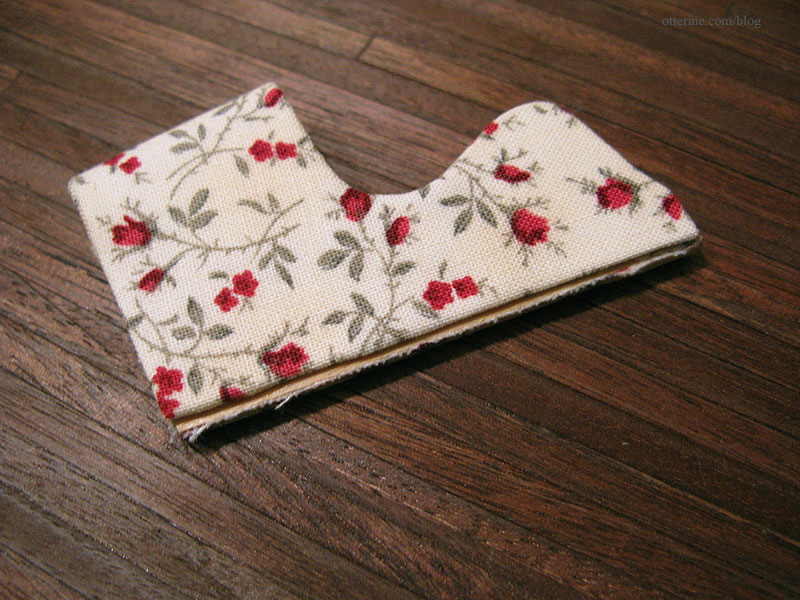
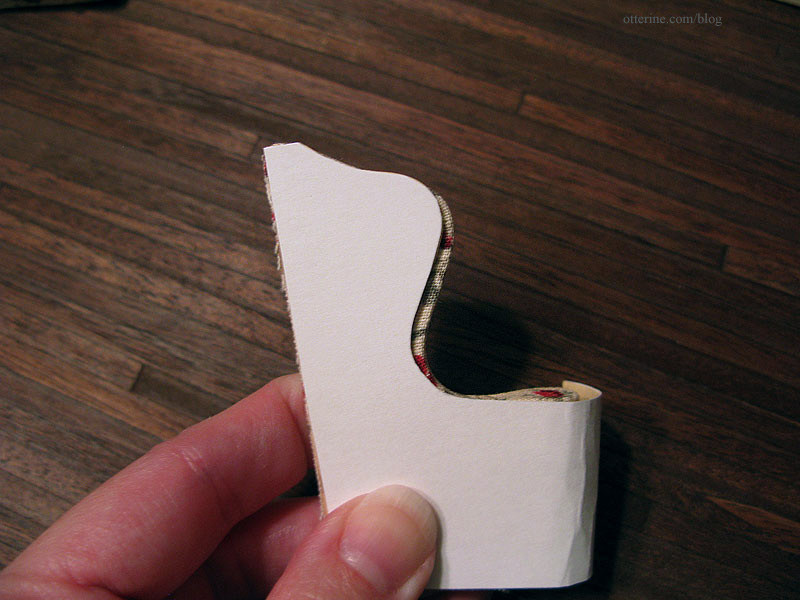
The kit was in near perfect condition, but I needed to make some adjustments. First, the card supplied with the kit is manila-folder type cardstock. It was in usable condition, but it made the fabric appear more yellow when placed underneath. I wanted the chair to be more of a true ivory like the original fabric.
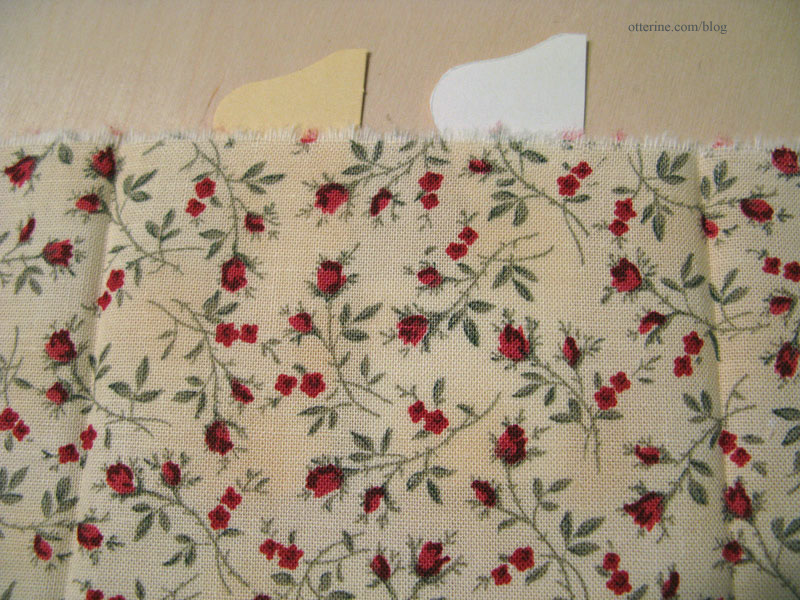
I cut new pieces from some thin white cardboard. It was so thin, I decided to just glue it to the original pattern pieces and use them together. Here they are before gluing.
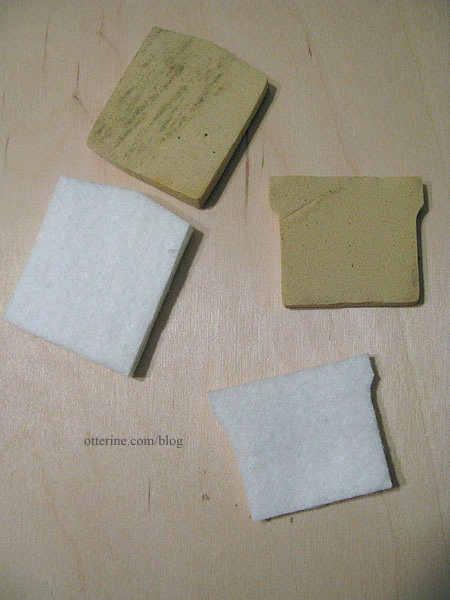
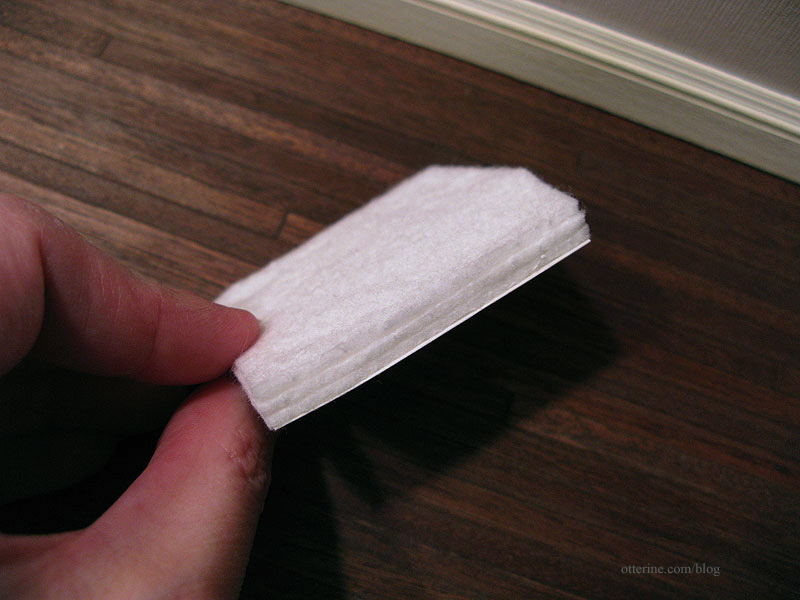
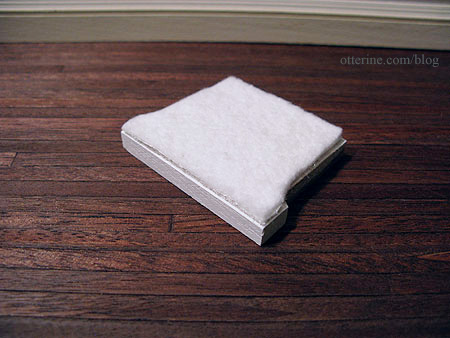
The foam inserts were in better condition than I had expected, but I still didn’t want to risk using them. They were starting to degrade and would probably break down completely over time. I cut layers of millinery batting to replace these foam pieces.
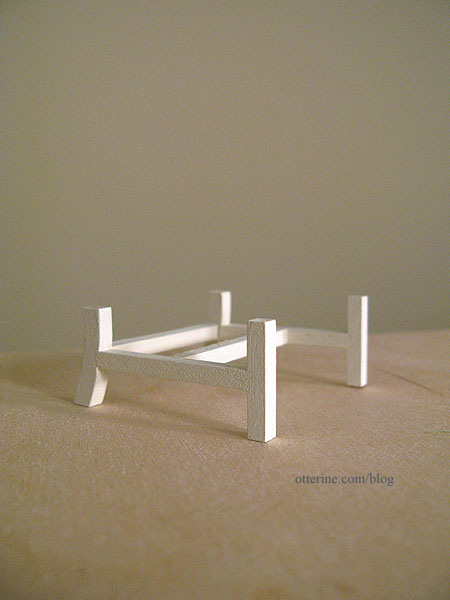
I painted the wood foundation Tapioca by Folk Art. I think it will complement the fabric well. I also didn’t want the legs to be lost in a dark room and make the chair seem like it was floating in air. :D
I found the instructions for this kit to be well thought out and adequately descriptive. The illustrations were helpful and made putting the chair together relatively simple. I just followed step by step, and the chair came to life.
Let’s not confuse matters and say it was easy, but simple in the straightforward approach the assembly follows. I did make a few modifications to the directions, and these might not make sense unless you are making this exact kit. I would not have thought to do these things if I hadn’t made the Millie August sofa kit previously. I am so glad I ran into that kit. It taught me a lot of tips and tricks for upholstering mini furniture. Unless otherwise noted, I followed the directions exactly.
In Step 3, the rounded moldings were longer than the chair sides. I glued them so the tops were flush and then sanded the excess from the bottom once the glue was dry. This might not be an issue for all kits.
In Step 8, you are to wrap the fabric around the card piece, including the bottom and back edges. I left these loose and wrapped only the curved front edge. I then glued the card to the side and wrapped the back and bottom edges around the wood, cutting flush with the opposite side. Otherwise, I would risk the fabric pieces not matching up with the back and seat coverings added later, therefore leaving gaps. (Doing this actually saved the piece in the end.)
In Step 9, I wrapped all edges of the card except those around the bottom of the rolled edge.
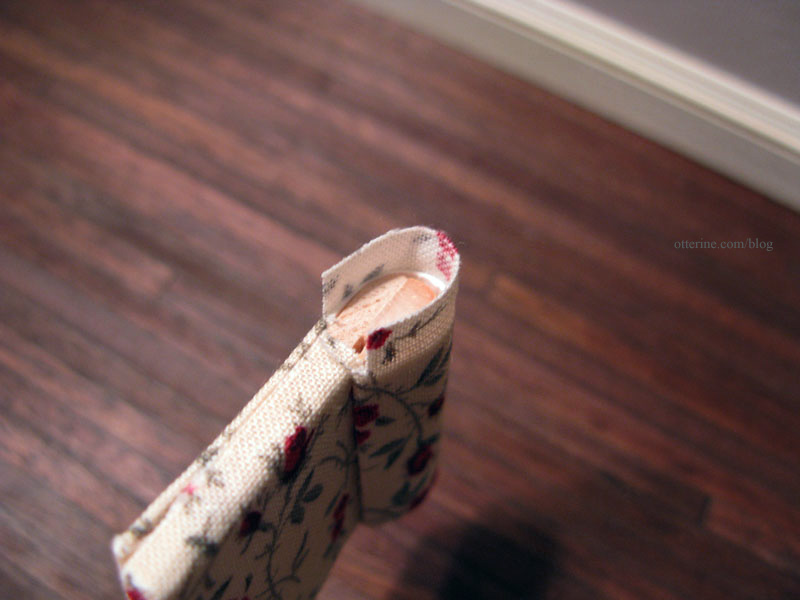
I again wrapped these ends under the wood on the bottom. (This did end up being a little bulky in the end, but I would have had gaps without doing it so it was worth it.)
Any gaps along the back or bottom edges for Step 9 won’t matter since these are joined on the inside with the back and seat to form the chair.
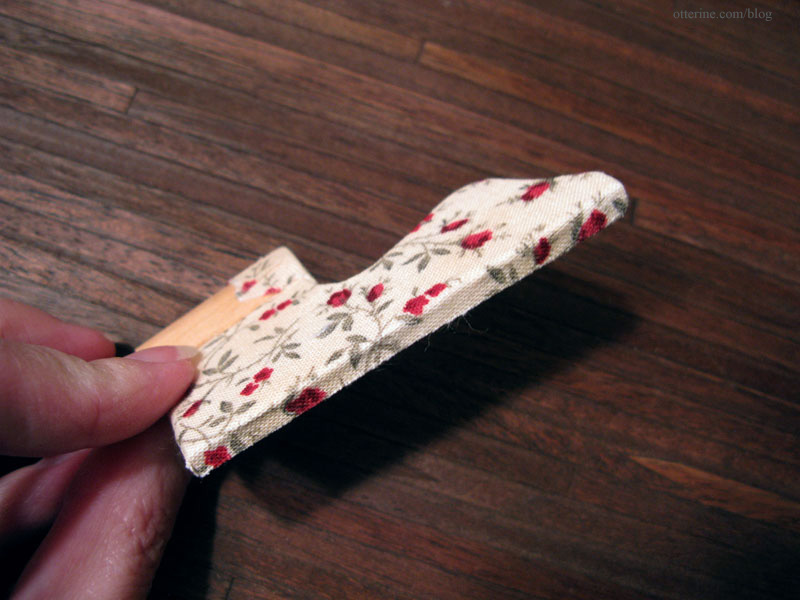
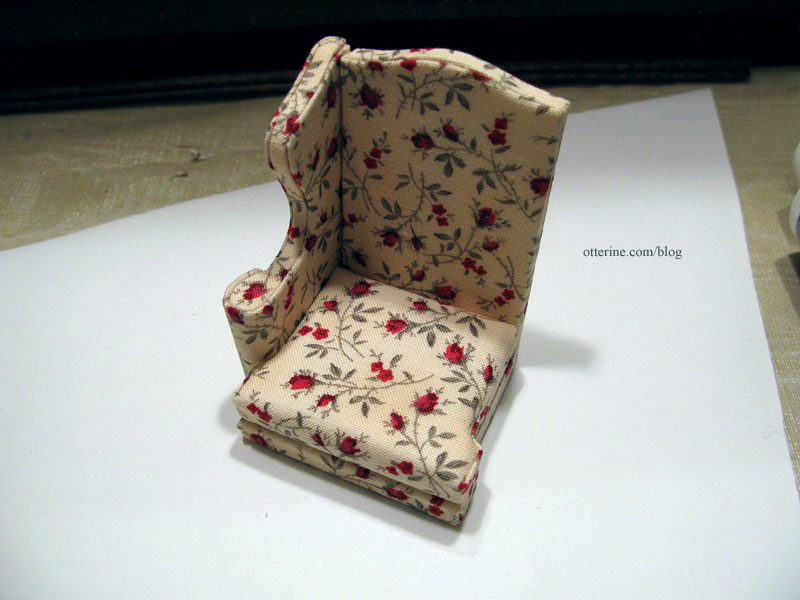
I did plan having roses centered on the arm rests, but I left the pattern random for the rest of the chair. :]
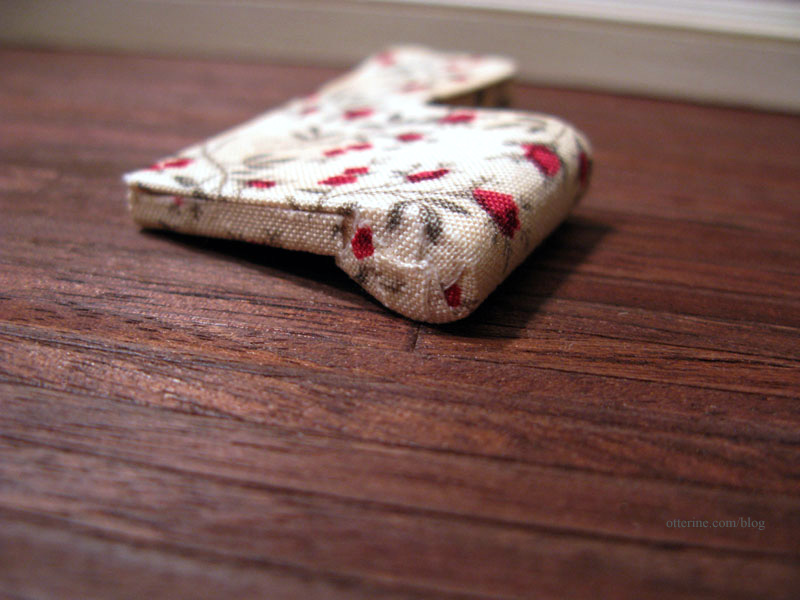
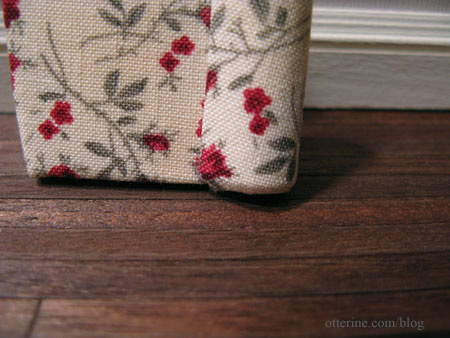
I will point out that you may need to cut new card pieces. A couple of the pieces were shorter than needed. I had to cut completely new pieces for D and E in Steps 8 and 9 for the second of the side assemblies, even though the first side worked perfectly with the original card pieces. Here you can see just how off the original piece E was around the front curve.
The patterns aren’t very precise, especially after you’ve added fabric in previous steps. Depending on the lightness of your fabric any shortness around the edges may show. Here you can see a little of the wood underneath at the bottom of the rolled edge. This should end up looking like nothing more than a shadow and not be obvious in the end.
I should add, too, that the white card I added to the kit card pieces to make the color of the fabric truer did not interfere with the assembly of the chair. It might have resulted in slightly thicker “piping” around the pieces, but it still looks in scale. If you add anything, though, it has to be very thin or take over for the kit supplied card in like thickness.
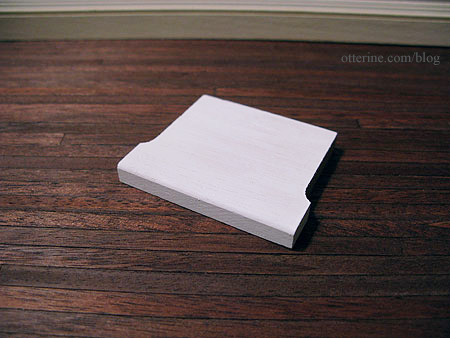
In Step 12, I painted the chair base (piece 52) white before adding the fabric. Otherwise, the fabric would have appeared darker on this piece due to being over bare wood instead of white card or white batting.
Also, since I wasn’t using the more rigid foam for the back cushion, I cut an extra piece of card for the back of the millinery batting layers to make it easier to cover with fabric.
In Step 13, I painted the edges of the seat cushion white for the same reason I had done so for the chair base.
In Step 14, for the actual assembly of the fabric covered pieces, I glued the back to the seat as indicated. I then glued on one side, but this is where I deviated from the instructions. I glued in the seat cushion next.
I then glued in the back cushion and slathered on the glue.
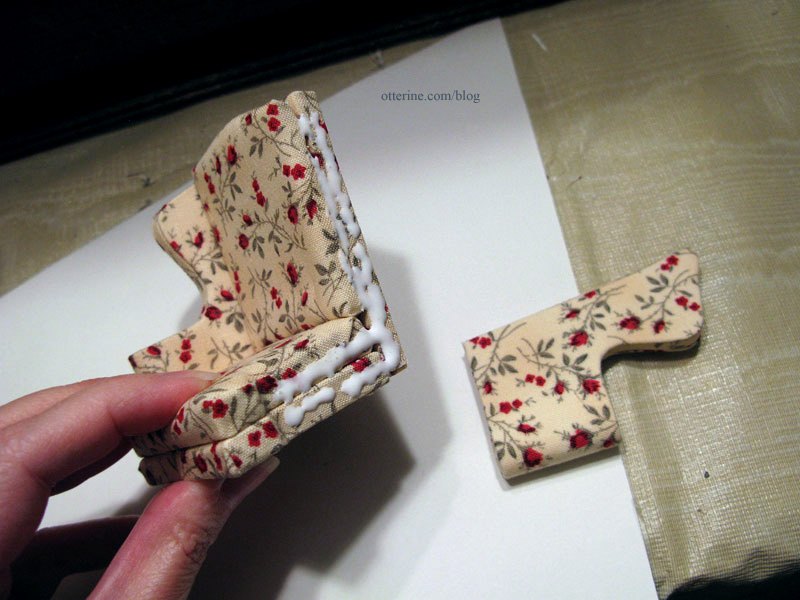
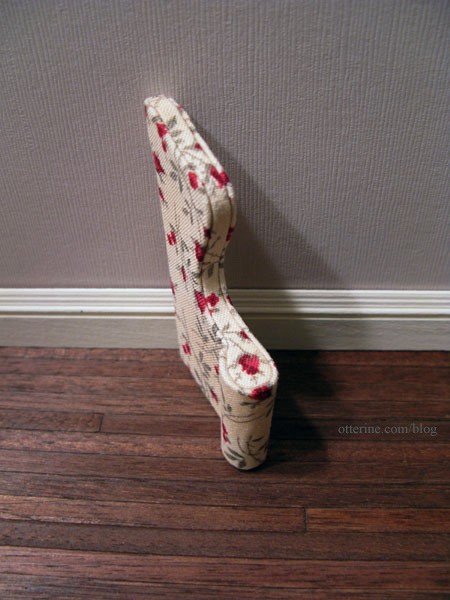
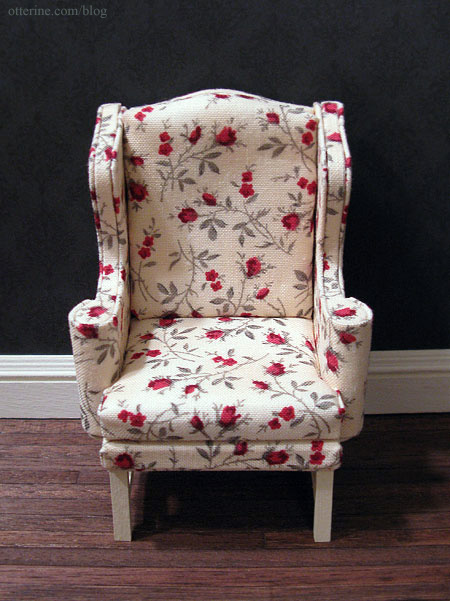
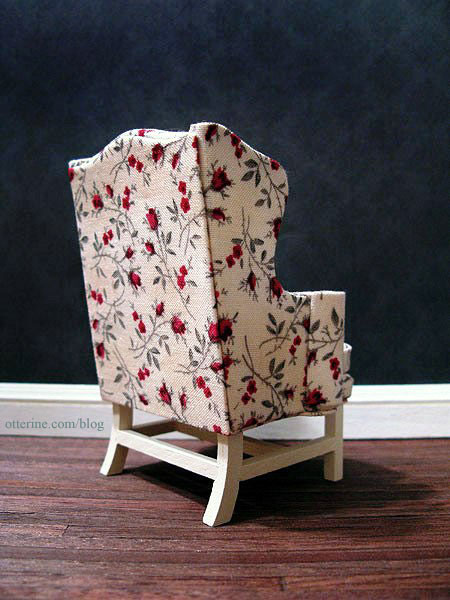
I then glued on the other side. This ensured a good, solid fit for all the pieces instead of waiting until the end to try to make adjustments. One happy accident: using millinery batting instead of a solid foam piece for the back cushion resulted in a delightfully saggy back to the chair. It looks like it has been well-loved all these years. :D
The Tapioca paint on the foundation ended up being a little too light when paired with the fabric, so I added a coat of warmer yellow. I mixed the paint on the fly to coordinate, and I’ll never be able to replicate it.
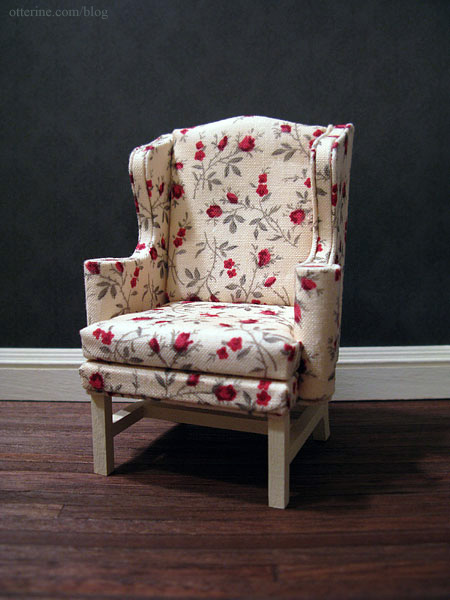
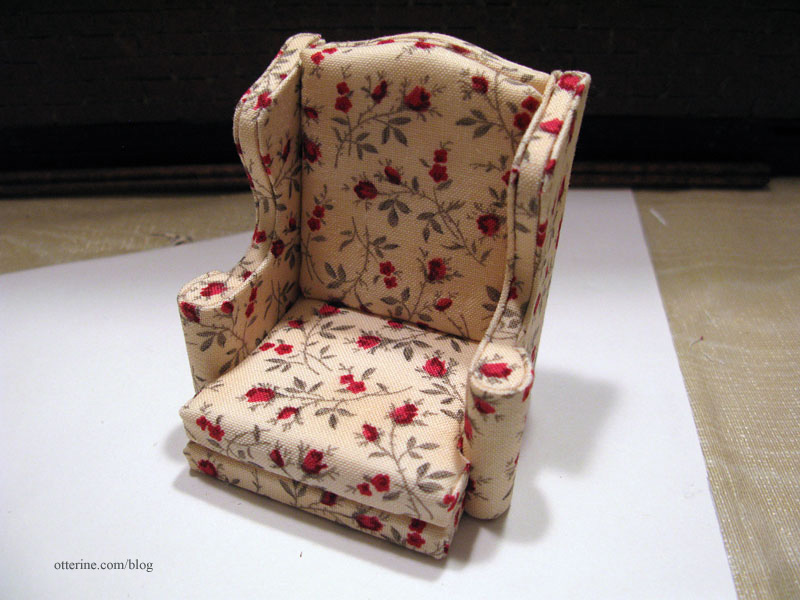
I think the chair turned out very well and I’m so pleased with it. I think using patterned fabric helps hide any inconsistencies that the solid blue fabric included with the kit would have accentuated.
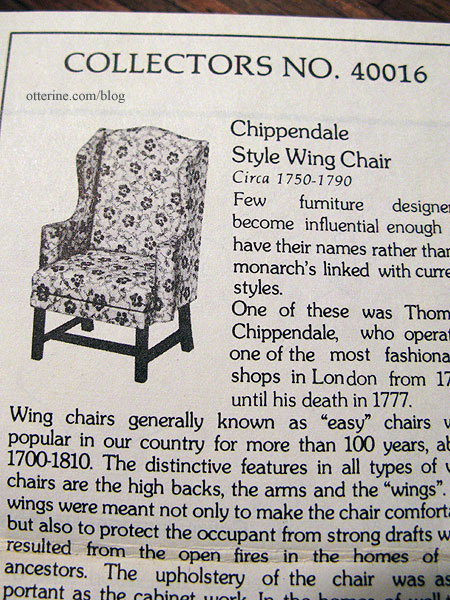
In fact, I love the fabric I used. It’s just the sort of feminine touch I was after. The piece I used was 11″ x 11″ and, with careful planning, I had just enough. If you use a fabric with a pattern that needs to be matched, you might need a larger piece. Interestingly, the black and white photo shown on the instruction sheet shows a similar floral pattern.
If I were to to this kit again, I would change out the simplistic base. It’s fine enough in the bedroom since it sits in a corner where the bed blocks the view of the base.
I’ve added one of my white patterned pillows with lace flower detailing. It was the only one I had on hand that coordinated well. A red one might be nice, too.
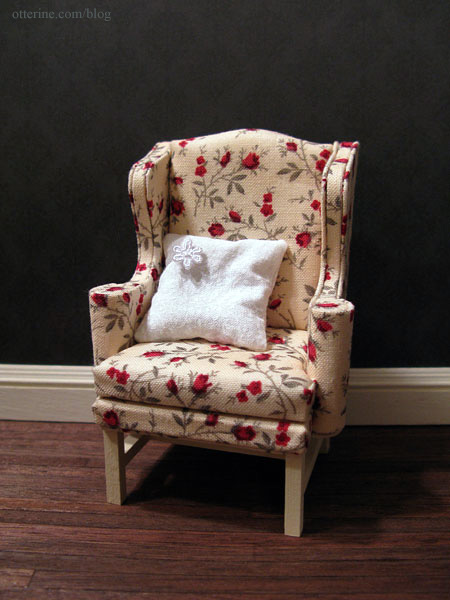
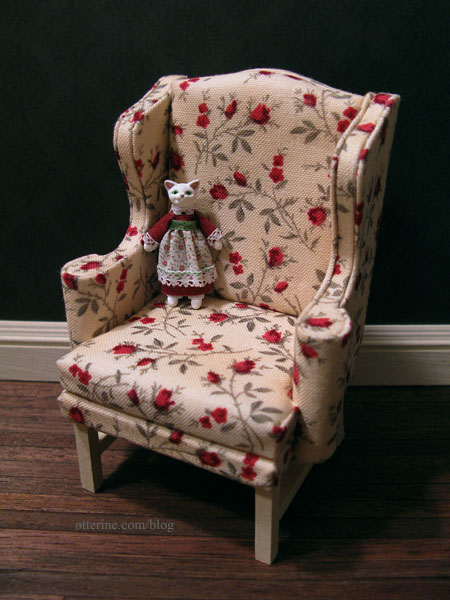
Considering I didn’t think I’d ever end up using this kit (it was included in a lot I bought), I might be inclined to pick up another if I find a good deal. :] It really is a classic design that can be so many things depending on the fabric. Ophelia loves it.
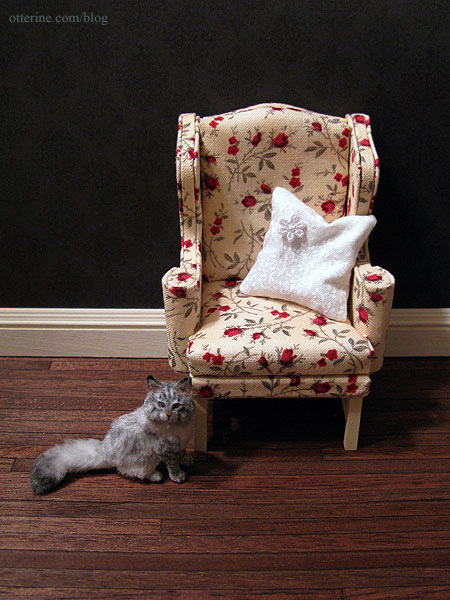
Miss Kitty loves it, too. :D
Categories: Furniture, The Haunted Heritage
November 14, 2012 | 0 commentsHeritage – bedroom wallpaper, part 1
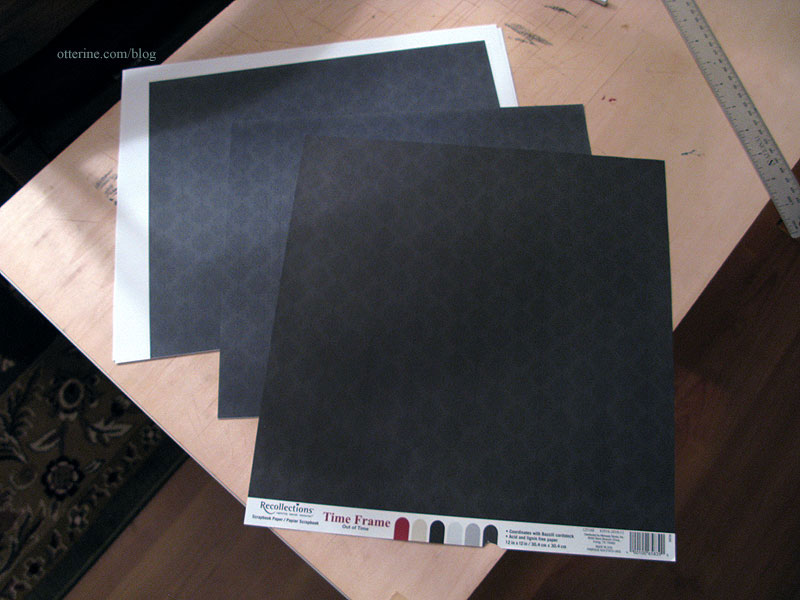
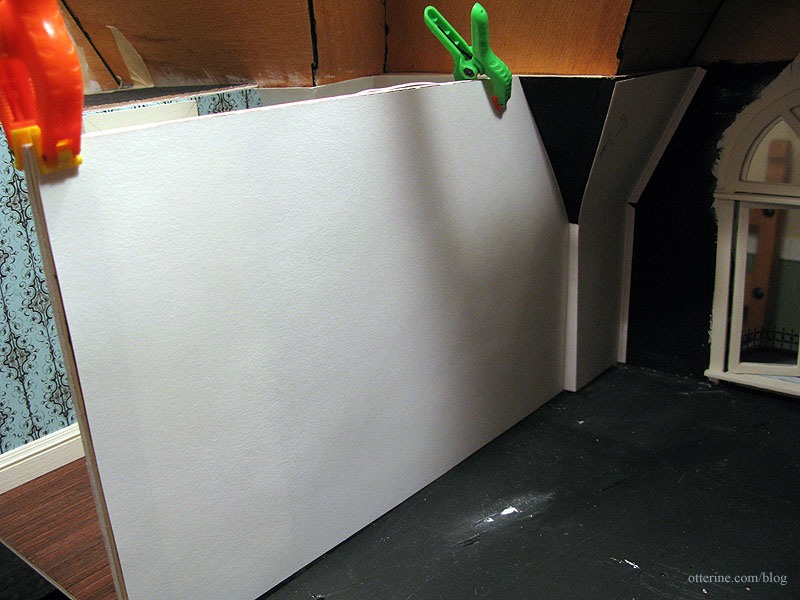
I have exactly five full sheets of scrapbook paper – Out of Time by Recollections – and it seems to have been discontinued, of course. Heather helped me by sending some scraps of the same paper that she had left over. There are a couple of small, angled cuts so her paper scraps will definitely come in handy. Even still, there is next to no margin for error for cutting the full pieces I have. So, I being with templates.

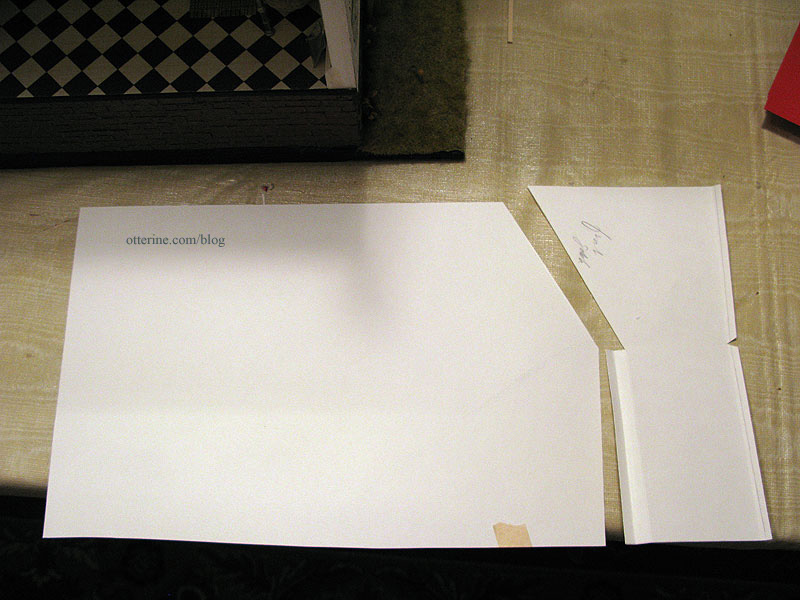
I started with the long interior wall, cutting one long piece of plain drawing paper for the main portion. This template is longer than my actual scrapbook paper is wide, but it will be relatively easy to piece it around the door without the seams showing. I left the template long and without the door opening cut just to make it easier to work with.
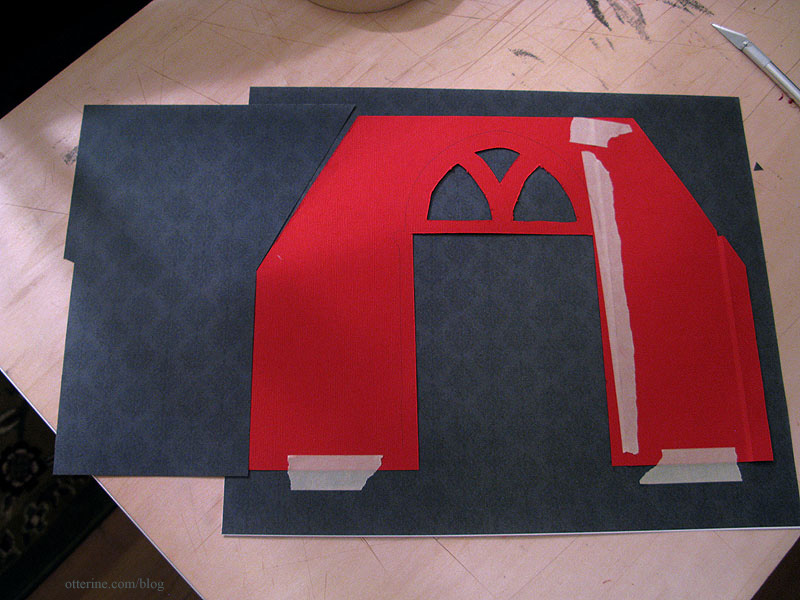
On the front portion of the wall, I cut a shaped piece to match the upper angle and included tabs that will go behind the front wall piece. The open triangle between the two pieces will have to be cut to match the pattern as best as possible.
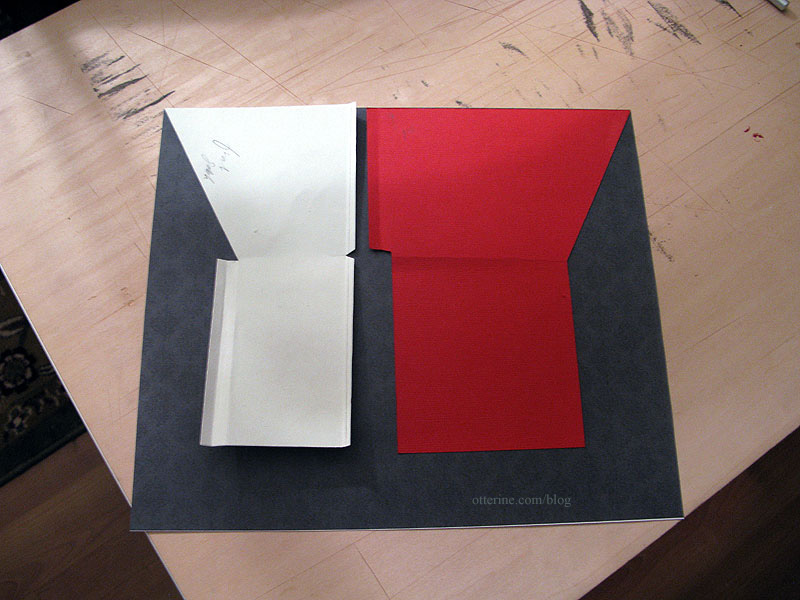
Using some extra red scrapbook paper, I then worked on the outer side wall where one of the two swinging windows will be. This piece is scored to wrap around the rear channel molding. It took me two tries to get the measurements right, which is why this template is made from two sections taped together. I cut the actual openings for the window to make sure the placement was good.
I then traced the interior window trim onto the template. I will need to leave some room for the acetate inserts in the upper portion of the window. Again, to make the templates easier to work with, I left the window openings as is for now.
Since this piece is similar for the front wall, I tested the fit of this template there. Not even close — have to start from scratch. :\
I completed the template for the right side angled wall, including tabs to mirror the left template.
I pieced the front wall template from scraps and then cut a complete piece.
I adjusted the front wall template to fit, and that should do it. :D I’ll probably move that side tab (which would actually be behind the front piece) to the front wall piece to make it easier to glue the pieces in a certain order.
Now that the main templates are cut, I plan to make photocopies of the black scrapbook paper and do a test run with those before cutting the final pieces from the original scrapbook paper.
Plan B, in case of disaster, is to use the dark patterned paper on top with plain black on the bottom and a black painted chair rail between the two. Update: test run here.
Categories: The Haunted Heritage
November 11, 2012 | 0 commentsHeritage – foyer lighting
I had originally planned to have a hanging light descending from the second story ceiling to the top of the foyer area, but I changed my mind because I didn’t think it would hang straight enough to suit me. The fixture is lightweight, and the chain would follow the curve of the electrical wire. It would need constant adjusting. Forget that nonsense.
I opted for a small silver wall sconce from my lighting stash since it is small enough to not be intrusive but gives off a good amount of light. The only reason I was able to add a wall light without any deconstruction is the fact that the bedroom wallpaper hasn’t been completed, so adding a wire channel was fairly straightforward.
I drilled a hole from the bottom of the wiring channel in the bedroom wall, angling slightly downward into the foyer. The hole is high enough so it won’t interfere with the working pocket door. The front channel you see is for the bedside lamps when I get to them.
I glued the light in place with the bulb facing downward. With the light on, the bulb would be distractingly bright when viewed through the open stairwell. I can still reach the fixture to remove the shade and change the bulb as needed. The silver also works well with the silver-framed wall art.
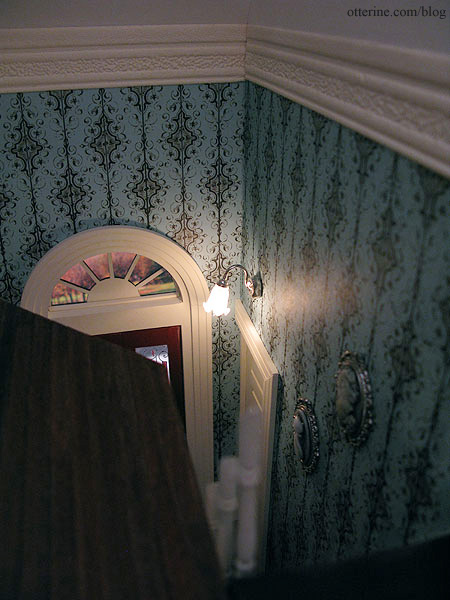
It’s just enough illumination without looking out of place. :]
Categories: The Haunted Heritage
November 5, 2012 | 0 commentsJack-o’-lantern
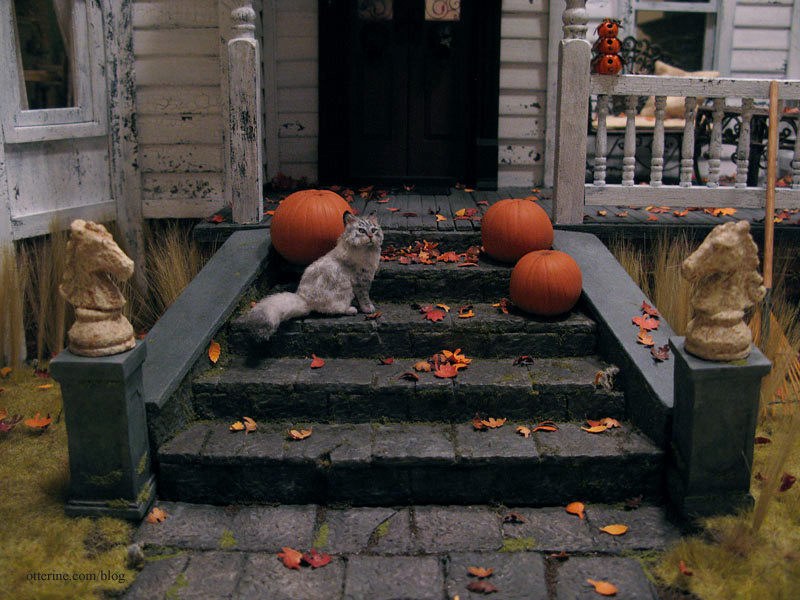
What’s a Halloween display without a jack-o’-lantern?! Ophelia wouldn’t hear of it!

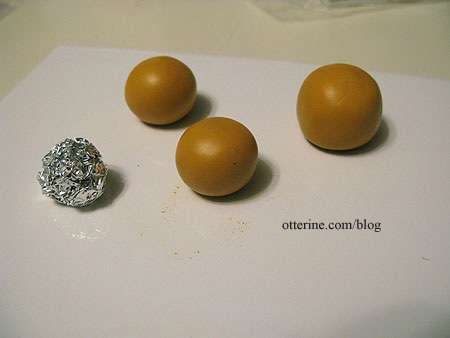
I’ve seen many techniques used online and in books for making hollow pumpkins from polymer clay. Most often something is baked inside: styrofoam, foil or a glass marble. Each of these has pros and cons. The styrofoam just seems noxious to bake, but maybe I’m wrong. The glass marble can cause breakage when you try to remove it, which makes me worry about all the effort to make it look good being ruined in an instant. The foil doesn’t seem the easiest to remove, but it seems the least noxious and easier than the marble…so that’s the way I went.
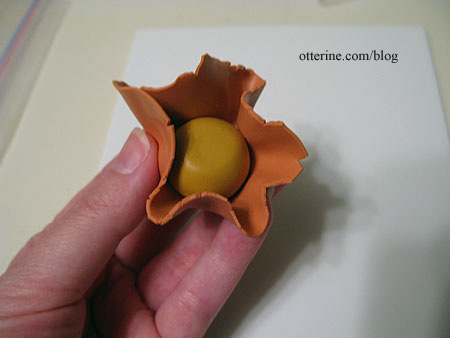
I used Fimo ochre clay around the foil ball and then added Fimo cognac clay around the clay ball. This way, the inside would be lighter than the outside once carved.
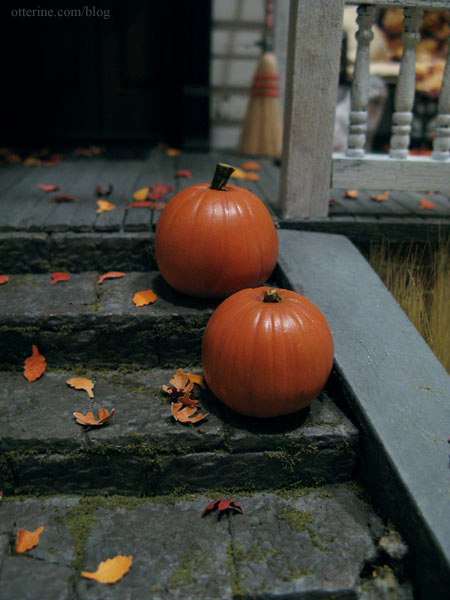
I added lines and texture but decided to carve my pumpkin after baking to minimize handling while the clay was pliable. I did plan to leave one or two of the pumpkins intact just for decoration, but I made all three the same way just in case.
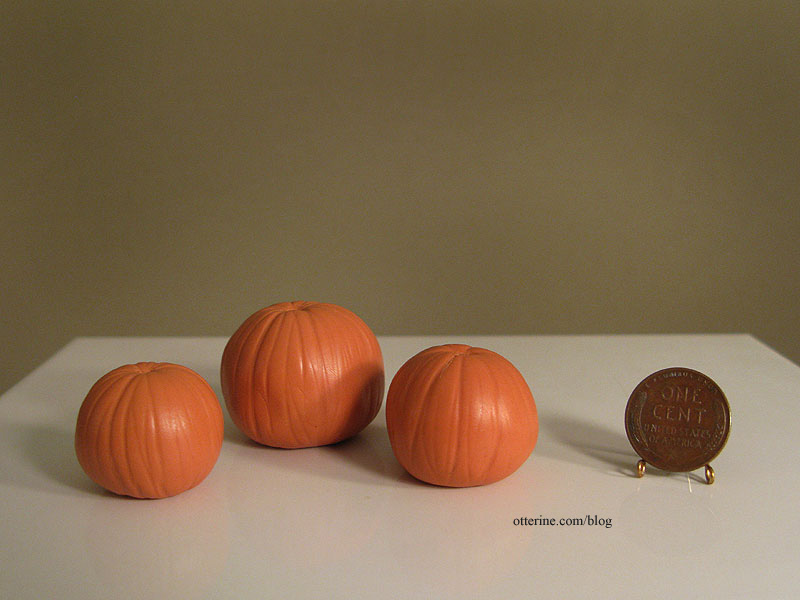
I used pastels to color the clay before baking to deepen the color and emphasize the sculpted lines. Here they are after baking.
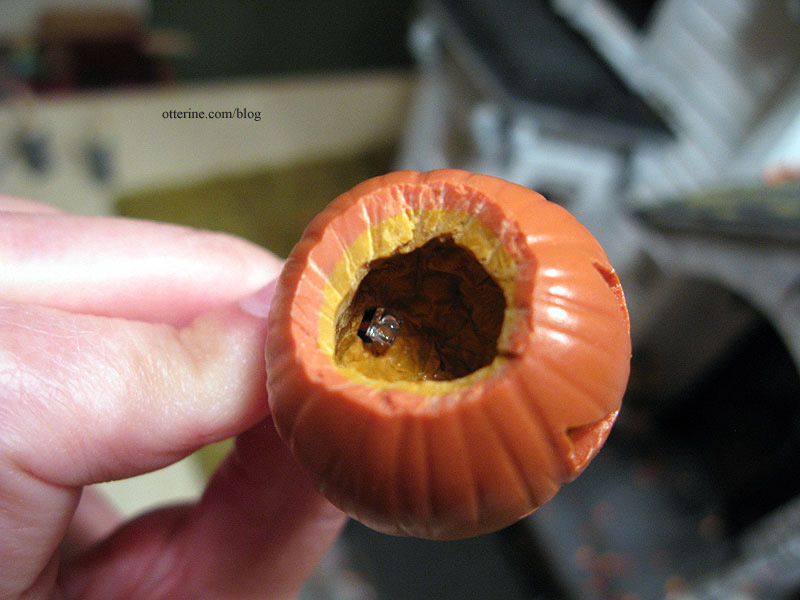
After the clay cooled, I cut the removable top, removed the foil innards and carved the pumpkin face. None of these things proved easily done. The clay was thicker and harder than I thought it would be. It didn’t ruin the illusion in the end, but I ended up making only this one for lack of time.

I used a grape stem for the top, an idea I saw on Joann Swanson’s blog. I used the larger main stem, though, and it was still green. I microwaved it to dry it out, and bleh…did it ever smell bad. Hahahaha
After gluing the stems on, I brushed on a thin coat of Sculpey satin glaze, even on the stems to seal them. It gives them a wonderfully realistic waxy finish. It also disguises the cutting and carving marks.
I drilled a hole in the bottom for the LED.
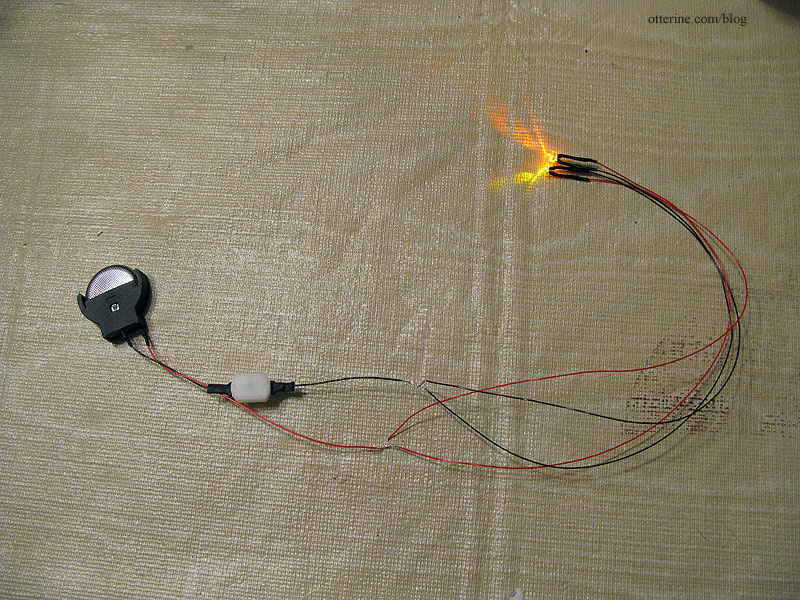
These are flickering LEDs from Evan Designs. They attach to a 3V battery adapter with a switch and come in yellow or orange. I bought both colors since I wasn’t sure which would look better, or if I would want a combination of the two. I ended up using a single orange bulb for my jack-o’-lantern since it was the better color of the two and plenty bright on its own.
I had already run the wire through the foundation so I could operate the switch in the cellar doors. Here’s the battery and switch in the cellar.
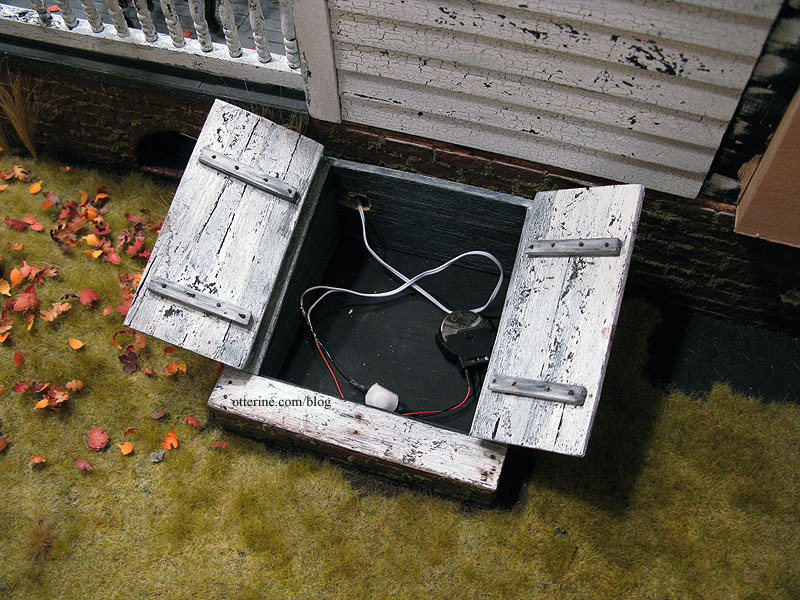
The light is on and pumpkins are in place! Hooray!
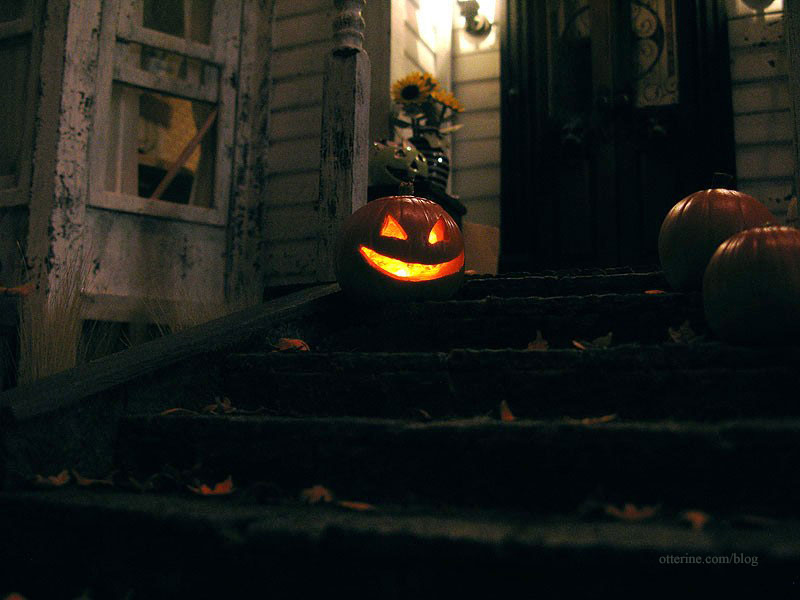
I think this requires a movie. ;D I apologize for the poor quality of the video, but it’s the best my camera will do. At least you get to see the flickering LED!
I will definitely use these flickering lights for the parlor fireplace, too. That wiring will be an easier endeavor to accomplish, though.
Categories: Polymer clay, The Haunted Heritage
November 2, 2012 | 0 comments
NOTE: All content on otterine.com is copyrighted and may not be reproduced in part or in whole. It takes a lot of time and effort to write and photograph for my blog. Please ask permission before reproducing any of my content. (More on copyright)