

Heritage – Chrysnbon bathroom sink
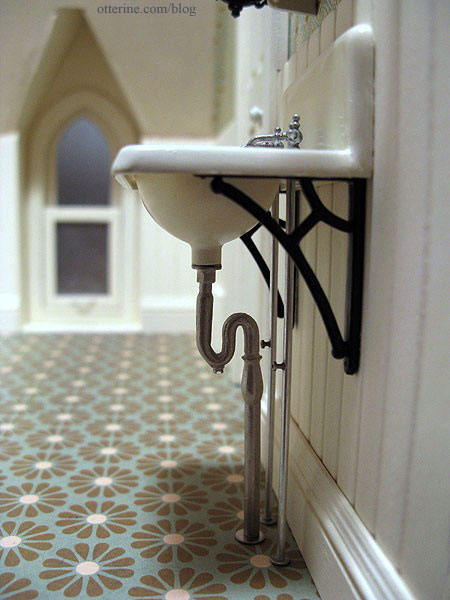
I used the same gloss ivory color from the bathtub on the sink and sprayed the brackets flat black. I painted the faucets with Testors Aluminum to tone down the shiny appearance and aged them with a wash of black acrylic. I still need to add an overflow outlet, paint the drain and add a little rusty water staining.
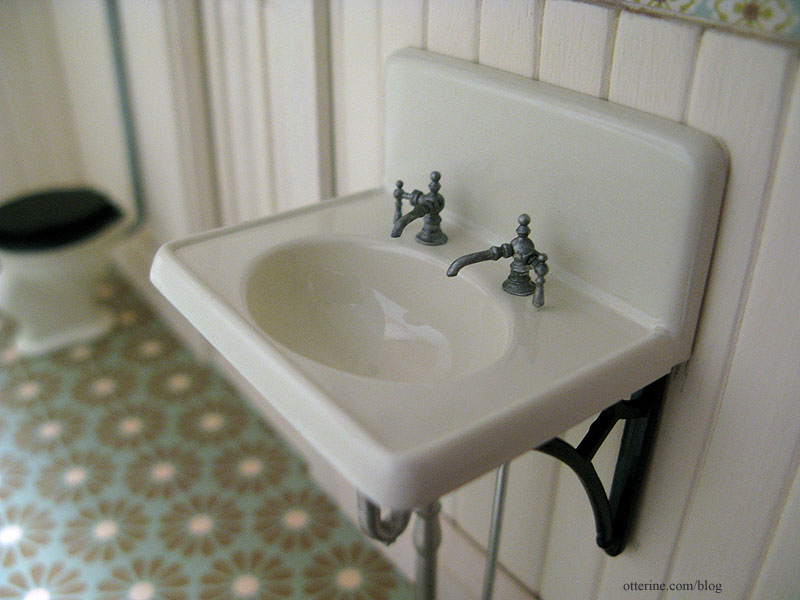
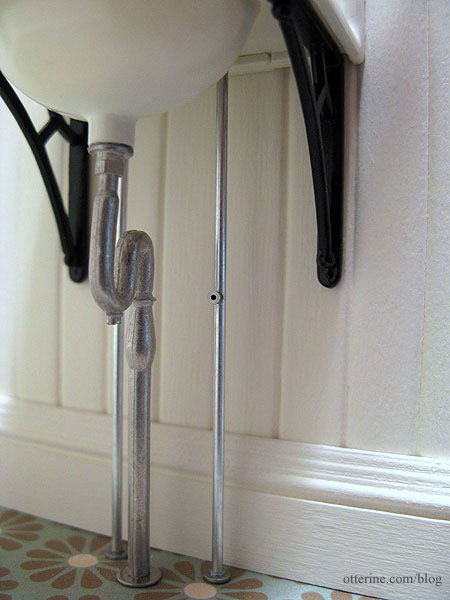
The pipe included with the kit would have made the sink too low, so I used a spare pipe I purchased from Sussex Crafts. I need to buy smaller washers but have put one I had on hand in for mockup purposes.
It also bothered the realist in me that there was no way for the water to get to the taps. So, I added two lines of aluminum tubing from the sink to the floor. I’ll need really tiny washers for these. And, I plan to fashion little valve knobs so grandma can turn off the water in an emergency.

It’s a lovely little sink, no?
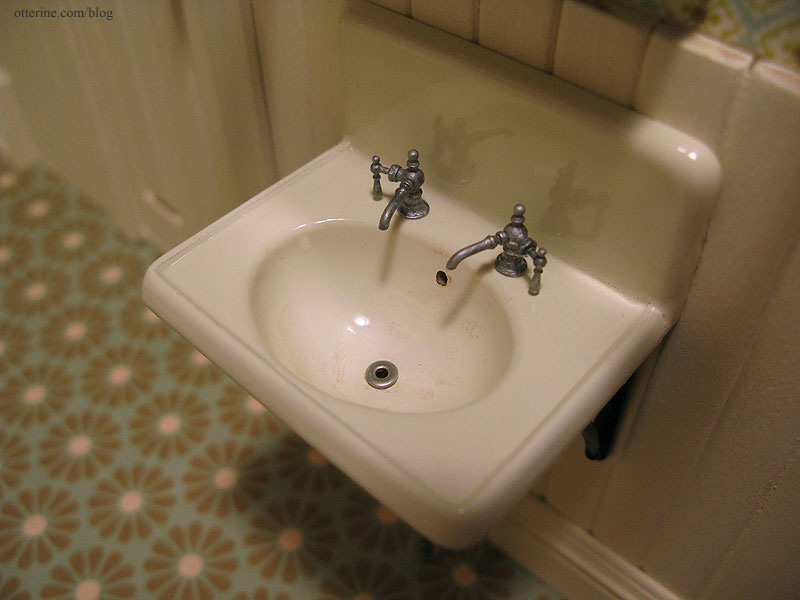
After having no luck at Lowes or Home Depot, I discovered a fine selection of tiny, thin washers at Ace Hardware. I didn’t have too much time to look around, but it just might become my new favorite store.
I added one washer to the sink bowl and drilled out a hole for the overflow. I placed a piece of black paper behind the overflow so no light would show through. I added a couple of brown paint washes but didn’t dirty it up too much…just enough to tone down the shine and make it look like it has been there awhile.
I bought a packet of miscellaneous watch parts some time ago for various projects I have planned. There are a lot of tiny, tiny parts in there!
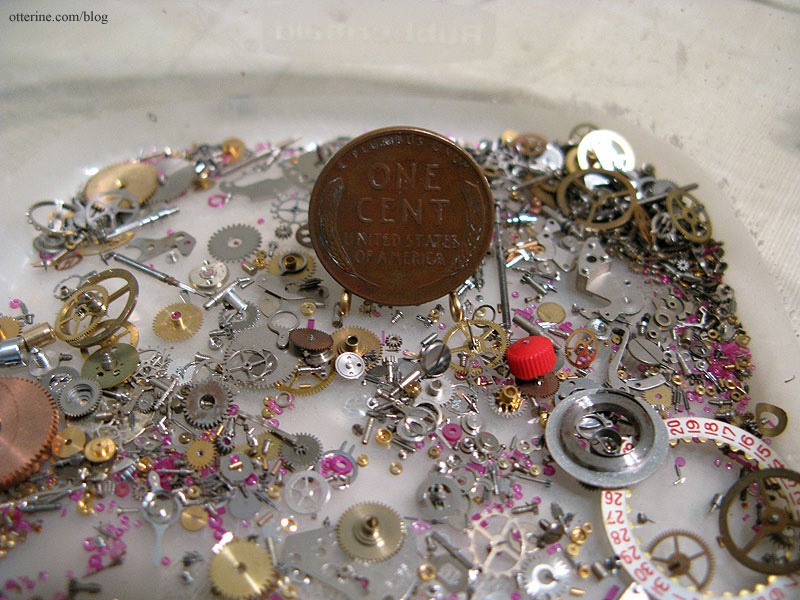
Today, I rummaged through it to find suitable shutoff valves. I know these are typically oval, but all I could find were round ones. I drilled holes into the aluminum tubing and glued them in place with super glue gel.
Two more of the tiny washers finish the bottoms of the water pipes where they meet the floor. I bought a washer one size larger for the drain pipe, too.
Categories: The Haunted Heritage
April 12, 2012 | 0 commentsHeritage – bathroom finishing, part 1
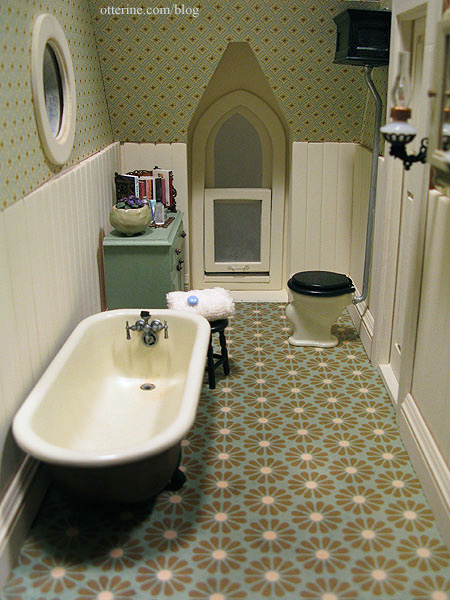
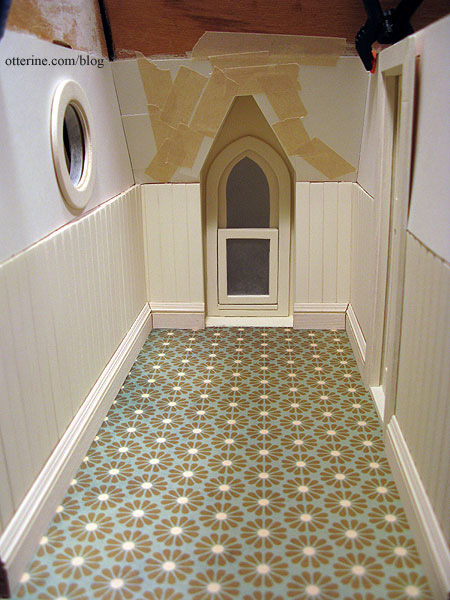
How do you get beadboard to look like it has been painted 50 times? You paint it 50 times. Okay, maybe I didn’t paint the bathroom walls 50 times, but I lost track of how many coats of paint I put on it. At least now it’s relatively smooth.
I tackled the flooring next. Using spray adhesive, I mounted the Flower Frenzy paper by We R Memory Keepers onto a sheet of regular drawing paper for stability and then sprayed it with matte sealer. I didn’t want it to be shiny, just a little deeper in color and not so paper-y. I like the way it looks like worn down linoleum.
The wallpaper is Cute Little Diamonds paper by The Paper Studio. I don’t have the paper on the front and outer walls installed permanently yet because I need to finish the chimney. I know Keli would have a fit if I didn’t continue the chimney inside the house! ;D
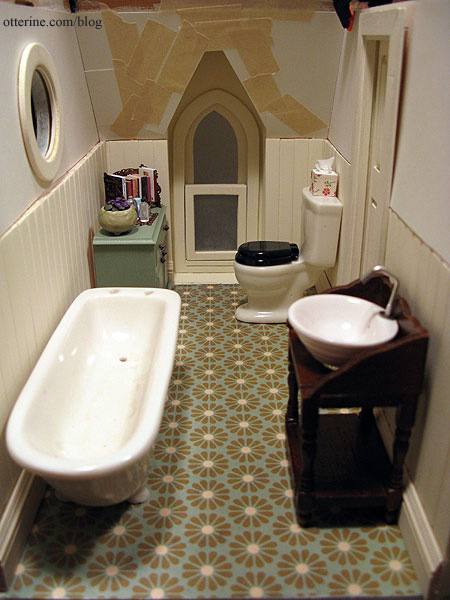
As I mentioned before, I know that the high tank loo isn’t exactly 1920s. But, I’m picking my battles and sticking with the Chrysnbon toilet assembled right out of the box. I used Krylon Gloss Ivory on the loo and flat black on the seat, lid, tank and brackets. I hand brushed Testors Aluminum paint onto the lever and pipe in the tank. I also painted the main pipe even though it was molded with a chrome finish in the original kit. I didn’t want the pipe to look brand new.
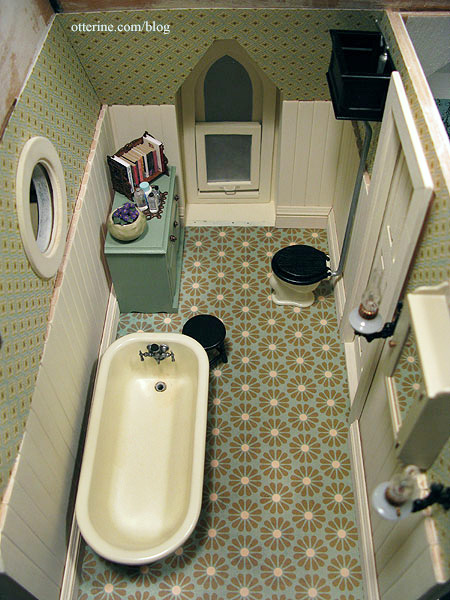
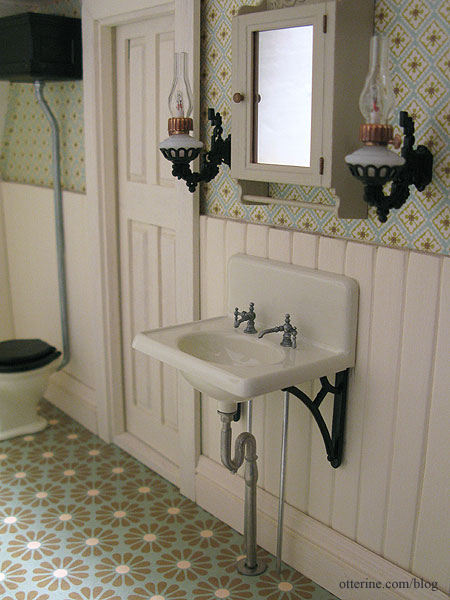
The medicine cabinet is also from the Chrysnbon kit. I painted it with Krylon Almond in satin finish, the same paint I used on the Bespaq bed. I like that it matches somewhat but I didn’t want a glossy finish to compete with the sink. The hinges and knob are painted with Liquitex Iridescent Bronze. I am still working on the Chrysnbon sink.

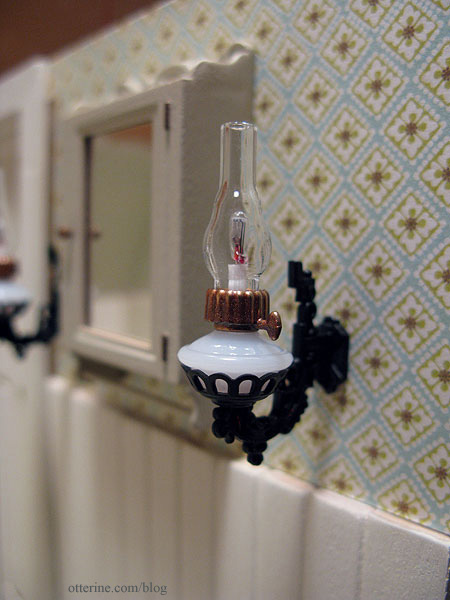
The wall sconces are Chrysolite kits, though I left off the reflectors.
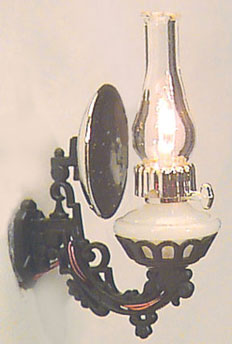
I painted the brass parts copper to match the bathroom colors and switched out the included wires for replaceable bulb sockets. I painted the wires black to make them less obvious.
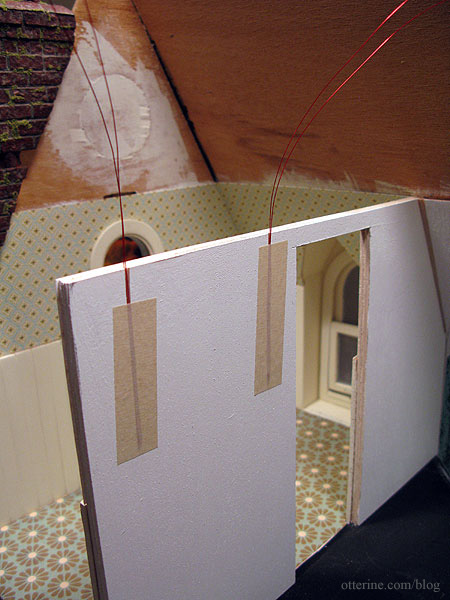
The wires go through the wall toward the hallway. I made thin channels in the wood and taped the wires toward the ceiling. These wires will be directed through channels on the attic floor and out the wall to the space allotted in the chimney.
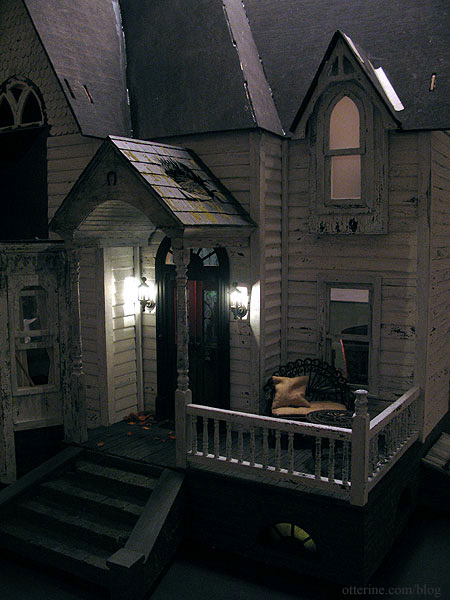
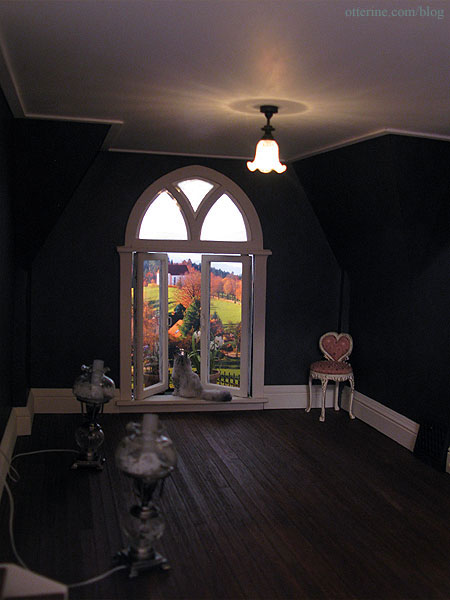
With a piece of white foam core propped in for the ceiling, I can already tell I am going to love this room when it is enclosed and finished. :D
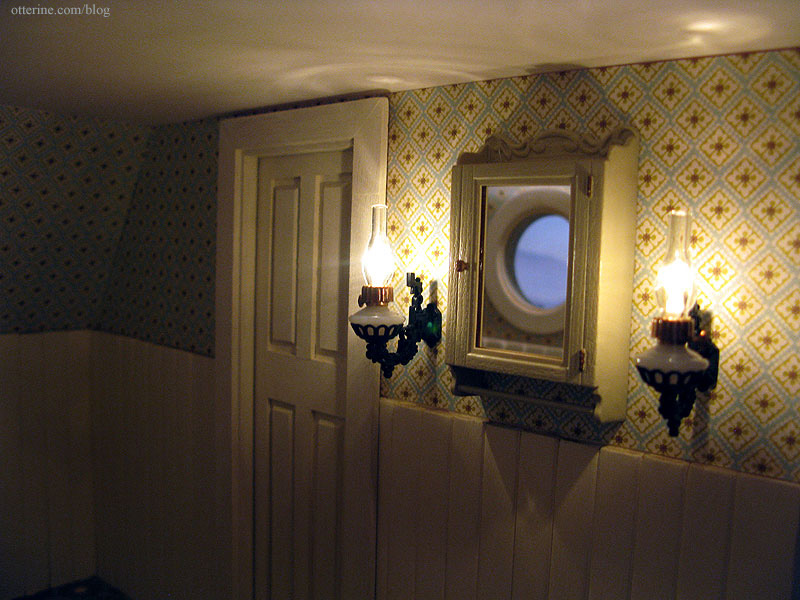
The door is propped in place backwards (door opening out) for now since it will take some work getting the interior trim in place. The beadboard takes up some of the extra wall thickness, so I’ll need to pad the framing around the top and sides of the opening.
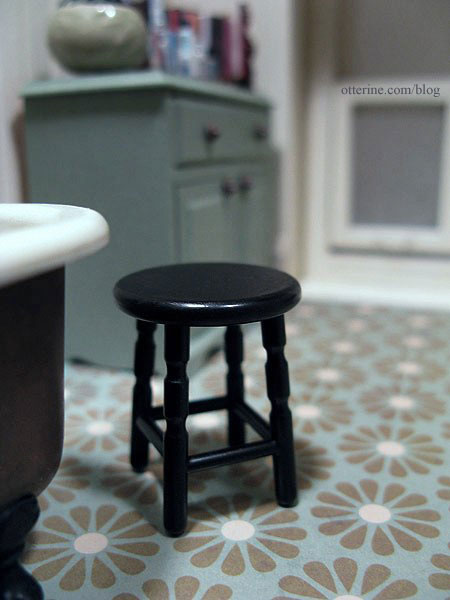
I made the small stool from the bath kit, too. I sprayed it flat black, but the top was rough so I had to follow up with acrylic paint. I topped it off with satin varnish, and now it looks like a vintage piece that’s been painted and painted and painted.
Categories: The Haunted Heritage
April 11, 2012 | 0 commentsHeritage – bathroom beadboard
With the window completed, I started cutting strip wood to create a beadboard effect.
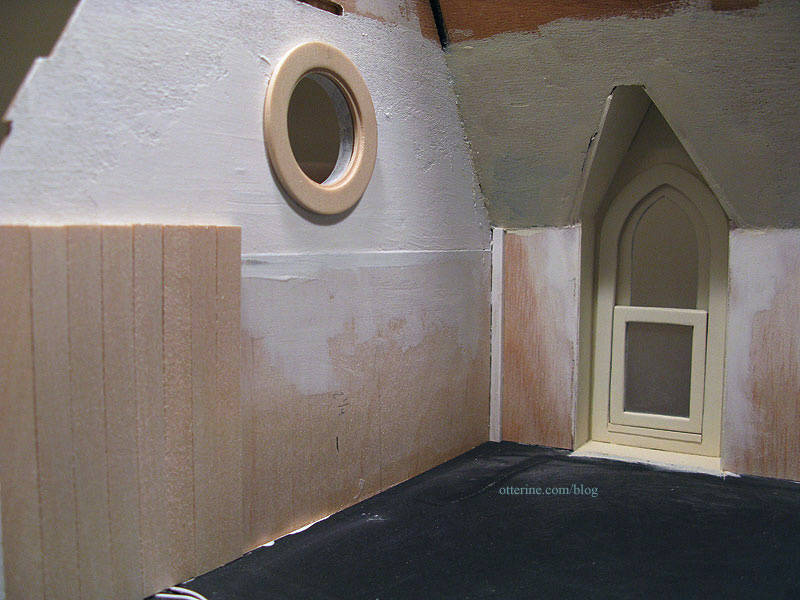
The bass wood I’ve been buying lately is in rather rough condition, so it took some work before I could install it. It’s cheaper, and that’s the only positive. I’ve cut the boards the same height as the wall connectors so they blend in.
I sanded each board to remove the majority of the roughness and also sanded the sides while I was at it to make the seams between the board more pronounced. I then painted them Vintage White by Folk Art, taping them onto a painting board for this first coat. I sanded the boards once dry and glued them in place.
I then covered the boards with a second coat of paint. Here you can see the roughness and fuzziness that remains even after all this work.
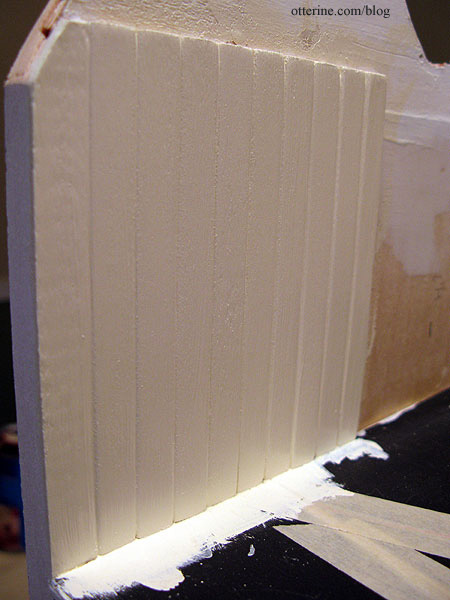
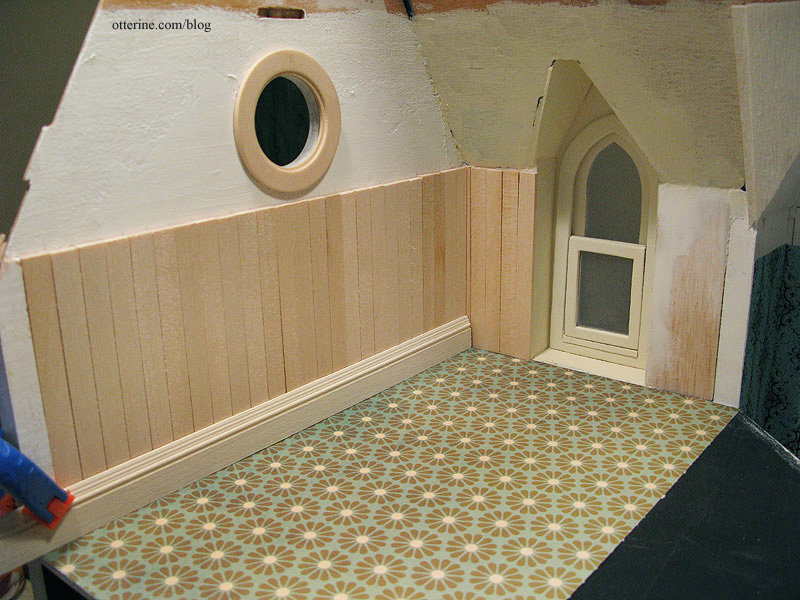
I then sanded again and again in between thin coats of paint. This should not have taken all day! Next time, I’ll spend the extra money for better wood.
I made templates for the wallpaper from regular paper which I’ll use to cut the scrapbook paper. I’ll also add a strip of wood on top of the beadboard to finish the edges. The baseboard trim is cut but not yet finished and glued in place, and the flooring still needs to be sealed and installed.
I think the tall beadboard finish adds to the vintage farmhouse look.
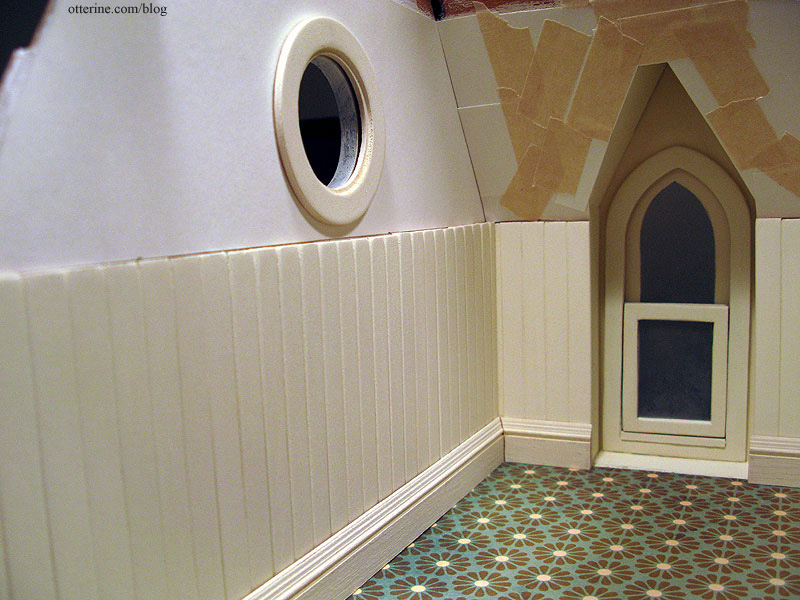
The Chrysnbon bathroom set is being assembled and painted, so I’ve used my mockup pieces again. The cabinet and accessories will be staying as is.
Categories: The Haunted Heritage
April 9, 2012 | 0 commentsHeritage – bathroom padding completed
The front dormer window is half kit parts and half scratch build, and as such, it didn’t fit seamlessly. I doubt it would have fit seamlessly even if I had used all kit parts. I padded the lower portion of the front wall to build up the wall for the beadboard treatment I have planned for this room. But, that still left gaps in and around the front dormer window.
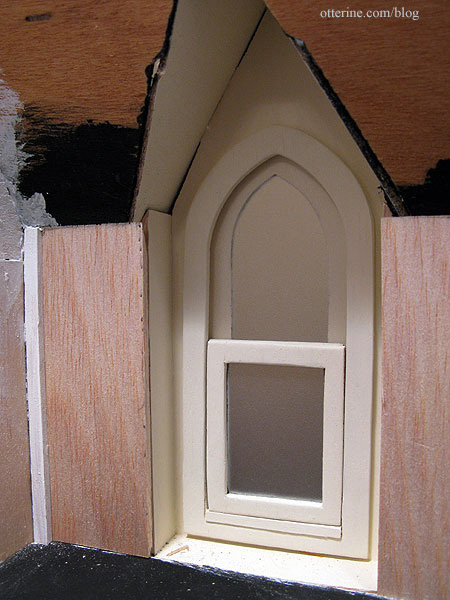
To finish the inside of the dormer window, I decided to add a thin veneer layer to mask the gaps. I first made a paper template of the entire side wall.
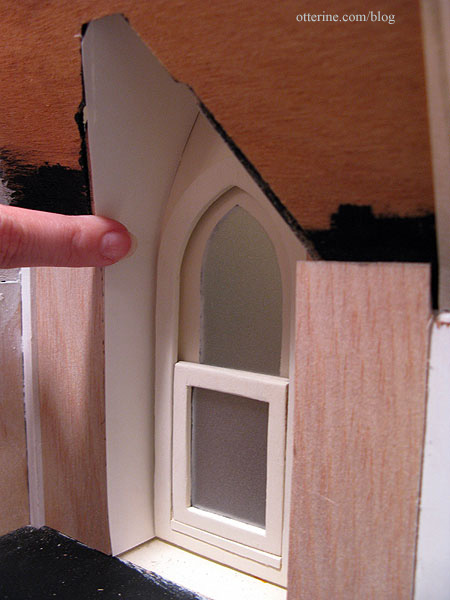
I used that template to cut the pieces of wood veneer.
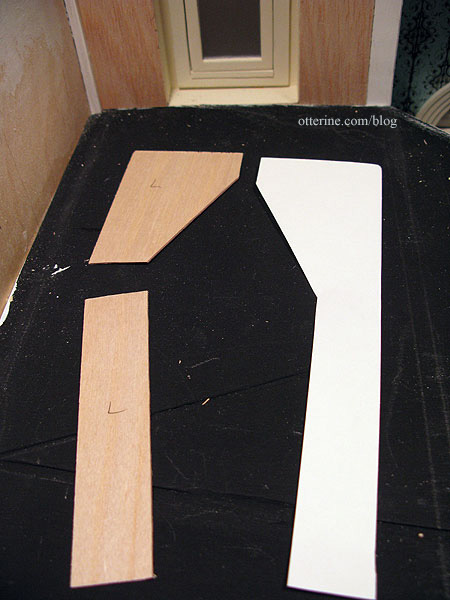

It took a double layer in a few areas, but I was able to even out the walls and eliminate the gaps. I also filled in the floor of the dormer window with a layer of balsa. Since the window is a little crooked, I’ve decided to just paint this area instead of tiling to the outer window wall.

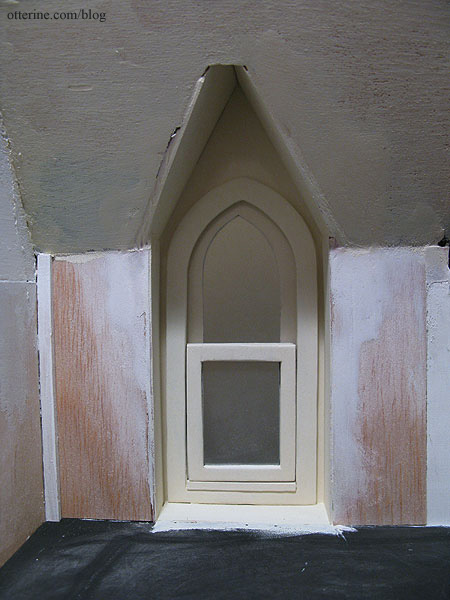
I used spackling to fill in and smooth the joins. It’s roughly done since the main wall will be covered by wallpaper.

I sanded the area, painted the window and primed the remaining front wall. Once this layer dries, I’ll sand again and paint the final layer.
Categories: The Haunted Heritage
April 7, 2012 | 0 commentsHeritage – foyer wallpaper and trim
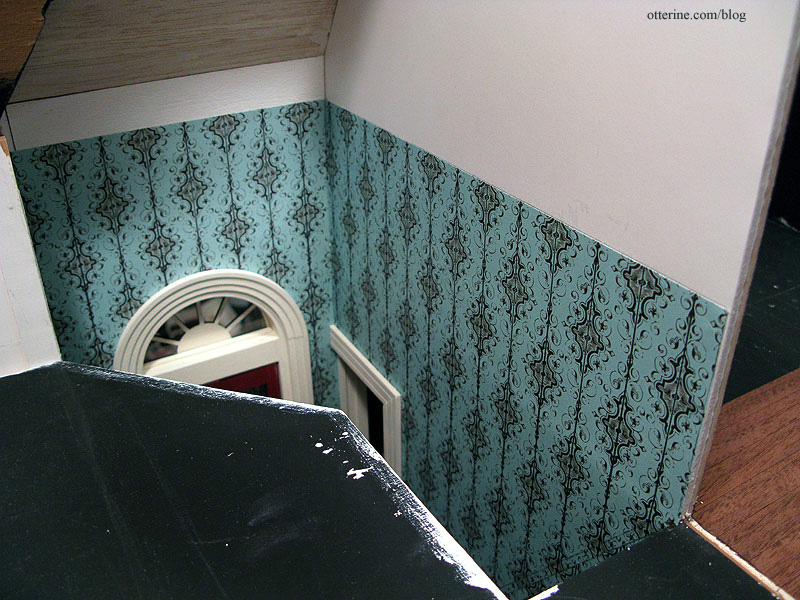
Continuing work on the foyer. I reapplied the wallpaper to the foyer and glued the pocket door trim back in place. You can see a little where the wall has a bump where the upper and lower halves meet, but that actually works for my old, settling house. :D And, once everything is in, I doubt it will even be that noticeable.
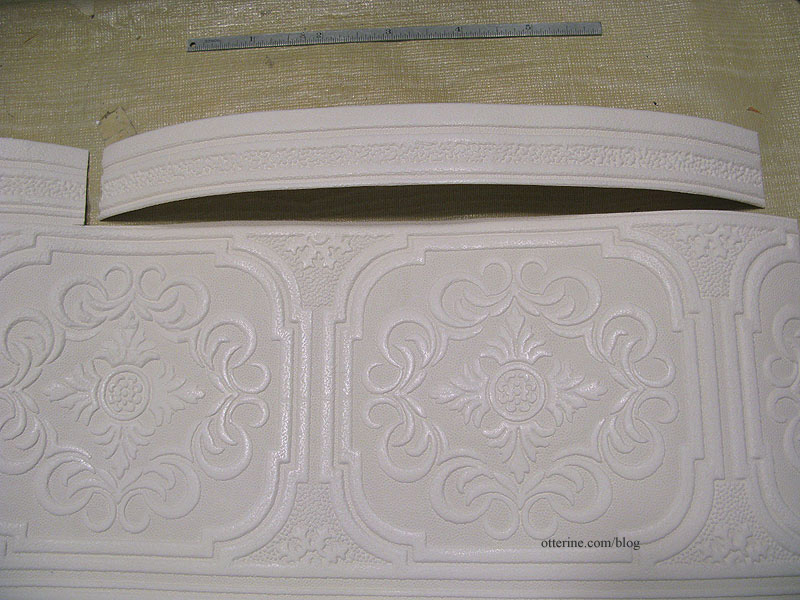
I saw a wonderful idea on The Dangerous Mezzo’s blog using what’s called anaglypta – textured wallpaper you can paint. I did some looking around on the internet and found the same one. It was $10 for a roll at the local Lowes.

I used the same cut border portion.
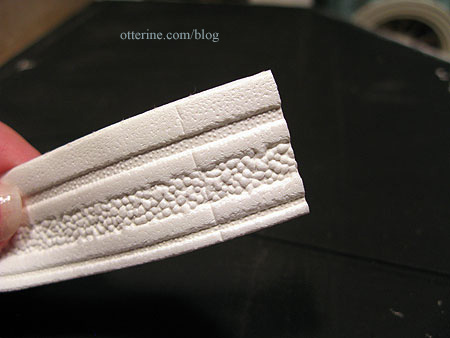
An Easy Cutter helps cut the ends straight.
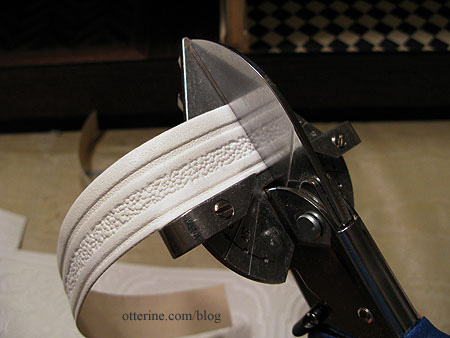
It won’t cut through the material, but it leaves a good crisp line to follow with scissors.
I’m planning to paint this Vintage White by Folk Art to match the rest of the trim, but I’ve put it on the wall with some mini hold wax to see what it will look like. There will be plain off white paper above the border. I think it’s going to look wonderful. It will make the transition between the wall and the ceiling of the foyer blend well and finish off the second floor wall nicely.

From the foyer, it will complement the nice, tall ceiling. :D Love it!
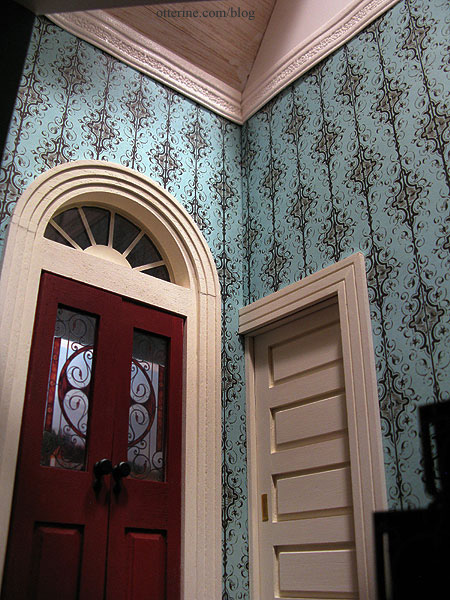
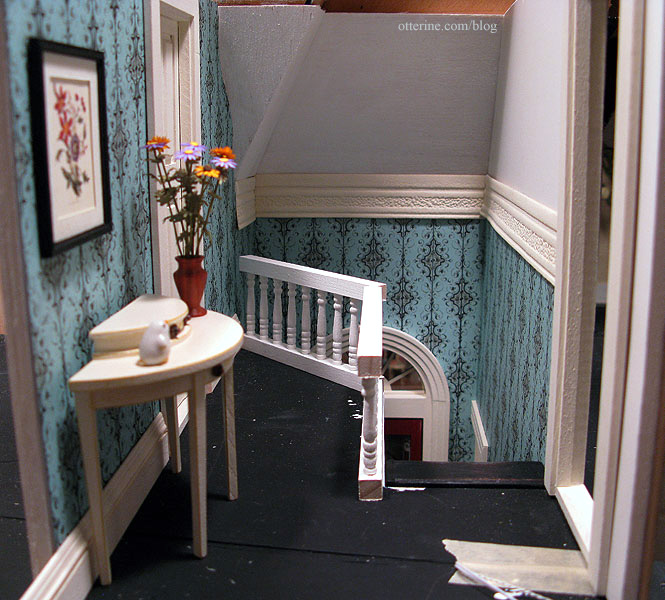
For the upstairs hallway, I opted for a full wall of wallpaper. The only reason I am using the wide anaglypta border in the two story foyer is because the Turquoise Gothic Stripe scrapbook paper has a maximum height of 12 inches and any seam between two sheets of paper would be very obvious. But, there is no reason why I can’t paper the entire hallway-to-bathroom wall with the same pattern. I don’t need to have the anaglypta border on this wall at all since there is no obvious seam to mask.
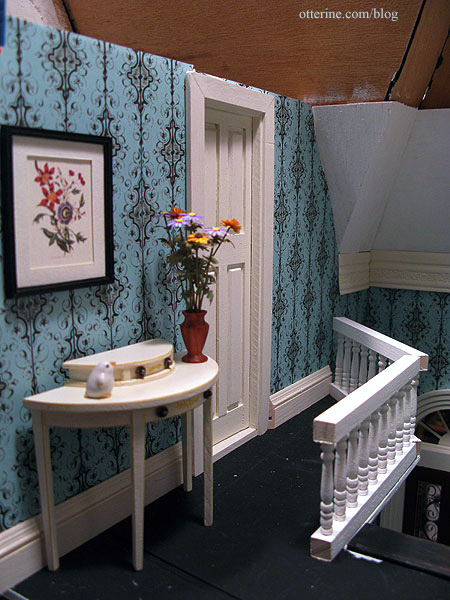
The border will finish off the foyer and terminate where the balcony railing begins on this wall. I won’t be using these railings but building my own. They will be taller and not painted white.
Finishing here.
Categories: The Haunted Heritage
April 7, 2012 | 0 commentsHouse of Miniatures Hutch Cabinet to bath cabinet
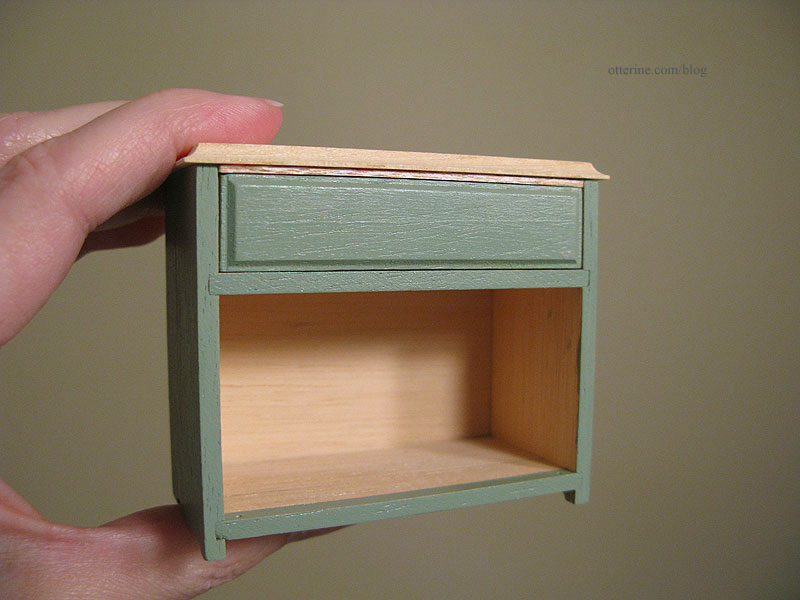
love House of Miniatures kits for their adaptability. This can be a quite formal piece, but with some soft Italian Sage paint by Folk Art and some copper knobs made from jewelry headpins it turns into a pretty bathroom cabinet.
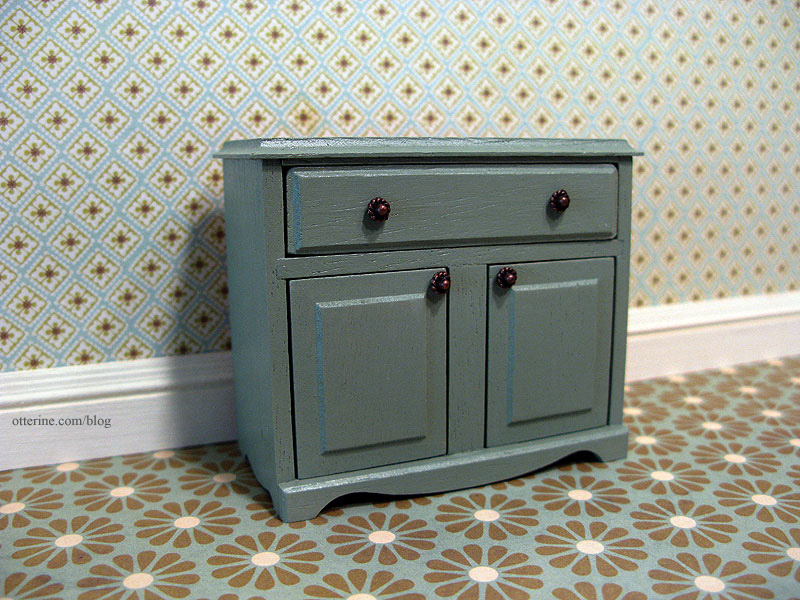
I’ve made one of these cabinets before, for the Newport. As with that cabinet, I added an extra piece of wood to fill in the gap between the drawer and the cabinet top.

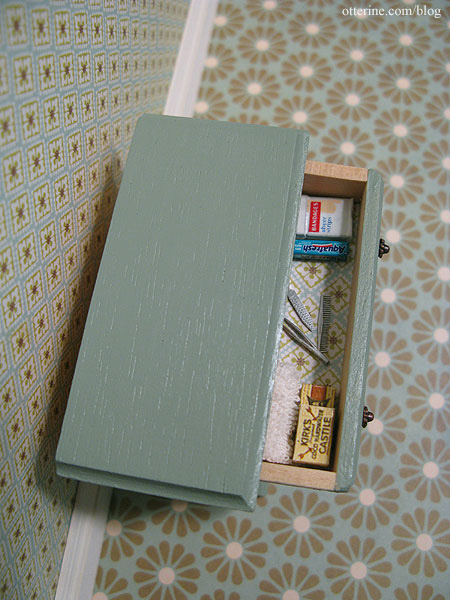
Now grandma has an attractive storage solution for all her necessities. :D I plan to put different items inside the cabinet but had these already on hand. I love hidden details even if they aren’t readily seen.

I lined the drawer with a scrap of Cute Little Diamonds paper by The Paper Studio, the same paper I’ll be using for the wallpaper. Grandma is frugal and has found a use for her leftover wallpaper scraps!
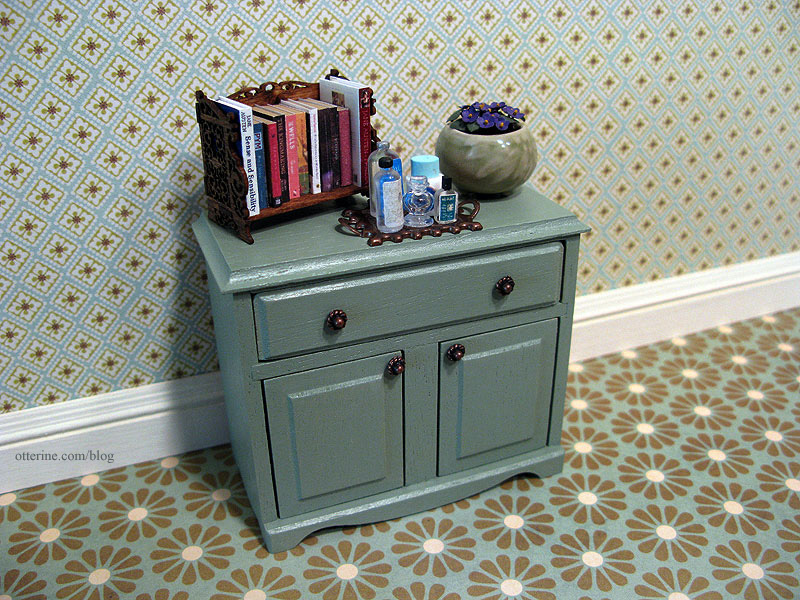
The bookshelf and African violets I made earlier will sit here. I also made up another jewelry finding tray as I had for the bedroom vanity. I will make new bottles specifically for this room but borrowed these from the Newport.
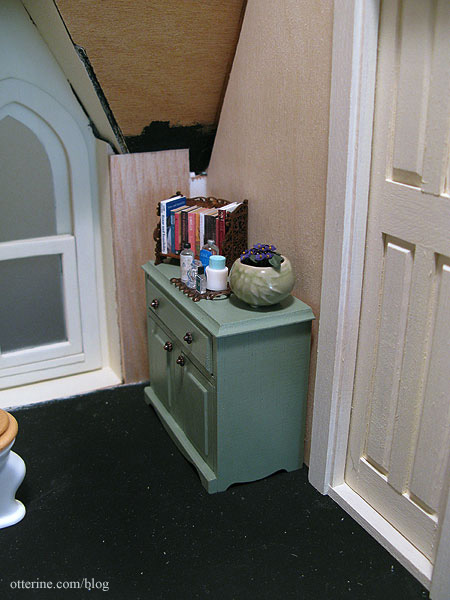
I found that I rather like the loud Flower Frenzy paper by We R Memory Keepers for the flooring. Adding sealer will yellow it a bit, but that will only add to the age of the floor.
I’m not sure if the cabinet will sit next to the door or next to the bathtub on the opposite wall. I’ll have to get the room put together before I make that decision.
Categories: Furniture, The Haunted Heritage
April 6, 2012 | 0 commentsHouse of Miniatures Hepplewhite Side Table
I did a quick google search for painted Hepplewhite tables and found three great inspiration pieces. I was looking for lighter finishes to stand out in the hallway. For a fantastic painted version of this table kit, check out Wasting Gold Paper. Fabulous!
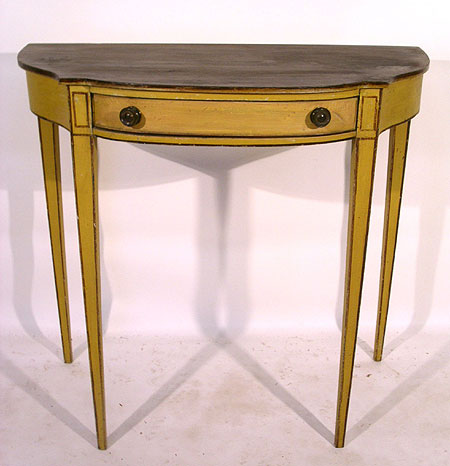
First, this lovely c.1790 North Shore, Massachusetts Hepplewhite side table from Wiederseim.com. This real life table sold at auction for $3,000.
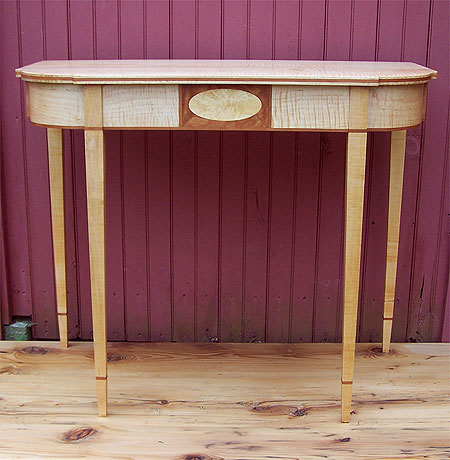
Second, a contemporary version by Craig Thomas White.
And, lastly, this c.1790 American Hepplewhite dressing table from antiques.com.
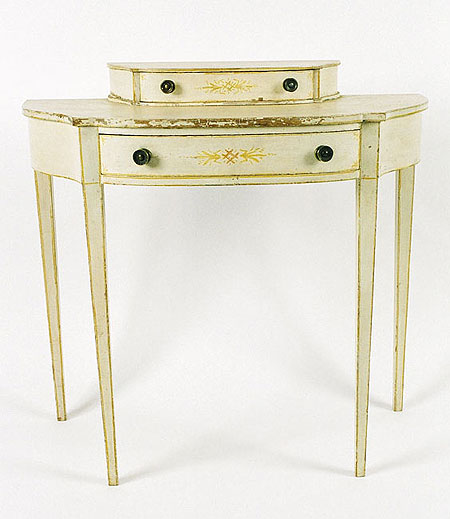
The last one is the clear winner for me. There is no drawer on the House of Miniatures table, but there’s no reason it can’t be faked with some drawer pulls.
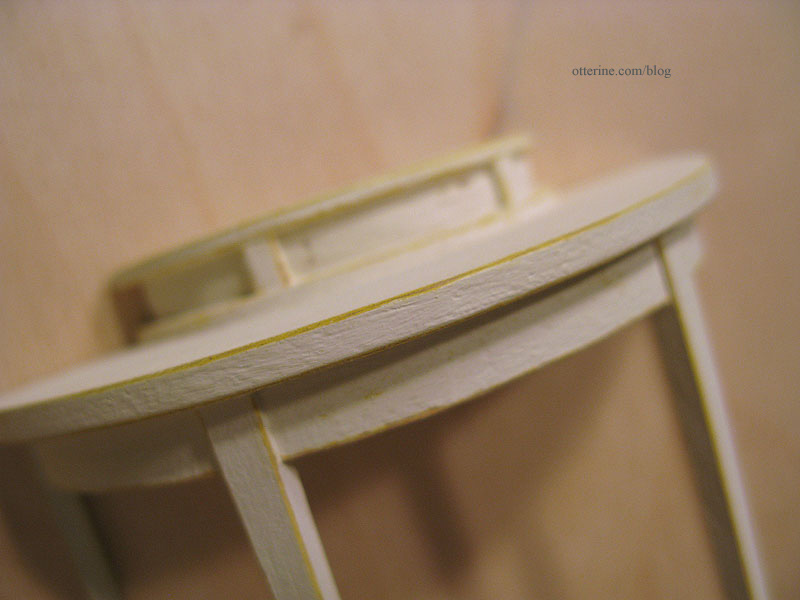
For the additional top detail, I used a Woodsies circle. To get the true center, I slipped it into a circle template I had from my art school days.
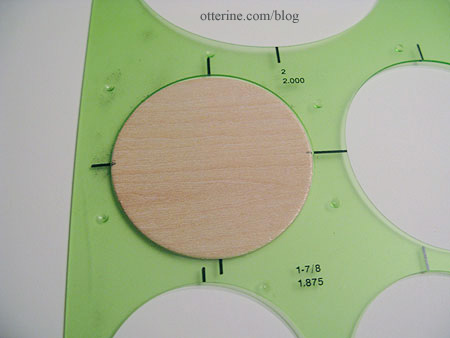
These markings then allowed me to measure how much of the circle I wanted for the top using some of the items I might use for display.
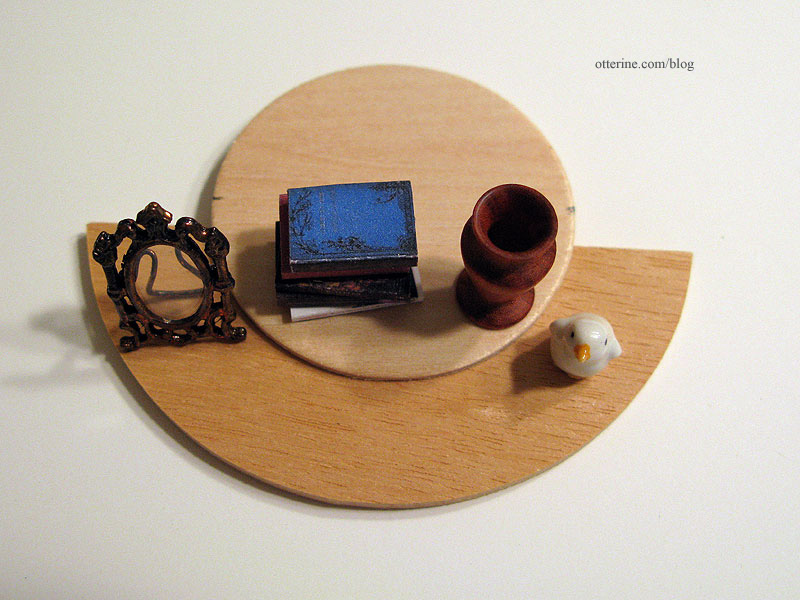
The middle is a scrap of balsa cut slightly smaller than the Woodsies half circles.
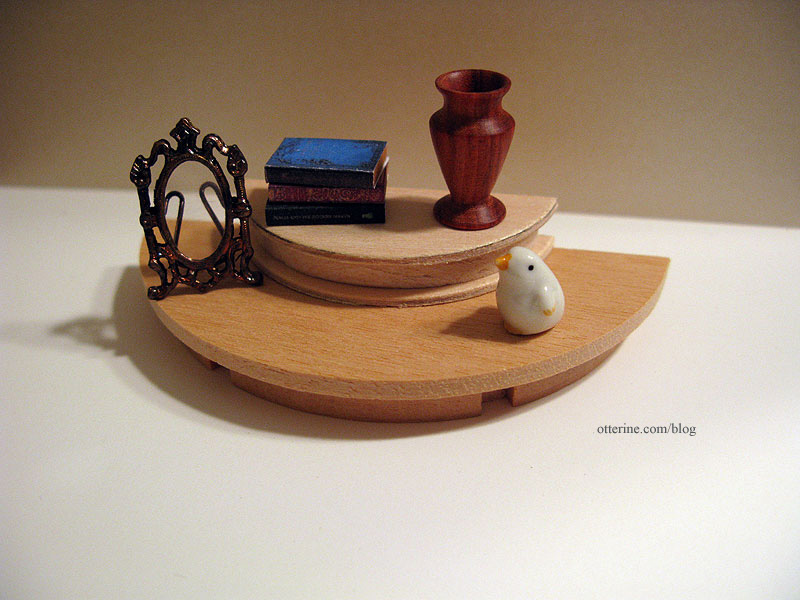
Since I wasn’t sure if I would like my addition once finished, I made another quick vignette with the border trim in place. I had to move the artwork up on the wall and added some of the accessories. As you can see, I added two small scraps of wood on the smaller top assembly to delineate the faux drawer. I think it’s going to be lovely.
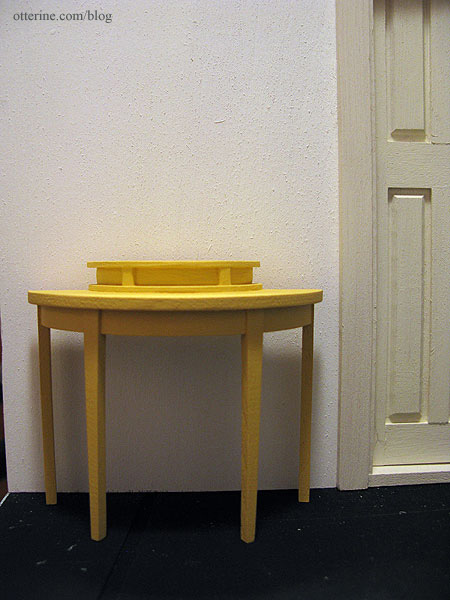
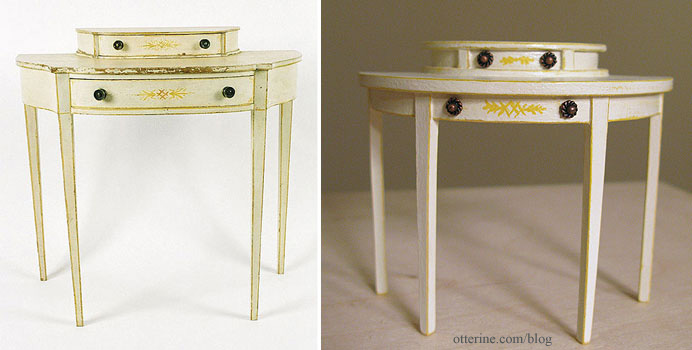
I didn’t think I’d have a steady enough hand to paint only the edges with the yellow detailing, so I started with a full under layer of Moon Yellow by Folk Art. This took two thin coats of paint with a light sanding in between.
I covered this with Tapioca by Folk Art. Again, two thin coats of paint were needed. I used fine sandpaper to lift the lighter top coat to reveal the yellow beneath, some parts to the original wood for an extra bit of wear.
I added aged copper knobs (fancy head pins for making jewelry) and painted the wheat and crisscross details with a fine tip brush. I don’t think I did a half bad job considering I’ve not painted freehand tiny designs before.
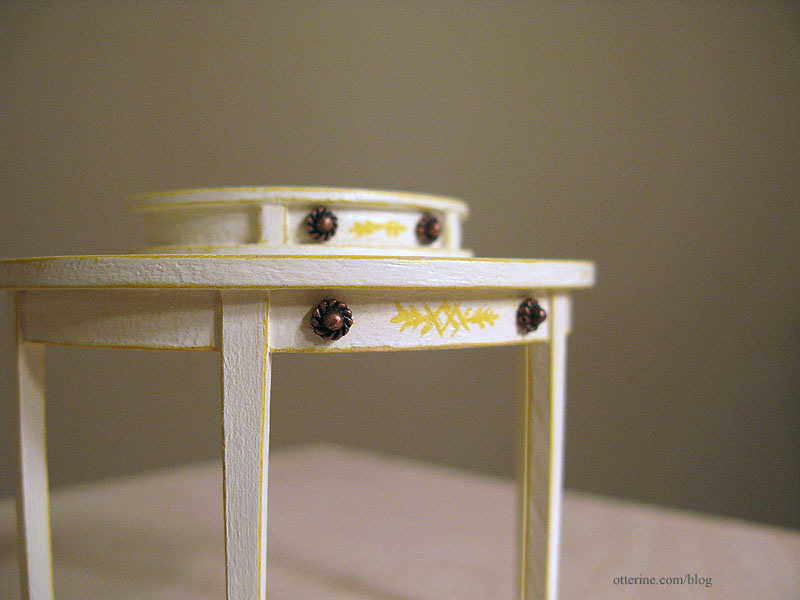
I then covered the table with a very thin coat of Delta Ceramcoat satin varnish.
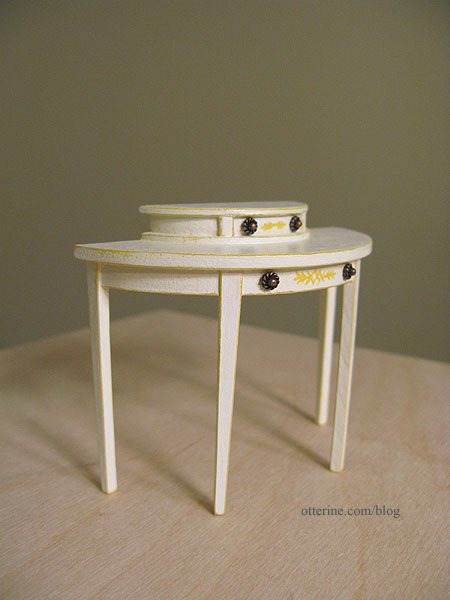
I love the way this table turned out! :D
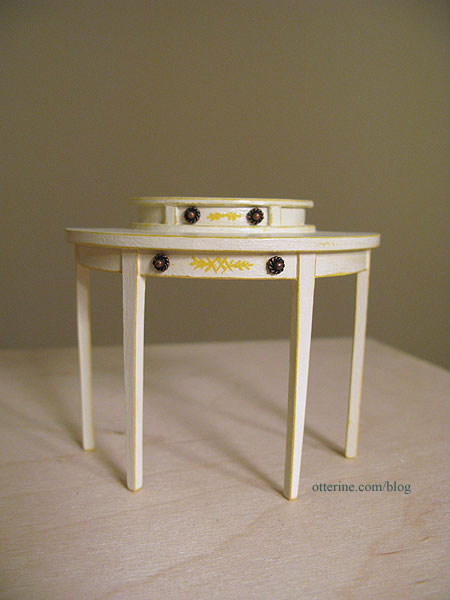
It has the same delicate look as the original.
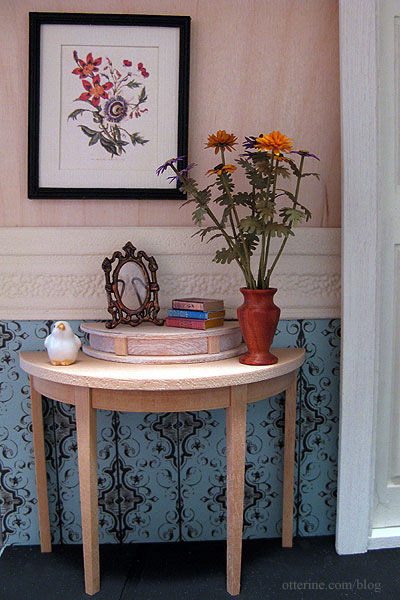
Here it is later in the finished upstairs hallway.
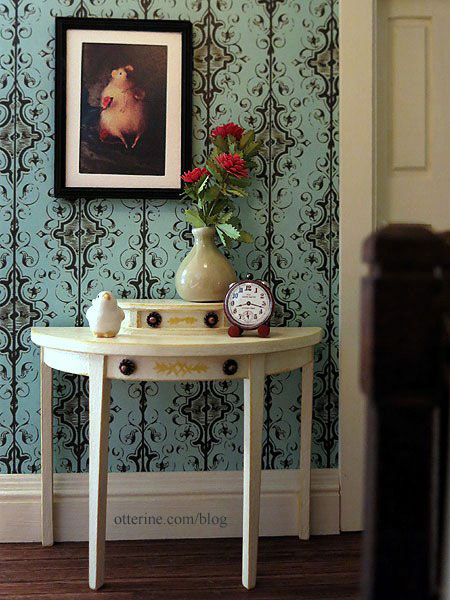
The artwork is a photograph from artisan Natasha Fadeeva. She makes the most amazing little animals. I just swoon over her mice!!! :D I contacted her about using the vintage mice photos in the Heritage, and she graciously gave me her permission. I made the tiny red alarm clock and the Bonnie Lavish red dahlias. The vase and bird figurine were purchased awhile ago, but I’m no longer sure of the vendor.
Categories: Furniture, The Haunted Heritage
April 4, 2012 | 0 commentsHeritage – front porch dormer and window, part 2
The eaves of the dormer are obviously formed by the roof pieces. Due to the die-cut tab-and-slot nature of this build, the slots are larger than necessary. When the pieces are glued together, there are gaps left around the tabs. In addition, the roof pieces don’t fit completely together, so it looks a little off to me.
To disguise this method of construction, I used 1/32″ thick balsa wood to create a veneer layer. This will hide any gaps and holes without adding too much thickness. I first measured the distance between the wall and the back of the gable trim.
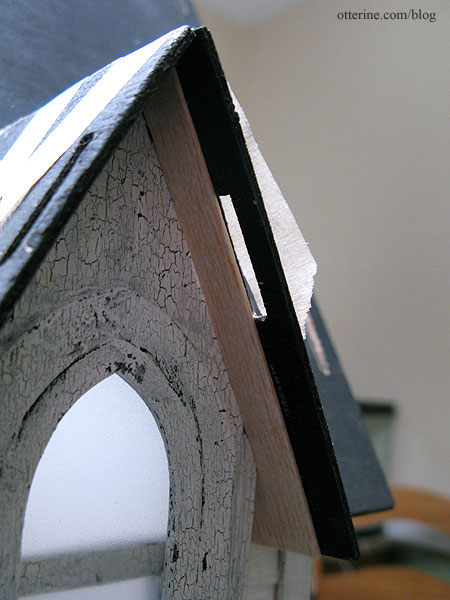
Once that piece was cut, I popped in the gable trim to trace the remaining exposed eave in front.
I did the same for the opposite side, and it already looks cleaner.
I taped the pieces in order on my painting board with the bottoms level. I measured 1/4″ increments to the top. Using an awl, I indented the wood along those measurements.
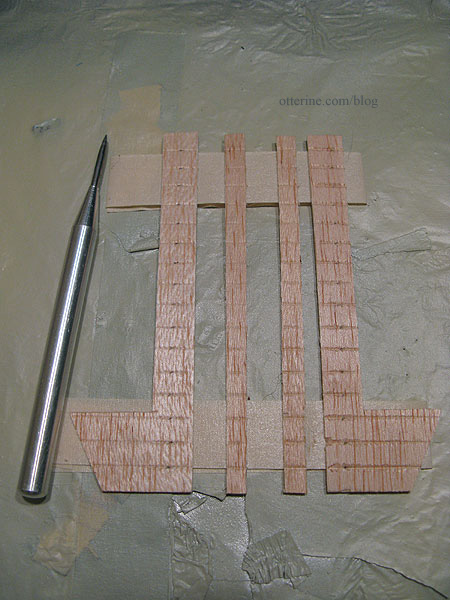
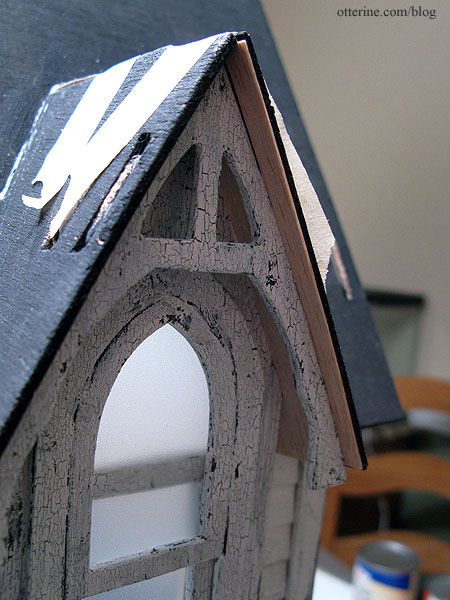
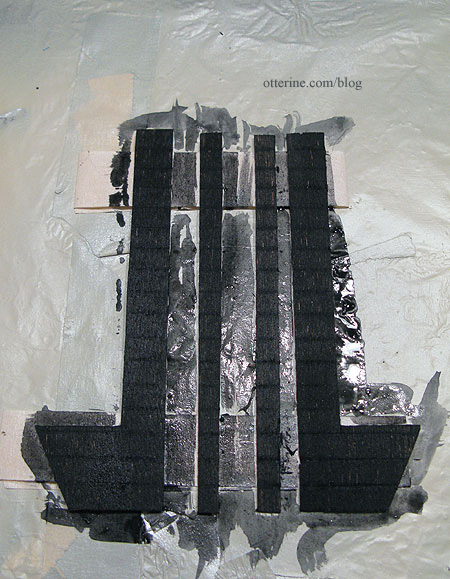
I treated the wood with a wash of black paint followed by the crackle medium.
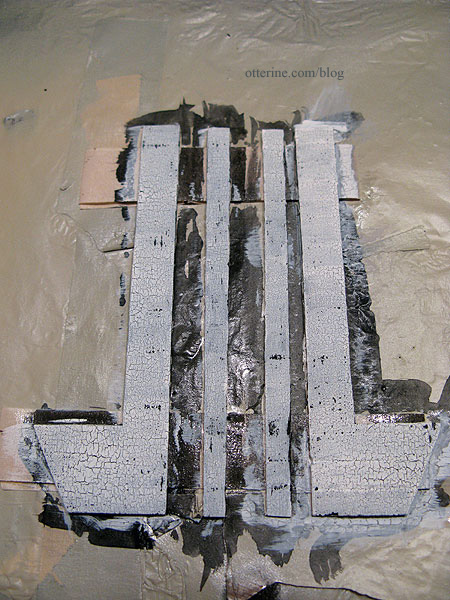
I then brushed on white paint. The lines are not all that visible, but I think it’s enough texture to do what I intended.
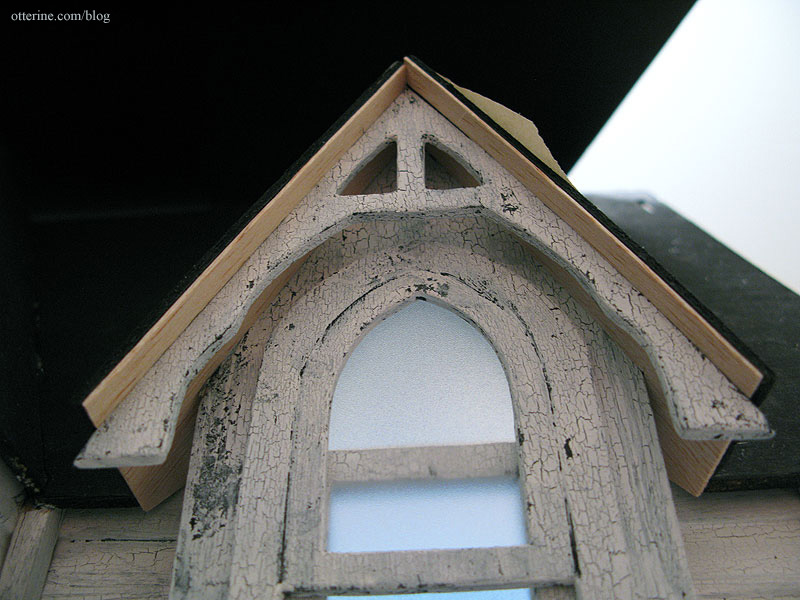
I glued the veneer pieces to the eaves and glued the now shortened gable trim piece in place. There will be trim along the front edges of the gable added later when the roof shingling is done.
This was my test area to see if I liked this finish, and I really do. I think it adds a lot of realism for relatively little effort. I wasn’t going to cut individual boards for the eaves the way I have for porch ceilings. :D So, I’ll be repeating this process for the large gables when I get to them.
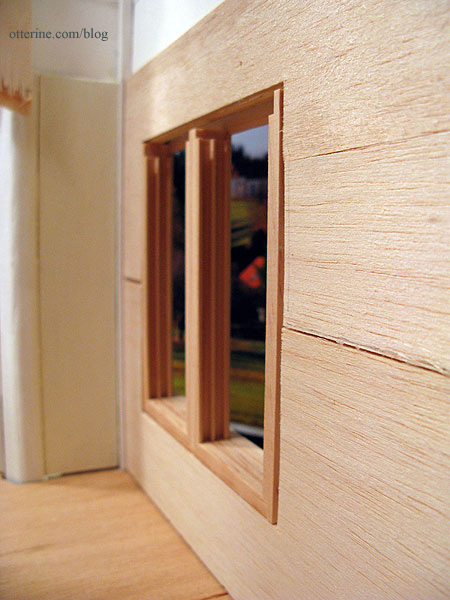
I added two laser cut brackets under the dormer window as well as some square trim on the sides. I used this trim since it mimics the look of the inner wall connectors.
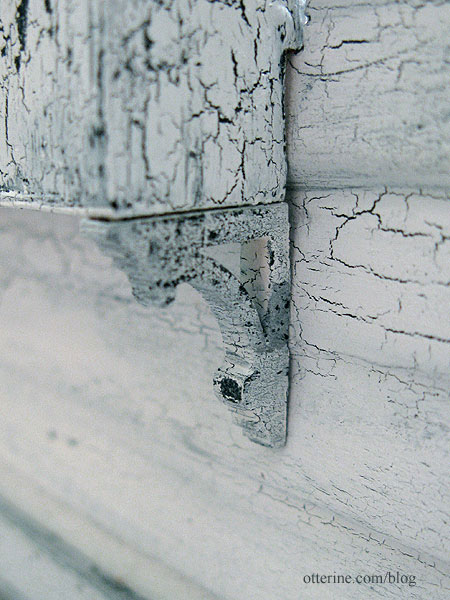
The more white paint I apply to the house, the more you notice the extra grunge layer I put on the portico when I assembled it. Later on, the rest of the house will get this same treatment.
Categories: The Haunted Heritage
April 1, 2012 | 0 commentsHeritage – front porch dormer and window, part 1
The second floor dormer window was to sit atop the original kit porch, which is no longer part of my Heritage.
I also raised the ceiling in the parlor, but I can’t raise this window by the same amount since the roof pieces would no longer fit correctly. And, I can’t cut down the window. So, instead of building it per the kit instructions, I had to wing it.
First, I taped the window roof pieces to the main roof then tested out the main window piece. It didn’t even come close to fitting – the curse of die-cut parts. I fixed the top angle and was able to get the window to fit. It doesn’t help that the main window piece is also warped.

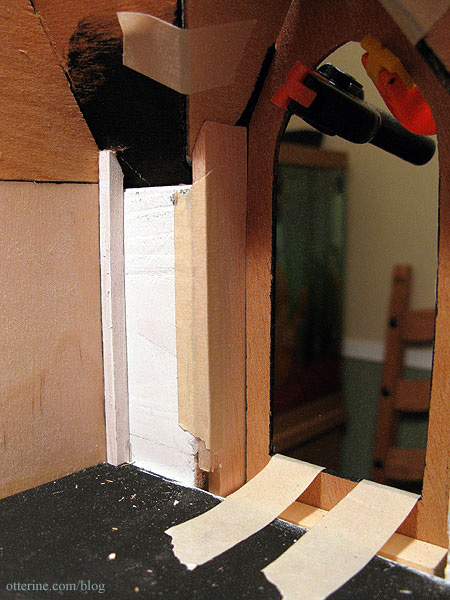
I added 5/8″ of scrap wood behind the lower portion of the window to hold the window straight out from the house.
I cut new sides that lined up with the exterior window. I used balsa since it’s easy to cut and shape, and it won’t be holding any structural weight. Basically, I was just building this one piece at time, making it fit along the way. Once the basic structure was determined, I could work on fine-tuning the fit and aesthetic.
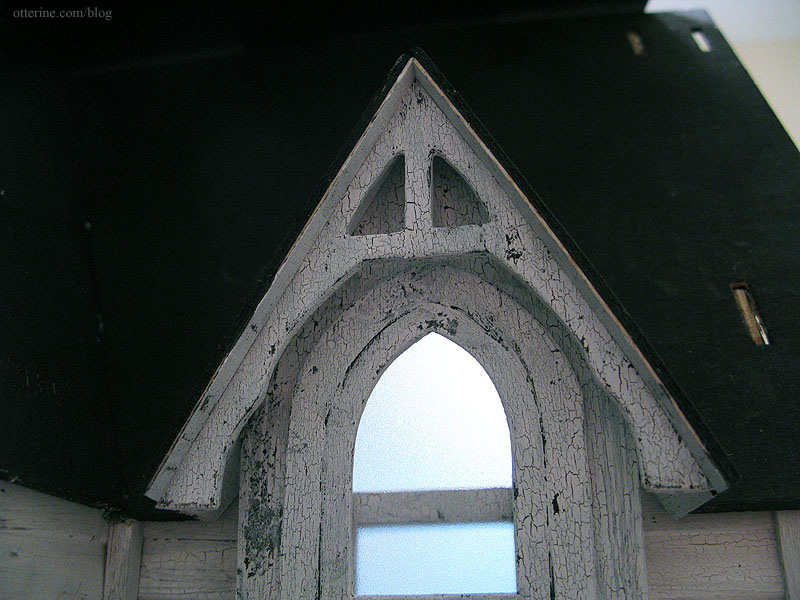
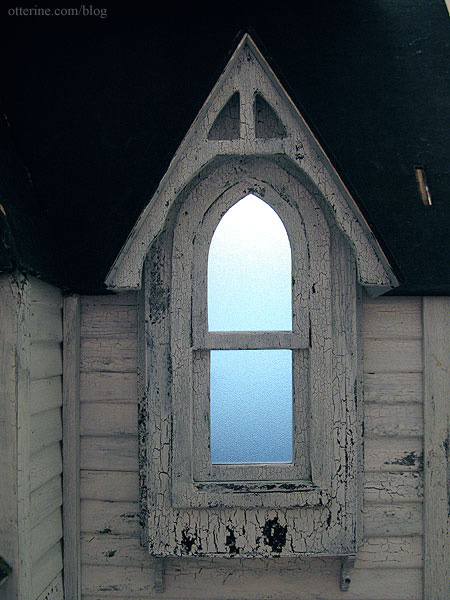
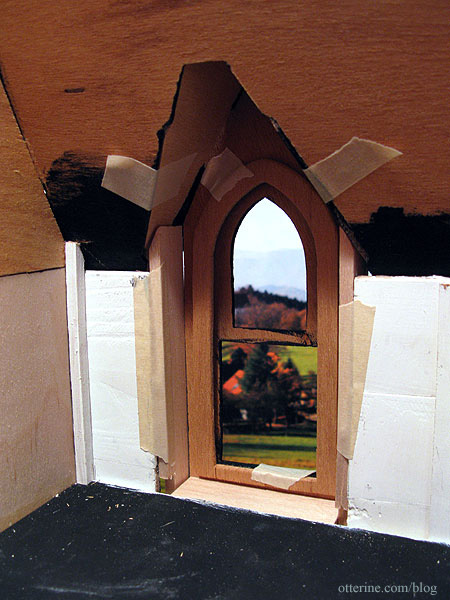
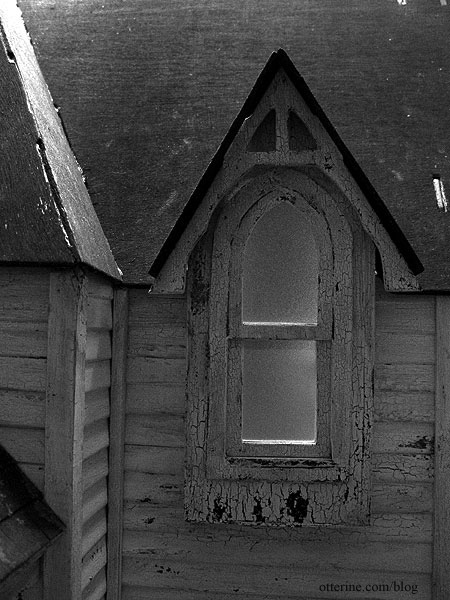
I think we have a winner! This window will have the same aged white paint as the rest of the windows.
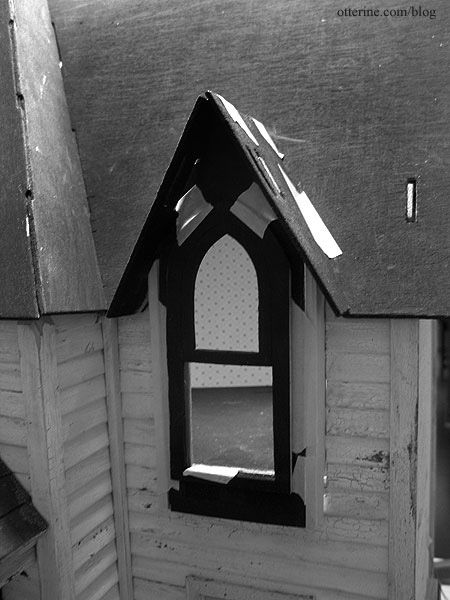
Today, you get black and white photos because my orange shirt reflected on the white house and messed up the colors. :D Looks a little creepy, no? The gaps around the window will be masked with trim, and I’ll finish the bottom of the exterior portion as well. I think it will work well with the portico and lower front window.
The new sides also line up with the interior walls. I’ll re-cut the new sides to fit better, but it already works better and should make it easier to decorate on the inside without all those silly wall connectors like the one in the corner there.
On the inside, this will now be a floor to dormer-ceiling window, so I’ve eliminated the sill. I trimmed the outside edges of the window frame pieces because they seemed bulky to me. This won’t effect the functionality of the window. I added a scrap of wood to fill in the hole and make the window level with the floor. Should be just enough room for flooring.
I cut new side walls for the dormer window and spent a fair amount of time repairing the old, brittle wood of the remaining original kit pieces. I decided to assemble and finish the window in its entirety before installing it, figuring it would be easier to touch-up the paint by doing it this way.
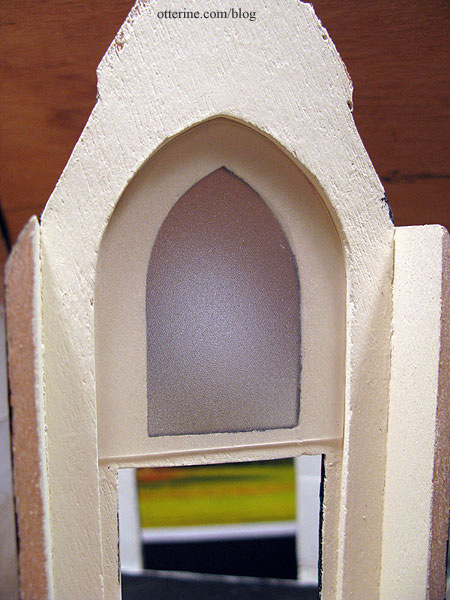
I opted for a fully painted interior to the dormer window assembly since I thought wallpapering would be too difficult in this small of an area. A painted window wouldn’t look out of place in an otherwise wallpapered room, in my opinion. Once the dormer roof pieces are in place permanently, I’ll fill in the gaps and touch up the paint.
One of the nice things about working in an office is that when bound presentations need to be taken apart and shredded, I can snag the specialty papers. Here is a frosted tab page.
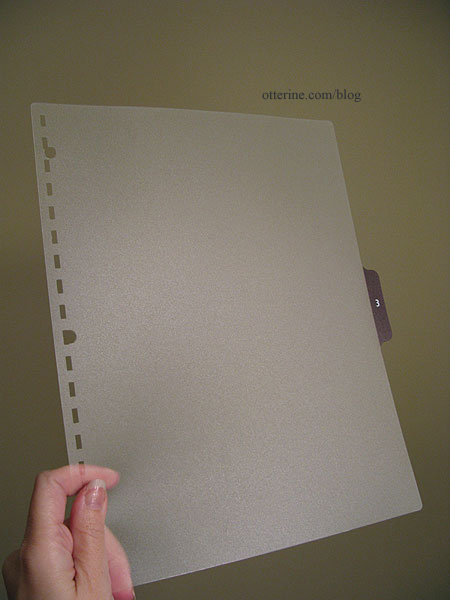
Cutting the window inserts from this material gives grandma a little privacy. :D
So, does the window work? Yes! Well, it’s a sticky window, but it works. :D
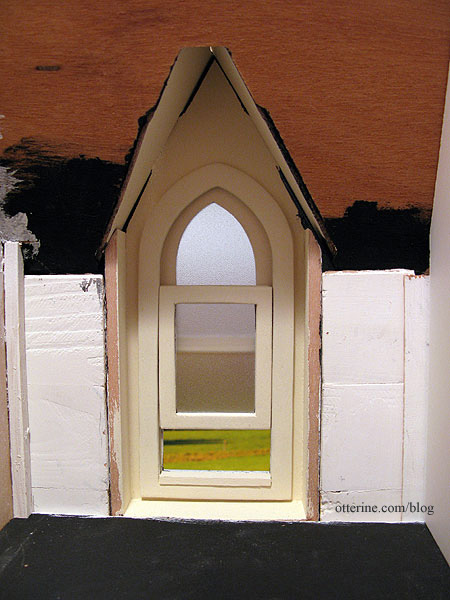
Aw, yeah…that’s creepy. :D
As you can see, I’ve painted the gable trim for the dormer. Both the roof pieces and this gable need to be adjusted to fit, but so far so good.
Finishing the exterior here. Finishing the interior here.
Categories: The Haunted Heritage
March 31, 2012 | 0 commentsHeritage – entryway accessories
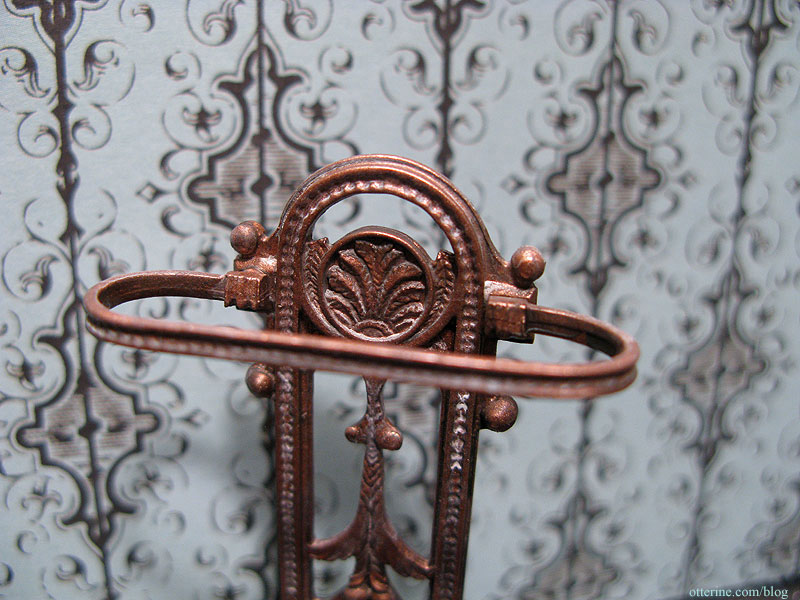
Over the weekend, I assembled the Phoenix Model umbrella stand kit. I primed it with grey and then sprayed it Burnished Copper Metal by Rustoleum.
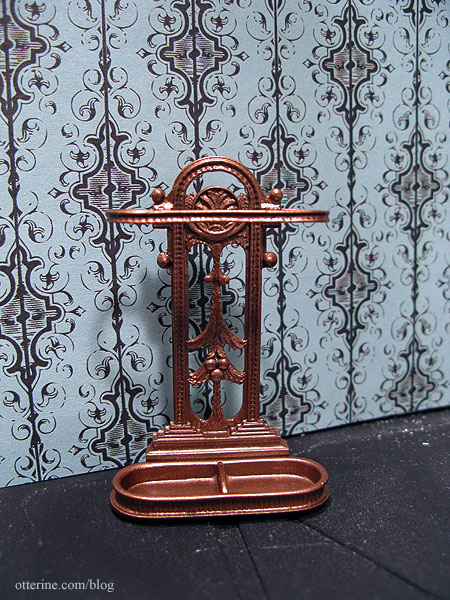
Once that was dry, I added a few paint washes. A few simple washes actually add weight to the piece, make it seem like a heavy piece you might stub your toe on if you’re not careful.
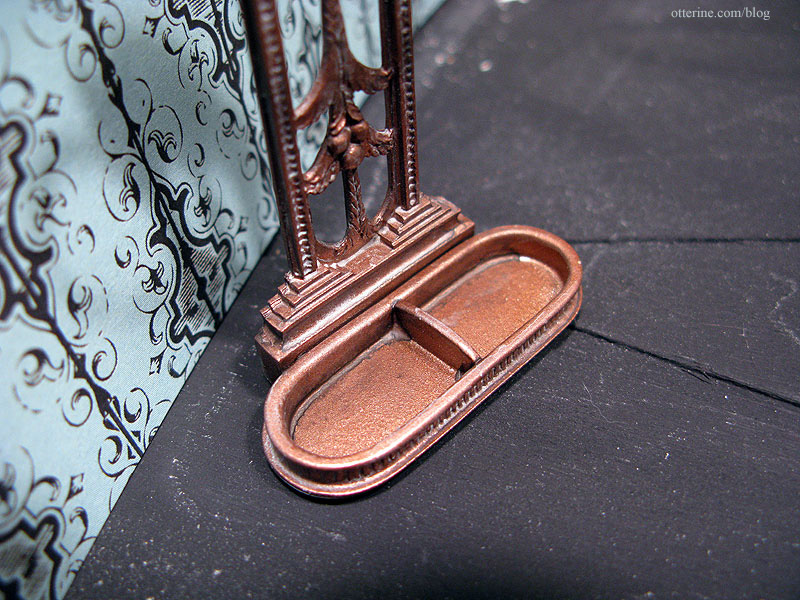
This piece has so many beautiful details – a true quality kit.
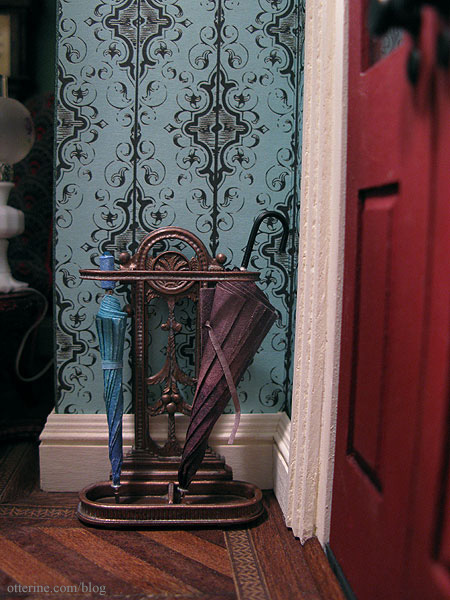
Add the beautiful umbrellas by Fran, and it’s the first vignette ready for a soon to be decorated foyer.
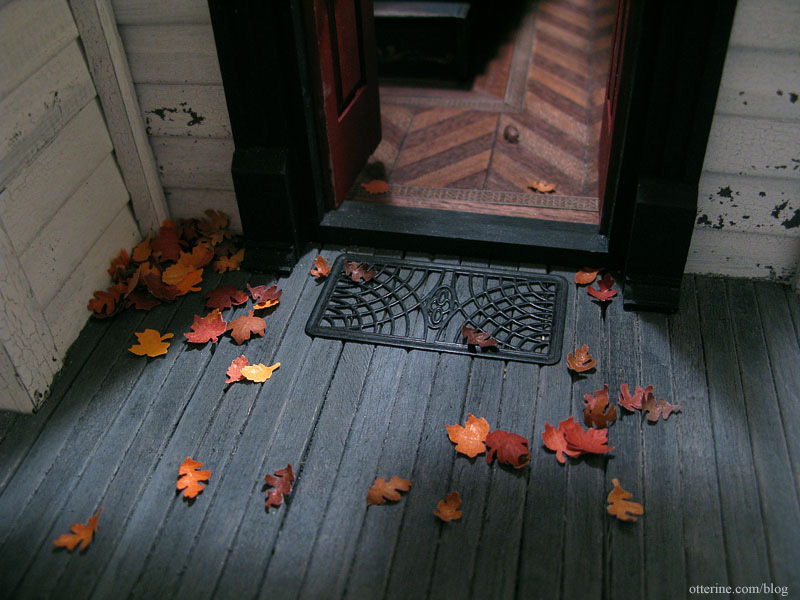
The other item I have for the entryway is a laser cut doormat from The Dolls House Mall. It started out as brass.
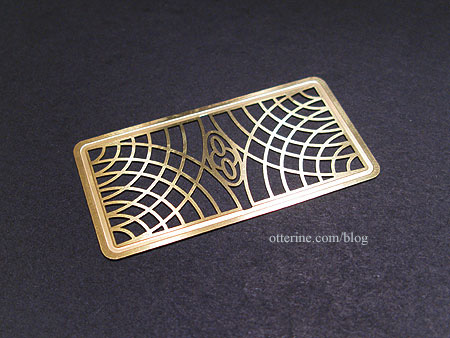
I spray painted it flat black and then added a brown paint wash to age it.
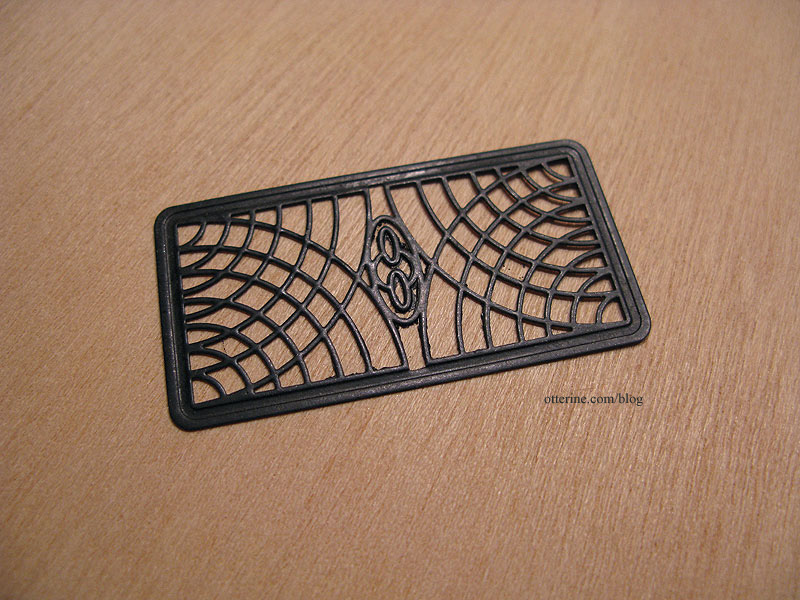
Love it! :D
I also added a metal doorbell that I found at the Bishop Show. It started out as plain white metal but I still sprayed it with grey primer. This gave the black paint wash something to stick to. I didn’t want to paint the doorbell all black since it would be lost on the black door frame. I dabbed a bit of white paint on for the button.
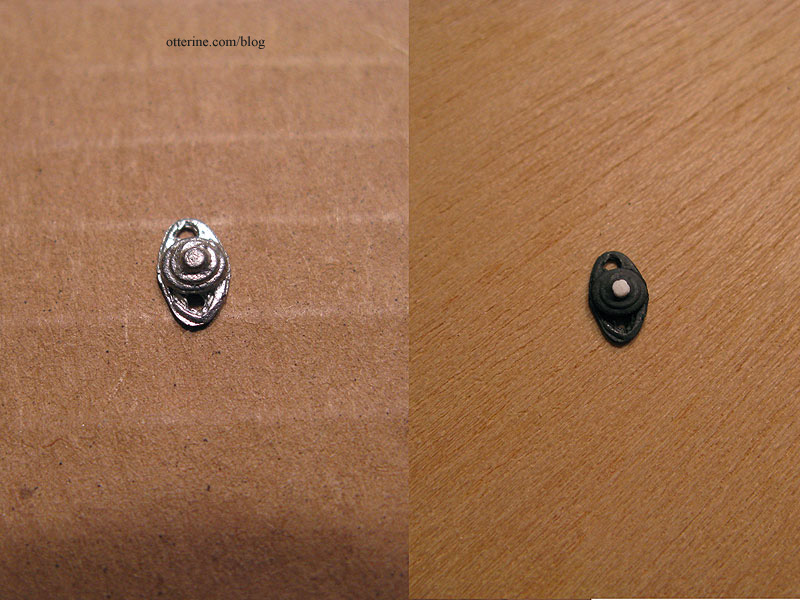
After gluing it to the door frame, I added some black and brown dry brushed detailing.
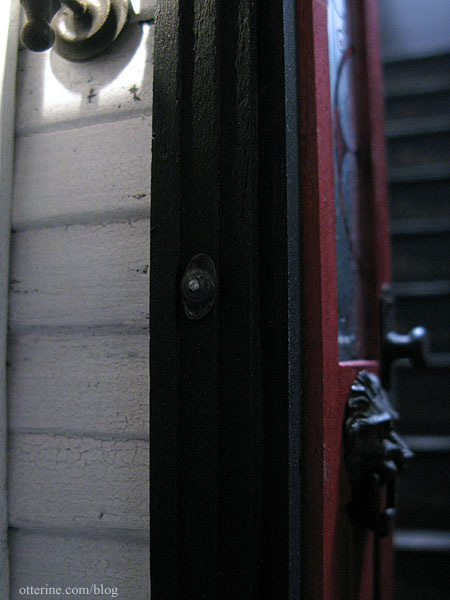
These two small details add to the realism of the front door.
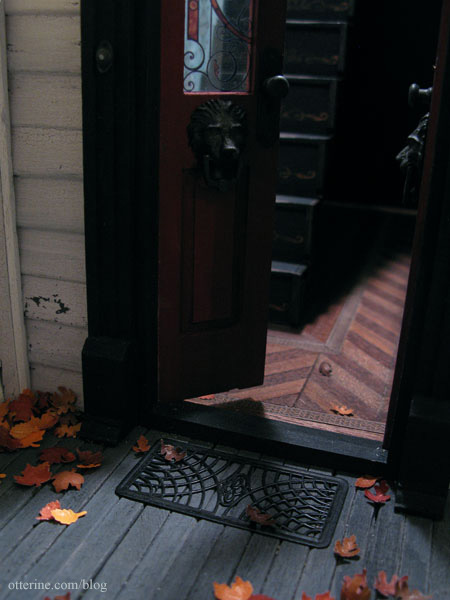
Come on in! :D

Categories: The Haunted Heritage
March 28, 2012 | 0 commentsBanjo wall clock
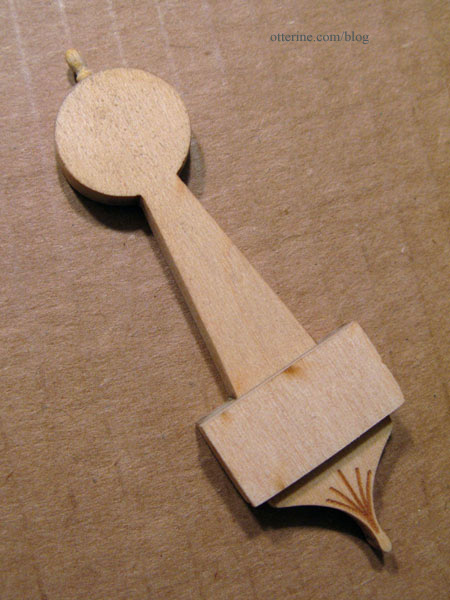
This is the Banjo wall clock from Cynthia Howe Miniatures. It’s a graceful kit with wonderful details.
I started by sanding most of the laser cut residue from the sides of the pieces. I also added a belaying pin as a topper after seeing several real life examples with this sort of detail.
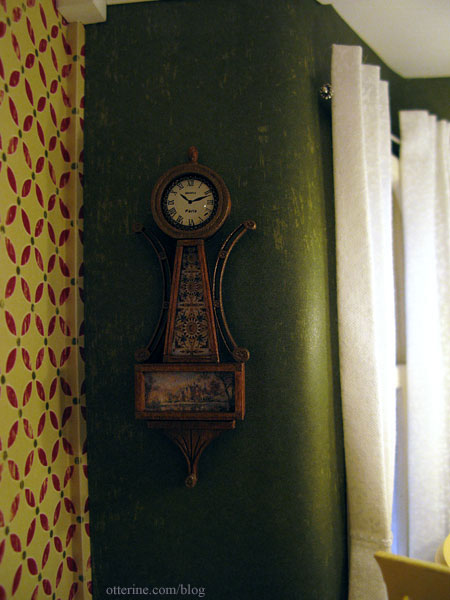
I didn’t want the clock to be lost on the dark green wall, so I used IKEA antique stain, but that was too light. To fix this, I mixed Traditional Burnt Umber acrylic paint with Staining Medium, both by Folk Art. The Staining Medium is gel that makes acrylic paint translucent like a stain. I love the wood grain of these tiny pieces. It will make it look like a real life sized clock.
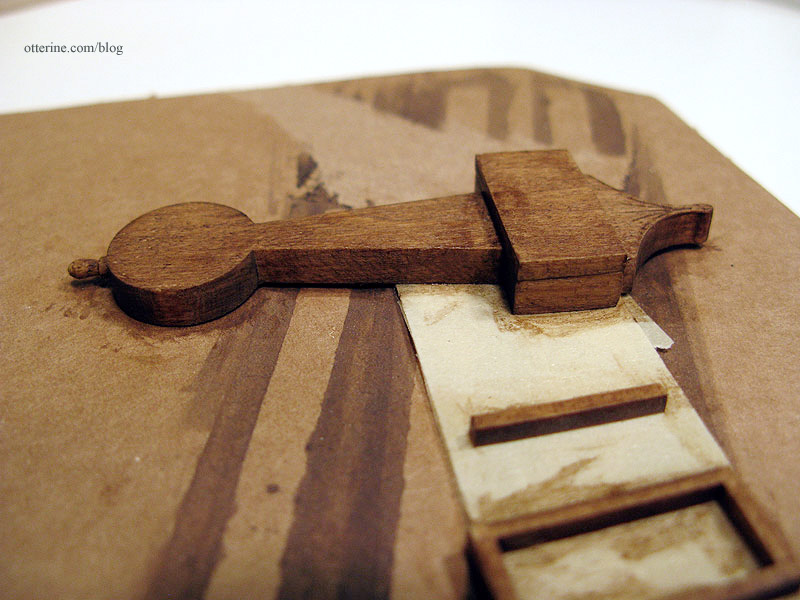
I used Liquitex Iridescent Bronze paint for the metallic accents and added two light coats of Delta Ceramcoat satin varnish to bring out the beauty of the wood.
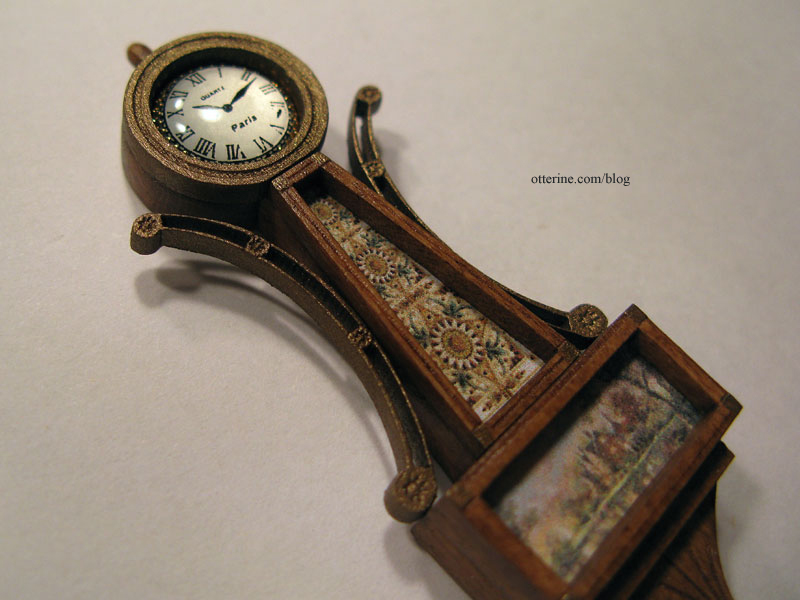
The cabochon clock face is very realistic.
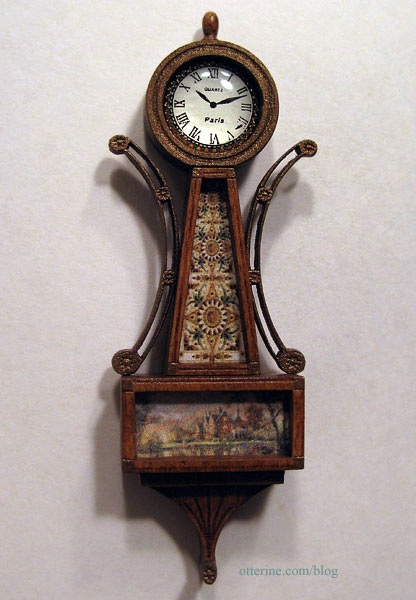
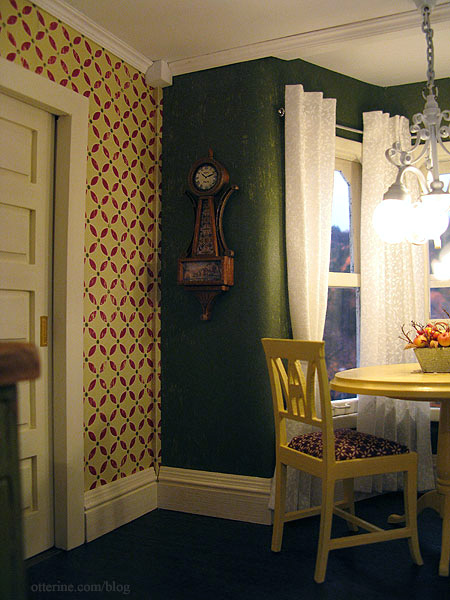
The artwork fits the kitchen décor perfectly.
Love this kit!!!! :D
Categories: The Haunted Heritage
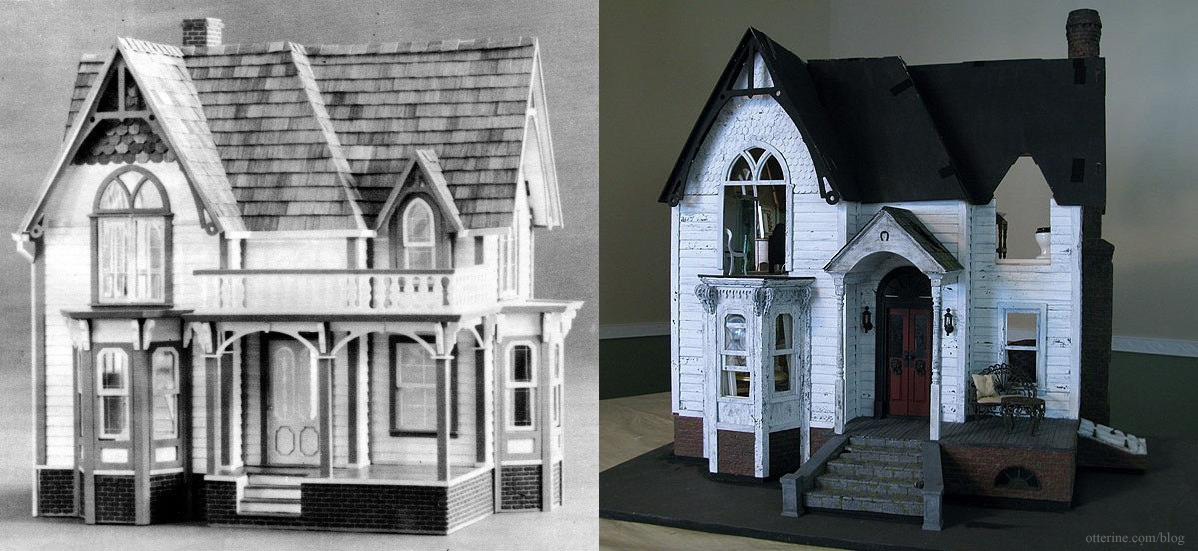
March 27, 2012 | 0 commentsMy old house … or … this place is a dive!
This particular Dura-Craft kit has walls built using strips of pre-milled siding. They are imperfect and therefore the interior surfaces are imperfect. I padded the walls on the first floor for a number of reasons: to allow for the addition of working Houseworks components, to provide a ledge to support the ceiling boards, to eliminate (for the most part) the obvious appearance of the wall connectors, and to smooth out the interior wall surfaces.
Here’s the kitchen in the beginning of the build where you can see how rough the interior walls are. It’s rather fun to look back and see what it looked like during the planning phase. :D
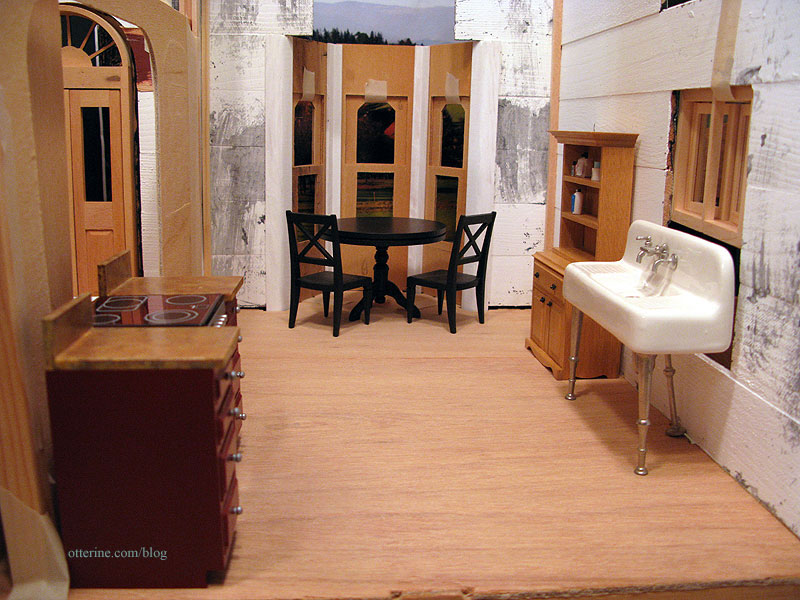
And, after the padding (and enlarging the window opening). Much smoother surface.
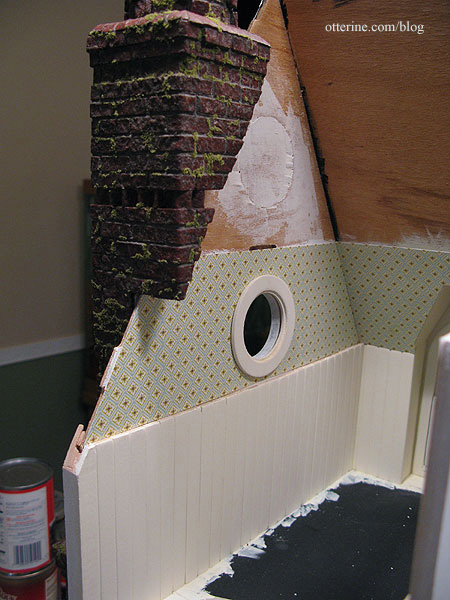
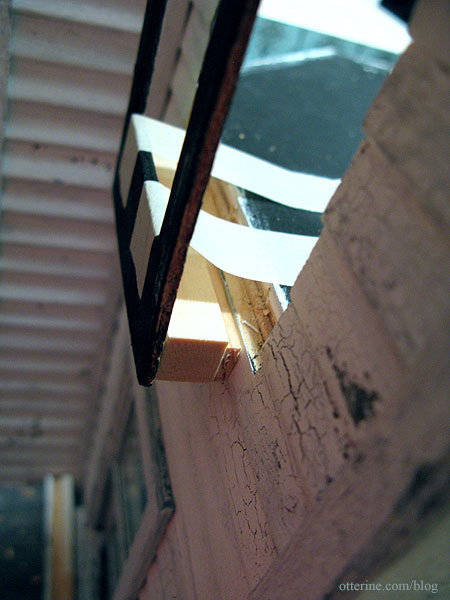
Padding won’t work on most the second floor because adding any additional thickness beyond the wallpaper will interfere with the assembly of the swinging windows. Even in the bathroom, where I added a thicker window, there isn’t any give since the added gable shingles make the interior portion of the round window flush with the interior wall.
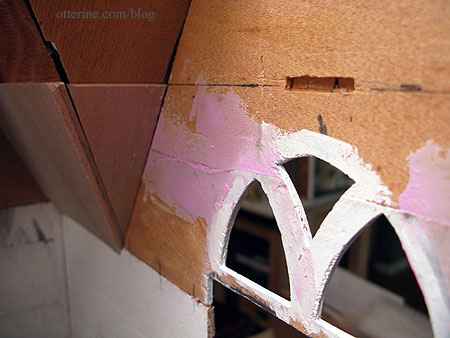
So, out comes the spackling! I did smooth these walls out somewhat beforehand, but this is more for fine-tuning since the two papers I have for the bathroom and bedroom are thin and likely to show the more obvious flaws underneath.
I use the spackling compound that goes on pink and dries white.

It’s easier to see where you’ve put it and you can tell when it’s ready to sand and paint.
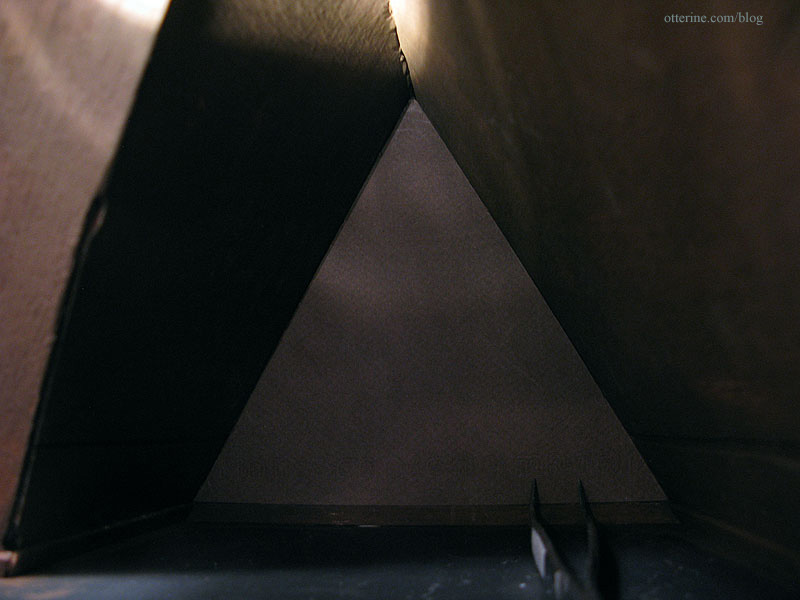
I cut the new dividing wall for the bedroom, too. This is a two-part wall: a 1/8″ thick plywood wall that sits atop the kitchen ceiling board and the roughly 1/4″ thick foam core board mockup wall that completes the parlor side of the pocket door wall. (As a reminder, I first fixed the gaps from the roof assembly here.)
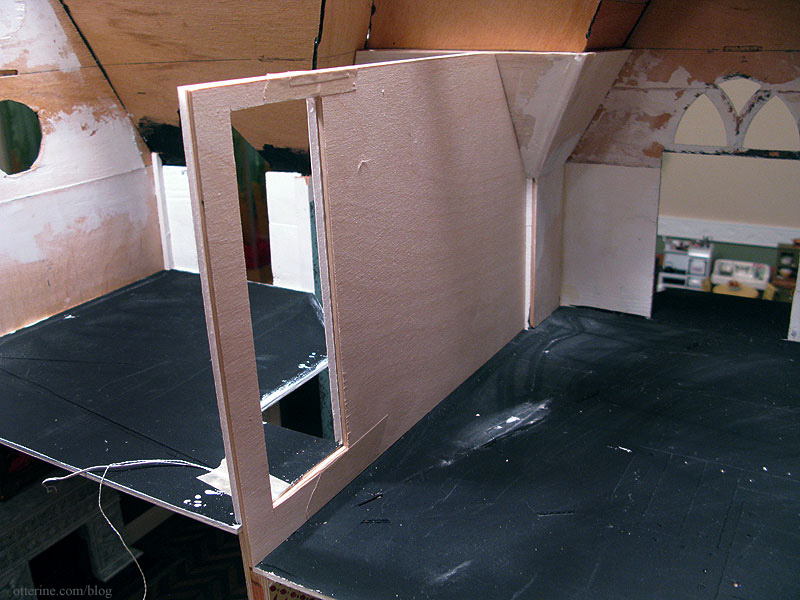
I kept the mockup board and used it as the other half of this wall since the plywood would hold the minimal weight of the attic floor board. In addition, the pocket door wall was slightly warped and I needed the extra thickness to make up the difference.
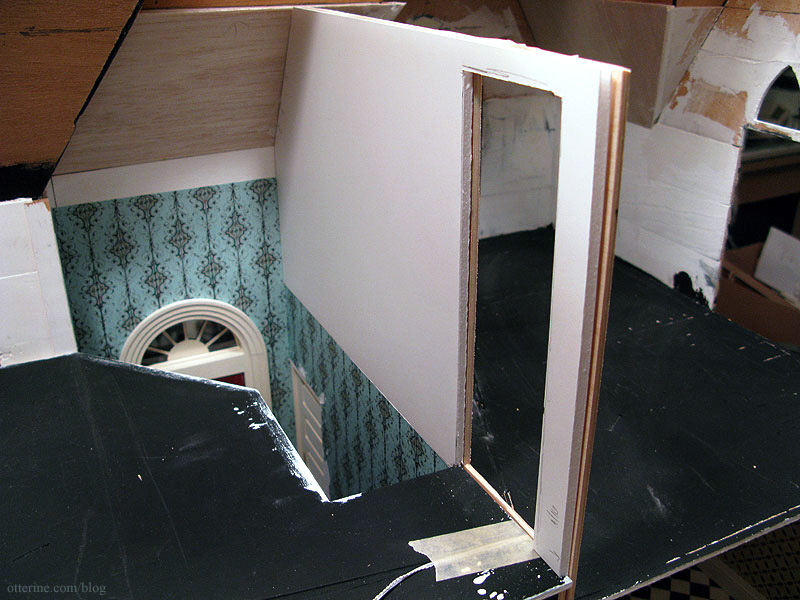
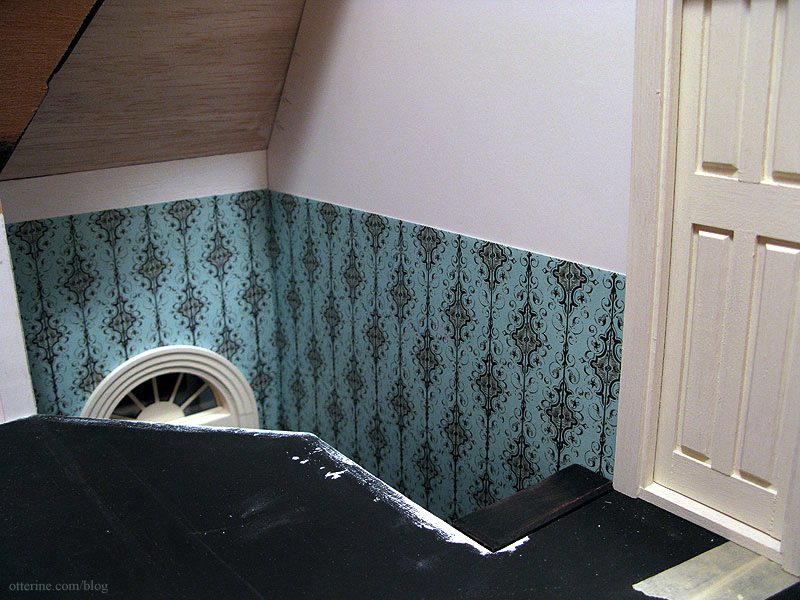
As expected, the line between the cut wallpaper bothered me.
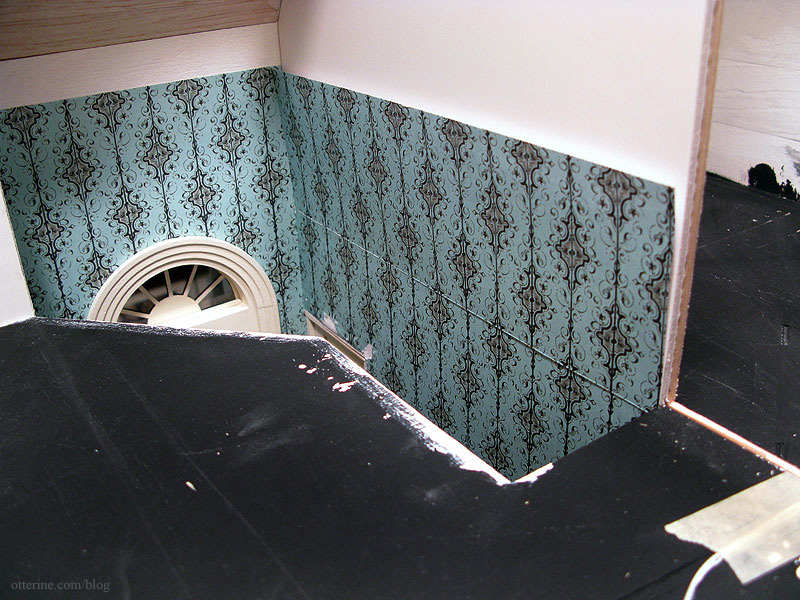
I took off the pocket door trim and plan to wallpaper over the existing foyer paper on this wall, continuing up to the same level as the top of the foyer. I’ll apply this once I glue in the bedroom wall, but I already like it better.
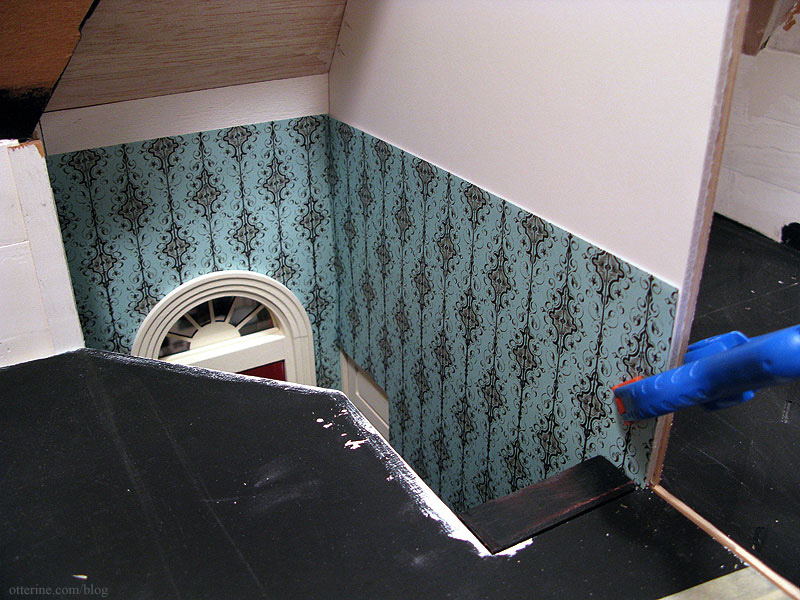
I like the plain wall above, too, so I’m thinking a chair rail height border with a plain off-white wall above the Turquoise Gothic Stripe scrapbook paper.
Wallpaper finishing here.
Categories: The Haunted Heritage
March 24, 2012 | 0 comments


NOTE: All content on otterine.com is copyrighted and may not be reproduced in part or in whole. It takes a lot of time and effort to write and photograph for my blog. Please ask permission before reproducing any of my content. (More on copyright)

Categories:
Grandma’s attic – faux slats and rafters, part 2
I continued working on the faux slats and rafters for the attic. Now, the front gable portion is small to work in, but it is manageable. Even so, I was not able to get in there to measure. I used the original gable template from the side gable and used that as an approximation. It worked very well.
Since I used the roof templates to make other templates after the shingling was done, I had to start over with those. I made the front gable templates by placing the paper on the outside of the roof to get the basic shape and size. Note to anyone making a Heritage: make at least two templates of these roof pieces and keep them until you’re finished!
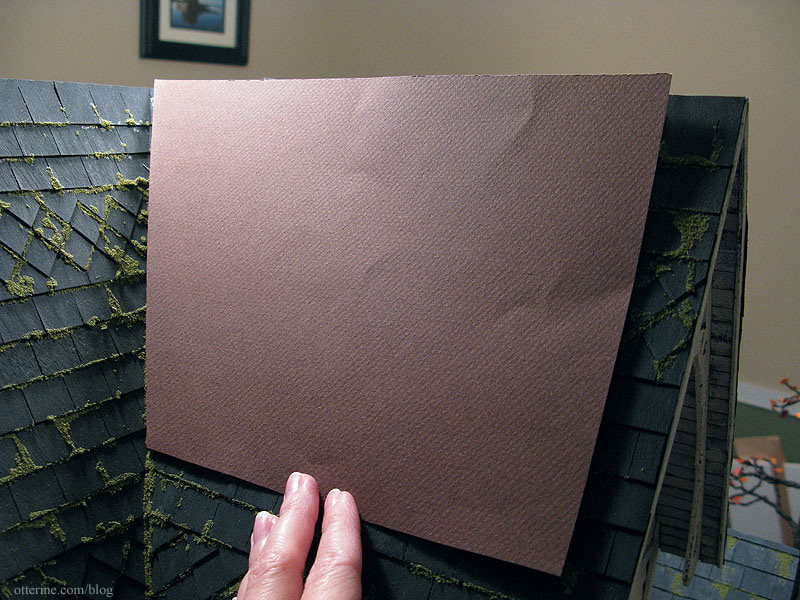
I then cut them down to fit.
I added the wood, painted and measured the rafters. Here are the forward and right side pieces in place.
I didn’t remember to mark the rafters on the right side gable, but I did remember on the left side. It shouldn’t be much of a problem figuring it out from there.
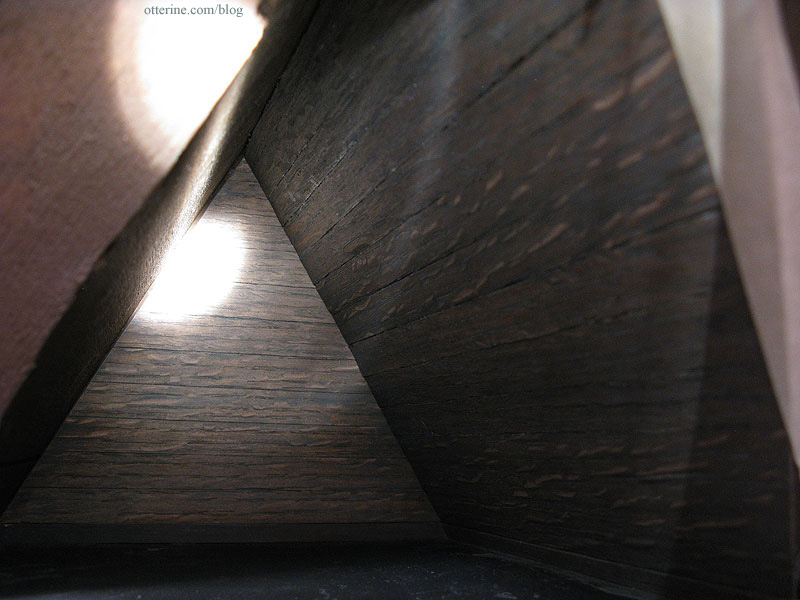
For the inside peak, I used a triangular piece of wood from my stash. This isn’t listed in the Heritage parts, so I am guessing it came from the old lost Dura-Craft kit. The piece I had is long enough to use both here in the gable and for the main span across when I get to that part.

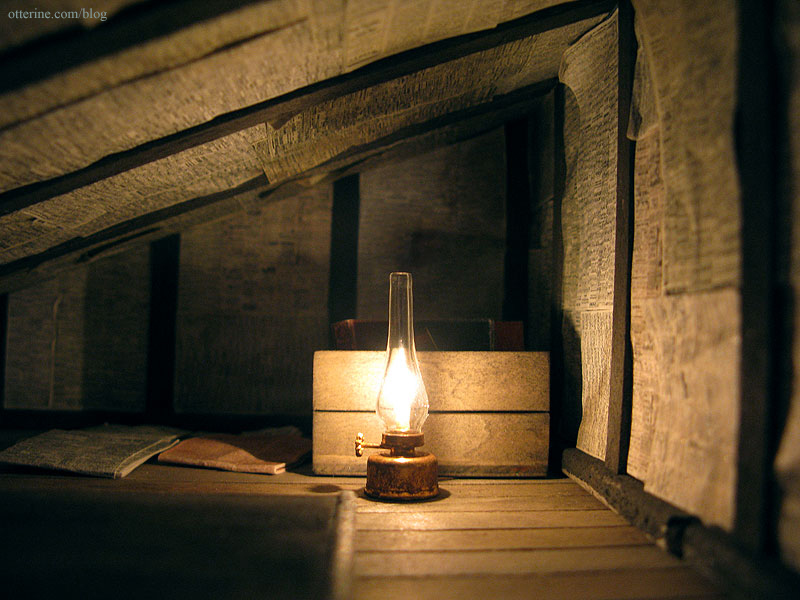
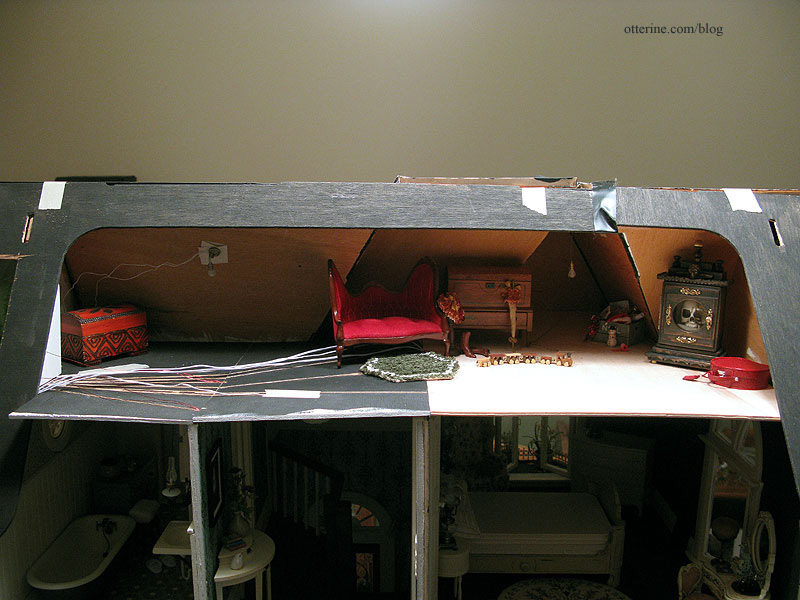
I painted it to match and then glued it in place. I installed the hanging light from The Lighting Bug and pulled the wire through. I aged the ceiling plate and socket with acrylic paint since it wouldn’t be handled at all.
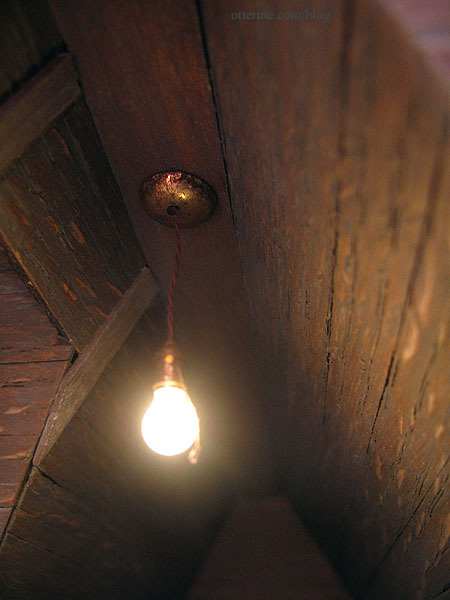
I love this light!!!! :D
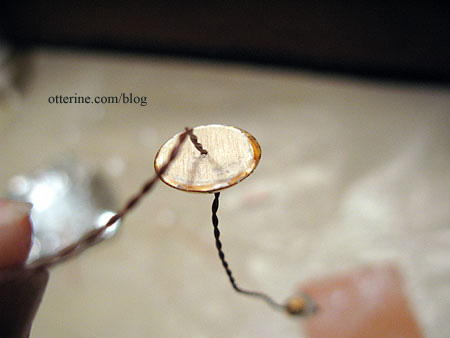
One tip for these. The ceiling plate is hollow, so I added a small Woodsies circle to steady the whole thing. The Woodsies circle is glued to the plate and the ceiling board.
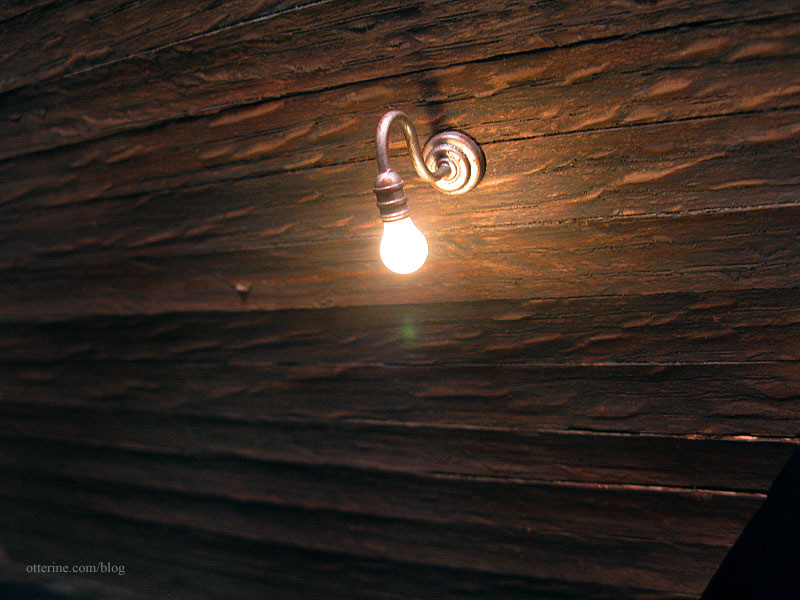
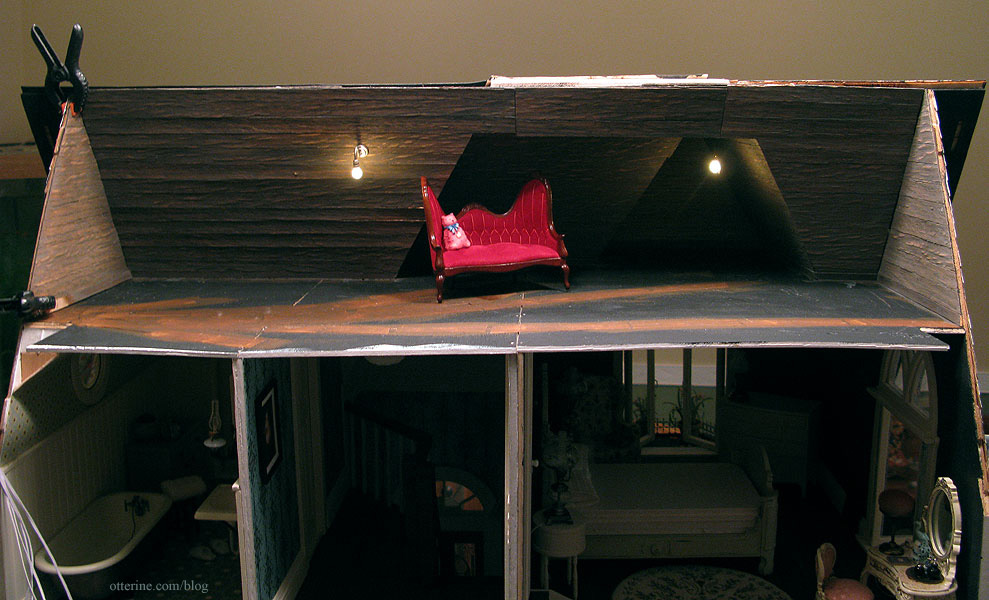
I finished up the rest of the front roof walls and installed the wall light, also from The Lighting Bug. The left side gable and its floor support will be installed after I get the attic chimney completed.

I love this light, too!!!! :D
I think this rustic background will be perfect for the antiques and treasures stored here.
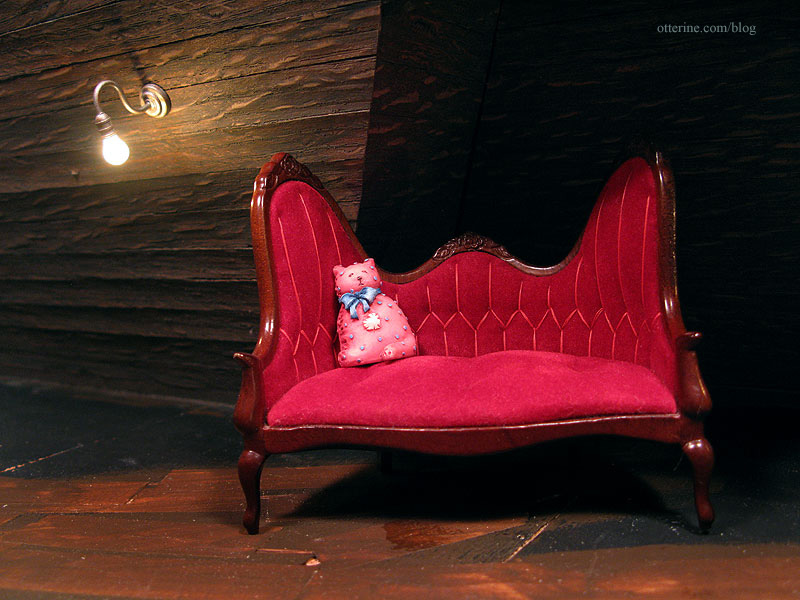
Rafters and detailing still to come…
Categories: The Haunted Heritage
January 5, 2013 | 0 commentsGrandma’s attic – faux slats and rafters, part 1
I’m mulling over the idea of using vintage newspaper to line the attic in the same manner as the attic in Baslow Ranch.
But, I also like the look of exposed wood in an old attic regardless of the energy inefficiency. Since I know what a newspaper covered attic would look like, I decided to try a wood slat attic. I can always cover it if I don’t like it, or do a combination of the two. :D
I used Dura-Craft wood flooring strips for the roof boards. These are pieces from both the old lost Dura-Craft kit and the Heritage.
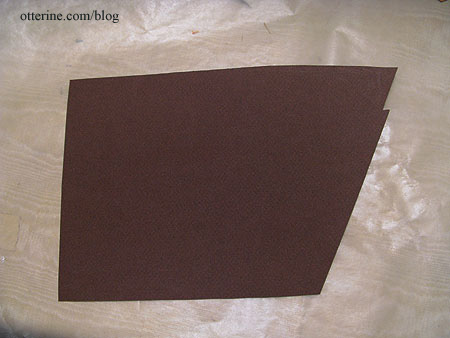
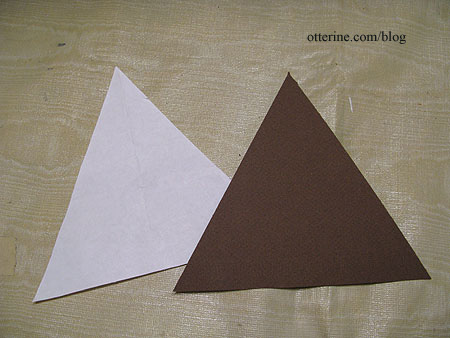
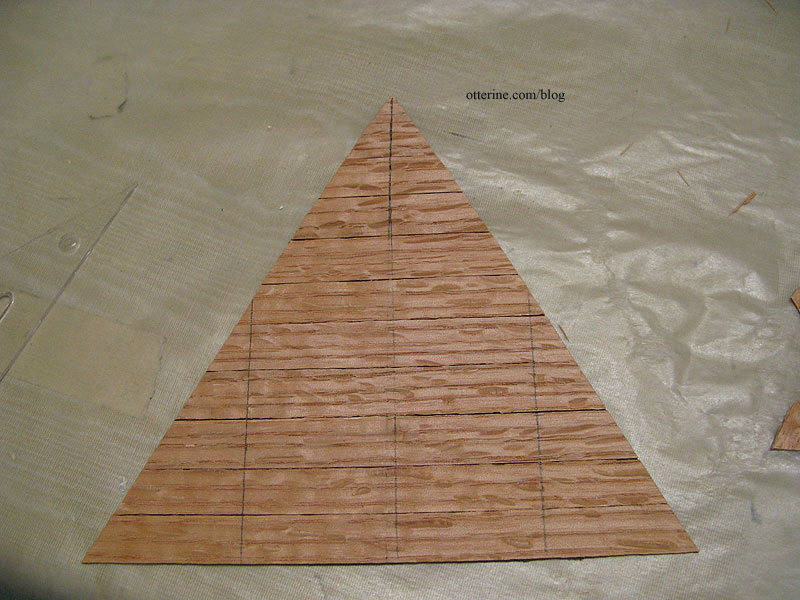
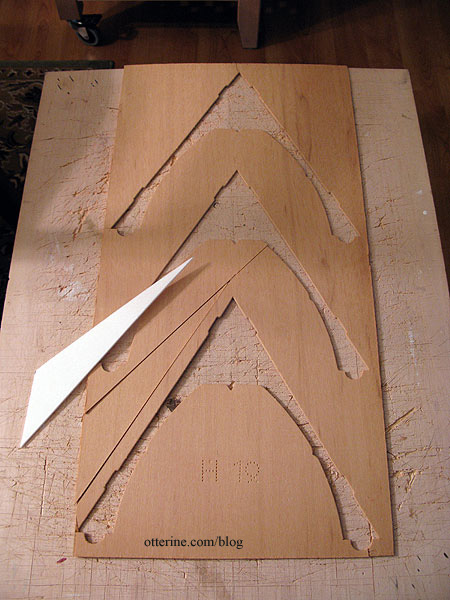
I started with the three gables that are roughly the same size and shape, because they are the smallest and simplest pieces. If I didn’t like the result, I wouldn’t have wasted much time. I made a regular paper template of the side gable and then made the final template from dark brown paper in case it showed through.
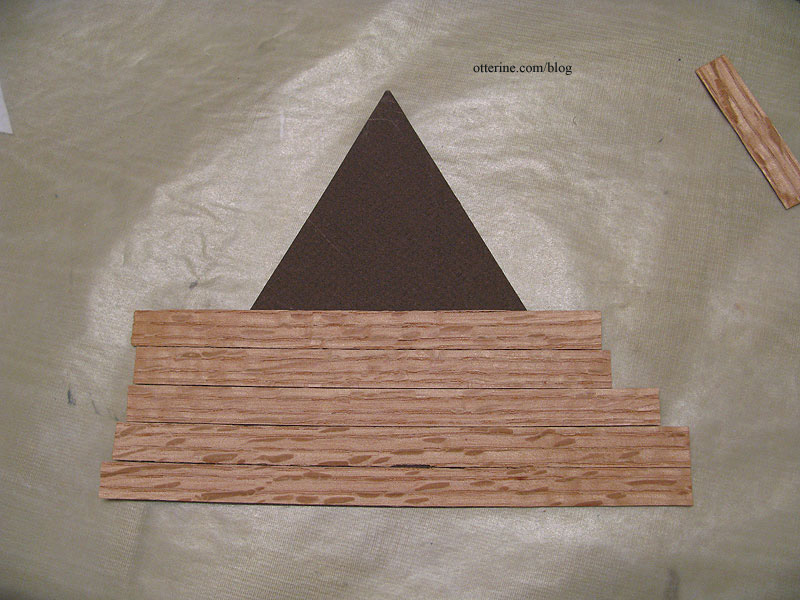
I glued wood strips to the back of the template, leaving them long.
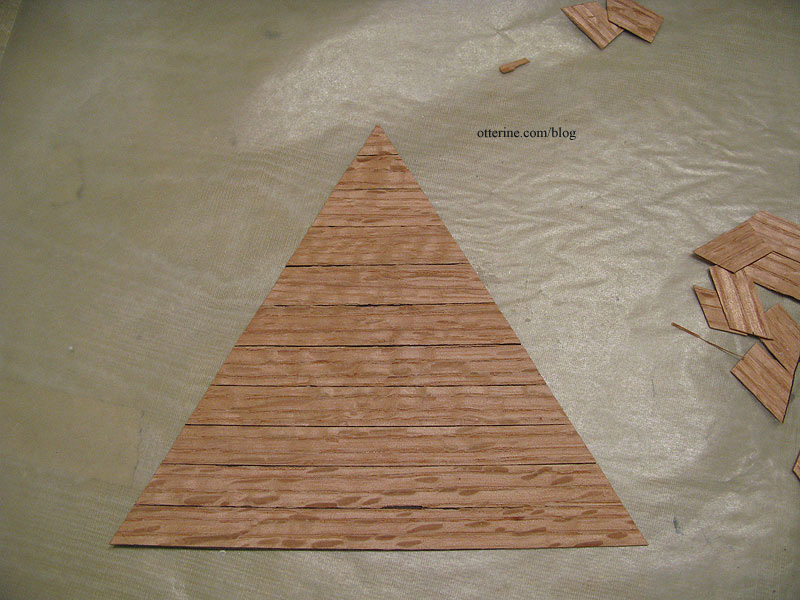
I then cut around the template.
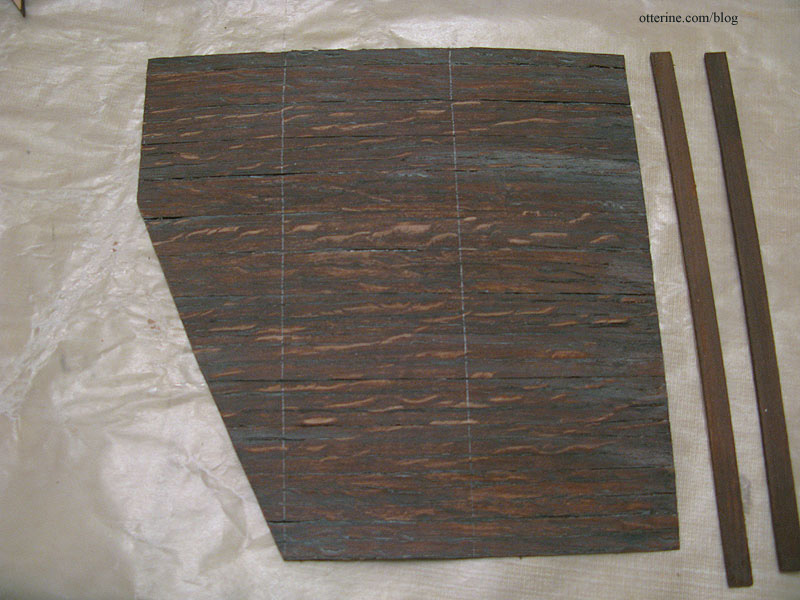
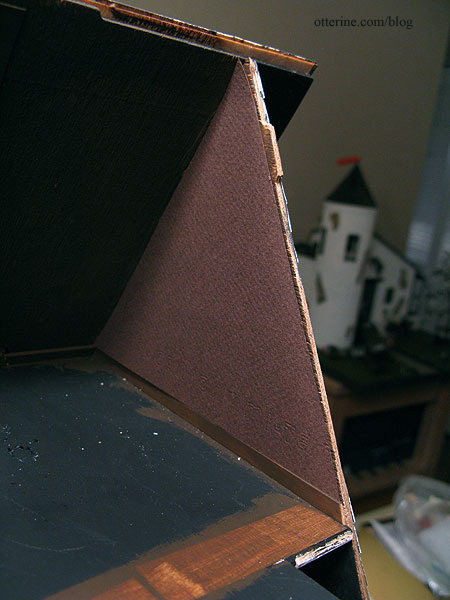
I checked the fit and then marked the visual center and the location of the two side supports.
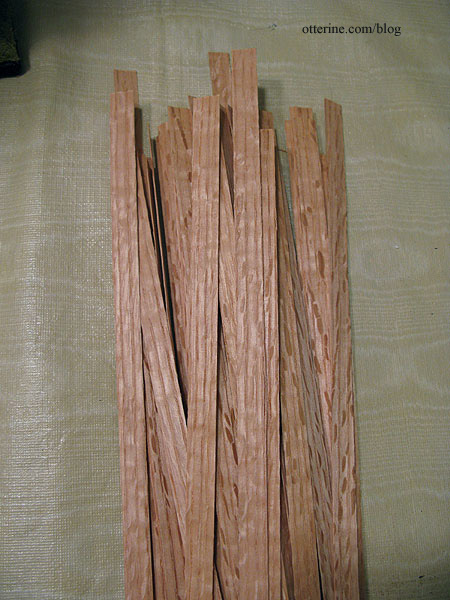
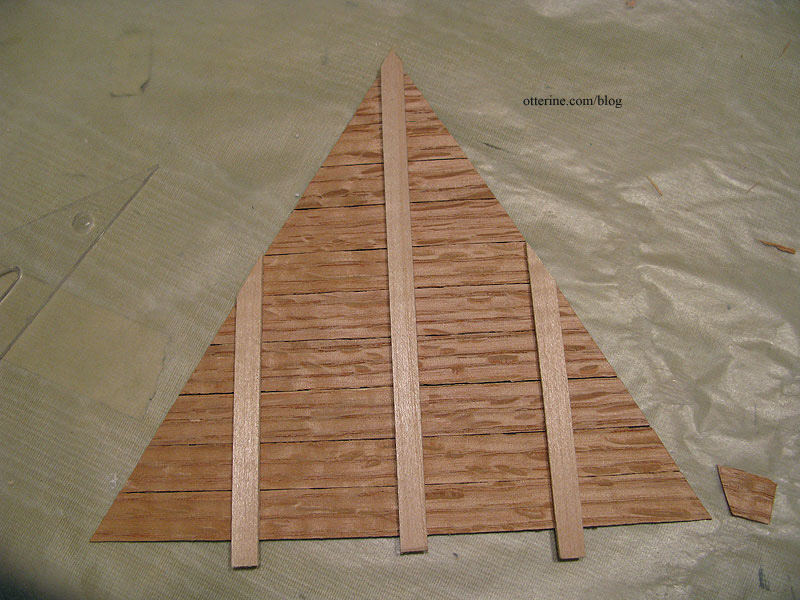
I cut rafters from 1/16″ x 1/4″ strip wood. If this were an actual roof, the rafters wouldn’t be flat, but I wanted mainly the look of an attic more than an architectural model.
I decided to add color before installation in case I needed to press the boards flat as they dried. I stained the wood by mixing Staining Antiquing Medium with Asphaltum, both by Americana. It was a rich color I will definitely keep in mind for future use, but it was too new and warm for an old attic. I added a stain of Staining Antiquing Medium mixed with Neutral Grey by Americana. It toned down the brown.
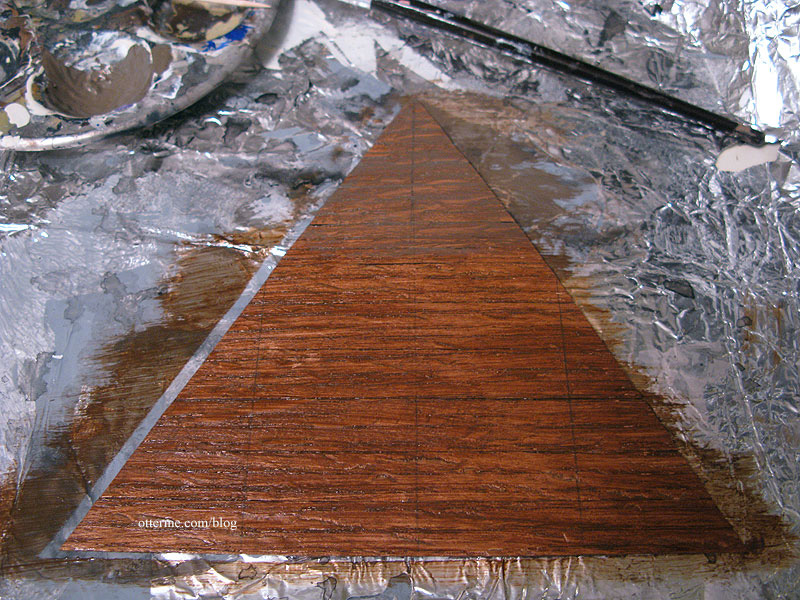
But, it wasn’t “dusty” enough, so I added a third stain of Staining Antiquing Medium mixed with Slate Grey by Americana. Very nice! Of course, I had to add this grey layer to the support boards I had primed brown previously.
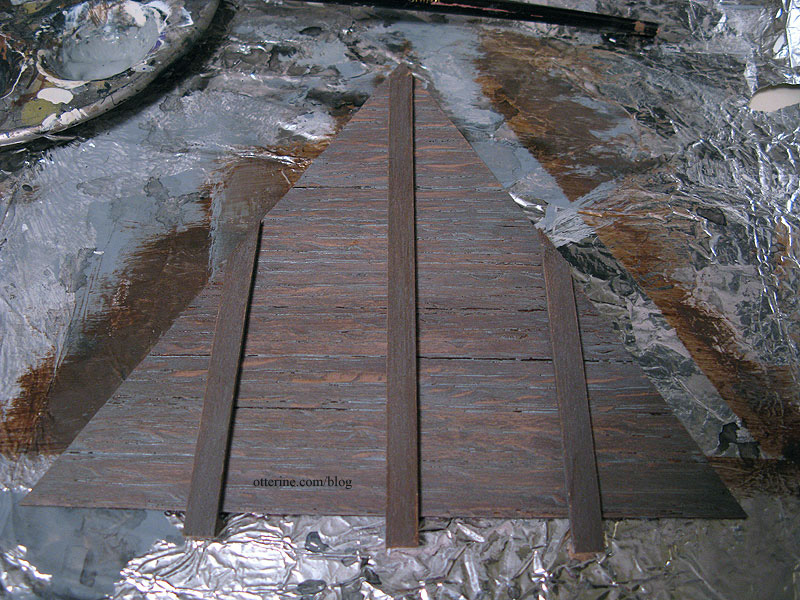
Once dry, I checked the fit again and then glued the main piece in place. I won’t glue in the rafters until I get the rest of the walls done and the floor installed, but I propped them up with mini hold wax.
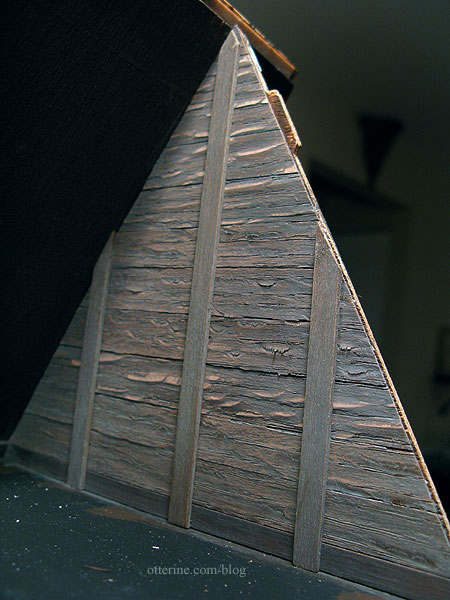
I absolutely love the way this looks! I didn’t sand the boards or the rafter pieces, and I think that really solidifies the rough-hewn look. Hooray!
Categories: The Haunted Heritage
January 4, 2013 | 0 commentsGrandma’s attic – prep work
To help keep the ceiling board in place and (relatively) level, I glued in wood supports along the attic floor. These were cut very rough to keep with the look of an attic.
I cut a new plywood piece for the flat roof since the original kit piece was beyond warped and didn’t fit at all. It won’t be glued in place until I finish the interior of the attic.
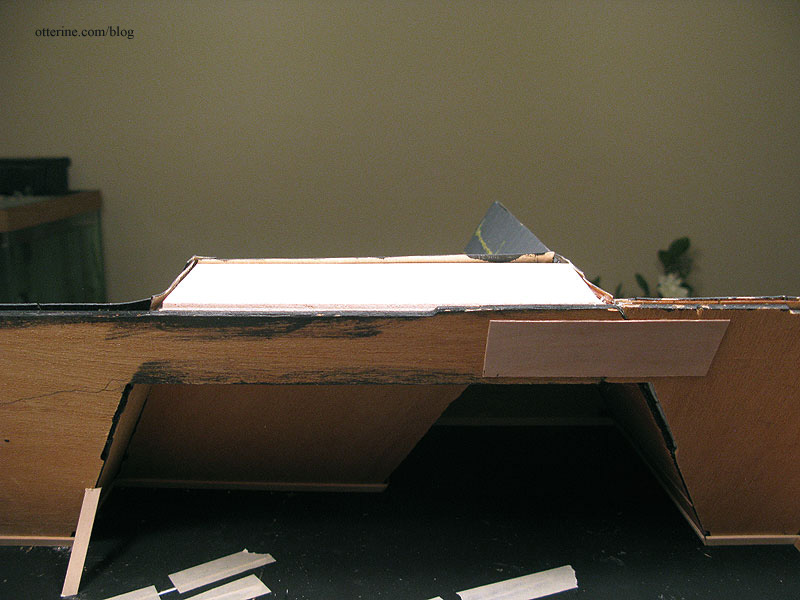
I used my new Dremel to cut my first wire channel in place! How exciting! It’s not pretty, but it doesn’t have to be. It took two minutes and was easier than it would have been with the utility blade. With practice, I’ll be steadier with it. I made the channel around the circular patch where I first cut the round window. I didn’t want to weaken the patch. As you can see, there is no floor support on the side gable. That will be put in place after I get the attic portion of the chimney installed.
I then primed the attic walls and supports with Asphaltum by Americana. It’s already starting to look like a cohesive room.
Categories: The Haunted Heritage
January 3, 2013 | 0 commentsHeritage – bedroom ceiling, part 2
Continuing work on the bedroom ceiling. Since I’ll be installing flat trim around the bedroom ceiling to help disguise any gaps, I traced the walls onto the unpainted ceiling board.
I then cut strip wood following these guidelines. I might have to do some adjusting during the actual installation, but this should give me a good approximation of lengths and angles. Much easier than trying to cut them in place later.
I painted the bedroom ceiling side with two coats of white paint, sanding once in between. I primed the attic floor side with black paint. I pressed the board to dry flat overnight to combat some warping in the plywood.
I glued the bedroom ceiling board in place first. The bedroom interior wall likes to lean into the hallway, so I had to hold it in place during the process. I added some straight pins for stability, cutting down the length as needed. I drilled pilot holes for them to keep the wood from splitting.
I glued in the hallway ceiling board that had been painted and prepped ahead of time. I taped the electrical wires into their respective channels, though I still have to lengthen a few of them on the outer wall to reach the power strip.
The ceiling line overall is a little crooked. Apparently, the bathroom and bedroom interior walls are slightly off in measurement from one another and the parlor ceiling has started to sag. It’s a good thing this is meant to be an old house. Haaaa! And, I’m hoping you will all be so wowed by the interior that you’ll ignore this problem. I have plans for finishing the back edges of the interior walls and floors to help disguise any warping. More on that later.
I’ve had a lot of challenges with this build, so I’ve taken these types of shortcomings in the final result in stride. I’ve learned a lot on this build, and I do love the way this house is turning out.
Update: After working on the back roof, I was able to finish up the bedroom ceiling trim. It’s a simple, flat strip wood trim, but it really brings it all together. It hides the slight gaps as well as the tabs and slots in the front and outer walls.
I cut and installed the final amount of bedroom wallpaper (I hadn’t yet added the flat ceiling trim around this corner to complete the room when I took this picture). There was a slight gap between the roof board and the gable wall, so I also added a thin strip of trim (painted black) along the angled wall that you can’t see unless you put your head inside the room.
Categories: The Haunted Heritage
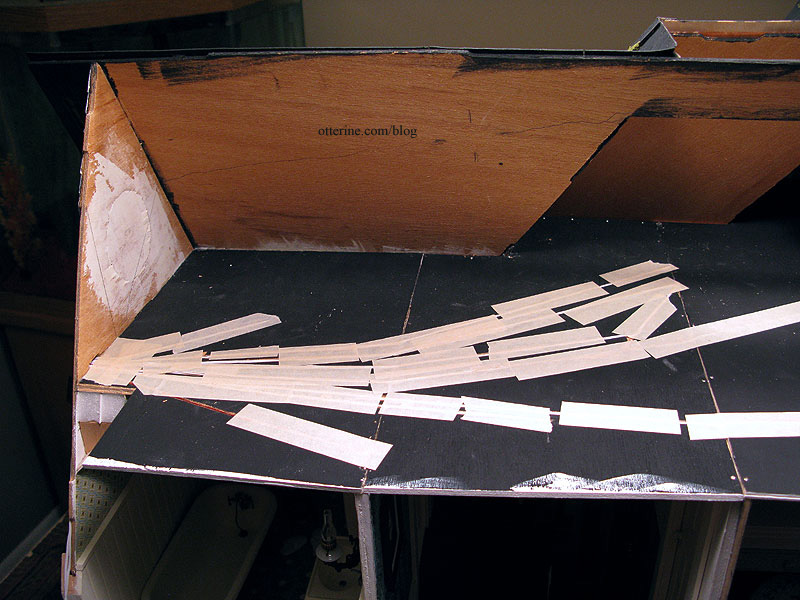
January 2, 2013 | 0 commentsHeritage – back roof dormer, part 1
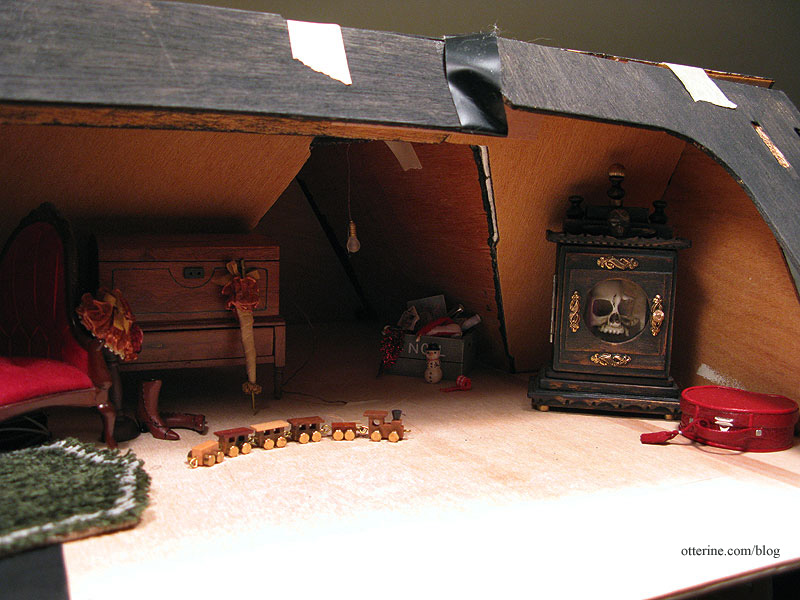
Grandma’s attic will be an eclectic array of novelties, antiques and storage. It is also mainly open and will require minimal lighting.
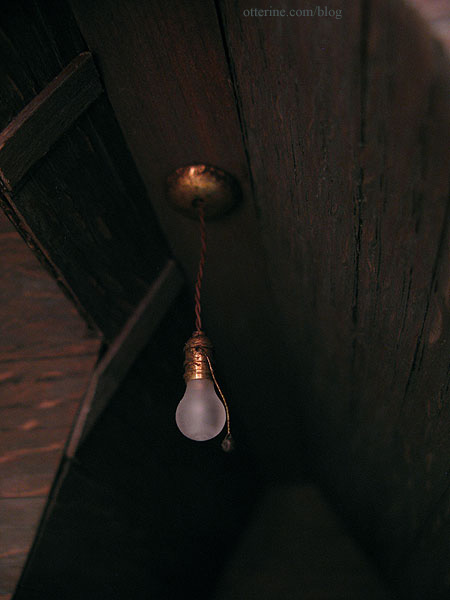
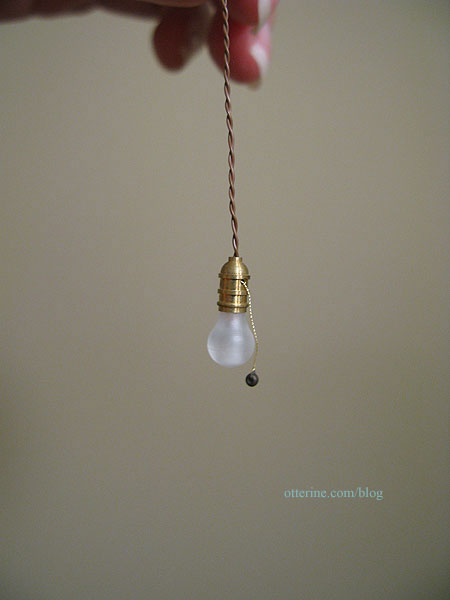
I bought two Lighting Bug lamps for the attic. One is the hanging kind with the pull chain. Love these! There will be more of these in my future builds. :D
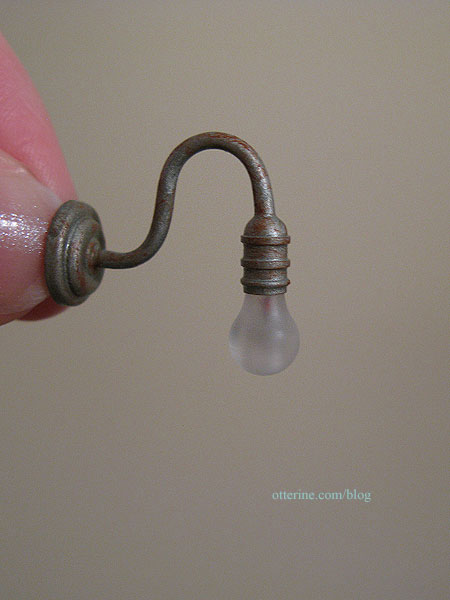
The other is a similar fixture with the bare bulb, but it has a wall fitting.
On the left side of the attic, there will be the interior portion of the chimney currently only a foam core base. There will also be a faux trap door like the one in Baslow Ranch where the scrap wood is placed on the floor. I’ve positioned the light so grandma can see what she’s doing up there.
As I’ve said before, in my world, grandma is able to navigate those pull down attic stairs easily, walk about the attic without hitting her head and sit comfortably for hours in a space that doesn’t appear to have any airflow for the warmer months or heating for the colder ones.
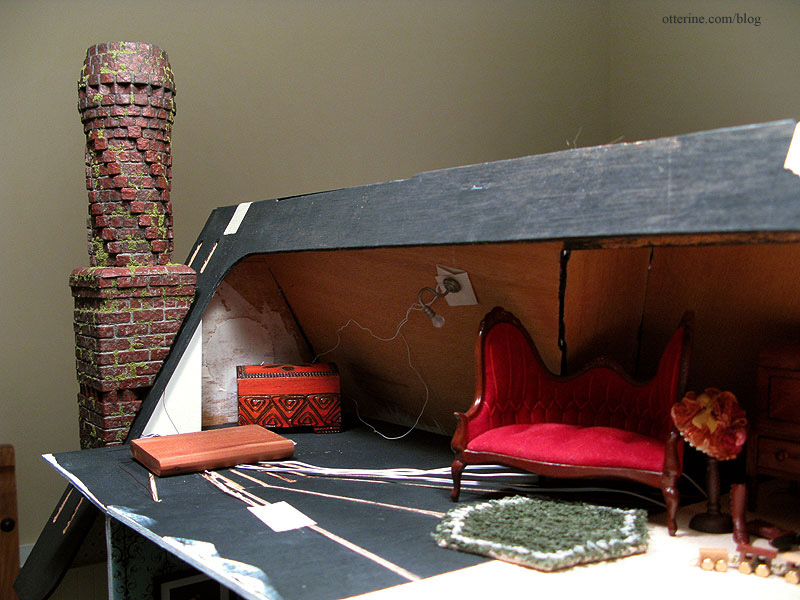
On the right side, there will be the forward storage area and Tony’s brilliant catacombs clock case. It’s up to you to decide who is in the case. :O I’ve put the hanging bulb at the opening to the front storage area. I think that will cast a nice glow into the space.
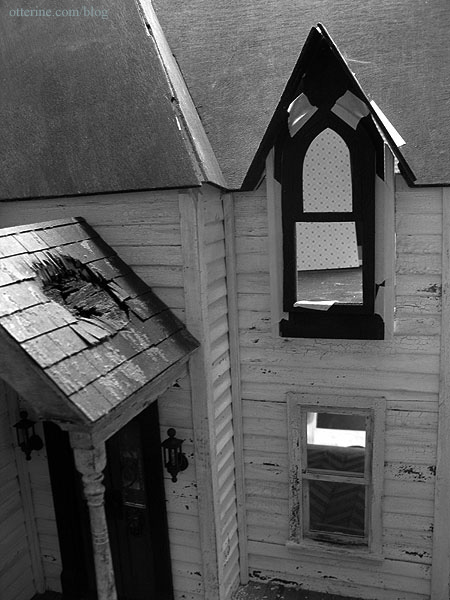
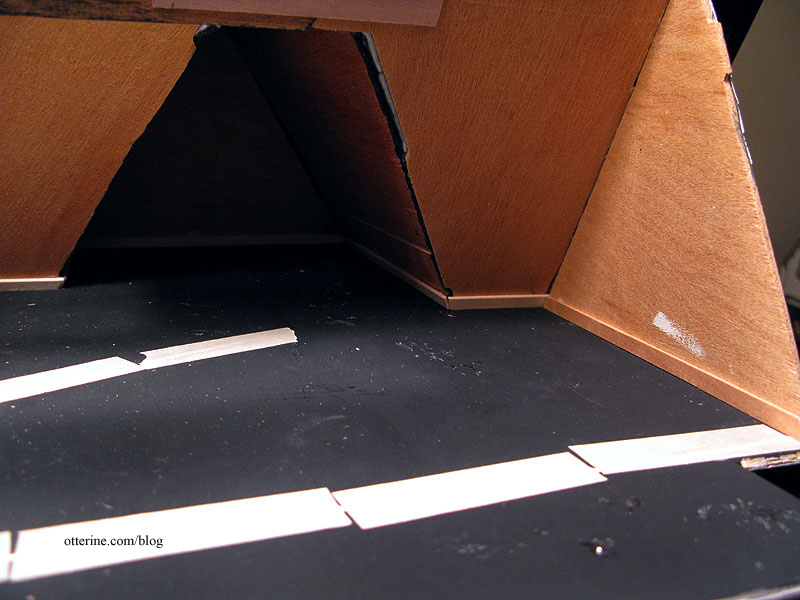
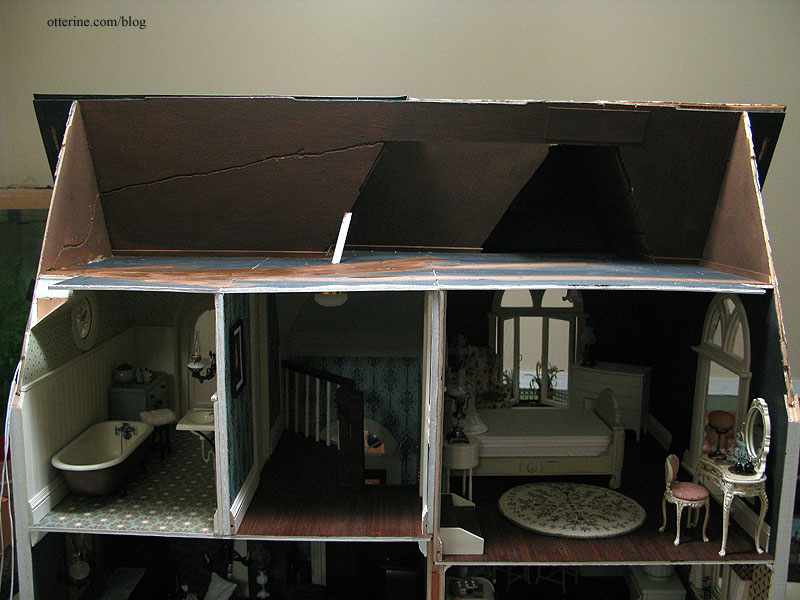
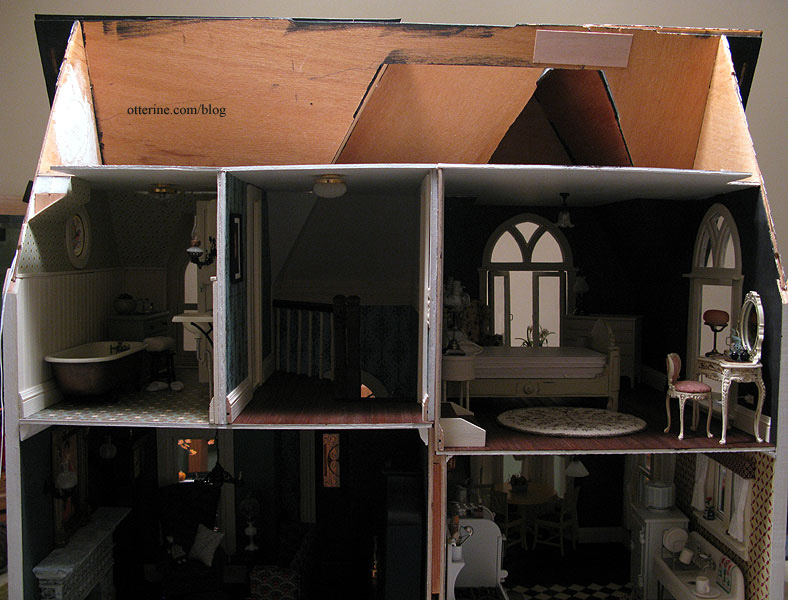
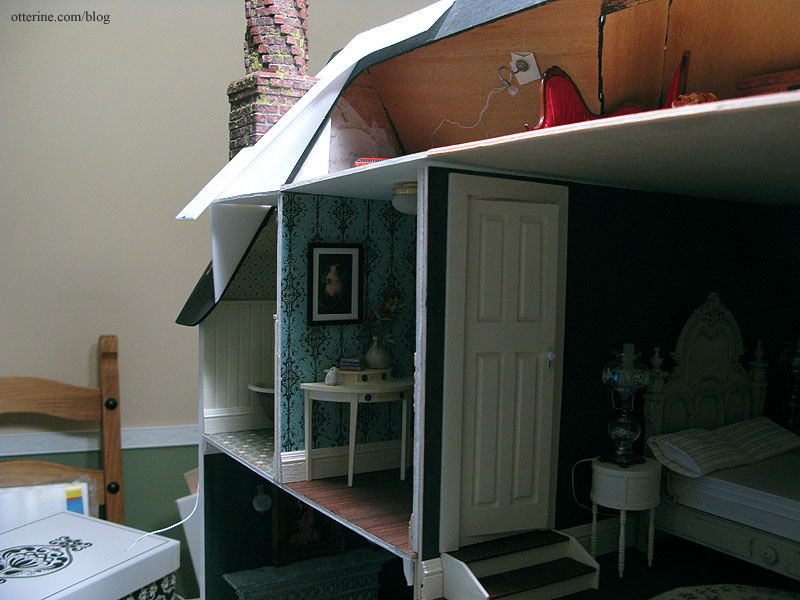
This is where the architectural issue comes into play. When I added to the ceiling boards in the back, I effectively eliminated the sloped ceilings on the second floor, except at the outer side gables. The bathroom vanity cabinet, hall table vignette and bedroom door would not have been possible had I kept the angled back walls that followed the slope of the roof.
However, when viewed from the side, these outcroppings are visible.

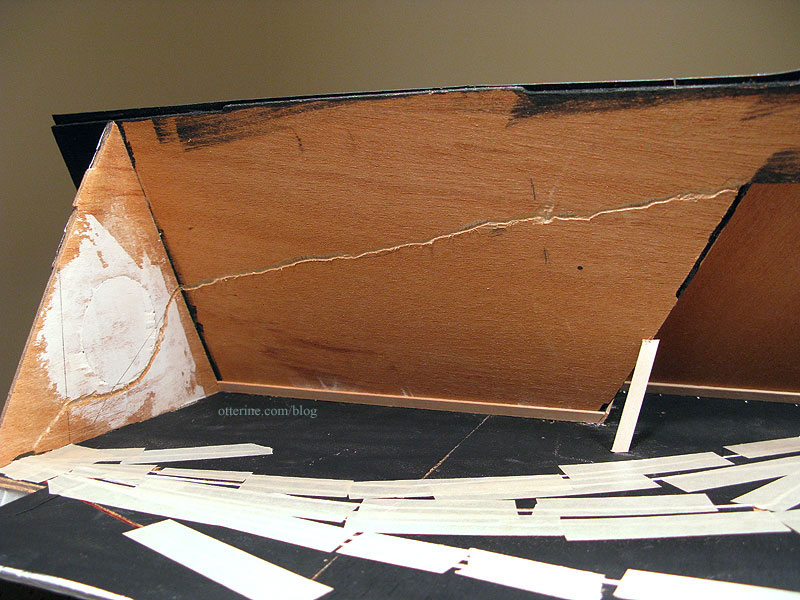
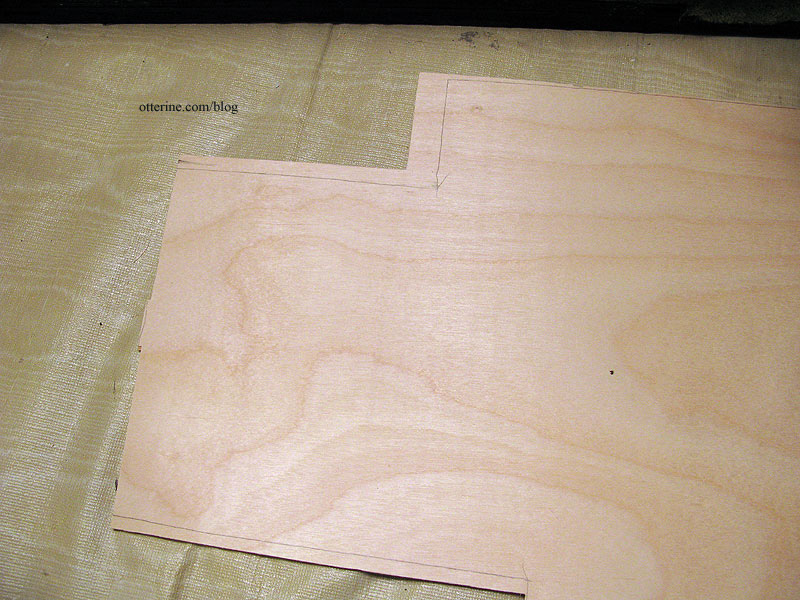
To remedy this problem, I’ve added a quick mockup cut from Cellfoam 88 (the same piece I used for the bedroom ceiling board – reduce, reuse and recycle!). This adds a triangular vertical wall that would be sided to match the house and an additional roof board to finish the back opening.
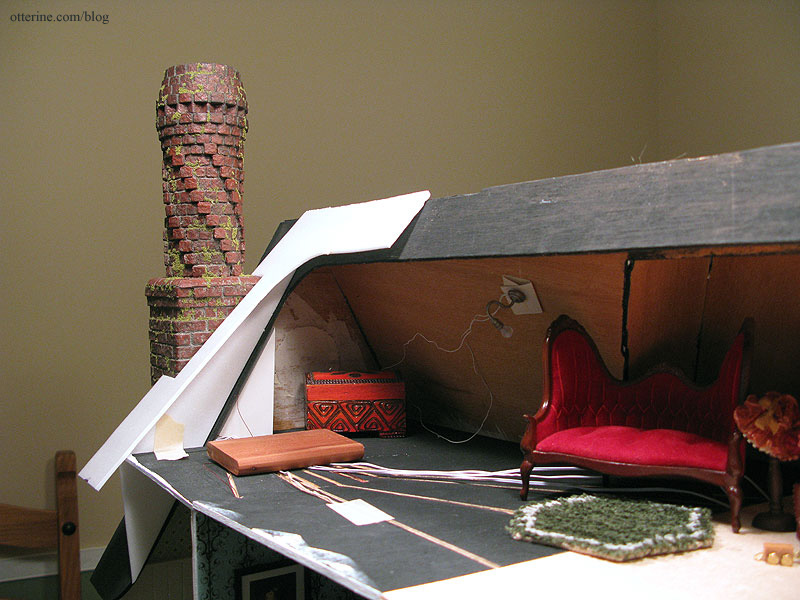
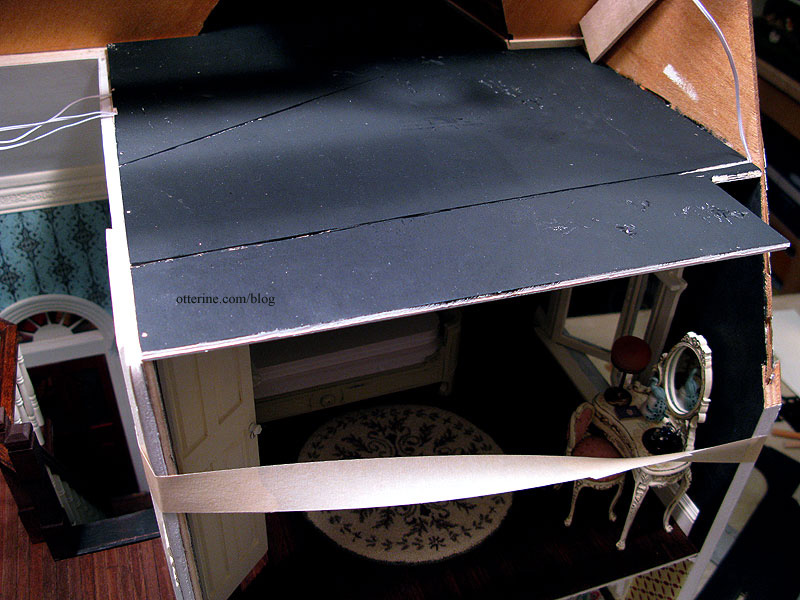
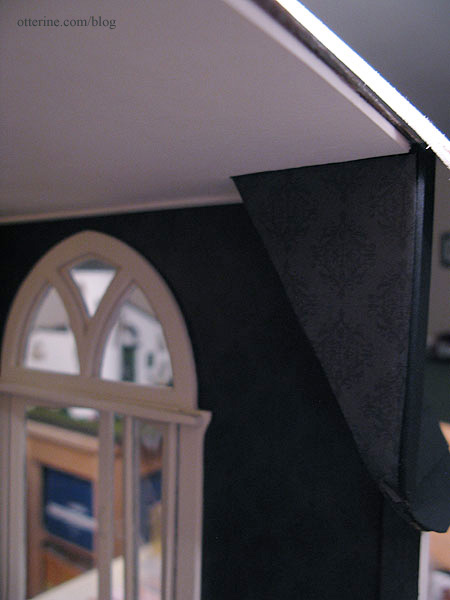
From the side, the bathroom wall is no longer visible. I think adding this outcropping makes architectural sense since it is in the back portion of the house and a viable renovation that could have been done at some point. It won’t be visible from the front, so it won’t detract from the Carpenter Gothic aesthetic.
I’ll have to do more wallpapering in the bathroom and bedroom to cover the new corners, but that should be straightforward enough. :D
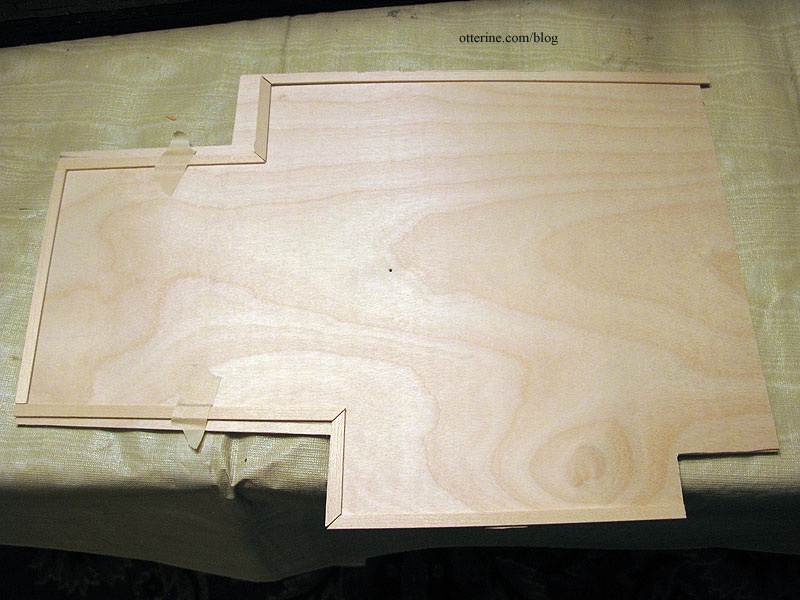
I then cut the new pieces for the roof addition but won’t install them until after the back roof is on.

I used the spare wood from a Heritage part sheet that held the gable trims. :D Waste not, want not.
Categories: The Haunted Heritage
January 1, 2013 | 0 comments
NOTE: All content on otterine.com is copyrighted and may not be reproduced in part or in whole. It takes a lot of time and effort to write and photograph for my blog. Please ask permission before reproducing any of my content. (More on copyright)