
Haunted Heritage photo book
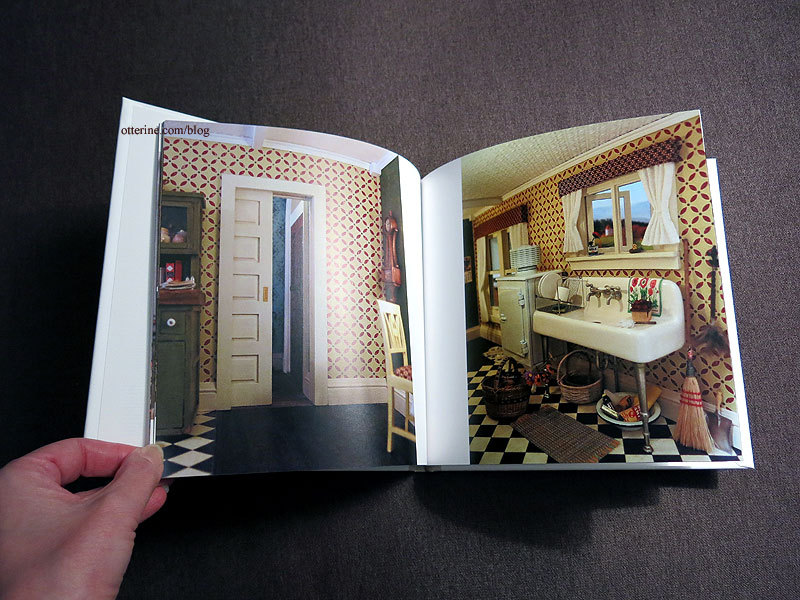
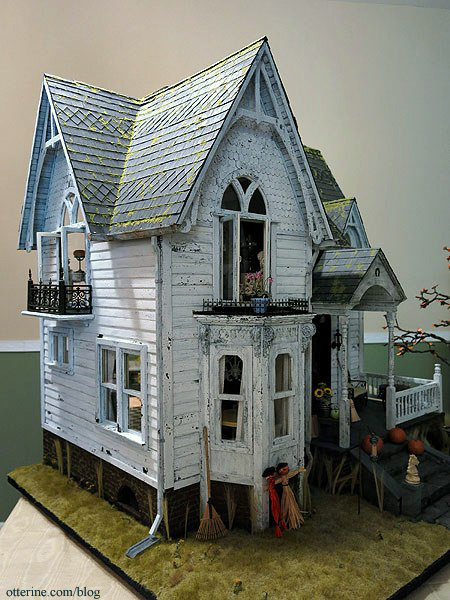
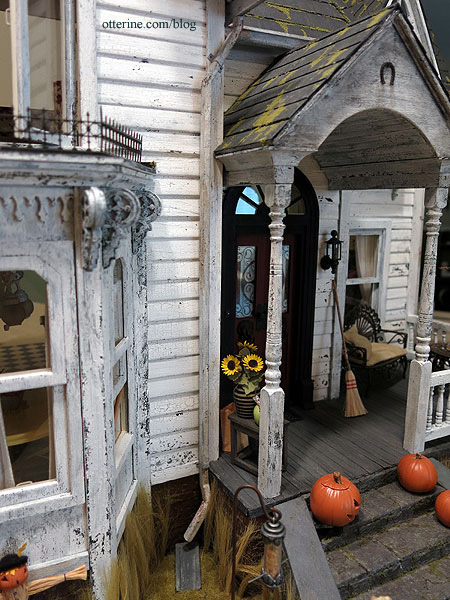
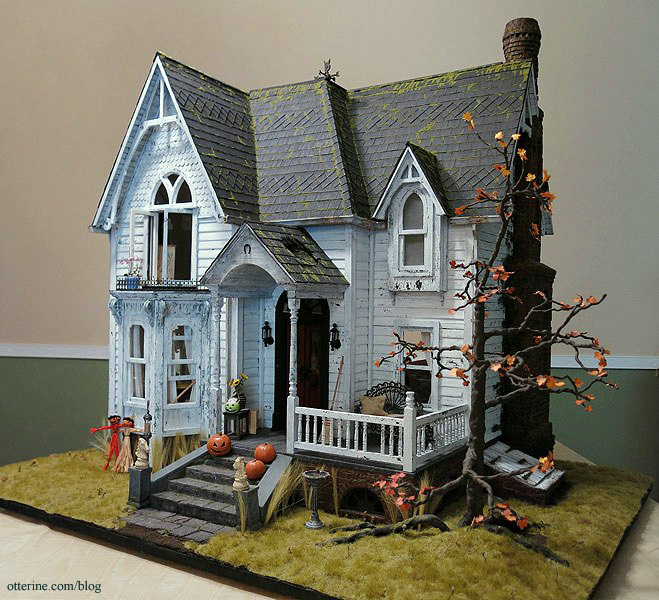
I’ve listed a new item in my etsy shop. It’s a full sized 8″ x 8″ hardcover book featuring photographs of the Haunted Heritage built and photographed by me.
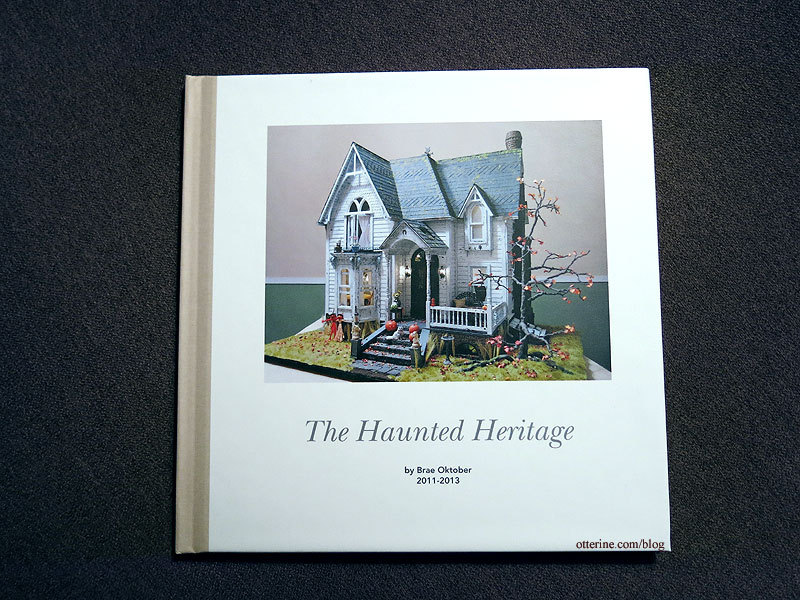
It has 20 pages of full color photographs showing the exterior and each interior room as well as a bonus image from a Halloween scene done after completion. I have signed the book as well. :]
Categories: The Haunted Heritage
January 16, 2017 | 0 commentsThe Haunted Heritage in Miniature Collector
I have news!!! The Haunted Heritage has not only been featured in the October 2014 edition of Miniature Collector, it made the cover!!! :D

Miniature Collector, October 2014 I was so excited when the writer contacted me about writing an article on the Heritage and even more excited when Miniature Collector accepted our work. I had no idea my beloved house would grace the cover.
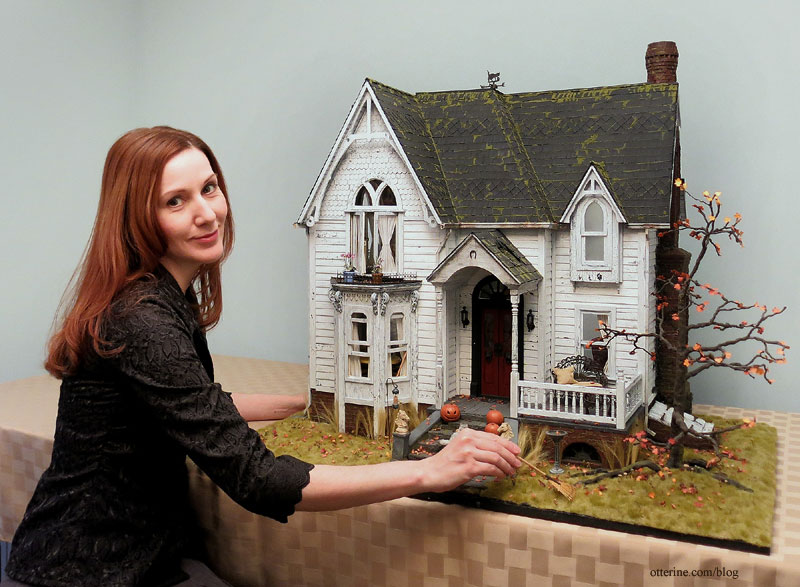
Many of you also pop over to my sewing blog to see me in my creations, but here I am with the Heritage. The camera was giving me fits with the autofocus (I was taking the photo solo with a tripod), and I ended up with an “alright already” look on my face. Oops. :D
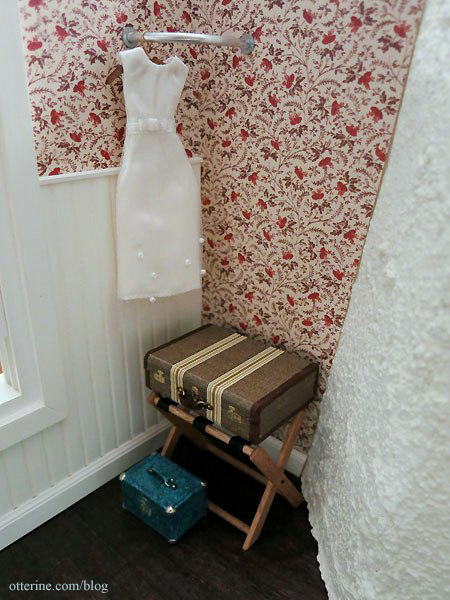
I wrote a tutorial for my folding suitcase valet, which is featured as well. :]
Thank you so much to the author for writing a splendid article and to the staff at Miniature Collector for the feature and amazing cover!
Categories: Books and media, The Haunted Heritage
September 4, 2014 | 0 commentsMushrooms!!!!
I am finishing up some landscaping for the final Heritage post showcasing the exterior and the overall build itself. But, I thought this element deserved its own post…mushrooms!!! :D

I started with Peiwen Petitgrand‘s book on making clay food.
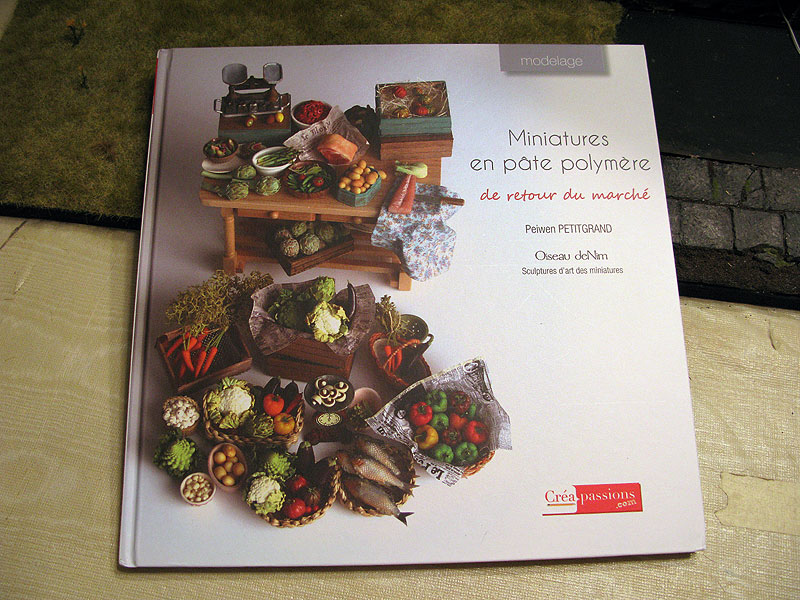
I had already planned to start with mushrooms since I wanted some for the Heritage lawn. Her instructions are wonderful, even though my French is very rusty. I was able to figure out the basics well enough. I made only a few changes. I added pastel coloration before baking and made the stems longer to have something to plant in the ground. I also made my molds a little variable, misshapen and left any imperfections. It translated into a more realistic result. :D

The undersides have the slotted detailing like the real thing. Even though it’s nearly impossible to see once the mushrooms are planted, I love knowing it’s there.

I planted them all around The Tree but wonder if these will last the night with Grahame on the loose! :O
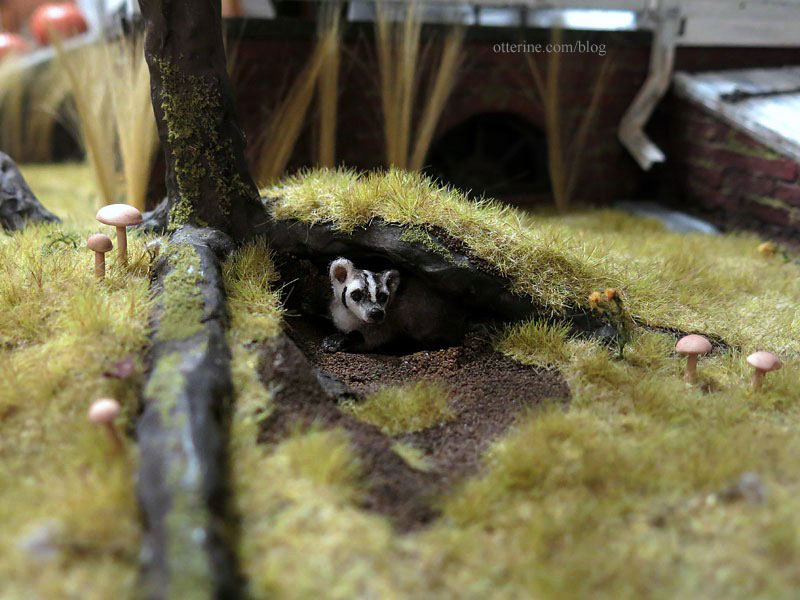
I might be making more tomorrow. Haaaaa!

Categories: Polymer clay, The Haunted Heritage
August 18, 2013 | 0 commentsThe Haunted Heritage – 1920s inspired kitchen
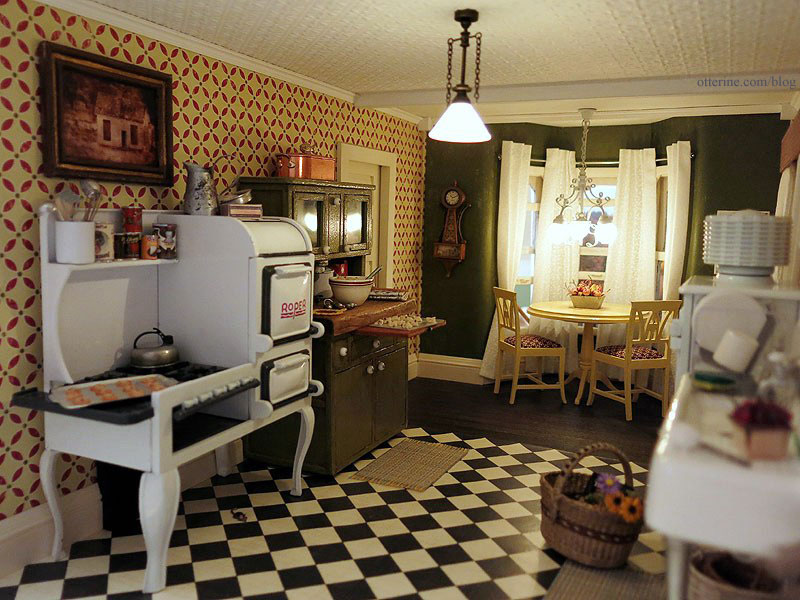
The 1920s inspired kitchen was the first room I completed in The Haunted Heritage. It’s a large room with a dining area and vintage kitchen appliances. I tried to avoid adding too much clutter, just a few added accessories really make a difference. Feels like home.
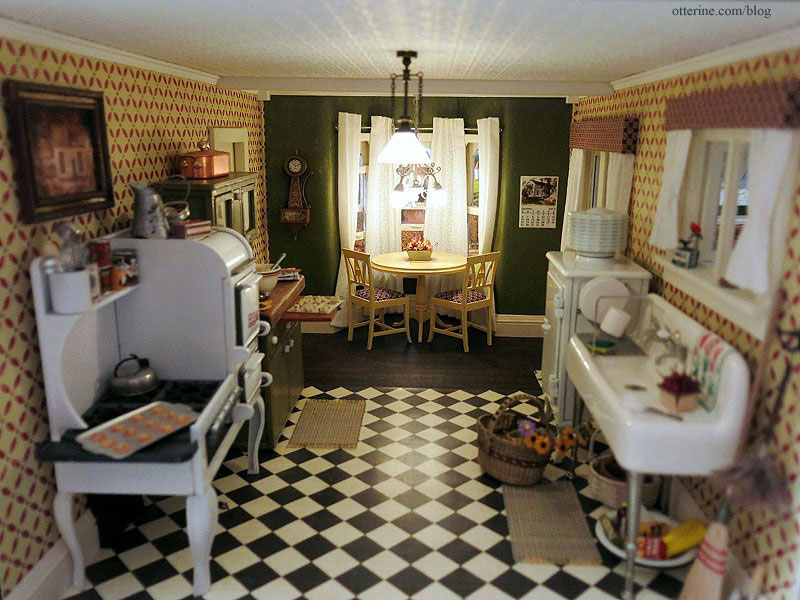
The furniture arrangement didn’t change much from the original dry fit layout trial.
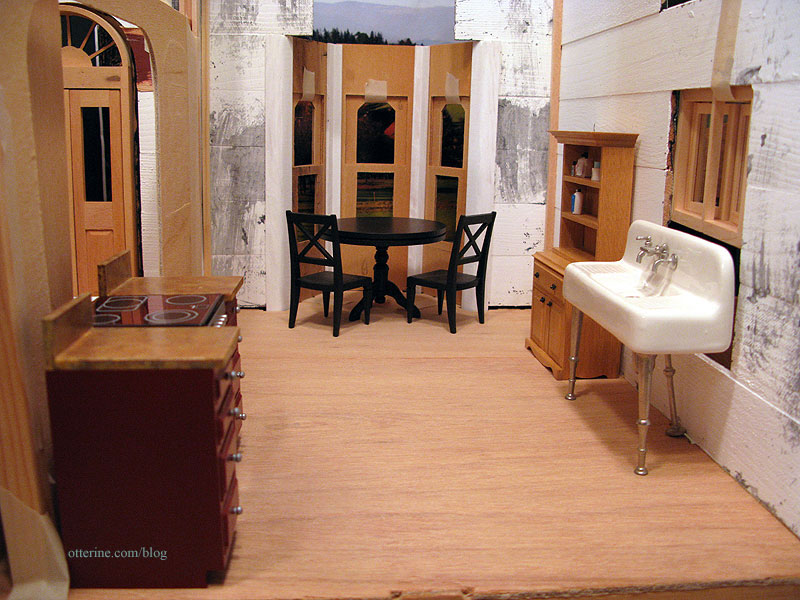
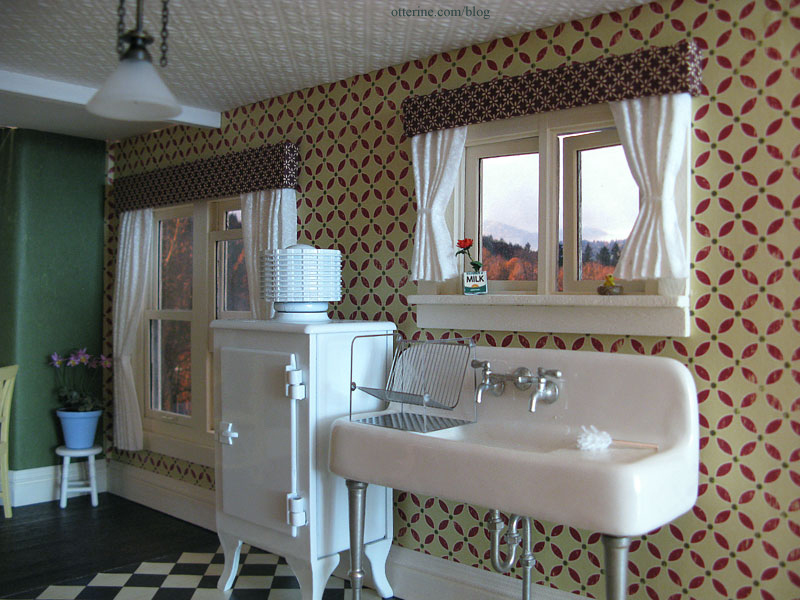
Structurally, I upgraded the side window with a Houseworks working window and added a casement window above the sink.
The tile flooring is Cream Diamonds by The Paper Studio, and the wallpaper in Geometric Fa La La by Making Memories. The back of the wallpaper is aged green, so I used that in the bay window section.
I went with subtle white patterned curtains and simple fabric pelmets for the window treatments. It softens the look of the room without being over the top. The potted flowering plant is from Michelle.
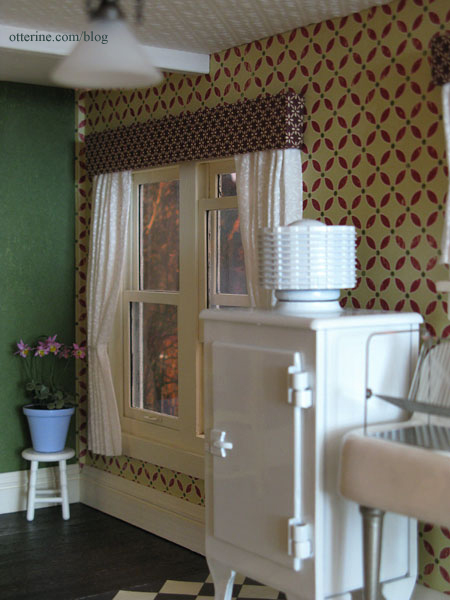
The casement window curtains ended up being a little too short, but I liked them well enough to leave them as is.
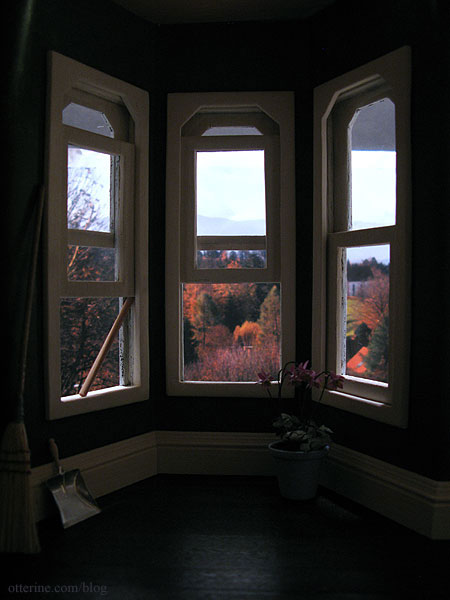
The front bay window is part of the original kit, and considering the age of the kit wood I was happy with the way it turned out.
One window assembly is completely glued together and the window is shut since the wood for these pieces was beyond repair. The second window is set partially open, and though the window slider isn’t glued in place, the wood for this assembly is not in the best condition and doesn’t allow for very fluid raising and lowering of the window. The third window, however, works so well that I need a dowel to keep it propped open! How positively wonderful! It’s just like a real life old house – one window is painted shut, one window sticks and one window won’t stay open!!! :D
The curtains in the bay window have a custom made rod to hold them in place.
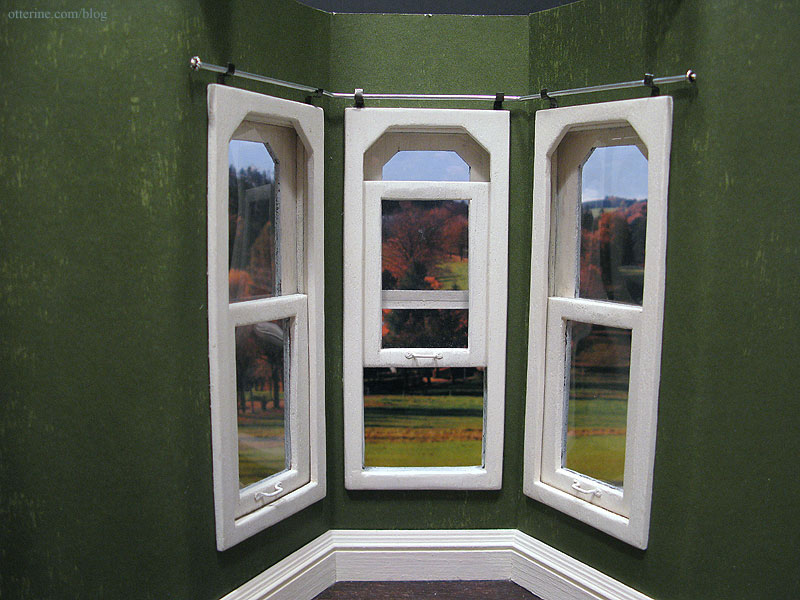
I used fairy lace tiebacks on the outer panels but I liked the look of the inner panels left straight. This way, grandma doesn’t have to reach over the table to untie them every time she wants a little privacy. ;D
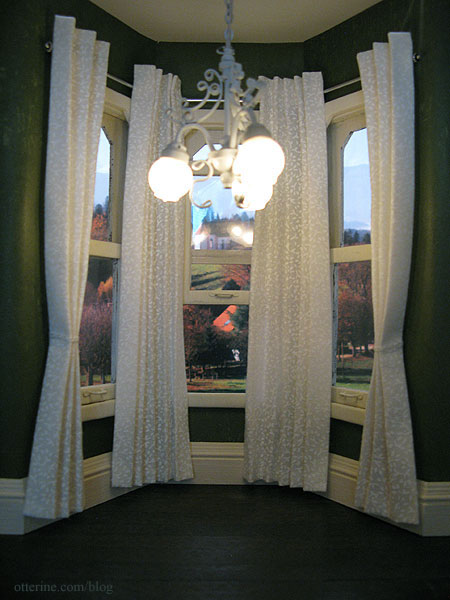
With the table and chairs in place, it really sets the mood. First, with the curtains in focus.
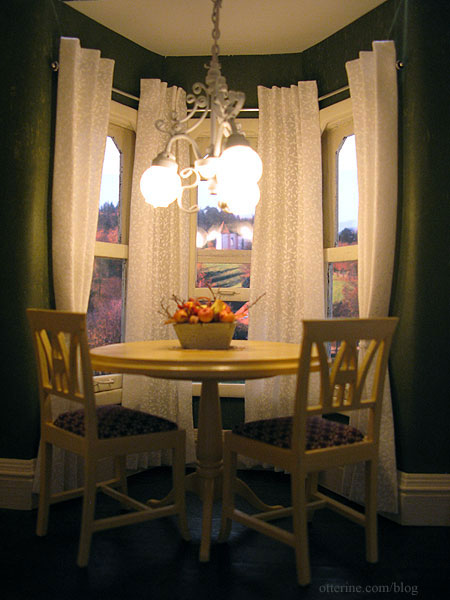
And, then with the furniture in focus.
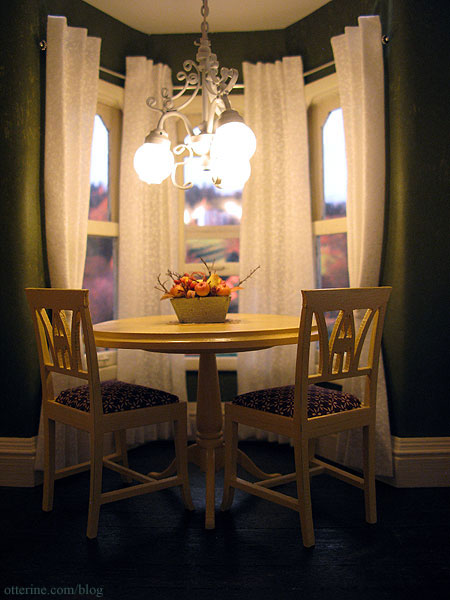
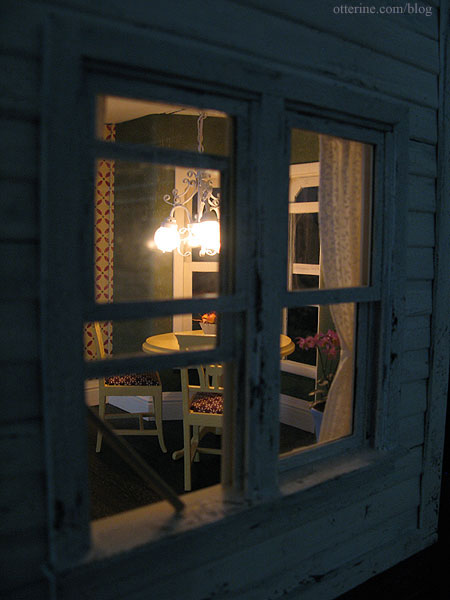
I love through-the-window photo views. :] The autumn fruit basket is from Hungarian Miniatures.
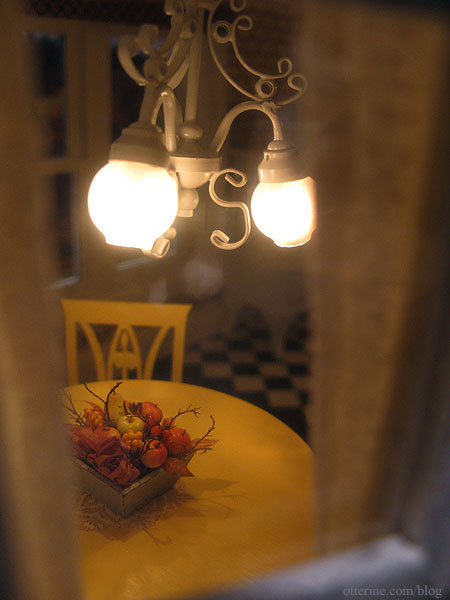
In this photo, I feel as though I can hear the crickets and see fireflies outside.
I replaced the interior wall, adding a working pocket door. There is a lever that operates the door from the open back so you don’t have to reach inside to open the door. It has a leather and Tyvek hinge to fold flat when the door is open.
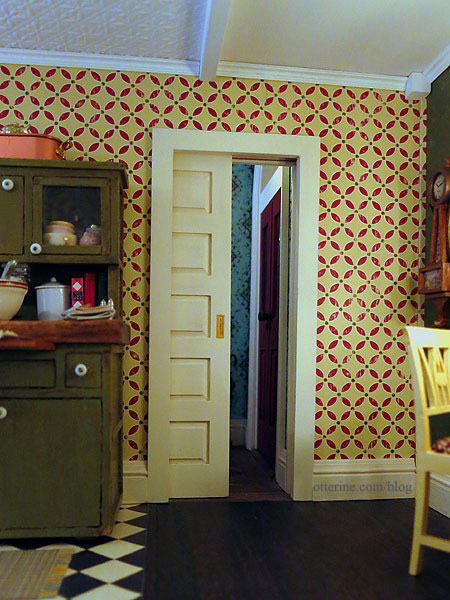
I really love the way the crown molding completes the room.
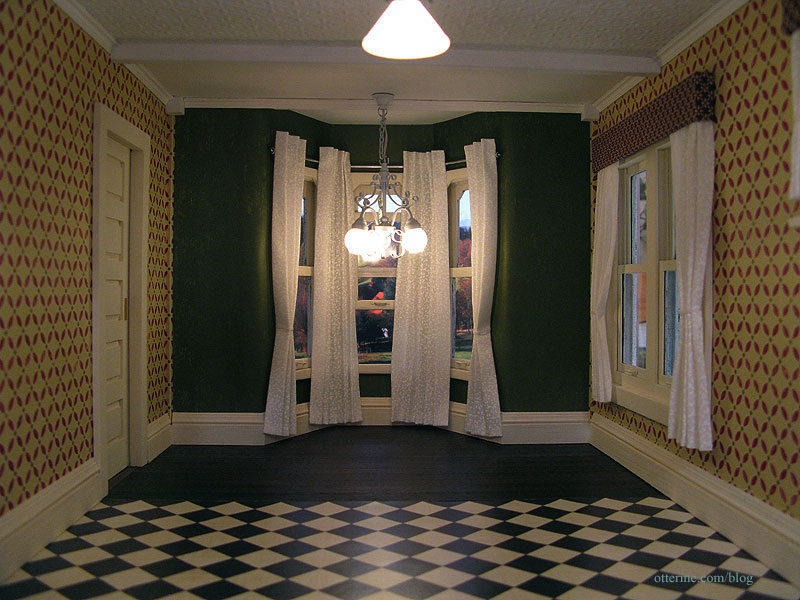
My original thought for heating the Heritage beyond the parlor fireplace was to place painted radiators in the rooms. Even though the rooms are somewhat spacious, radiators do take up a decent amount of space. Then I ran into a fantastic tutorial by Kris at 1 Inch Minis: gravity baseboard registers. Perfect!
I used diamond canvas instead of square and added a metal headpin for the lever. I placed the heat register under the Roper range so it could be seen, though it’s one of those details that’s mainly for me. It’s not strikingly obvious, but I am glad it’s there.
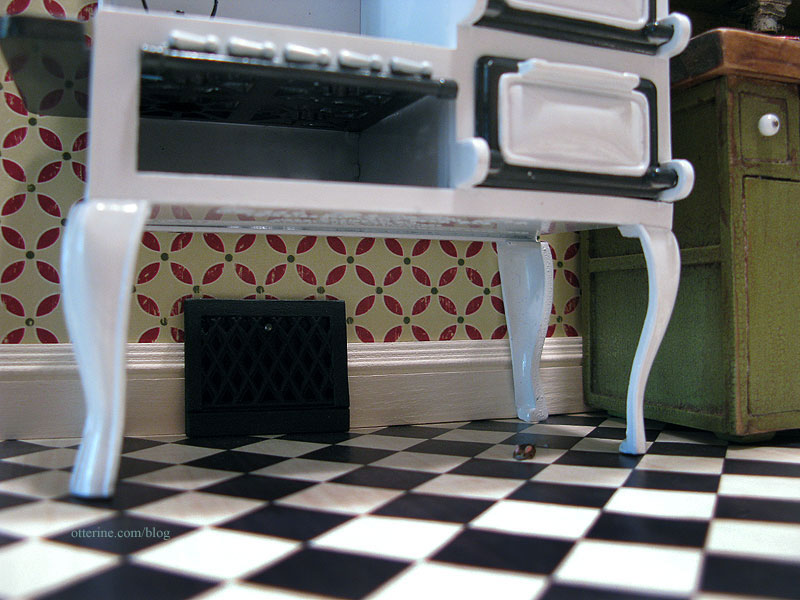
The cast metal Roper range is by Jacqueline Kerr Deiber. It’s a heavy piece with lots of character.
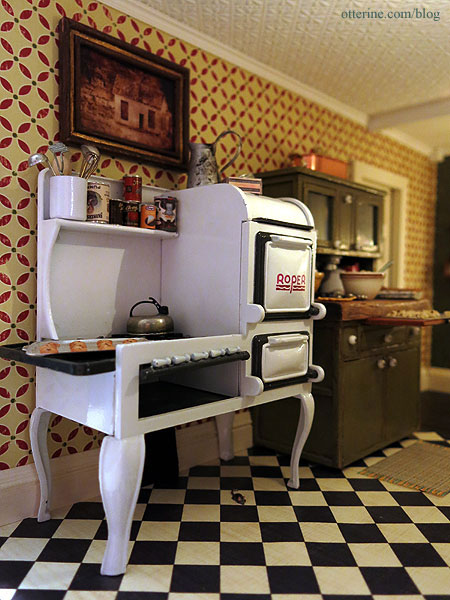
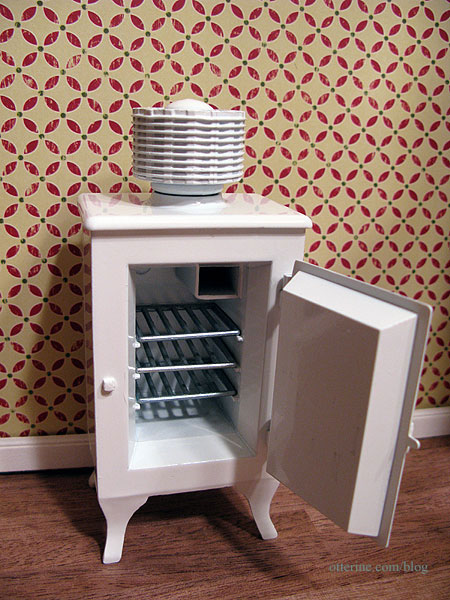
The metal Monitor Top Refrigerator was also designed by Jacqueline Kerr Deiber. It has wonderful lines and is also very heavy.
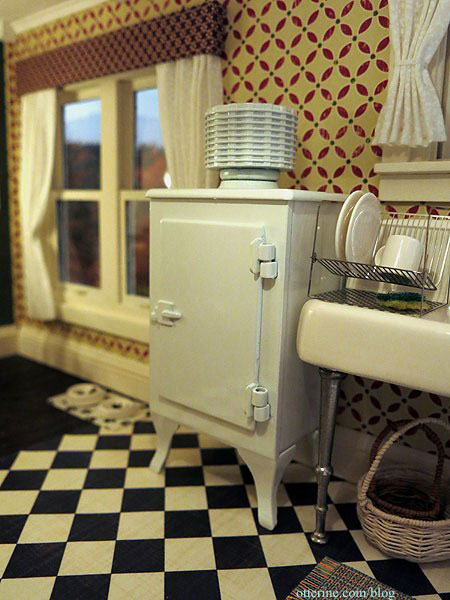
I love the shelves and the ice box. :D
The kitchen sink is one of my favorite minis! The dish drainer is from The Dolls House Mall and it came with a mop, too. The laser cut stainless steel has wonderful detail and looks great for scale.
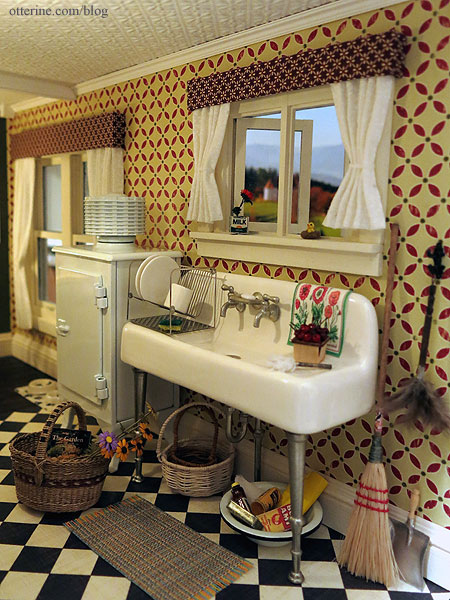
It’s a 1920s porcelain Kohler kitchen sink by Jacqueline Kerr Deiber. I’ve always liked the look of this sink but never thought I’d build a house to use one.
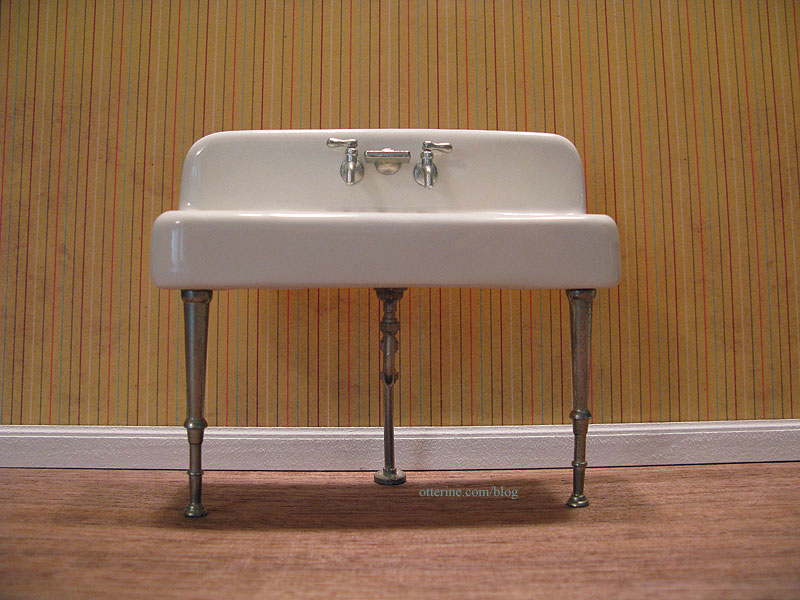
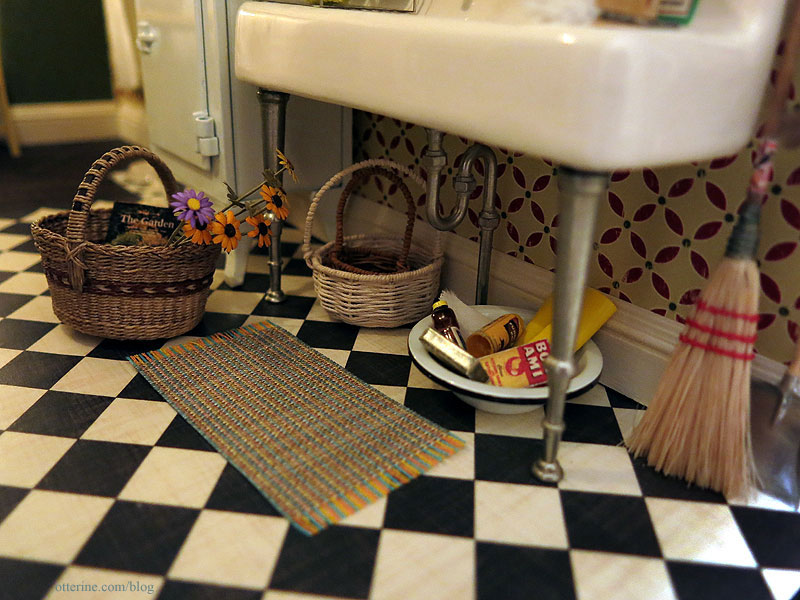
Grandma has her cleaning supplies and some extra baskets under the sink. Lyssa made the beautiful white and brown baskets
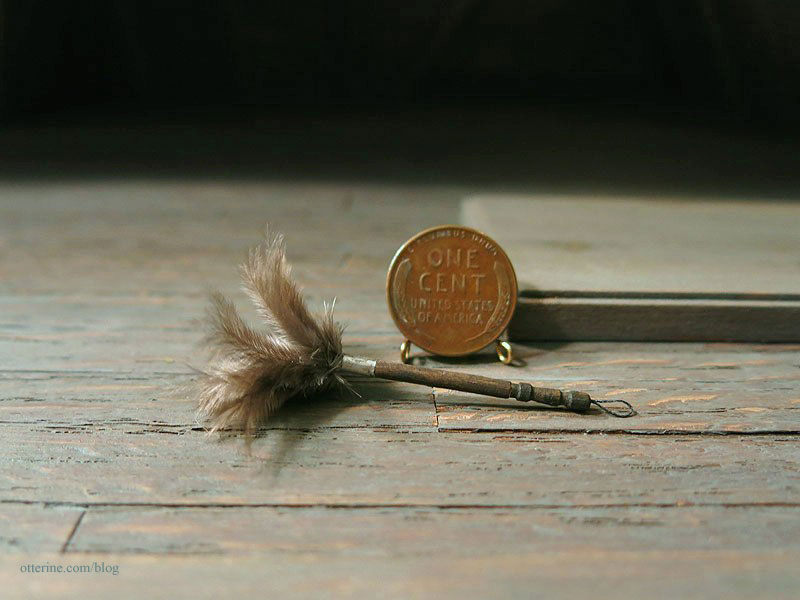
I made the duster from a Silly Sisters tutorial. I added a cord loop on the end for hanging.
The chick in the nest was made by Cathy Rohal.
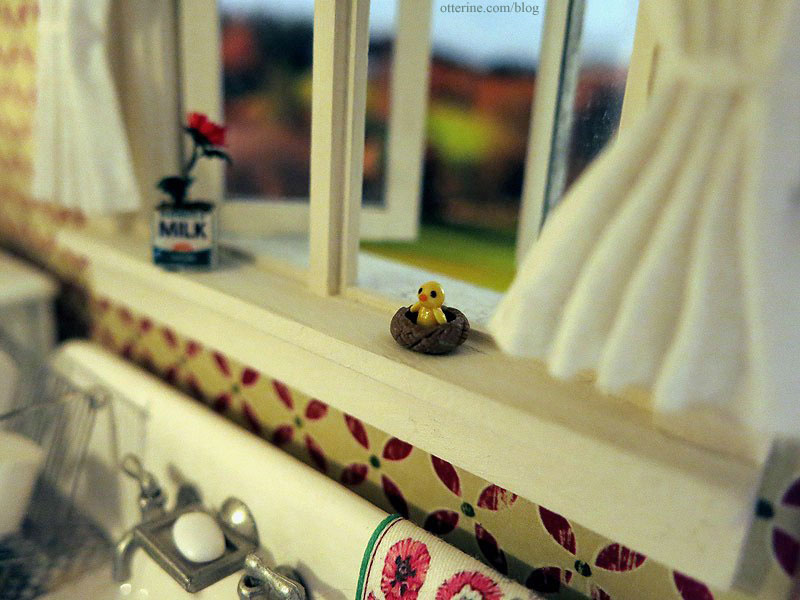
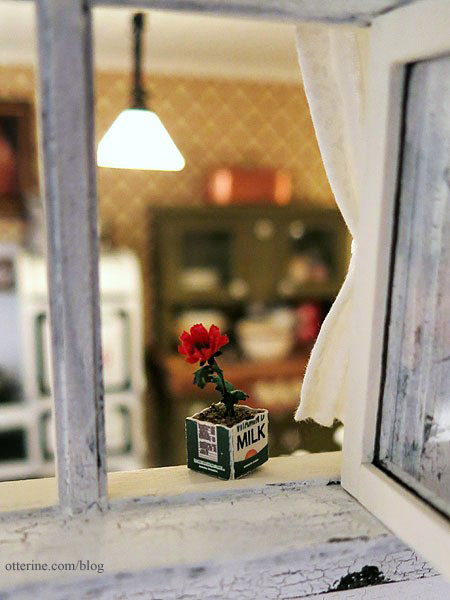
The flower in the milk carton was made from a true2scale kit.
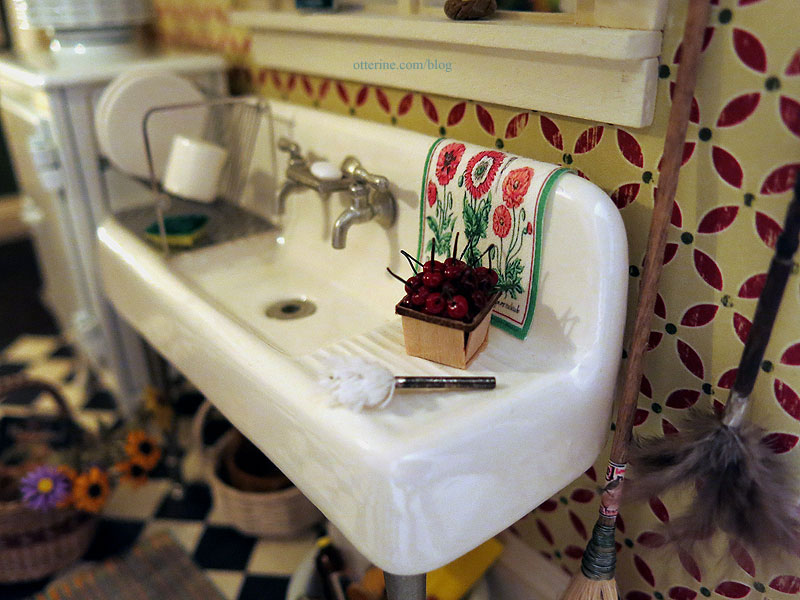
The pint of perfect cherries is from The Garden Path, purchased at a local mini show.
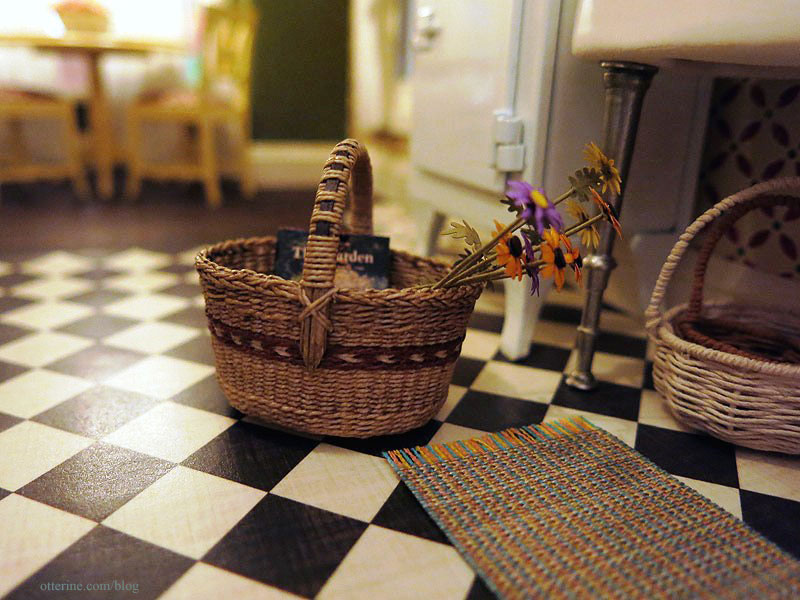
This wonderfully made basket is from Lidi, and I made the Bonnie Lavish flowers from kits.
Keli made this amazing Hoosier cabinet for me – such a wonderful and generous gift.
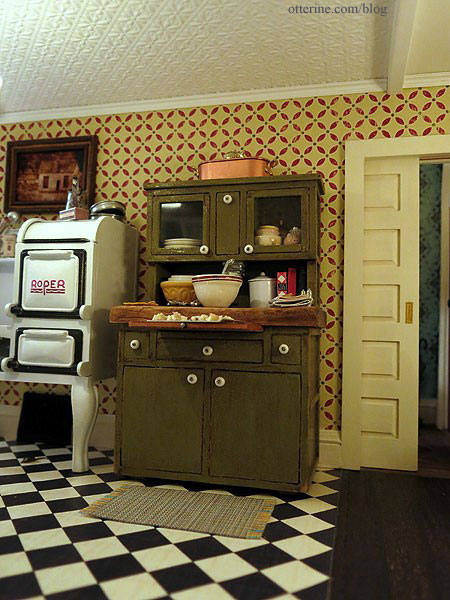
I had to set up the vignette outside of the kitchen to get a photograph of the details since the kitchen is a little tight to fit the camera. The tea towels throughout the kitchen are from Marlene.
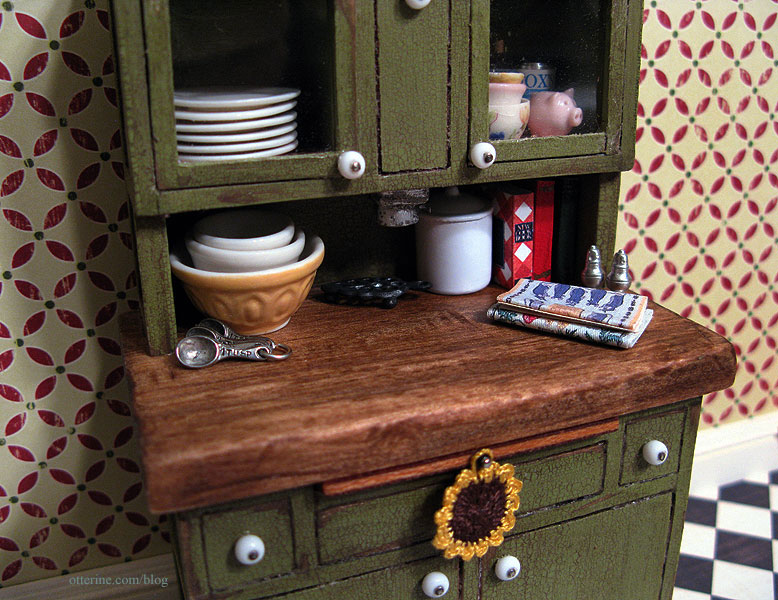
I won a lovely cookie baking set from Creating Dollhouse Miniatures. The pieces are so well made and realistic.
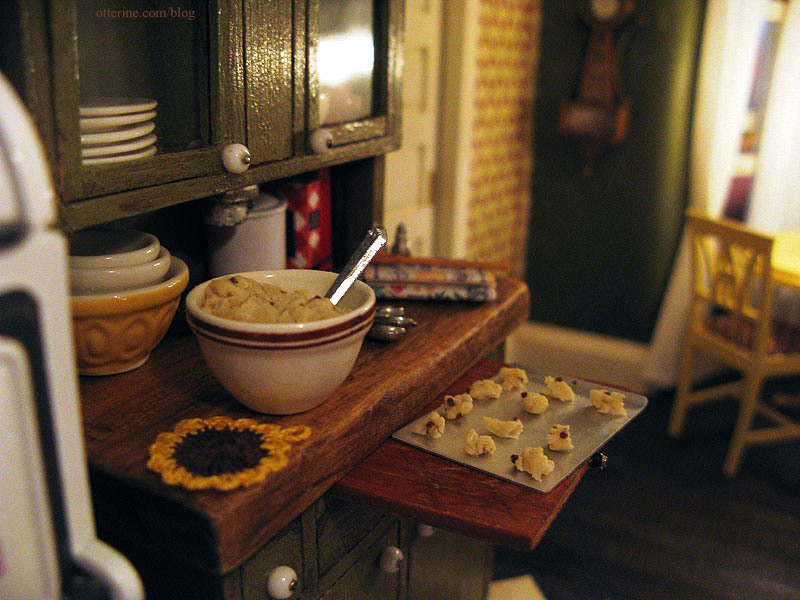
My mom makes the best chocolate chip cookies. No kidding. Every family gathering has people hoarding the cookies she brings, even though she brings dozens! I know chocolate chip cookies, and these minis are just like hers! :D
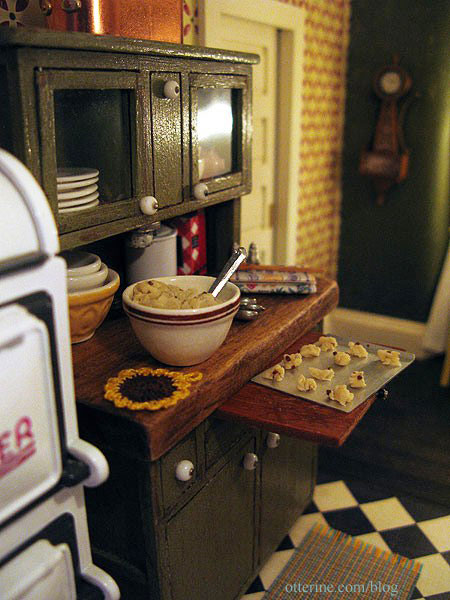
Cookies in progress certainly warm up a kitchen, don’t they?
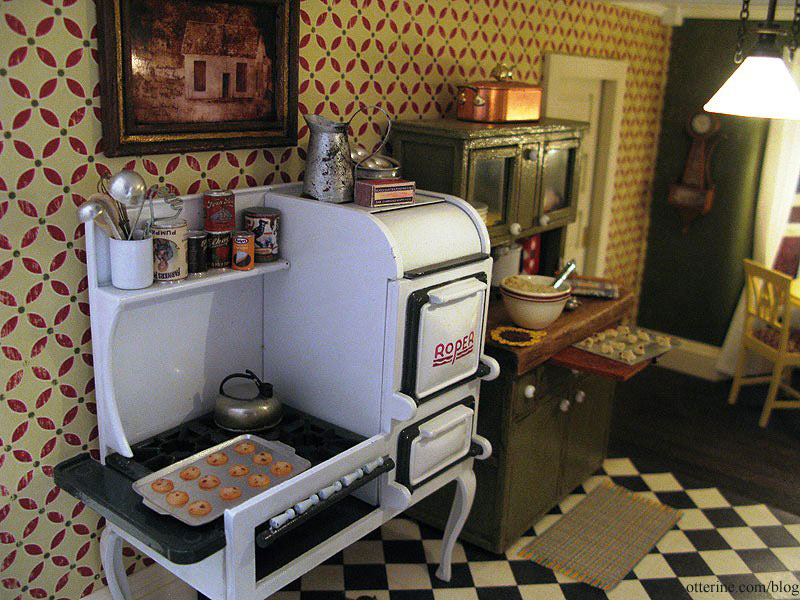
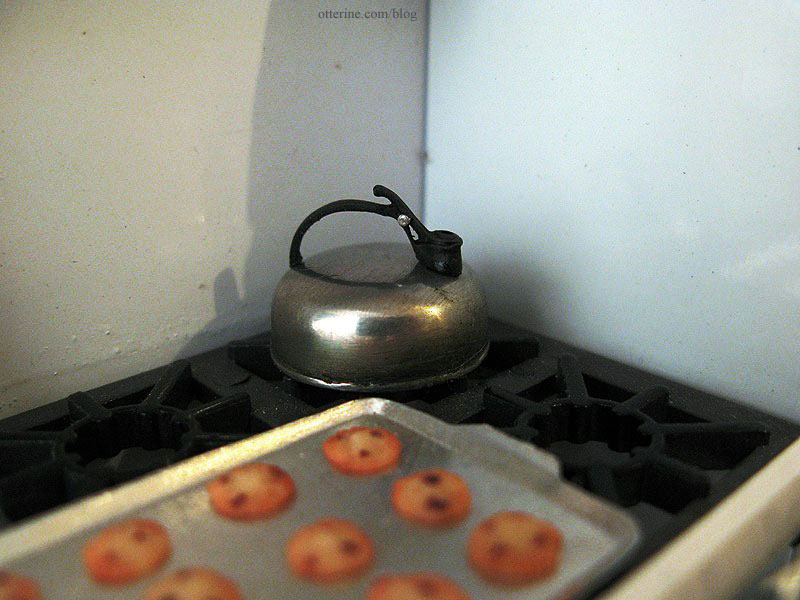
The whistling tea kettle is by Ulus Miniaturas – purchased from Mainly Minis. We had one of these in real life at my childhood farmhouse. Mom still has it and uses it, too!
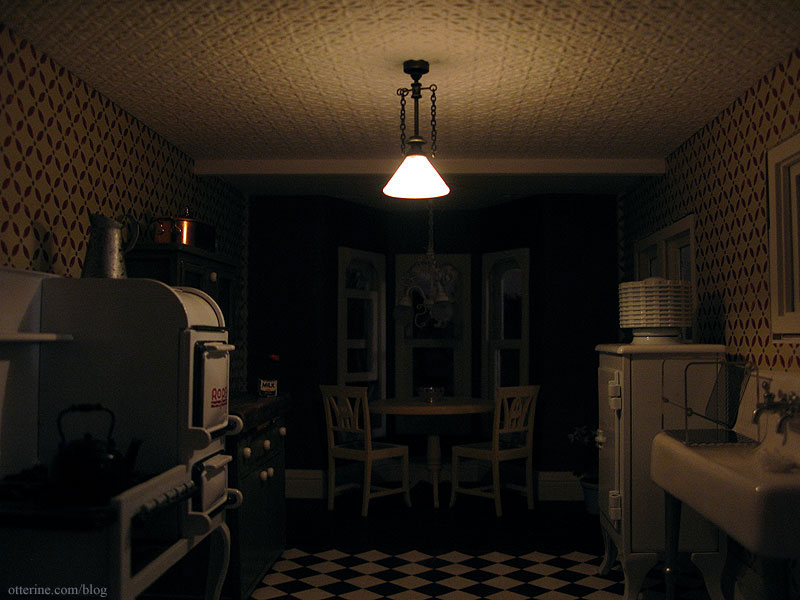
There is a white ceiling fixture above the dining table. Here’s a post on the kitchen lighting details.
The kitchen area has a lovely Ray Storey pendant gas light. If I had had a larger budget, I would have bought the matching 3-arm down light for the dining table. But, the white ceiling fixture is still a beautiful piece. The gas light is very well made. I love the way it highlights the textured ceiling. It’s the perfect vintage touch to the textured ceiling.
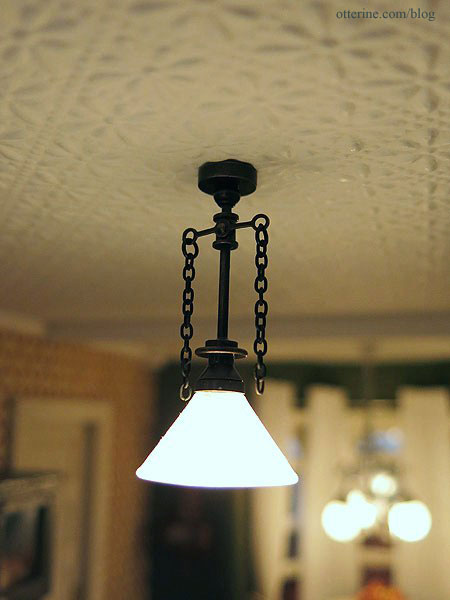
I don’t suppose in reality this dim fixture would do much good in the kitchen for nighttime cooking, but it casts such a wonderfully soft light over this part of the room.
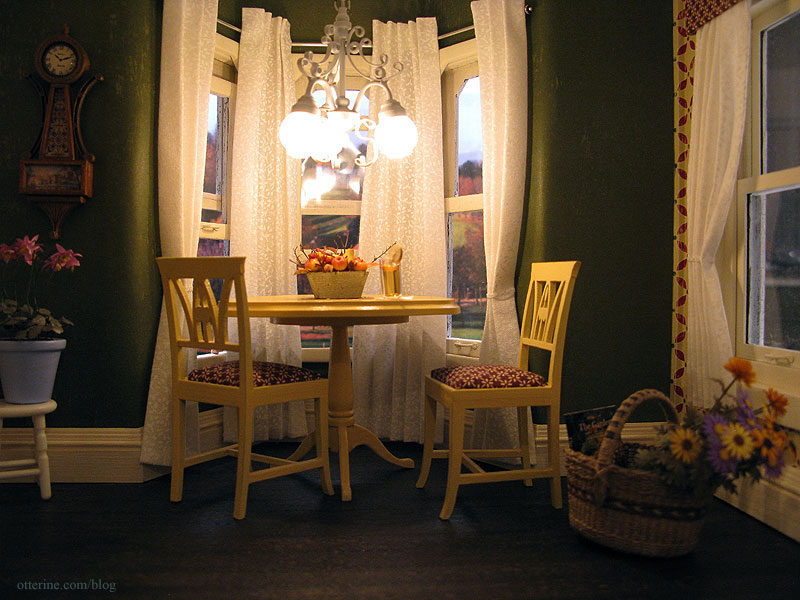
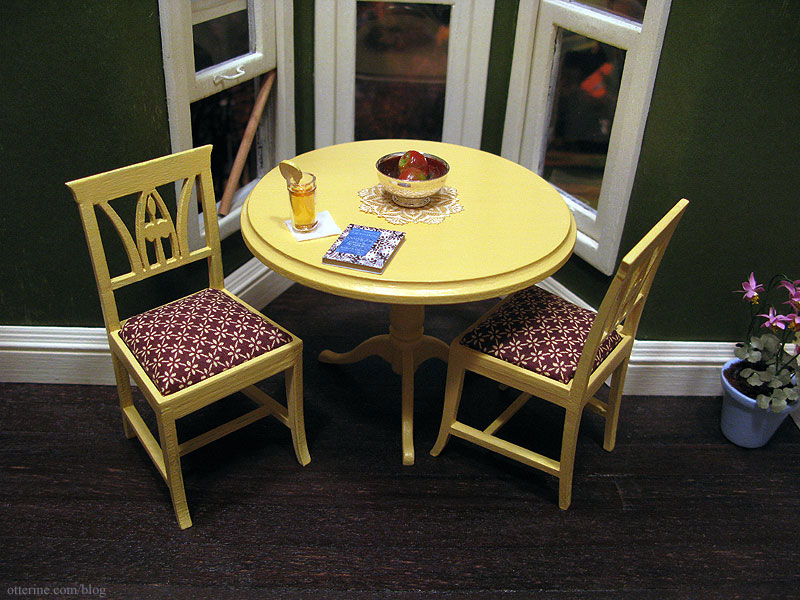
In the bay window nook, there’s just enough room for a small table and chairs. The dining table was made from a House of Miniatures kit, and the Lilje chairs kit came from Art of Mini. For the upholstery, I chose a brown and ivory print. I think it is close enough to the dark red to tie in well with the wallpaper.
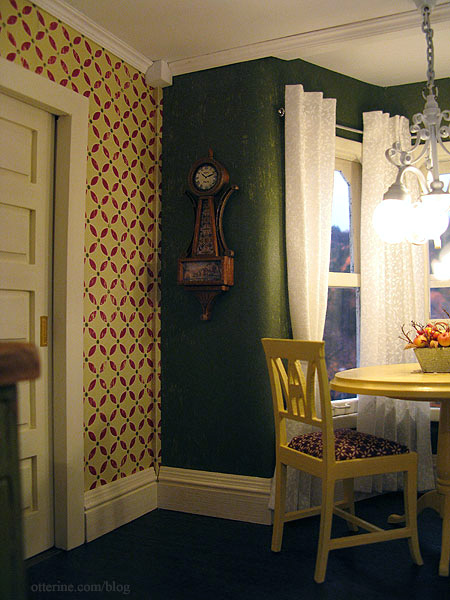
The banjo clock was made from a Cynthia Howe Miniatures kit. Love it!!!! :D
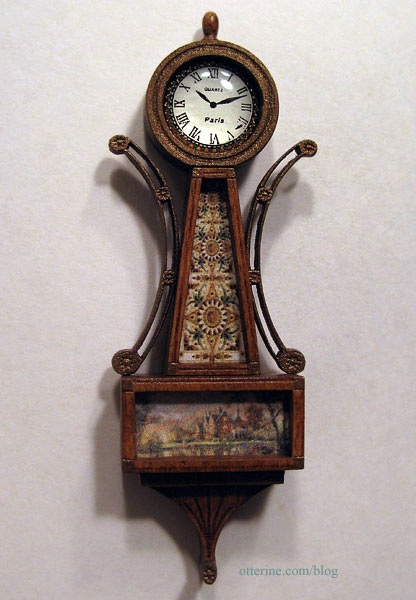
The artwork fits the kitchen décor perfectly, and the cabochon clock face is very realistic. My grandparents had lovely vintage clocks in their home, one of which now hangs in my real life kitchen.
Kelly made this wonderful artwork called Ghosts of the Past. I think it works wonderfully here in the kitchen. Maybe it’s an old faded photo of grandma’s childhood home. :] The lovely pitcher is from Caterina.
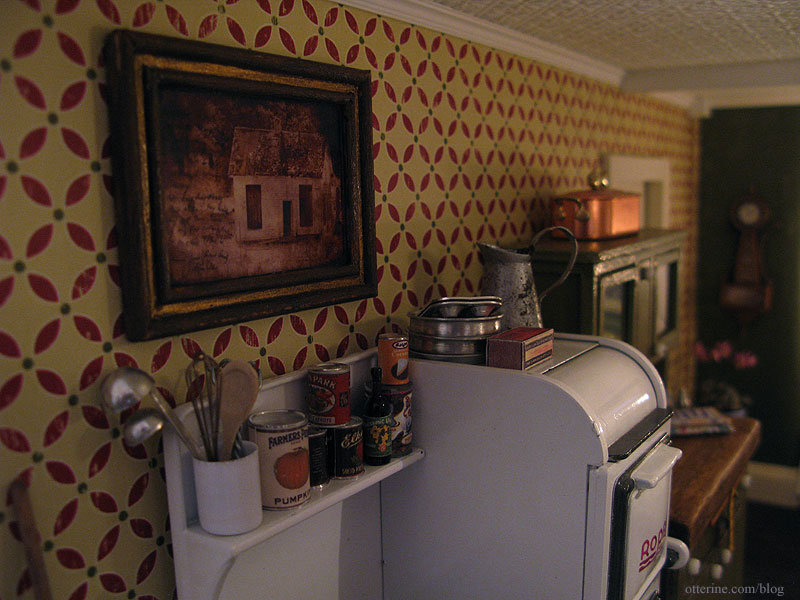
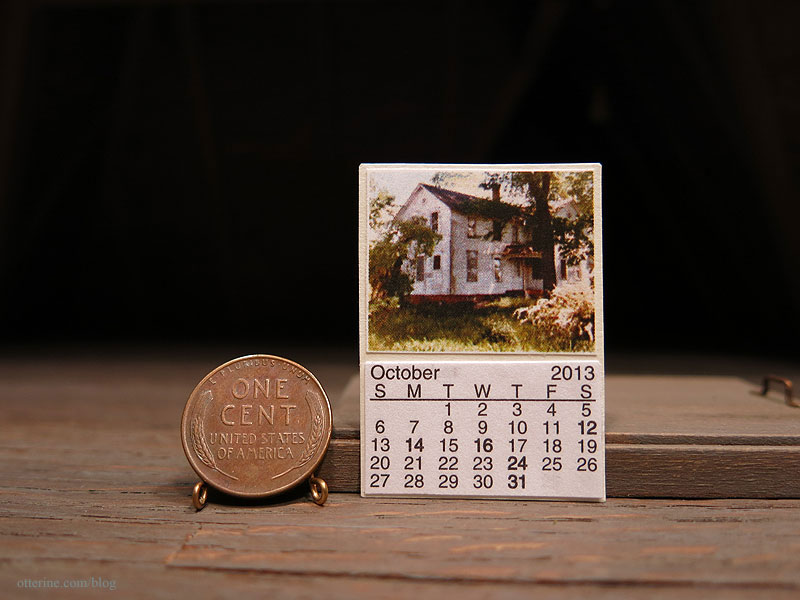
I made a wall calendar using the image of my childhood home, the lovely place from my dreams that inspired this build.
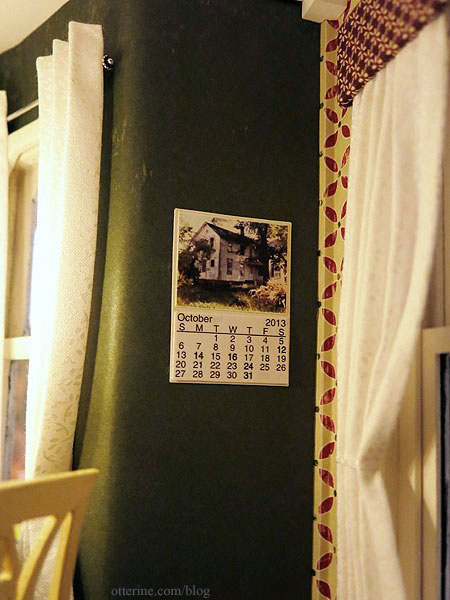
The tiny paper months of October, November and December were cut from a mini desk calendar and pasted to a piece of cardstock along with the printed photo.
The cat bowls are from D’s Miniatures and Collectibles, and I made a mat for them from paw print fabric.
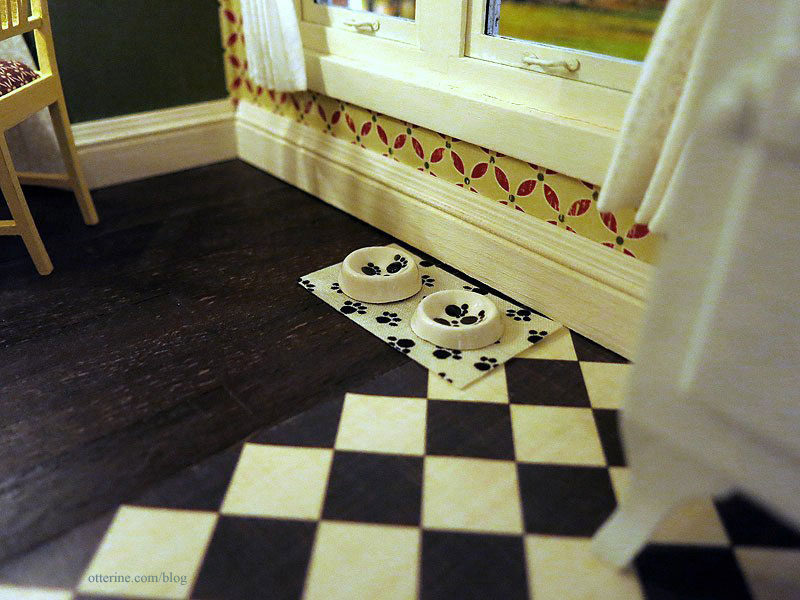
They are under the side window ready for Ophelia.
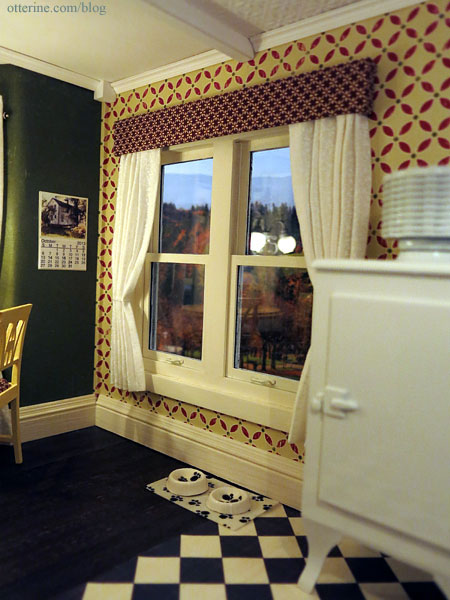
I love the way this room turned out…now let’s have some cookies!
——
For The Haunted Heritage pictorial recap post, please click here. Click here for a full list of Heritage posts, including how I made things and the materials used.Categories: The Haunted Heritage
August 9, 2013 | 0 commentsHeritage – open back trim details
One of the small things that can make a big difference is finishing the back edges of an open dollhouse. I haven’t needed to do much besides paint these edges in the various houses I’ve built because the wood was nice and clean, or I covered it with another material that eliminated the need for finishing. For The Haunted Heritage, there was channel trim on the outer edges but none on the inside edges. Additionally, some of the inside edges were warped or comprised of multiple layers of wood, like the pocket door wall.
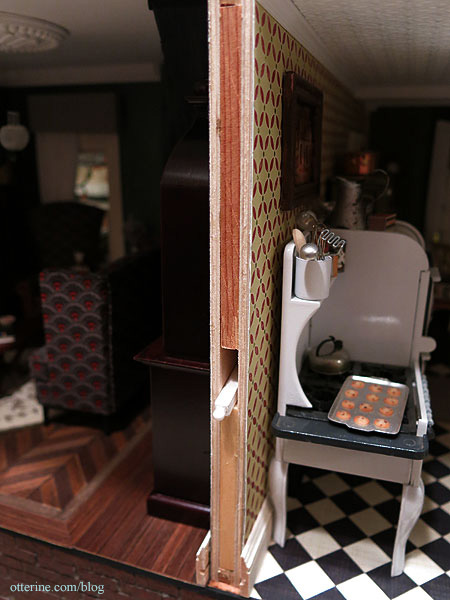
You can see from my previous post on the attic, that the second floor ceiling board is rather uneven. This is due to the fact that I made the board from three pieces, the bathroom wall might be slightly shorter than the bedroom wall, and the parlor ceiling is sagging ever so slightly. Being an old house, it actually works in my favor, but I wanted to tone it down when looking at the open back.
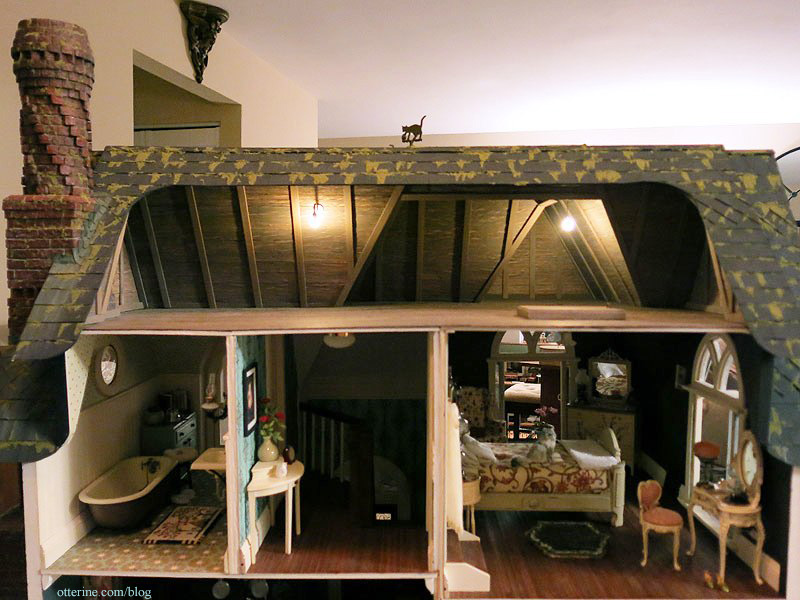
Using one long strip of corner trim across the back edge of the attic floor helps disguise the minor warp between the three boards that make up the second floor ceiling. The back surface of the trim is painted dark brown, but I painted the top portion to match the attic floor.
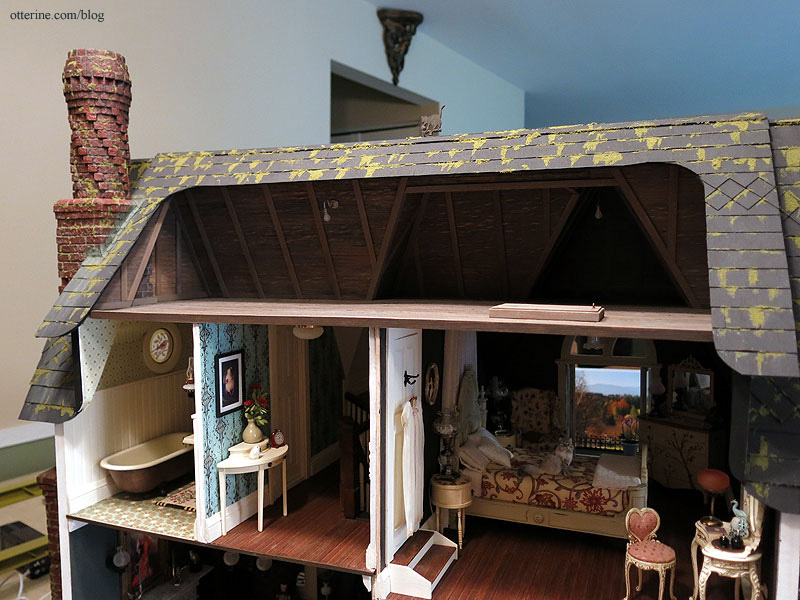
For the remaining back edges, I used various widths of basswood to make a clean finish.
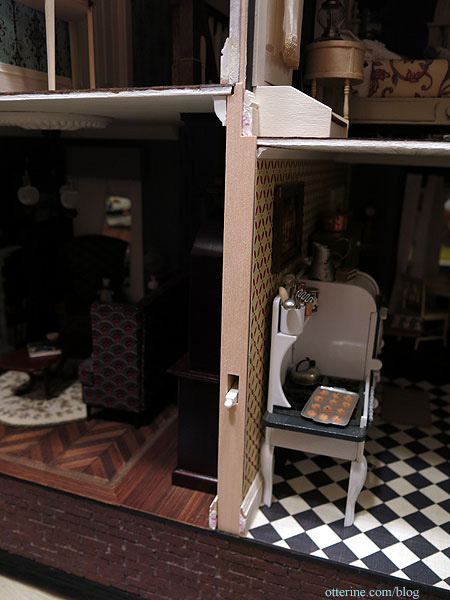
I painted these dark brown to be less obvious when the open back is viewed as whole.
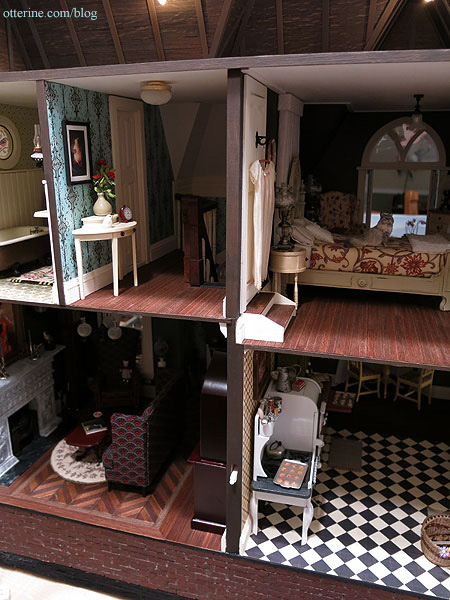
Dark brown allows the edge to fade into the background so the focus remains on the rooms and furnishings.
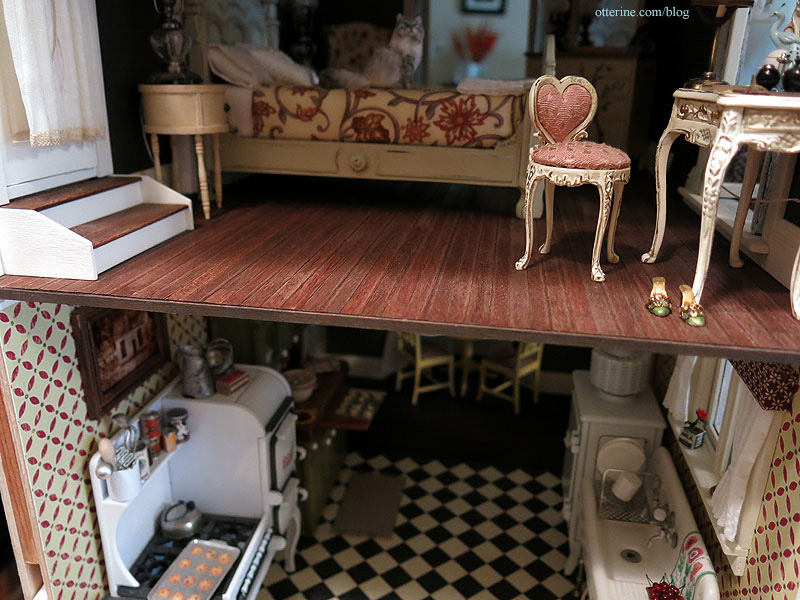
Over the next week or so, I’ll be posting room by room finished settings of The Haunted Heritage. Of course, no dollhouse is ever completely finished, but it’s time for me to wrap this one up and move on to the next great thing! :D
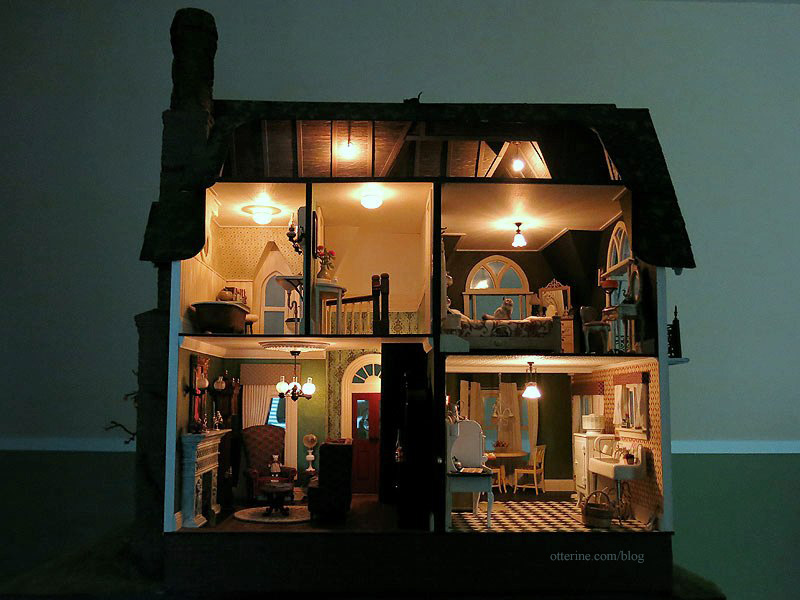
I love the silhouette of the black cat on the roof. :D
Categories: The Haunted Heritage
August 8, 2013 | 0 commentsGrandma’s attic – faux slats and rafters, part 4
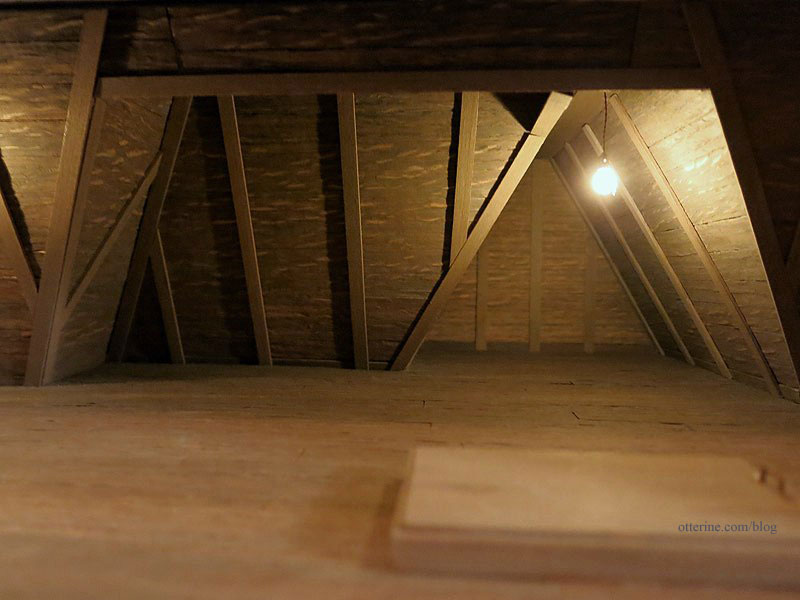
I continued working on the faux slats and rafters for the attic. Once the back roof pieces were in place, I could finish up the rafters and trim. To save myself aggravation and ruined trim wood, I used paper strips to measure. I learned to cut the long pieces first since if they are too short, you can still cut your shorter pieces from those lengths. I cut each piece a little long so it would need just a bit of sanding to fit in place. The paper patterns worked especially well.
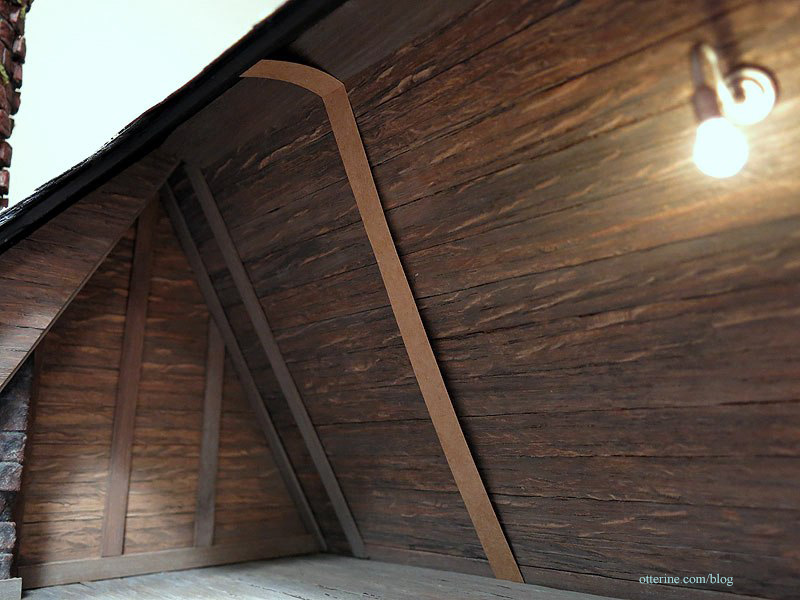
The layout I used was mainly to give the illusion of structure without much concern for how rafters would actually be placed for support. I needed to finish the edges of the cross boards and corners, and this configuration accomplishes just that. In fact, I can see in these photos that I missed the short vertical boards above the main cross beam in the middle. I have enough scraps to fix that.
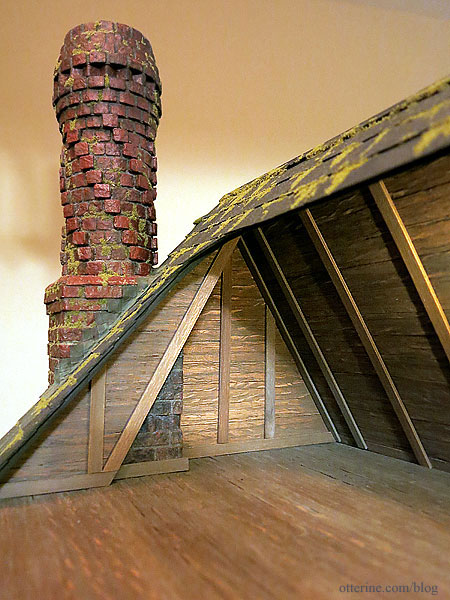
Love the tiny bit of chimney in the attic. :D
The last item in the attic was the faux stairs. I put one of these in Baslow Ranch based on the Greenleaf tutorial. I altered the upper portion a little, making the door taller than the sides.
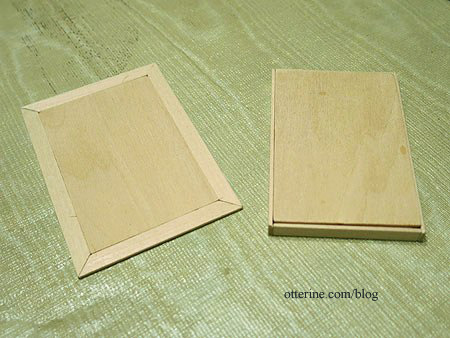
It’s not yet glued in place since I need to determine where the lower door will be on the second floor. Most likely, it will end up installed in the bedroom since that room has the largest ceiling expanse. I had originally planned to have this in the bathroom but there was no room there to realistically have stairs that pull down. The same issue arose in the hallway. That leaves the bedroom. It’s a small detail and should be not at all obtrusive.
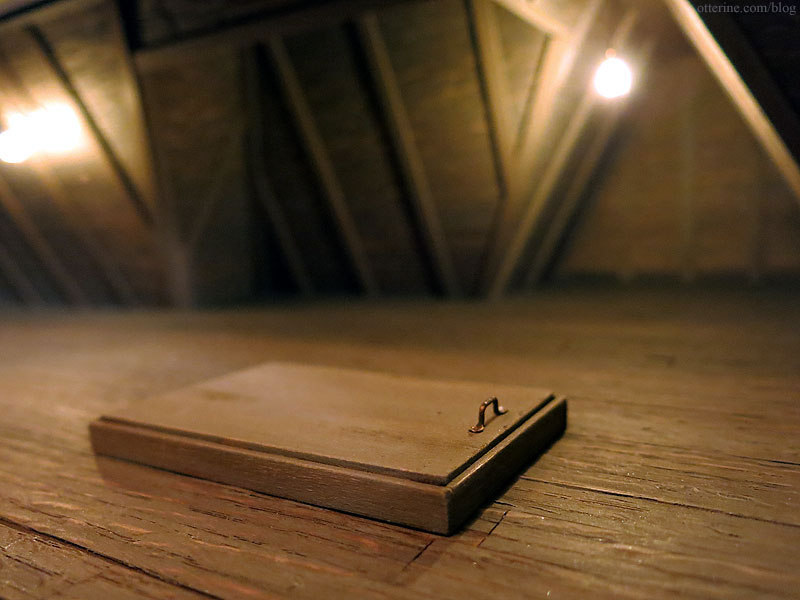
I love the atmosphere of this space.
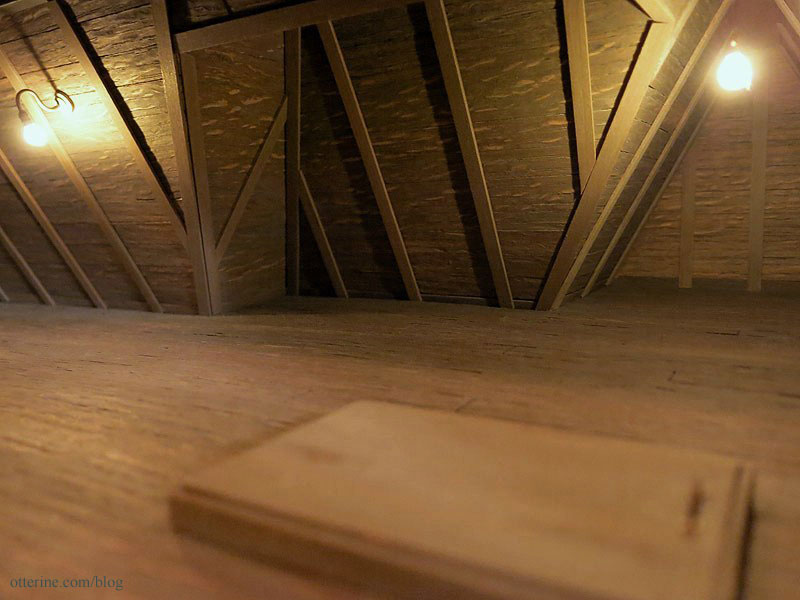
Even empty it exudes character. Hmm…looks like I need another vertical board in the front gable, too.
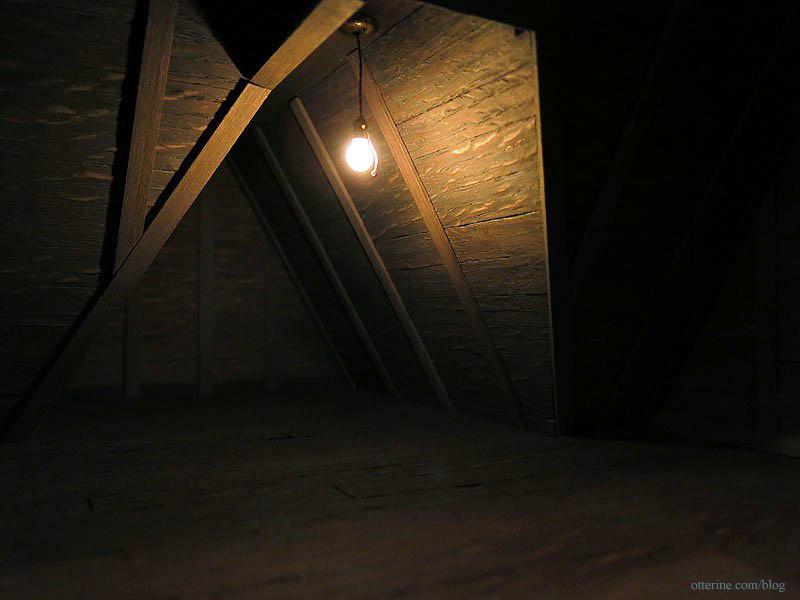
Overall, it’s really taking shape.

Categories: The Haunted Heritage
August 5, 2013 | 0 commentsHeritage – gutters and downspouts, completed
Finishing work on the gutters and downspouts. The original kit intended for only the left side to have a downspout yet there would be gutters all around the front.
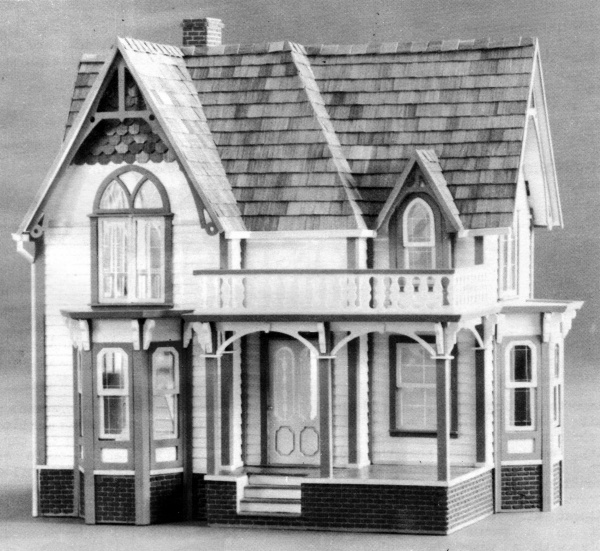
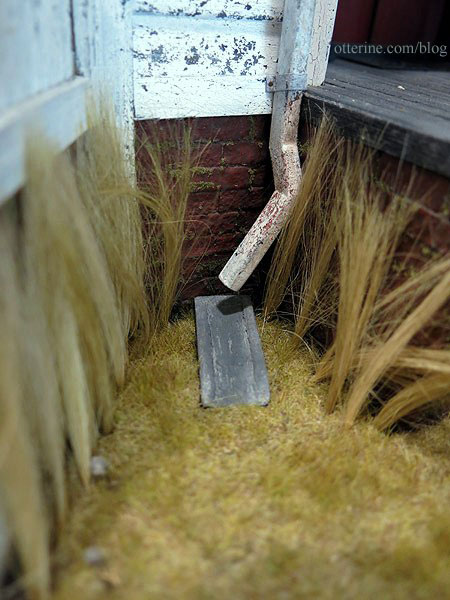
Well, that wouldn’t do! Water would be pouring over the sides all over the entryway and porch. The middle gutter required a diverted end to move away from the house and empty into the splash block.
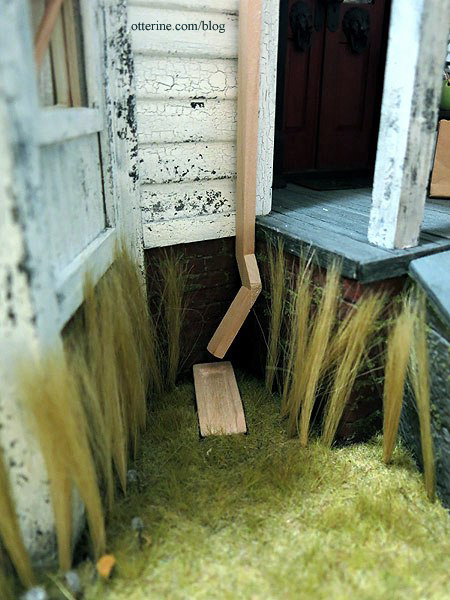
I found a website with a flat bent downspout to help me figure out the shape I needed.
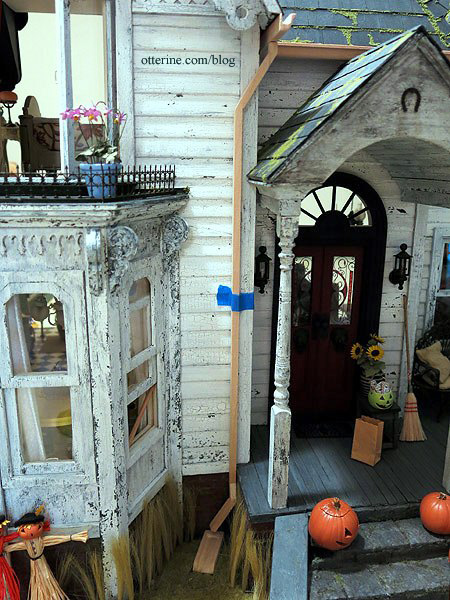
The last gutter required some demolition. The cellar doors had to be moved over about 3/4″ closer to the chimney. There was room, but it was a pain prying the assembly off the base. I built things securely. Anyway, I took no photos of the process since I worked fast to put it all back together. I glued some new dirt cover over the bare spots and then needed to wait for that glue to dry. I still have landscaping to finish besides, so it’s not much of a big deal, just a speed bump.
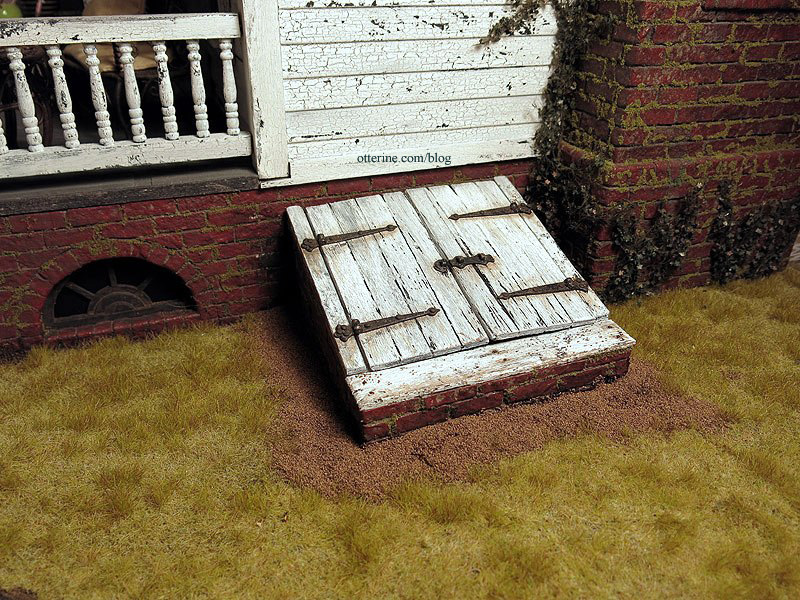
With the cellar doors moved, the final side downspout could be finished without looking like a wet noodle stuck to the wall. :]
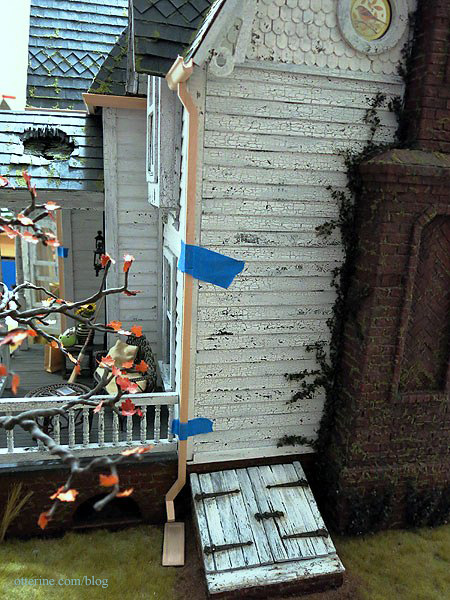
To make the end caps for the gutters, I added pieces of cardstock cut to shape.
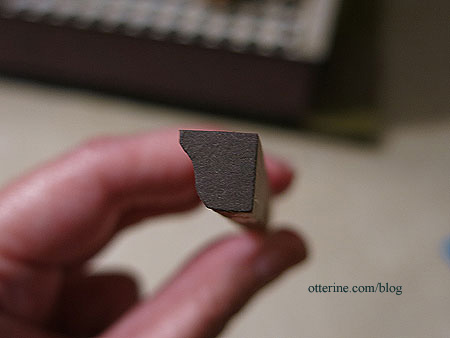
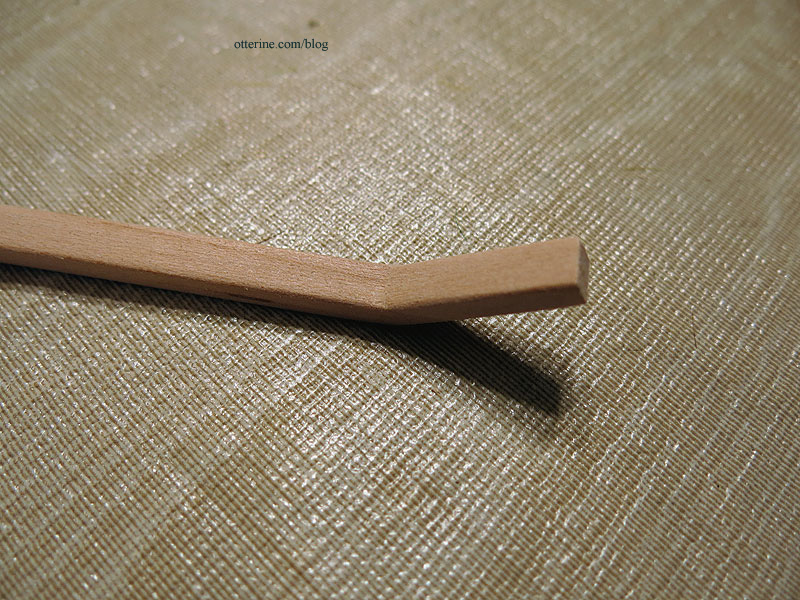
I sanded the edges and turns of the downspouts to be more rounded.
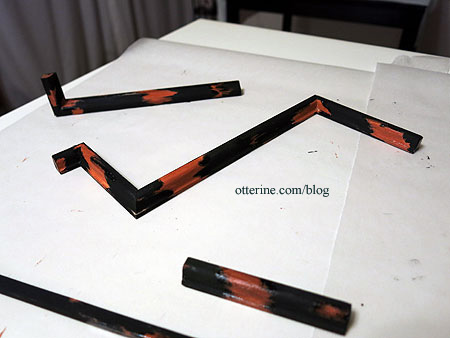
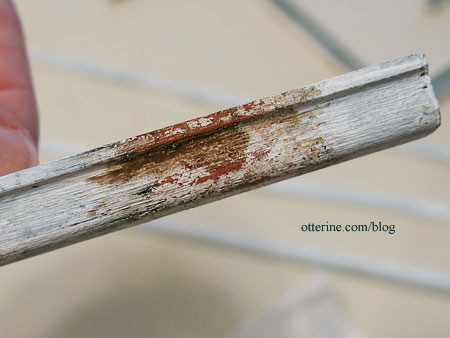
To give them a bit of age, I first painted some spots Terra Cotta by Americana, followed by crackle medium. The rest of the pieces were painted black. They look like coral snakes! :D
When I painted white over the assemblies, the black paint toned down the brightness of the white overall, and the paint flaked where there was crackle medium.
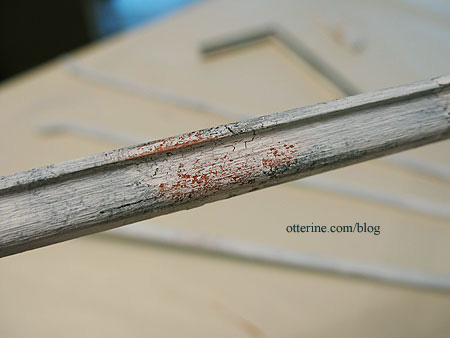
With a slight terracotta and brown wash, it became rusted flaked paint. :D
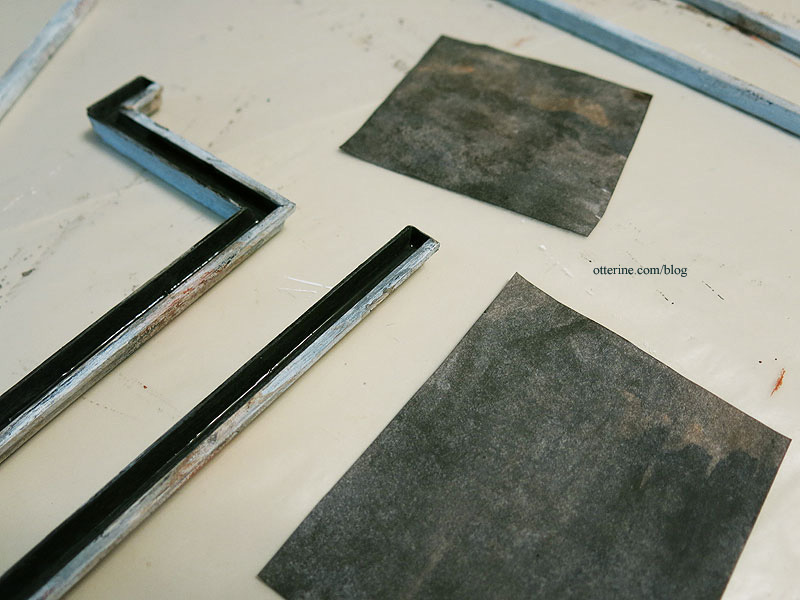
I added an aging wash to the whole thing and then dirtied up the inner track since these are old gutters. I painted some scraps of paper with the leftover paint washes and let them dry.
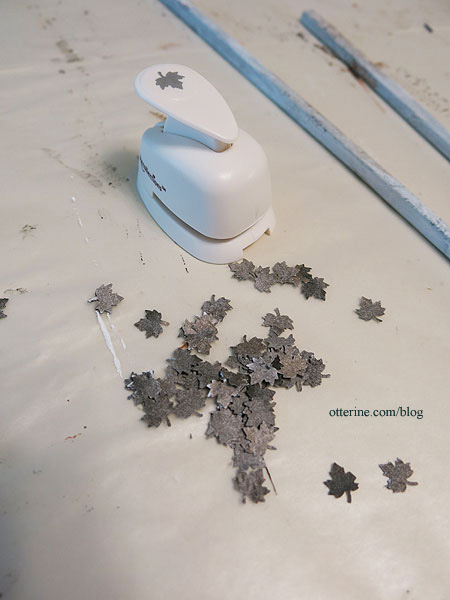
I punched as many maple leaves as I could from the scraps.
I smashed the leaves and glued them into the track, some sticking out over the top edge.
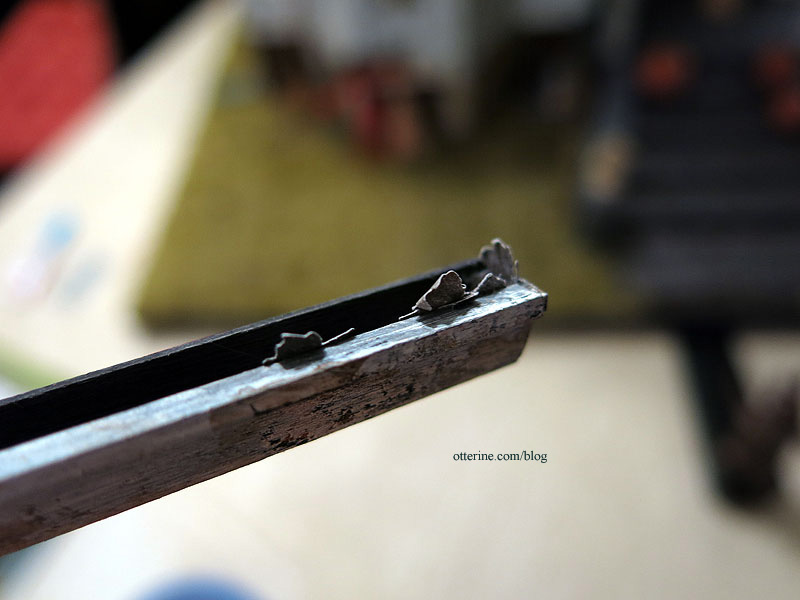
I glued in some moss material besides.
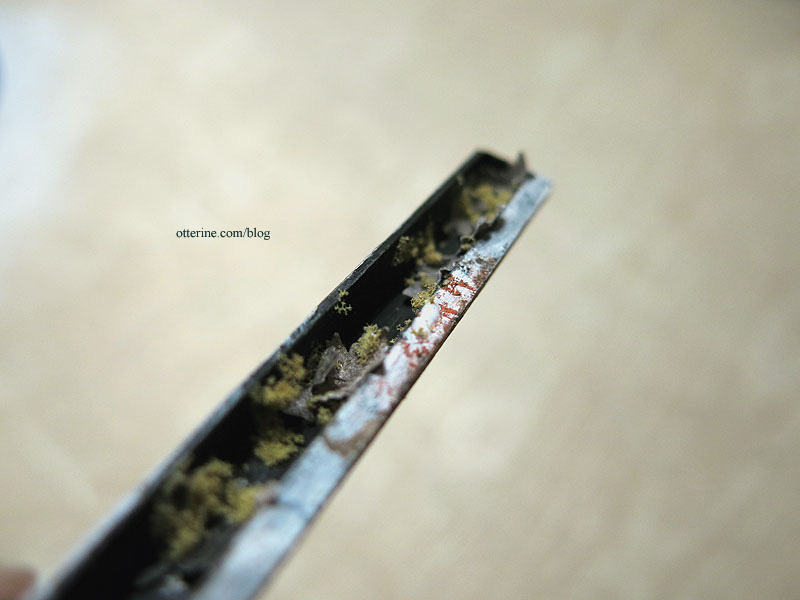
I then added a final brown wash. Voilà! Good and dirty gutters. :D
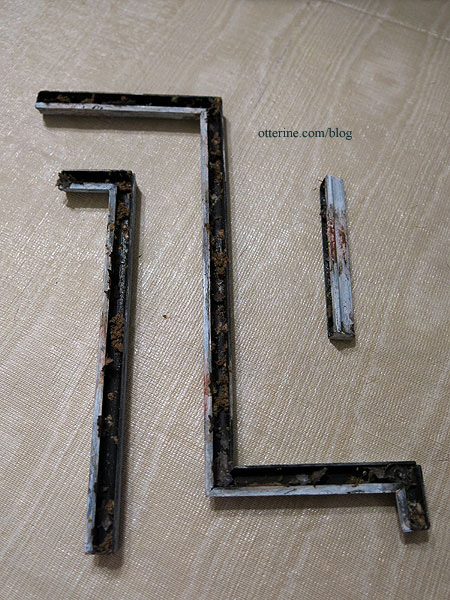
I glued the assemblies to the house, and the downspouts helped hold the gutters in place while the glue dried.
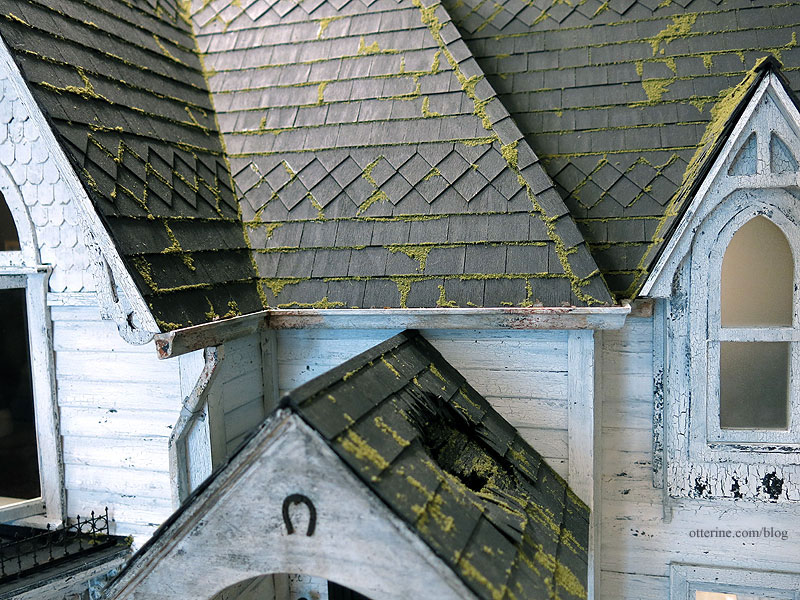
The bottom ends of the downspouts aren’t easily seen, but I did paint them black to give the illusion of being hollow.
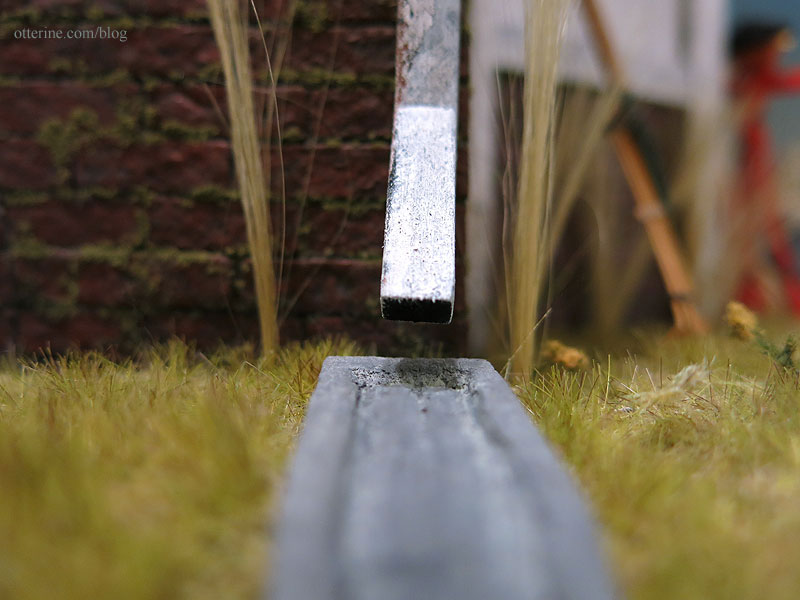
I painted the splash blocks to look like concrete.
The straps are cardstock. I cut them long so I would be able to work with them during the final fitting.
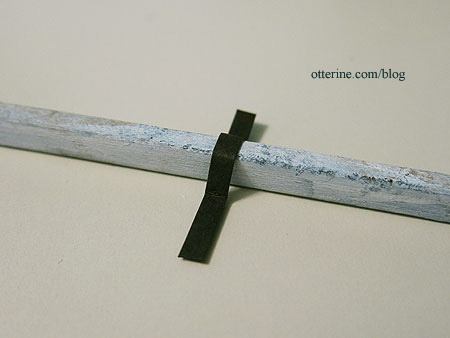
I painted the paper with a grey wash and then glued them in place. The nails are just painted dots. The straps are mostly decorative since the downspouts are glued in place.
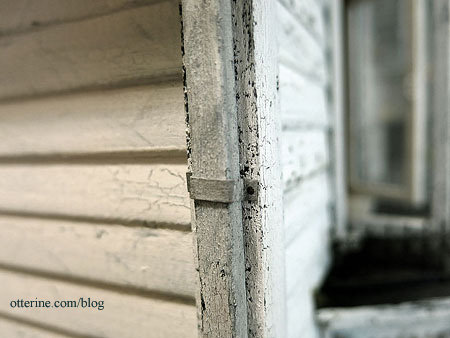
It really adds that little something, no?

Grandma has no leaf screens, so looks like she’ll need some yearly help getting these cleaned up. :D
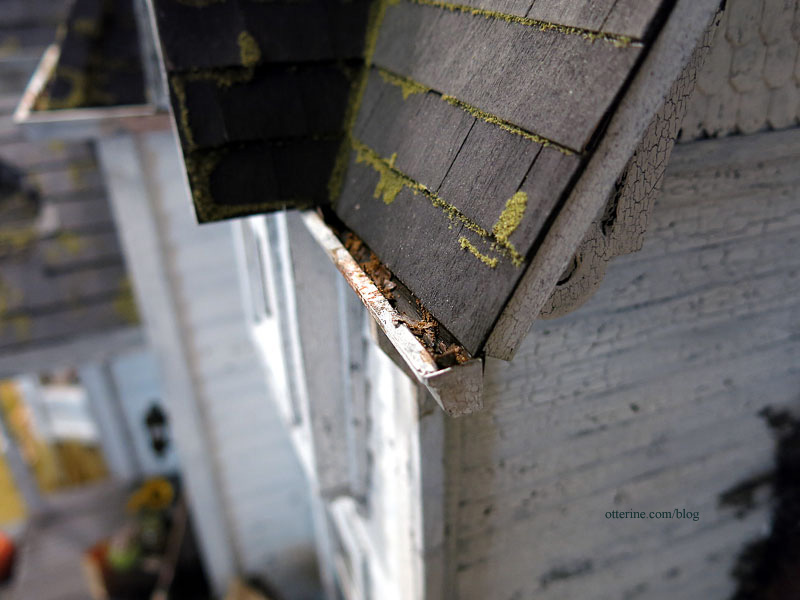
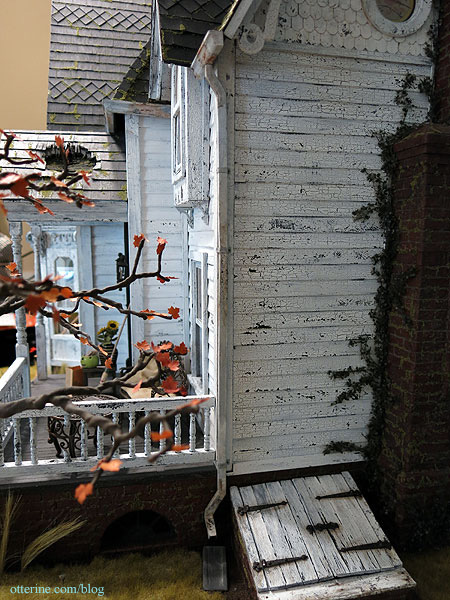
Left assembly.
Middle assembly.
Right assembly.
Almost done with the exterior! Hooray! :D
Categories: The Haunted Heritage
August 4, 2013 | 0 commentsHeritage – gutters and downspouts, part 1
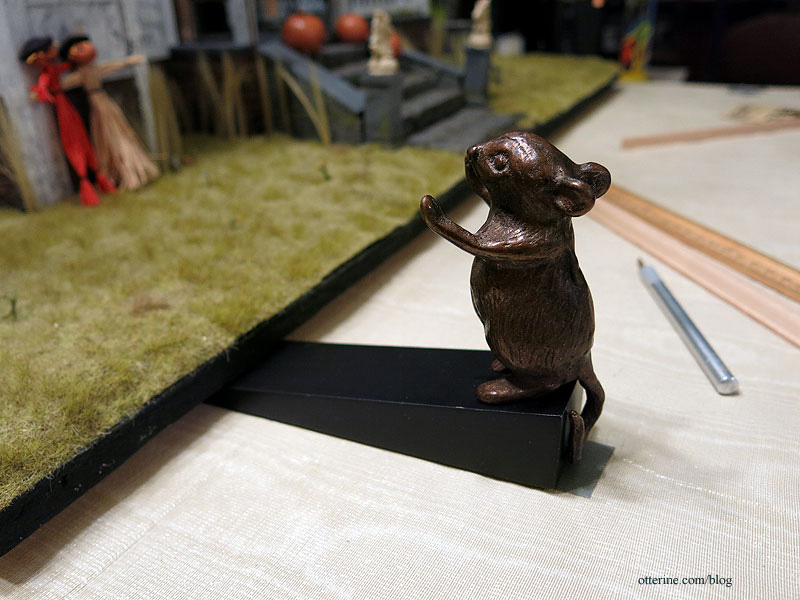
When you’re working on a house that sits on a turntable, you need a little help. Whoa, Heritage!
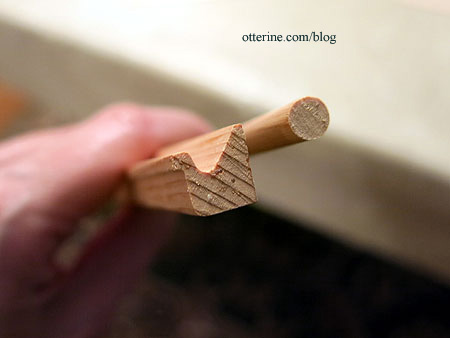
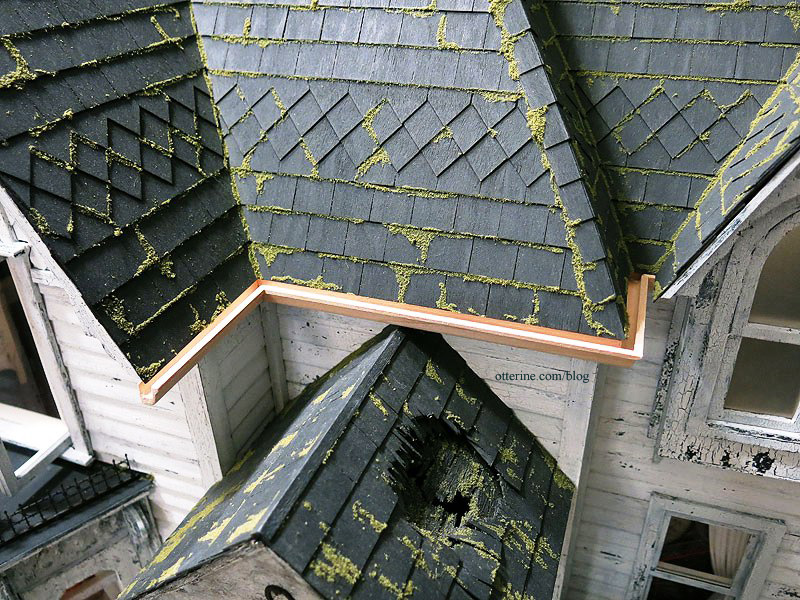
The Heritage kit included gutters and downspout materials. One length of gutter-shaped wood and one long dowel. These were acceptable, but I went with different parts.
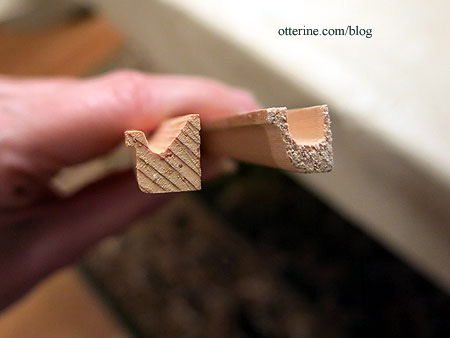
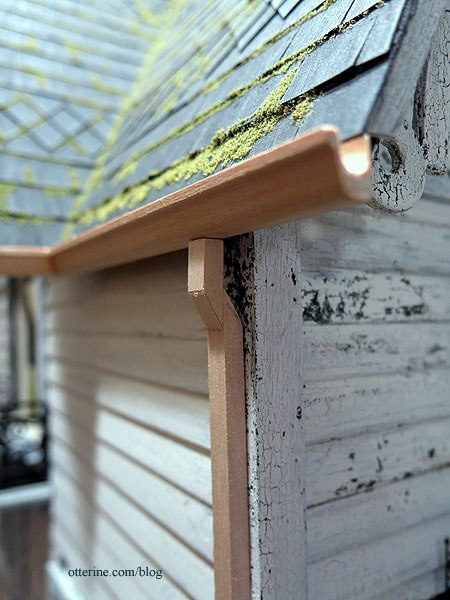
I bought gutter shaped wood from All Small Miniatures the day I went there for the asphalt shingles for The Artist’s Studio. It’s shaped differently and it is lighter in weight. Considering there will be very little surface area for gluing, I thought the lighter weight material would work better in the end.
I cut the lengths I would need using my scroll saw. The corner joins weren’t the cleanest fit mainly because this house is so rickety. :D But, I was able to sand them to fit well enough. A little spackling here and there, and it won’t be an issue in the end. The ends will also be capped before painting.
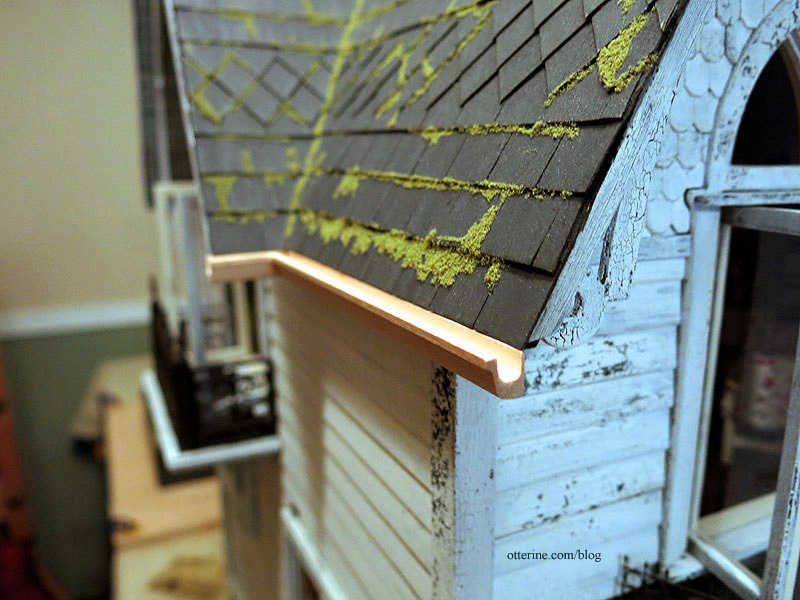
I had to forego putting gutters on either side of the dormer, because the area between the main roof and the left side of the dormer didn’t allow for a full turn. Putting it on the right side only would have brought more attention to the problem.
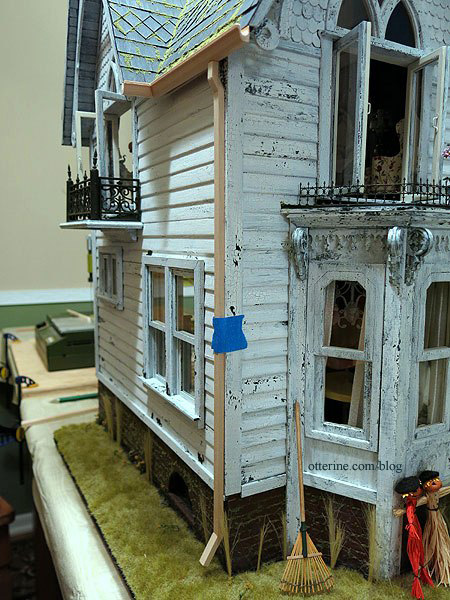
I formed the downspouts by cutting 1/8″ x 1/4″ wood. These will be sanded to shape before painting.
I thought this was a more realistic approximation than round downspouts.
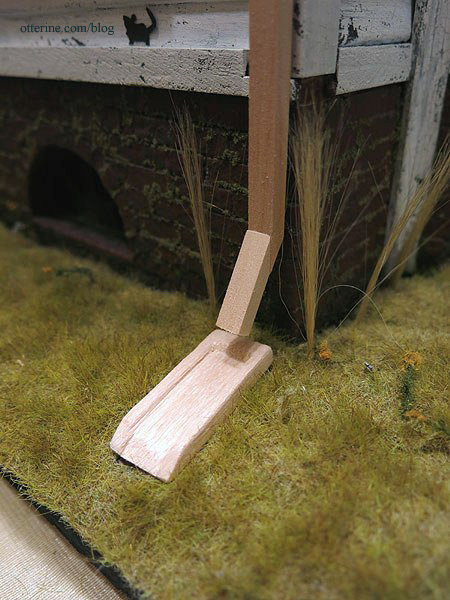
The splash blocks are balsa, shaped by sanding. I had to cut away some of the landscaping to get them to sit flat on the ground.
Update: part 2 here.
Categories: The Haunted Heritage
August 3, 2013 | 0 commentsFramed photos add a personal touch
When I bought Ophelia from *Reve*, there was a photo in the listing that I loved. I asked the artist if I could use the photo, and she graciously said yes. I edited it in PhotoShop and printed a teeny tiny copy for a vintage looking frame I had.
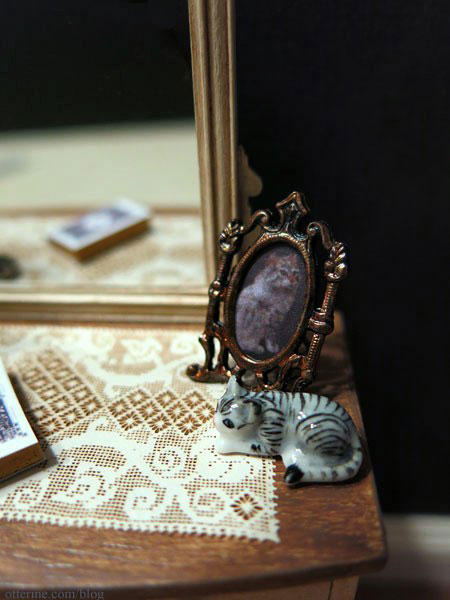
This photo of Ophelia is one I took.
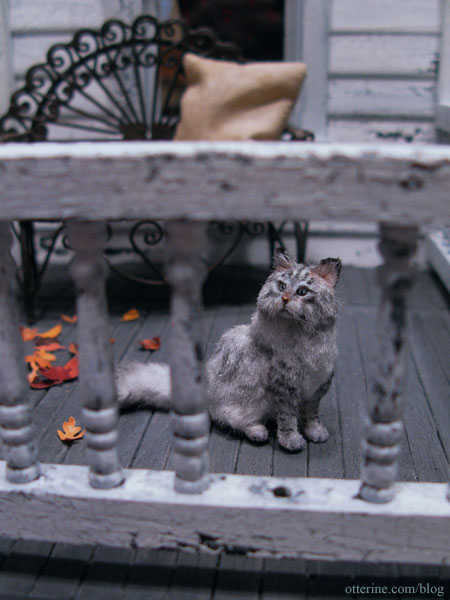
I loved it so much I decided to print it for framing as well. This one is a little larger to keep the details visible.
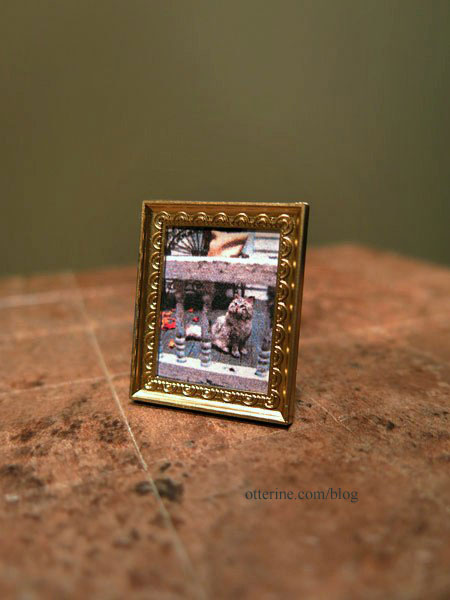
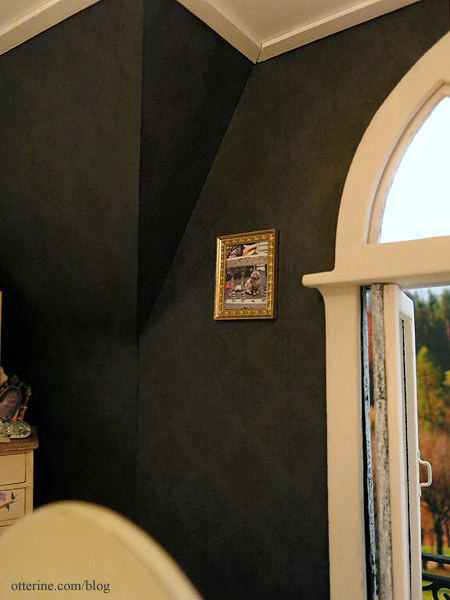
The bedroom is hard to decorate with its odd angled corner walls, so this is the perfect size for the space.
After repairing the bubble in the bedroom wallpaper, I needed a photo to fill the oval frame that would mask the repair seam. I thought a 1920s wedding photo would be perfect, but I didn’t have any in my own family to use. I searched online and found this wonderful photo from Rick Zolla, who granted me permission to use it for the Heritage. :D I edited it in PhotoShop – adding some background to the left of the man and at the top of the photo, then feathering the border into an oval shape.
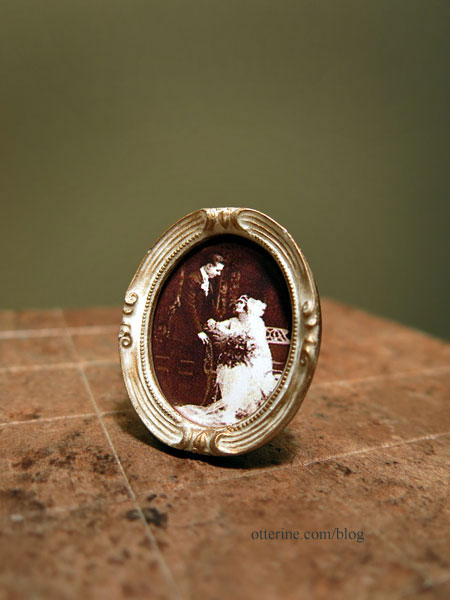
It fits perfectly with the ambiance of the room.
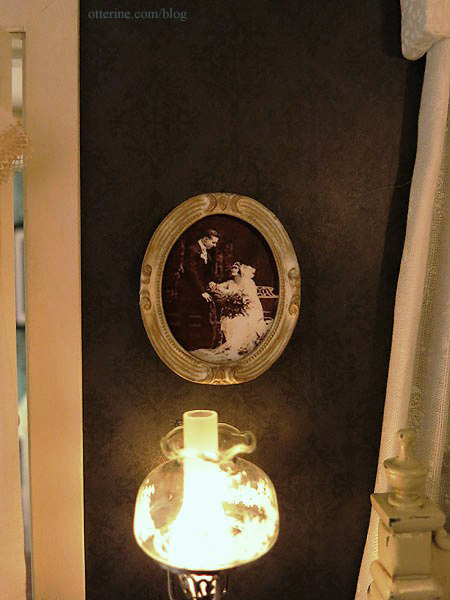
I love the relaxed pose and setting…such a great image! Thank you, Rick!
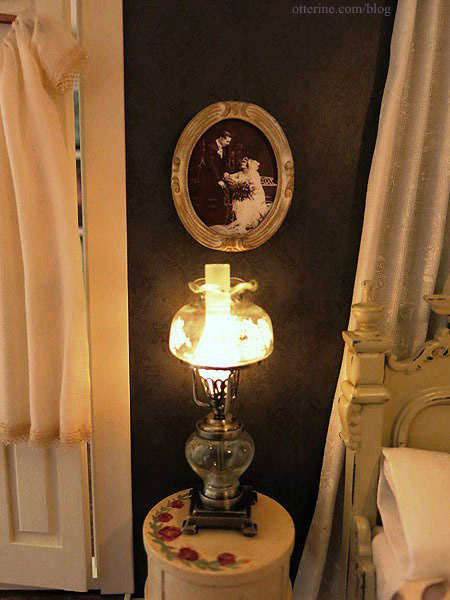
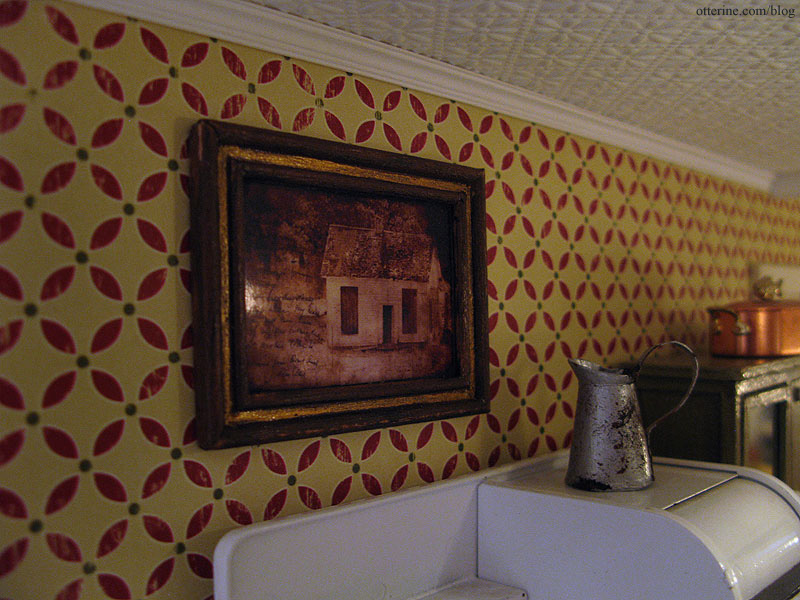
Kelly recently told me she and I share a love of photography, and she was so generous to send me one of her miniature works for the Heritage. It’s titled Ghosts of the Past. How perfect! :D
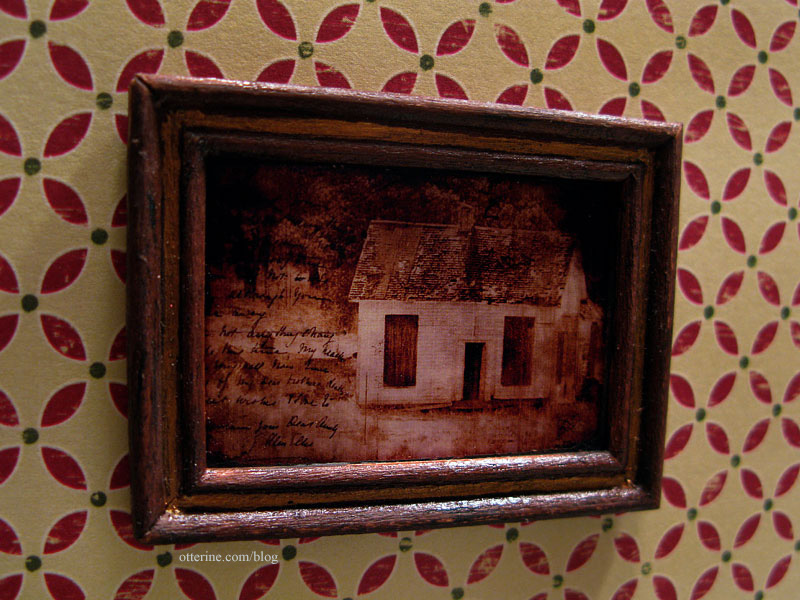
I think it works wonderfully in the kitchen. Maybe it’s an old faded photo of grandma’s childhood home. The lovely pitcher is from Caterina.
Categories: The Haunted Heritage
August 2, 2013 | 0 commentsAntique drum nightstands, part 2
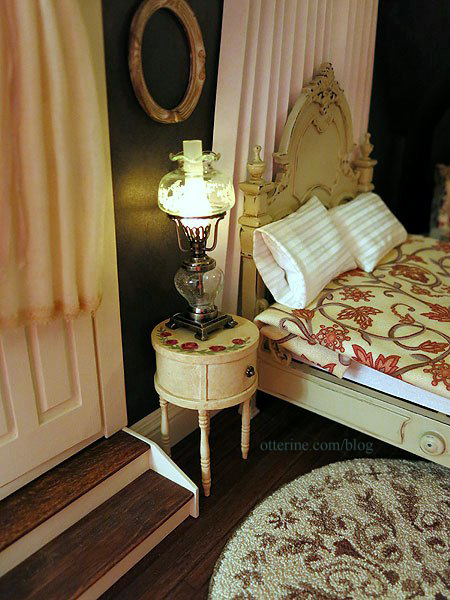
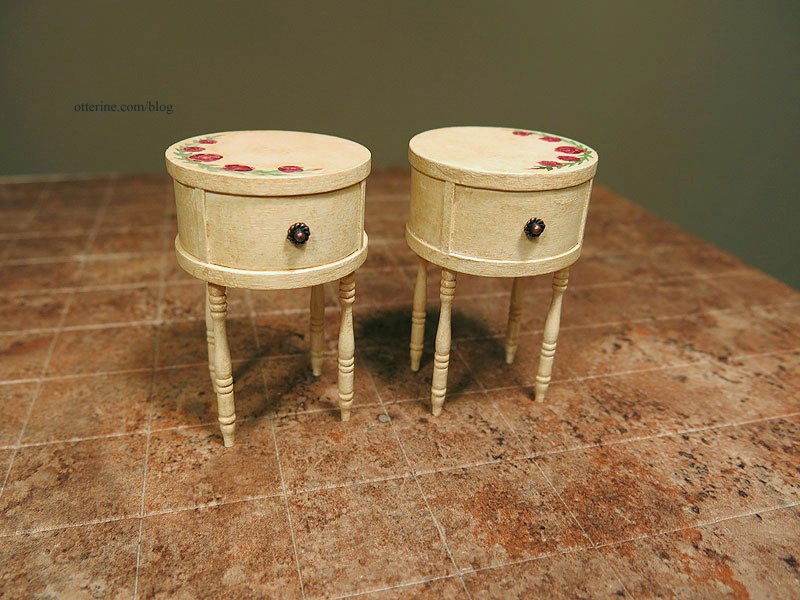
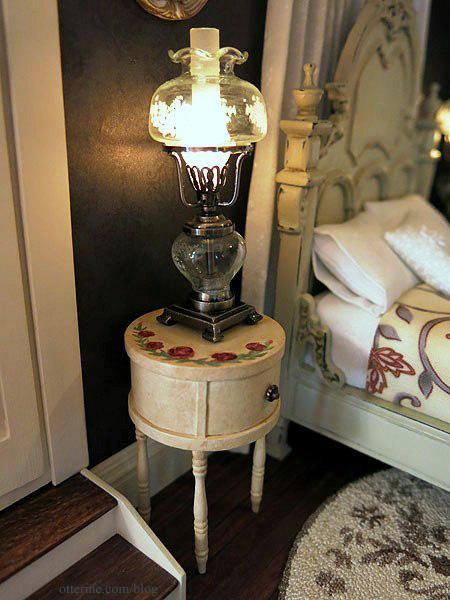
Continuing work on the antique drum nightstands. Instead of matching the painted bow front dresser, I chose a different design for the nightstands.
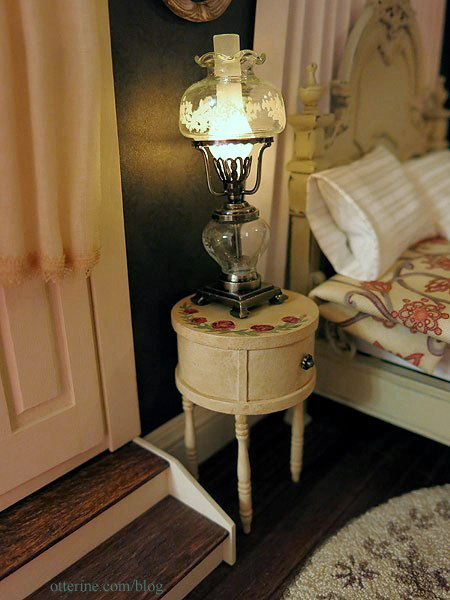
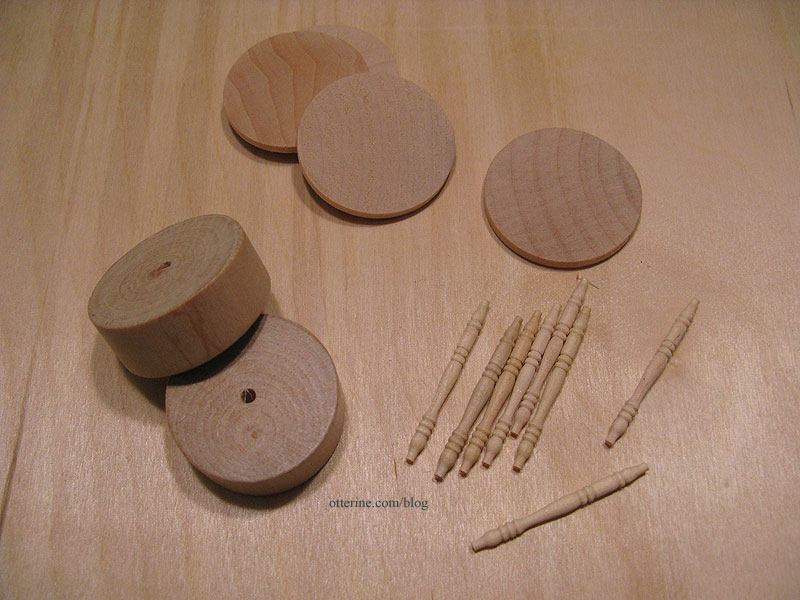
As a reminder, the nightstands were made from the round stands that came with my artist models, 1 1/2″ x 1/8″ wood circles and Houseworks 1 9/16″ long spindles.
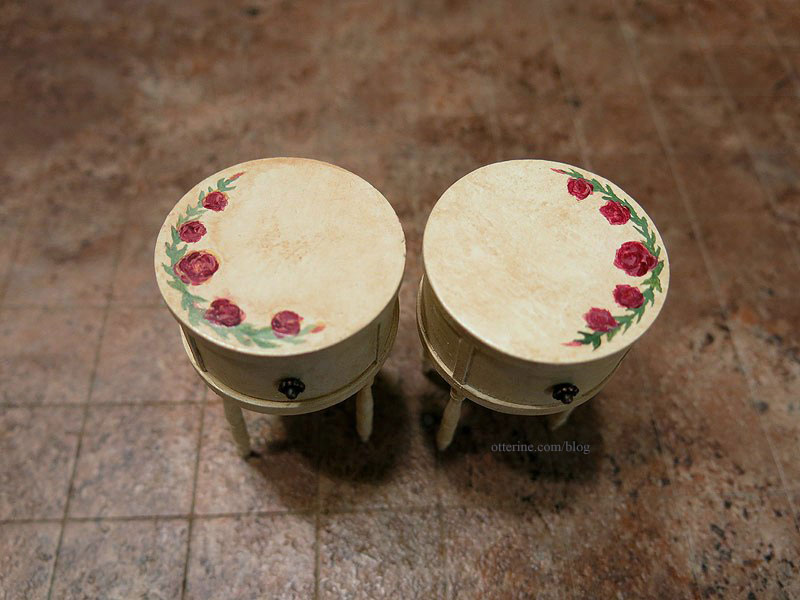
I painted them with a base coat of Tapioca by Folk Art then added an aging wash of light brown. I then painted the green vines, followed by red and yellow for the roses.
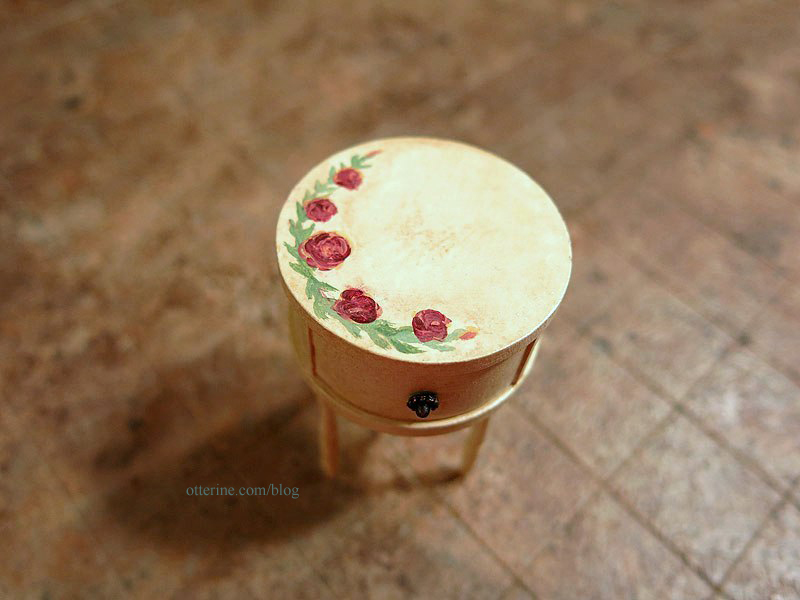
The knob is the fancy end of an antique copper headpin. I love the way it turned out.
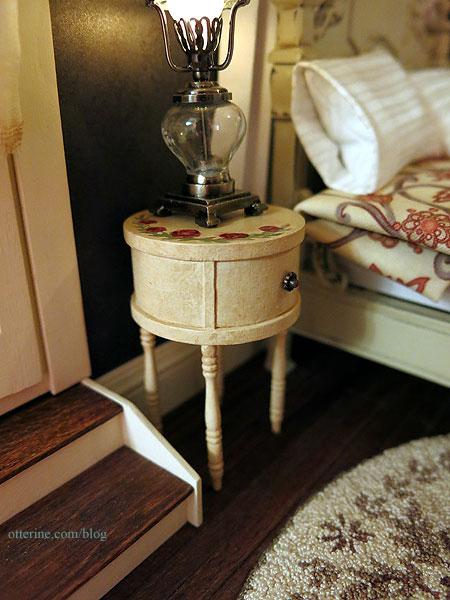
It fits in well with the rest of the furnishings.
I finished painting the second nightstand, and they are a pretty close match to one another.
I opted for doing mirror image painting so they would look more like a planned set than two of the same table.
There’s not much room on them for anything besides the lamps, but it all seems to work well together.
With these completed, this room is almost finished! :D
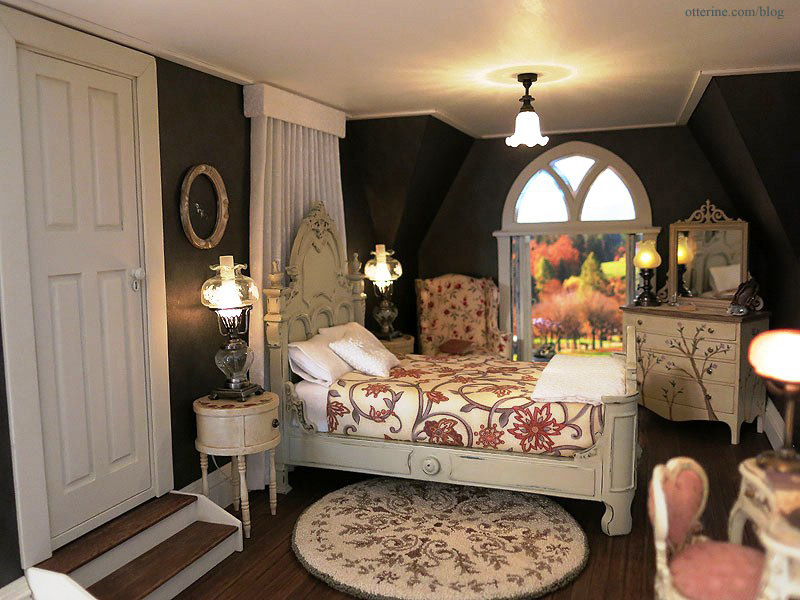
Of course, it hasn’t been fully accessorized yet, so stay tuned!
Categories: Furniture, The Haunted Heritage
August 1, 2013 | 0 commentsRepairing buckled wallpaper without redoing the entire wall
If you recall from a previous post, I noticed that the Heritage bedroom paper had buckled in a few places on the long wall after using Yes paste. After posting a question on the Greenleaf forum for suggestions, I received two great ideas. (Note: I no longer recommend Yes paste – I use Wallpaper Mucilage instead. Yes paste has problems with longevity.)
One suggestion for fixing the paper involved using a glue syringe. I would cut a small slit in the paper, lift the edge and inject glue under the paper. I would use a credit card or similar flat edge to distribute the glue and even out the paper. To disguise the slit in the paper, I would just hang a framed photograph or small painting. The other suggestion was to form a curtain behind the bed. I’ve seen fancy valances and partial canopies that fasten to the wall and have draped fabric hanging down to the floor.
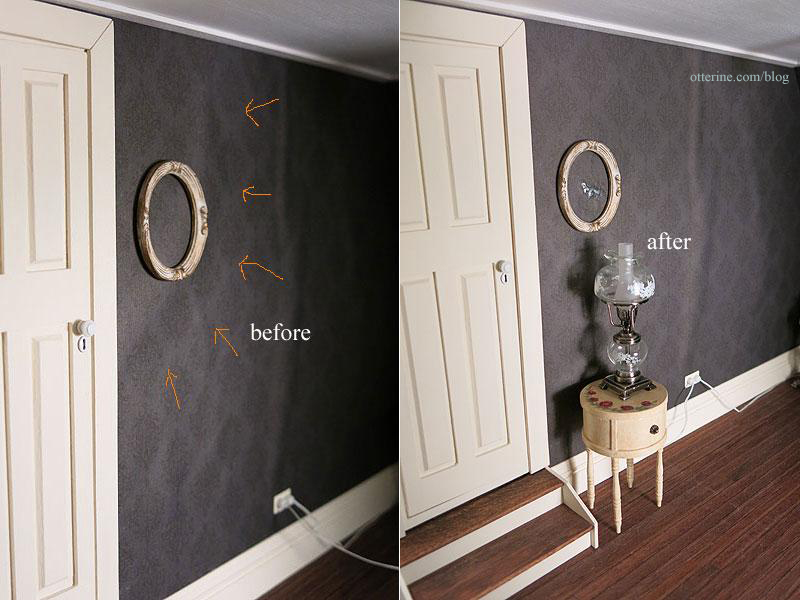
First, I worked on repairing the one large bubble between the bed and the door. I used a bright light to make sure I was getting the right spot.
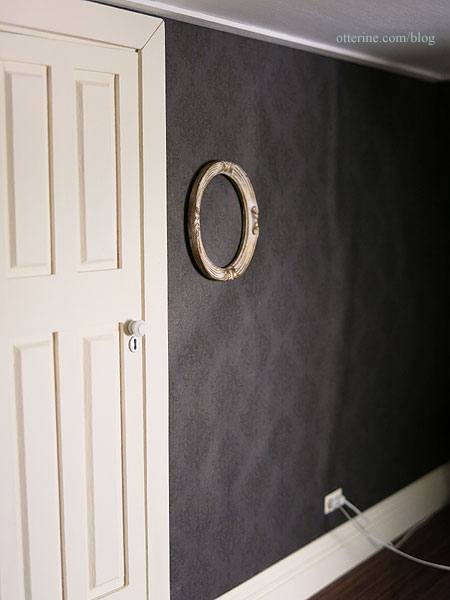
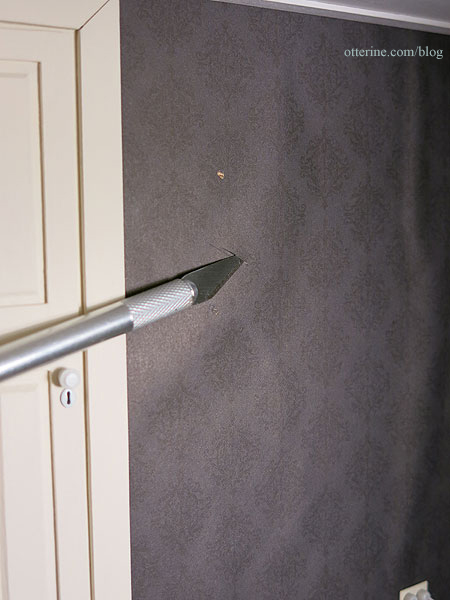
I kept my oval frame in place to show where the cut would need to be. I used a brand new blade to make a clean cut in the paper about 1/2″ long.
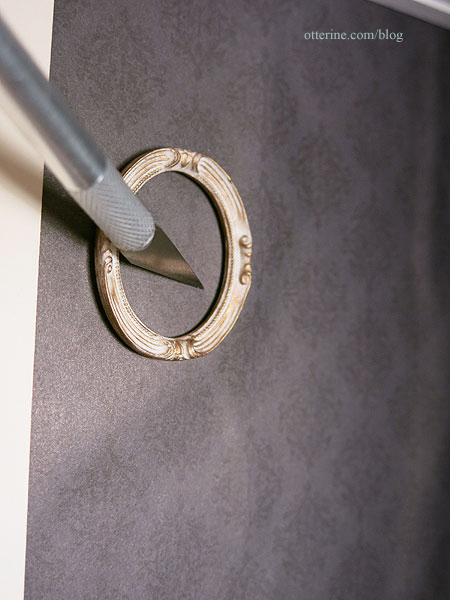
The dot above the cut is the mini hold wax I used to hold the frame in place. I left it to make sure I put the frame back in the same spot after the repair.
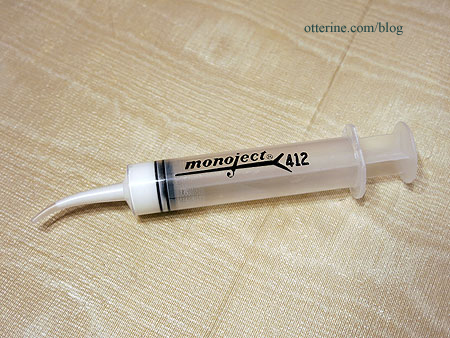
I put some Aleene’s Quick Dry glue into my syringe.
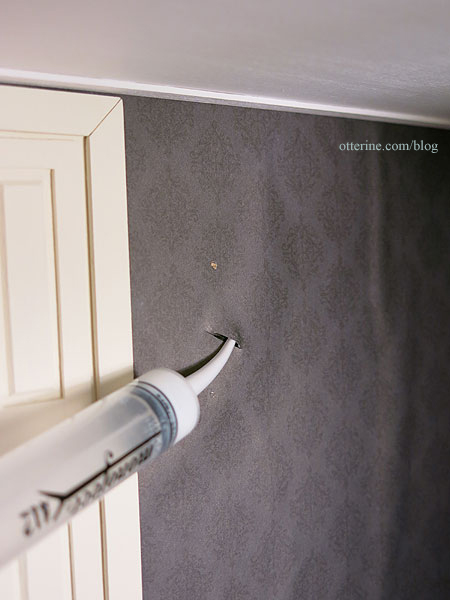
I lifted the edge of the paper and inserted the syringe tip. I squeezed out a good amount of glue into the bubble.
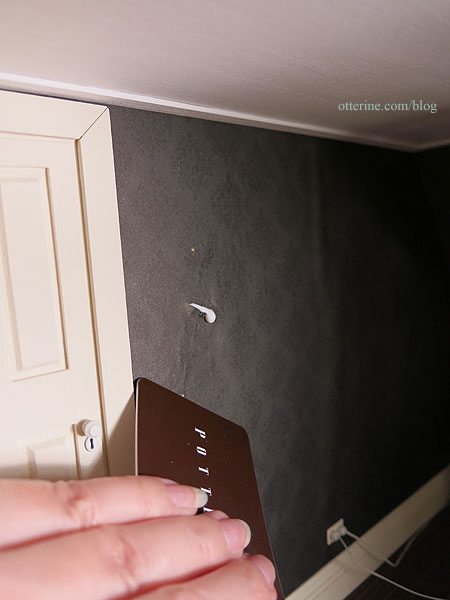
Using a plastic gift card, I smushed (technical term there) the glue around inside the upper portion of the bubble. I then repeated the process for the lower portion.
I used the back of my fingernail and lightly rubbed the surface in a circular motion to even out the texture. It’s not perfect by any means, but it looks so much better than it did. There was one spot where there was something under the paper, so it marred the front just a little. The tall lamp covers that without a problem. The seam will be behind the oval frame and hidden. I just need something for the frame…I’m thinking a 1920s wedding photo. :D
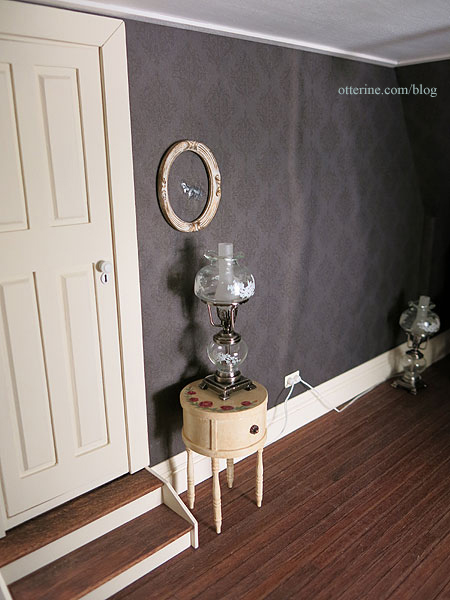
Success!
For the larger vertical bubble and the small one right next to it, I used the wall curtain idea instead of attempting to inject glue into the bubbles. I mocked up a drapery panel with plain white paper even though I wasn’t sure about using a light colored fabric behind the light colored headboard. But, I loved it instantly, and it was just quickly folded paper! The drapery would be less stark since the fabric I had in mind was relatively sheer.
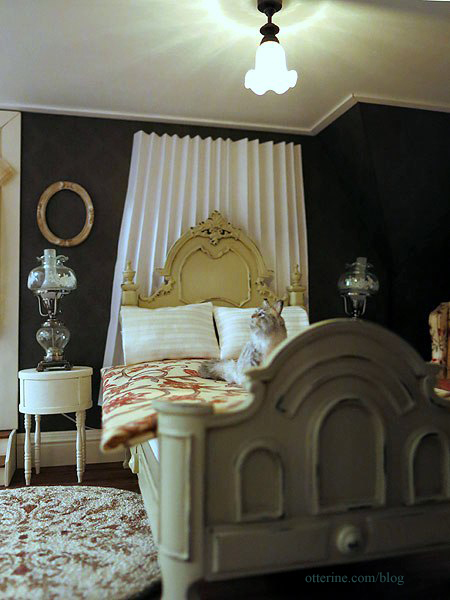
The drapery panel also creates the perfect balance with the two floor-to-ceiling windows on the other two walls.
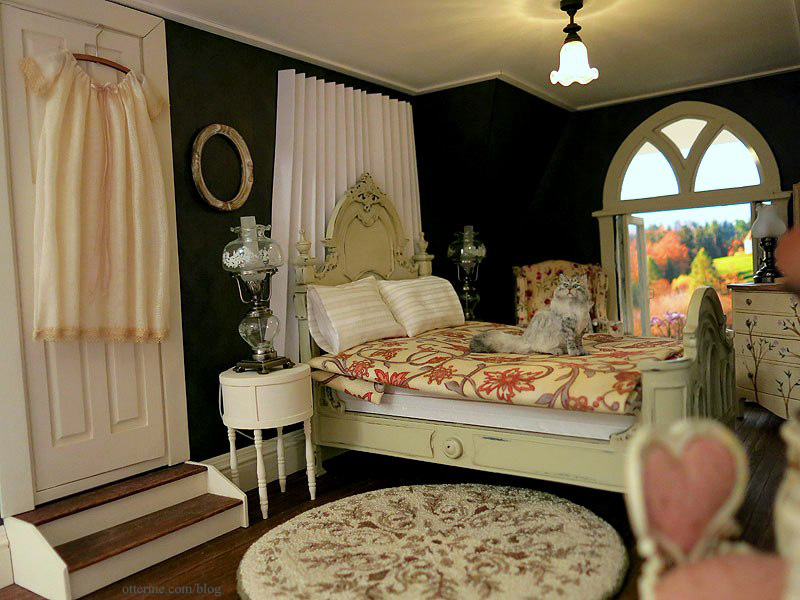
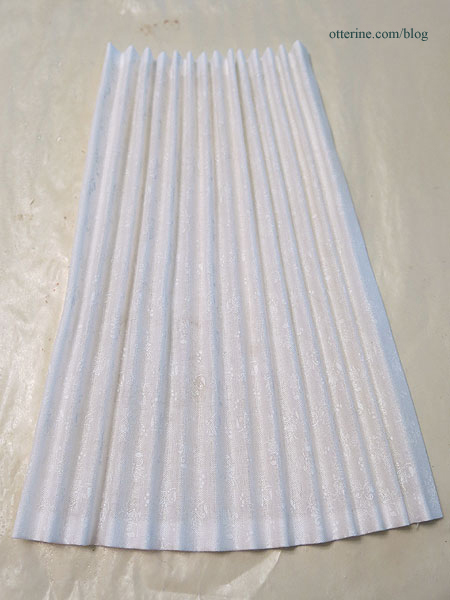
I made the wall panel a few days ago using the Millie August Magic Mini pleating tool. I made the pleats with the tool and then sprayed them with Aleene’s Stiffen Quik to set my final arrangement.
I made a pelmet for the bedroom curtain (top) smaller than the one I made for the parlor (bottom).
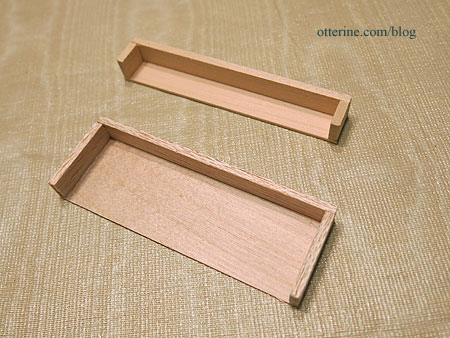
I painted it white and then covered it with the same fabric I used for the accent pillow on the bed. I hadn’t needed to paint the pelmet in the parlor since the fabric was darker. I glued the curtain inside the pelmet.
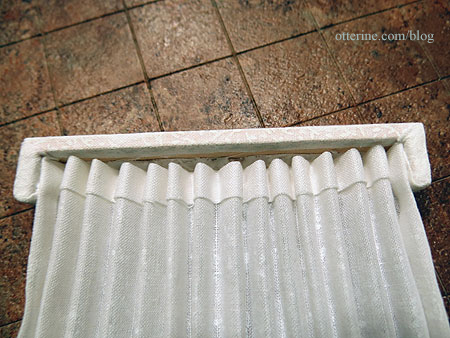
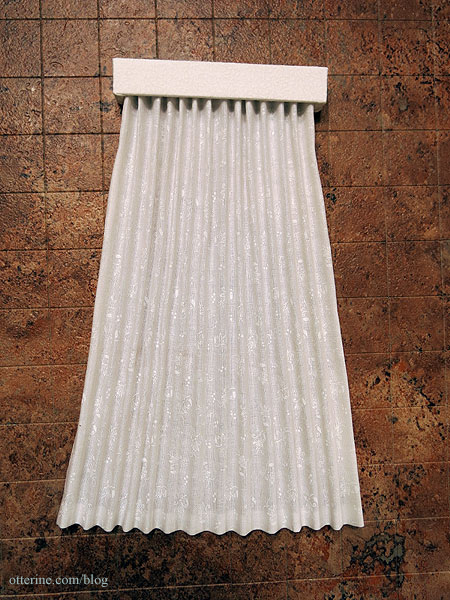
I used mini hold wax to attach the pelmet to the wall. If I ever need to remove it for cleaning or replacement, I won’t risk damaging the delicate paper on the wall.
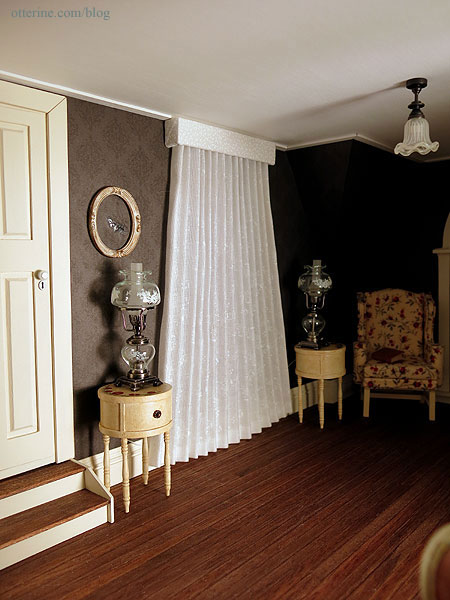
The bubbles are covered, and the panel adds a wonderful design element. I would never have done this without the wallpaper problem, so I suppose it’s another one of those happy accidents. :D
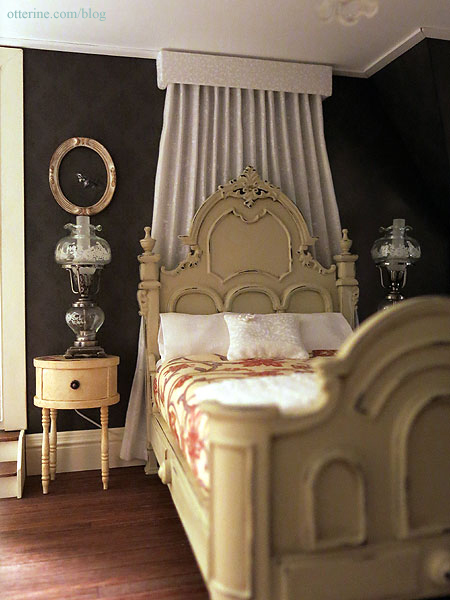
Categories: The Haunted Heritage
July 31, 2013 | 0 commentsBespaq bed makeover, part 2
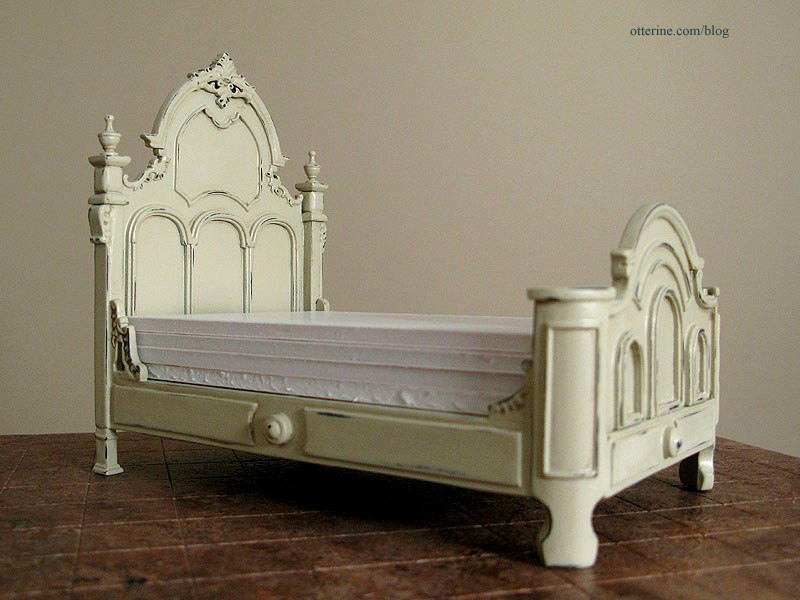
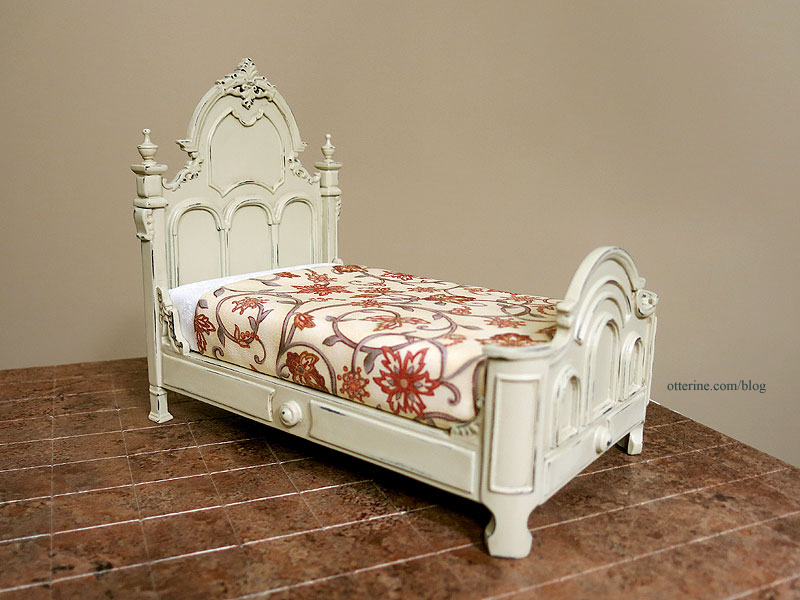
The Bespaq bed makeover is done!
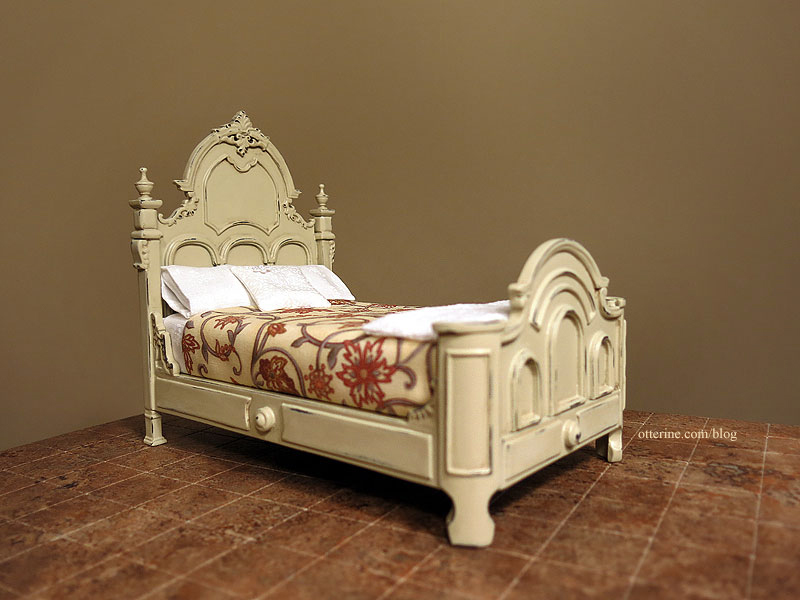
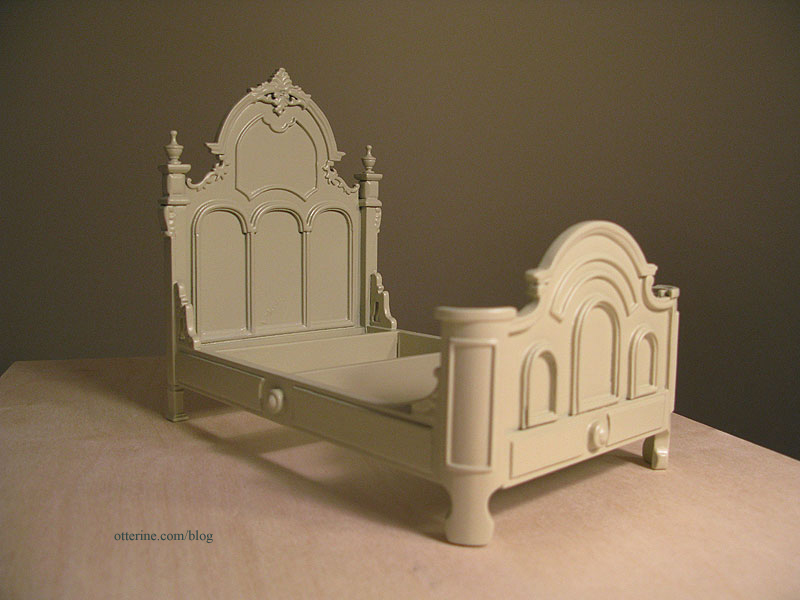
This is where the bed started.
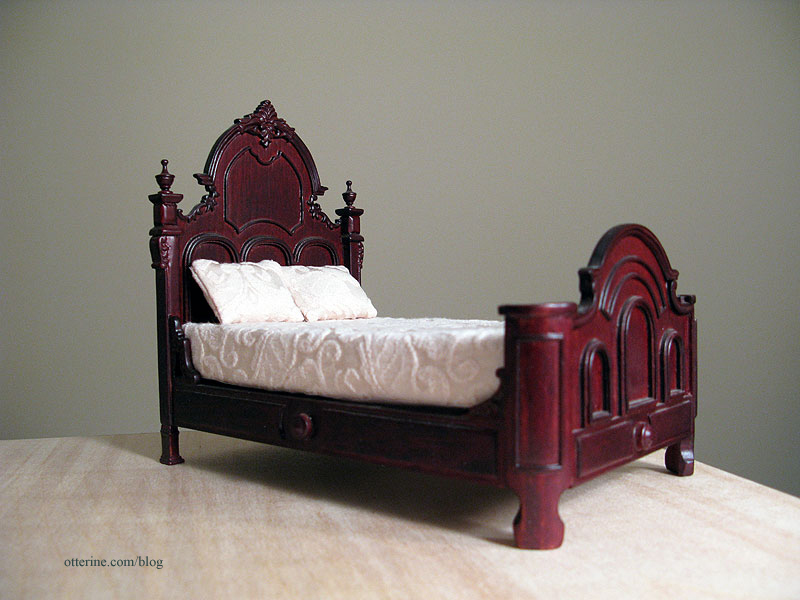
Then primed (grey) and painted with Krylon Almond in satin finish.
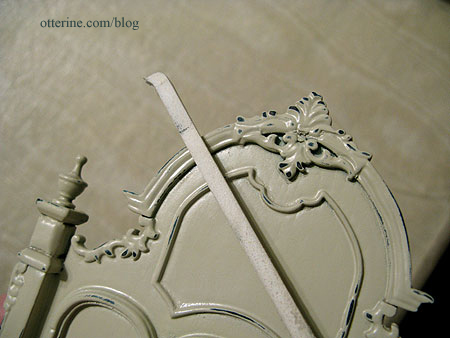
Then aged by sanding.
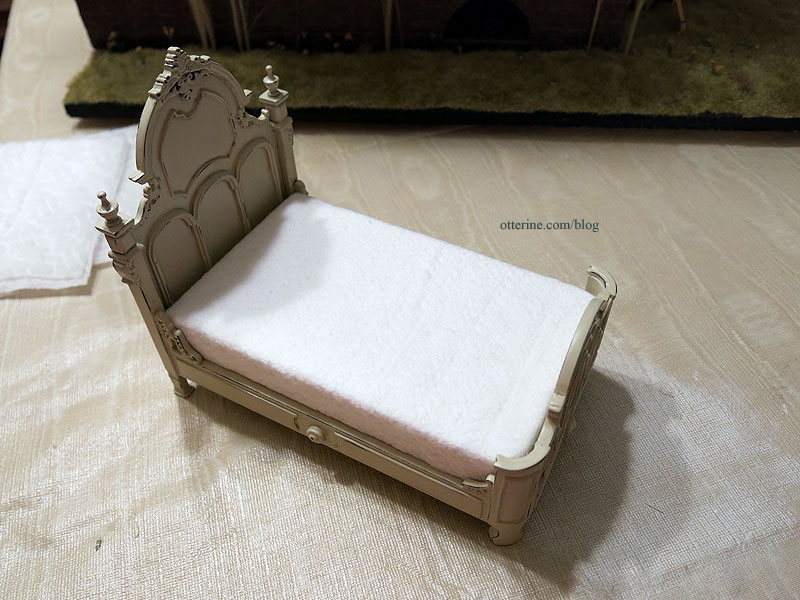
I cut new foam core board pieces to replace the original mattress.
I started the bedding, first by applying a layer of millinery batting to the foam core board mattress base.
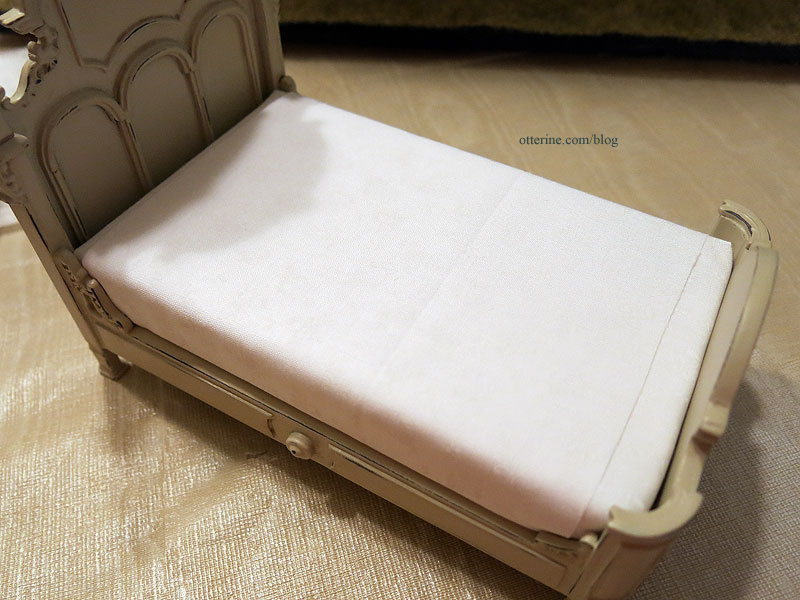
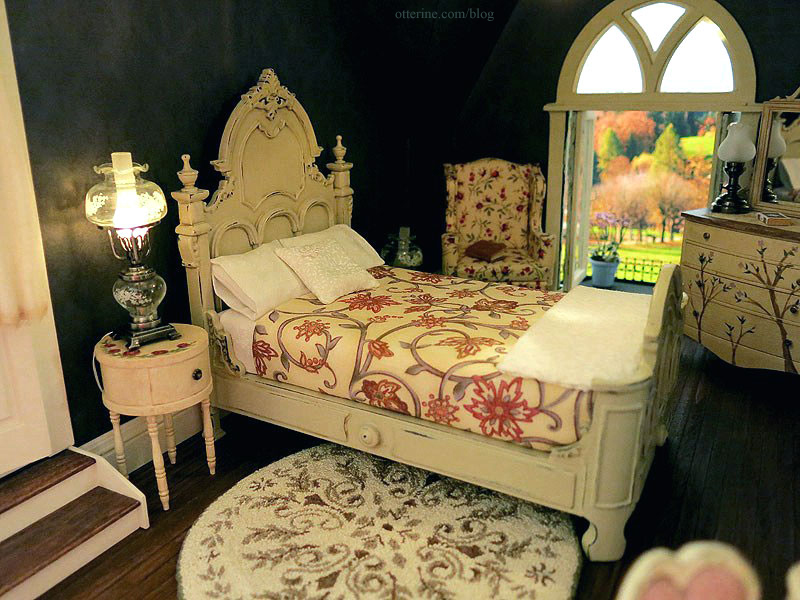
I added sheets made from sheer white floral fabric. Since there would be a coverlet, I opted to keep the top sheet short to cut down on the bulk.
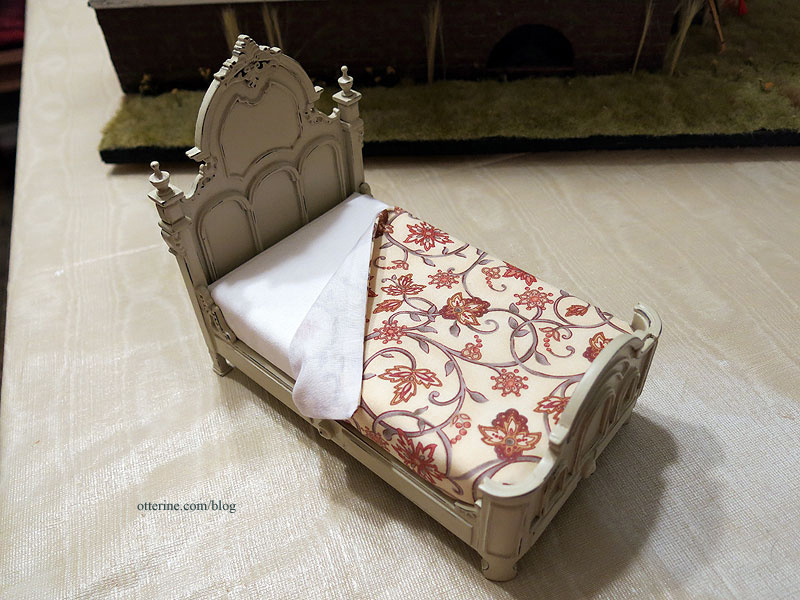
I sewed the coverlet from the fabric April sent to me, adding a plain white backer. I would like to try my hand at an unmade bed, but in the interest of time I went with my standard treatment.
I like the way it pulls in the colors of the other furnishings, and the large scale of the flowers balances out the busier patterns throughout the room.
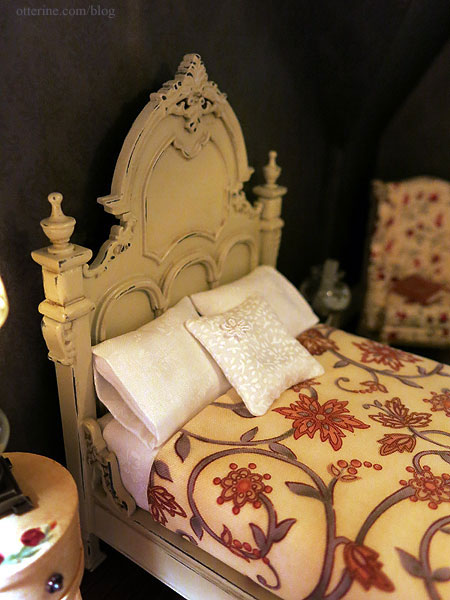
I sewed some pillows and made pillowcases from the same sheer white floral fabric as the sheets. I added one small white printed floral pillow to complete the bedding. It has a tiny venise lace flower attached in the corner.
I made a small lace throw from some open weave fabric. It is full sized to cover the entire bed when opened, but I’ve pressed it flat to sit at the end of the bed as an extra blanket for those chilly autumn evenings.
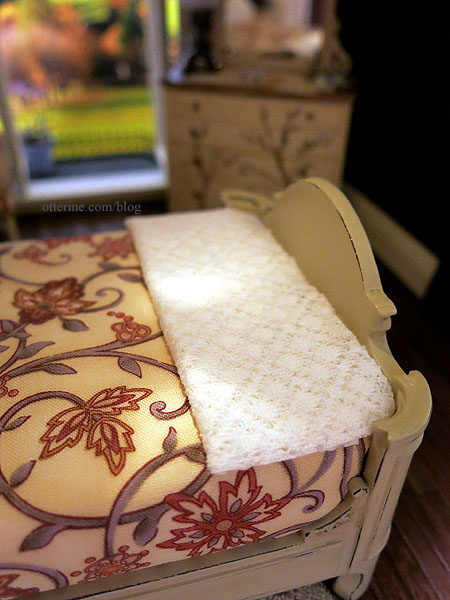
Hooray for a successful makeover! :D
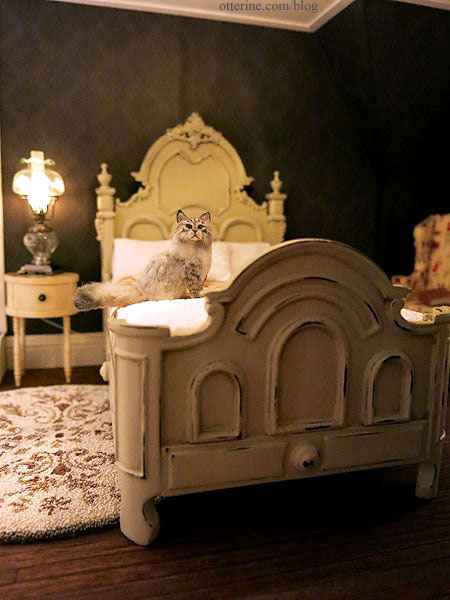
Now, who wants to take a cat nap with Ophelia?! :D
Categories: Furniture, The Haunted Heritage
July 30, 2013 | 0 comments
NOTE: All content on otterine.com is copyrighted and may not be reproduced in part or in whole. It takes a lot of time and effort to write and photograph for my blog. Please ask permission before reproducing any of my content. (More on copyright)

Haunted Heritage photo book
I’ve listed a new item in my etsy shop. It’s a full sized 8″ x 8″ hardcover book featuring photographs of the Haunted Heritage built and photographed by me.

It has 20 pages of full color photographs showing the exterior and each interior room as well as a bonus image from a Halloween scene done after completion. I have signed the book as well. :]

Categories: The Haunted Heritage
January 16, 2017 | 0 commentsThe Haunted Heritage in Miniature Collector
I have news!!! The Haunted Heritage has not only been featured in the October 2014 edition of Miniature Collector, it made the cover!!! :D

Miniature Collector, October 2014 I was so excited when the writer contacted me about writing an article on the Heritage and even more excited when Miniature Collector accepted our work. I had no idea my beloved house would grace the cover.
Many of you also pop over to my sewing blog to see me in my creations, but here I am with the Heritage. The camera was giving me fits with the autofocus (I was taking the photo solo with a tripod), and I ended up with an “alright already” look on my face. Oops. :D

I wrote a tutorial for my folding suitcase valet, which is featured as well. :]

Thank you so much to the author for writing a splendid article and to the staff at Miniature Collector for the feature and amazing cover!
Categories: Books and media, The Haunted Heritage
September 4, 2014 | 0 commentsMushrooms!!!!
I am finishing up some landscaping for the final Heritage post showcasing the exterior and the overall build itself. But, I thought this element deserved its own post…mushrooms!!! :D

I started with Peiwen Petitgrand‘s book on making clay food.

I had already planned to start with mushrooms since I wanted some for the Heritage lawn. Her instructions are wonderful, even though my French is very rusty. I was able to figure out the basics well enough. I made only a few changes. I added pastel coloration before baking and made the stems longer to have something to plant in the ground. I also made my molds a little variable, misshapen and left any imperfections. It translated into a more realistic result. :D

The undersides have the slotted detailing like the real thing. Even though it’s nearly impossible to see once the mushrooms are planted, I love knowing it’s there.

I planted them all around The Tree but wonder if these will last the night with Grahame on the loose! :O

I might be making more tomorrow. Haaaaa!

Categories: Polymer clay, The Haunted Heritage
August 18, 2013 | 0 commentsThe Haunted Heritage – 1920s inspired kitchen
The 1920s inspired kitchen was the first room I completed in The Haunted Heritage. It’s a large room with a dining area and vintage kitchen appliances. I tried to avoid adding too much clutter, just a few added accessories really make a difference. Feels like home.

The furniture arrangement didn’t change much from the original dry fit layout trial.

Structurally, I upgraded the side window with a Houseworks working window and added a casement window above the sink.
The tile flooring is Cream Diamonds by The Paper Studio, and the wallpaper in Geometric Fa La La by Making Memories. The back of the wallpaper is aged green, so I used that in the bay window section.
I went with subtle white patterned curtains and simple fabric pelmets for the window treatments. It softens the look of the room without being over the top. The potted flowering plant is from Michelle.

The casement window curtains ended up being a little too short, but I liked them well enough to leave them as is.

The front bay window is part of the original kit, and considering the age of the kit wood I was happy with the way it turned out.
One window assembly is completely glued together and the window is shut since the wood for these pieces was beyond repair. The second window is set partially open, and though the window slider isn’t glued in place, the wood for this assembly is not in the best condition and doesn’t allow for very fluid raising and lowering of the window. The third window, however, works so well that I need a dowel to keep it propped open! How positively wonderful! It’s just like a real life old house – one window is painted shut, one window sticks and one window won’t stay open!!! :D

The curtains in the bay window have a custom made rod to hold them in place.

I used fairy lace tiebacks on the outer panels but I liked the look of the inner panels left straight. This way, grandma doesn’t have to reach over the table to untie them every time she wants a little privacy. ;D

With the table and chairs in place, it really sets the mood. First, with the curtains in focus.

And, then with the furniture in focus.

I love through-the-window photo views. :] The autumn fruit basket is from Hungarian Miniatures.

In this photo, I feel as though I can hear the crickets and see fireflies outside.

I replaced the interior wall, adding a working pocket door. There is a lever that operates the door from the open back so you don’t have to reach inside to open the door. It has a leather and Tyvek hinge to fold flat when the door is open.

I really love the way the crown molding completes the room.

My original thought for heating the Heritage beyond the parlor fireplace was to place painted radiators in the rooms. Even though the rooms are somewhat spacious, radiators do take up a decent amount of space. Then I ran into a fantastic tutorial by Kris at 1 Inch Minis: gravity baseboard registers. Perfect!
I used diamond canvas instead of square and added a metal headpin for the lever. I placed the heat register under the Roper range so it could be seen, though it’s one of those details that’s mainly for me. It’s not strikingly obvious, but I am glad it’s there.

The cast metal Roper range is by Jacqueline Kerr Deiber. It’s a heavy piece with lots of character.

The metal Monitor Top Refrigerator was also designed by Jacqueline Kerr Deiber. It has wonderful lines and is also very heavy.

I love the shelves and the ice box. :D

The kitchen sink is one of my favorite minis! The dish drainer is from The Dolls House Mall and it came with a mop, too. The laser cut stainless steel has wonderful detail and looks great for scale.

It’s a 1920s porcelain Kohler kitchen sink by Jacqueline Kerr Deiber. I’ve always liked the look of this sink but never thought I’d build a house to use one.

Grandma has her cleaning supplies and some extra baskets under the sink. Lyssa made the beautiful white and brown baskets

I made the duster from a Silly Sisters tutorial. I added a cord loop on the end for hanging.

The chick in the nest was made by Cathy Rohal.

The flower in the milk carton was made from a true2scale kit.

The pint of perfect cherries is from The Garden Path, purchased at a local mini show.

This wonderfully made basket is from Lidi, and I made the Bonnie Lavish flowers from kits.

Keli made this amazing Hoosier cabinet for me – such a wonderful and generous gift.

I had to set up the vignette outside of the kitchen to get a photograph of the details since the kitchen is a little tight to fit the camera. The tea towels throughout the kitchen are from Marlene.

I won a lovely cookie baking set from Creating Dollhouse Miniatures. The pieces are so well made and realistic.

My mom makes the best chocolate chip cookies. No kidding. Every family gathering has people hoarding the cookies she brings, even though she brings dozens! I know chocolate chip cookies, and these minis are just like hers! :D

Cookies in progress certainly warm up a kitchen, don’t they?

The whistling tea kettle is by Ulus Miniaturas – purchased from Mainly Minis. We had one of these in real life at my childhood farmhouse. Mom still has it and uses it, too!

There is a white ceiling fixture above the dining table. Here’s a post on the kitchen lighting details.

The kitchen area has a lovely Ray Storey pendant gas light. If I had had a larger budget, I would have bought the matching 3-arm down light for the dining table. But, the white ceiling fixture is still a beautiful piece. The gas light is very well made. I love the way it highlights the textured ceiling. It’s the perfect vintage touch to the textured ceiling.

I don’t suppose in reality this dim fixture would do much good in the kitchen for nighttime cooking, but it casts such a wonderfully soft light over this part of the room.

In the bay window nook, there’s just enough room for a small table and chairs. The dining table was made from a House of Miniatures kit, and the Lilje chairs kit came from Art of Mini. For the upholstery, I chose a brown and ivory print. I think it is close enough to the dark red to tie in well with the wallpaper.

The banjo clock was made from a Cynthia Howe Miniatures kit. Love it!!!! :D

The artwork fits the kitchen décor perfectly, and the cabochon clock face is very realistic. My grandparents had lovely vintage clocks in their home, one of which now hangs in my real life kitchen.

Kelly made this wonderful artwork called Ghosts of the Past. I think it works wonderfully here in the kitchen. Maybe it’s an old faded photo of grandma’s childhood home. :] The lovely pitcher is from Caterina.

I made a wall calendar using the image of my childhood home, the lovely place from my dreams that inspired this build.

The tiny paper months of October, November and December were cut from a mini desk calendar and pasted to a piece of cardstock along with the printed photo.

The cat bowls are from D’s Miniatures and Collectibles, and I made a mat for them from paw print fabric.

They are under the side window ready for Ophelia.

I love the way this room turned out…now let’s have some cookies!

——
For The Haunted Heritage pictorial recap post, please click here. Click here for a full list of Heritage posts, including how I made things and the materials used.Categories: The Haunted Heritage
August 9, 2013 | 0 commentsHeritage – open back trim details
One of the small things that can make a big difference is finishing the back edges of an open dollhouse. I haven’t needed to do much besides paint these edges in the various houses I’ve built because the wood was nice and clean, or I covered it with another material that eliminated the need for finishing. For The Haunted Heritage, there was channel trim on the outer edges but none on the inside edges. Additionally, some of the inside edges were warped or comprised of multiple layers of wood, like the pocket door wall.

You can see from my previous post on the attic, that the second floor ceiling board is rather uneven. This is due to the fact that I made the board from three pieces, the bathroom wall might be slightly shorter than the bedroom wall, and the parlor ceiling is sagging ever so slightly. Being an old house, it actually works in my favor, but I wanted to tone it down when looking at the open back.

Using one long strip of corner trim across the back edge of the attic floor helps disguise the minor warp between the three boards that make up the second floor ceiling. The back surface of the trim is painted dark brown, but I painted the top portion to match the attic floor.

For the remaining back edges, I used various widths of basswood to make a clean finish.

I painted these dark brown to be less obvious when the open back is viewed as whole.

Dark brown allows the edge to fade into the background so the focus remains on the rooms and furnishings.

Over the next week or so, I’ll be posting room by room finished settings of The Haunted Heritage. Of course, no dollhouse is ever completely finished, but it’s time for me to wrap this one up and move on to the next great thing! :D

I love the silhouette of the black cat on the roof. :D
Categories: The Haunted Heritage
August 8, 2013 | 0 comments
NOTE: All content on otterine.com is copyrighted and may not be reproduced in part or in whole. It takes a lot of time and effort to write and photograph for my blog. Please ask permission before reproducing any of my content. (More on copyright)


