


NOTE: All content on otterine.com is copyrighted and may not be reproduced in part or in whole. It takes a lot of time and effort to write and photograph for my blog. Please ask permission before reproducing any of my content. (More on copyright)

The Brownstone – entrance and front steps, part 9
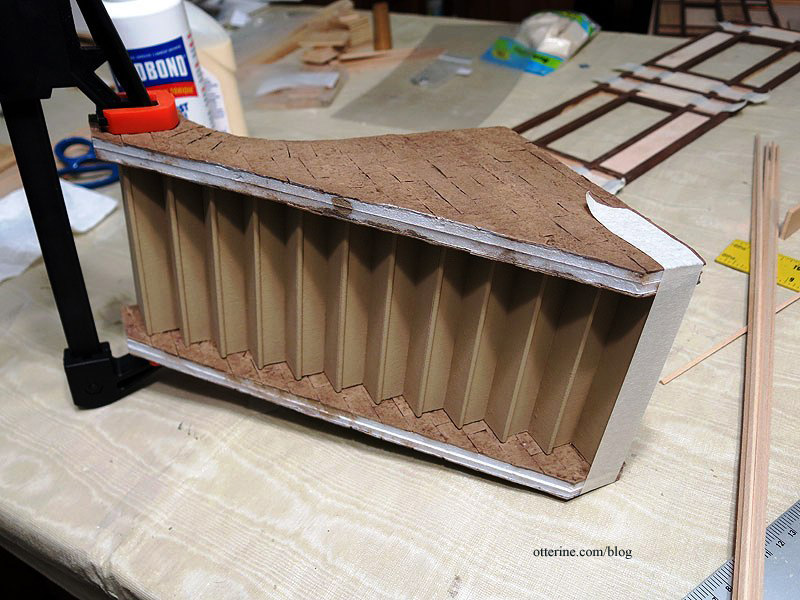
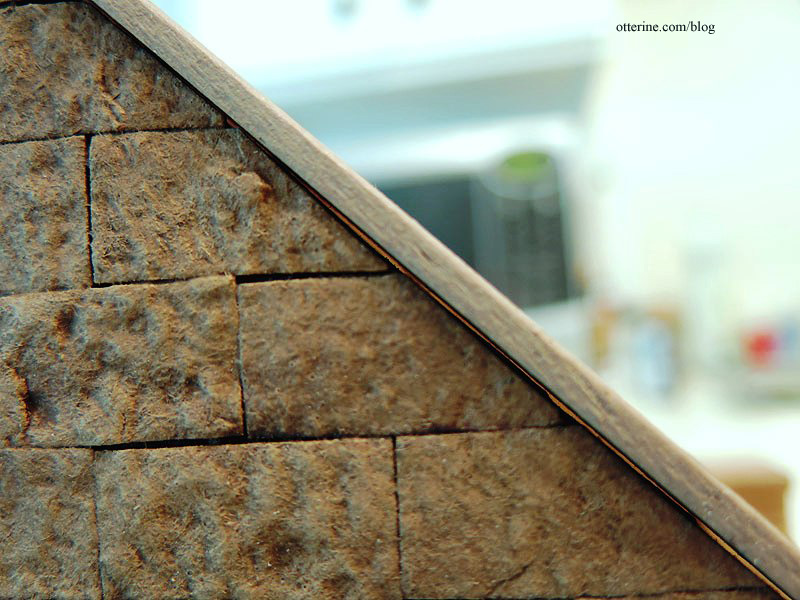
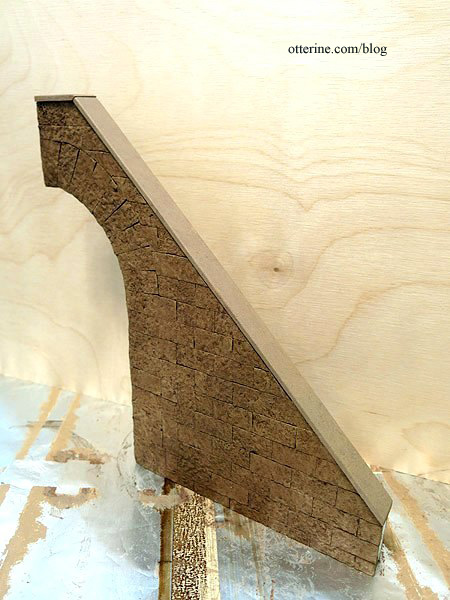
Continuing work on the entrance and front steps. With the gate built and set aside for spray-painting weather, I was able to glue the side walls to the stairs. I used Weldbond and super glue gel, then a large clamp and some masking tape to hold the piece together while the glue dried. The minor gaps will be addressed later.
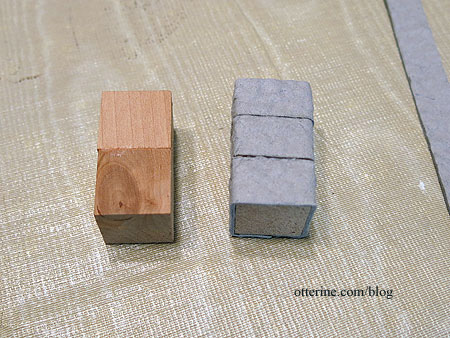
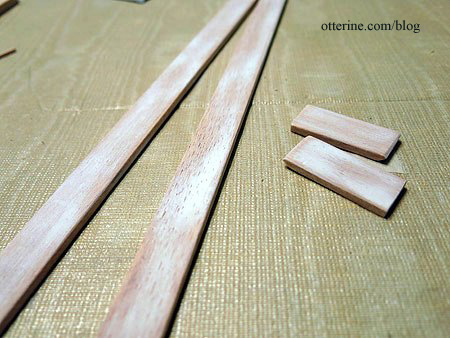
I glued two 3/4″ wood blocks together to make each pedestal to finish the front edges of the stone walls, adding long strips of 1/2″ wide egg carton material around them.
I cut plywood bases and toppers.
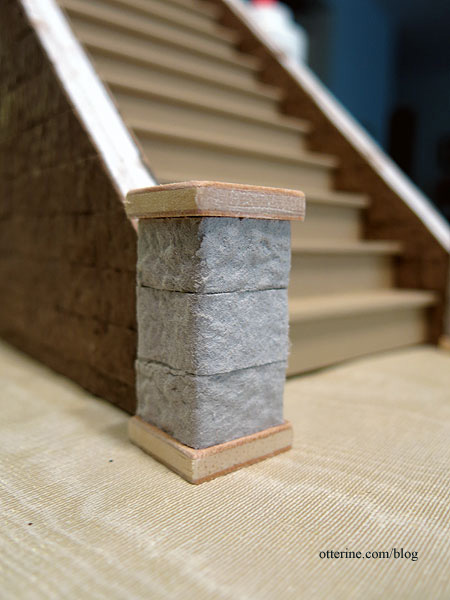
I painted the new pieces to match the previous finishes.
Since the top surfaces of the side walls aren’t perfectly uniform, there would be gaps if I glued the toppers on as is.
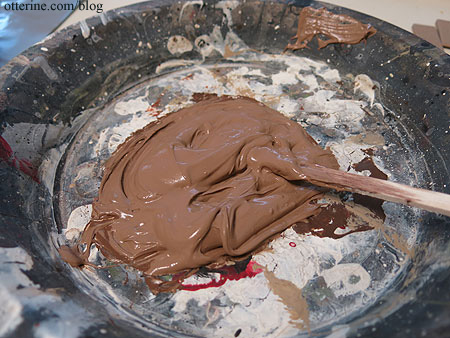
I made a mixture of spackling, Weldbond glue and brown paint. Yum, pudding! :D
I slathered this onto the side walls and then pressed the pedestals in place.
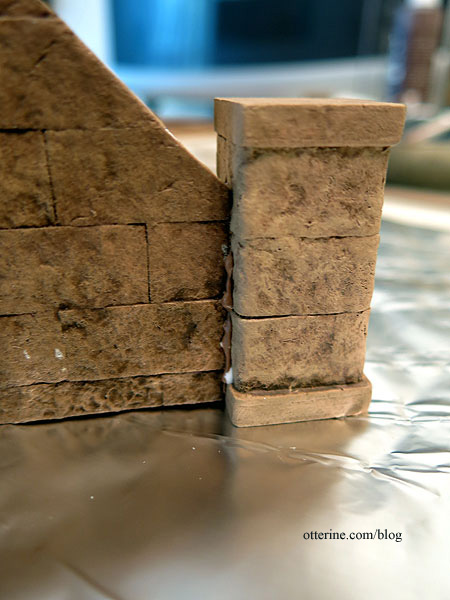
I did the same for the toppers and wiped away any excess with a brush followed by a damp cloth.
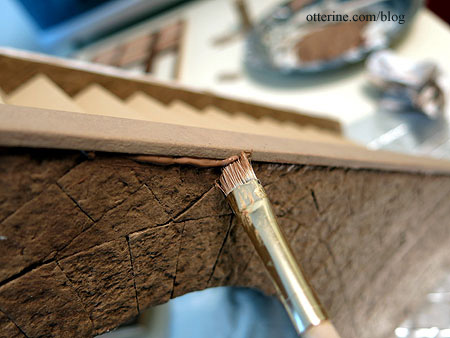
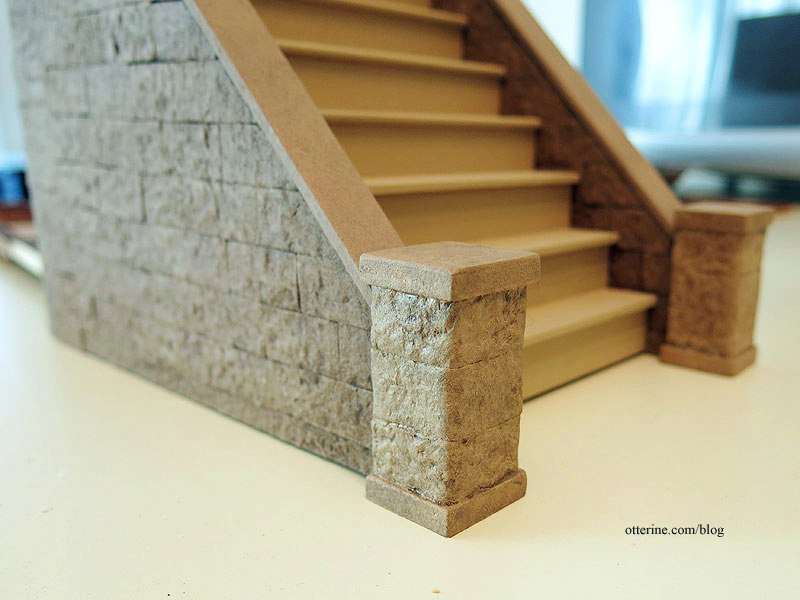
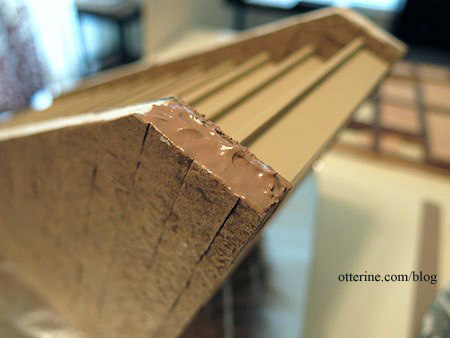
I put some of the mixture into my glue syringe.
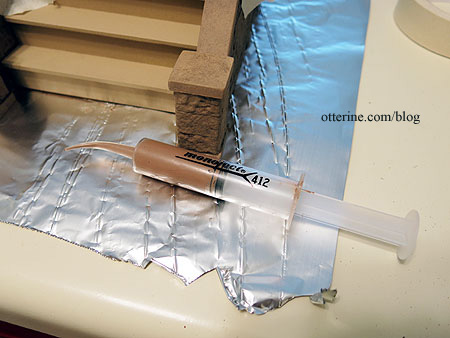
There were gaps along the sides of the steps, so I squeezed the mixture into the gaps.
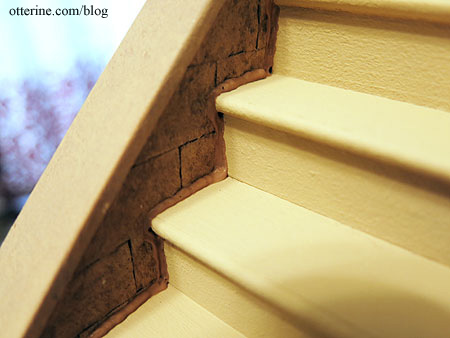
I then smoothed the material and added final paint washes to finish the steps.
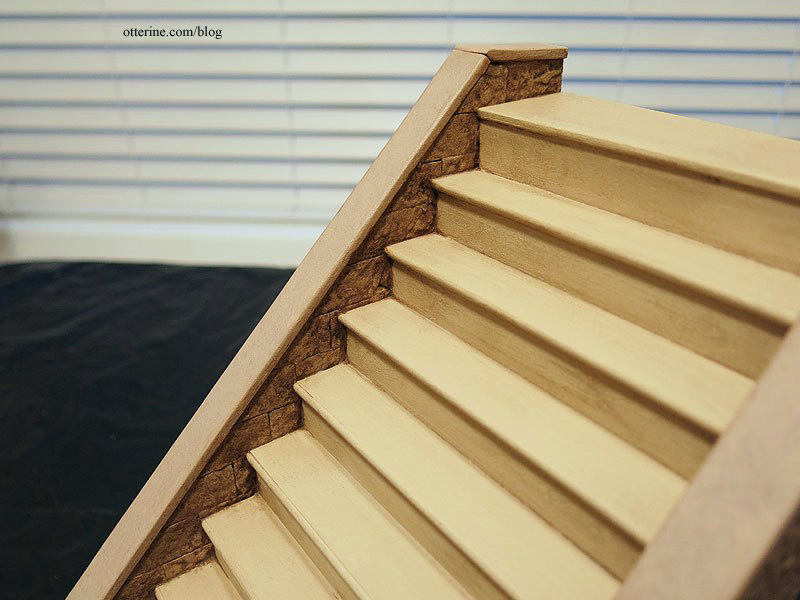
I’m still thinking about the railing, so I’ll leave this as is for now.
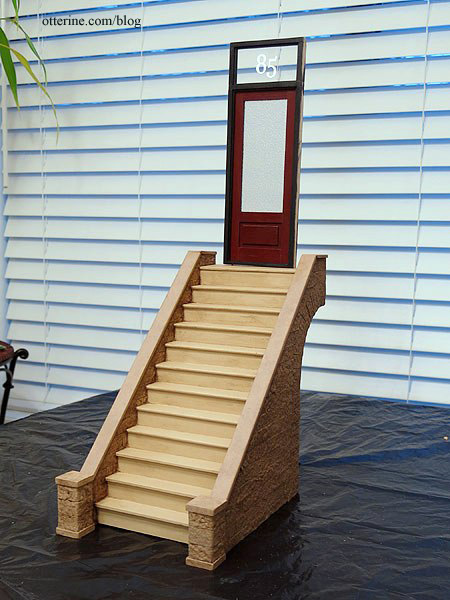
I like the way the plain sealed wood looks on the back, so it will stay as is.
Categories: The Brownstone
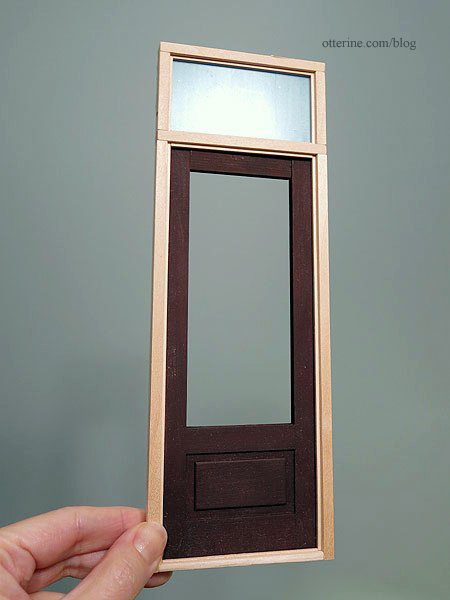
February 22, 2014 | 0 commentsThe Brownstone – front door, part 3
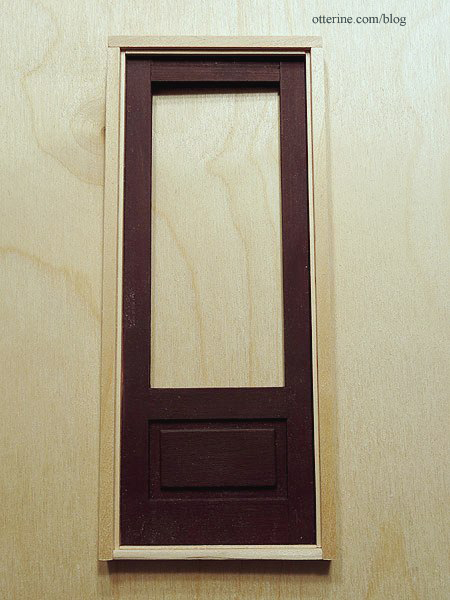
Continuing work on the front door. I painted the door surround black followed with a satin varnish. I thought the original Black Plum by Americana was too brown, so I covered the door with two thin coats of Black Cherry by Folk Art. The Black Cherry would have been too bright on its own, so the two layers of color worked out well. I finished the door with satin varnish as well.
I added textured glass using two layers of rippled water sheet from HBS in place of the acrylic insert included with the kit. This allows light to come in while adding some privacy. The top window is clear acrylic.
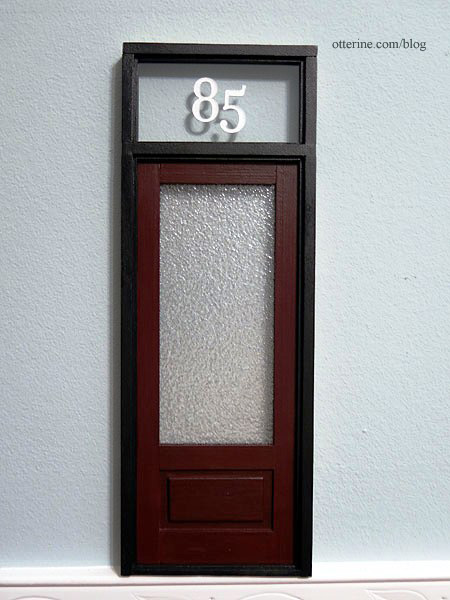
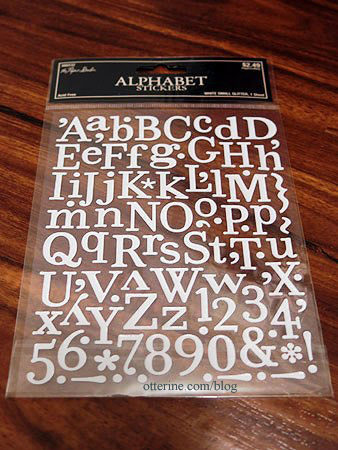
I added white numbers for the house address using stickers from Hobby Lobby purchased for less than $2. :]
They are fairly large numbers at 3/4″, but real life 9″ house numbers aren’t unusual. I decided to limit the number to two stickers so I wouldn’t overwhelm the window. Instead of trying to eyeball the placement, I printed out a similar font size as a guide.
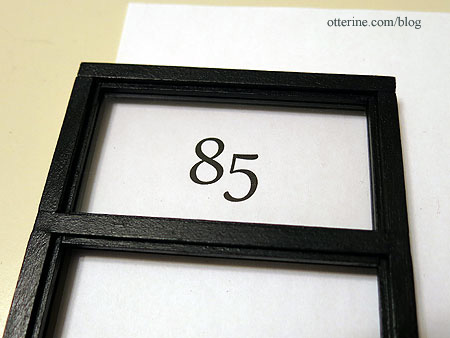
Why 85? I was trying to think of some historical figure to serve an inspiration, and Edgar Allen Poe popped into my head. I found this article on one of his residences at 85 West Third Street in Greenwich Village, so 85 it was! :D
Categories: The Brownstone
February 21, 2014 | 0 commentsThe Brownstone – security gate, part 1
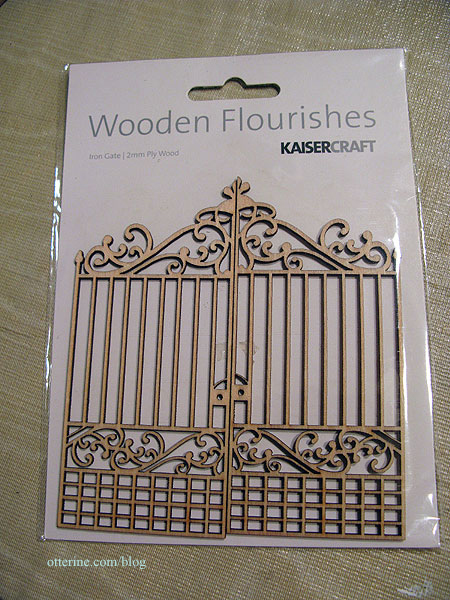
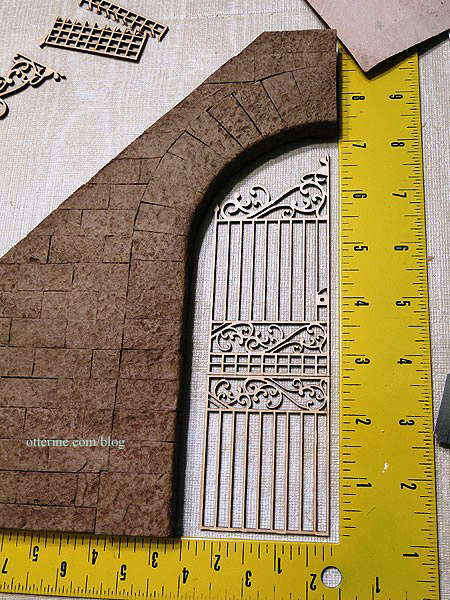
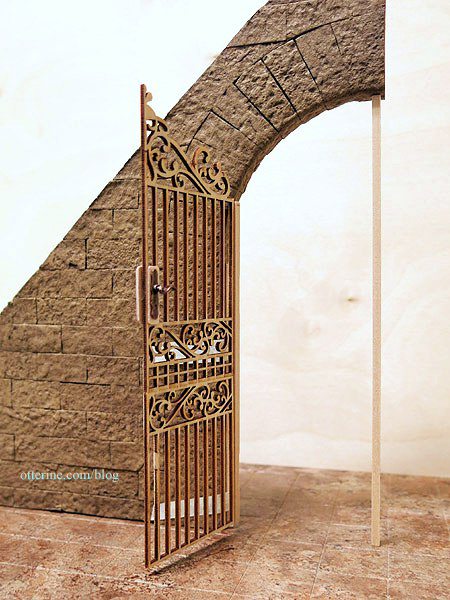
Before I could put the front steps together, I needed to address security for the lower level entrance. Wrought iron gates seem to be the norm, but my metalworking in miniature skill set isn’t quite there yet. Maybe someday. I started with a gate that Keli sent me a long time ago.
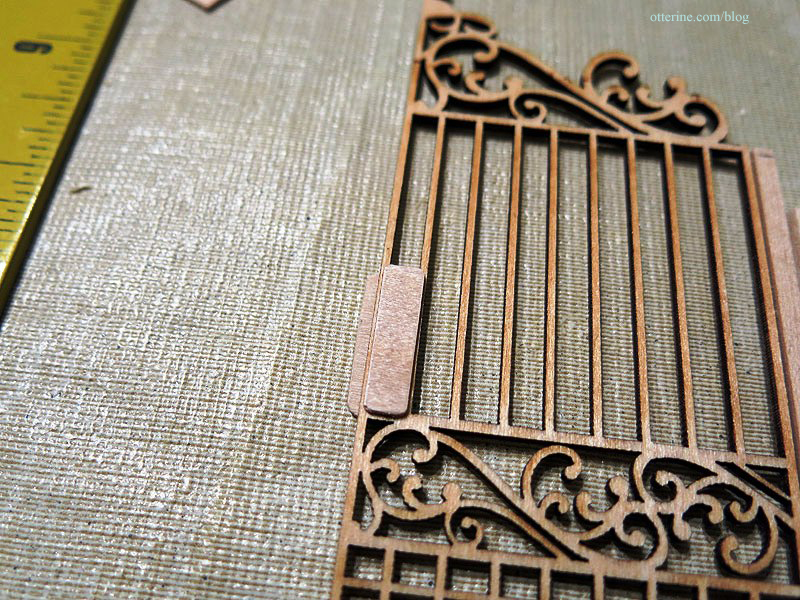
Using a carpenter’s square as a guide for the wall and ground, I set one of the gate pieces so there was very little space left uncovered at the top. I carefully removed bits from the other gate to create a complete iron door. I glued the pieces together using wood glue.
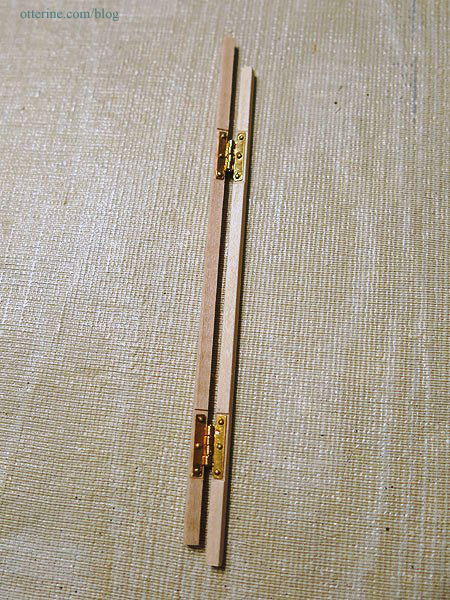
Now, to get it to function. I cut three lengths of 1/8″ x 1/8″ strip wood: two on the left and one on the right.
I installed hinges between the two left posts. I carved recesses for the hinges, drilled pilot holes with a mini drill, added a thin layer of super glue gel to help secure the hinges and then pushed the tiny nails into the pilot holes.
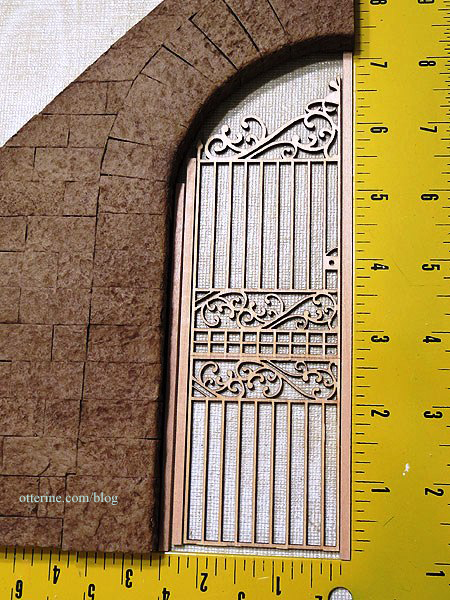
Once I had the hinges functioning smoothly, I glued the gate to the right hand post. I covered the existing lock detail with wood veneer to mimic a lock box. The back piece is flush with the gate, but the front piece hangs over a little to catch the adjacent post.
I added a pair of French door handles from Mary’s Miniatures.
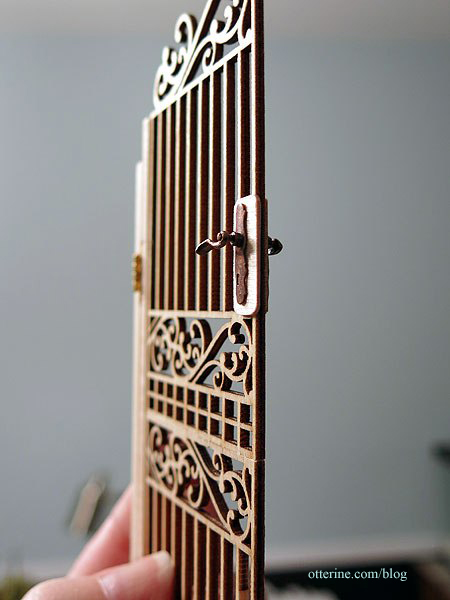
Check the fit. Looking good! :D
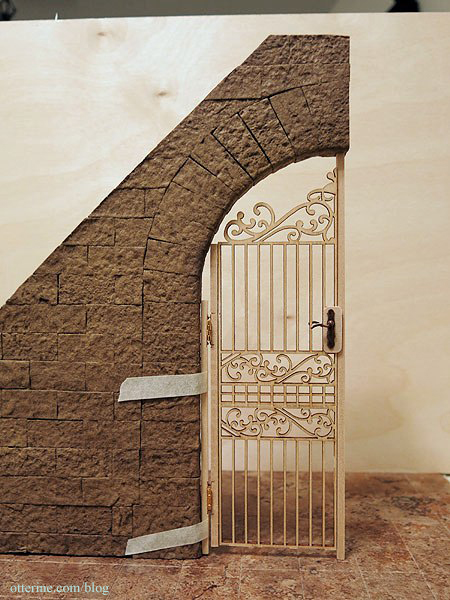
It’s 39° outside…let’s go spray paint! :D Okay, maybe not…it’s also dark outside. I don’t need to have this finished and installed to move forward. I just needed to figure out the basic fit.
Categories: The Brownstone
February 18, 2014 | 0 commentsThe Brownstone – entrance and front steps, part 8
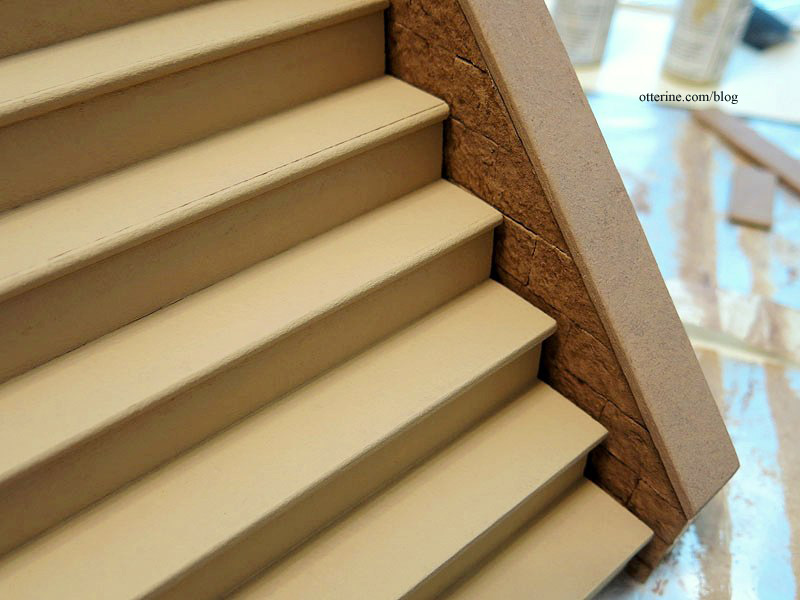
Continuing work on the entrance and front steps. I cut two pieces of balsa to finish each of the tops. I would have used basswood, but I didn’t have any 1/8″ thick on hand and this is the hardest sheet of balsa I’ve ever seen. You can’t bruise it with your fingernail at all. Very dense fibers on this one.

I sanded the edges and adjusted the fit before coating the pieces with spackling to remove any hint of grain.

I sanded the pieces smooth.
I then painted them to look like stained concrete. :D
After a light sanding of the base coat of Fawn by Americana, I applied a mixture of Fawn, Desert Tan and Staining Medium to the stairs. The Staining Medium made the paint more of a glaze, so there is a subtle variation of color that is hard to see in photographs. I will add more aging once it is all glued together.
But, I have one more thing to address first. Stay tuned.
Categories: The Brownstone
February 16, 2014 | 0 commentsThe Brownstone – front door, part 2
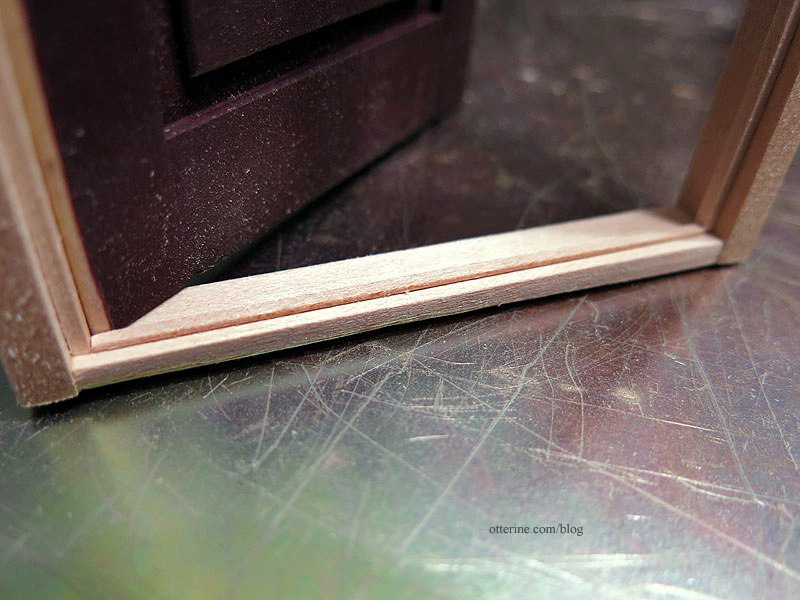
Continuing work on the front door. Now that the frame has been constructed, it’s time to add the 1/16″ x 1/16″ trim to keep drafts out. This also serves as the door stop to keep the door from swinging freely in and out. No more drafty door!
The threshold trim is 1/32″ x 1/16″ for added realism in proportion.
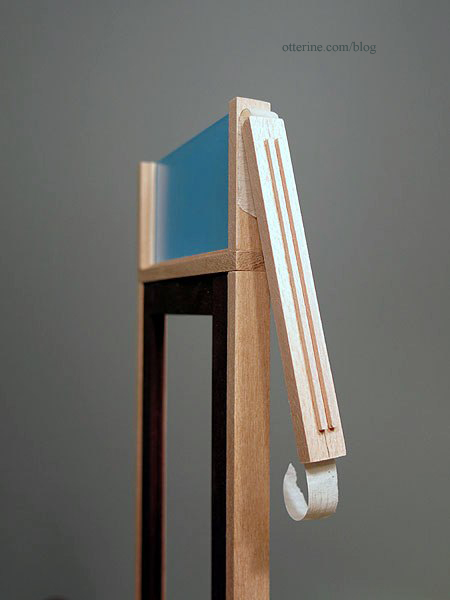
Next up was the transom window. I used more 3/16″ x 3/8″ trim to make the sides and top. I glued only the sides in place. I made a channel from the same trim used on the door frame.

This will hold the acrylic window in place. Here you can see I’m using the acrylic sheet during the gluing process to ensure a secure fit.
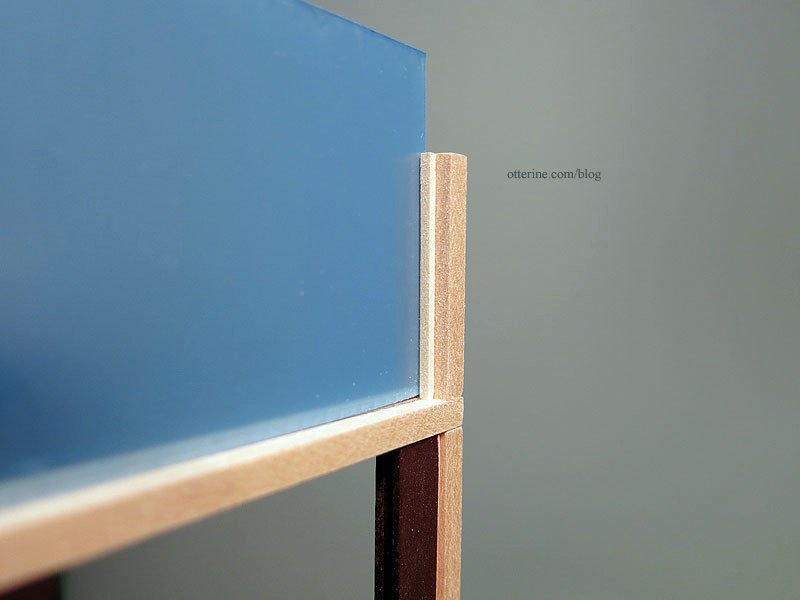
I taped the top to the sides and fashioned the remaining channel. The top piece will remain removable until I get the whole thing painted.
Ok…time to do some painting and staining before I can move forward. :D
Categories: The Brownstone
February 13, 2014 | 0 comments
NOTE: All content on otterine.com is copyrighted and may not be reproduced in part or in whole. It takes a lot of time and effort to write and photograph for my blog. Please ask permission before reproducing any of my content. (More on copyright)