


NOTE: All content on otterine.com is copyrighted and may not be reproduced in part or in whole. It takes a lot of time and effort to write and photograph for my blog. Please ask permission before reproducing any of my content. (More on copyright)

The Aero Squadron Lounge – tower, part 2
Continuing from the tower construction part 1 for The Aero Squadron Lounge.
I will detail the main room build in another post, but I do need to mention a few things I did before the next steps in the tower construction. I glued the main room floor to the landscaping base, which was a layer of builders foam over a 24″ square plywood board. I glued the side walls in place and glued the spiral stairs base adjacent to the main floor.
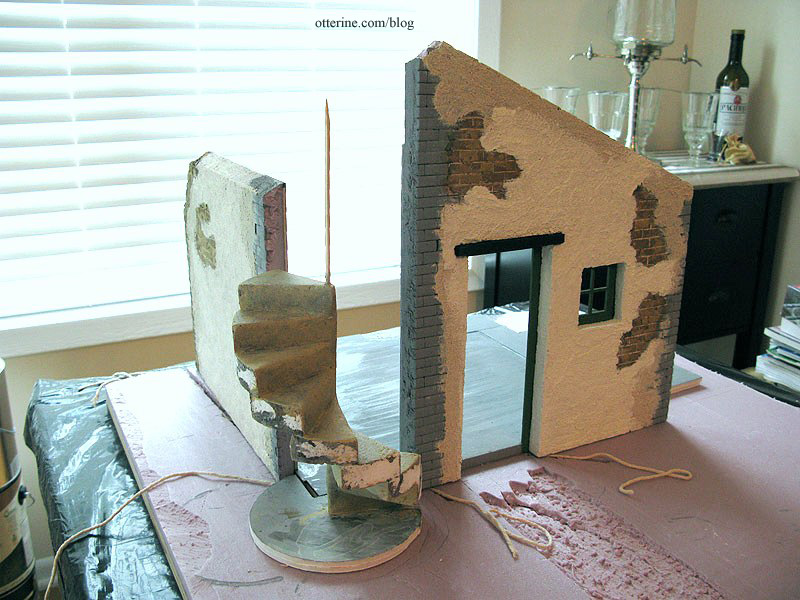
The slight gaps between the two pieces didn’t matter since I would be covering the whole surface with egg carton stone. I didn’t tile that tiny space behind the bottom steps.
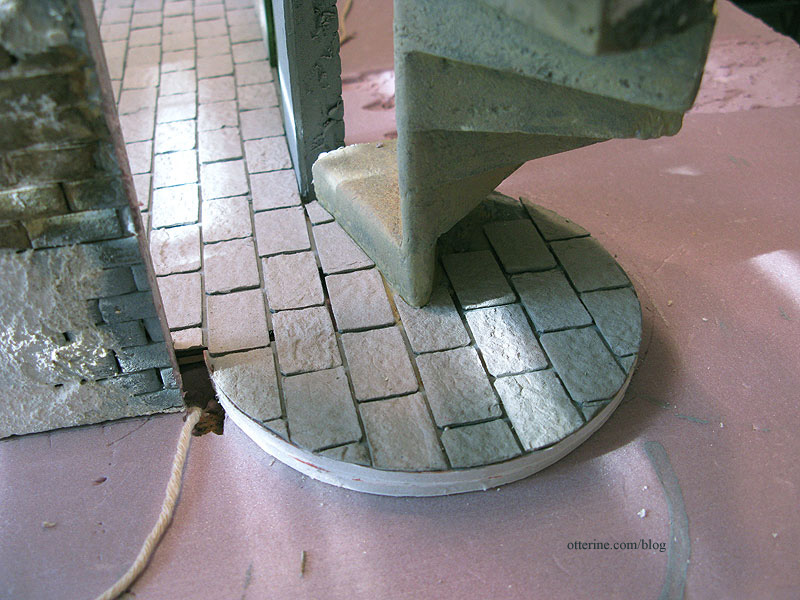
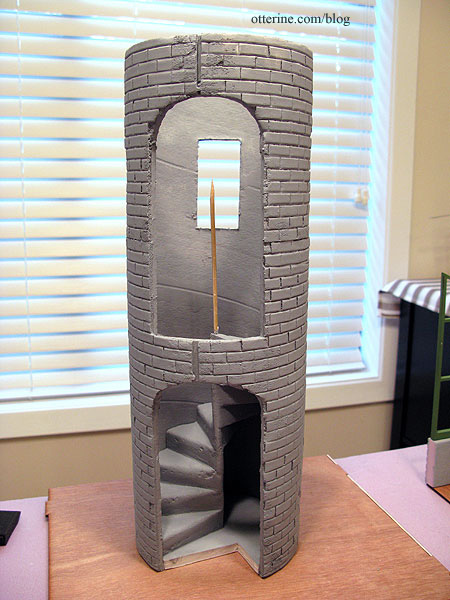
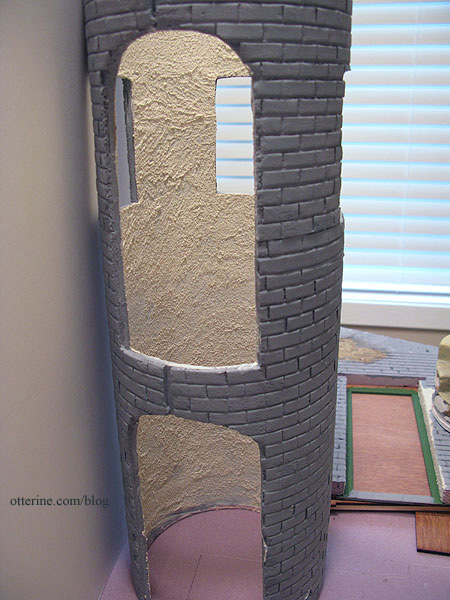
I painted, sealed and grouted the stone floor before proceeding with the tower. I also painted the lower portion of the tower interior Warm White by Americana, the same color used inside and out on the stucco surface.
I didn’t paint all the way up since I still needed to finish the window openings and I was still thinking about what I wanted to do. I considered actual windows but ended up with bars to keep wayward tourists from tumbling out of the tower. More about that in part 3 (link at the bottom).
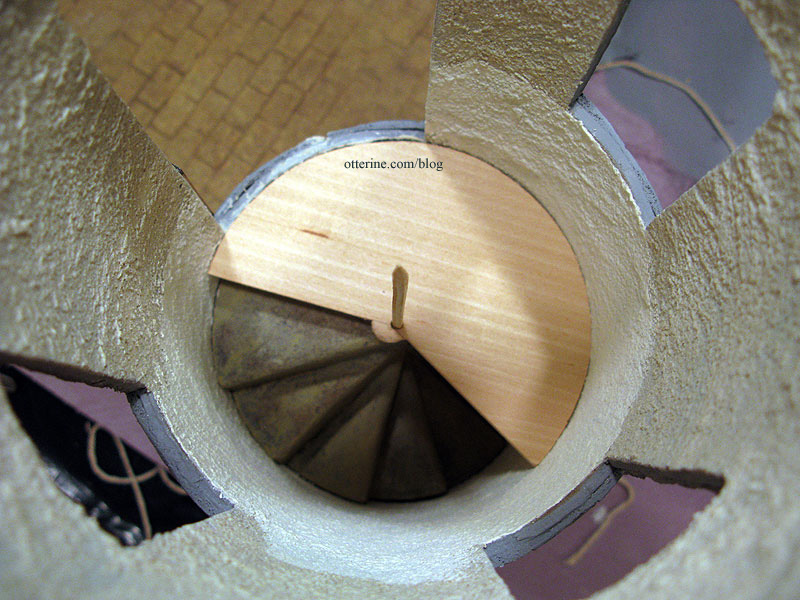
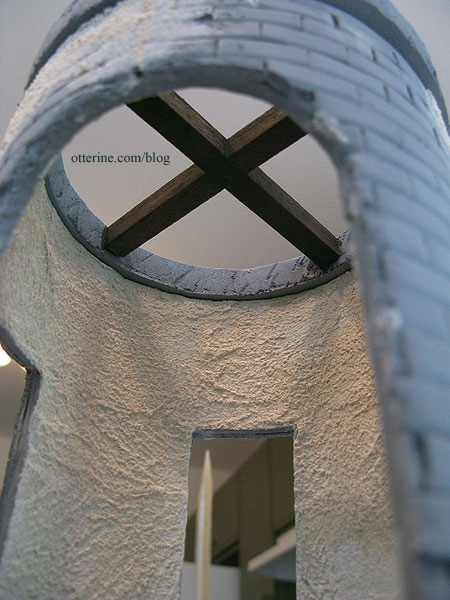
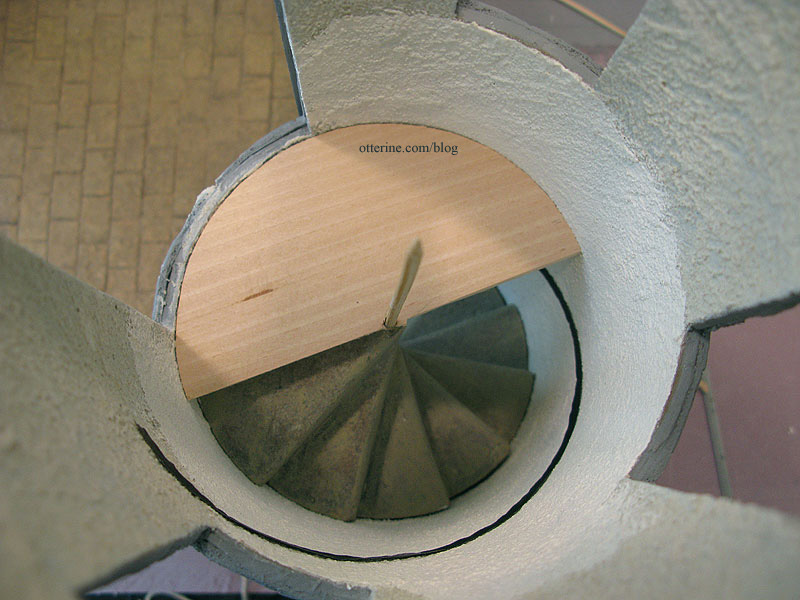
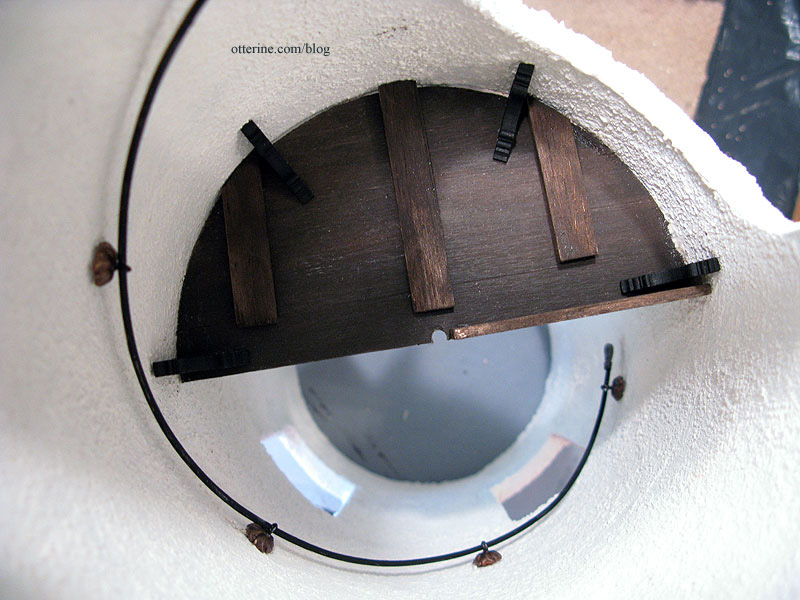
I wanted a light in the tower and needed cross beams to hold it. I also needed something to finish off the top of the tower. I cut a rough circle from builders foam (primed with gesso) and made beams from balsa. I like balsa for old beams and rafters because it is easy to dent and score, and it has a nice grain to it when paint washes are used.
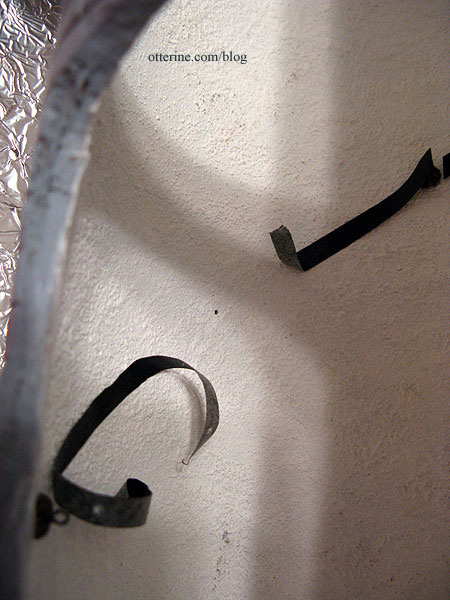
Since gluing this ring in place would effectively seal off the tower access from the top, I put it aside and worked on the handrail instead. I used thin black tape to mark where I wanted the railing. It was here that I discovered my “greater than half” balcony would not work. While I could fool your eye into thinking there was enough room for someone to walk up the stairs beforehand, the railing would run right into the balcony’s back edge and ruin the illusion.
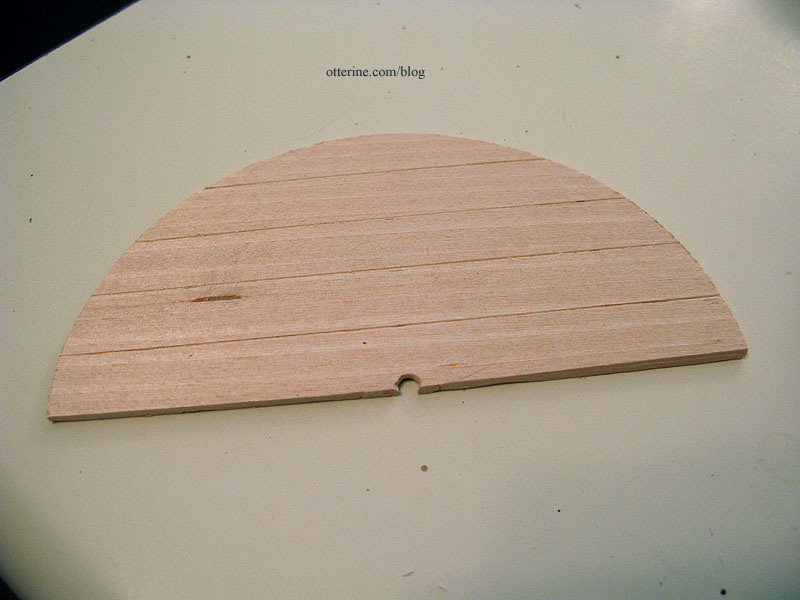
Cut, cut, cut, and problem is solved!
I scored lines in the top and bottom with an awl.
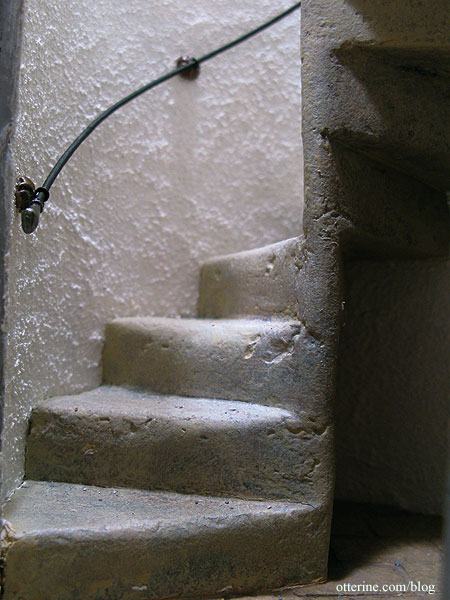
I used an absinthe bottle to bend 1/16″ aluminum tubing (from Hobby Lobby) into the right curve to fit inside the tower and tested it against the black tape guide. The balcony is painted a blend of Bittersweet Chocolate by Americana and black, then sanded for a bit of wear. As for why I used an absinthe bottle, it was slightly wider than any other bottle I had on hand, and it made for a looser curve.
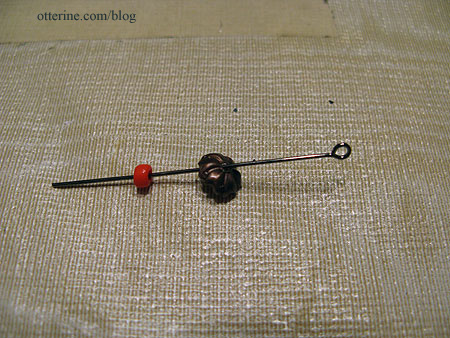
I made the railing brackets from eyelet headpins, bead caps and beads. Even with holes punched into the tower, I knew gluing only the end of the eyelet headpin into the wall would not hold the railing. So, I added the plastic bead inside the bead cap to increase the gluing surface. Glue holds the bead cap and bead together, and glue holds that assembly to the wall. Somewhat. I used super glue gel to supplement the Aleene’s Fast Grab glue.
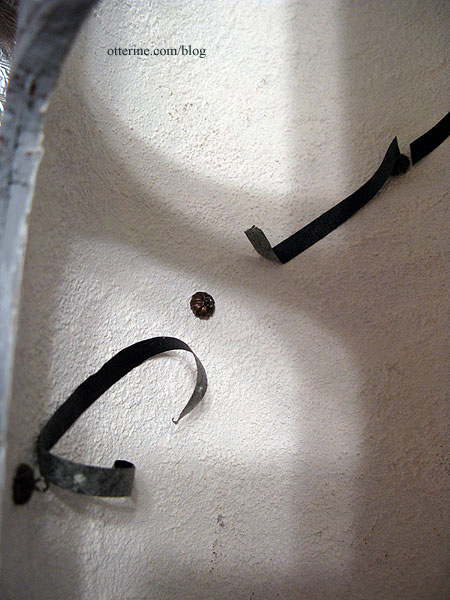
Following the tape guide, I used an awl to punch evenly spaced holes in the tower where the five railing brackets would be.

I left the tape in place throughout the process to make sure I didn’t lose the proper alignment.
I cut the bracket assemblies down so there was only a small bit of wire left.

I glued the bracket assemblies onto each of these spots, trying to get them as flush against the stucco surface as possible.
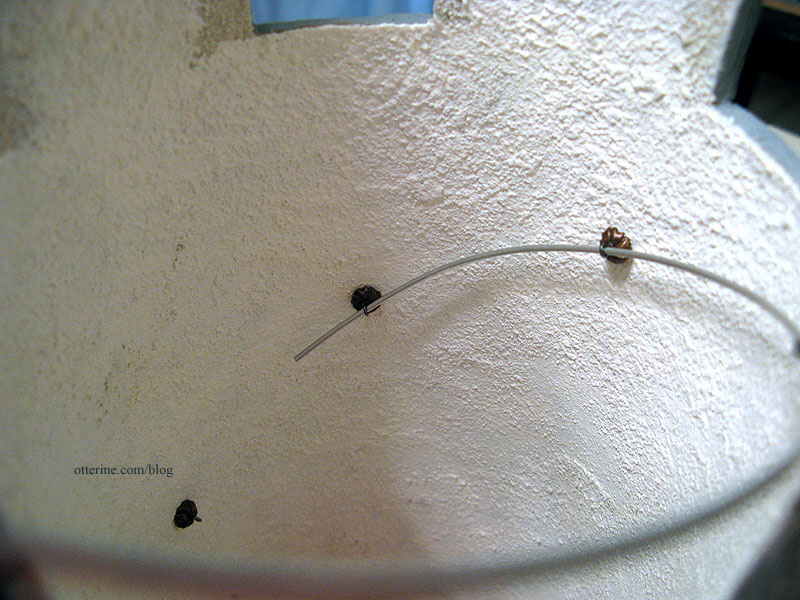
I then fed the tube through the eyelets, and it worked perfectly!!! No, it didn’t. Two of those brackets popped right off the wall. So, I glued them again, tweaked the arc of the tubing and waited for the glue to dry. There was one stubborn bracket that popped again, but I just let it hang there and glued it back in place after I had the tubing fed through all five eyelets. I held it by hand, even with the super glue, for about 15 minutes just to be sure. Success! :D
I painted the railing with black acrylic after it was on the wall. I knew painting it beforehand would be useless for a couple of reasons. First, threading it through the eyelets would scrape the paint off, and second, the paint flecks would gum up my fingers and get all over the place, namely the lovely white stucco. With the tower still being removable, I was able to paint from the bottom and top openings, a relatively easy task.
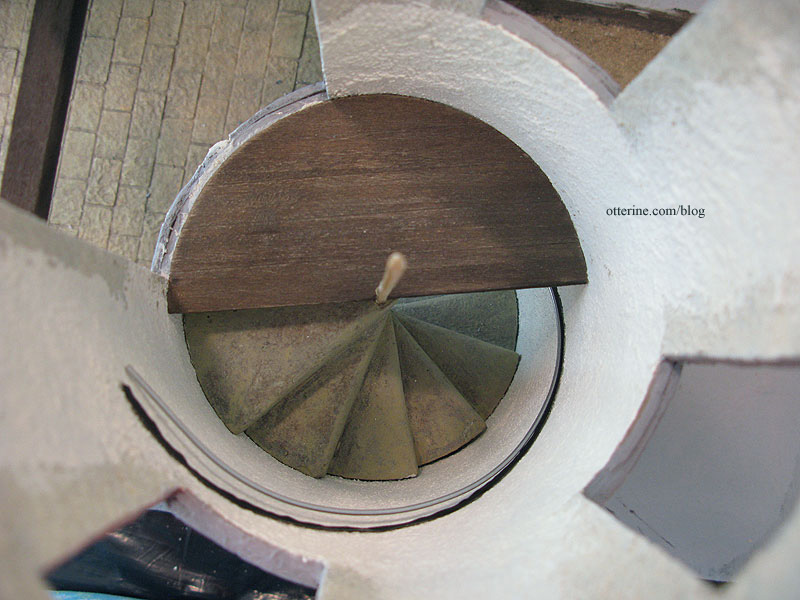
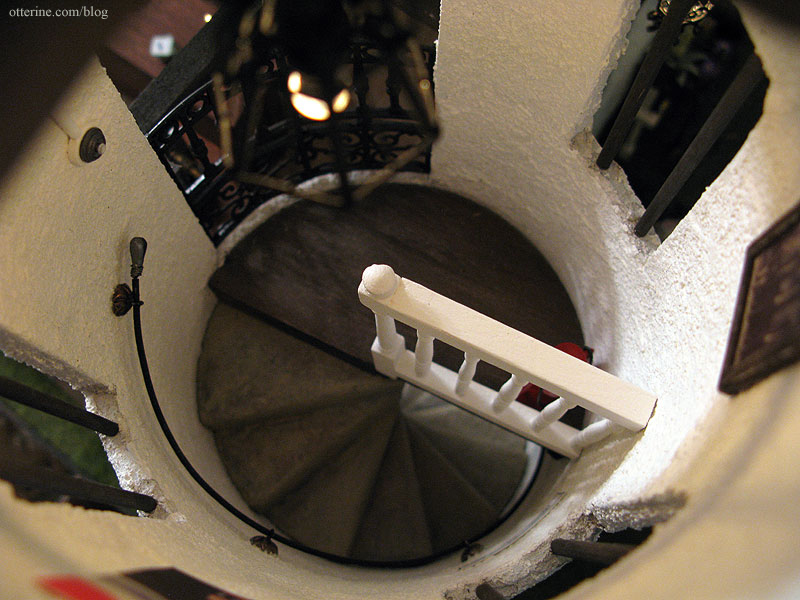
I then added fancy headpins to either end of the railing for finishing. From above…
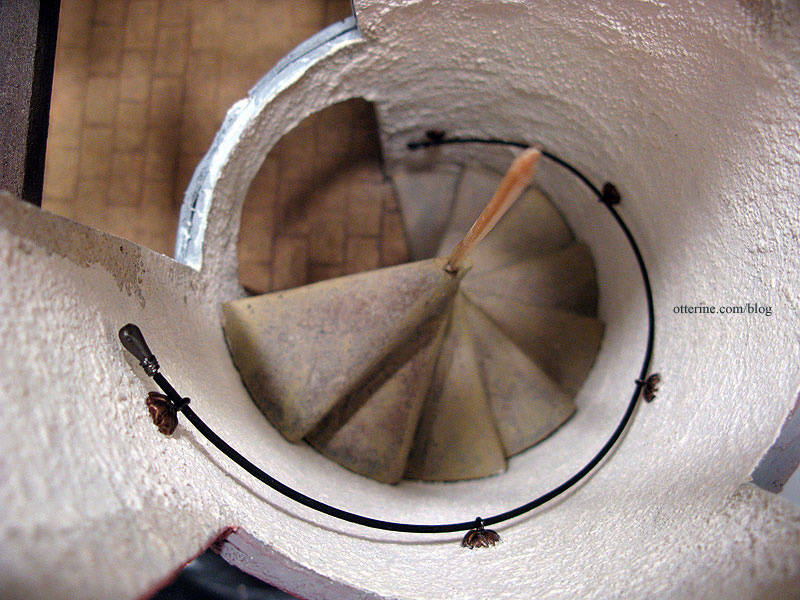
And a close up. I have to say it turned out even better than I had hoped. This gives me ideas for freestanding spiral staircase railings now, too.
Time for the balcony, but first prayers that we don’t knock the railing brackets out of place while we work on said balcony. :D
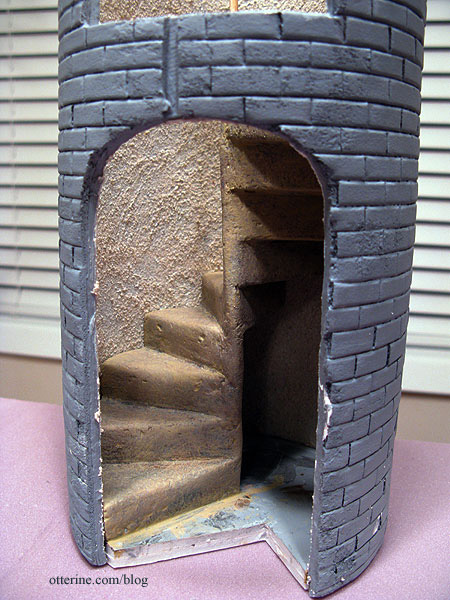
On the underside, I added floor supports from scrap wood as well as laser cut brackets to hold the balcony level on the wall. I also added a riser piece needed to bridge the gap between the top stone step and the balcony. This is a shot never to be seen again, but do I love the way it looks.
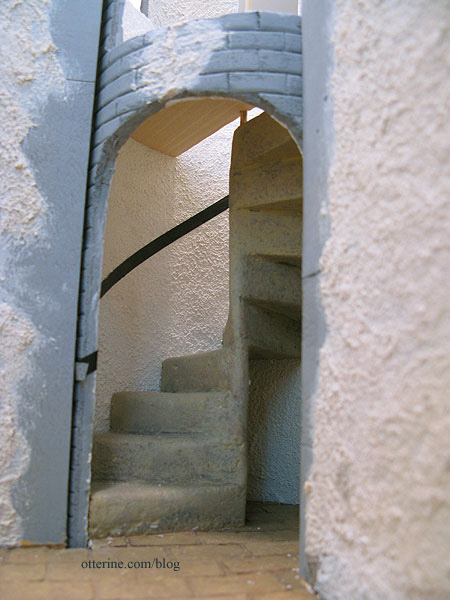
And, you can see a little of my efforts — the brackets — when you look into the archway. :D It was worth it to me, because I know the added details are there.

Continued in part 3.
Categories: The Aero Squadron Lounge
September 11, 2012 | 0 commentsThe Aero Squadron Lounge – tower, part 1
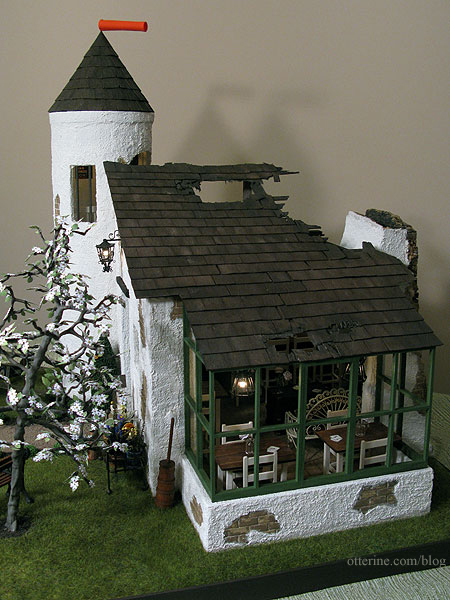
One of the aspects I liked most about the French farmhouses I found in reference photos was the tower. I thought it would be wonderful to add one to The Aero Squadron Lounge since the main kit building was a single room and lent itself well to the addition. The first tower I attempted was made from a large oatmeal container. Boy, did I ever eat a lot of oatmeal! :P No, I just transferred the contents into another container. :D
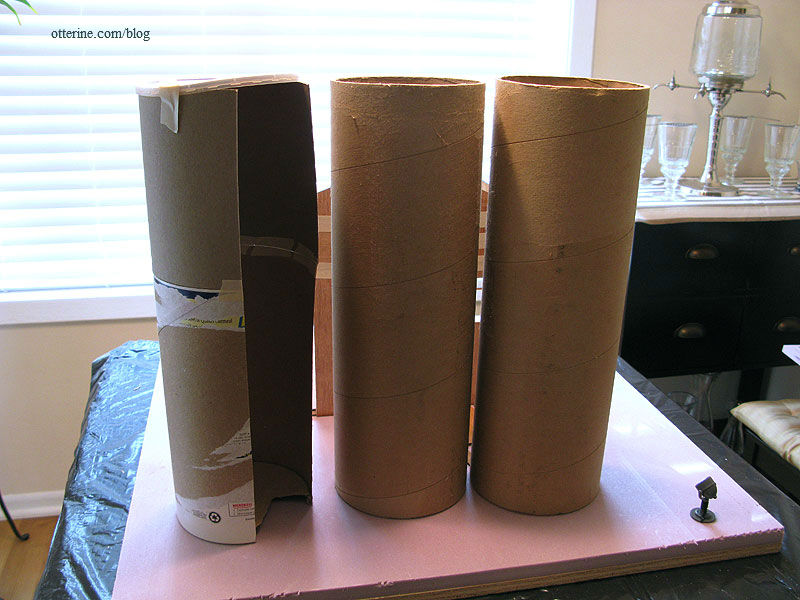
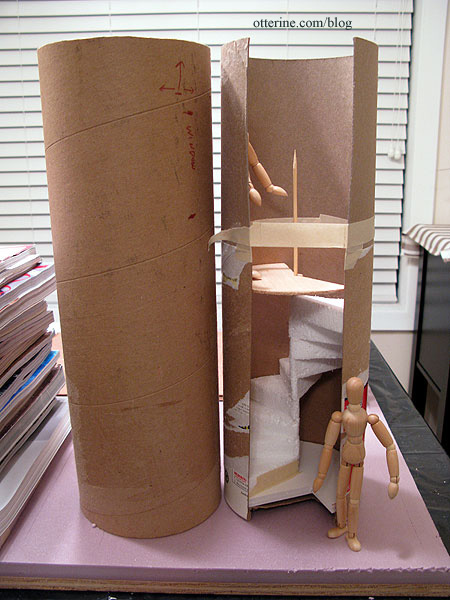
With a 5″ diameter, it was the perfect size, but it was too short. I attempted to add some cardboard to the top, but it was too flimsy. I was able to obtain a 31″ tall, 5″ diameter Uline mailing tube from Freecycle, and it was exactly twice the height I needed. I cut the tube into two 15.5″ lengths which gave me two attempts to get it right. I still have the second one left over.
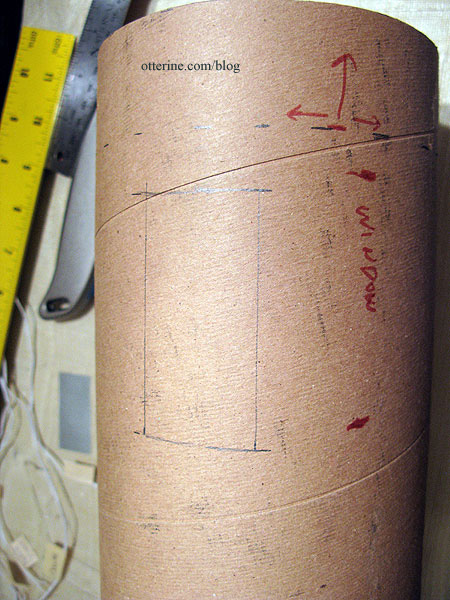
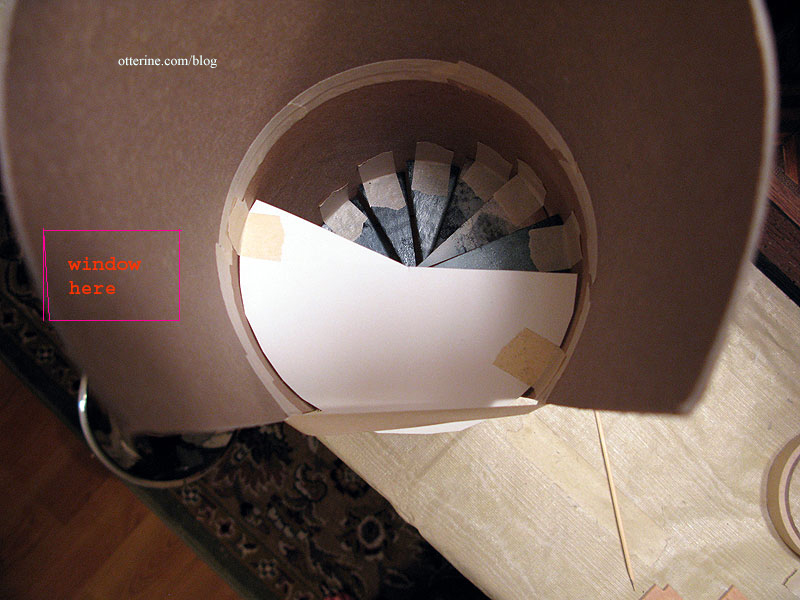
With my model on the balcony at the top of spiral stairs in the mockup tower, I was able to mark where the window overlooking the Sopwith Camel should be.
I measured and marked a line 1.5″ from the edge all the way around the top of the tube. This ring would stay intact and serve to hold the roundness of the tower in shape.
I cut the smaller 1.5″ x 3″ window openings before cutting the arched openings, because I had to press the utility blade into the thick cardboard with significant pressure and I thought having the large openings already cut would make the tube more likely to buckle as I pressed.
The arched openings join the side walls of the main room.
I drew the arched tops freehand, leaving another full band intact in the middle for stability.
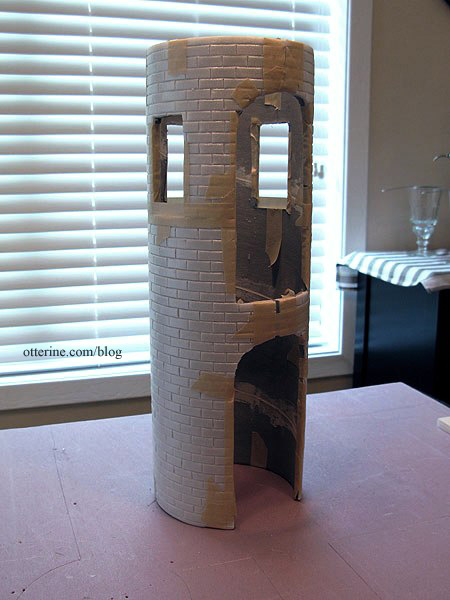
Here you can see the three windows I cut.
I covered the exterior of the tower with Cellfoam 88. It’s white foam sheeting approximately 1/8″ thick. I bought a two-pack at Hobby Lobby with a 40% off coupon. The sheets measure 12″ wide by roughly 4ft long. I measured the amount needed to cover the surface of the tower, and then marked my stone lines 5/16″ apart on the sheet while it was flat and unattached to the tube.
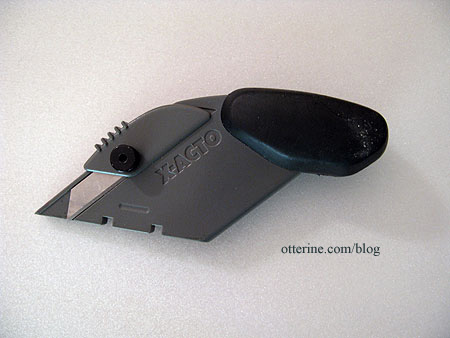
I used a special adjustable X-Acto knife that allows you to cut into a surface at a controlled depth. You turn the knob to allow more or less of the blade to sink into the material. This kept the back of the sheet whole while allowing me to carve the stonework on the front.
After scoring the lines with the blade, I used a dull wooden pencil to indent the lines. It’s a small step that makes all the difference.

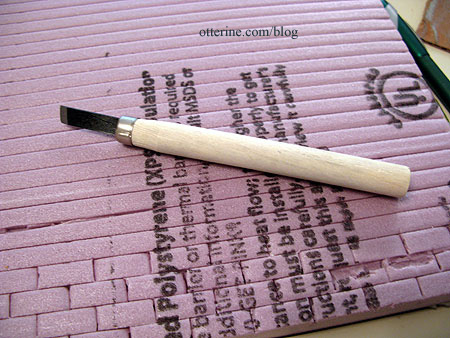
I used a carving tool from a set bought at Michael’s to press and cut the vertical lines forming the individual stone blocks. I thought I had a photo of it, but apparently not. Here’s the tool with the builders foam stone started (I’ll detail this portion in a later post). I just lined the blade up between the horizontal lines and pressed until it broke the front surface without cutting through the back. The bricks measure 3/4″ wide.
I used Weldbond glue to attach the carved stone sheet to the bottom of the tower tube, applying the glue to the tube and then pressing the sheet onto it. My measurement was a little off, so I had a gap over the arched opening, but this would be filled in with stucco besides.
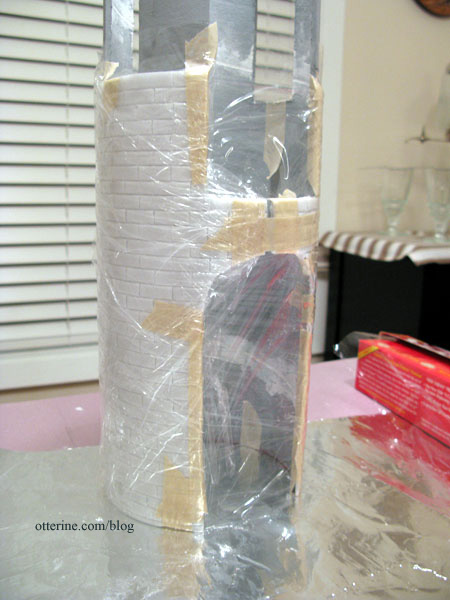
The Weldbond glue held the sheet well enough to allow me cut the arched openings after the foam was attached. I then taped down the edges.
Since there was no way to press the foam flat on the tube, I wrapped it tightly with cling wrap and let it set.
In the meantime, I prepared the next sheet of foam needed to cover the remaining exposed tube in the same manner as the bottom sheet. I made sure the stone pattern continued seamlessly between the two sheets.
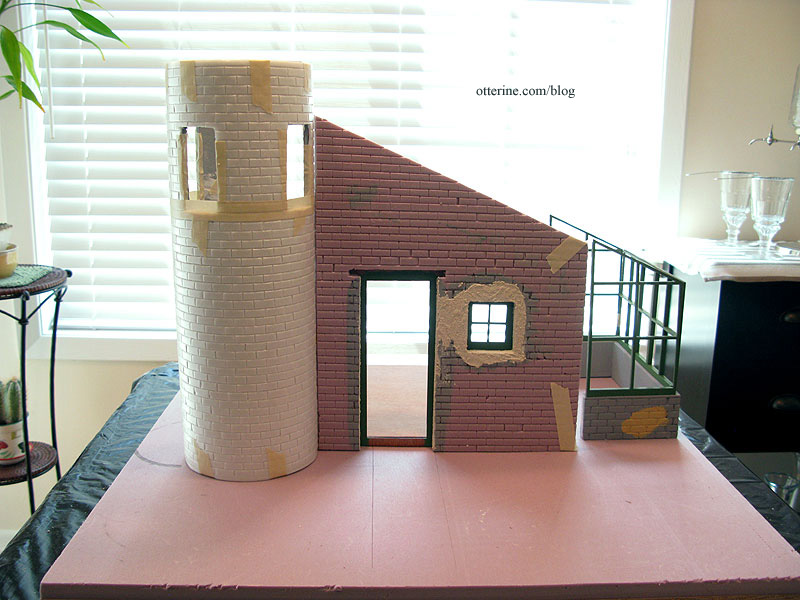
Here it is in place with the main room.
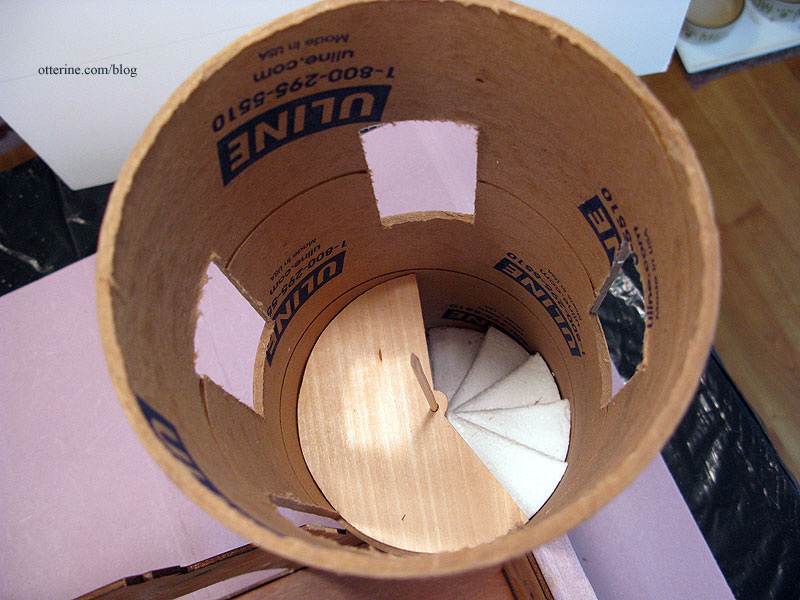
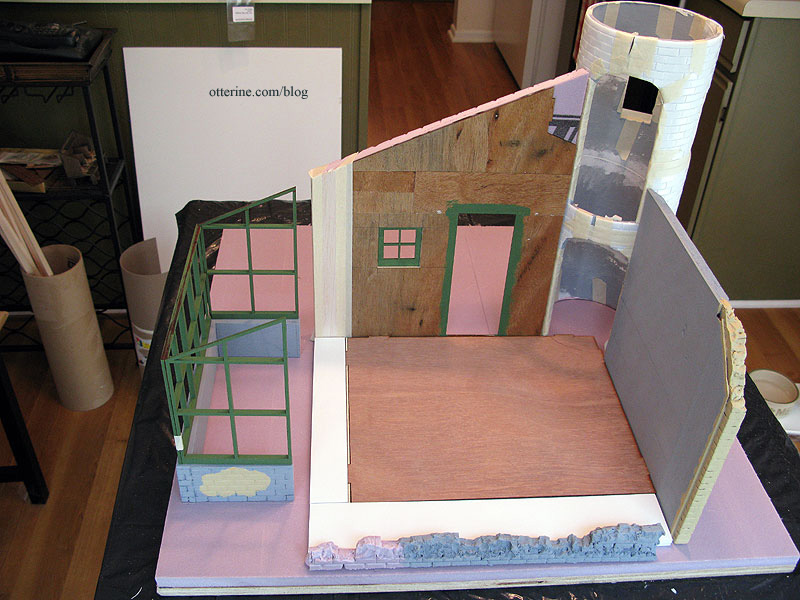
And, from the inside. Now you can see why I keep my kits in dry fit so long. I build parts, check the fit, and so on until I am ready to assemble all the pieces. Even when I am ready, I still usually wait a day to make sure I haven’t missed something. :D
I primed the tower inside and out with gesso to seal it.
I covered the interior surface of the tower with stucco patch from Home Depot. Since the spiral stair base was a snug fit in the mailing tube, I made sure there was no stucco on that portion at the bottom. Once painted, you wouldn’t be able to tell the difference even if you could see that far into the tower.
Checking the fit of the spiral stairs after stucco application.
I painted portions of the tower Desert Sand by Americana. Once dry, I grouted with spackling compound.
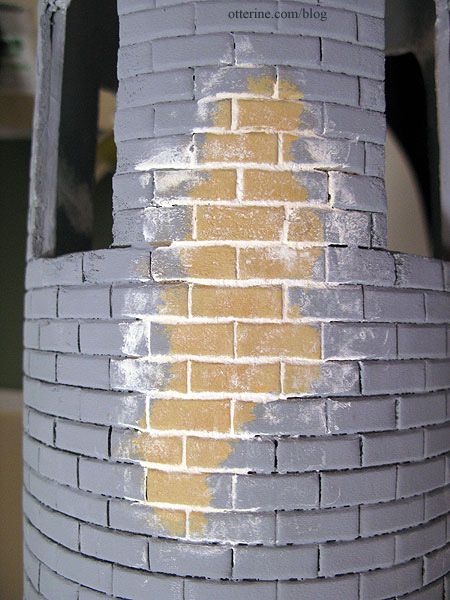
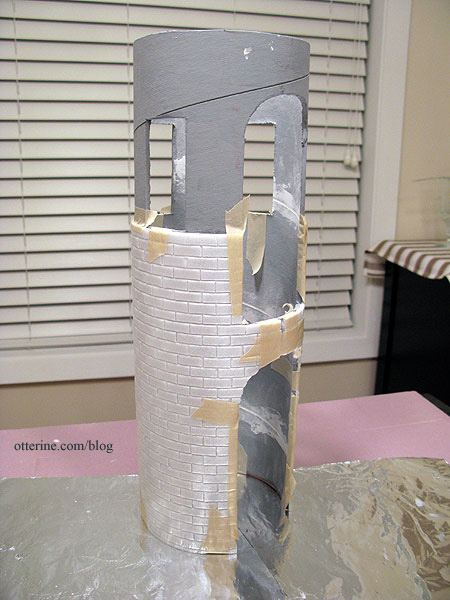
I layered on washes of browns and a little black to stain the grout and give the stone a natural mottled appearance. I then covered the exterior with stucco, leaving the painted stone areas untouched.
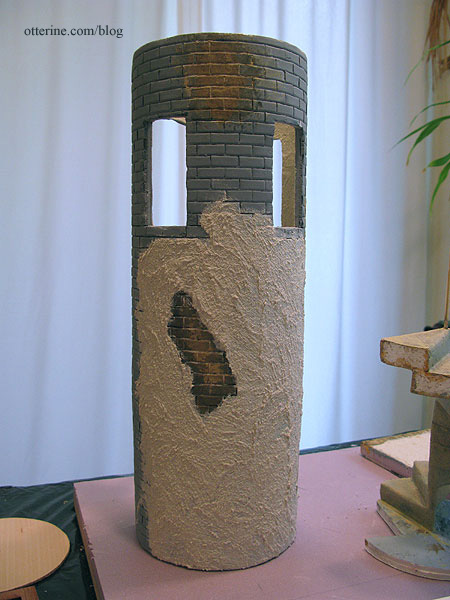
I also left the edges of the windows, the attachment points where the tower meets the main room and the arched openings uncovered. The stucco would be added later to those areas. Here the tower is still not glued in place.
Continued in part 2.
Categories: The Aero Squadron Lounge
September 10, 2012 | 0 commentsWatercolor paintings from 1916, wartime
One of the drawbacks of working on a project in secret is that others can’t pipe in and say, “I have just the thing for your mini scene!” Now that The Aero Squadron Lounge has been revealed, a friend and fellow miniaturist was able to do just that.
Elga inherited two small paintings from a collection belonging to her late Mother-in-Law and offered to send me scans so that I might add these little paintings to The Aero Squadron Lounge. I was overjoyed at the thought, and I fell in love with them when I saw them.
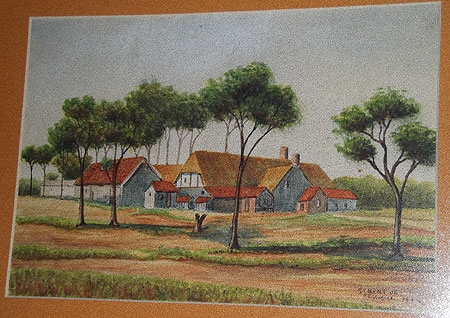
The watercolor paintings measure 10″ x 7″ and are signed by F. E. Glazier. One is titled St. Gent, JE and dated April 24, 1916. The inscription on the back reads, “D. Companies first billet in France.”
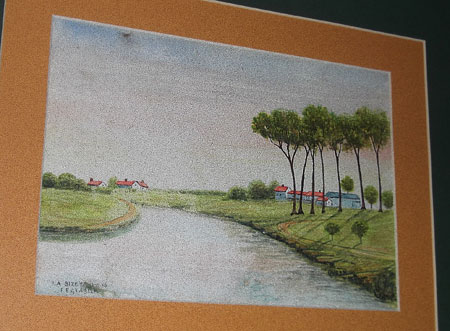
The other is titled La Bizet and dated May 12, 1916. The inscription on the back reads, “Le Bizet canal at back of Le Bizet Trench.”
Elga wrote, “I always wonder if it was a soldier that painted them and send them home to the family as they are quite small, wanting to show them the farm he lived on and the place where he was fighting in the trenches.”
We both did a little bit of sleuthing on the internet to see if we could make a connection to anything more recent. Even though one painting’s inscription states this was in France, Elga wondered if it was actually Ghent, Belgium. I’m not sure what the “JE” stands for on the front, either. Le Bizet seems like it also might be in Belgium based on a limited google search, though Elga found that it is right on the border with France. She also found a few online references to Le Bizet in WWI related links.
Elga was able to find an F. E. Glazier listed in the 1940 U.S. Census, working under the assumption that D Company was from America. However, Elga lives in South Africa along with the paintings, as did her Mother-in-Law.
I found a listing for Private F. E. Glazier on a July 14, 1916 roll call page from the South African Infantry, stating that he was injured July 19th.
Elga looked in her phone book and found two listings for people with the surname Glazier in the Cape Province. Her Mother-in-Law lived in Cape Town for over 20 years, and Elga surmises she bought the paintings at a fair or market. She’s not sure her Mother-in-Law even knew what they were, their age or the fact that they are original watercolor paintings of historical significance. She thinks they were purchased simply because they are beautiful landscapes.
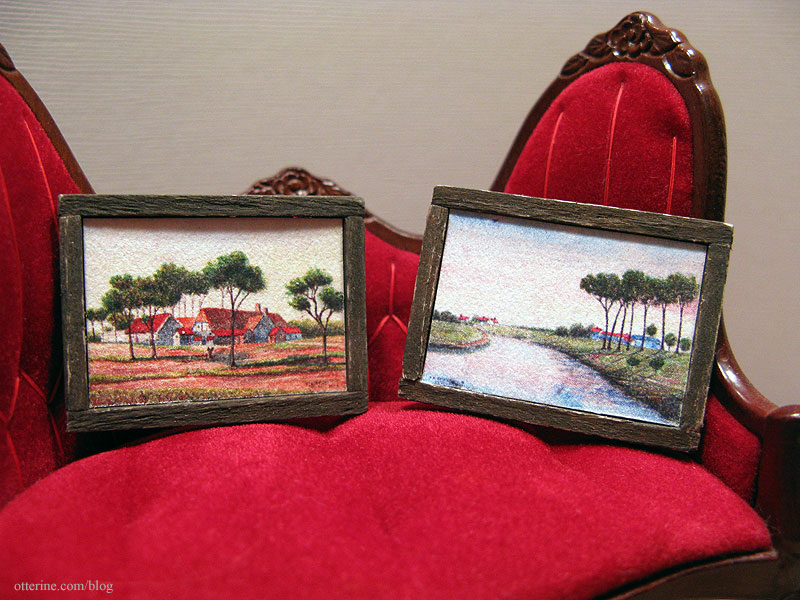
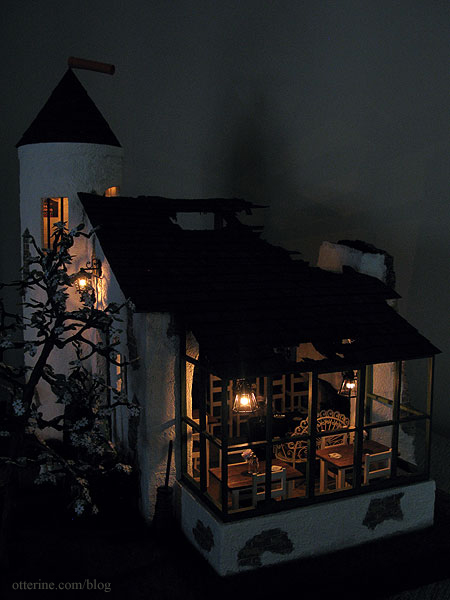
That they are, so I’ve printed the scans in miniature and made matchstick frames for them. Since the Lounge is dark, I’ve set up a vignette to show their detail and color.
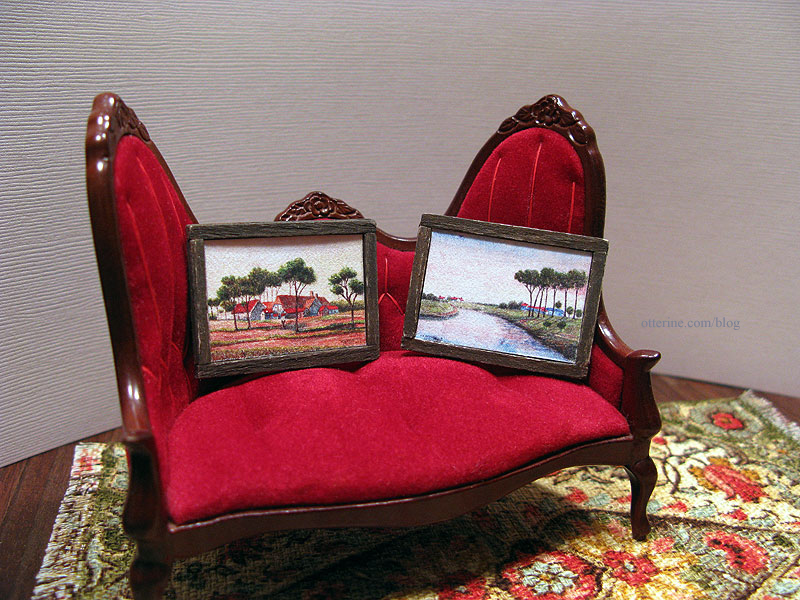
Even in miniature, they look like real paintings.
I moved some things around to make room for them in the Lounge.
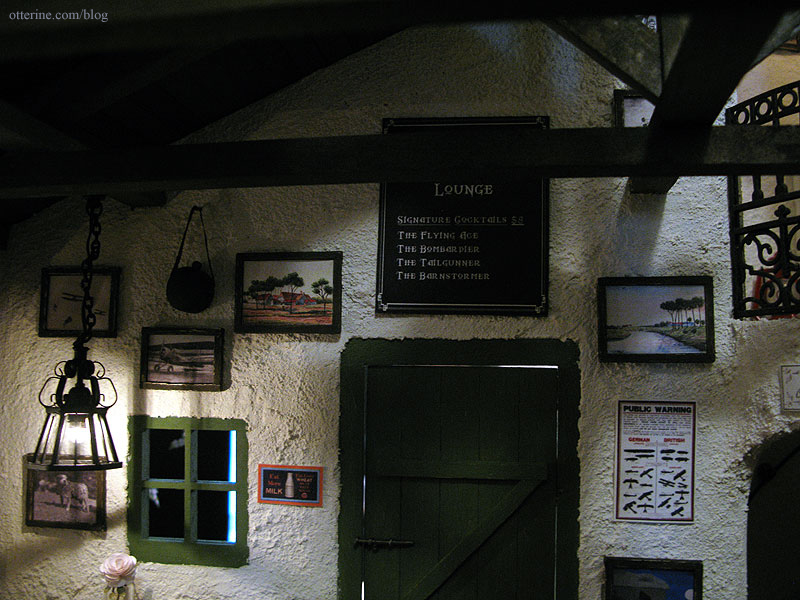
Adds a bit of authenticity, don’t you think? Thanks so much, Elga!

So, there’s our clever little mystery. Maybe someone will stumble upon this blog post and have something to add. Elga and I would love to know the rest of the story. :D
——
Someone reached out to me from this post and emailed more information about Mr. Glazier (edited to remove identifying information). Thank you for adding to the story.
“Fred Glazier was a veteran of WWI. He served with the South African army and was injured at the battle of Delville Wood (15 July – 21 July, 1916). In fact, he lost a leg during that skirmish. At some point after the end of WWI, Fred moved to live in the little town of Port St Johns, on the east coast of South Africa. My dad … vividly remembers Fred Glazier, whom he called ‘Old Man Glazier’ in the years after WWII. Fred was an artist who painted a number of pictures of the landscapes around Port St Johns. My uncle … owns a painting done by Fred Glazier depicting the mountains and river mouth around Port St Johns. Fred Glazier was a great fan of cricket, obviously not as a player because he was an amputee, but as a supporter, and was the first President of the Port St Johns Cricket Club.”
Categories: The Aero Squadron Lounge
September 9, 2012 | 0 commentsThe Aero Squadron Lounge – tower spiral stairs
This post will give you some background on the mockup portion I did and then explain how I made the final set of stairs for the tower.
My idea from the beginning was to have spiral stairs leading to a balcony overlooking the main room and a window to see the Sopwith Camel from above.
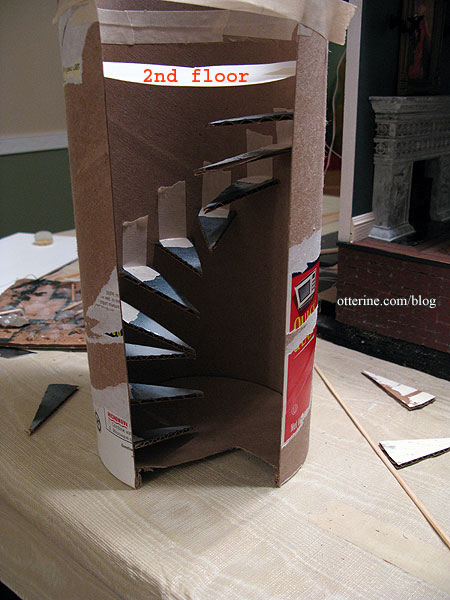
The diameter of the original oatmeal container tower was roughly 5″, so I cut some quick triangle shaped steps from a 5″ diameter cardboard circle. I taped them into the oatmeal container before I cut the 5″ diameter mailing tube that would serve as the final tower. I wanted to make sure I could get the stairs to work before altering the mailing tube. However, I did cut the 31″ tall mailing tube into two pieces each 15 1/2″ tall since anything taller would have looked out of proportion with the single story main building.
The stairs worked great. I haven’t measured here or made the triangles uniform. I just wanted to see the layout in three dimensional form.
Originally, I thought in order for the balcony to bridge the gap in the opening and access the window, it had to be cut in a “greater than half” shape. I later changed this to a semicircle.
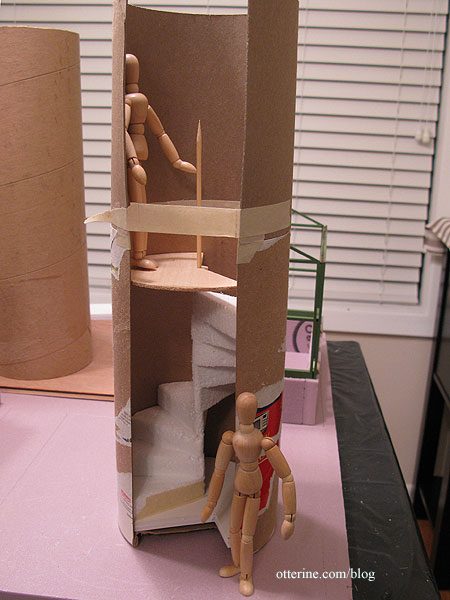
The problem with the stairs was that part way up them, my model hits her little head!!!! :O

I couldn’t raise the balcony, because (a) the spiral staircase would have had to cross the arched opening if it were any taller and (b) with a maximum tower height of 15.5″ raising the balcony would have made the second story too short.
I could have cut the balcony to “less than half” so that it only overlooked the main room and didn’t allow access to the window…but I didn’t really care for that idea. As it turned out, the semicircle still worked, though there really isn’t much head clearance to speak of in the final tower.
Anyway, as I was figuring this all out, there were three possible solutions:
- Close up the tower completely, including the roof (no exposed beams in the conical roof) but have a faux door on the inside to look like there is access to the tower. Add windows and interior lighting (but make the windows like the Heritage cellar windows so you can’t really see in). Seemed like cheating, no?
- Make the spiral stairs and the balcony as is, but still close up the tower…except…make a doorway on the inside so you can see the lower stairs. And, leave some of the roof beams exposed so you can see the balcony from the top and through the windows. You won’t see both the stairs and the balcony at the same time so you can’t tell they don’t make sense spatially. That seemed more complicated than it needed to be.
- Lyssa suggested building it as is, adding a WATCH YOUR HEAD sign and leaving the mini people to fend for themselves! :D Winner winner, chicken dinner!
And, it was settled…on to the spiral stairs construction! Warning: lots of math ahead, so WATCH YOUR HEAD! :D I’ve written this out as plainly as possible, but it might not be easy to see what I am getting at without doing your own mockup.
After studying my mockup, I determined that the best layout included nine steps each 3/4″ thick (tall) leading to the balcony 7 1/4″ above the first floor. The nine steps equal a height of 6 3/4″ so the last step up onto the balcony would be 1/2″ tall.
I found two drawings of circles with equal sections online at Enchanted Learning, one with 10 sections and one with 12. I used the 12-section circle for the visible width of each step but cut the steps using the 10-section circle as a template; they will stack on top of one another and I needed added width to glue them together. This will be shown and further detailed in the photos below.
I used the 12-section circle template to determine the best shape for the second floor base. I left a full circle in the middle since I thought I might need it to stabilize the spiral stairs. Remember, I later made this balcony a semicircle instead, but that was near the end right before installation. My construction photos show the “greater than half” balcony.
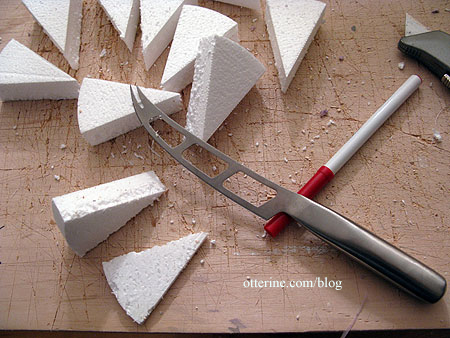
I was able to find a circle of white styrofoam at Michaels that measured 6″ in diameter and was 1″ thick. My mailing tube tower was 5″ in diameter and the steps needed to be 3/4″ thick, but the styrofoam circle was actually the perfect size for the project.
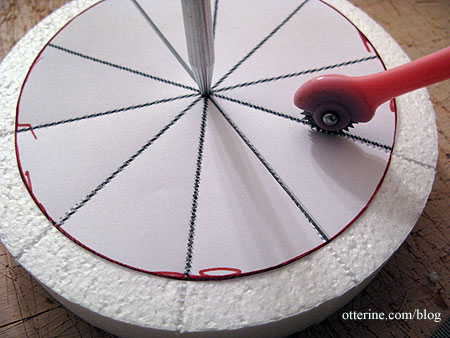
I first attached my 10-section circle template to the styrofoam circle with an awl, matching centers. Using my tracing wheel (a sewing tool), I transferred the lines onto the styrofoam so I could cut out the pieces.
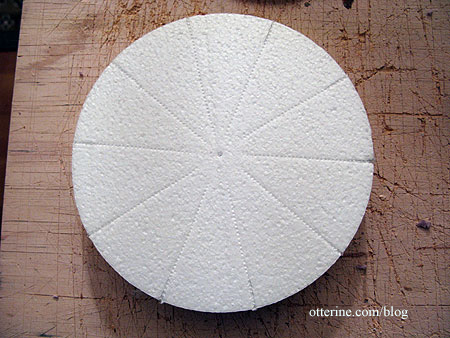
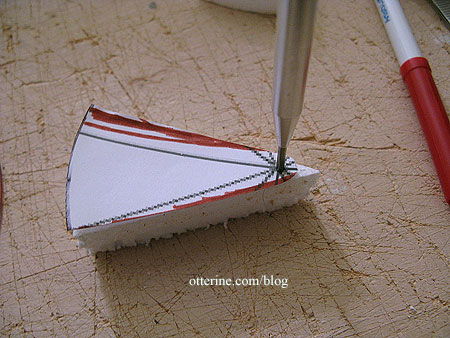
I cut the steps from the circle along the guidelines with a utility blade and then, using a cheese knife I’ve always thought looked like a Klingon blade, I cut off 1/4″ of thickness from each section. I’m good at eyeing measurements freehand, so I didn’t mark them first. I also planned to shape them to look like natural cut stone steps, so they didn’t need to be exact.
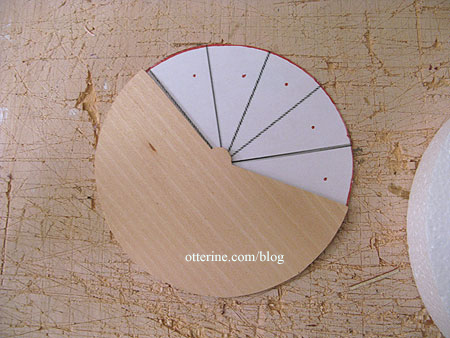
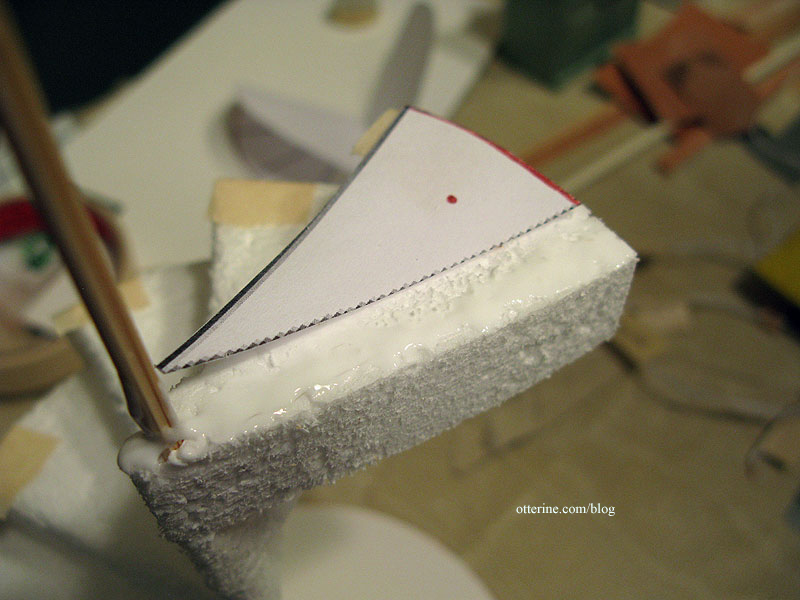
Based on my reference photo, each slice needed to have a rounded hub at one end. These rounded centers would line up and the stairs would pivot around that center point. I cut a template using the 12-section circle as a guide, adding excess to the back edge of the slice as well as the rounded tip.
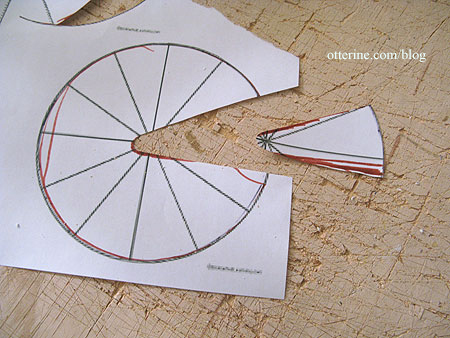
Before altering my styrofoam pieces, I cut nine paper steps, joined them in the middle and tested the fit. This paper mockup indicated I needed to cut the template down just a bit on the outer curved edge.
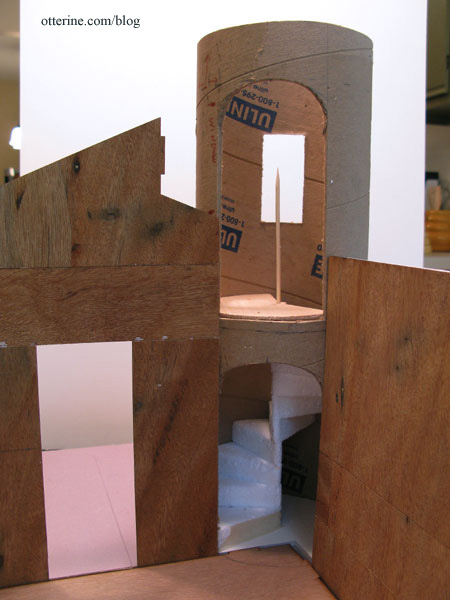
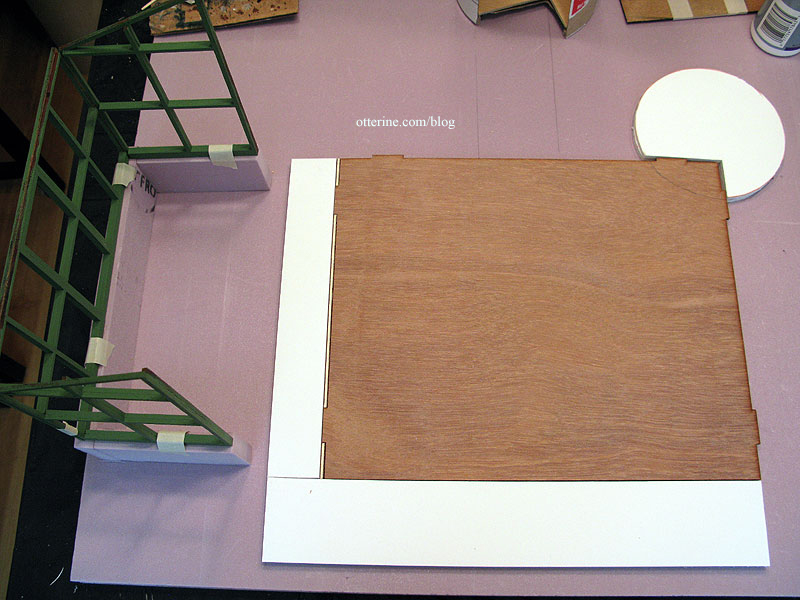
In the above photo, you can see the floor base I made for the tower from two layers of 1/4″ foam core board. The rectangular notch abuts the kit floor so the tower and main room share the same level surface. Here you can also see the floor space I added (also with double layers of foam core board).
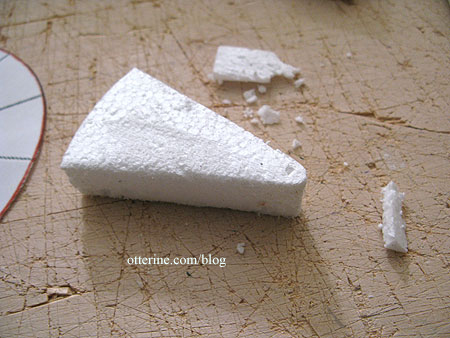
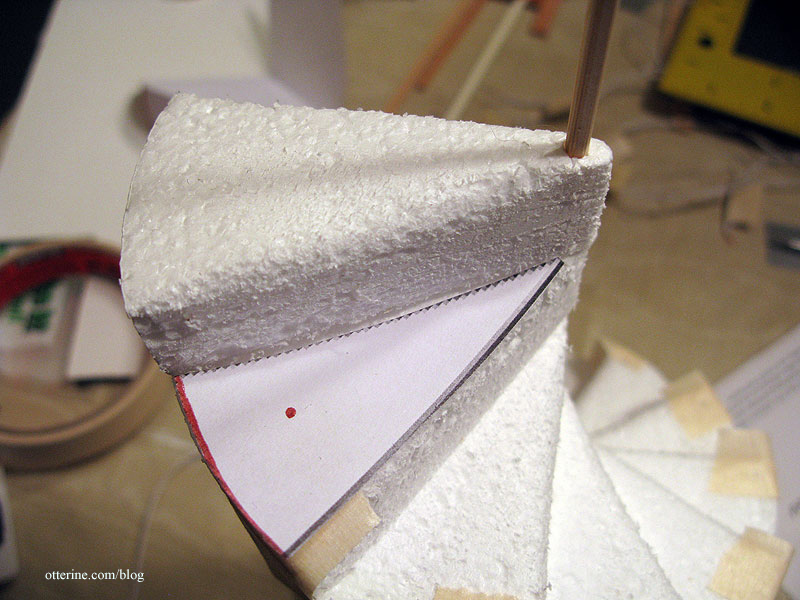
I used the paper template to fine tune the styrofoam pieces. Not much needed to be removed – just a little in the center to make the rounded hub. I used the awl to make a hole in each tip while I was at it.
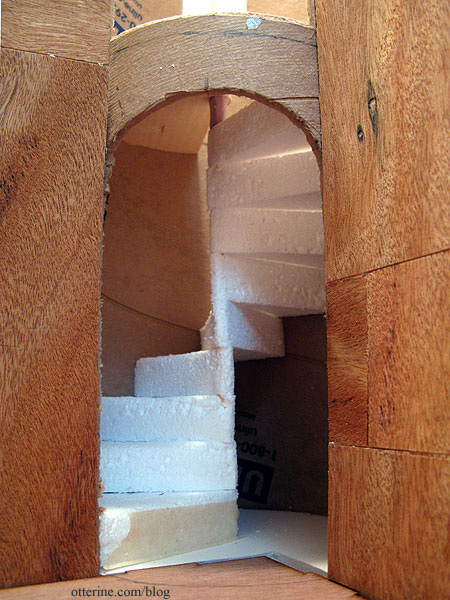
I sanded the steps to give them a more natural appearance.
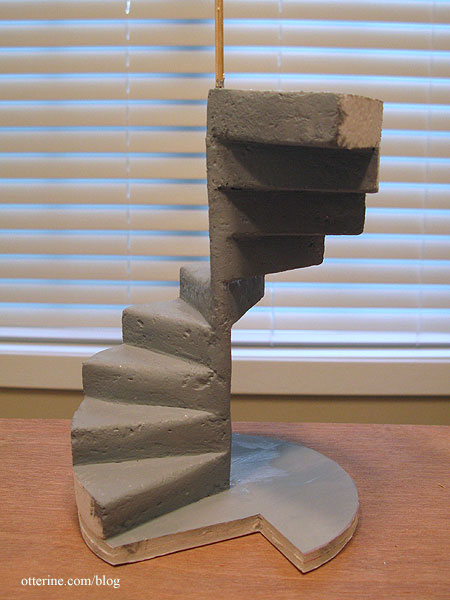
I fed the steps onto a bamboo skewer but left them unglued until I could check the final fit of all the steps in place.
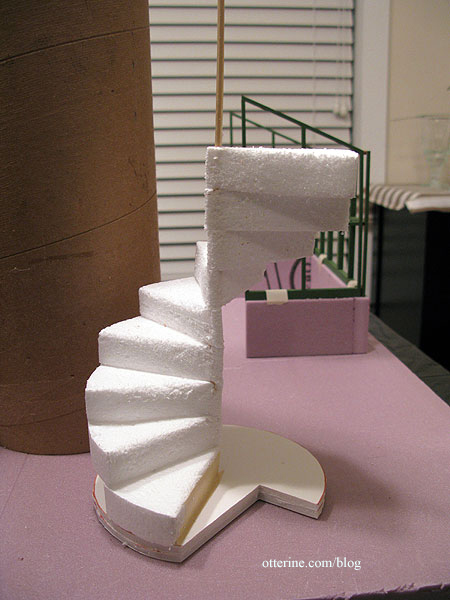
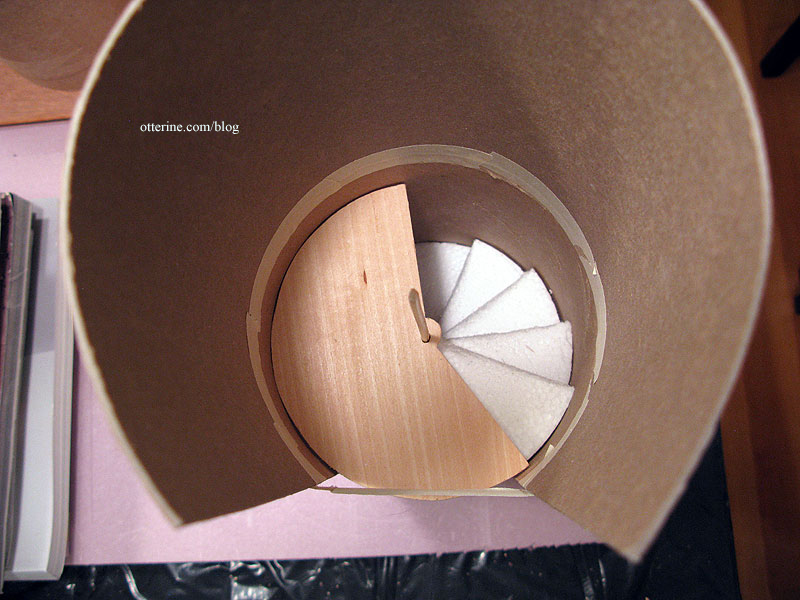
For this photo, I added a bit of builders foam after the ninth step to hold up the second floor balcony though I later added a full wooden riser to keep people from stumbling on the top step and getting their feet and legs caught in the opening. Here’s the styrofoam assembly shown in the oatmeal container mockup.
I love it!
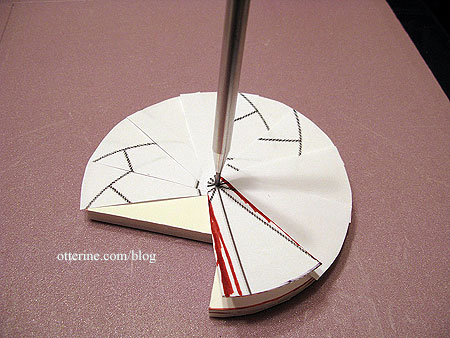
I glued the first step in place on the floor base and then used a template cut from the 12-section circle to determine where to apply glue for all subsequent steps. I taped the stairs to hold them in place while the glue dried.
Once the glue was dry, I spread spackling over the surface with my fingertips. I was heavy handed with it so it would cover any holes in the styrofoam and allow me to sand a smooth “stone” surface once it was dry. Here you can also see the permanent flat head straight pins I added to each outer edge for stability.
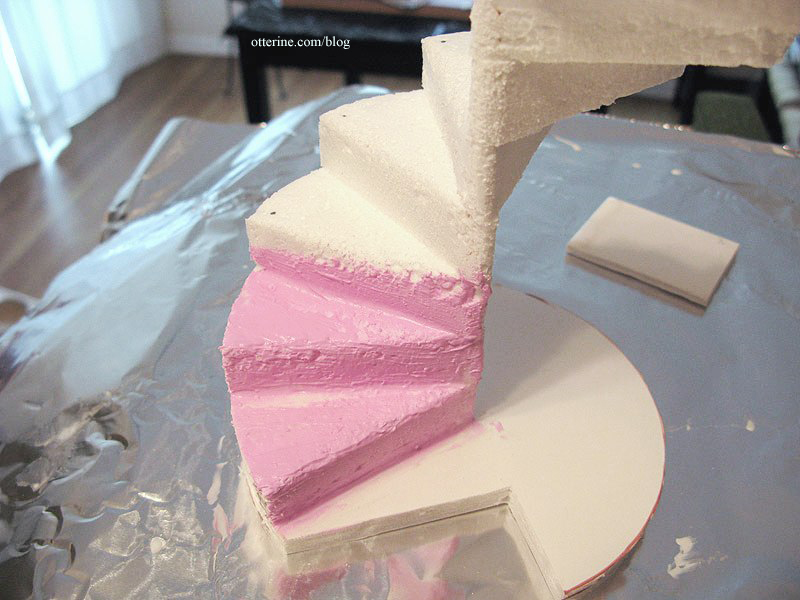
The sanding resulted in smooth stone with chips…a nice touch I hadn’t expected. :D Here the lower three steps are sanded; the remaining steps are shown before any sanding was done.
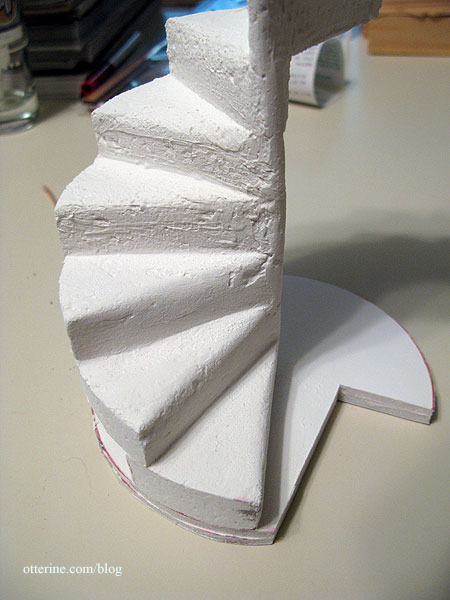
I primed the whole assembly with gesso.
The paint colors I used are first Camel and then Desert Sand, both by Americana. I then just kept adding washes of browns (Coffee Latte, Asphaltum by Folk Art and Traditional Burnt Umber by Americana) and tiny bit of black. I lifted off the excess with a paper towel and just kept adding until I got to the coloration I wanted. Here it is mid-process.
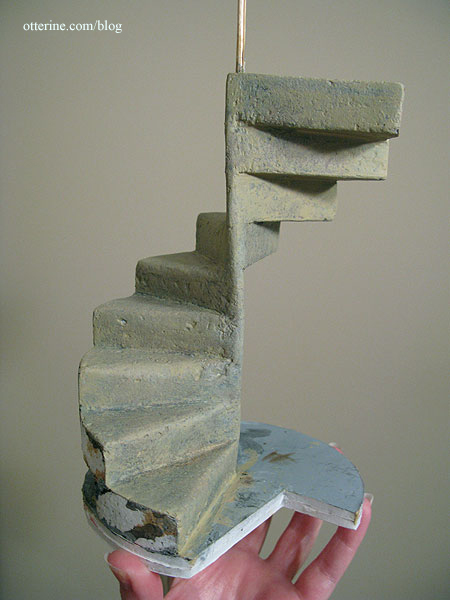
There was a great deal of “chicken or the egg” with the spiral stairs, and I ended up finishing them completely on their base before gluing them next to the main room and then adding the final tower over the top of them at the end. I kept constantly fitting the tower over the stairs to make sure they would still fit.
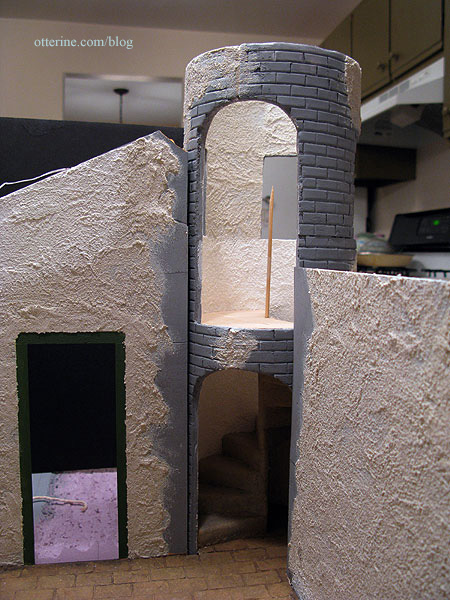
Here’s how they look in the final layout. From this angle, they look built right into the wall, though there is a very small gap between the stairs and the tower wall. This was so the tower could be lowered over the staircase as the final step in construction.
From above, you can somewhat see it. But, I love the way they turned out…just like I had it in my head! :D
I will detail the tower construction, including the balcony and railing, in future posts.
—-
Update: Tower construction, part 1, part 2 and part 3.
Categories: The Aero Squadron Lounge
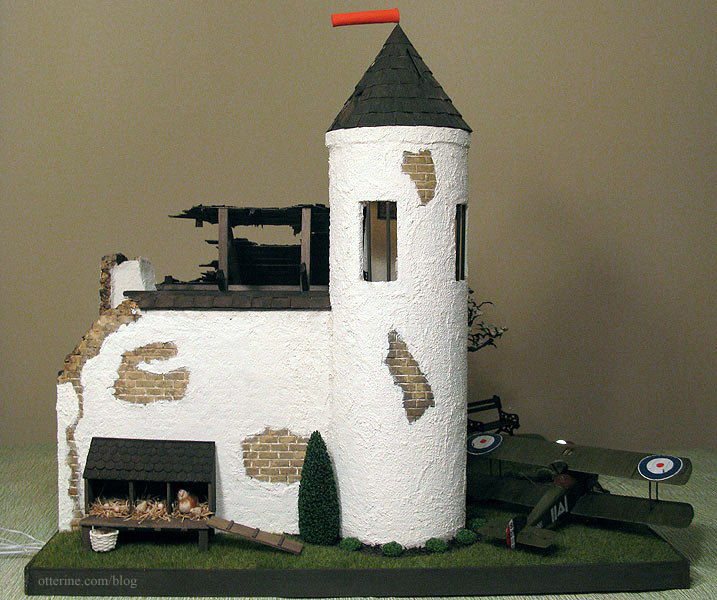
September 7, 2012 | 0 commentsThe Aero Squadron Lounge – Exterior accessories
There aren’t a lot of exterior accessories on The Aero Squadron Lounge compared to the interior, but I tried to make what I did add to the outside count for a lot. I’ll detail the landscaping and construction changes separately, but here are some close-ups of the exterior details.
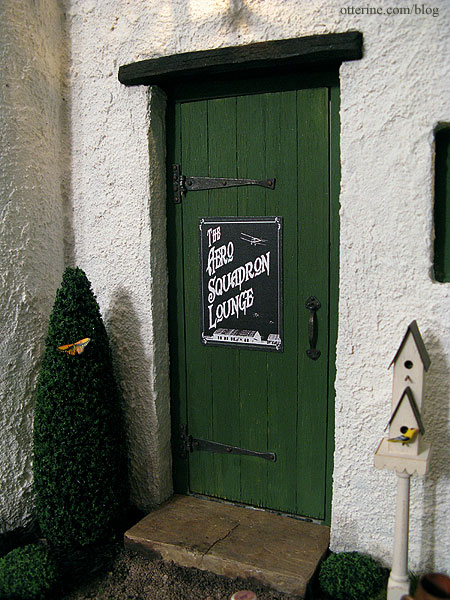
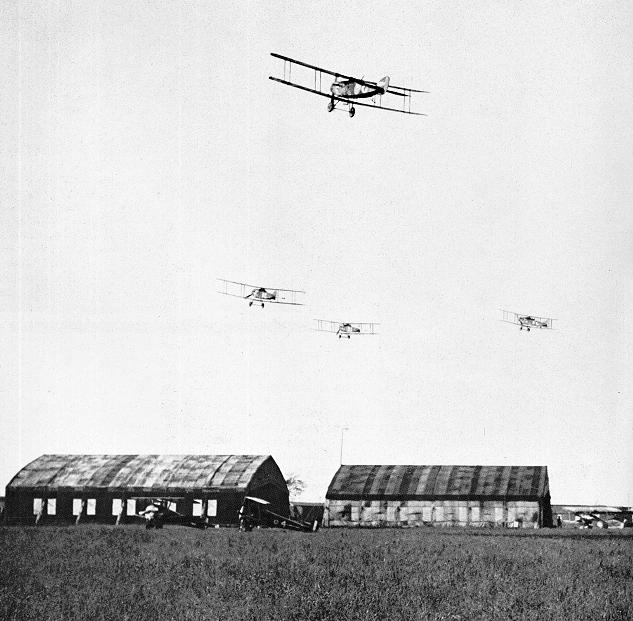
I used a WWI photograph to make the main Lounge sign. I tried out a number of colorations for the background and ended up liking the black and white “negative” version the best. The others seemed to either compete with the color of the front door or be too washed out.
Here is the original photograph from 9thinfdivsociety.org.
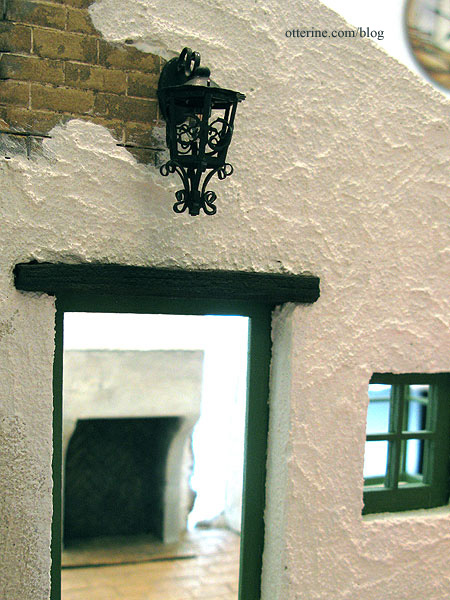
The overhead light is by Heidi Ott. It’s similar to the indoor lighting, but it originally had a shiny finish. I dabbed on black acrylic paint to tone down the shine and removed the plastic “glass” from inside the cage.
This lovely birdhouse was made from a kit by Twilla’s Tiny Treasures, the bird is from A
Little More in Miniatures.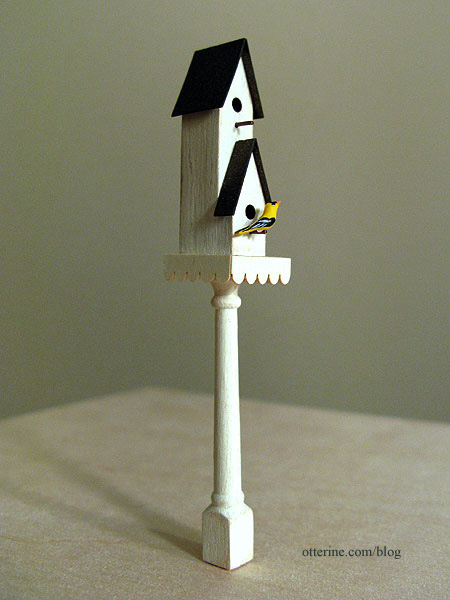
I used a small length of wire glued into the bottom of the post to hold it in place in the builders foam base. Uh, oh! Looks like a kitty has wandered over and spotted the birdie! :O
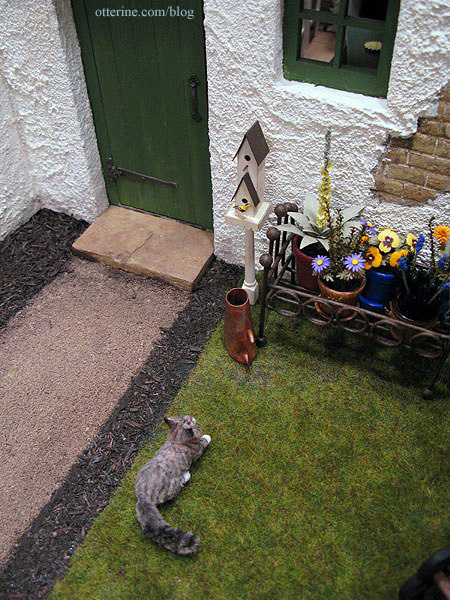
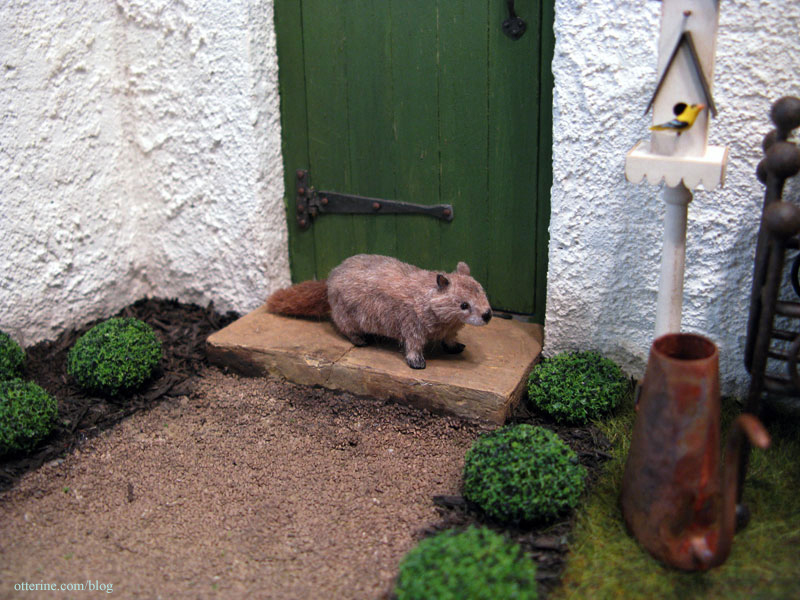
Woodrow also made an appearance as I was building, but neither of these critters will live at the Lounge permanently. :]
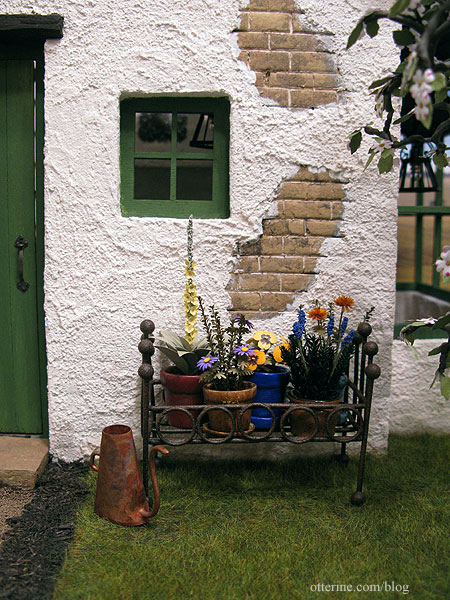
I also showed the planter and plants in earlier post, though I didn’t end up using one of the plants I made. I really like the way this small potted garden fills the space without taking over. The watercan is from Celtic Juju. The plants are made from a combination of kits from The Miniature Garden and Bonnie Lavish with added greenery from A Little More in Miniatures.
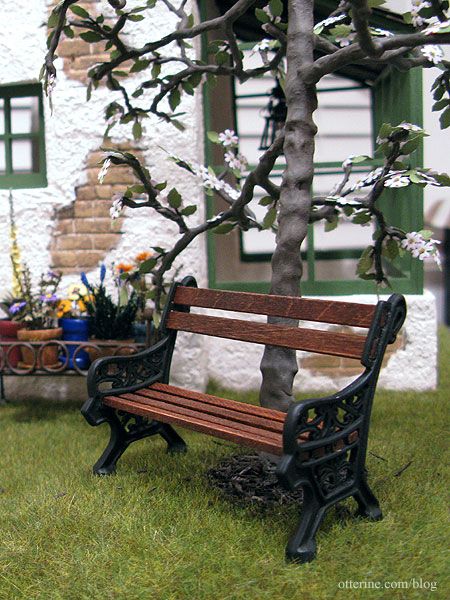
The bench was assembled from a Phoenix Models kit. The “kit” comes with two white metal bench ends that you can paint, and you supply the wood in whatever length you wish. It’s a perfect solution when you need a completely custom size bench. It’s a sturdy little piece once you manage to wrangle all the wood ends into place.
I used some leftover Dura-Craft trim wood for the seat slats and skinny sticks for the back rest, stained with Minwax English Chestnut. I cut the boards 3.25″ in length, so the seat ended up at 3″ wide — a perfect loveseat under a pretty tree. :D
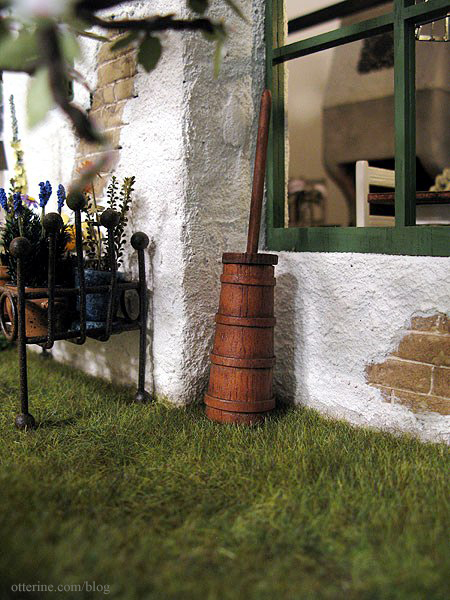
I bought this cheapy butter churn at the Bishop Show and added some black and brown washes to it. That subtle aging made all the difference; it looks like a high quality piece now. :D
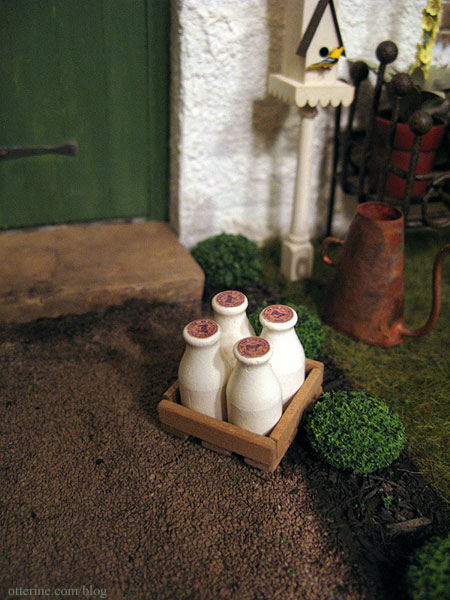
I purchased the milk bottles for I think a quarter each last April at the Bishop Show…or fifty cents each, some small amount. They were wonderfully painted. I added a light grey paint wash to tone down the bright white and printed vintage milk caps for the tops.

I made a quick milk crate from skinny sticks and placed them on the pathway. They would look great on the front stone step other than the fun fact that as soon as you opened the door, the milk would go flying. :\
The henhouse is not easily seen in the overall build because of the tower, but I’m glad I included it. The breed of hens I’ve made are Faverolles, a French hen suggested by Teddi. I have a standing hen not yet completed.
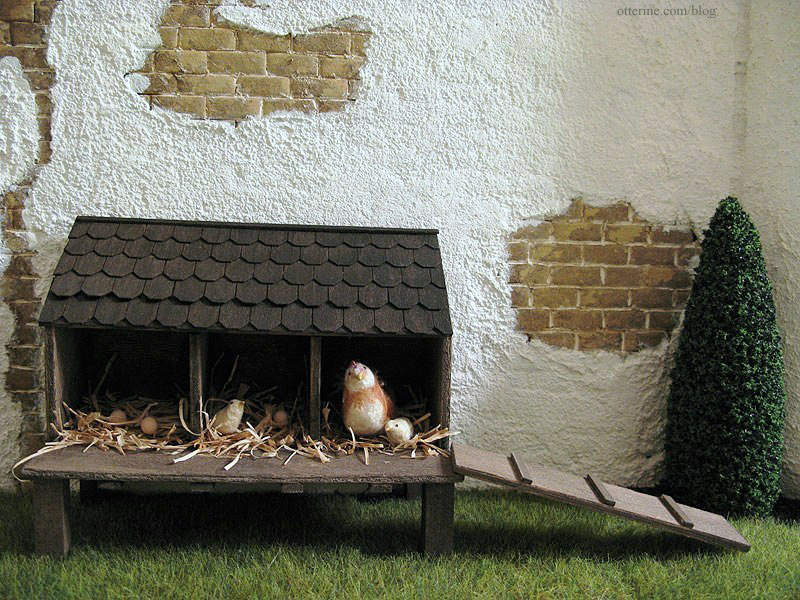
I’ve used a few of the eggs I made, too.
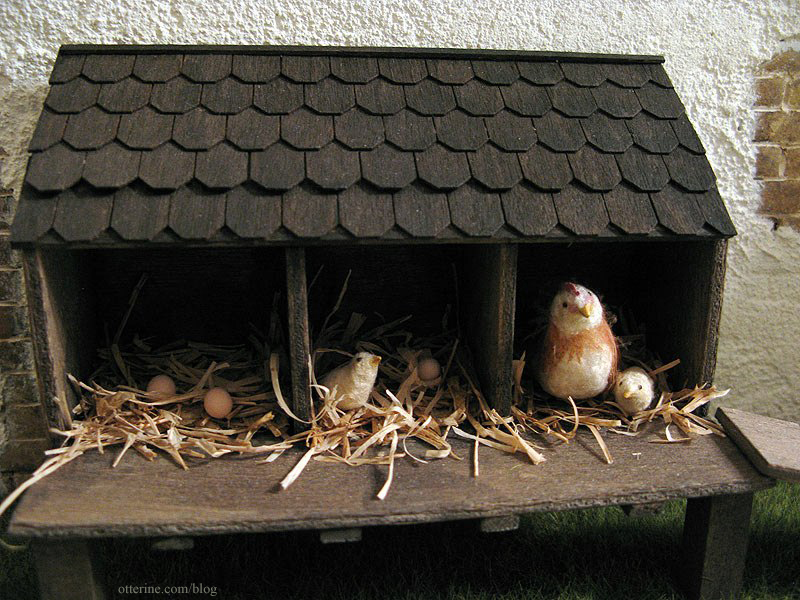
The henhouse is just what was needed to fill the open area on this side.
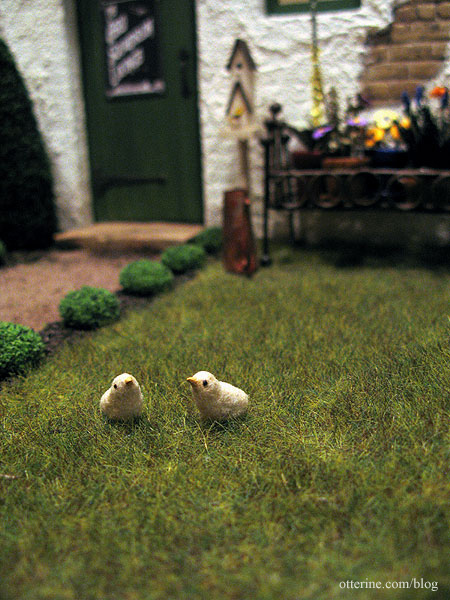
And, speaking of hens…there’s chicks on the lawn.
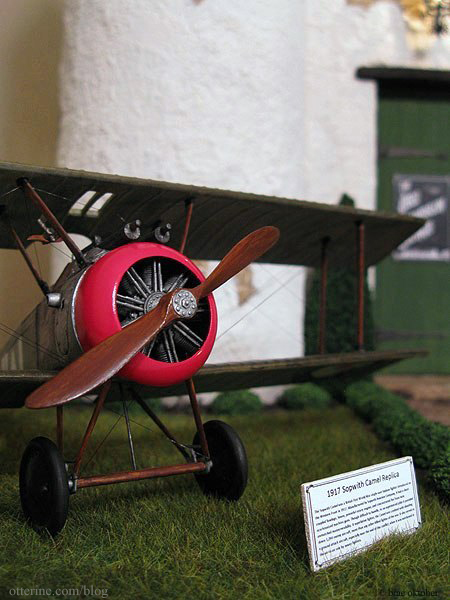
The full post on the 1:32 Scale Academy Sopwith Camel can be found here. The sign verbiage is taken from the Wikipedia article on the Sopwith Camel. I printed it on paper, pasted it onto a primed wood scrap and staked it into the ground with some wire.
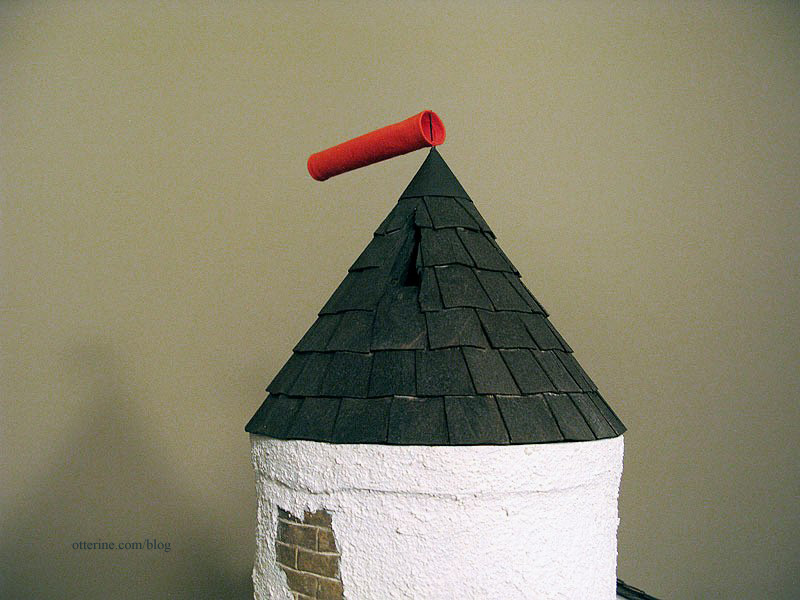
And, of course, the windsock that sits on top of the tower isn’t easily missed. ;D It’s a glued tube of orange cotton held in place with a head pin. Yes, it rotates, though it pretty much always falls back into the same place.
Stop on by for a nightcap.
Categories: The Aero Squadron Lounge
September 6, 2012 | 0 comments
NOTE: All content on otterine.com is copyrighted and may not be reproduced in part or in whole. It takes a lot of time and effort to write and photograph for my blog. Please ask permission before reproducing any of my content. (More on copyright)