


NOTE: All content on otterine.com is copyrighted and may not be reproduced in part or in whole. It takes a lot of time and effort to write and photograph for my blog. Please ask permission before reproducing any of my content. (More on copyright)

Categories:
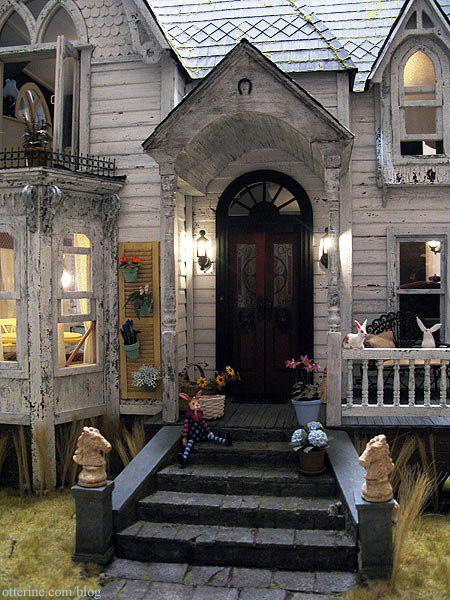
Happy Easter from The Haunted Heritage
Presto! No more Halloween and on to Easter…as long as I don’t show the big autumn tree out front. :D
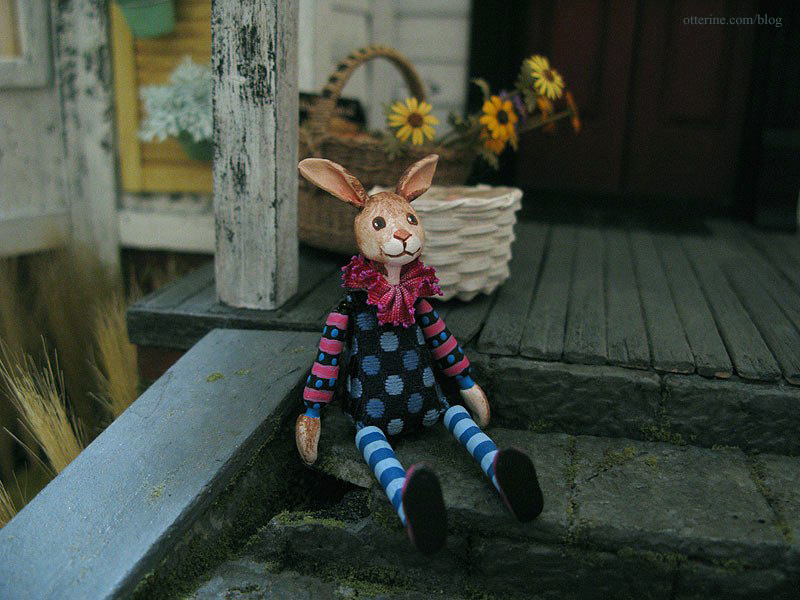
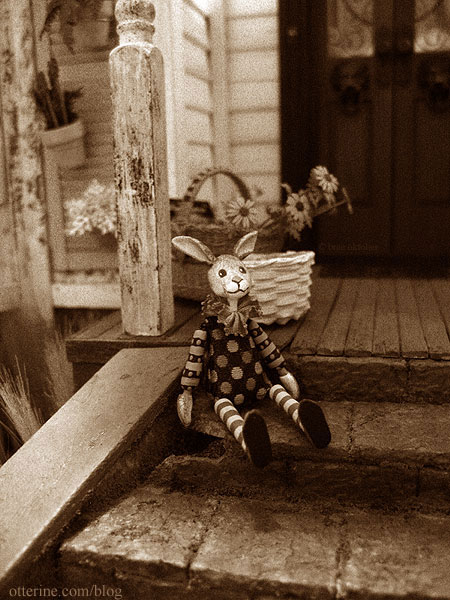
Mr. Rabbit is by K. Kuti Designs. The large basket is from Lidi at Basketcase Miniatures, and I made the flower stems from Bonnie Lavish kits. The white basket was purchased and holds eggs I made for The Aero Squadron Lounge.
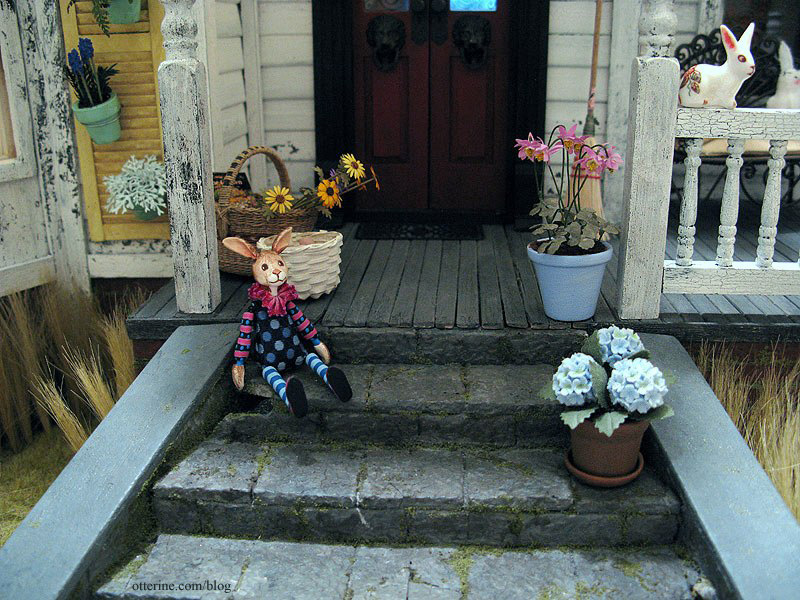
The purple flowers in the blue pot are from Michelle of Little Rabbit Minis, and the hydrangeas were purchased.
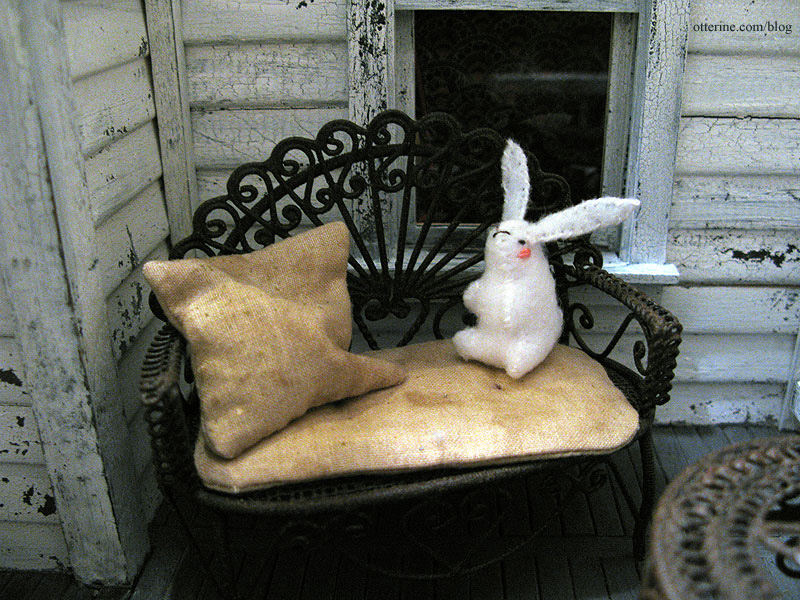
The stuffed rabbit is from Sisters Dreams.
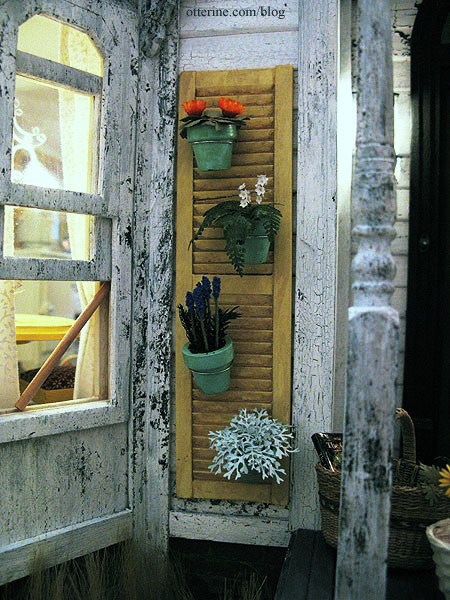
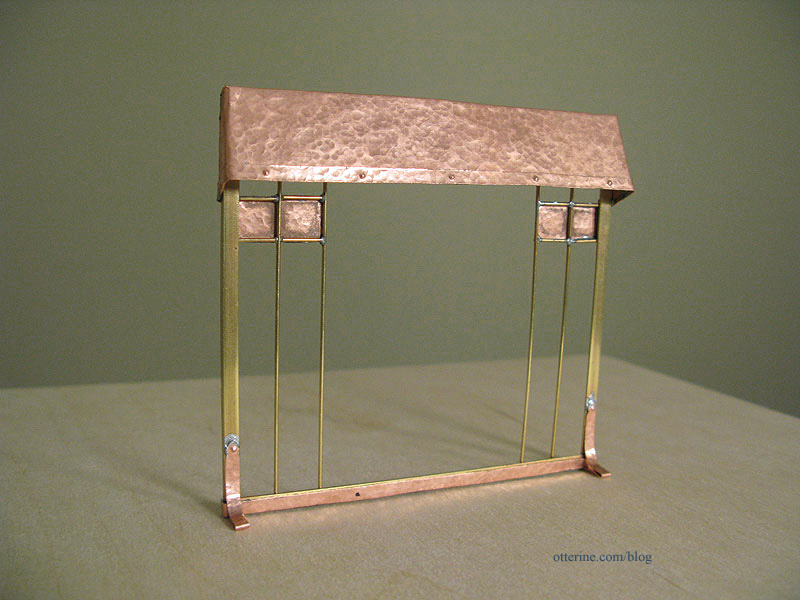
The shutter garden I made for The Artist’s Studio fits well on the Heritage, too. :D
Happy Easter!!!! :D
Categories: Roomboxes and Mini Scenes, The Haunted Heritage
March 31, 2013 | 0 commentsMackintosh dining room
Since I’ve taken the furnishings out of the Newport to pack away until the next modern build, I decided to play tonight. Another incentive is the wonderful modern mini contest over at Minismodernas. :D
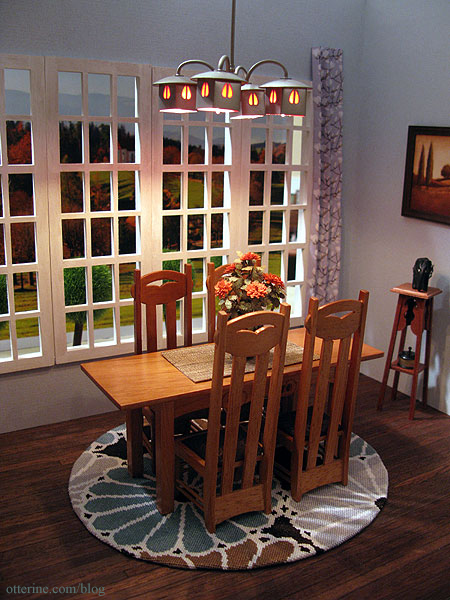
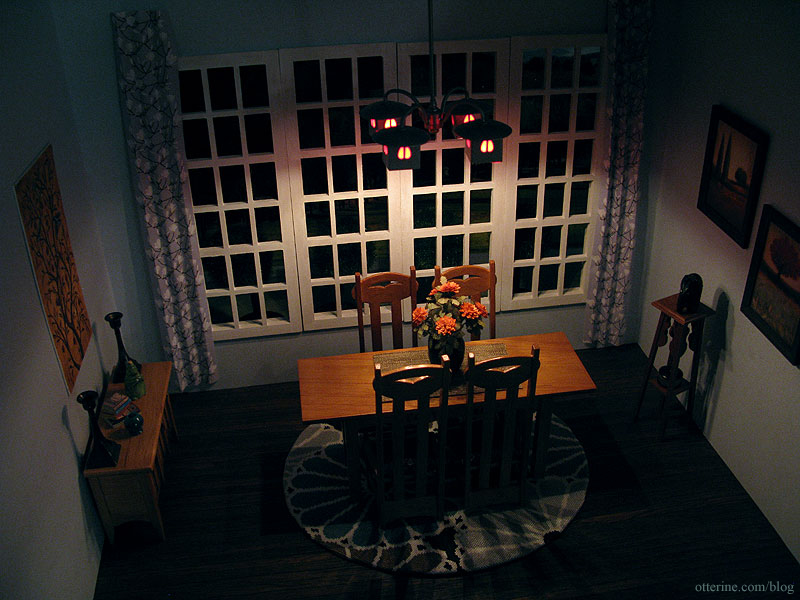
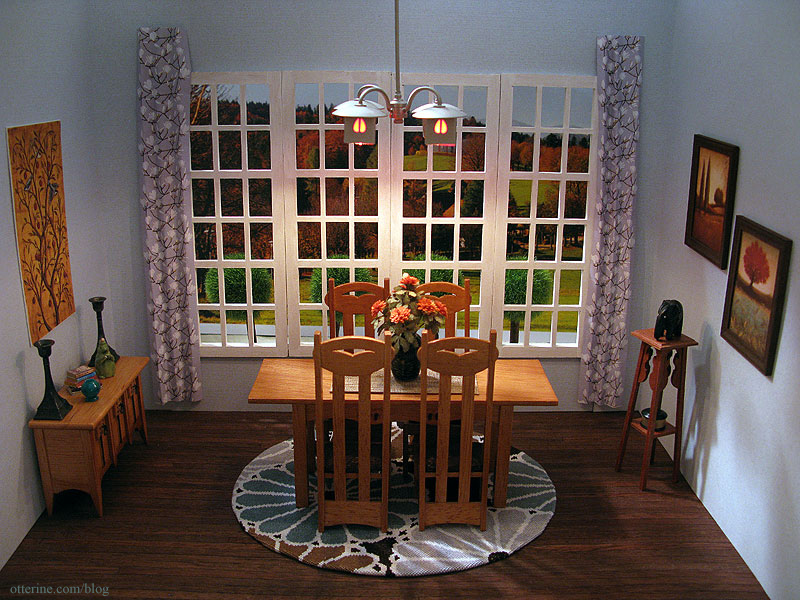
So, I set up a high end contemporary dining room with the Mackintosh dining set I had never taken out of the boxes. The Mackintosh ceiling light and dining set are from The Dolls House Emporium.
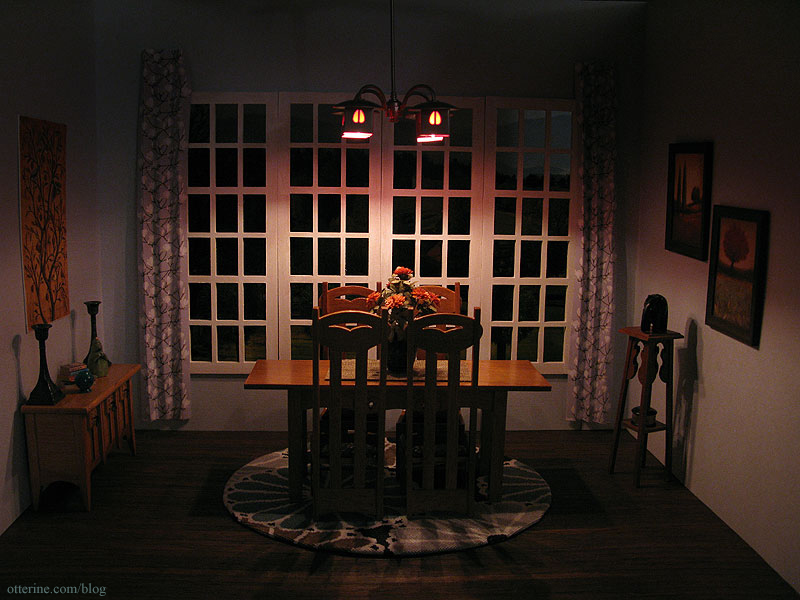
The curtains are a Marimekko design printed on regular paper, folded and tacked to the sides of the window.
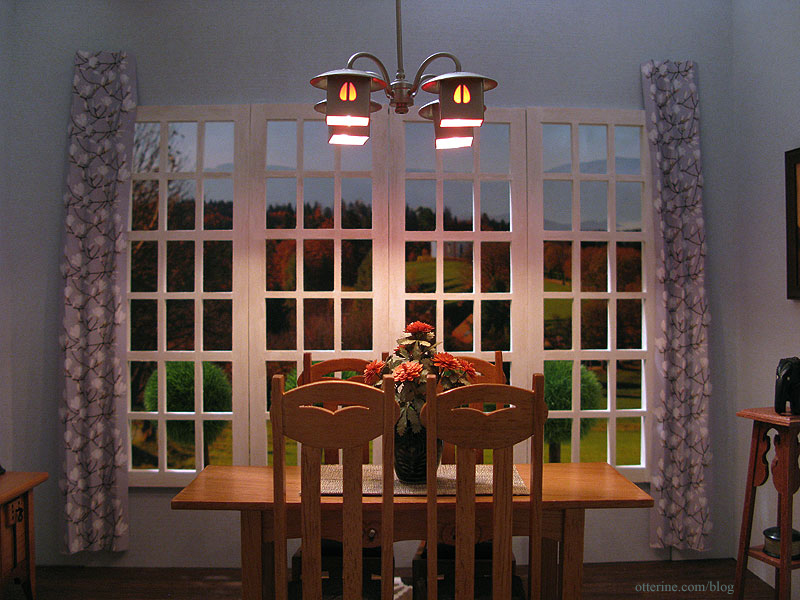
The orange dahlias on the table were made from a Bonnie Lavish kit and placed in a Manor House Minis vase, borrowed from Baxter Pointe Villa. The runner is a piece of real life silk wallpaper.
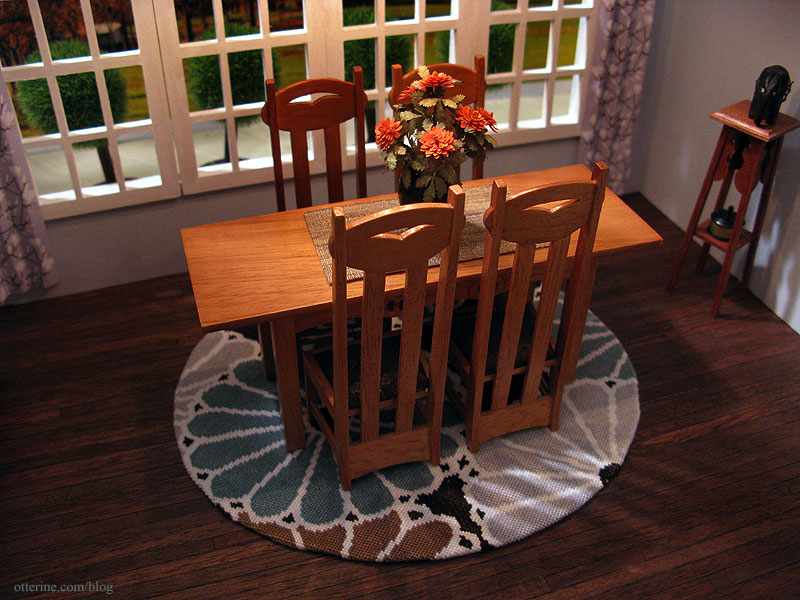
I stitched the needlepoint rug after adapting a real life rug design called Parasols by Thomas Paul. The flooring is borrowed from the Heritage bedroom.
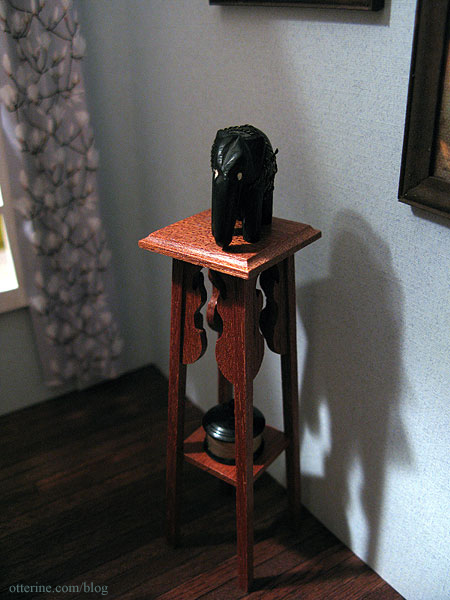
The two autumn prints are Crimson Dusk and Today by Edward Raymes. I printed them on Art Canvas by The Crafty PC and made frames for them. I built the McQueenie miniatures plant stand from a kit some time ago.
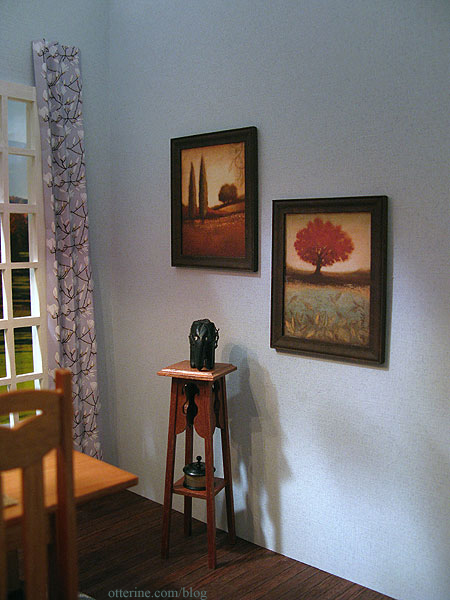
The elephant was purchased at the Bishop Show from Patricia M. Wehmeier Miniatures. The turned brass box is by C.W. Lubin.
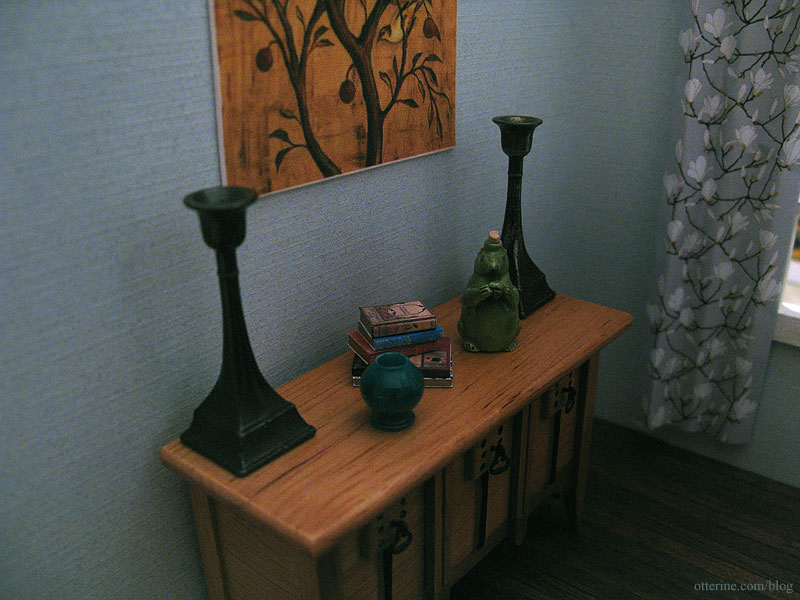
The sideboard is also a Mackintosh piece. The bird print is Plum Tree Panel III by Rodolfo Jimenez printed on Art Canvas.
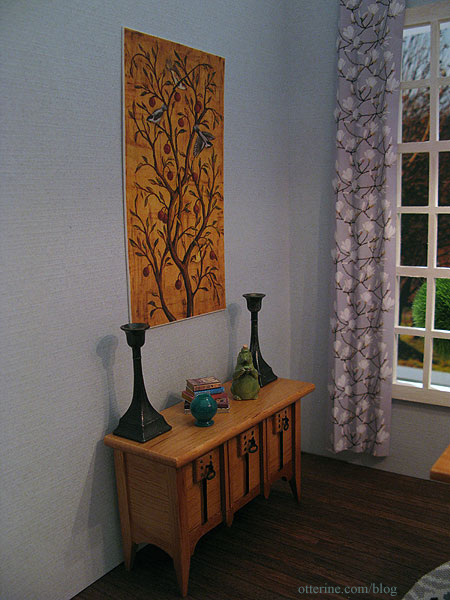
The candlesticks are from Patricia M. Wehmeier Miniatures and the squirrel bottle is by Jane Graber, both purchased at the Bishop Show. The green vase is by C.W. Lubin. I made the books for the Heritage library.
I think this perspective looks like it was taken from atop a flight of stairs.
I loved setting up this scene. There will definitely be more modern minis in my future. :D
Categories: Roomboxes and Mini Scenes
May 29, 2012 | 0 commentsPhotographing minis without a room box
When I post photos of new minis, I don’t usually photograph them in a dollhouse or room box. I do a quick setup on my dining room table.
Here’s my Halloween 2013 scene, for instance. It was set up on the kitchen counter. I used a sheet of unfinished wood flooring, a scrapbook paper sheet clipped to a piece of plywood and held up by a can of paint and miscellaneous miniatures to create the scene. I have a box for balancing the camera in low light for the nighttime photos and a piece of white foam for diffusing the overhead light in normal lighting conditions.
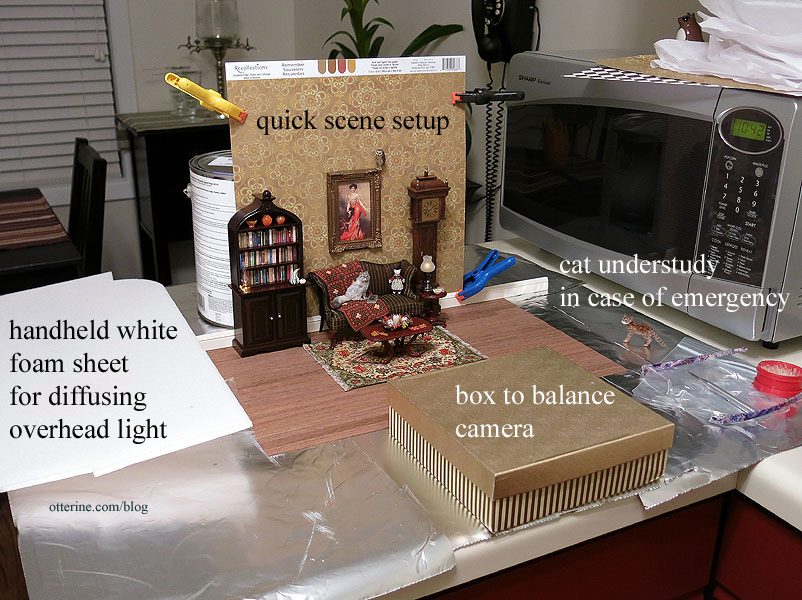
I start with either a small box or a sheet of plywood on top of canned goods from my pantry. High tech all the way! I then put a sheet of unfinished wood flooring on top of the box or plywood. I use another can to hold up either a scrap of foam core board or plywood and place a sheet of scrapbook paper in front of that.

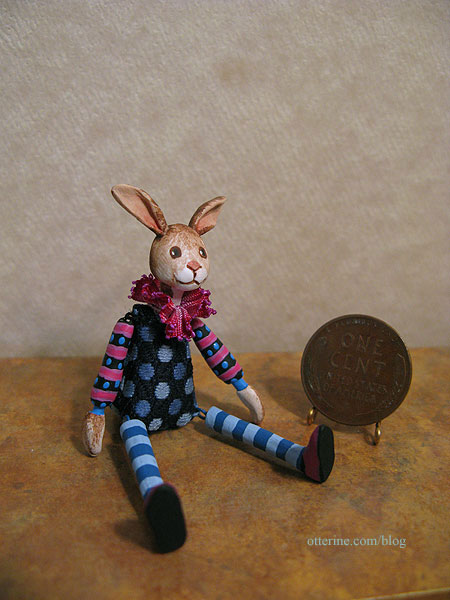
I place a long piece of baseboard trim in front of the wallpaper to finish the “room.” If it’s a table top item, I borrow a display table – usually this EuroMini’s island I painted for the Newport. Along with the item to be photographed, I include my wheat back penny on a wire stand for size reference.
I use the standard macro setting on my Canon PowerShot G9 with its standard lens. If I need to steady my hand, I’ll stack more canned goods to the proper height or use a box in front of the display table. I also use only the overhead lighting of my dining room fixture, which can be adjusted with a dimmer as needed.
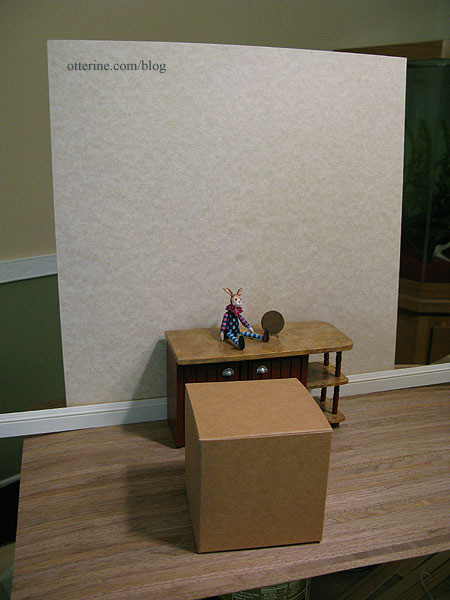
For non-table top items, I just use the scene as is without a display table. In this next photo, I’ve used a piece of finished flooring.

With this kind of quick setup, I can change the wallpaper and baseboard between photos easily. I can also add other props to the display.
If I am in a hurry or just need to photograph one thing, I don’t bother with any of the setup. I grab a clean plywood board, put my item on it, hoist it up in the air so my dining room wall is the backdrop and click the photo! :D
But, even with this on-the-fly setup, I can still put a piece of flooring on the plywood board beforehand.

For the Navajo rug, I place the stitching frame flat on the table, prop up wallpaper on the side and back, and include props.

Categories: Roomboxes and Mini Scenes
May 24, 2012 | 0 comments
NOTE: All content on otterine.com is copyrighted and may not be reproduced in part or in whole. It takes a lot of time and effort to write and photograph for my blog. Please ask permission before reproducing any of my content. (More on copyright)