
The Wishing Fountain – Halloween 2024
Seamus is awaiting your presence (and treat offerings) at The Wishing Fountain.
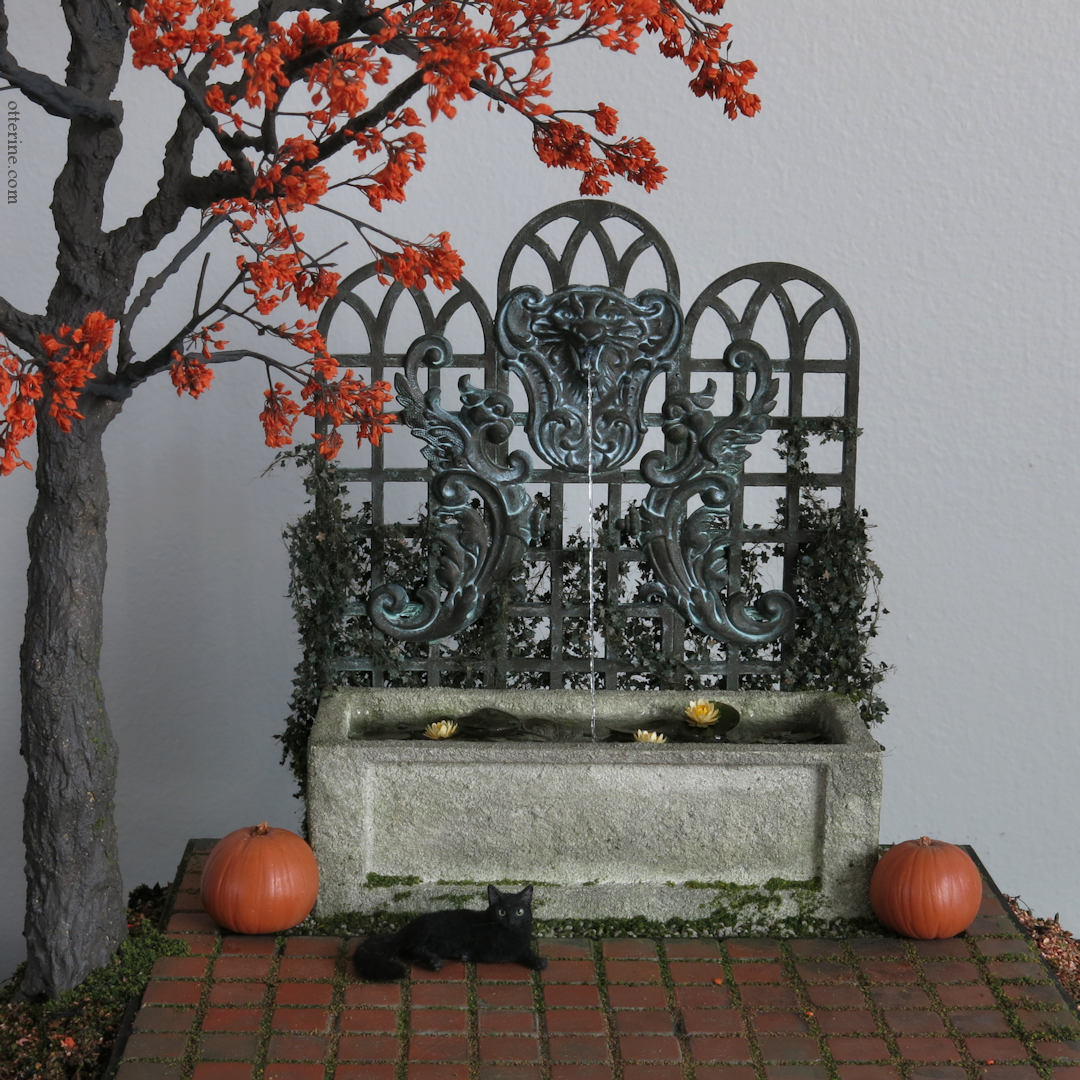
The Wishing Fountain was inspired by my various autumn trips to the East Coast. I’ve visited many historical estates, and these often have lavish gardens with fountains from a bygone era. I envisioned a fountain garden in the middle of a forest, perhaps a remnant of a once vast estate.
I started with the Garden Planter Corner Kit from miniatures.com and used it pretty much to spec.
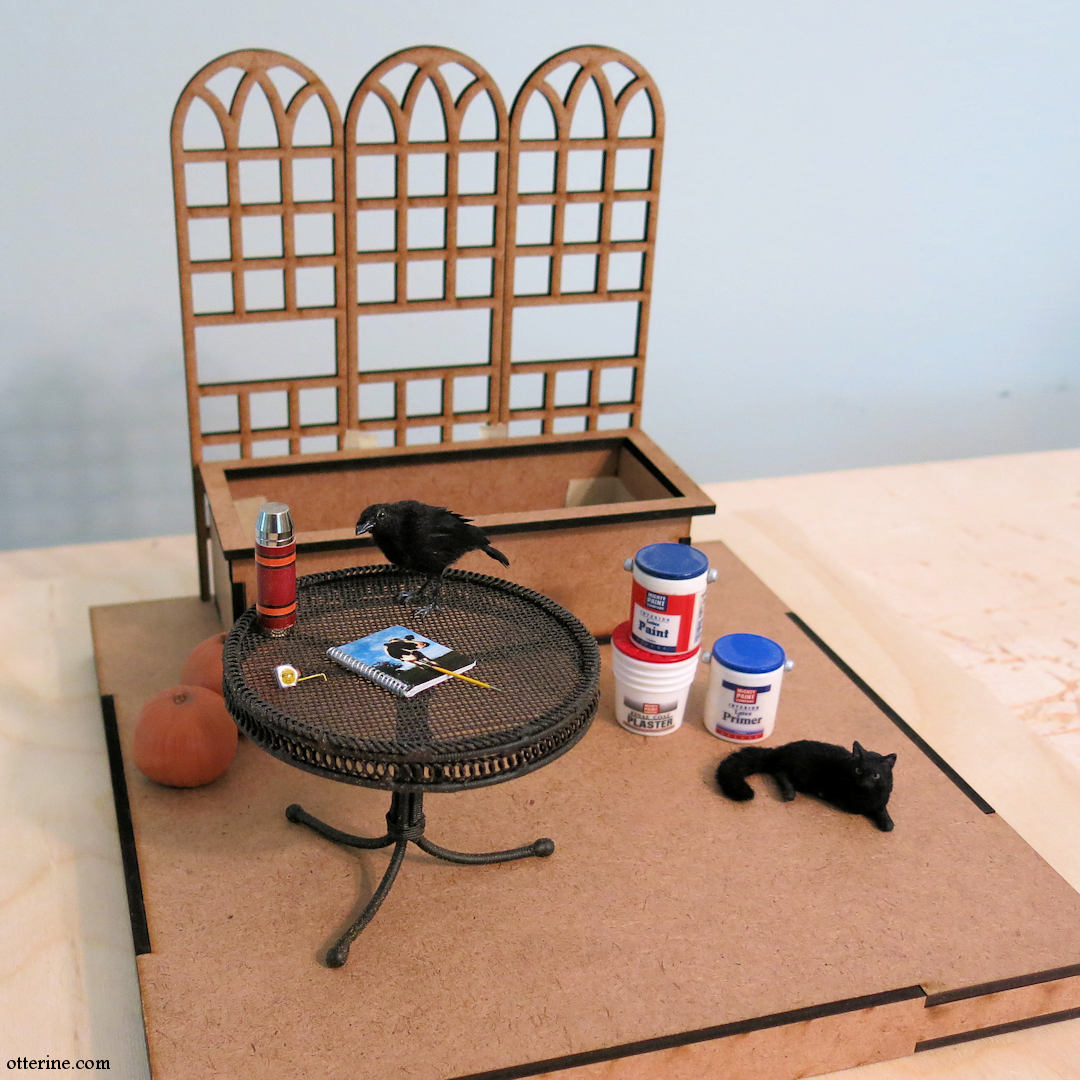
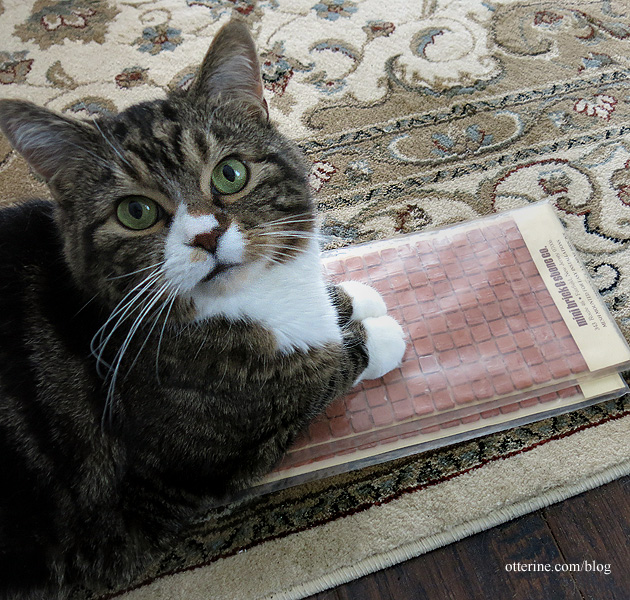
I covered the forward portion and the back sides of the kit base with square patio bricks. These come on mesh backing, so no having to place tiles one at a time; just cut the mesh to size and glue in place. I later added a thin strip wood border around the tiles to finish the edges.
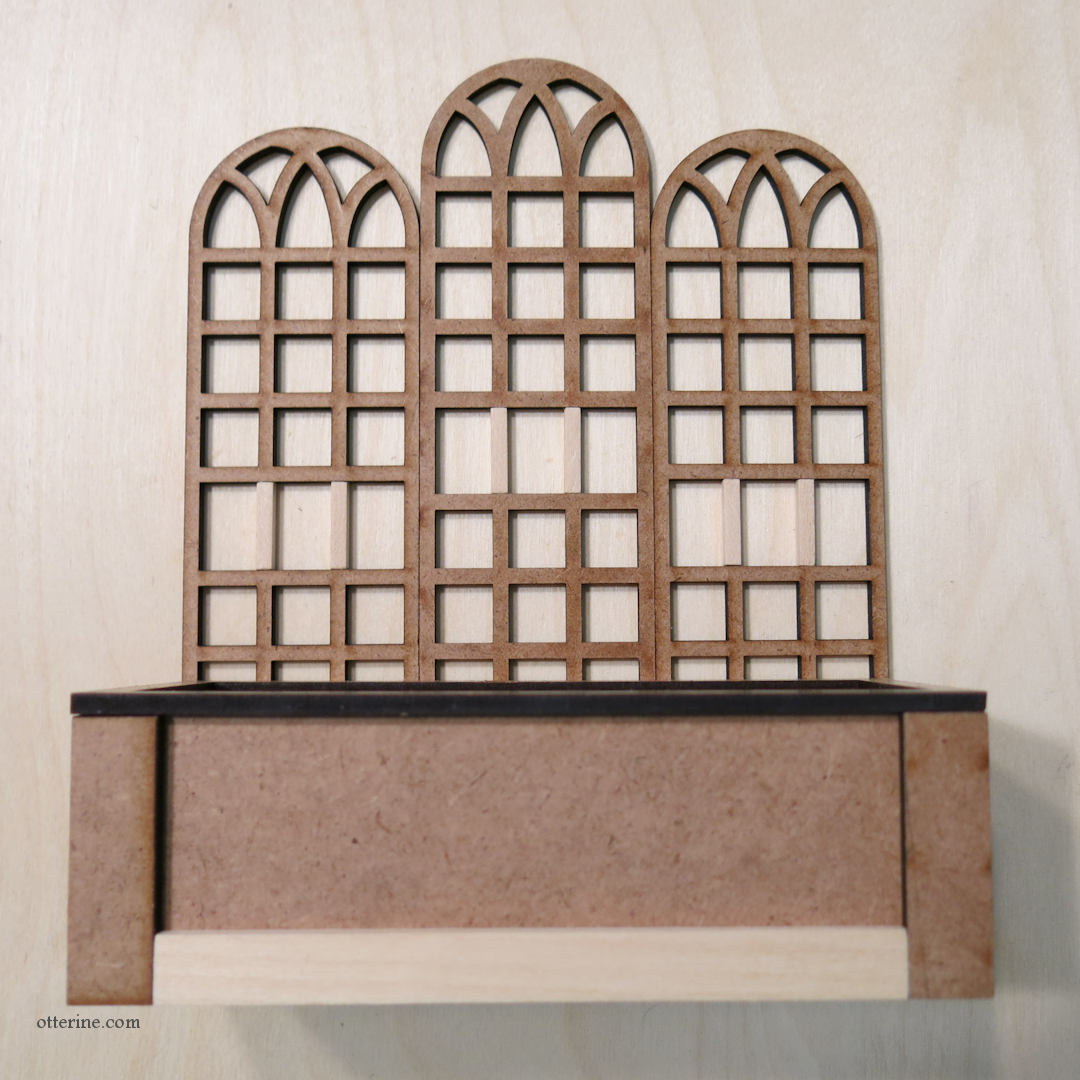
To add visual interest to the trellis, I glued the arches together with the middle section raised slightly. I aligned the grid lines so it would look planned and added strip wood to fill in the “holes” so it would look uniform overall. For the planter, I added additional wood strips around the base to add visual weight to the bottom.
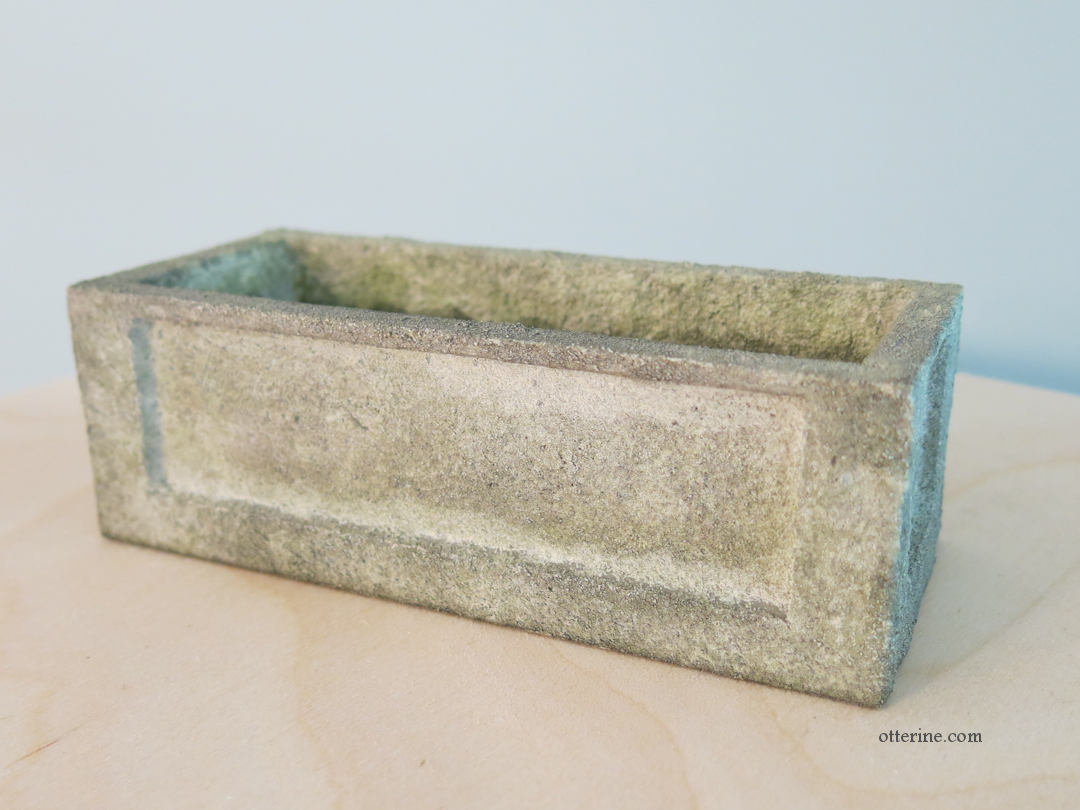
Since I planned to turn the planter into a basin, I covered the inside and outside with stucco patch. I left the back uncovered and just painted it to match the coloration of the front and inside. I needed the back flat to glue securely to the trellis. I glued aquarium gravel at the bottom since many real life examples I found had this detailing.
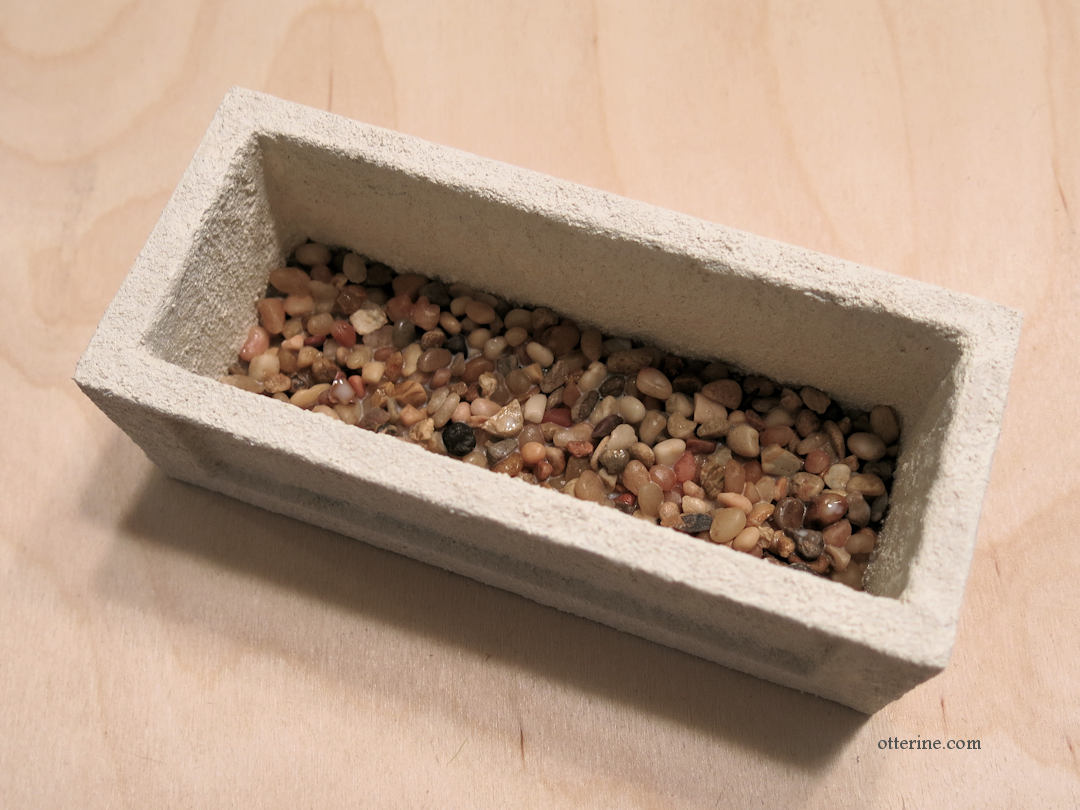
I applied several paint washes in brown and green to create the look of algae, then sealed the interior with a thin layer of white glue once the paint was dry.
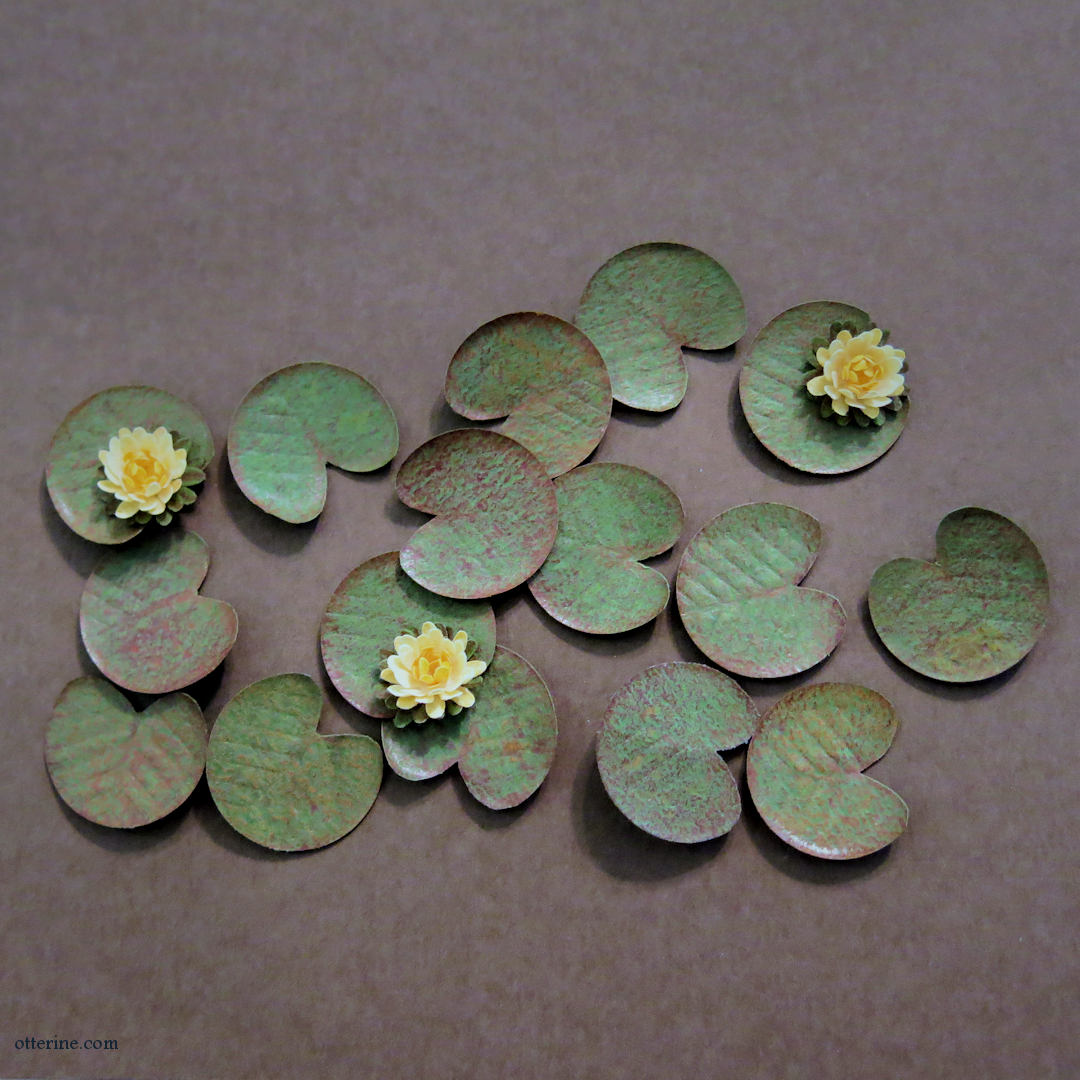
The waterlilies were made from origami paper, paper punches, and colored pencils.
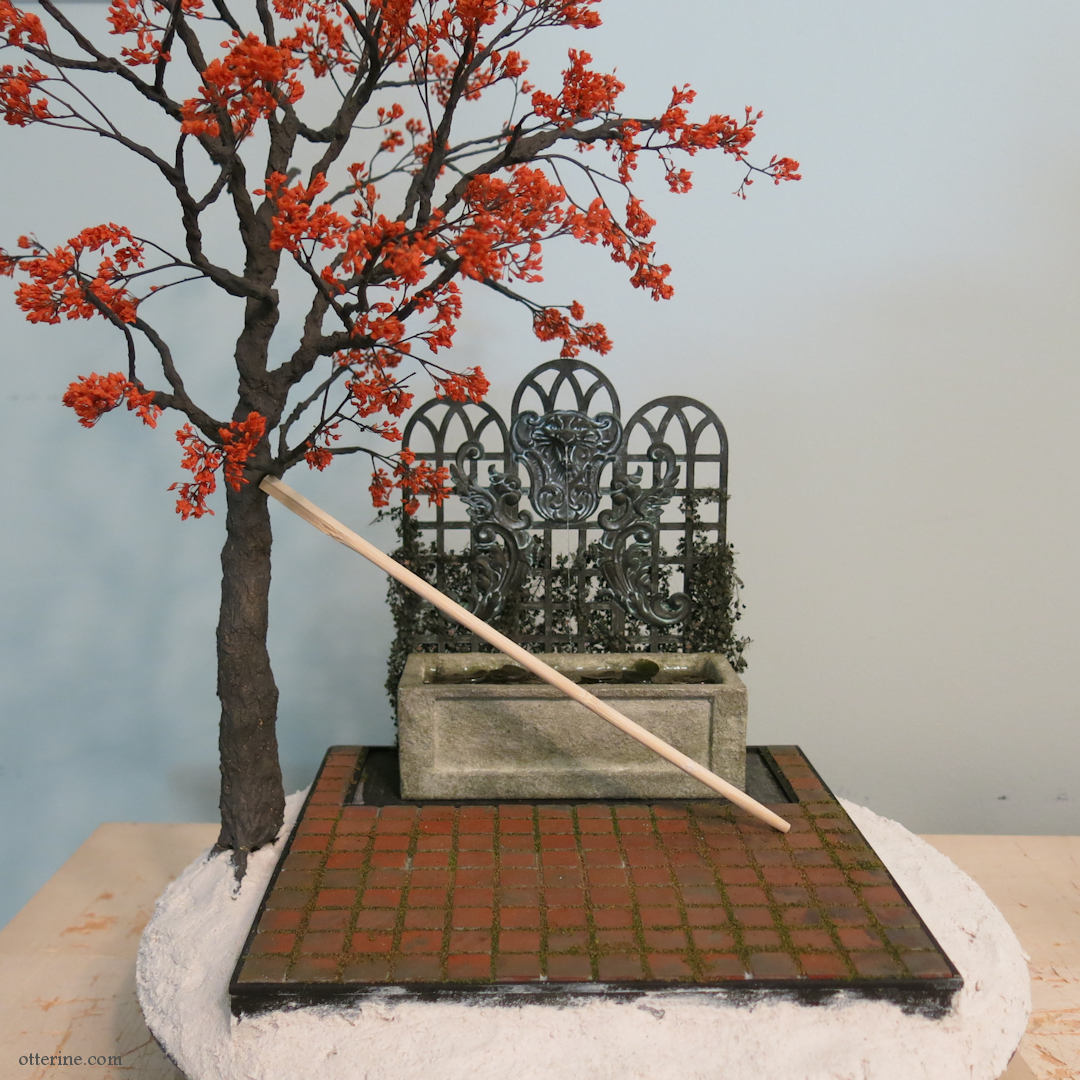
Autumn trees are great on a tight deadline since they take fewer branches to get the point across. I used my standard method of floral wire, Durham’s Water Putty, and candytuft. The tree was planted in stucco patch that I used to build up an uneven surface to serve as the surrounding landscape, and I propped it up with a chopstick while the stucco set. The landscape base is a round wood plaque. Its routed edge surrounded a circular top that was a perfect fit for the square kit base.
The fountain detail was made from brass findings from Birdy’s Design Gallery — a spooky cat and two flourishes — glued to the trellis using epoxy. The assembly was spray painted dark copper then aged with acrylics to achieve a subtle patina.
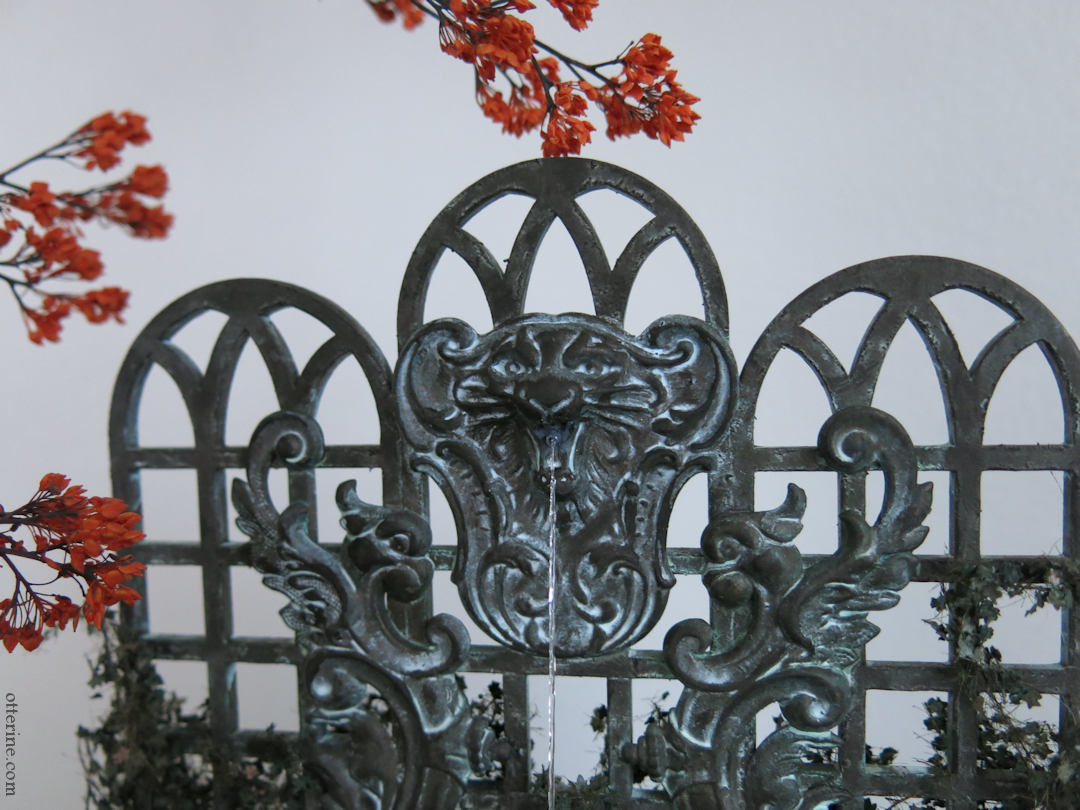
I used Woodland Scenics Deep Pour Water to fill the basin. You can pour up to half an inch in depth, so I needed to do this in two layers. You can add pigments, but the acrylic paint washes I had applied were enough.
Once the first layer cured “enough” at four hours, I planted the waterlily leaves. I probably should have done this a bit sooner than the four hours because it was not easy to pierce the thick resin with a pin to plant the stems. Too soon, and the stems would have fallen over. It’s something to watch more closely next time.
At this point, I also glued a thin transparent thread to serve as the base for the water stream from the cat face to the basin. This was a trial and error process, and I would do things differently next time. More on that below.
Once the leaves were planted, I poured the upper layer of Deep Pour Water. The resin transformed the paper into dark, translucent leaves. As much as I loved the green paper with the subtle aging, this reaction with the resin made them more like the real deal. I then let the resin cure overnight. (The below photo was taken after the water stream was completed.)
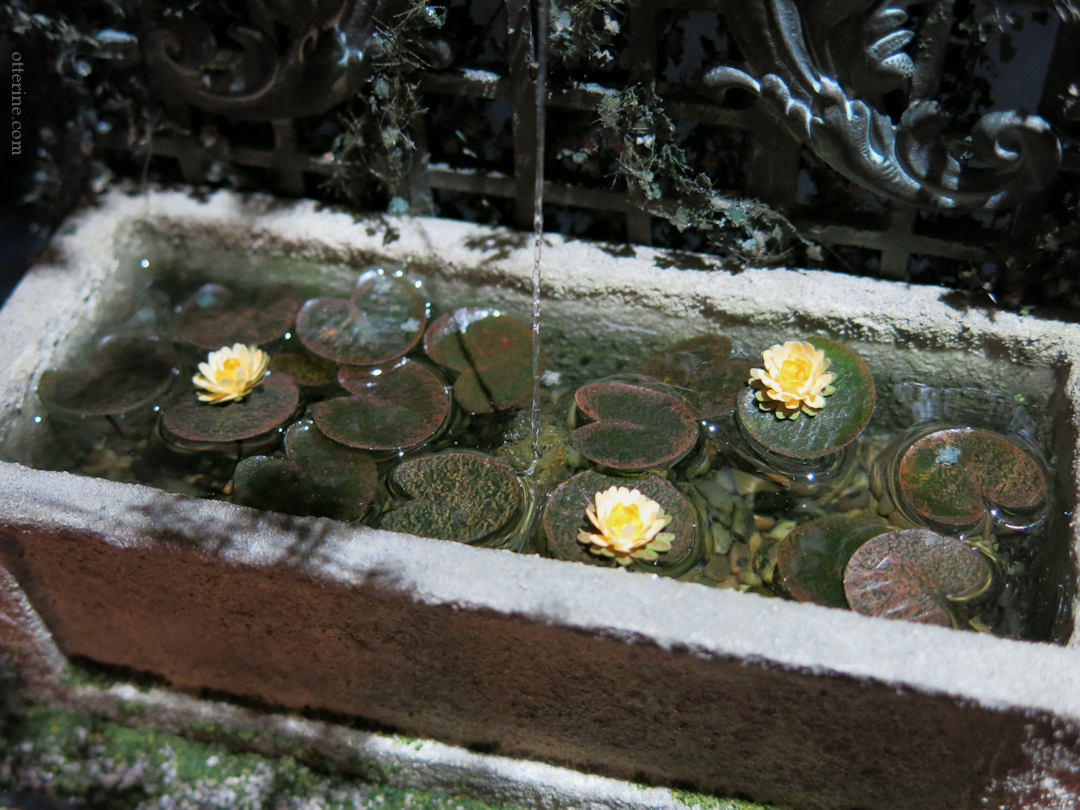
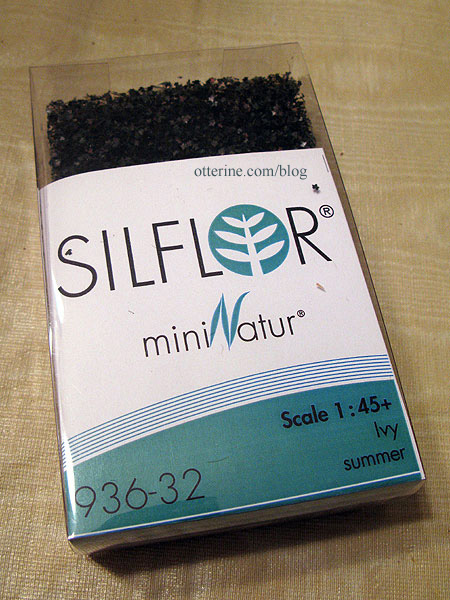
Before finishing the water stream, I added ivy to the back of the trellis. This is O-Scale (1:45) English Ivy from Scenic Express (Silflor Summer Ivy by Mininatur), but it works well in 1:12 scale.
I didn’t want to completely obscure the cat face or flourishes, but it does add a finishing touch. I wrapped some of the strands around the sides and slipped a few through the trellis onto the front surface.
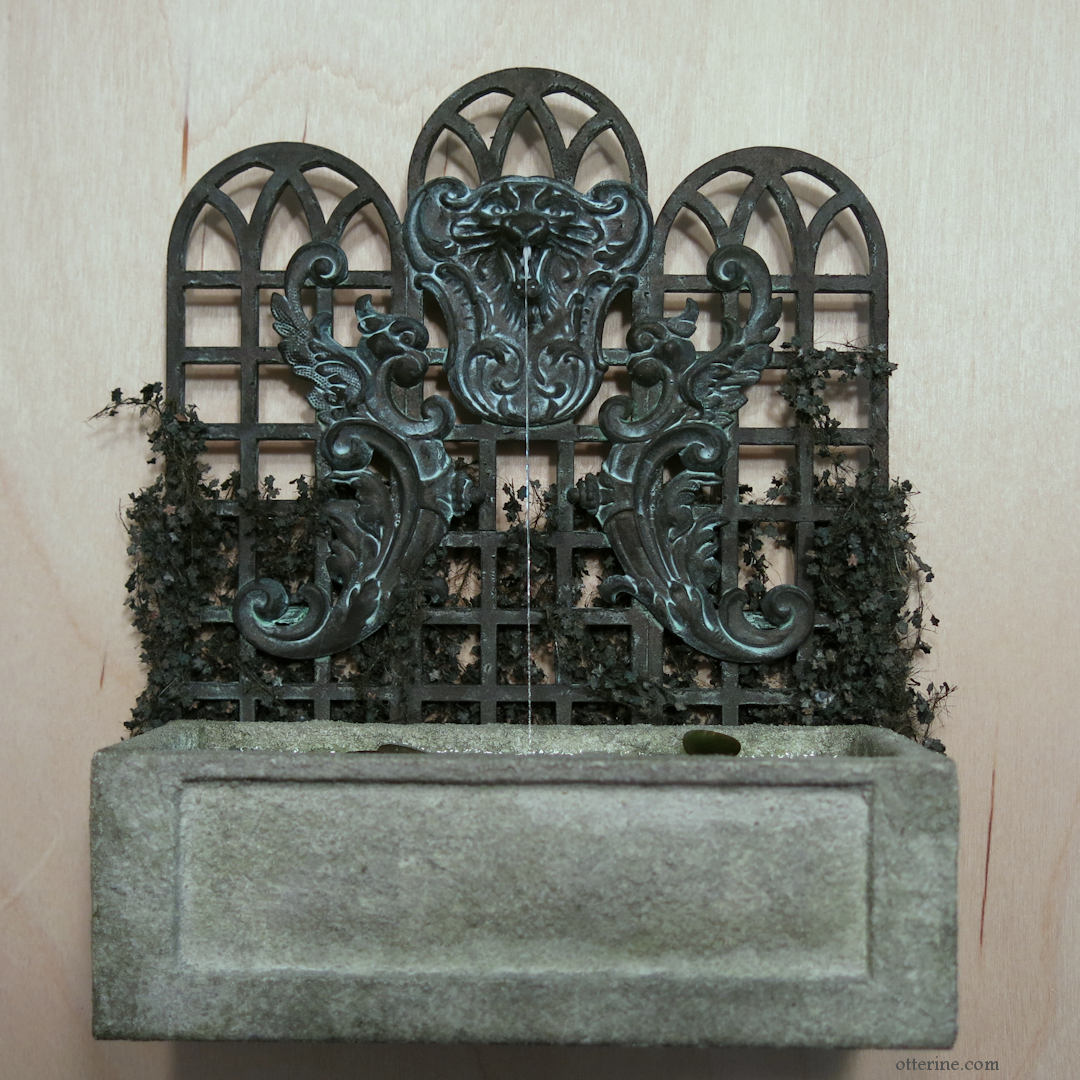
The water stream wasn’t easy, and it’s not terribly durable as it stands. As long as I watch my fingers when handling the build, it should stay intact.
How I did it:
I started with transparent thread (this is way too thin). I originally glued one end to the cat mouth with super glue gel and then glued the other end to the top of the first resin water layer. The super glue clouded the resin surface, though it didn’t mater in the end since it was covered by the upper layer of resin (and the waterlilies blocked the view a bit in the end).
Once I added the Woodland Scenics Water Ripples, the thread began to sag. Since the Water Ripples material stays flexible, it didn’t help with the sag, so I disconnected the thread from the cat mouth to fix the issue. I drilled a hole in the mouth, fitted a bit of aluminum tubing, then glued the thread into the aluminum tube. Once secure, I inserted the tube into the mouth and adjusted the thread for proper tension. No more sag.
I painted the aluminum to match the cat face patina and added more Water Ripples to finish the water stream. It’s as good as it gets from here, and I think it’s pretty convincing.
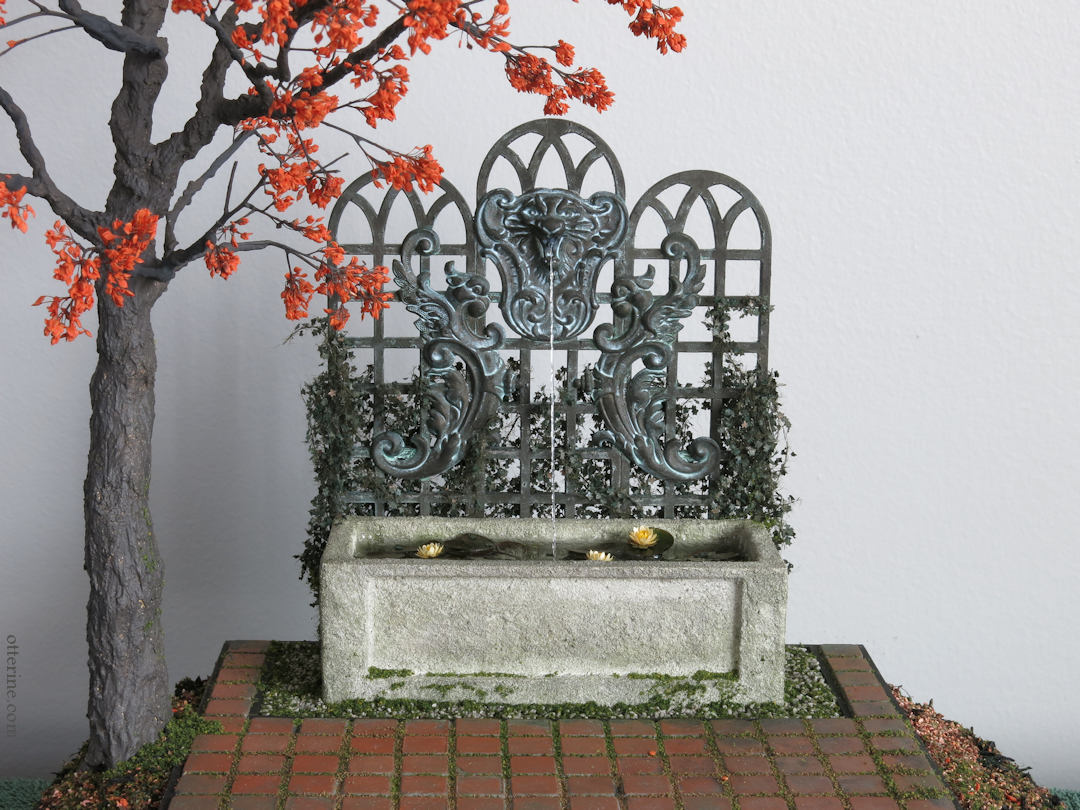
How I would do it from the start:
Instead of transparent thread, I would use 50lb fishing line. It’s more substantial and easier to control. I would also drill the hole and use tubing from the start, leaving the final adjustments and gluing in place to the end as I did in my fix above. All else would remain the same — gluing it into the basin, pouring the Deep Pour Water to bury the bottom of the fishing line and adding Water Ripples to make the stream.
Once the fountain assembly was complete, I glued it to the kit base and added the waterlily flowers. Since the resin was cured, the flowers stayed intact and bright. I filled the ground area around the basin with Woodland Scenics gravel sprinkled with Woodland Scenics foliage. I painted the landscape black brown and then added various Woodland Scenics loose ground cover to mimic a forest floor. All landscaping materials were secured with Scenic Cement.
My entry in the miniatures.com Halloween Challenge features a whimsical ghost dog with a bone from M for Miniatures. I painted the bone instead of leaving it white. The pumpkins were made from polymer clay and borrowed from The Haunted Heritage.
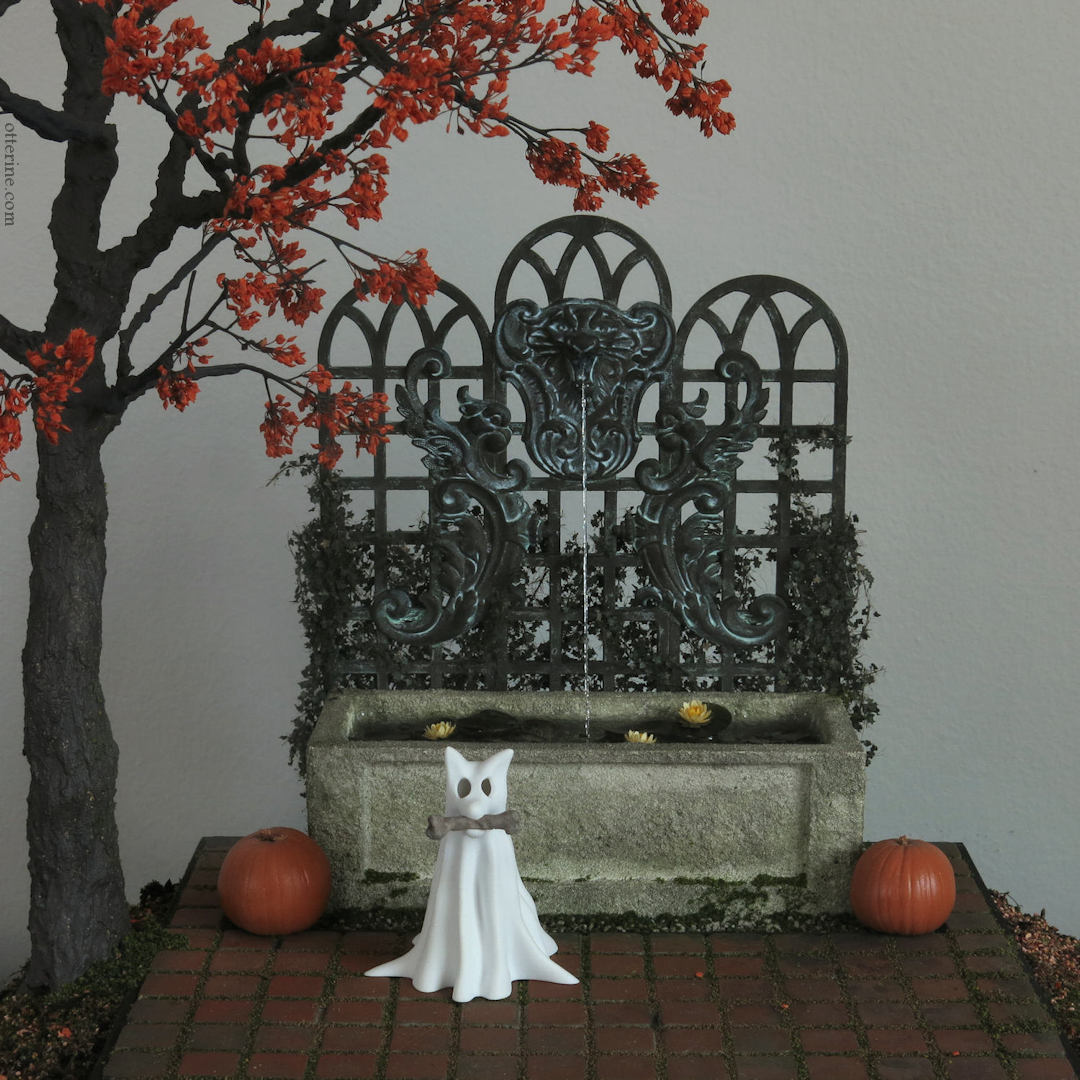
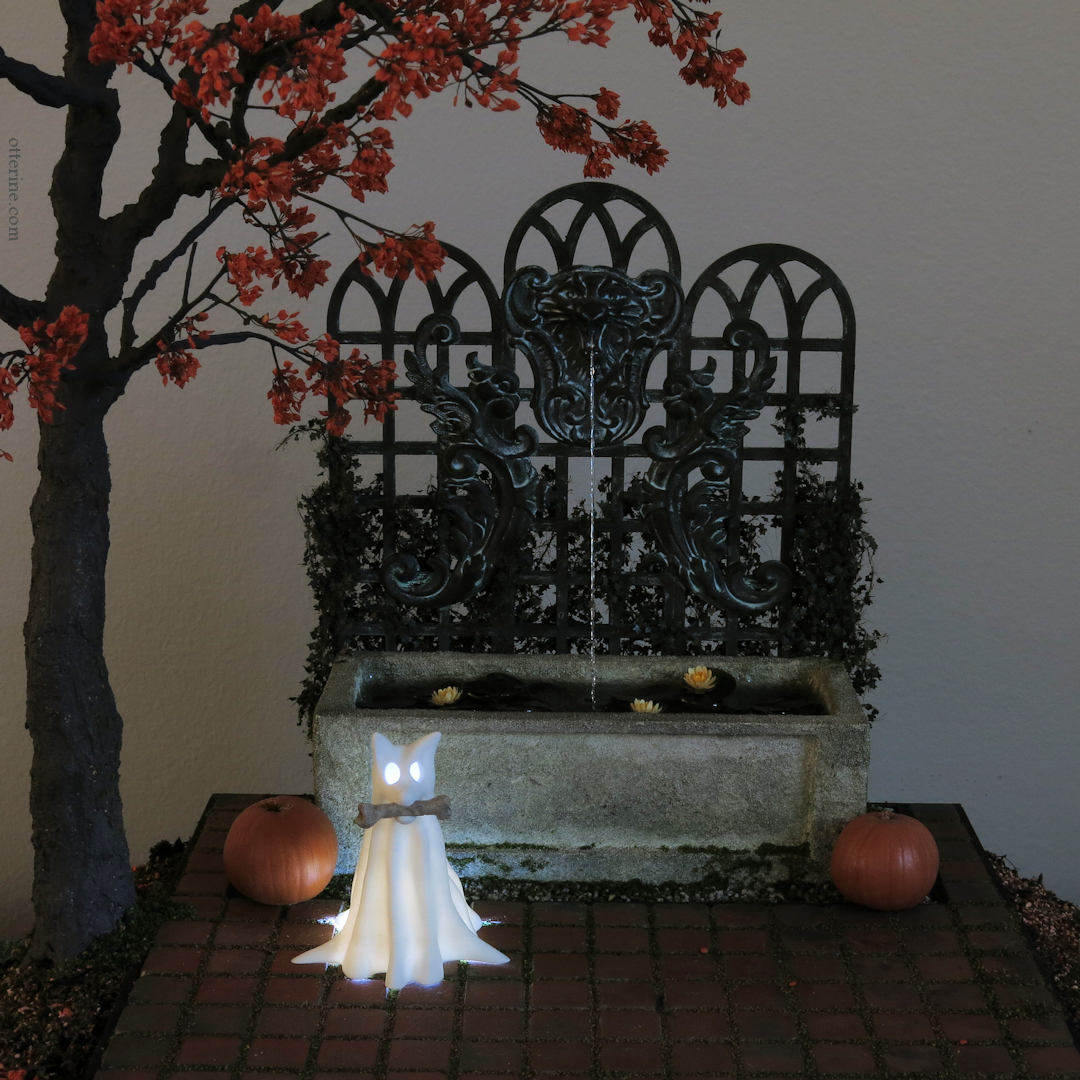
The ghost dog comes with a light, but I rather like it without.
There’s also a cat ghost. :D
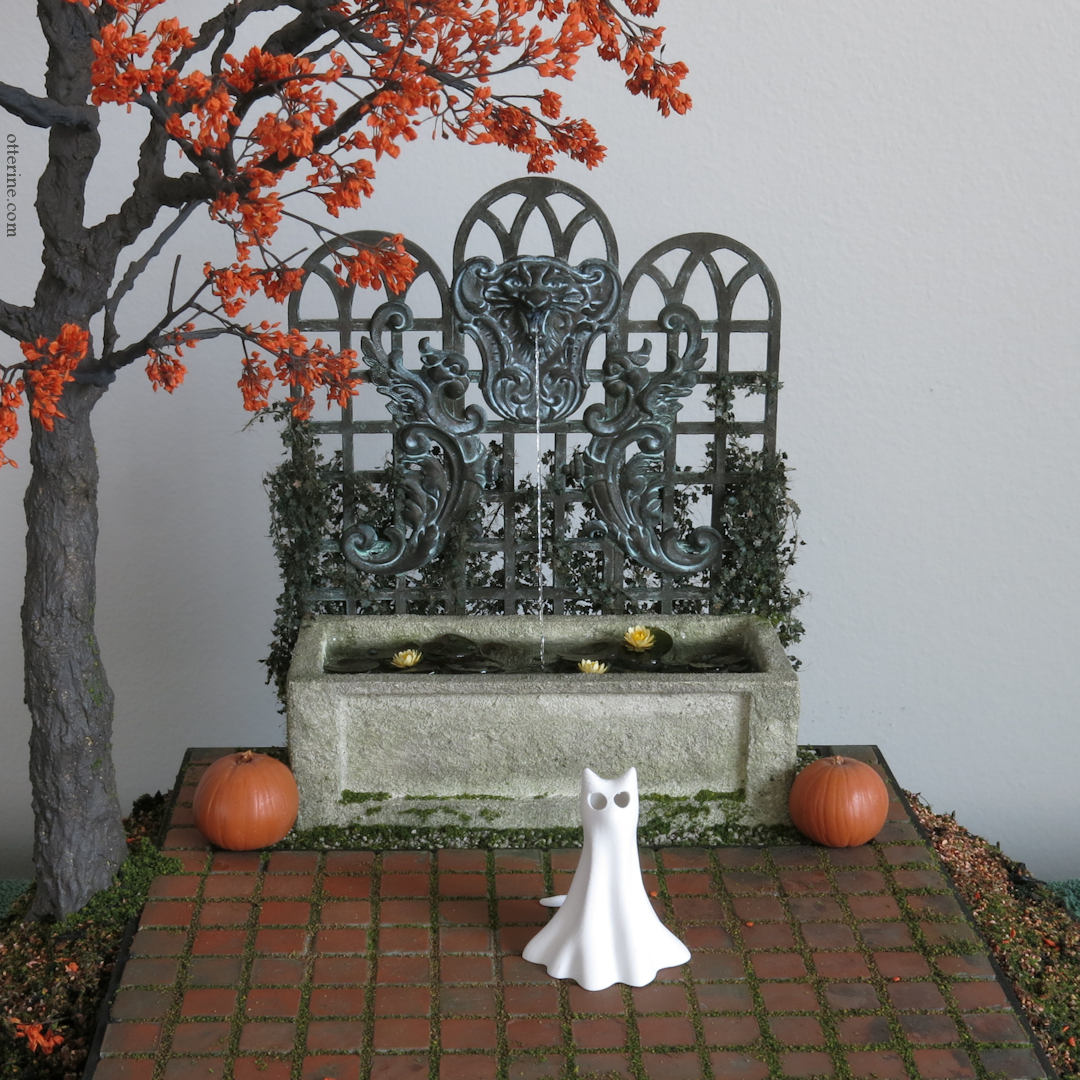
Wishing you all a Happy Halloween!
———-
Note: As an Amazon Associate, I earn from qualifying purchases from the Amazon product links in this post.Categories: Roomboxes and Mini Scenes
October 31, 2024 | 3 commentsHappy New Year 2022
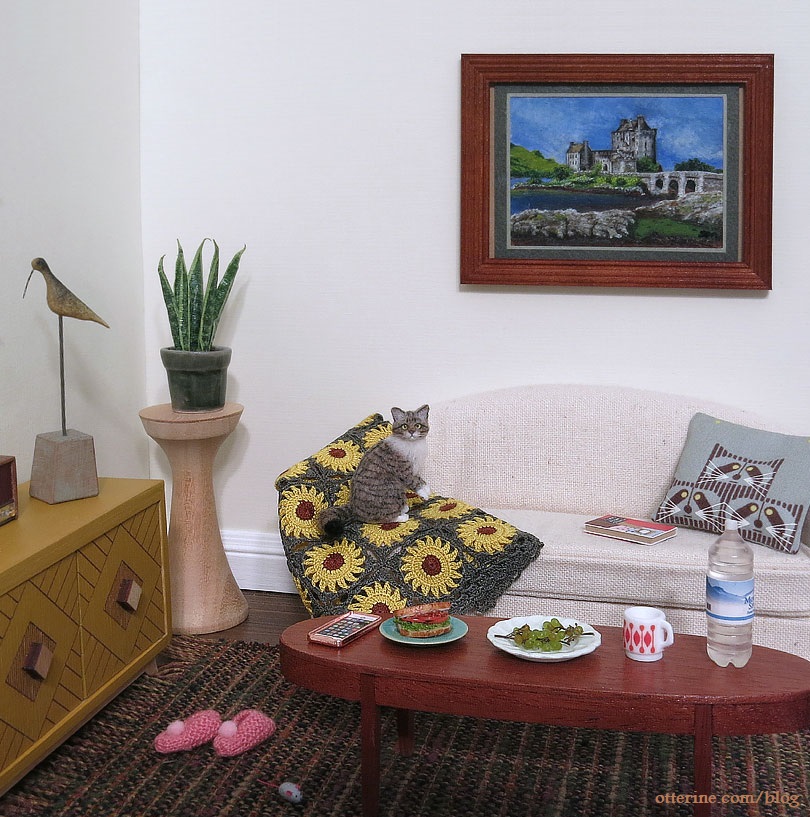
I spent some time over the New Year weekend making a mini scene and cleaning up my workspace for new projects. I’m excited to work on new minis for myself and for sale. :]
—–
Chester the cat by 2014erok; sideboard by Minterior; sunflower blanket by Gweaneth’s Dream; slippers by Freedom Miniatures; mouse toy by A. Smith Arts; bacon sandwich by Sugar Charm Shop; grapes by Rina Vellichor; mug by Woodland Trail Whimsy; water bottle from Shepherd Miniatures; painting by blueprintminiatures; coffee table by minisx2.Categories: Miniatures, Roomboxes and Mini Scenes
January 3, 2022 | 0 commentsA Coral Pink Christmas, part 4
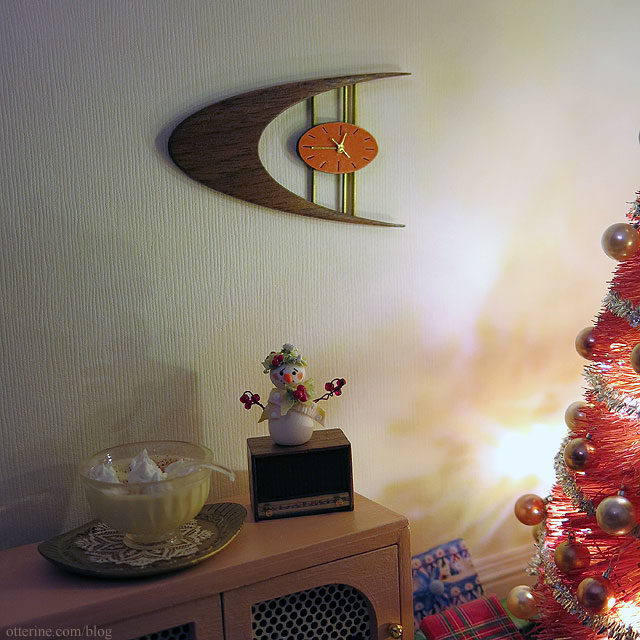
Wishing you a very Merry Coral Pink Christmas! I finished just under the wire.
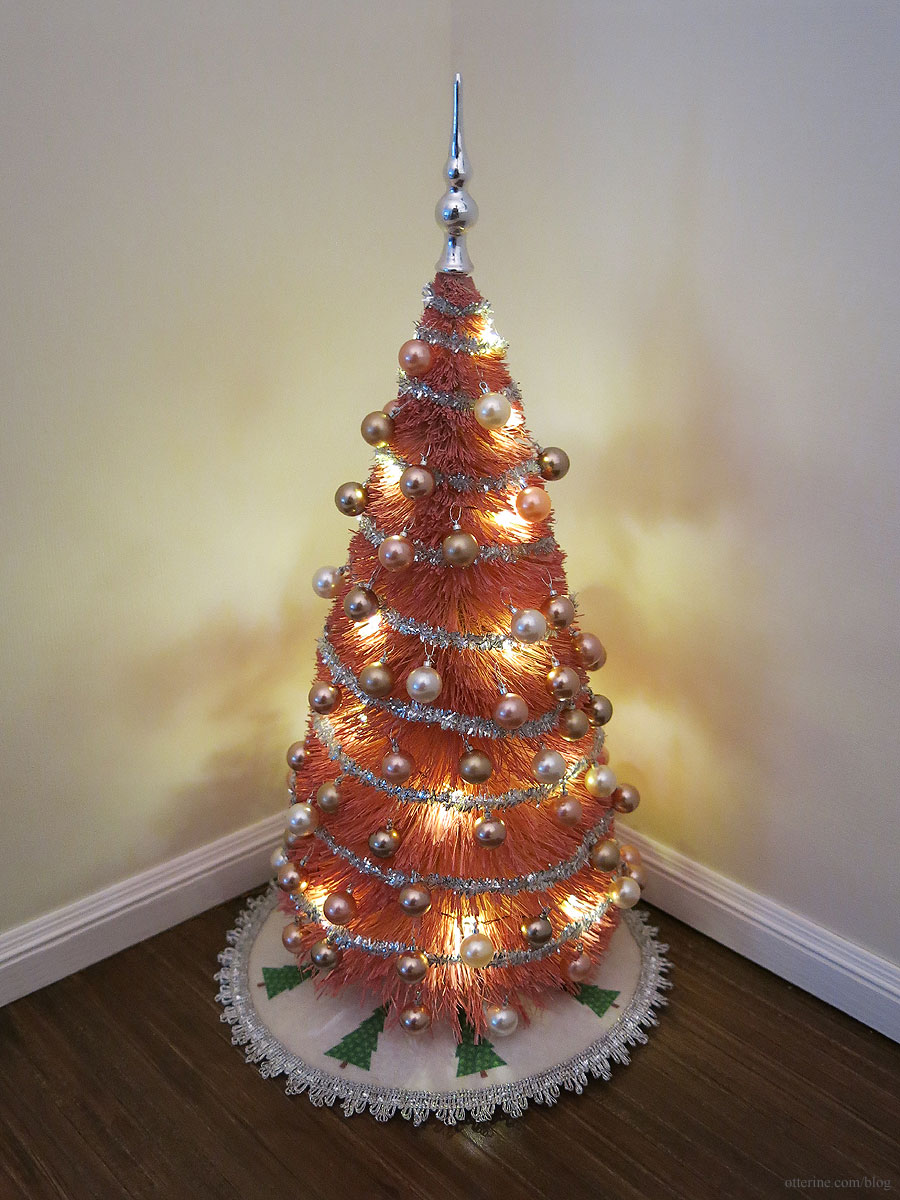
I had so much fun playing and digging through my stash for retro inspired minis! :D
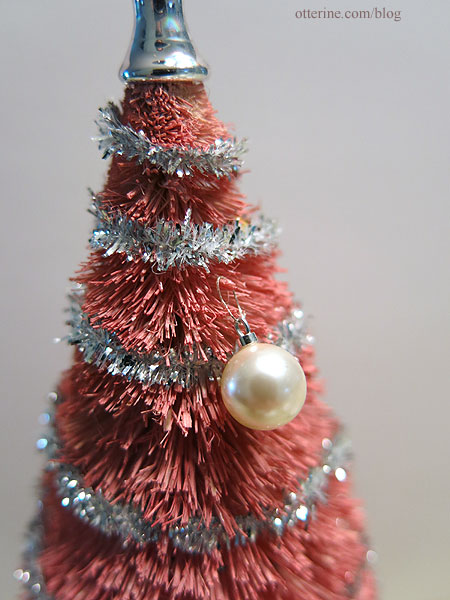
I opted for silver thread from my stash of sewing supplies. For being so fine, the thread is very strong and easy to work with.
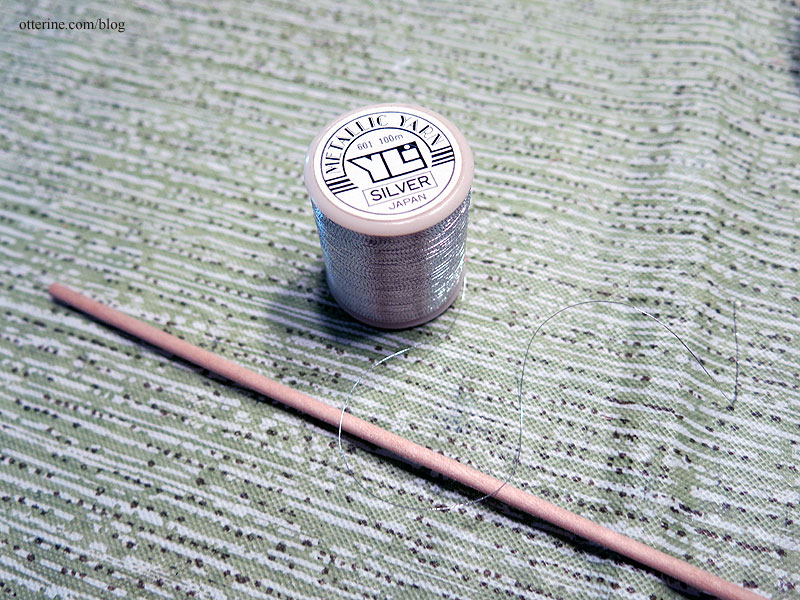
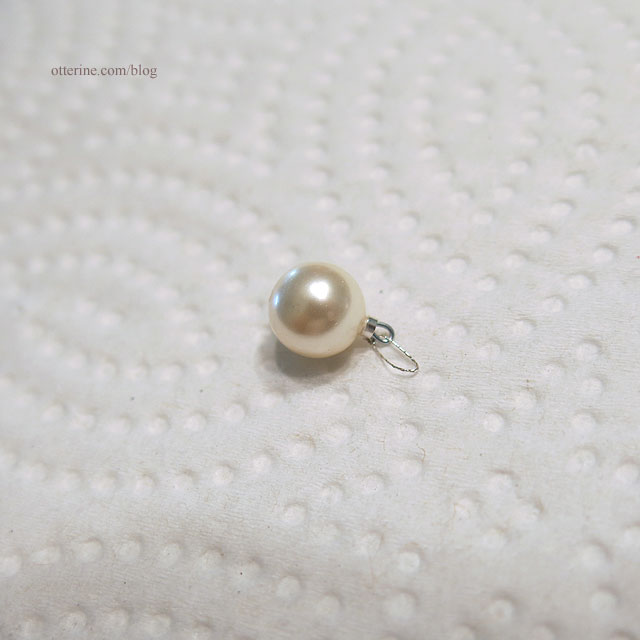
I glued the strings to the tree since the ornament beads are heavy and would not stay put on their own.
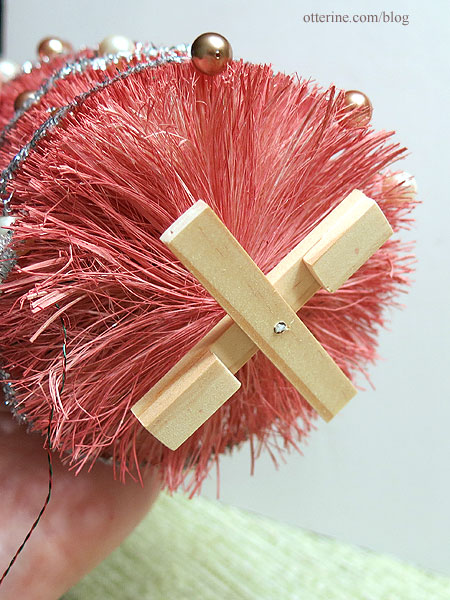
Here’s the new tree base to replace the original wood round. Just some scrap basswood cut to fit and glued to the center wire.
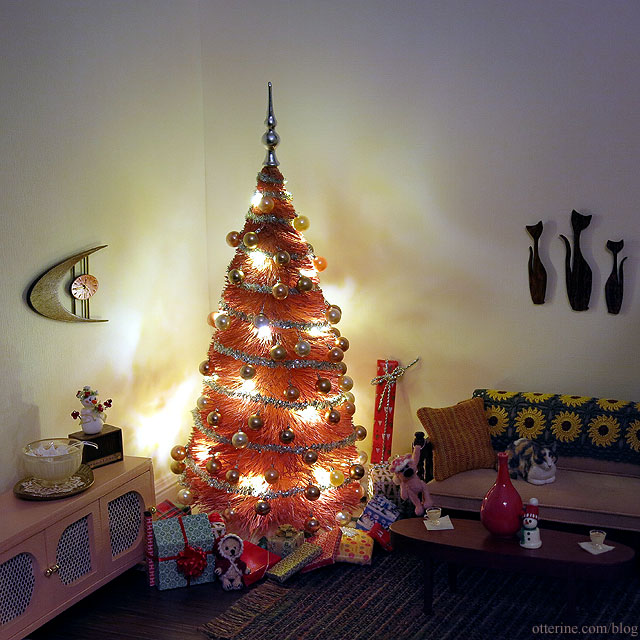
I used a tree skirt and presents from past scenes since I didn’t have time to make something new.
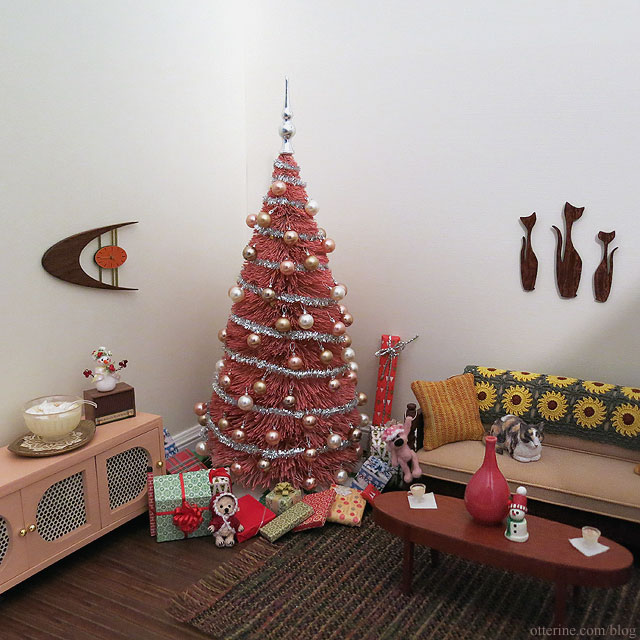
The retro clock (and the wood cats) were made by the talented Cyd of Mod Pod Miniatures.
———
Sideboard from Minterior. Sunflower afghan by Gweaneth’s Dream. Bear in red hoodie by Obscurely Small; pink bear by LugArt Petit. Calico cat by Paizley Paws. Snowman figure by Sherry Moller; plant pot snowman from Just Miniature Scale. Egg nog punch bowl and cups by Sue’s Little Things. Pink vase by Lorie Marsh. Doily from Stewart Dollhouse Creations. Coffee table by minisx2. Wrapped dollhouse by A Pocket Full of Wishes.Categories: Miniatures, Roomboxes and Mini Scenes
December 25, 2021 | 0 commentsHappy Halloween 2021!
Lucius and Igraine wish you a very Happy Halloween from the Haunted Heritage.
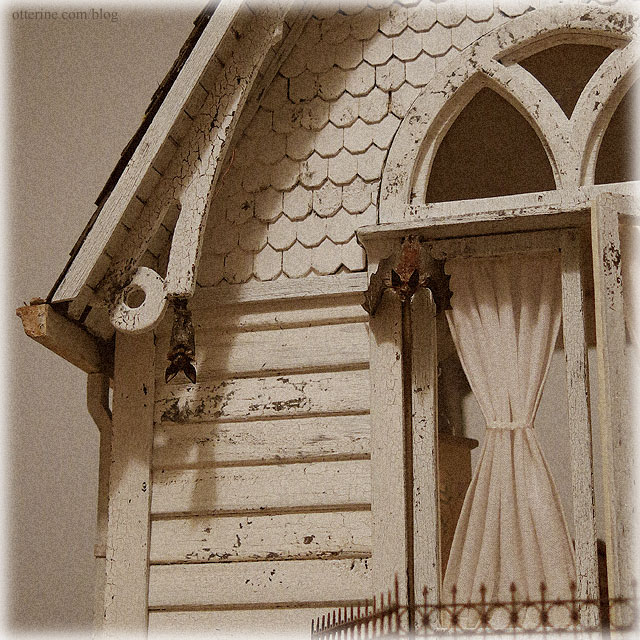
Grandma had best close that window unless she wants additional guests. :D
Categories: Roomboxes and Mini Scenes
October 31, 2021 | 0 commentsSewing in mini
I entered this mini room box in a real life size sewing contest. I didn’t win, but it was a lot of fun putting the scene together.
——
Linus is the Fabricworm mascot, and everyone entering had to use this fabric for their entry. I’ve made a set of building block pillows to feature Linus and his inchworm form (yep, these are available in my etsy shop).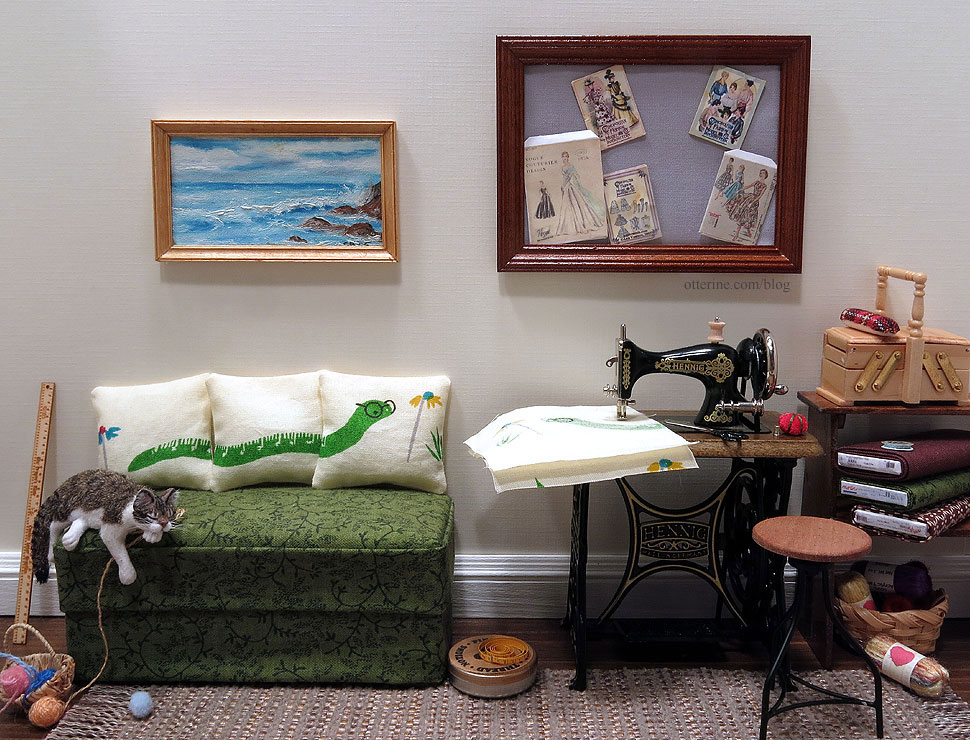
Finn is napping after wearing himself out with the yarn.

The Bodo Hennig sewing machine is one of my favorite minis. You can lift the presser foot to place fabric underneath.

I didn’t get my high powered readers out to see if I could thread it, but I wouldn’t doubt it. Maybe next time….

A relatively recent acquisition are these pinking shears by Frank Matter. They open on a tiny hinge pin.

They have chipped paint just like my real life originals, which is a detail I adore.

Look at those tiny teeth!

Finn was made by JMDS, and I made the divan from a pattern in Dolls’ House Furniture: Easy-to-make projects in 1/12 scale by Freida Gray.

Jennifer at aMusingMiniatures custom made the seam roll for me. It’s simply perfect, just like the real deal! I made the fabric bolts and purchased the thimble and needles from Vilia Miniatures at the local shows.

The fabric also has some nice close-ups of Linus, so I’ve made those as well. :]


Additional notes: I believe the sea painting is from Barbara, likely an estate mini; it is signed S Bedu 2005. I made the fabric bulletin board and most of the patterns displayed. The adjustable stool is by Boutique Miniatures, and the rug is from Iklectic Kollectibles. The fish pot is by Barbara Begley Miniature Gardens. I made the snake plant and sofa.
Categories: Roomboxes and Mini Scenes
December 4, 2018 | 0 commentsHappy New Year – on to 2017!!!
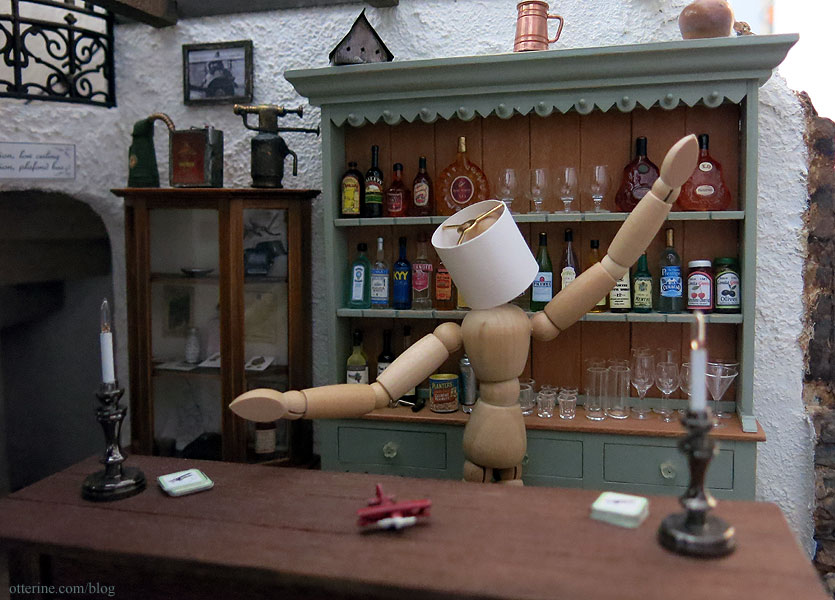
Coming to you live from The Aero Squadron Lounge! Wishing you all a safe and Happy New Year! :D It’s ok to get a little crazy, just be sure to drink plenty of water. Cheers!!!
Categories: Roomboxes and Mini Scenes
December 31, 2016 | 0 commentsMerry Christmas 2016
Wishing everyone a wonderful Christmas!!

Jack and Zero are all in the holiday spirit decorating the tree and sorting out the presents.

Zero has one he’s eager to open. :D

Jack is a bendy doll and Zero is a wind up toy, both of which I’ve had for a long time. I made the presents and the wrapping paper rolls. The tree is from The Newport. It was a bare Lemax tree that I lighted and decorated with mini bulbs, star garland and a tree skirt. The wallpaper is Ornate Quatrefoil by The Paper Studio. The rug is from Iklectic Kollectibles.
Categories: Roomboxes and Mini Scenes
December 25, 2016 | 0 commentsMom’s Kitchen
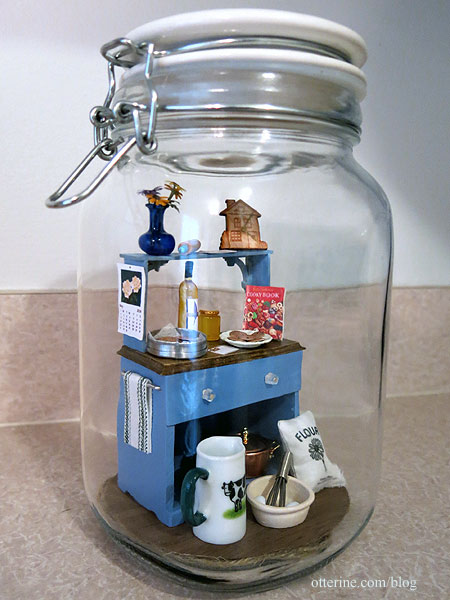
I made mom a gift for Mother’s Day, though I was late in the offering. :D I got the idea from a local mini group where they made a little kitchen setting in a jar.
I went to Hobby Lobby and bought a well-made, locking jar. It was pricey for a plain glass jar, but I had my 40% off coupon. :D

I had scraps of wood flooring, so I cut a piece to fit the bottom. I lined it with black foam core board for stability. It is held in place with glue dots.

But, the jar had a bump in the bottom that made the flooring unstable. After some brainstorming, I decided to add a coil of rope in the recess to level the base. It goes well with the country kitchen theme and disguises the foam core circle.

The hutch base is made from a House of Miniatures Hutch Cabinet that was missing the drawer pieces. I made a new false drawer front but left the doors off so I could display more minis. I built the hutch top from strip wood along with some laser cut brackets to add some interest. Mom likes blue, so I chose Folk Art French Blue. I added a towel bar from ELF Miniatures and jewelry finding hardware.

The plates, canning jars, vase and cooking set are Hobby Lobby purchased miniatures.

I printed a new cover to make a Betty Crocker Cooky Book, some recipe cards and a wall calendar to add a date to the project.

I printed a wine label for a bottle blank and made chocolate chip cookies from a tutorial by Sugar Charm Shop. I must admit, they do look like the real deal. nom nom nom! :D

I searched my minis stash for other items to add – cow pitcher from The Dolls House Emporium, tea pot, rolling pin from Honey and Bee, clock from The Dolls House Mall, and copper pot. I also added one of my flour sacks and made Bonnie Lavish wildflowers for the vase.

Everything is glued in place.

Since the glass glares a bit, here is a photo of the full setup outside of the jar.

I love how it turned out.

And, so did mom! :D
I needed this small project to get my juices flowing again. :D
Categories: Roomboxes and Mini Scenes
May 13, 2016 | 0 commentsA quiet little Christmas
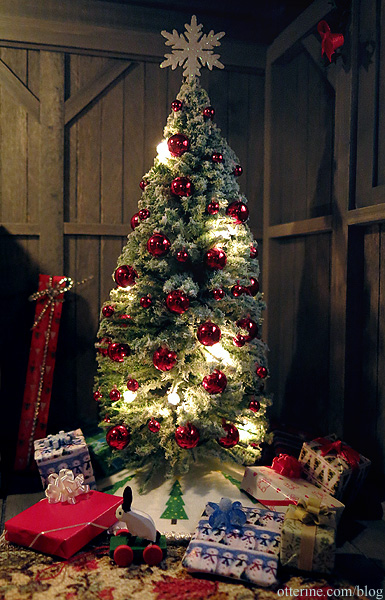
I’ve set up a mini scene in the barn of Milo Valley Farm. The plain tree is by Lemax bought from Michaels. I decorated it with battery operated lights and small ornaments cut from a miniature garland and glued on one by one.
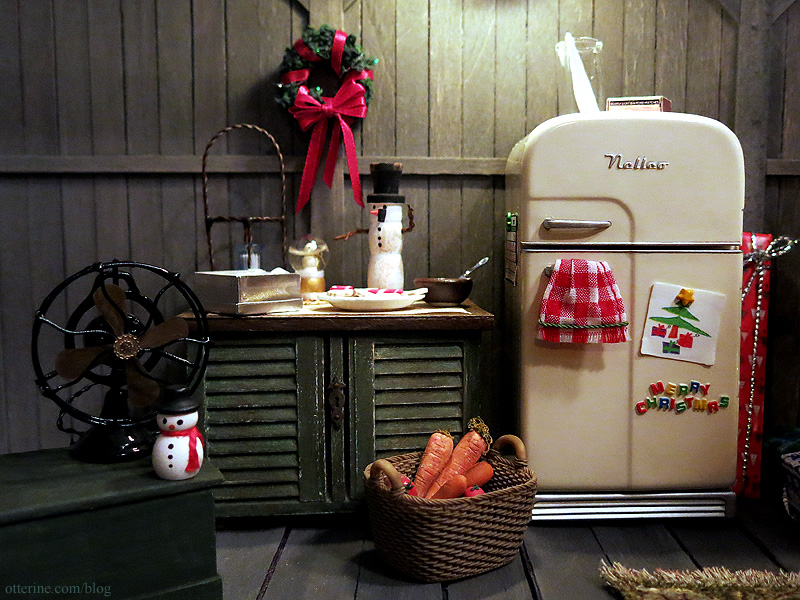
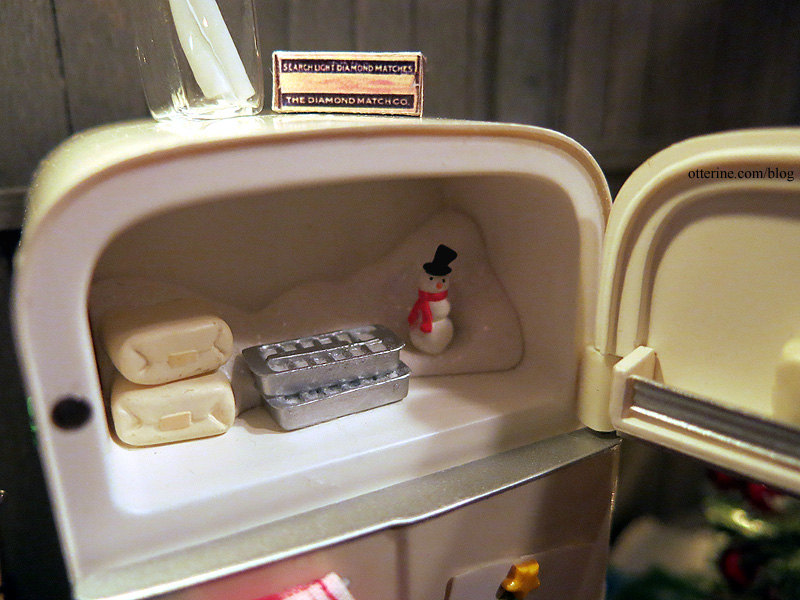
The refrigerator is an old Hallmark ornament that is battery operated.
Some goodies in there for sure! The only thing it was lacking was cheese, so I added a mini from Debora.
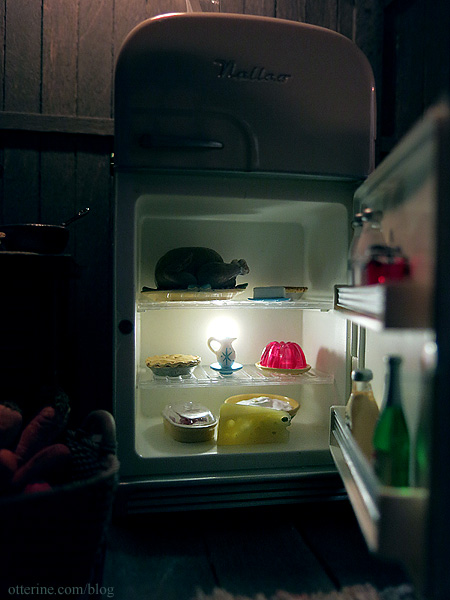
One of the snowmen wasn’t feeling well, so he took refuge in the freezer for a bit. haaaaaaaaa! (This is an actual detail of the ornament.)
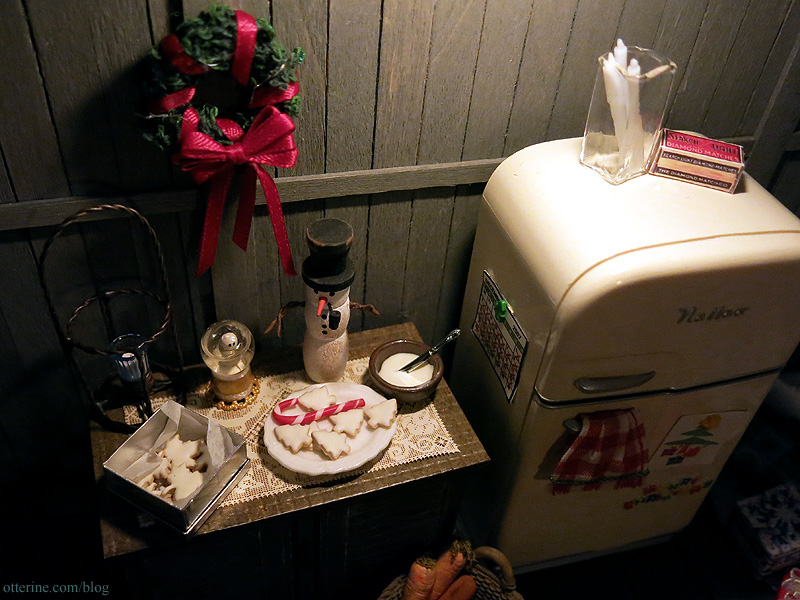
Cookies have been made for Santa (well, to share with Santa).
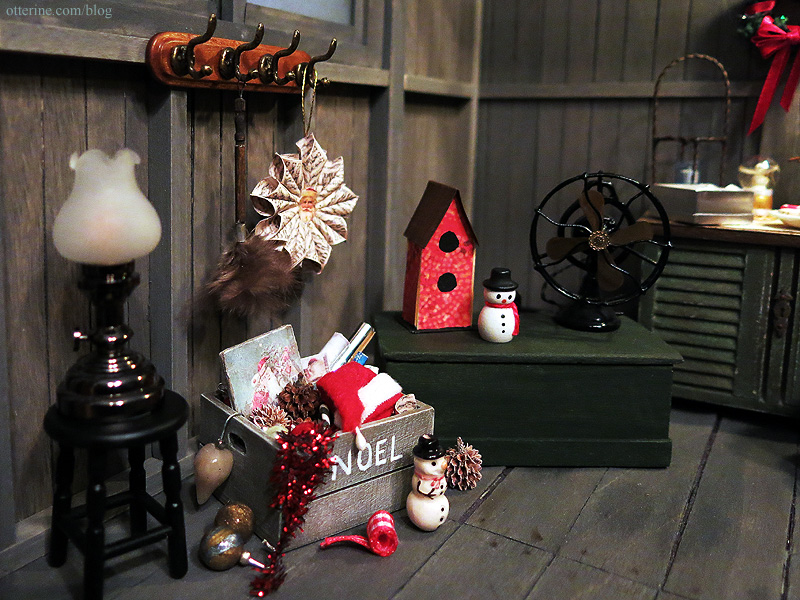
There are still decorations left over.
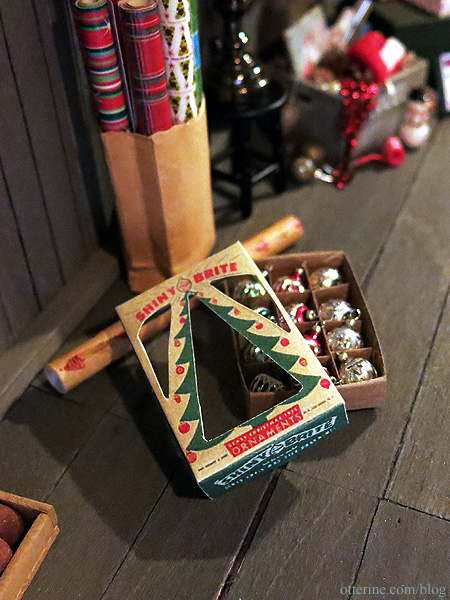
April made the box of vintage ornaments (and snowman snow globe on the cookie table).
The mice are a gift from my mom, made by Rustles from the Meadow.
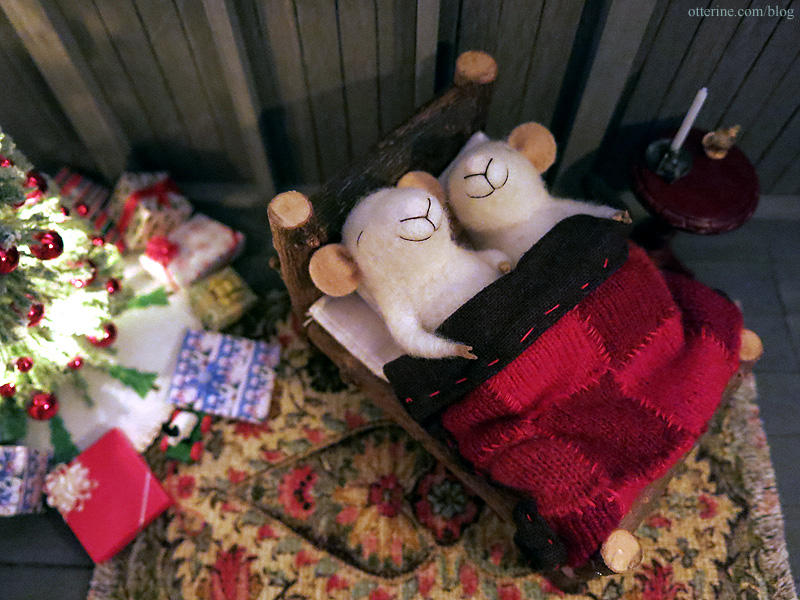
They seem to be having wonderful Christmas dreams.
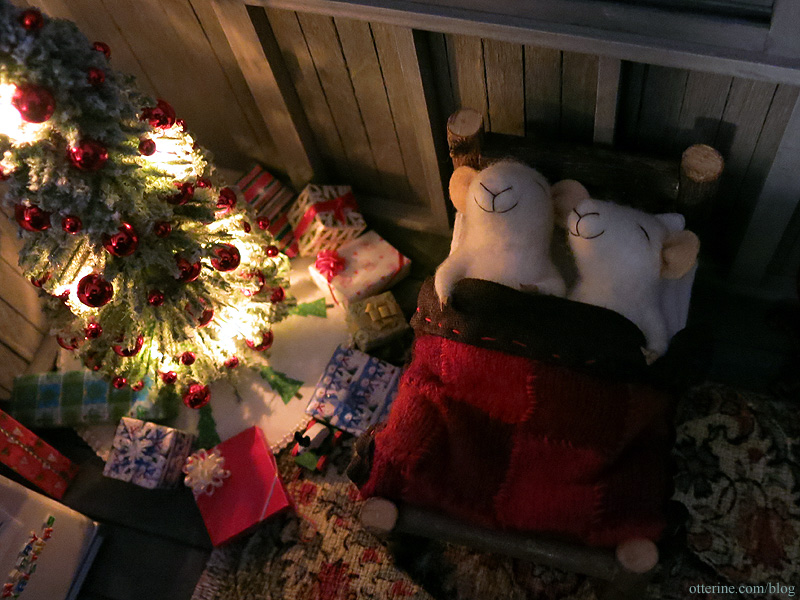
Wishing you all the best for the holidays and in the coming New Year! Merry Christmas!!! :D
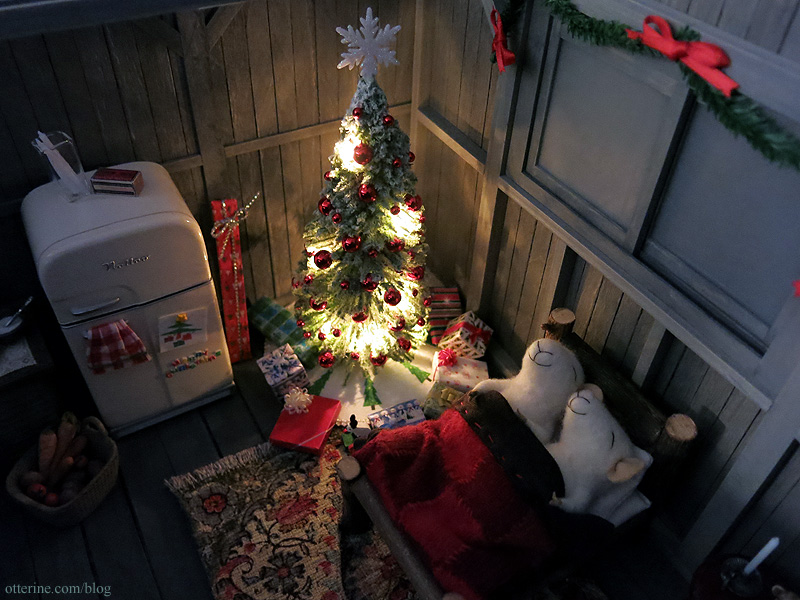
——-
Box of Christmas goodies from M Carmen; glittered ornaments from Mini Fanaticus. Lyssa sent me the veggies, wreath and birdhouse. Vintage fan by The Kummerows. Tall primitive snowman from Barb’s Corner; snowman on the chest from Patricia Wehmeier Miniatures. Serving platter from Greenhouse Miniatures. Lamp, resin basket and coat rack from HBS. Bespaq side table, bird statue by Jane Graber. Rug from Dales Dreams, doily from Stewart Dollhouse Creations. Rabbit pull toy from D’s Miniatures; matches from Wright Guide Miniatures; votive holder from A Pocket Full of Wishes; shutter table from Karen Aird Miniatures.
I made the cookies, wrapping paper, some of the wrapped gifts (some purchased), bowl of icing, Chrysnbon stool, garland, tree skirt, sea chest (in progress), and feather duster.
Categories: Roomboxes and Mini Scenes
December 24, 2015 | 0 commentsHappy Halloween 2015
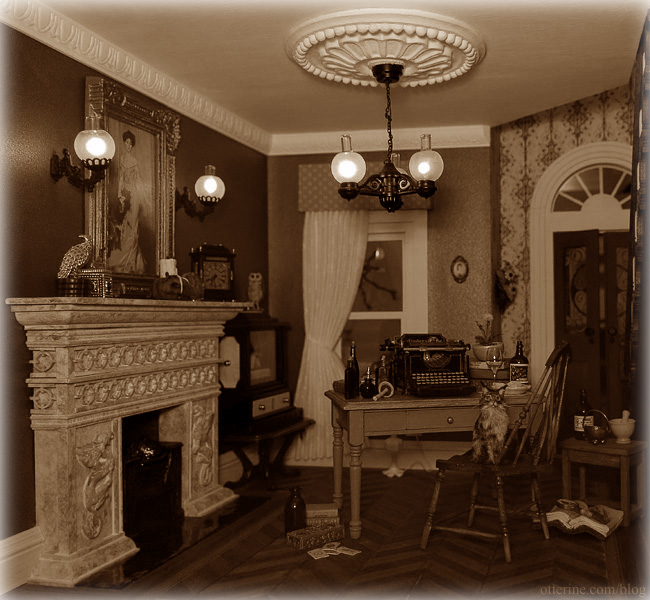
I missed Halloween with the renovation and move last year, so I wasn’t about to let it go this year! :D I’ve set up grandma’s fine parlor for some fun. The dollhouse room has poor lighting at night, so I tried some fancy flash covering work and other tricks of PhotoShop.
I like this photo because the lighting makes it look like a sound stage for a play before the lights go down at curtain time!
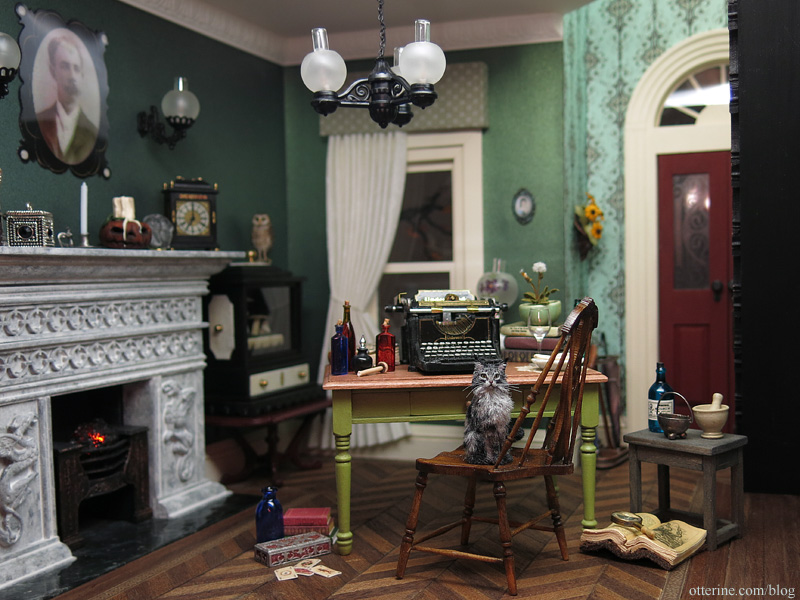
That dashing fellow in the photograph seems to take on a different personality if you look really close.

There are many curiosities going on around the room on this fine Halloween day.
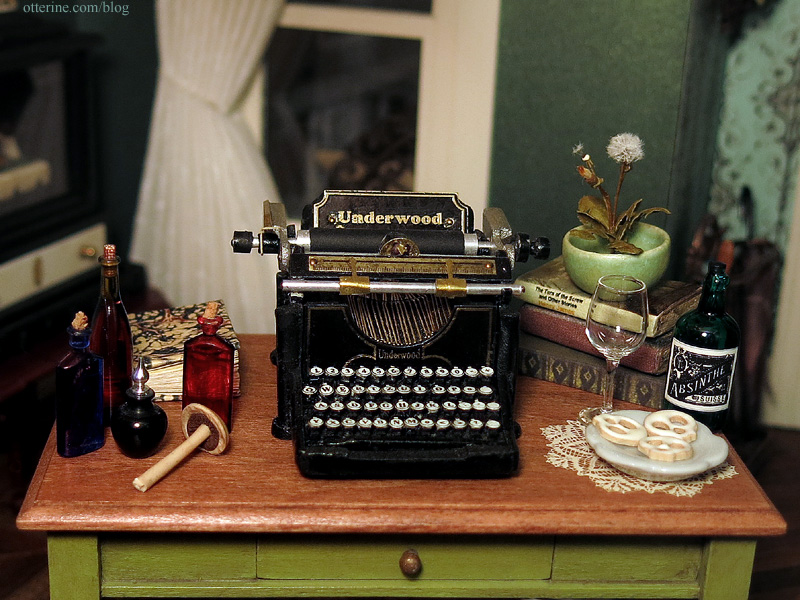
I don’t think I want to know what this spell is for, though. :O With that bottle of arsenic, it can’t be good.

But, it’s no wonder you get up to no good when you’re on a bender of cookies, Absinthe and magic mushrooms. I would imagine the story about to be typed is going to be a weird one.
These mushrooms are just for show.

It’s awfully cool outside, so the fan can be put away for the season.

Is it time for candy yet? :D
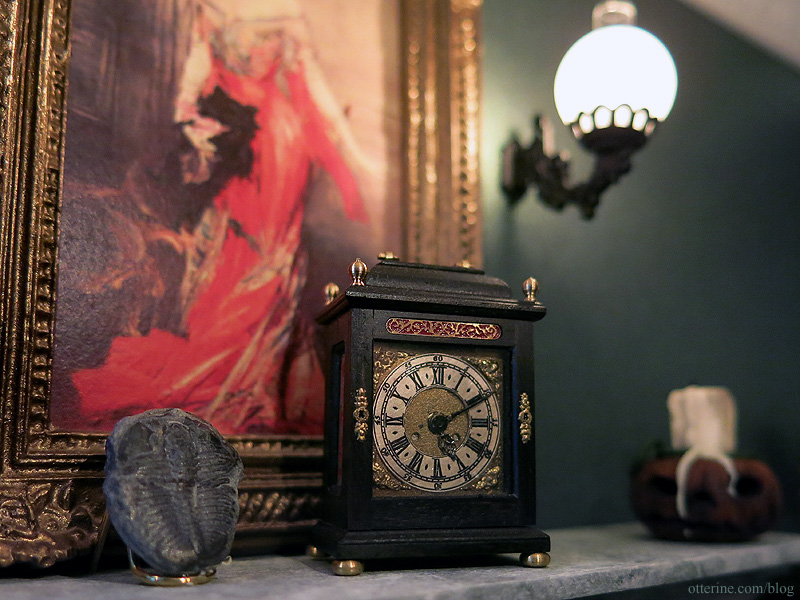
Boo!
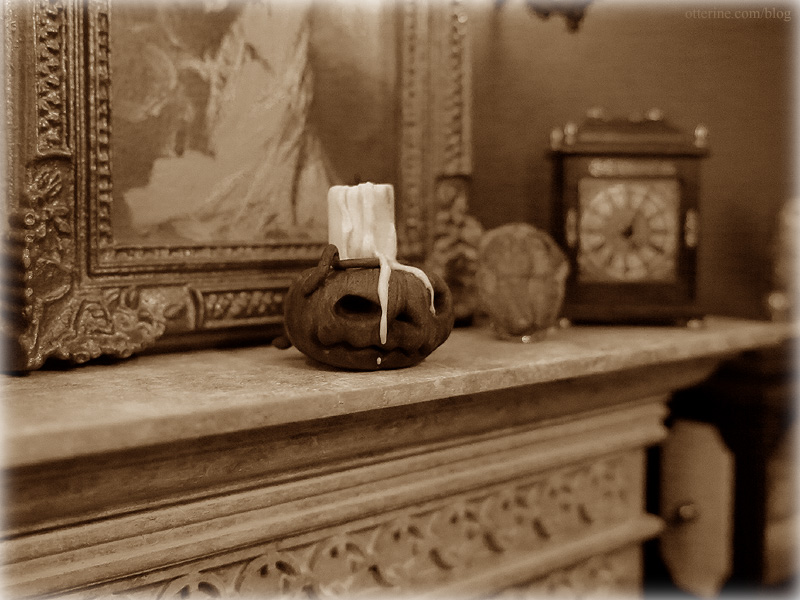
Seriously, there’s nothing spookier than a curious old sepia-tone photograph.
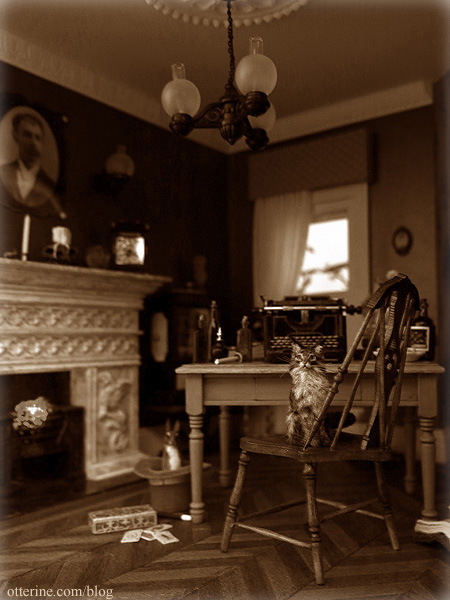
Can’t you just hear a tinny music box playing out of tune?!! =shudder= Happy Halloween, everyone!!! :D
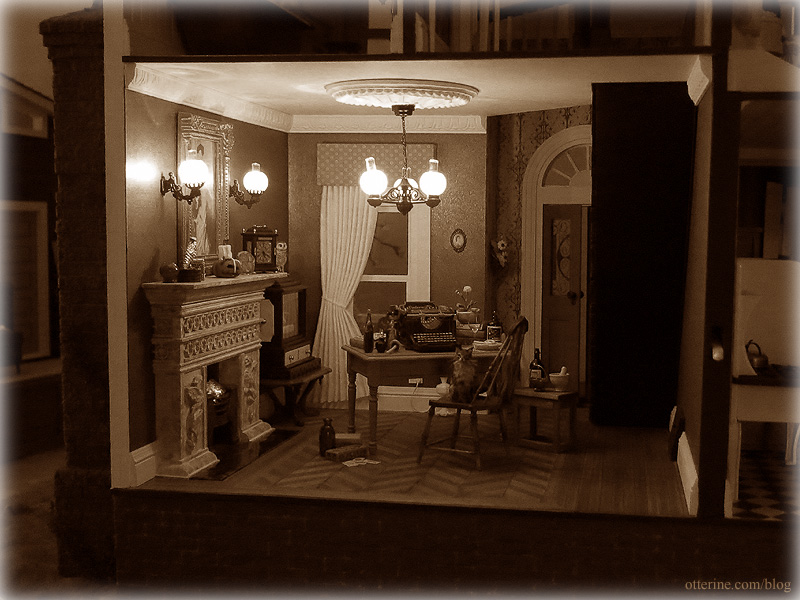
——
Notes and credits
The gentleman’s photo is a Martha Stewart hologram sticker and it changes to a scary face at certain angles. It glared with certain light, so Elizabeth Wharton Drexel returned for some of the photos.Pumpkin with candle by Marikes Magical Minis, fossil trilobite from Wendy’s Miniatures, and working clock from Halls Miniature Clocks. Mortar and pestle from Jane Graber, blank bottles from Mini-Tiques, Wright Guide Miniatures and CW Lubin. Dandelion by Lamis Minis, typewriter by Shaker Works West, open book by L. Delaney, magnifying glass by Bill, poison and Absinthe from Four Little Walls. Friedrich the rabbit by Michal Gvir, Isabeau the cat by Maya Schippl, the brace back Windsor chair by Weston Miniature, and mushroom specimen case by Tony. Antique table fan by The Kummerows.
I made … well, the Haunted Heritage :D … and the country table, griffin box, skull cookies, mushroom, burrowing owl, bird statue, playing cards, Oly Studio Ichibad Side Table and rustic stool.
Categories: Roomboxes and Mini Scenes
October 31, 2015 | 0 commentsPaperwork in mini
Man, the work is piling up around here. :D
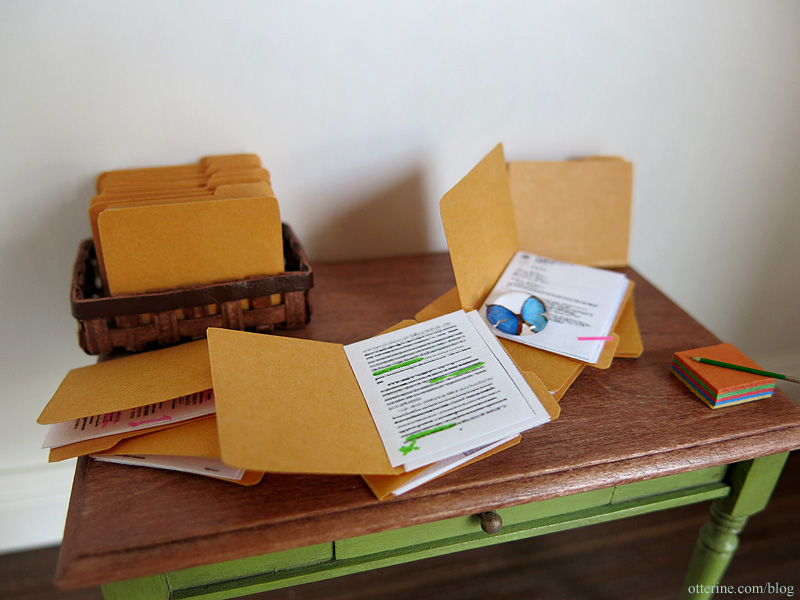
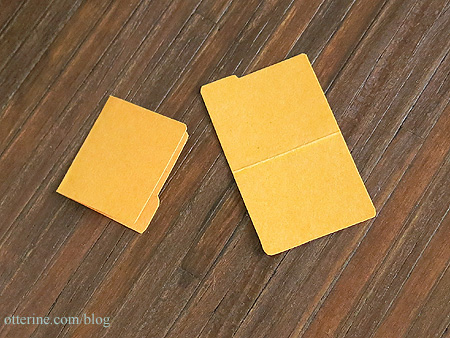
At the office, I often need to break down outdated business materials and shred the contents. I keep the plain tab pages and color separators for reuse. I used one of these tab pages to make goldenrod file folders using a template found online. I printed them on the page, and then cut inside the black lines. They have a faint fold line that disappears once folded.
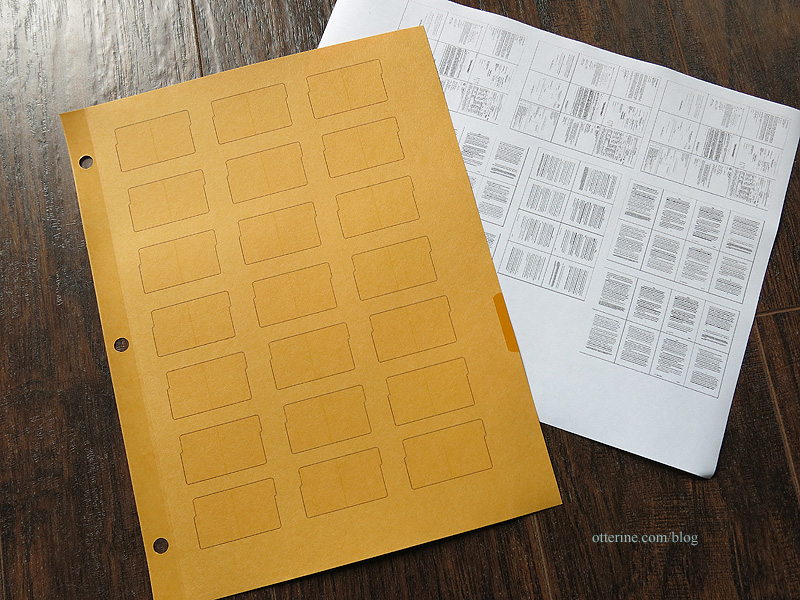
The paper is thicker than regular computer paper but still thin to work in scale.
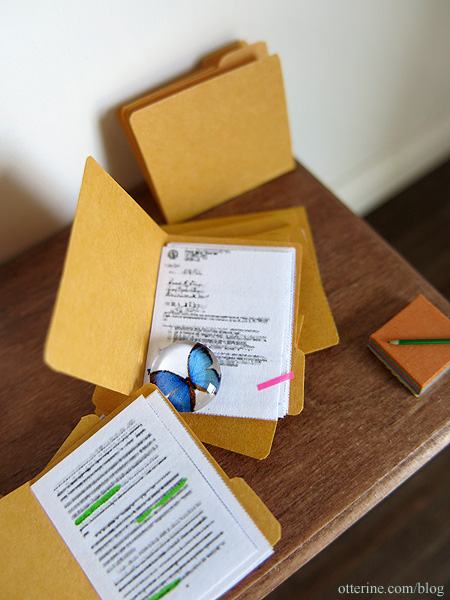
The legal documents are from PrintMini. I used the fine tip of my highlighters for a few of the documents. Right now the folders and papers are unruly, but when I make my mini scene I will glue some of them closed. I also need to clean up some of the guideline edges. :]
This one still has the sticky “sign here” tab attached. This was made from cutting a sliver from the real deal. :D The paperweight is from Debora.
I used some online images for the business checks, invoices and forms.
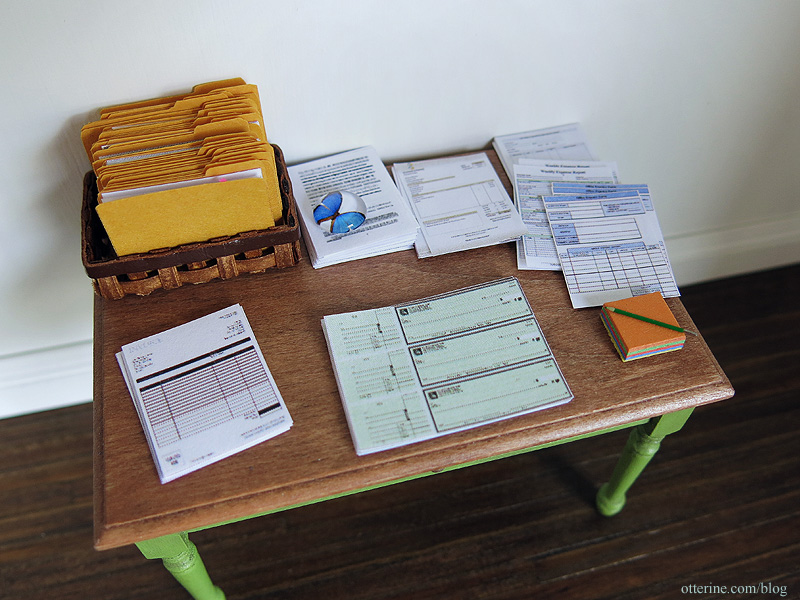
Update: added a tutorial on making the paperwork in miniature.
Categories: Roomboxes and Mini Scenes
June 17, 2015 | 0 commentsThe Maple Room – a weekend build
Time to make The Maple Room! :D As noted before, I’m using this Traditional Room Box kit by Real Good Toys as a quick build room that will be interchangeable for photographing minis. I always like to start with finishes that can be done while the kit is still in flat pieces. This allows me to press the boards flat while paint, stain or glue dries, therefore reducing warping while the build is in process.
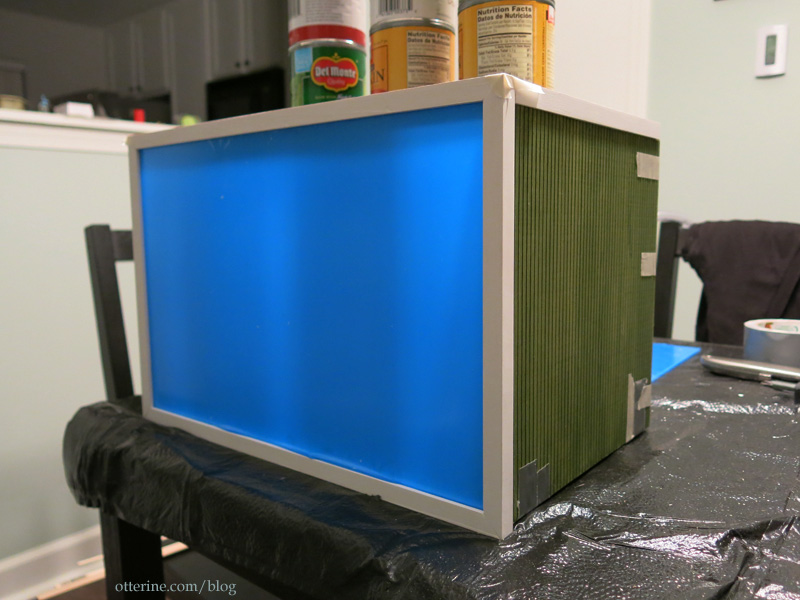
I started by marking lines on the exterior of the box where the front and upper trims will be. I am finishing the exterior not only to make the room more attractive on a shelf but to add thickness and stability to the base kit wood.

I bought this siding some time back and it wasn’t exactly what I wanted for that project. I kept it in my stash, and today it came in handy without my having to buy additional materials. For the sides, I followed the guidelines. For the back, I left some overhang to overlap the sides.

I primed the interior with white craft paint and stained the exterior with a mix of Staining Medium and Plantation Pine by Americana. I chose paint stain since it dries faster. This box isn’t meant as a showpiece, but the paint stain will seal the wood while looking nice besides. I later added one very thin coat of Delta Ceramcoat Satin Varnish.

I also chose green since I already have grey and red siding builds, and The Maple Room could easily serve as an outdoor backdrop just by turning it around.
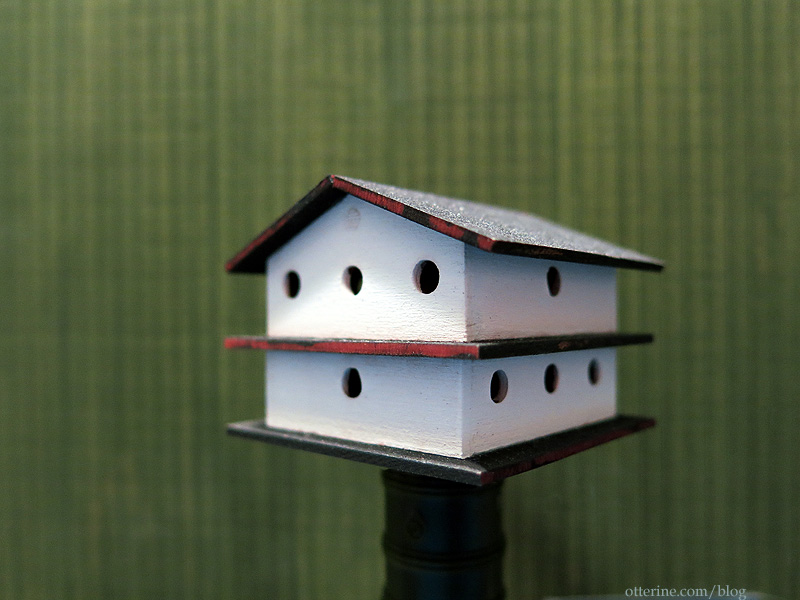
I painted the plexiglass trims, baseboards and casing trims white. The baseboards are leftovers from the Heritage. I assembled the main room pieces of the bottom, sides and back using wood glue. I had masked off the edges to keep a clean wood surface for the joins.
I glued the front lower and front side channel trims in place. The front upper trim and side upper channels will need to stay removable to swap out the papers. They each have a deep channel groove and hold in place nicely without adhesive. But, I assembled the box with everything taped in place so it would dry in the correct shape.
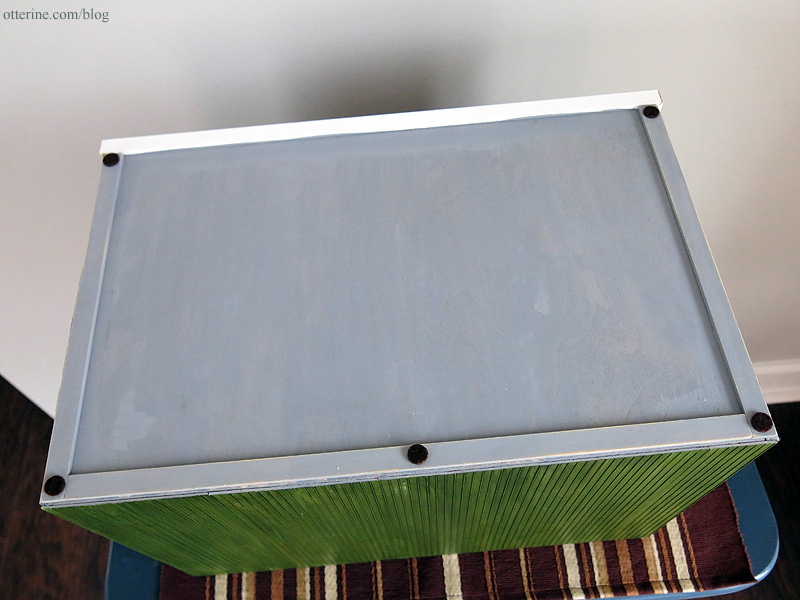
I glued the bottom trims to the underside and then touched up the paint. I had primed the floor board and these trims with grey gesso. Small felt feet added to the bottom will protect table surfaces.
I had some flooring leftover from Mt. Sydney Chalet. It was a staining mishap that I never got around to correcting. It’s a weird red-orange color that was supposed to be cherry and some of the boards didn’t take the stain very well. =shrug=
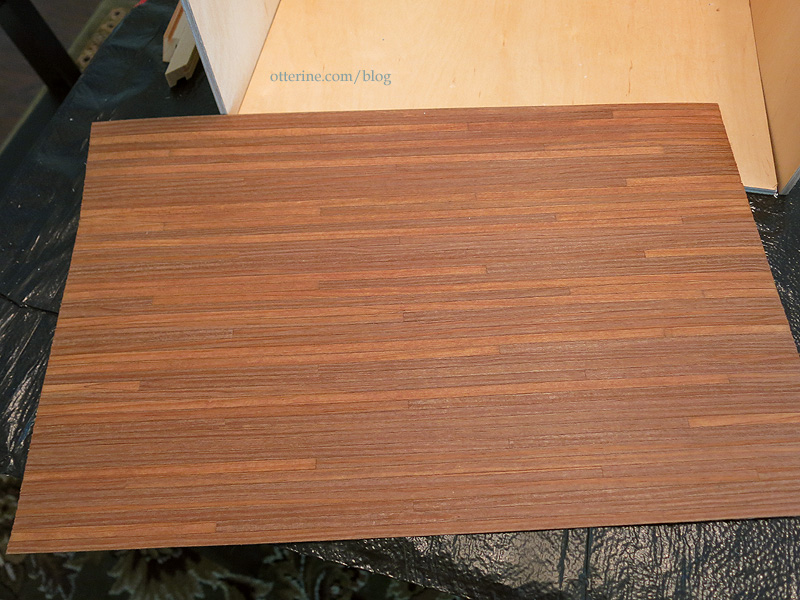
I used a mix of Staining Medium and Bittersweet Chocolate by Americana to darken the color. In a few places, I needed to use undiluted paint to cover the light boards. The final finish is Delta Ceramcoat Satin Varnish, two liberal coats. This floor is permanently attached, but other flooring can be placed on top as needs be. I glued the flooring while the board was able to be pressed flat, before assembly. During assembly, the floor board still bowed a little, but it’s not all that noticeable except in the lower left corner.
I cut some leftover baseboard trim from the Heritage to fit the room. These will remain loose, held in place with mini hold wax.
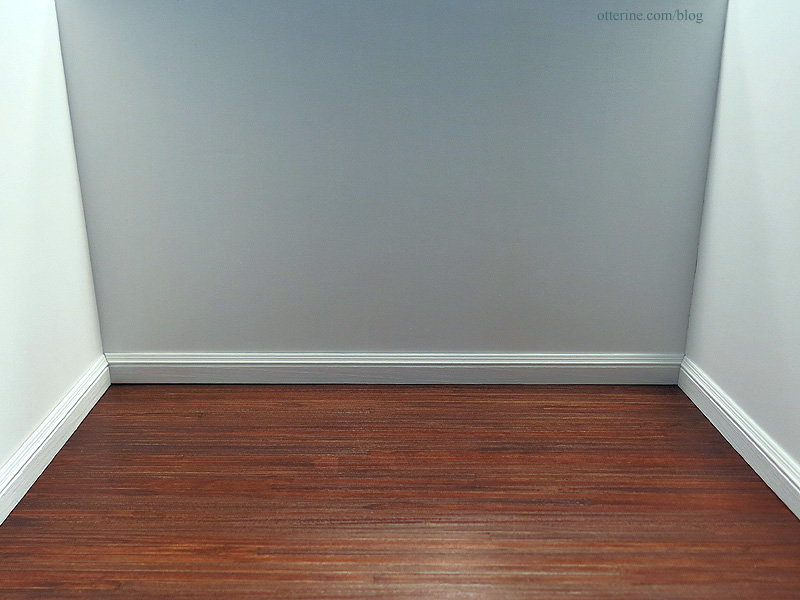
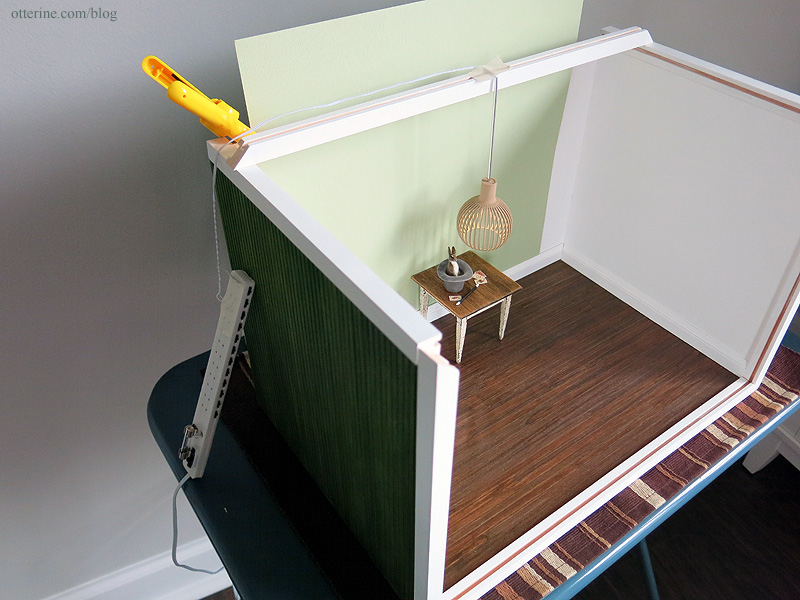
Most scrapbook papers, which is what I mainly use for my builds, measure 12″ wide. A quick clamp holds the paper in place at the top and the baseboards hold it at the bottom. A 12″ wide piece of paper is adequate most of the time, but sometimes I do need a wider room. Since the baseboards are removable, I can paper the whole room or around a corner if a scene required.

What about lighting, you ask? Any overhead lighting can be supported with the front cross beam and plugged into a power strip outside of the box.
For table and floor lights, the power strip can be pulled out of the way far enough to be out of the field of vision for the camera. The lamp wires will be positioned as necessary.
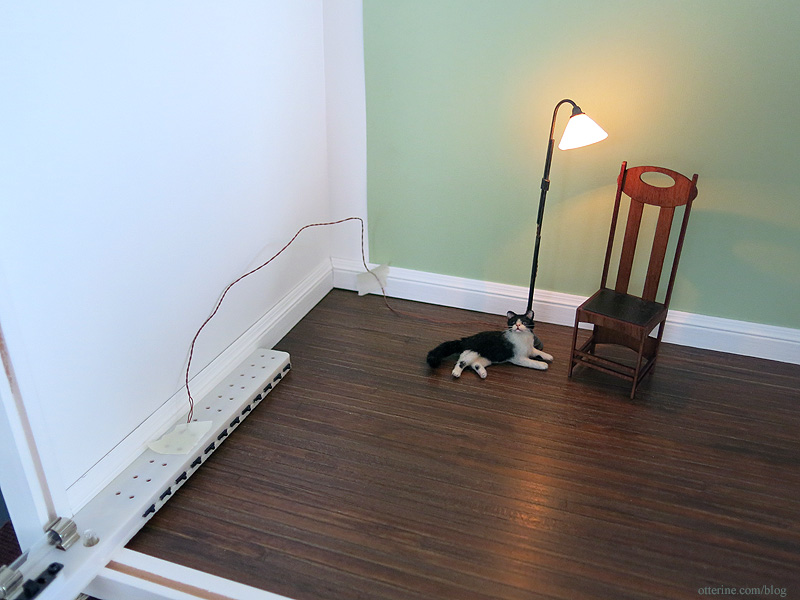
These can either be hidden with furnishings (or cats) or removed with PhotoShop. In this case, the cord is dark and thin so it’s more realistic on its own.

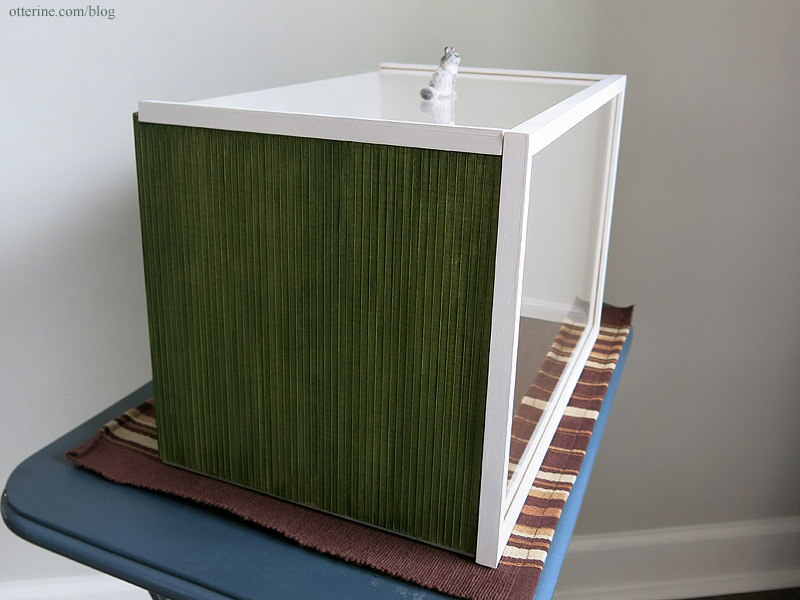
When not in use, the plexiglass inserts slide into place to keep the dust out.
A perfect weekend project! :D

Categories: Roomboxes and Mini Scenes
June 7, 2015 | 0 comments
NOTE: All content on otterine.com is copyrighted and may not be reproduced in part or in whole. It takes a lot of time and effort to write and photograph for my blog. Please ask permission before reproducing any of my content. (More on copyright)

The Wishing Fountain – Halloween 2024
Seamus is awaiting your presence (and treat offerings) at The Wishing Fountain.

The Wishing Fountain was inspired by my various autumn trips to the East Coast. I’ve visited many historical estates, and these often have lavish gardens with fountains from a bygone era. I envisioned a fountain garden in the middle of a forest, perhaps a remnant of a once vast estate.
I started with the Garden Planter Corner Kit from miniatures.com and used it pretty much to spec.

I covered the forward portion and the back sides of the kit base with square patio bricks. These come on mesh backing, so no having to place tiles one at a time; just cut the mesh to size and glue in place. I later added a thin strip wood border around the tiles to finish the edges.

To add visual interest to the trellis, I glued the arches together with the middle section raised slightly. I aligned the grid lines so it would look planned and added strip wood to fill in the “holes” so it would look uniform overall. For the planter, I added additional wood strips around the base to add visual weight to the bottom.

Since I planned to turn the planter into a basin, I covered the inside and outside with stucco patch. I left the back uncovered and just painted it to match the coloration of the front and inside. I needed the back flat to glue securely to the trellis. I glued aquarium gravel at the bottom since many real life examples I found had this detailing.

I applied several paint washes in brown and green to create the look of algae, then sealed the interior with a thin layer of white glue once the paint was dry.

The waterlilies were made from origami paper, paper punches, and colored pencils.

Autumn trees are great on a tight deadline since they take fewer branches to get the point across. I used my standard method of floral wire, Durham’s Water Putty, and candytuft. The tree was planted in stucco patch that I used to build up an uneven surface to serve as the surrounding landscape, and I propped it up with a chopstick while the stucco set. The landscape base is a round wood plaque. Its routed edge surrounded a circular top that was a perfect fit for the square kit base.

The fountain detail was made from brass findings from Birdy’s Design Gallery — a spooky cat and two flourishes — glued to the trellis using epoxy. The assembly was spray painted dark copper then aged with acrylics to achieve a subtle patina.

I used Woodland Scenics Deep Pour Water to fill the basin. You can pour up to half an inch in depth, so I needed to do this in two layers. You can add pigments, but the acrylic paint washes I had applied were enough.
Once the first layer cured “enough” at four hours, I planted the waterlily leaves. I probably should have done this a bit sooner than the four hours because it was not easy to pierce the thick resin with a pin to plant the stems. Too soon, and the stems would have fallen over. It’s something to watch more closely next time.
At this point, I also glued a thin transparent thread to serve as the base for the water stream from the cat face to the basin. This was a trial and error process, and I would do things differently next time. More on that below.
Once the leaves were planted, I poured the upper layer of Deep Pour Water. The resin transformed the paper into dark, translucent leaves. As much as I loved the green paper with the subtle aging, this reaction with the resin made them more like the real deal. I then let the resin cure overnight. (The below photo was taken after the water stream was completed.)

Before finishing the water stream, I added ivy to the back of the trellis. This is O-Scale (1:45) English Ivy from Scenic Express (Silflor Summer Ivy by Mininatur), but it works well in 1:12 scale.

I didn’t want to completely obscure the cat face or flourishes, but it does add a finishing touch. I wrapped some of the strands around the sides and slipped a few through the trellis onto the front surface.

The water stream wasn’t easy, and it’s not terribly durable as it stands. As long as I watch my fingers when handling the build, it should stay intact.
How I did it:
I started with transparent thread (this is way too thin). I originally glued one end to the cat mouth with super glue gel and then glued the other end to the top of the first resin water layer. The super glue clouded the resin surface, though it didn’t mater in the end since it was covered by the upper layer of resin (and the waterlilies blocked the view a bit in the end).
Once I added the Woodland Scenics Water Ripples, the thread began to sag. Since the Water Ripples material stays flexible, it didn’t help with the sag, so I disconnected the thread from the cat mouth to fix the issue. I drilled a hole in the mouth, fitted a bit of aluminum tubing, then glued the thread into the aluminum tube. Once secure, I inserted the tube into the mouth and adjusted the thread for proper tension. No more sag.
I painted the aluminum to match the cat face patina and added more Water Ripples to finish the water stream. It’s as good as it gets from here, and I think it’s pretty convincing.

How I would do it from the start:
Instead of transparent thread, I would use 50lb fishing line. It’s more substantial and easier to control. I would also drill the hole and use tubing from the start, leaving the final adjustments and gluing in place to the end as I did in my fix above. All else would remain the same — gluing it into the basin, pouring the Deep Pour Water to bury the bottom of the fishing line and adding Water Ripples to make the stream.
Once the fountain assembly was complete, I glued it to the kit base and added the waterlily flowers. Since the resin was cured, the flowers stayed intact and bright. I filled the ground area around the basin with Woodland Scenics gravel sprinkled with Woodland Scenics foliage. I painted the landscape black brown and then added various Woodland Scenics loose ground cover to mimic a forest floor. All landscaping materials were secured with Scenic Cement.
My entry in the miniatures.com Halloween Challenge features a whimsical ghost dog with a bone from M for Miniatures. I painted the bone instead of leaving it white. The pumpkins were made from polymer clay and borrowed from The Haunted Heritage.

The ghost dog comes with a light, but I rather like it without.

There’s also a cat ghost. :D

Wishing you all a Happy Halloween!
———-
Note: As an Amazon Associate, I earn from qualifying purchases from the Amazon product links in this post.Categories: Roomboxes and Mini Scenes
October 31, 2024 | 3 commentsHappy New Year 2022
I spent some time over the New Year weekend making a mini scene and cleaning up my workspace for new projects. I’m excited to work on new minis for myself and for sale. :]

—–
Chester the cat by 2014erok; sideboard by Minterior; sunflower blanket by Gweaneth’s Dream; slippers by Freedom Miniatures; mouse toy by A. Smith Arts; bacon sandwich by Sugar Charm Shop; grapes by Rina Vellichor; mug by Woodland Trail Whimsy; water bottle from Shepherd Miniatures; painting by blueprintminiatures; coffee table by minisx2.Categories: Miniatures, Roomboxes and Mini Scenes
January 3, 2022 | 0 commentsA Coral Pink Christmas, part 4
Wishing you a very Merry Coral Pink Christmas! I finished just under the wire.

I had so much fun playing and digging through my stash for retro inspired minis! :D

I opted for silver thread from my stash of sewing supplies. For being so fine, the thread is very strong and easy to work with.


I glued the strings to the tree since the ornament beads are heavy and would not stay put on their own.

Here’s the new tree base to replace the original wood round. Just some scrap basswood cut to fit and glued to the center wire.

I used a tree skirt and presents from past scenes since I didn’t have time to make something new.

The retro clock (and the wood cats) were made by the talented Cyd of Mod Pod Miniatures.

———
Sideboard from Minterior. Sunflower afghan by Gweaneth’s Dream. Bear in red hoodie by Obscurely Small; pink bear by LugArt Petit. Calico cat by Paizley Paws. Snowman figure by Sherry Moller; plant pot snowman from Just Miniature Scale. Egg nog punch bowl and cups by Sue’s Little Things. Pink vase by Lorie Marsh. Doily from Stewart Dollhouse Creations. Coffee table by minisx2. Wrapped dollhouse by A Pocket Full of Wishes.Categories: Miniatures, Roomboxes and Mini Scenes
December 25, 2021 | 0 commentsHappy Halloween 2021!
Lucius and Igraine wish you a very Happy Halloween from the Haunted Heritage.

Grandma had best close that window unless she wants additional guests. :D
Categories: Roomboxes and Mini Scenes
October 31, 2021 | 0 commentsSewing in mini
I entered this mini room box in a real life size sewing contest. I didn’t win, but it was a lot of fun putting the scene together.
——
Linus is the Fabricworm mascot, and everyone entering had to use this fabric for their entry. I’ve made a set of building block pillows to feature Linus and his inchworm form (yep, these are available in my etsy shop).
Finn is napping after wearing himself out with the yarn.

The Bodo Hennig sewing machine is one of my favorite minis. You can lift the presser foot to place fabric underneath.

I didn’t get my high powered readers out to see if I could thread it, but I wouldn’t doubt it. Maybe next time….

A relatively recent acquisition are these pinking shears by Frank Matter. They open on a tiny hinge pin.

They have chipped paint just like my real life originals, which is a detail I adore.

Look at those tiny teeth!

Finn was made by JMDS, and I made the divan from a pattern in Dolls’ House Furniture: Easy-to-make projects in 1/12 scale by Freida Gray.

Jennifer at aMusingMiniatures custom made the seam roll for me. It’s simply perfect, just like the real deal! I made the fabric bolts and purchased the thimble and needles from Vilia Miniatures at the local shows.

The fabric also has some nice close-ups of Linus, so I’ve made those as well. :]


Additional notes: I believe the sea painting is from Barbara, likely an estate mini; it is signed S Bedu 2005. I made the fabric bulletin board and most of the patterns displayed. The adjustable stool is by Boutique Miniatures, and the rug is from Iklectic Kollectibles. The fish pot is by Barbara Begley Miniature Gardens. I made the snake plant and sofa.
Categories: Roomboxes and Mini Scenes
December 4, 2018 | 0 comments
NOTE: All content on otterine.com is copyrighted and may not be reproduced in part or in whole. It takes a lot of time and effort to write and photograph for my blog. Please ask permission before reproducing any of my content. (More on copyright)


