


NOTE: All content on otterine.com is copyrighted and may not be reproduced in part or in whole. It takes a lot of time and effort to write and photograph for my blog. Please ask permission before reproducing any of my content. (More on copyright)

Jack-o’-lantern
What’s a Halloween display without a jack-o’-lantern?! Ophelia wouldn’t hear of it!

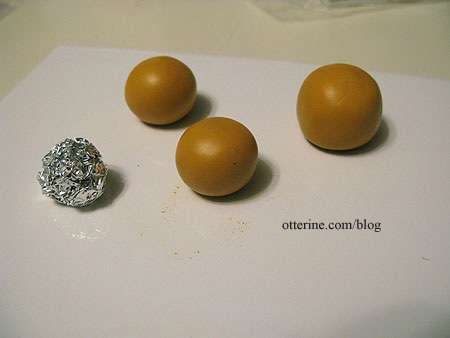
I’ve seen many techniques used online and in books for making hollow pumpkins from polymer clay. Most often something is baked inside: styrofoam, foil or a glass marble. Each of these has pros and cons. The styrofoam just seems noxious to bake, but maybe I’m wrong. The glass marble can cause breakage when you try to remove it, which makes me worry about all the effort to make it look good being ruined in an instant. The foil doesn’t seem the easiest to remove, but it seems the least noxious and easier than the marble…so that’s the way I went.
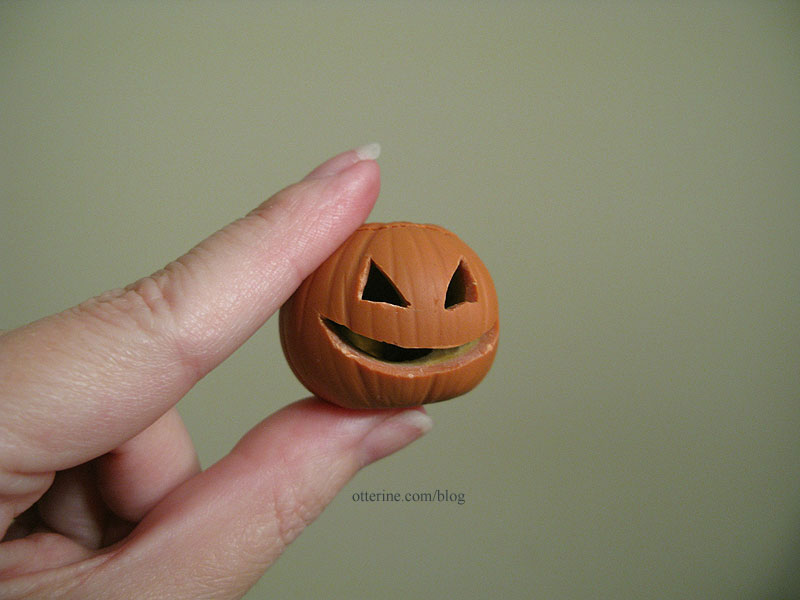
I used Fimo ochre clay around the foil ball and then added Fimo cognac clay around the clay ball. This way, the inside would be lighter than the outside once carved.
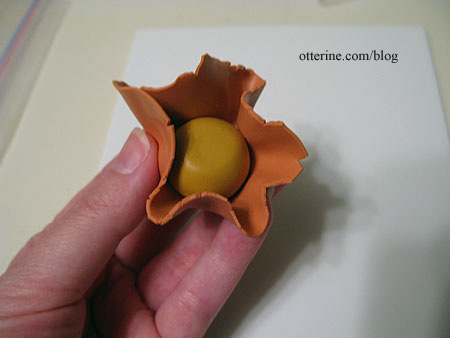
I added lines and texture but decided to carve my pumpkin after baking to minimize handling while the clay was pliable. I did plan to leave one or two of the pumpkins intact just for decoration, but I made all three the same way just in case.
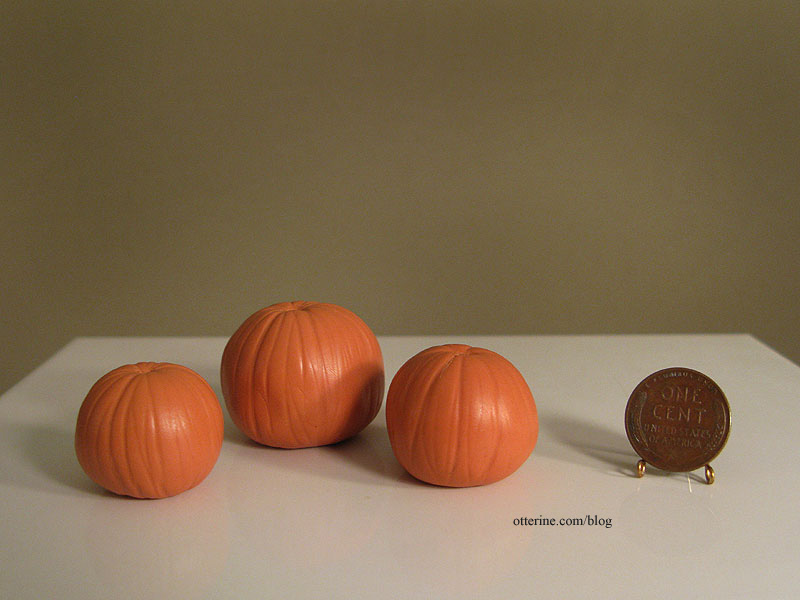
I used pastels to color the clay before baking to deepen the color and emphasize the sculpted lines. Here they are after baking.
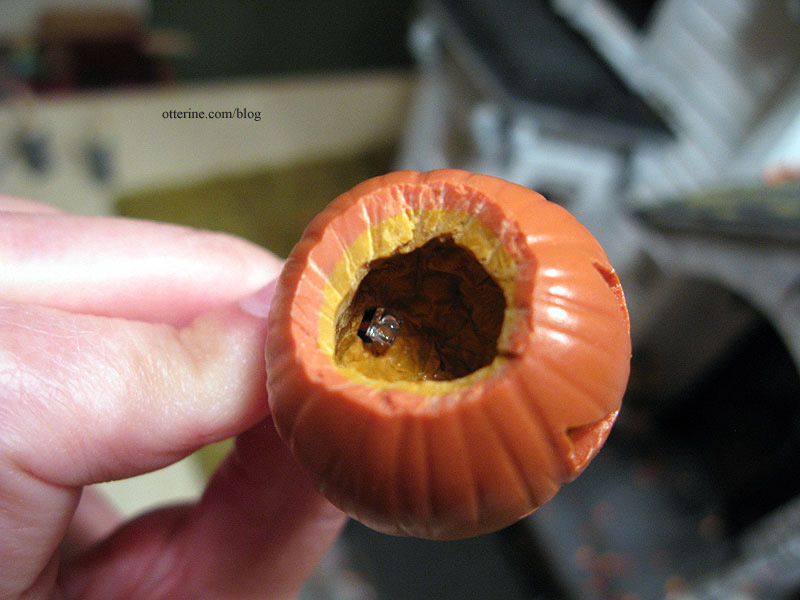
After the clay cooled, I cut the removable top, removed the foil innards and carved the pumpkin face. None of these things proved easily done. The clay was thicker and harder than I thought it would be. It didn’t ruin the illusion in the end, but I ended up making only this one for lack of time.
I used a grape stem for the top, an idea I saw on Joann Swanson’s blog. I used the larger main stem, though, and it was still green. I microwaved it to dry it out, and bleh…did it ever smell bad. Hahahaha
After gluing the stems on, I brushed on a thin coat of Sculpey satin glaze, even on the stems to seal them. It gives them a wonderfully realistic waxy finish. It also disguises the cutting and carving marks.
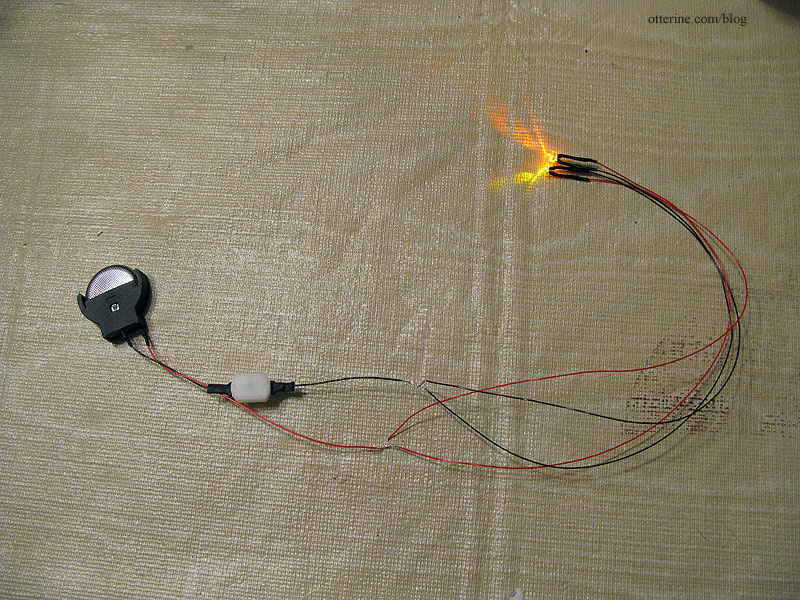
I drilled a hole in the bottom for the LED.
These are flickering LEDs from Evan Designs. They attach to a 3V battery adapter with a switch and come in yellow or orange. I bought both colors since I wasn’t sure which would look better, or if I would want a combination of the two. I ended up using a single orange bulb for my jack-o’-lantern since it was the better color of the two and plenty bright on its own.
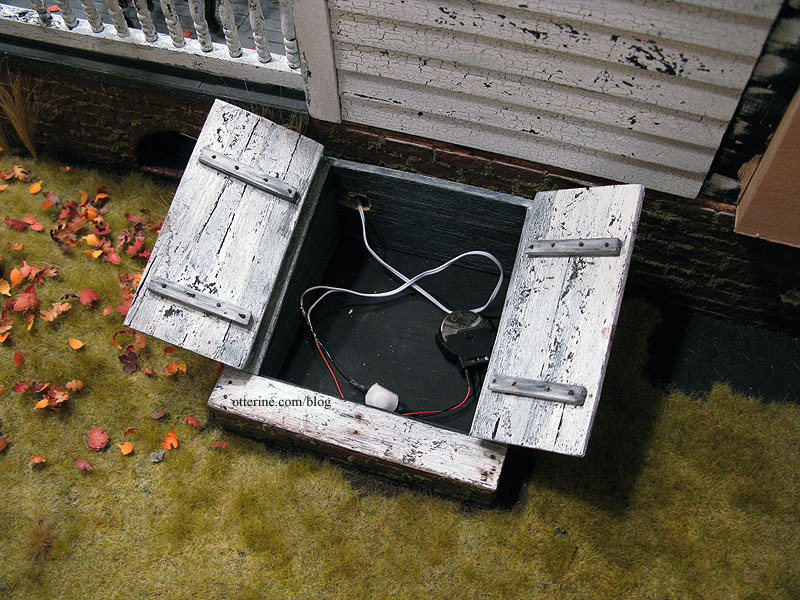
I had already run the wire through the foundation so I could operate the switch in the cellar doors. Here’s the battery and switch in the cellar.
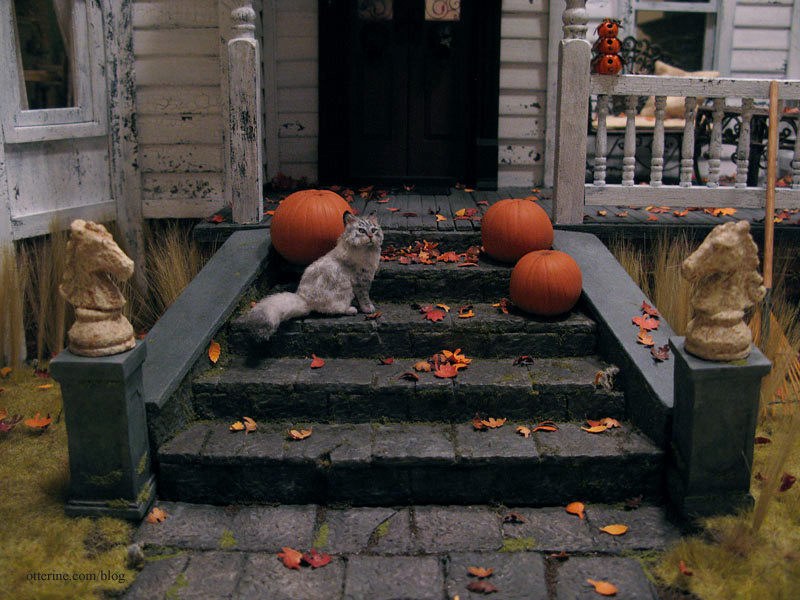
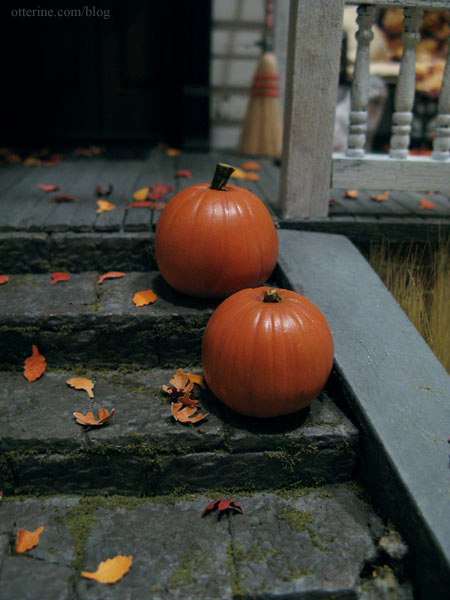
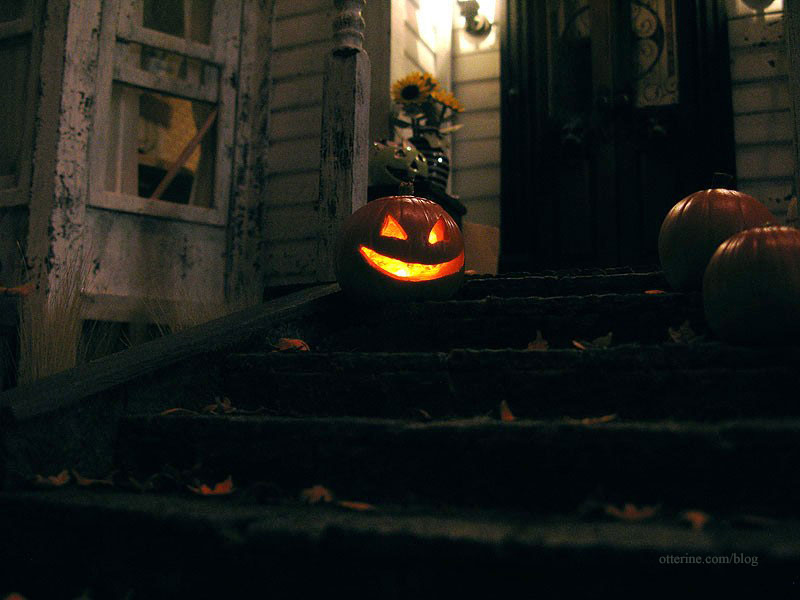
The light is on and pumpkins are in place! Hooray!
I think this requires a movie. ;D I apologize for the poor quality of the video, but it’s the best my camera will do. At least you get to see the flickering LED!
I will definitely use these flickering lights for the parlor fireplace, too. That wiring will be an easier endeavor to accomplish, though.
Categories: Polymer clay, The Haunted Heritage
November 2, 2012 | 0 commentsWhooooo’s a cutie?!
One of my favorite animals is the owl, and I especially love the Burrowing Owl. I have a printout of an image of a Burrowing Owl chick on my wall at work. It makes me smile. :D
I’ve been so inspired by the work of Anya Stone and Kerri Pajutee, two amazing artisans who make the most realistic miniature animals I’ve ever seen. I’ve wanted to make a Burrowing Owl for some time now, so I decided to just hop to it! Kerri has two great tutorials on CDHM: one for sculpting a bird and another on flocking and feathering. I used those as a basis to start my mini owl.
I decided to make an adult Burrowing Owl.
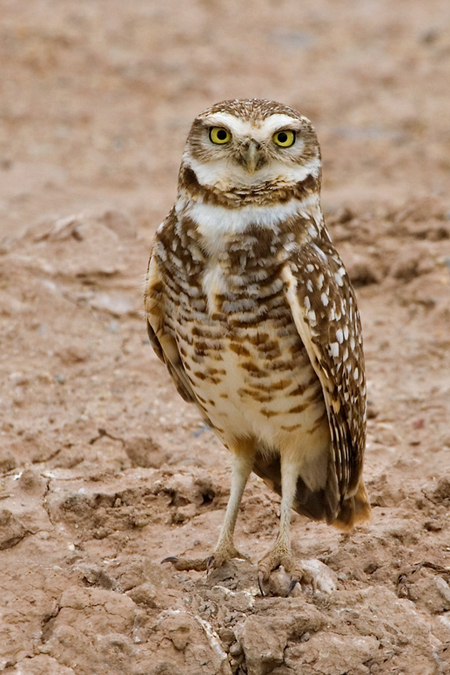
image by Nature’s Pic’s Online I was lucky to find a good photo of the back of the owl, too (see photos by Ecobirder).
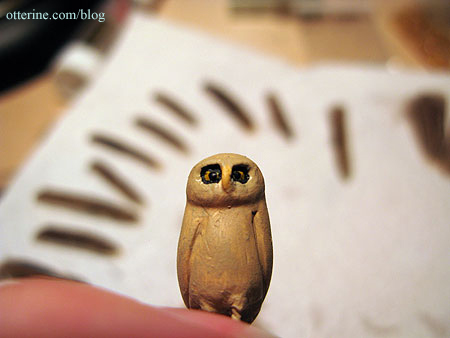
I sculpted my bird using white polymer clay, though it got fairly dirty as I worked with black wire to make the legs and feet. The feet look a bit big, but it was the only wire I had and the flocking and feathering will add weight once applied. To get the bird to stand while baking, I tied some wire around the ceramic tile I use for baking clay.
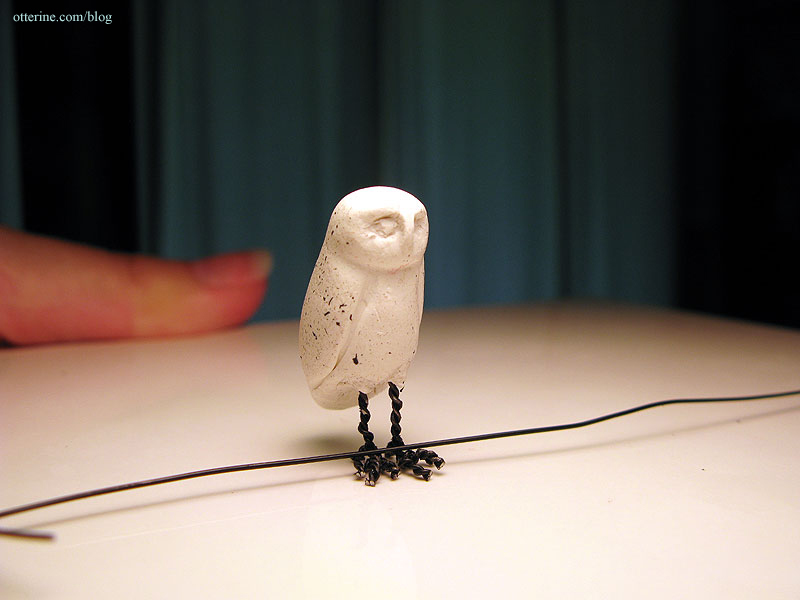
After baking and cooling, I painted the whole piece with light tan acrylic paint. I also painted the eyes and beak before feathering. Caution: naked birdie below…
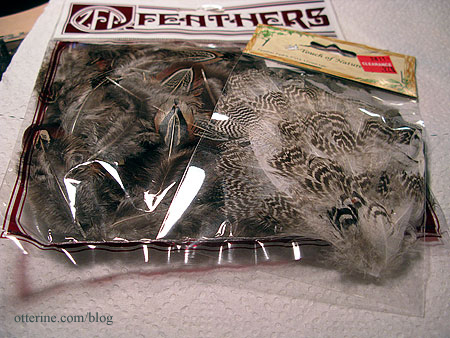
I bought two types of feathers, using the darker ones for the tail feathers and back and using the lighter ones for the breast. I used embroidery floss to make the flocking. I cut all but the spotted and striped portions from the feathers. I followed Kerri Pajutee’s tutorial for placement for the most part but tried to use the natural patterns of my feathers to mimic those of the Burrowing Owl.
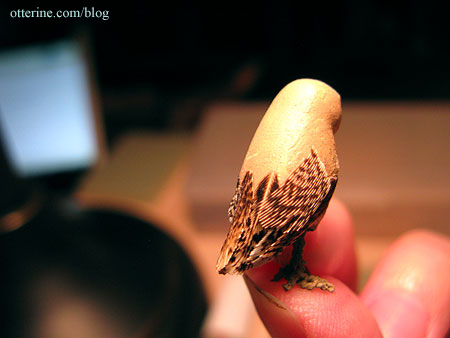
Here are some photos of my owl as the feathering progressed…
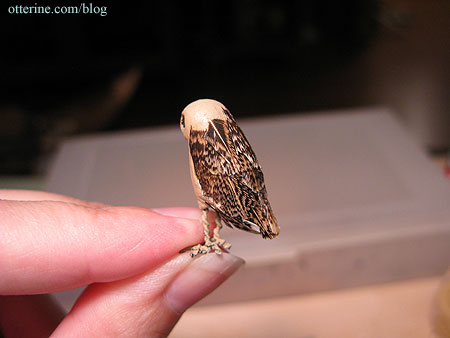
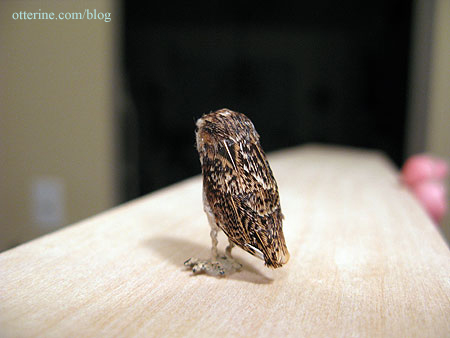
And, finished! :D
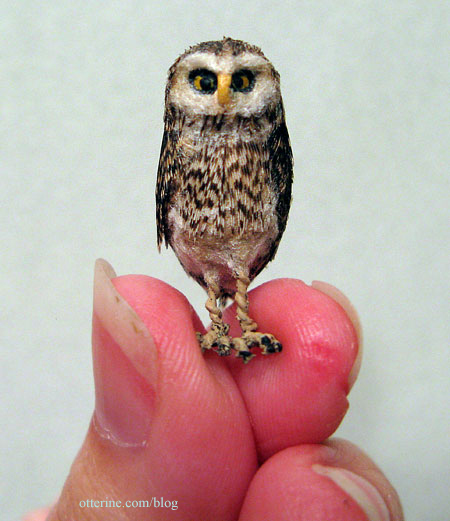
I love him!!!!! I don’t think I did half bad my first time around if I do say so myself.
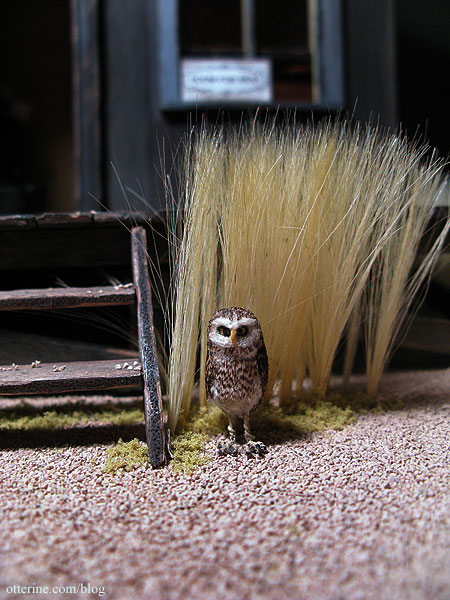
And, he looks right at home on Baslow Ranch! :D

Categories: Animals and birds, Polymer clay
August 20, 2010 | 0 comments
NOTE: All content on otterine.com is copyrighted and may not be reproduced in part or in whole. It takes a lot of time and effort to write and photograph for my blog. Please ask permission before reproducing any of my content. (More on copyright)