

Making a custom door, part 2
Continuing work on the custom door. I glued the middle layer to the back layer. I changed my mind about the larger opening, concerned that the front or back might bow between the window openings. To help, I glued some scrap pieces of the veneer between the circles. There will then be three small squares of acrylic, still easier than cutting circular glass inserts to fit. :]
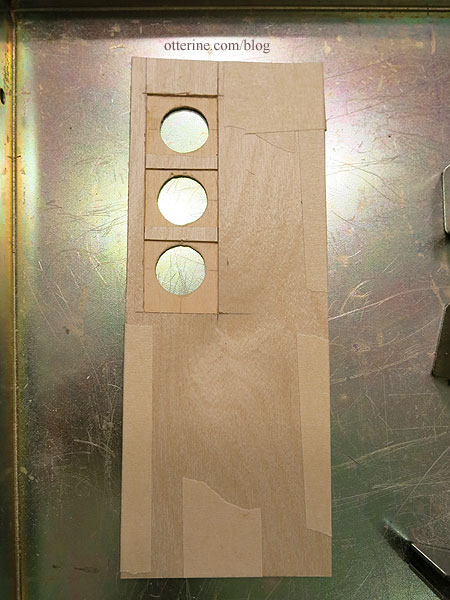
Since the front and back pieces are different types of wood, they have different textures. I spread spackling over the front to even out the grain. I also lined the interior of the circles and filled in any nicks in the wood on both sides from the cutting process.
Once dry, I sanded the pieces smooth.
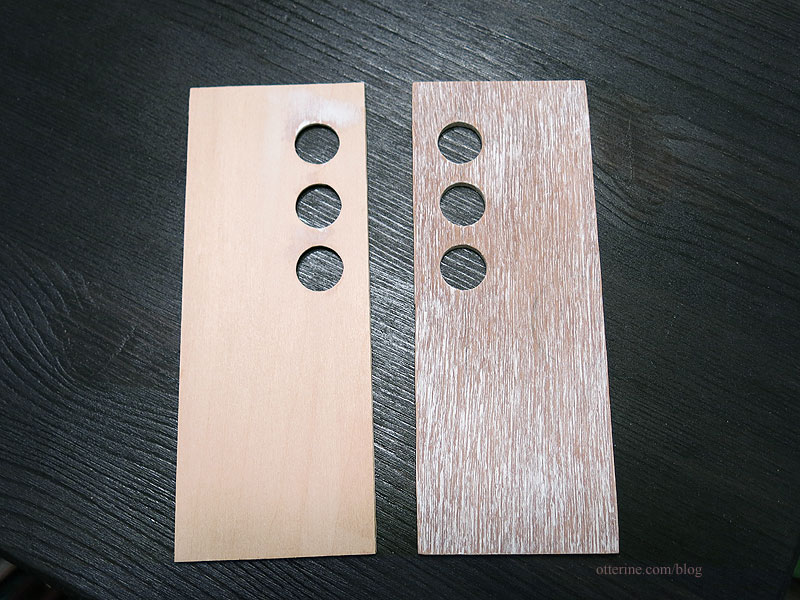
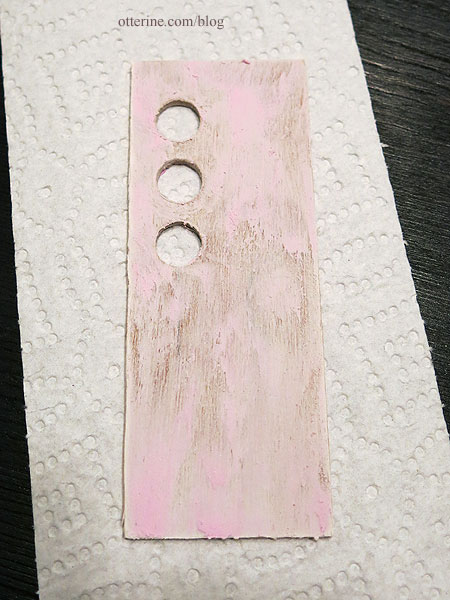
I’ll need to paint it before further assembly, so I’m going to leave this here for now. I need to choose my colors. :]
Categories: Otter Cove
March 3, 2015 | 0 commentsMaking a custom door, part 1
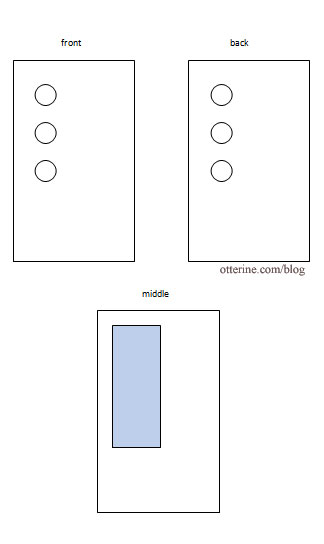
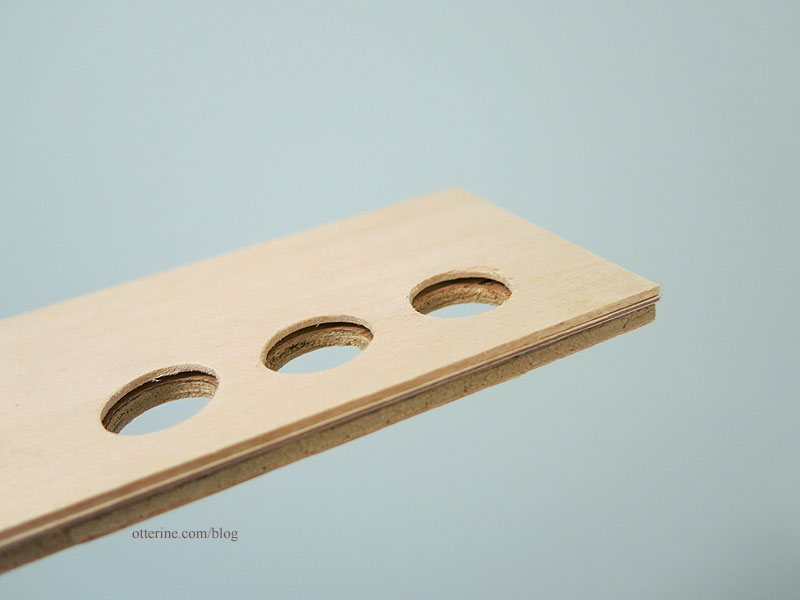
I want a custom door for the Creatin’ Contest build, so today I tackled cutting the basic pieces. The door will have three circular windows, so I opted for a layer cake building method — a front piece with the three holes, a thinner middle piece with a section cut out for the acrylic insert, and a back piece with the three holes.
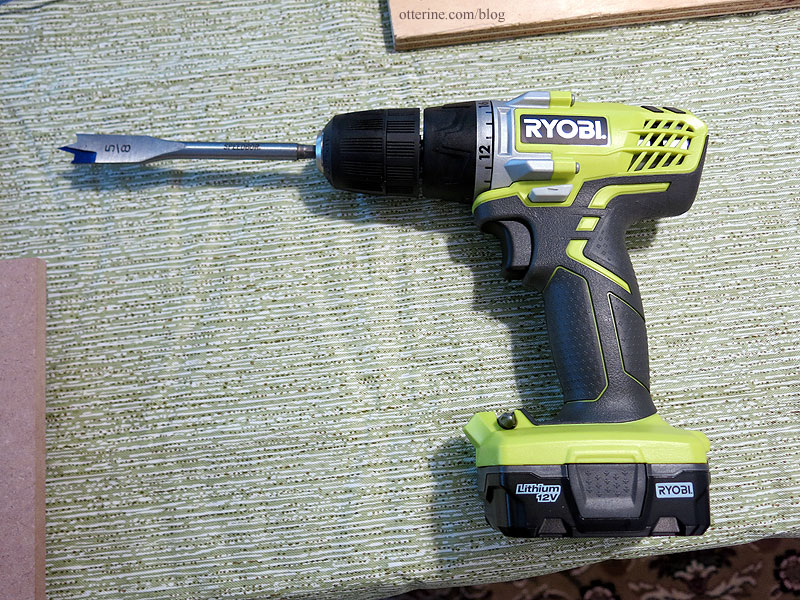
Since the windows will measure 5/8″ in diameter, I needed a tool other than the circle cutting guides for the Dremels. I bought a set of spade bits at the local Ace Hardware.
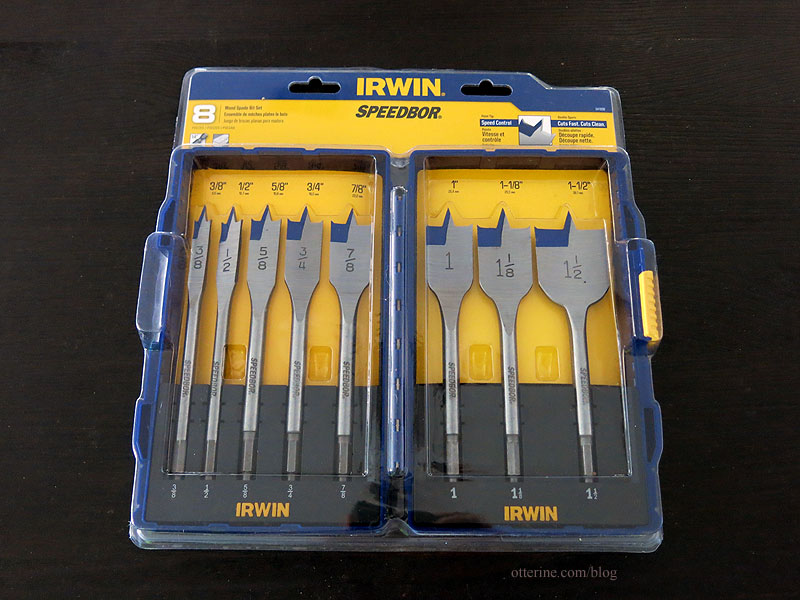
These fit into a standard drill.
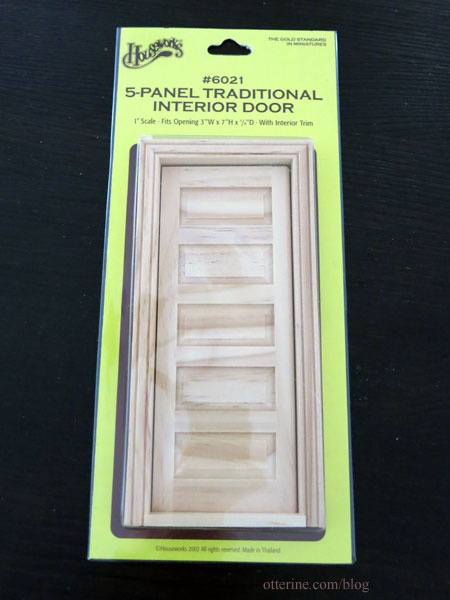
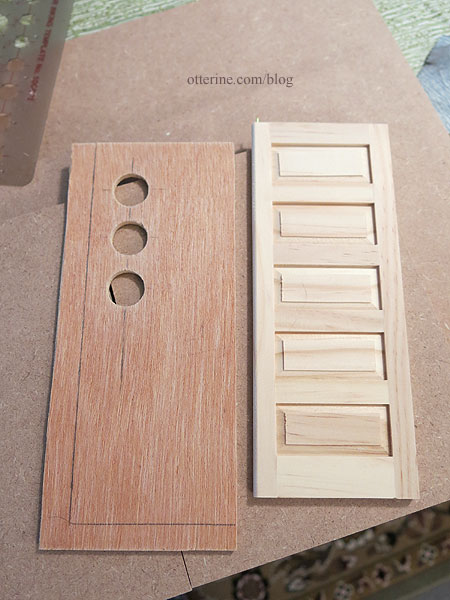
I didn’t feel like building a door frame, so I started with a Houseworks door. The insert here won’t go to waste since I’d like to make another working pocket door at some point.
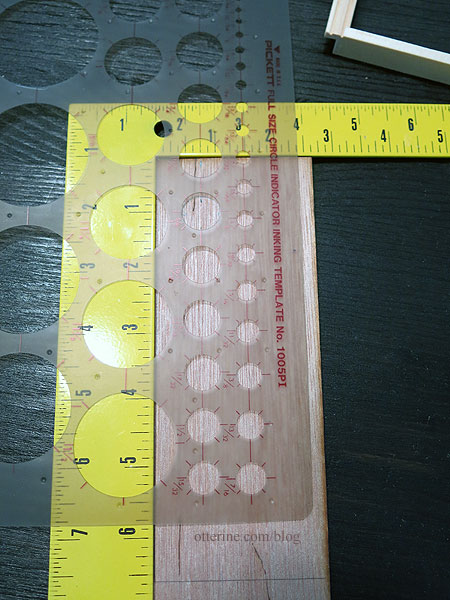
Using a circle template, I drew my layout on the top board. This was made from a spare piece of 1/8″ Greenleaf kit plywood.
The back piece was made from 1/16″ basswood and the middle piece from 1/32″ birch veneer. Shown below from left to right: middle, back and front.
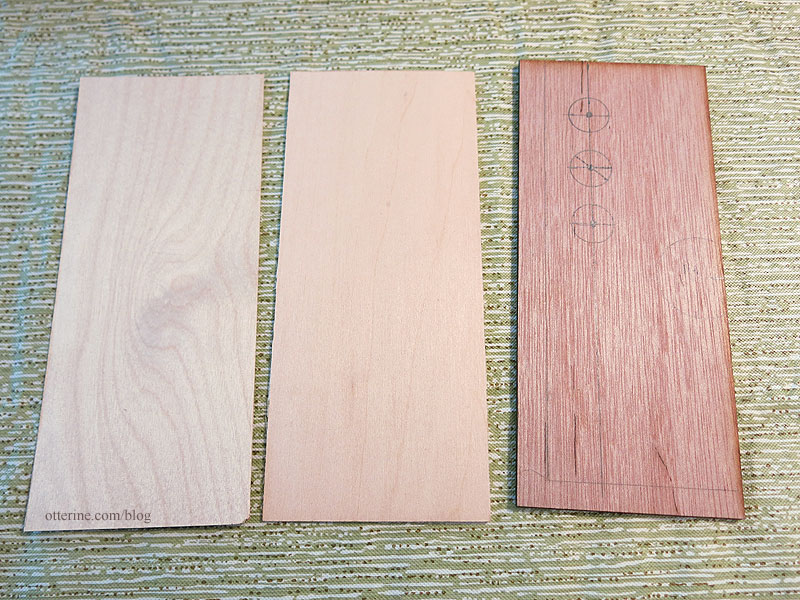
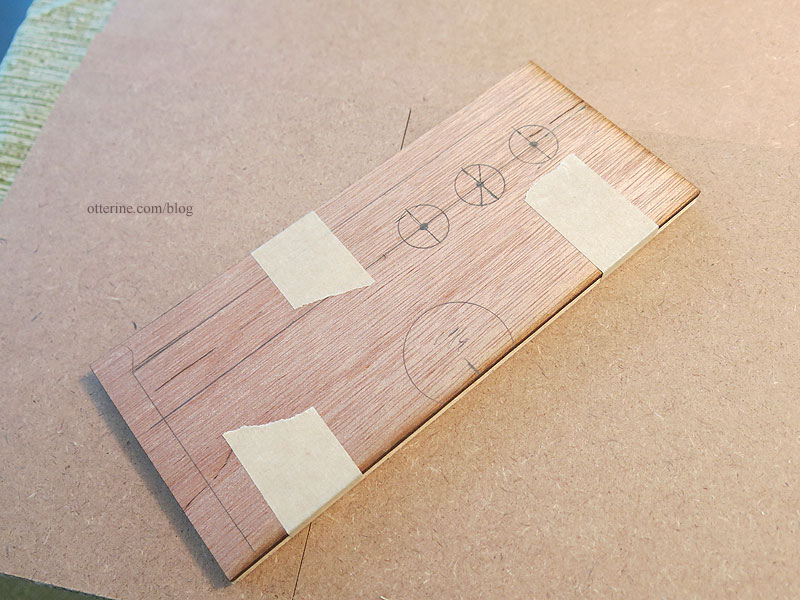
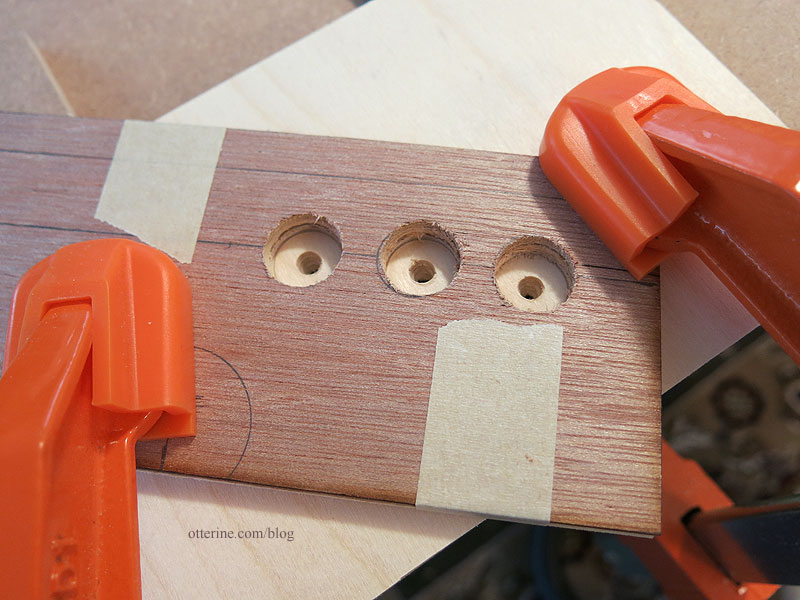
I taped the pieces together to cut all three at once.
The spade bits are great because they have a sharp center tip that makes it easy to line up more than one circle cut.
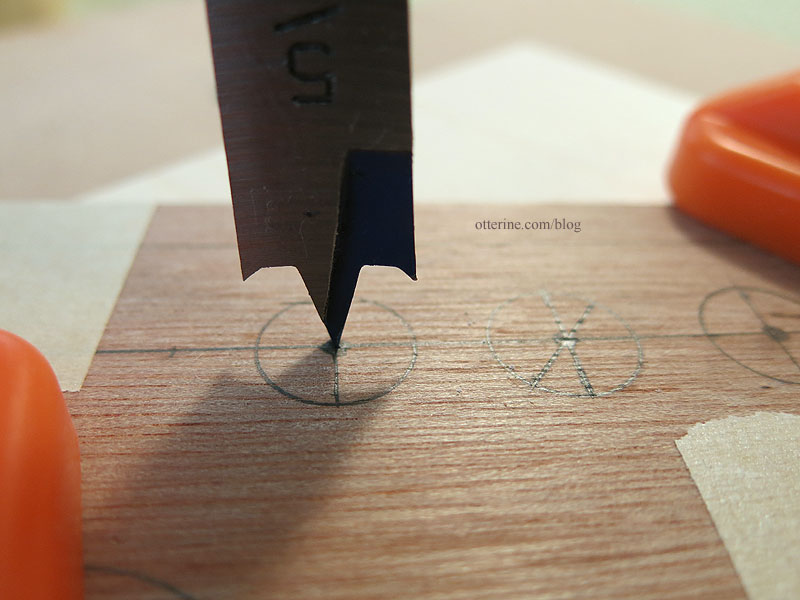
The pointed spurs on the edges cut the circular edge as the middle point drills down.
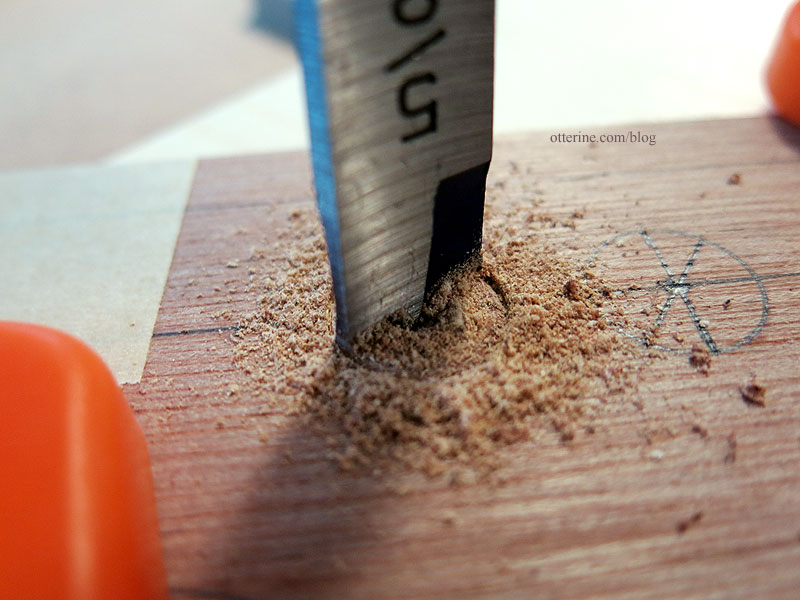
I vacuumed the dust and bits and it looked good from the top.
While I did use a spare board under the bottom piece to save the wood from splintering, it was the middle basswood piece that didn’t end up working. :\ It was the softest wood of the three.
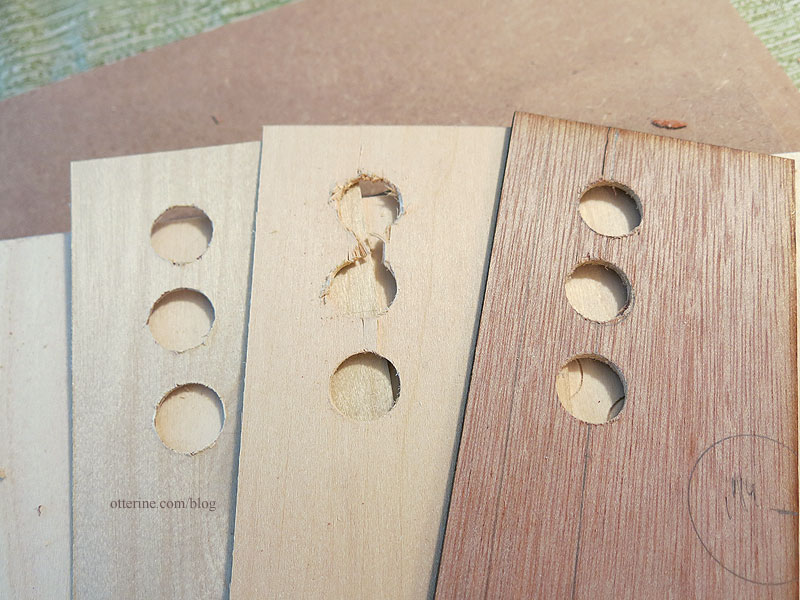
I also messed up the plywood piece and had to redo it, but that wasn’t related to using the spade bits. I cut another front piece from a spare part from Walnut Bay Light. :D

I cut another piece of basswood and cut it on its own, which worked a little better. I then used the Houseworks door to mark the outer edges of the door. I waited to do this until after the holes were cut just in case the circles didn’t work, just to save time, and I’m glad I did.
I then cut around the circles in the middle layer so I have to use only one piece of acrylic for the window inserts.
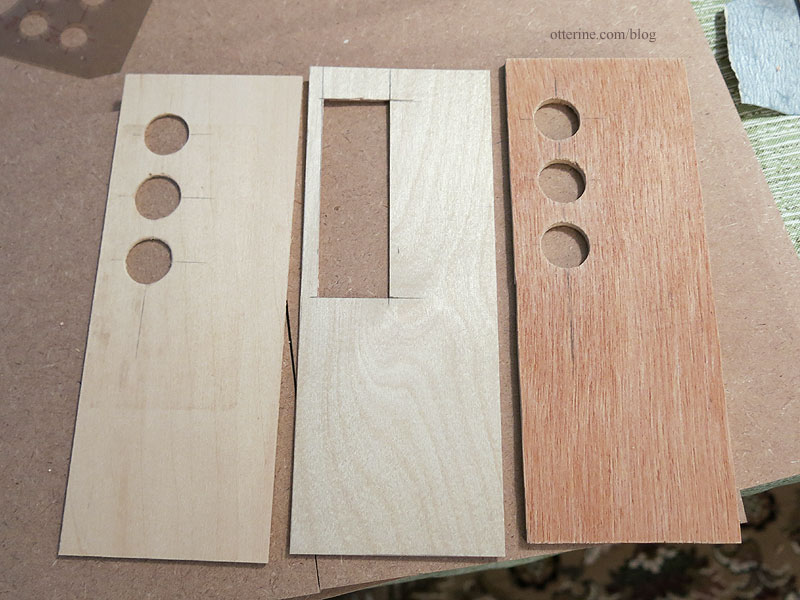
As expected, all three pieces will need some cleaning up during construction, but I’m on the right track now. :D
So far, so good. :]

Categories: Otter Cove
March 1, 2015 | 0 comments


NOTE: All content on otterine.com is copyrighted and may not be reproduced in part or in whole. It takes a lot of time and effort to write and photograph for my blog. Please ask permission before reproducing any of my content. (More on copyright)

Making draperies
Now that I’ve picked my favorite from the paper mockups, it’s time to make the pleated draperies for real.
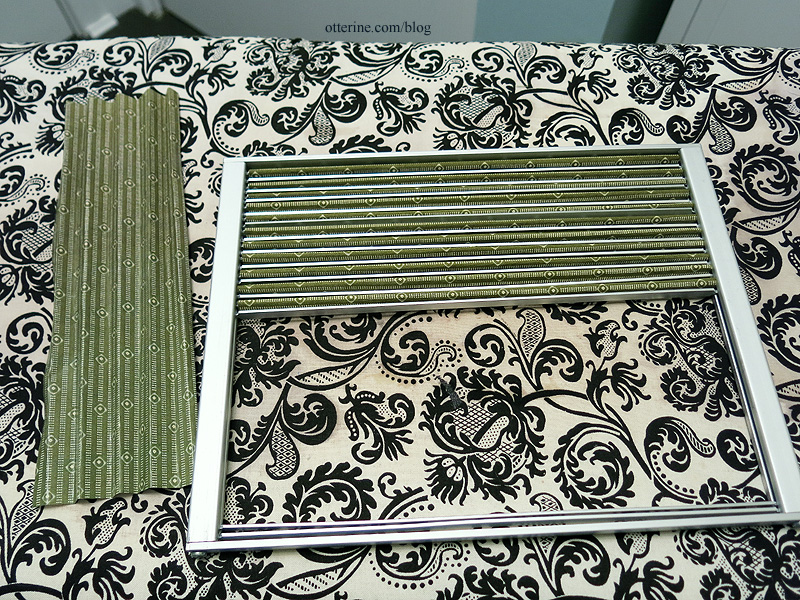
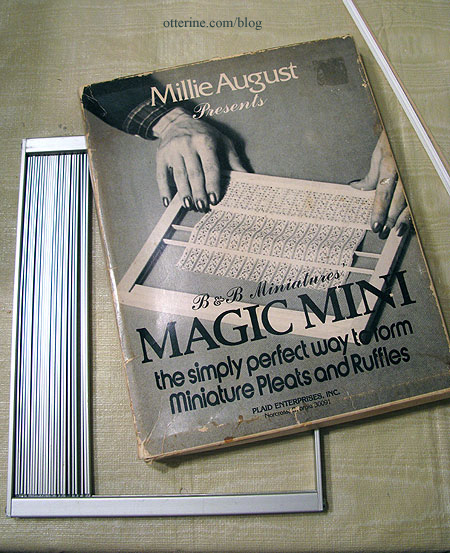
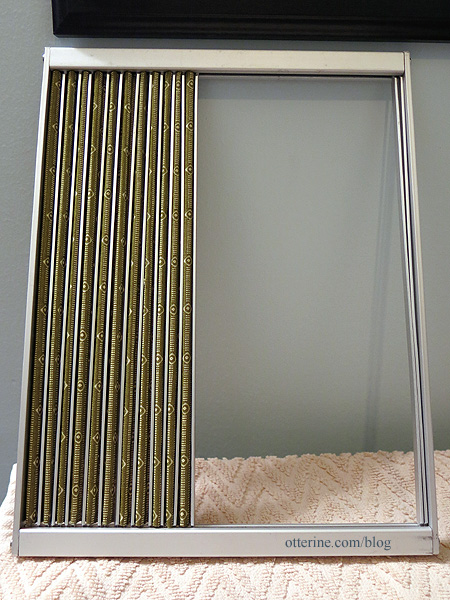
I’m using my vintage Millie August Magic Mini pleating tool. I have a post on the process here. The only difference was this time I used Fray Check along all the edges since the fabric wanted to fray just looking at it.
I’ve set them aside to dry until I’m ready for them…should have a good pleat by then. I’ll likely spray them once I remove them from the pleater so they keep their shape, but for now it keeps them out of the way to leave them in the pleater.
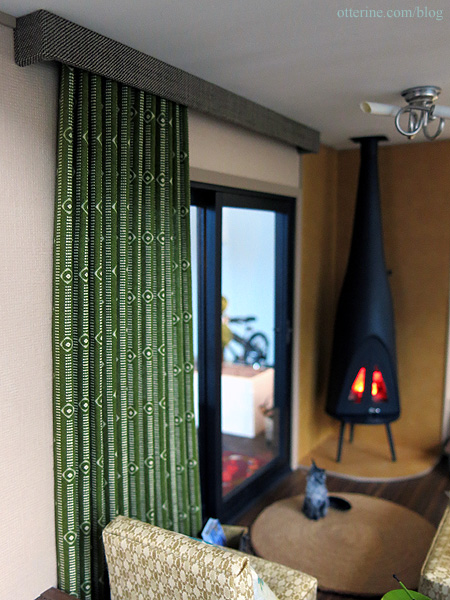
Here’s how it looks installed in Otter Cove. The valance is made from scrap wood and covered in fabric. The valance is glued to the wall, but the drapery panel just slips into place underneath so it can be removed for cleaning or replacement.
Categories: Otter Cove
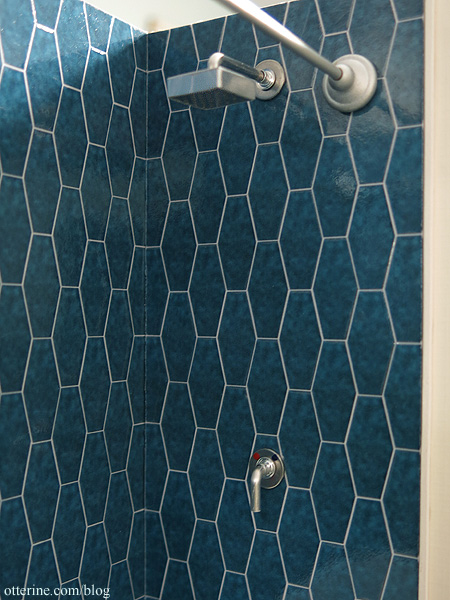
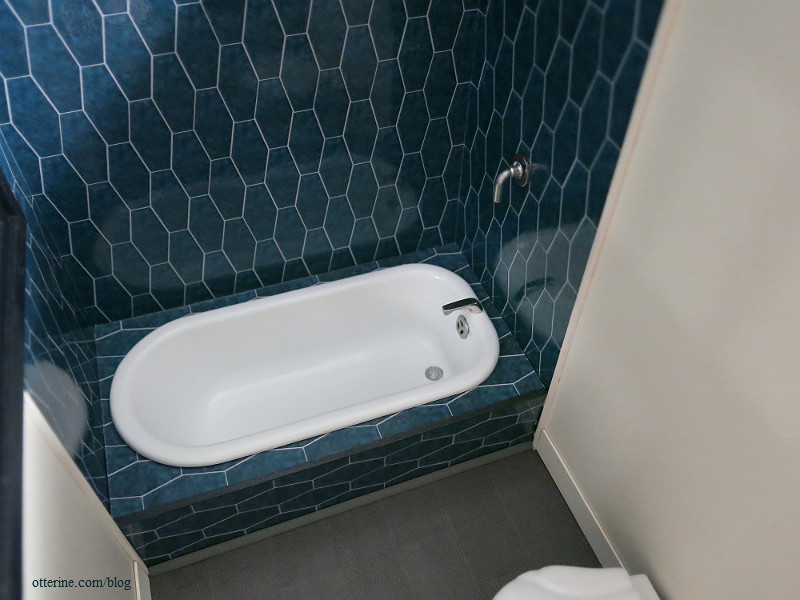
November 24, 2015 | 0 commentsModern bathroom tiles
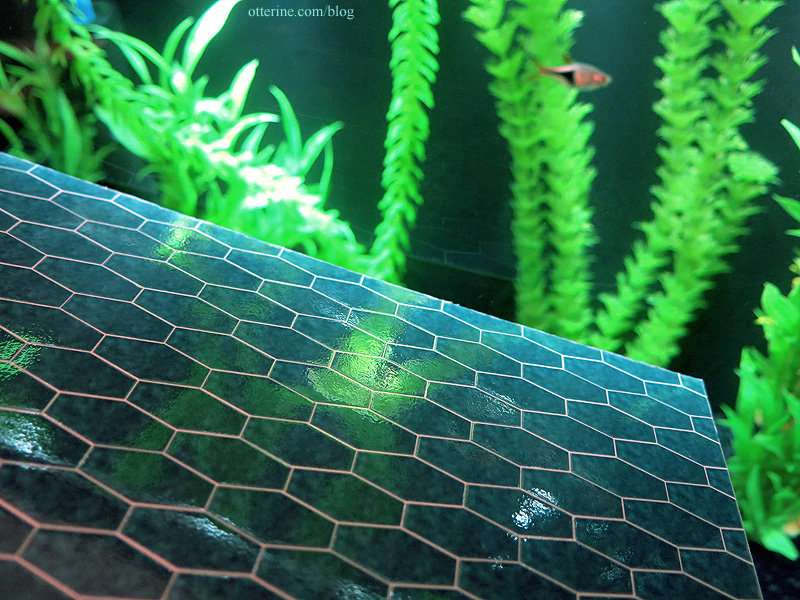
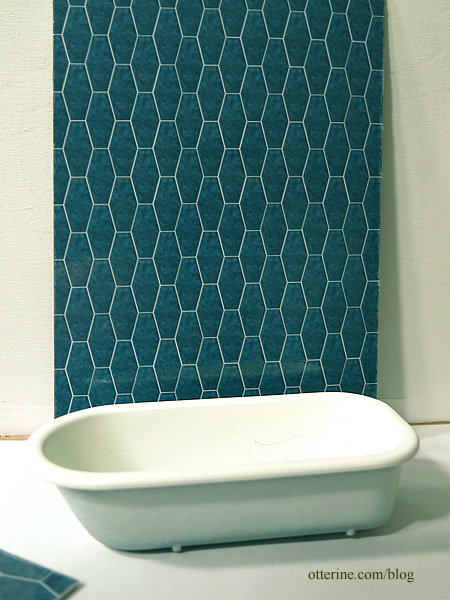
I made the shower tile using Word. (Yes, Microsoft Word.) I started by making a page of long hexagons filled with a tile texture sampled from real life tile and edged with a thin white border. I printed this on computer paper and used 3M Super77 spray glue to adhere the paper to mat board. I applied a generous coat of Triple Thick Gloss Glaze. Once dry, I cut the tile sheets to fit my space and used a stylus to score the grout lines.
The tub is a spare Chrysnbon piece purchased from Sir Thomas Thumb at the local mini shows; these came without hardware but are perfect when you want the tub to make a built-in.
The floor tile is Bazzill Basics paper in Dusk; it has a subtle texture. I used 3M Super 77 spray glue to mount the paper to a layer of bristol board. I sealed it with Delta Ceramcoat Satin Varnish and cut the tiles in 3/4″ x 1 1/2″ pieces. I was going for the modern porcelain tile look.
I’ve been adding trims and bath hardware.
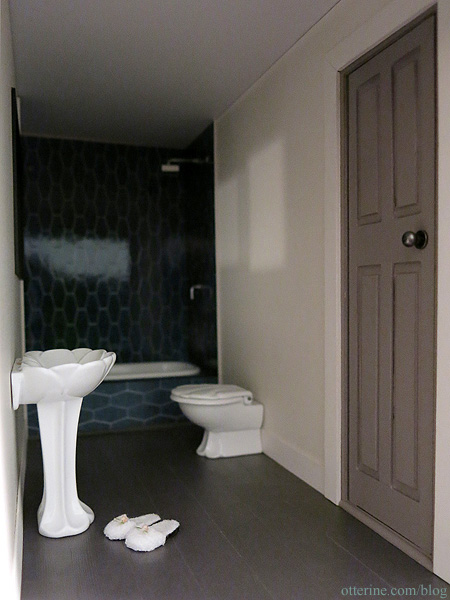
The shower head is from ELF Miniatures. I added washers around both the water lever and the shower head then painted color detail for hot and cold.
The overflow is the tip of a pen cap. I had a drain cover, but I had to snag that for the kitchen sink so I ended up painting the molded drain in the tub. The faucet is vintage hardware.
Categories: Otter Cove
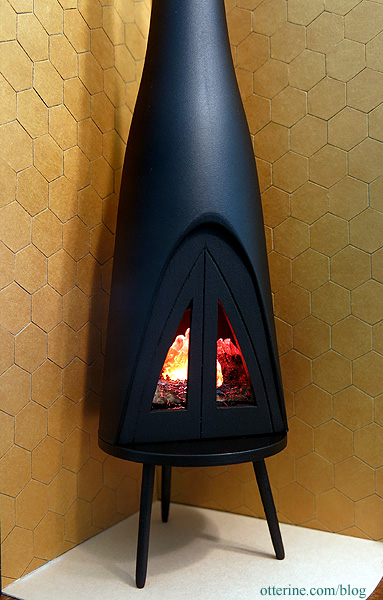
November 19, 2015 | 0 commentsModern wood stove
I finished up the stove and have it installed. It’s held in place with tension alone. I have it wired through the ceiling with a lot of extra wire looped inside the stove in case I need to remove it to replace the red bulb inside. The base is separate from the main stove; the flange top and fire insert are also removable.
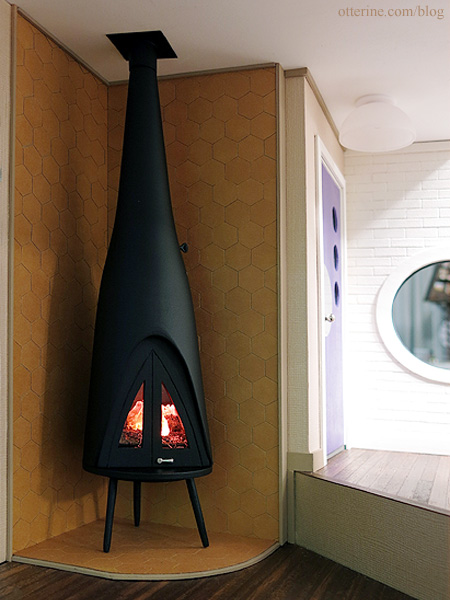
My inspiration was the Invicta Pow Wow wood stove. The surround is made from scrapbook paper cut with a hexagon paper punch. Yep, applied those tiles one at a time. The damper handle is from a defunct Chrysnbon kit that’s being used for parts.
Categories: Otter Cove
November 6, 2015 | 0 commentsMaking a custom door, part 4
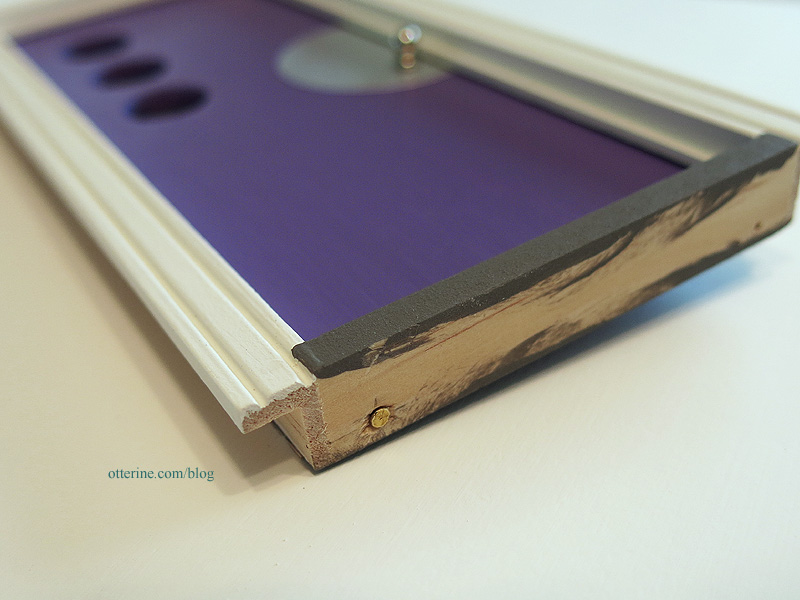
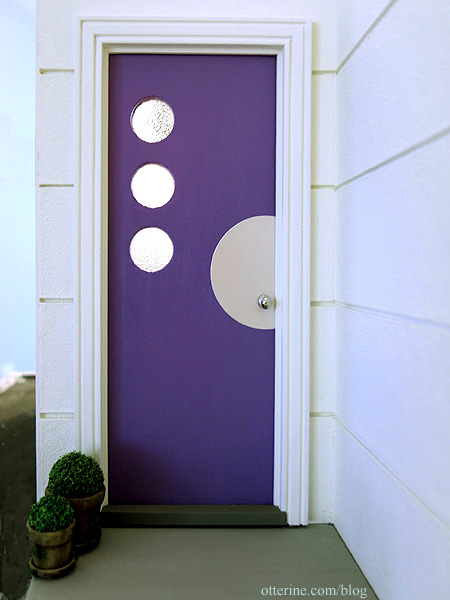
I’ve finished working on the custom door. I cut some Avery silver labels to add some interest around the door knob from ELF Miniatures. I didn’t add a lock detail because all of my attempts fell short of what I wanted. So, we’ll just say it’s a smart house and it knows who should come and go. :D
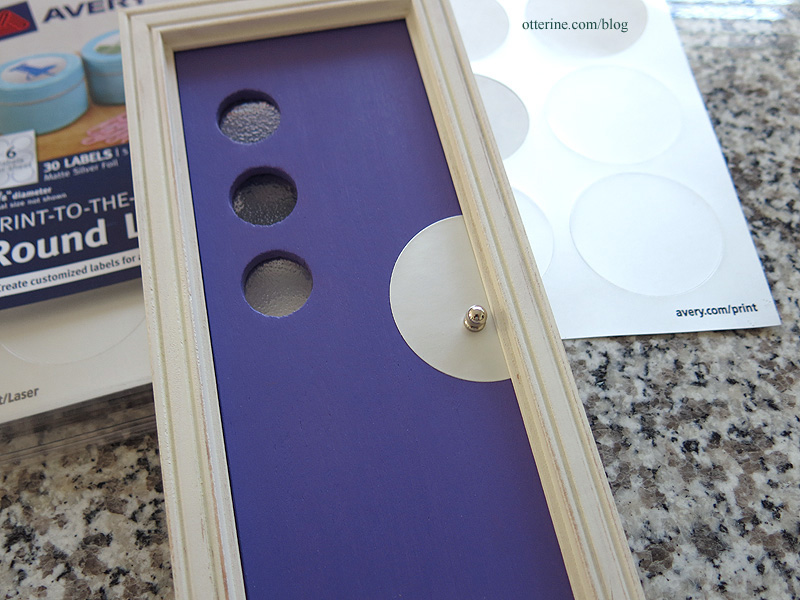
I like to cut out the underside of the hinge pin to countersink the pin head. This will keep the door from tipping or floating over the flooring surface.
I painted the door frame Warm White and the base step Neutral Grey, both by Americana. Here’s a sneak peek!
Categories: Otter Cove
October 21, 2015 | 0 commentsNine Horses wall tapestry
I’ve mentioned before that I save things in an inspiration folder. Quite a few years ago, I ran across a mousepad with an image of vintage needlepoint on it. I couldn’t tell if they were supposed to be llamas or horses, but they were definitely 1960s-1970s colors and style. Into the file the image went.
I later thought about that old image, so I looked for the mousepad website again but couldn’t find it. I did find another website showing the same image, with the same name as old seller with the mousepads. I wrote to the person for info about the origin of the design, but never received a reply. The image was clear enough and the design simple enough that I was able to draft a pattern to make a miniature reproduction for my personal collection. That was as far as I got.
Moving has its upside in that you find stuff you forgot about. As I was sorting needlework patterns, I ran across my pattern. I went back to the website with the photo of the needlework and found a different website for the same seller. I wrote to her again and heard back this time. She wasn’t sure of the origin and thought the needlework had been done 35 years ago.
In the meantime, I also did a new google search and a different image of the same design showed up at an auction house. No idea if this was related to the mousepad seller or not. I don’t even know if it is a one of a kind work or if there was a pattern for it way back when.
I stitched my adaptation of the design on 32ct Jobelan fabric in parchment using two strands of DMC floss in half cross stitch. Needlepoint (half cross stitch) goes twice as fast as full cross stitch. I finished the stitching portion of the Nine Horses tapestry in 38.5 hours.
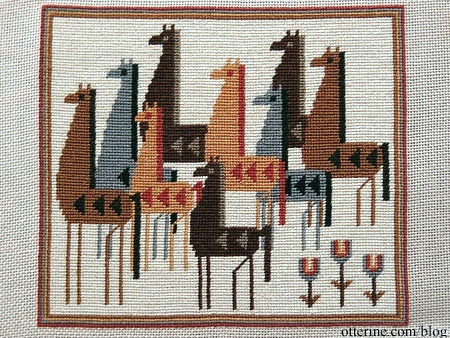
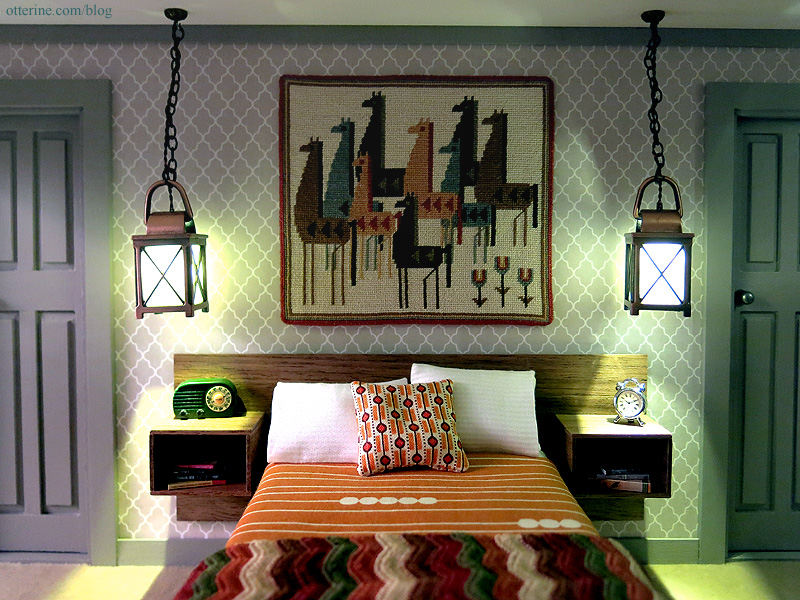
I turned under the edges and hung it in the bedroom of Otter Cove. The final measurements are roughly 4 x 3.5 inches.
Categories: Needlework - French knot rugs, Otter Cove
September 17, 2015 | 0 comments
NOTE: All content on otterine.com is copyrighted and may not be reproduced in part or in whole. It takes a lot of time and effort to write and photograph for my blog. Please ask permission before reproducing any of my content. (More on copyright)