
NOTE: All content on otterine.com is copyrighted and may not be reproduced in part or in whole. It takes a lot of time and effort to write and photograph for my blog. Please ask permission before reproducing any of my content. (More on copyright)
Categories:

Rose rug – introduction
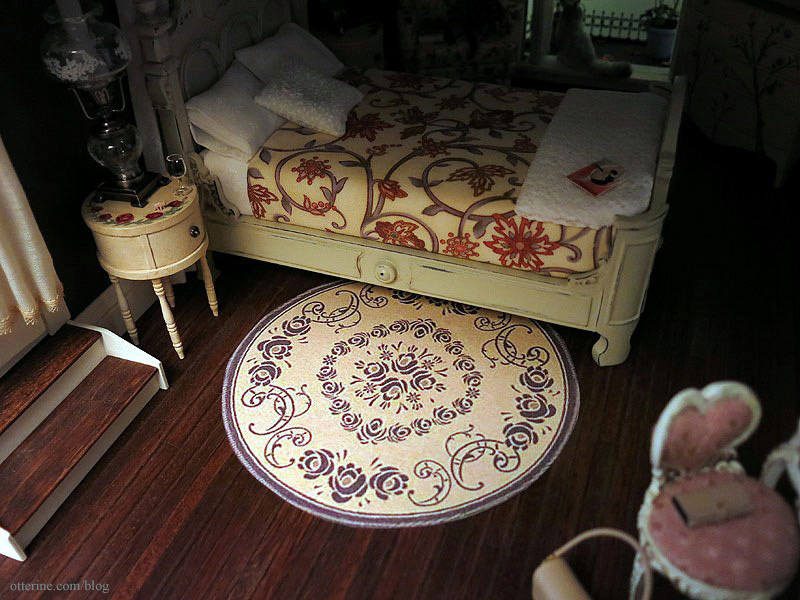
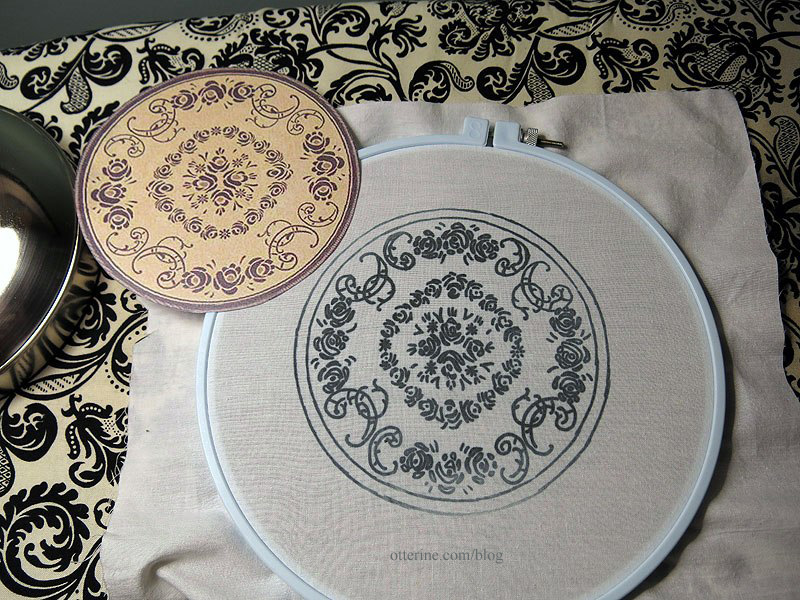
There were a few unfinished projects for the Haunted Heritage, one of which being the replacement rug for either the parlor or the bedroom. I looked online for a suitable replacement and found this design from overstock.com and printed out a paper mockup to see how I liked it in the bedroom. The subtle rose design suits the rest of the décor well.
I will use a simple color palette similar to the punchneedle rug by Katie Arthur. Here’s that rug in the bedroom. Very similar in overall style.
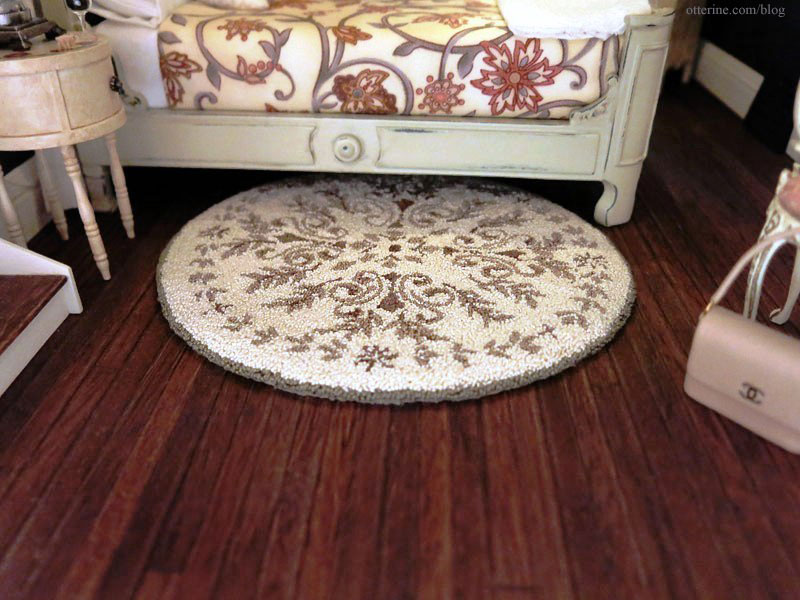
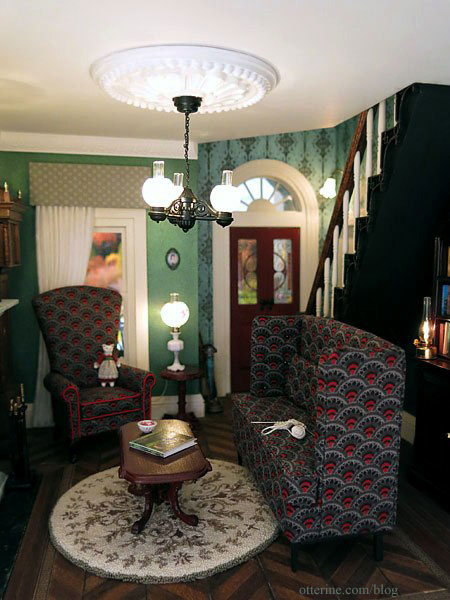
But, that rug will stay in the parlor, since I bought the rug for that room and like it there best. :]
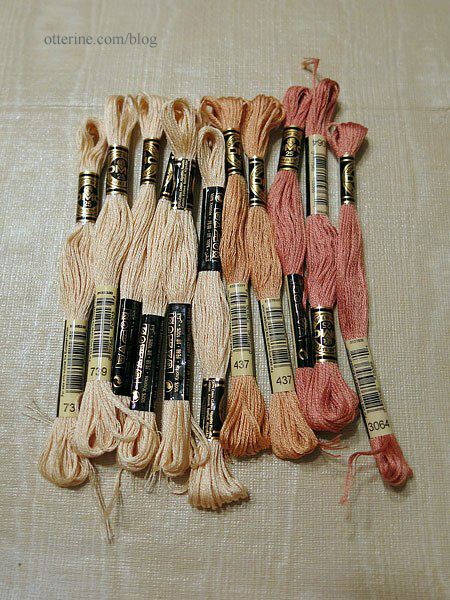
After looking at the pattern more closely, I decided to make the Rose rug in French knots instead of punchneedle. It’s roughly three times the area of the Bees and Trees rug, so it shouldn’t be too much of a time investment relatively and I think the texture will be wonderful. Here are my floss colors.
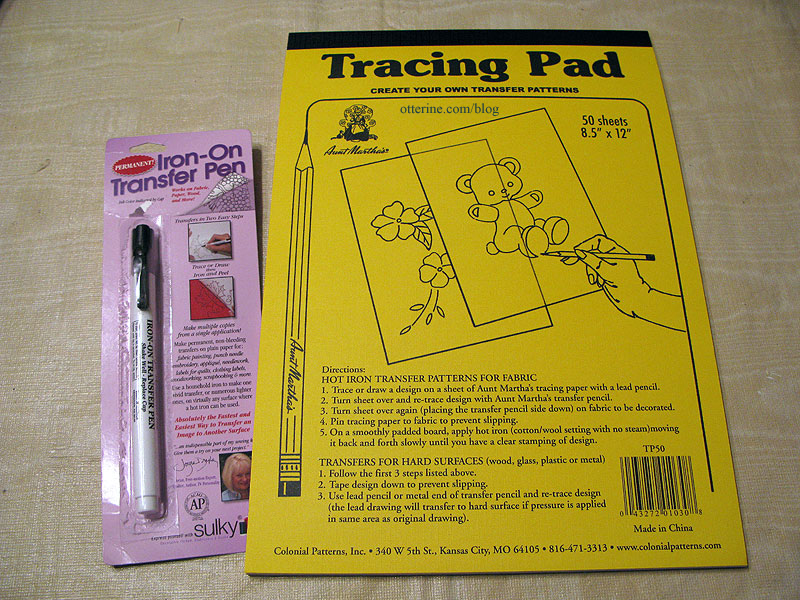
I used the same technique for making the pattern as I had done for the Prairie rug: Aunt Martha’s Tracing Paper and a Sulky Iron-On transfer pen in black (as an Amazon Associate, I earn from qualifying purchases). For detailed info on how I transferred that pattern, click here. (Note: I’ve since found fine tip transfer pens at Sublime Stitching which offer a better pattern for fine needlework. See this post for more info.)
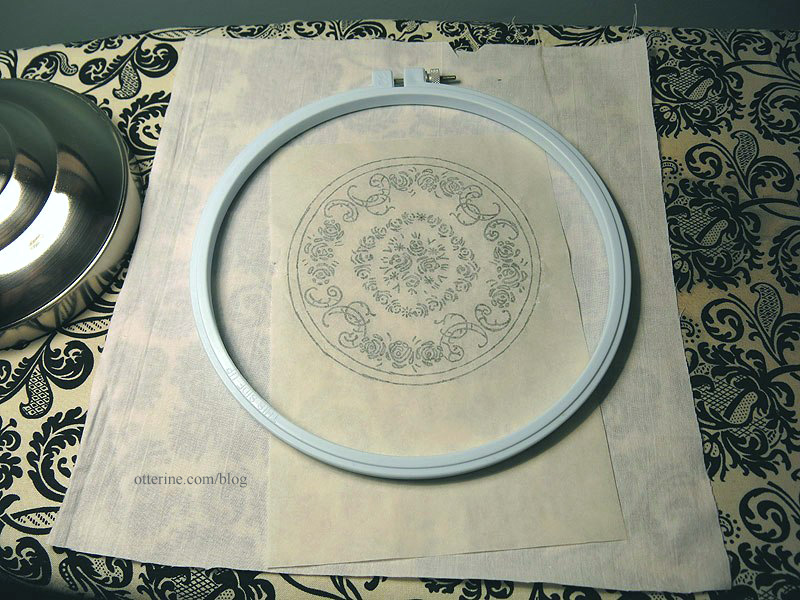
I measured a piece of cotton muslin to fit my 8″ hoop and centered the pattern in the middle. Something I didn’t think about this time is that I didn’t flip the photo before making my transfer pattern. Since there are no words in the design, it won’t make a difference.
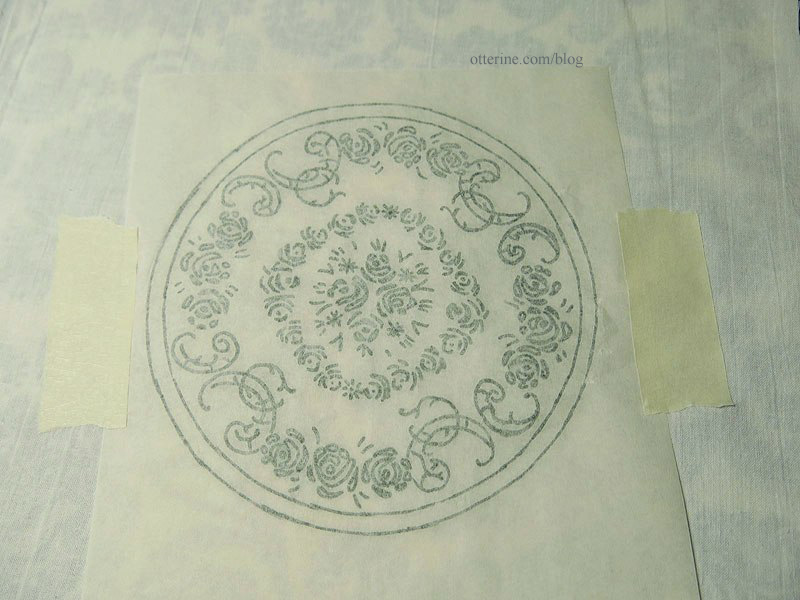
I had some operator error last time, so I taped the pattern to the fabric. I was careful not to iron over the tape so the sticky residue wouldn’t transfer to the fabric.
I fit the fabric in the hoop, and we’re ready to go! :D
Categories: Needlework - French knot rugs
September 3, 2013 | 0 commentsPrairie Rug – a major setback
At 29.25 hours of work on the Prairie Rug, a major problem came to light with this project. You can clearly see the two different colors of green/grey in this photo. I didn’t notice this until photographing the rug tonight since the colors look relatively close in person, but the camera really picked up the difference.
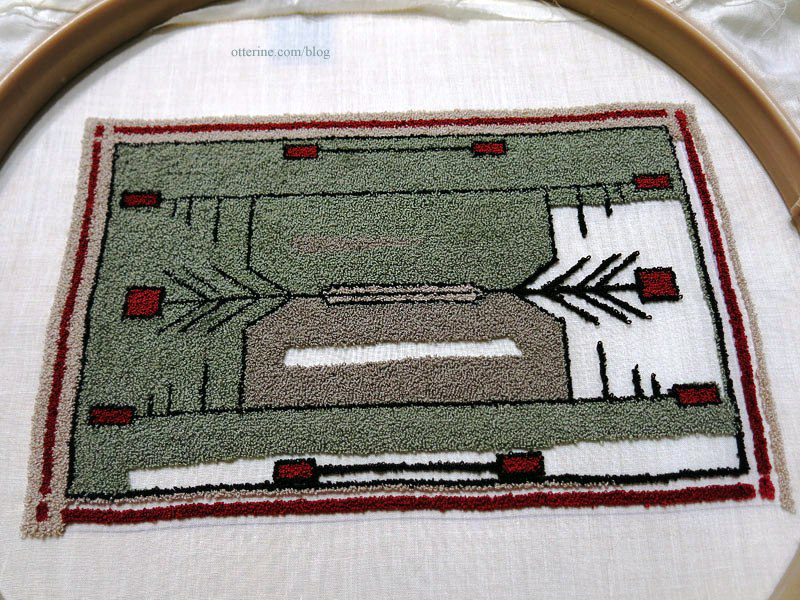
I am using a different brand of floss – Sullivans – for this rug because the store I went to did not carry DMC. I’ve always used DMC and have never had a problem. Of course, I’ve never done large swaths of color in DMC to make a fair comparison, but Sullivans clearly has shifts in dye lots. There’s no indicator of dye lot on the Sullivans tags as there is on DMC tags. I photographed the three skeins I have left on the rug, and they match the grey. I’m just glad this wasn’t a huge investment of time. It’s still frustrating and disappointing. :\
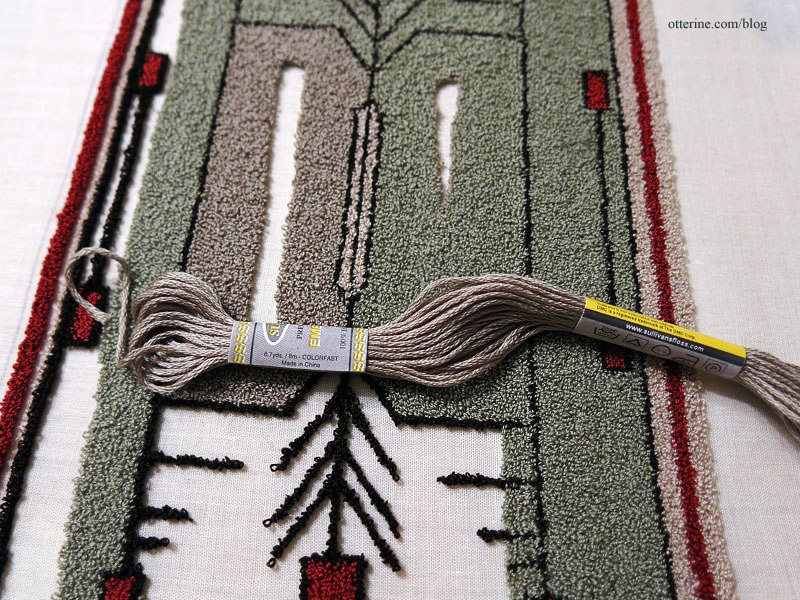
I contacted Sullivans, and they were very apologetic about the dye lot problem. They said they’ve never had this happen before. They sent a photo of their stock 45118, and I told them that looked like the color I bought. I requested four skeins, but they generously sent me a full boxed dozen. Unfortunately, these match the latest grey. I must have bought some old stock along with the newer stock that is now produced. Just to be clear, to the naked eye, they all look like sage green; it’s the camera that picks up the difference in color.
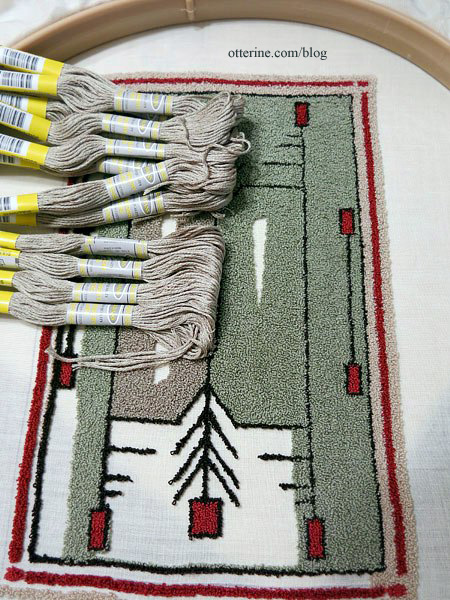
I have to say I was pleased with the quick reply from Sullivans and their willingness to help resolve the issue. No matter what brand I buy in the future, if I am going to have large expanses of one color in a project, I will shop with my camera to make sure they all match one another.
Categories: Needlework - French knot rugs
August 29, 2013 | 0 commentsBees and Trees – how to finish a French knot rug
I finished stitching the Bees and Trees French knot rug kit by Teresa Layman. It took me a total of 34.75 hours of stitching time, just over 5.25 hours per square inch for this tiny 3.25″ x 2″ rug. :]

I love the way it turned out, but I don’t think I will combine Colonial knots with French knots in my future rugs. I like both knots separately, but not together. The French knots are smaller and look cleaner in my opinion, especially when you have Colonial knots mixed in.
The following section is how I finish my rugs. I’m sure there are a number of ways to finish a rug, but this is the method I prefer.
I trimmed then turned under the edges, pressing them flat with an iron.

I try to roll the backing behind the outside edge of stitching as much as possible.

I put a small dab of Fray Check on each corner.


I folded each corner in, trying to make it as tight and invisible (from the front) as possible.

I then trimmed inside each corner to reduce the bulk. This is why I use Fray Check, to make sure these corners stay true over time.

I trimmed the turned edges closer.

I cut a piece of iron-on adhesive sheet smaller than the rug, making sure it would cover the turned edges.

I use Heat-n-Bond Ultimate.

I ironed it to a piece of scrap cloth. This cloth is actually from the same French knot kit, cut away when I trimmed the rug edges.

I cut around the scrap cloth and checked the fit on the back of the rug.

I then ironed the scrap cloth to the back of the rug. This adds only the slightest thickness, but it protects the stitching in the back and keeps the edges secure. It also helps keep the rug flat.

I just want to run my mini toes through that soft pile rug! :D
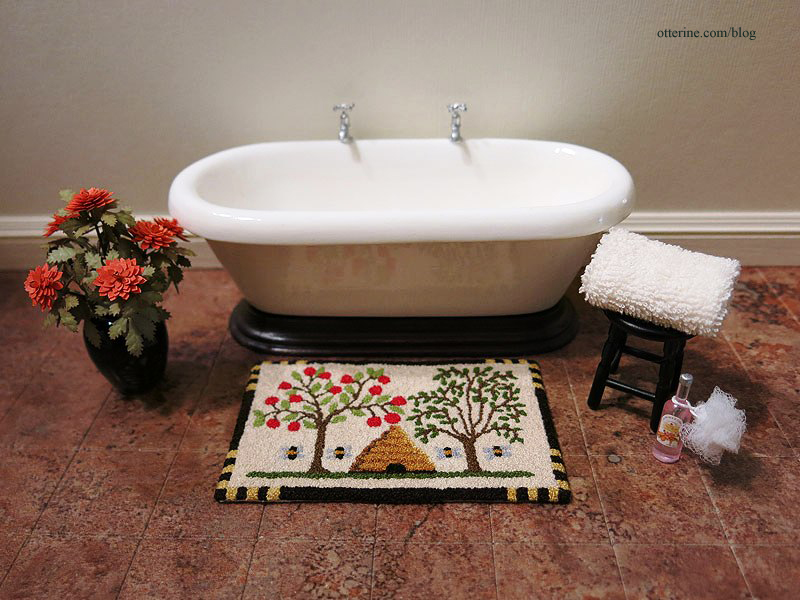
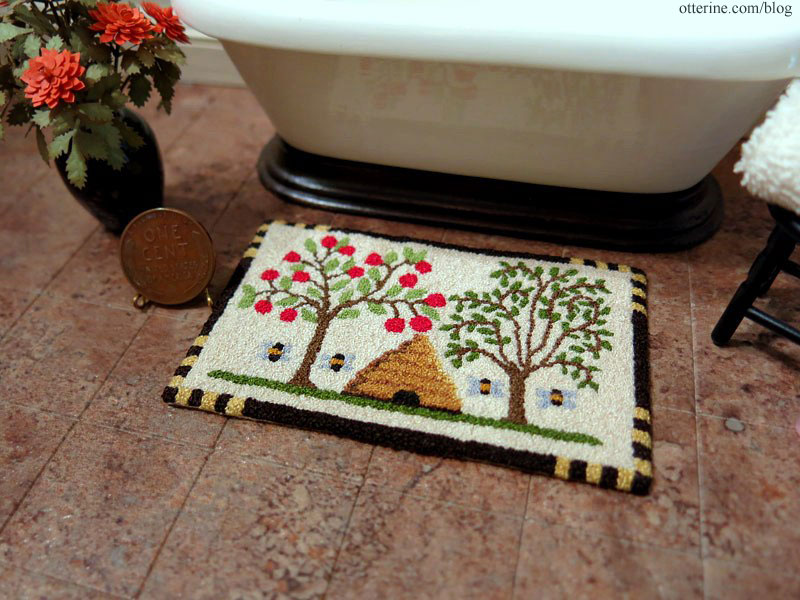
Here’s a penny to show the size. You can see just a hint of the turned edges. If I find it bothersome in its final location, I will color the edges of the turned fabric with a permanent marker of the closest matching color.
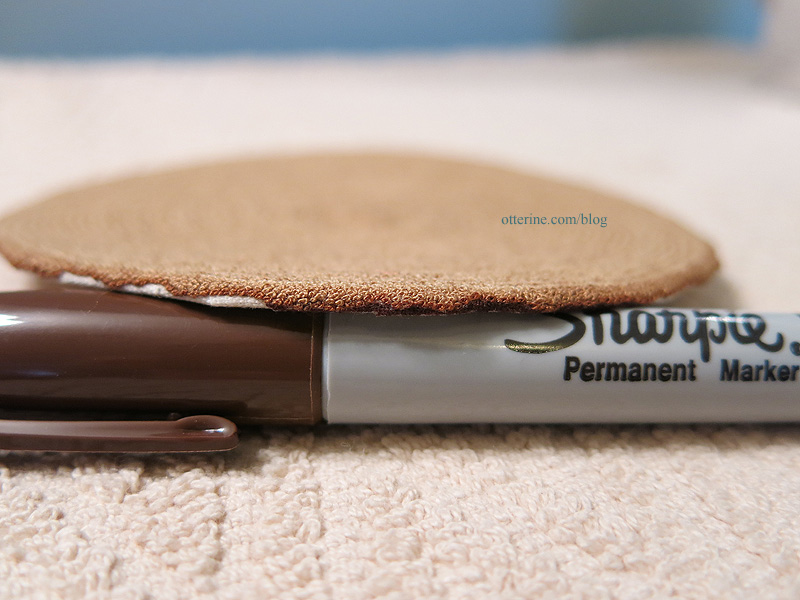
Here’s an example from the Tree Ring rug, where I used a brown Sharpie to color the turned edges to make them less conspicuous. You do have to be careful with this method and use a light touch, but it works well.
Here’s the French knot rug in comparison to the Prairie punchneedle rug.

The pile is definitely finer with French knots, but punchneedle takes considerably less time and is still convincing in miniature.

Categories: Needlework - French knot rugs
July 22, 2013 | 0 commentsBees and Trees rug – introduction
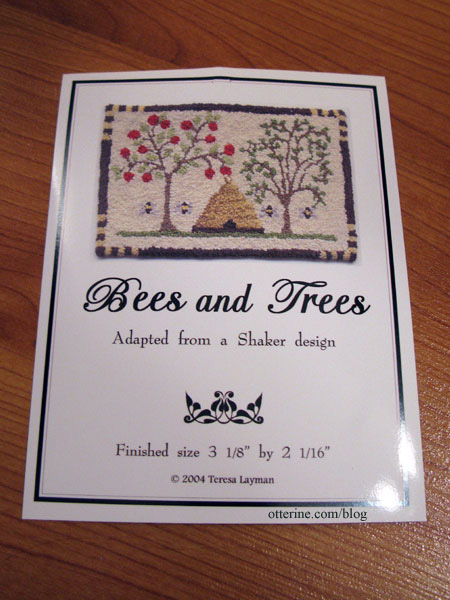
I opened the package and sorted by yarns for the Teresa Layman Bees and Trees French knot rug. I had most of the suggested colors on hand but substituted a few like colors for the missing ones.
It actually uses a combination of Colonial knots and French knots, neither of which are familiar to me. I know I did a lot of them incorrectly at the start, but you can’t tell. Below is 2 hours of work, though I am sure to become more proficient as I go along.
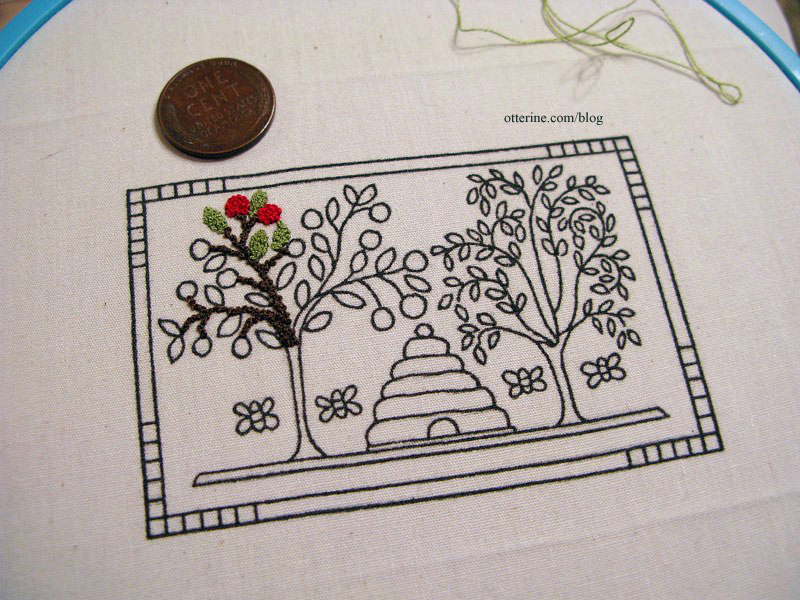
I’ve never tried one of these but think French knot rugs provide the best illusion of proper scale in miniature. I bought three of her kits at the 3 Blind Mice show, but opted for this one to start. They are all similar in complexity, but this is the smallest of the three.
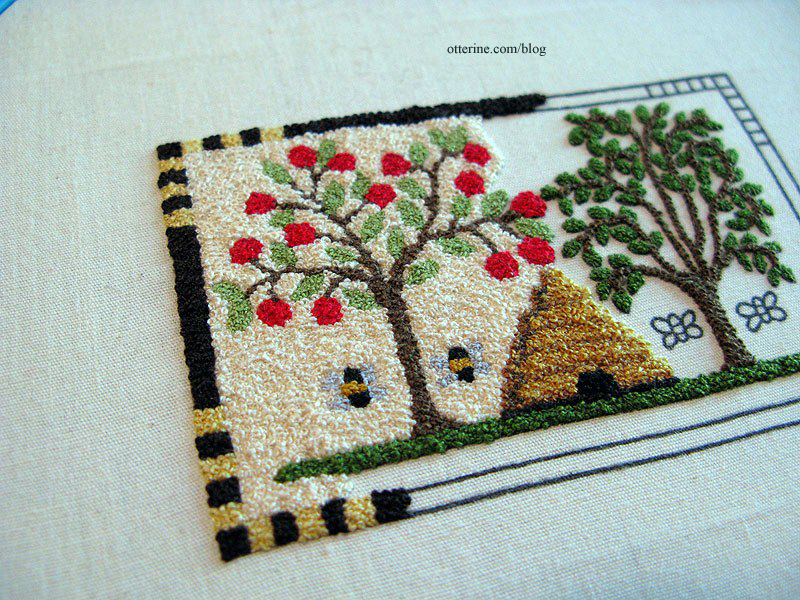
Update: I’ve managed to work a little each day, and the Bees and Trees rug is probably halfway done if you were to transfer the stitching from the right tree over to the empty spot on the left. I’m at 19.5 hours of work below.
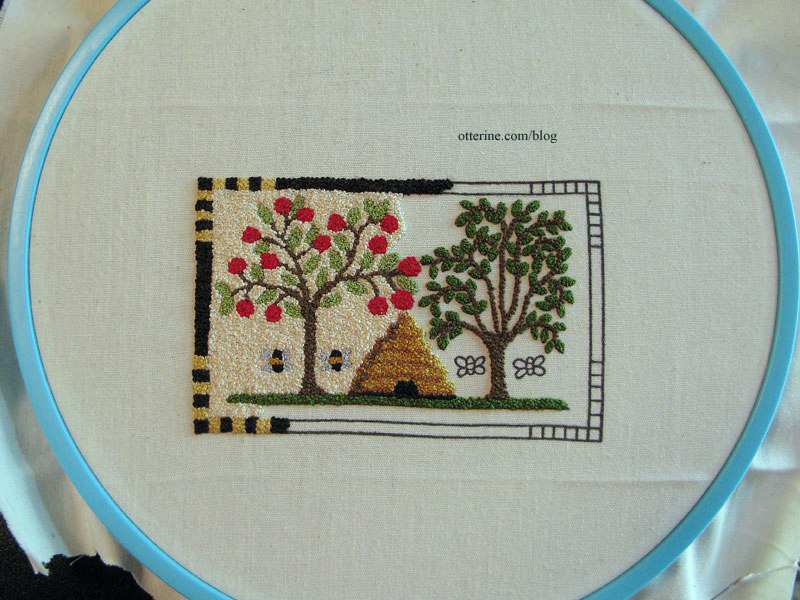
I love the way these knotted rugs look in mini…such great texture. I departed from the kit instructions just a little. For smaller areas that called for Colonial knots, I used French knots instead since it seems a softer texture. I might just be doing the knots wrong, but I find the Colonial knots are slightly larger than the French knots. I’m also using a combination of the two to fill in the background for the same reason…the French knots can get into smaller spots around the trees and other details and they can fill in between the Colonial knots. (Note: going forward, I’ve used French knots exclusively since it’s a more consistent texture for the way I stitch.)
Categories: Needlework - French knot rugs
June 9, 2013 | 0 commentsPrairie Rug – part 1
I’ve been meaning to give punchneedle a try since I bought the fine rug for the Haunted Heritage from Katie Arthur. I love doing cross-stitch but it does have its drawbacks for absolute realism in mini. French knot rugs offer the best illusion of rugs in scale, but they are also time consuming. Punchneedle seems to be a good compromise.
I found this beautiful Prairie rug on Mitchell’s Interiors and printed it out at 9″ x 6″ as a large area rug. It would be gorgeous in French knots but that would take forever! :O
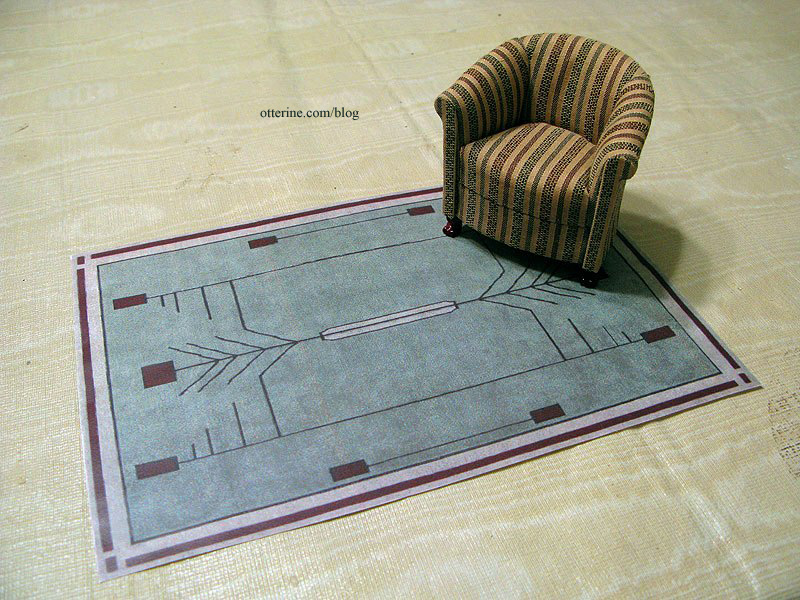
Click this post for instruction on getting from a printed image to a pattern on fabric ready for stitching. The area shown in the pic below took 3.5 hours to stitch, and at this point I am still going slowly to make sure I maintain good coverage on the background. It’s relatively easy to go back and add more loops in, but I figure it’s worth taking it slower and not having to rework areas later on. As you can see, it’s much faster than French knot work or cross-stitch. And, the more you fill in, the better it looks.
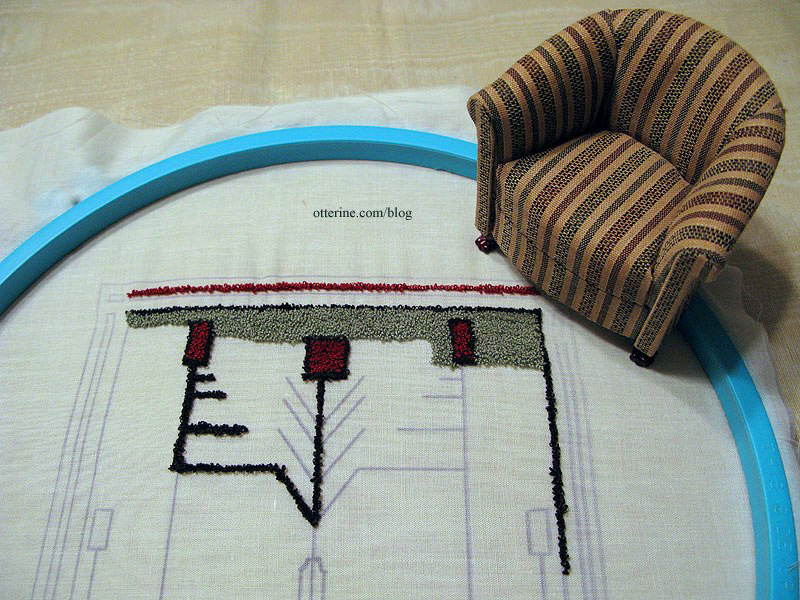
Here’s the rug at 9.5 hours of work. I’ve found the loops to be mostly consistent as I learn the process. Having the tighter hoop has made a world of difference, too. For the few loops that stick up too far, I just clip them with sharp embroidery scissors. As long as you don’t pull, there’s no risk of them coming out. You can also keep punching until you run out of thread, so you will have the occasional long thread hanging on the front side. These can be cut also, just don’t pull on them.
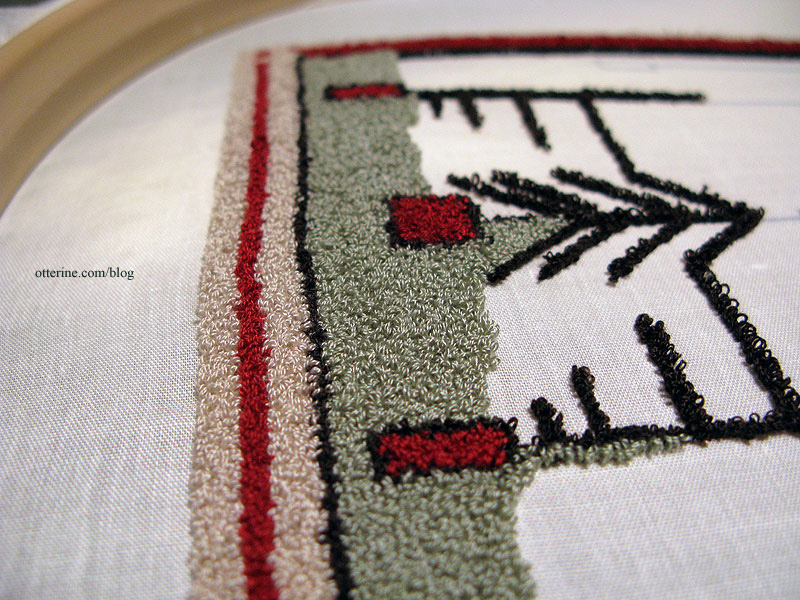
On the back, you can see the initial green areas where I worked are less clean and orderly. I’m getting the hang of working with the needle and cutting my strings longer. Holding your work up to the light helps to see if there are any thinner areas of stitching you need to fill in.
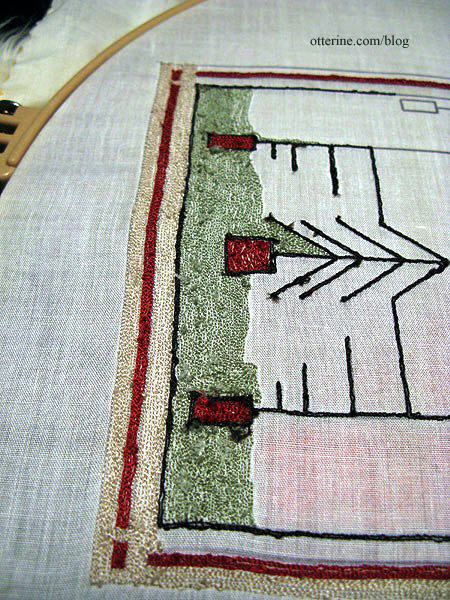
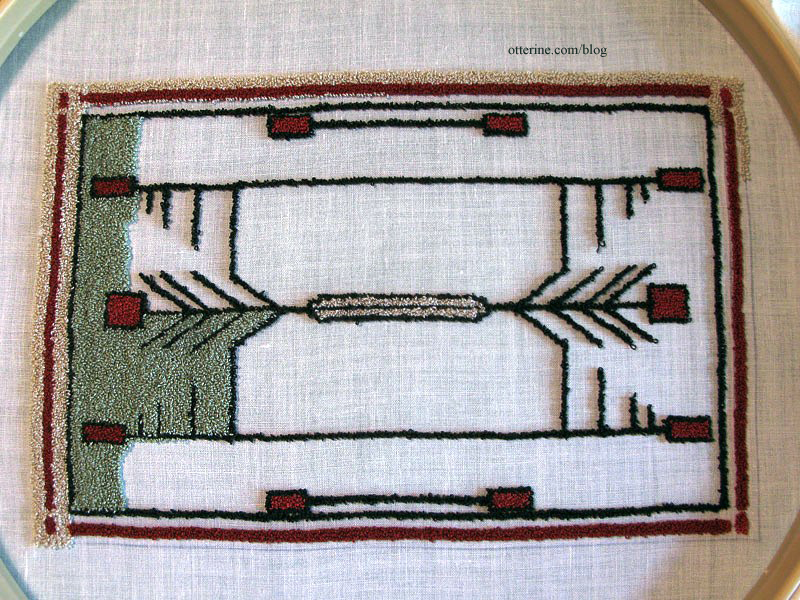
And, below at 14 hours of work with a lot more filled in.
Categories: Needlework - French knot rugs
June 9, 2013 | 0 comments
NOTE: All content on otterine.com is copyrighted and may not be reproduced in part or in whole. It takes a lot of time and effort to write and photograph for my blog. Please ask permission before reproducing any of my content. (More on copyright)


