
NOTE: All content on otterine.com is copyrighted and may not be reproduced in part or in whole. It takes a lot of time and effort to write and photograph for my blog. Please ask permission before reproducing any of my content. (More on copyright)

Nine Horses wall tapestry
I’ve mentioned before that I save things in an inspiration folder. Quite a few years ago, I ran across a mousepad with an image of vintage needlepoint on it. I couldn’t tell if they were supposed to be llamas or horses, but they were definitely 1960s-1970s colors and style. Into the file the image went.
I later thought about that old image, so I looked for the mousepad website again but couldn’t find it. I did find another website showing the same image, with the same name as old seller with the mousepads. I wrote to the person for info about the origin of the design, but never received a reply. The image was clear enough and the design simple enough that I was able to draft a pattern to make a miniature reproduction for my personal collection. That was as far as I got.
Moving has its upside in that you find stuff you forgot about. As I was sorting needlework patterns, I ran across my pattern. I went back to the website with the photo of the needlework and found a different website for the same seller. I wrote to her again and heard back this time. She wasn’t sure of the origin and thought the needlework had been done 35 years ago.
In the meantime, I also did a new google search and a different image of the same design showed up at an auction house. No idea if this was related to the mousepad seller or not. I don’t even know if it is a one of a kind work or if there was a pattern for it way back when.
I stitched my adaptation of the design on 32ct Jobelan fabric in parchment using two strands of DMC floss in half cross stitch. Needlepoint (half cross stitch) goes twice as fast as full cross stitch. I finished the stitching portion of the Nine Horses tapestry in 38.5 hours.
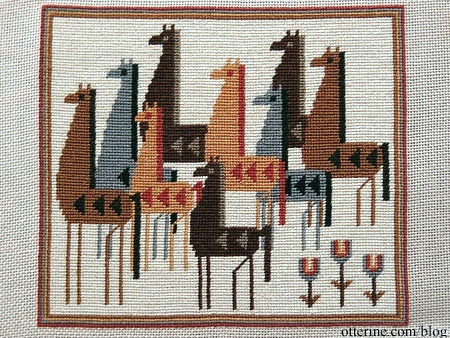
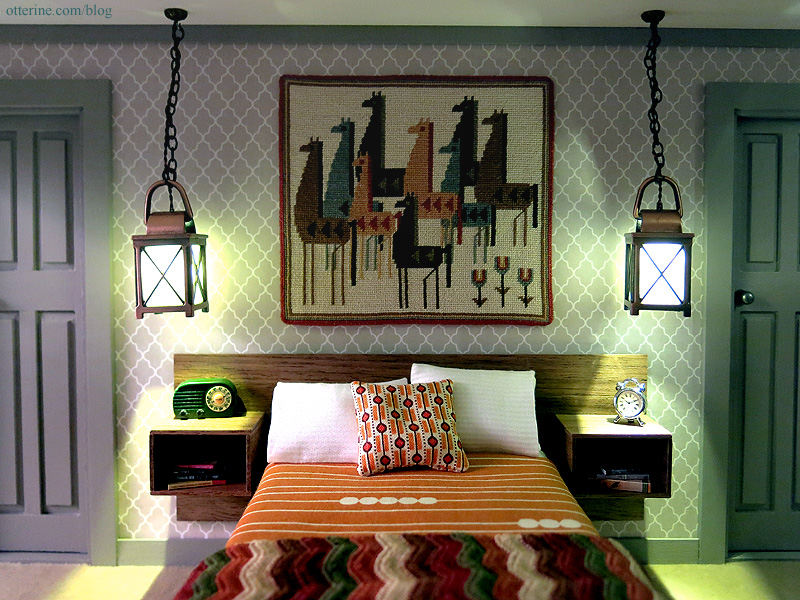
I turned under the edges and hung it in the bedroom of Otter Cove. The final measurements are roughly 4 x 3.5 inches.
Categories: Needlework - French knot rugs, Otter Cove
September 17, 2015 | 0 commentsMorgan Lap Stand
I’ve shown you the wonderful wooden Baby Z Lap Frame I have to hold my needlework projects. It’s portable and well made. It is relatively heavy, but that works well to hold it in place while in use.

I’ve also shown you the Morgan No-Slip hoop that holds the fabric tight.
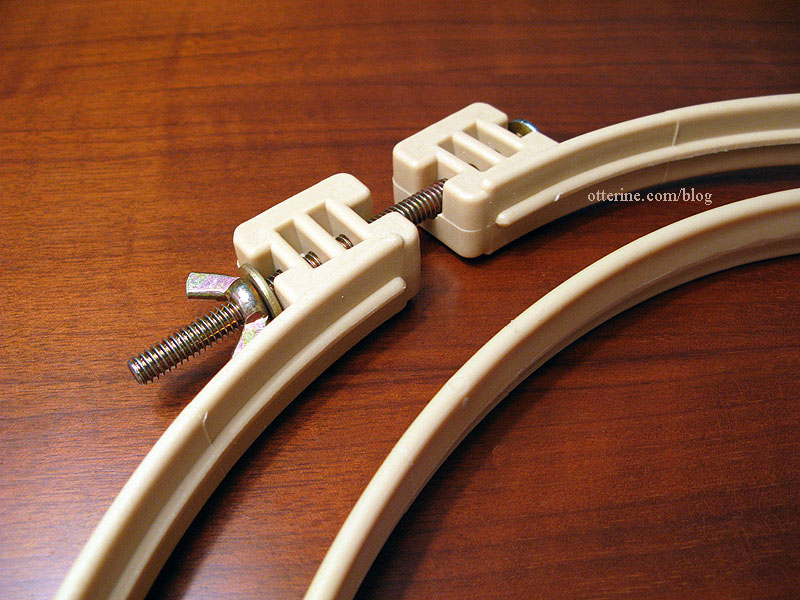
Well, I now have a Morgan Lap Stand. This set has two no-slip embroidery hoops and extenders to create a lap frame. (As an Amazon Associate, I earn from qualifying purchases.)

There are many sizes available, but I chose the 7″ and 9″ set. You can use the stand with either the large or small hoop as the base.

This is especially nice for French knot work or if you want to rotate the work at all. It can be used either on your lap or on a tabletop. You can also use either hoop by itself. These will fit in my wooden lap frame, too. It collapses for travel and storage, though you’ll need a bag to keep all the pieces together.

I found working with this frame on a tabletop to be quite comfortable even though it is a flat surface. You could probably prop a towel or pillow under one edge to angle it if desired.
Categories: Needlework - French knot rugs
March 11, 2014 | 0 commentsPrairie Rug II
As you may recall, the first Prairie Rug ran into a major problem with dye lot mismatching.
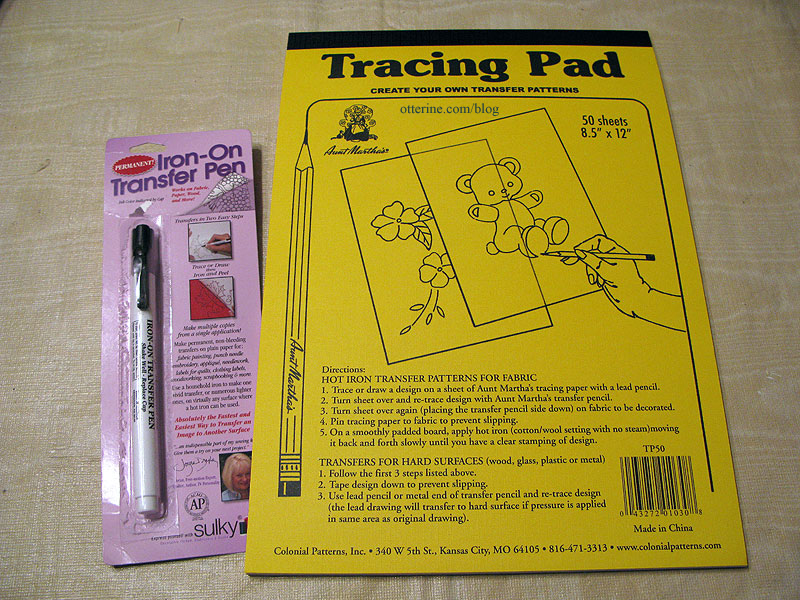
I used the original pattern I had made with Aunt Martha’s Tracing Paper and a Sulky Iron-On transfer pen in black (as an Amazon Associate, I earn from qualifying purchases). You can obtain a few transfers from the same pattern. (Note: I’ve since found fine tip transfer pens at Sublime Stitching which offer a better pattern for fine needlework. See this post for more info.)

I chose a slightly darker purple-red and have made the brown DMC 3371 outlines thicker. One nice thing about starting over is being able to change things you were unhappy with in the first run. Punchneedle goes relatively quickly, so below is 7.5 hours of work. The border is done as well as most of the interior details. After that, it will be all green, green, green. I bought nine skeins of DMC 522 all of the same dye lot, so I hope this means the issue will not repeat itself.

Below is 15.5 hours of work. It seems to be going faster this time around now that I have the hang of the technique.

I finished stitching the Prairie Rug II with 24.75 hours of stitching time, which is a lot less than what I put into the first one I had to abandon. As I mentioned, I had a better handle on the technique so I was able to work more quickly.
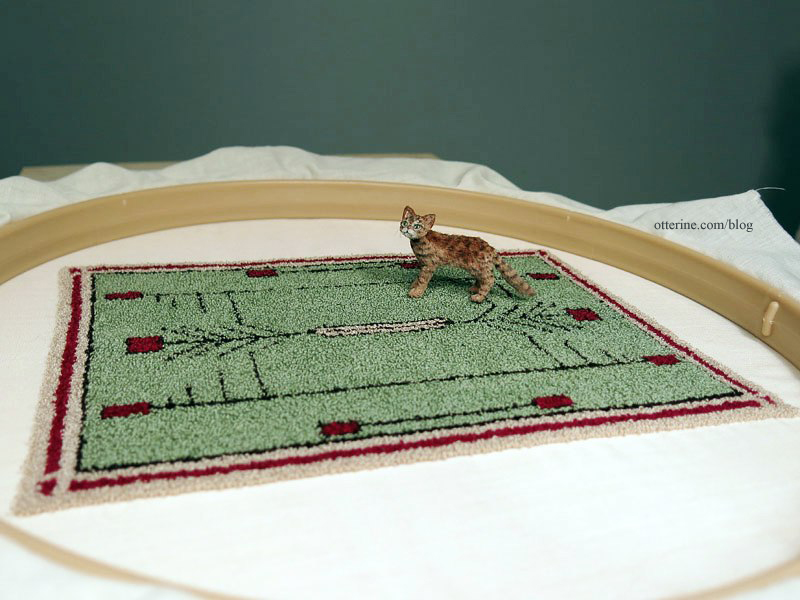
I need to go back over it once more, clip any random long loops and fill in anywhere I think it needs it. Then it will be time for final finishing around the edges.
Categories: Needlework - French knot rugs
January 13, 2014 | 0 commentsPunchneedle tips and tricks
I’m not an expert on punchneedle, but several people have contacted me about it so I decided to make a blog post with some of the things I’ve encountered. I haven’t finished a punchneedle rug, but when I do I will add those instructions here.
Find the largest (highest resolution) image of your design as possible if you are adapting from a real life design. This will help you capture as much detail as possible. Print the image in the finished size you want in the house, test out the fit and adjust as needed.
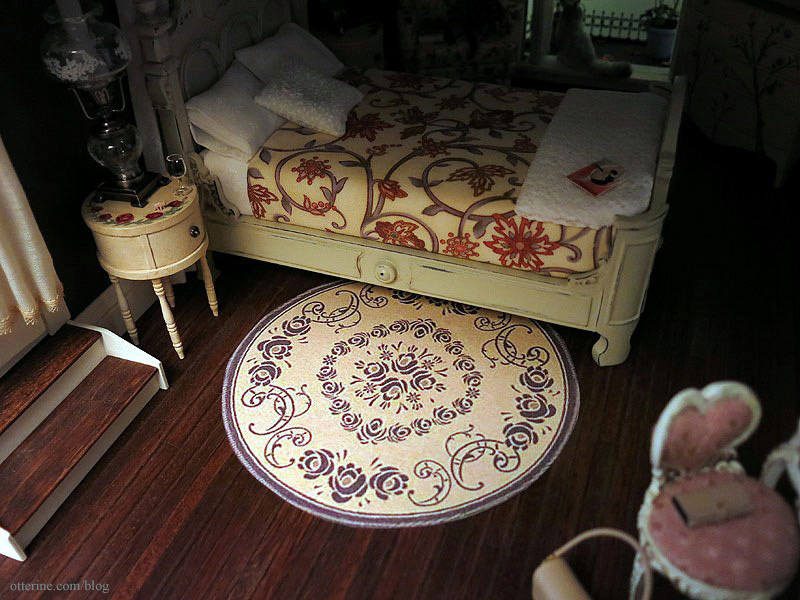
Make a high contrast printout in the final size (shown on the left in the photo below). You can do this with any program that allows you to adjust the brightness and contrast of an image. You need to be able to see the design through the tracing paper.

Trace the high contrast printout using Aunt Martha’s Tracing Paper and a Sulky Iron-On transfer pen in black (as an Amazon Associate, I earn from qualifying purchases). Simplify the detailing. You can stitch in more detail, but you don’t have to draw it all in. (Note: I’ve since found fine tip transfer pens at Sublime Stitching which offer a better pattern for fine needlework. See this post for more info.)
The recommended fabric is “weaver’s cloth” but I’m not sure exactly what that is. You can purchase it from the same place that sells the needles. I went to Joann and bought a poly/cotton, relatively sheer woven fabric. You don’t want anything bulky. I bought a Dee Lite Ex. Small punchneedle (website defunct as of 2024) and adjusted the dark blue stopper as close to the tip as possible while still getting the loops to stick.

The pile on my rugs is roughly 1/16″ high, about as short as you can get it without issues.

You’ll need needle threaders, but I think those come with the punchneedle. Take really good care of these since a bent one won’t work and you can’t use the needle without one. I keep mine in a folded Vermont Covered Bridges map since it’s the right size and doesn’t bend.

Get a Morgan no-slip hoop in the appropriate size (my review here). You’ll want a little room around the rug design but also consider the size of any rugs you want to do in the future. The fabric has to be as tight as you can get it, otherwise the loops slip out during stitching. (As an Amazon Associate, I earn from qualifying purchases.)

Follow the package instructions for the iron-on transfer to your fabric. Be sure to take into consideration your hoop size when you place the design on the fabric. You will be working from the back, with your finished design away from you. Your transfer will be “opposite” of your original, but the final piece will match your original. In other words, you don’t need to flip your design.
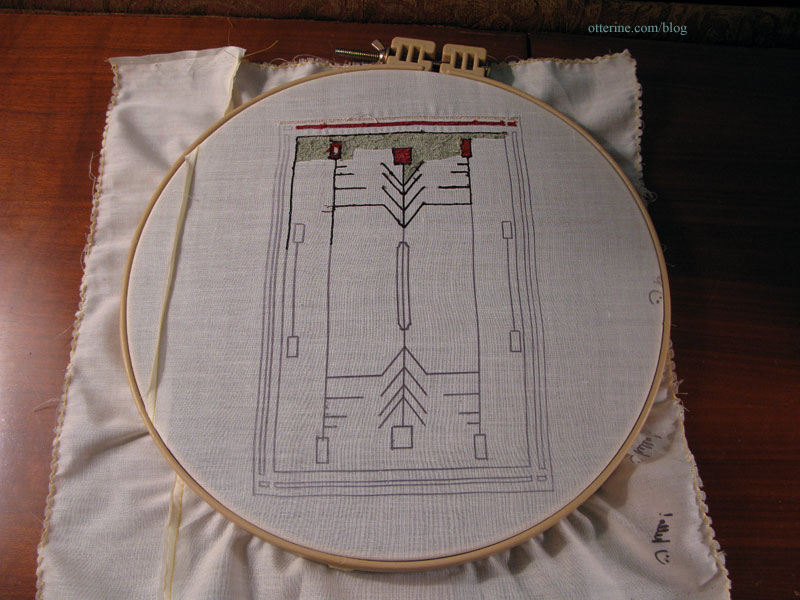
Here you can see where the hoop would pull on some areas if not large enough to frame the entire design.
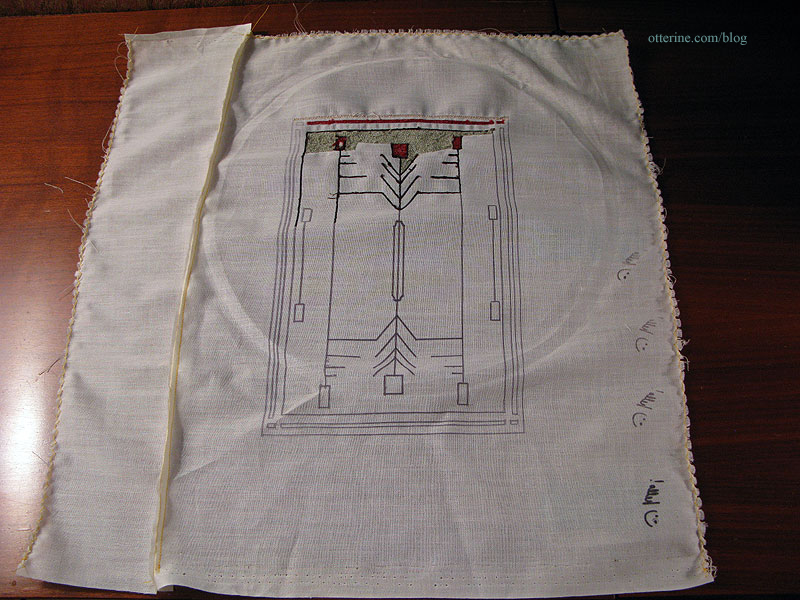
And, you can see where I had cut my fabric too close, so I had to sew on some additional fabric.
Buy DMC embroidery floss in your chosen colors. You will need more than you think. Punchneedle takes a lot of thread. Wait for a sale or a coupon, but buy a lot of each color, especially backgrounds. Make sure the dye lot numbers match, too.
When working with the floss, I’d cast the skeins onto cardboard bobbins first (as an Amazon Associate, I earn from qualifying purchases). Then, you will cut a long, long, long strand to work with while stitching. Once you’ve done some stitching, you’ll see what I mean about wanting a long strand. Otherwise, you spend all your time threading the needle. You’ll need to separate the floss into individual strands as shown here. This method cuts down on knotting.
Here is a good video on threading the needle and punching. She is using a larger needle and more floss strands than you will for miniature projects, but the technique is exactly the same. I don’t think it’s possible to describe the technique in words, though.
Some miscellaneous tips for punching:
- Get a good pair of sharp embroidery scissors.
- Pay attention to the direction of your needle when stitching. You want the open part of the tip toward you with the thread trailing.
- Keep in mind that punchneedle work doesn’t look like anything good until you get a large area covered.
- Start with outlines. You’ll want at least 2-3 “rows” for each line you want to show up in the final design. Once the fill colors abut the outlines, the lines will “shrink” visually in the final design.
- Try to get as many loops as possible by controlling how much space you skip in between. You can always go back and fill in, but it’s better to do this from the start. Since we’re using 1 strand of floss, you want a lot of loops to get full coverage.
- Punch until the thread runs out. You can snip the start and finish ends right to the fabric. Be careful not to pull the thread once you’ve made loops because they will come right back out.
- If you end up with loops that are too tall (sometimes the needle will push a previous loop out of place), just snip them level with the pile on the front.
- If you don’t like an area, you can pull it back out and move your fingernail against the fabric to close up the weave…then start over.
If you’re interested in the comparison between punchneedle and French knots, here is the Bees and Trees rug in French knots compared to the Prairie Rug in punchneedle. The pile is definitely finer with French knots, but punchneedle takes considerably less time and is still convincing in miniature.

I hope that answers most of your questions and points you in the right direction.
Categories: Needlework - French knot rugs
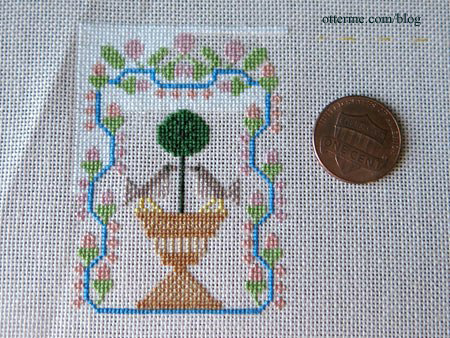
January 9, 2014 | 0 commentsTopiary with birds – 12.75 hours
I had hoped to have this finished for the monthly needlework update, but then that pesky lightning strike happened and threw everything off. This pattern is a motif from a Dutch sampler dated 1776 provided by Berthi Smith-Sanders. I found the file for free download at The Workbasket (defunct site as of 2024).

I changed the colors completely from the listing on her pattern and made the tree topiary shaped. I’ve stitched the main design and am now filling in the background with DMC 3865 Winter White. This will be a wall hanging measuring approximately 1.75″ x 2.5″ when finished. This is currently 12.75 hours of work on 32ct Jobelan.
Categories: Needlework - French knot rugs
September 10, 2013 | 0 comments
NOTE: All content on otterine.com is copyrighted and may not be reproduced in part or in whole. It takes a lot of time and effort to write and photograph for my blog. Please ask permission before reproducing any of my content. (More on copyright)


