
Prairie Rug – part 1
I’ve been meaning to give punchneedle a try since I bought the fine rug for the Haunted Heritage from Katie Arthur. I love doing cross-stitch but it does have its drawbacks for absolute realism in mini. French knot rugs offer the best illusion of rugs in scale, but they are also time consuming. Punchneedle seems to be a good compromise.
I found this beautiful Prairie rug on Mitchell’s Interiors and printed it out at 9″ x 6″ as a large area rug. It would be gorgeous in French knots but that would take forever! :O
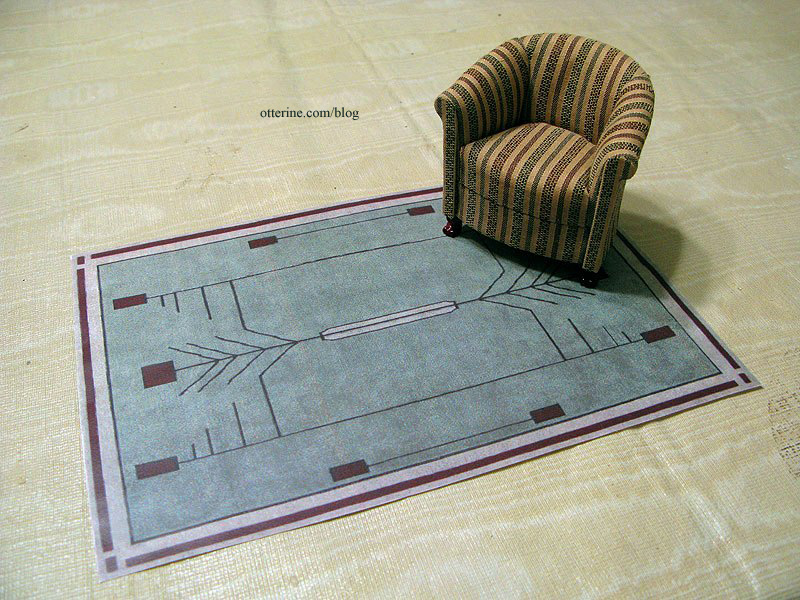
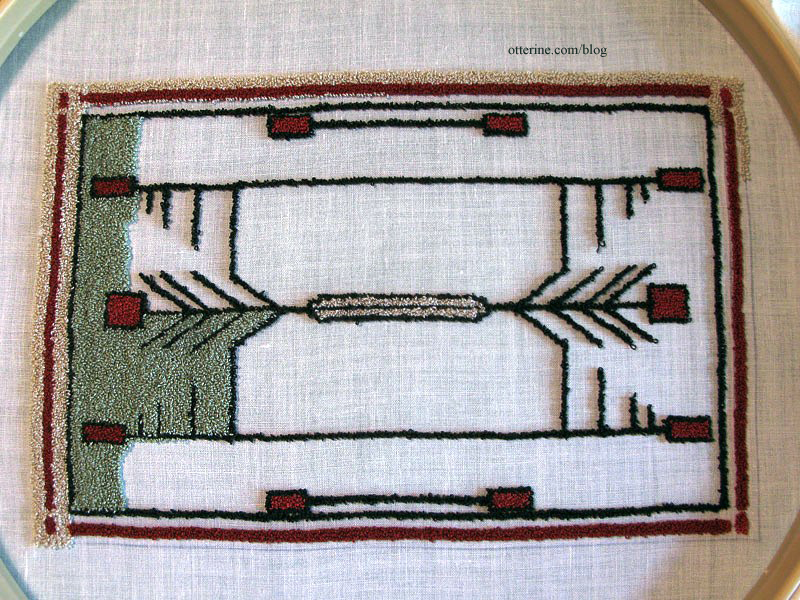
Click this post for instruction on getting from a printed image to a pattern on fabric ready for stitching. The area shown in the pic below took 3.5 hours to stitch, and at this point I am still going slowly to make sure I maintain good coverage on the background. It’s relatively easy to go back and add more loops in, but I figure it’s worth taking it slower and not having to rework areas later on. As you can see, it’s much faster than French knot work or cross-stitch. And, the more you fill in, the better it looks.
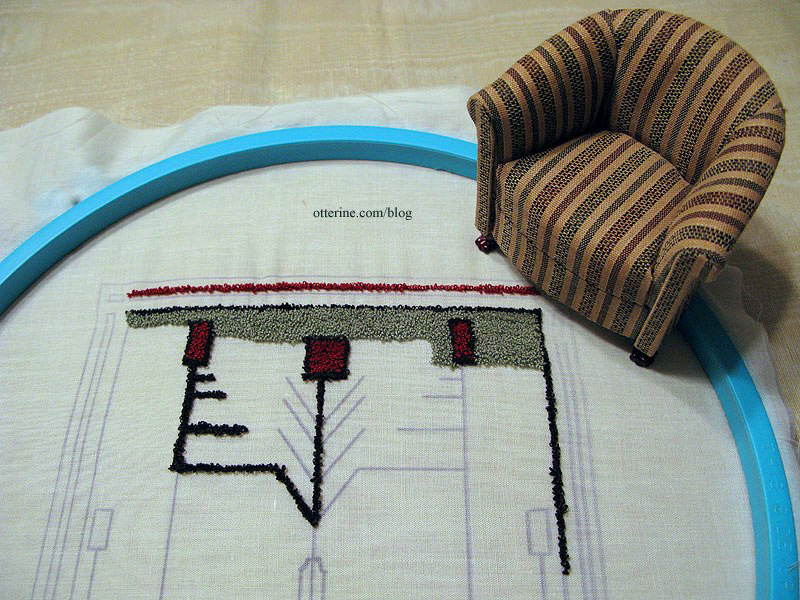
Here’s the rug at 9.5 hours of work. I’ve found the loops to be mostly consistent as I learn the process. Having the tighter hoop has made a world of difference, too. For the few loops that stick up too far, I just clip them with sharp embroidery scissors. As long as you don’t pull, there’s no risk of them coming out. You can also keep punching until you run out of thread, so you will have the occasional long thread hanging on the front side. These can be cut also, just don’t pull on them.
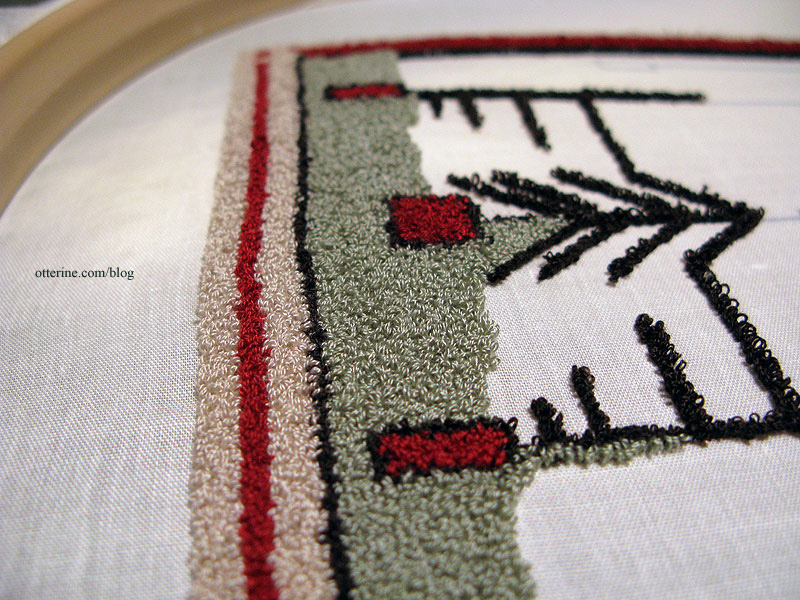
On the back, you can see the initial green areas where I worked are less clean and orderly. I’m getting the hang of working with the needle and cutting my strings longer. Holding your work up to the light helps to see if there are any thinner areas of stitching you need to fill in.
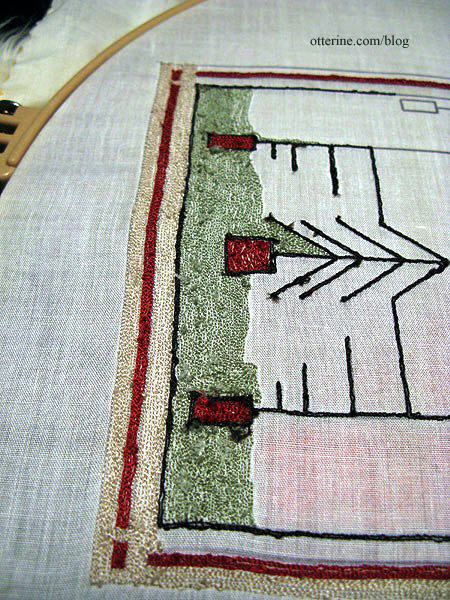
And, below at 14 hours of work with a lot more filled in.
Categories: Needlework - French knot rugs
June 9, 2013 | 0 commentsMorgan No-Slip Hoop
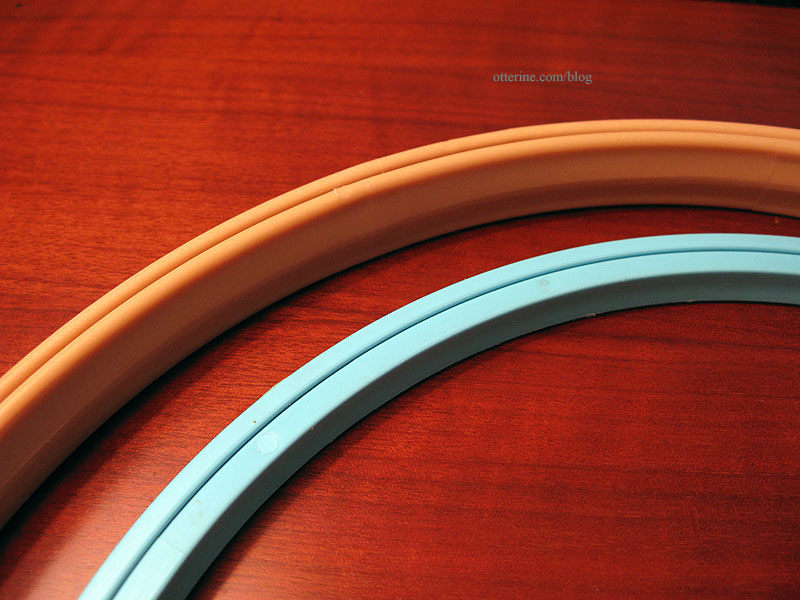
I inherited a set of plastic embroidery hoops from my grandma. They are in good shape, but I’ve always had a love-hate relationship with embroidery hoops. They never keep the fabric tight enough, and I constantly need to adjust the fabric.
To do French knots and punchneedle embroidery successfully, you need tight fabric in the hoop. I think it’s the fact that you’re continually putting pressure on the fabric and it slips more and more as you work.
I needed a larger hoop besides, so I did some online searching and found the Morgan 12″ No-Slip Hoop. It has a groove in the middle that keeps the hoop from coming apart until you loosen the wingnut. (As an Amazon Associate, I earn from qualifying purchases.)
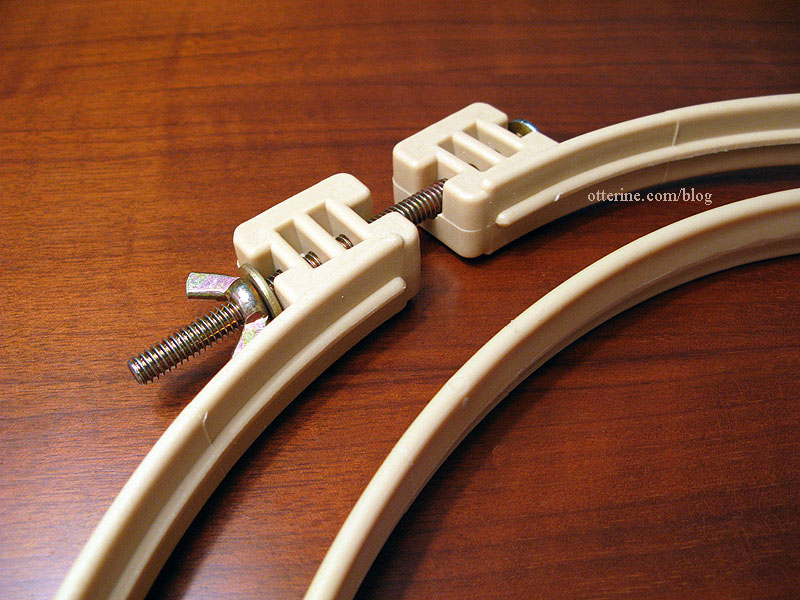
It does have a taller profile than the usual embroidery hoop, but I didn’t find it to be uncomfortable or heavy to work with.
I had cut my fabric too close since I thought a 10″ hoop would work, so I sewed on some additional fabric.
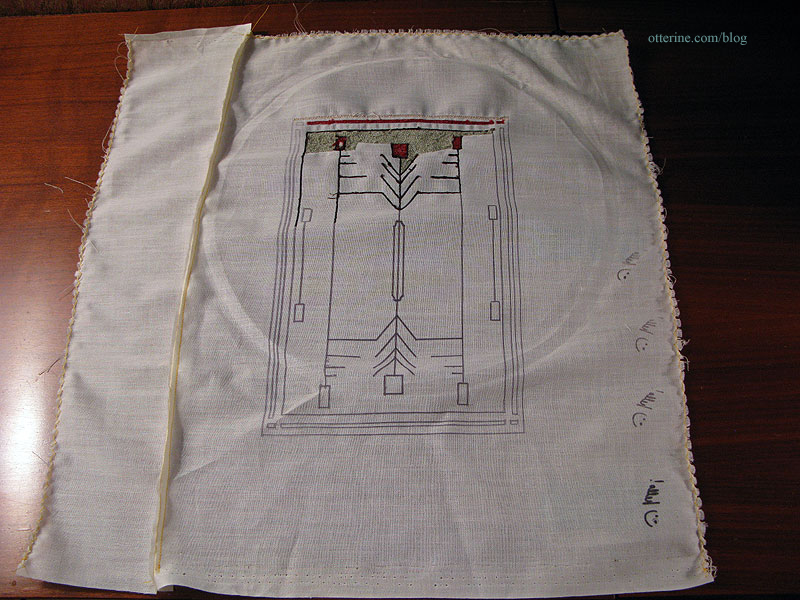
I tightened the fabric in the new hoop.
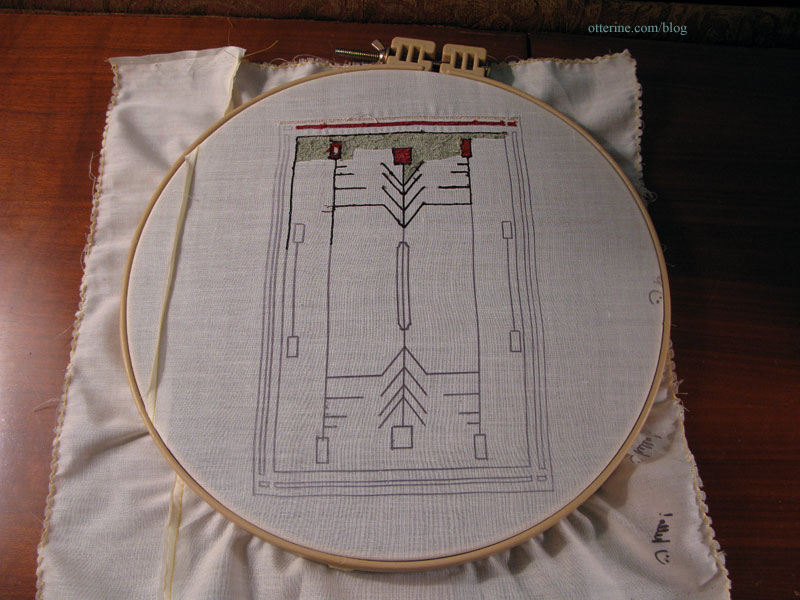
I stitched a few rows and could already tell the difference. The fabric was tighter than I had been able to get it in the regular hoop and it stayed taut the entire time I stitched. Hooray!!!!
Categories: Needlework - French knot rugs
May 29, 2013 | 0 commentsBaby Z Lap Frame
Working with French knots is different from working in cross-stitch or petit point in that it is easier if you have both hands free. I’ve been working on the Bees and Trees rug without a lap frame, and it’s hard not to start hunching forward as you work, balancing the hoop on your lap and completing each knot…not at all comfortable for long periods of time.
I bought a Baby Z Lap Frame since some fellow stitchers were talking about lap frames recently. Though the instructions for assembly were minimal, it went together easily enough. I did have to sand it in a few rough areas, but all in all the quality is good. It’s a solid frame and has a base just 11.5″ wide, so it is a comfortable weight and width for me.

It has a tray in the base for holding yarns and scissors.

Plus, it is adjustable in height, folding relatively flat for transport.

So far, I really like the frame. It will definitely save being hunched over while stitching. Here’s a photo of me sitting with the frame. I keep the knobs of the clamp facing downward so they stay out of the way when stitching.

Categories: Needlework - French knot rugs
May 14, 2013 | 0 commentsBlue medallion rug – completed
I have finished binding the blue medallion rug, and it is ready to take its place in The Artist’s Studio.
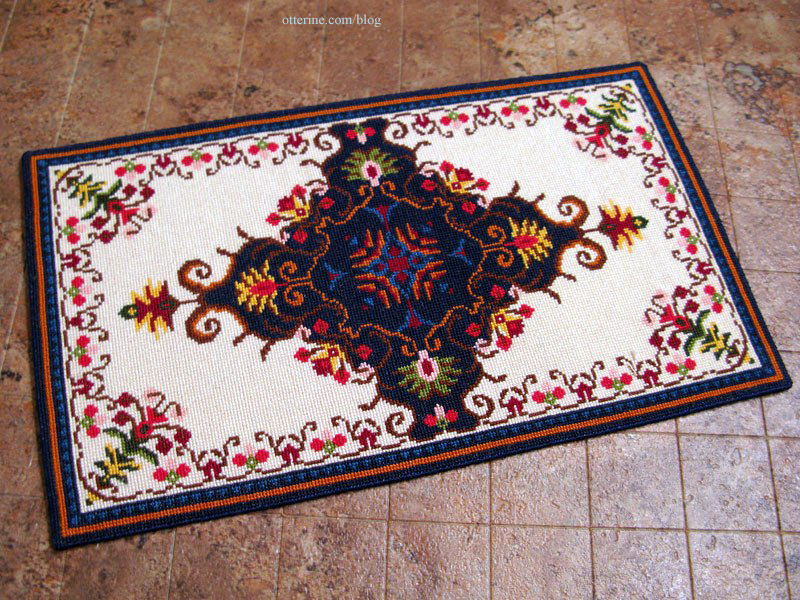
Cross-stitching time was 154.5 hours on 32 count Jobelan.
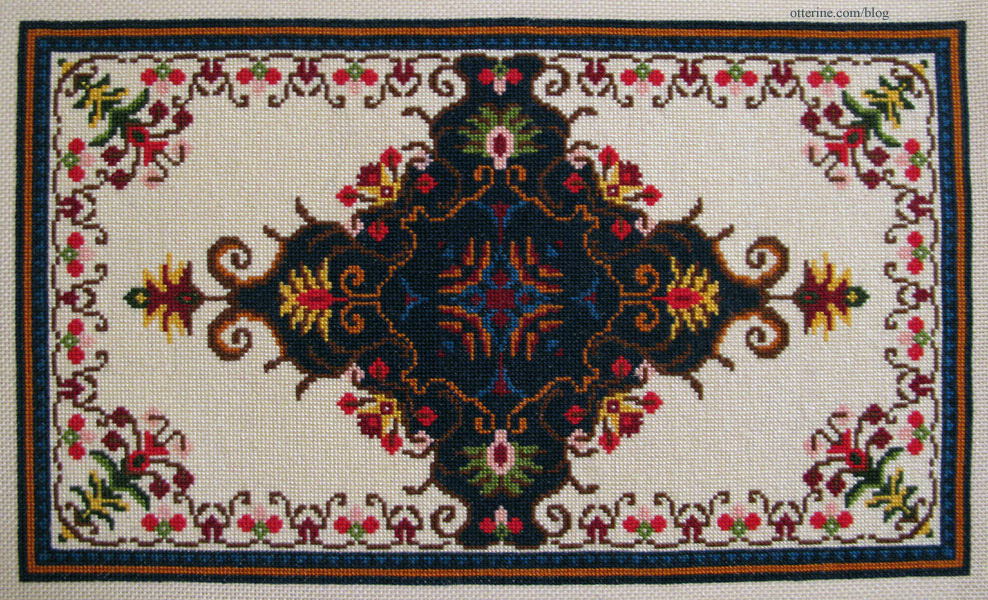
Final finishing took only a couple of hours. The final measurements are 7 7/8″ long by 4 5/8″ wide.
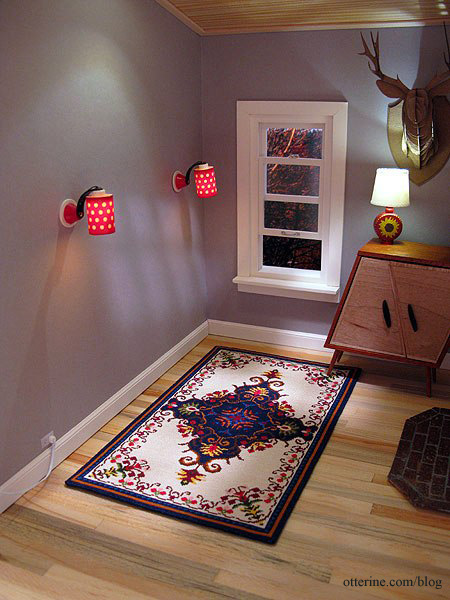
It fits well with the furnishings, though I will need to add feet to the daybed and whimsical cabinet to make them level.
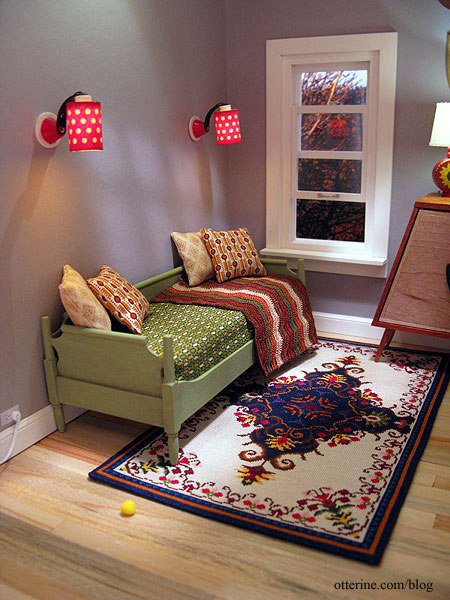
It’s such a striking design, which is what drew me in when I first saw it. The chart came from Jorge Cubells’s blog, though if you plan to make one for yourself, please write to Jorge for the half chart since the one listed on his blog is missing a column in the pattern. My final rug has this error, but it’s not noticeable.
Categories: Needlework - French knot rugs, The Artist's Studio
April 12, 2013 | 0 commentsBlue medallion rug – introduction
I found this beautiful rug on Jorge Cubells’s blog, and he was kind enough to upload a larger picture so I could stitch one for myself. I will be using colors very similar to his. I mounted a piece of 32ct Jobelan on a wood frame, and my threads are all from my existing stash…though I do need a better dark green than the one I have. The background will be ivory – DMC 712 – which I will do most of after the border and medallion are in place. I want to limit the chances of the ivory being soiled as I work on the darker designs.

Update 9-9-2012: I noticed a small issue with the pattern. It seems there is a column missing from the middle of the design on the pattern I downloaded, so there are two lines of stitching missing in my rug as I’ve stitched it. From Jorge’s photo, I see the violet flowers are uniform all the way around, but on my rug as I followed the chart, my middle violet flower is smaller than the two on either side…and the blue decoration in the border runs together where there should be a space between them. I realized it was off when I taped the pattern together but thought it was just a design element. It wasn’t until I looked at the photo of the finished rug again that I saw the pattern was off.
But, I am not starting over after 34.75 hours of work! Unless you are familiar with the original, you don’t even notice. Looking at my rug, nothing appears obviously off; it just differs from Jorge’s original. I still love it, and I am forging ahead!

Categories: Needlework - French knot rugs, The Artist's Studio
August 23, 2012 | 0 commentsNavajo rug – completed
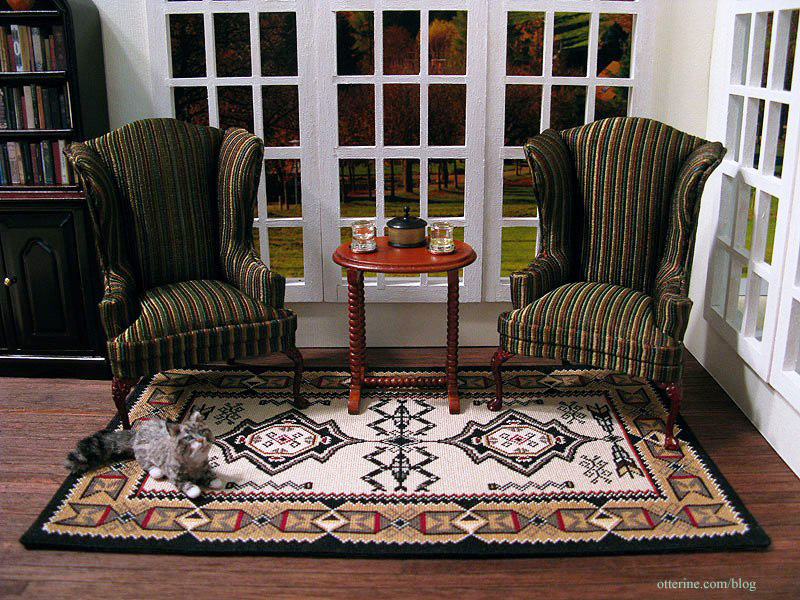
I finished stitching around the edges of the Navajo rug and completed the backing! As noted before, I didn’t count the finishing time, just the cross-stitch time. The stitching time was 189.5 hours, and the rug was stitched on 32 count Jobelan in parchment. The finished size is 5 3/16″ x 8 7/16″.
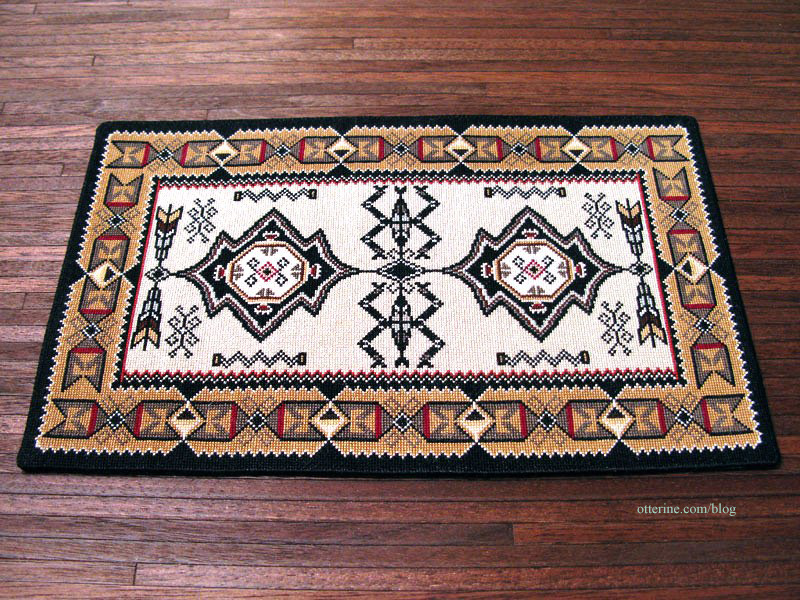
I had estimated stitching time to be 204 hours, so I am pleased to have finished ahead of schedule by 14.5 hours.
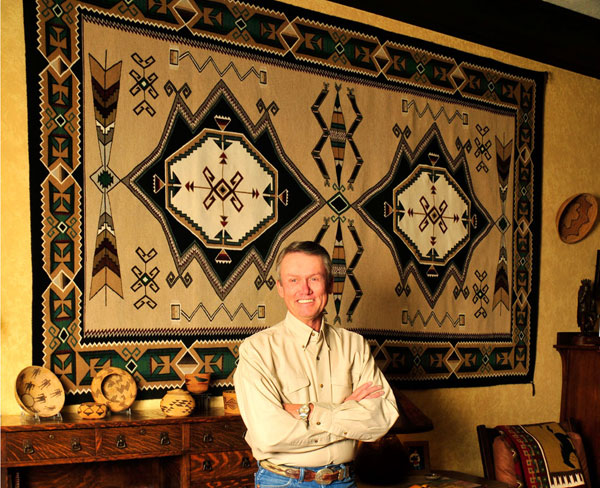
This project was based on a contemporary Navajo original weaving, shown here with Steve Getzwiller.
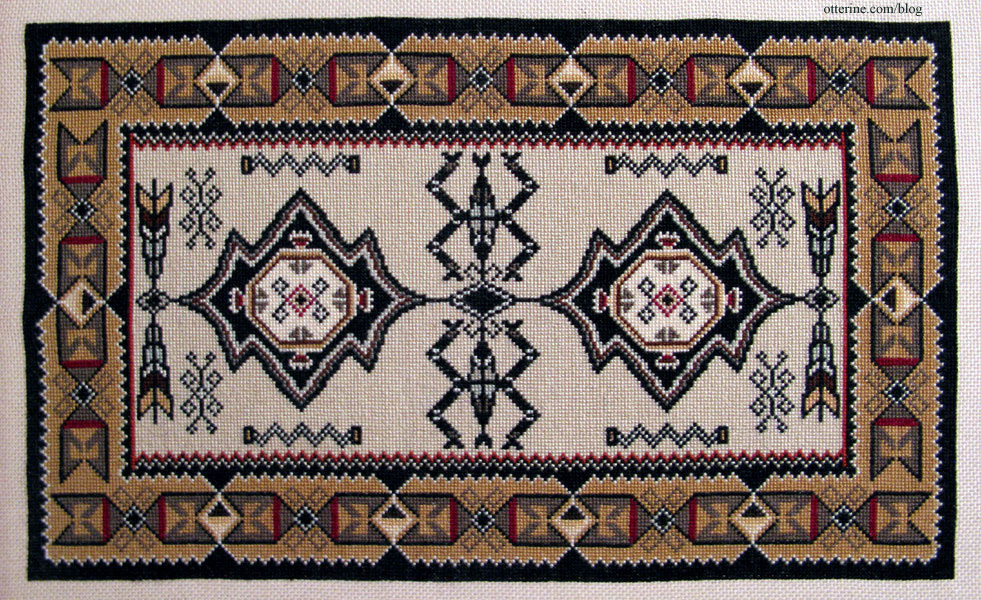
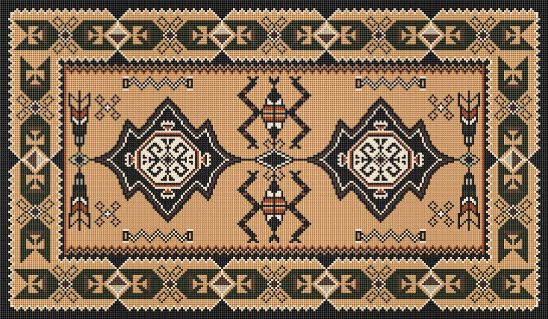
Natalia Frank did a wonderful job of charting it for me (see below photo), and I send a huge thank you to Natalia, who is not only a gifted artist but a very classy lady. I made some minor alterations to Natalia’s chart for my final rug, including choosing my own coloration and changing some design elements such as the center medallions.
I’ve set up a quick scene to show it in a room setting. I don’t know if any of these pieces will stay with the rug in its future home, but it gives a good view of the texture and scale.
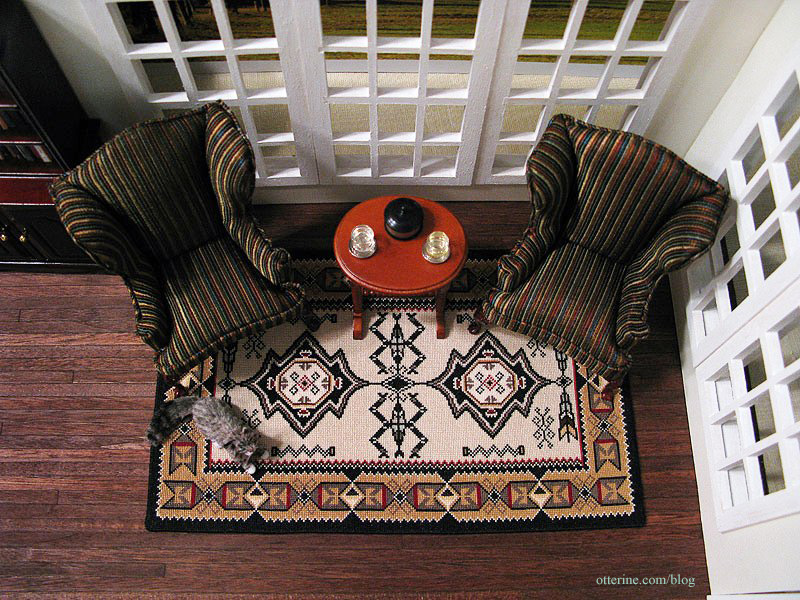
Anyone care to join me in the sitting room? I’ve poured us each a Scotch.
Categories: Needlework - French knot rugs
August 11, 2012 | 0 commentsNavajo rug – introduction
Natalia Frank recently stitched a gorgeous Navajo design on 40ct silk gauze. I am one quarter Navajo, though I don’t know much about the culture since I’ve not had much contact with that side of my family since I was very young. I thought it was a perfect way to bring that part of me into my miniature art, like gathering the pieces that make me who I am to include in my mini projects.
I checked out numerous books from the library and found many designs I liked, but it wasn’t until I did a google search that I found the perfect piece: a beautiful contemporary weaving presented by Steve Getzwiller (below, see the second weaving from the left for the one I was immediately drawn to). You can see more of these wonderful works here. So many intricate and beautiful designs to admire. I love the corn stalk weaving on the far left, too. True artisan work!
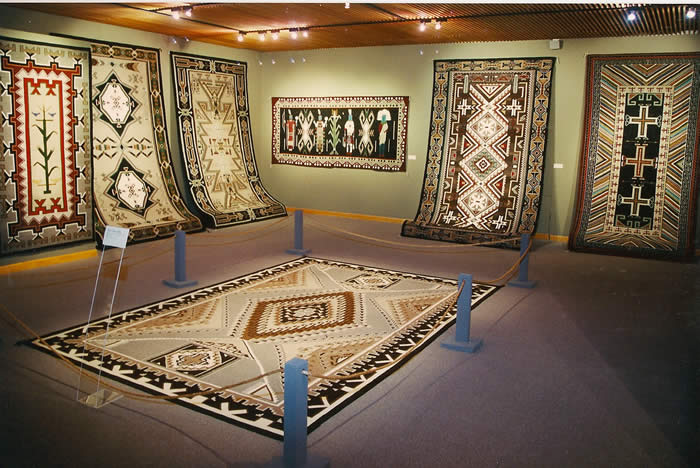
I was instantly drawn to the colors and shapes of that one particular design, so I set out to find a better photo. This was the best I could do. That is Steve Getzwiller.

I wrote to Natalia to see how she charts her patterns, and she offered to chart it for me. I can’t tell you how grateful I am to her. She saved me so much time and headache since I had no idea where to begin. She has captured the beauty of the rug in miniature scale, and I will soon begin to stitch.

Mine will be cross-stitched on 32ct Jobelan in parchment, though I do plan to stitch the entire rug, including the background. I just thought it would be easier on my eyes than stark white. I like the coloration as it appears in the first photo above considering the room I plan to put it in, so I’ll use colors similar to those instead of the warmer earth tones of the second photo.
I have the project on a wood frame since that’s what I had on hand. It is held in place with thumbtacks on the right side. I’ve picked my colors from my existing stash of floss, though I need to buy more of the center background color. I plan to buy several skeins so the dye lots will match since it covers a large open area. Most of the other colors won’t require as much, so I’m set as far as those go. I went with a subdued palette though I think the contrast levels will be quite nice overall.
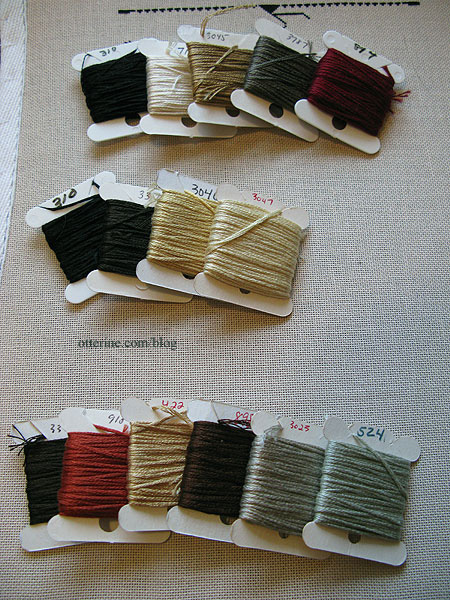
With the fresh beginning, I am getting into the groove of it. I’ve set myself a goal of stitching at least ten hours per week. That should keep a steady pace going.
Categories: Needlework - French knot rugs
December 2, 2011 | 0 commentsWilliam Morris rug – completed
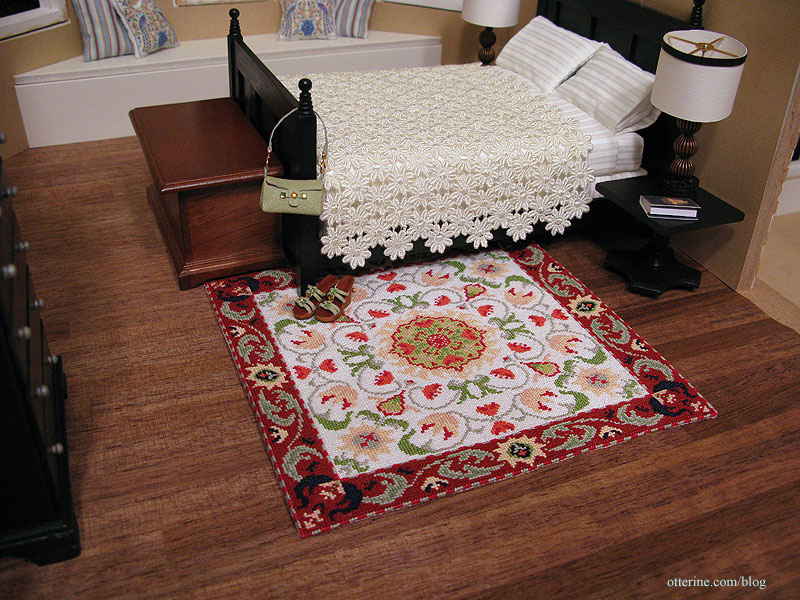
I’ve finished with the red border of the William Morris rug! At 97 hours (29 hours for filling in the red border alone), the rug is really taking shape. The interior color will take a good deal longer and I imagine working in a very light color will be challenging in its own way.
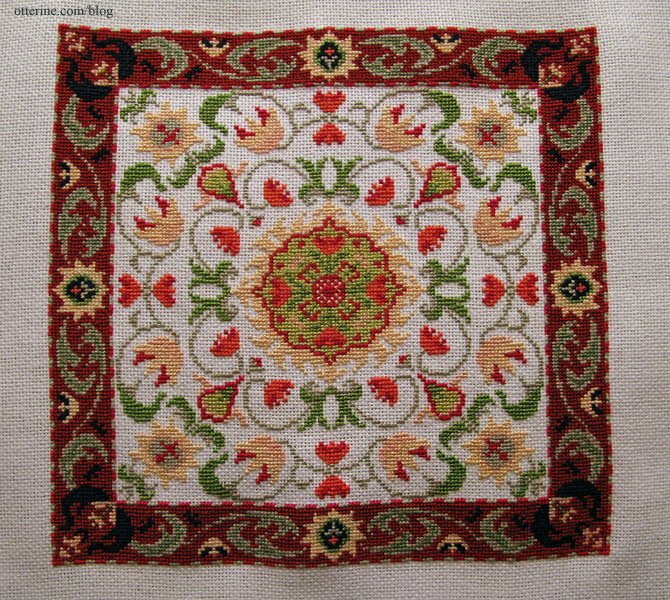
I began filling in the center with DMC 712, which was supposed to be cream. I had barely stitched a full corner when the color went from vanilla cream to flat tan. Bleh! I expected the cream and the peach/pink tones to compete a bit, but the 712 flattened out the pale green, too.
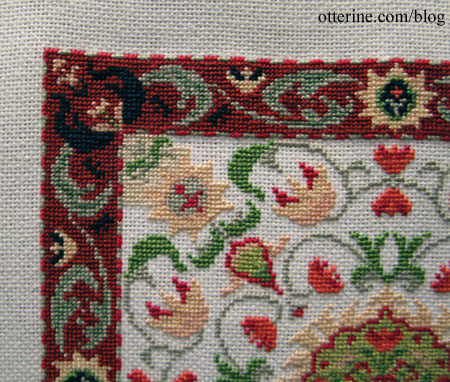
I thought I would have to use white since the 712 cream color was about as light as the colors come. From seeing the design with the white fabric background, it wouldn’t look bad stitching with white floss. When I went through my stash of floss, however, I found DMC 746, the bright creamy tone I was looking for to begin with. Before removing the 712 stitching, I did up the opposite corner with 746 just to make sure. As expected, the peach faded slightly into the background, but the pale green stayed prominent.
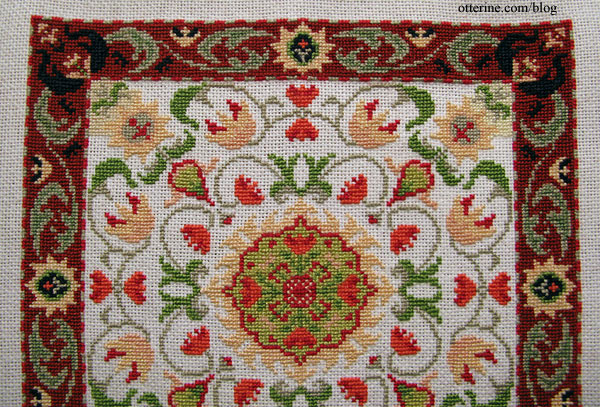
I went through my thread stash and found what I dubbed “secondhand smoke white.” Of course, that’s not the official name on the DMC chart, but that’s the color I’m going with. It was once white, but after years in my grandmother’s home, it became not-so-white. I’ve inherited many of her craft supplies since she’s no longer with us, and I found a whole bunch of this “white” embroidery floss.
After removing the stitches of the 712 and 746, I needed something a little brighter. I looked at the overdyed, 4150, ecru colorations a few blog readers suggested, but they were all as dark as the initial 712.
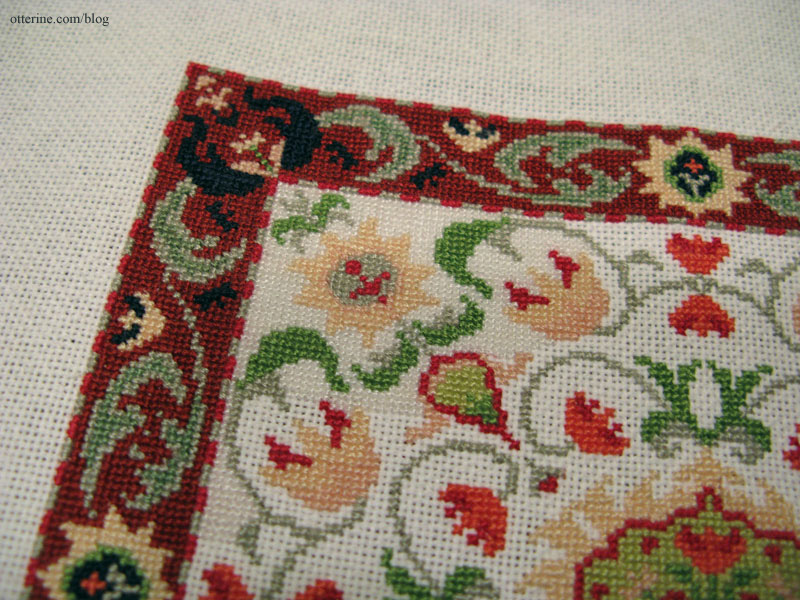
Here’s the new white…er…smoky white (upper left corner). It fills in well and doesn’t compete. We had a winner.
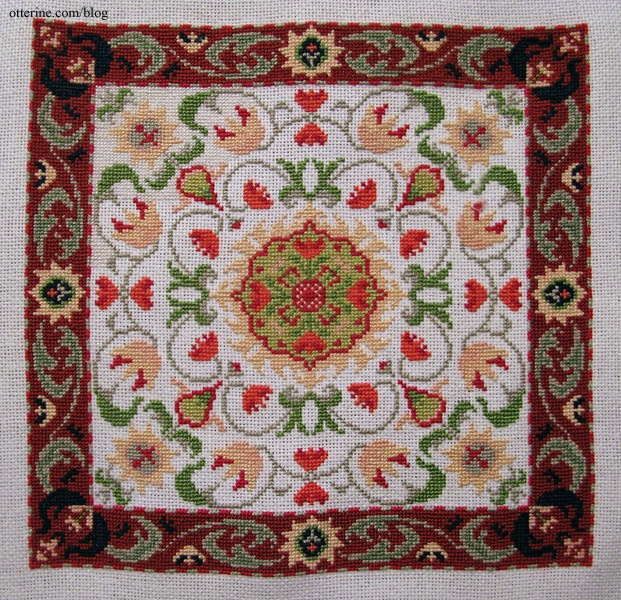
Also, strangely enough, it seems thicker than the dyed flosses, so I need only one strand per square instead of the two I had used for the rest of the stitching. This is 4.25 hours of white stitching, 101 hours total stitching.
The entire rug consists of 142 hours of stitching time including 29.25 hours for filling in the red border and 42.25 hours for filling in the white background.
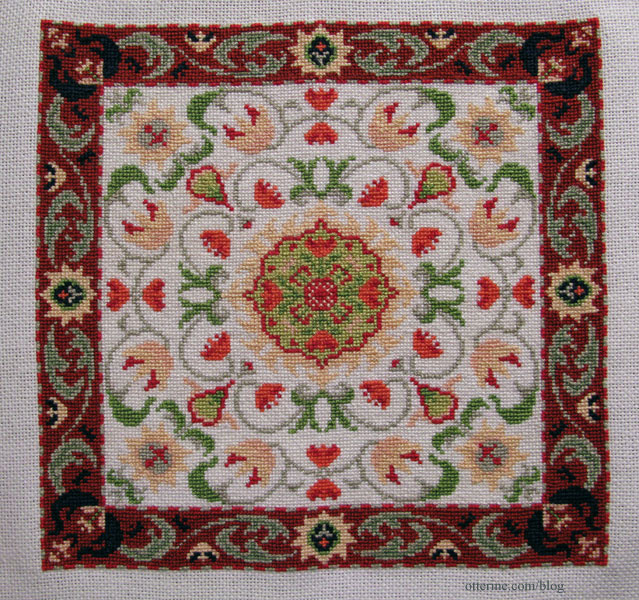
It measures 5 5/8″ square.
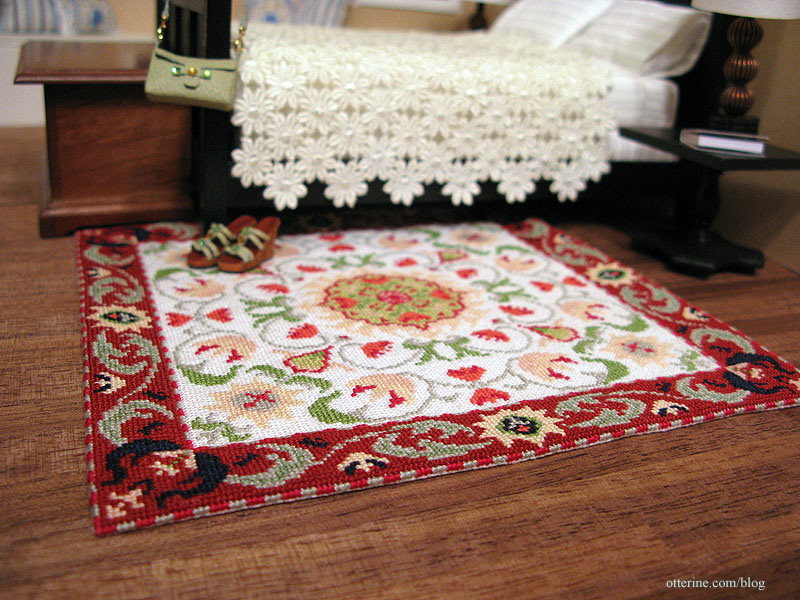
The shoes and purse are by Patrizia Santi. I made the bedspread from venise lace; tutorial is available in my etsy shop.
Categories: Needlework - French knot rugs
October 2, 2010 | 0 commentsWilliam Morris rug – part 1
I am stitching the William Morris rug shown on the front cover of the book Miniature Needlepoint Carpets by Janet Granger.

Her patterns are made for 18ct canvas, but this rug would measure about 9″ x 9″ using that material. Too large for my purposes, and 18ct isn’t as fine a finish as I prefer. I decided to stitch the pattern on 28ct fabric, which will result in a rug just under 6″ x 6″. I also decided to cross stitch this pattern to eliminate the tendency for the fabric to show through the usual needlepoint stitch.
I made a color copy of the pattern to attach to my magnetic board and liked the colors better than the original, so I visually matched the thread colors from my stash instead of using the suggested colors in the book. This is the rug after about 13 hours of work. Long way to go.

Now at roughly 33 hours of work. I’ll be finishing the second half of the design before filling in the background and border. I’m still undecided on those colors, though I have some ideas. I just love the design itself so much, I don’t want to detract from it.

At just under 70 hours, the entire design is done! :D

Now comes the long process of filling in the background colors. I am sold on the rusty red for the outer border but I am torn between the vanilla and silver-grey for the interior. My plan is to work on the red border for now and decide on the inner portion once that’s done.
I think the vanilla will be really rich looking – like red velvet cake with butter cream frosting. Yum! But, the silver-grey has its appeal as well – the peach and pink floral shapes will likely stand out more against the silver-grey.

Categories: Needlework - French knot rugs
July 10, 2010 | 0 commentsLlama rug
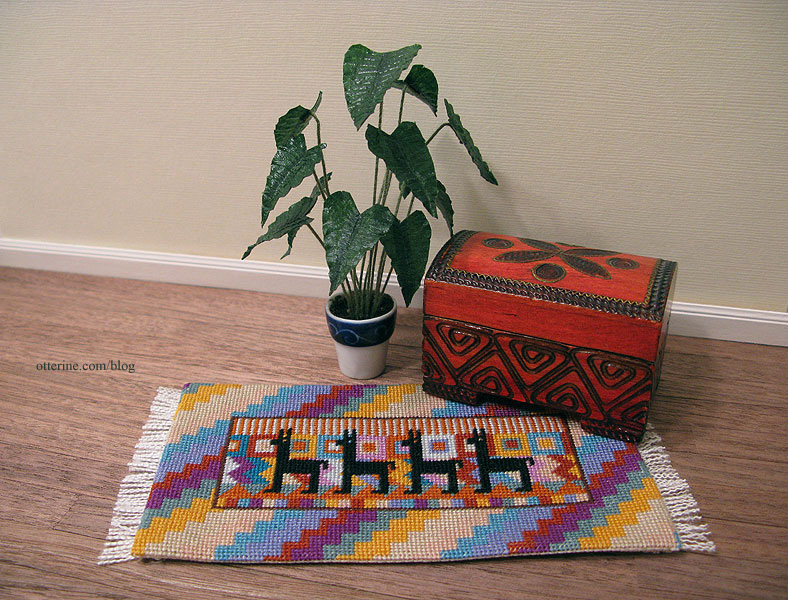
I stitched a pattern from Exquisite Miniatures in Cross Stitch and Other Counted Thread Techniques by Brenda Keyes. I went to a local needlework shop and asked for 22 count needlepoint canvas the project called for, but once I started stitching I realized she had sold me 24 count canvas. Not a big deal for this project, but I was glad I noticed before I used the canvas for anything that required an exact count.
Since this was my first project using canvas, I had to get something besides an embroidery hoop. I tried to find a smaller needlepoint frame, but the local stores didn’t carry the smaller sizes. I could order online, but then again I wanted to be able to see what I was getting beforehand. On a trip to Michael’s, I found a 4″ x 6″ unfinished wood frame for less than two dollars. t was perfect for miniature needlework and less expensive than the frame components. Sold!

I stapled the canvas in place but have since acquired flat tacks that I plan to use in the future.


I substituted some of the colors listed in the pattern book for what I had on hand, using only embroidery floss not wool as indicated. I also moved some colors around on the pattern to make the llamas stand out more against the background. The rug measures approximately 3″ x 5″ (not including the fringe) and took about 24 hours of work time.

Though I am not planning a southwest-inspired room, I really liked the pattern of the rug. It reminds me of a souvenir my mini inhabitants might have brought back from traveling. The miniature trunk is carved wood and opens; it was a gift from a relative many years ago. It’s marked Made in Poland. I made the plant from floral tape and wire.
Categories: Needlework - French knot rugs
March 12, 2010 | 0 commentsOrange Tree tapestry
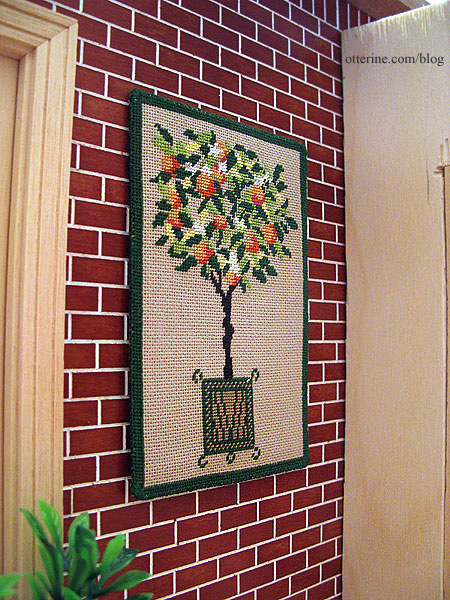
I checked out a bunch of books from the library and lined up a number of projects. The first one I completed was from Exquisite Miniatures in Cross Stitch and Other Counted Thread Techniques by Brenda Keyes. This book is not specifically for dollhouses but has smaller real life size projects that can be used in miniature settings both with and without minor modifications.
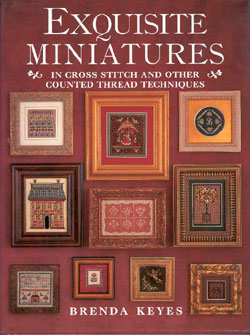
The art is called Orange Tree, so I thought it would look nice in a conservatory.
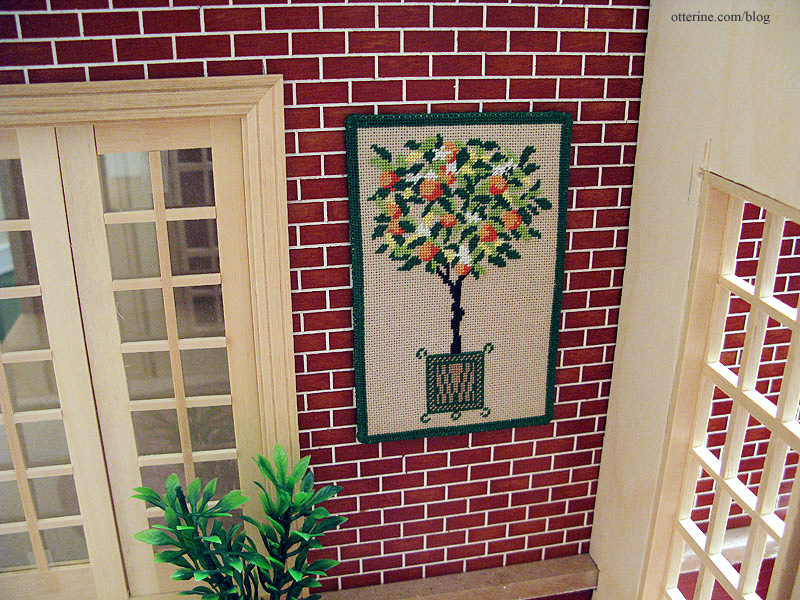
I stitched it on 28 count evenweave fabric in mushroom color. The book had called for it to be stitched on 22 count needlepoint canvas. The color of the fabric saved my having to stitch the background, and the higher count made the project smaller in size. The needlework is mounted on stiff felt on the back.
Categories: Needlework - French knot rugs
March 7, 2010 | 0 commentsMackintosh chair covers
I’ve been checking out books from the library to find ideas for projects and to generally drool over all of the beautiful minis out there. One of the better books I found was Embroidered Projects by Sue Hawkins.
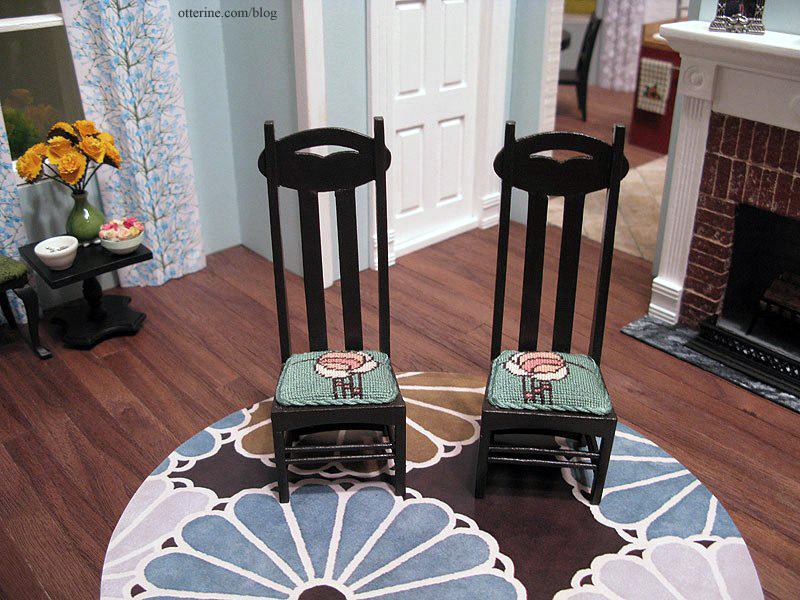
It has rugs, screens and pillows in a nice array of styles. There were a few lovely items worth spending the time stitching, but there was one in particular that caught my eye: the Mackintosh chair cover. I already had the chairs…and the design in the book fit perfectly with my modern living room.
In the past, I’ve done quite a bit of counted cross-stitch but very little needlepoint. The project called for 32-count silk gauze but I had a hard time locating it. I also changed the colors from what was listed in the book because the pinks were just too bright for my taste.
My eyesight has always been good, but wow were these tiny stitches!
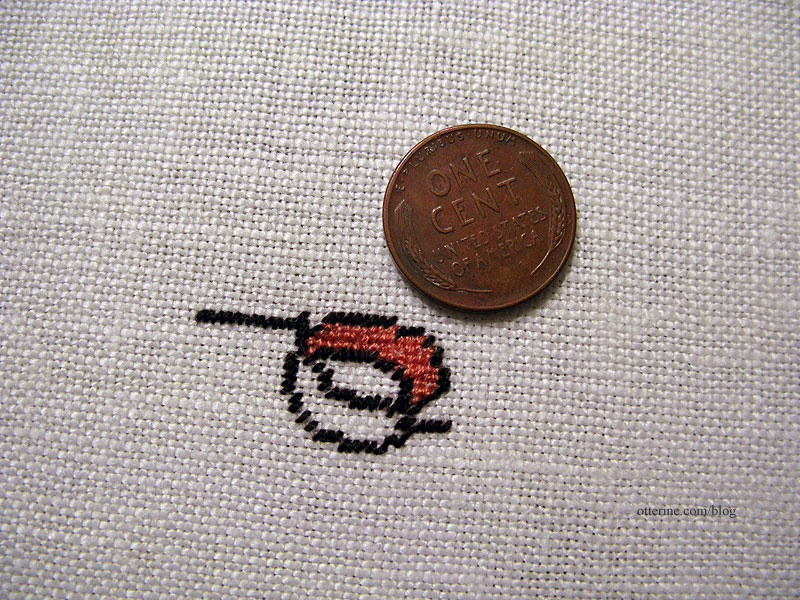
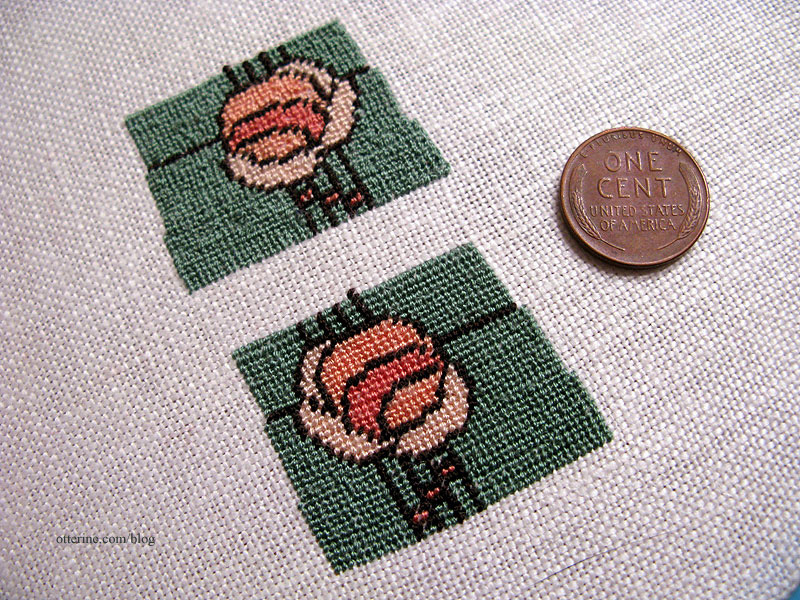
The first one took a little over five and a half hours of work, and I did it without the aid of a magnifier. For the second one, I flipped the design to have a mirror of the first and bought a magnifier with two LEDs. The second one (at the bottom of the photo below) took about the same amount of time but it was much cleaner since I could actually see what I was doing. :D Since I already had enough fabric in the hoop, I decided to make another like the first one; it turned out much better the second time around.
I had to remove the glued-on chair pads, which was a scary task since the chairs were expensive. I popped them into the microwave to loosen the glue, but it still wasn’t easy removing them. While the cushions were off, I gave the chairs a couple of coats of Bittersweet Chocolate paint by Americana. The original finish was uneven and a bit too red. I then sealed them with satin varnish.
I removed the original fabric from the chair pads and used the needlework to upholster the chairs. I finished the edges with twisted embroidery floss. I think they turned out pretty well for my first attempt at miniature needlework and fit in rather well with the modern style and colors in the living room.
Categories: Needlework - French knot rugs
February 24, 2010 | 0 comments
NOTE: All content on otterine.com is copyrighted and may not be reproduced in part or in whole. It takes a lot of time and effort to write and photograph for my blog. Please ask permission before reproducing any of my content. (More on copyright)

Tribal Foxes Rug – 110.75 hours, stitching complete
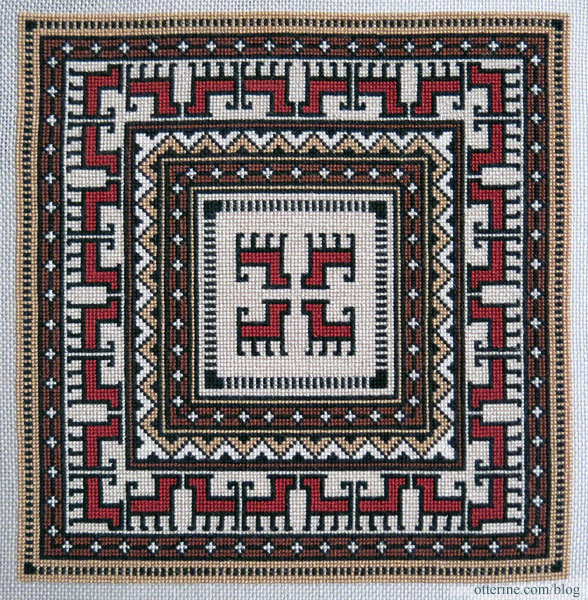
I’ve finished stitching the Tribal Foxes rug with a total stitching time of 110.75 hours. I just need to bind the edges and complete the final finishing. This was done in full cross stitch with single thread over 32 count Jobelan.
Categories: Needlework - French knot rugs, Watson Mill
March 18, 2017 | 0 commentsThe Persian – introduction
Quite awhile back, I saw a vintage needlepoint rug on eBay from an estate sale. It was miniature, though done on a lower count of 18 or 22 and therefore a large rug for 1:12 scale. I loved the pattern but knew nothing about it. There was some discussion on the PetitPointers group I belong to, and one of the members Frances said it was from an old purse kit by Patons. She had made up a miniature rug for herself on higher count silk gauze from the pattern.
After some sleuthing, I found some further information. This was the C201 Persian Needlepoint Tapestry chart made in Patons Beehive Tapestry Wool. It was a kit that made a clutch purse. I’ve seen partially finished kits on eBay along with another miniature rug rendition in slightly different colors.
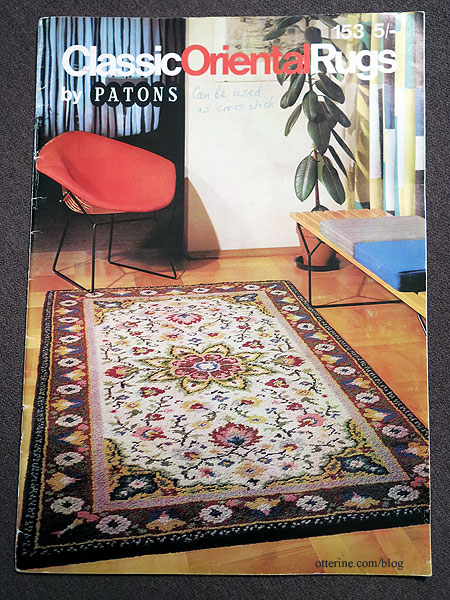
Luckily, this pattern is also found in the latch hook patterns booklet Classic Oriental Rugs By Patons No. 153 (it’s pattern 2001 in the booklet and featured on the cover). I picked up an inexpensive copy and now can get to work on my own version. I will be changing the colors slightly, though I do think the original is lovely.
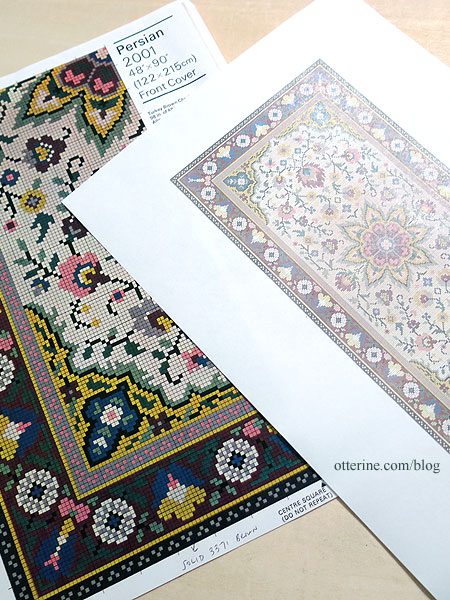
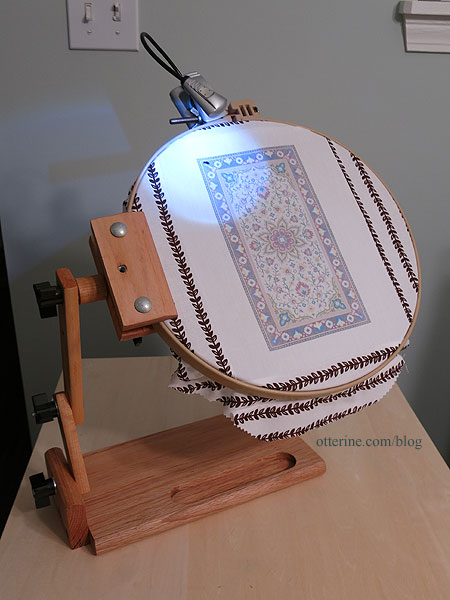
There are nine colors listed on the original Persian chart, but I have added a few additional colors to bring my total to sixteen. I opted to print the existing pattern directly on fabric. I scanned the pattern from the book on a high DPI setting and then copied the quadrant in PhotoShop to make a whole chart image. I edited the image for contrast, brightness, hue and saturation to make a very pale version. After resizing in Word, I printed a facsimile of the rug measuring approximately 8″ x 4 3/8″ on regular paper. This seemed a bit tight to me considering the fine details of the chart versus knot size, so I printed a second version at 8.5″ x 5 3/8″ on regular paper. Using this method, you can make the rug a custom size without being limited by thread count of your fabric. This will be a large rug, but lovely.
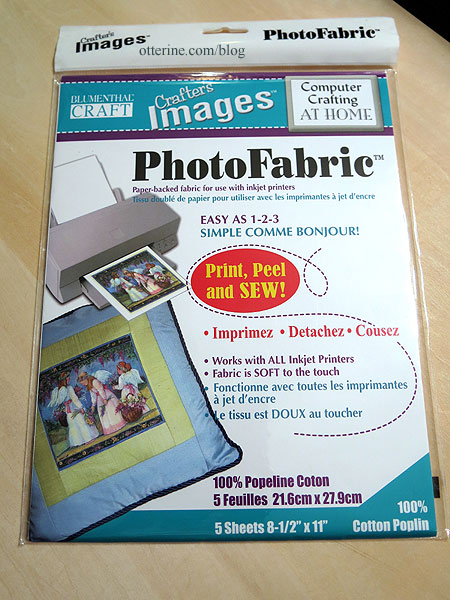
I’ve printed on fabric in the past with mixed results. In this instance, it doesn’t much matter if the color is true or vibrant since my threads will provide the final color and texture. I recently helped a family friend with a fabric printing project, and she gave me the leftovers. This is the particular brand of printable fabric I will use for this project.
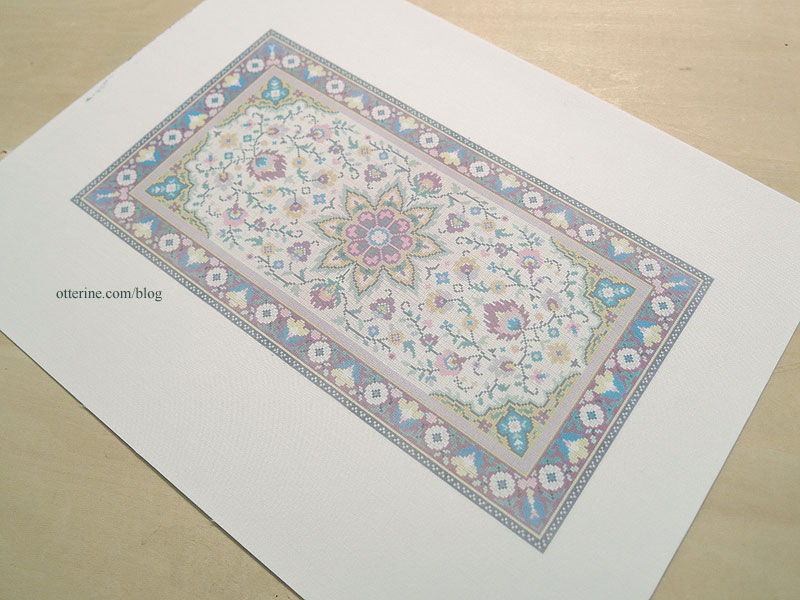
After printing on the finest settings, I let it dry completely. Here it is before removing the paper backing.
Per the instructions, I ran the fabric under water. Ink residue discoloring my stitching over time would be bad, bad, bad. I sped up the drying process with a hairdryer. There’s a hint of the grid in the whiter areas and even the color areas are boxy from the chart image.
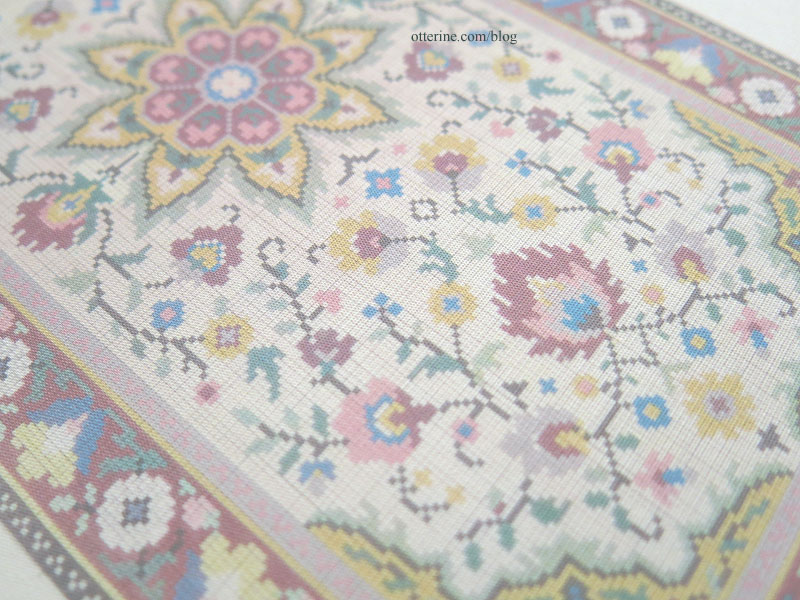
It’s a faint pattern but good enough to follow. The advantages are the precise replication of the original design and the fact that the colors are printed in place, so I can keep better track of which colors to use where. I’m not following the exact grid here, but it will help with knot placement overall.
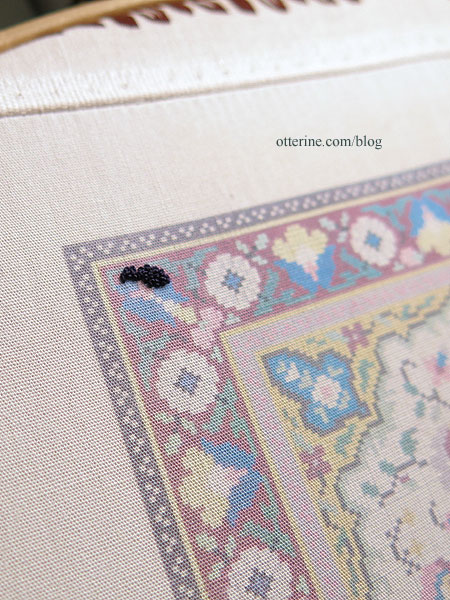
Since the printer fabric measures 8.5 x 11″, I sewed on scrap fabric to mount the print in the Morgan 12″ No-Slip Hoop (as an Amazon Associate, I earn from qualifying purchases). It has a groove in the middle that keeps the hoop from coming apart until you loosen the wingnut. (My review here.) I use this hoop with the Baby Z Lap Frame. I have a clip-on LED and can use my magnifying readers for needlework. :]
Categories: Needlework - French knot rugs
January 31, 2017 | 0 commentsPattern Maker Pro by HobbyWare
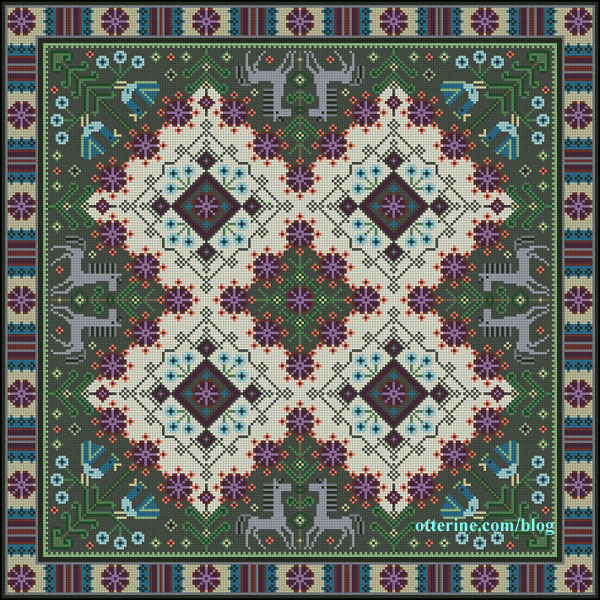
For Christmas, mom gave me Pattern Maker Pro by HobbyWare (as of 2024, it seems the company website is defunct). Previously, I had been charting simple designs in Excel using tiny cells filled with color. While Excel had its appeal in ease of repeating patterns and printing options, it was also limited in changing colors universally and flipping designs any which way. Since I am new to the Pattern Maker software, I thought it might be easier to work from an existing chart as a first trial. I did read through the manual to familiarize myself with the button icons and the basic functions, but sometimes it’s best to just dive in! :]
I found a needlework image on Pinterest and tracked it back to a Russian website then finally to a book on Ukrainian embroidery. I think this version was charted from a photo in the book. I don’t speak (or read) the language, so I am not sure what the caption indicates as far as origin.
I changed the colors and made some minor modifications to the design. I was able to do this chart in an evening. On 32ct fabric, the rug will be approximately 7.5″ square. I’m not sure if I will stitch this rug, but it was a good exercise in learning the software. I love the ease of changing colors universally in the Pattern Maker software.
Categories: Needlework - French knot rugs
April 1, 2016 | 0 commentsTribal Foxes Rug – introduction
When I’m scouting around the internet looking for inspiration and vendors, I often find random bits that I wasn’t looking for but like to save for later. One such item was a vintage needlepoint rug I found from Wil Shepherd. This particular one is large at 12.5″ square, more suited to playscale than 1:12 scale. I love the colors and the red critters marching along the edges. Given their color and dog-like shape, I’m going to call them foxes.
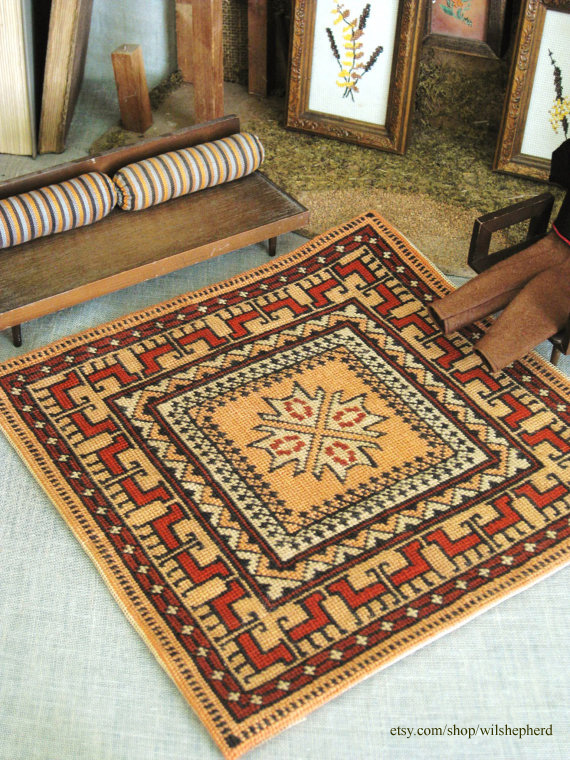
He had two other rugs listed. There was a maroon and tan one, and I recognized it as the “Holbein” rug from the booklet Miniature Needlepoint Rugs for Dollhouses by Susan McBaine (might have to stitch this one, too). The other was the same as the modern Navajo rug from the same booklet.
Of course, the one I liked most of the three was not in this booklet or any of the others I thought to look through. I was not to be thwarted, so I charted it myself. If anyone does recognize it, I would love to be able to give credit to the designer.
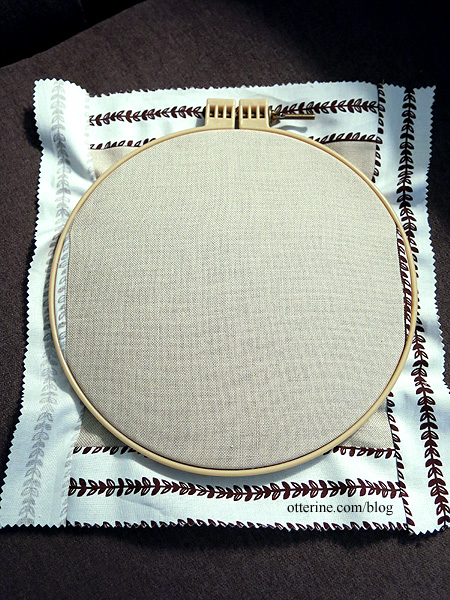
I’ll work in my usual 32 count on Jobelan, which should give me a rug just under 5″ square when finished. Perfect for 1:12 scale. I’m thinking full cross-stitch this time around, so it will be a good amount of hours for this one. My fabric piece measured 9″ square, a bit too small for my hoop, so I sewed strips of scrap cotton to the edges.
I have my colors chosen – nice and simple.
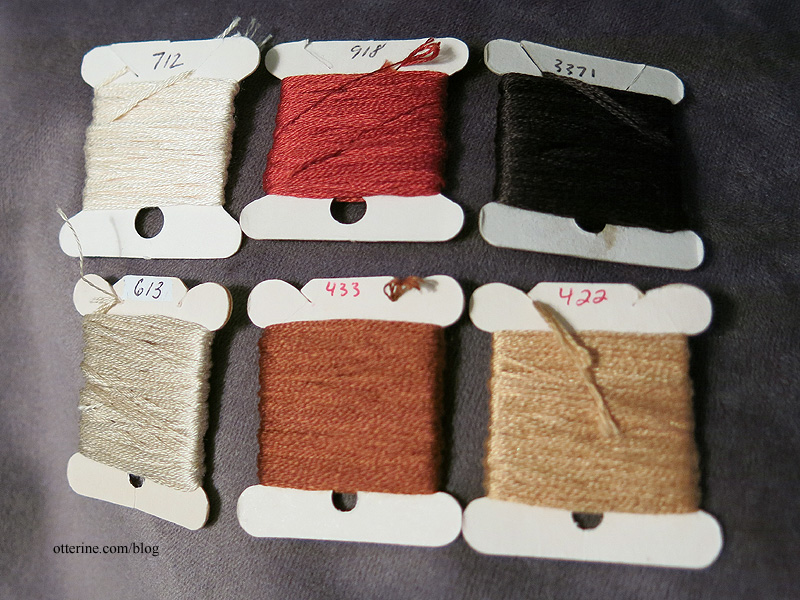
While I was drawn to the colors of the original, I wanted a bit more contrast and less yellow in my version. Below is how it looks at 23 hours of work. I am stitching full cross stitch with single thread over 32 count Jobelan.
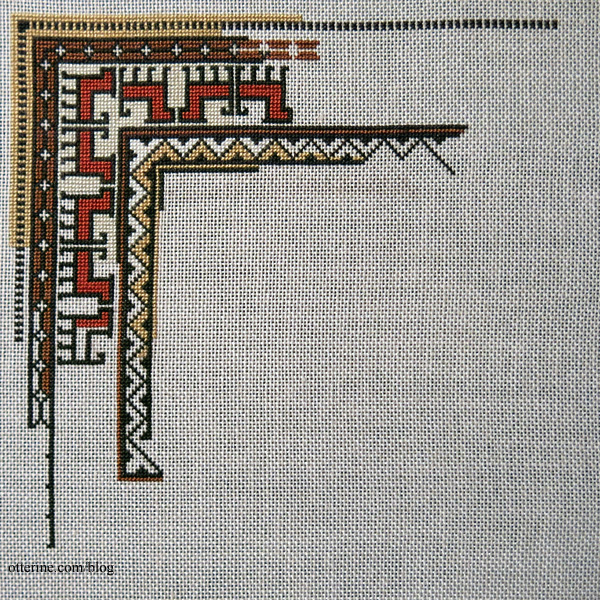
Once I reached the inner border, I decided to redesign the center. I had never been sold on the busy pattern of tiny crosses and dots in the border, and I liked the foxes so much I added four more in the middle.
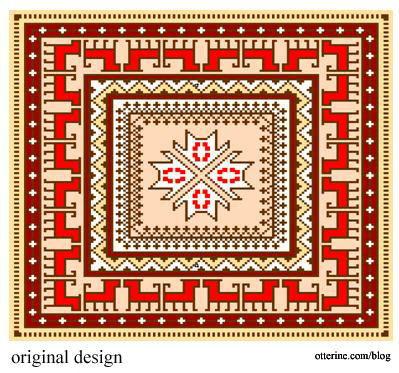
I reproduced the dark border and added detailing that mimicked the dashes in the outer border to frame the foxes.

Categories: Needlework - French knot rugs, Watson Mill
December 28, 2015 | 0 commentsTree Ring Rug
My inspiration is a lovely rug by YLdesign called the Woody Wood Carpet. While theirs is printed, mine will be done in French knots. I like the idea of an organic process for an organic subject matter. And, I can just stop stitching once I reach the diameter I want. I’ll be using four colors of tan and brown — two lighter ones (DMC 422 and DMC 167) for the interior rings and two darker ones (DMC 839 and DMC 938) for the bark edges. I usually keep track of my time when stitching, but I don’t think I’ve ever captured the first stitch of a project. One French knot down….

This was a completely freehand project. I made no pattern or markings on the fabric.

At 13 hours, I reached 1 3/4″ diameter. I planned to reach roughly 5 3/4″ diameter. The progress was deceiving since it took longer to make a full perimeter of French knots each time around.

At 31.25 hours, the diameter was 2 3/4″ and taking on a lovely shape as I would make some areas of the lighter tan wider in areas.

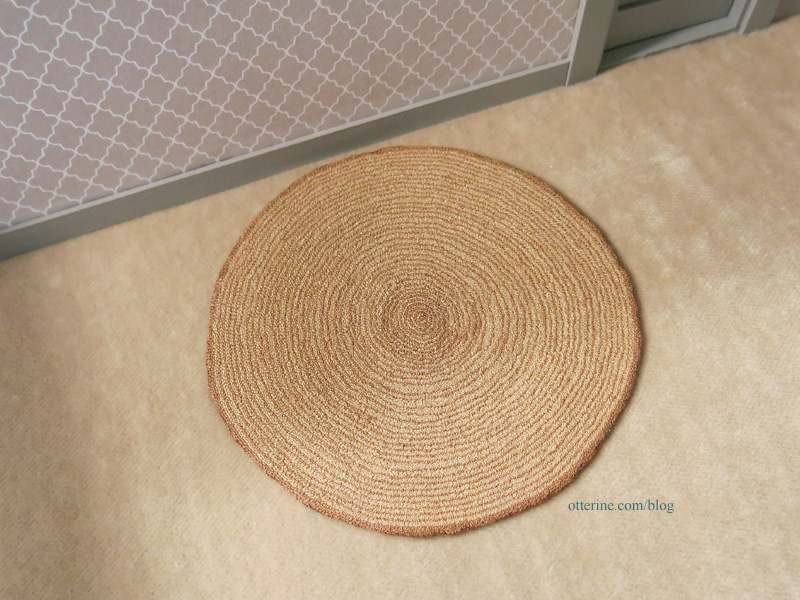
I finished stitching the Tree Ring rug for Otter Cove just in time! I stitched this rug in 77 hours over the course of 61 days. Yeow.
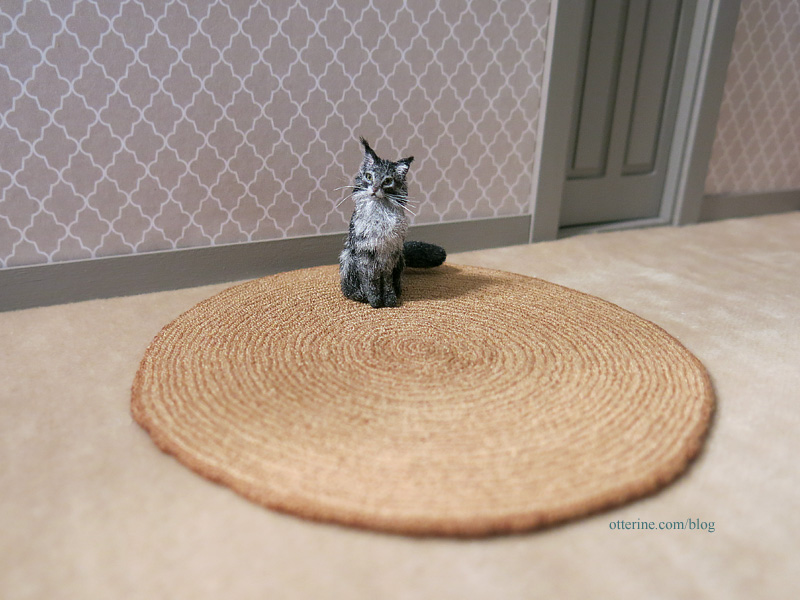
The inner ring portion ended up 4.25″ in diameter, a full inch smaller than I had originally planned. As the rug grew larger, I tested out the sizes and was able to save myself a lot of stitching time. Toward the end, making one full circle of French knots took over an hour and added a mere 1/32″ in diameter. After final finishing, the diameter ended up at roughly 4 5/16″.
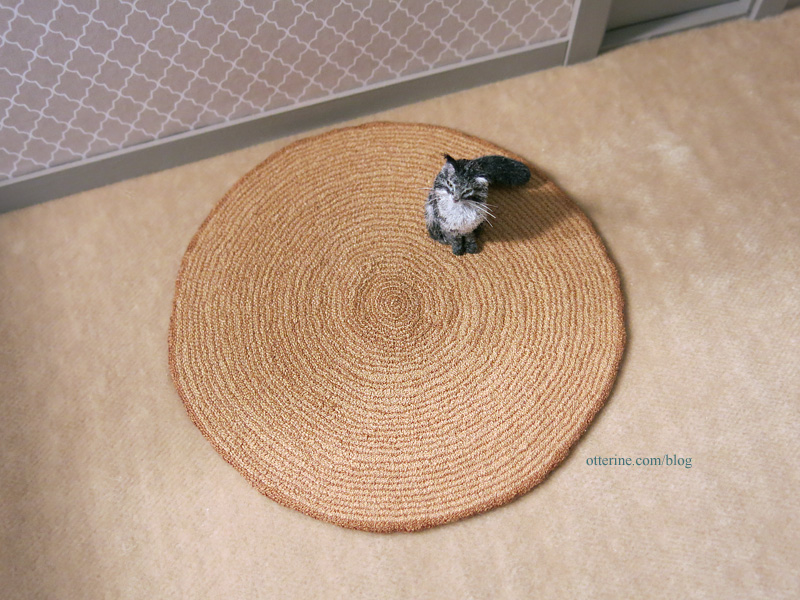
There are 37 rings to the rug, and each of those rings is made from 1-4 rows of light tan (DMC 422) and 1 row of brown (DMC 167). The outer edge bark is the same brown from the ring portion with a border edge in a slightly darker brown (DMC 869). I didn’t make my bark portion as pronounced as the inspiration rug.
To finish the edge, I added a thin line of Fray Check around the perimeter. I then snipped up to the stitching and turned the pieces to the back.
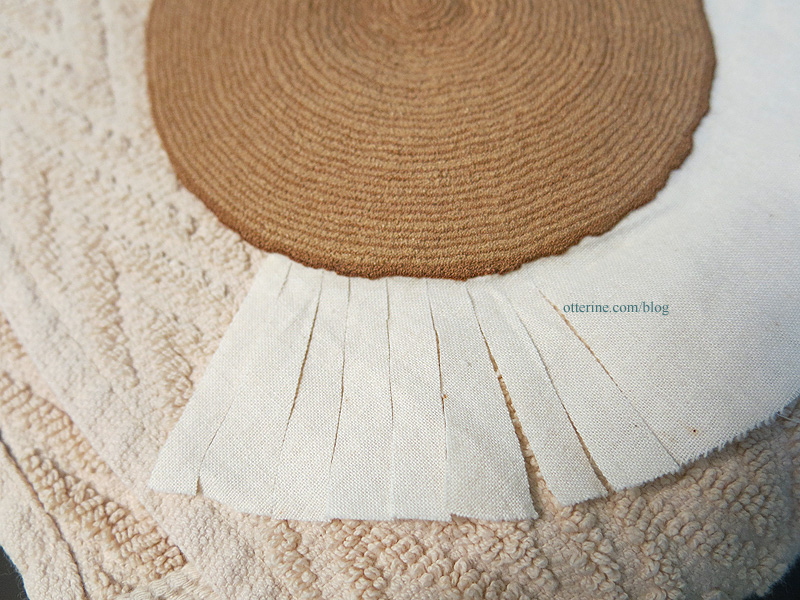
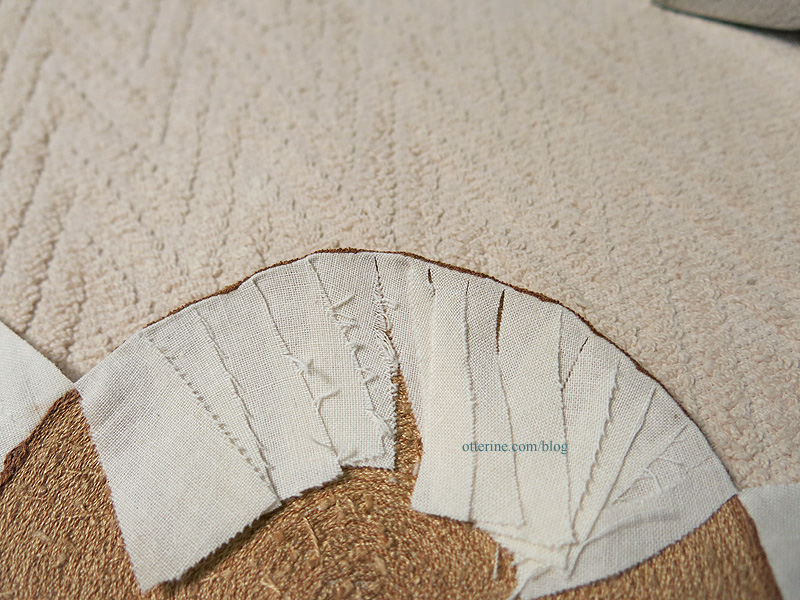
Once done, I trimmed the loose pieces.
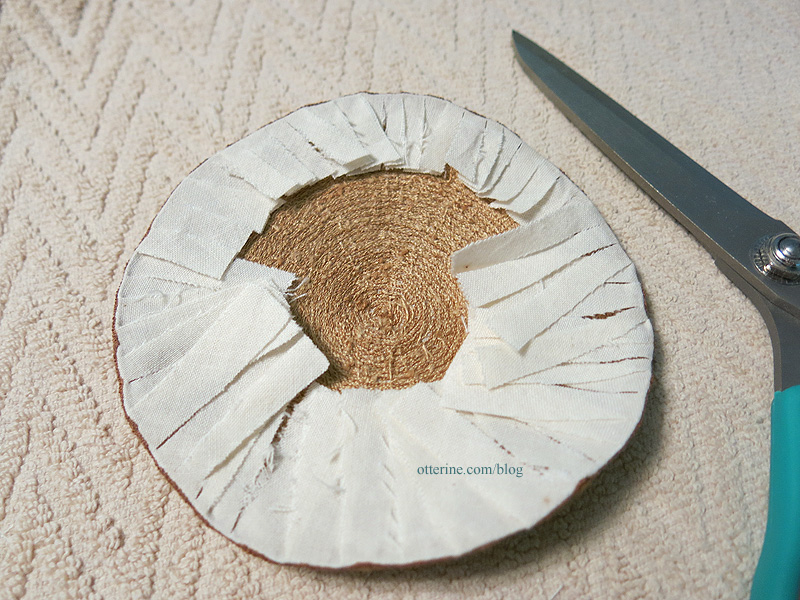
I added a circle of muslin to cover the back using Heat -n Bond (full process here).

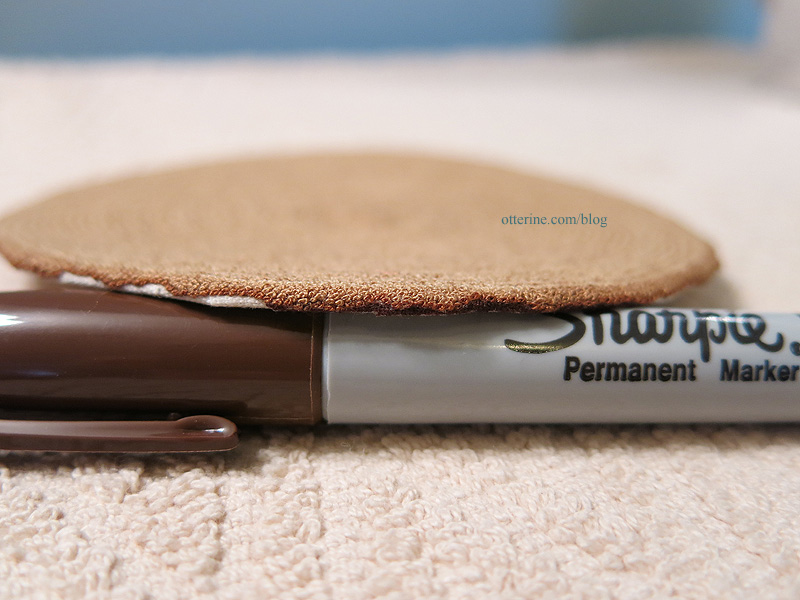
Because of the uneven edge, some of the fabric showed. I used a brown Sharpie to color in the slight underneath edge. You do have to be careful with this method and use a light touch, but it works well.
Though mine differs from the original rug by, I think I’ve captured the essence. And, I love the texture.
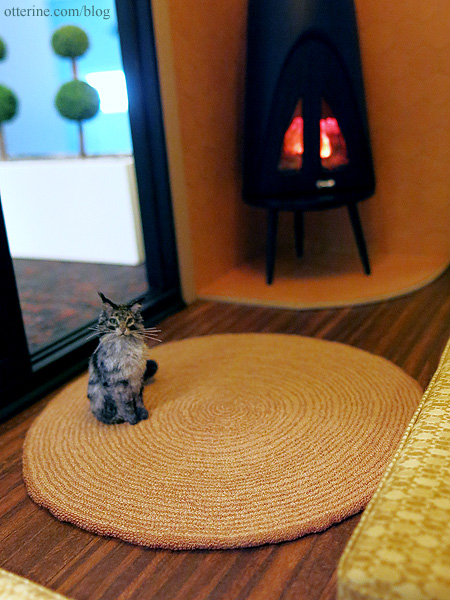
Isabeau approves.
Categories: Needlework - French knot rugs, Otter Cove
December 12, 2015 | 0 comments
NOTE: All content on otterine.com is copyrighted and may not be reproduced in part or in whole. It takes a lot of time and effort to write and photograph for my blog. Please ask permission before reproducing any of my content. (More on copyright)


