
Pattern Maker Pro by HobbyWare
For Christmas, mom gave me Pattern Maker Pro by HobbyWare (as of 2024, it seems the company website is defunct). Previously, I had been charting simple designs in Excel using tiny cells filled with color. While Excel had its appeal in ease of repeating patterns and printing options, it was also limited in changing colors universally and flipping designs any which way. Since I am new to the Pattern Maker software, I thought it might be easier to work from an existing chart as a first trial. I did read through the manual to familiarize myself with the button icons and the basic functions, but sometimes it’s best to just dive in! :]
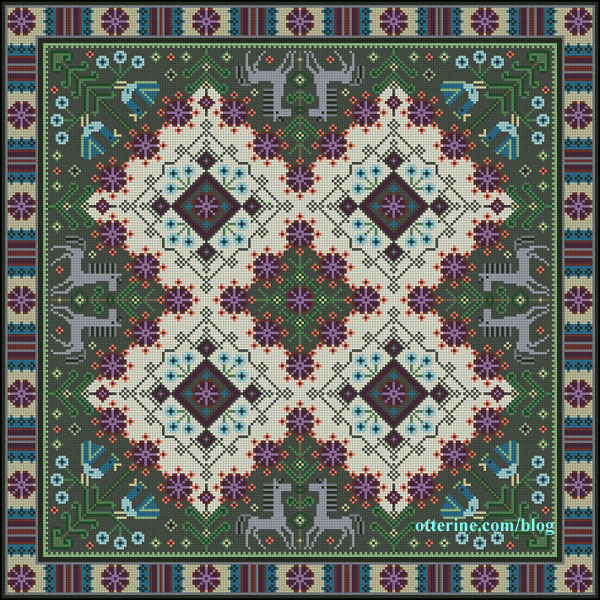
I found a needlework image on Pinterest and tracked it back to a Russian website then finally to a book on Ukrainian embroidery. I think this version was charted from a photo in the book. I don’t speak (or read) the language, so I am not sure what the caption indicates as far as origin.
I changed the colors and made some minor modifications to the design. I was able to do this chart in an evening. On 32ct fabric, the rug will be approximately 7.5″ square. I’m not sure if I will stitch this rug, but it was a good exercise in learning the software. I love the ease of changing colors universally in the Pattern Maker software.
Categories: Needlework - French knot rugs
April 1, 2016 | 0 commentsTribal Foxes Rug – introduction
When I’m scouting around the internet looking for inspiration and vendors, I often find random bits that I wasn’t looking for but like to save for later. One such item was a vintage needlepoint rug I found from Wil Shepherd. This particular one is large at 12.5″ square, more suited to playscale than 1:12 scale. I love the colors and the red critters marching along the edges. Given their color and dog-like shape, I’m going to call them foxes.
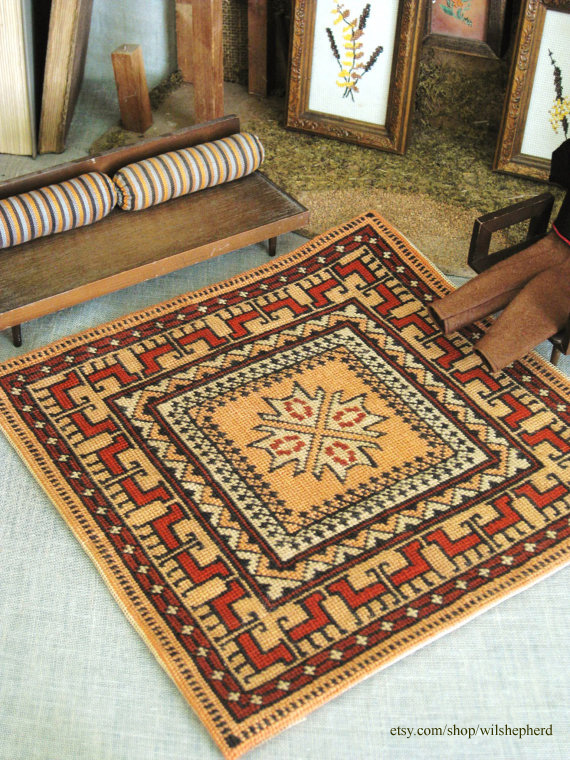
He had two other rugs listed. There was a maroon and tan one, and I recognized it as the “Holbein” rug from the booklet Miniature Needlepoint Rugs for Dollhouses by Susan McBaine (might have to stitch this one, too). The other was the same as the modern Navajo rug from the same booklet.
Of course, the one I liked most of the three was not in this booklet or any of the others I thought to look through. I was not to be thwarted, so I charted it myself. If anyone does recognize it, I would love to be able to give credit to the designer.
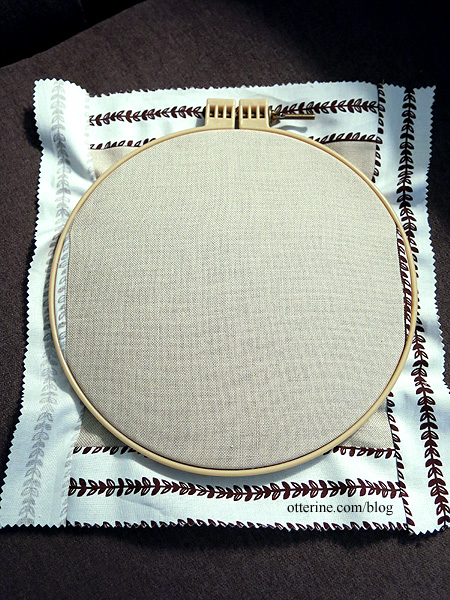
I’ll work in my usual 32 count on Jobelan, which should give me a rug just under 5″ square when finished. Perfect for 1:12 scale. I’m thinking full cross-stitch this time around, so it will be a good amount of hours for this one. My fabric piece measured 9″ square, a bit too small for my hoop, so I sewed strips of scrap cotton to the edges.
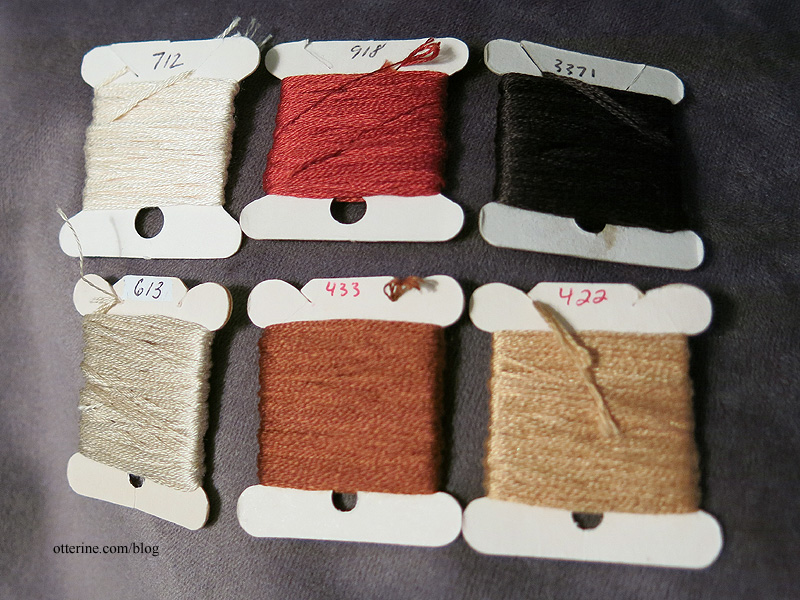
I have my colors chosen – nice and simple.
While I was drawn to the colors of the original, I wanted a bit more contrast and less yellow in my version. Below is how it looks at 23 hours of work. I am stitching full cross stitch with single thread over 32 count Jobelan.
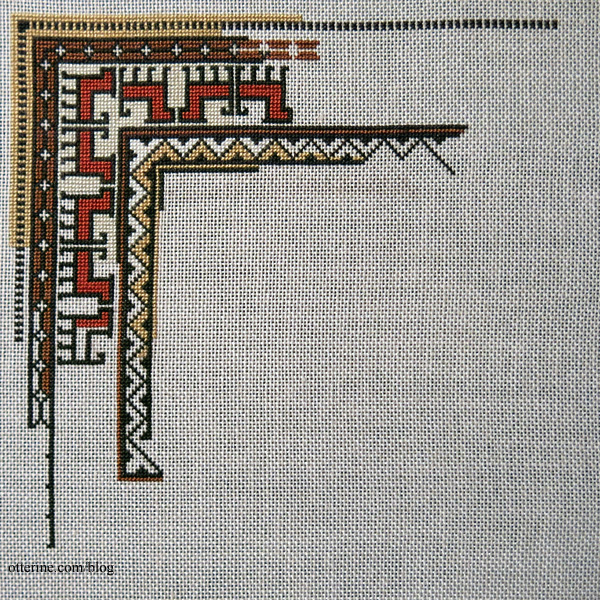
Once I reached the inner border, I decided to redesign the center. I had never been sold on the busy pattern of tiny crosses and dots in the border, and I liked the foxes so much I added four more in the middle.
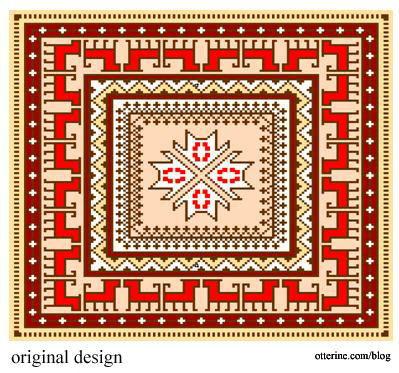
I reproduced the dark border and added detailing that mimicked the dashes in the outer border to frame the foxes.

Categories: Needlework - French knot rugs, Watson Mill
December 28, 2015 | 0 commentsTree Ring Rug
My inspiration is a lovely rug by YLdesign called the Woody Wood Carpet. While theirs is printed, mine will be done in French knots. I like the idea of an organic process for an organic subject matter. And, I can just stop stitching once I reach the diameter I want. I’ll be using four colors of tan and brown — two lighter ones (DMC 422 and DMC 167) for the interior rings and two darker ones (DMC 839 and DMC 938) for the bark edges. I usually keep track of my time when stitching, but I don’t think I’ve ever captured the first stitch of a project. One French knot down….

This was a completely freehand project. I made no pattern or markings on the fabric.

At 13 hours, I reached 1 3/4″ diameter. I planned to reach roughly 5 3/4″ diameter. The progress was deceiving since it took longer to make a full perimeter of French knots each time around.

At 31.25 hours, the diameter was 2 3/4″ and taking on a lovely shape as I would make some areas of the lighter tan wider in areas.

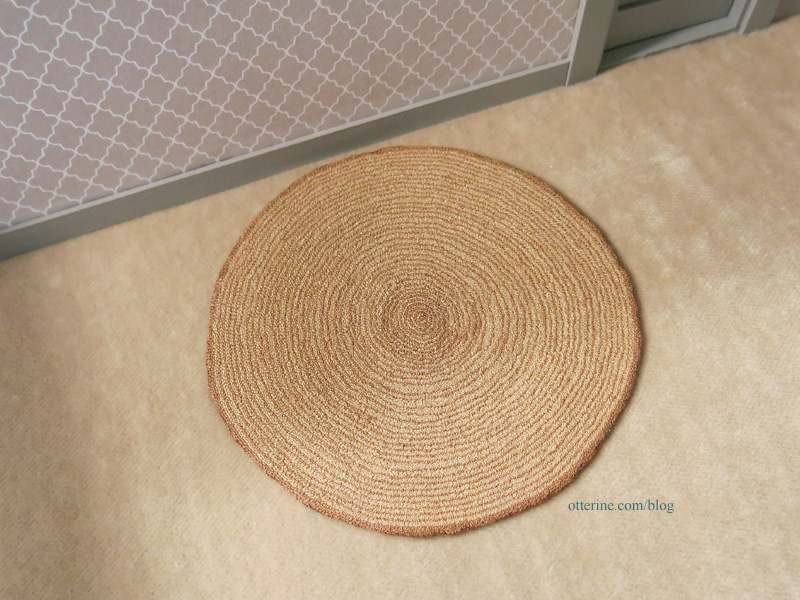
I finished stitching the Tree Ring rug for Otter Cove just in time! I stitched this rug in 77 hours over the course of 61 days. Yeow.
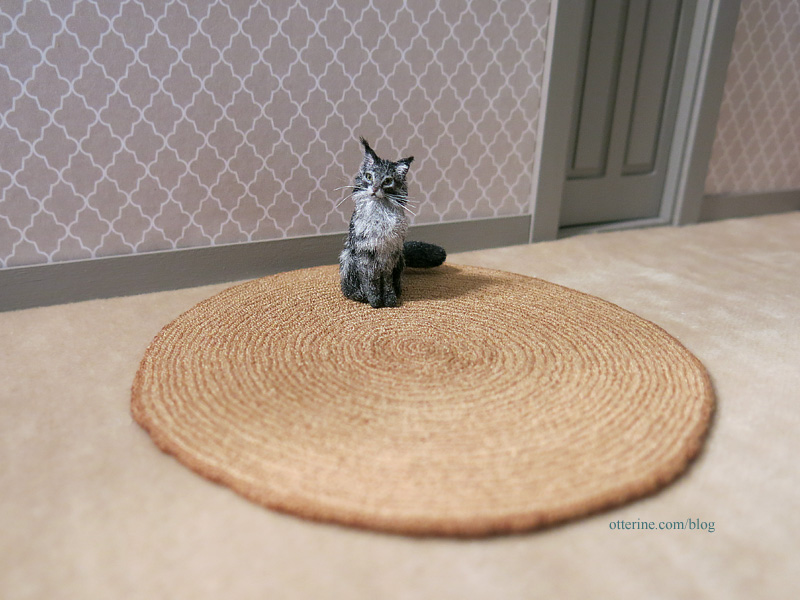
The inner ring portion ended up 4.25″ in diameter, a full inch smaller than I had originally planned. As the rug grew larger, I tested out the sizes and was able to save myself a lot of stitching time. Toward the end, making one full circle of French knots took over an hour and added a mere 1/32″ in diameter. After final finishing, the diameter ended up at roughly 4 5/16″.
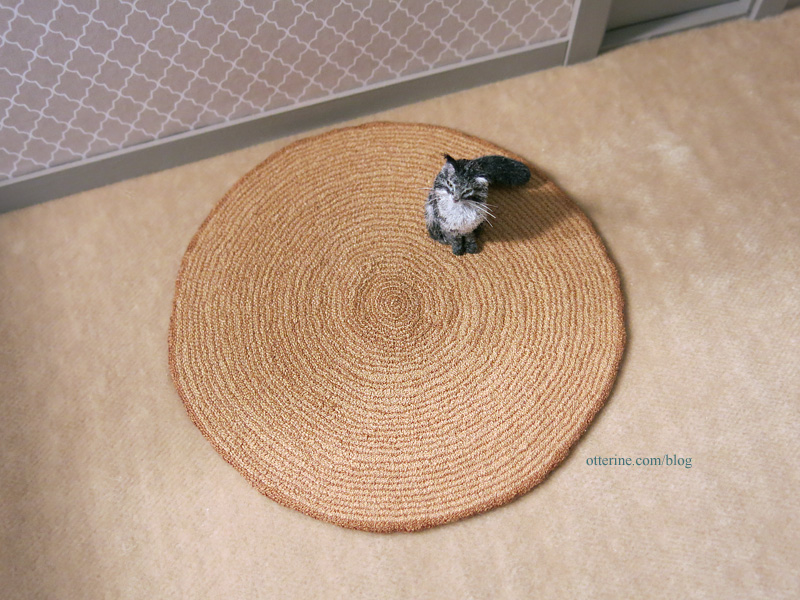
There are 37 rings to the rug, and each of those rings is made from 1-4 rows of light tan (DMC 422) and 1 row of brown (DMC 167). The outer edge bark is the same brown from the ring portion with a border edge in a slightly darker brown (DMC 869). I didn’t make my bark portion as pronounced as the inspiration rug.
To finish the edge, I added a thin line of Fray Check around the perimeter. I then snipped up to the stitching and turned the pieces to the back.
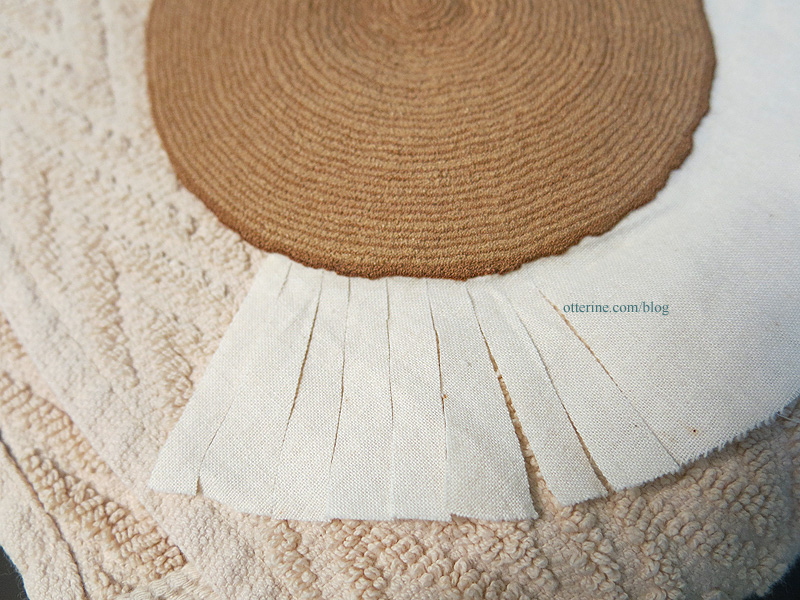
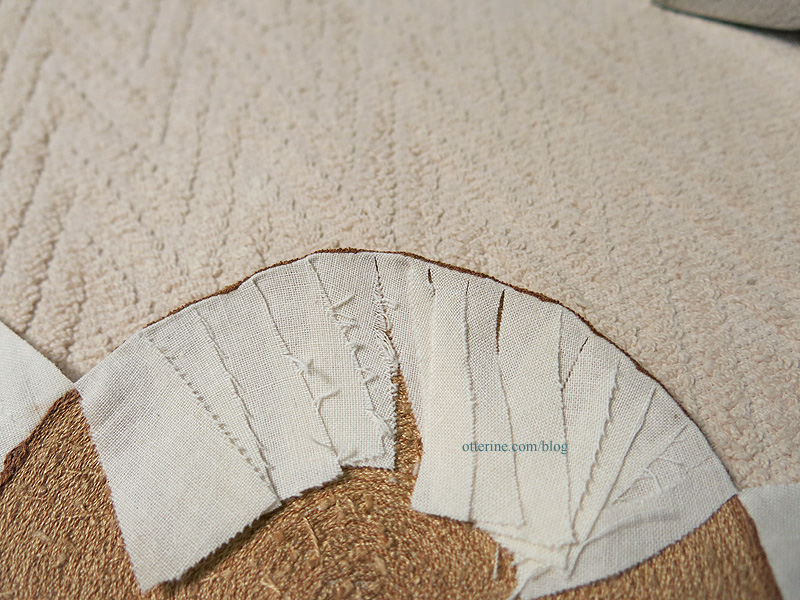
Once done, I trimmed the loose pieces.
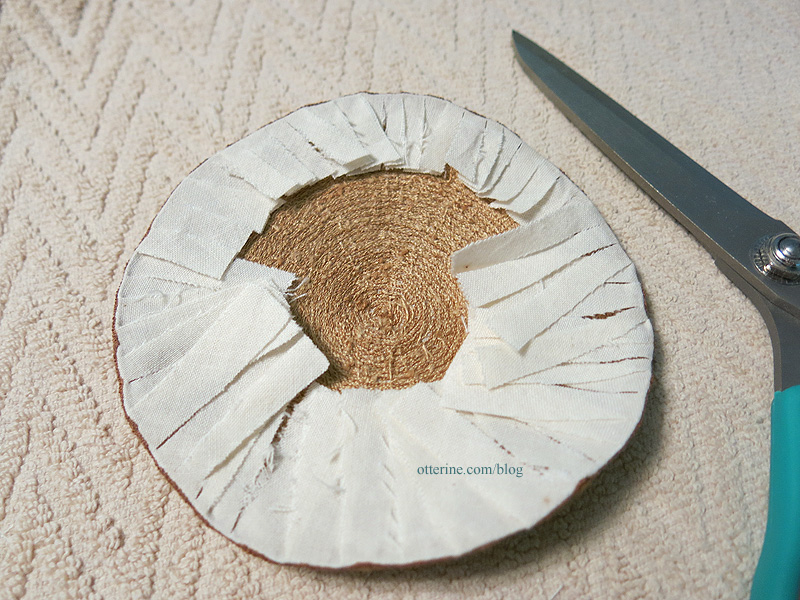
I added a circle of muslin to cover the back using Heat -n Bond (full process here).

Because of the uneven edge, some of the fabric showed. I used a brown Sharpie to color in the slight underneath edge. You do have to be careful with this method and use a light touch, but it works well.
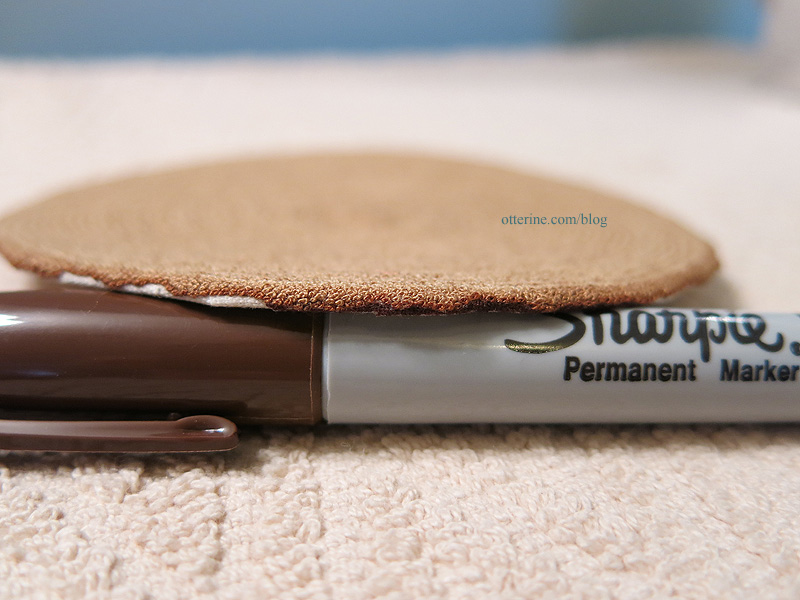
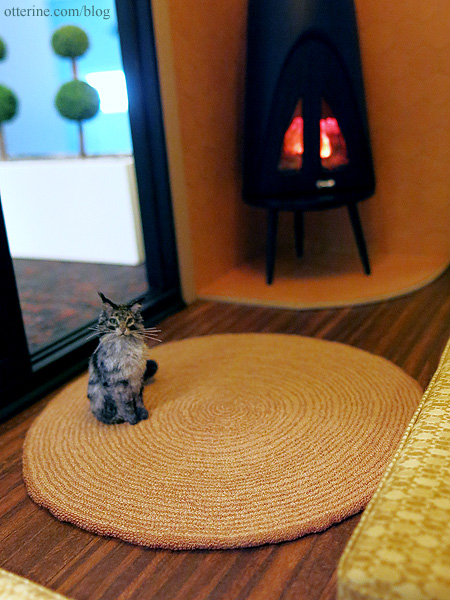
Though mine differs from the original rug by, I think I’ve captured the essence. And, I love the texture.
Isabeau approves.
Categories: Needlework - French knot rugs, Otter Cove
December 12, 2015 | 0 commentsNine Horses wall tapestry
I’ve mentioned before that I save things in an inspiration folder. Quite a few years ago, I ran across a mousepad with an image of vintage needlepoint on it. I couldn’t tell if they were supposed to be llamas or horses, but they were definitely 1960s-1970s colors and style. Into the file the image went.
I later thought about that old image, so I looked for the mousepad website again but couldn’t find it. I did find another website showing the same image, with the same name as old seller with the mousepads. I wrote to the person for info about the origin of the design, but never received a reply. The image was clear enough and the design simple enough that I was able to draft a pattern to make a miniature reproduction for my personal collection. That was as far as I got.
Moving has its upside in that you find stuff you forgot about. As I was sorting needlework patterns, I ran across my pattern. I went back to the website with the photo of the needlework and found a different website for the same seller. I wrote to her again and heard back this time. She wasn’t sure of the origin and thought the needlework had been done 35 years ago.
In the meantime, I also did a new google search and a different image of the same design showed up at an auction house. No idea if this was related to the mousepad seller or not. I don’t even know if it is a one of a kind work or if there was a pattern for it way back when.
I stitched my adaptation of the design on 32ct Jobelan fabric in parchment using two strands of DMC floss in half cross stitch. Needlepoint (half cross stitch) goes twice as fast as full cross stitch. I finished the stitching portion of the Nine Horses tapestry in 38.5 hours.
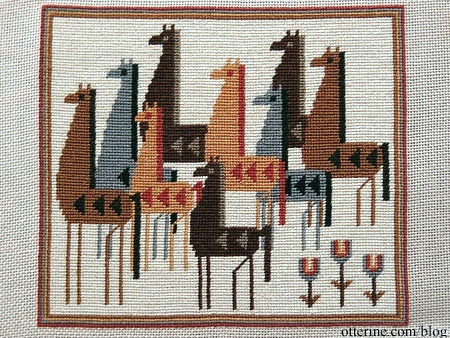
I turned under the edges and hung it in the bedroom of Otter Cove. The final measurements are roughly 4 x 3.5 inches.
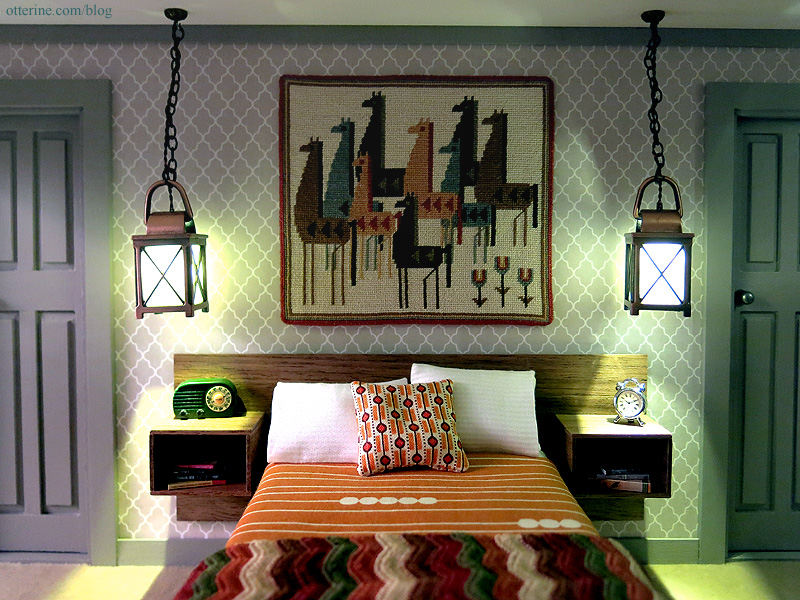
Categories: Needlework - French knot rugs, Otter Cove
September 17, 2015 | 0 commentsMorgan Lap Stand
I’ve shown you the wonderful wooden Baby Z Lap Frame I have to hold my needlework projects. It’s portable and well made. It is relatively heavy, but that works well to hold it in place while in use.

I’ve also shown you the Morgan No-Slip hoop that holds the fabric tight.
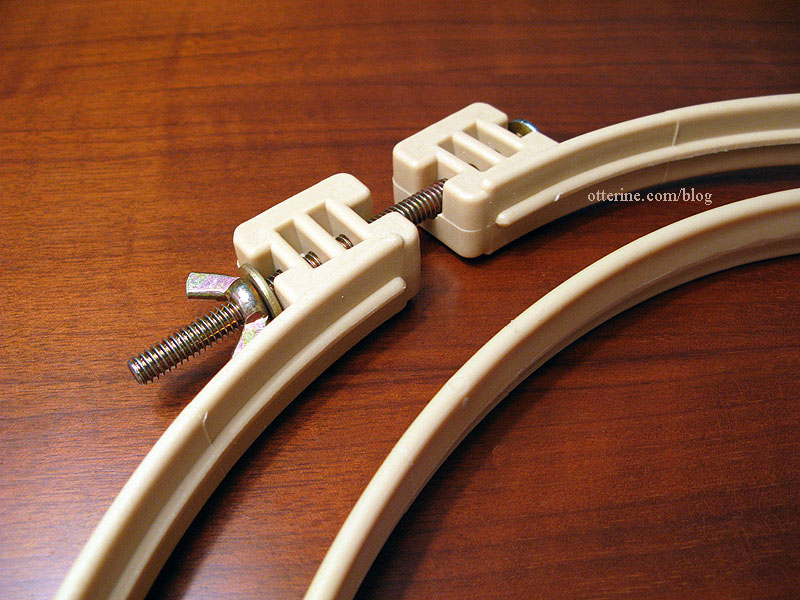
Well, I now have a Morgan Lap Stand. This set has two no-slip embroidery hoops and extenders to create a lap frame. (As an Amazon Associate, I earn from qualifying purchases.)

There are many sizes available, but I chose the 7″ and 9″ set. You can use the stand with either the large or small hoop as the base.

This is especially nice for French knot work or if you want to rotate the work at all. It can be used either on your lap or on a tabletop. You can also use either hoop by itself. These will fit in my wooden lap frame, too. It collapses for travel and storage, though you’ll need a bag to keep all the pieces together.

I found working with this frame on a tabletop to be quite comfortable even though it is a flat surface. You could probably prop a towel or pillow under one edge to angle it if desired.
Categories: Needlework - French knot rugs
March 11, 2014 | 0 commentsPrairie Rug II
As you may recall, the first Prairie Rug ran into a major problem with dye lot mismatching.
I used the original pattern I had made with Aunt Martha’s Tracing Paper and a Sulky Iron-On transfer pen in black (as an Amazon Associate, I earn from qualifying purchases). You can obtain a few transfers from the same pattern.

I chose a slightly darker purple-red and have made the brown DMC 3371 outlines thicker. One nice thing about starting over is being able to change things you were unhappy with in the first run. Punchneedle goes relatively quickly, so below is 7.5 hours of work. The border is done as well as most of the interior details. After that, it will be all green, green, green. I bought nine skeins of DMC 522 all of the same dye lot, so I hope this means the issue will not repeat itself.

Below is 15.5 hours of work. It seems to be going faster this time around now that I have the hang of the technique.

I finished stitching the Prairie Rug II with 24.75 hours of stitching time, which is a lot less than what I put into the first one I had to abandon. As I mentioned, I had a better handle on the technique so I was able to work more quickly.
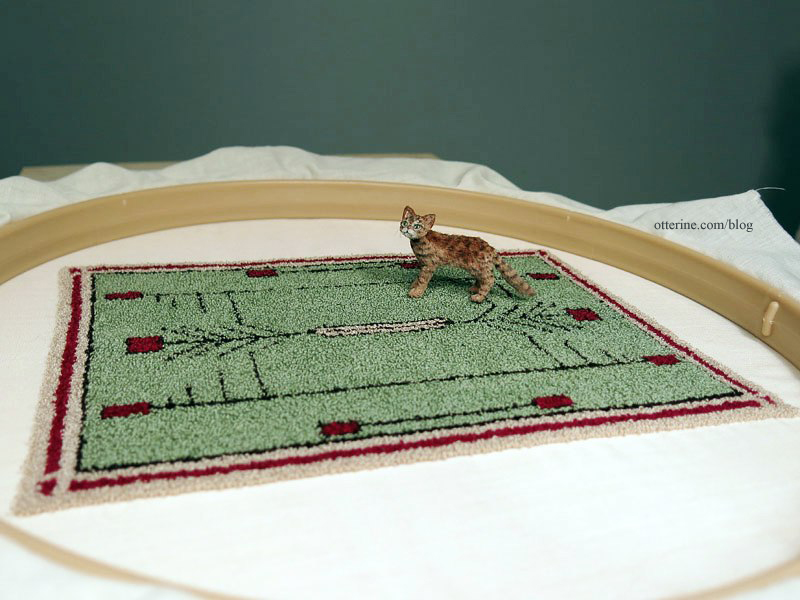
I need to go back over it once more, clip any random long loops and fill in anywhere I think it needs it. Then it will be time for final finishing around the edges.
Categories: Needlework - French knot rugs
January 13, 2014 | 0 commentsPunchneedle tips and tricks
I’m not an expert on punchneedle, but several people have contacted me about it so I decided to make a blog post with some of the things I’ve encountered. I haven’t finished a punchneedle rug, but when I do I will add those instructions here.
Find the largest (highest resolution) image of your design as possible if you are adapting from a real life design. This will help you capture as much detail as possible. Print the image in the finished size you want in the house, test out the fit and adjust as needed.
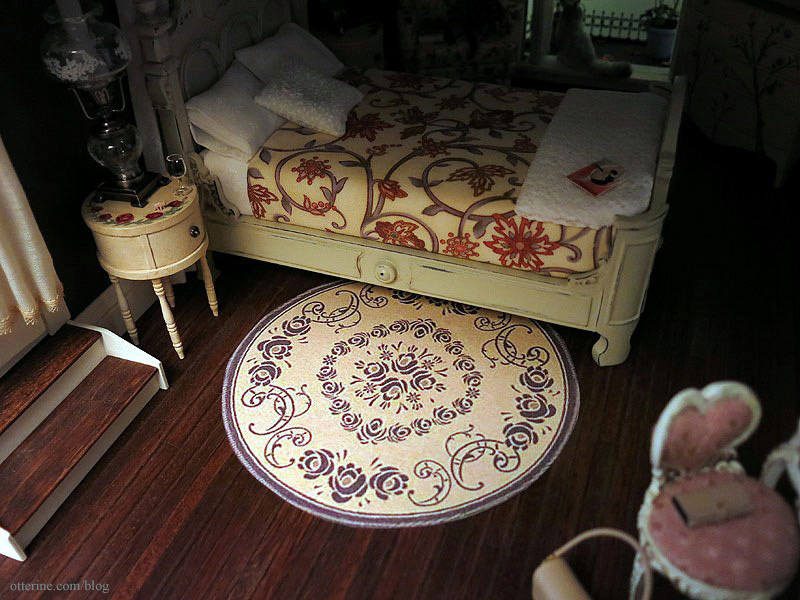
Make a high contrast printout in the final size (shown on the left in the photo below). You can do this with any program that allows you to adjust the brightness and contrast of an image. You need to be able to see the design through the tracing paper.

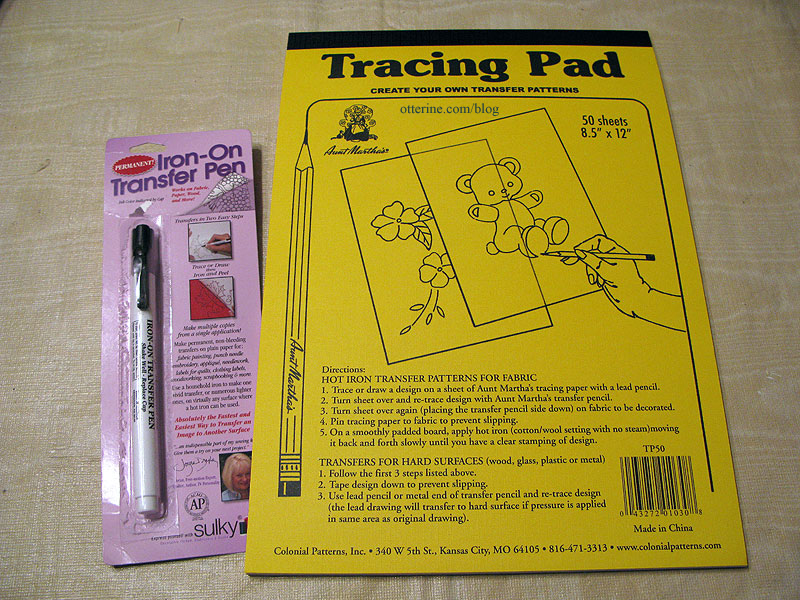
Trace the high contrast printout using Aunt Martha’s Tracing Paper and a Sulky Iron-On transfer pen in black (as an Amazon Associate, I earn from qualifying purchases). Simplify the detailing. You can stitch in more detail, but you don’t have to draw it all in. (Note: I’ve since found fine tip transfer pens at Sublime Stitching which offer a better pattern for fine needlework. See this post for more info.)
The recommended fabric is “weaver’s cloth” but I’m not sure exactly what that is. You can purchase it from the same place that sells the needles. I went to Joann and bought a poly/cotton, relatively sheer woven fabric. You don’t want anything bulky. I bought a Dee Lite Ex. Small punchneedle (website defunct as of 2024) and adjusted the dark blue stopper as close to the tip as possible while still getting the loops to stick.

The pile on my rugs is roughly 1/16″ high, about as short as you can get it without issues.

You’ll need needle threaders, but I think those come with the punchneedle. Take really good care of these since a bent one won’t work and you can’t use the needle without one. I keep mine in a folded Vermont Covered Bridges map since it’s the right size and doesn’t bend.

Get a no-slip hoop in the appropriate size (my review here). You’ll want a little room around the rug design but also consider the size of any rugs you want to do in the future. The fabric has to be as tight as you can get it, otherwise the loops slip out during stitching.

Follow the package instructions for the iron-on transfer to your fabric. Be sure to take into consideration your hoop size when you place the design on the fabric. You will be working from the back, with your finished design away from you. Your transfer will be “opposite” of your original, but the final piece will match your original. In other words, you don’t need to flip your design.
Here you can see where the hoop would pull on some areas if not large enough to frame the entire design.
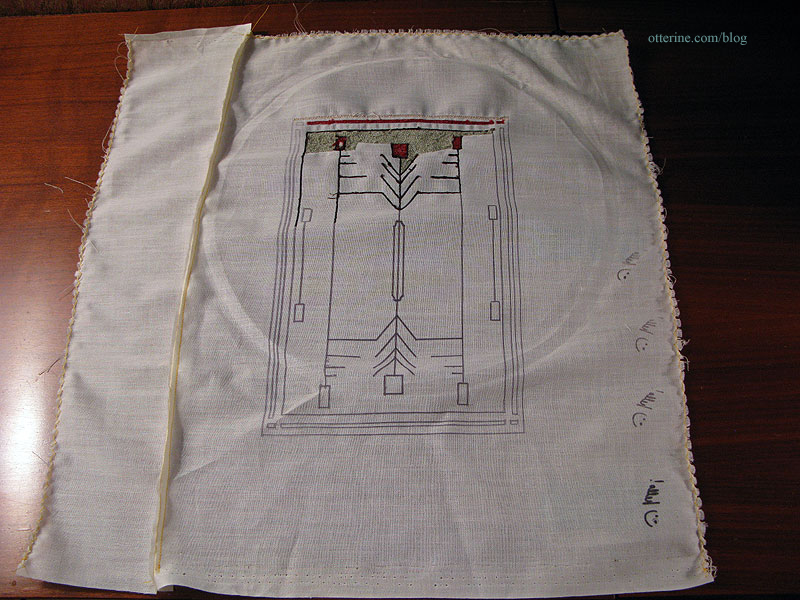
And, you can see where I had cut my fabric too close, so I had to sew on some additional fabric.
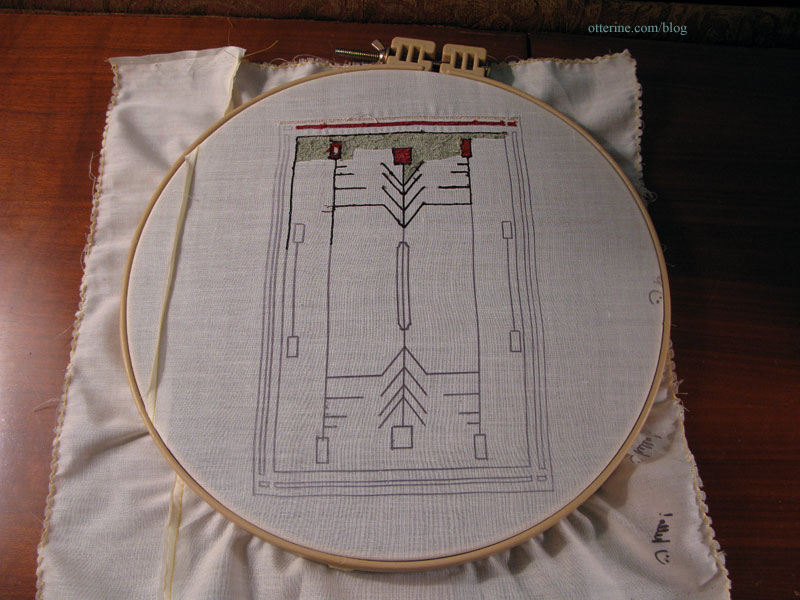
Buy DMC embroidery floss in your chosen colors. You will need more than you think. Punchneedle takes a lot of thread. Wait for a sale or a coupon, but buy a lot of each color, especially backgrounds. Make sure the dye lot numbers match, too.
When working with the floss, I’d cast the skeins onto cardboard bobbins first (as an Amazon Associate, I earn from qualifying purchases). Then, you will cut a long, long, long strand to work with while stitching. Once you’ve done some stitching, you’ll see what I mean about wanting a long strand. Otherwise, you spend all your time threading the needle. You’ll need to separate the floss into individual strands as shown here. This method cuts down on knotting.
Here is a good video on threading the needle and punching. She is using a larger needle and more floss strands than you will for miniature projects, but the technique is exactly the same. I don’t think it’s possible to describe the technique in words, though.
Some miscellaneous tips for punching:
- Get a good pair of sharp embroidery scissors.
- Pay attention to the direction of your needle when stitching. You want the open part of the tip toward you with the thread trailing.
- Keep in mind that punchneedle work doesn’t look like anything good until you get a large area covered.
- Start with outlines. You’ll want at least 2-3 “rows” for each line you want to show up in the final design. Once the fill colors abut the outlines, the lines will “shrink” visually in the final design.
- Try to get as many loops as possible by controlling how much space you skip in between. You can always go back and fill in, but it’s better to do this from the start. Since we’re using 1 strand of floss, you want a lot of loops to get full coverage.
- Punch until the thread runs out. You can snip the start and finish ends right to the fabric. Be careful not to pull the thread once you’ve made loops because they will come right back out.
- If you end up with loops that are too tall (sometimes the needle will push a previous loop out of place), just snip them level with the pile on the front.
- If you don’t like an area, you can pull it back out and move your fingernail against the fabric to close up the weave…then start over.
If you’re interested in the comparison between punchneedle and French knots, here is the Bees and Trees rug in French knots compared to the Prairie Rug in punchneedle. The pile is definitely finer with French knots, but punchneedle takes considerably less time and is still convincing in miniature.

I hope that answers most of your questions and points you in the right direction.
Categories: Needlework - French knot rugs
January 9, 2014 | 0 commentsTopiary with birds – 12.75 hours
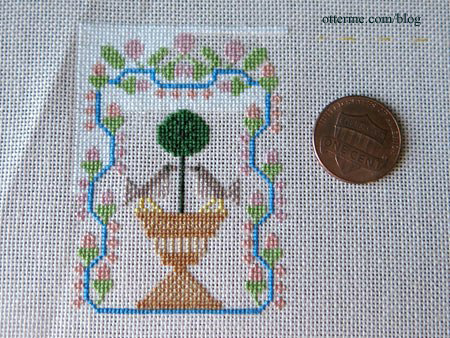
I had hoped to have this finished for the monthly needlework update, but then that pesky lightning strike happened and threw everything off. This pattern is a motif from a Dutch sampler dated 1776 provided by Berthi Smith-Sanders. I found the file for free download at The Workbasket (defunct site as of 2024).

I changed the colors completely from the listing on her pattern and made the tree topiary shaped. I’ve stitched the main design and am now filling in the background with DMC 3865 Winter White. This will be a wall hanging measuring approximately 1.75″ x 2.5″ when finished. This is currently 12.75 hours of work on 32ct Jobelan.
Categories: Needlework - French knot rugs
September 10, 2013 | 0 commentsRose rug – introduction
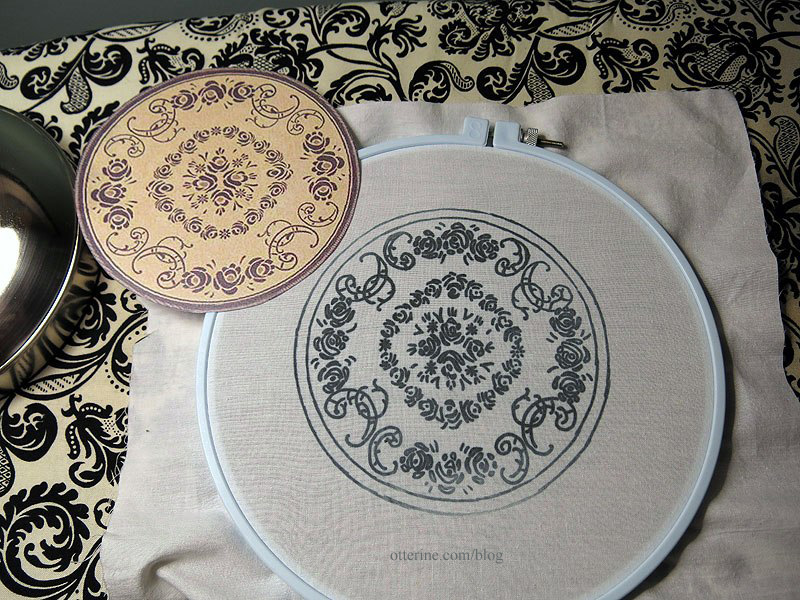
There were a few unfinished projects for the Haunted Heritage, one of which being the replacement rug for either the parlor or the bedroom. I looked online for a suitable replacement and found this design from overstock.com and printed out a paper mockup to see how I liked it in the bedroom. The subtle rose design suits the rest of the décor well.

I will use a simple color palette similar to the punchneedle rug by Katie Arthur. Here’s that rug in the bedroom. Very similar in overall style.
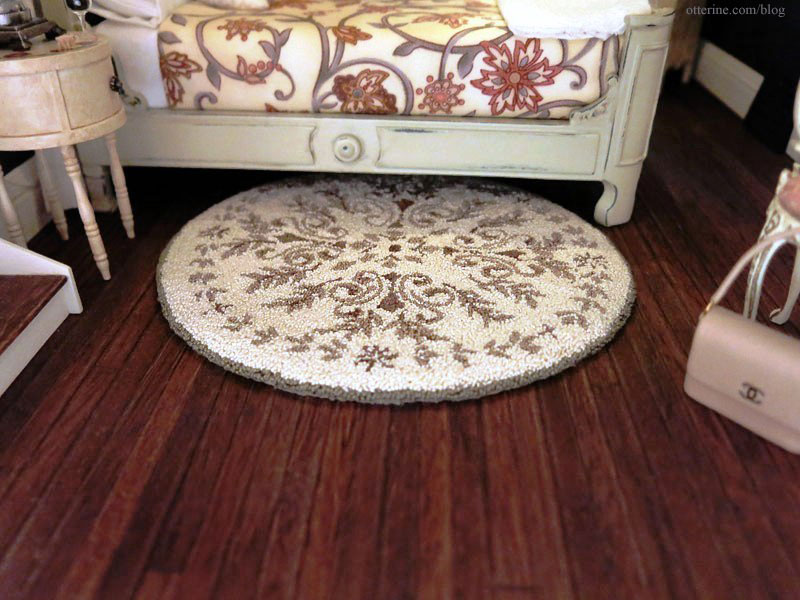
But, that rug will stay in the parlor, since I bought the rug for that room and like it there best. :]
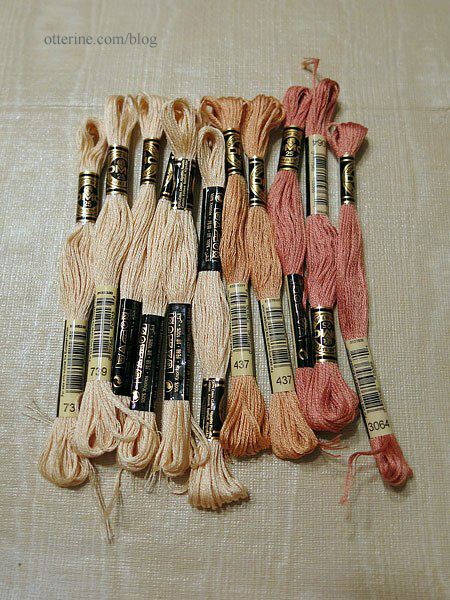
After looking at the pattern more closely, I decided to make the Rose rug in French knots instead of punchneedle. It’s roughly three times the area of the Bees and Trees rug, so it shouldn’t be too much of a time investment relatively and I think the texture will be wonderful. Here are my floss colors.
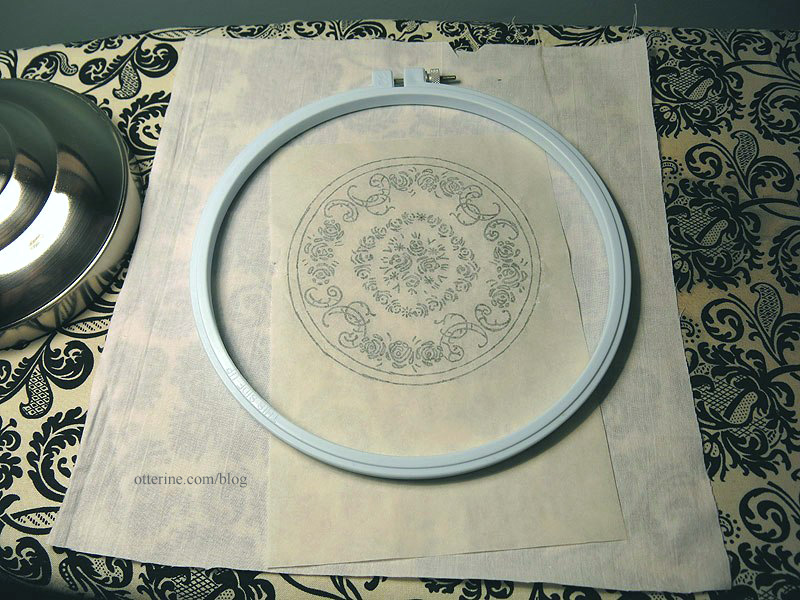
I used the same technique for making the pattern as I had done for the Prairie rug: Aunt Martha’s Tracing Paper and a Sulky Iron-On transfer pen in black. For detailed info on how I transferred that pattern, click here. (Note: I’ve since found fine tip transfer pens at Sublime Stitching which offer a better pattern for fine needlework. See this post for more info.)

I measured a piece of cotton muslin to fit my 8″ hoop and centered the pattern in the middle. Something I didn’t think about this time is that I didn’t flip the photo before making my transfer pattern. Since there are no words in the design, it won’t make a difference.
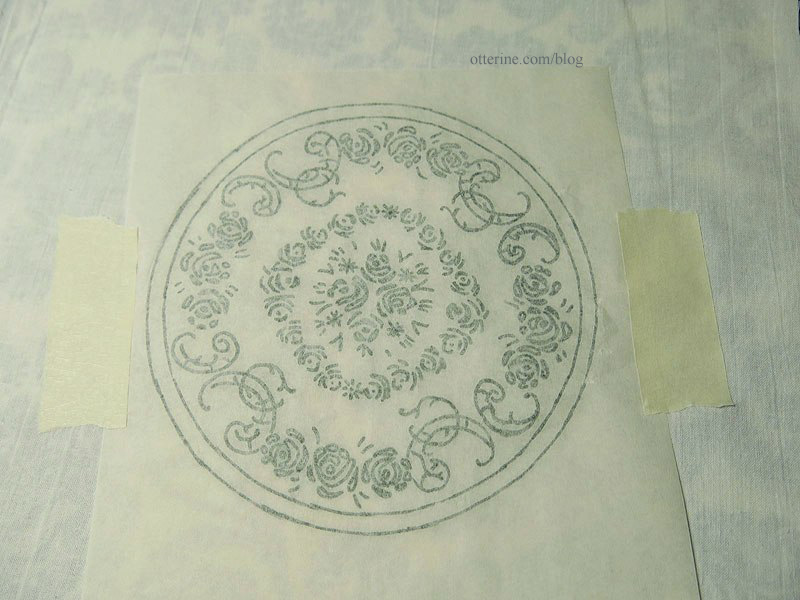
I had some operator error last time, so I taped the pattern to the fabric. I was careful not to iron over the tape so the sticky residue wouldn’t transfer to the fabric.
I fit the fabric in the hoop, and we’re ready to go! :D
Categories: Needlework - French knot rugs
September 3, 2013 | 0 commentsPrairie Rug – a major setback
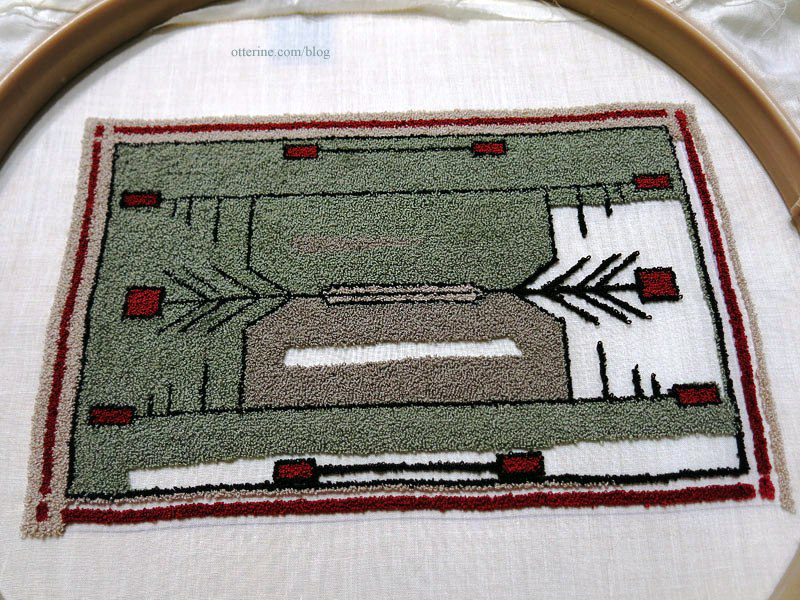
At 29.25 hours of work on the Prairie Rug, a major problem came to light with this project. You can clearly see the two different colors of green/grey in this photo. I didn’t notice this until photographing the rug tonight since the colors look relatively close in person, but the camera really picked up the difference.
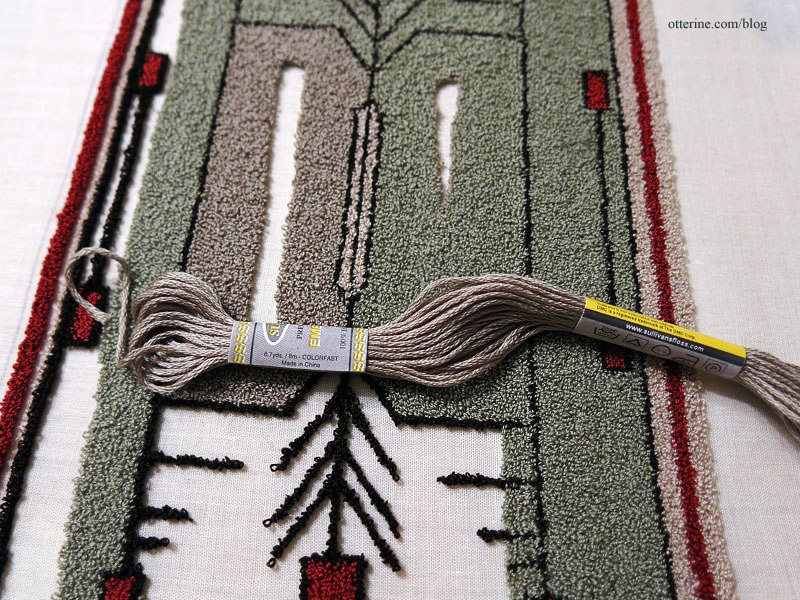
I am using a different brand of floss – Sullivans – for this rug because the store I went to did not carry DMC. I’ve always used DMC and have never had a problem. Of course, I’ve never done large swaths of color in DMC to make a fair comparison, but Sullivans clearly has shifts in dye lots. There’s no indicator of dye lot on the Sullivans tags as there is on DMC tags. I photographed the three skeins I have left on the rug, and they match the grey. I’m just glad this wasn’t a huge investment of time. It’s still frustrating and disappointing. :\
I contacted Sullivans, and they were very apologetic about the dye lot problem. They said they’ve never had this happen before. They sent a photo of their stock 45118, and I told them that looked like the color I bought. I requested four skeins, but they generously sent me a full boxed dozen. Unfortunately, these match the latest grey. I must have bought some old stock along with the newer stock that is now produced. Just to be clear, to the naked eye, they all look like sage green; it’s the camera that picks up the difference in color.
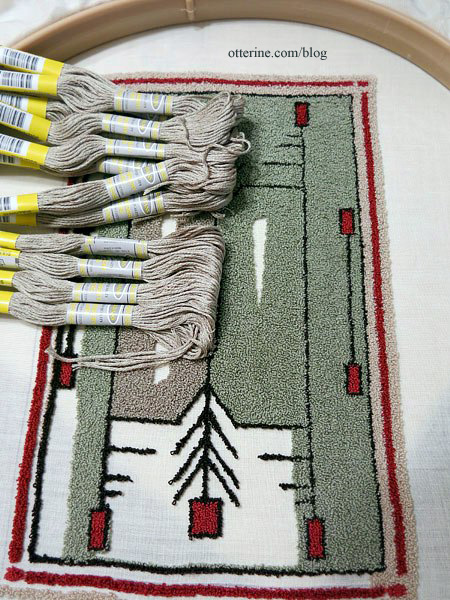
I have to say I was pleased with the quick reply from Sullivans and their willingness to help resolve the issue. No matter what brand I buy in the future, if I am going to have large expanses of one color in a project, I will shop with my camera to make sure they all match one another.
Categories: Needlework - French knot rugs
August 29, 2013 | 0 commentsBees and Trees – how to finish a French knot rug
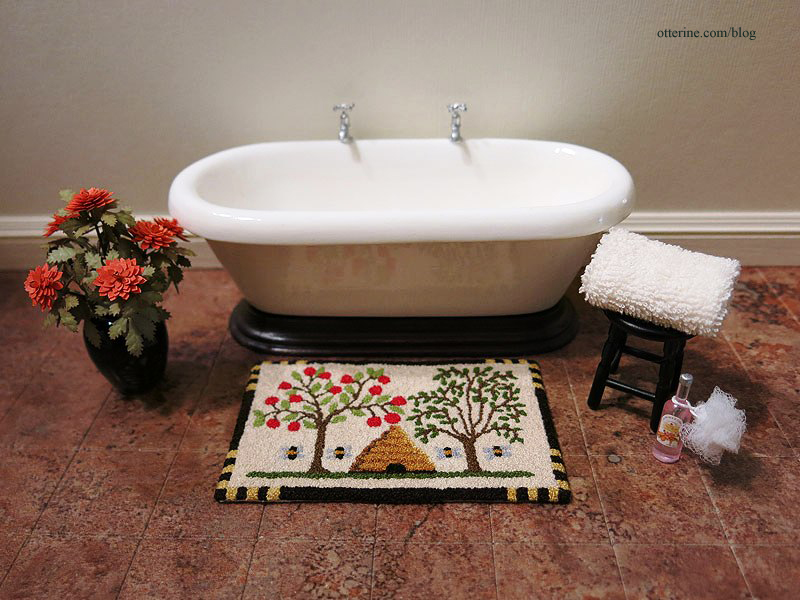
I finished stitching the Bees and Trees French knot rug kit by Teresa Layman. It took me a total of 34.75 hours of stitching time, just over 5.25 hours per square inch for this tiny 3.25″ x 2″ rug. :]

I love the way it turned out, but I don’t think I will combine Colonial knots with French knots in my future rugs. I like both knots separately, but not together. The French knots are smaller and look cleaner in my opinion, especially when you have Colonial knots mixed in.
The following section is how I finish my rugs. I’m sure there are a number of ways to finish a rug, but this is the method I prefer.
I trimmed then turned under the edges, pressing them flat with an iron.

I try to roll the backing behind the outside edge of stitching as much as possible.

I put a small dab of Fray Check on each corner.


I folded each corner in, trying to make it as tight and invisible (from the front) as possible.

I then trimmed inside each corner to reduce the bulk. This is why I use Fray Check, to make sure these corners stay true over time.

I trimmed the turned edges closer.

I cut a piece of iron-on adhesive sheet smaller than the rug, making sure it would cover the turned edges.

I use Heat-n-Bond Ultimate.

I ironed it to a piece of scrap cloth. This cloth is actually from the same French knot kit, cut away when I trimmed the rug edges.

I cut around the scrap cloth and checked the fit on the back of the rug.

I then ironed the scrap cloth to the back of the rug. This adds only the slightest thickness, but it protects the stitching in the back and keeps the edges secure. It also helps keep the rug flat.

I just want to run my mini toes through that soft pile rug! :D
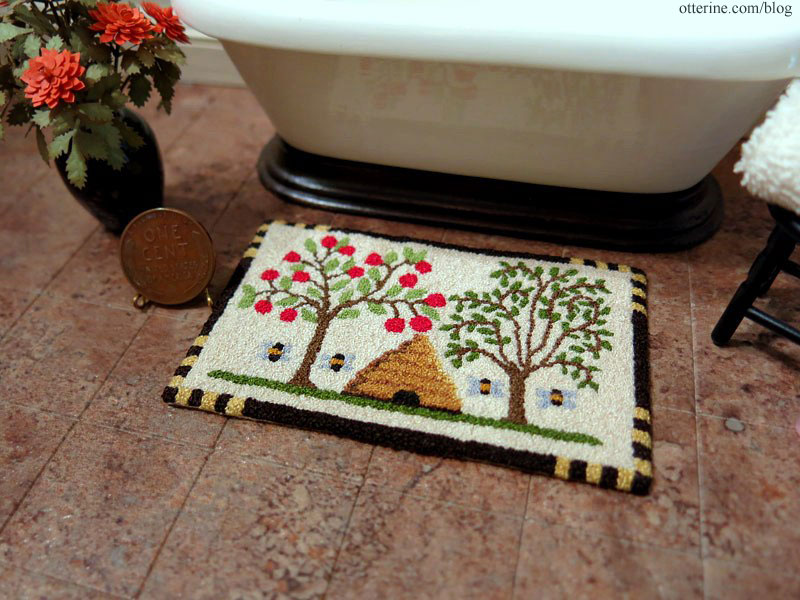
Here’s a penny to show the size. You can see just a hint of the turned edges. If I find it bothersome in its final location, I will color the edges of the turned fabric with a permanent marker of the closest matching color.
Here’s an example from the Tree Ring rug, where I used a brown Sharpie to color the turned edges to make them less conspicuous. You do have to be careful with this method and use a light touch, but it works well.

Here’s the French knot rug in comparison to the Prairie punchneedle rug.

The pile is definitely finer with French knots, but punchneedle takes considerably less time and is still convincing in miniature.

Categories: Needlework - French knot rugs
July 22, 2013 | 0 commentsBees and Trees rug – introduction
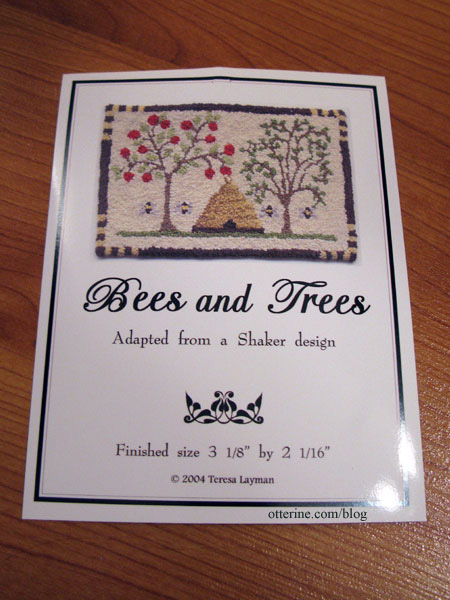
I opened the package and sorted by yarns for the Teresa Layman Bees and Trees French knot rug. I had most of the suggested colors on hand but substituted a few like colors for the missing ones.
It actually uses a combination of Colonial knots and French knots, neither of which are familiar to me. I know I did a lot of them incorrectly at the start, but you can’t tell. Below is 2 hours of work, though I am sure to become more proficient as I go along.
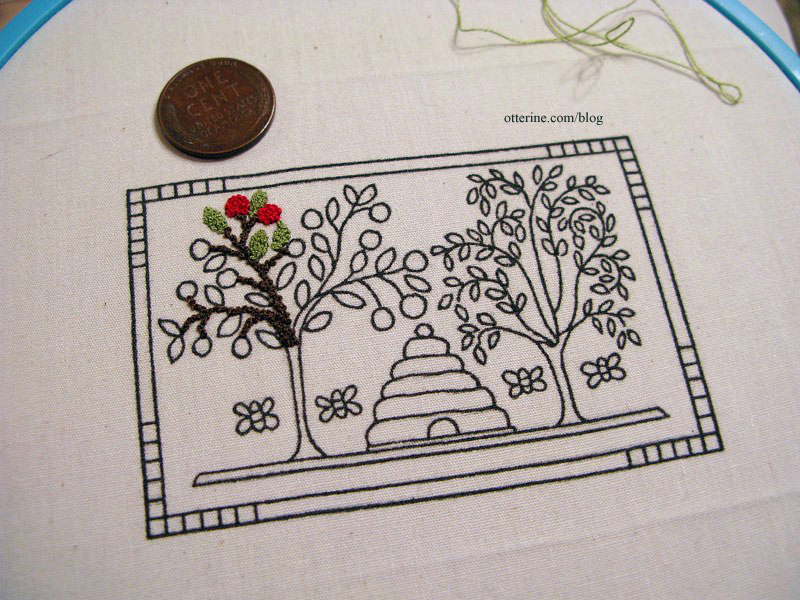
I’ve never tried one of these but think French knot rugs provide the best illusion of proper scale in miniature. I bought three of her kits at the 3 Blind Mice show, but opted for this one to start. They are all similar in complexity, but this is the smallest of the three.
Update: I’ve managed to work a little each day, and the Bees and Trees rug is probably halfway done if you were to transfer the stitching from the right tree over to the empty spot on the left. I’m at 19.5 hours of work below.
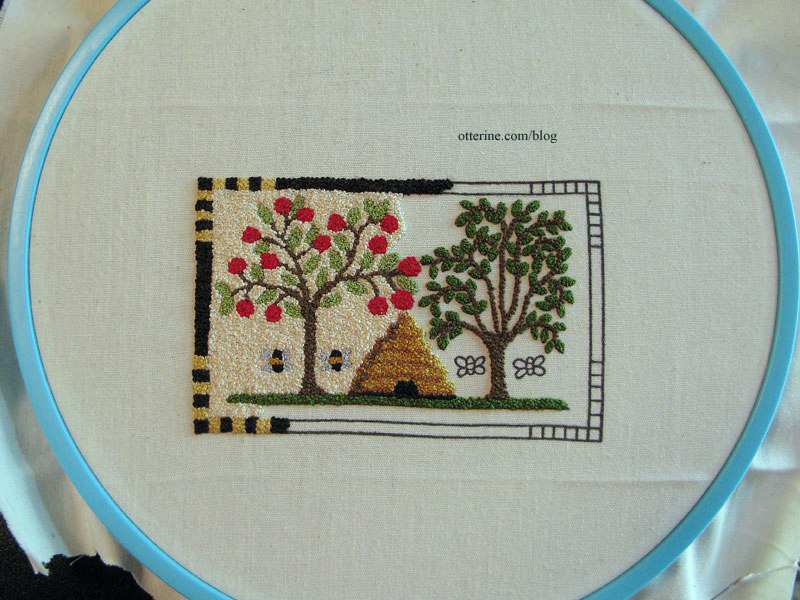
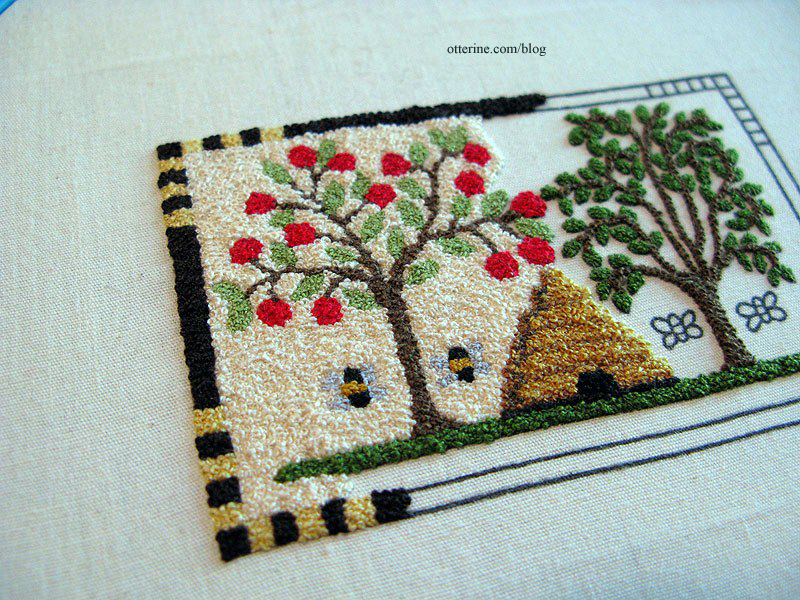
I love the way these knotted rugs look in mini…such great texture. I departed from the kit instructions just a little. For smaller areas that called for Colonial knots, I used French knots instead since it seems a softer texture. I might just be doing the knots wrong, but I find the Colonial knots are slightly larger than the French knots. I’m also using a combination of the two to fill in the background for the same reason…the French knots can get into smaller spots around the trees and other details and they can fill in between the Colonial knots. (Note: going forward, I’ve used French knots exclusively since it’s a more consistent texture for the way I stitch.)
Categories: Needlework - French knot rugs
June 9, 2013 | 0 comments
NOTE: All content on otterine.com is copyrighted and may not be reproduced in part or in whole. It takes a lot of time and effort to write and photograph for my blog. Please ask permission before reproducing any of my content. (More on copyright)

Memories and gifts
The miniature community lost a talented miniaturist and lovely lady, Elly in Amsterdam. I knew her through a petitpoint group and never met her in person, but she was one of the sweetest ladies and super fun. She’s definitely missed. One of her close friends is also a talented miniaturist and is looking after Elly’s estate. Josje has a blog of Elly’s miniatures for sale, and I bought two items to have something from Elly. :]
These cat matryoshkas are beautifully painted and actually function.

Too stinkin’ cute!

The coal scuttle is something I don’t have a plan for, but it is so well made it could be just an antique used for décor in a more modern setting. :]

One little coal was included.

Mom gave me two needlework books for Christmas that I’m sure Elly would have loved. The first is Embroidered Cats by Hiroko Kubota.

While it’s not an instruction book and not for beginners, the book illustrates the process of turning a photo into an embroidered likeness. I might need to see about making a needlework Jasper. With a little planning, it could probably be done in miniature to make a wall hanging.

The other book is Cluny Tapestry Rabbit, a counted cross-stitch pattern by Scarlet Quince. Elly made a similar one in miniature for a fire screen. This is a larger pattern, but with a high count fabric, it might be a good wall tapestry in miniature.

Categories: Books and media, Miniatures, Needlework - French knot rugs
January 24, 2019 | 0 commentsBargello seat covers in tan
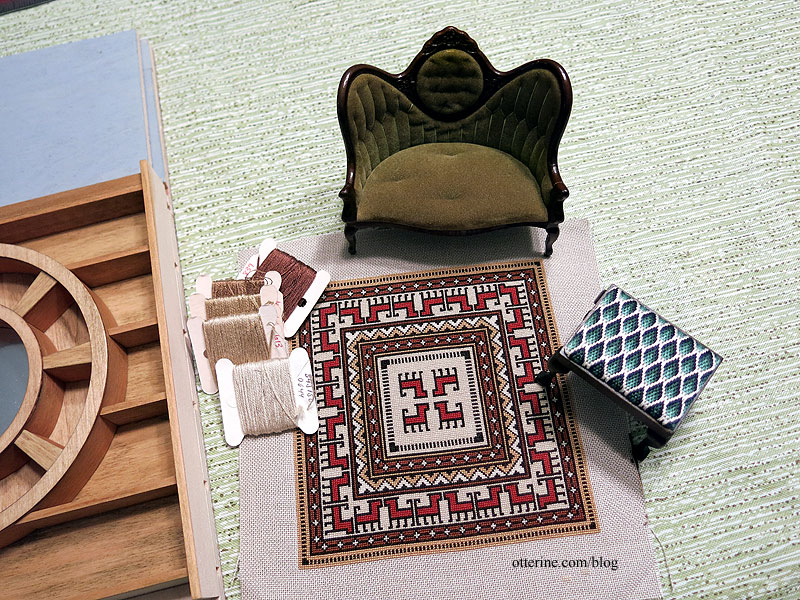
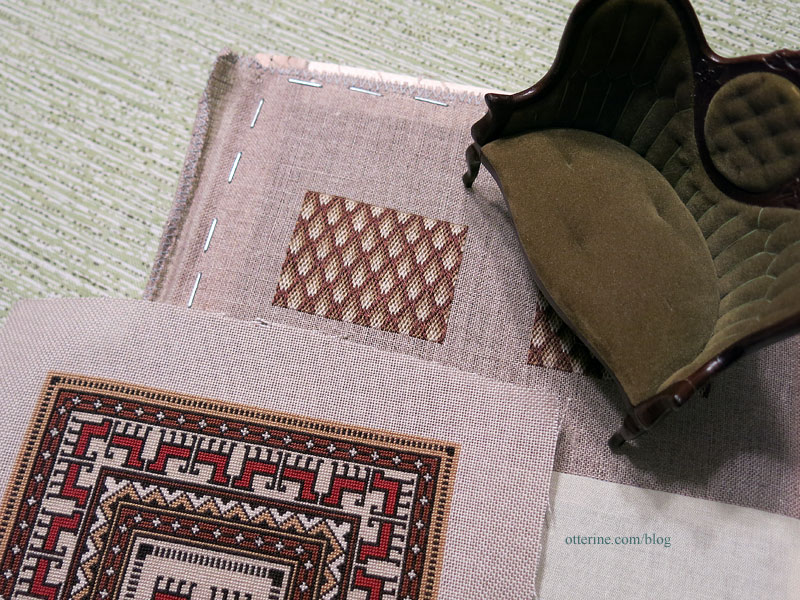
Here is one of the benches with the other items selected for the main floor of the mill. The stain, the settee and the foxes all have yellow/red tones, and the blue cast in the bargello was not working at all. I chose new colors in a grey/brown combination. The darkest brown will be the lattice and the others the “diamonds” inside. I think it will work much better than the blue/greens I had and should be a more subtle pattern as well.
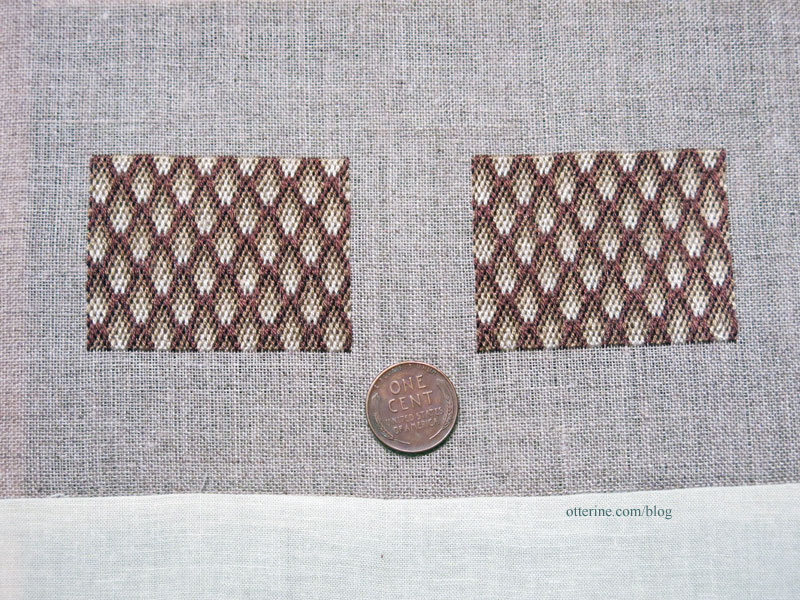
The one on the left took 5 hours and the one on the right took 4.25 hours, just like the first time around. It must just take more time to plot the first one, whereas you can just copy for the second one. The 40 count linen was rough in a couple of places for the second one, so it might look a little threadbare in spots once done. It will just make it look old, so I’m not worried about it enough to redo it.
The colors go much better with the settee and rug. :] Now I just need to make the new benches.
Categories: Needlework - French knot rugs
August 10, 2017 | 0 commentsBargello seat covers in green
I’ve always liked bargello needlework, and since Gustav has an eclectic taste I thought it would work well in the Mill. Bargello is also called Florentine or flame stitch, and there are a lot of lovely patterns out there. Being in miniature, keeping it simple is best. I found a suitable pattern in the book Miniature Needlepoint and Sewing Projects by Kathryn Falk.The pattern is for a wide bench, but the geometrical nature of bargello makes it easy to adapt to other sizes. You just stitch more or less to cover the area you need. To make it easier to follow, I charted the book pattern in full color using Pattern Maker Pro by HobbyWare.
The pattern called for 5 colors worked on 42 mesh cotton Penelope canvas. I chose three blue-greens, one navy and one cream color from my stash of DMC floss. I didn’t have the canvas, but I still had the 40 count silk gauze from my previous attempts at petitpoint and French knots, both of which were unsuccessful. This was no exception. My eyes want to focus on the holes, not the threads even with high magnification. Again, I could feel a headache developing. Here is the old silk gauze photo…too sheer for me, but you can’t say I haven’t tried multiple times.

There is 40 count linen on the market, but I figured I would try a quick sample on 32 count Jobelan to see if I even liked it. I used three strands to cover the fabric here. It does bulk up quickly, but that works fine for upholstery. I’ll just cut down on the padding underneath. This was much easier for me. I need substantial fibers to see in order to stitch.

Since the sample on 32 count turned out so well, I ordered a small piece of 40 count linen. My test on 32 count Jobelan required three strands, but the 40 count linen needed only two. I did try a sample of single thread but it left noticeable bare patches. I opted for medium beige linen to mask any bare spots that might arise with the two strand coverage as well. The linen is less even in texture than the Jobelan, but bargello stitching covers more area so it’s doesn’t seem to impact the end result.
Below is roughly an hour’s work so it does cover a good area rather quickly. The linen works better than gauze for me, though it does take some concentration to start. You have to be so careful with the count, but I can at least see the threads this time. Once you get the pattern started, it seems to go faster as well. I’ve stopped short on the right since I wanted to measure against the seat insert and didn’t have it handy. Bargello makes for a bulkier end fabric, so I want enough to cover the seat insert without having to tuck stitched portions underneath.

I finished up the seat overs rather quickly. The first took roughly 5.25 hours of stitching, whereas the second took only 4.25 hours since I had worked into a rhythm and had pretty much memorized the pattern.

I built the two Chippendale Benches by The House of Miniatures.
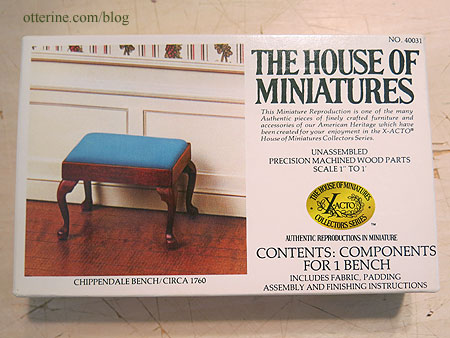
I wanted a stain that would complement the vivid bargello needlework, so I opted for Minwax Jacobean. It’s a rich dark chocolate brown. Hmm…now I want brownies. Anyway, I tested a swatch next to stitching to see if it would work before staining the benches.

The stitch itself makes for a bit of a hairball on the back, so I used only one layer of black felt on the cardboard insert as padding.

I glued the felt in place.

Though the 40 count linen is rather stiff, it will still fray. I ran a line of Fray Check around the stitching and let it dry.

I cut within one square of the stitching.

I had stitched 1/8″ beyond the seat insert so there would be excess to still add padding, but I could have used a little more around the edge. I used a black Sharpie (not shown here) around the edges after gluing the linen flaps to the back of the cardboard just in case the linen showed above the wood frame.

I glued the seat inserts in place with a small amount of tacky glue.
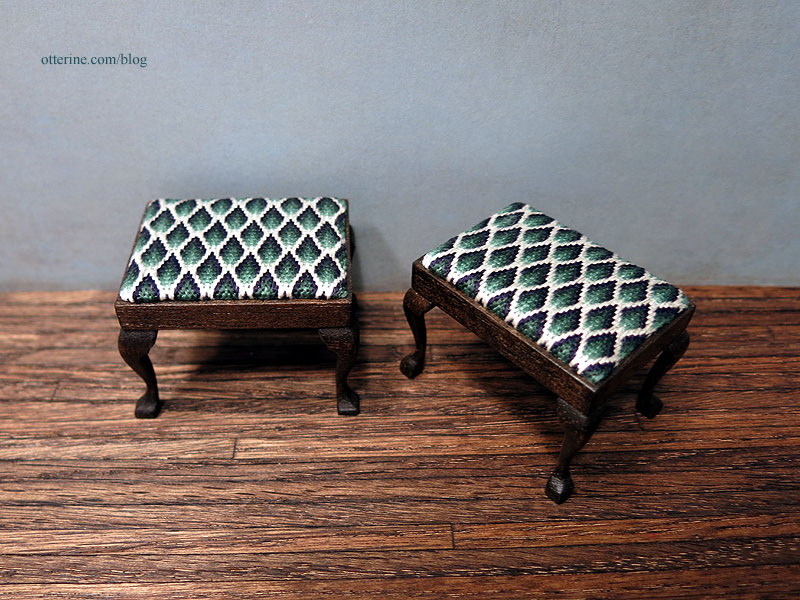
I probably should have used a more subdued lightest color than the cream. I think these will be a redo. With roughly 5 hours of stitching time each, it wouldn’t be a big deal to try again with different colors.

In the end, I did sell these on eBay and moved on to a different coloration.
Categories: Needlework - French knot rugs
July 15, 2017 | 0 commentsGazelle Rug – work in progress
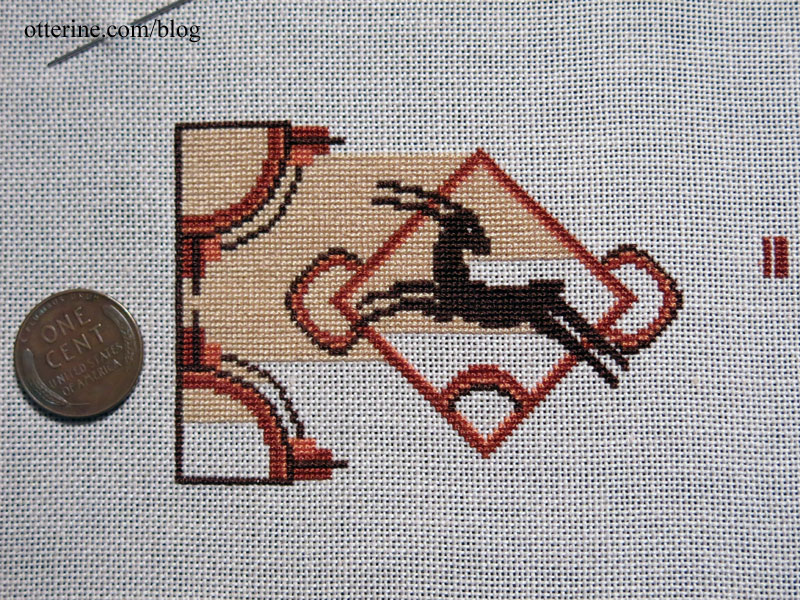
I ran across this work while organizing this weekend. I had already done the center detailing in late 2015 with the intention of having it in Otter Cove. This is 4.25 hours of stitching. Cross-stitch on 32 count Jobelan. Pattern from Miniature Embroidery for the 20th Century Dolls’ House by Pamela Warner.

I’ve also done a little more work, now up to 12.75 hours of work.
Categories: Needlework - French knot rugs
July 10, 2017 | 0 commentsMod Flowers rug – intro and prep
Many years ago, I ran across a rug called Parasols by Thomas Paul and printed it on regular paper to see how it would look in a miniature scene (here in the Newport).
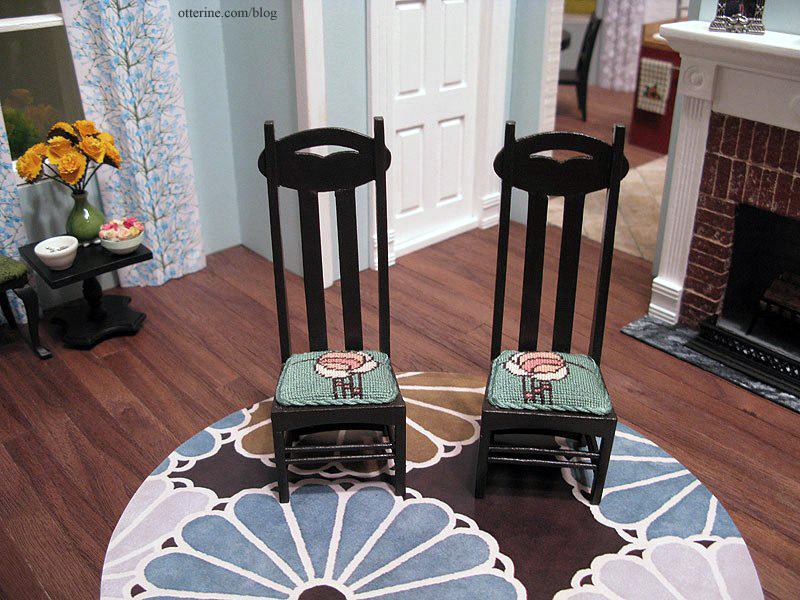
Although the paper printout photographs beautifully, I wanted to create something that looked more realistic in real life. I tried a specialty velour paper. The colors still weren’t as deep at they had been on the regular paper printout, but the texture was lovely.

I thought stitching the rug would be a good way to more accurately recreate the design. I would be certain to end up with the right coloration since I could match the embroidery floss to the paper printout.

I found a great site called pic2point (now defunct) where you can convert an image to a needlepoint pattern for free. The site created a pdf of the pattern, and I started stitching on 24 ct Congress Cloth. It was a lot of work, approximately 60 hours worth, and I wish I could say I loved it in the end. Needlepoint on a lower count fabric can look choppy, especially when there are a lot of curves to the design. The background also showed through more than I liked, and I ended up with more of an oval than a circle once I cut the rug from the cloth and turned the edges under.

This was all before I had done a miniature rug in French knots, which are such a great scale texture in miniature. I decided to make a new rug and used a transfer pen and tracing paper method using Aunt Martha’s Tracing Paper and a blue fine tip transfer pen from Sublime Stitching (as an Amazon Associate, I earn from qualifying purchases). I bought blue and black pens but used blue in this instance, because black lines can be hard to cover when stitching with white floss.

I took the velour paper printout and taped it to a sheet of non-transfer tracing paper. I taped the paper to the window in the afternoon light and traced the design using a fine point Sharpie.

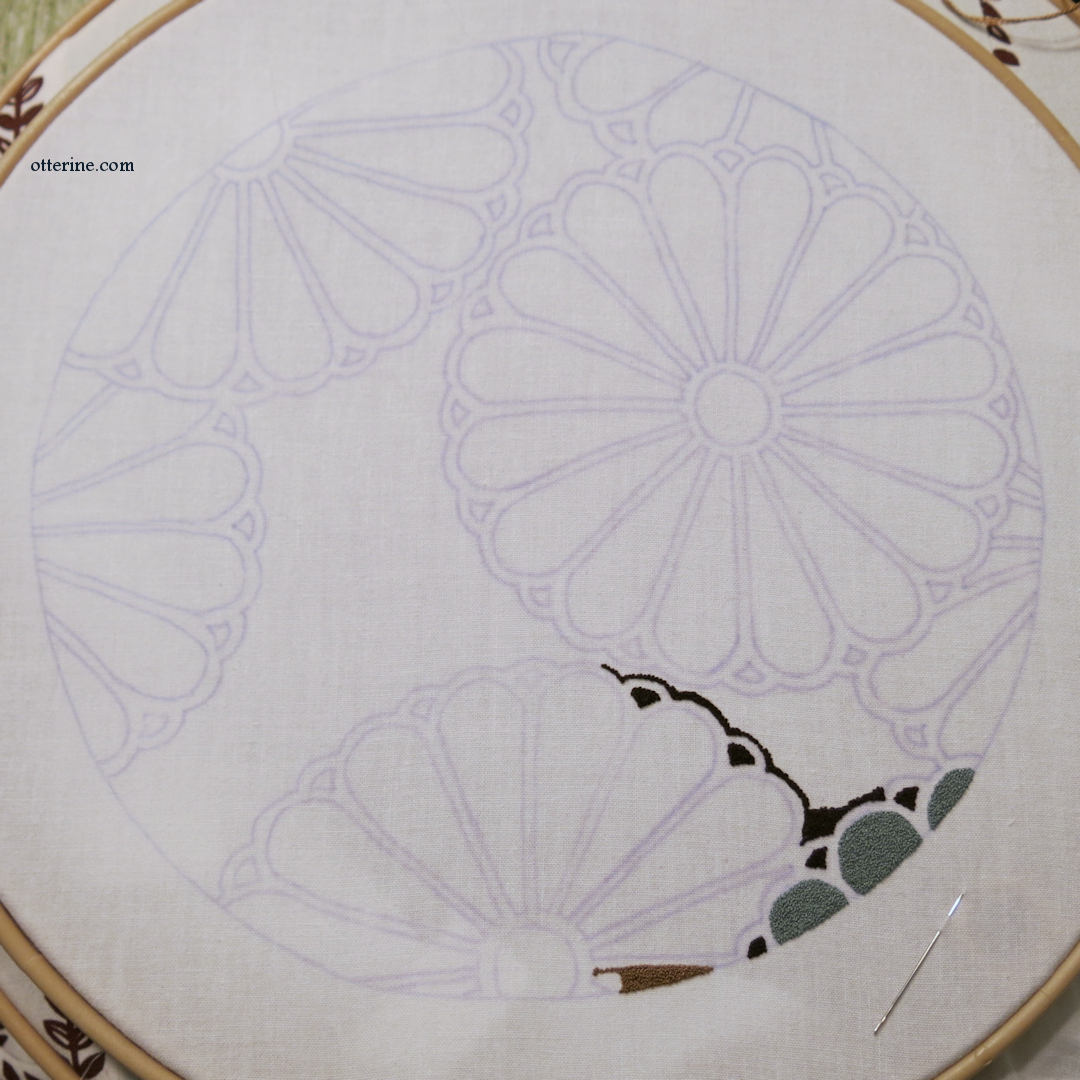
I then flipped the Sharpie traced image over and traced it with the blue transfer pen onto the iron-on transfer paper. Having had ink shifting issues in the past, I taped the paper to the muslin fabric before ironing. The transfer ink didn’t spread very much if at all.

This is 3.5 hours of stitching.
Categories: Needlework - French knot rugs
May 16, 2017 | 0 comments
NOTE: All content on otterine.com is copyrighted and may not be reproduced in part or in whole. It takes a lot of time and effort to write and photograph for my blog. Please ask permission before reproducing any of my content. (More on copyright)


