
Needlework
Quick links:
– Post on punchneedle tips and tricks
– Post on finishing a French knot rug
– Post on Baby Z Lap Frame
– Post on Morgan No-Slip Hoop
– Post on Morgan Lap Stand———–
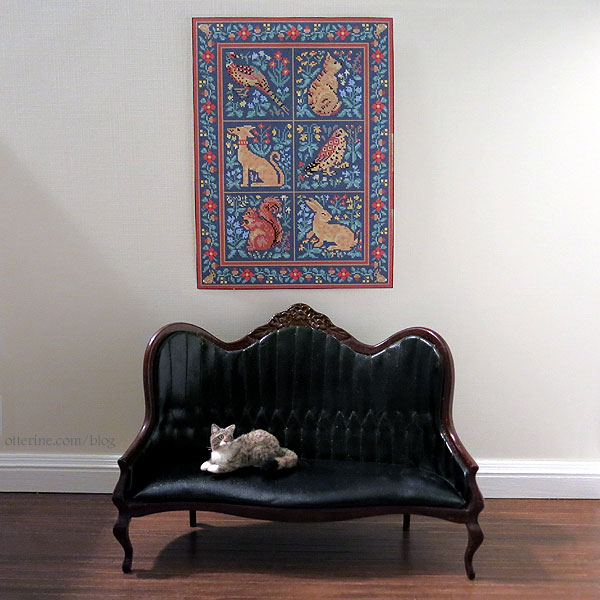
Cluny Animals – modified from a Bobbie Schoonmaker design, French knots – future project
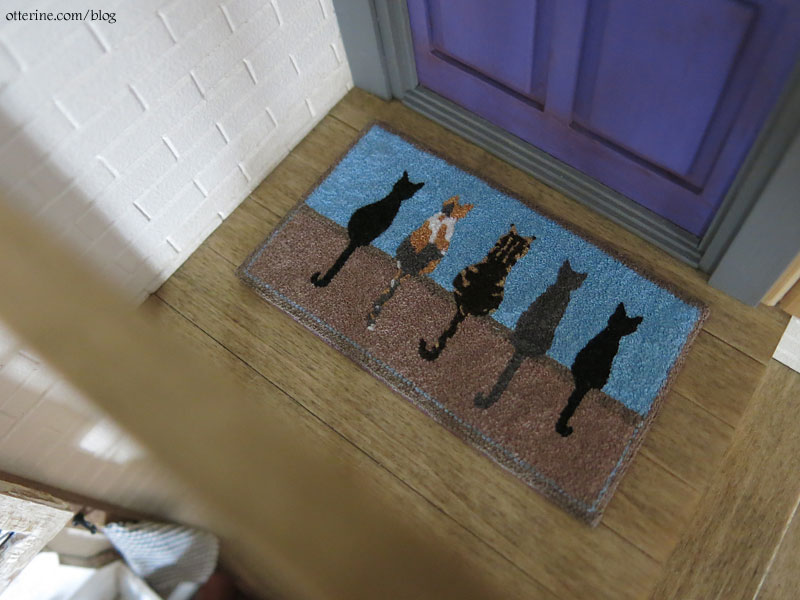
Five Felines rug – The original pattern was made by Anne Ritter, and I was inspired by the rug made by Shelly Norris from this pattern. I altered the position, shape and size of the various cats to better suit the real life cats they represent. The rug measures 3 1/8″ by 1 3/4″ and took me 28 hours to stitch.
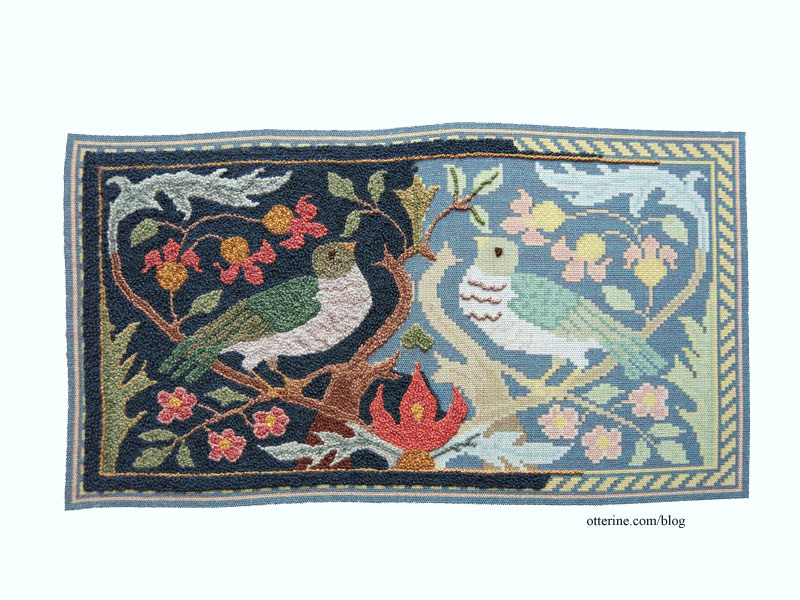
Birds on a Branch – Sue Bakker design, re-charted in Pattern Maker Pro and printed on cotton, French knots – work in progress
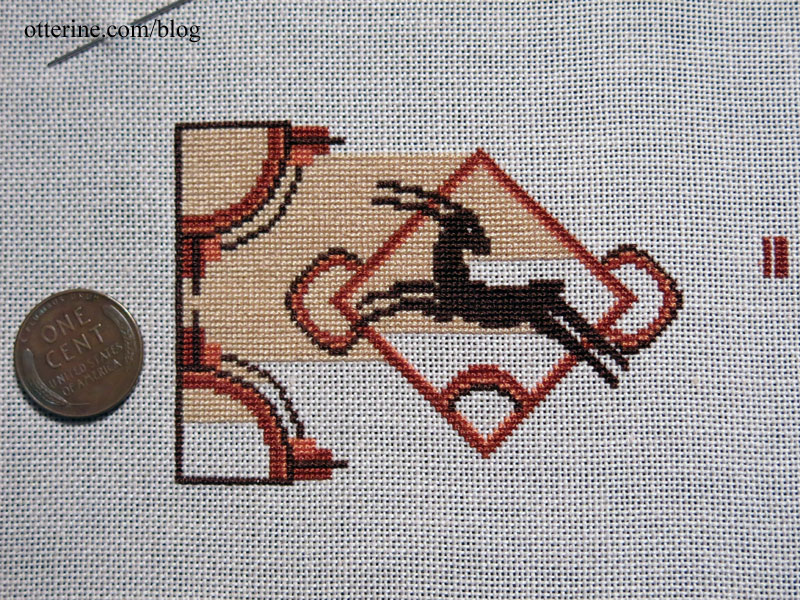
Gazelle Rug – cross stitch, 32ct Jobelan – Pattern from Miniature Embroidery for the 20th Century Dolls’ House by Pamela Warner, work in progress
Mod Flowers Rug – French knots on cotton – based on modern real life rug by Thomas Paul – work in progress
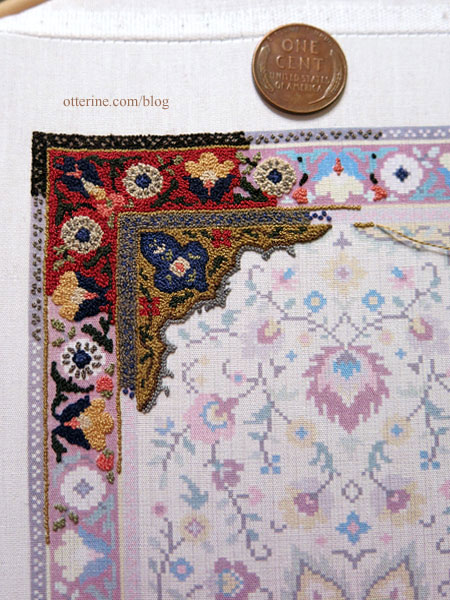
The Persian – French knots on cotton – original latch hook chart by Patons – work in progress
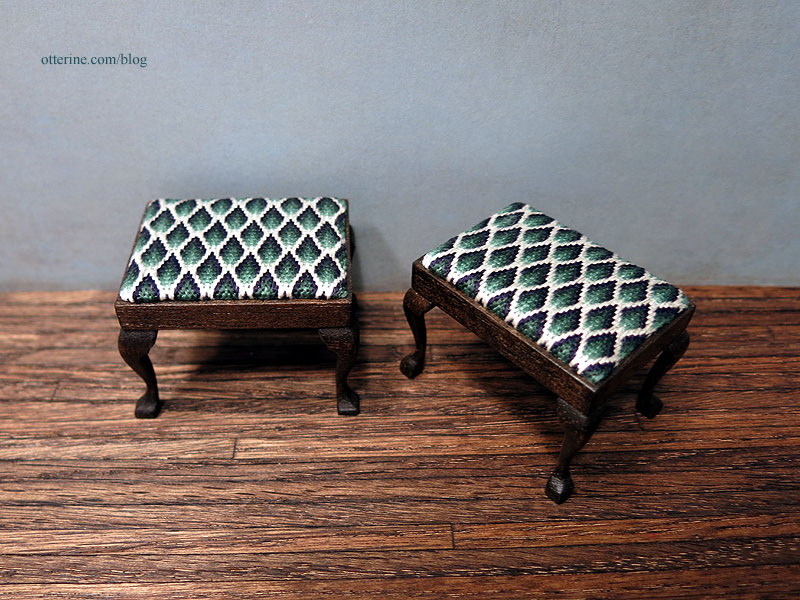
Bargello seat covers in green – 40 count linen, two strands DMC floss – pattern from the book Miniature Needlepoint and Sewing Projects by Kathryn Falk
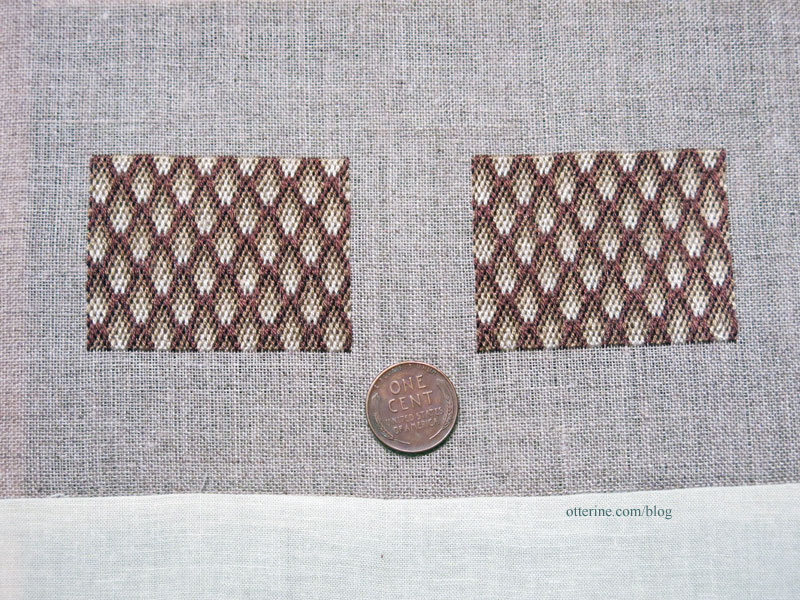
Bargello seat covers in tan – 40 count linen, two strands DMC floss – pattern from the book Miniature Needlepoint and Sewing Projects by Kathryn Falk
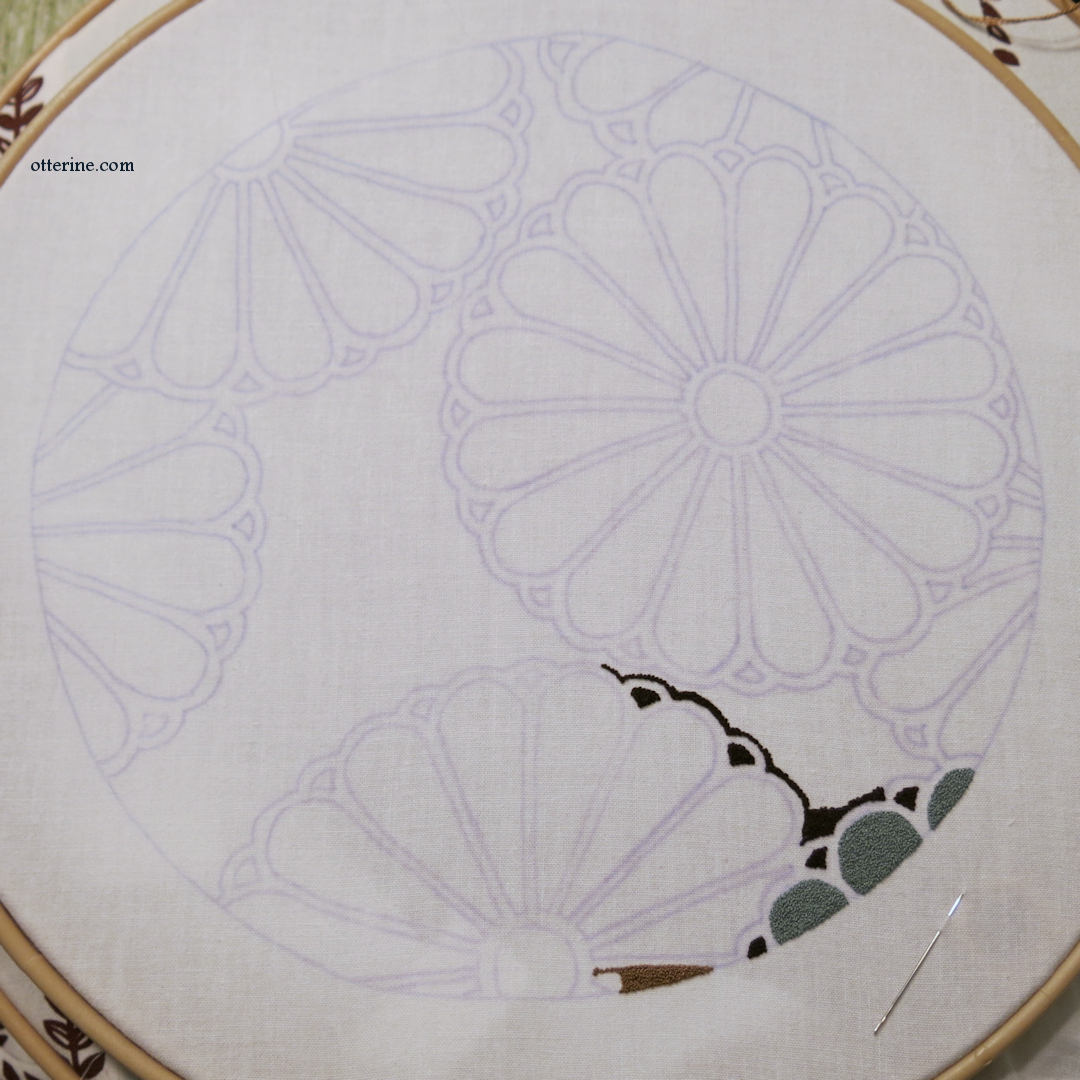
Tribal Foxes Rug – cross stitch, 32ct Jobelan – adapted from vintage original, work in progress
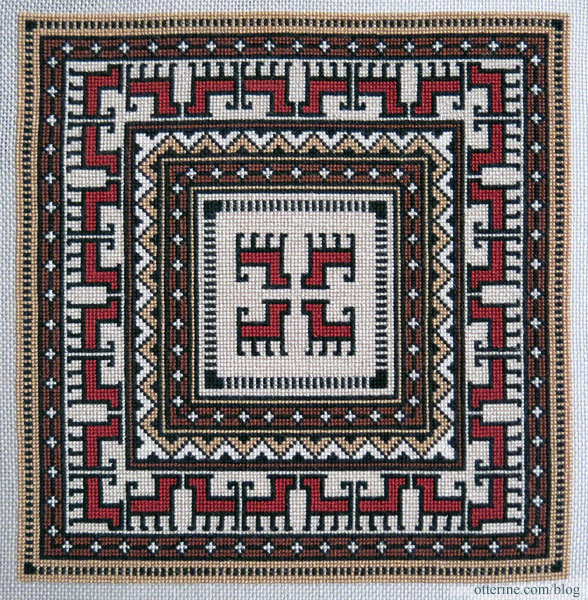
Horses and Birds Rug – adapted from a book on Ukrainian embroidery, charted on Pattern Maker Pro. I’m not sure if I will stitch this rug, but it was a good exercise in learning the software. I love the ease of changing colors universally in the Pattern Maker software.
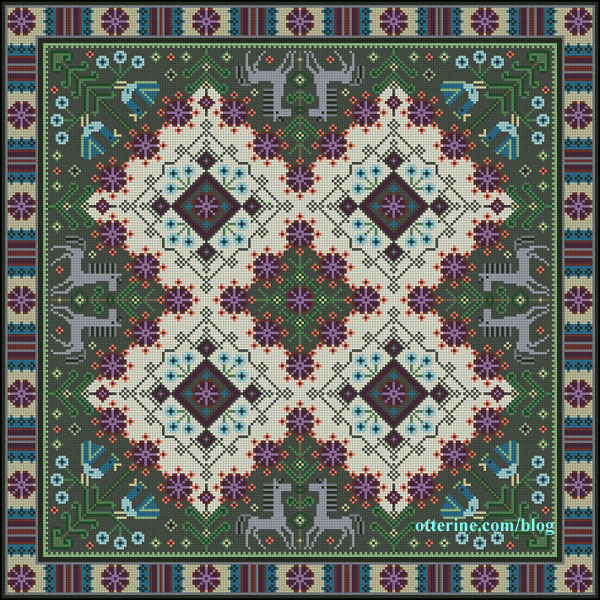
Tree Ring Rug – freehand French knots, inspired the Woody Wood Carpet by Dutch designer Yvette Laduk
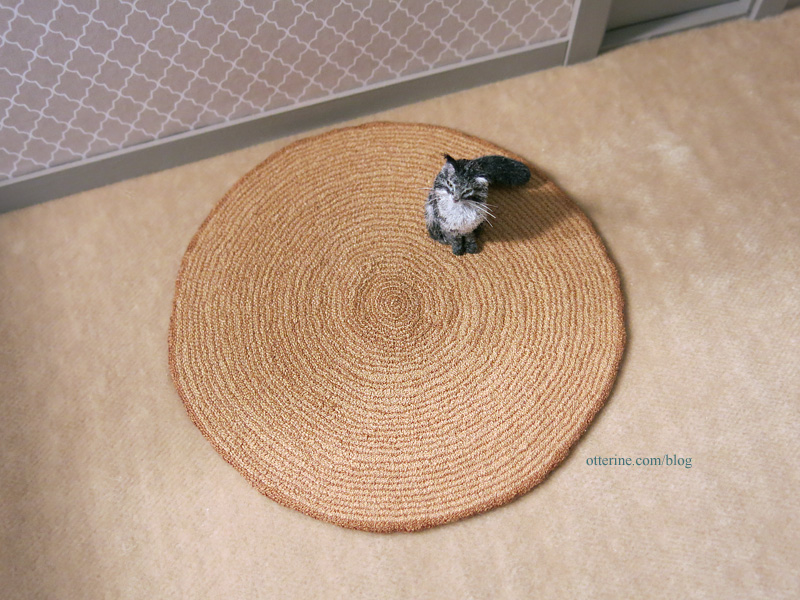
Nine Horses wall tapestry – half cross stitch, 32ct Jobelan – adapted from vintage original
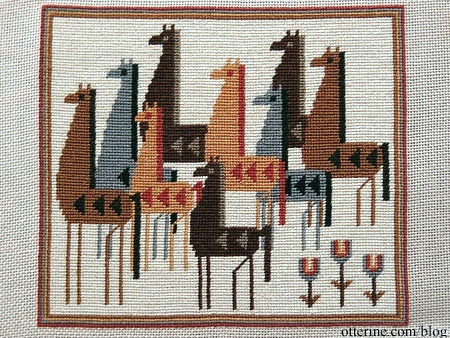
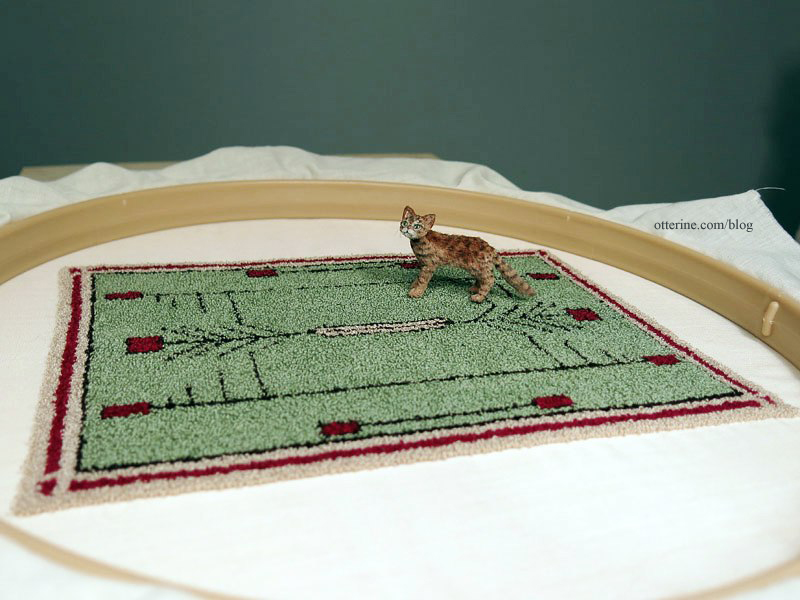
Prairie rug – punchneedle adapted from Mitchell’s Interiors original – work in progress
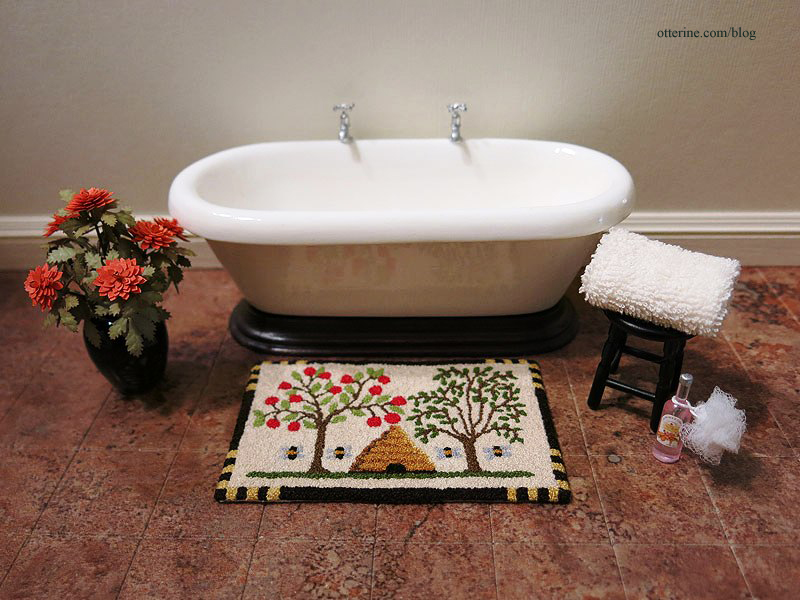
Bees and Trees – French knot kit by Teresa Layman
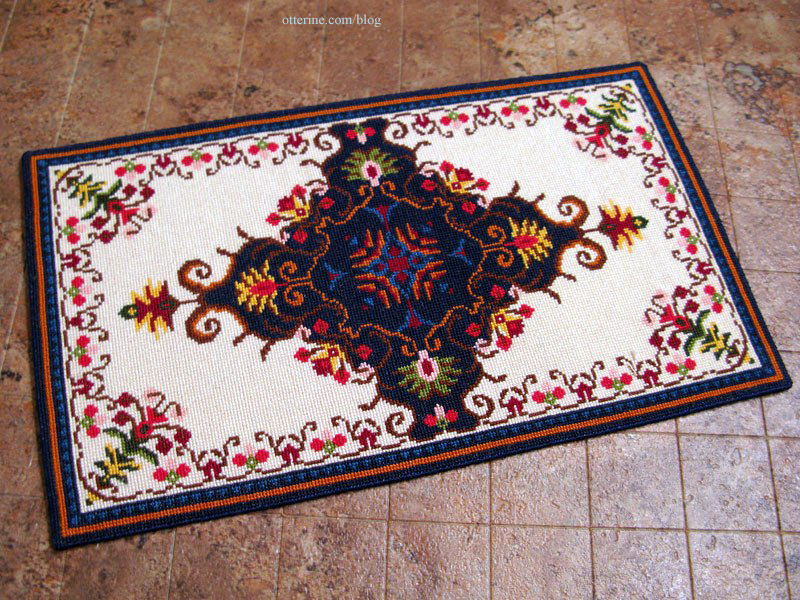
Blue Medallion rug, chart provided by Jorge Cubells
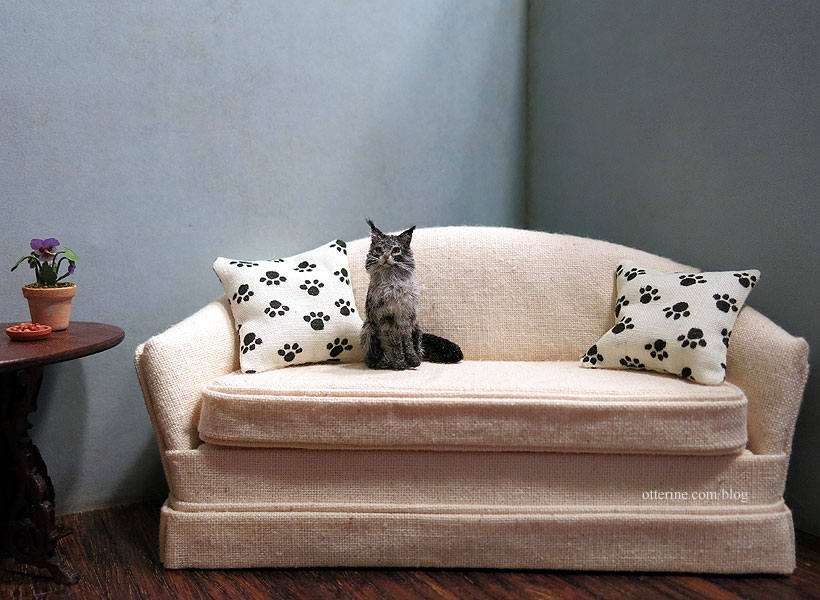
Bedding pillows, pillowcases and accent pillows – most available in my etsy shop
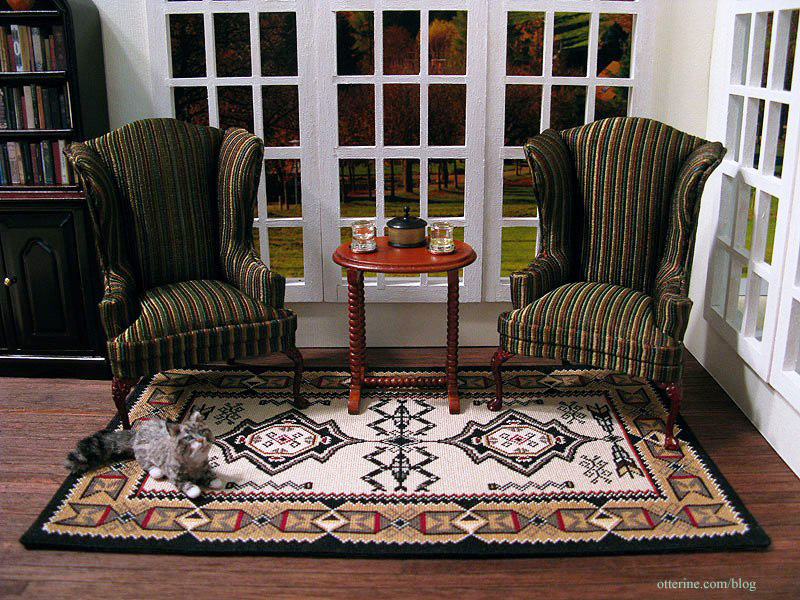
Navajo rug – Natalia Frank design based on a Navajo original weaving
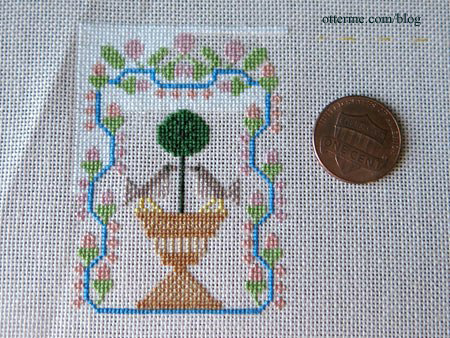
Topiary with Birds – motif from a Dutch sampler dated 1776
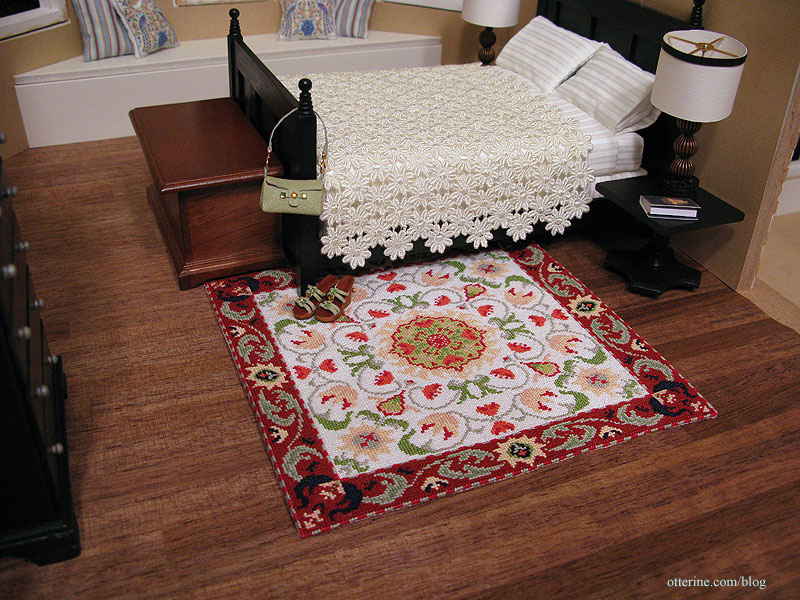
William Morris rug – adapted from a Janet Granger design
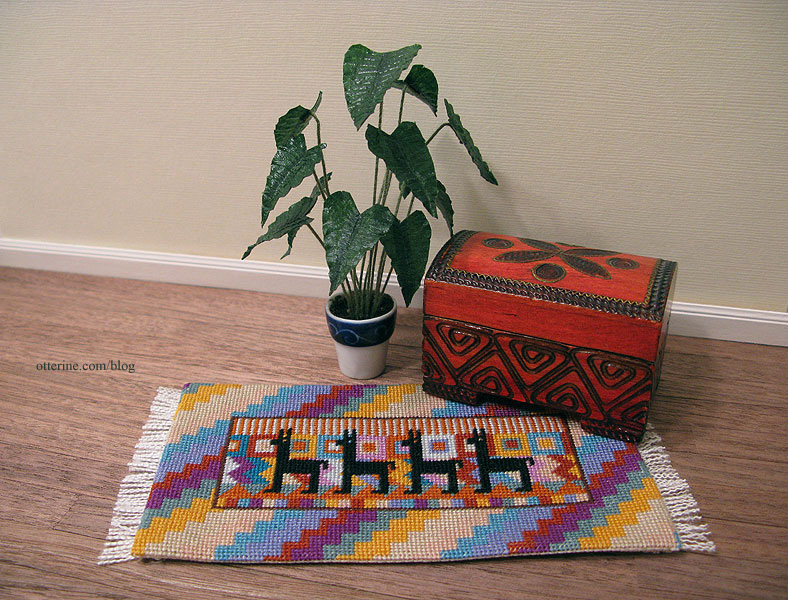
Llama rug – Brenda Keyes design
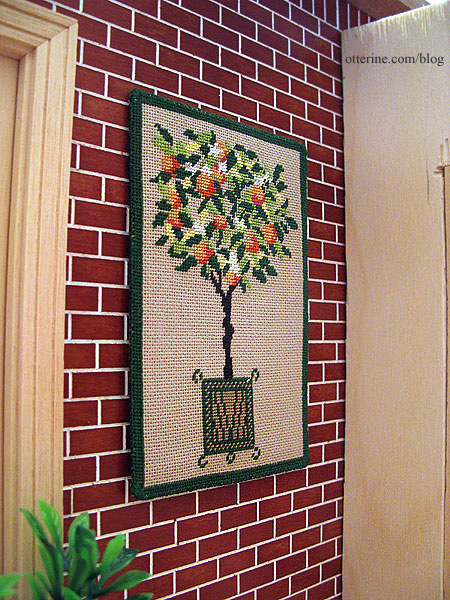
Orange Tree tapestry – Brenda Keyes design
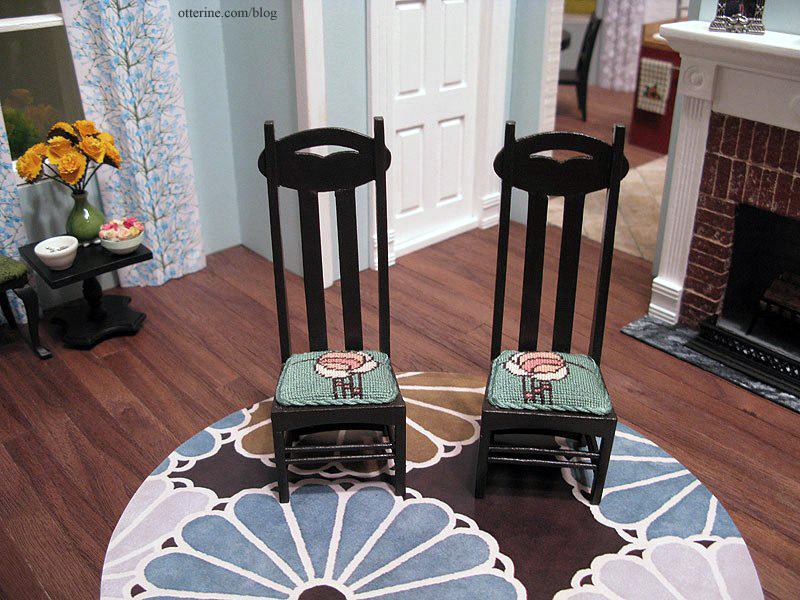
Mackintosh chair covers – Sue Hawkins design
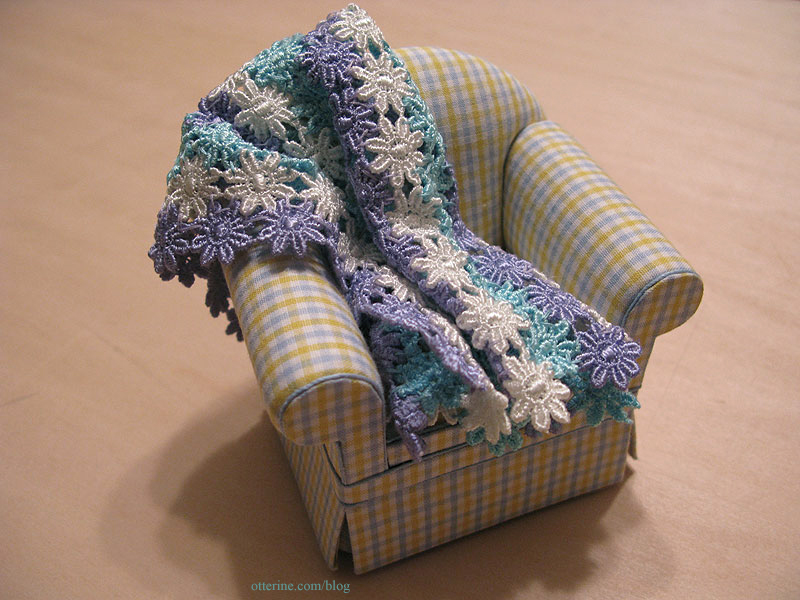
Faux crochet throw blanket – tutorial available in my etsy shop
Categories: Needlework - French knot rugs
March 21, 2024 | 1 commentThe Persian – update 2024
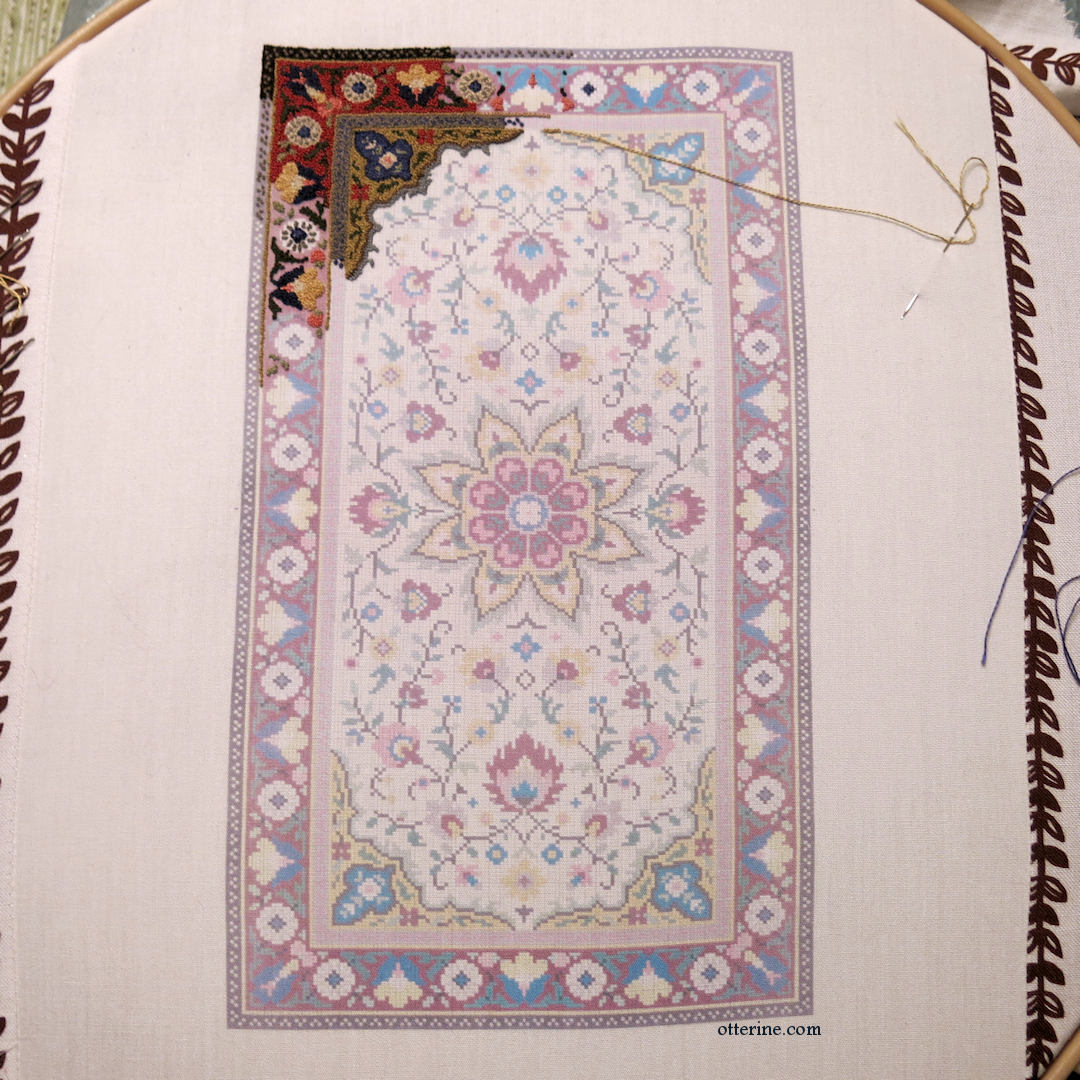
Picking up The Persian again. Back in 2017, I had made it to 18.25 hours of French knot stitching. The look turned out very rich, and I’m pleased with it so far.

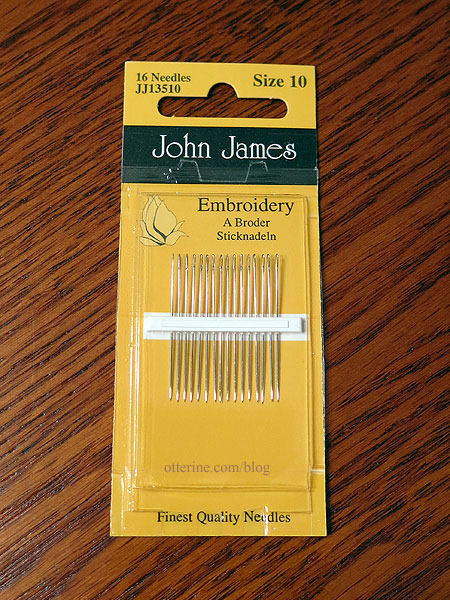
Here are the needles I’m using, John James embroidery in size 10. I has helped immensely to have multiple needles in play so I can have many different colors threaded for the small areas without having to stop to change colors.
Since I like to have side projects for down time, I’ve put this rug back into circulation. After many years away from it, I found it difficult to follow my change notes. I had made a color copy of the original booklet pattern and then added notes about color substitutions. To make things easier, I decided to chart the design using Pattern Maker Pro so I could print out a fresh chart with my updated color list. It feels good to get back to this lovely project.
Categories: Needlework - French knot rugs
January 28, 2024 | 2 commentsCluny Animals – introduction
I’ve been meaning to tackle the Cluny Animals rug designed by the late Bobbie Schoonmaker for many years. There are other projects ahead of it, but I recently took some time working on re-charting the pattern in Pattern Maker Pro by HobbyWare (as of 2024, it seems the company website is defunct). Charting into the software makes it easy to swap colors and make modifications to the layout, which is what I planned to do. Working on the chart little by little now means it will be ready for when I want to dive into stitching.
I drew a cat in the same style as the other animals to replace the original monkey, and it came out well if I do say so. I’ve decided on a size slightly smaller than the original with mine to be stitched in French knots. I made the border rabbits mirror one another and rearranged the placement and direction of the animals for a flow of color and direction more pleasing to me.

While meant as a rug, this size can also serve as a wall hanging, which is likely what I’ll end up doing with it.

Here is what the original looked like.

Categories: Needlework - French knot rugs
May 9, 2021 | 0 commentsBirds on a Branch, removing sections of knots
Update on the Birds on a Branch rug. I lost a bit of motivation after deciding I didn’t like the diagonal striped border. The knots were not lining up well, and it was becoming a jumbled mess the more I added. Here is what it looked like last.
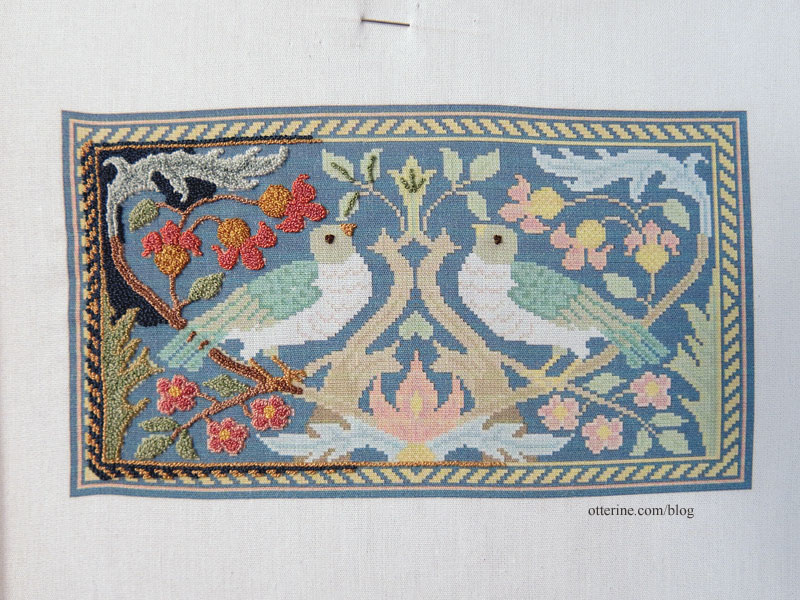
I had two choices – remove the knots in the border or start over. At 11 hours of work, it wasn’t a terrible thing to restart, but I decided to try removing the knots. If I couldn’t salvage it afterwards, I would have at least tried.
You can’t just rip stitches when every stitch is a knot, because it will destroy the fabric. Instead, I took a fresh X-Acto blade, wiped it completely clean to remove any oils and slid the edge under the heads of the knots on the front side. This is as scary as it sounds.
After shaving the knots, I used packing tape to lift the threads and fuzz left. There were three places in the fabric where there was some minor damage – not true holes but very thin, worn remaining fabric.

I ironed on some fusible interfacing to the back in order to patch those areas. It’s very thin material, so it wouldn’t build up any bulk while still providing more substance for the stitches to grab onto. This would lock in the thin cotton between the stitched threads and the interfacing fabric.
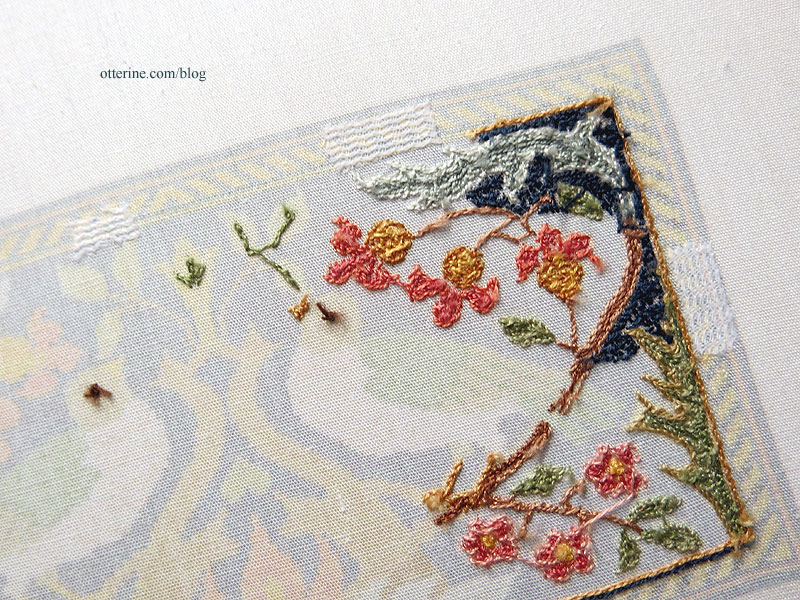
I opted for a solid border, which I already like better. I might make it wider later on. The diagonal striped border would have been nice, but it was too hard to manage with freehand knots in such a small area. A vertical striped border would have been too geometric with the organic bird and branch patterns of the interior.

I didn’t count the time of the knot removal and redo, but I was able to stitch more after that was done. So, this is now at 14.5 hours of work.
——
Design notes: Birds on a Branch – Sue Bakker design, re-charted in Pattern Maker Pro and printed on cotton, French knotsCategories: Needlework - French knot rugs
September 10, 2019 | 0 commentsBirds on a Branch, intro and prep
This is a design by Sue Bakker, and I think the folksy look is marvelous. She called it Arts & Crafts Wallhanging, but I like Birds on a Branch better. This is from a 1998 issue of International Dolls House News magazine, but I am not sure which month.
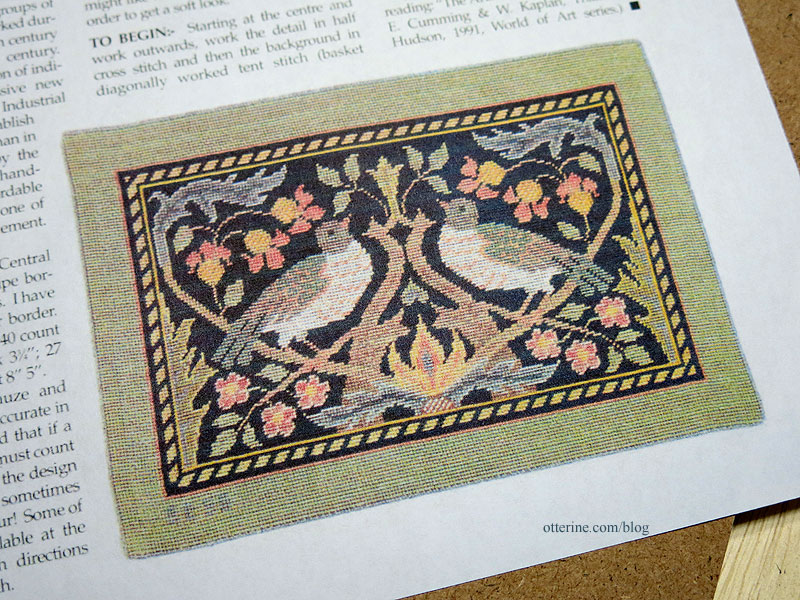
Sue charted the pattern using the same symbols for different parts – such as the X is blue for one area and then the X is pink in another. That was too hard for me to follow, and I had been told by others who stitched the pattern that the colors were wrong in places. So, I redid the chart in Pattern Maker Pro by HobbyWare (as of 2024, it seems the company website is defunct). I converted the Anchor colors Sue used to all DMC colors since I have only DMC in my stash of floss. I corrected what I thought were errors and chose new colors for some parts. I also redesigned the border since my brain prefers symmetrical patterns.
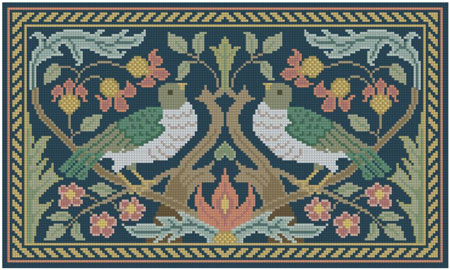
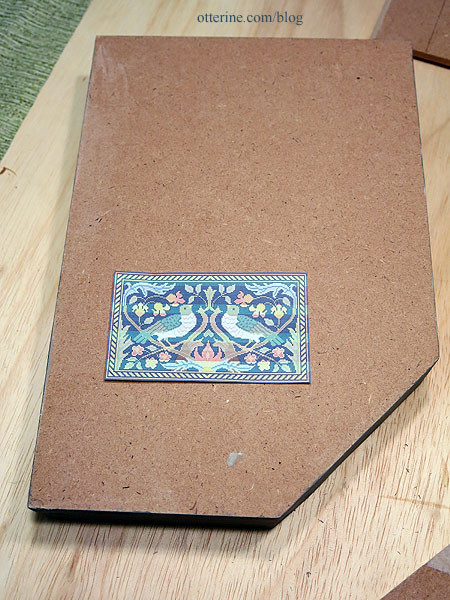
While I loved the wide border of the original, it made the rug larger than I wanted (low ink here in my printer). I’ve narrowed the border, which means saved needlework time as well.
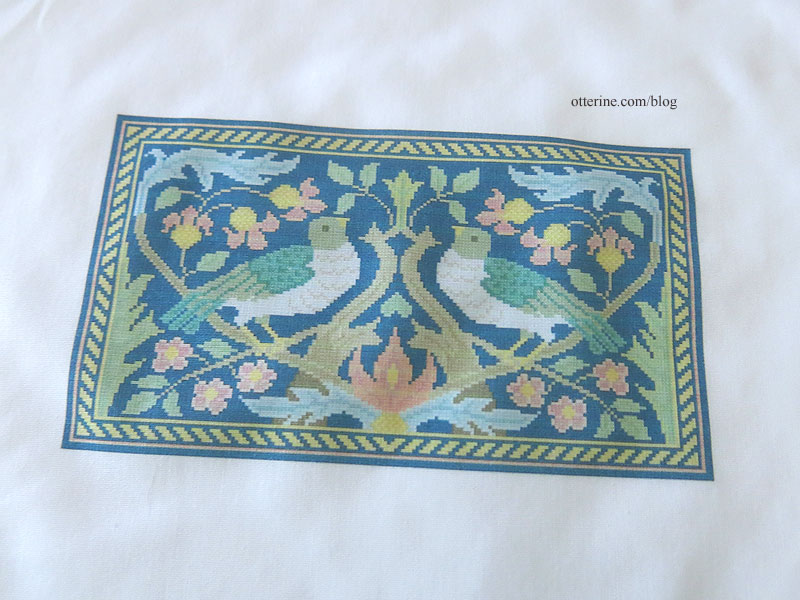
I decided to go the way of the Persian and printed the color photo from the pattern onto cotton to stitch the pattern. Here’s the print after rinsing, before ironing and setting in the hoop.
You can see the tiny squares.
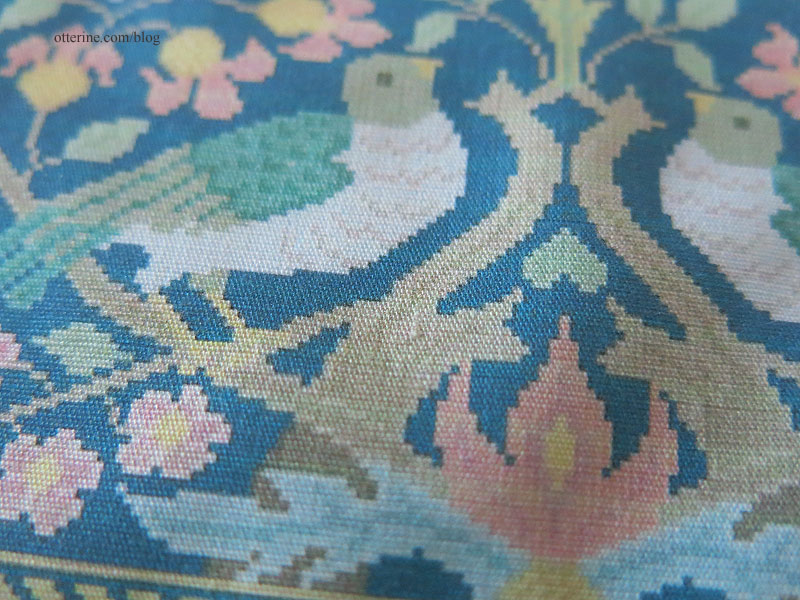
This is two hours of work, and I love it already. I’m still referencing the pattern and symbol chart for the colors, but I am not counting the knots. I use the printed areas as a guide and get the general feel of the pattern using the colors I charted. Much easier this way – working on the details and filling in after.
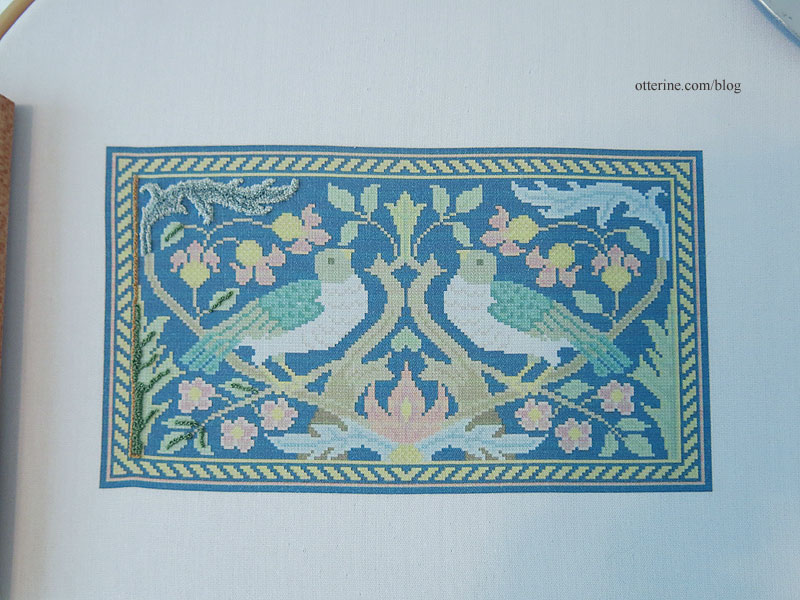
I like seeing the whole design at once, watching the various parts come to life as I complete the knots. As you can see, it doesn’t keep the boxy shape of the original pattern as the knots are made.
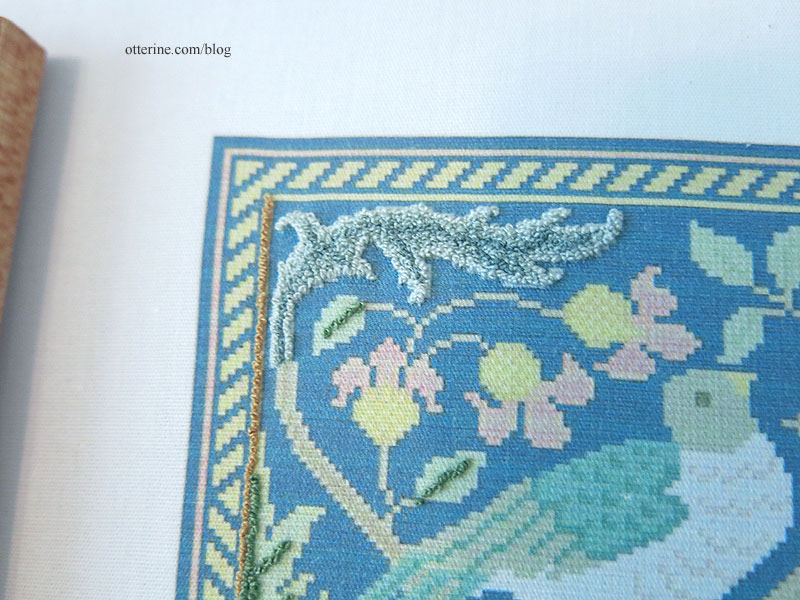
Update: I later changed the border for this pattern.
Categories: Needlework - French knot rugs
July 20, 2019 | 0 commentsMemories and gifts
The miniature community lost a talented miniaturist and lovely lady, Elly in Amsterdam. I knew her through a petitpoint group and never met her in person, but she was one of the sweetest ladies and super fun. She’s definitely missed. One of her close friends is also a talented miniaturist and is looking after Elly’s estate. Josje has a blog of Elly’s miniatures for sale, and I bought two items to have something from Elly. :]
These cat matryoshkas are beautifully painted and actually function.

Too stinkin’ cute!

The coal scuttle is something I don’t have a plan for, but it is so well made it could be just an antique used for décor in a more modern setting. :]

One little coal was included.

Mom gave me two needlework books for Christmas that I’m sure Elly would have loved. The first is Embroidered Cats by Hiroko Kubota.

While it’s not an instruction book and not for beginners, the book illustrates the process of turning a photo into an embroidered likeness. I might need to see about making a needlework Jasper. With a little planning, it could probably be done in miniature to make a wall hanging.

The other book is Cluny Tapestry Rabbit, a counted cross-stitch pattern by Scarlet Quince. Elly made a similar one in miniature for a fire screen. This is a larger pattern, but with a high count fabric, it might be a good wall tapestry in miniature.

Categories: Books and media, Miniatures, Needlework - French knot rugs
January 24, 2019 | 0 commentsBargello seat covers in tan
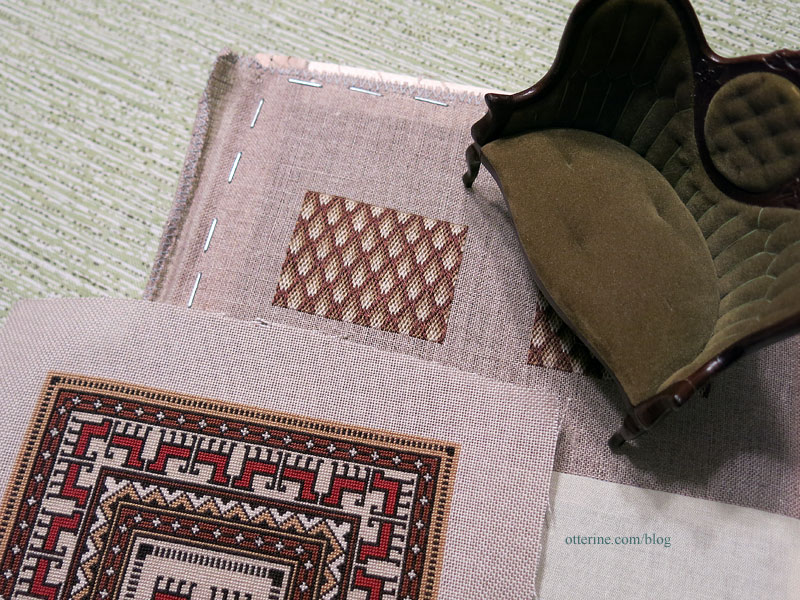
Here is one of the benches with the other items selected for the main floor of the mill. The stain, the settee and the foxes all have yellow/red tones, and the blue cast in the bargello was not working at all. I chose new colors in a grey/brown combination. The darkest brown will be the lattice and the others the “diamonds” inside. I think it will work much better than the blue/greens I had and should be a more subtle pattern as well.
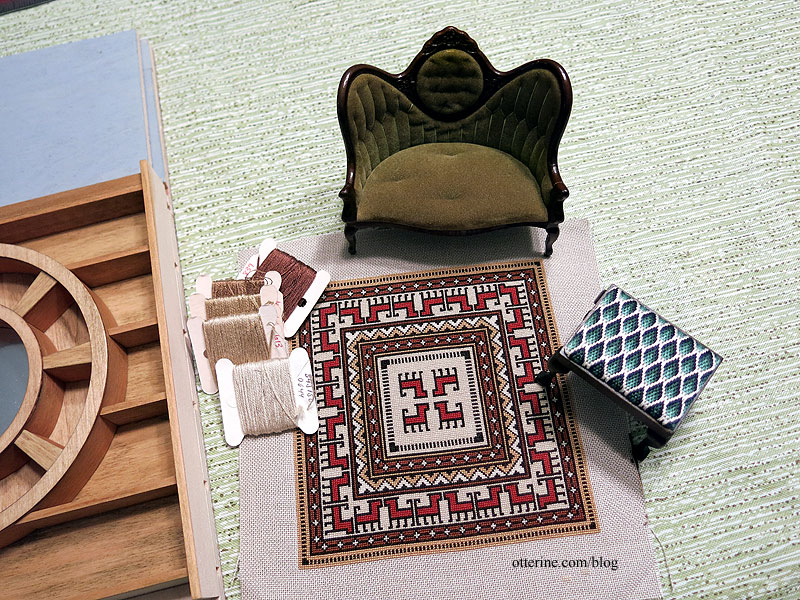
The one on the left took 5 hours and the one on the right took 4.25 hours, just like the first time around. It must just take more time to plot the first one, whereas you can just copy for the second one. The 40 count linen was rough in a couple of places for the second one, so it might look a little threadbare in spots once done. It will just make it look old, so I’m not worried about it enough to redo it.

The colors go much better with the settee and rug. :] Now I just need to make the new benches.
Categories: Needlework - French knot rugs
August 10, 2017 | 0 commentsBargello seat covers in green
I’ve always liked bargello needlework, and since Gustav has an eclectic taste I thought it would work well in the Mill. Bargello is also called Florentine or flame stitch, and there are a lot of lovely patterns out there. Being in miniature, keeping it simple is best. I found a suitable pattern in the book Miniature Needlepoint and Sewing Projects by Kathryn Falk.The pattern is for a wide bench, but the geometrical nature of bargello makes it easy to adapt to other sizes. You just stitch more or less to cover the area you need. To make it easier to follow, I charted the book pattern in full color using Pattern Maker Pro by HobbyWare.
The pattern called for 5 colors worked on 42 mesh cotton Penelope canvas. I chose three blue-greens, one navy and one cream color from my stash of DMC floss. I didn’t have the canvas, but I still had the 40 count silk gauze from my previous attempts at petitpoint and French knots, both of which were unsuccessful. This was no exception. My eyes want to focus on the holes, not the threads even with high magnification. Again, I could feel a headache developing. Here is the old silk gauze photo…too sheer for me, but you can’t say I haven’t tried multiple times.

There is 40 count linen on the market, but I figured I would try a quick sample on 32 count Jobelan to see if I even liked it. I used three strands to cover the fabric here. It does bulk up quickly, but that works fine for upholstery. I’ll just cut down on the padding underneath. This was much easier for me. I need substantial fibers to see in order to stitch.

Since the sample on 32 count turned out so well, I ordered a small piece of 40 count linen. My test on 32 count Jobelan required three strands, but the 40 count linen needed only two. I did try a sample of single thread but it left noticeable bare patches. I opted for medium beige linen to mask any bare spots that might arise with the two strand coverage as well. The linen is less even in texture than the Jobelan, but bargello stitching covers more area so it’s doesn’t seem to impact the end result.
Below is roughly an hour’s work so it does cover a good area rather quickly. The linen works better than gauze for me, though it does take some concentration to start. You have to be so careful with the count, but I can at least see the threads this time. Once you get the pattern started, it seems to go faster as well. I’ve stopped short on the right since I wanted to measure against the seat insert and didn’t have it handy. Bargello makes for a bulkier end fabric, so I want enough to cover the seat insert without having to tuck stitched portions underneath.

I finished up the seat overs rather quickly. The first took roughly 5.25 hours of stitching, whereas the second took only 4.25 hours since I had worked into a rhythm and had pretty much memorized the pattern.

I built the two Chippendale Benches by The House of Miniatures.
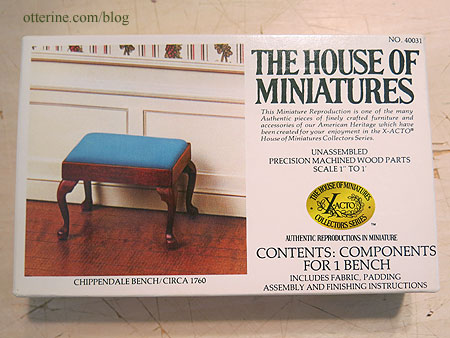
I wanted a stain that would complement the vivid bargello needlework, so I opted for Minwax Jacobean. It’s a rich dark chocolate brown. Hmm…now I want brownies. Anyway, I tested a swatch next to stitching to see if it would work before staining the benches.

The stitch itself makes for a bit of a hairball on the back, so I used only one layer of black felt on the cardboard insert as padding.

I glued the felt in place.

Though the 40 count linen is rather stiff, it will still fray. I ran a line of Fray Check around the stitching and let it dry.

I cut within one square of the stitching.

I had stitched 1/8″ beyond the seat insert so there would be excess to still add padding, but I could have used a little more around the edge. I used a black Sharpie (not shown here) around the edges after gluing the linen flaps to the back of the cardboard just in case the linen showed above the wood frame.

I glued the seat inserts in place with a small amount of tacky glue.

I probably should have used a more subdued lightest color than the cream. I think these will be a redo. With roughly 5 hours of stitching time each, it wouldn’t be a big deal to try again with different colors.

In the end, I did sell these on eBay and moved on to a different coloration.
Categories: Needlework - French knot rugs
July 15, 2017 | 0 commentsGazelle Rug – work in progress
I ran across this work while organizing this weekend. I had already done the center detailing in late 2015 with the intention of having it in Otter Cove. This is 4.25 hours of stitching. Cross-stitch on 32 count Jobelan. Pattern from Miniature Embroidery for the 20th Century Dolls’ House by Pamela Warner.

I’ve also done a little more work, now up to 12.75 hours of work.

Categories: Needlework - French knot rugs
July 10, 2017 | 0 commentsMod Flowers rug – intro and prep
Many years ago, I ran across a rug called Parasols by Thomas Paul and printed it on regular paper to see how it would look in a miniature scene (here in the Newport).

Although the paper printout photographs beautifully, I wanted to create something that looked more realistic in real life. I tried a specialty velour paper. The colors still weren’t as deep at they had been on the regular paper printout, but the texture was lovely.

I thought stitching the rug would be a good way to more accurately recreate the design. I would be certain to end up with the right coloration since I could match the embroidery floss to the paper printout.

I found a great site called pic2point (now defunct) where you can convert an image to a needlepoint pattern for free. The site created a pdf of the pattern, and I started stitching on 24 ct Congress Cloth. It was a lot of work, approximately 60 hours worth, and I wish I could say I loved it in the end. Needlepoint on a lower count fabric can look choppy, especially when there are a lot of curves to the design. The background also showed through more than I liked, and I ended up with more of an oval than a circle once I cut the rug from the cloth and turned the edges under.

This was all before I had done a miniature rug in French knots, which are such a great scale texture in miniature. I decided to make a new rug and used a transfer pen and tracing paper method using Aunt Martha’s Tracing Paper and a blue fine tip transfer pen from Sublime Stitching (as an Amazon Associate, I earn from qualifying purchases). I bought blue and black pens but used blue in this instance, because black lines can be hard to cover when stitching with white floss.

I took the velour paper printout and taped it to a sheet of non-transfer tracing paper. I taped the paper to the window in the afternoon light and traced the design using a fine point Sharpie.

I then flipped the Sharpie traced image over and traced it with the blue transfer pen onto the iron-on transfer paper. Having had ink shifting issues in the past, I taped the paper to the muslin fabric before ironing. The transfer ink didn’t spread very much if at all.

This is 3.5 hours of stitching.

Categories: Needlework - French knot rugs
May 16, 2017 | 0 commentsTribal Foxes Rug – 110.75 hours, stitching complete
I’ve finished stitching the Tribal Foxes rug with a total stitching time of 110.75 hours. I just need to bind the edges and complete the final finishing. This was done in full cross stitch with single thread over 32 count Jobelan.

Categories: Needlework - French knot rugs, Watson Mill
March 18, 2017 | 0 commentsThe Persian – introduction
Quite awhile back, I saw a vintage needlepoint rug on eBay from an estate sale. It was miniature, though done on a lower count of 18 or 22 and therefore a large rug for 1:12 scale. I loved the pattern but knew nothing about it. There was some discussion on the PetitPointers group I belong to, and one of the members Frances said it was from an old purse kit by Patons. She had made up a miniature rug for herself on higher count silk gauze from the pattern.
After some sleuthing, I found some further information. This was the C201 Persian Needlepoint Tapestry chart made in Patons Beehive Tapestry Wool. It was a kit that made a clutch purse. I’ve seen partially finished kits on eBay along with another miniature rug rendition in slightly different colors.
Luckily, this pattern is also found in the latch hook patterns booklet Classic Oriental Rugs By Patons No. 153 (it’s pattern 2001 in the booklet and featured on the cover). I picked up an inexpensive copy and now can get to work on my own version. I will be changing the colors slightly, though I do think the original is lovely.
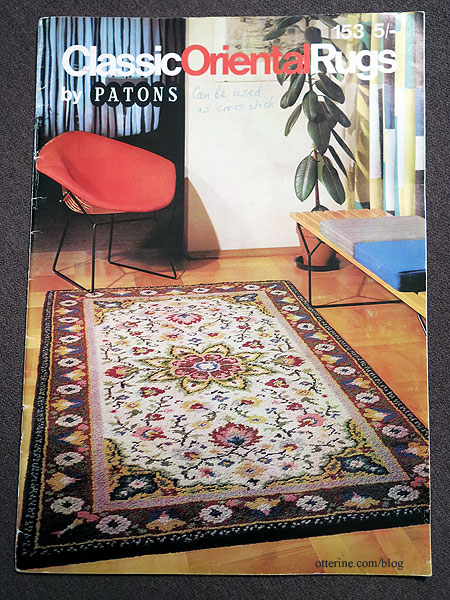
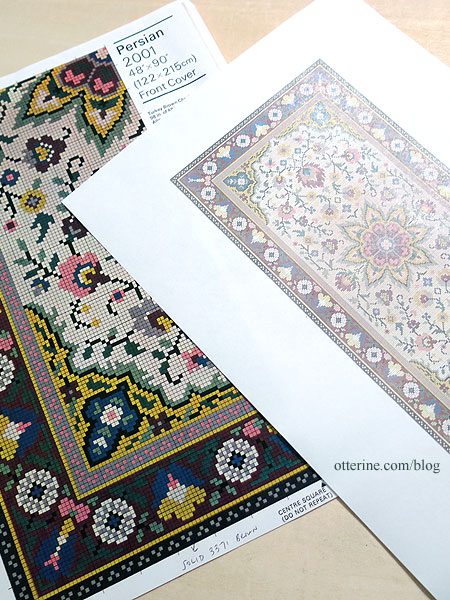
There are nine colors listed on the original Persian chart, but I have added a few additional colors to bring my total to sixteen. I opted to print the existing pattern directly on fabric. I scanned the pattern from the book on a high DPI setting and then copied the quadrant in PhotoShop to make a whole chart image. I edited the image for contrast, brightness, hue and saturation to make a very pale version. After resizing in Word, I printed a facsimile of the rug measuring approximately 8″ x 4 3/8″ on regular paper. This seemed a bit tight to me considering the fine details of the chart versus knot size, so I printed a second version at 8.5″ x 5 3/8″ on regular paper. Using this method, you can make the rug a custom size without being limited by thread count of your fabric. This will be a large rug, but lovely.
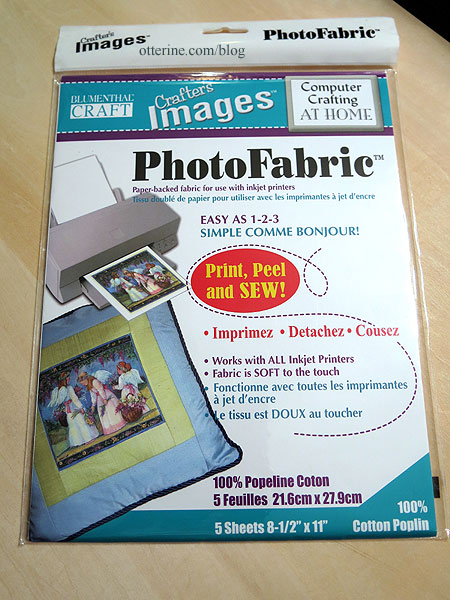
I’ve printed on fabric in the past with mixed results. In this instance, it doesn’t much matter if the color is true or vibrant since my threads will provide the final color and texture. I recently helped a family friend with a fabric printing project, and she gave me the leftovers. This is the particular brand of printable fabric I will use for this project.
After printing on the finest settings, I let it dry completely. Here it is before removing the paper backing.
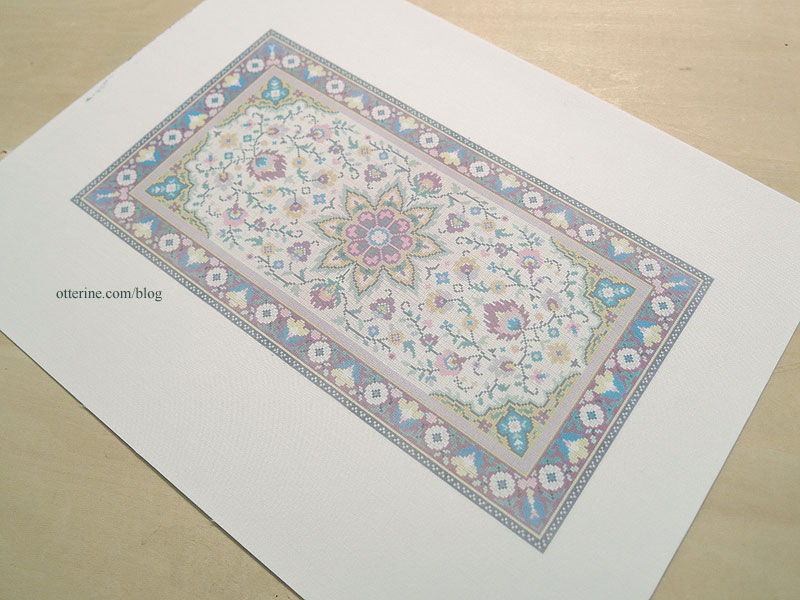
Per the instructions, I ran the fabric under water. Ink residue discoloring my stitching over time would be bad, bad, bad. I sped up the drying process with a hairdryer. There’s a hint of the grid in the whiter areas and even the color areas are boxy from the chart image.
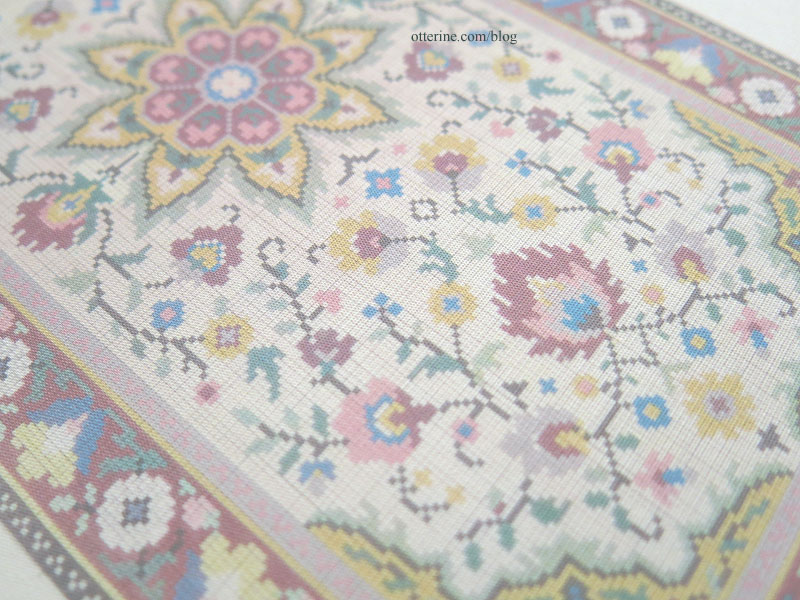
It’s a faint pattern but good enough to follow. The advantages are the precise replication of the original design and the fact that the colors are printed in place, so I can keep better track of which colors to use where. I’m not following the exact grid here, but it will help with knot placement overall.
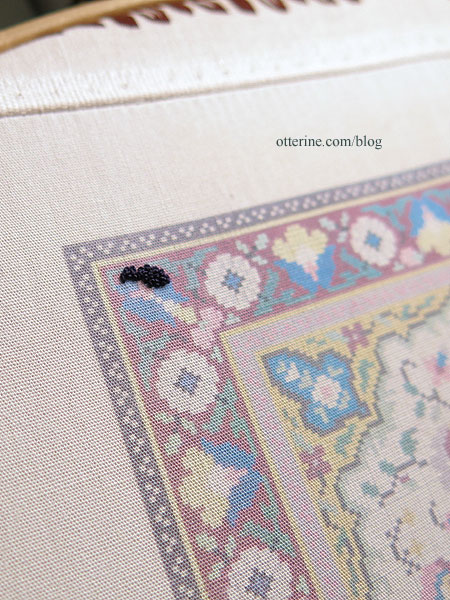
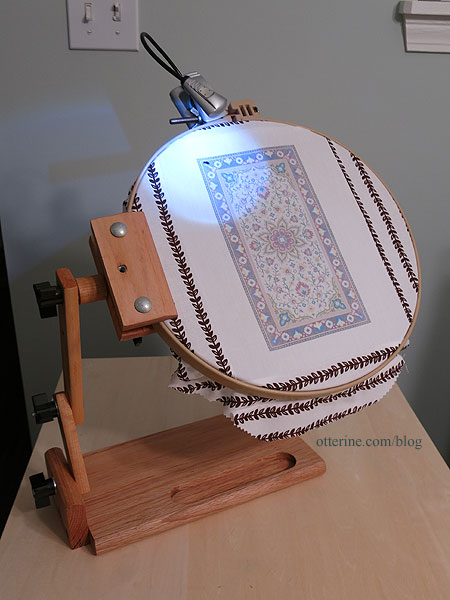
Since the printer fabric measures 8.5 x 11″, I sewed on scrap fabric to mount the print in the Morgan 12″ No-Slip Hoop (as an Amazon Associate, I earn from qualifying purchases). It has a groove in the middle that keeps the hoop from coming apart until you loosen the wingnut. (My review here.) I use this hoop with the Baby Z Lap Frame. I have a clip-on LED and can use my magnifying readers for needlework. :]
Categories: Needlework - French knot rugs
January 31, 2017 | 0 comments
NOTE: All content on otterine.com is copyrighted and may not be reproduced in part or in whole. It takes a lot of time and effort to write and photograph for my blog. Please ask permission before reproducing any of my content. (More on copyright)

Needlework
Quick links:
– Post on punchneedle tips and tricks
– Post on finishing a French knot rug
– Post on Baby Z Lap Frame
– Post on Morgan No-Slip Hoop
– Post on Morgan Lap Stand———–
Cluny Animals – modified from a Bobbie Schoonmaker design, French knots – future project

Five Felines rug – The original pattern was made by Anne Ritter, and I was inspired by the rug made by Shelly Norris from this pattern. I altered the position, shape and size of the various cats to better suit the real life cats they represent. The rug measures 3 1/8″ by 1 3/4″ and took me 28 hours to stitch.

Birds on a Branch – Sue Bakker design, re-charted in Pattern Maker Pro and printed on cotton, French knots – work in progress

Gazelle Rug – cross stitch, 32ct Jobelan – Pattern from Miniature Embroidery for the 20th Century Dolls’ House by Pamela Warner, work in progress

Mod Flowers Rug – French knots on cotton – based on modern real life rug by Thomas Paul – work in progress

The Persian – French knots on cotton – original latch hook chart by Patons – work in progress

Bargello seat covers in green – 40 count linen, two strands DMC floss – pattern from the book Miniature Needlepoint and Sewing Projects by Kathryn Falk

Bargello seat covers in tan – 40 count linen, two strands DMC floss – pattern from the book Miniature Needlepoint and Sewing Projects by Kathryn Falk

Tribal Foxes Rug – cross stitch, 32ct Jobelan – adapted from vintage original, work in progress

Horses and Birds Rug – adapted from a book on Ukrainian embroidery, charted on Pattern Maker Pro. I’m not sure if I will stitch this rug, but it was a good exercise in learning the software. I love the ease of changing colors universally in the Pattern Maker software.

Tree Ring Rug – freehand French knots, inspired the Woody Wood Carpet by Dutch designer Yvette Laduk

Nine Horses wall tapestry – half cross stitch, 32ct Jobelan – adapted from vintage original

Prairie rug – punchneedle adapted from Mitchell’s Interiors original – work in progress

Bees and Trees – French knot kit by Teresa Layman

Blue Medallion rug, chart provided by Jorge Cubells

Bedding pillows, pillowcases and accent pillows – most available in my etsy shop

Navajo rug – Natalia Frank design based on a Navajo original weaving

Topiary with Birds – motif from a Dutch sampler dated 1776

William Morris rug – adapted from a Janet Granger design

Llama rug – Brenda Keyes design

Orange Tree tapestry – Brenda Keyes design

Mackintosh chair covers – Sue Hawkins design

Faux crochet throw blanket – tutorial available in my etsy shop

Categories: Needlework - French knot rugs
March 21, 2024 | 1 commentThe Persian – update 2024
Picking up The Persian again. Back in 2017, I had made it to 18.25 hours of French knot stitching. The look turned out very rich, and I’m pleased with it so far.

Here are the needles I’m using, John James embroidery in size 10. I has helped immensely to have multiple needles in play so I can have many different colors threaded for the small areas without having to stop to change colors.

Since I like to have side projects for down time, I’ve put this rug back into circulation. After many years away from it, I found it difficult to follow my change notes. I had made a color copy of the original booklet pattern and then added notes about color substitutions. To make things easier, I decided to chart the design using Pattern Maker Pro so I could print out a fresh chart with my updated color list. It feels good to get back to this lovely project.

Categories: Needlework - French knot rugs
January 28, 2024 | 2 commentsCluny Animals – introduction
I’ve been meaning to tackle the Cluny Animals rug designed by the late Bobbie Schoonmaker for many years. There are other projects ahead of it, but I recently took some time working on re-charting the pattern in Pattern Maker Pro by HobbyWare (as of 2024, it seems the company website is defunct). Charting into the software makes it easy to swap colors and make modifications to the layout, which is what I planned to do. Working on the chart little by little now means it will be ready for when I want to dive into stitching.
I drew a cat in the same style as the other animals to replace the original monkey, and it came out well if I do say so. I’ve decided on a size slightly smaller than the original with mine to be stitched in French knots. I made the border rabbits mirror one another and rearranged the placement and direction of the animals for a flow of color and direction more pleasing to me.

While meant as a rug, this size can also serve as a wall hanging, which is likely what I’ll end up doing with it.

Here is what the original looked like.

Categories: Needlework - French knot rugs
May 9, 2021 | 0 commentsBirds on a Branch, removing sections of knots
Update on the Birds on a Branch rug. I lost a bit of motivation after deciding I didn’t like the diagonal striped border. The knots were not lining up well, and it was becoming a jumbled mess the more I added. Here is what it looked like last.

I had two choices – remove the knots in the border or start over. At 11 hours of work, it wasn’t a terrible thing to restart, but I decided to try removing the knots. If I couldn’t salvage it afterwards, I would have at least tried.
You can’t just rip stitches when every stitch is a knot, because it will destroy the fabric. Instead, I took a fresh X-Acto blade, wiped it completely clean to remove any oils and slid the edge under the heads of the knots on the front side. This is as scary as it sounds.
After shaving the knots, I used packing tape to lift the threads and fuzz left. There were three places in the fabric where there was some minor damage – not true holes but very thin, worn remaining fabric.

I ironed on some fusible interfacing to the back in order to patch those areas. It’s very thin material, so it wouldn’t build up any bulk while still providing more substance for the stitches to grab onto. This would lock in the thin cotton between the stitched threads and the interfacing fabric.

I opted for a solid border, which I already like better. I might make it wider later on. The diagonal striped border would have been nice, but it was too hard to manage with freehand knots in such a small area. A vertical striped border would have been too geometric with the organic bird and branch patterns of the interior.

I didn’t count the time of the knot removal and redo, but I was able to stitch more after that was done. So, this is now at 14.5 hours of work.
——
Design notes: Birds on a Branch – Sue Bakker design, re-charted in Pattern Maker Pro and printed on cotton, French knotsCategories: Needlework - French knot rugs
September 10, 2019 | 0 commentsBirds on a Branch, intro and prep
This is a design by Sue Bakker, and I think the folksy look is marvelous. She called it Arts & Crafts Wallhanging, but I like Birds on a Branch better. This is from a 1998 issue of International Dolls House News magazine, but I am not sure which month.

Sue charted the pattern using the same symbols for different parts – such as the X is blue for one area and then the X is pink in another. That was too hard for me to follow, and I had been told by others who stitched the pattern that the colors were wrong in places. So, I redid the chart in Pattern Maker Pro by HobbyWare (as of 2024, it seems the company website is defunct). I converted the Anchor colors Sue used to all DMC colors since I have only DMC in my stash of floss. I corrected what I thought were errors and chose new colors for some parts. I also redesigned the border since my brain prefers symmetrical patterns.

While I loved the wide border of the original, it made the rug larger than I wanted (low ink here in my printer). I’ve narrowed the border, which means saved needlework time as well.

I decided to go the way of the Persian and printed the color photo from the pattern onto cotton to stitch the pattern. Here’s the print after rinsing, before ironing and setting in the hoop.

You can see the tiny squares.

This is two hours of work, and I love it already. I’m still referencing the pattern and symbol chart for the colors, but I am not counting the knots. I use the printed areas as a guide and get the general feel of the pattern using the colors I charted. Much easier this way – working on the details and filling in after.

I like seeing the whole design at once, watching the various parts come to life as I complete the knots. As you can see, it doesn’t keep the boxy shape of the original pattern as the knots are made.

Update: I later changed the border for this pattern.
Categories: Needlework - French knot rugs
July 20, 2019 | 0 comments
NOTE: All content on otterine.com is copyrighted and may not be reproduced in part or in whole. It takes a lot of time and effort to write and photograph for my blog. Please ask permission before reproducing any of my content. (More on copyright)


