


NOTE: All content on otterine.com is copyrighted and may not be reproduced in part or in whole. It takes a lot of time and effort to write and photograph for my blog. Please ask permission before reproducing any of my content. (More on copyright)

Categories:
1913 Model T Van – part 10
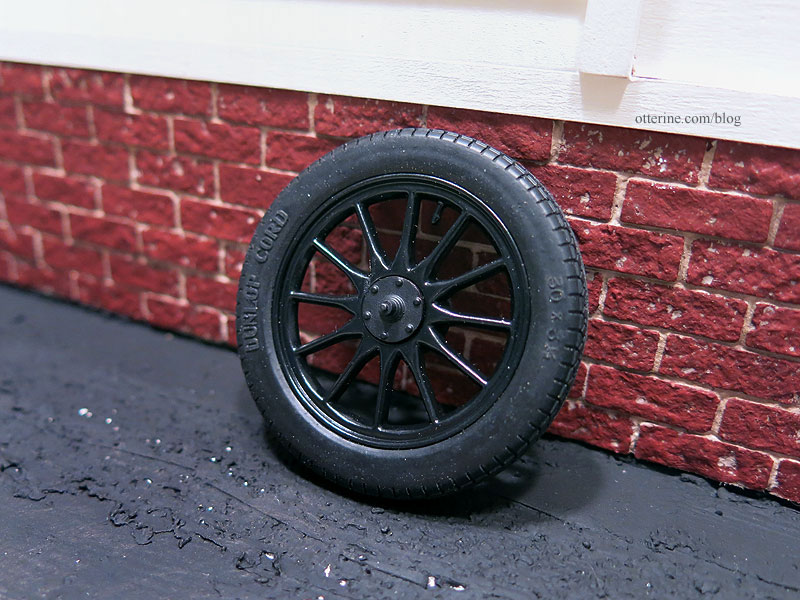
Continuing work on the Model T Van. The kit comes with rubber tires that you stretch over the plastic wheels. The wheels are substantial, so you don’t risk snapping them in half during this process.

From the examples I’ve seen, the real life wheels were natural wood or painted. I opted for semi-gloss black. The tires have a nice tread.

My second kit’s tires were defective with a mottled surface, but one of those four was in decent condition on one side. These extras will be used for something else.

You are to sand the hub parts so the wheels turn freely. I’ve never been a fan of the phrase sand to fit, but these worked relatively well. I left them a little stiff so the Model T doesn’t roll away on me, but one ended up really stiff. If it doesn’t end up spinning in the end, I won’t worry about it. Since I opted to make these parts black and thought added paint would hinder functionality, I colored the sanded edges with a Sharpie.

This was by far the easiest part of the building process. :D
I love how it’s turning out so far.

Categories: Model Cars, Vehicles
November 8, 2016 | 0 comments1913 Model T Van – part 9
Continuing work on the Model T Van. There are eight lights on this model: two headlights, two side lamps, two coach lamps and two taillights. I figured I would give LED lighting a go for the headlights and possibly the taillights. I opted not to attempt wiring the side lamps and coach lamps mainly because there was no way to hide the wires inside the cabin.
I detailed the headlight installation in part 5. The lamps are mounted, but I left off the brass valves and tubing so I could give this a whirl. If it didn’t work out, I could just install the original parts that simulate the gas lines.
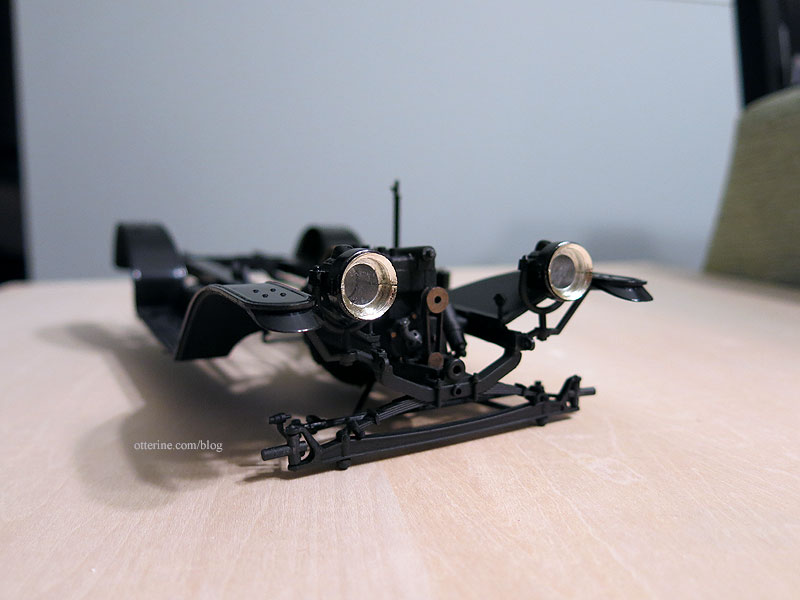
I am using pico size 3V LEDs in warm white from Evan Designs. I could have probably used nano size, but the chips I had on hand were too large and I ordered the pico to be on the safe side. It’s plenty of light for the purpose; they are quite bright for the size. Besides, it’s not like the Model T was equipped with halogen high beams.

I found tubing in an unlikely place — the pony bead jewelry section at Hobby Lobby. It’s not exactly to scale, but it should blend in well enough. It’s also more malleable than the tubing included with the kit.

There’s a hole on the bottom for the brass valve in each headlight, and I made these larger before installation to allow the tubing to fit.

I threaded the wires through the tubing, leaving it as long as possible for now. There was already a tubing map in the instructions since you were to fake these gas lines in the original kit. I didn’t follow it; instead I used electrical tape to hold things in place along a route leading to the rear cabin.

I’ll put the battery and switch there.

Electrical tape can look like rubber bands in a model and holds well. Being black, it blends in with the chassis.

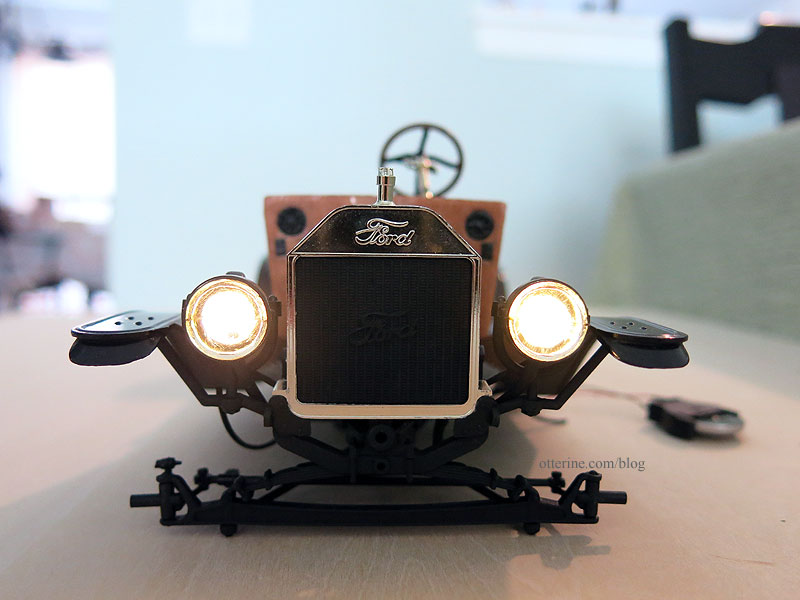
The lights work well, but as I mentioned before one of the headlight glass inserts is scratched and the super glue brought out that flaw even more. :\

Photographed in regular lighting conditions, though, the lights look marvelous. This is one of those rare instances where the camera can mask the flaw. :D
I need to do some additional thinking and building before I can see about the taillights. :]
Categories: Model Cars, Vehicles
November 5, 2016 | 0 comments1913 Model T Van – part 8
Continuing work on the Model T Van. From now on, I will be a purist and buy spray paints made for car models if I want a showroom new vehicle. I do love the “craft” spray paints I’ve used in the past on other materials, but for plastic models it has to be the real deal. The reason I ended up with two kits is because the craft spray paint didn’t work on the body panels and there was no way to salvage and end up with a newish looking vehicle. Having two kits was a lifesaver anyway because this kit has quite a few unforgiving pieces, and I’ve delved into both kits to get this one model built.
Initially, I primed the body panels with Krylon grey, then Krylon flat white, then Krylon gloss Dover White. This was a new can and while I ended up with better results than I did with the old can on the first model, it wasn’t as pristine as I wanted. I sanded back down to an even finish as I had for the chassis/fenders. I primed with Krylon flat white because Krylon flat paints are very good for even, fine coverage.
After doing the previous assembly work, I was able to better understand how the body panels fit into the process. Instead of leaving them on the sprue for the final finishing, I prepped them individually for painting. This eliminates overspray from one piece to the next, and you can concentrate on each part.
Model T lollipops. :D

I used a two-part lacquer system called Model Master (a Testors product) of Wimbeldon White and Gloss clear coat. The Wimbeldon White was a lovely finish right out of the can.This paint levels out so much better than the gloss craft paints. You have to let the paint cure before adding the top coat.

The hood ended up with three coats of paint, but I ran out before I could put a third coat on the rest (small can, larger model). The hood looked fabulous, so I bought a second can for the remaining panels. For those panels, I sanded with the 8,000 and 12,000 grit mesh papers before the final coat. My coverage wasn’t completely uniform across the parts, but that was operator error. I get nervous making things new and that can cause mistakes. After the third coat on the body panels, I ended up with slight orange peel texture.
I let the parts dry overnight before sanding lightly with the 6,000, 8,000 and 12,000 grit mesh papers. This removed dust and scratches and made it shinier overall. I had to wait overnight for better weather and then added the gloss coat. It’s a delicate balance to spray enough to get a gloss sheen without ending up with drips. Nervous, nervous, nervous process. It was a 99.9% success. Of course I ended up with a dust varmint in the one panel I wanted to be as pristine as possible. I had even brushed each part before spraying. :\ So, I sanded that particle out the following night and finished the sealer after. The finish was slightly textured and pitted in places, but all of this might be due to the fact that I was not working with fresh, pristine plastic. I had removed the initial poor finish from the craft spray paint.

Again, I waited overnight before sanding lightly with the 6,000, 8,000 and 12,000 grit mesh papers to tone down the slight texture and bring out the shine. The finish has slight imperfections, but I am going to quit while ahead. I didn’t bother with the small indented areas because I was worried about stripping the finish too much. There’s one raised bit that has some primer showing, but I am done messing with it for now. I can always do spot touch-ups later.
In retrospect, I wish I had used this sealer on the chassis/fenders. There is no way to do it now. But, the way I see it, dust and dirt would settle on the fenders while the body would be more pristine. Right?

The panels have raised lines that you can paint for added detail. I know this to be above my pay grade, so I’ve left the van uniform in color. I did try it on the spare panels and just couldn’t get the feel for it. Besides, it takes only one mess-up to ruin a project and there are far too many lines to take the risk. Now that I have them in great shape, I will leave them be for a few days while I do other things.
Categories: Model Cars, Vehicles
November 4, 2016 | 0 comments1913 Model T Van – part 7
Continuing work on the Model T Van. The kit comes with tubing and wires to add realistic detailing to the engine compartment. The thin tubing is rather stiff, so in just about every instance it has broken off the tiny plastic rod that’s supposed to hold it in place. =rolls eyes and mutters a swear= Instead of fighting a losing battle, I just snapped off the rods and drilled holes instead. :D Now the tubes and wires are secure with super glue and there are no parts to snap off under pressure.

They do add so much, no?
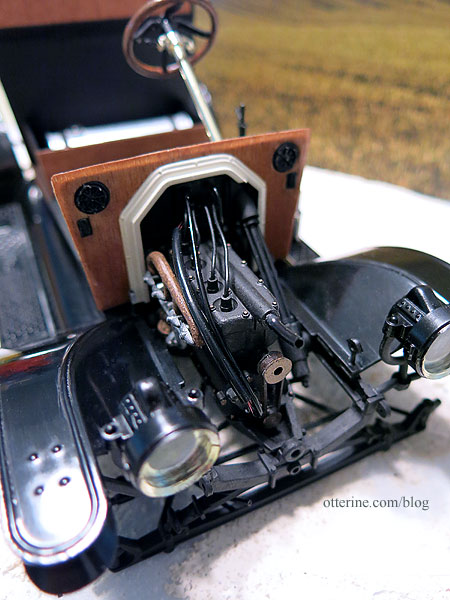
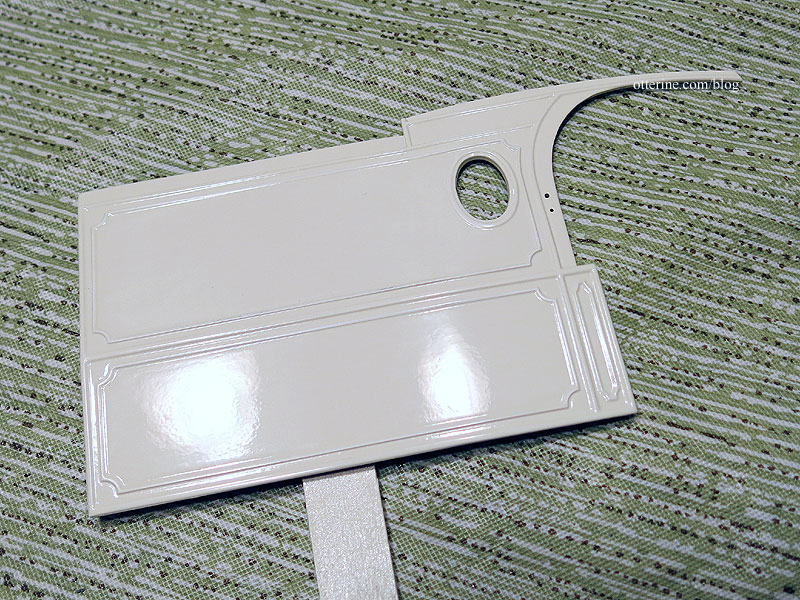
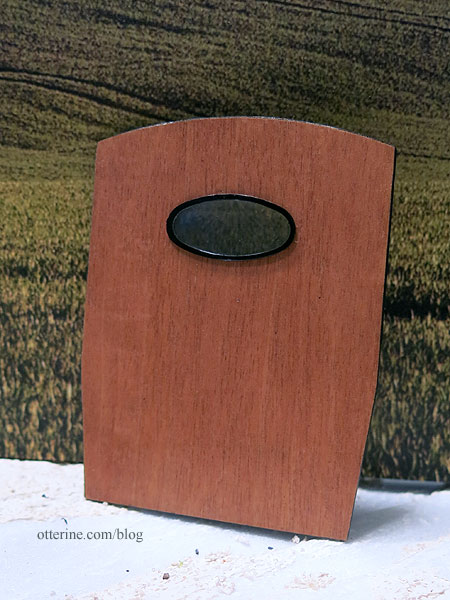
I’ve got the body panels in process behind the scenes and I am up to that point in the instructions, so it’s time to jump around a bit while those are finished. The front and rear cabins are separated by a wall with an oval window. Since the pre-cut micro wood panel didn’t fit well, I cut a new one instead. Since I knew I would never match the wood grain on the frame, I painted it black. I’ve stained all the micro wood with Minwax Cherry sealed with Delta Ceramcoat gloss varnish.
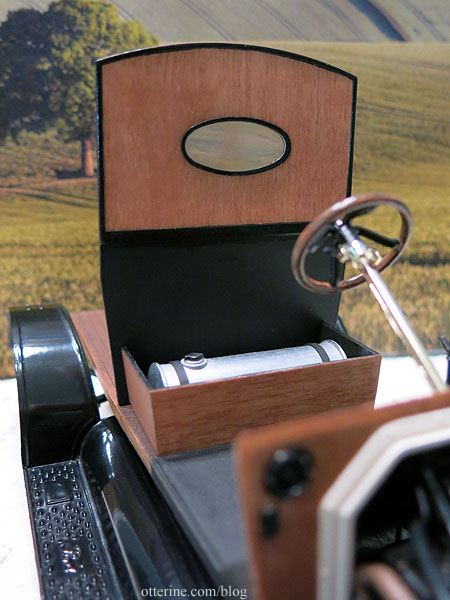
The back of the panel was to be left bare except for the very top, so I cut a piece of micro wood to finish it as well. I might have to do some trimming later in case this throws off the fit, but the wood is very thin and shouldn’t cause too many issues. The oval window is meant to be installed from the back, but it looked unfinished to me without a frame on both sides. Since I have two kits, I was able to use both windows and have a frame on each side.
The black roof portions were sprayed flat black to even out the tone followed by Rust-Oleum Painter’s Touch 2X Ultra Cover sealer in semi-gloss clear.
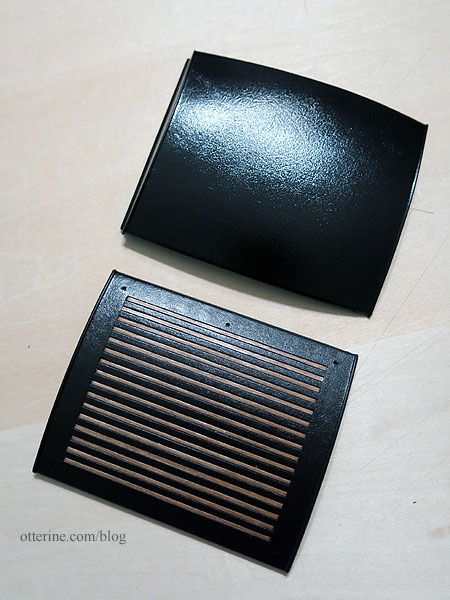
On the inside of the front roof, there’s an included wood piece cut to fit. It’s stained and sealed to match the rest of the wood.

I prepped the radiator, which will be needed in the steps to come. It might need a few flies. :D

Oh, and it’s National Cat Day. :D Hooray for furry friends!

Categories: Model Cars, Vehicles
October 29, 2016 | 0 comments1913 Model T Van – part 6
Continuing work on the Model T van. The kit includes adhesive backed micro wood to simulate the parts that were wood on the real van. Since I have two kits, I have some excess. One of the kits had the pieces pre-cut and the other was not cut but had a printed pattern. So, I basically had the proper amount I need but with some extra wood to use otherwise. I wanted the option to add more wood where it was lacking and have some extra in case of disaster, so I bought two sheets of adhesive backed wood veneer from eBay. One was likely more than enough, but why pay for shipping twice? This is also a good material to have in my stash for other projects as well.

I like to talk in correct terminology, but as of writing this post I am still trying to figure out which parts are which…so bear with me. The original kit fire wall has the wood on the outside (like the original auto). There is no wood piece for the interior, though you can certainly paint the simulation. I used the pre-cut wood for the exterior fire wall. I finished all of the micro wood pieces in Minwax Cherry with Delta Ceramcoat gloss varnish. The cherry is a warm finish without being too dark. I painted the raised details gloss black since there would not have been a way to get matching brass accents.
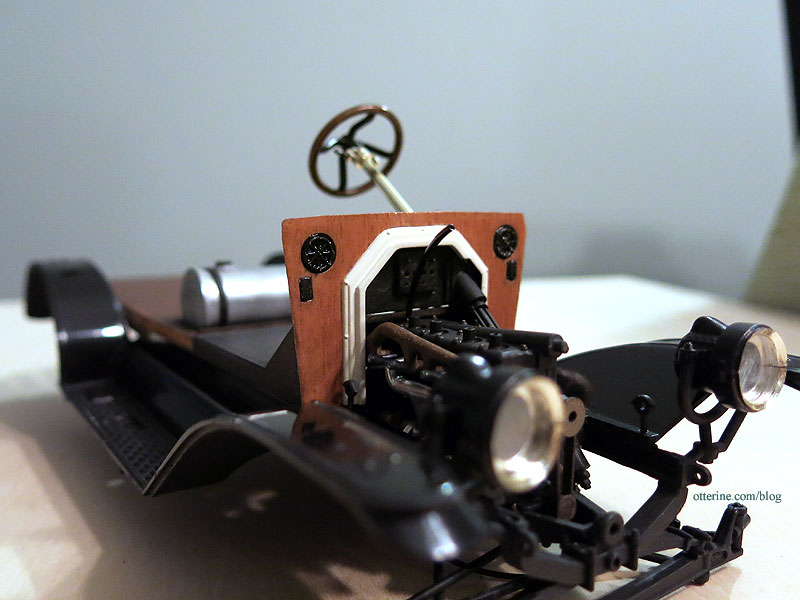
Unlike the real auto, the kit dash is molded in two pieces. The front piece has the coil box molded in place. I’ve seen these boxes in wood (with dovetail joints) and black. As a compromise, I painted the front dash piece black in its entirety since masking would have been difficult. I cut micro wood for the back dash piece. I masked the front cabin floor and sprayed it flat black. After the paint dried, I dry brushed some browns and greys to add some weathering to make it seem like a separate mat. The speedometer was molded in brass, and I added black to the face to make the details stand out.

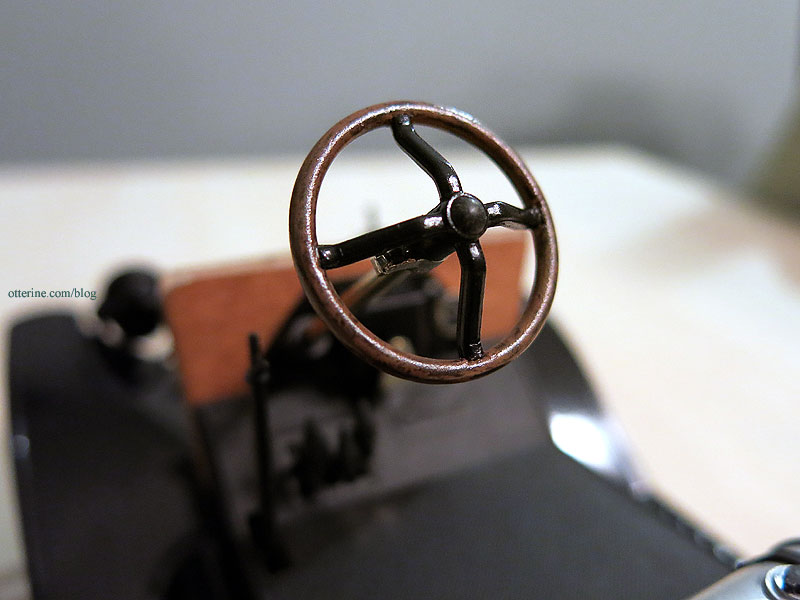
I painted a faux wood finish to the steering wheel.
I painted the wood grain portions of the floor board with Krylon Brown Boots satin spray paint. I used acrylic washes to accent the grain and add weathering.

I showed the ga tank in a previous post, but now it’s time to install it. The kit didn’t come with the straps, so I’ve fashioned those from paper. This great video details how to check the gas level (no dash indicator) and the oil (no built-in dipstick). :D The video shows a later model than what I am building, so there’s a lot less wood on it.

The bottom has darker washes from road exposure. I haven’t yet aged the bottom of the gas tank.

Looks like we’re getting somewhere! :D

Categories: Model Cars, Vehicles
October 23, 2016 | 0 comments
NOTE: All content on otterine.com is copyrighted and may not be reproduced in part or in whole. It takes a lot of time and effort to write and photograph for my blog. Please ask permission before reproducing any of my content. (More on copyright)