


NOTE: All content on otterine.com is copyrighted and may not be reproduced in part or in whole. It takes a lot of time and effort to write and photograph for my blog. Please ask permission before reproducing any of my content. (More on copyright)

Categories:
Hell on wheels
I’ve been rather busy the past couple of weekends socially and have another busy one ahead, but I am mulling ideas and of course buying minis behind the scenes. I even got a NEW CAR (now I have The Price is Right theme song in my head).
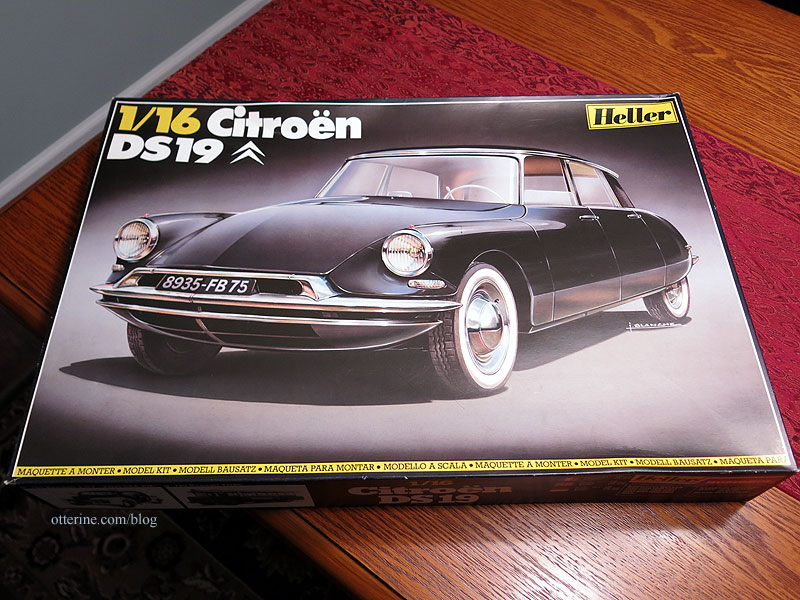
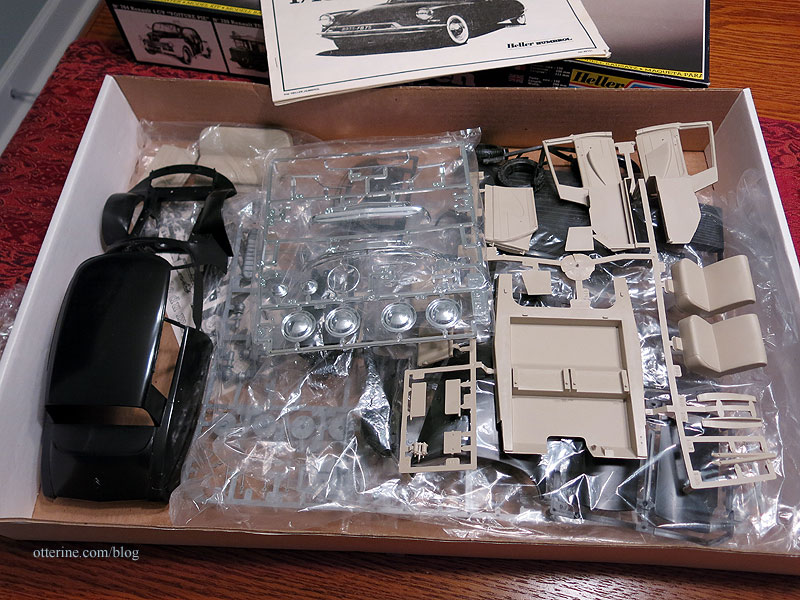
Errmmm, some assembly required. The Citroën DS19 is one of my favorite vintage autos, and I know I’m not alone.
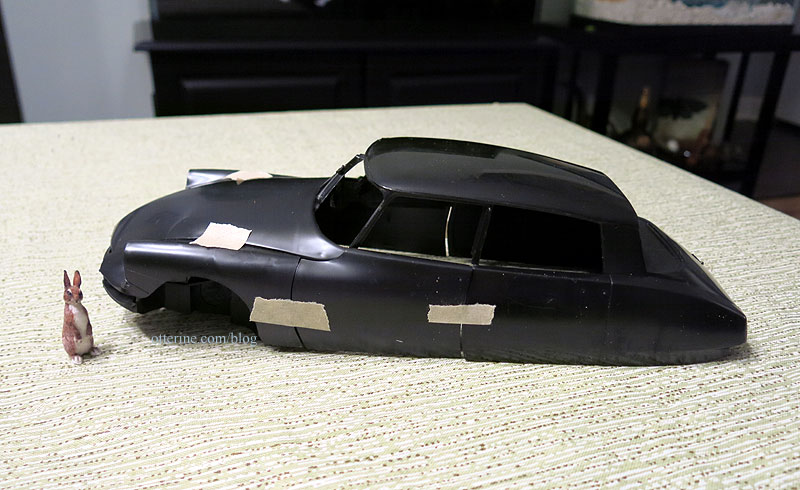
It’s 1/16 scale like the Model T Van, but it’s longer still. Who knew? :]

The reviews on this kit range from “if you’re an experienced builder, you can get a decent result with a lot of work” all the way to “I threw it in the trash and said ‘see you in hell!'” So, we shall see. But, the car keys from Whimsy Cottage Minis are fabulous anyway even if they end up belonging to a different car.

A new model car, especially one with cautionary reviews, always starts with extensive research. I look at many forums, blogs and online photo albums from people who have built, or attempted to build, the same kit. I even look at other scales of the same car for ideas on additional detailing and color schemes. While I do look at real life examples and vintage literature, sometimes it’s nice to build a car without adhering to the limitations of the real life examples. This modeler built one to completion, and it’s gorgeous. If I can get even close to this result, I will call it a success. :D
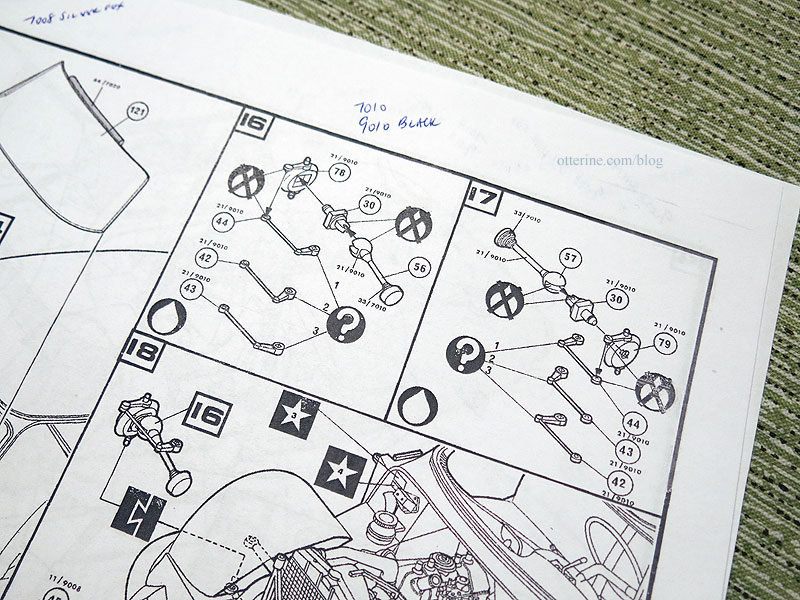
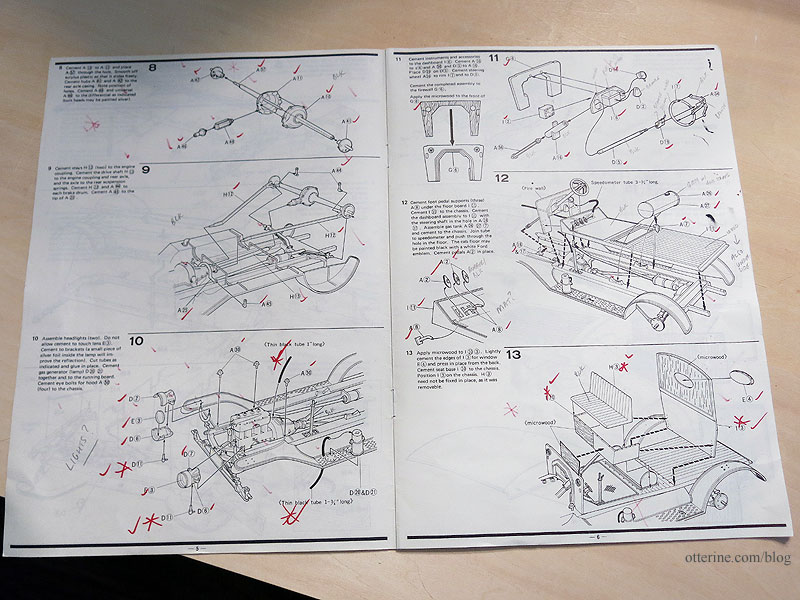
The other thing I do is make a copy of the instructions to mark up along the way. These particular instructions have symbols, arrows and numbers, none of which are indicated in any legend so there’s some guesswork to be done. Fat teardrop is likely glue; fat teardrop with X through it is likely “don’t” glue. Squares with stars are decals; circled numbers are part numbers, though there will still be a lot of hunting around.
The tiny numbers are paint indicators, which meant nothing until I found an online post that I printed out for desk reference and marked up the directions for ease of keeping it all straight. I don’t know why some are 70 numbers and some are 90 numbers when they indicate the same color, i.e., 7010 and 9010 are both black. =shrug= I googled the other colors to see if I could find an approximation online so I could make an educated substitution from my existing stash of paints (or shop for new ones).
The other thing to do is figure out which sprues or parts of sprues will be primed in which color. Spraying primer on an intact sprue always makes for an easiest start. You can scrape paint for gluing parts and touch up a lot easier with a good base coat. Sometimes you have loose parts that you’re better off removing cleanly so they don’t end up in the grass when you’re spray painting outside.
Large sprues can be unwieldy and make parts prone to overspray from one side to the next, so I cut those down, too. There aren’t a whole lot of pieces to this model, so for the larger parts I might end up with a lot of popsicle stick mounts and spray them individually for even better paint control.
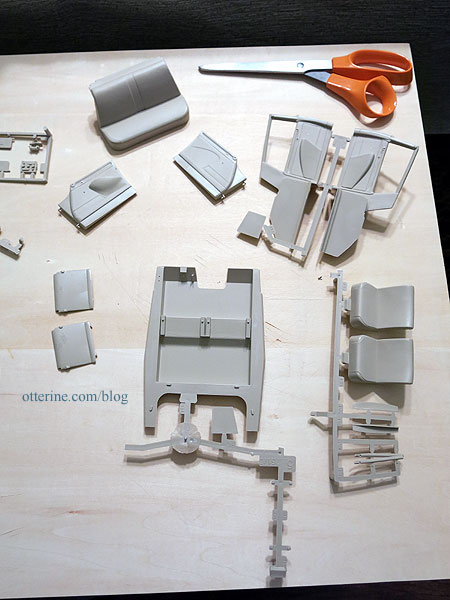
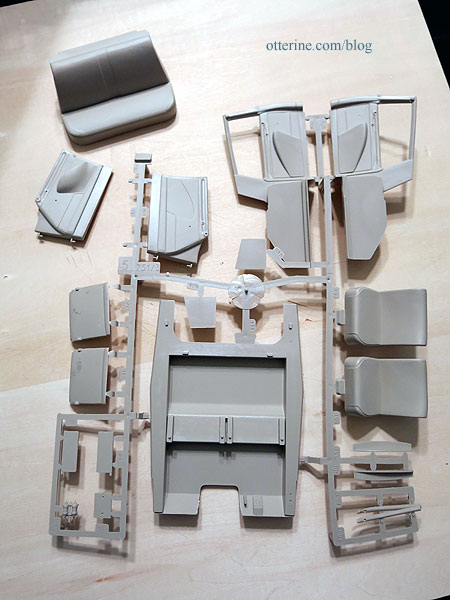
Of course, sometimes you need to fill in injection marks (or sand them down). I try to determine early on which are worth doing and which won’t be seen later on anyway. Why do the work if it won’t show? At first glance, this one doesn’t seem to have many unruly spots, just a few scratches to buff and a bubble or two to sand and fill.
Dry fitting parts also makes a lot of sense for a car touted as being difficult, though you want to remove tape right away to keep the residue from marring the surfaces. This one does appear to have a bit of gap-itis, so I will likely follow suit of the builder who glued the doors in place from the beginning. I want “pretty to look at” over functional at this point. And, no, this will not stay a black car in the end. While black looks sleek, it’s a pain to photograph and keep clean. :\
The last part of the initial process is to give yourself permission to launch the project into high speed traffic if it truly becomes a bear that you just know you can’t tackle any longer. :]
Categories: Model Cars, Vehicles
March 2, 2017 | 0 comments1913 Model T Van, completed
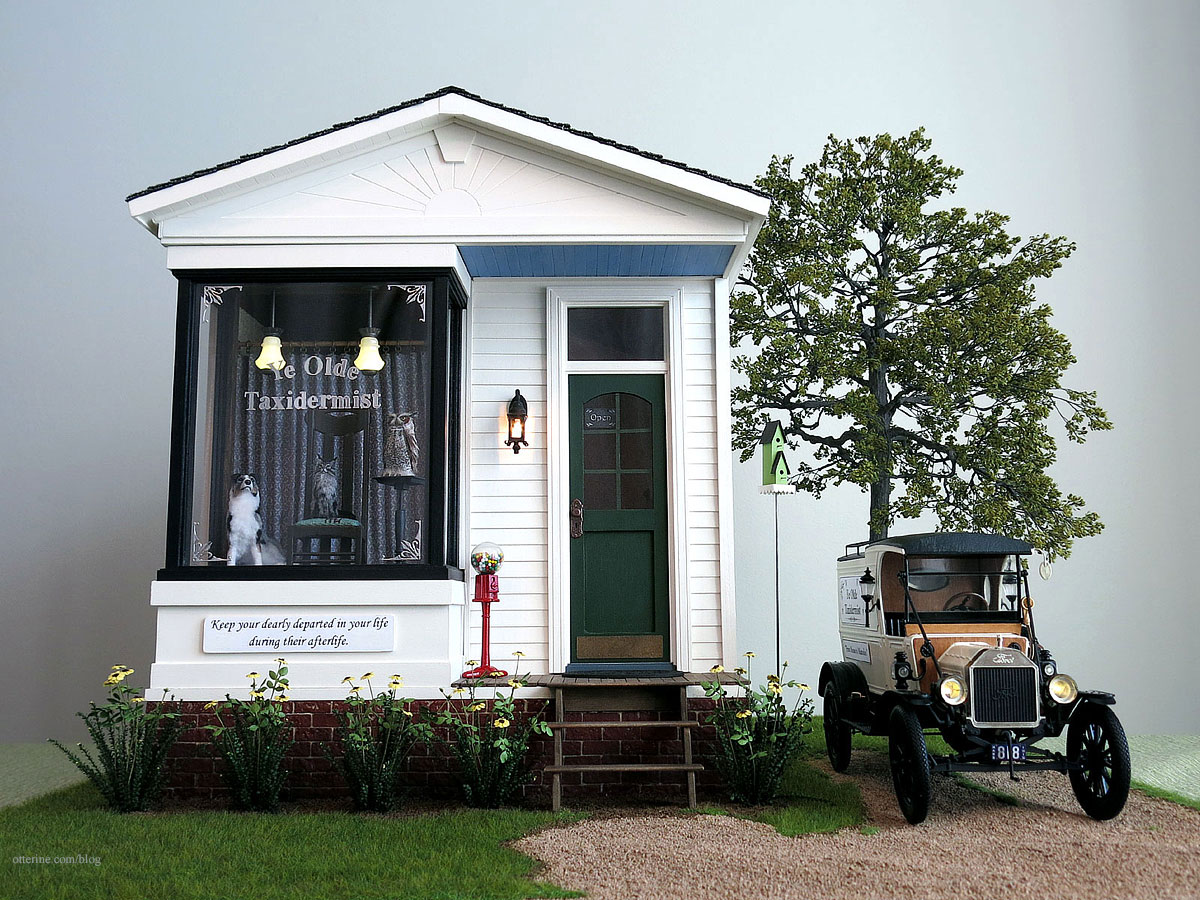
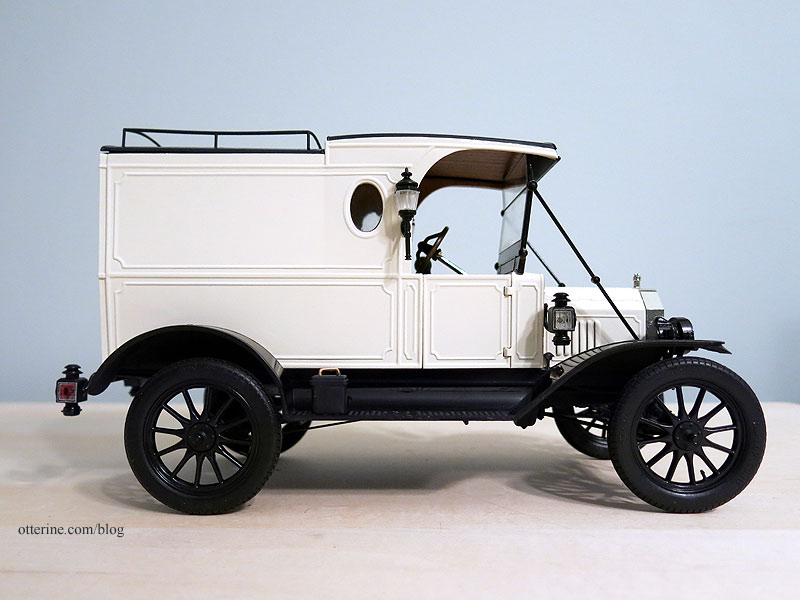
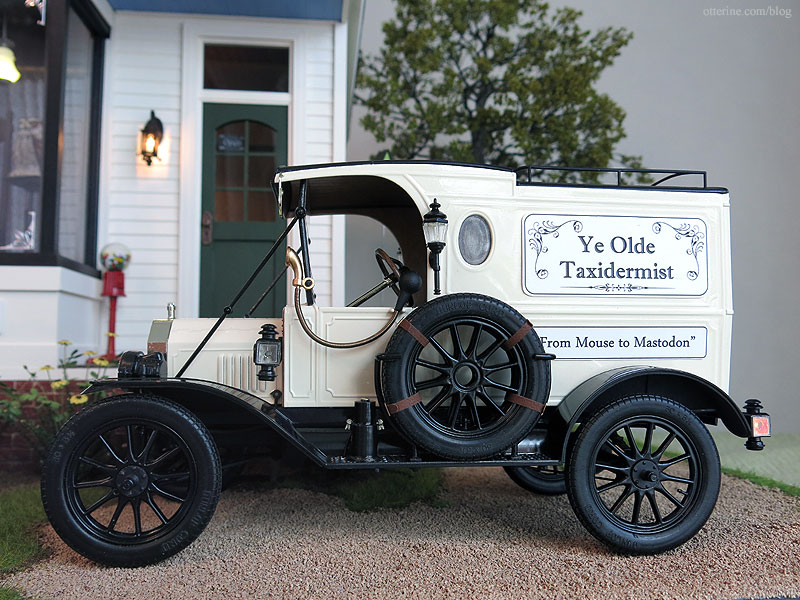
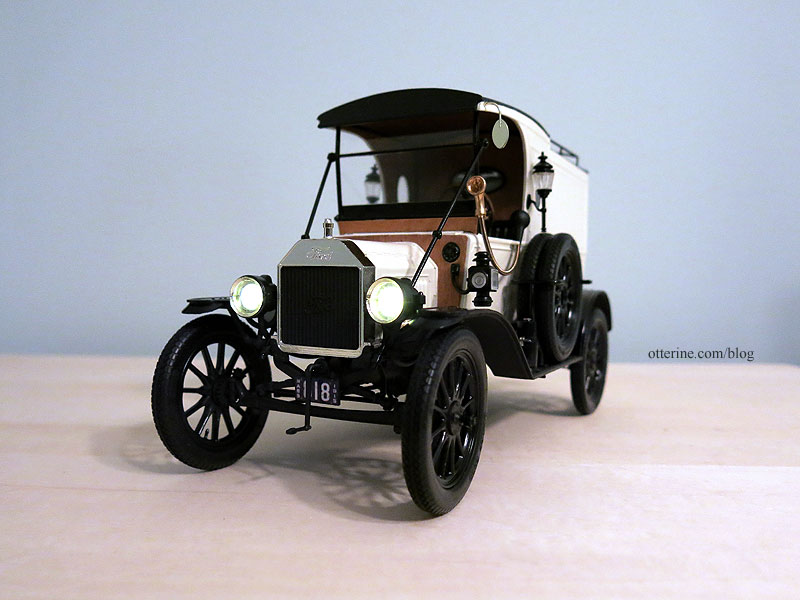
I have finished the 1/16 scale 1913 Model T Van! In this post are the final photos and links back to the individual posts along the way for easier reference.

It fits relatively well for scale in my final project, but I do love it even on its own.
This was not an easy or forgiving kit. So many parts broke during assembly, and a few were even broken from the start. I had two kits, and even with that, I ended up having to glue the suspension so the front wheels would not turn and the van would not roll. But, I was able to add LED headlights and taillights. Overall, I’m glad I took on the task and I’m pleased with the look of the final model. :]
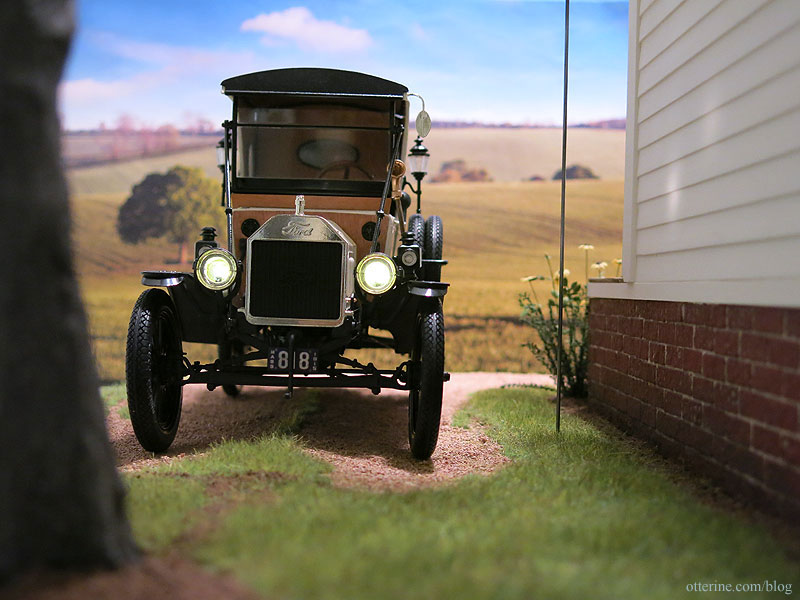
Only one back door opens due to broken hinge parts, but the back cabin contains all the LED wiring so it doesn’t matter much. The headlights and taillights work by remote control, so I won’t need access to the back cabin all that often. There are mock porcelain plates dated 1915.
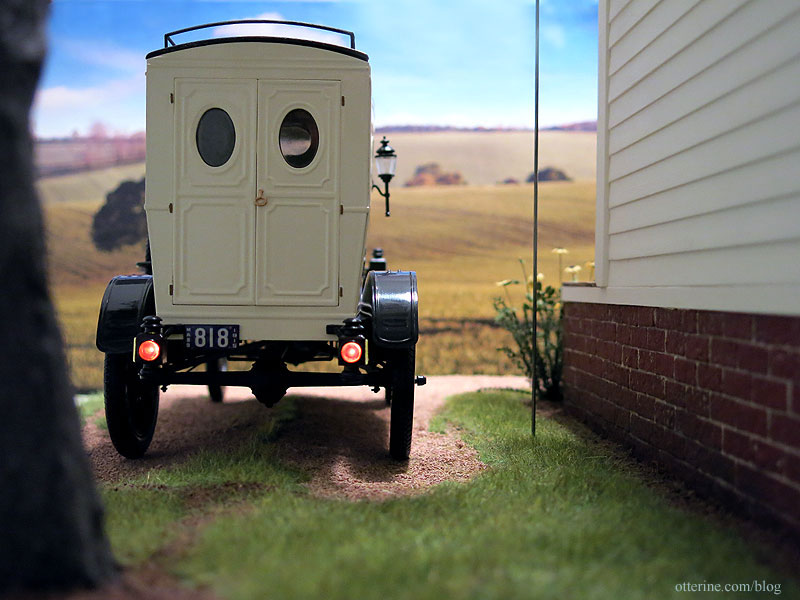
I knew I would never be able to make this 1913 van showroom new, so setting it in 1915 gave me two years of road wear and weather exposure to work with in detailing. Just enough dirt, wear and grime to make it realistic.
Still looks pretty clean, though. :D
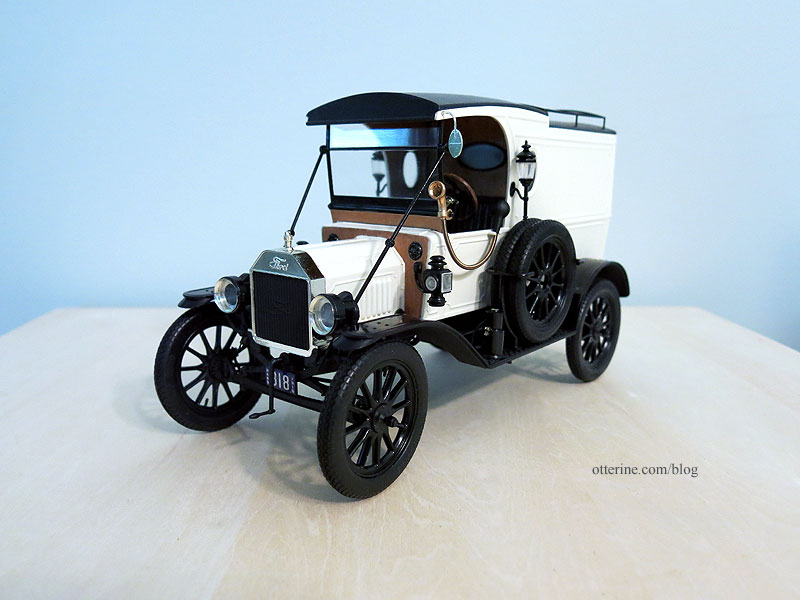
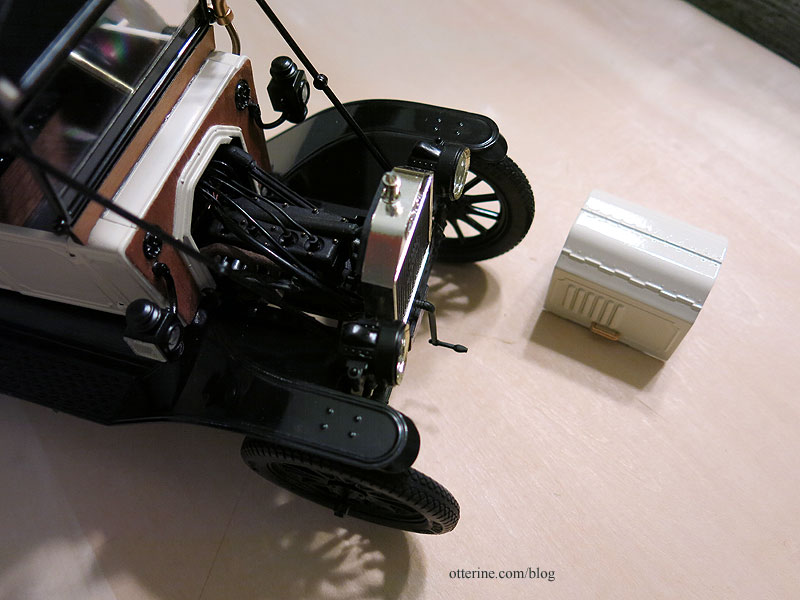
The hood lifts off, whereas the real life van would have had hinged access to the engine compartment.
The door is glued shut due to delicate hinges, but I did split the seat in two so I could lift out the lower part to see the detail I put into the gas tank. :D I keep the lower part in place with mini hold wax.
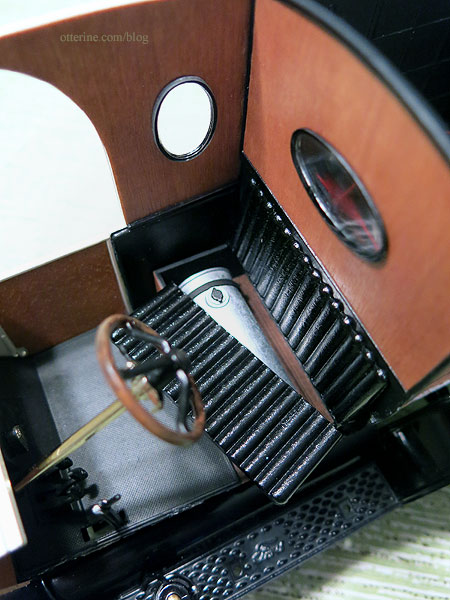
The interior is not easily photographed in the final model, but you can see the detailing in person.
A lot of the kit “brass” ended up painted black to disguise the glued joining lines and bare spots from removing from the sprue.
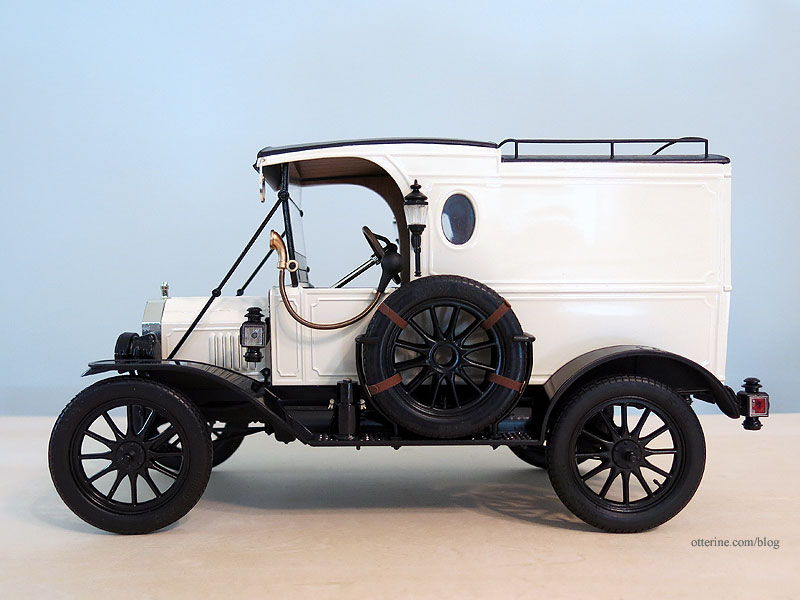
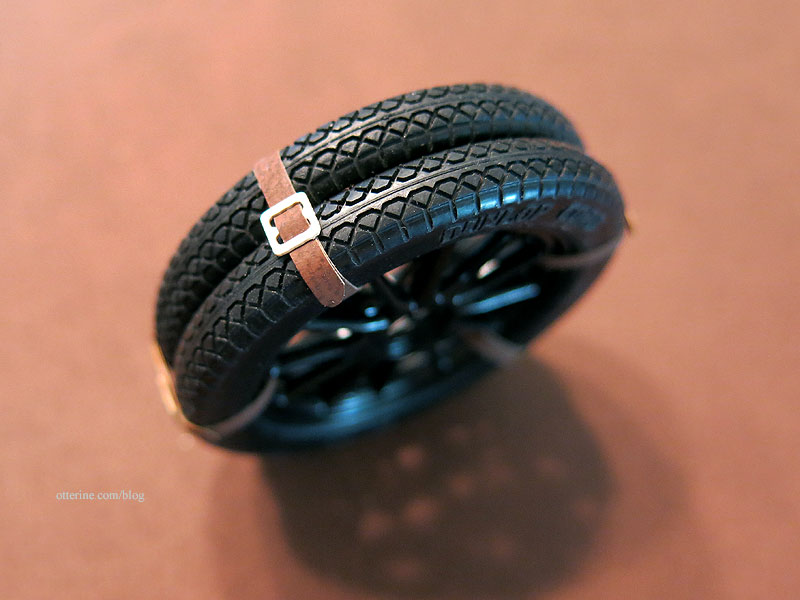
The spare tires were supposed to be solid parts to mimic covers. These had belt detailing that I knew would be impossible for me to paint to my satisfaction, so I used two of the spare tires I had from the second kit. I find it much more realistic, and the tires hide the main flaw I had when putting this side together. I didn’t put any permanent decals on the van for reasons soon to be revealed. The main reason is I might want to use this for other builds, and removable signs seemed the right way to go.
I went through many ideas before finally stopping on a vintage taxidermy shop set c. 1915 where the van would sit.

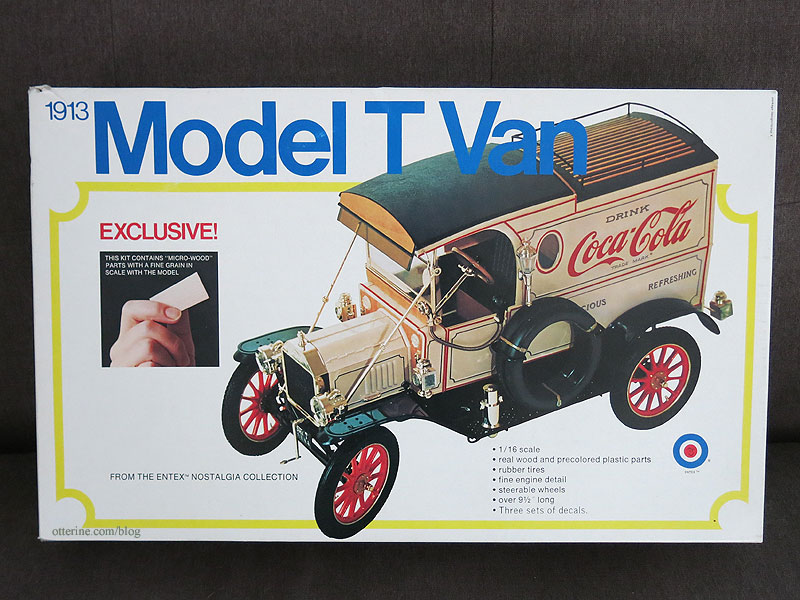
The other ideas were sound, but it was all decided once I found the 1:16 scale 1913 Model T Van kit by Entex that included decals for a taxidermist. From Mouse to Mastodon. I love it! :D
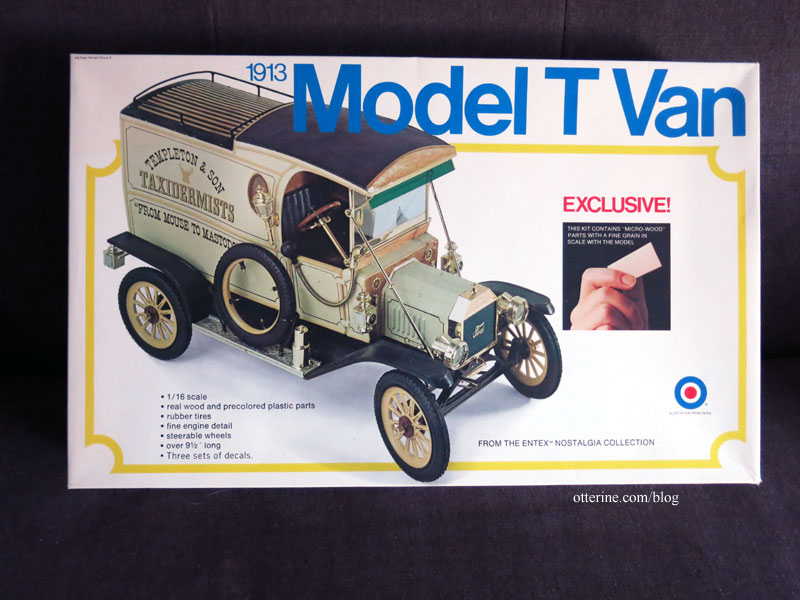
Yes, that’s a different image on the box cover than what I’ve been showing. There was more than one kit release over time, but even though I had two kits with different front images, the parts were identical for both. Interestingly, this one is shown built with the driver’s side opposite but with the use of a spare tire instead of the plastic covers. That would not have been possible with the parts molded as they were. Four different sets of decals were included: Carnation Milk, Coca Cola, The Texas Company and Templeton & Son Taxidermists.
I ended up making my own removable sign boards for the van for a few reasons. I wasn’t keen on using the name on the included decals, and I wasn’t sure about my success in applying large decals either. And, I might want to use the van for something else in the future, so I can just swap out the boards. :] These are printed on regular paper and mounted to bristol paper for added weight. Mini hold wax keeps them in place without marring the paint finish.
My instruction sheet showing my markup along the way….
I learned a lot about Model T Fords and early motorized transportation during the build, and here are a few of the references I sited along the way:
- A video on learning to drive a Model T at the Henry Ford Museum along with some excellent vintage off-road footage
- A video that takes you for a ride in a Model T
- An awesome video showing the fabulous articulation of a Model T
- Article on Model T lights
- Article on porcelain license plates
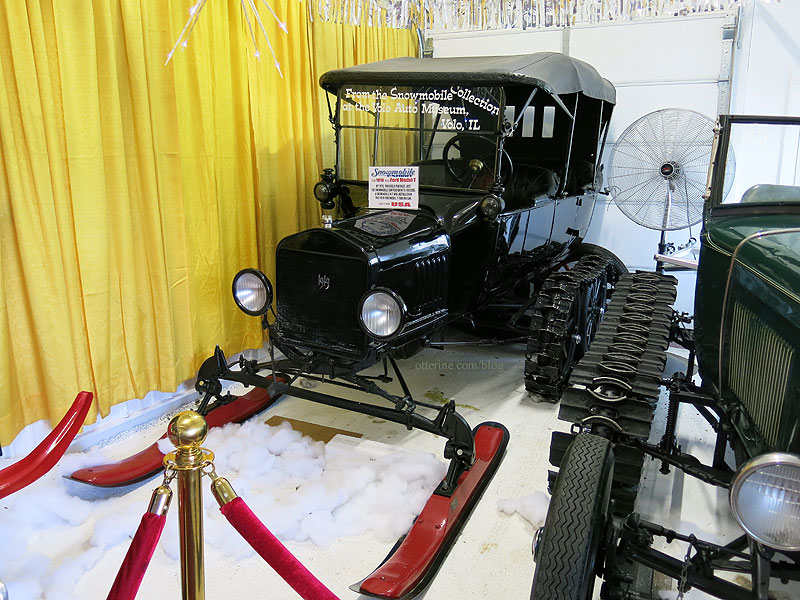
Here’s an interesting contraption I photographed at the local Volo Auto Museum. Many a Chicago winter would call for such a beast. :D
——————–
Here is the Entex kit photo to kick off the recap. I’ve listed the links in reverse order from newest to oldest.
Part 13 – body assembly, final detailing, belts for the spare tires
Part 12 – taillights, micro wood and body assembly
Part 11 – tags for the devil wagon
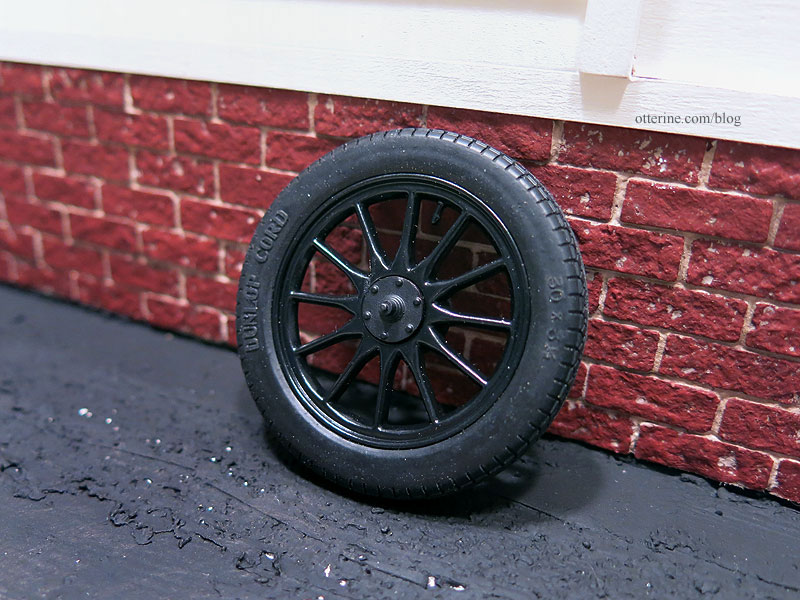
Part 10 – wheels and tires
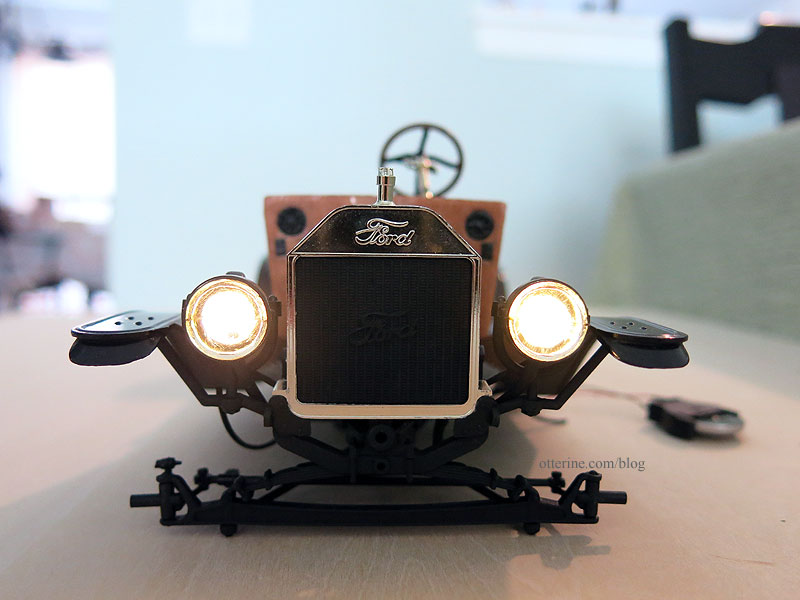
Part 9 – headlights!
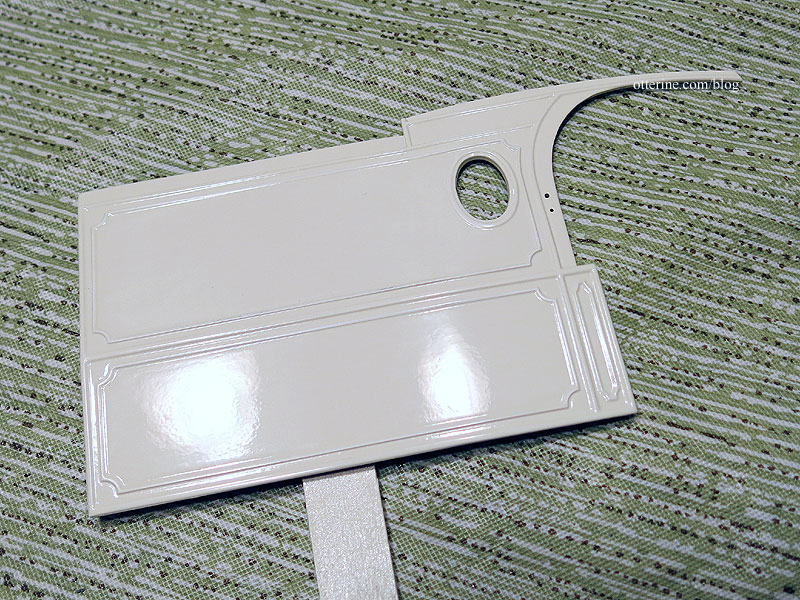
Part 8 – painting the body panels
Part 7 – wiring details and more wood finishes
Part 6 – wood finishes, front cabin and installing the floor board

Part 5 – acetylene generator and headlamps
Part 4 – installing the engine and assembling the frame
Part 3 – metal gas tank and exhaust system
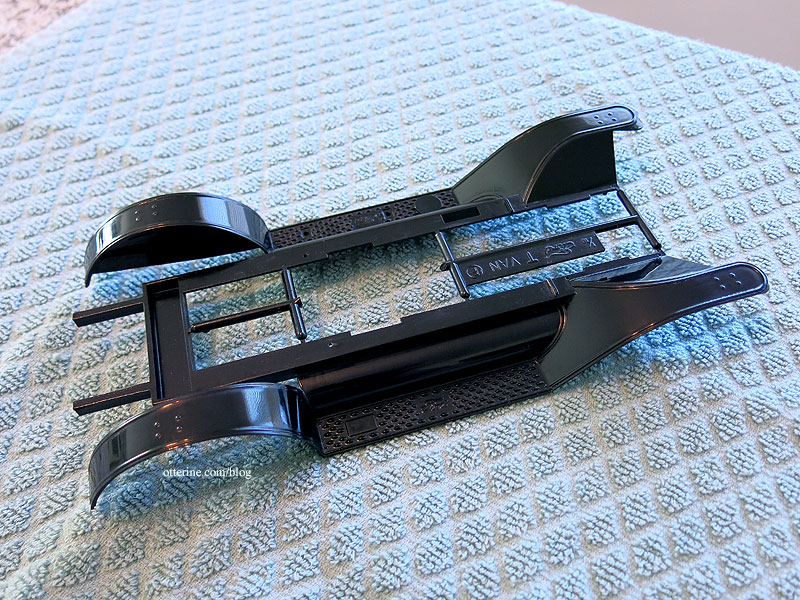
Part 2 – painting the chassis and getting those fenders to shine
Part 1 – the beginning of the engine build
Categories: Model Cars, Vehicles
December 11, 2016 | 0 comments1913 Model T Van – part 13
Finalizing work on the 1913 Model T Van. It’s time to put on the remaining body panels and get to the final details. I mentioned that I had a problem with the driver’s side panels. Because the passenger side has a door that was supposed to be operational, the front panel and the door were molded as two separate pieces. The driver’s side front panel and door are molded as one piece, which makes it slightly shorter. There was a gap between the door and the back body panel (larger than the thickness of the micro wood I put on the separating wall, so that effect was negligible).
I added a tiny strip of styrene to make up the difference and repainted the panel. It’s not as clean of a fix as it would have been had I noticed it earlier, but it’s less noticeable than a dark gap. I used plastic cement to glue the front and side panels together before putting them on the frame because they didn’t want to line up properly otherwise. The front middle panel is a little off, but I am happy with the results as is because this was not easy to assemble.

I had wanted to leave the back cabin roof removable to access the wiring due to the delicate back door hinges, and it does sit well without glue. The side panel top edges show just slightly, so I ran a black Sharpie along them to disguise them as best I could. I still won’t have room to work on the LED wiring, but this does give me access to the battery without having to open the one back door that functions.

For the hood handles and horn, I used Testors Metallic Gold spray paint. It’s not a precise substitute for the brass factory finish, but it will do in a pinch.

I didn’t think the gold paint would work as well for the window surrounds and long stays, so I sprayed those black. I used Crafter’s Pick The Ultimate glue to hold the window panes in place since super glue makes clear plastic cloudy. These panes often need to be glued repeatedly over time in car models because the glue fails with age.

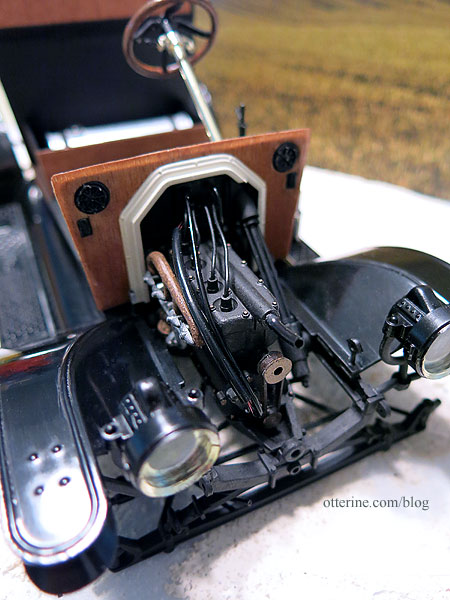
The front cabin roof didn’t fit very well, which was odd. It seemed to be molded at a different angle than the side panels. I managed to wrangle it into shape. I skipped the green sun visor since the pieces from both of my kits were not in great shape. Better to just leave it off than have it look like a sloppy afterthought.
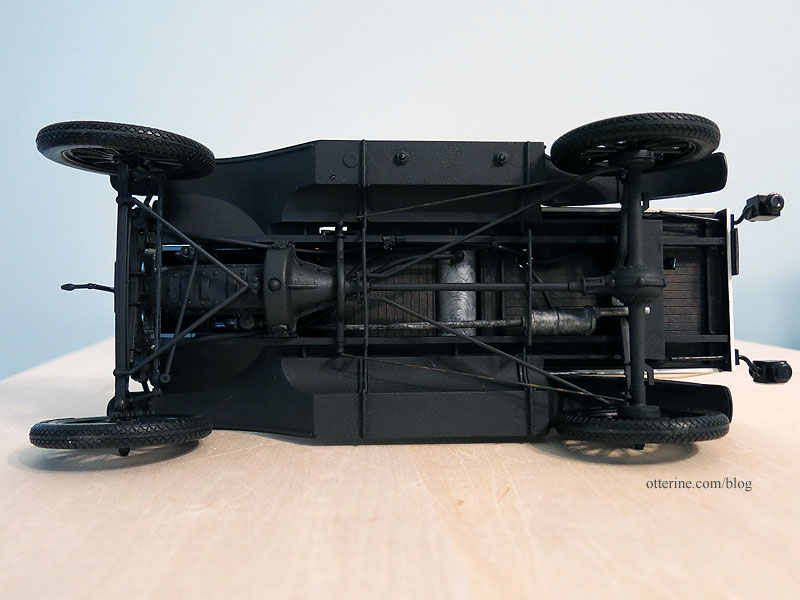
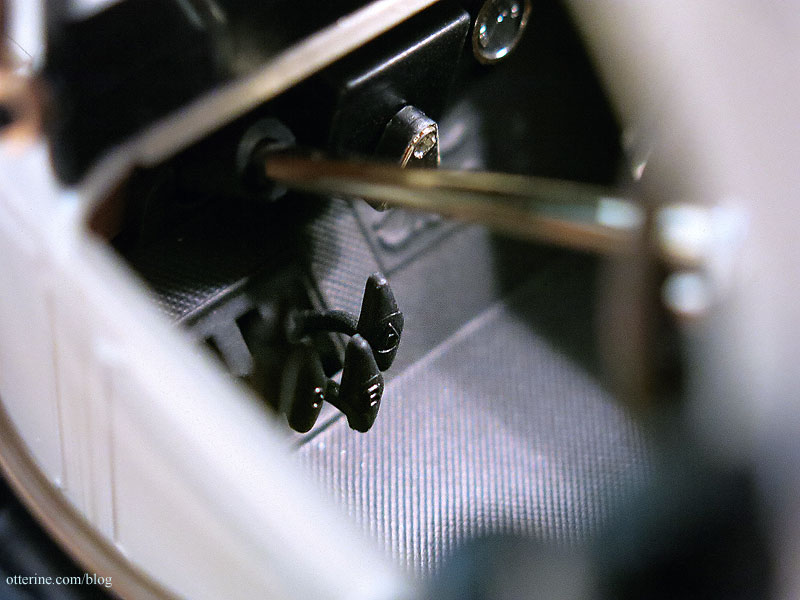
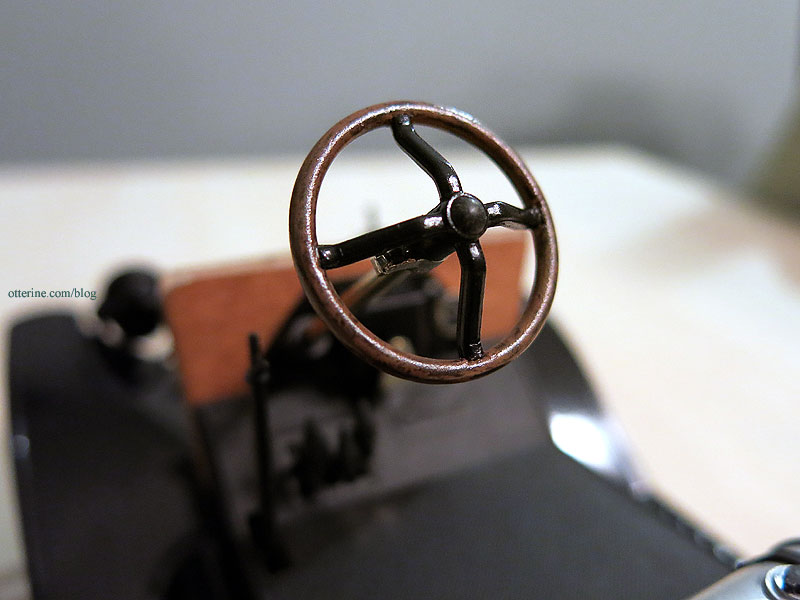
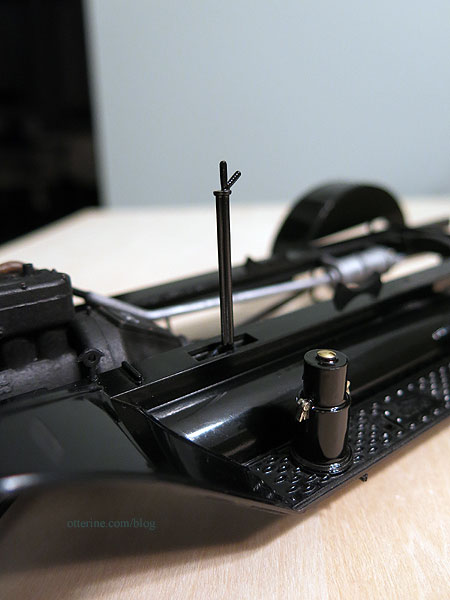
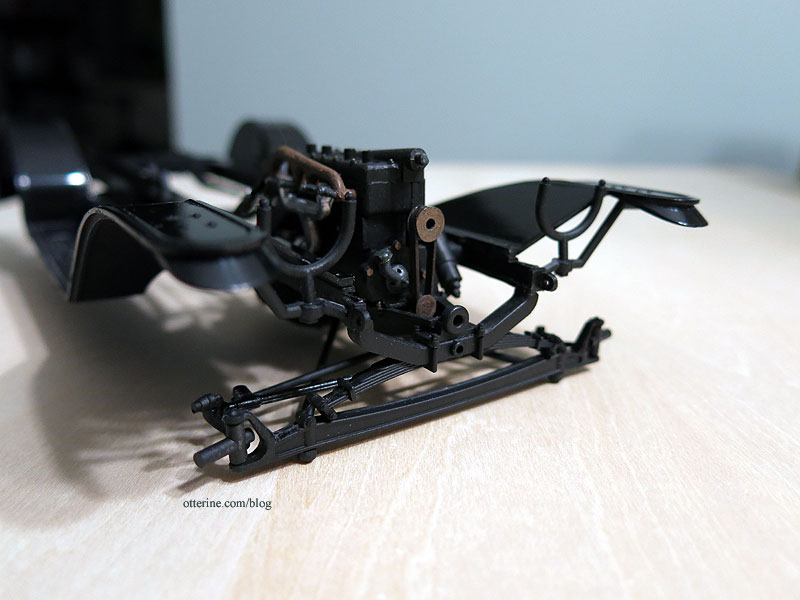
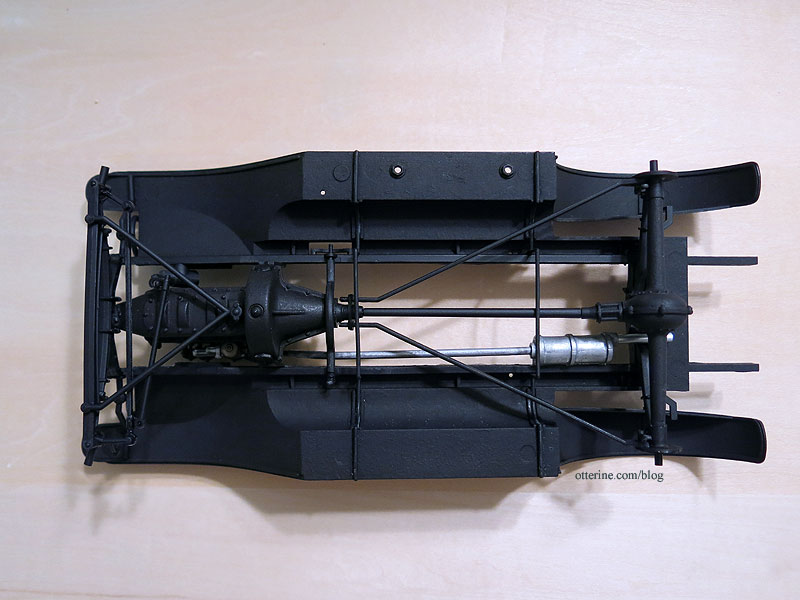
I snipped the speedometer and gas light tubes under the chassis since I knew they would just end up snapping parts off as well. You can still see them in the front cabin and next to the acetylene canister.
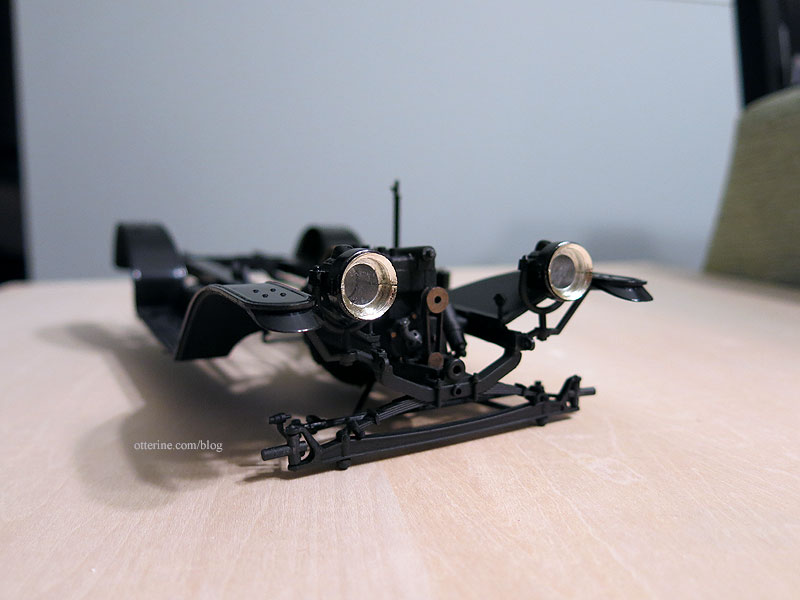
The two side lamps and two coach lamps are painted black to match the other lights. I didn’t wire these since there wasn’t a way to disguise the wires in the open front cabin.
The spare tires were supposed to be solid parts to mimic covers.

These had belt detailing that I knew would be impossible for me to paint to my satisfaction, so I used two of the spare tires I had from the second kit. I used super glue gel to hold the two tires together to keep them uniform. I glued the brackets to the running board, and slipped the tires in to fit. Using the tires with the spindle wheels helps disguise that body panel gap repair, too. :]
I added belts made from scrapbook paper called Buckskin Brown by The Paper Company. The silver buckles are laser cut paper representations from Dragonfly International, bought at the local shows. They are a little large for scale perhaps, but I like the added detail.
So, that’s it…99.9% done. I’ll be making my own removable sign boards for the van for a few reasons. I didn’t plan to use the included decals, and even though I can print my own, I wasn’t sure about my success in applying such large decals. The last thing I wanted to do was muck it all up at the 11th hour since this model gave me so many fits along the way as is. Finally, I might want to use the van for something else in the future, so I can just swap out the boards. :]
Categories: Model Cars, Vehicles
December 10, 2016 | 0 comments1913 Model T Van – part 12
Continuing work on the Model T Van. A dry fit of the body panels shows that the back doors do not open fully.

This is partly due to the outer raised hinge detail, the hinge brackets not being wide enough to clear the body panel and my heavy-handed paint job. I’ve seen one other model with the doors open wide, so this is also likely operator error on my part. :D

Had I known this earlier, I would have removed the hinge detail altogether before painting. If you didn’t know it was supposed to be there, would you miss it? I took an X-Acto blade and scraped off some of the paint. I’ll touch it up with paint later.

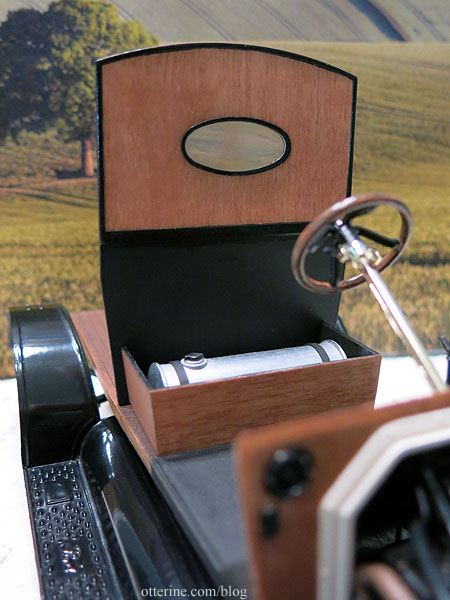
The rear cabin has molded rack detailing on the inside walls. You are to add pre-cut micro wood strips as accent. Since there will be such limited visibility, I opted for the easy way out and painted the interior black, leaving the one forward wood wall I did as is. I won’t open the cabin often, just to change the battery, so seeing inside is irrelevant. I’ve added the remaining micro wood pieces to the interior as well as the side seat padding and the oval window.

I drilled a hole in the floor board so I could run all the wiring into the rear cabin. Why such a large hole? I didn’t want to have to do this more than once! :D

Jasper offering moral support while stealing my chair….

To limit the wear and tear on the rear door hinges, I installed a remote control from Evan Designs for the lights.

It will even dim the lights.

The sensor is installed on the rear frame for ease of access while blending in with the undercarriage.

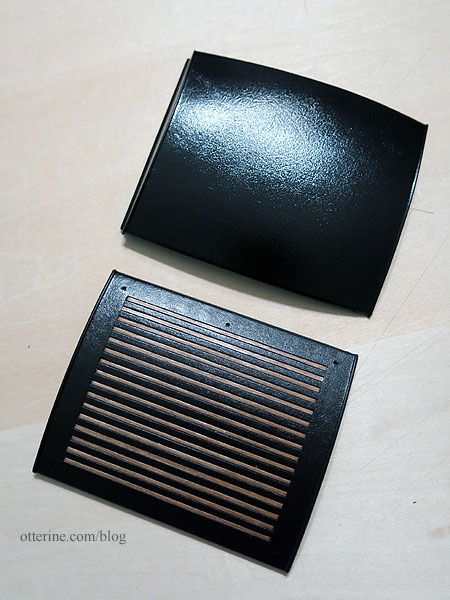
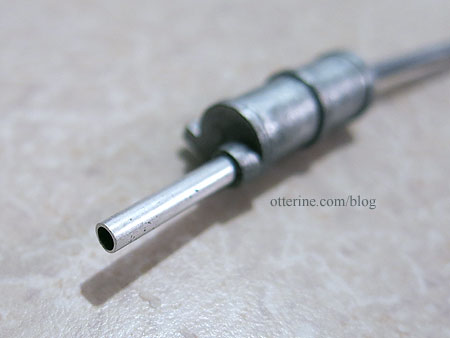
The taillights had solid brackets, so there was no way to just feed wires as is. Since I have two kits, I had spare parts to see what I could come up with. I modified the lamps using custom cut and bent 1/16″ diameter aluminum tubing to hold the wires.

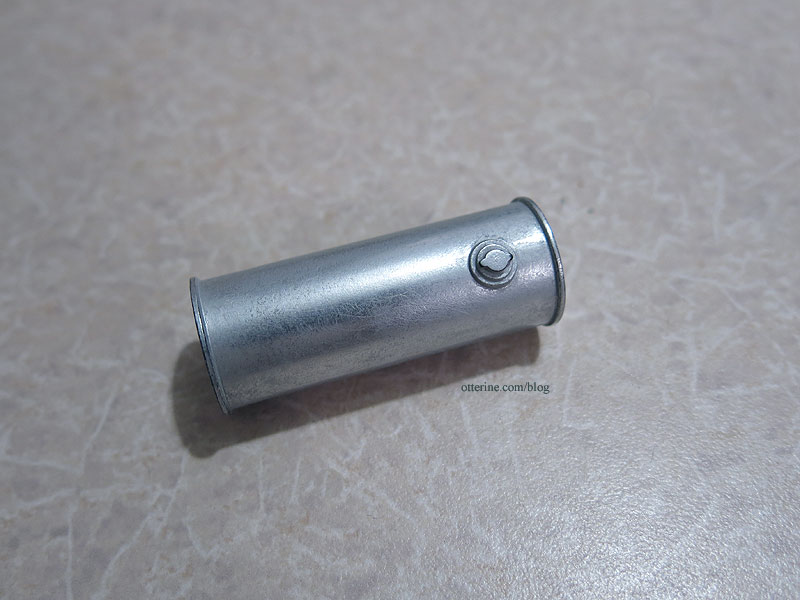
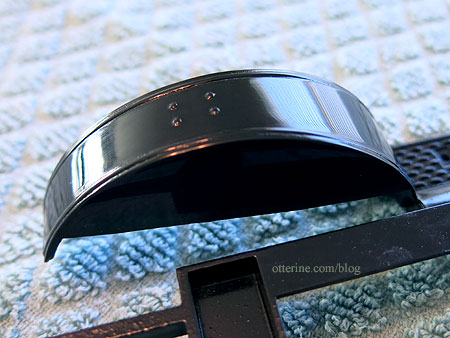
I kept the plate that attaches the lamp to the bumper, drilling a hole adequate for the tubing. The left shows the original bracket; the right shows my modified plate before painting.

At this point, I needed to glue on some of the body panels. I had a problem with the driver’s side, so I ended up prying those off. More on that later. I needed one side on to glue on the back piece, so I used the other side instead. The door is meant to open, but I have no idea how these parts were supposed to snap together without breaking the hinges. I tried with the spares and the tiny pieces snapped off as expected. So, I cut the tab on the interior and glued the door in place. Considering just how many parts have broken during assembly, opening and closing the door is not a priority.

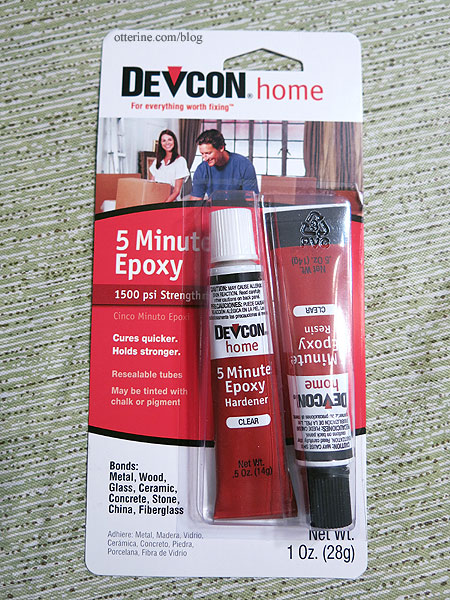
I used Devcon 5 Minute Epoxy on the taillights to get a firm hold since I was using mixed materials. This stuff stinks to high heaven with the hardener smelling like rancid, rotten eggs, but it is as advertised.
I painted the lamps black to disguise the sprue marks and to blend the aluminum.

The red is Testors Metallic Red paint. Using a tip from the guys at Hobby Town USA, I didn’t shake the bottle to mix the paint but used the clear tint from the top of the bottle. It colors while remaining transparent, though it takes a few passes. I touched up any bare spots with a red Sharpie.

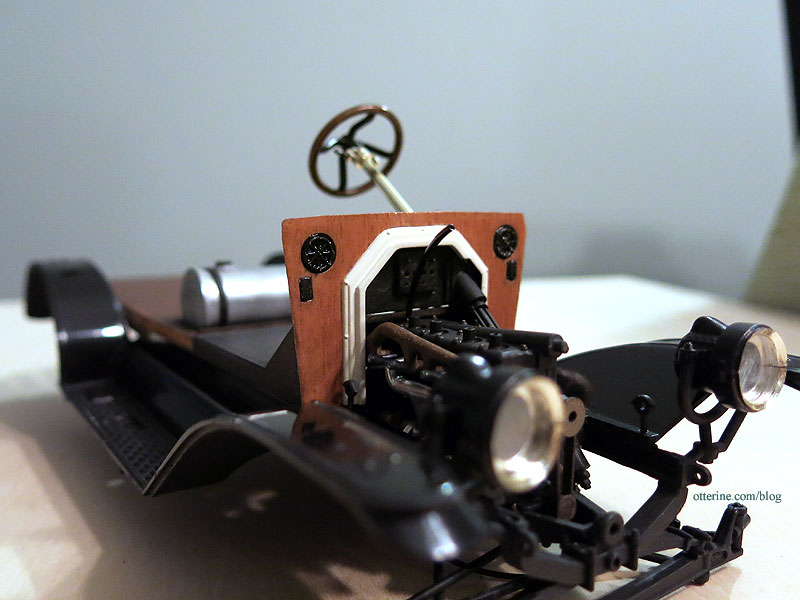
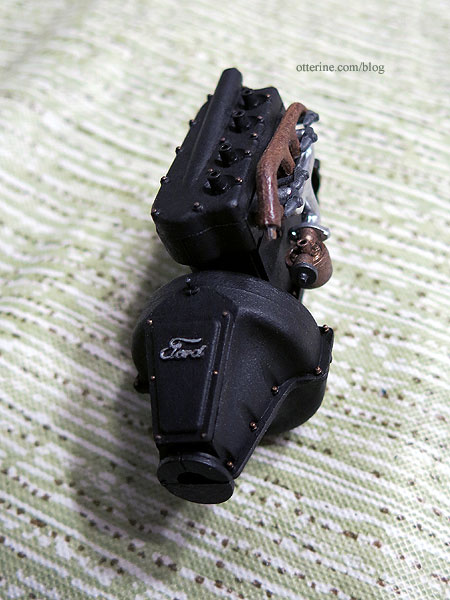
The tube runs long under the bed for stability and connects to the same type of flexible tubing I had used for the headlights. I’ll do touch-ups later.

All the tubing and wires enter through the hole in the floorboard. The electrical work is all enclosed in the rear cabin. The door hinges are very delicate. If one breaks after assembly, I don’t think there’s a way to repair it. As it is, one broke as I assembled the hinge holders, so I had to glue one door closed. I am not hopeful for its longevity. With this system, I will need to open the door only every once in awhile to change or remove the battery. The wire length allows me to work outside of the van for battery replacement. As for accessing the wires in the cabin, if one goes out, it will be out for good.

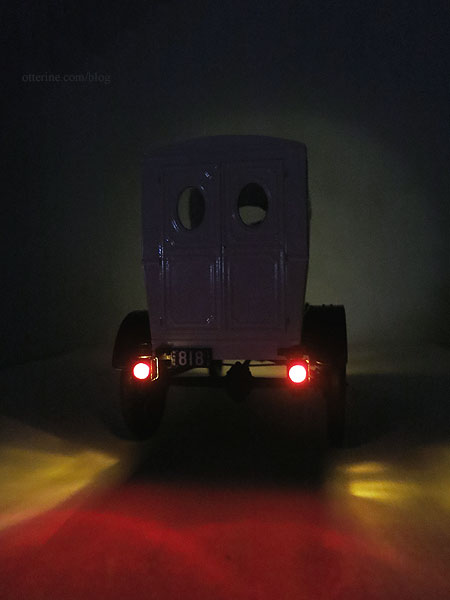
I dabbed a bit of amber glass paint on the LEDs to tone down the whiteness for the rear lights.

The license plate further disguises the sensor. It’s pretty sensitive; you don’t need to aim the remote directly at the sensor for the lights to work.

Testing…okay, so now we can be seen coming and going. :D
They might look a little rigged if studied closely, but at least the taillights work. :]

I will let the epoxy gas out for awhile before adding the clear side glass pieces to the taillights.
Categories: Model Cars, Vehicles
December 8, 2016 | 0 commentsTags for the devil wagon
I’ve been working on getting through the remaining steps for the Model T Van, and things have not been going well. Mishaps with the insanely delicate steering and suspension parts means the wheels had to be glued so they will not turn or spin. The model is still salvageable overall for looks, so far that is, but it’s disappointing that it won’t be poseable or roll around. But, I forge ahead…
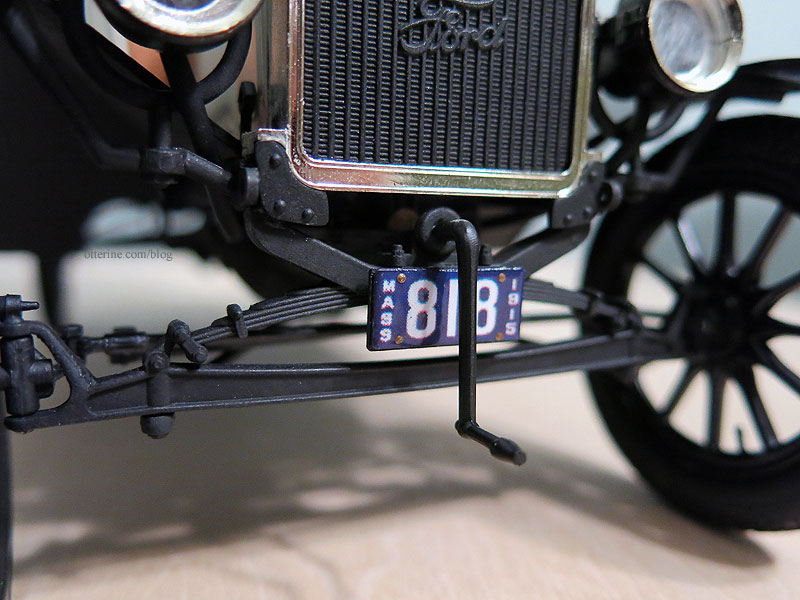
———————Apparently, license plates started out as porcelain not stamped metal, and the 1913 Model T Van fits squarely in that time frame. This is an awesome article on porcelain plates. I find it amusing (and not surprising) that tags came about due to miscreants wreaking havoc on the general public in their “devil wagons.” :D Yes, I so would have been one of those miscreants.
I measured the plate holders for the model and printed up some old time plates. I edited the image to remove imperfections and the long holes that would have been part of the plate. Instead of making these stamped like my previous versions, these are finished in a smooth gloss surface using Triple Thick. They are glued on with paint dabs simulating screws. Crank it up and hit the road! We’re street legal! :]
Categories: Model Cars, Vehicles
December 4, 2016 | 0 comments
NOTE: All content on otterine.com is copyrighted and may not be reproduced in part or in whole. It takes a lot of time and effort to write and photograph for my blog. Please ask permission before reproducing any of my content. (More on copyright)