

Mini bicycles
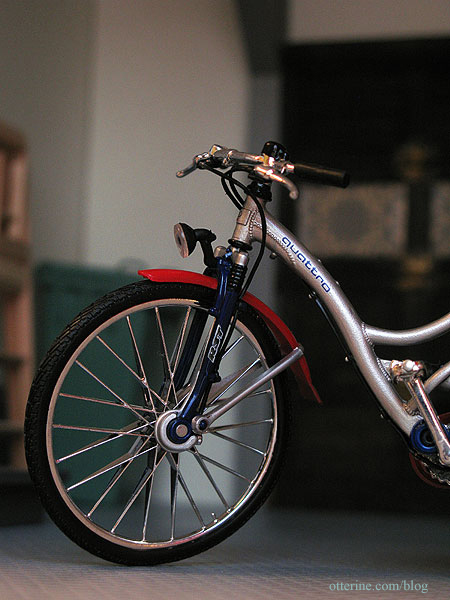
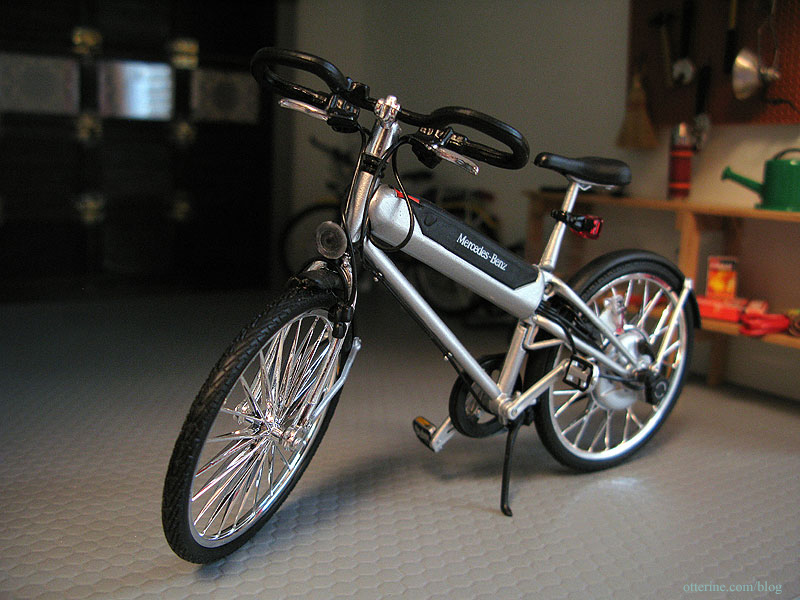
Now, I love my 1:14 scale remote control Audi TT, though in person it’s not as realistic as I would like. On the other hand, I just found some bicycles that are marvelously realistic! They are 1:12 scale diecast models by Maisto. First, the Audi Quattro Citybike.
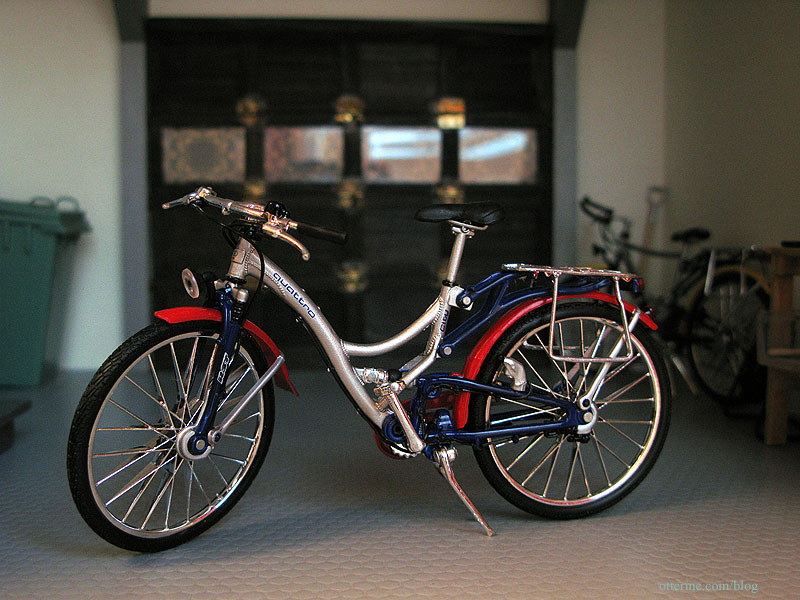
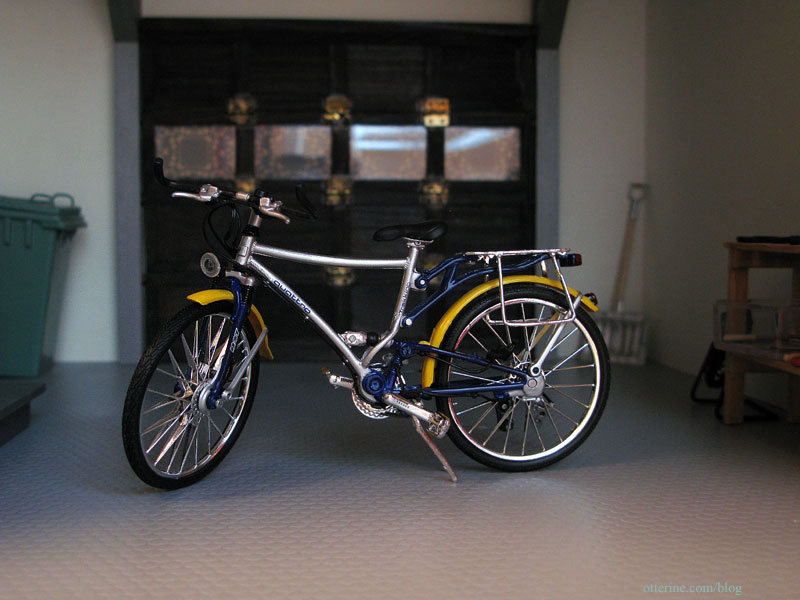
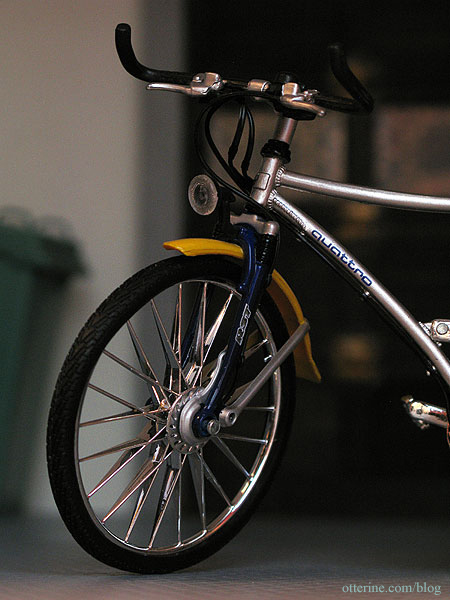
And, the Audi Quattro Trekkingbike.
Finally, a Mercedes Benz Hybrid Bike. This should be the last of my collection, though. The three I bought were the ones I liked best.
No, I haven’t kicked the Audi TT out, but I’ll have to figure out some storage solutions for the bicycles when the car is parked in the garage. I have a couple of ideas to keep it from feeling so cramped…though that is how most garages are.
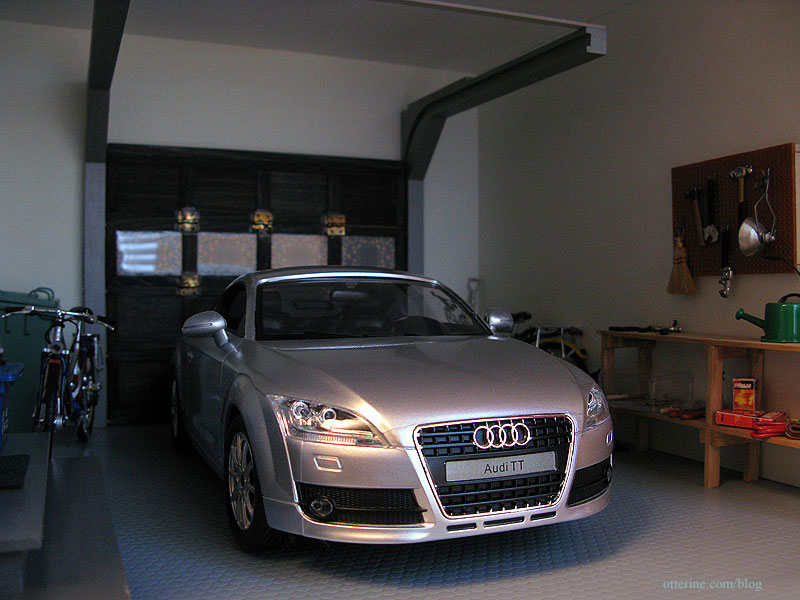
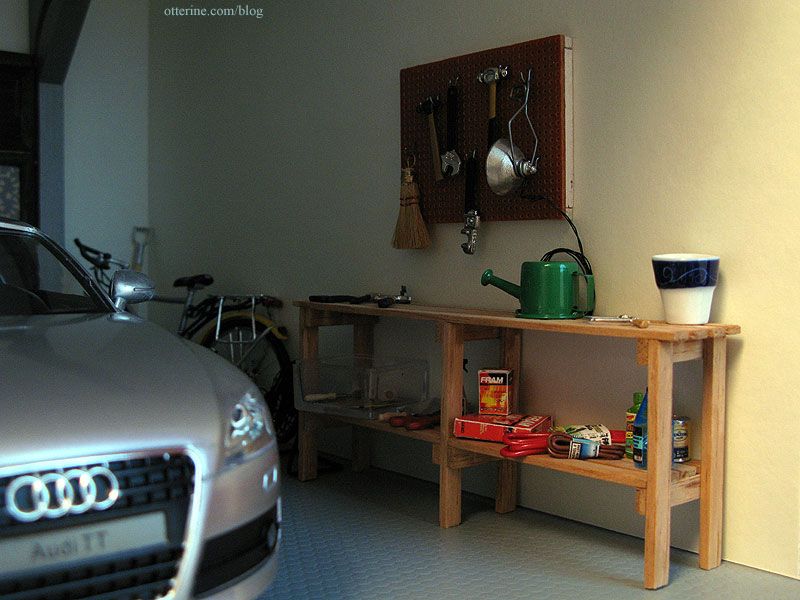
The more stuff I get crammed into the garage, the more realistic it feels. Yes, I know it’s insanely tidy, but it’s a new house. :D
The shelves were made from balsa wood following instructions in the book Making Miniature Gardens by Freida Gray. The tools and accessories were all purchased, though I did paint a few of the tools to make them look more realistic. The pegboard has tiny hooks that can be moved around. The shop light works, too, though I don’t have it wired at the moment.
Categories: Model Cars, Vehicles
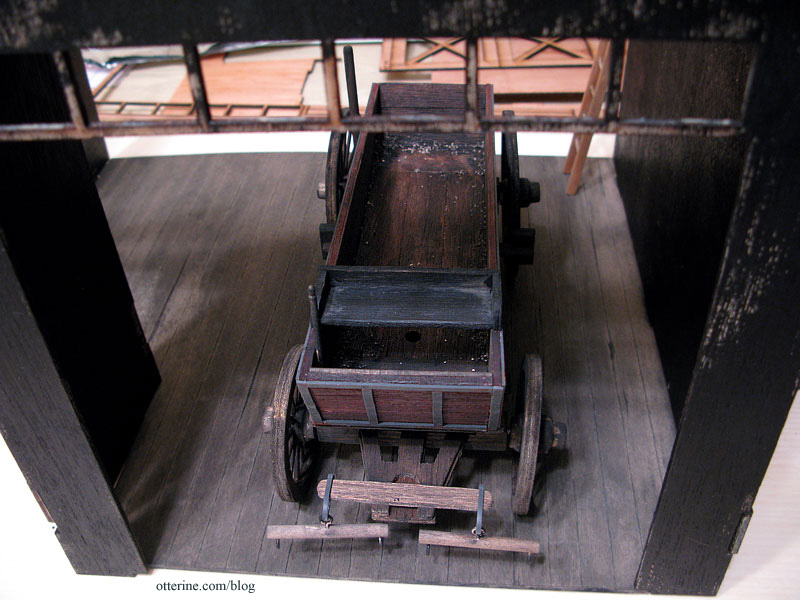
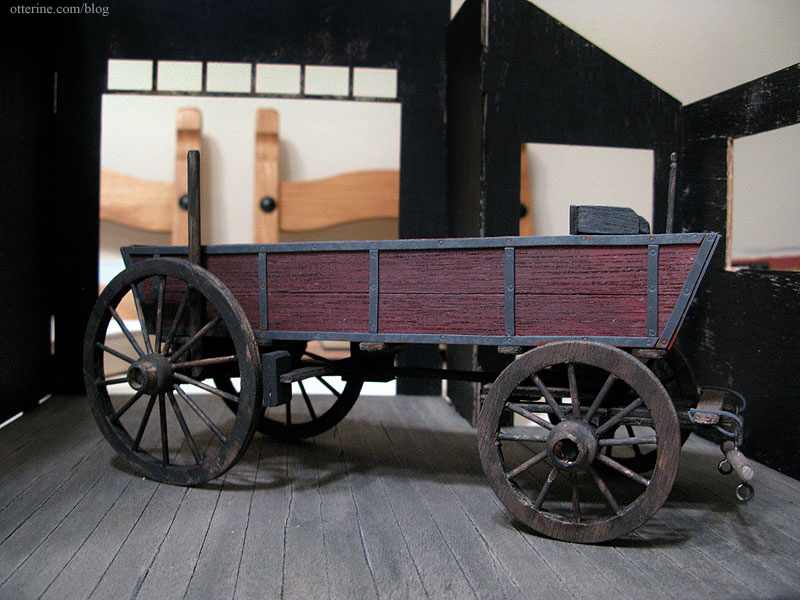
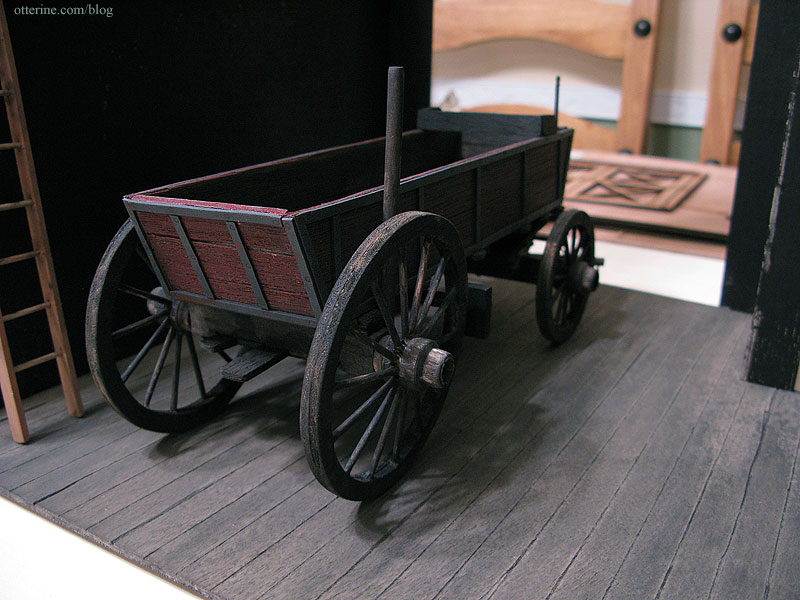
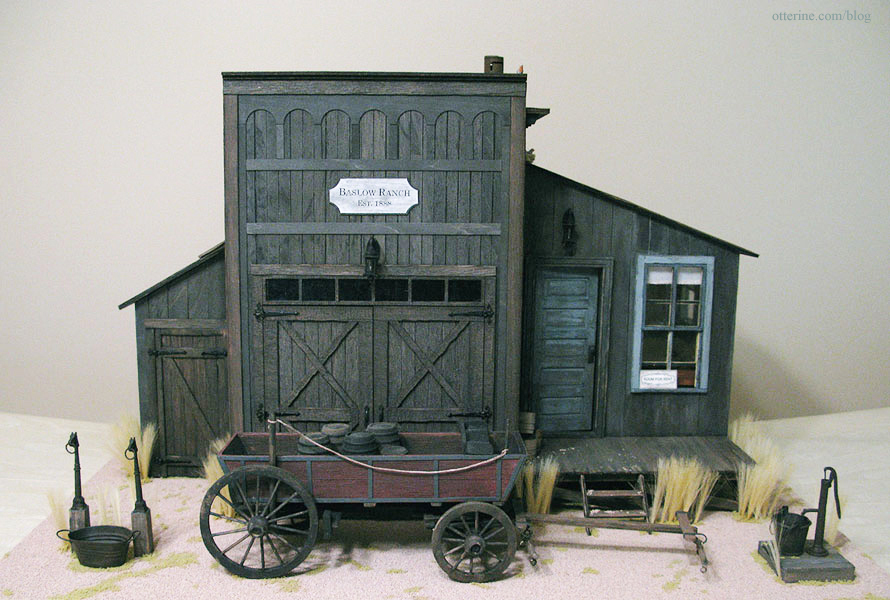
March 28, 2011 | 0 commentsBaslow Ranch – Farm wagon
This was one of the initial things I built for Baslow Ranch. As an integral part of my idea, I had to figure out from the start if it would even work the way I wanted.
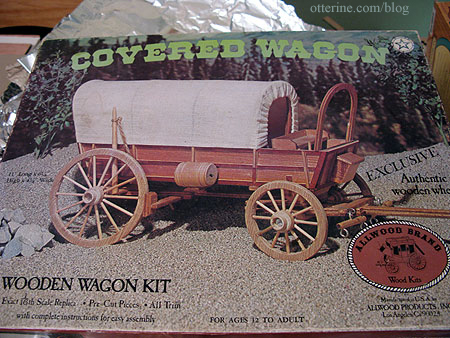
My wagon was adapted from a covered wagon kit by Allwood (made in the 70s, I think). I changed it from a covered wagon to a farm wagon since the kit was 1:16 scale and, as a covered wagon, it would have been a bit small in relation to the barn. Here’s the box image.
The kit was partially assembled when I bought it. Three of the four wheels were already done as well as the main body. The faux wood trim didn’t look right (think wood paneling on an old station wagon), so I ended up taking the body apart altogether and cut new pieces from a scrap of plywood I already had. This allowed me to score the inner and outer surfaces of the pieces to mimic wood planks.
I painted the outer body Black Cherry by Folk Art. I painted the rest of the pieces with a wash of black and brown paint and used some of this wash to age the Black Cherry paint.
The trim is made from 1/8″ wide Instant Lead Lines by Plaid. This is a self-adhesive material used for faux stained glass. Once in place, I pressed a nail set into the lines to create rivets. A little rust paint added here and there aged the look a bit.

I added some ballast by Woodland Scenics to dirty up the inside.
It’s a good thing this was meant to be a rickety ol’ wagon, because the wheels are nowhere near straight. Three of the four wheels were assembled by the previous owner, but I my fourth wheel wasn’t much better. The chassis and basic structure are solid, though.
It ended up fitting perfectly in the barn space.
I applied multiple paint washes to some unfinished wood barrels I purchased and put them in the back of the wagon.
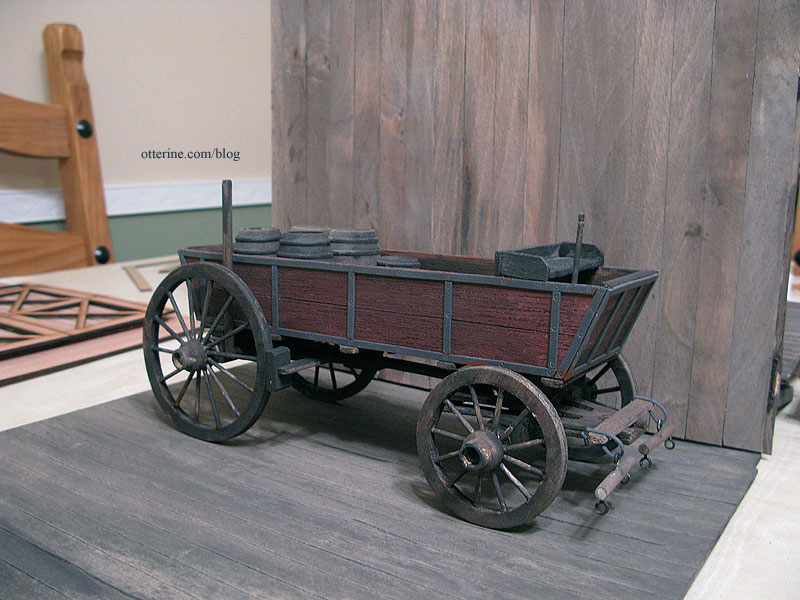
I made the stool using a pattern in the book Finishing Touches by Jane Harrop. It, too, was aged with a black and brown paint wash.
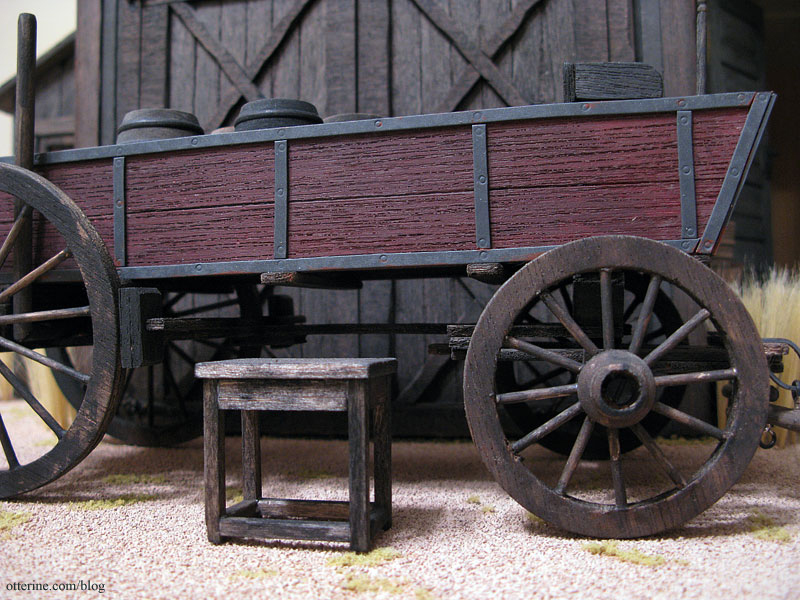
The wagon has a removable tongue, too, though it makes the wagon too long to park inside the barn with the doors closed.
Categories: Baslow Ranch, Model Cars, Vehicles
May 30, 2010 | 0 commentsThe wayback machine
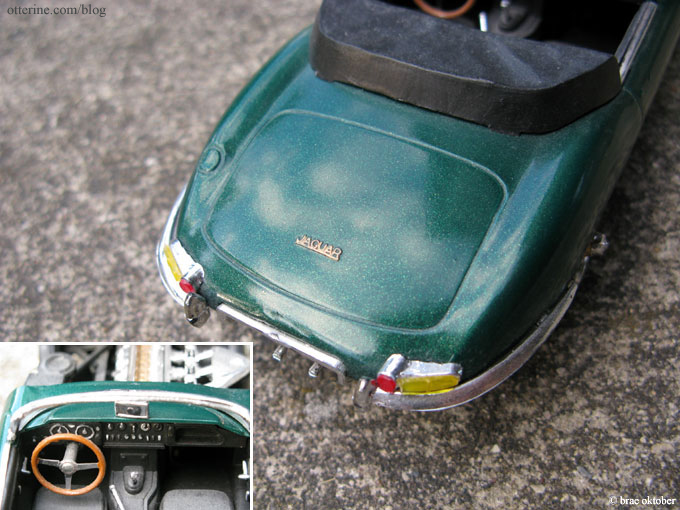
Though I had a dollhouse in childhood, my main interest for as long as I can remember has been cars. I wanted an all-terrain vehicle for my second birthday, and grandpa bought it for me. I am not sure exactly when I got into building model cars, but I still have three completed 1:25 scale models – one showroom quality and the other two junkers. These were made sometime in the late 80’s – early 90’s.
The first is a Jaguar XKE. It’s the most polished of the three. It has a gold metallic undercoat covered by sheer deep green. I used an airbrush on all the models. Other than on the wheels where I was able to use a small brush, the chrome details were painted gold using the tip of a sewing pin. That same method was used to paint the dashboard details.

The second is a Volkswagen Beetle in a lovely shade of oxidized army green. Of course, the kit body was originally pink. Ech!
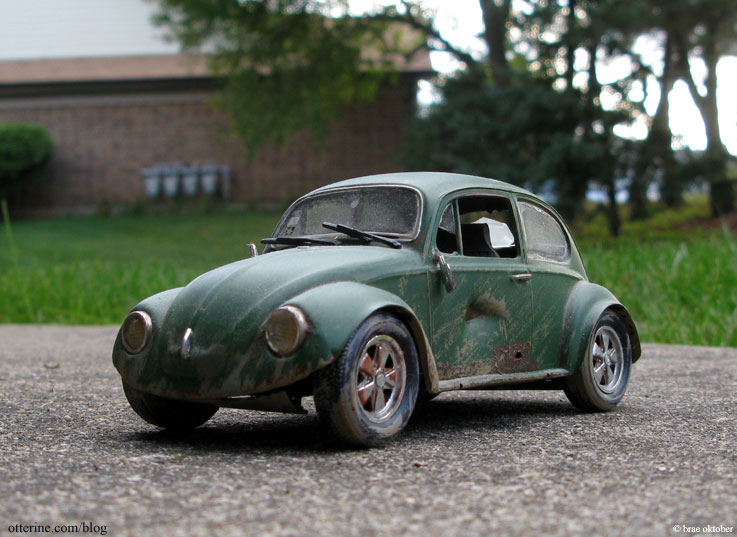
I cut mini vinyl floor mats to cover the holes in the floorboards. It has broken windows, dents, rust, a missing rear view mirror, multiple city stickers and a now-missing CB antenna mounted on the back. That’s railroad paint called dirt as accent.

The third, and my personal favorite, is the Datsun 240Z. It has a cockeyed suspension, which – if you have ever seen one of these on the road – should seem familiar to you.
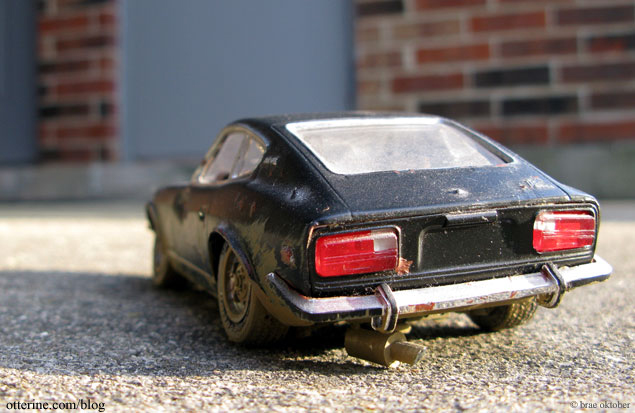
Occasionally, I will see one that is showroom new and I just have to smile. This model has the same issues as the Beetle – the dents, rust etc., but I did a few extra things here.

The spider web crack in the front windshield is done by poking a heated straight pin through the plastic then using a hobby knife to etch the pattern.

I upholstered the hatchback just to put a greasy tire mark there.

There are cigarette burns in the seats, a missing headlight and only part of the nameplate remains on the back. I painted most of the car in a mix of gloss and flat black, but the hood and rear piece have a bit more gloss to represent replacement parts. It, too, got a splash of dirt to finish it off. Interestingly enough, the dustier these models get over time the more realistic they look.

Categories: Model Cars, Vehicles
September 16, 2009 | 0 comments


NOTE: All content on otterine.com is copyrighted and may not be reproduced in part or in whole. It takes a lot of time and effort to write and photograph for my blog. Please ask permission before reproducing any of my content. (More on copyright)

Categories:
RX-7 in half scale – body work
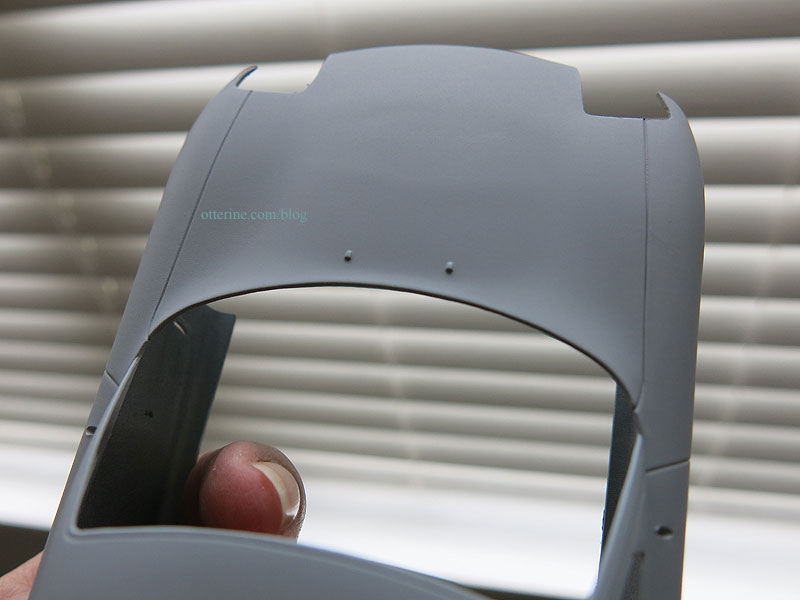
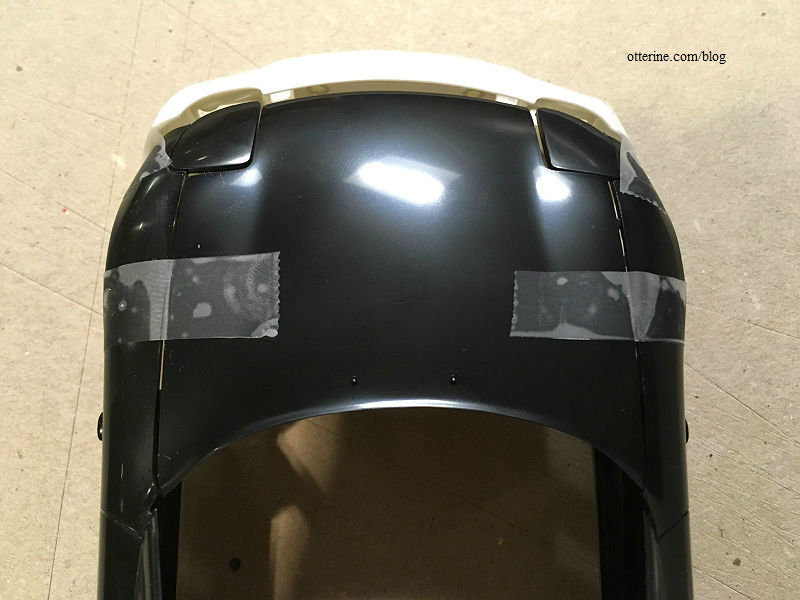
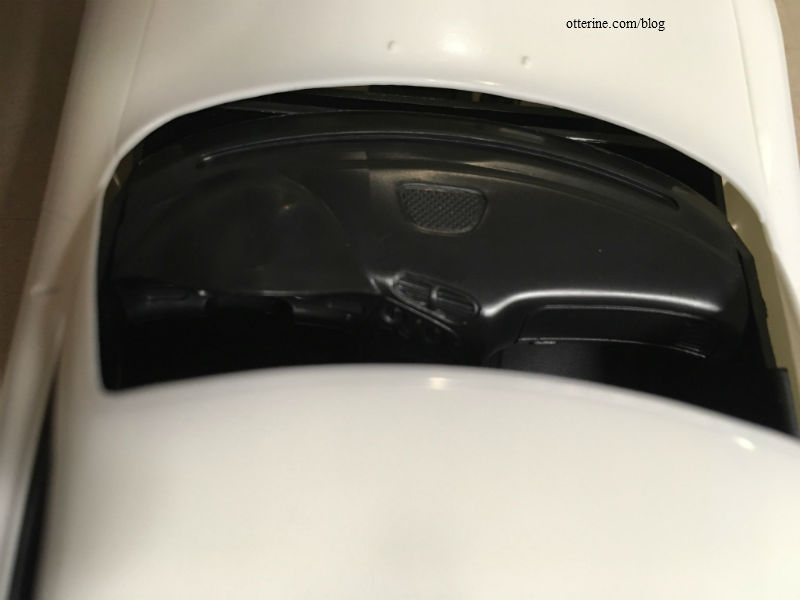
Continuing work on the RX-7 in half scale. One of the imperfections of the C-West kit is the mold line on the hood. It’s not meant to be decorative from what I can tell from the kit box photo, and no part is meant to sit in the depression inside the mold line.
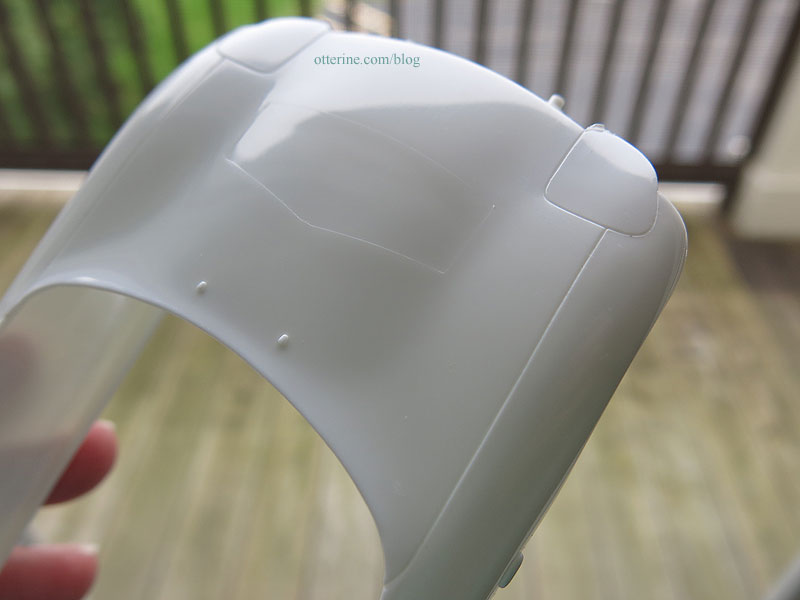
Here is the underside of the hood.

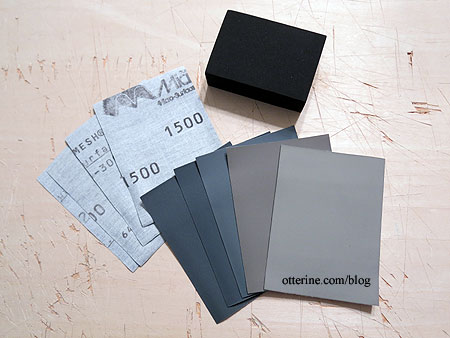
I used Micro-Mesh Sanding Sheets, starting with 2400 grit to remove the mold line and then 4000 grit to prepare the finish for priming.
The mold lines are now gone, but the halo might end up showing in the end. I don’t want to risk filling in such a low depression with putty and making a bigger mess, so I will forge ahead to see if paint layers will soften the look. Also, the kit comes molded with light covers, but it has the clear covers for situated headlights as well. You have to cut away the light covers from the body if you want to use the clear covers. Yeah…. Holding my breath the whole time and using a very sharp X-Acto, it worked. Oy!
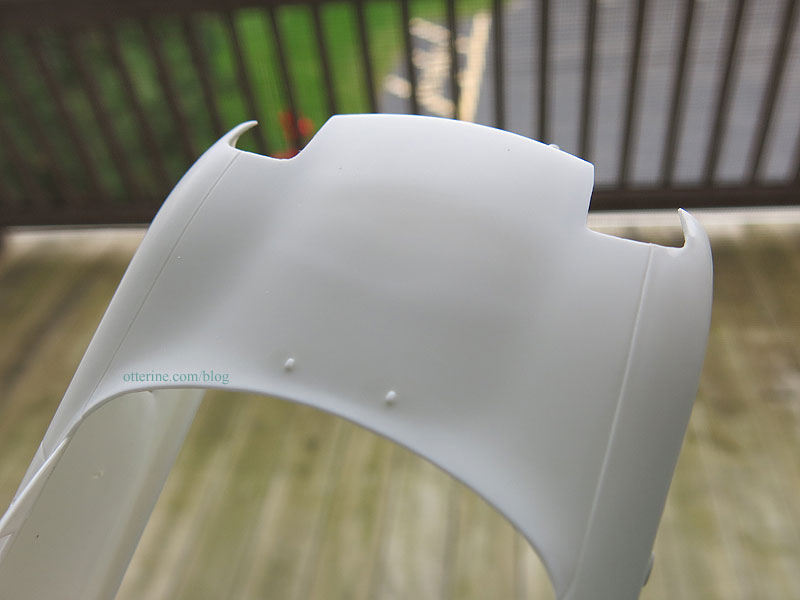
Here it is after the first primer coat. I think the halo of the mold lines will still show in the end, but it should be minimal.
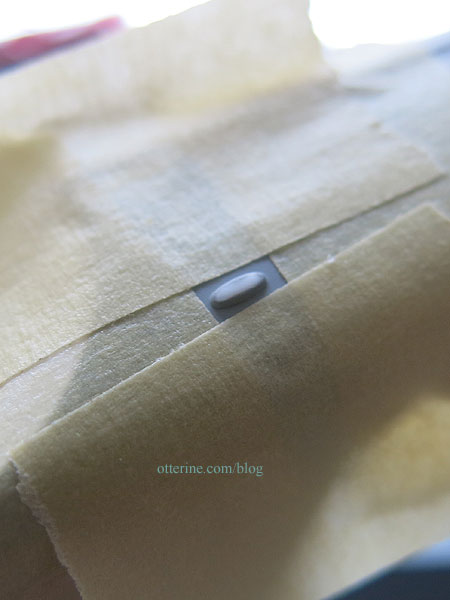
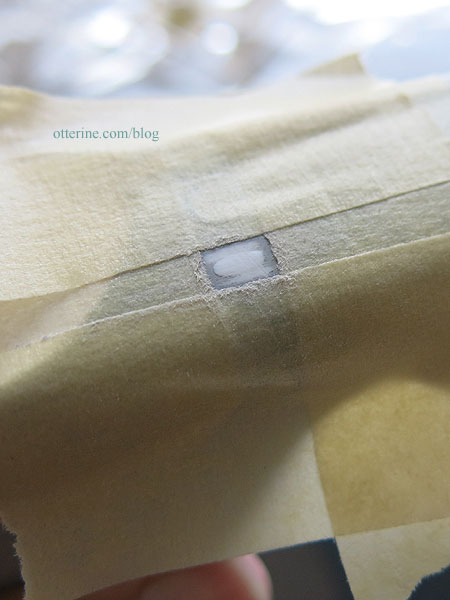
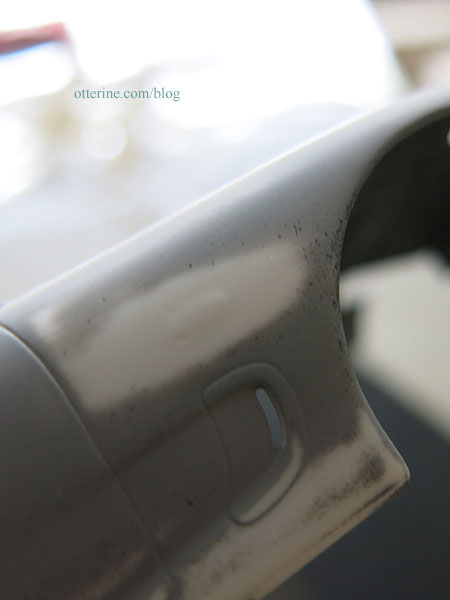
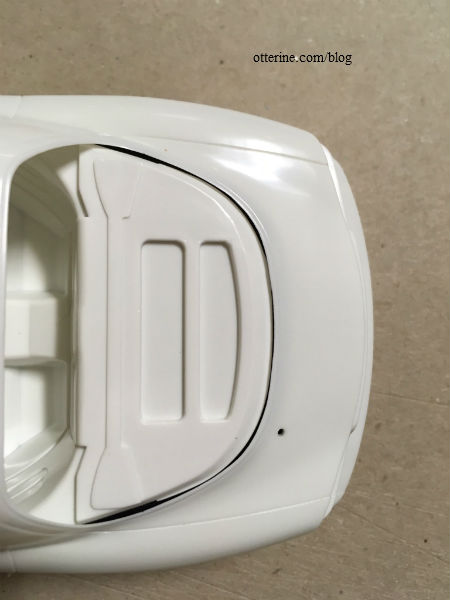
I removed the molded side lights. There are extra clear parts between the three kits, so I will add these more like the real deal. Besides, these are always so hard to paint when they are molded in place. I used masking tape to protect the area around the parts I planned to remove.
I then scraped away the lights with an X-Acto blade and then sanded.
I did a final wet sanding with a high grit to smooth it out. Any halo will just help with placement of the final parts later, but it is pretty smooth.
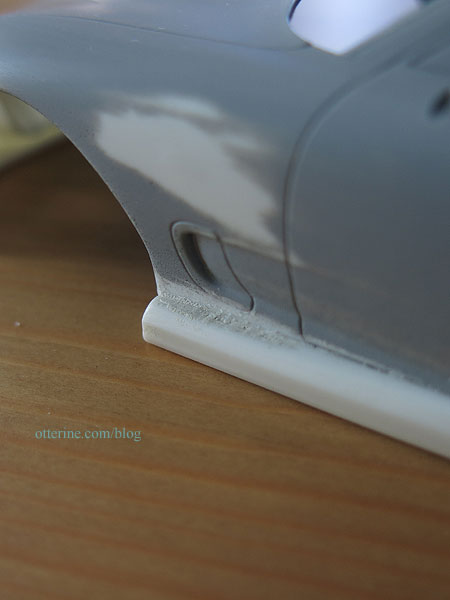
The side skirts were a bit taller than I wanted, so I cut them down. Here is the original skirt (shown on the other kit body) as a reminder.
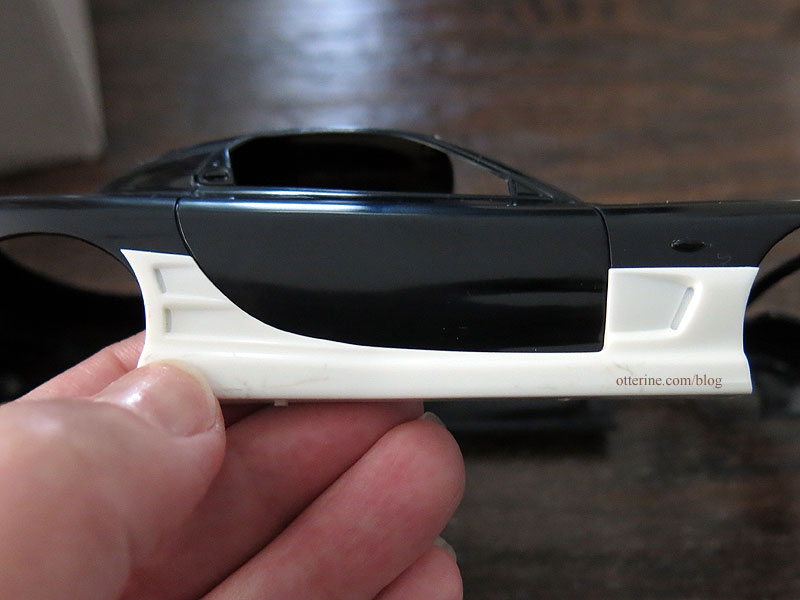
After cutting away the parts I didn’t need, I glued them to the body. There were gaps since they are not solid pieces, so I filled in with Squadron Products White Putty. It’s a good product that bonds well and sands smooth. Right now it’s rough since I’m letting it cure before final sanding and touch-ups.
The next thing was adding the rear wing from the Fujimi kit to the C-West body. There will be minimal gaps, and since I plan to paint the car black, it should look mostly seamless. There’s a top piece that goes to the wing, but you can’t spray inside of a tight space like that, so it will be finished separately and added at the end.
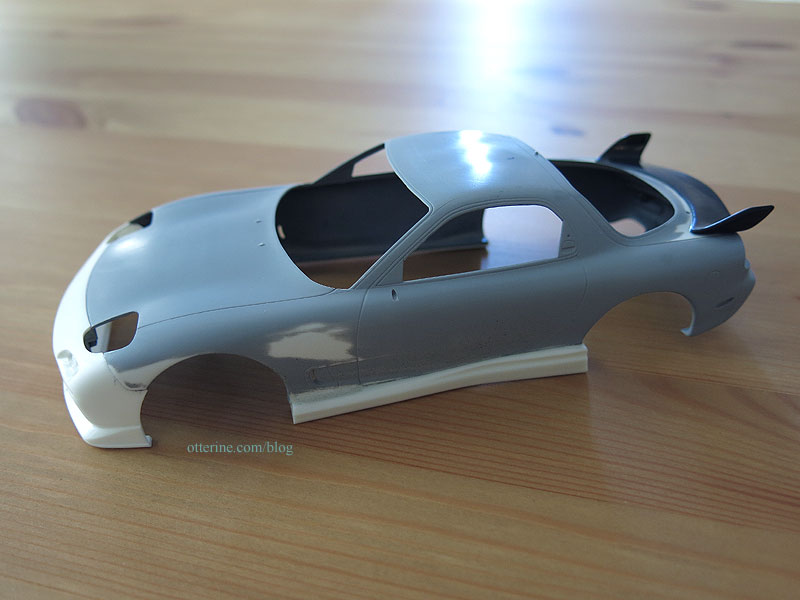
Once the putty has set and I’ve touched up where needed, it will be time to prime again. I have the undercarriage parts primed and ready for finishing and assembly.
Categories: Model Cars, Vehicles
September 9, 2018 | 0 commentsRX-7 in half scale
I know I have countless model cars started, but there’s another one in the body shop: the Mazda RX-7 in 1:24 scale. Half scale?!! Yes, you read that right. Don’t worry…it will all make sense later on.
I have three models hoping to morph into one exotic model.
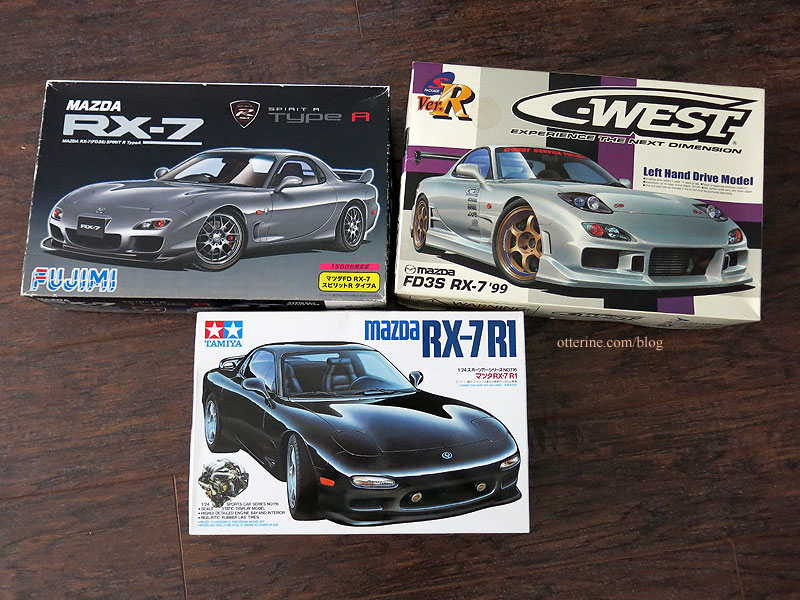
If I’m not able to make all the changes I want, then the white C-West kit will be the closest to the end result I need. Unfortunately, this one doesn’t have an engine for display, which is much of the fun in building car models.

I’ll start by trying to alter the body of the black Tamiya model to hold the skirts of the C-West model so there will be an engine. Plus the C-West model’s hood has mold lines that might be difficult to sand away. Fingers crossed.
Otherwise, the cross kit parts seem to fit well, so if I am successful in adding the front skirt to the black body, then I’ll be ready to dive in.
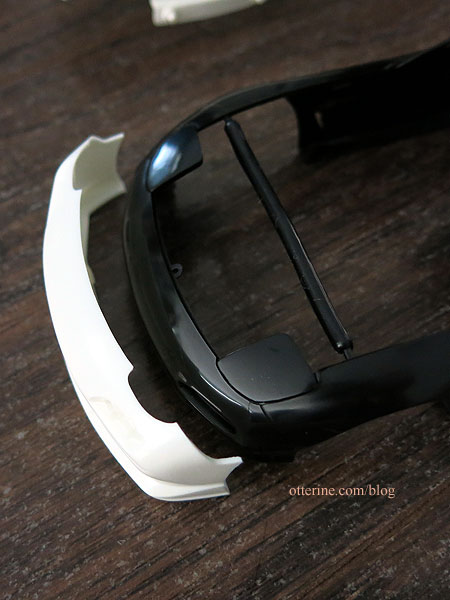
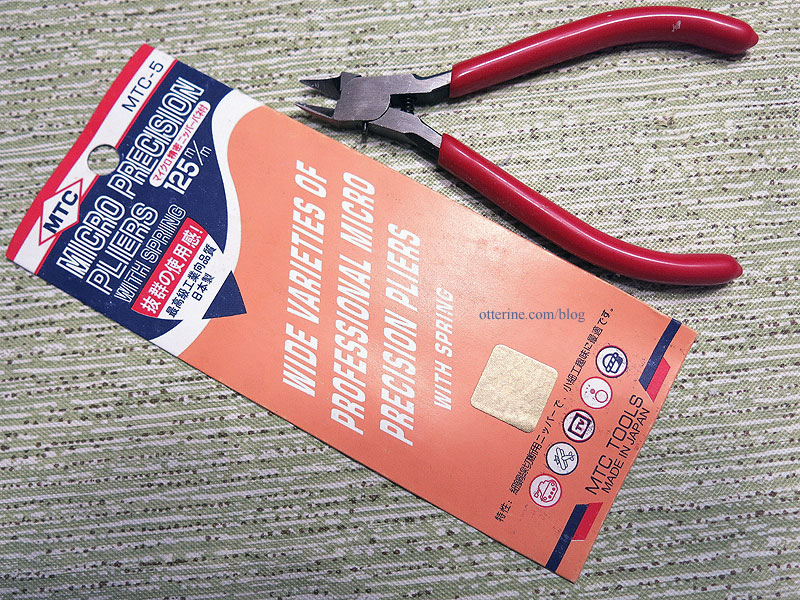
Before work could start in earnest, I wanted to try a few things. First, I attempted to alter the body of the black Tamiya model to hold the skirts of the C-West model so there would be an engine with the fancier sports car exterior. Cutting the front from the black body wasn’t so bad since I used the below pliers to clip away the excess.
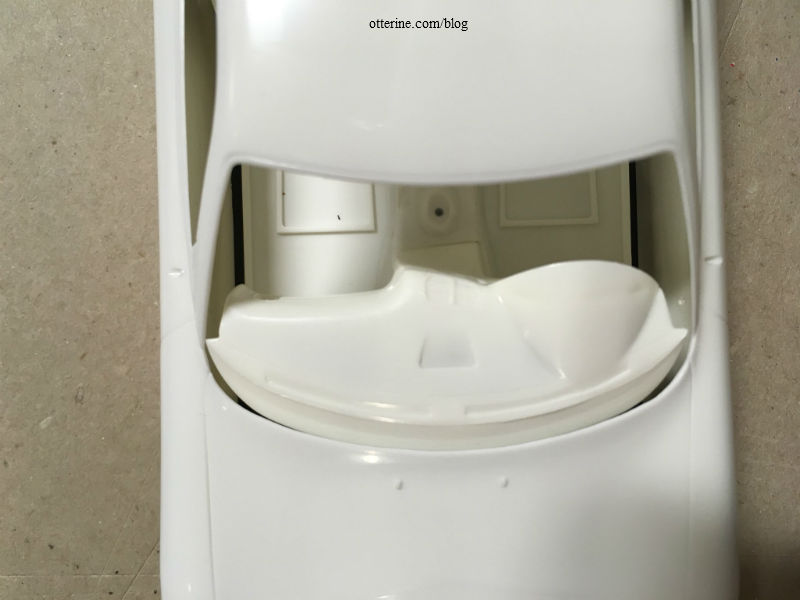
But, the white front skirt is significantly wider than the black body, more than can be filled or sanded. The headlight covers are also slightly different shapes. Unfortunately, there are too many gaps to make this feasible.
I then checked to see if the whole white body would fit over the chassis/interior/engine of the black kit. Then I could potentially cut the hood from the white body. That was even less likely because the white hood is thick and not properly detailed underneath. The black hood would likely not fit as a replacement since the black body is narrower than the white body, as noted above. It was worth a look before giving up on the engine, though. As expected, it didn’t pan out.
This is the white body on the Tamiya assembly in back…
and in front. The pieces are molded to slightly different shapes and there are a lot of gaps.
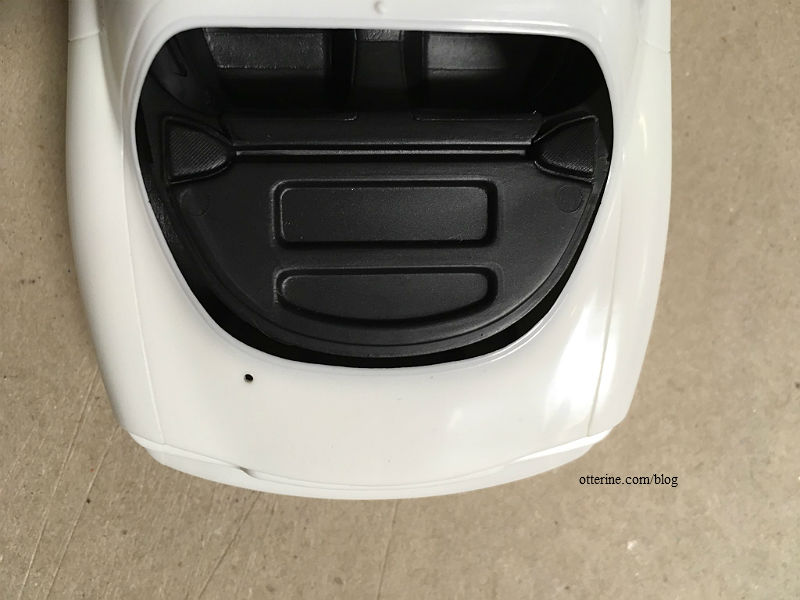
This is the fit of the white body on its own back…
and front (the dash piece is tipped toward the front seat since it’s not glued yet, but you can see the curve matches so it will fit without gaps)
I’m still planning a hella beautiful ride, though…so not to worry. :] I will forge ahead with the white C-West kit without an engine.
Categories: Model Cars, Vehicles
August 31, 2018 | 0 commentsRX-7 in half scale – chassis work
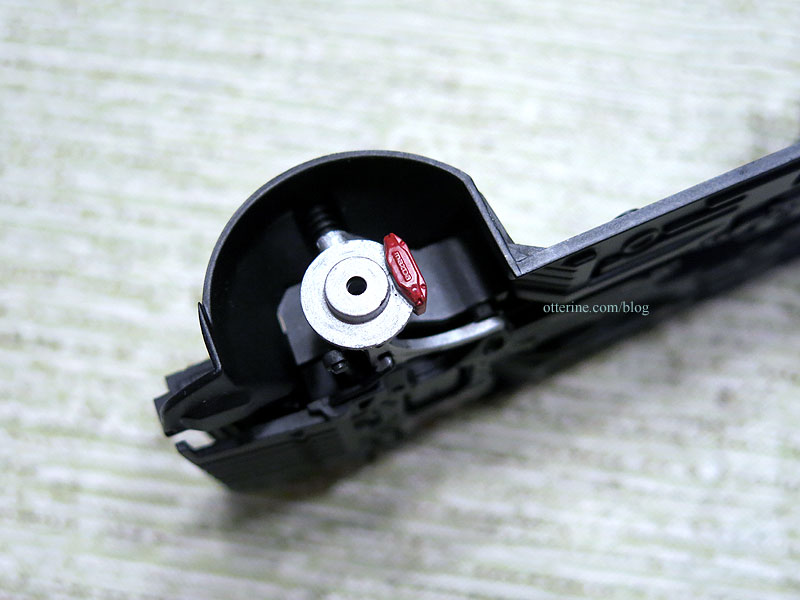
Continuing work on the RX-7 in half scale. A smaller scale model has less detailing and fewer individual parts, but they are often sturdier because so much is molded as one piece. Case in point, I could not get the delicate suspension of the 1:16 scale Model T to work and ended up gluing the whole thing as a solid assembly. The RX-7, though, has an articulated front that actually works. The wheels angle from side to side.
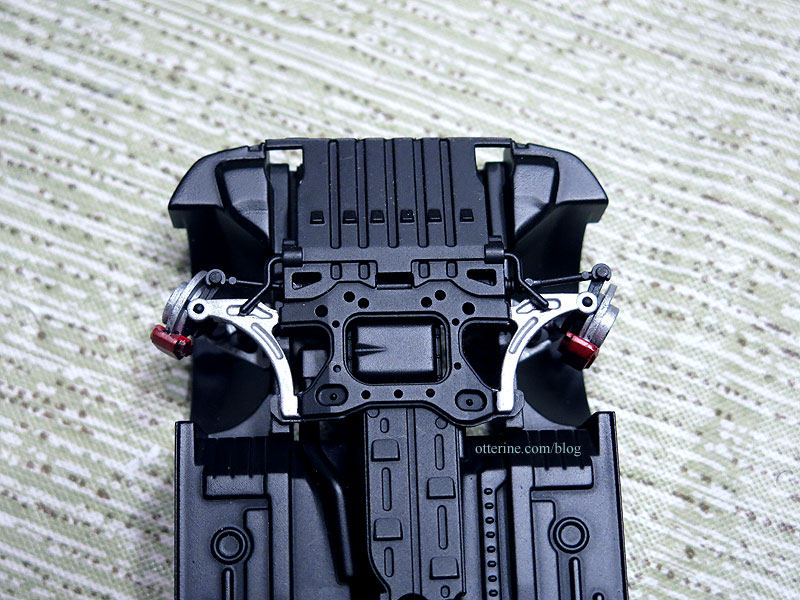

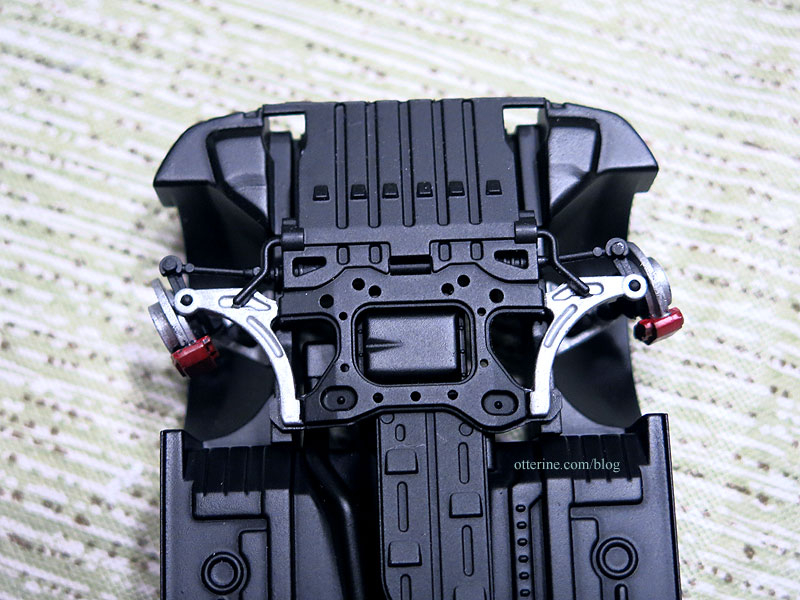
I’ve put on the fancy chrome muffler that is included with the kit.
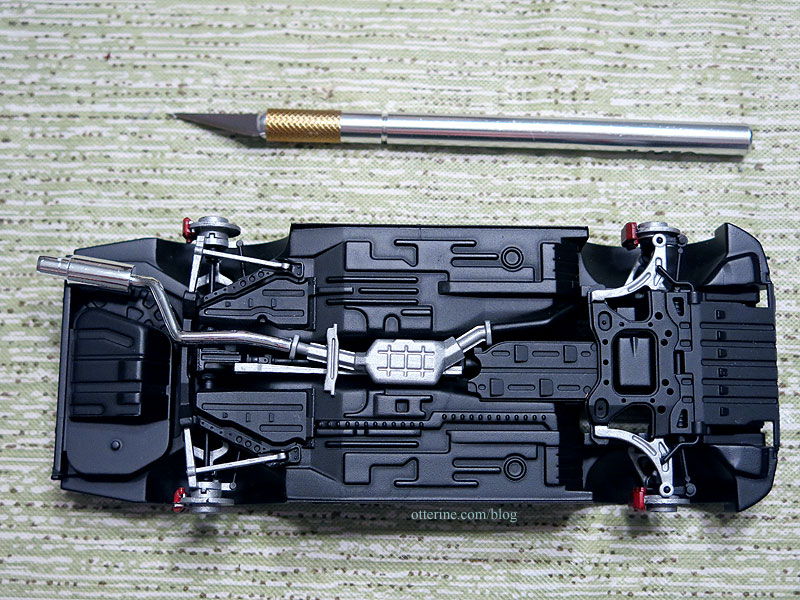
I also painted the brake calipers red. :]
Next up in assembly is the interior, and I need to get back to the body paint.
Categories: Model Cars, Vehicles
April 19, 2018 | 0 commentsCitroën DS19 1/16 – part 3
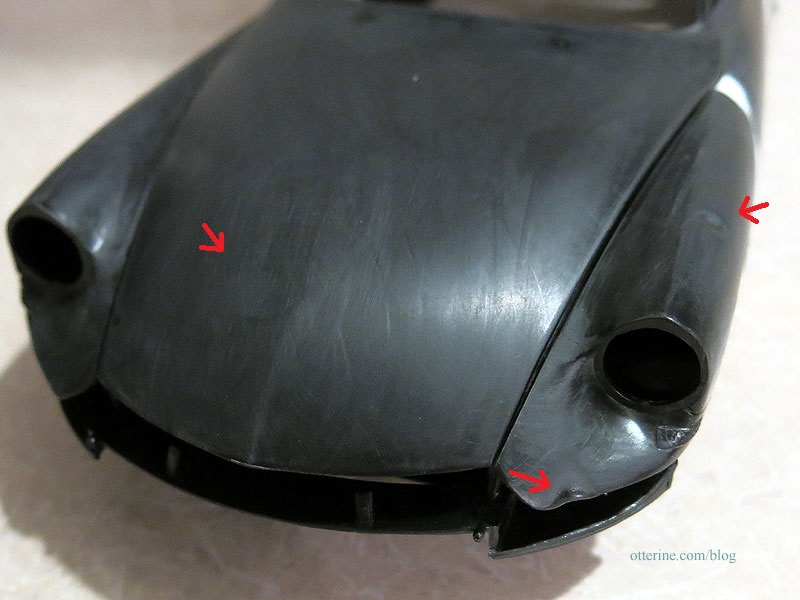
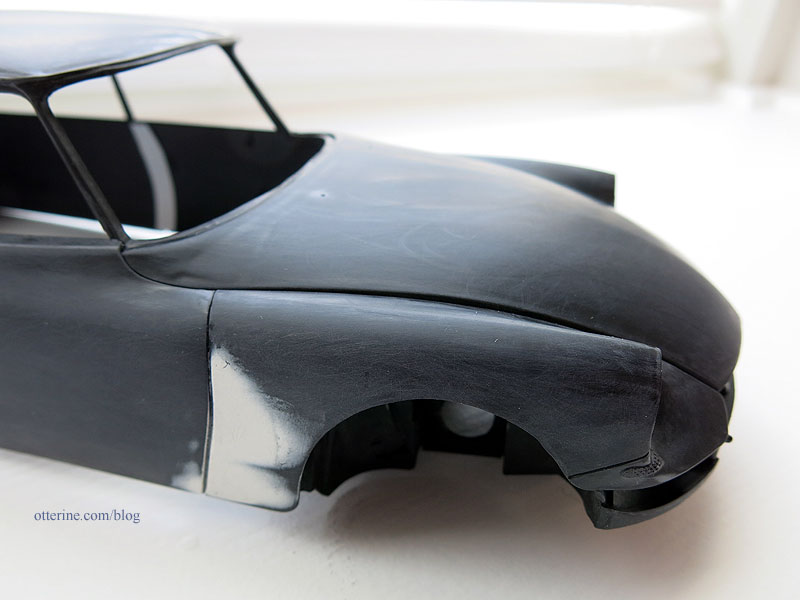
After applying putty to even out the body panels and letting the Citroën DS19 sit for a few days, I came to the realization that I don’t need this kind of stress. pffft. If there’s one thing I do well, it’s making junkers.
So, let’s have some fun and aim for making this a rally car. :D I sanded out the mini bondo, and I’m still glad I put in the effort. A better overall fit makes for better realism, but a rally car can get away with an ill-fitting hood. It’s likely a replacement anyway. Thus, I move on.
First order of business, perhaps a dent or two. This is done by heating the plastic with a candle and using the rounded end of a butter knife to push the plastic into shape. You do have to take care not to cause problems with the fit later. Only a tiny bit of heat and soft pressure with the knife are needed.
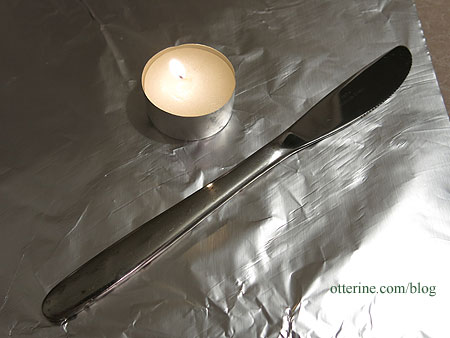
Fenders are a good place since there aren’t usually parts inside. I’m being modest with the damage, just a little road wear for our experienced trophy winner. I can’t recall what we hit that dented the hood.
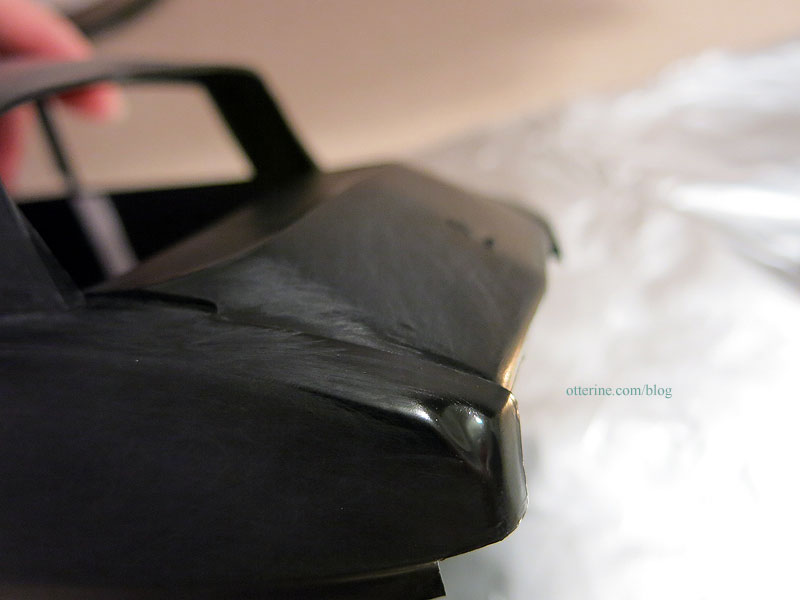
You can melt a corner and let it sink in for a realistic back up collision. Just wait for it to cool completely before touching or sanding since you can tear the plastic or leave your fingerprint in the finish.
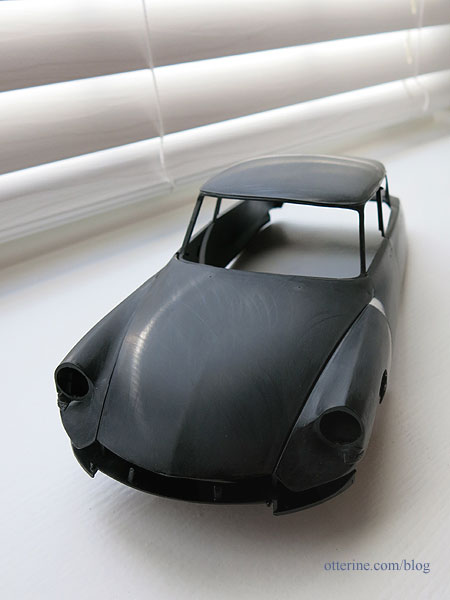
Sometimes branches fall on the roof.
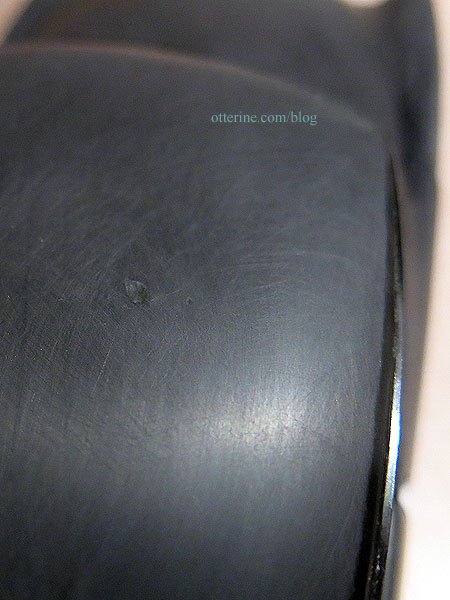
The candle heat can raise the plastic around the dent.
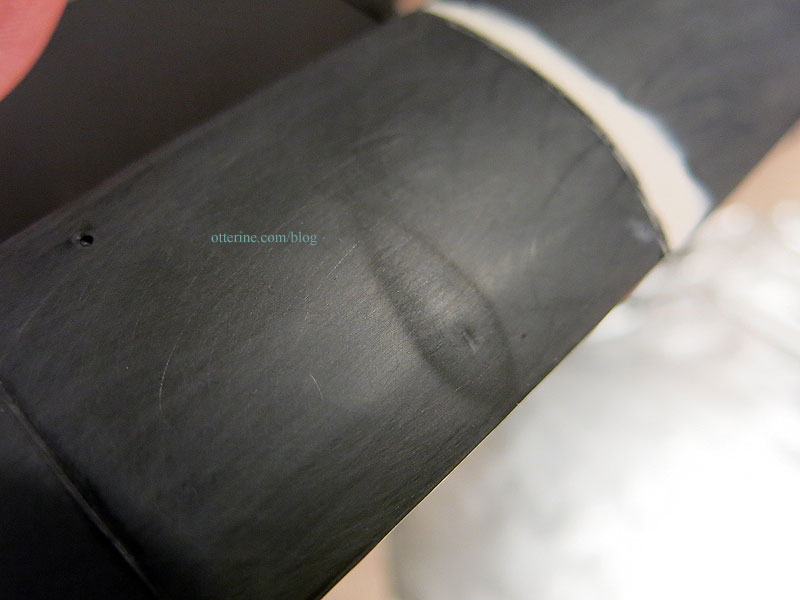
Just sand to get it smooth again so the dent takes center stage.
Next up, priming the various engine sprues for assembly, painting and aging. I’ll still follow the assembly instructions from the modeler who made the closed door new Citroën, but I will have different painting and aging techniques along the way. I already feel more relaxed and ready to enjoy the build.
Categories: Model Cars, Vehicles
May 4, 2017 | 0 commentsCitroën DS19 1/16 – part 2
Beginning work on the Citroën DS19 in 1/16 scale. As I mentioned previously, there’s a modeler who built one to completion with excellent results so I am following those instructions as well as those from the kit. The main change made is putting the doors on now and not bothering with function. These models can be so delicate and unless you are lucky, the doors never sit right. So, I will go with aesthetic over function.
I’ve decided to work on the body first, so if I throw my hands up with this model, I won’t have wasted time on the unseen details. I am not at all confident this model will work.
A huge thank you to Nancy Enge for recommending these pliers. Having the proper tool is key, and it works unbelievably well in removing parts from the sprue.
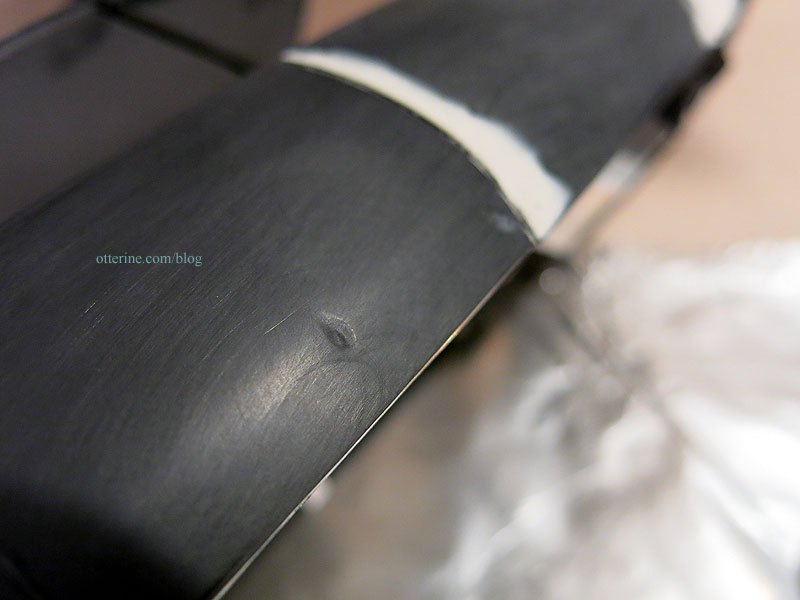
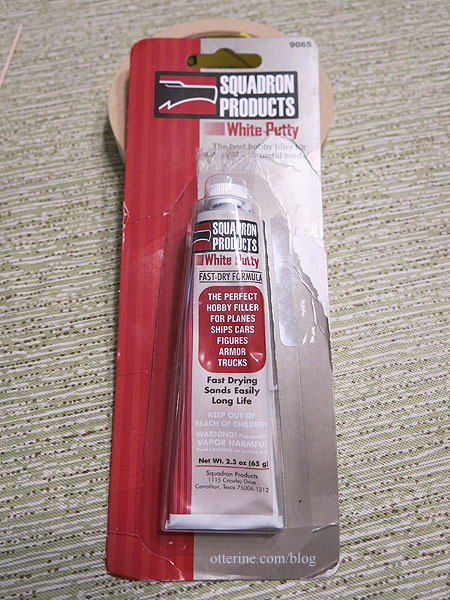
I had to repair two small areas where the main body mold had broken during shipment as well, but the breaks were in inconspicuous places. Unfortunately, these remain delicate joins and can cause issues later. Additionally, the body panels were not uniform in thickness, so gluing them end to end resulted in different depths. Real cars are streamlined, so that was something I needed to address. I used Squadron Products White Putty to build up and fill. Yes, it stinks to high heaven but it’s a great filler for plastic models.
This can take a few tries to get it to look right.
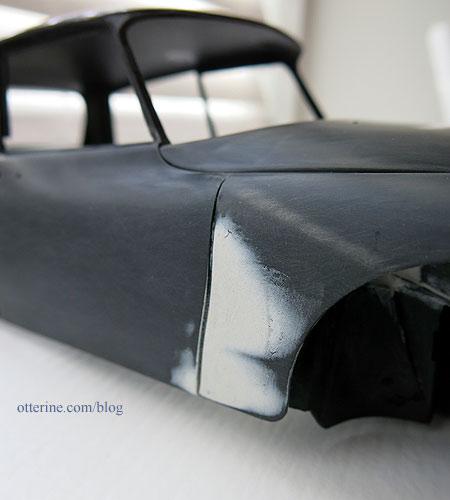
At this point, it’s hard to tell the depth with a light patch on a dark base, so I need to give it a uniform primer coat to see where further adjustments need to be made.
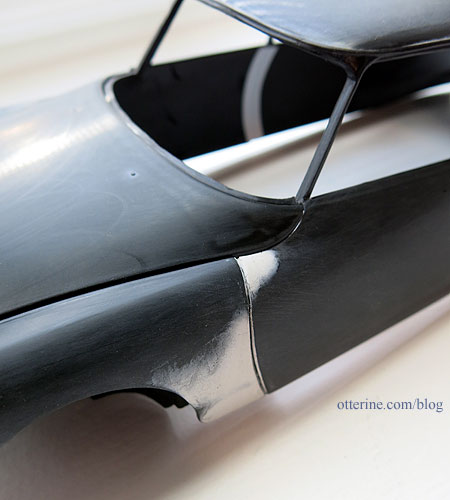
Even with careful planning, there’s still a rough fit to the hood when viewed from the side. I am considering gluing the hood in place, too, since I am going more for aesthetic and I could live without opening the hood…ever. Gluing it in place would save on fine engine detailing, though I would still add all weight to the engine bay for stability.
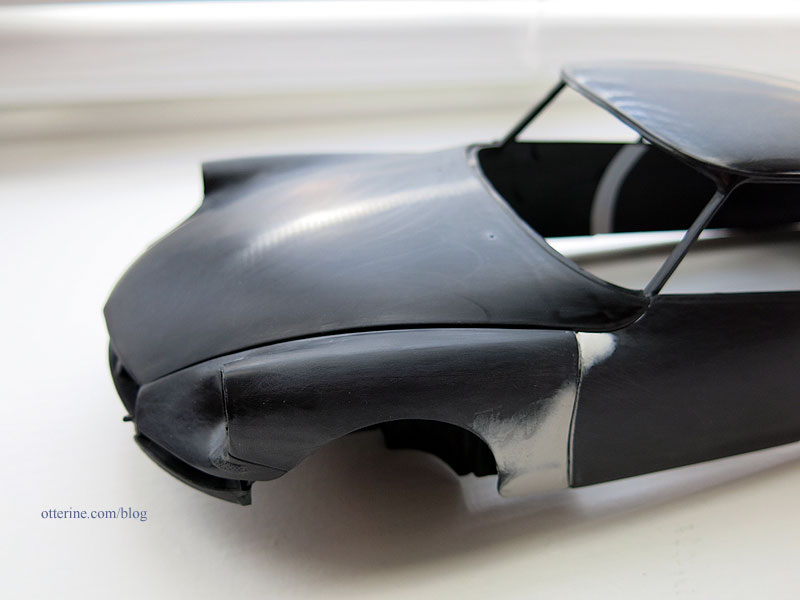
Here’s the other side.
I have the basic body assembled and prepped for the next good day of spray painting weather. Not throwing in the towel just yet, but I have already accepted that it’s a 50-50 chance this car will turn out looking newish.
Categories: Model Cars, Vehicles
April 24, 2017 | 0 comments
NOTE: All content on otterine.com is copyrighted and may not be reproduced in part or in whole. It takes a lot of time and effort to write and photograph for my blog. Please ask permission before reproducing any of my content. (More on copyright)