


NOTE: All content on otterine.com is copyrighted and may not be reproduced in part or in whole. It takes a lot of time and effort to write and photograph for my blog. Please ask permission before reproducing any of my content. (More on copyright)

Categories:
Mail call!
I ran across an old Rondel Wood Products Mail Wagon kit on eBay, and now it’s in my house. Why? Peer pressure, plain and simple. You all know who you are!
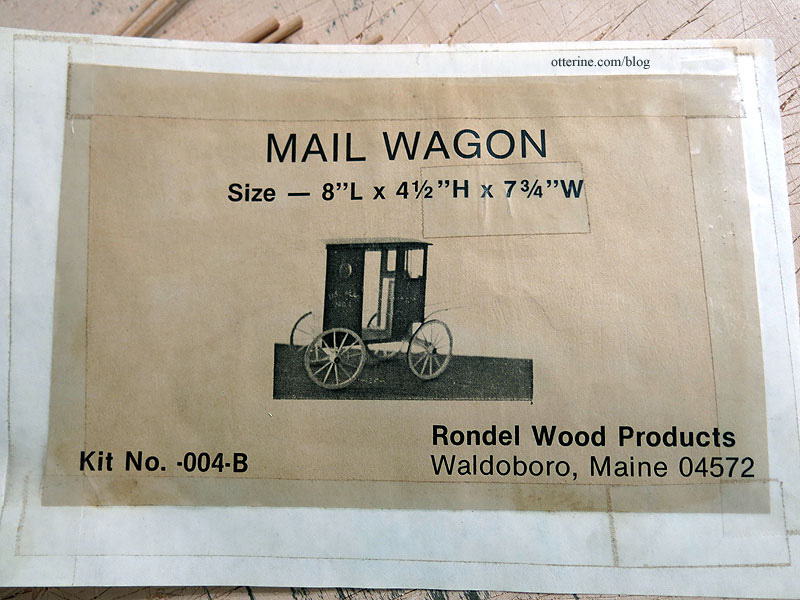
All kidding aside, it’s a simple little kit that makes one of these: a rural mail wagon.
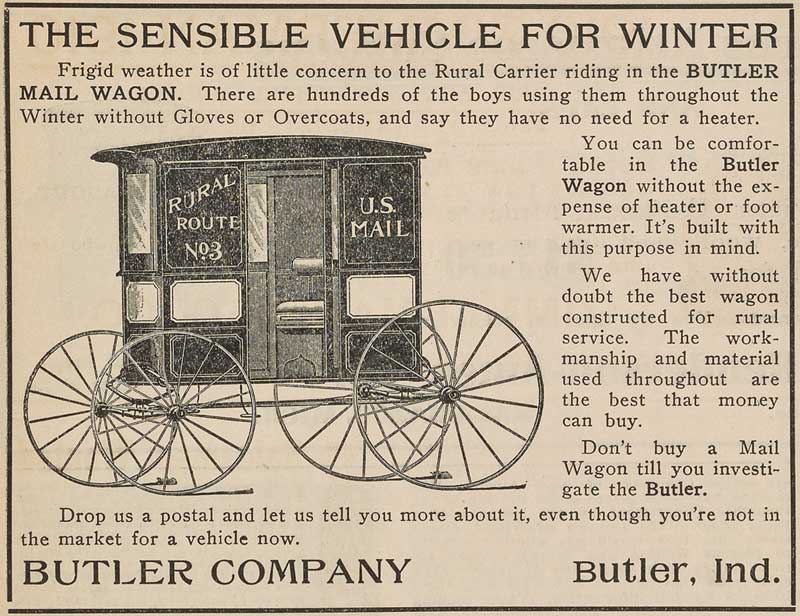
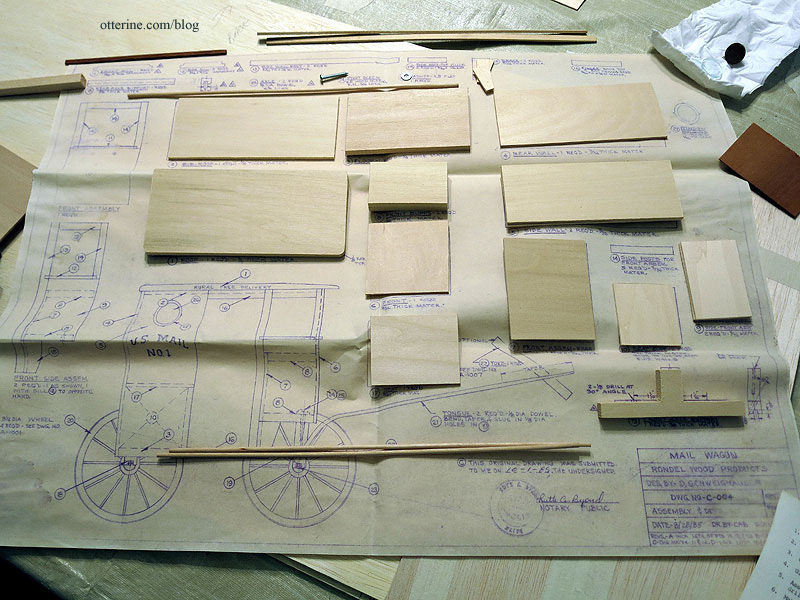
image from The Smithsonian Included in the kit is a large blueprint. Some pieces are pre-cut and some you do yourself. This kit was missing a piece, but that’s a relatively easy fix.
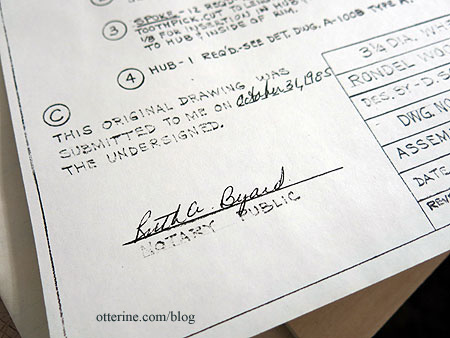
The plans and wheel drawing are even notarized. :D Not with original signatures, but still….
It comes with a jig for making the wagon wheels. Though these are made differently, I’ve made two wagons in the past and have some experience with the fiddly things.
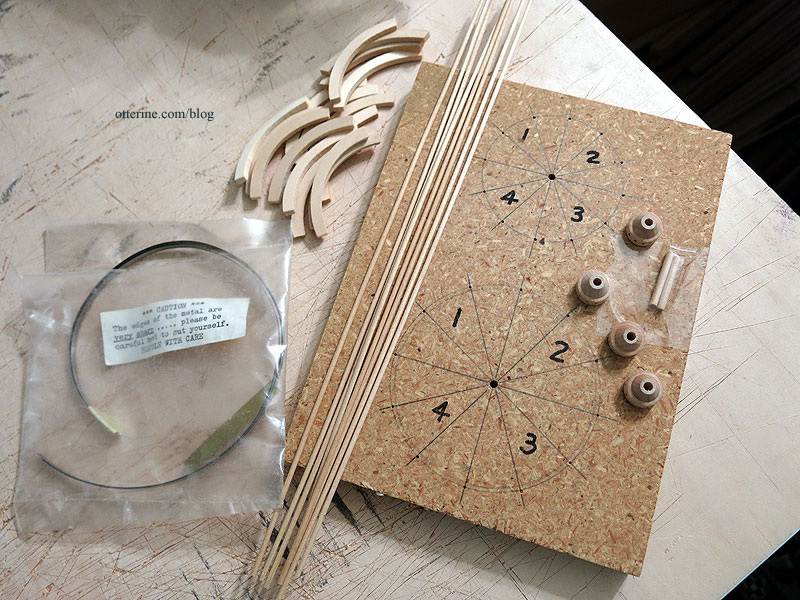
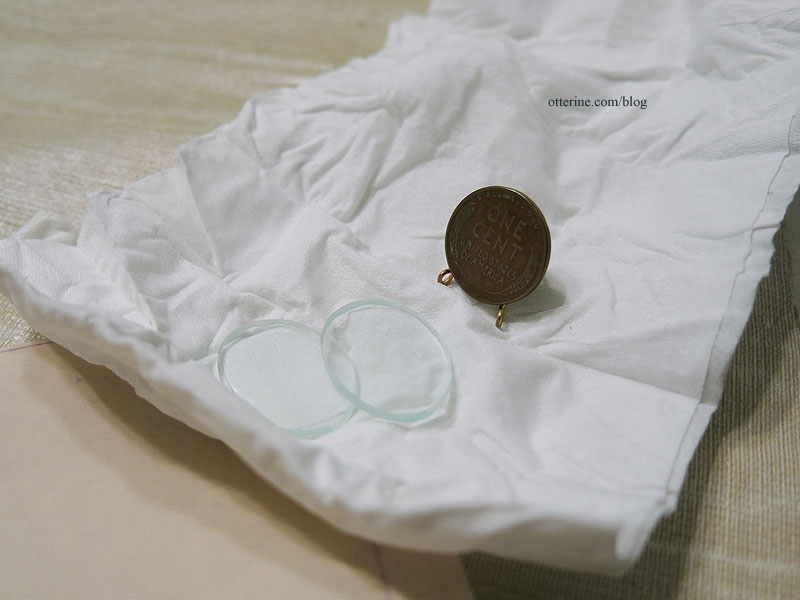
It also includes two tiny oval glass windows. :D
There are no materials for interior detailing included, but I will certainly add that.
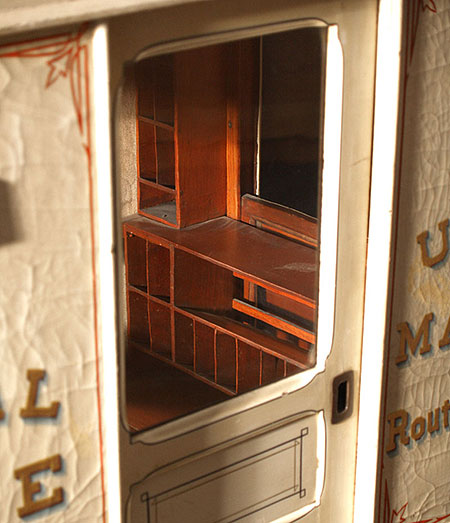
image from The Smithsonian These can be quite beautiful. :D In the kit, you’re to paint the lettering by hand. Riiiiiiiiight. I see Woodland Scenics rub-on letters in my future. :D
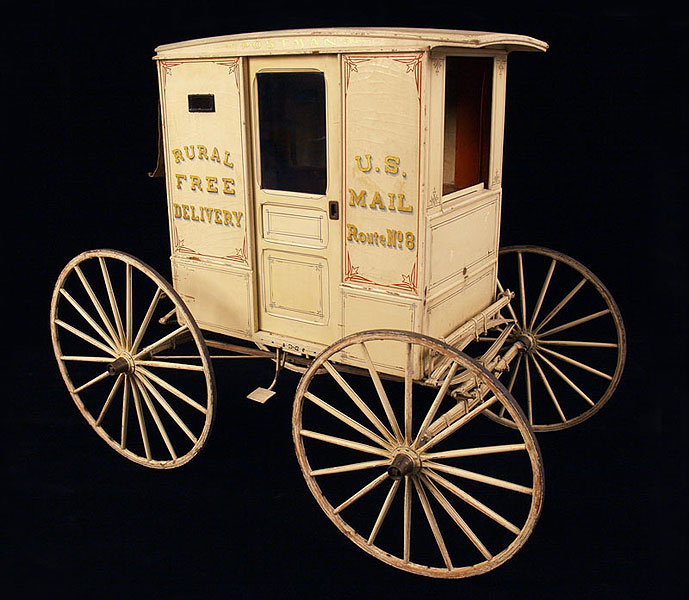
image from The Smithsonian Categories: Model Cars, Vehicles
April 21, 2014 | 0 commentsScirocco in mini
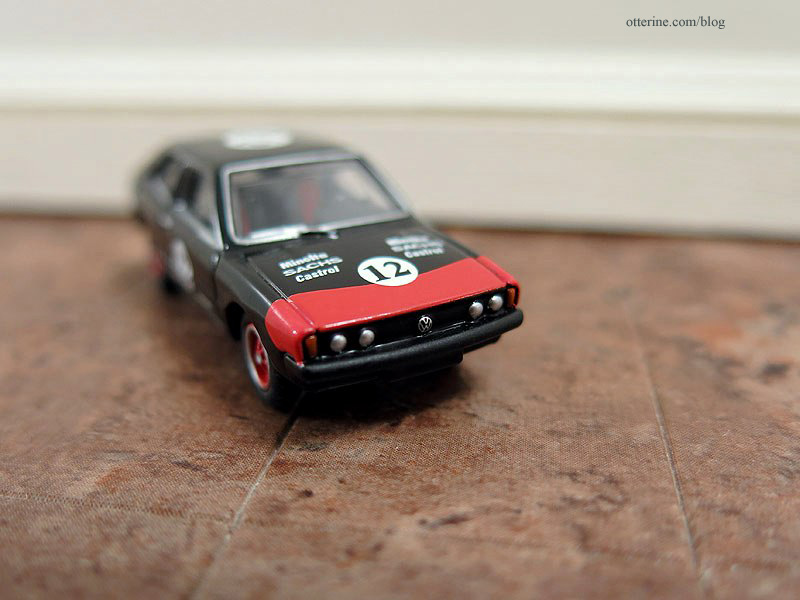
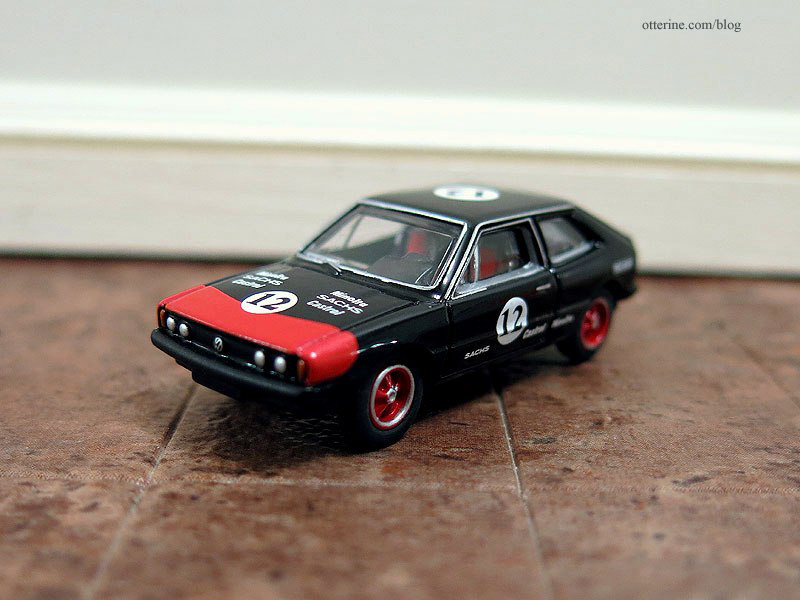
The most adorable tiny VW Bus was featured on Call of the Small a long time ago. I search eBay every once in awhile to see if I can find one for my own collection. Searching eBay is dangerous, because there are a lot of cute wee automobiles. This 1:87 scale Scirocco by BUB from nathan1002010 caught my eye.
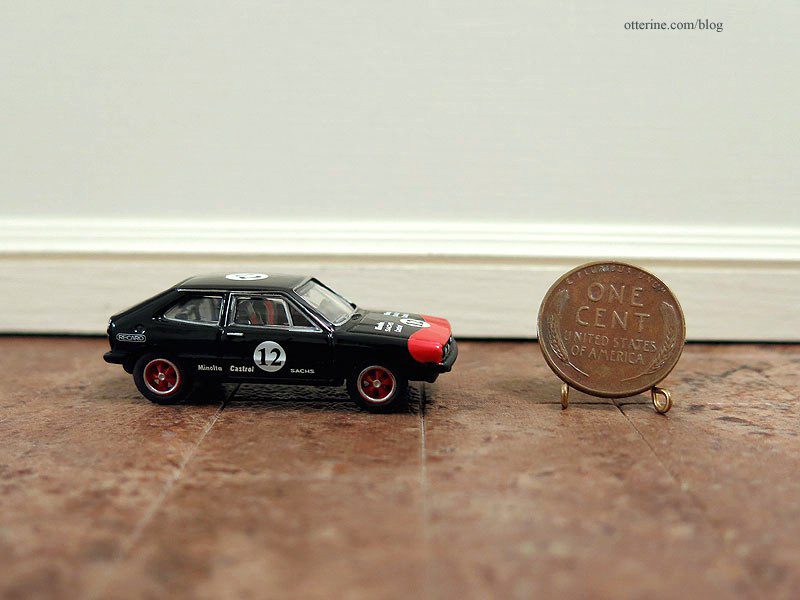
In a 1:12 scale dollhouse, this would be slightly smaller than 1:6 scale, so a playscale car for a dollhouse. Look at that tiny VW emblem. :O
Race ya! :D
Categories: Model Cars, Vehicles
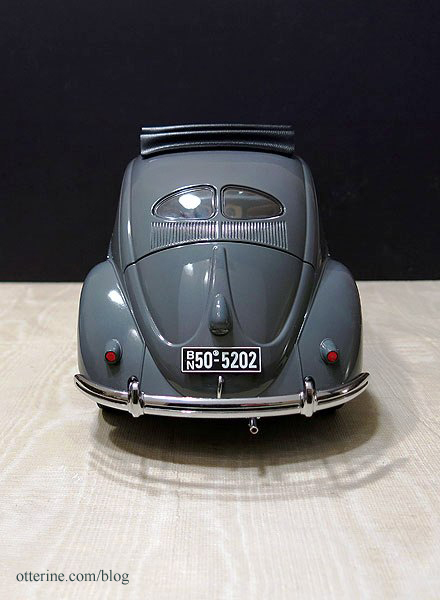
March 12, 2014 | 0 comments1950 Volkswagen Beetle
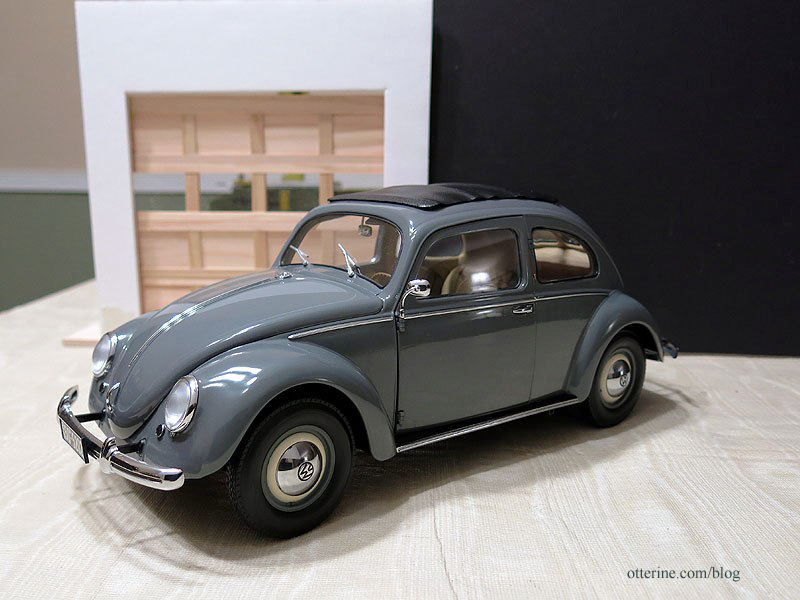
This beauty is a 1950 Volkswagen Beetle Saloon 1:12 scale model by Sun Star.

The 1:14 scale Audi TT remote control car I have is a nice reproduction, and I love that its headlights are functional as well. It photographs well, even though it doesn’t look as realistic in person.
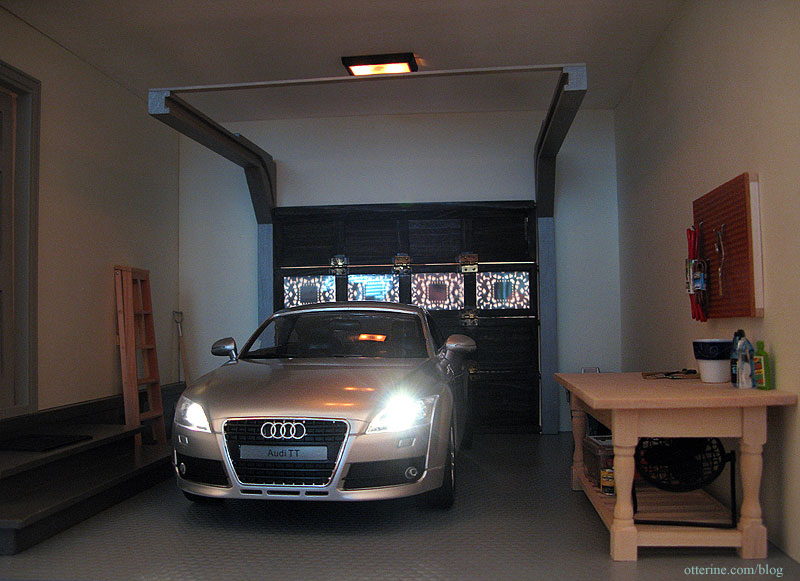
But, having a true 1:12 scale car for inside a 1:12 scale garage is the best for realism.
Look at the orange flag turn signal by the door. :D
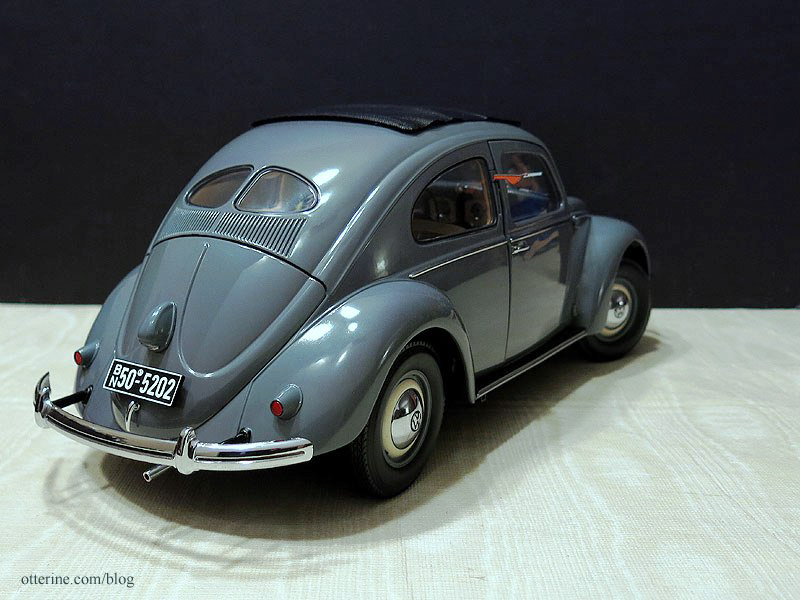
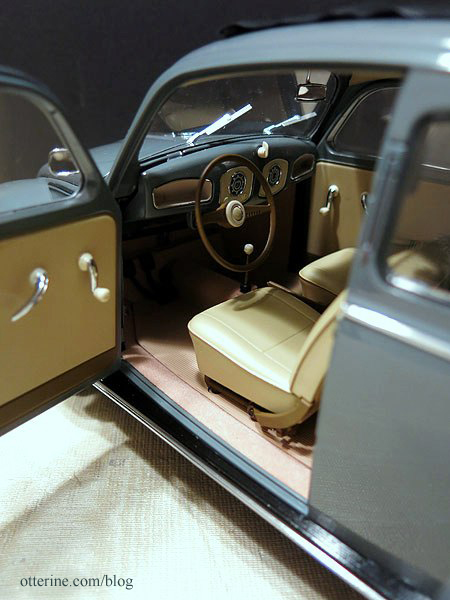
It has many moving parts and wonderful detail. There’s a tool with the model to help open the doors, hood and trunk. The front seats move forward, as does the back seat. The steering wheel controls the wheels. It is a bit rickety while rolling, but maybe that’s to scale, too! ;D I wasn’t too sure about the salmon pink carpet, but it’s growing on me.
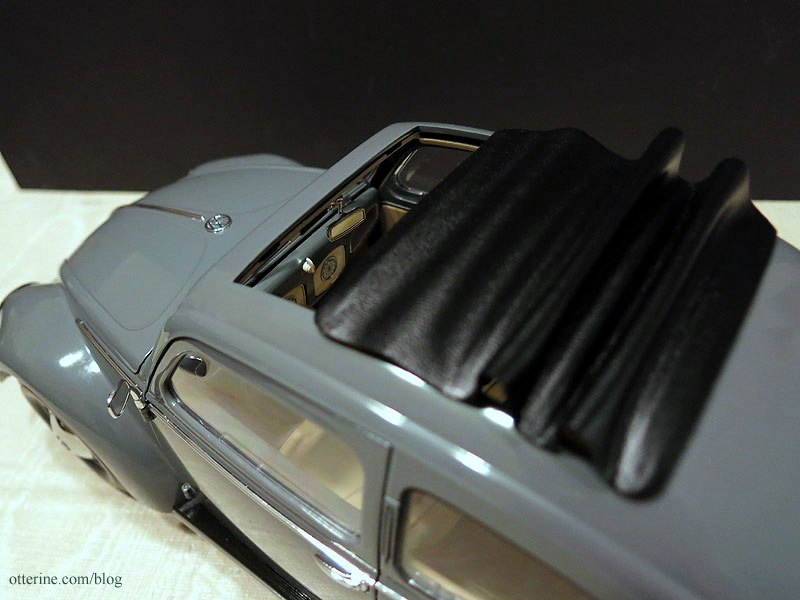
The cloth top retracts to show the interior.
Included with the model are a set of tools, a spare tire, a jack and lug wrench. Yes, the lug wrench works to remove the tires! :D I used a bit of mini hold wax on each of the tools because they were not fastened into the case and fell all over.
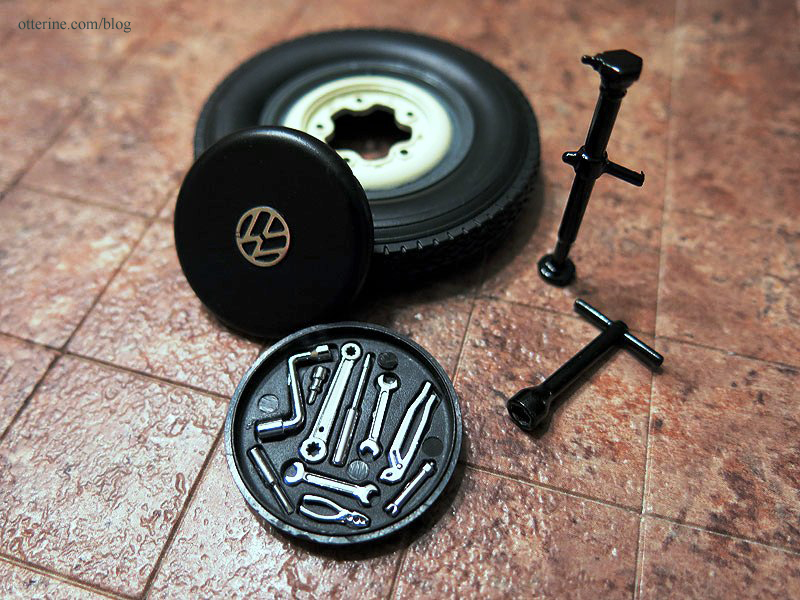
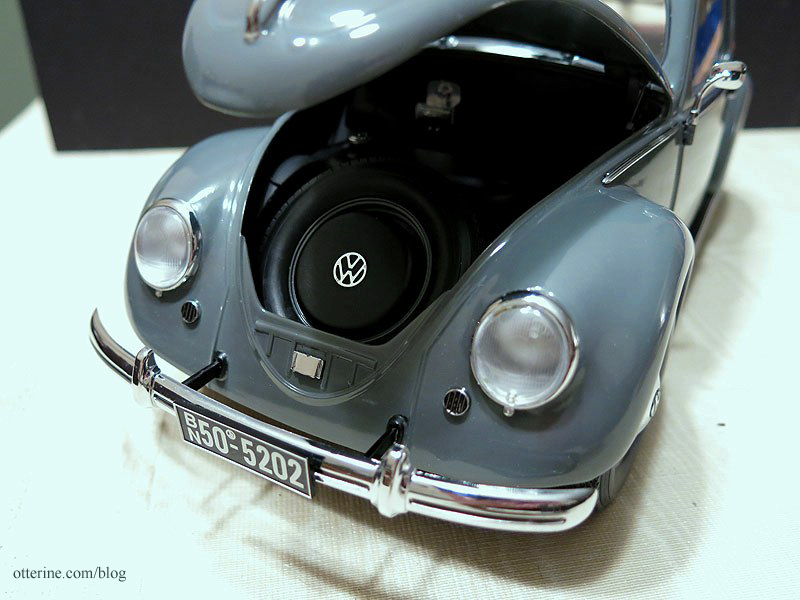
The case sits inside the spare tire and fits into a space under the hood. I placed the jack and lug wrench in there, too.
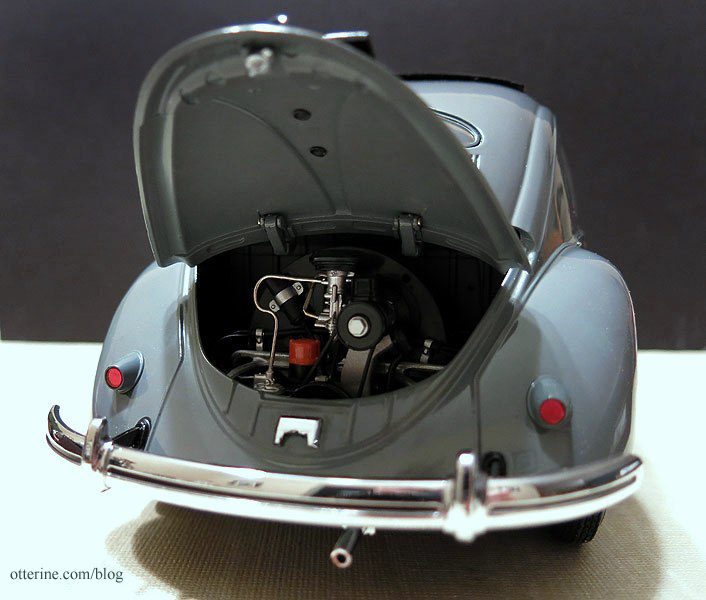
Engine in the back.
Some of the paint had a purple cast, and from what I’ve seen online, that seems to be a characteristic of this particular model. On mine, however, it was rather streaky.
I took some mild soap and water to it only to discover a weird pink residue on the tissue. It took some elbow grease to remove it all, but it’s now much better.
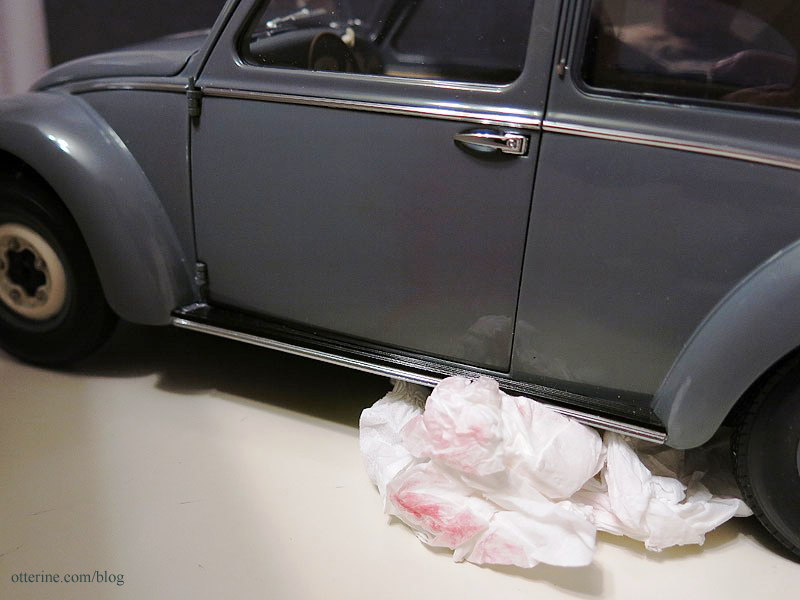
I mention this only in case someone buys one based on my blog post…so you aren’t surprised if this happens. The paint problem is in no way a bad reflection on the eBay seller, but more a problem from the manufacturer. The model I received was new in box. I’ve been very pleased with the seller’s communication. It turns out this is supposed to be a “pearl finish” for the car. That’s all and good, but it’s streaky and comes off. So, I’m glad I went ahead and scrubbed it off. I don’t plan to sell it, so I don’t care much about “resale value” without the pearl finish.
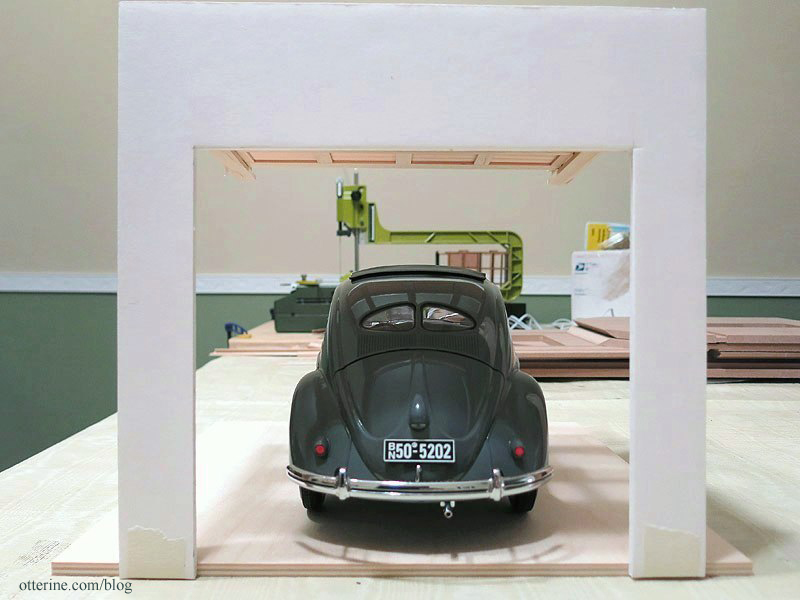
The Houseworks garage door kit is from miniatures.com. I’ve made a quick mockup to test the fit for the Beetle.
The fit is just right! :D
Categories: Model Cars, Vehicles
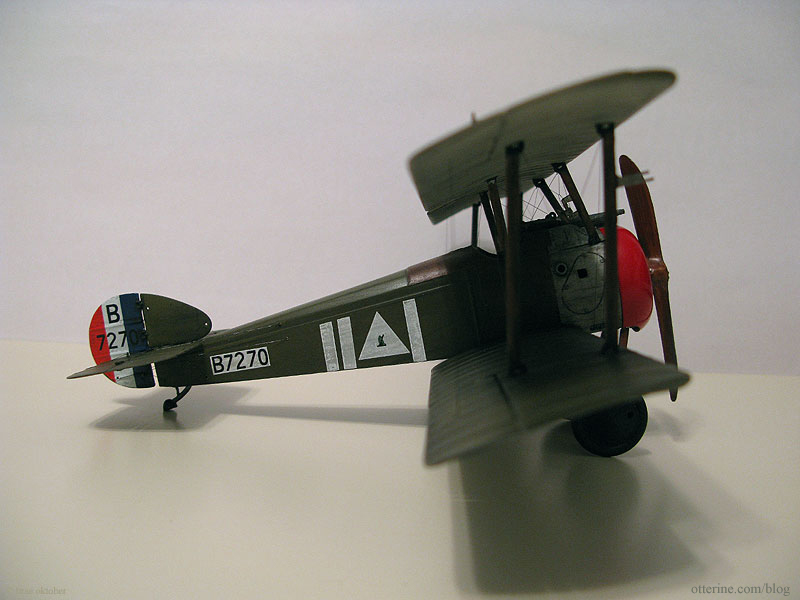
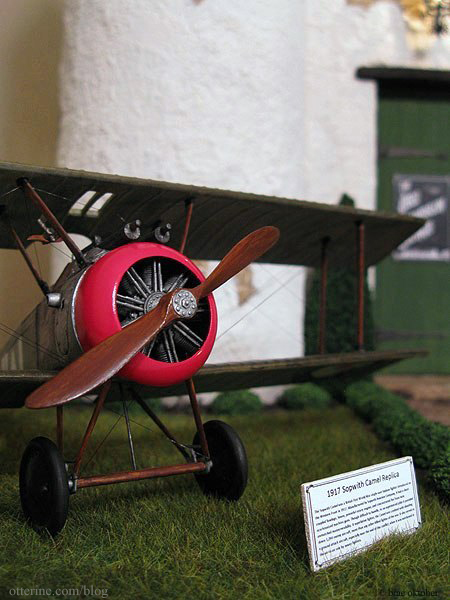
August 30, 2013 | 0 comments1:32 Scale Academy Sopwith Camel
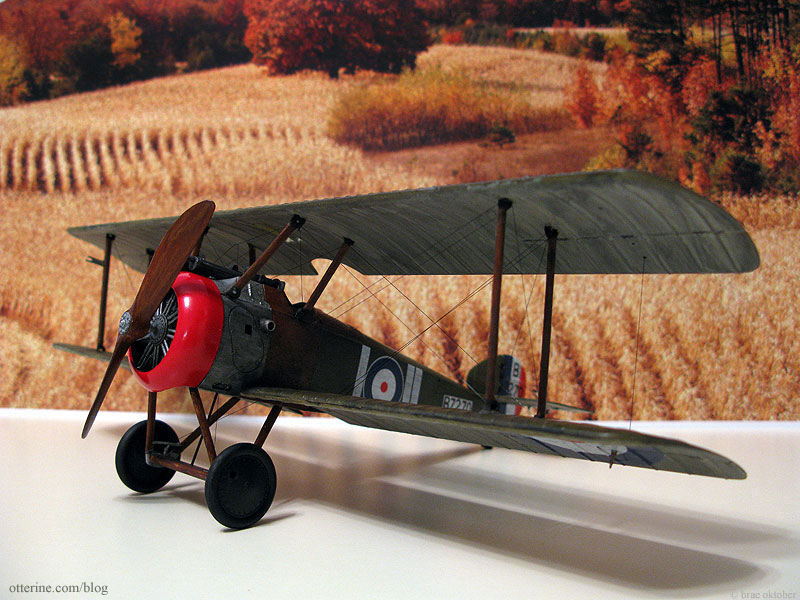
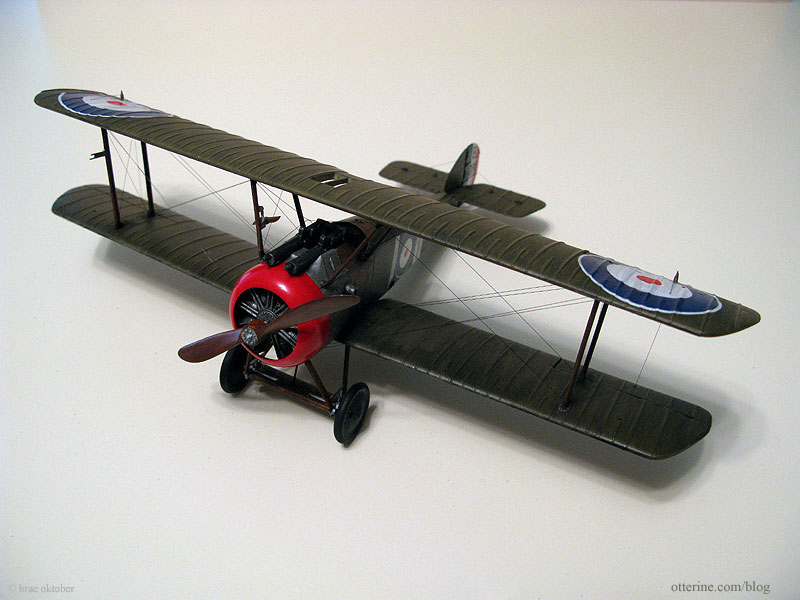
My finished 1917 Sopwith Camel Replica.
It has been a long time since I put together a plastic car model, and I have never done any sort of aircraft before let alone one with rigging. I learned a whole bunch of new vocabulary words during this part of the project, too! No, not new curse words…actual aeroplane terminology. :D
As with scale houses, there is a wealth of information out there on the internet. I found everything from novice builds to finely detailed expert builds. I opted for a 1:32 scale plane since a 1:12 scale replica would have overpowered the building itself as well as my condo. I think the one I chose looks appropriate for scale and enhances the project without taking over completely.
Considering the scope of my project and the fact that the aeroplane was meant to be one element in that larger project instead of a stand-alone piece, I used the base kit as is but put my painting and aging expertise to work! This is your basic plastic model and, as such, some detailing is lost and some is likely historically inaccurate. The kit was inexpensive, but I was able to eek out enough detail to suit my tastes without breaking the bank.
The wings of the original were fabric as were the tail and back portion of the body. After working with the Chrysnbon bathroom in the Heritage, I knew any little mark would show under spray paint. And, I had to fill in many injection marks on the pieces. So, while I was at it, I decided to try an experiment. I sanded the pieces with a linen weave pattern with a sanding stick. I sanded front to back and then perpendicular from side to side to create a very subtle matte cross-weave texture. Since flat paint still often has a sheen when sprayed over shiny plastic, I figured that even if the fabric texture didn’t show up clearly it would at least tone down the shine on the paint finish.
Here is the original shiny plastic.
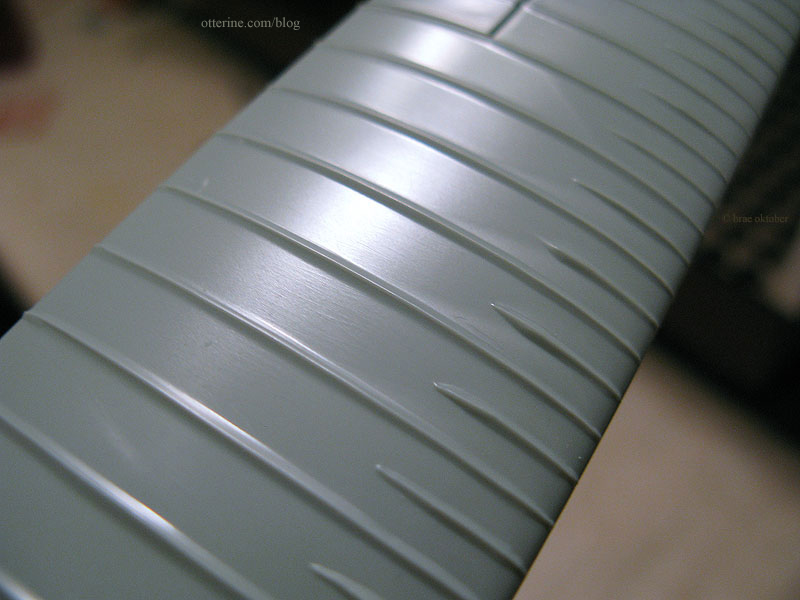
And, after the sanding…

After the spray primer coat, the finish didn’t necessarily register as fabric, but it had a great matte, non-plastic finish. That was a success to me!
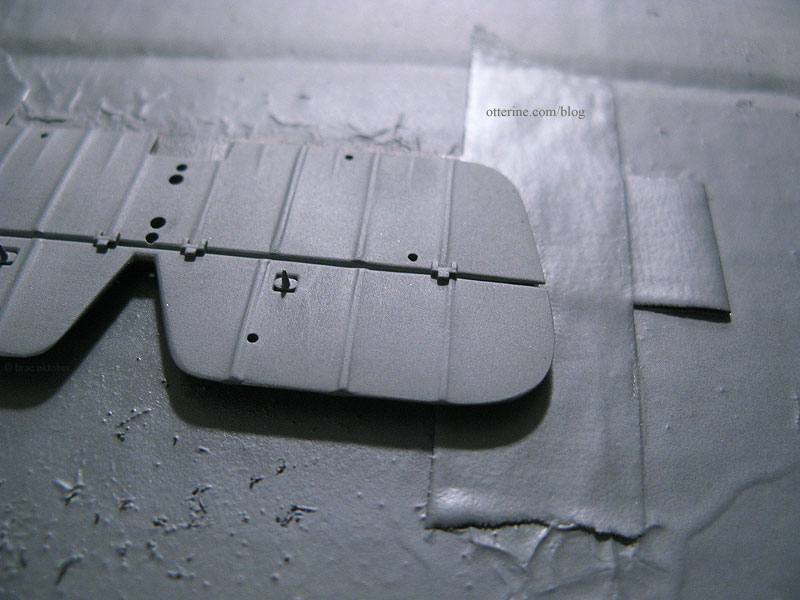
After the spray top coat of Testors Flat Light Aircraft Grey for the underside and Testors Flat Olive for the top side, the finish was just as I wanted. Well, I did have a few spray paint mishaps that required sanding and refinishing…but it’s an old replica, right? :D
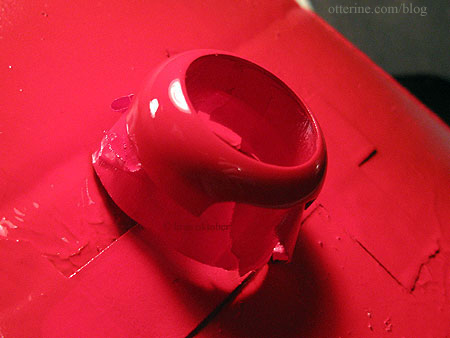
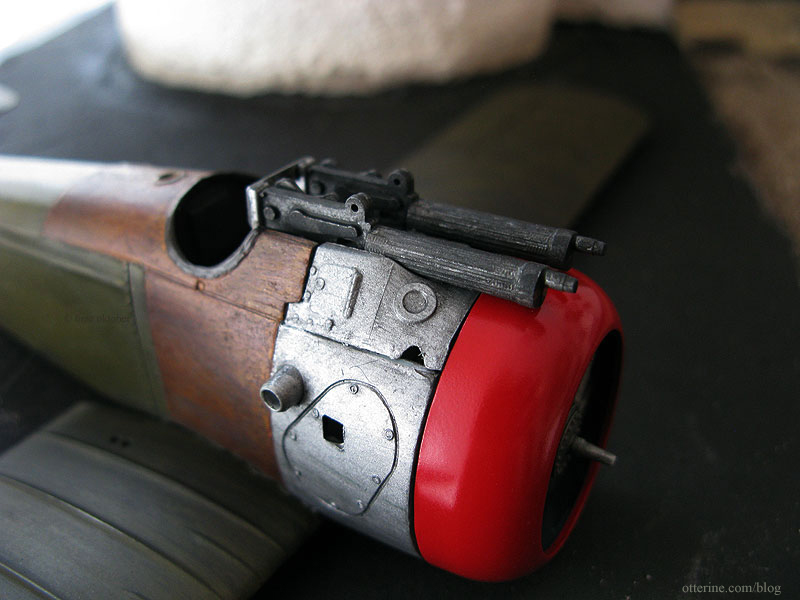
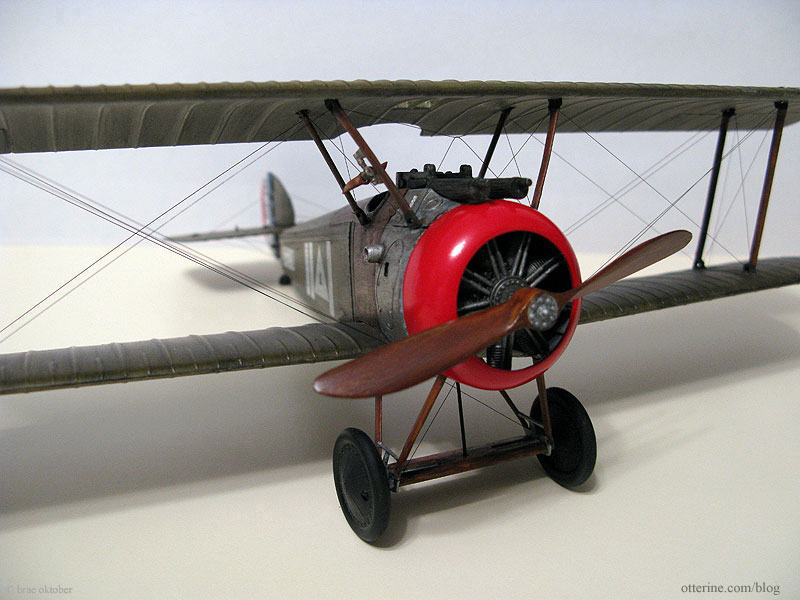
The shiny red nose turned out so well, I couldn’t bring myself to age it or dirty it in any way.
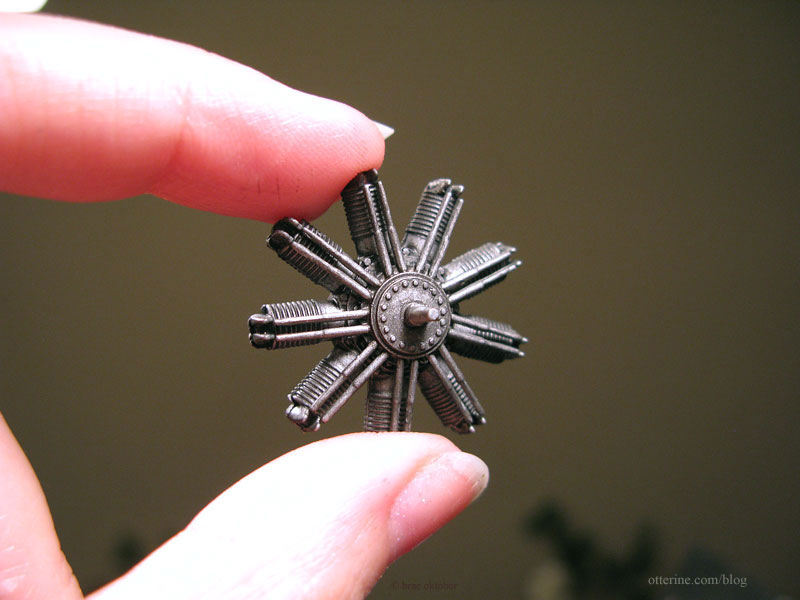
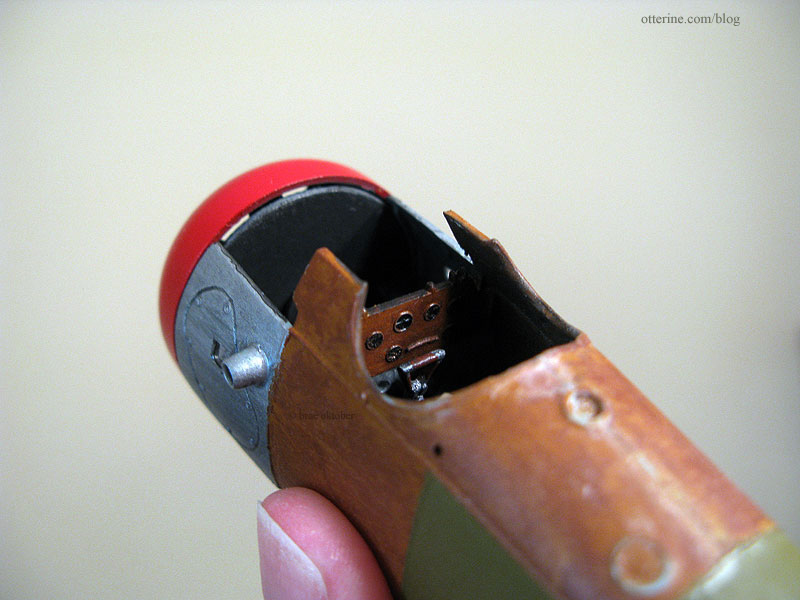
Not much of the engine shows, but I detailed what would be seen. It’s obviously a simplified version of the original, but I figured painting and making it grungy would be detailing enough. I brush painted the four engine parts with Testors Aluminum. Once that was dry I used black and brown acrylic washes to fill in the details, which it did wonderfully. It has the look of an oiled and working machine. :D
The “wood” portions were easier to mimic than I thought they would be. When I read that you were to first paint the base color and then paint on the wood grain, I thought, “Riiiiiiiiiiiight.” But, it works! I used a hand painted base coat of Testors Flat Light Tan followed by Testors Flat Military Brown, also hand painted and then wiped away with a paper towel. Maybe it’s not fine wood grain, but it is remarkably convincing.
There are some fantastic scale cockpit modifications people have done to accurately reflect the original planes, but I ended up using the original kit piece as is. I did the same wood grain finish on the interior walls, floor and dash based on the various models I had seen other modelers build. On the interior, I used black and brown acrylic washes to tone down the shiny new finishes. The instruments were first painted with a toothpick to fill in the black background. I then used a sewing pin to paint the instrument details using Liquitex Iridescent Bronze acrylic paint.
I had read that the guns were molded upside down in this kit, but with my shortened build timeline and the fact that I really didn’t want to start deconstructing parts, I used the guns as is. My model wouldn’t be the most accurate besides, and it would have been a lot of work for a minor payoff. :D
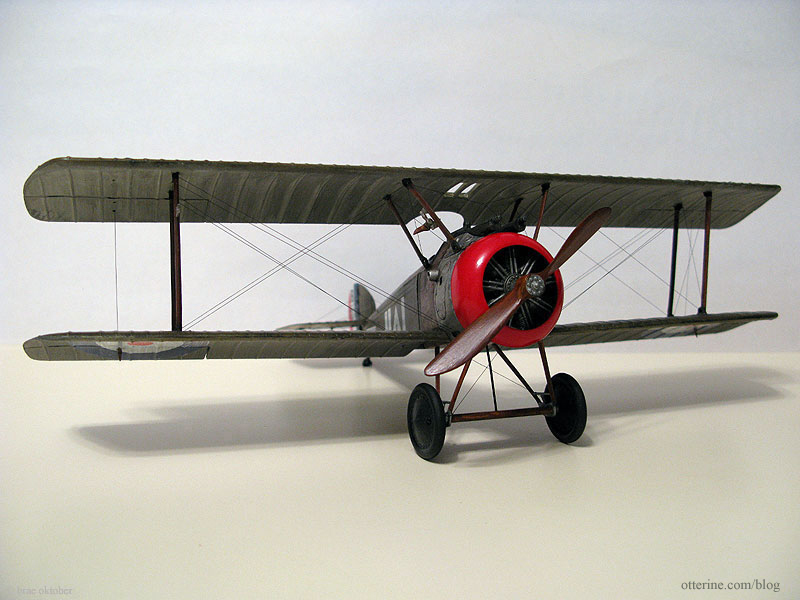
Show of hands…who knew what a turnbuckle was? :D I sure didn’t…but I found out about them in a hurry when researching biplane rigging. I found a tutorial on making these scale miniature approximations, but after seeing just how blasted tiny the materials were, I went with a more simplified approach.
I basically used the kit method, though I used black “transparent” thread instead of the kit supplied black fiber thread. I also waited until after the plane was assembled to add the lines. I didn’t see how you could add the lines during the body assembly, then keep them out of the way and clean during the painting process. This meant a bit more headache in the end, but it worked out well.
I mostly just used super glue gel to hold the wires in place in the pre-drilled kit holes. For the ones in the body, I cut small lengths of brass wire and slipped them into the holes with the wires. This plugged the hole and held the wire more securely. I dabbed black paint on them later to remove the obvious brass shine.
I started with the tail section, and in this photo you can see the brass pins before I painted them.

The decals were not the easiest things to deal with, and I admit to being out of practice using them. But, the end result was pretty good and this was meant to be a weathered replica, so any imperfections actually worked to my advantage.
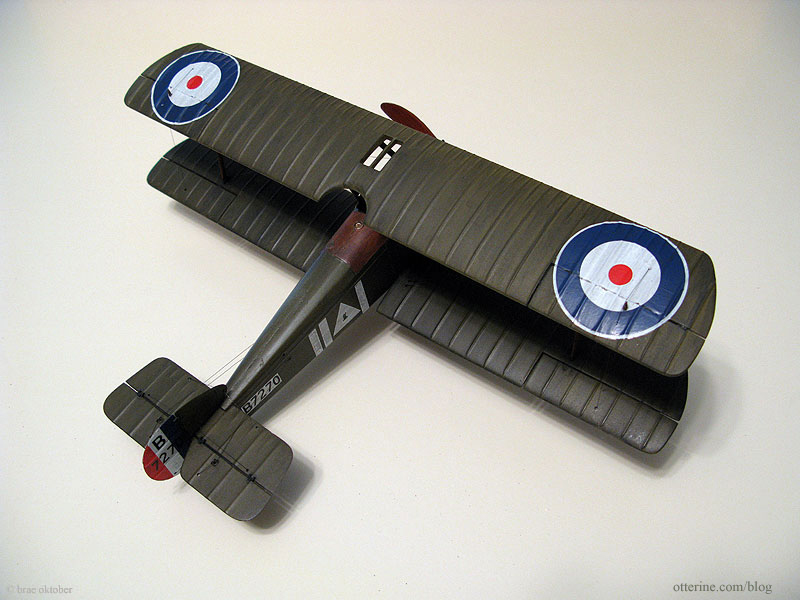
I followed most of the recommended placements and others I made up from the available decals…like the triangle with a logo in it shown below.
I made one substitution during the rigging process. There was supposed to be a straight wire from the bottom of the plane running perpendicular to the wheel assembly. I knew there would be no way to get the tension correct, so I used a cut off head pin. It doesn’t look like a substitution at first glance and it added stability to wheels besides.
I was terribly out of practice with building plastic models and this was my maiden voyage with rigging, but I love the end result! Overall, I enjoyed the process of putting the model together even if I don’t foresee myself making a whole squadron of these. ;D
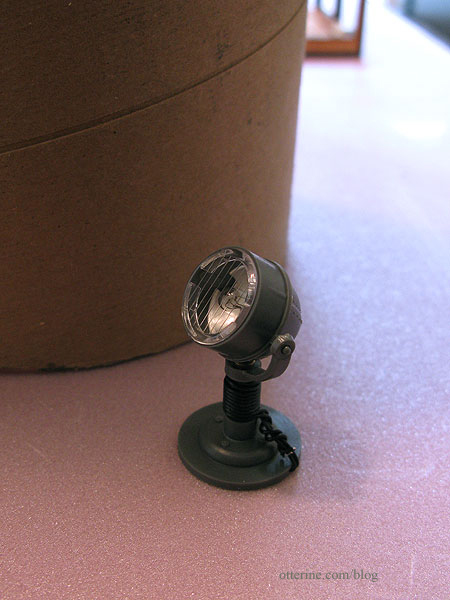
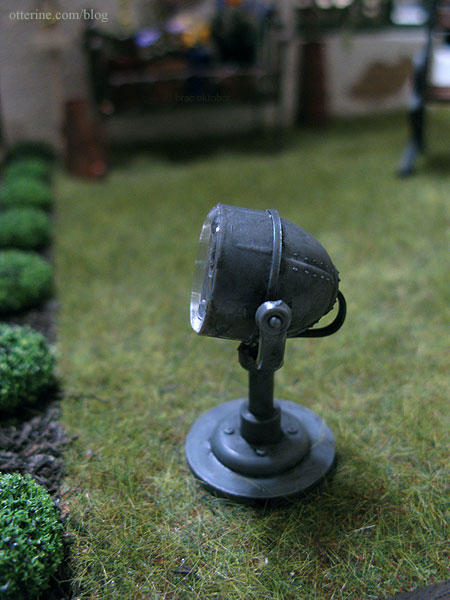
I found these fantastic Scene Master spotlights on amazon.com and instantly knew they would be perfect for lighting up the plane. They have a vintage industrial look about them that complements the plane and building. They are labeled multi-scale, and I think they work wonderfully in my scene. In the final layout, I used only one of the pair that were included in the package.
I aged it with brown and black acrylic to remove the plastic sheen.
The sign verbiage is taken from the Wikipedia article on the Sopwith Camel. I printed it on paper, pasted it onto a primed wood scrap and staked it into the ground with some wire.
Be sure to check out these sources and inspirations:
– Excellent video of the same model kit with snappy music
– Beautiful kit model by Des DelatorreCategories: Model Cars, Vehicles, The Aero Squadron Lounge
September 1, 2012 | 0 commentsRoundy roundy wagon wheels
The Allwood covered wagon kit I transformed into a 1:12 scale farm wagon has an ingenious method for constructing the wagon wheels. They supply dowels you cut into spokes and the shaped inner hubs.
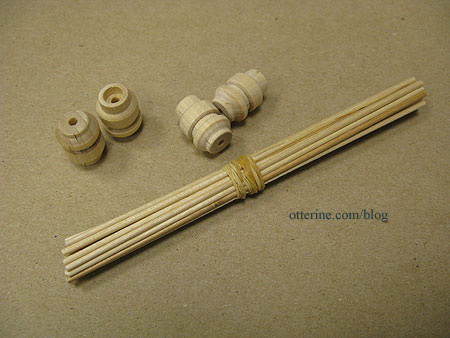
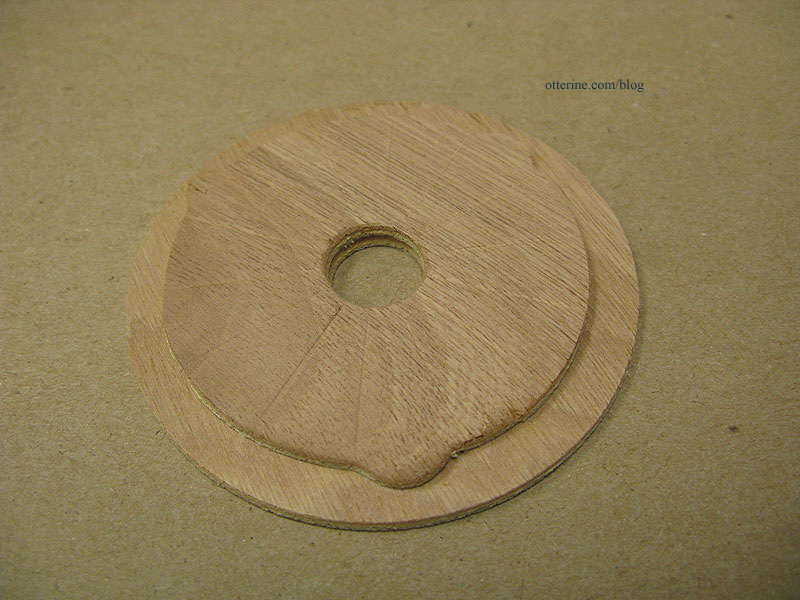
The wheels are made from two layers of diecut plywood glued together and sanded.
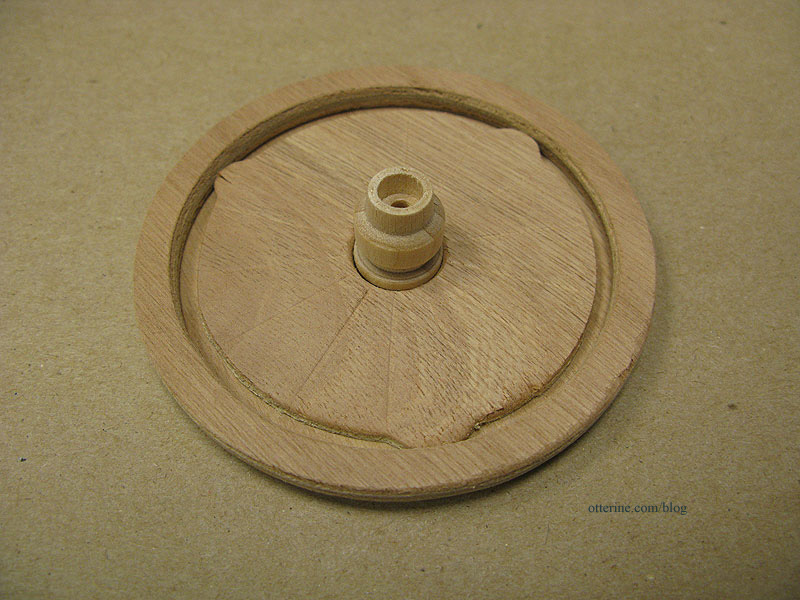
The ingenious part comes in the form of the jig used to line up the spokes. It is made from two layers of plywood lined up in the middle and glued together.
The wheel assembly fits snugly onto the jig and the hub is placed in the middle. The jig has grooves in it serving as a guide for the spokes.
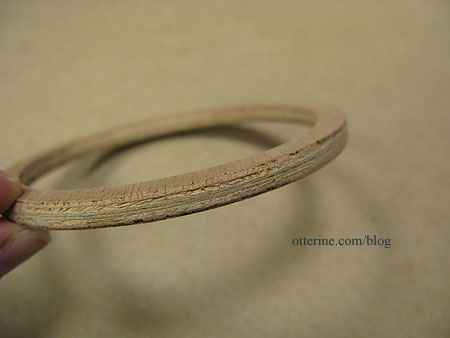
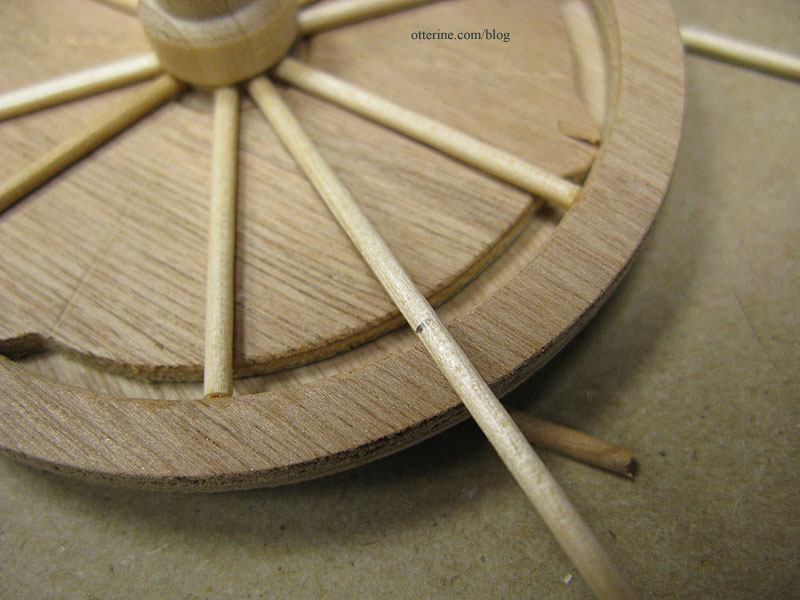
The instructions tell you to cut a whole bunch of dowel lengths to certain measurements, but I didn’t do it that way. Instead, I measured only the first one to the kit specified length and then measured the rest of the dowel lengths to fit. There was no way the standard measurements given with the kit instructions were going to work for all the spokes – some would be too long and others too short. That’s the nature of imprecise diecut parts.
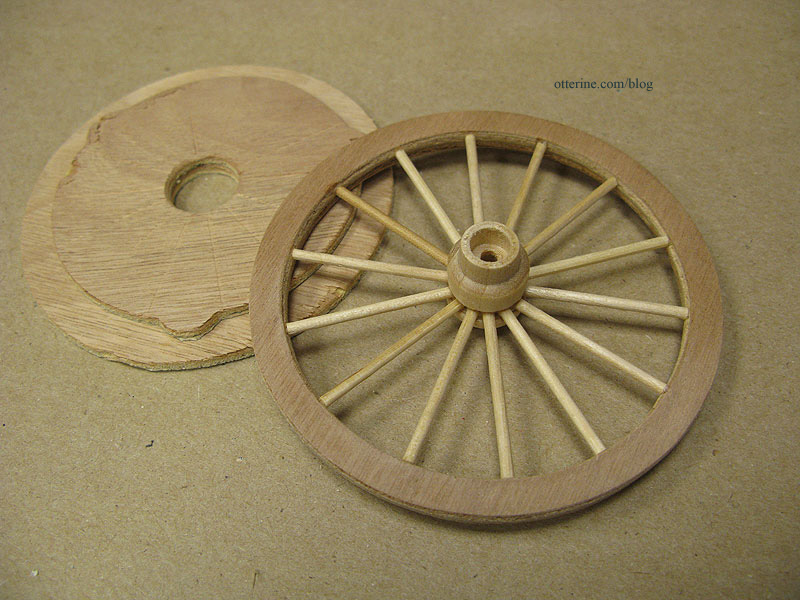
Once the glue has dried, the wagon wheel pops off from the jig. :D
Categories: Baslow Ranch, Model Cars, Vehicles
January 25, 2012 | 0 comments
NOTE: All content on otterine.com is copyrighted and may not be reproduced in part or in whole. It takes a lot of time and effort to write and photograph for my blog. Please ask permission before reproducing any of my content. (More on copyright)