


NOTE: All content on otterine.com is copyrighted and may not be reproduced in part or in whole. It takes a lot of time and effort to write and photograph for my blog. Please ask permission before reproducing any of my content. (More on copyright)

Categories:
1913 Model T Van – part 1
This is a 1/16 scale Model T Van by Entex. There are decidedly fewer parts to the Model T kit than the Datsun, but my summation is there were fewer parts to the real Model T than the real Datsun as well. :D
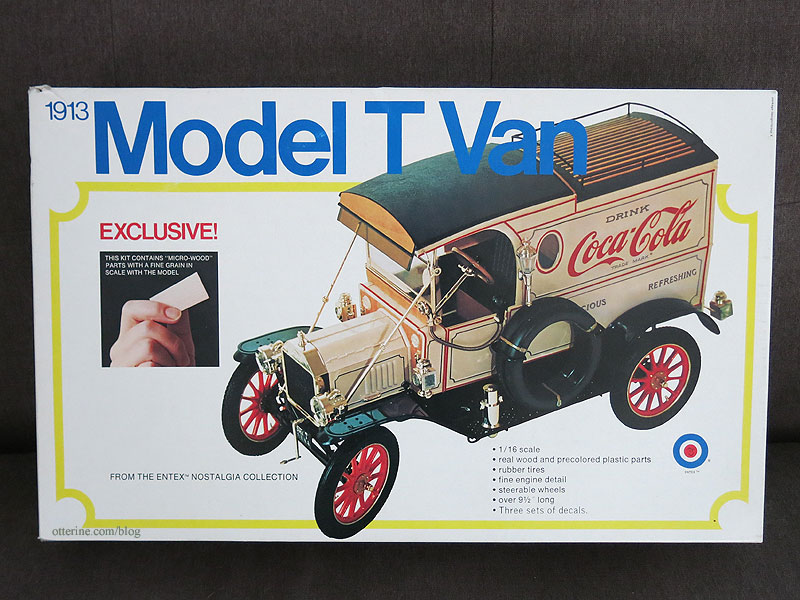
The final model will be 9.5 inches long, so it should work well regardless of being a smaller scale than the building. The kit even has real wood — they call it micro wood. I’ll be making my own decals as well as a few adjustments here and there.

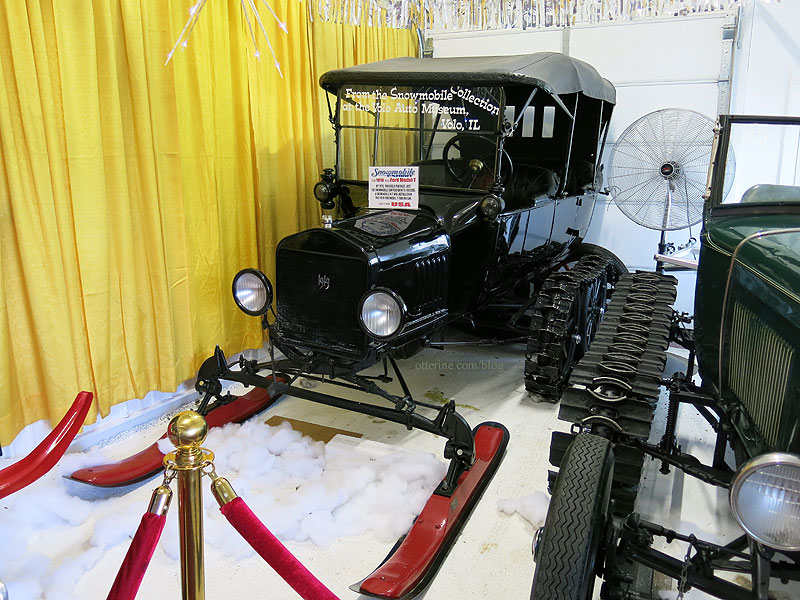
I even went to the local Volo Auto Museum to have a looksee at their vintage Fords. This is quite the contraption, no? Many a Chicago winter would call for such a beast.
Before I begin, I thought you might like to check out a few videos I found while researching. The first one shows a gal learning to drive a Model T at the Henry Ford Museum along with some excellent vintage off-road footage. The second just takes you for a ride. Feel that wind in your hair?!! Brisk! The last one is just awesome. :D
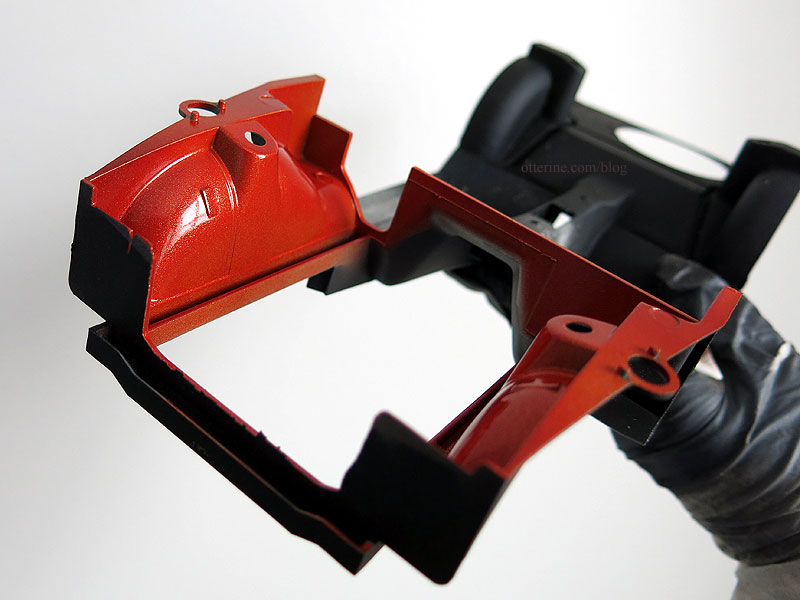
The sprues have been primed with their respective base colors. Even though models are molded in color, I still prefer a painted finish for more realism. I use spray primers for uniform coverage.
There are ten pages of assembly instructions, and as usual this build starts with the engine. I actually ended up buying two kits because of operator error (oops), but that means I have plenty of spare parts. I think some of the leftovers will make for delightful junk at Milo Valley Farm.
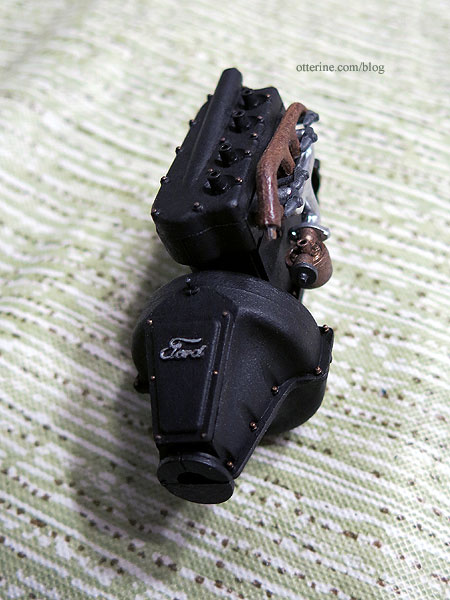
In addition to the videos, I located some engine photos online and saw some cars in person at the Volo Auto Museum, so I’ve followed those as a guideline for color and finish. I use Testors jar paints and acrylics on plastic models after priming in base colors. These are the tiny brushes I use, though many of the smaller details are painted with toothpicks and straight pins.

Here is the engine in the primed metallic base color. Rather fake looking.

After some further painting, I now have a relatively clean engine in flat black with bronze bolts that looks heavier and more solid. I have more bolts to detail, but I’m calling it a night. I rusted one part that might not have rusted this quickly in a newer vehicle, but we’ll call it artistic license. Once I’m further along, the whole assembly will receive washes and such to tone down the shiny newness. I want a recent vehicle with a little bit of road experience. :]
Half of page one done! :D
Categories: Model Cars, Vehicles
September 27, 2016 | 0 commentsDatsun 240ZG – part 5 – initial aging
Continuing work on the Datsun 240ZG. The engine compartment of my barn find auto shouldn’t be showroom new, but of course the Testors Fiery Orange turned out showroom new. :\ Ah, well…easily fixed.
I sprayed the compartment with Testors Frosted Glass. I am sure you can use any matte finish spray, but I had this one on hand. It tones down the shine and gives the subsequent paint treatments something to grab.
Next up, adding grime. The easiest way for me to add grime is with acrylic paint and Americana Staining Medium. I mixed blobs of browns, greys and black with the staining medium and used a variety of soft brushes.

I didn’t worry about areas where parts will be glued in place since it’s part of the process to scrape those places clean before gluing anyway. The transparent stain mixtures created realistic dark areas without completely obscuring the orange body color. The staining medium adds a bit of sheen, which works well for engine grease. :]
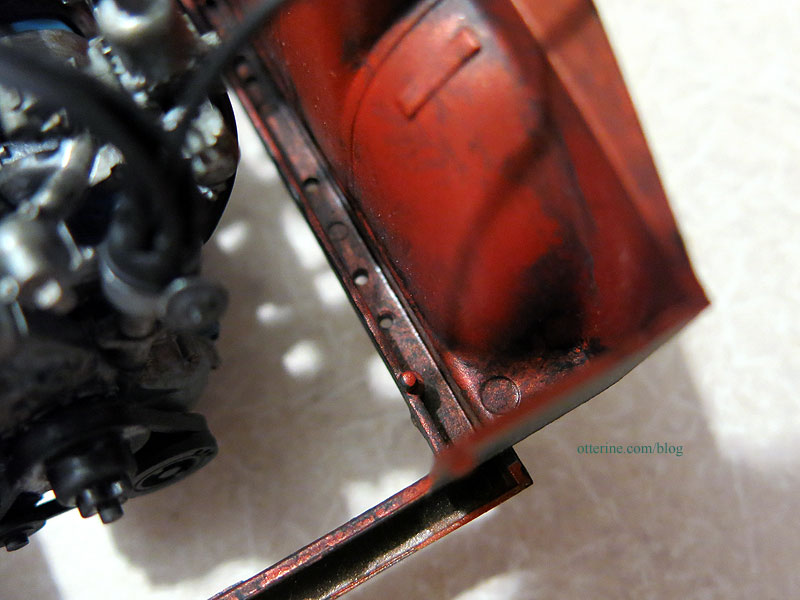
Flip it over to age the underside, turning the pristine flat black into road-worn dirt. :D Here I brushed on undiluted paint using a stencil brush, repeating the process for several layers.

This removed the smooth finish of the plastic base.
Using the leftover staining mixtures, I added a bit of light aging to the engine assembly. More can be added later, but it works in my favor to add some now while tight areas are easily accessible.
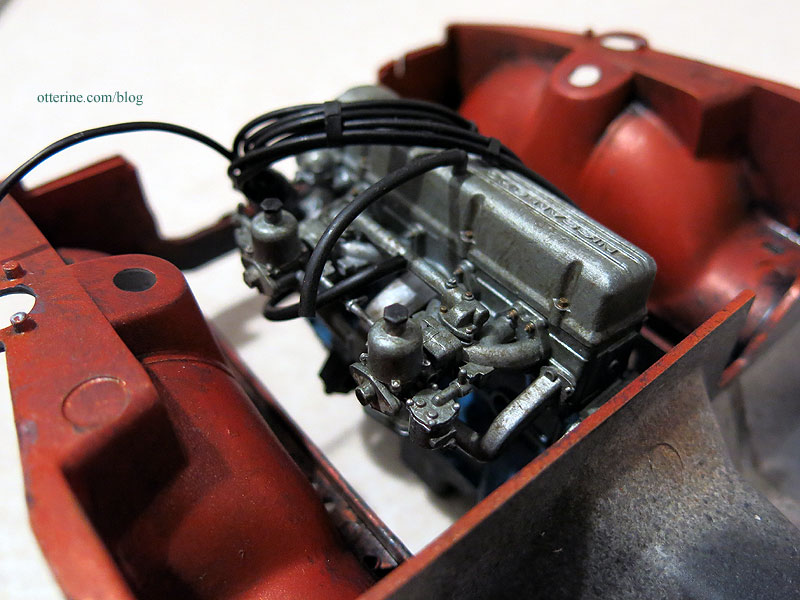
I’m not overdoing the process. I prefer subtle aging that adds depth and visual weight. :]

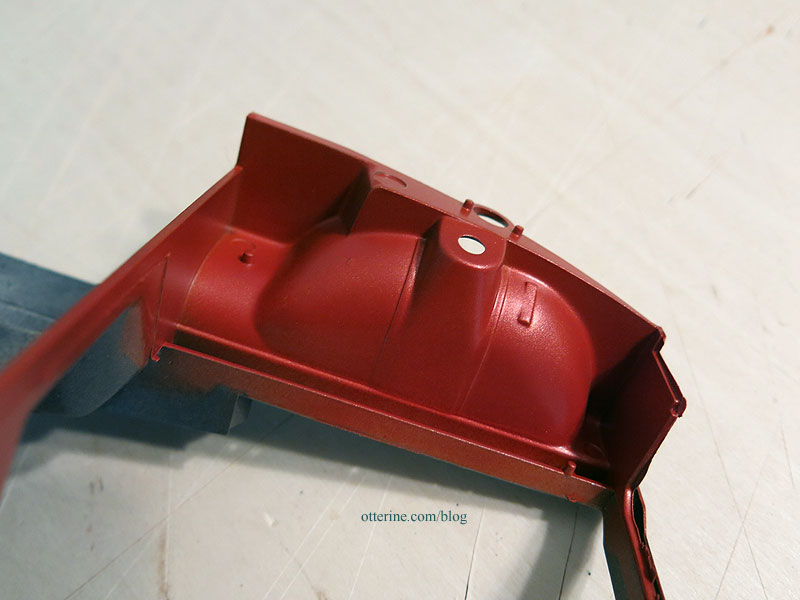
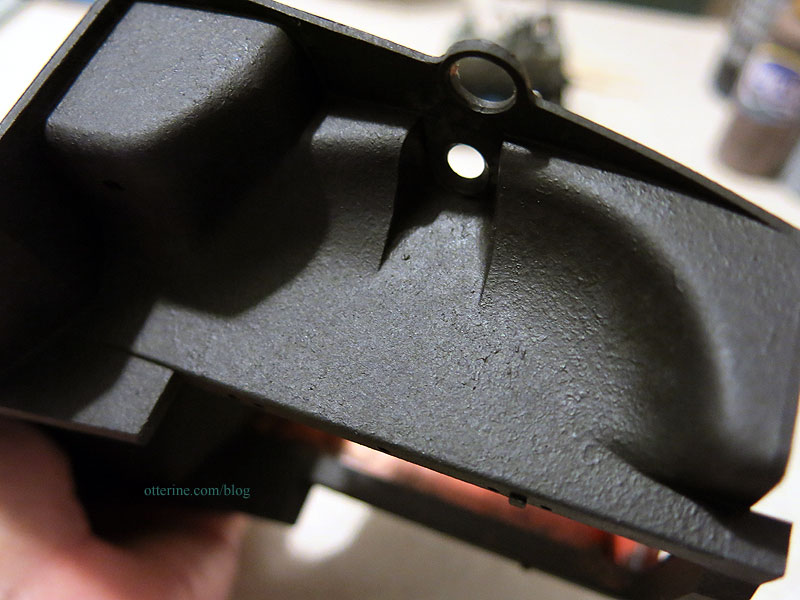
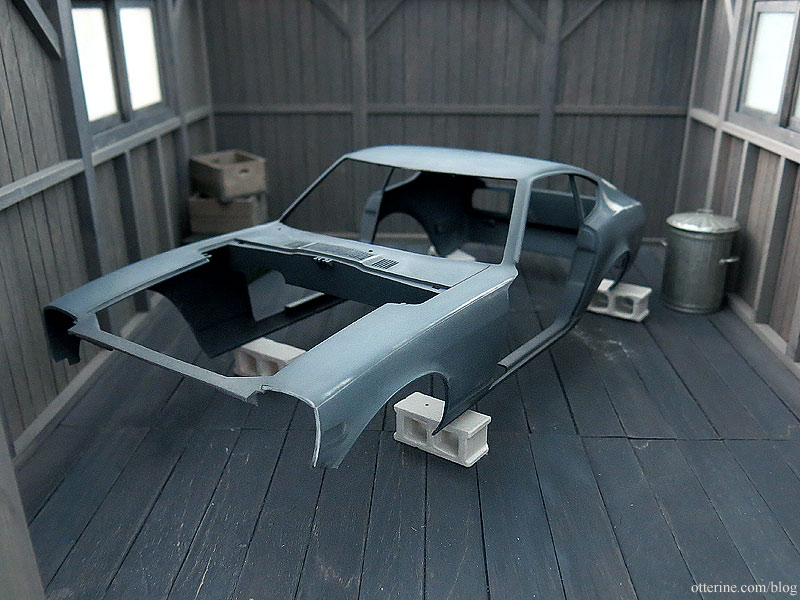
I started sanding and detailing the main body piece. This is an excellent model, so there was very little to do in the way of prep work, just light sanding here and there. I had spray painted the body with a quick pass of grey. This paint layer helps highlight the imperfections and excess plastic from the molding process. Cinder blocks from Mini Materials.
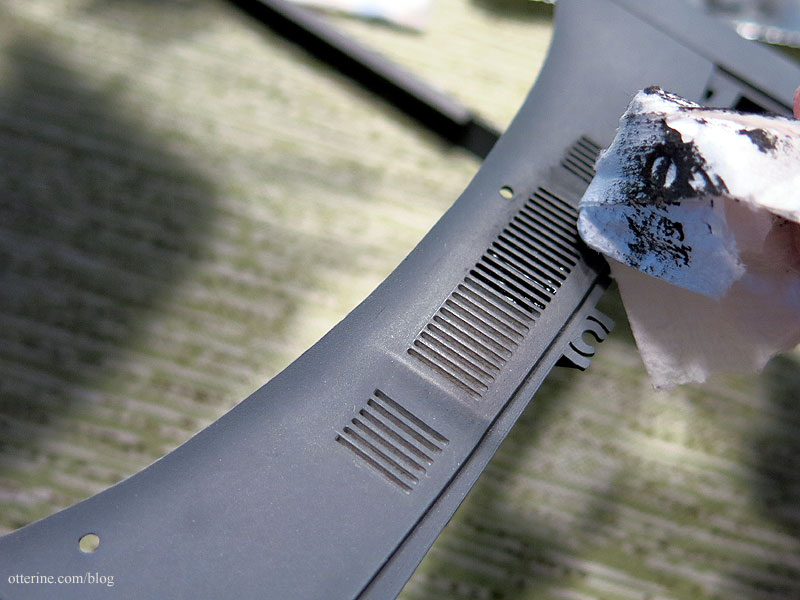
There’s a vent detail in front of the windshield. It didn’t take the initial coating of primer spray very well, so I decided to detail it now. Any subsequent spray-painting shouldn’t interfere with the work. I used a toothpick to drop in Testors flat black.

I wiped the excess with a paper towel.
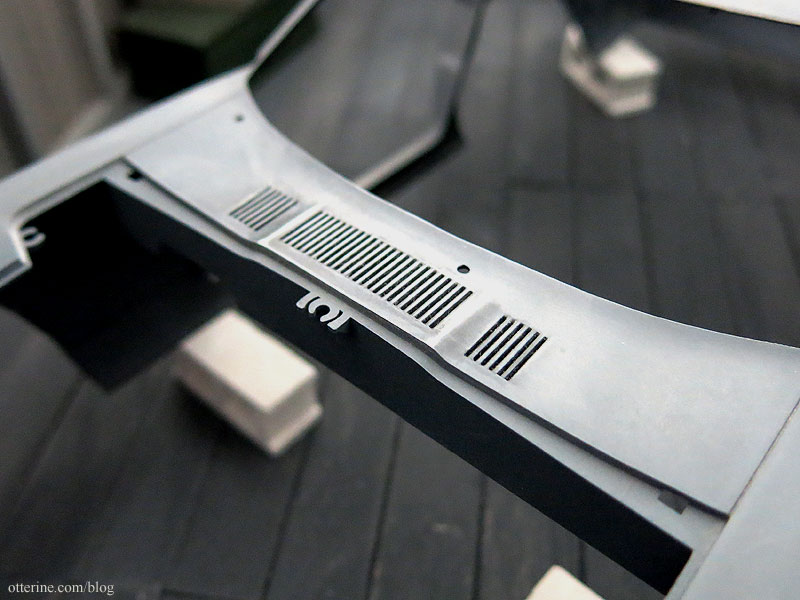
This fills the vent and makes it look like an opening in the body. I can touch up the effect after the final body color by using acrylic paint, which won’t stain the enamel color the way the Testors paint would. This is a good base to build on later.
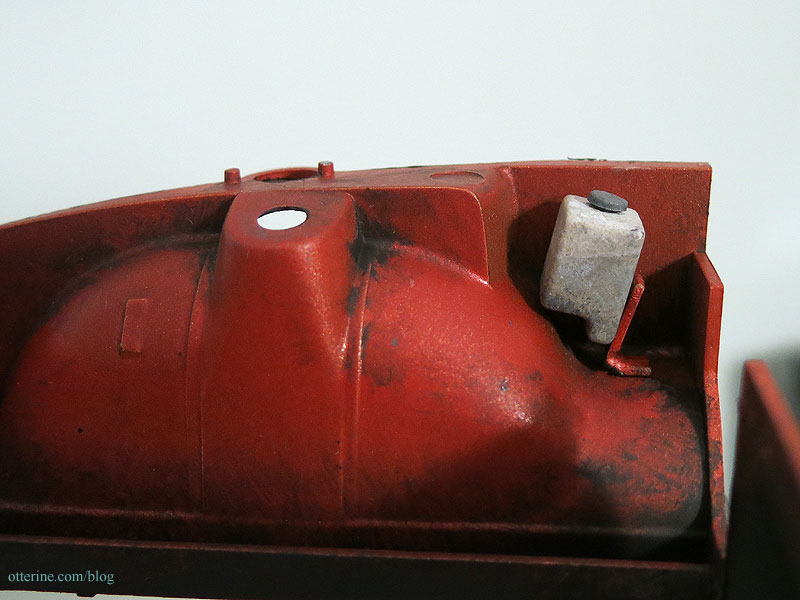
Back in the engine compartment, I wanted the washer fluid tank to look like it contains actual fluid so I spent several hours painting it. The tank isn’t glued in yet, but the holding bracket is. I needed to know the angle of the tank to paint the fluid line at the appropriate slant. Dirtying up the surface helps sell the idea. :]
Categories: Milo Valley Farm, Model Cars, Vehicles
April 3, 2016 | 0 commentsDatsun 240ZG – part 4 – engine work
I knocked out two pages of instructions for the Datsun 240ZG this weekend! This isn’t all of the work I completed from those pages, but this is the main piece in progress.
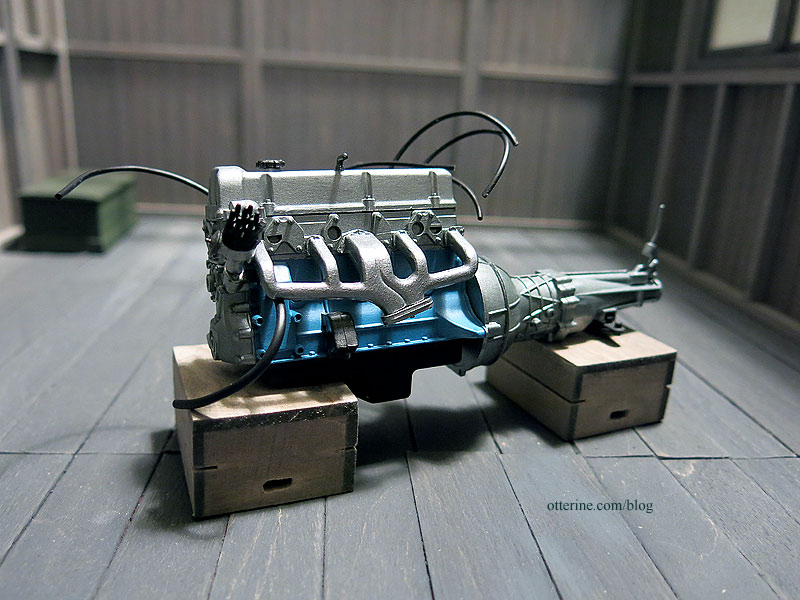
I’ve looked at some real life engine photos for color but I’ve mostly followed the instructions. Fine detailing, aging and grime will come later.
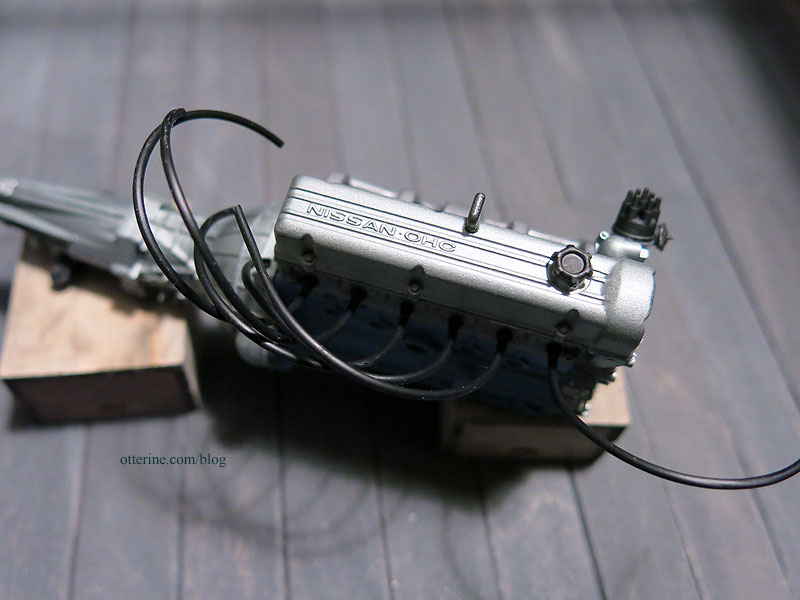
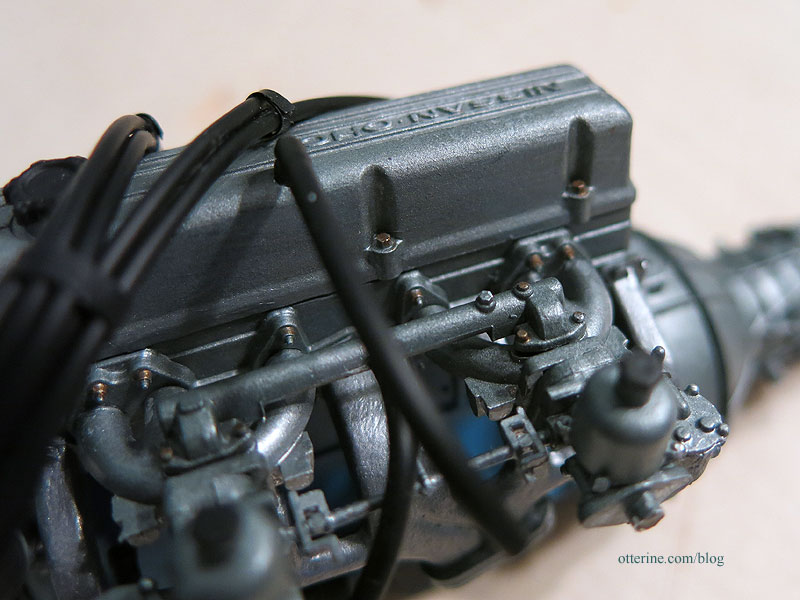
It’s coming together nicely. I added some painted detailing in the way of bronze nuts and bolts. Making nuts and bolts a different color can add realism with a minimal amount of work. I also used electrical tape to group the spark plug wires together.
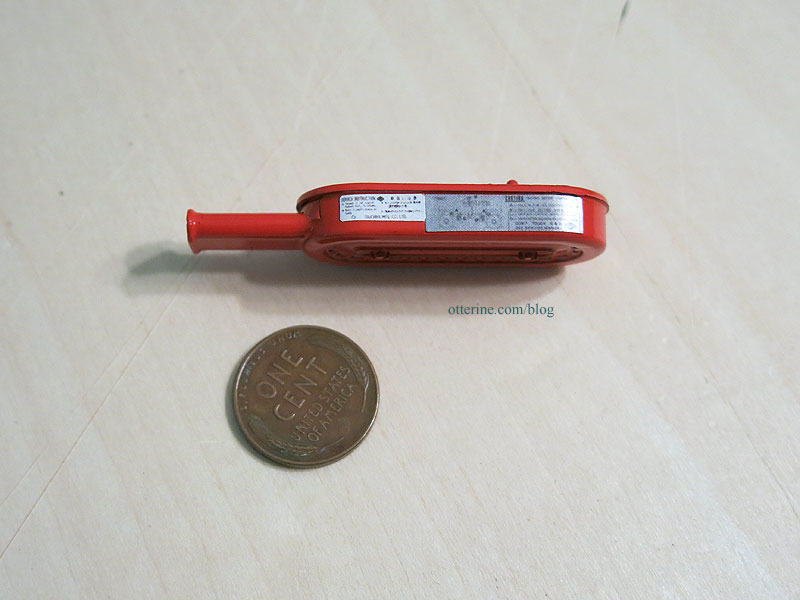
I printed up some labels and decals. Yes, I filled out the “Battery Finder” form to get the right label for a replacement battery. :D I haven’t finished painting the detailing on the battery or other engine parts just yet.
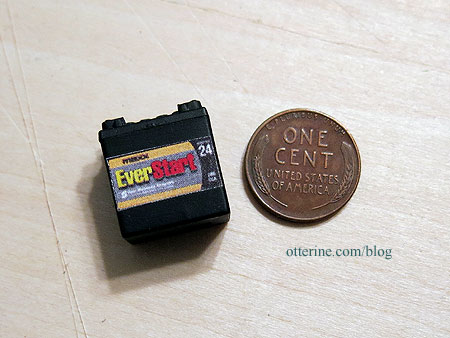
There are two for the air cleaner (love that Hugger Orange by Model Masters). I found the replica images online. I printed one of the air cleaner labels and the VIN plate (not shown) on Avery silver labels. The material gives it just enough sheen.
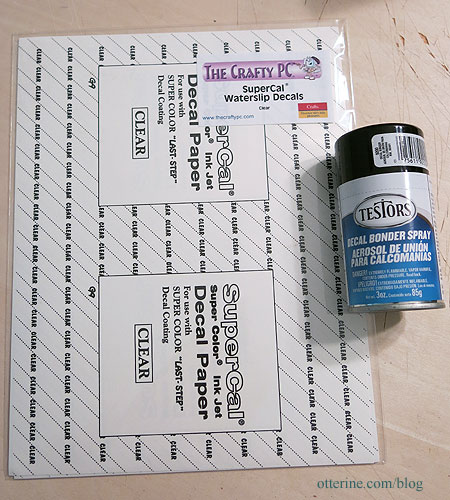
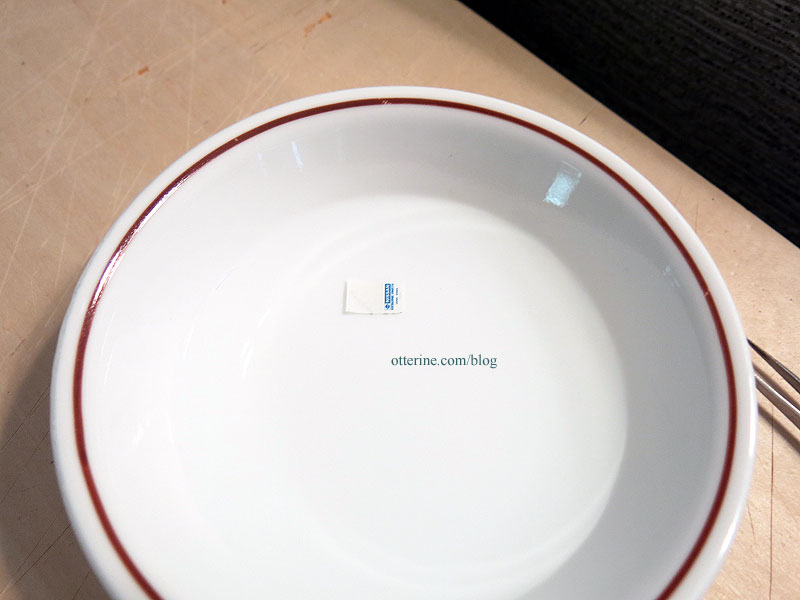
The last item was a decal for the oil filter. This was my first time making my own decals, and I love it! I will definitely do more of this in other mini situations. I used SuperCal Waterslip Decals from The Crafty PC, which is now out of business, but there are other similar products on the marketplace, including one by Testors. I can’t speak to that specific item, though I like their other products.
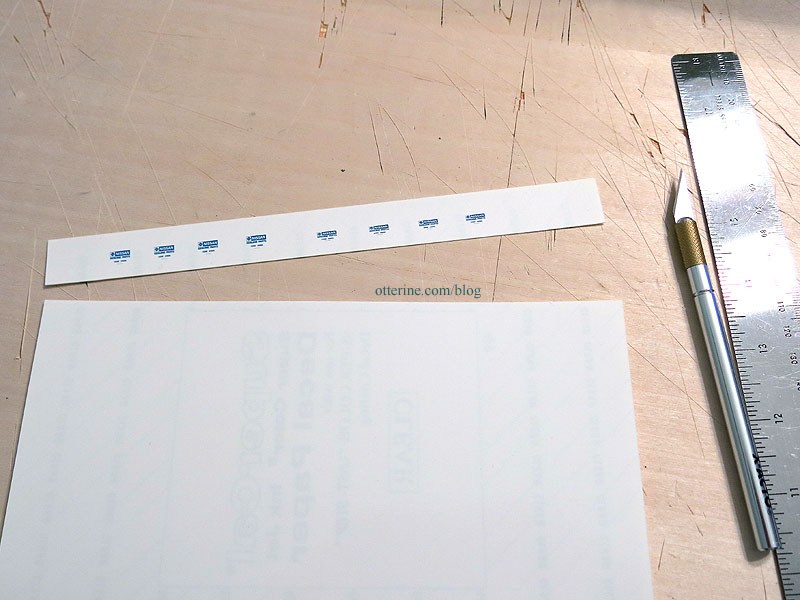
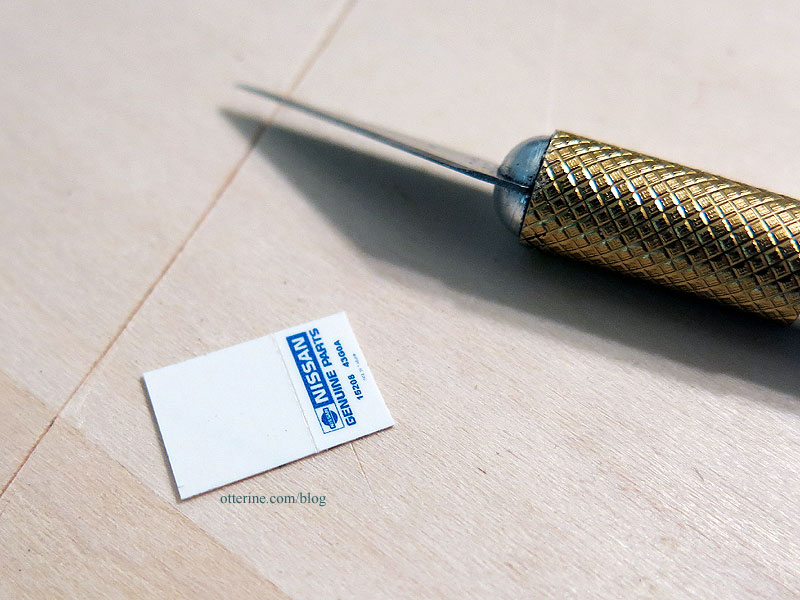
I mocked up the design using a Nissan logo and text in PhotoShop. I then printed on the decal paper. You can print along one edge and then cut cleanly across to use the remaining sheet for printing again. As you can see, I made a few at the same time to have extras in case of disaster. I also like to make a couple of sizes just in case. I ended up using the smaller one and had to make two attempts.
I used Testors Decal Bonder for the spray. I put on one thin coat, let it dry for half an hour. I then added a second heavier coat and let that dry overnight. I wanted something to grab onto during the process, so I cut the paper larger than I needed and scored a line where I wanted the decal to separate.
I soaked the decal for 15-20 seconds until it slipped easily.
In that time, I wiped the oil filter with a Q-tip dipped in Testors Decal Set. I slipped the decal onto the oil filter and positioned it with the Q-tip. Once it was set, I dabbed it with a paper towel.
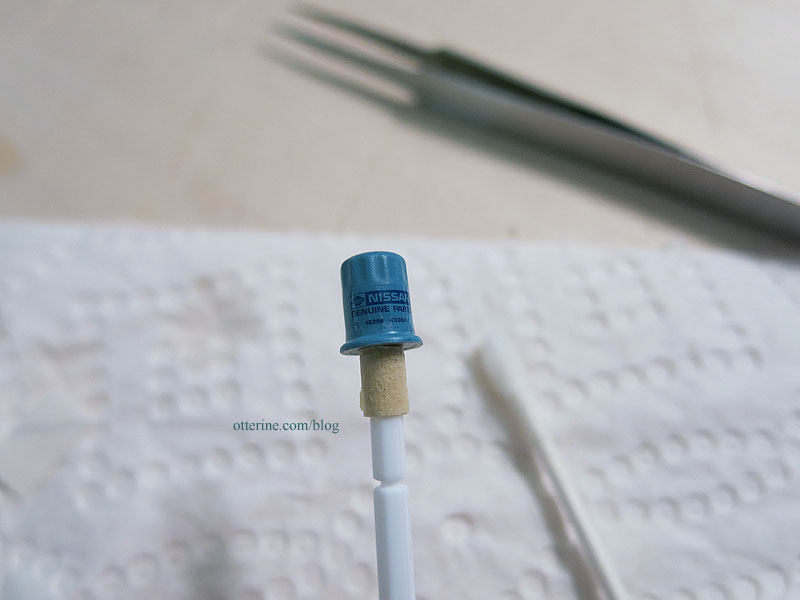
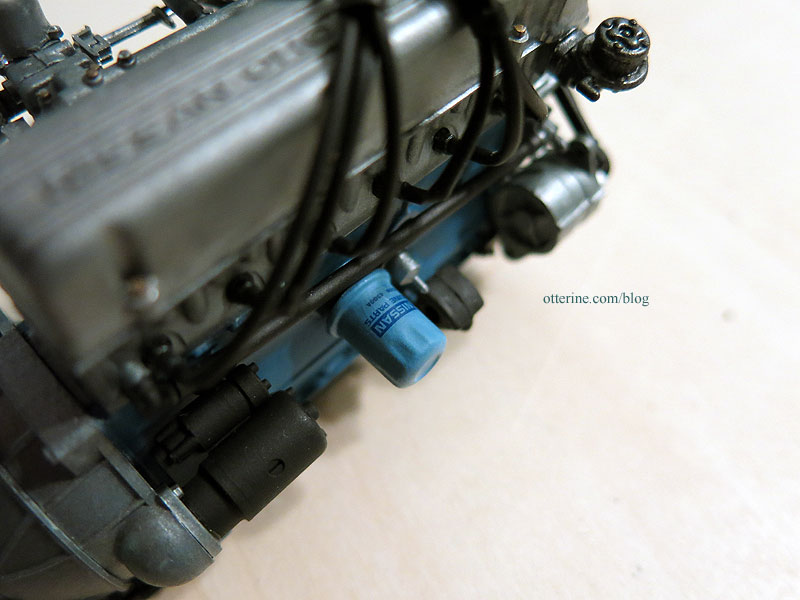
In order to remove the sheen, I sprayed the oil filter with Testors Frosted Glass spray. It was the only matte finish spray I had on hand, and it worked perfectly. Adding a decal to the oil filter is a minor detail, but it adds a lot. :]
Categories: Milo Valley Farm, Model Cars, Vehicles
March 22, 2016 | 0 commentsDatsun 240ZG – part 3
Continuing work on the Datsun 240ZG. It has been a long while since I last worked on the car model for my barn find. This will be slow going because there are so many parts in general and many of them will be functional parts. I’m also in no rush and want it to match my vision. These sorts of projects are not for the timid. Now I’m back to building, one step at a time. I’m still on page one (of 13).
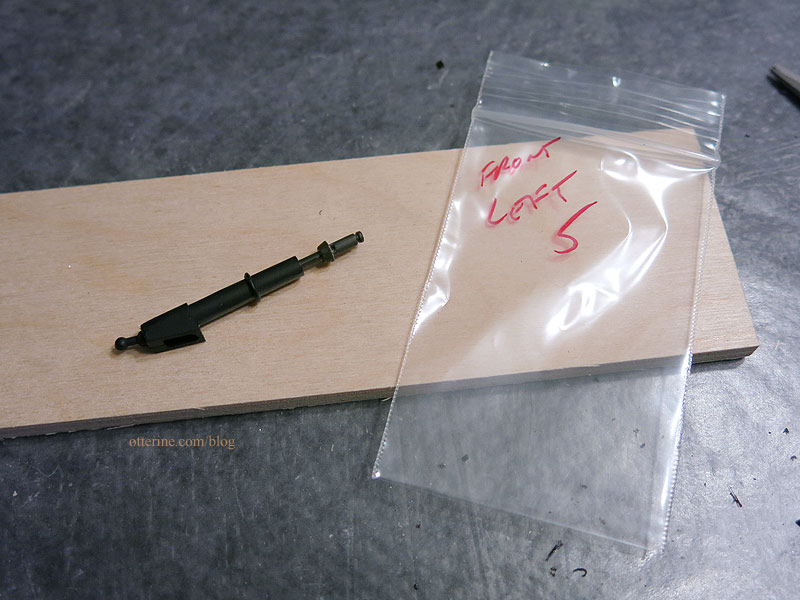
I don’t know if any of you will build a model car, but I like to share tips in case someone stumbles onto my blog. Or, perhaps the tips will apply to other situations. One of the things I’ve done for this build is to mark tiny plastic bags to hold assembled parts when I have to know front, back, left or right. I also mark them with the step number so I can easily find what they are when needed later. There are a lot of smaller assemblies that get pulled in later, so it just makes sense to mark them and protect them as I go (I’ll worry about touch-ups later).
The other tip I have is removing that gleaming chrome finish from plastic model parts. There are several videos on the matter, and the easiest method involves household bleach. I stripped the bumper and the shock absorber parts mainly because I’ll be making the underneath a little aged and well used. Beyond that, the chrome bumper just looked like chrome coated plastic. :\ I will paint it to match the front bumper, which is grey metallic.
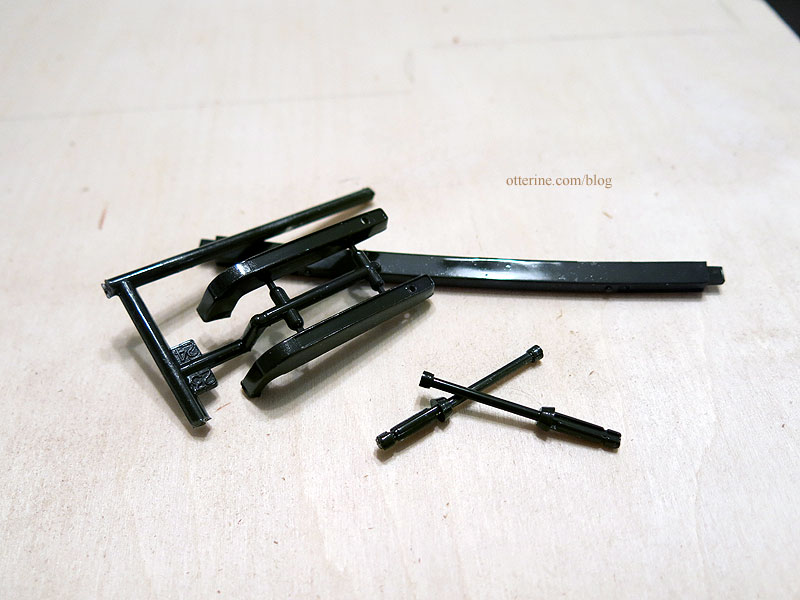
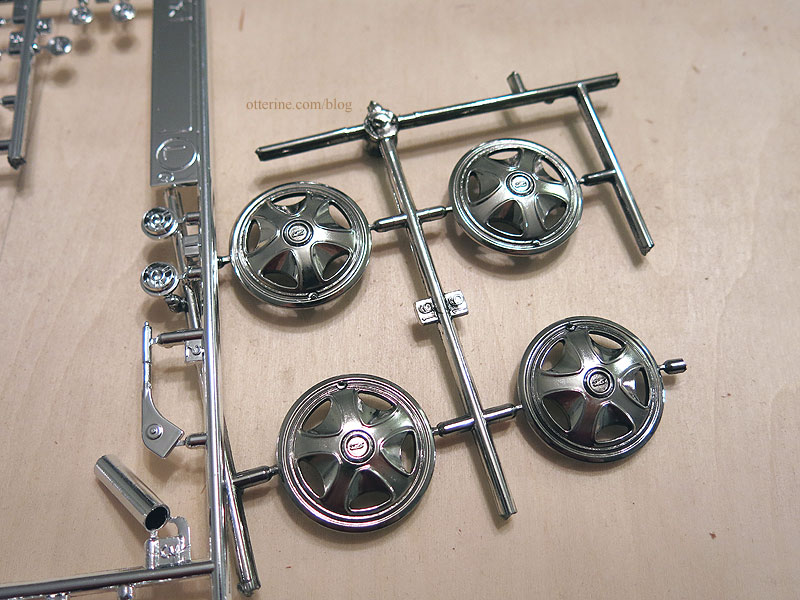
I watched the chrome disappear during the process, and the color went from high silver to yellowish to absent. This gave me an idea for the chrome wheel caps. =bling=
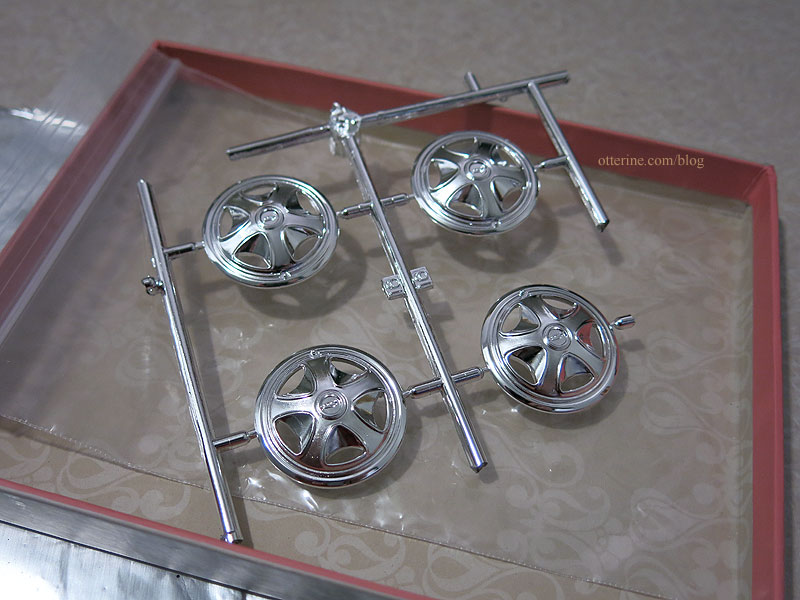
I soaked them until they turned slightly yellow.

I don’t know if I will attempt painting these like the real deal, so this is a good compromise. Now they are less brilliant and yet still have good styling. It brought out the details actually, because it darkened the recessed lines by removing the finish in those areas. You can see the slightly yellow tinge next to the original parts. If the finish becomes unstable, it’s no worry to me…I can always paint them.
Removing chrome finish from plastic would definitely apply to the Chrysnbon bathroom kit. You could then paint the pipes and faucets any color you like. :] Or, you could do as I did and soak them a short time to weather them.
Categories: Milo Valley Farm, Model Cars, Vehicles
March 9, 2016 | 0 commentsTamiya tool set – part 2
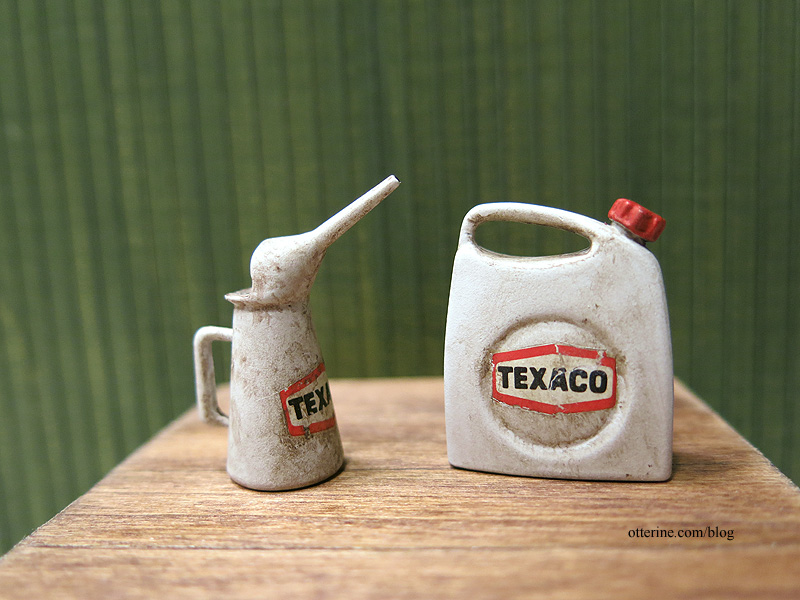
Continuing work on the 1:12 scale Tamiya tool set. I’m starting with the polyethylene tank and oil jug. Here’s a reminder of what these looked like after assembly and initial sanding.


I primed them with grey spray primer and then followed that up with flat white spray paint. The grey toned down the white, which is good for a base to start aging.
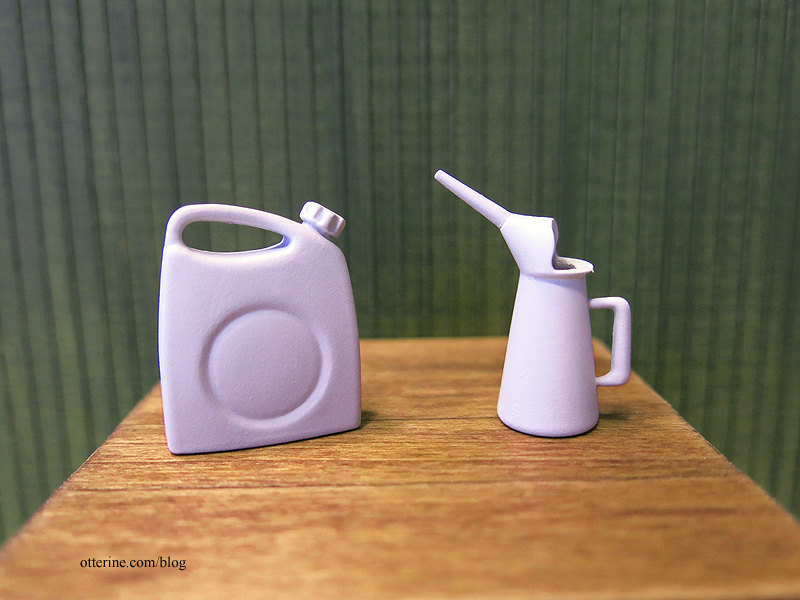
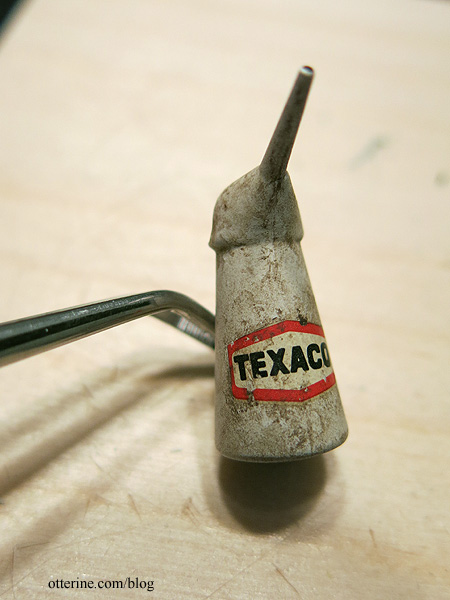
The vintage Texaco jugs I found online were all red, but I liked the white on the kit box, so I stuck with that. I painted the interior of the jug silver.

I added grime with acrylic paints thinned with Staining Medium. I left the decal whole when applying but scraped some holes from it after it dried in place. I also cut away the shiny clear portion around the outside of the decal as best I could. I put a dot of black paint at the tip of the spout to give the illusion of an opening.
For the polyethylene tank, I added the same grime and painted the cap red. I mixed some of the grime paint wash with satin varnish. Using a tiny paintbrush, I made a dribble of dried liquid down the side.
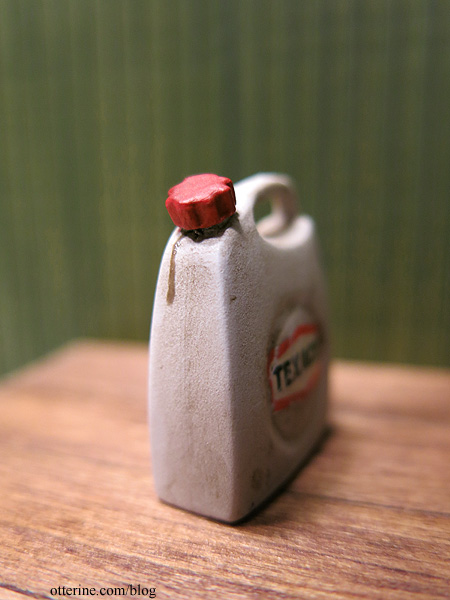
For these decals, I split them before applying so they appear broken and misshapen. I scraped holes and removed the clear halo from these as well.
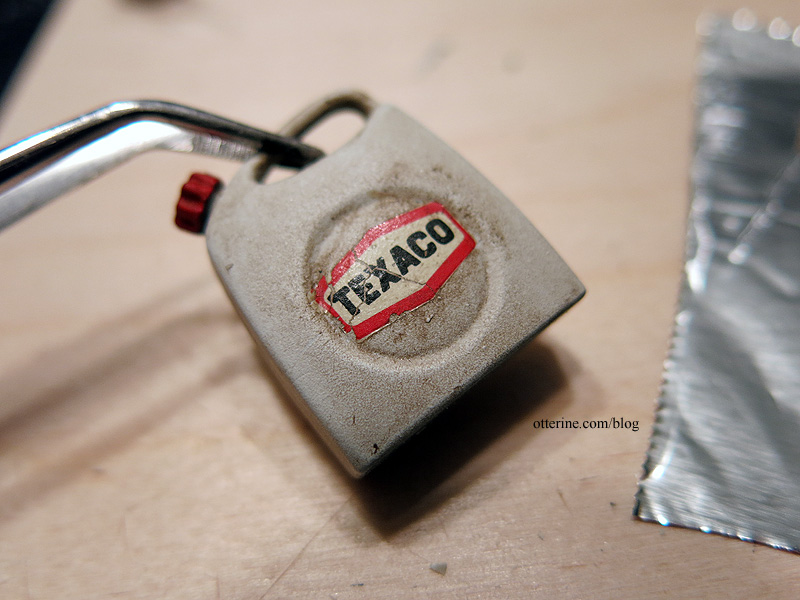
I built up the cracks in the label with white paint, followed by an aging wash to tone down the brightness. Now it looks like a paper label that has loosened, cracked and moved after getting wet.

I love the way they turned out.
Categories: Miniatures, Model Cars, Vehicles
June 19, 2015 | 0 comments
NOTE: All content on otterine.com is copyrighted and may not be reproduced in part or in whole. It takes a lot of time and effort to write and photograph for my blog. Please ask permission before reproducing any of my content. (More on copyright)