

Mail Wagon – part 15
Continuing work on the mail wagon. Many of the pictures in this post show the parts after painting since I was on a deadline and had little time to take progress photos.
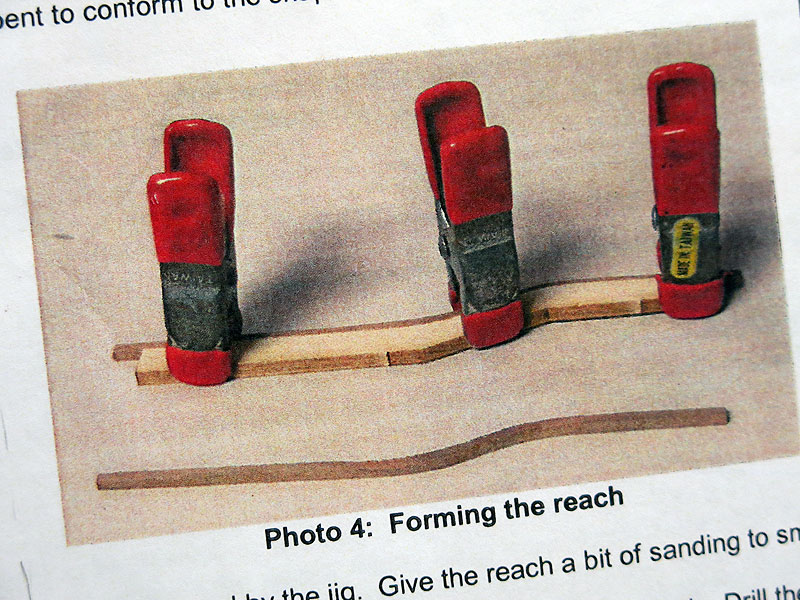
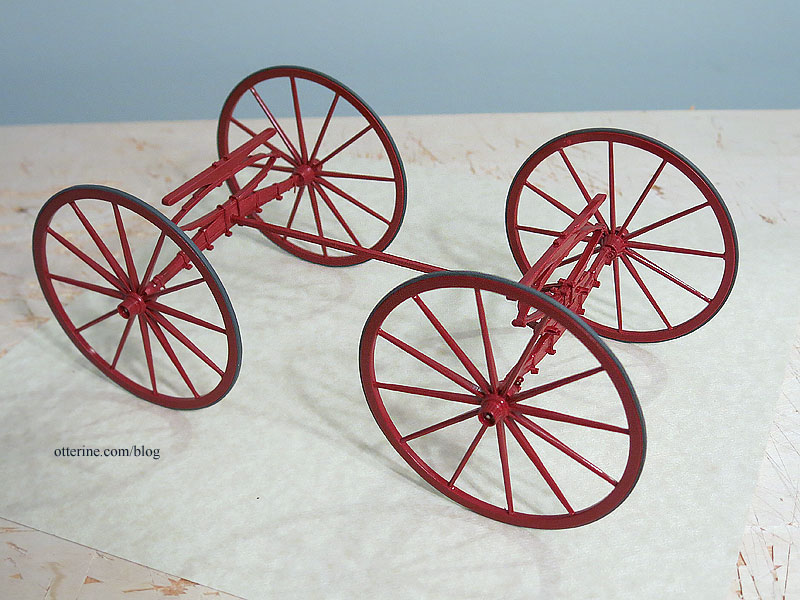
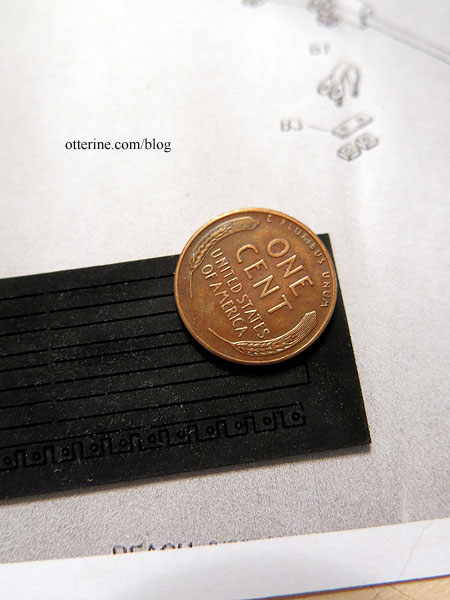
The chassis from the doctor’s buggy kit had wonderful detail, but it was not made for a straight bottom cabin like my mail wagon. The original chassis planned for a curved reach. That’s the long bar that connects the front axle assembly to the rear axle assembly.
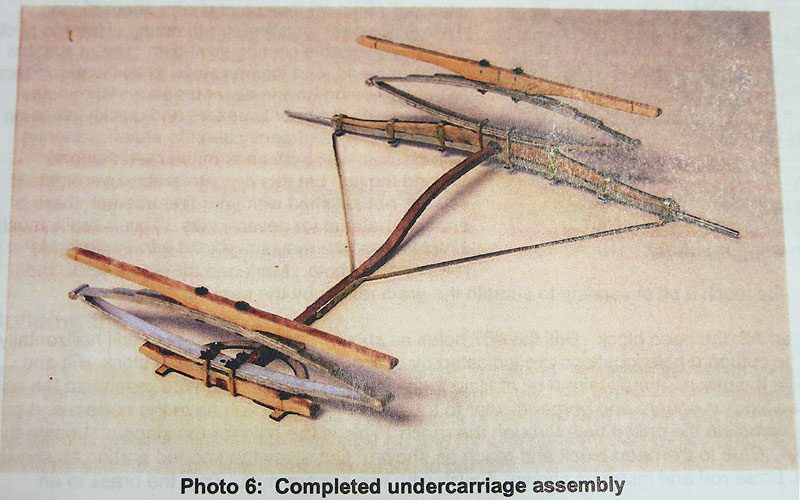
Mine had to be relatively straight but also account for the slight difference in height between the front and back wheel hubs. Since it was such a slight incline, I used a long piece of 3/32″ basswood as my new reach without any curve built in. The kit was supposed to come with a piece of cherry for the reach, but I couldn’t find it. It’s entirely possible it was in the box originally, but I misplaced it.
In case you ever need to know, the small McCormick spice bottles are just under 2 1/4″ tall. :D The spice jars helped me mark where the front and rear spring bars would hit the cabin.
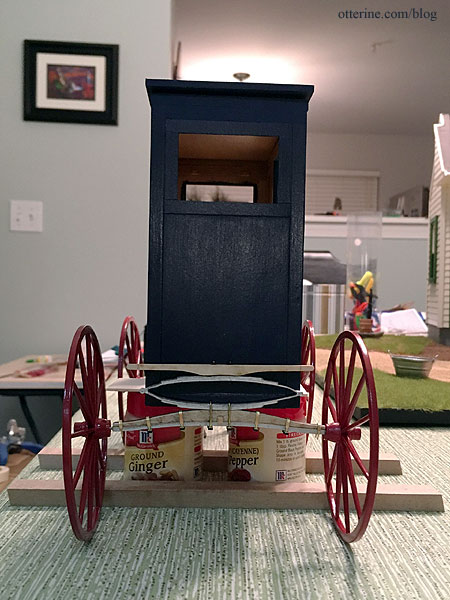
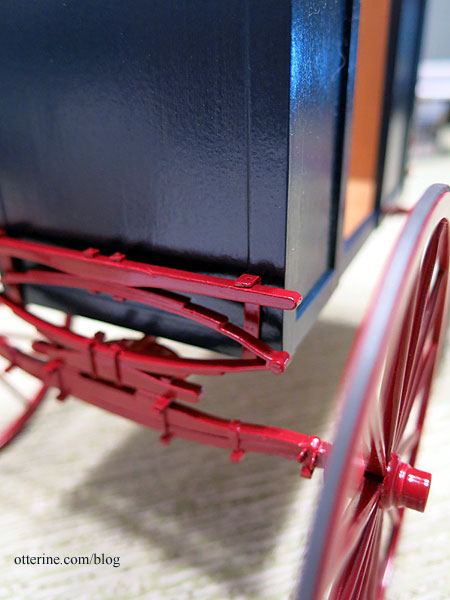
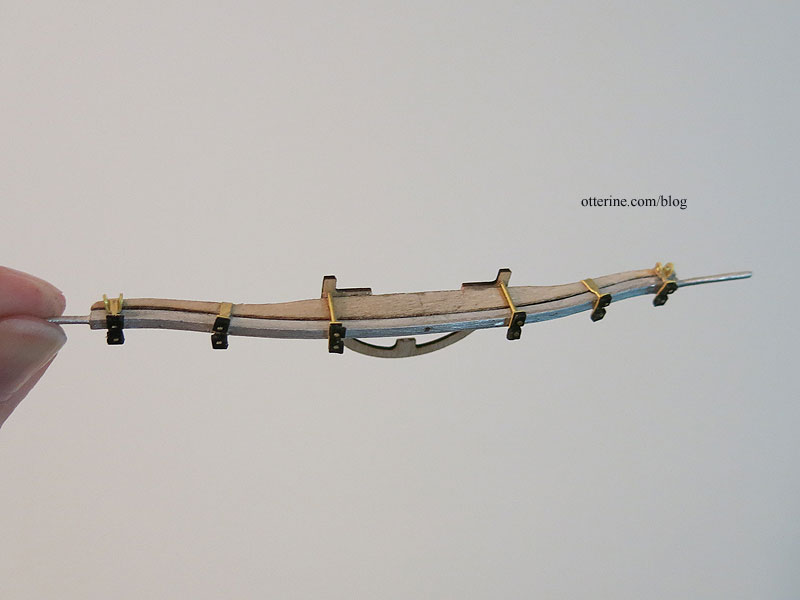
I trimmed the spring bars to fit since my cabin was skinnier than the original doctor’s buggy passenger compartment.
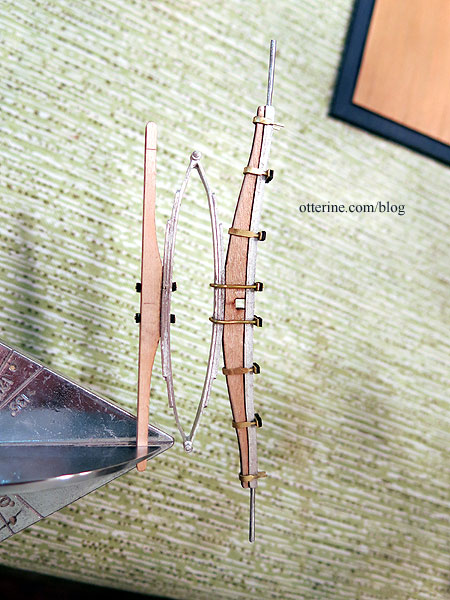
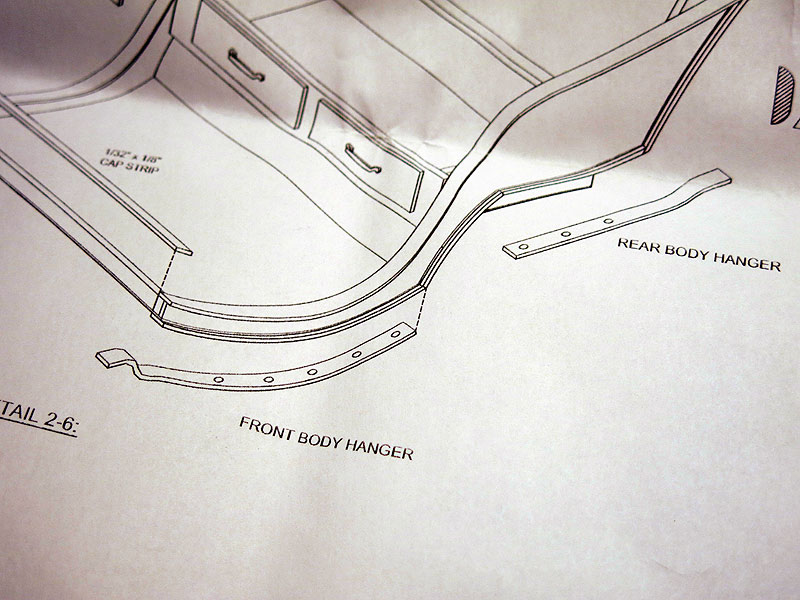
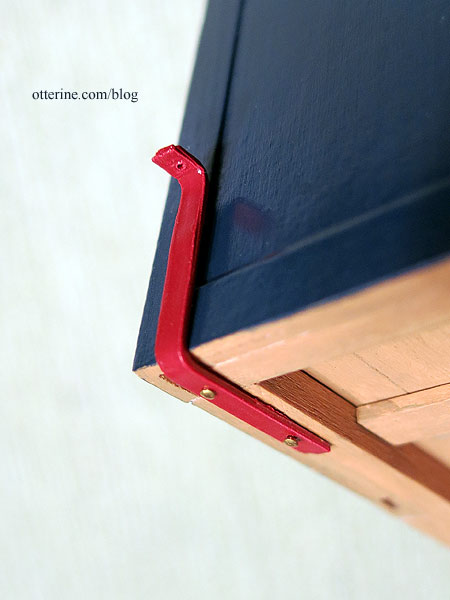
The front and rear body hangers from the original kit are soft metal, so I was able to straighten them out and bend to the new shape needed.
I drilled holes for nails to be added. These are also epoxied in place for stability and durability.
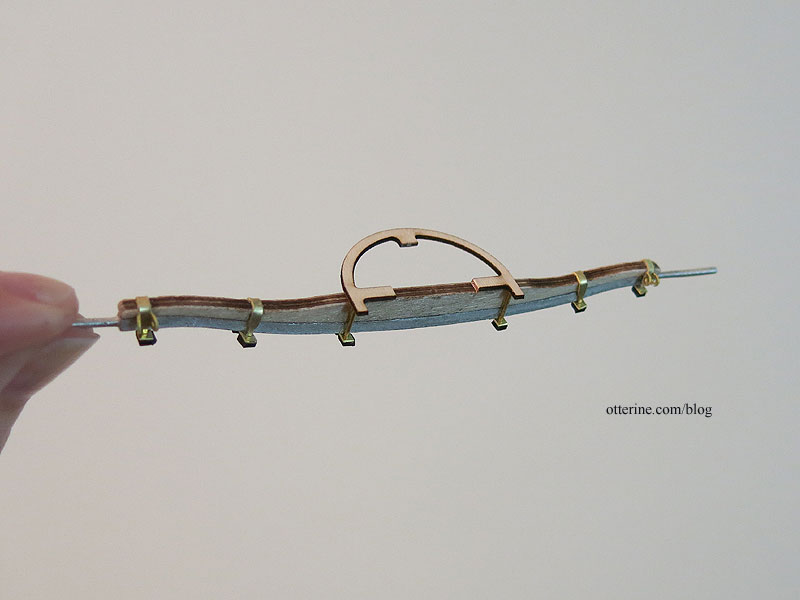
The body hangers sit on top of the spring bars, suspending the cabin above the reach. I left them unattached at this point.
After I had the placement, I could slide the excess reach out the back and trim it to fit.
Chassis completion to be continued….
Categories: Ivy Hollow RFD, Model Cars, Vehicles
January 27, 2020 | 0 commentsMail Wagon – part 14
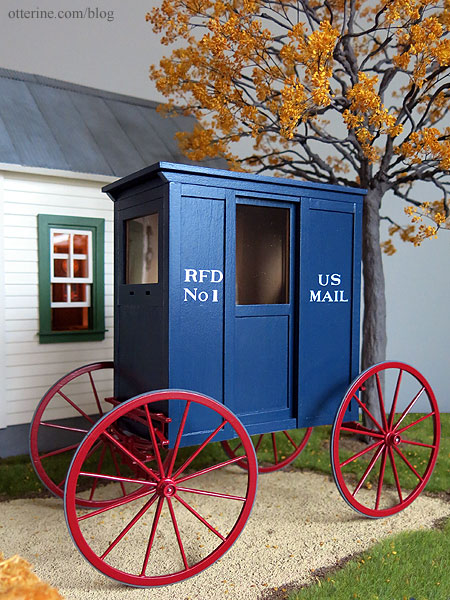
Continuing work on the mail wagon. Once the painting and sealer were done, I could move on to the lettering. I neglected to put on the cross detailing before the last coat of sealer but plan to add it later, so I took that into consideration when I did the layout. I used frog tape to create a line to follow and used a towel to cushion the cabin as I worked.
The letters are rub-on transfers by Woodland Scenics – Roman White in six sizes from 1/16″ to 5/16″ on one sheet. I used 1/4″ for the main letters except size 3/16″ for the “o” in No.
Since these didn’t come with numbers, I bought Roman Stencil/Block Letters White in three sizes from 3/32″ to 1/4″ on one sheet. I used the Stencil font size 1/4″ for the rural route “1” designation.
Since you can transfer all or part of a letter, I cut down the long portions of the “F” and “L” for a cleaner look.
Originally, wheels would have had metal around them to protect the wood. The kit supplied laser cut rubber material for the tires, but there were two issues with this. First, if you recall, the original kit wheels and spokes were not cut correctly and needed to be replaced. Once I received the replacements, I opted to use the “waste” circles between the true wheels for sturdier construction. This meant one set of the rubber tires was too short. Besides that, it would have been very messy to glue these fiddly bands.
Instead, I turned to a material I had used before for another wagon project – Instant Lead Lines (thin version). These are a rubber like material with adhesive already applied. There is a wider version of this material, but it was too wide for my wheels.
The thin tires add just enough extra detailing to the wheels and were easy to apply and cut to size. They look close enough to metal without further fiddling.
Categories: Ivy Hollow RFD, Model Cars, Vehicles
January 1, 2020 | 0 commentsMail Wagon – part 13
Continuing work on the mail wagon. While I was painting one day, I went ahead and finished up the wheels. I painted them flat white, then gloss Cherry Red by Krylon.
I joined the front and back cabin assemblies using strip wood along the inside bottom, using spacer boards at the top to keep the front and back assemblies square as I worked.
I installed the floor and then added more support boards underneath.
You can see I added the same scored lines on the bottom to mimic individual boards.
I added strip wood along the top to finish the walls and to fill the gaps on the top and bottom of the doorway. These wagons would have had slightly curved rooftops, but I left mine flat for ease of building. I did add some shaping to the front sides.
I cut a piece of 1/16″ thick basswood the exact shape of the ceiling opening.

I cut a roof board from 1/8″ thick luan plywood (leftovers from Walnut Bay Light) and covered the edges with thin basswood. I added the 1/16″ thick basswood ceiling to the plywood which would allow the roof to sit firmly in place but remain removable. I again scored the basswood to mimic individual boards. Having a removable roof means I can always try my hand a curved roof later. I apparently didn’t take progress photos of this part, so here is the roof after painting.
From the inside, it looks solid. :]
From the outside, you can’t tell it’s not all glued together.
Categories: Ivy Hollow RFD, Model Cars, Vehicles
December 20, 2019 | 0 commentsMail Wagon – part 12
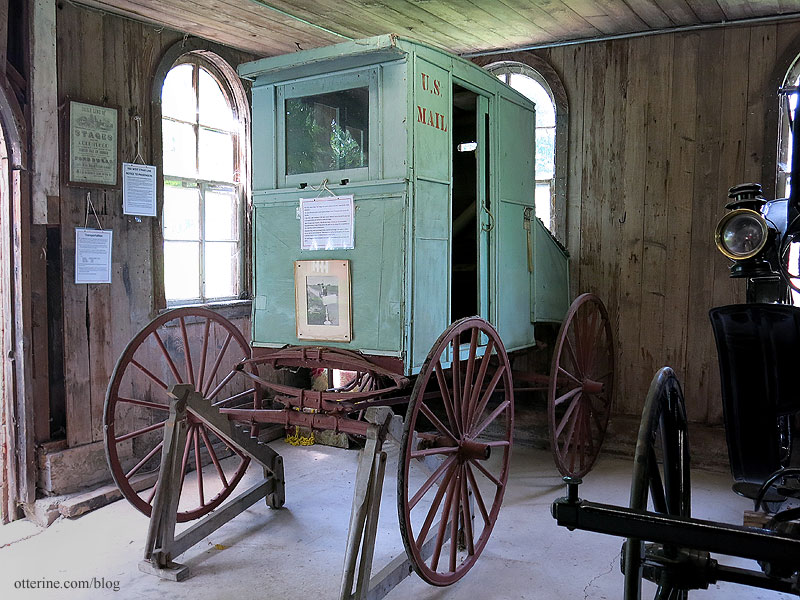
Continuing work on the mail wagon. Here’s a reminder of the mail wagon from the Galloway House and Village in Fond Du Lac, Wisconsin. Since its interior is the only one I’ve been able to photograph up close, I’m modeling many of my details after it.
I chose Deep Midnight Blue by Americana for the exterior. I sealed the paint first with a satin spray sealer that must have been old, because it would not dry. I followed that up with a semi-gloss sealer, which ended up looking better overall. I had to wait a few days for it to full cure before I felt comfortable taping or clamping the surface.
The interior of my inspiration has interesting hardware details.
In the beginning, postal carriers were photographed with satchels, but I’ve always liked the look of the sorters inside some mail wagons I’ve seen, including my inspiration. There wasn’t a lot of room, but I was able to add a few cubbyholes. These wouldn’t necessarily be reserved as one per household on the route but a way to sort along the way.
I added a window lock from my stash of interesting hardware (not sure where I even got them or the manufacturer). The lock bar actually slides, though it doesn’t matter much for my non-working window. I’m thinking the hook on the top would hold the window open, maybe? I’ll definitely add small hinges to complete the look of my non-operating front window.
Next up, a comfortable bench seat. This had to be built with the doors held in place to make sure there was clearance for the doors on either side. I’ll make a padded cushion for a softer ride. :D
Categories: Ivy Hollow RFD, Model Cars, Vehicles
November 30, 2019 | 0 commentsMail Wagon – part 11
Continuing work on the mail wagon. Here is the mock-up from last time.
I originally intended to build a working window for the front, but after considering that the small space would make it difficult to actually operate the window, I opted for faking the window instead. I cut a front following the cardboard template from the mock-up and then built the trim to fit. I will enclose acrylic sheet inside the window frame during final assembly. No sense in risking marring the acrylic as I continue to work. Even though the window doesn’t operate, I did add the holes for the horse reins.
The back wall has a slightly smaller window and is also non-opening.
After building the front, back and doors, I figured it was easier to prime and paint what I could before assembly. I started with the interior since I could start putting things together as I painted if I wanted to do so. The first coat on the interior was Camel by Folk Art mixed with Staining Medium by Americana. After a light sanding, I added a second coat using Honeycomb by Folk Art mixed with Staining Medium by Americana. I followed that with a light coat of Delta Ceramcoat Satin Varnish. These layers give the look of varnished wood.
It reminded me a lot of the Model T wood portions as shown below, which would fit the era well.
I cut a solid floor and then scored lines to mimic individual boards. Much less fiddly than trying to use actual planks. This is painted to match the remaining interior.
Categories: Ivy Hollow RFD, Model Cars, Vehicles
November 21, 2019 | 0 commentsMail Wagon – part 10
Continuing work on the mail wagon. As you saw last time, I had primed the wagon wheels. On the hubs, I used Rust-Oleum Aluminum Primer, which is light grey. It bonds specifically to aluminum, and an aluminum primer was recommended in the instructions for the doctor’s buggy.
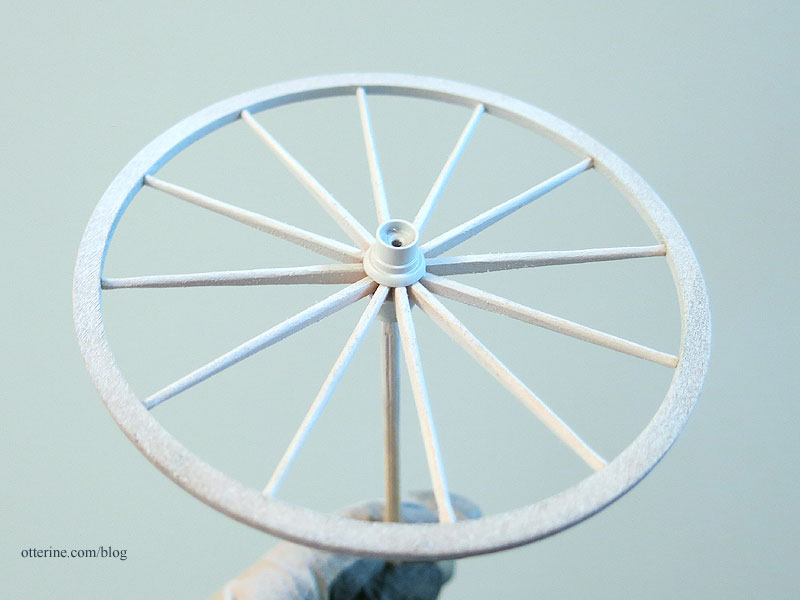
I then used plain flat grey Rust-Oleum primer. As you can see, the wheels are rather fuzzy.
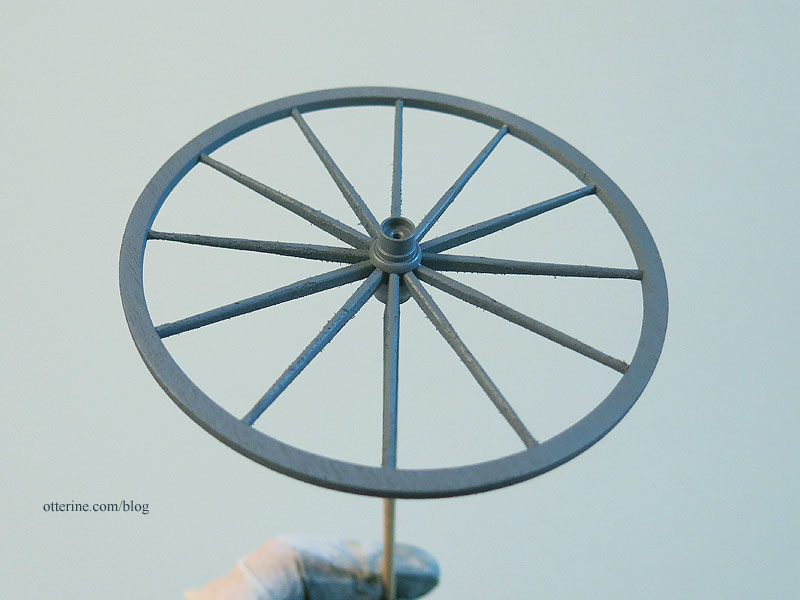
Sanding after priming a first coat always helps smooth the fibers away. Then a second quick spray of the same grey primer and they are now ready for final color when I get there….
Back to the cabin. I made a drawing for the front based on my built walls, not the previously drawing of the sides. My final measurements for the sides ended up being different from how I had drawn them.
Before continuing, I cut the front and back from cardboard to get a feel for the final size. Easier to adjust here than after I started building the front hinged window.
I checked the width against the rear axle assembly, which can be adjusted to fit, but I think the cabin size is good for proportion.

Categories: Ivy Hollow RFD, Model Cars, Vehicles
September 21, 2019 | 0 commentsMail Wagon – part 9
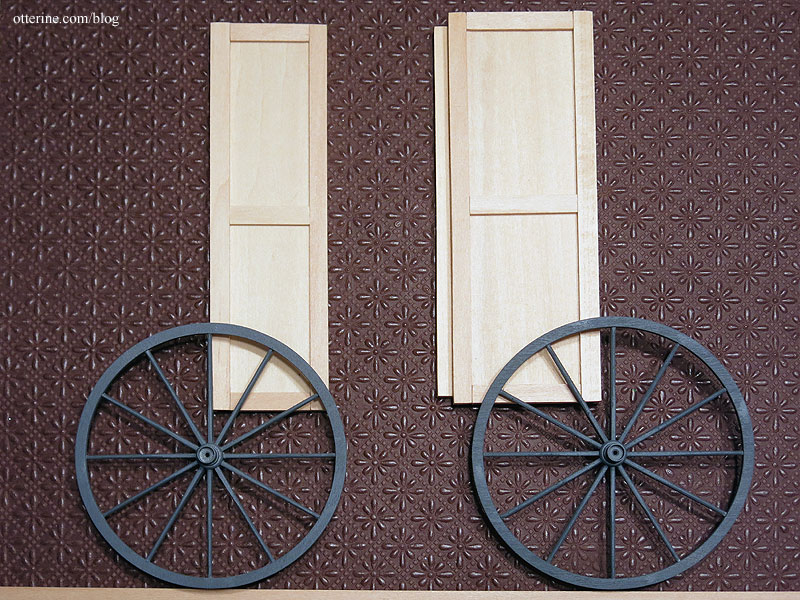
Continuing work on the mail wagon. I’m planning a basic box cabin with trimmed details, a hinged front window, and sliding side doors. I’m using 3/64″ thick basswood sheets (3″ x 24″) for the majority of the parts. It’s thinner than 1/16″ and therefore lighter in weight but still durable when trimmed.
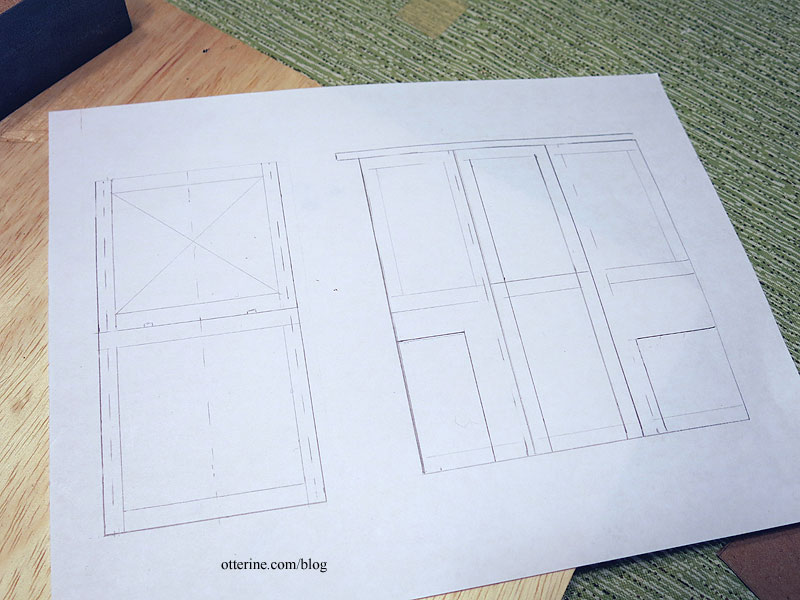
I started by drawing a quick sketch using the Rondel kit sides as a starting point, then refining from there based on measurements for average seat height, the seated height of my artist model and general proportions from the various mail wagon examples I’ve reviewed.
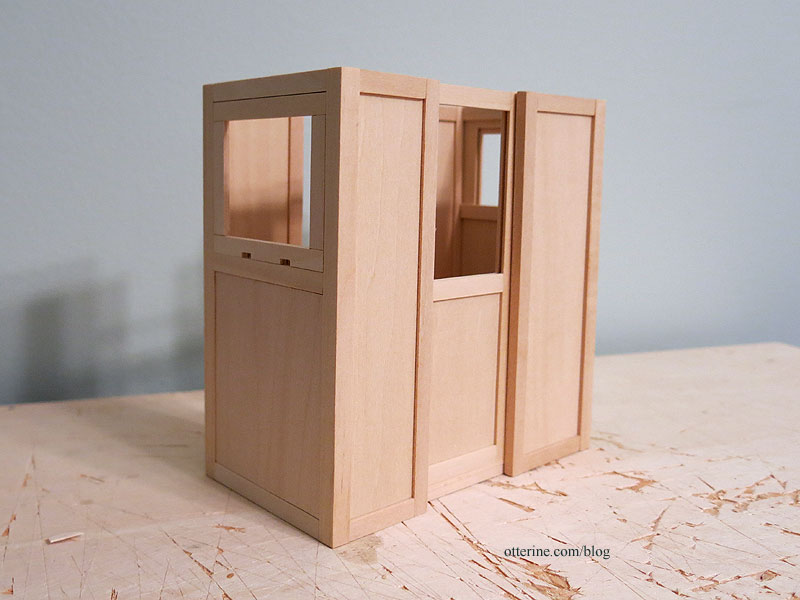
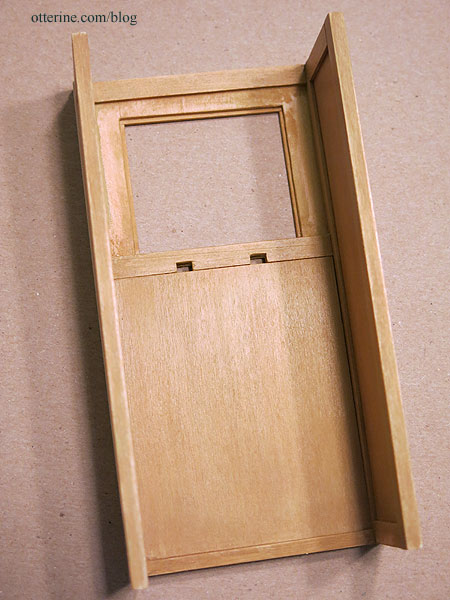
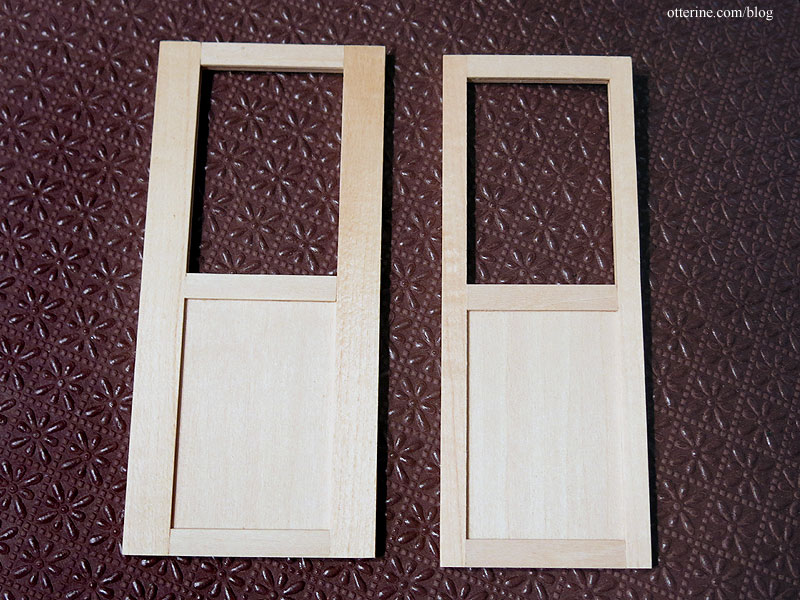
The two doors are where I will begin, then I can build the walls to enclose around them. If these don’t work, then my basic construction will change since I’ll make hinged doors instead. I’m using door frames from Northeastern Scale Lumber, cutting them down width-wise. I am sure there must be a place to get the window channel that Houseworks uses to make their windows, but I have yet to discover it.
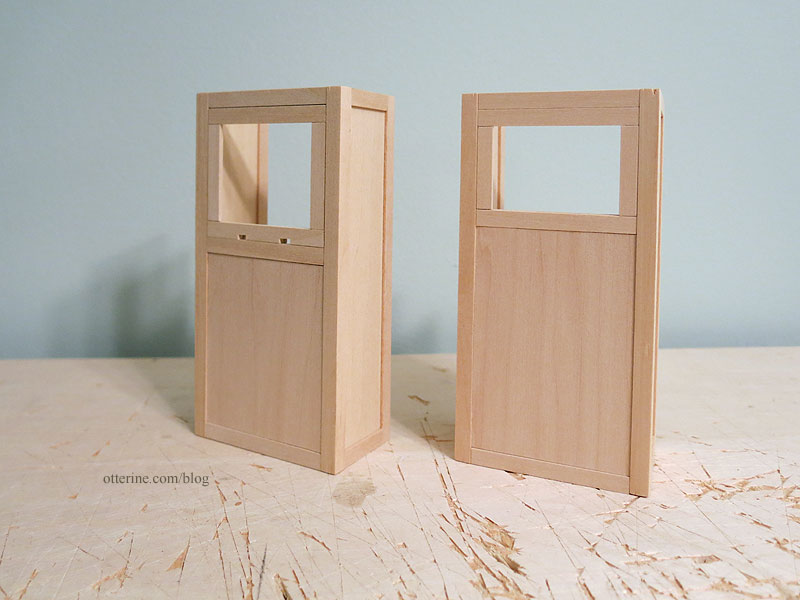
The door frame material holds the 3/64″ thick basswood perfectly as an insert, and 3/64″ thick trim finishes the frame. The top will have acrylic sheet for the window. As I was working, I decided to make my door a little wider than my drawing for practicality. This will add a modest amount to the length of the wagon, but it seemed necessary for better proportion. Here is one door with the original width of door frame material on the side and the other with the width cut down.
I built the side front and side back walls using the door frame material for the lead edge of the door openings as well as the tops and bottoms, cut down to size width-wise. I used 1/4″ corner trim for the front and back edges to make it easier to join the front and back of the cabin when I get to that stage.

Most of the examples I saw had no side windows, sometimes small slits to peer through, so I’ve left the side walls solid to have more room for the lettering. The cross trim on the side front and side back panels isn’t glued in place yet, since I want it to line up with the door in the end. Leaving it unattached allows for adjustment later.
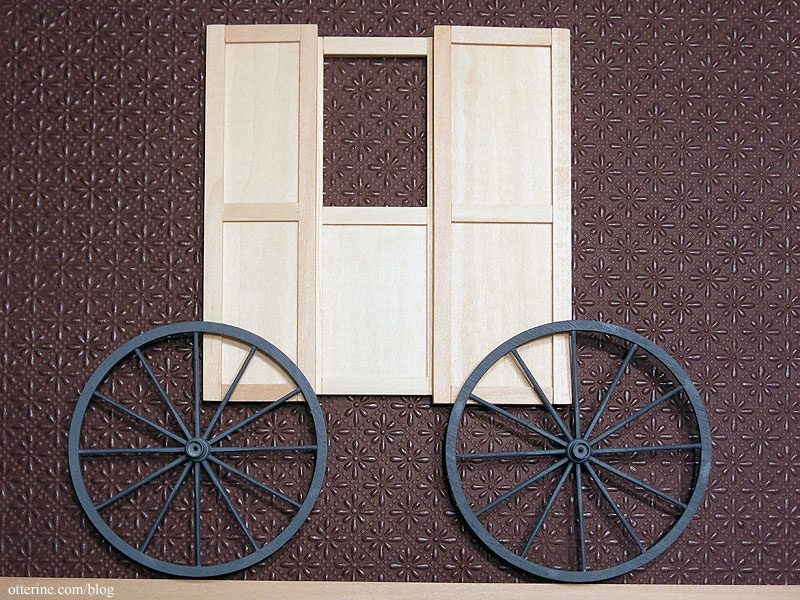
Each door will slide to the back just short of its door handle.
I think this will work well, so next I will make the front, back and floor.
Categories: Ivy Hollow RFD, Model Cars, Vehicles
September 8, 2019 | 0 commentsMail Wagon – part 8
Continuing work on the mail wagon. With the front and rear axle assemblies and wheels made, I can start to build the cabin. I’ve pretty much been researching mail wagons since I started down this path, and there was no standard type of wagon over the years. RFD was such a novel thing, though horse wagons were not, it really was each man for himself. So, I get a lot of room to play.
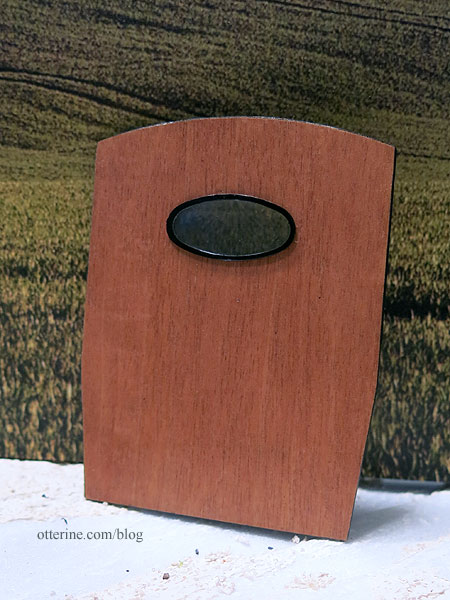
There were sliding doors and front windows that could be lowered into the front wall.
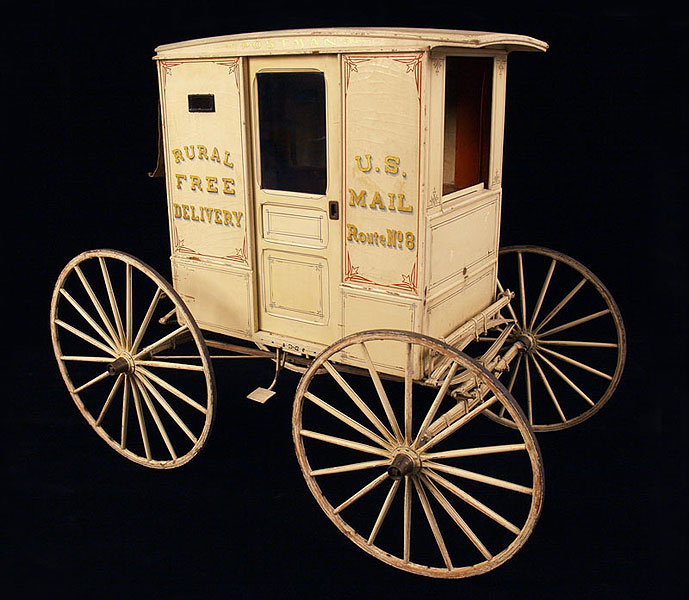
image from The Smithsonian There were hinged doors.

There were hinged windows and mail slots.
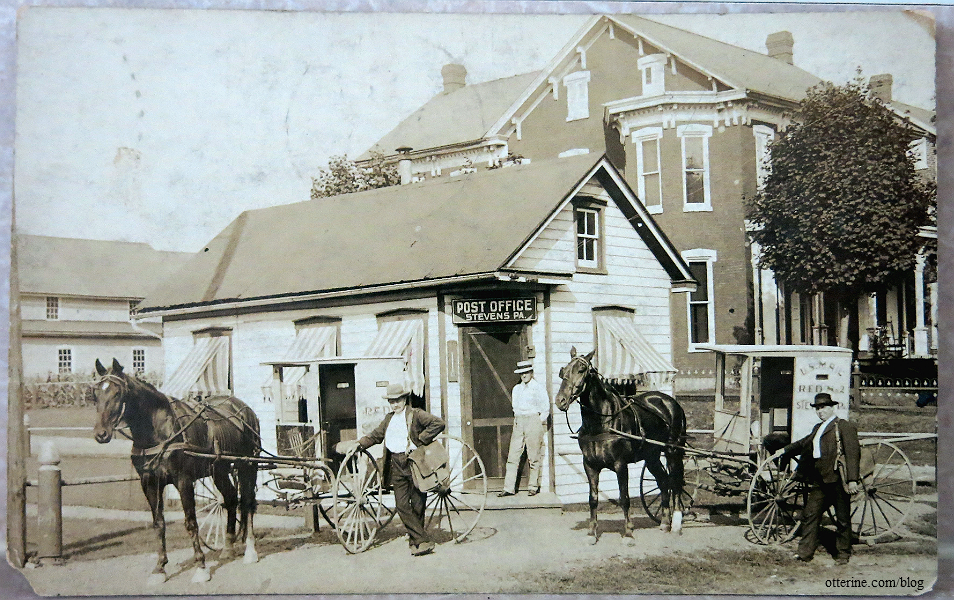
If you look at the original wagons from the postcard, there was no room in front – just the window wall.
There were built in heaters and portable heaters.
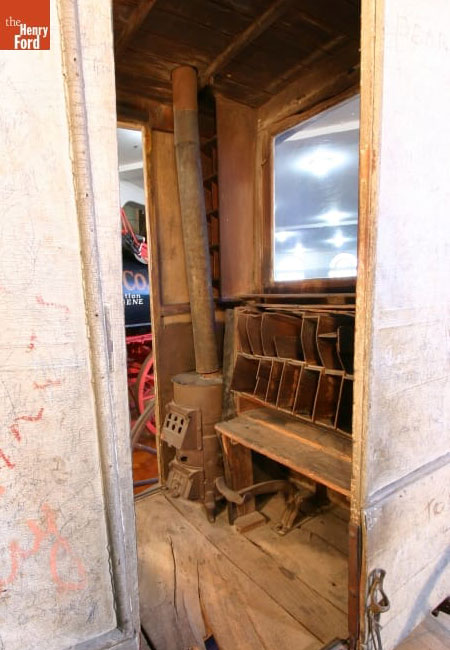
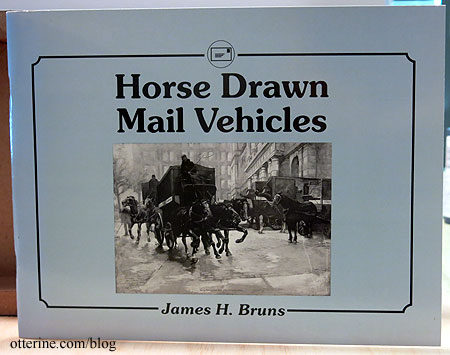
image from The Henry Ford One great source is Horse Drawn Mail Vehicles by James H. Bruns
Look at this tiny thing that’s barely a box built around a chair and a heater! Where did the mail fit? I’m also pretty sure only one horse was needed. :]
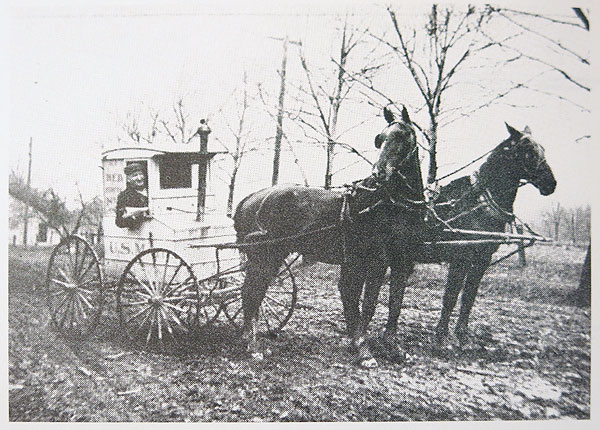
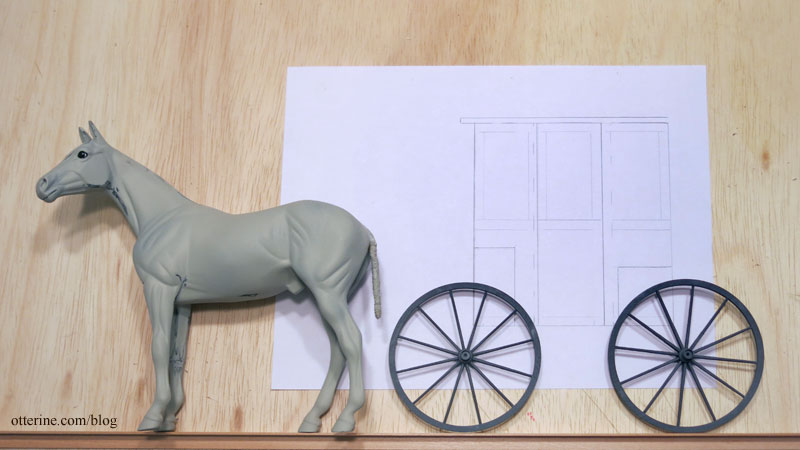
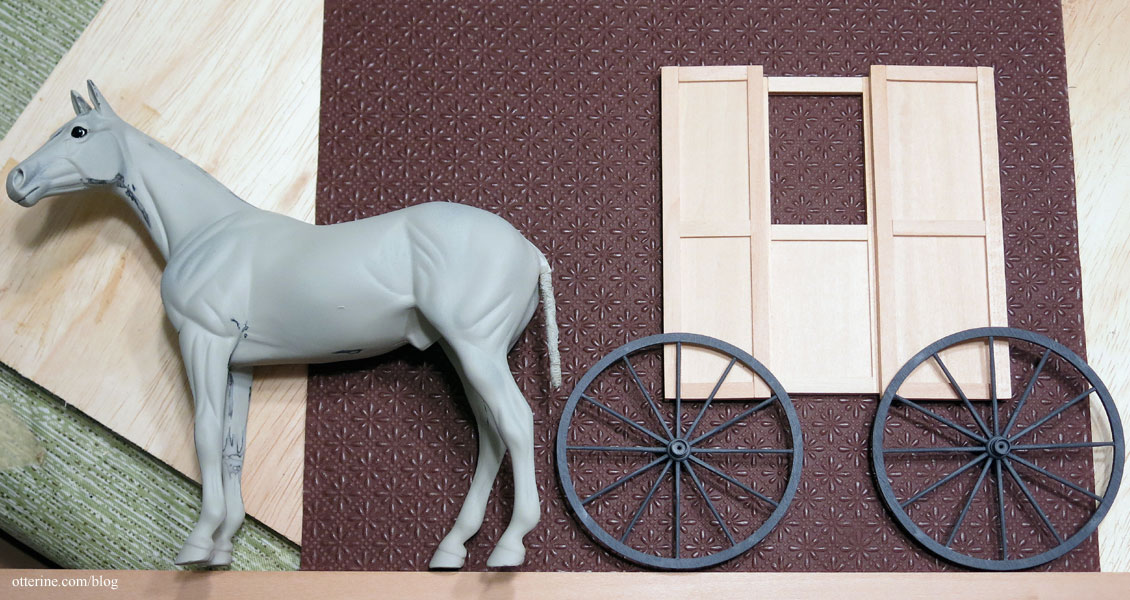
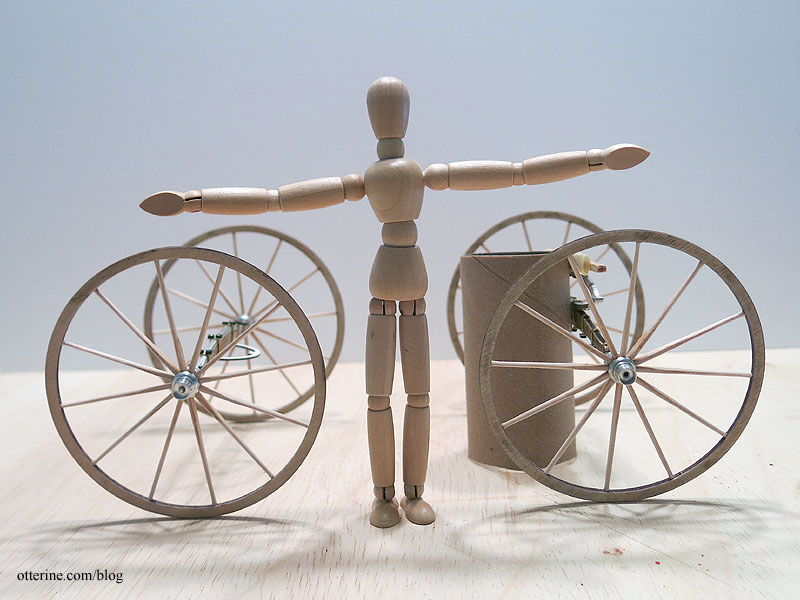
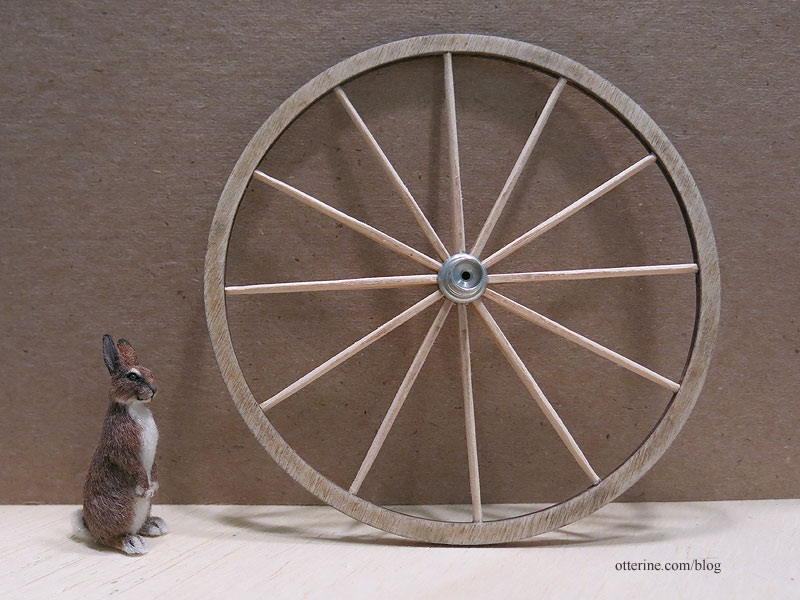
from Horse Drawn Mail Vehicles by James H. Bruns I set up my wheels and axles with Jebediah and one of my artist models. I can probably back Jebediah to the wagon a bit more, but this total span is 17 inches from his nose to the back of the wheels.
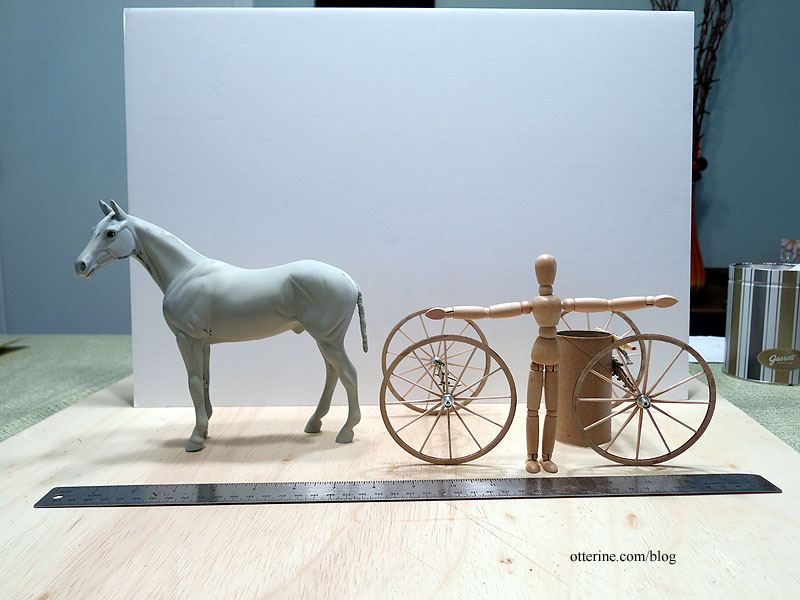
The span from the axle centers is 5.5 inches. Having a very narrow space between the wheels for the mail carrier to enter the wagon was not uncommon.
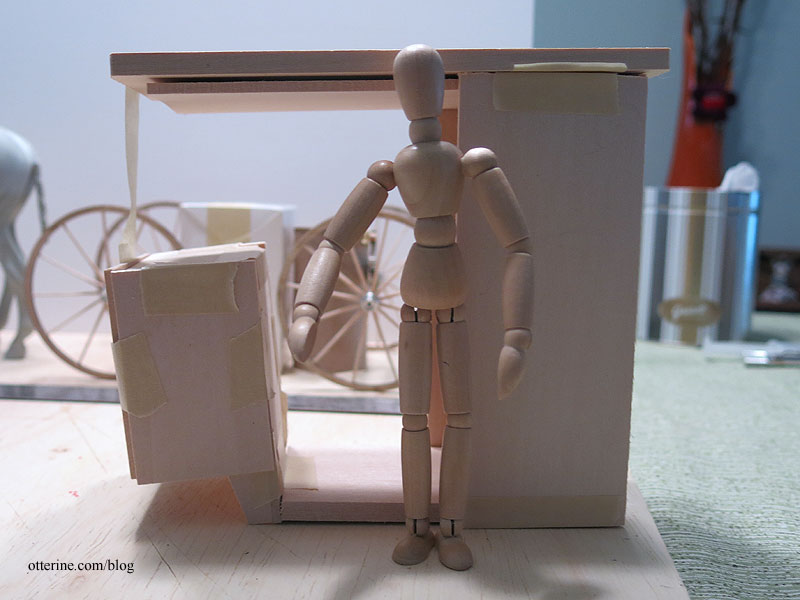
I won’t be using the Rondel kit, but here is that cabin in dry fit for size comparison (obviously not this tall).
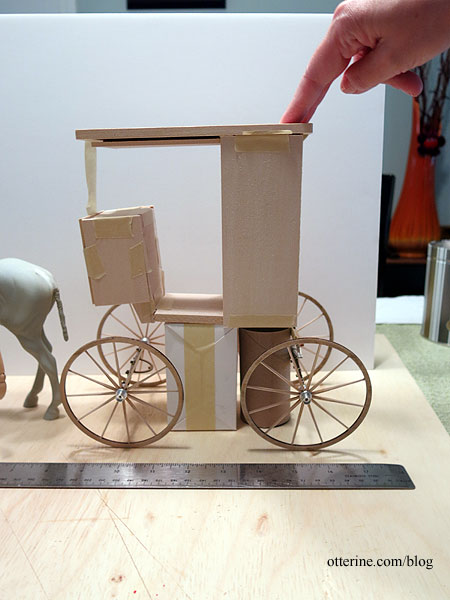
This should be a good gauge for overall size, though.
I’ll need to make the cabin as light as possible since the axles are fairly delicate, but I can layer thin wood to get good detailing without adding a lot of weight.
Categories: Ivy Hollow RFD, Model Cars, Vehicles
September 1, 2019 | 0 commentsMail Wagon – part 7
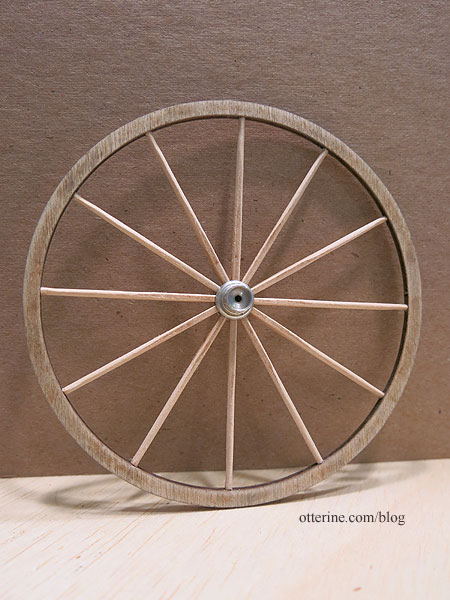
Continuing work on the Mail Wagon. With the replacement wheel parts received, I was able to assemble all four wheels. I decided to use the “scrap” wheels that were cut between the thin true parts. The scrap wheels are more substantial for a mail wagon versus a doctor’s buggy, and I will be handling the wagon and therefore the wheels a lot during the cabin construction. As expected, the replacement scrap wheels are slightly smaller than the original wheels, but this works without issue. I’ve seen mail wagons with all the same size wheel and those with smaller wheels in the front.
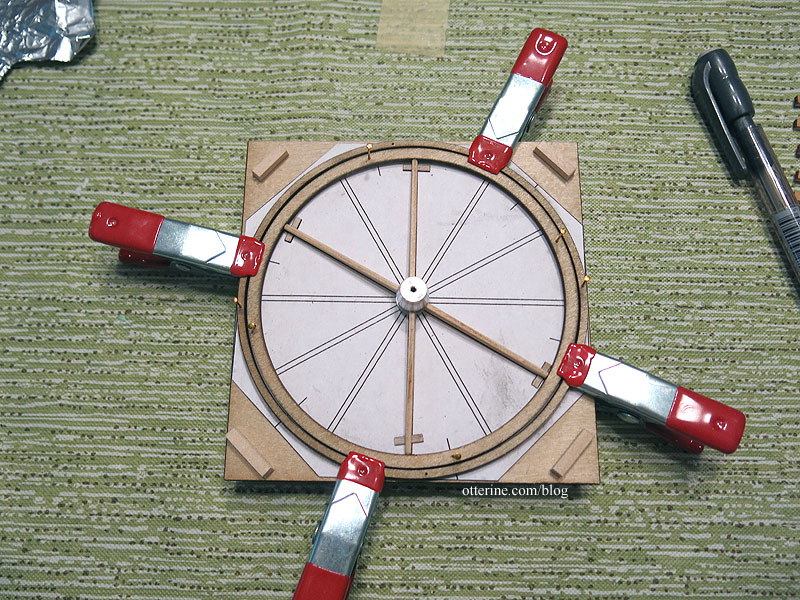
I left the previous large wheel on the jig and fit its corresponding scrap wheel inside since the paper pattern isn’t meant as a guide for the scrap wheels. I’m using only the long spokes, measuring and cutting them to fit one at a time. While there are two extras in each set of spokes in case of disaster, I am assembling the larger wheels first. If I get a spoke too short for these, those shortened pieces will likely work for the smaller wheels.
You are to complete the spokes in opposing pairs so the wheel stays uniform and flat. I built in a little tension to help the minimal amount of super glue gel used, but too much tension can make the wheel buckle.
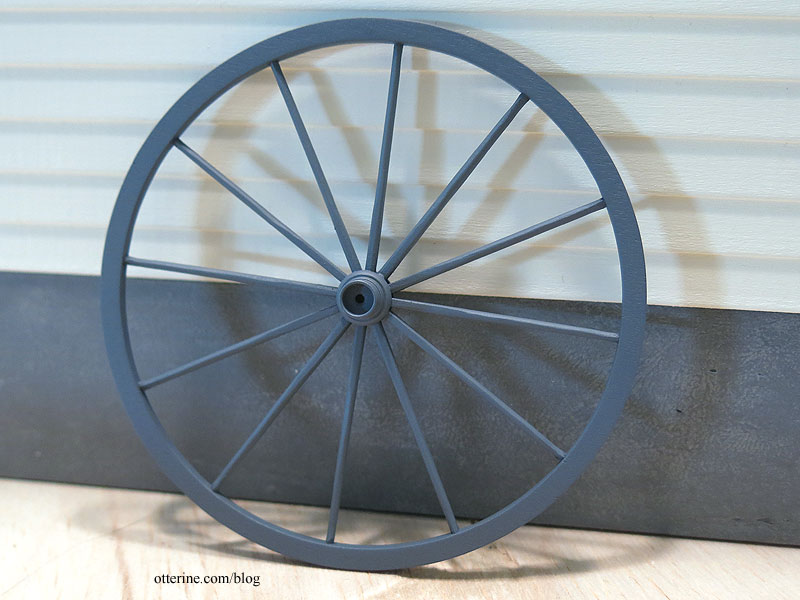
The assembly was actually very sturdy once removed from the jig.
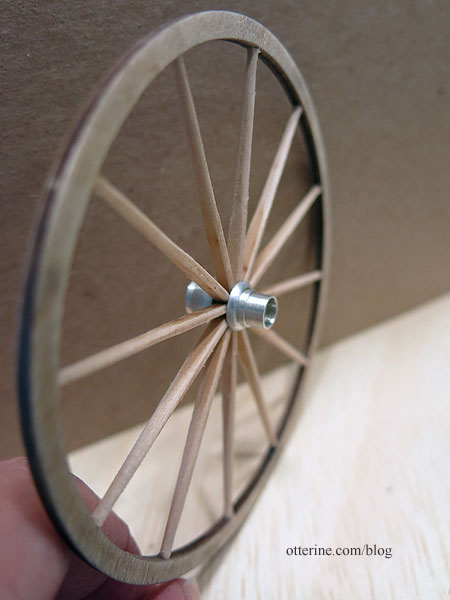
While I did round the edges a touch before assembly, the instructions indicate to fine-tune the small ends into rods. This worked only so well in that each one will always turn out differently. Once painted and with added grime, they should be fine. I filled the nail holes with wood putty.
Three more to go….
Categories: Ivy Hollow RFD, Model Cars, Vehicles
August 10, 2019 | 0 commentsMail Wagon – part 6
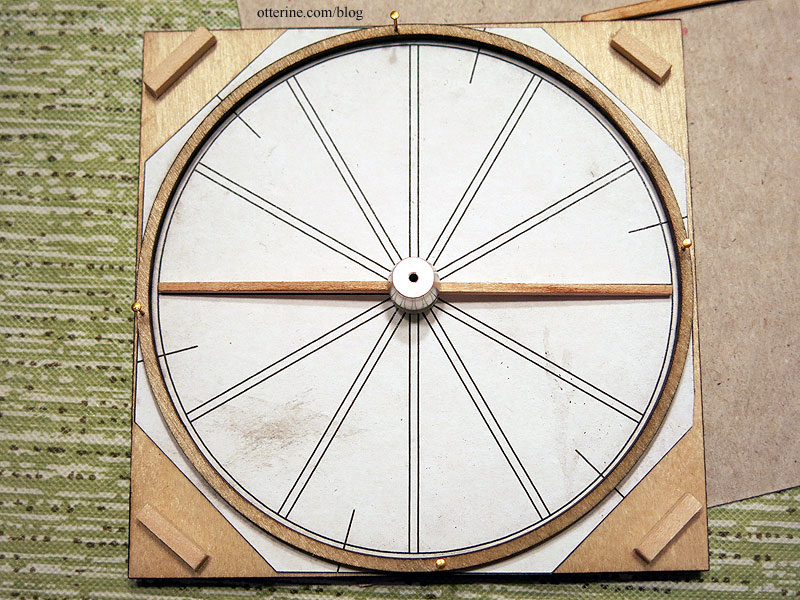
Continuing work on the Mail Wagon. With the front and rear axle assemblies started, it was time to work on the wheels. Most instructions tell you to read through the whole process before starting. This is to familiarize yourself with the parts and process. In this case, the instructions indicate it was noticed during the prototype stage, the manufacturer found it was easier to sand the spokes after assembly. That saves a lot of initial prep work on individual fiddly parts.
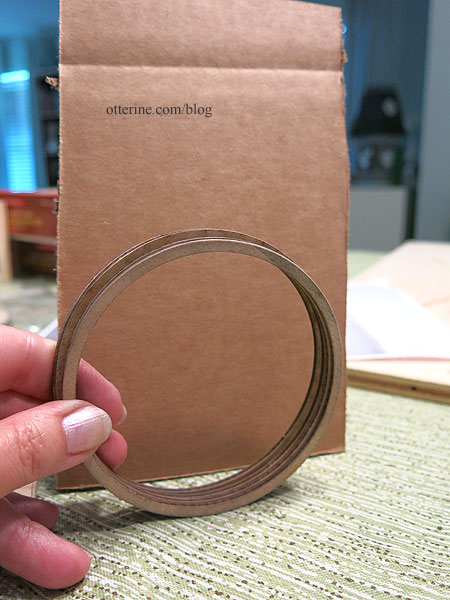
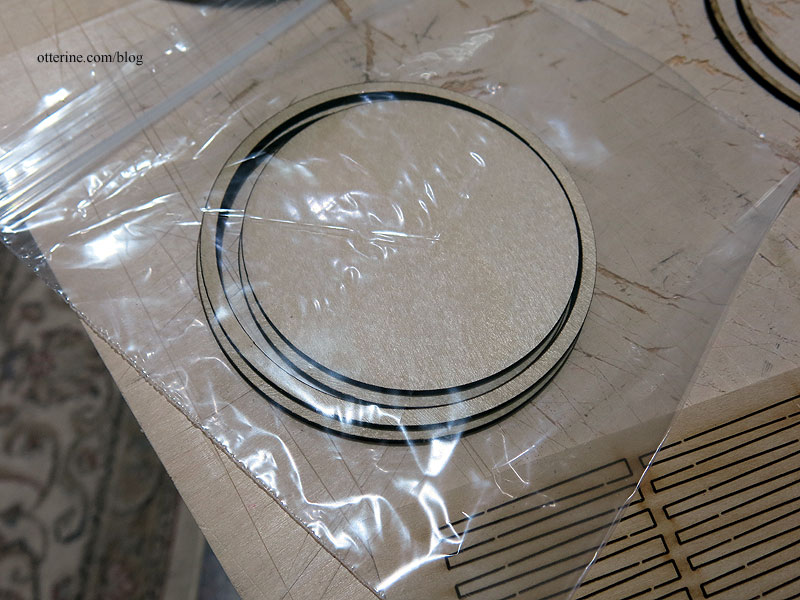
The wheels are made from laser cut wood parts, aluminum hubs and a jig.
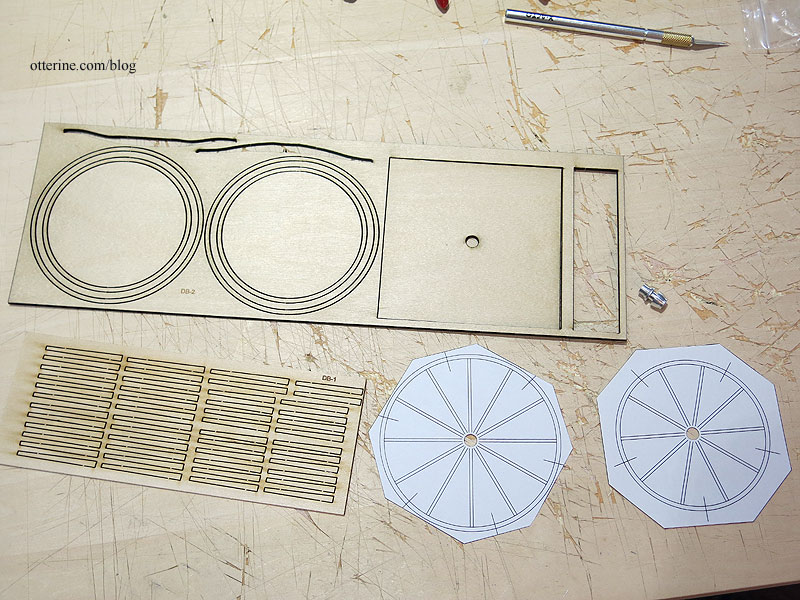
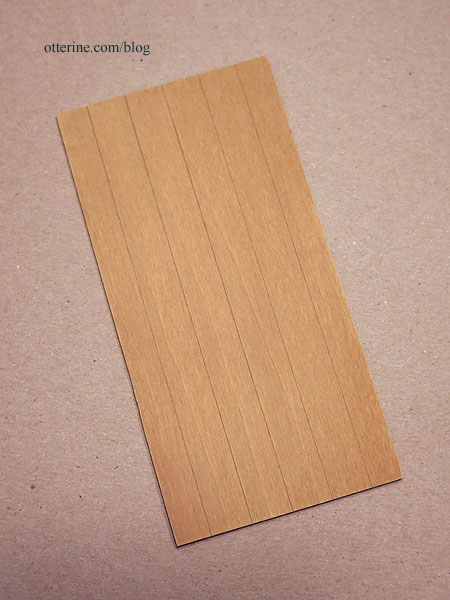
I used MiniGraphics Wallpaper Mucilage to apply the paper patterns to the wood base. Here is the smaller wheel pattern. The larger wheel pattern is on the reverse, but in reality, you would work on one wheel at a time so it’s not an issue.
Another nice thing is the intact inner circle and middle “wheel” waste pieces. I saved those in my stash. Never know when I might need pieces like these. :]
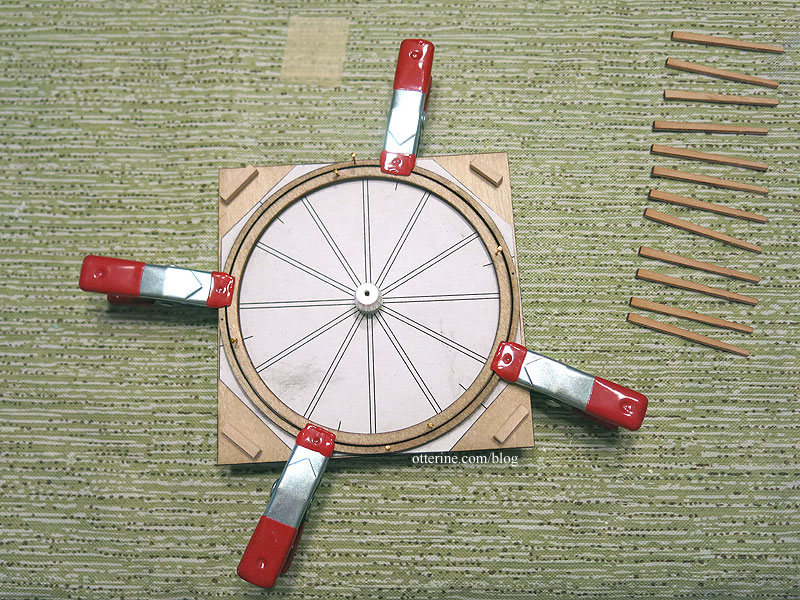
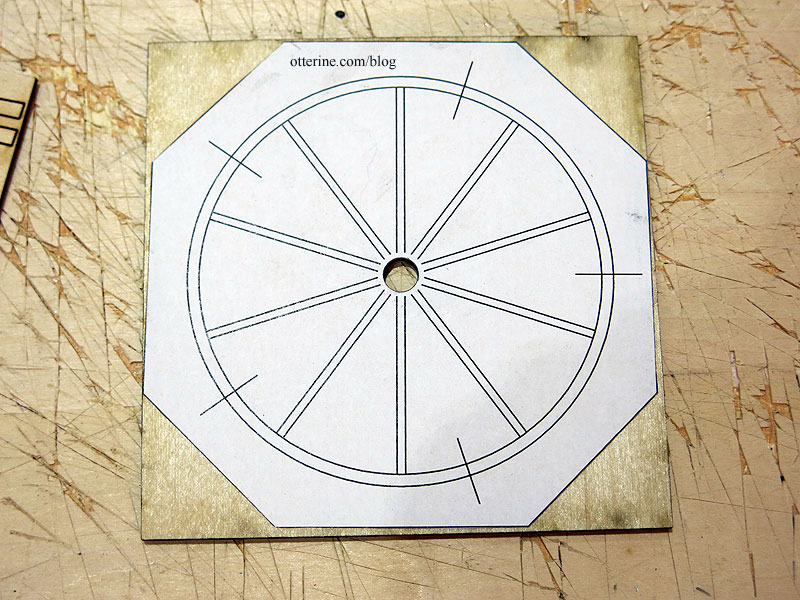
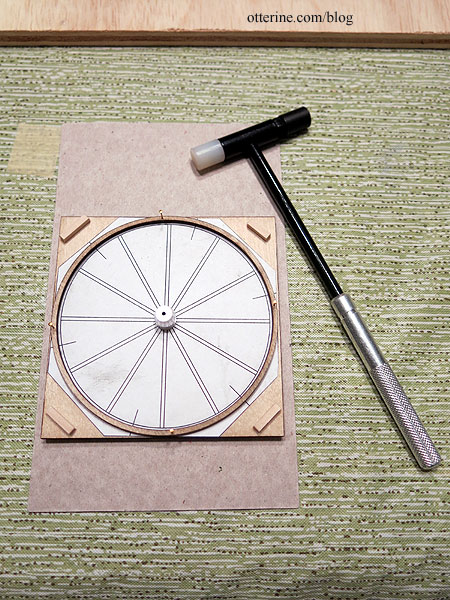
I decided to use the recommended nails to hold the wheels in place while assembling. The paper pattern did not match up with the wheel size, so I centered as best as I could. Using the nails also helped keep the circular shape while working whereas clamps might not have.
Even though I will be doing the final shaping after assembly, I did clean the laser char from the edges of the spokes beforehand.
I did the same for the wheels to have a cleaner gluing surface.
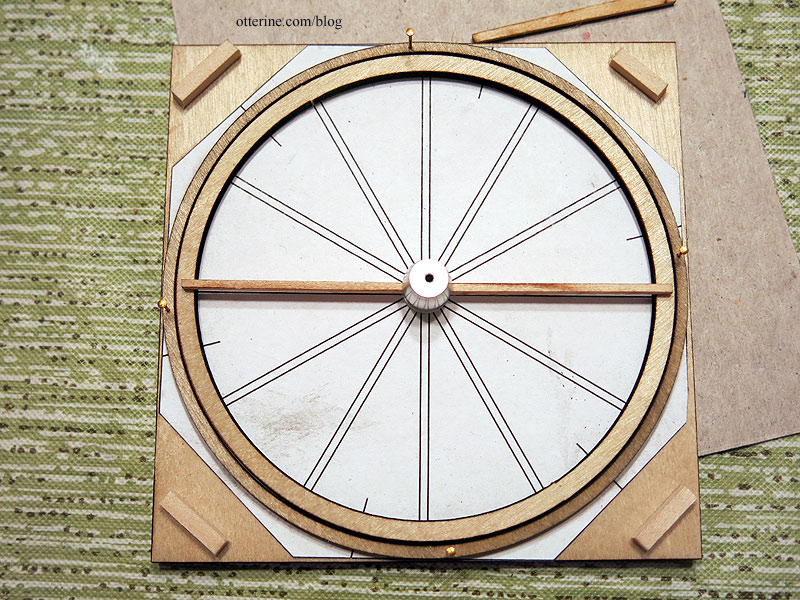
That’s when things went off the rails. The spokes fit well into the hub, but overall the wheels, hubs and spokes simply did not work together. (These will have a snug fit, but I was just testing parts at this point and didn’t trim the spoke ends to fit all the way into the hub groove.)

The wheels are larger than the jig pattern as noted, and the spokes are too short. I am putting the parts together as instructed and have removed the parts precisely from the laser cut sheets without removing any length from the spokes.
I could use the “scrap” wheels between the two true wheels with the longer spokes, but that would give me only two wheels instead of four.
Luckily, this kit is made by a company still in business, so I sent them these photos and told them about my issues. They checked their production, and what they have now is correct. Mine must have been an errant batch. They sent me a new wheel sheet, another spoke sheet and four hubs just to make sure it all worked well together. It’s fantastic when a company will stand behind its product. :]
Now, I need to prep the new parts for assembly. Back soon….
Categories: Ivy Hollow RFD, Model Cars, Vehicles
July 17, 2019 | 0 commentsMail Wagon – part 5
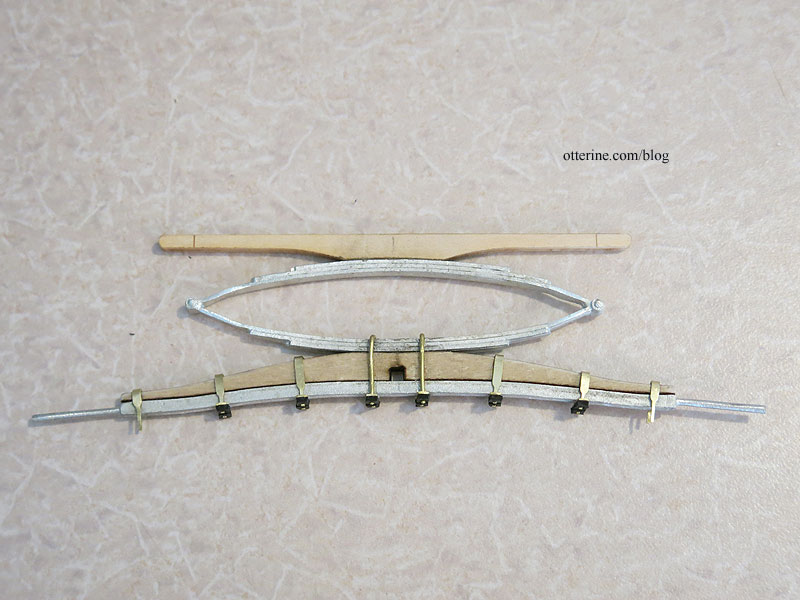
Continuing work on the Mail Wagon. I put together the rear axle assembly.
The front assembly required drilling a hole using the provided jig. I was able to use my hand tools – a pin vise – to make this hole. For the rear assembly, the metal was thicker and the pinvise was no match. I got a blister and two shallow pilot holes for my efforts. :\
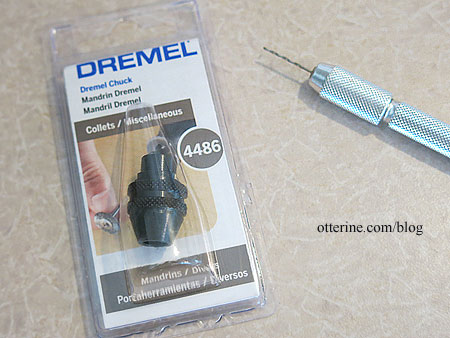
To finish drilling the holes, I bought the Dremel chuck #4486, which holds bits with 1/32″ to 1/8″ shanks. The buggy kit provides a 1/32″ drill bit (shown here in the pin vise).
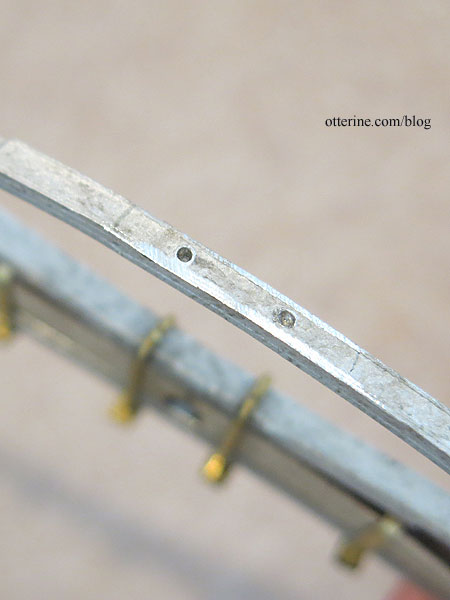
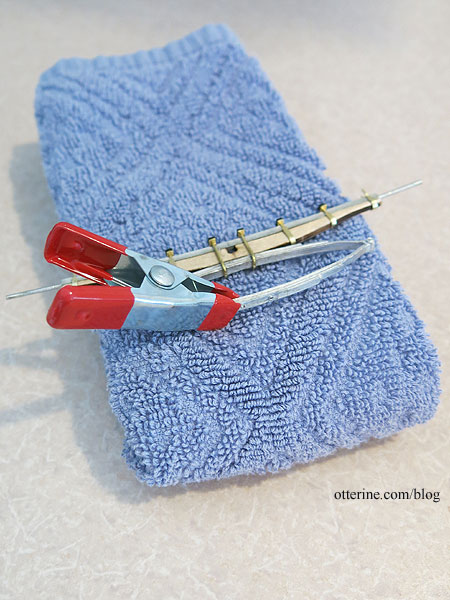
Since the metal parts are delicate and easily marred by pliers, I had to figure out a way to safely hold the assembly while also not breaking any of the parts already assembled. I folded a small hand towel to protect and brace the assembly. I attempted to drill, and the metal wagon spring heated up fast, so I added a tipped clamp to hold and protect my fingers from the heat.
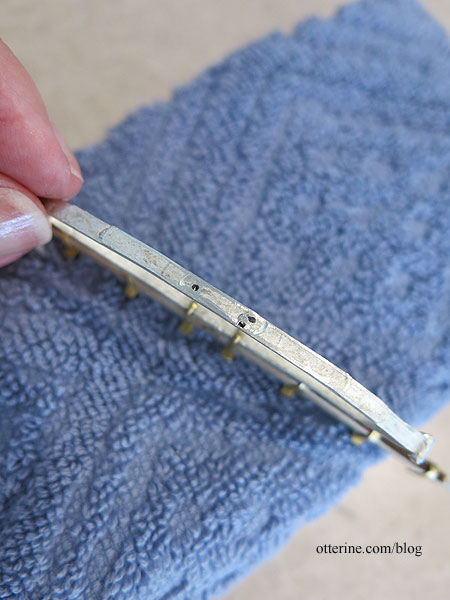
The first hole worked great since I had been able to get further into the metal with the pin vise. The other hole wanted to wander, so I had to work more with the pin vise to get the pilot hole deeper and in the right line. The excess hole will not be visible after assembly.
I reapplied the epoxy to the wood piece that sits on top of the wagon spring. I added the brass rods right away to make sure everything lined up properly while the epoxy set.
I added the square nuts and trimmed the brass rod to complete the rear axle assembly. It’s not very level or straight, but that is a limitation of the cast metal spring. It’s somewhat pliable, so it doesn’t want to hold the proper shape. I think it will be barely noticeable once the parts are painted a uniform color and the wagon cabin is added.
There is a spring for the front axle assembly, but that will have to be added later since I’m not using the reach (the rod that connects the front and rear axle assemblies). I’ll be making my own reach once I have the wagon cabin built, so the front spring will have to wait for now. Next up will be working on the wheels, which seems like it will labor intensive. If all turns out, they should be beautiful.
Categories: Ivy Hollow RFD, Model Cars, Vehicles
June 9, 2019 | 0 commentsMail Wagon – part 4
Continuing
to swear atwork on the Mail Wagon. To make it easier to work on the next part, I took closeup photos of the large schematics and printed the sections I needed. This eliminated the need to keep walking into the kitchen to look at the blueprint sized papers. I could sit and work in one area.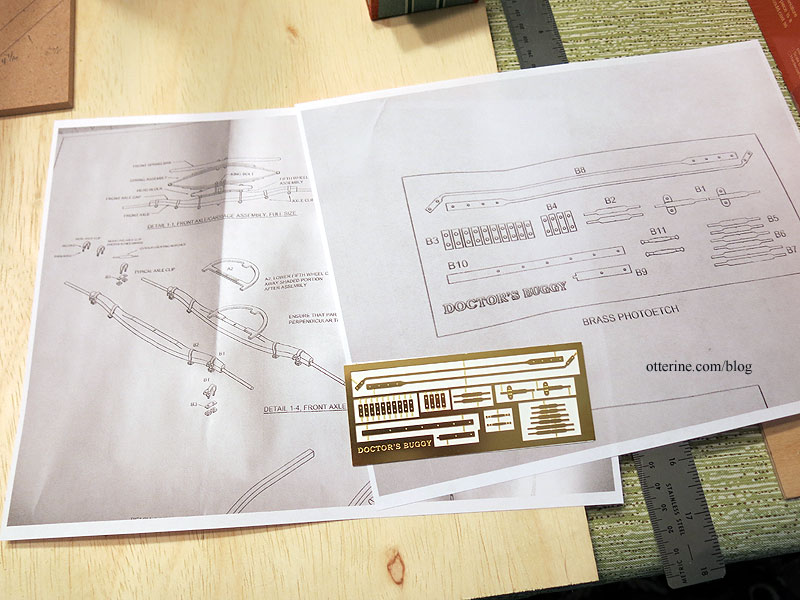
The laser etched brass pieces add fantastic detail, but they are tiny and challenging to work with.
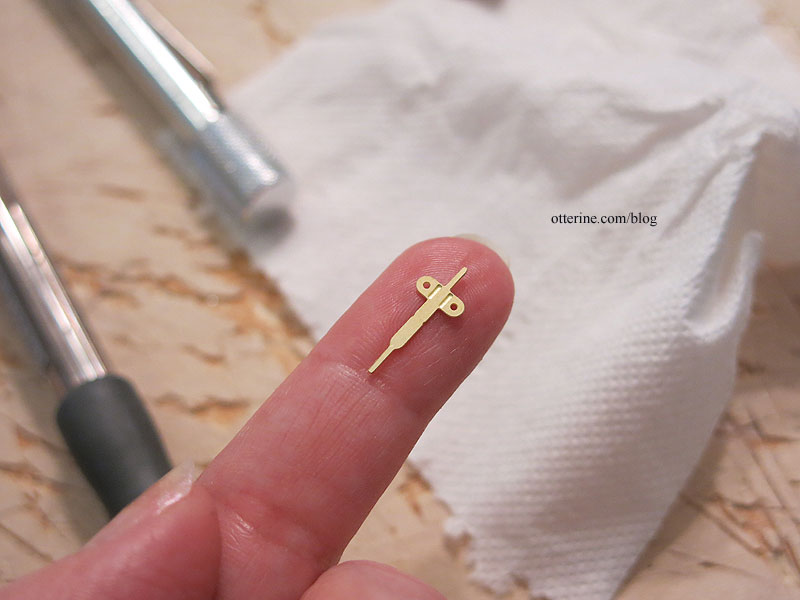
They fit well once you wrangle them into submission. I do worry about the longevity, even with using super glue. I think that’s because of how delicate the parts seem.
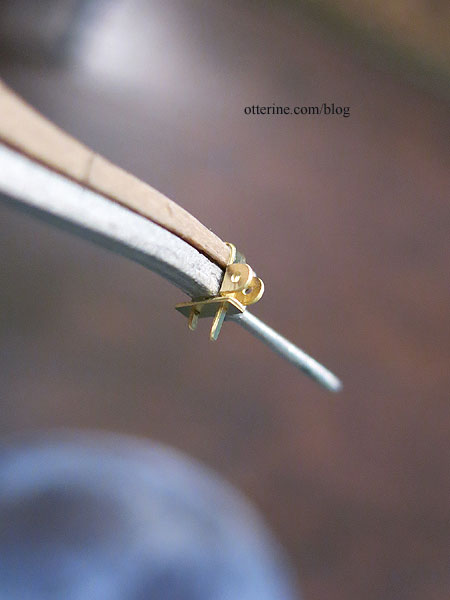
The bolts are made from another type of laser cut material. Fiddly, but again the detailing is wonderful.
I clipped the excess brass as recommended, and they do now look like tiny bolts. :]
The front axle assembly is done.
Next up, the rear axle assembly and wheels.
Categories: Ivy Hollow RFD, Model Cars, Vehicles
June 8, 2019 | 0 comments


NOTE: All content on otterine.com is copyrighted and may not be reproduced in part or in whole. It takes a lot of time and effort to write and photograph for my blog. Please ask permission before reproducing any of my content. (More on copyright)

Mail Wagon – part 15
Continuing work on the mail wagon. Many of the pictures in this post show the parts after painting since I was on a deadline and had little time to take progress photos.
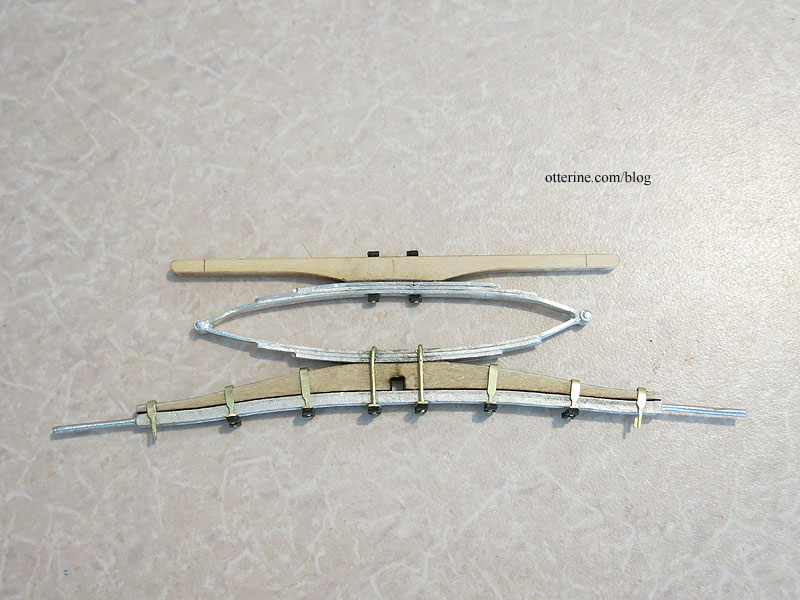
The chassis from the doctor’s buggy kit had wonderful detail, but it was not made for a straight bottom cabin like my mail wagon. The original chassis planned for a curved reach. That’s the long bar that connects the front axle assembly to the rear axle assembly.
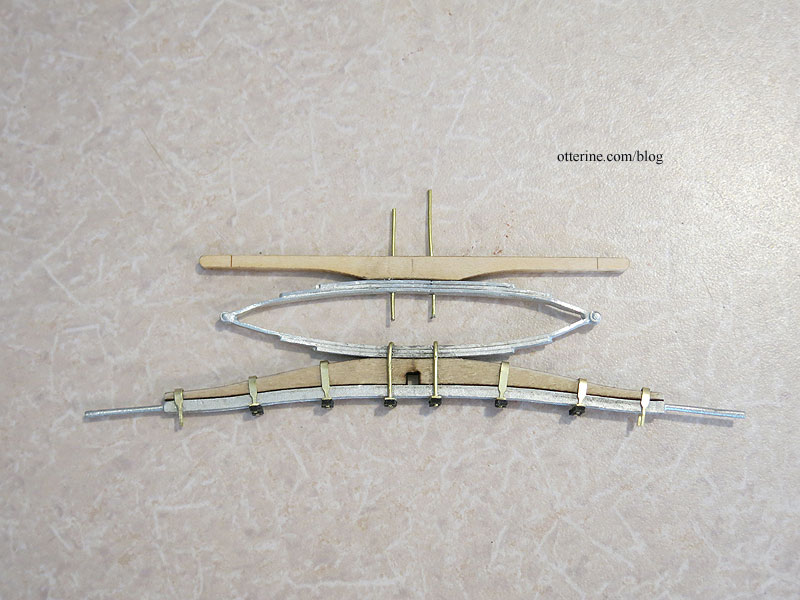
Mine had to be relatively straight but also account for the slight difference in height between the front and back wheel hubs. Since it was such a slight incline, I used a long piece of 3/32″ basswood as my new reach without any curve built in. The kit was supposed to come with a piece of cherry for the reach, but I couldn’t find it. It’s entirely possible it was in the box originally, but I misplaced it.
In case you ever need to know, the small McCormick spice bottles are just under 2 1/4″ tall. :D The spice jars helped me mark where the front and rear spring bars would hit the cabin.
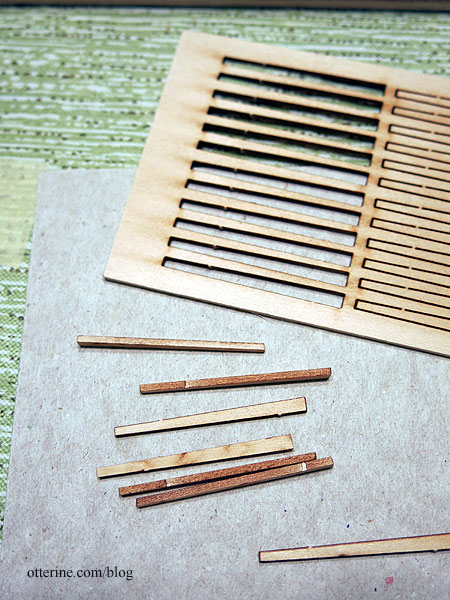
I trimmed the spring bars to fit since my cabin was skinnier than the original doctor’s buggy passenger compartment.
The front and rear body hangers from the original kit are soft metal, so I was able to straighten them out and bend to the new shape needed.
I drilled holes for nails to be added. These are also epoxied in place for stability and durability.
The body hangers sit on top of the spring bars, suspending the cabin above the reach. I left them unattached at this point.
After I had the placement, I could slide the excess reach out the back and trim it to fit.
Chassis completion to be continued….
Categories: Ivy Hollow RFD, Model Cars, Vehicles
January 27, 2020 | 0 commentsMail Wagon – part 14
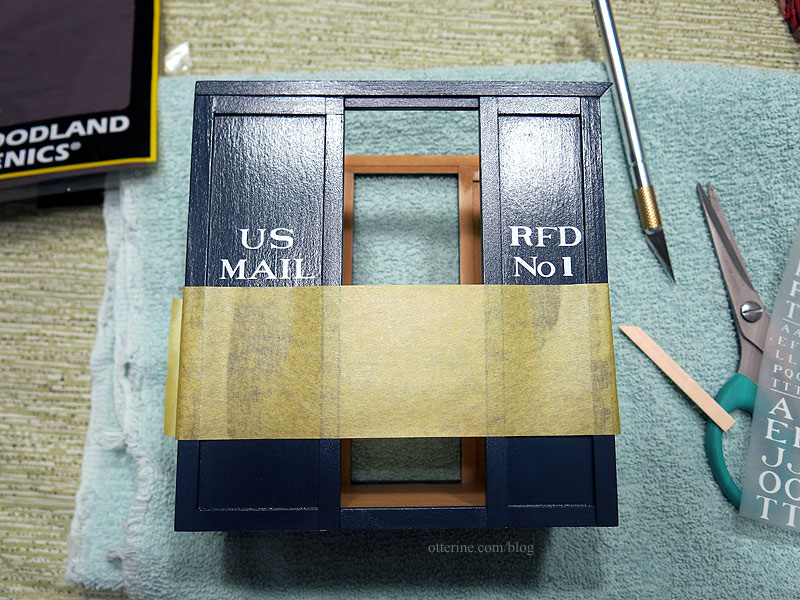
Continuing work on the mail wagon. Once the painting and sealer were done, I could move on to the lettering. I neglected to put on the cross detailing before the last coat of sealer but plan to add it later, so I took that into consideration when I did the layout. I used frog tape to create a line to follow and used a towel to cushion the cabin as I worked.
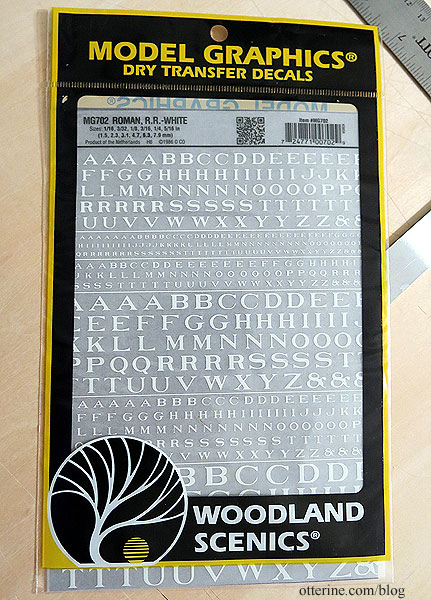
The letters are rub-on transfers by Woodland Scenics – Roman White in six sizes from 1/16″ to 5/16″ on one sheet. I used 1/4″ for the main letters except size 3/16″ for the “o” in No.
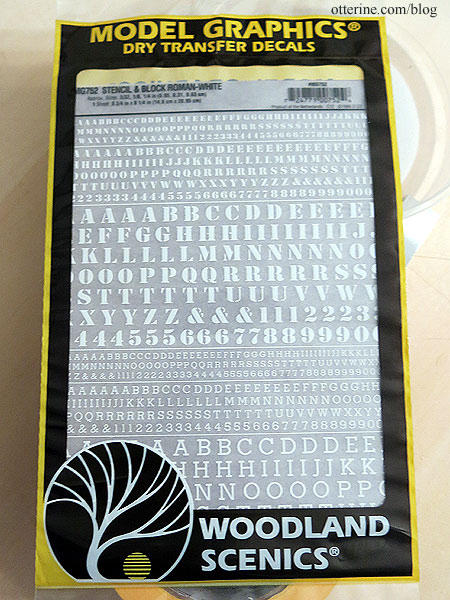
Since these didn’t come with numbers, I bought Roman Stencil/Block Letters White in three sizes from 3/32″ to 1/4″ on one sheet. I used the Stencil font size 1/4″ for the rural route “1” designation.
Since you can transfer all or part of a letter, I cut down the long portions of the “F” and “L” for a cleaner look.
Originally, wheels would have had metal around them to protect the wood. The kit supplied laser cut rubber material for the tires, but there were two issues with this. First, if you recall, the original kit wheels and spokes were not cut correctly and needed to be replaced. Once I received the replacements, I opted to use the “waste” circles between the true wheels for sturdier construction. This meant one set of the rubber tires was too short. Besides that, it would have been very messy to glue these fiddly bands.
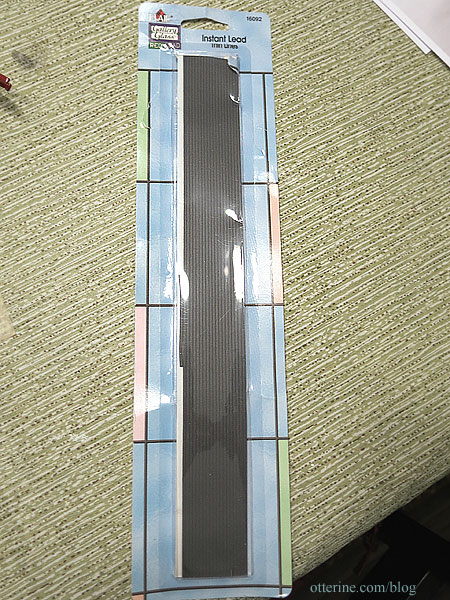
Instead, I turned to a material I had used before for another wagon project – Instant Lead Lines (thin version). These are a rubber like material with adhesive already applied. There is a wider version of this material, but it was too wide for my wheels.
The thin tires add just enough extra detailing to the wheels and were easy to apply and cut to size. They look close enough to metal without further fiddling.
Categories: Ivy Hollow RFD, Model Cars, Vehicles
January 1, 2020 | 0 commentsMail Wagon – part 13
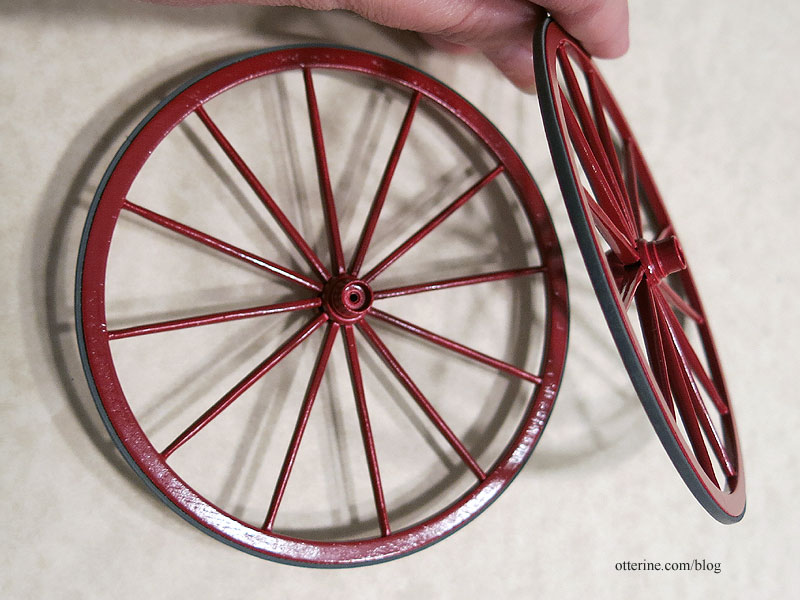
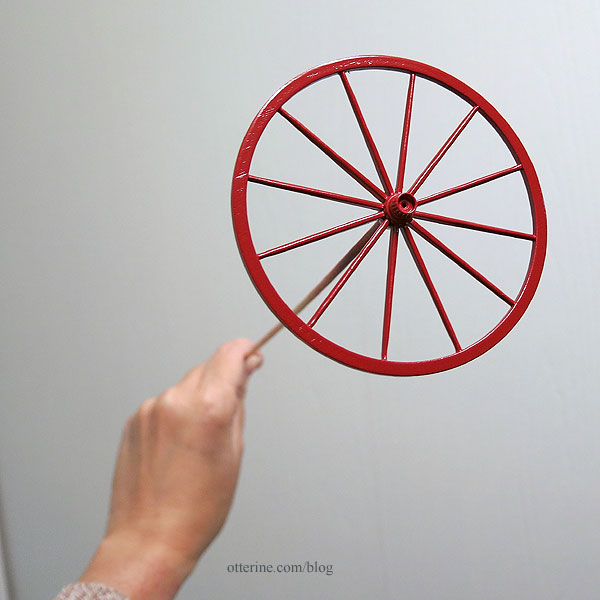
Continuing work on the mail wagon. While I was painting one day, I went ahead and finished up the wheels. I painted them flat white, then gloss Cherry Red by Krylon.
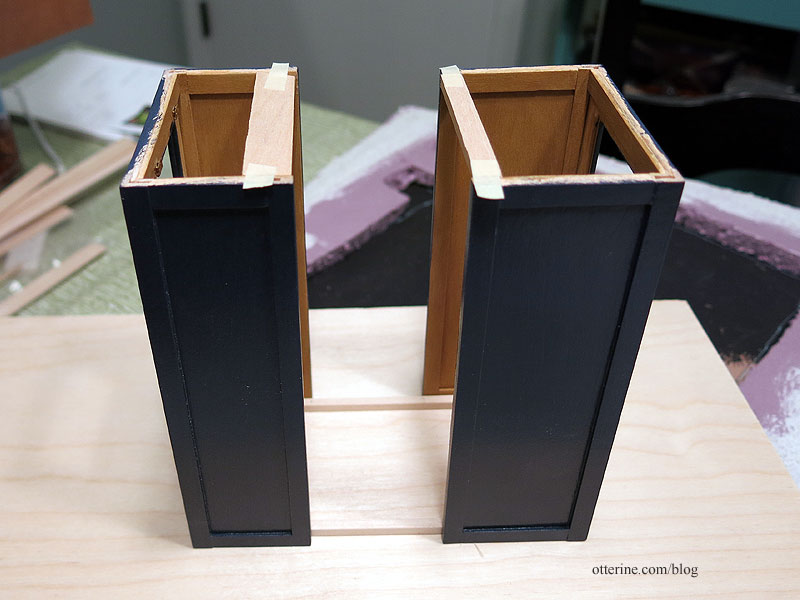
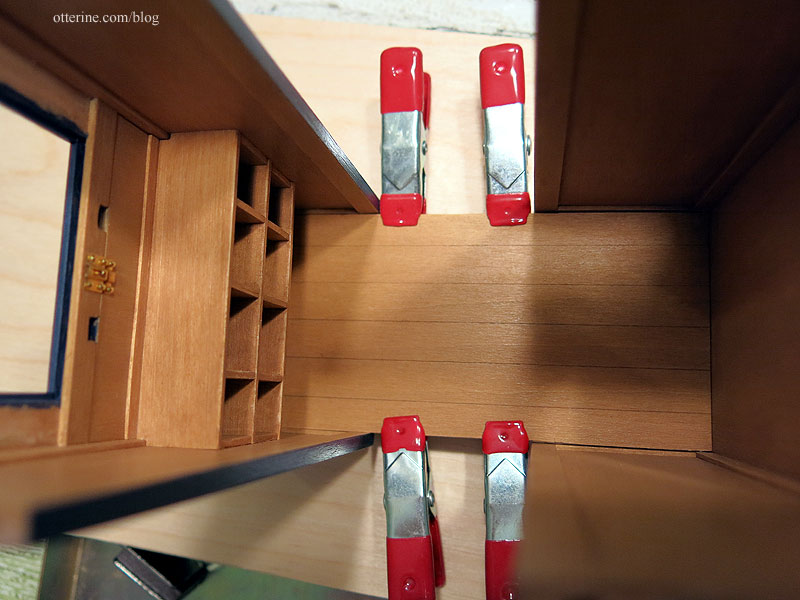
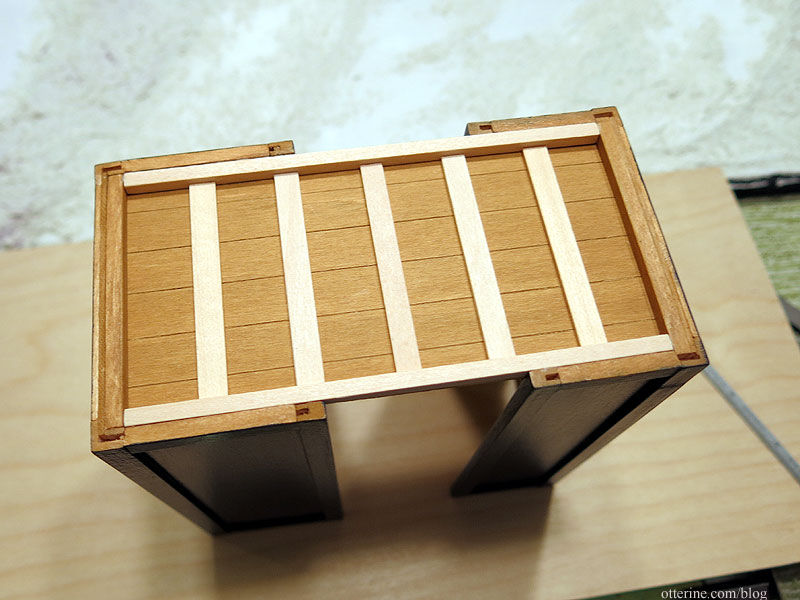
I joined the front and back cabin assemblies using strip wood along the inside bottom, using spacer boards at the top to keep the front and back assemblies square as I worked.
I installed the floor and then added more support boards underneath.
You can see I added the same scored lines on the bottom to mimic individual boards.
I added strip wood along the top to finish the walls and to fill the gaps on the top and bottom of the doorway. These wagons would have had slightly curved rooftops, but I left mine flat for ease of building. I did add some shaping to the front sides.
I cut a piece of 1/16″ thick basswood the exact shape of the ceiling opening.
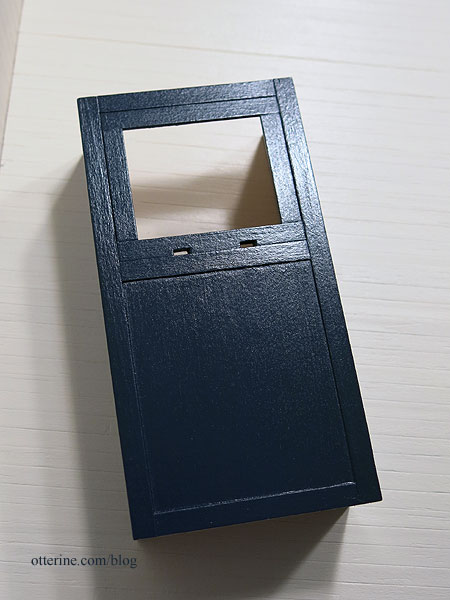
I cut a roof board from 1/8″ thick luan plywood (leftovers from Walnut Bay Light) and covered the edges with thin basswood. I added the 1/16″ thick basswood ceiling to the plywood which would allow the roof to sit firmly in place but remain removable. I again scored the basswood to mimic individual boards. Having a removable roof means I can always try my hand a curved roof later. I apparently didn’t take progress photos of this part, so here is the roof after painting.
From the inside, it looks solid. :]
From the outside, you can’t tell it’s not all glued together.
Categories: Ivy Hollow RFD, Model Cars, Vehicles
December 20, 2019 | 0 commentsMail Wagon – part 12
Continuing work on the mail wagon. Here’s a reminder of the mail wagon from the Galloway House and Village in Fond Du Lac, Wisconsin. Since its interior is the only one I’ve been able to photograph up close, I’m modeling many of my details after it.
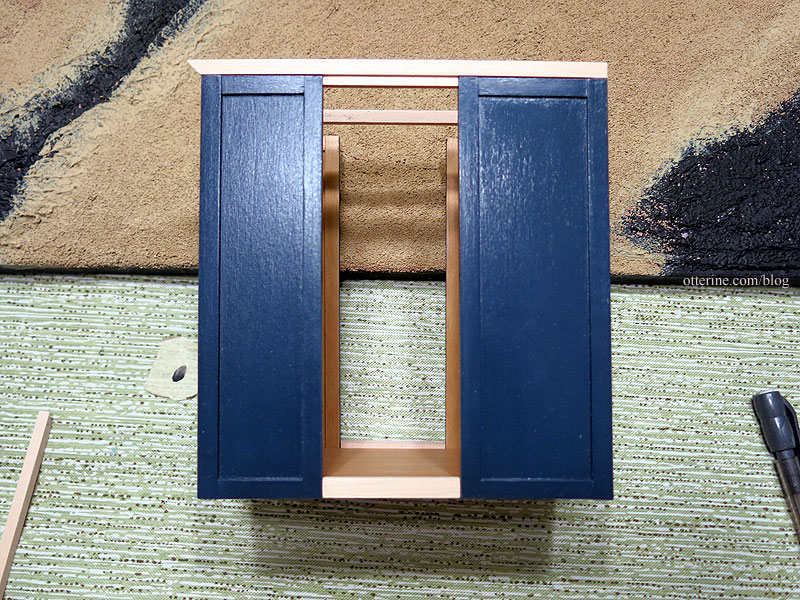
I chose Deep Midnight Blue by Americana for the exterior. I sealed the paint first with a satin spray sealer that must have been old, because it would not dry. I followed that up with a semi-gloss sealer, which ended up looking better overall. I had to wait a few days for it to full cure before I felt comfortable taping or clamping the surface.
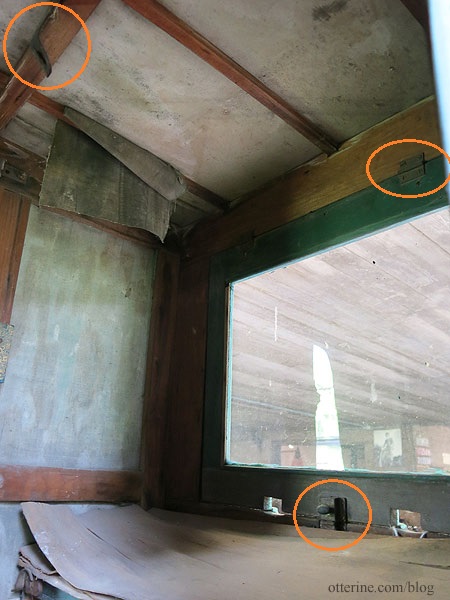
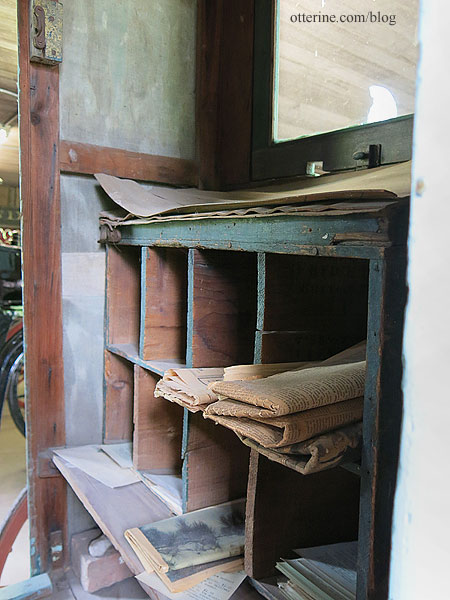
The interior of my inspiration has interesting hardware details.
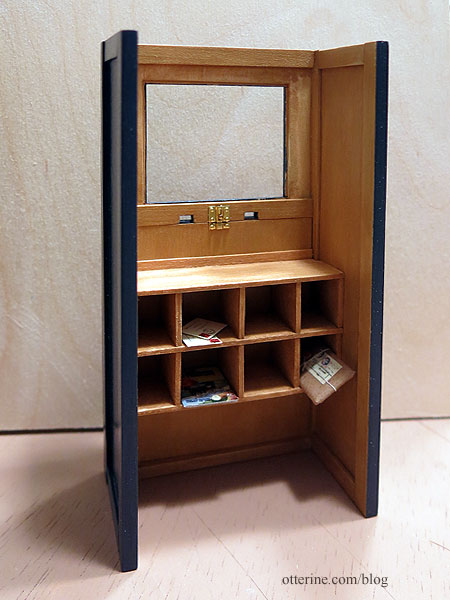
In the beginning, postal carriers were photographed with satchels, but I’ve always liked the look of the sorters inside some mail wagons I’ve seen, including my inspiration. There wasn’t a lot of room, but I was able to add a few cubbyholes. These wouldn’t necessarily be reserved as one per household on the route but a way to sort along the way.
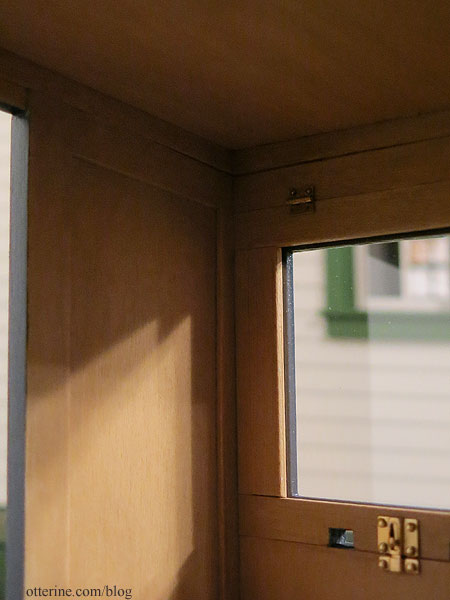
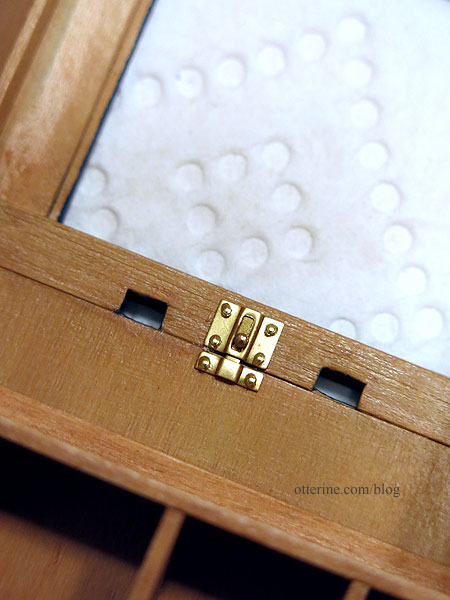
I added a window lock from my stash of interesting hardware (not sure where I even got them or the manufacturer). The lock bar actually slides, though it doesn’t matter much for my non-working window. I’m thinking the hook on the top would hold the window open, maybe? I’ll definitely add small hinges to complete the look of my non-operating front window.
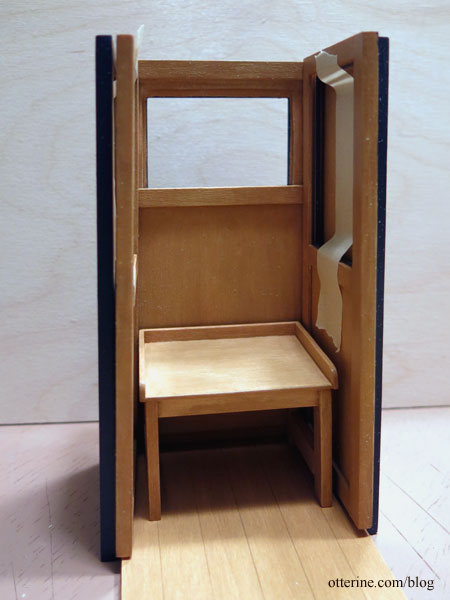
Next up, a comfortable bench seat. This had to be built with the doors held in place to make sure there was clearance for the doors on either side. I’ll make a padded cushion for a softer ride. :D
Categories: Ivy Hollow RFD, Model Cars, Vehicles
November 30, 2019 | 0 commentsMail Wagon – part 11
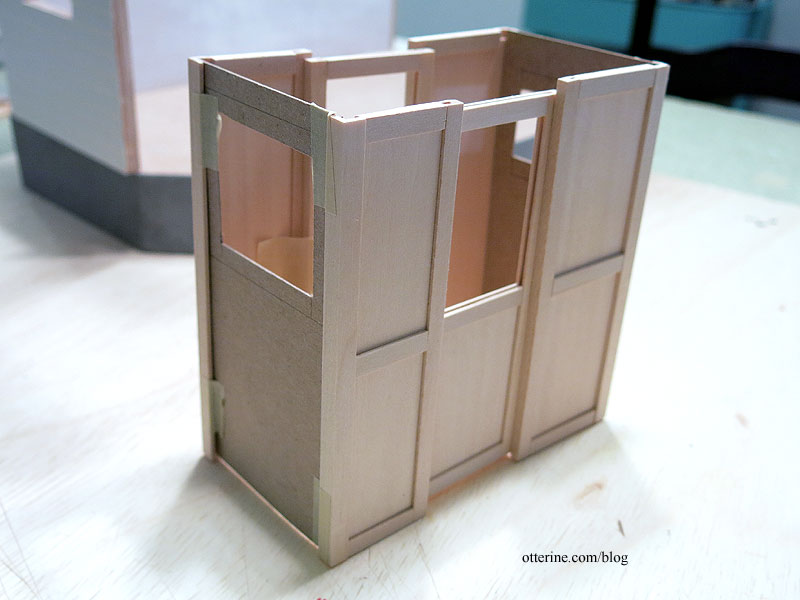
Continuing work on the mail wagon. Here is the mock-up from last time.
I originally intended to build a working window for the front, but after considering that the small space would make it difficult to actually operate the window, I opted for faking the window instead. I cut a front following the cardboard template from the mock-up and then built the trim to fit. I will enclose acrylic sheet inside the window frame during final assembly. No sense in risking marring the acrylic as I continue to work. Even though the window doesn’t operate, I did add the holes for the horse reins.
The back wall has a slightly smaller window and is also non-opening.
After building the front, back and doors, I figured it was easier to prime and paint what I could before assembly. I started with the interior since I could start putting things together as I painted if I wanted to do so. The first coat on the interior was Camel by Folk Art mixed with Staining Medium by Americana. After a light sanding, I added a second coat using Honeycomb by Folk Art mixed with Staining Medium by Americana. I followed that with a light coat of Delta Ceramcoat Satin Varnish. These layers give the look of varnished wood.
It reminded me a lot of the Model T wood portions as shown below, which would fit the era well.
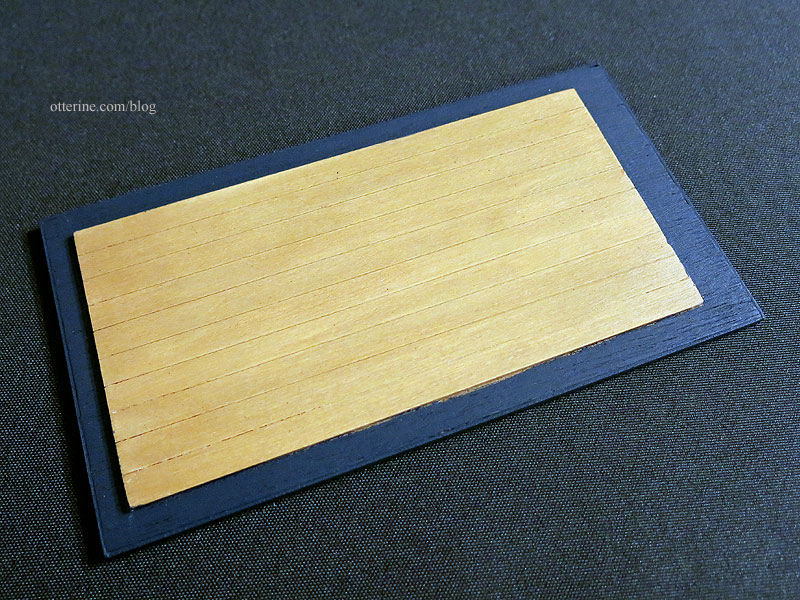
I cut a solid floor and then scored lines to mimic individual boards. Much less fiddly than trying to use actual planks. This is painted to match the remaining interior.
Categories: Ivy Hollow RFD, Model Cars, Vehicles
November 21, 2019 | 0 comments
NOTE: All content on otterine.com is copyrighted and may not be reproduced in part or in whole. It takes a lot of time and effort to write and photograph for my blog. Please ask permission before reproducing any of my content. (More on copyright)