


NOTE: All content on otterine.com is copyrighted and may not be reproduced in part or in whole. It takes a lot of time and effort to write and photograph for my blog. Please ask permission before reproducing any of my content. (More on copyright)

Categories:
Plant stand and mannequin
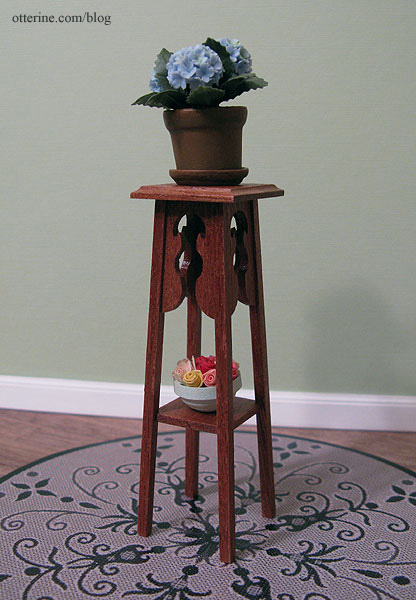
While buying supplies from a shop in the UK, I added a plant stand kit by McQueenie Miniatures to my order. It’s a beautiful kit made from mahogany that was very easy to put together. I sealed the wood with satin varnish by Delta Ceramcoat to bring out the grain of the wood.
The hydrangea plant is by Falcon Miniatures. I made the roses and bowl from quilling paper many years ago. The rug is a paper printout of the Piazza rug by Dynamic Rugs.
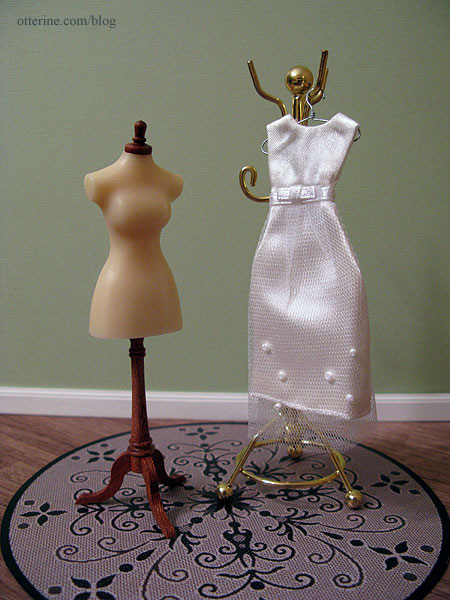
The other kit came from Hazel Dowd, a different supplier in the UK. The mannequins are sold premade as well, but I bought it unassembled at a lower cost. It was a very easy kit, again with a wood base and cap beautiful enough to varnish without modification.
The wire hanger is by Handley House and the dress is a scrapbooking item by Jolee’s by You. I plan to make some clothing myself but couldn’t pass up this beautiful dress in perfect scale. :D The brass coat rack came from a furniture lot a friend gave to me.
Categories: Furniture, Miniatures
March 13, 2010 | 0 commentsSpice rack
I wanted a wall mounted spice rack, but I wasn’t sure how to go about making the little spice jars to go in it. I considered using beads for the base and perhaps polymer clay to make the caps, but I couldn’t really find anything that matched the idea I had in my head. Most things were either too large or not the right color, texture or shape.
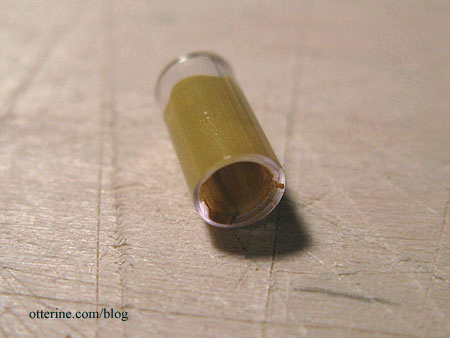
What I ended up using was 3/16″ diameter rigid aquarium tubing for the jars and 3/16″ diameter wooden beads for the caps.

I cut 3/8″ lengths of the tubing using a sharp X-Acto knife and a lot of patience.
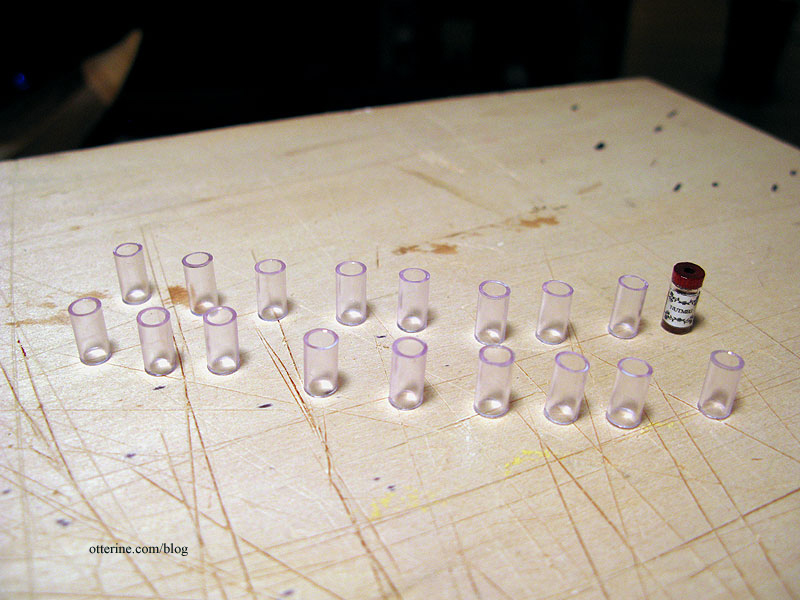
I painted part of the inside with colors matching the various spices I wanted to mimic.
I didn’t seal the bottoms since the jars would be displayed either in a rack or standing upright on a countertop, and since they were merely painted, there was nothing to spill out.
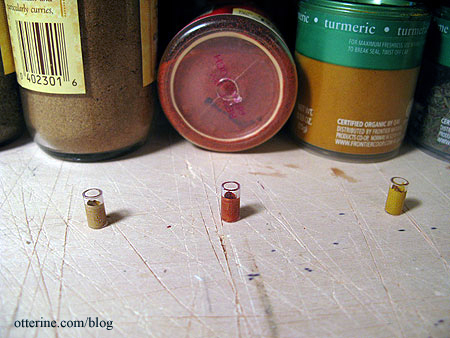
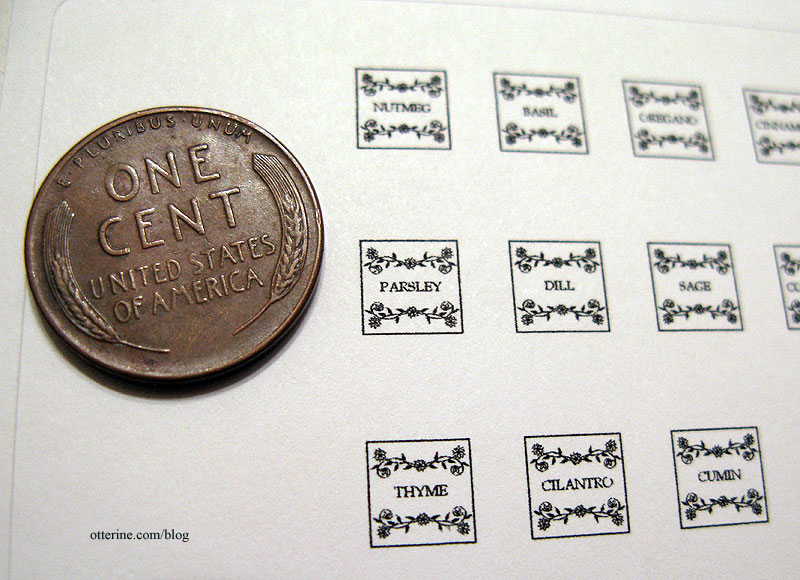
I created labels in Word using clip art borders for the design. These measure just 1/4″ square but they are legible. I printed them on Avery label paper since I figured I’d get more glue on myself than on the tiny labels if I tried applying an adhesive after cutting them out.
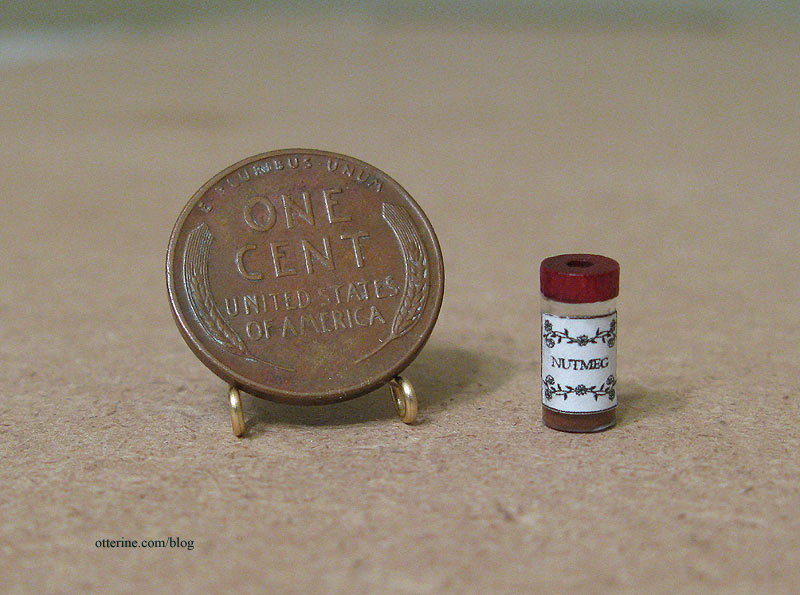
I cut out each label along the lines and found it relatively easy to pull the backing off even though the paper was so tiny. Using the sticky label paper made it very easy to attach the nameplates to the miniature bottles. I then glued on the wooden beads to the serve as caps; I liked the existing reddish color so I decided to leave them as is. The hole in the top didn’t bother me since the jars wouldn’t normally be viewed directly from above. From the front perspective, the hole seems like a design detail.
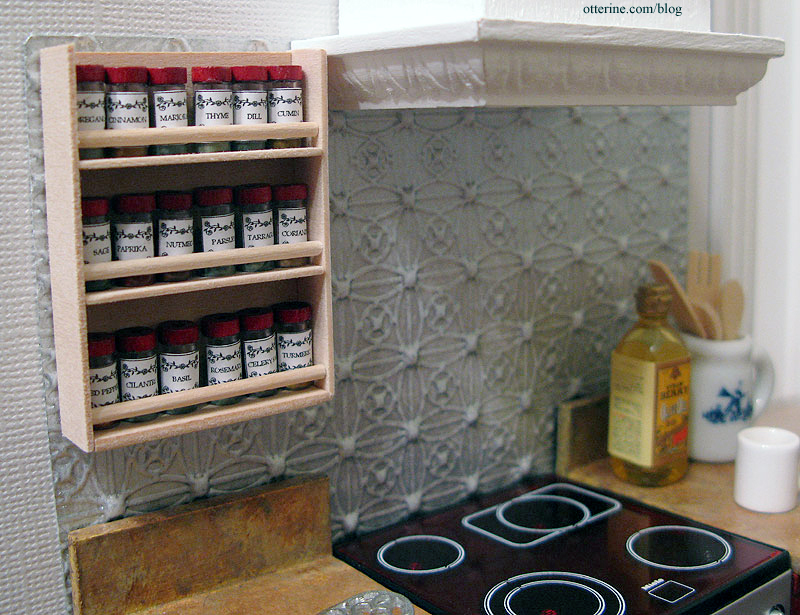
Once the jars were made, I built a spice rack out of basswood and mini dowels, leaving it unfinished for now since I like the color. I will likely seal it but not paint it. Here you can also see the finished backsplash; I used two light coats of metallic silver paint that I wiped off before drying to create variegated shades of silver.
Categories: Miniatures
January 22, 2010 | 0 commentsKitchen sink
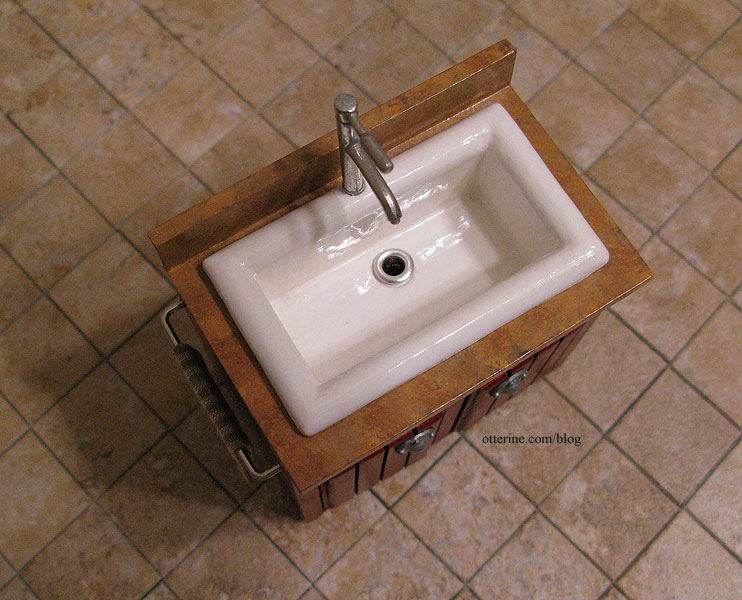
The kitchen sink that came with the Euro Mini’s sink cabinet was very shallow and not exactly what I wanted.
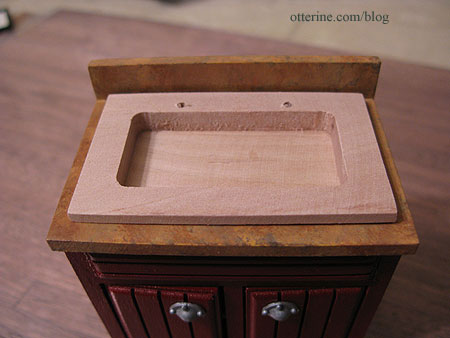
The hole in the top of the cabinet for the sink was deep, so there was plenty of room to add a deeper sink. My attempts at making a sink out of polymer clay were lumpy and rather sad. So, I built one out of 1/8″ basswood and balsa.
I first measured and cut the vertical pieces to fit inside the opening in the cabinet. I then glued them onto a thin sheet of balsa using a jig. Before enclosing the box, I used a metal sewing eyelet to punch a hole for a drain.
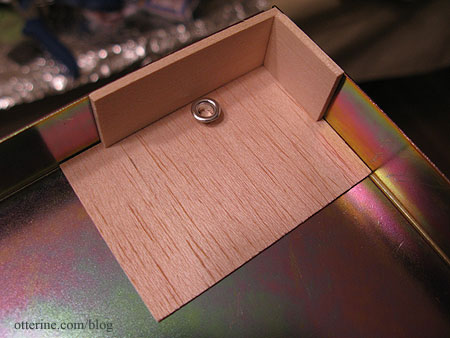
Once the basic box was dry, I cut the balsa base to fit and drilled a hole in the base cabinet to match up with the drain.
Using 1/4″ half round strip wood, I built a frame for the top of the sink box.
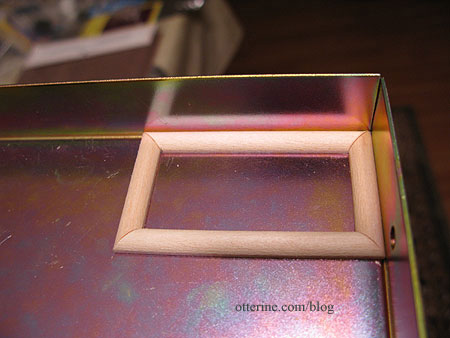
I used a tiny bit of spackling to fill in any gaps between the frame and the box.
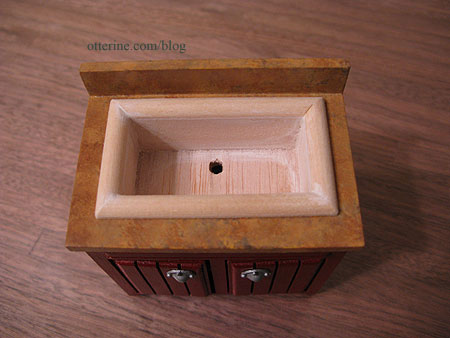
I watered down the paint so the finish would dry without any brush marks, sanding in between coats to remove any imperfections that would give away the fact that the sink is wood and not porcelain. Once the paint finish was dry, I added a couple of coats of gloss sealer (Delta Ceramcoat gloss varnish). To get the effect in the bottom of the sink, I let the gloss sealer pool. I also covered it after applying the gloss to keep dust from settling on the finish.
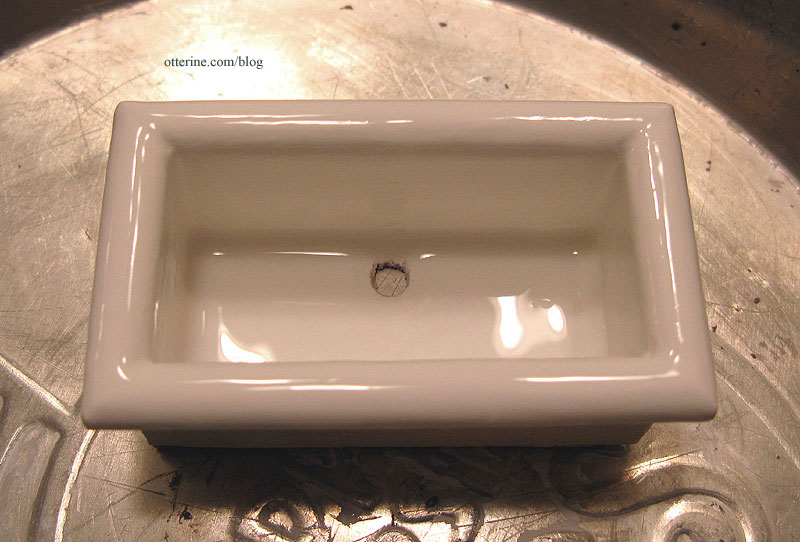
UPDATE (01-12-10)
Alas, the above sink is no more. The gloss varnish cracked and yellowed in the thicker areas when it dried. I had used it on the faux granite without a problem. Thin coats of this varnish work great.I made a second sink, and this time I used Triple Thick Brilliant Brush-On Gloss Glaze by DecoArt for the finish.
The finish turned out like porcelain again, though the glaze was definitely thick and not easy to use. You have to work fast because it dries so fast. I am pleased with the second sink but disappointed that the varnish I had used ruined the first.
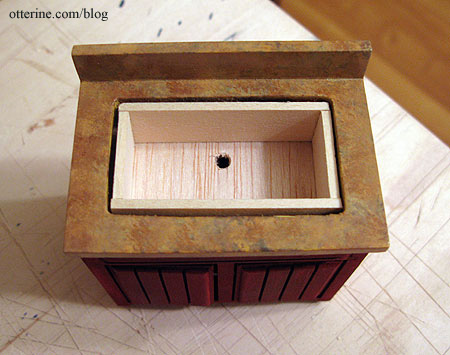
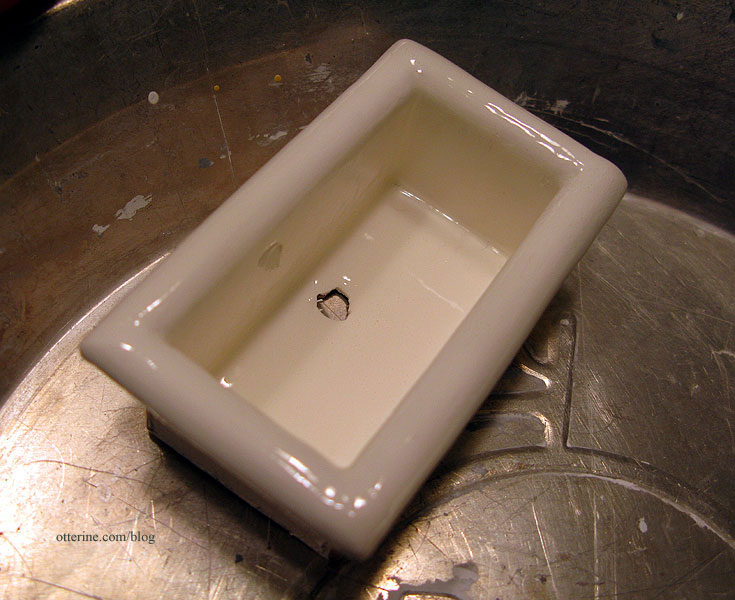
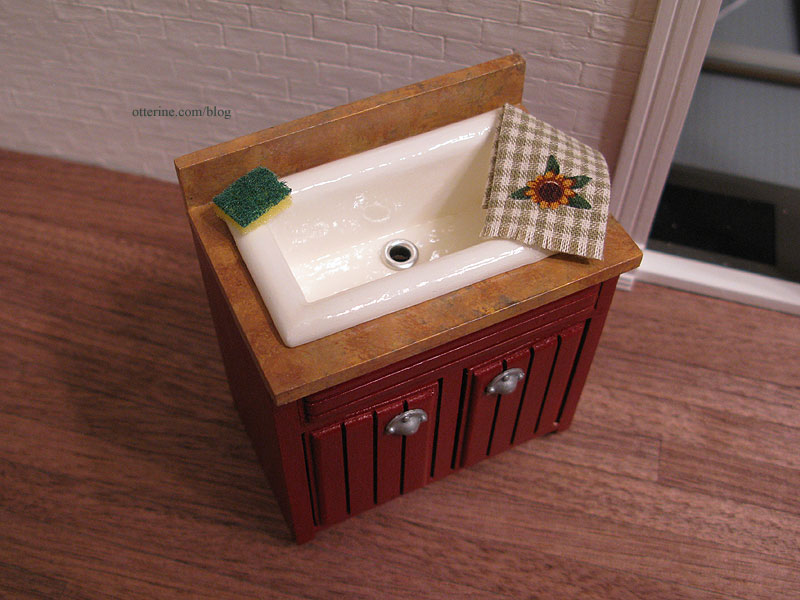
Here the sink is installed in the cabinet with the sewing eyelet drain pressed into place. Crisis averted! :D
Update 02-20-10:
Well, I spoke too soon. The second varnish (Triple Thick Brilliant Brush-On Gloss Glaze by DecoArt) turned yellow, too. There are big letters on the front of the package that read, “Non-Yellowing,” so I don’t know what happened.
I wasn’t going to give up on the second sink without trying to fix it first. I removed it from the cabinet, removed the hardware and gave it two coats of Krylon indoor/outdoor gloss white spray paint. It worked! :D
Categories: Miniatures
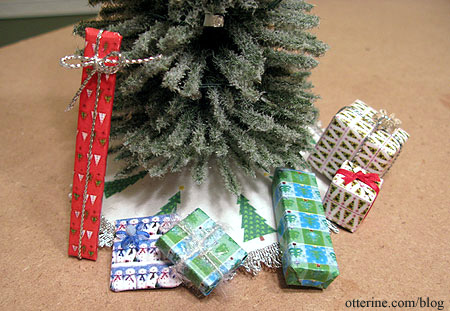
January 10, 2010 | 0 commentsChristmas wrap and presents, tree skirt
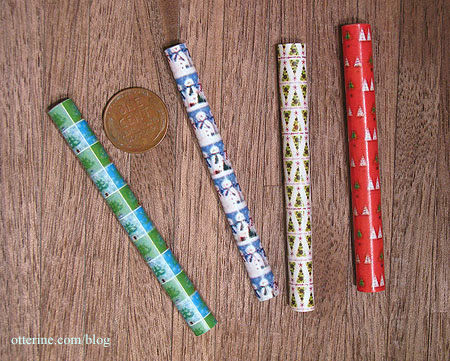
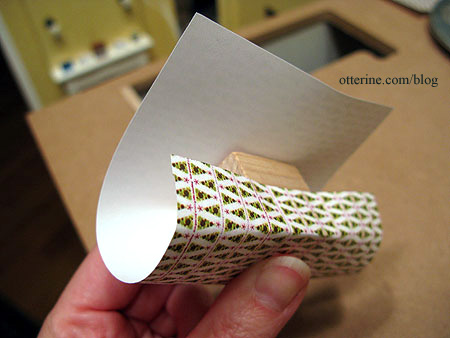
I made some wrapping paper for both presents and rolls. I found images of wrapping paper online and then used PhotoShop to replicate the design into larger sheets and then resize to an appropriate scale.
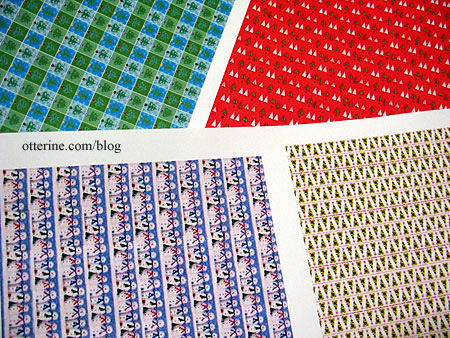
For the rolls, I cut the paper into 3″ wide strips of varying lengths, rolled the paper into tubes using a small dowel and glued the edge in place.
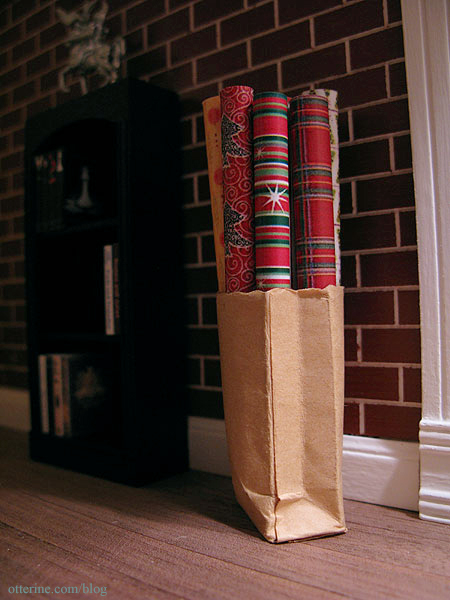
I bought a bag of random minis from craigslist, and this paper bag was part of the loot.
For the presents, I took scraps of wood and wrapped them in paper.
For some of the presents I added textured thread or ribbon; the bows are plastic beads (one is topped with a tiny pompom).
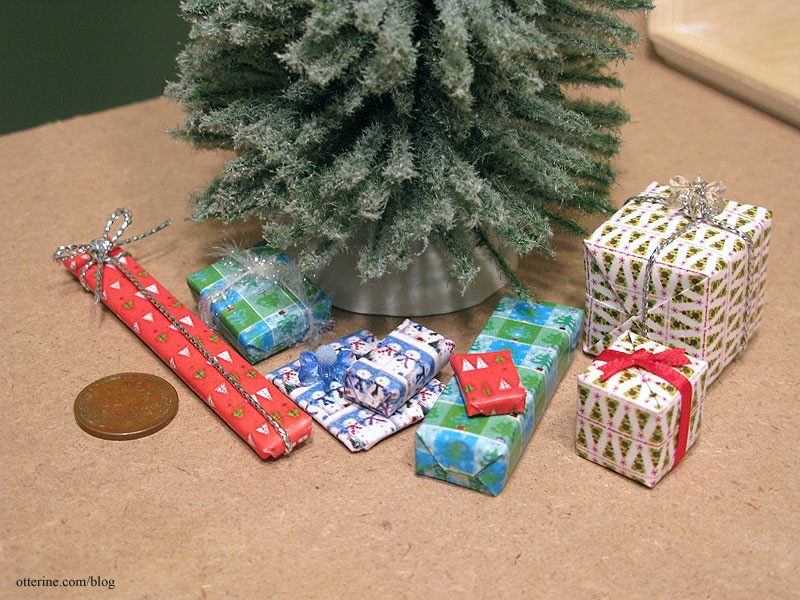
I used Word to create a circle 4.5″ in diameter and then added clipart trees around the edge. I printed it on fabric and adhered it to sticky-backed felt. I then sewed some silver trim around the edge.

It’s the perfect thing to cover the plastic snow mound of the Lemax tree.
Categories: Miniatures
December 11, 2009 | 0 commentsPhotos from contact sheets
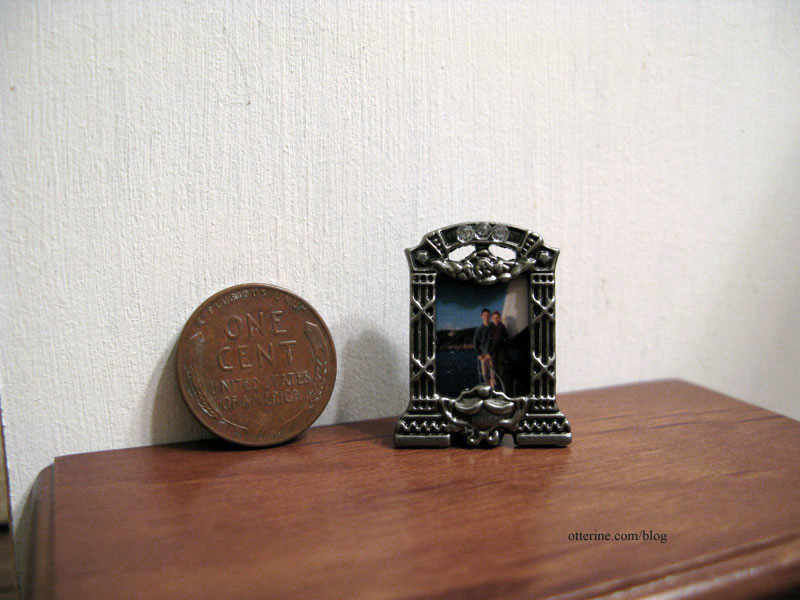
When I order regular size photos from Kodak Gallery online, they send a contact sheet of what is in the packet. These sheets have mini photos that are 9/16″ x 13/16″. I also have some from Sam’s Club that are roughly the same size, but those have numbers printed in the corners, which limits their usability depending on the photo’s composition and the size you need.
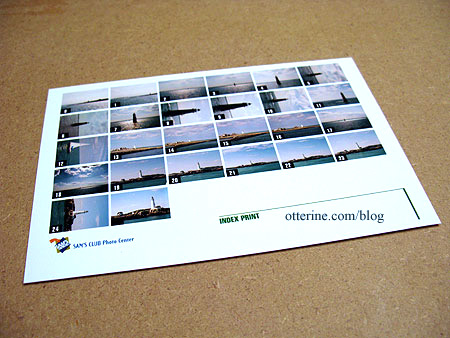
This first example was made using a Kodak contact sheet without the numbers printed in the corners. The mini frame has an acetate “glass” that I used to center over the part of the image I wanted. I cut out the image and glued into place with the backer.
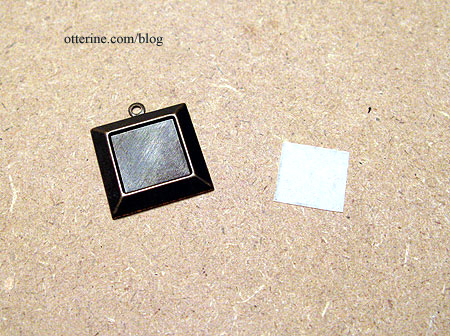
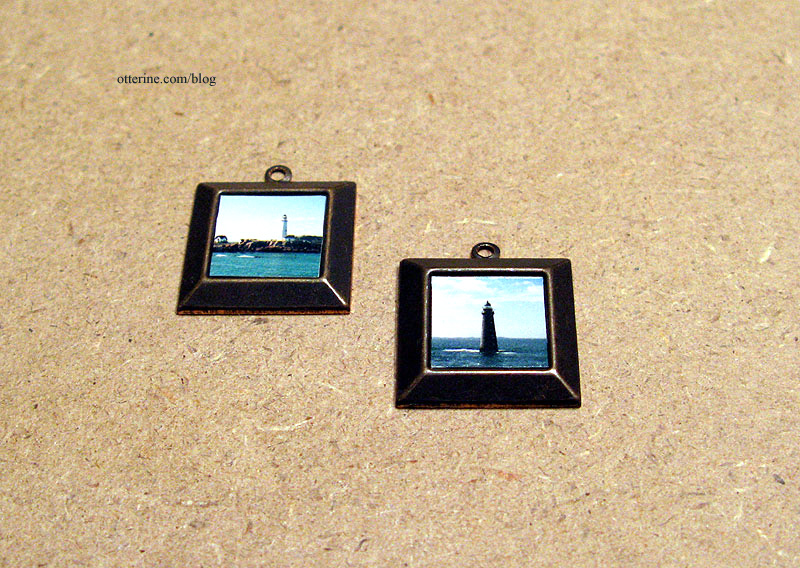
The second example uses brass jewelry findings with 1/2″ photo openings. I first cut a template out of vellum paper, which is translucent enough to see through. This way you can center the template over the image without guessing if you’re centered over the portion you want.
I like these since the images are crisp and printed on quality photo paper and the frames already have holes to hang them on the wall.
Categories: Miniatures
November 26, 2009 | 0 comments
NOTE: All content on otterine.com is copyrighted and may not be reproduced in part or in whole. It takes a lot of time and effort to write and photograph for my blog. Please ask permission before reproducing any of my content. (More on copyright)