


NOTE: All content on otterine.com is copyrighted and may not be reproduced in part or in whole. It takes a lot of time and effort to write and photograph for my blog. Please ask permission before reproducing any of my content. (More on copyright)

Categories:
Datsun 240ZG – part 2 – color
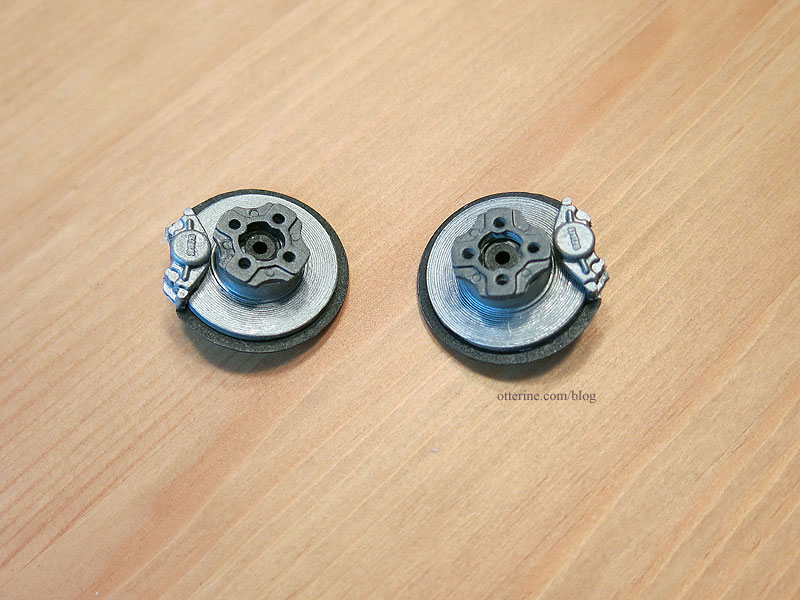
Continuing work on the 1:12 scale Datsun 240ZG by Tamiya. Once the front brakes are assembled, the parts are supposed to spin. Success so far! I’m mixing the different colors of metallic silver on the fly to achieve various types of metal. I think this adds realism even if these aren’t the truest colors for the parts. Obviously, these have not been dirtied up yet.
I spray painted the underside, wheel wells and engine compartment flat black. I then did a quick spray of flat grey in the engine compartment. I didn’t worry too much about overspray for the grey since this will be a grungy car when I’m done and grey will be part of the dirt process.
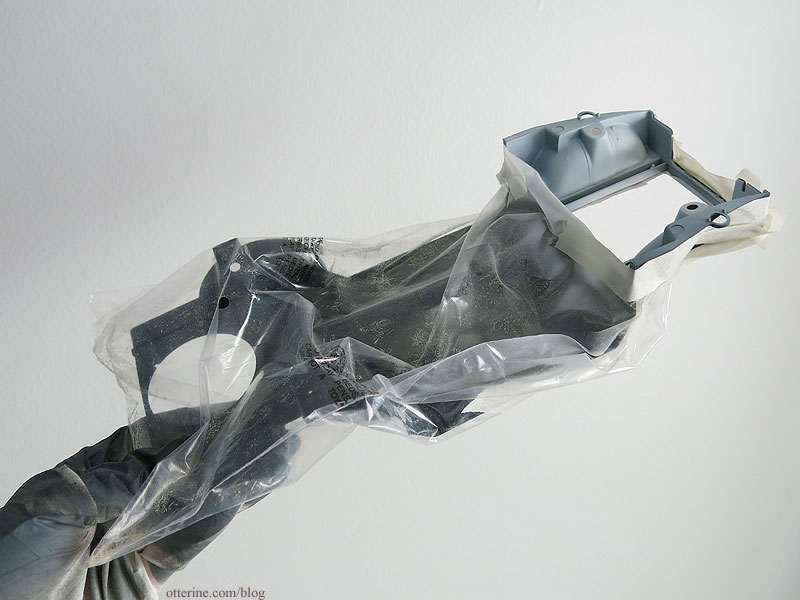
The engine compartment is supposed to be the same color as the exterior, however, so I needed to do some masking before doing that part. I used a bag to cover the majority of the molded chassis. I then taped off the wheel wells and front portions of the underside. I always wear a latex glove and hold pieces in my hand when spray painting for better control.
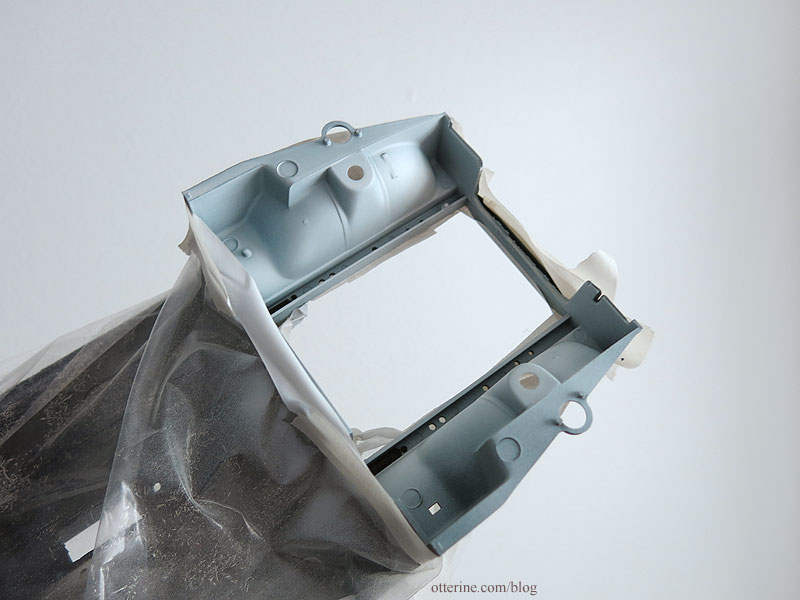
I sprayed a quick layer of flat white, not worrying too much about getting into the recesses. The black, then grey, then white layers will create some depth under the final paint color before I even get to the aging process.
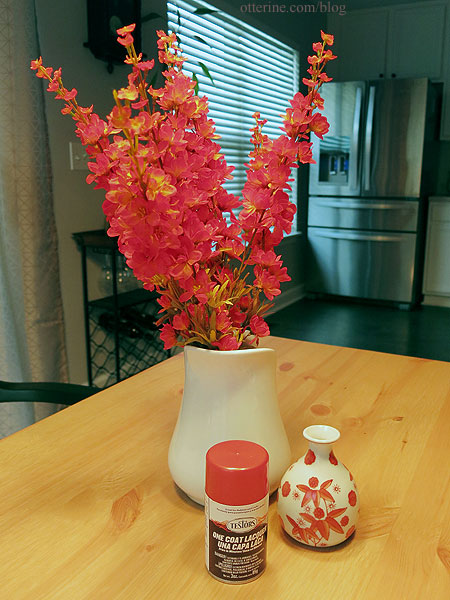
Next up was the final coat of Testors Fiery Orange. Wow! This is one awesome color! :D
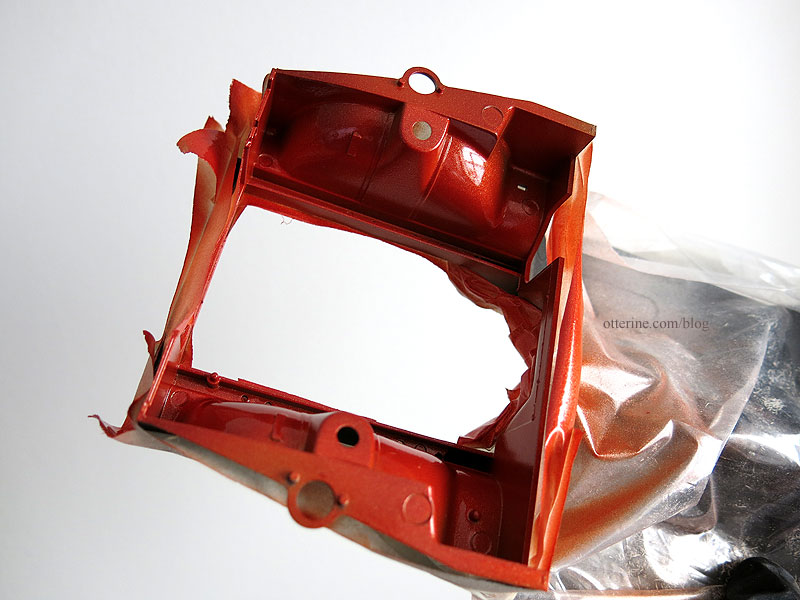
The engine compartment is now body color and the whole piece is ready for its place in the assembly.
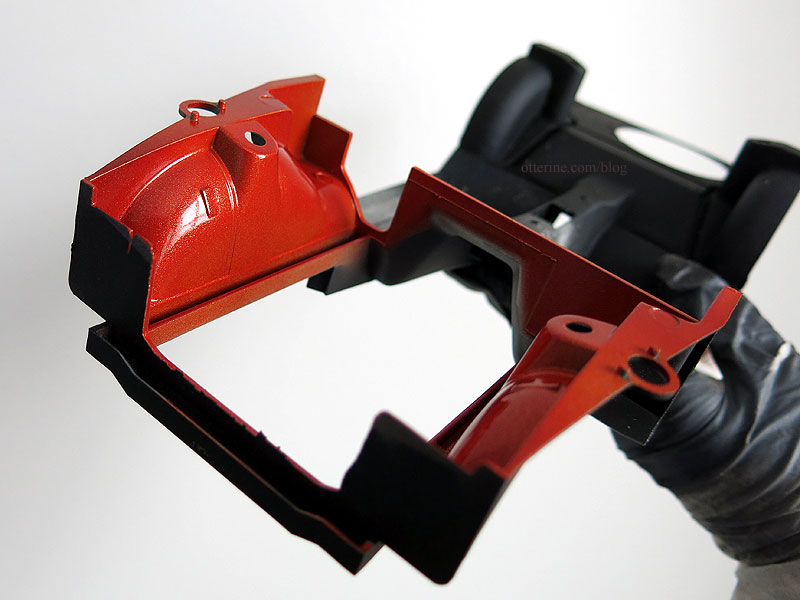
The nice thing about doing the engine compartment before painting the body is that I can try things out here. Even though this will be a barn find car, it’s better to experiment with the lesser seen places first. :]
Categories: Milo Valley Farm, Model Cars, Vehicles
April 2, 2015 | 0 commentsMilo Valley Farm – siding, part 1
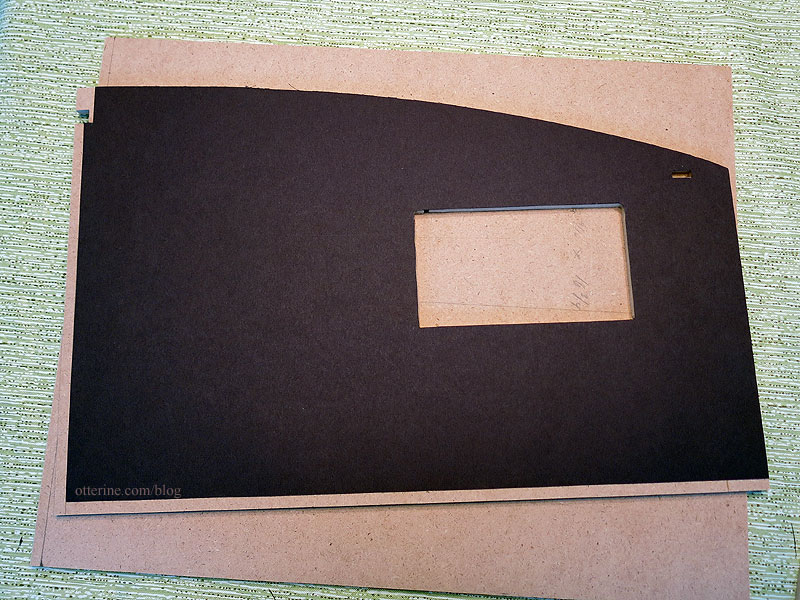
With the window openings cut on side walls, I made wall templates from black construction paper. I will apply Greenleaf Dollhouses 3/4″ birch siding strips to these templates and then glue the templates to the building walls. I did this for the siding on The Artist’s Studio, and it was a much easier approach than applying directly to the wall boards.
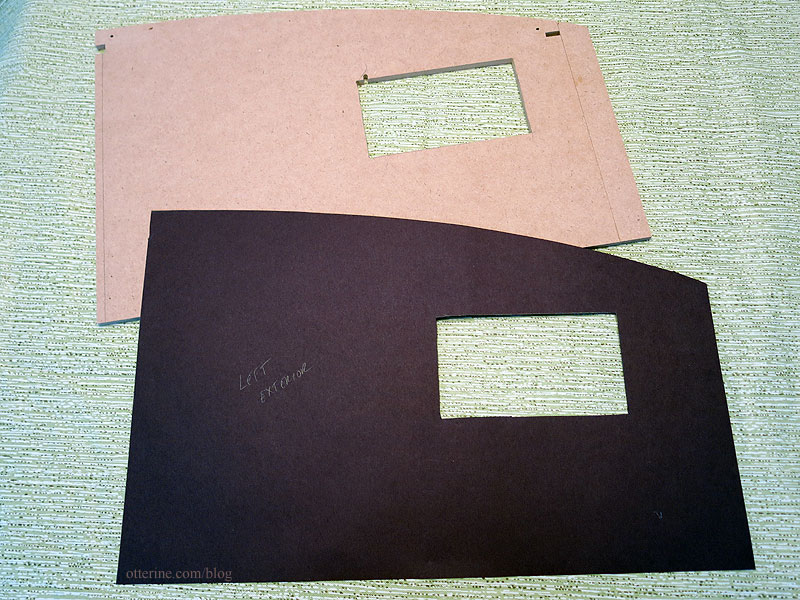
There are templates for inside and out to give the illusion of a plank-built barn. The interior will have strip wood beams to mimic the skeletal structure of the barn.
I primed the walls and floor with black craft paint. I used painter’s pyramids so I could do both sides at the same time. You paint one side of your board, wait until it’s relatively dry and then flip it over onto the tips of the pyramids. This means your painted surface won’t stick to the work surface. You can work much more quickly than you would be able to without them. And, painting both sides of the boards at the same time keeps warping to a minimum. The pyramids allow both sides to dry evenly.
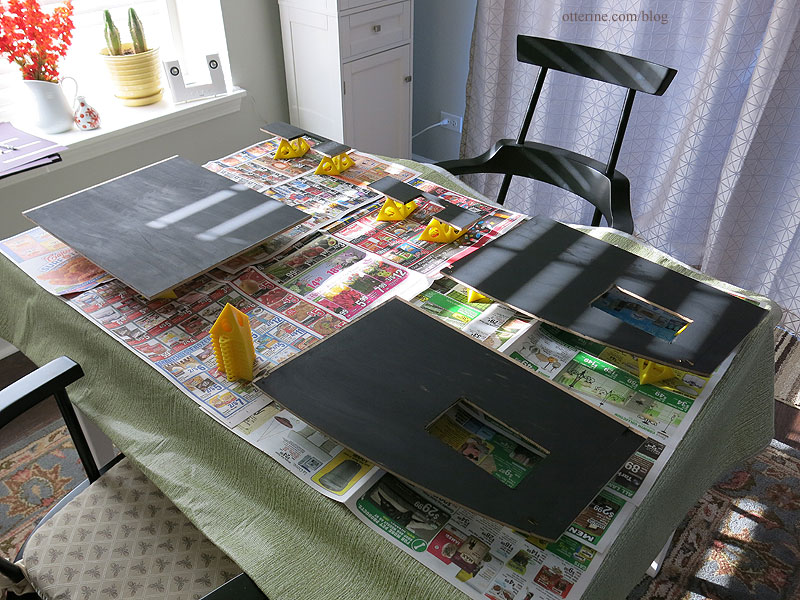
Since I didn’t prime the underside of the floor board, I ran a damp brush over the surface to counteract the moisture of the primed side. This was the only piece I pressed under magazines after the paint was dry since it needs to be perfectly flat on the raised foundation.
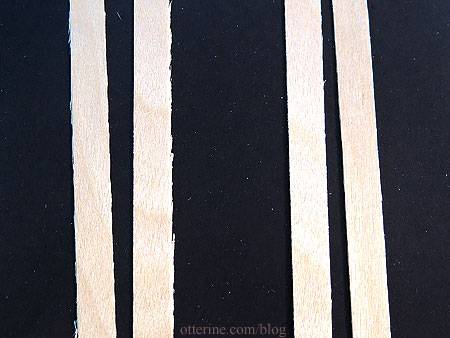
I’m now cutting the 3/4″ siding strips in half lengthwise to make narrower boards. While I like the look of the wide boards on Baslow Ranch and The Artist’s Studio, I wanted to have a different look this time around.
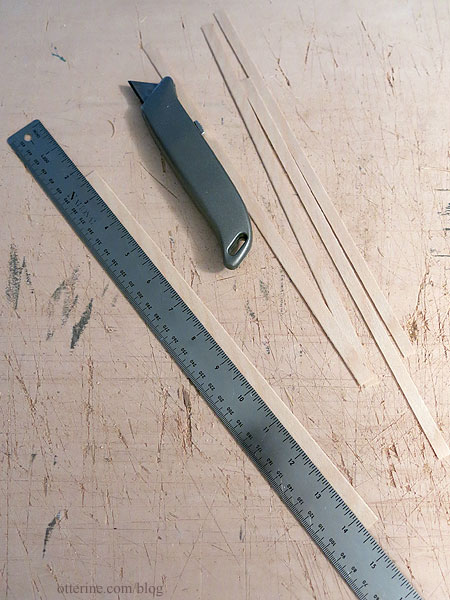
In cutting the strips lengthwise, I was left with boards that had one clean edge and one rough edge. I sanded the rough edge just enough to make it less noticeable but not to the point of making it a super clean, new plank.
I drew a few vertical guidelines with a carpenter’s square and then began applying the siding strips back to front allowing the ends to go past the top and bottom edges of the template. I used Aleene’s Quick Dry applied with a toothpick. I was careful to keep glue off the front of each board, but it won’t matter if there are errant marks in the end. The guidelines helped me keep the boards relatively aligned, but the variation in the width (a natural occurrence with strips like these) left some gaps perfect for an old building. :]

For the front piece, I used a whole 3/4″ wide plank cut to size. I then cut around the outline of the template.

It looks good for scale. :D
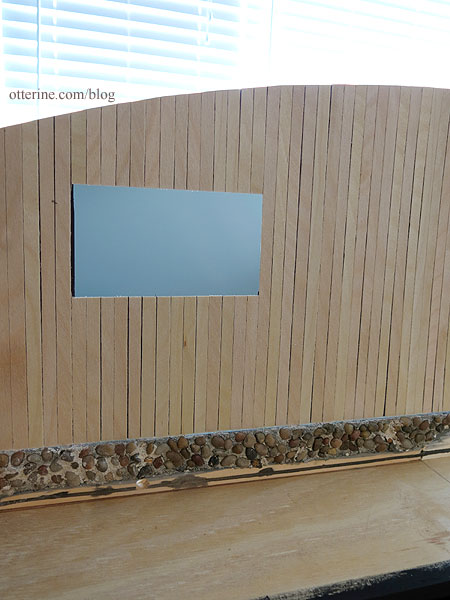
As you may notice, I’ve painted the edge of the base board black-brown and glued the foundation in place. I drilled a hole for the wiring to exit the foundation below the stone line.
Categories: Milo Valley Farm
March 29, 2015 | 0 commentsMilo Valley Farm – interior lighting plan
I like to cut the basic wiring channels before assembly, because it’s easier to do it that way. Sometimes a lot of thought has to go into the lighting, but in this case, it’s a one-room building with only basic lighting required. I bought some new old stock E-Z-Lectric light fixtures from Itsy Bitsy Old Stuff. They had four packages of two lights and one package of two spare bulbs. They all worked.
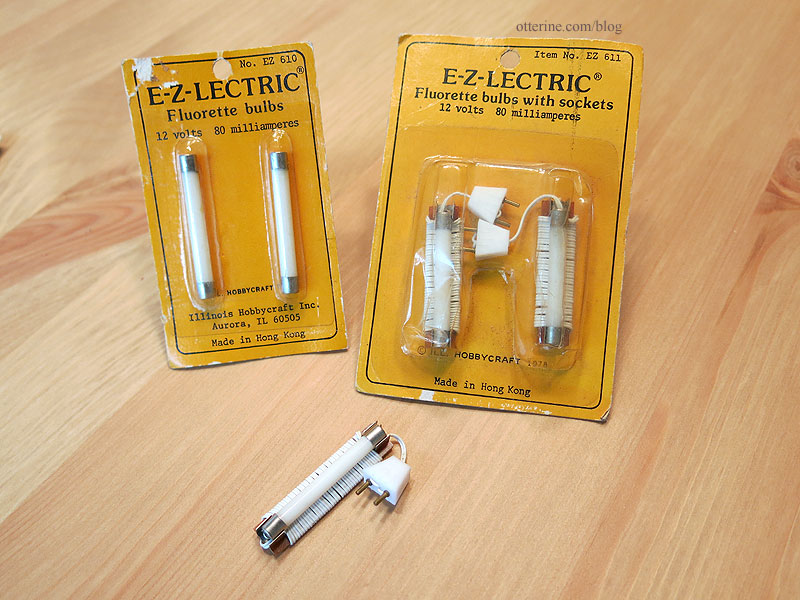
These are great since they already look a bit aged; a few of the bulbs show crackling in the frosted glass finish. I figured 4 to 6 inside the building, then save the extras for replacement bulbs.
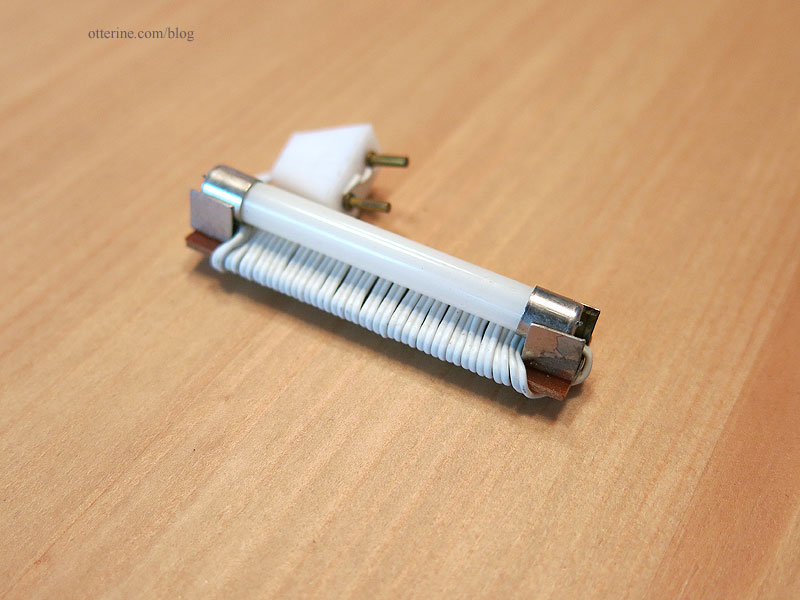
There are similar fixtures on the market today, but they have black backings. I liked the older look of these brown backings. You could paint the more modern ones as well.
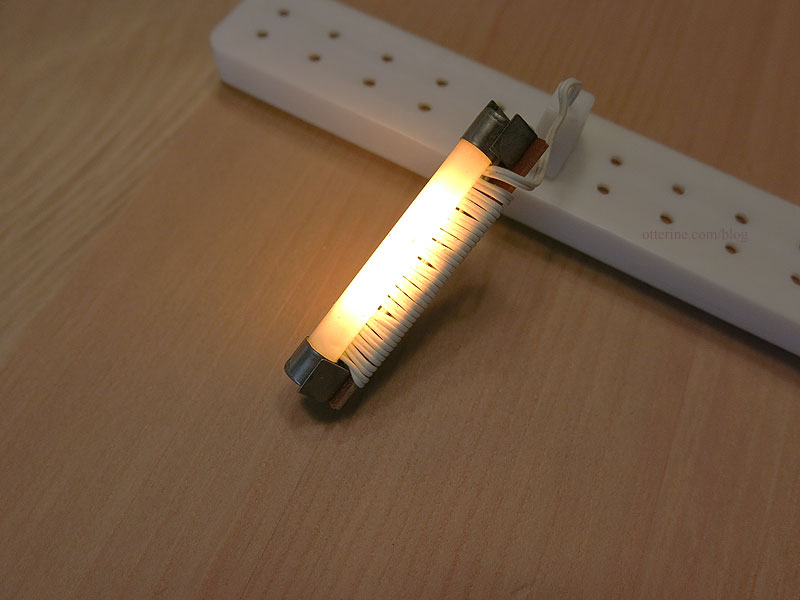
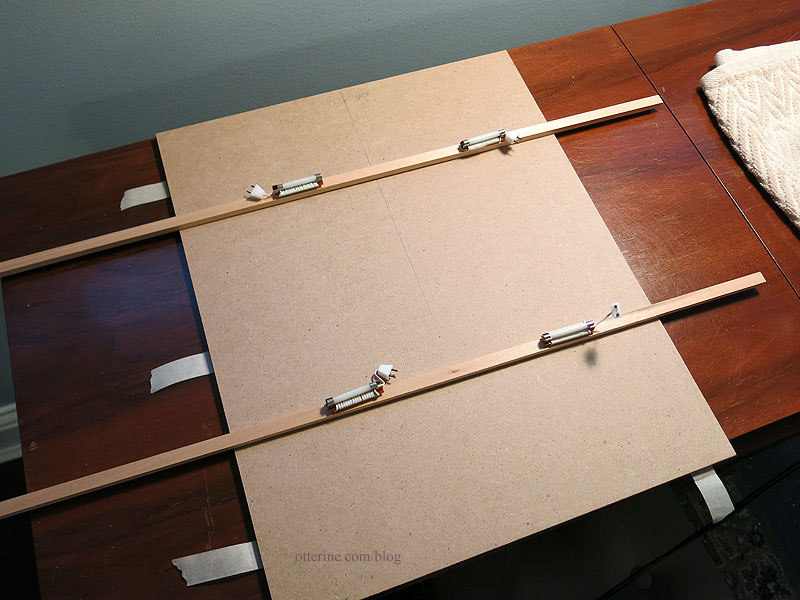
Exposed conduit would be nice, but I’m thinking channel molding would be the easiest way to go here. I can always add fake conduit. At first I thought about putting them on the wall, but with the offset window it might be an odd layout.
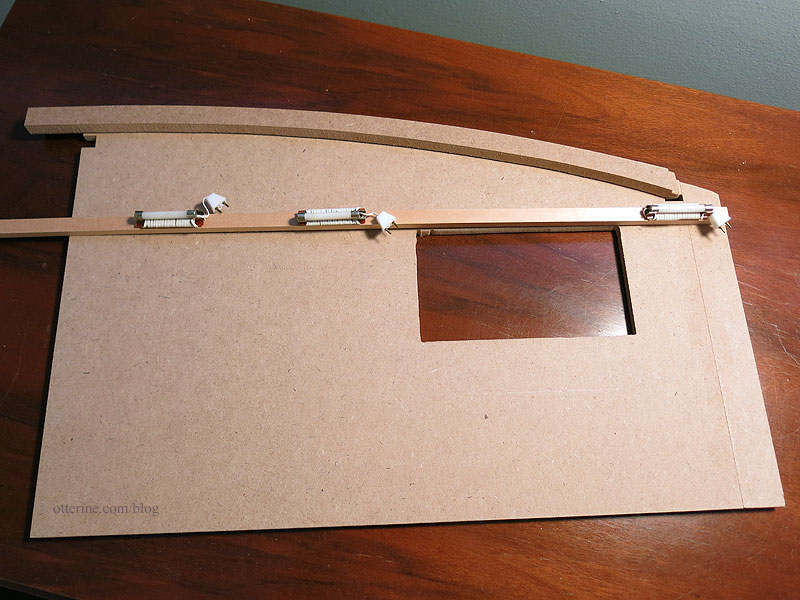
Then I thought about putting straight cross beams overhead and using 4 lights. I think this will work much better, but I’ll tape them in place during the next dry fit to see how the lighting looks inside.
Categories: Milo Valley Farm
March 26, 2015 | 0 commentsMilo Valley Farm – base and foundation, part 2
Continuing work on the base and foundation. I needed to figure out the earthen ramp before I could determine whether to cut down the base board. It happens that the new foundation is exactly three thicknesses tall of the builders foam. Fantastic!

I cut two full pieces of foam for the front and used one scrap on the top. I marked the door to begin shaving the foam layers into a hill.
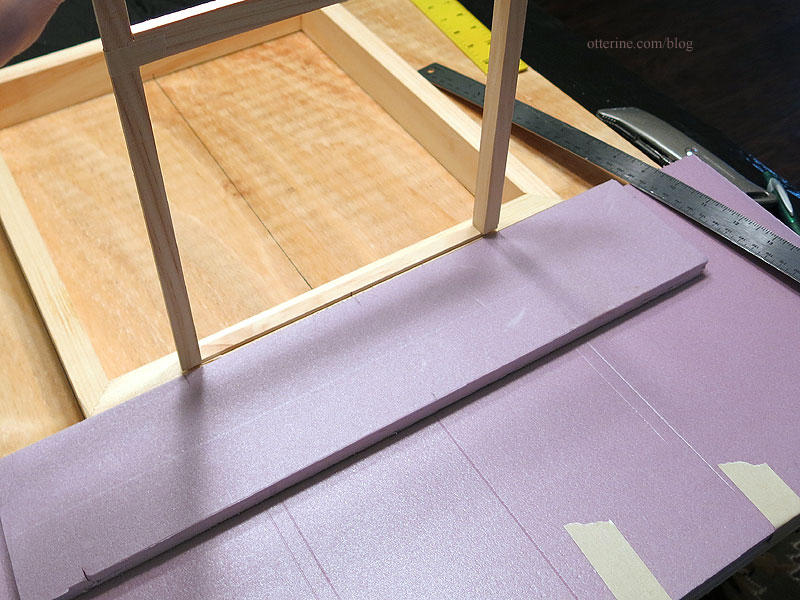
I then did the same for either side of the foundation. This doesn’t have to be exact since other landscaping materials will be applied to this base.
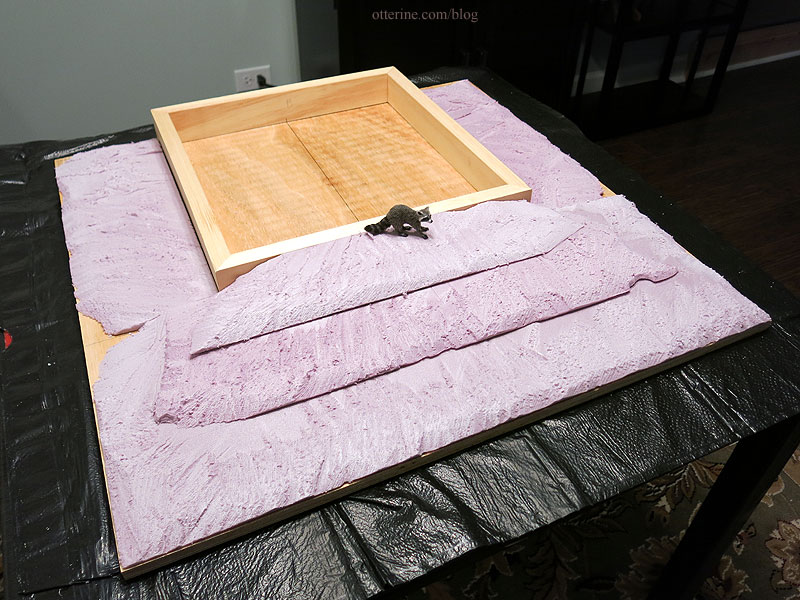
I think the base board will need to be this original size otherwise it won’t look proportionate to the hill and the barn. Roland approves. :D

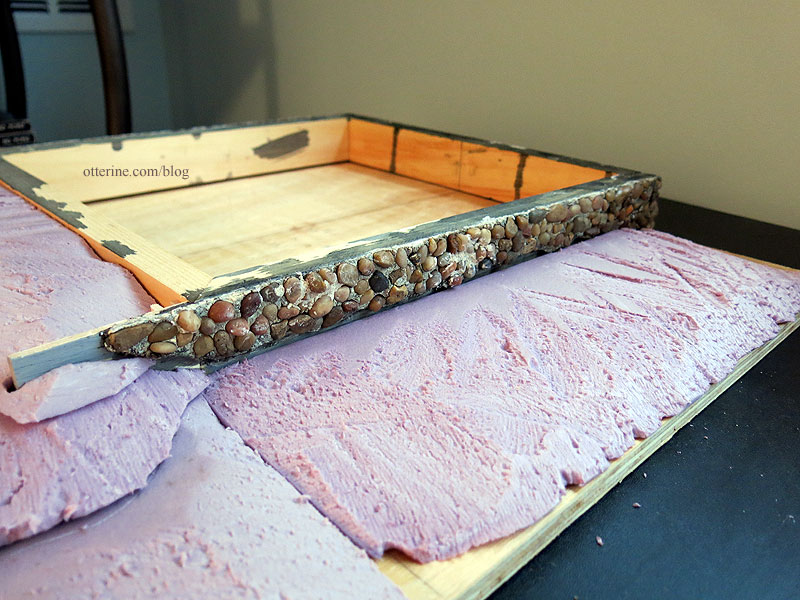
It was suggested by a Greenleaf member that I prime the foundation wood, so I did that. I then applied a slightly thinner coating of stucco patch and pressed in the aquarium gravel. I set the foundation upside down to make sure the upper edge was flat and uniform.
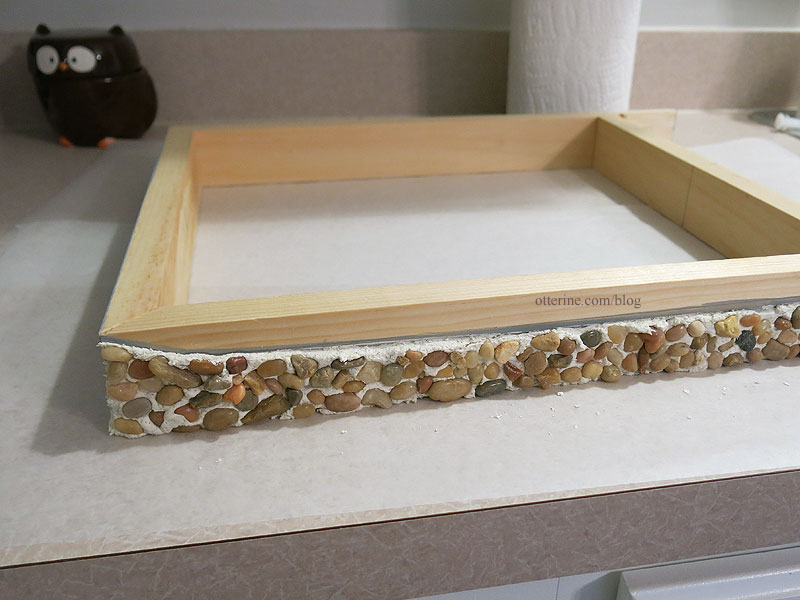
The sample I had made turned very yellow and I wasn’t sure how well the material would stain once dry, so I added a black brown paint wash while the stucco was still wet.
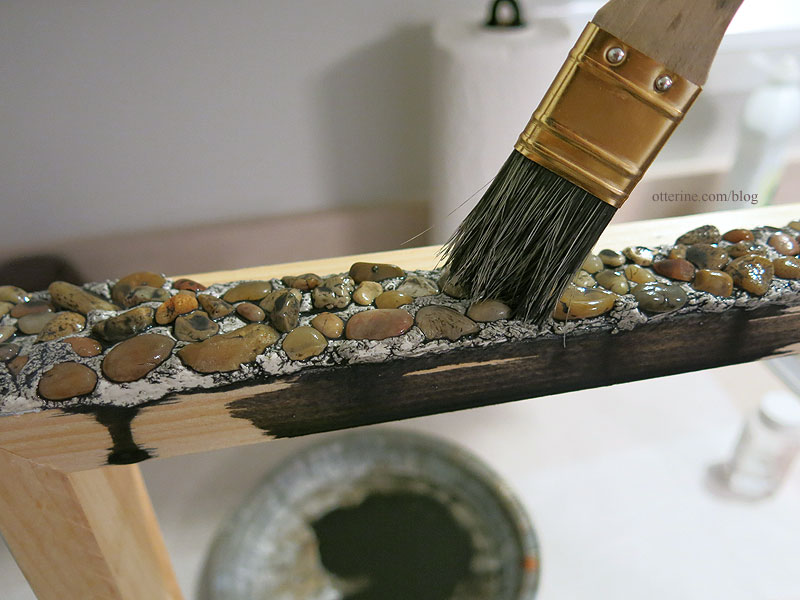
This darkened the grout just enough to start. A few of the stones didn’t want to stay. Might have been a combo of the thinner application and the added water from the paint wash. No worries. I glued the wayward stones back in place and they held.

Once dry, I applied some more stucco material in areas where it seemed too thin. Looks like the walls have been repaired over the years.

To the new grout, I added a brown paint wash to remove the brightness. I can dirty this up more later, as needed.
Looks good for scale. :]
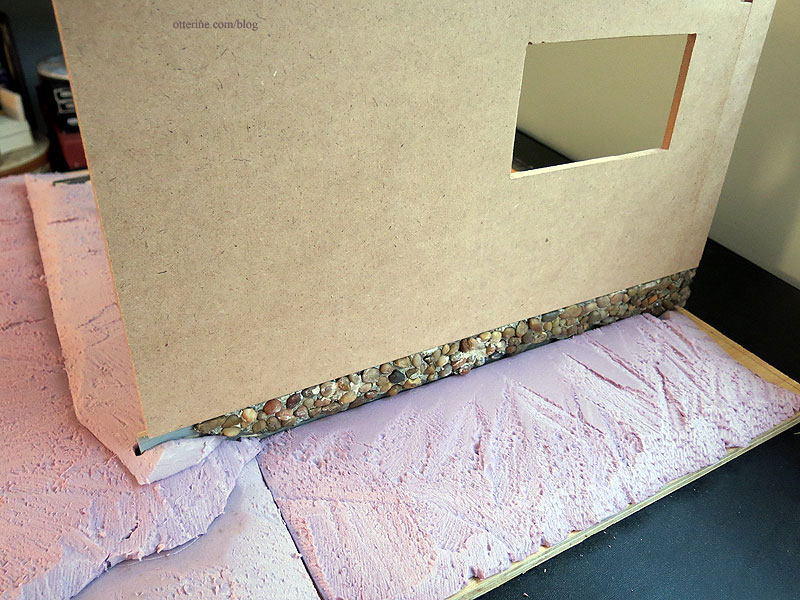
Any gaps or exposed areas of the wood foundation will be addressed in later landscaping.
Categories: Milo Valley Farm
March 24, 2015 | 0 commentsDatsun 240ZG – part 1
I’m going to start this build with a disclaimer: I am an artist, not a modeler. This is a very specific car, so be forewarned that I plan to take several liberties with it strictly for taste. I’ve scoured the internet and saved a bunch of photos of the real deal cars as well as some of the fantastic models done by top-notch modelers. There are some fantastic stock and modified builds out there, and I admire the dedication and thought that went into those projects. I will link to some these during my build. But, my end goal here is to create a barn find. How well-preserved or how dilapidated it ends up, who knows. One thing I do know…it won’t look much like the box art.
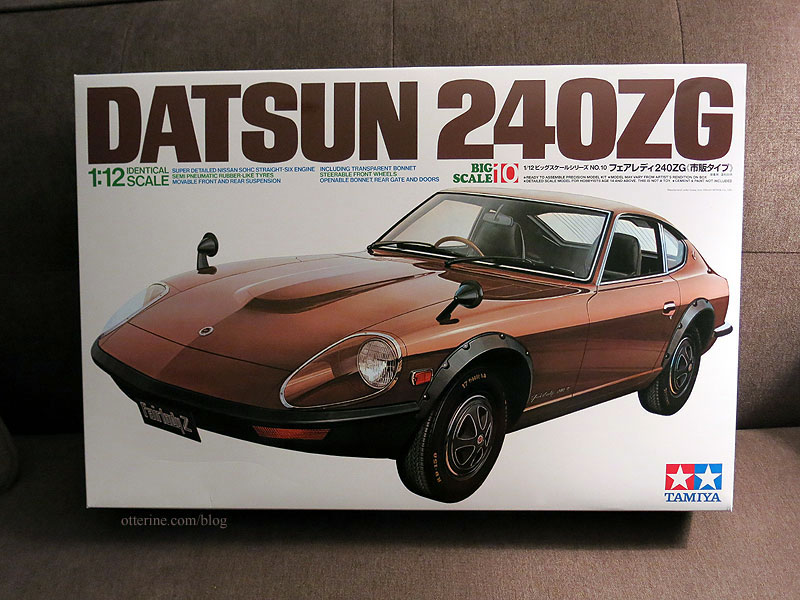
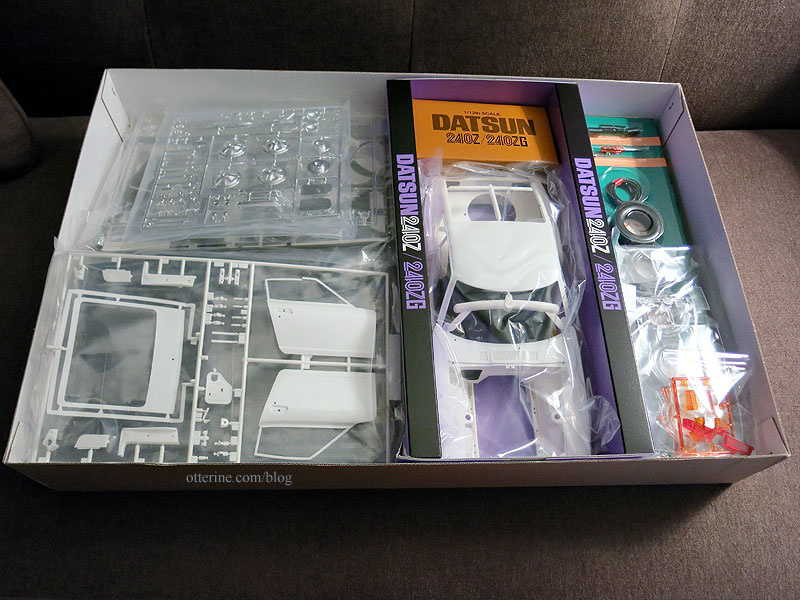
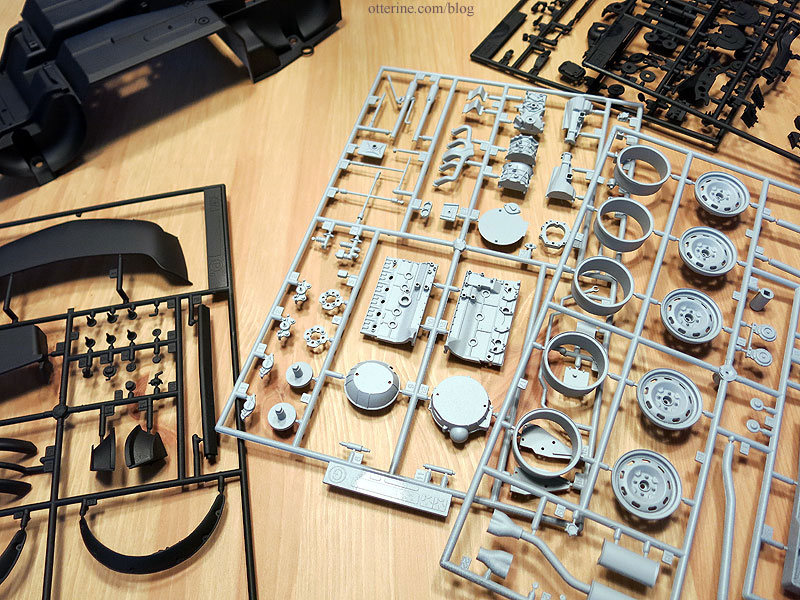
There are 14 sprues of parts with a smattering of other pieces. So far, I’m really impressed with this kit. I’ve not built a car this large, so the details are wonderful. There are also pre-colored light covers and rubberized parts beyond just the tires. I plan to build a complete model, but I’m not going to be a stickler for every last detail. I will be adding a few elements not included in the kit, though. A lot of this car will end up dirty, too, so some details will be lost in age and grime anyway. I will pick my battles. :D
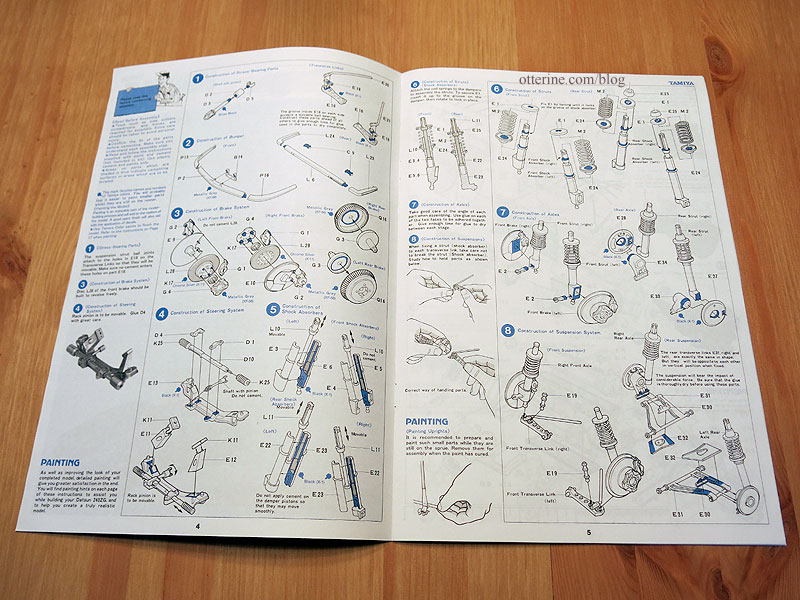
There are 14 pages of detailed instructions in building the model, one of which is the main body color chart.
One of the first liberties I am taking is the body color. I bought Testors Fiery Orange. It’s a beautiful red orange metallic. It’s so lovely that I came so close to making this a well-preserved barn find. I’m going to have to spray *something* new in this beautiful color to satisfy that itch. I’m a fan of this color, just so you know.
If I were making a showroom new model, I would take more care to study all of the parts before priming. As it is, I primed whole sprues in a color close to their molded color. I like to work with primed plastic because I feel I can work more fluidly with colors and textures on a primed surface.
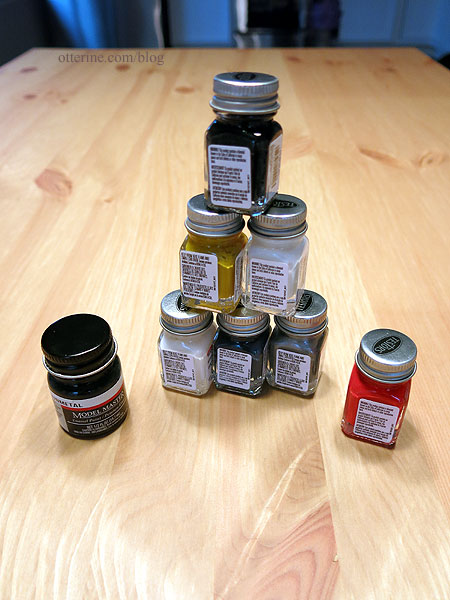
I bought a bunch of Testors bottled paints (plus one Model Masters) and have a few brushes on hand to start. No reason for Testors other than I like their paints and have some already in my stash. I will also be using craft paint acrylics.
I won’t be detailing every step of the build here on the blog but will post updates along the way. I’ll also make a recap post with links to the various steps as I get further along. So, that’s where I am now…primed sprues, instructions opened to step 1, sample photos ready.
Categories: Milo Valley Farm, Model Cars, Vehicles
March 22, 2015 | 0 comments
NOTE: All content on otterine.com is copyrighted and may not be reproduced in part or in whole. It takes a lot of time and effort to write and photograph for my blog. Please ask permission before reproducing any of my content. (More on copyright)