


NOTE: All content on otterine.com is copyrighted and may not be reproduced in part or in whole. It takes a lot of time and effort to write and photograph for my blog. Please ask permission before reproducing any of my content. (More on copyright)

Categories:
Milo Valley Farm – removable back wall, part 1
When I constructed Baslow Ranch, I made a standalone board to enclose the open back when photographing from the front. It has siding on it just like the rest of the building.
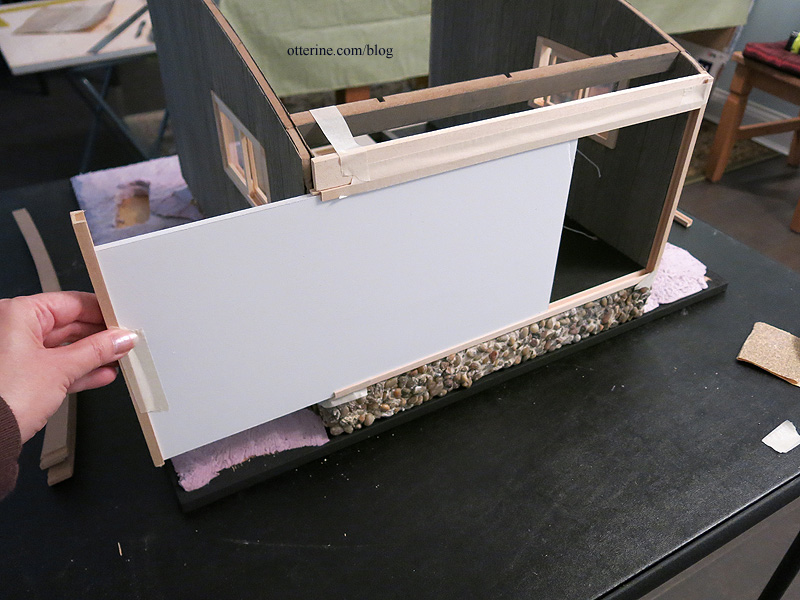
However, it is not easy to prop in place and has warped over time with nothing to keep it stable. With Milo Valley Farm, I’m going to incorporate the back wall into the build. But, it has to remain removable to access the interior. To that end, I will make it a sliding wall using channel molding.
The channel molding measures 1/4″ x 3/8″ and holds a board 1/4″ thick. I left space for this trim on the foundation when planning. I cut two vertical boards floor to ceiling for the back edges.
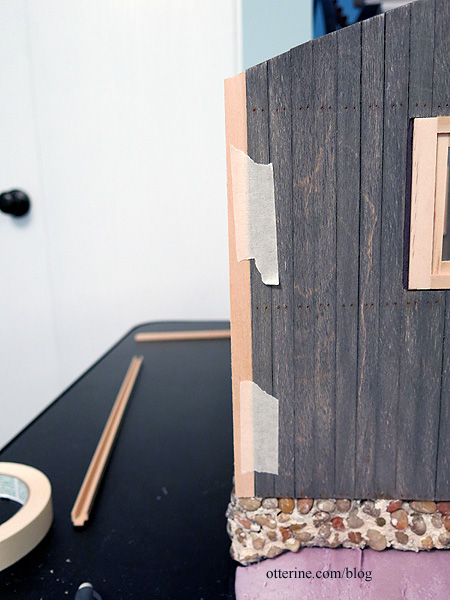
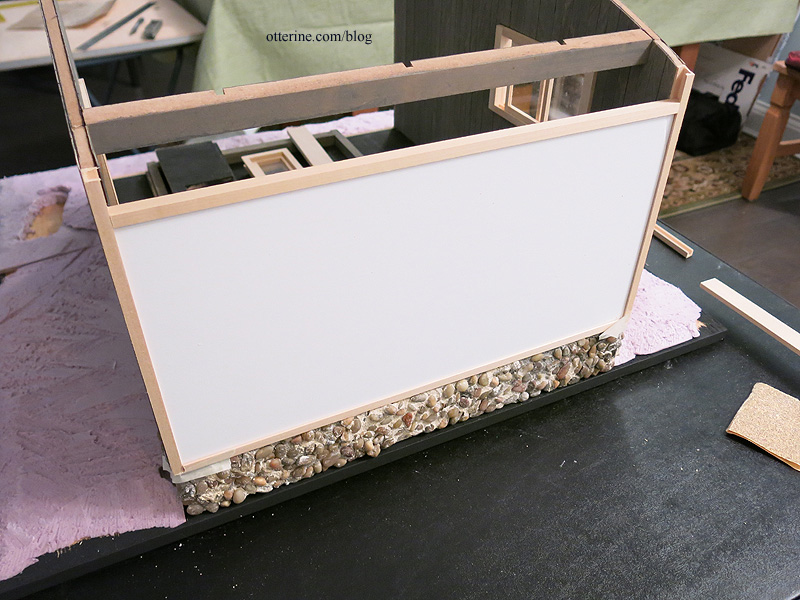
I cut a piece of foam core board to serve as a template for my final wood wall. As you can see, I’m not making the removable part go all the way to the ceiling. I think having a static wall at the top and a removable wall on the bottom will work better for stability.
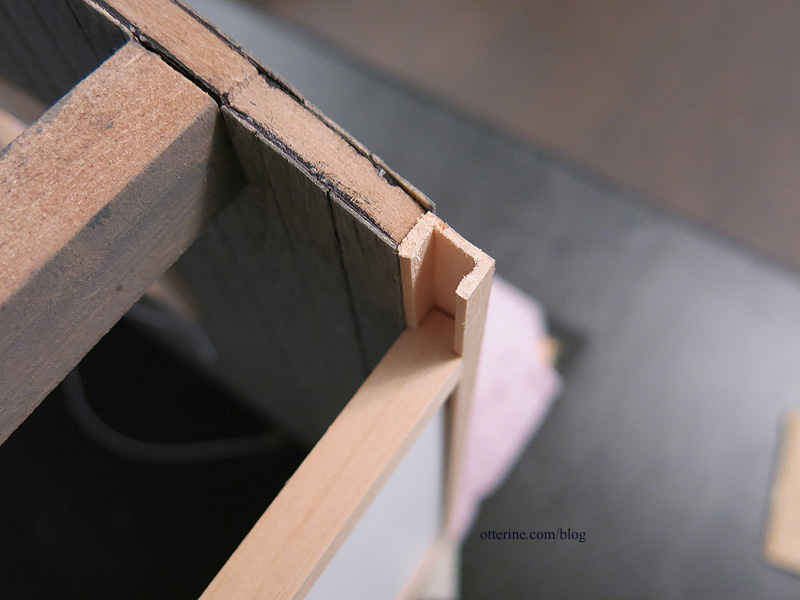
I cut two channel pieces to fit the width between the vertical boards. I notched the ends to fit inside the vertical channels. This will keep it locked in place when closed.
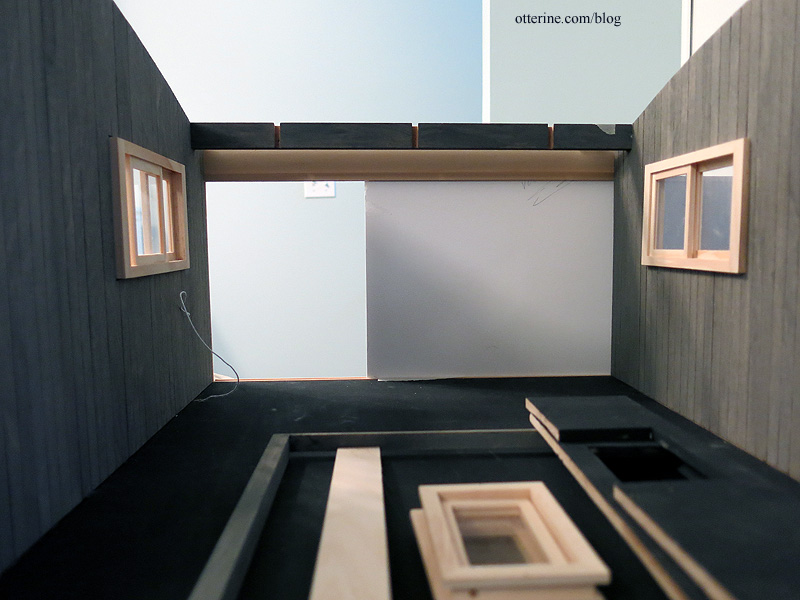
I cut a board from 3/16″ basswood to serve as the stationary upper wall base. I chose basswood since it was easy to sand into an angle along the upper edge.

The upper and lower channels will be glued in place as well as one side channel. The remaining side channel will be attached to the removable wall and will move with it.
We have a plan. Now to tinker until it works.
Categories: Milo Valley Farm
May 25, 2015 | 0 commentsMilo Valley Farm – siding, part 2
Continuing work on the siding. I finished applying the siding strips to the side wall templates, both interior and exterior.

I applied Weldbond glue to the previously primed kit walls to attach the finished templates. I use scrap pieces of foam, foam board, cardboard, etc. to spread the glue evenly.


Using Staining Medium by Americana, I aged the planks with a mix of grey, brown and black acrylic paints.

The Staining Medium acts somewhat like a glaze, looks a little like an ointment, and makes acrylic paint behave like a liquid stain. I apply it thinly and then wipe away the excess with a paper towel to reveal the grain.

I did a second pass on the exterior for deeper color and less grain. I allowed the boards to dry to the touch and then pressed all of the boards under magazines to minimize warping.

I painted the cross beams and door frame with the remaining mixture. I will do more to these later, but it’s a good base coat.

I drilled a hole in the floor board for exiting wires.

After feeding some florist wire through the hole in the foundation, I glued the floor board to the foundation.

Categories: Milo Valley Farm
May 24, 2015 | 0 commentsMilo Valley Farm – abandoned bathtub, part 3
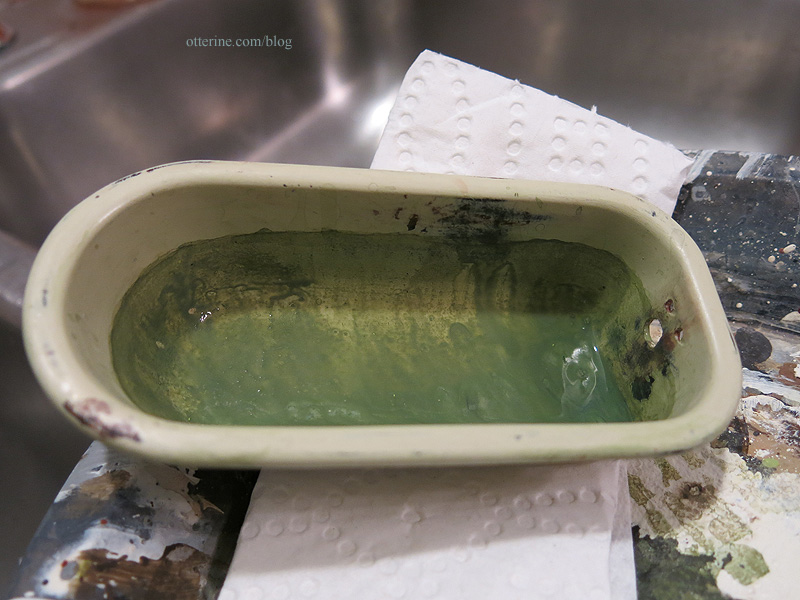
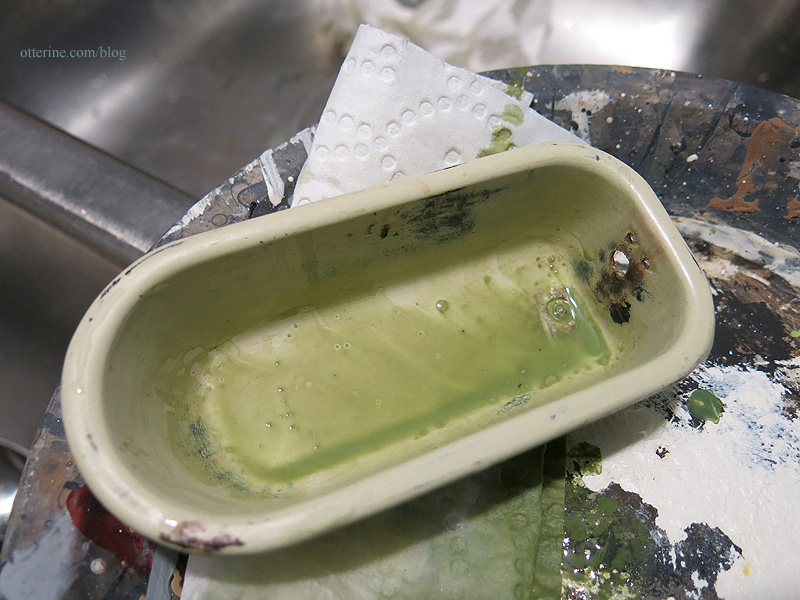
Continuing work on the abandoned bathtub. The initial algae process turned out well.
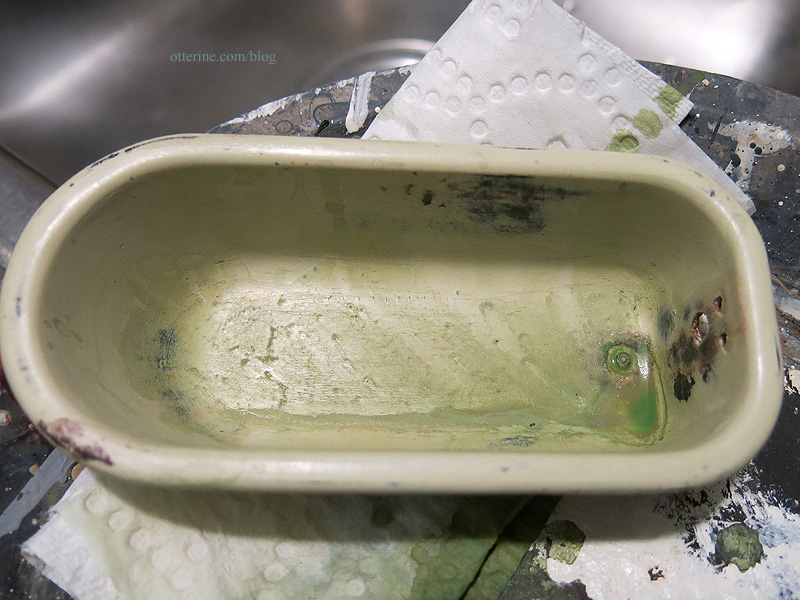
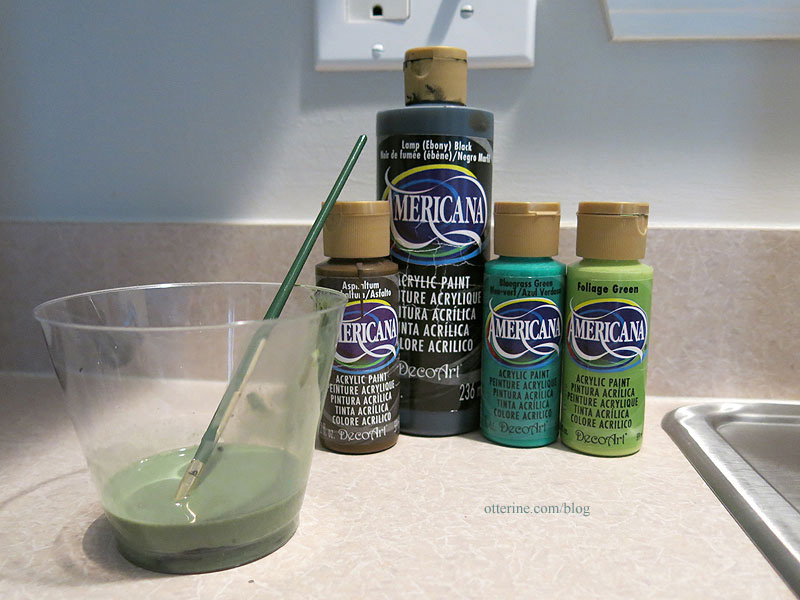
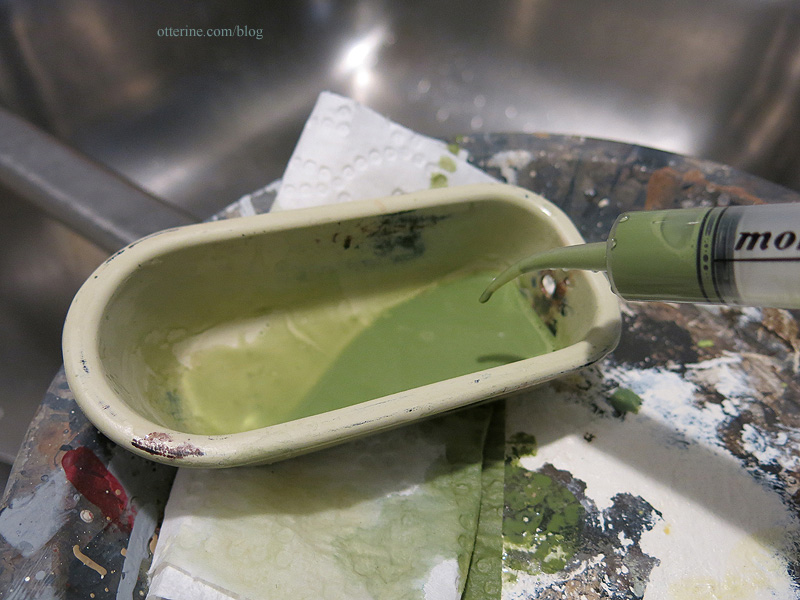
Then it was time for the ring around the tub. :D I made another green paint wash and poured some into the tub. I then took a smaller brush and kept making rounds, dropping liquid down the sides.

They were such light layers of watered down paint that they dried quickly, allowing me to build up layers of rings. I then let it dry completely after this step.
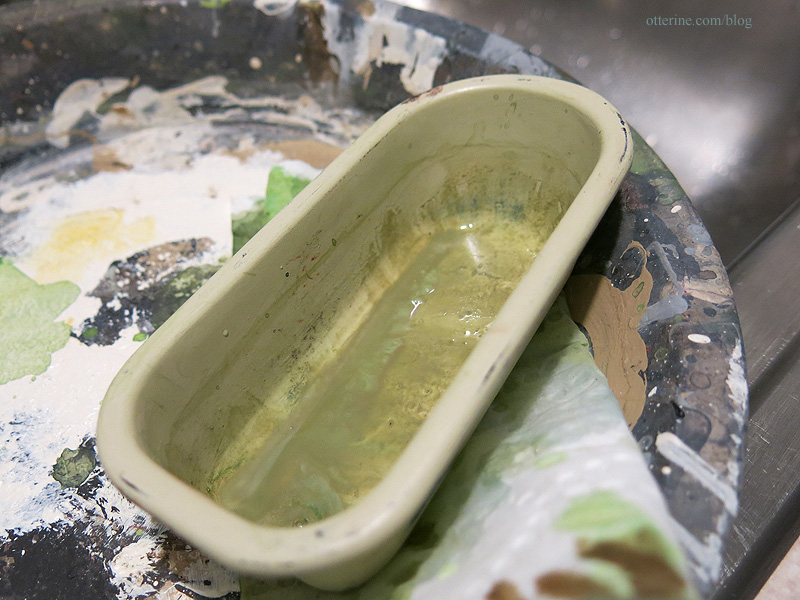
It was too light and too matte when dry, so I did a third round with darker green and satin varnish mixed in. Here it is wet.
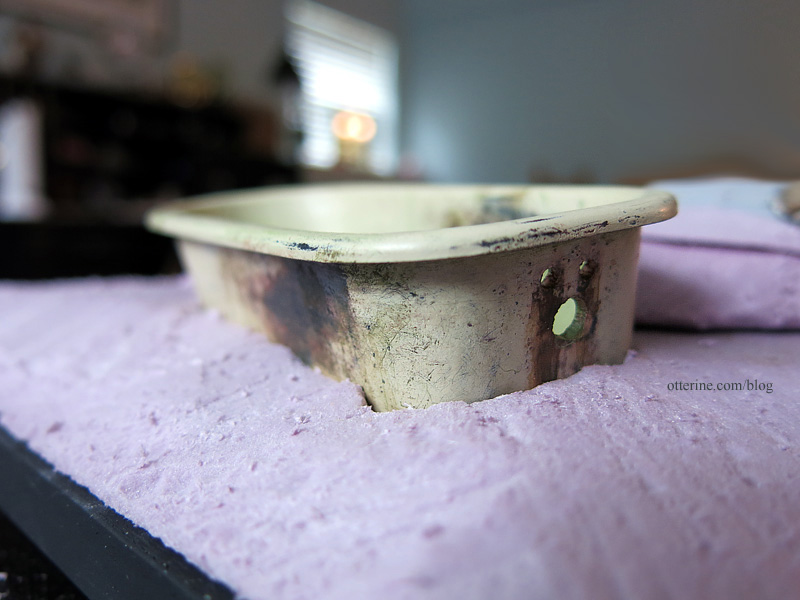
I cut away the necessary material to sink the tub into the ground. You can see why I didn’t bother with the tub legs.

This will allow for the slight angle I built into the sludge and the doors (swinging or rolling) will clear it easily. I already love it just buried in foam!
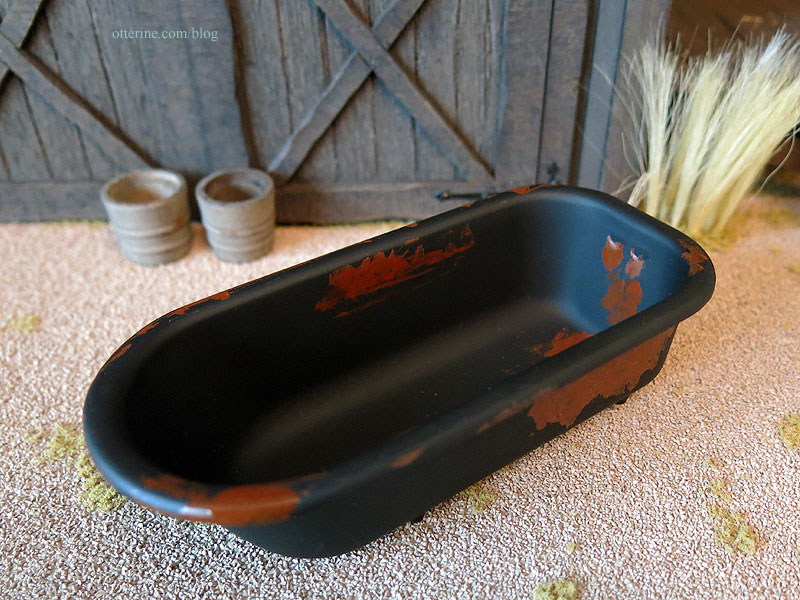
I added the final aging on the exterior using random paint washes and dry brushing.
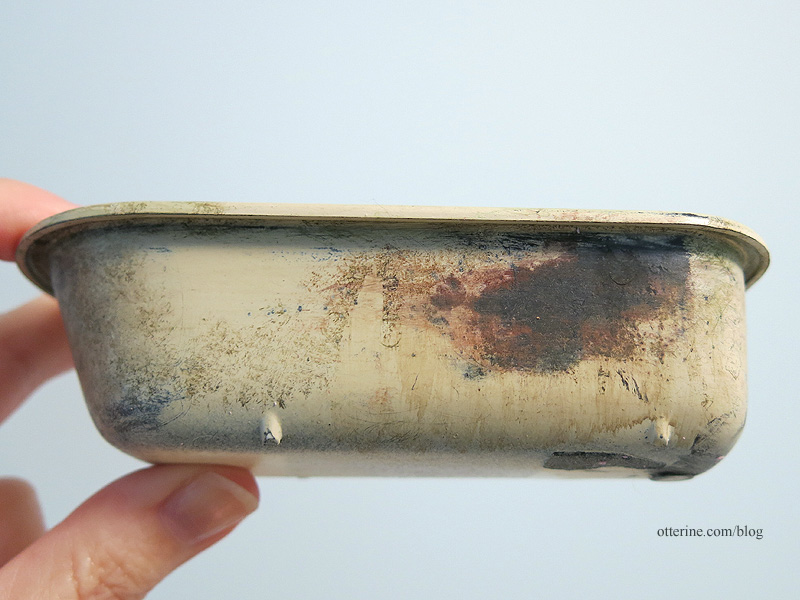
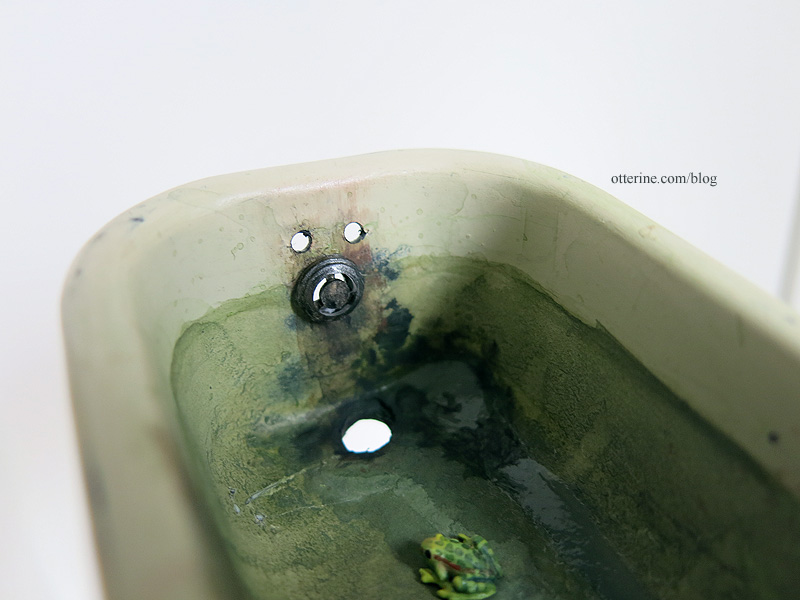
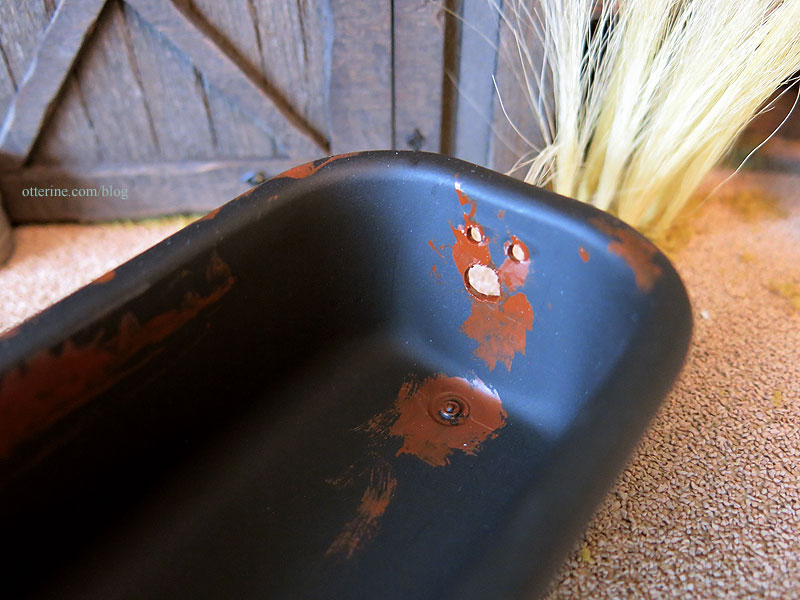
Though the faucets are long gone, I added the overflow cover plate made from a pen cap. I had done this before for the Heritage tub, and it worked well.

I painted it silver and then aged it with washes before gluing it in place. I also drilled out the drain hole and painted the subsequent bare plastic. I added gloss painted details to the interior using Triple Thick Gloss Glaze, like there’s always some moisture in there. With all the rust and grime, you can’t even tell there was a drilling misfire. :]
It looks like heavy cast iron, no?
Yes, this tiny frog feels right at home. I’ve named him Herbert. :D He was made by Amanda Skinner.
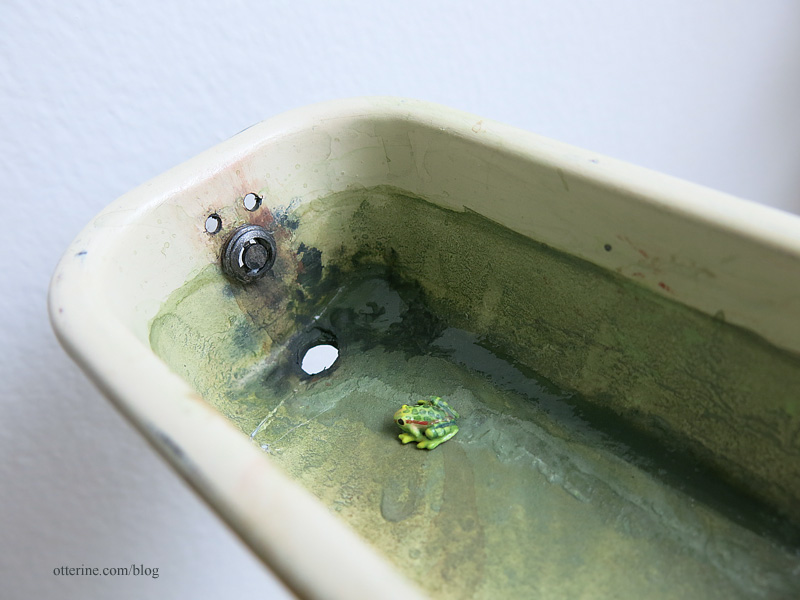
Now it will sit until I get to the final landscaping. :D
Categories: Milo Valley Farm
April 26, 2015 | 0 commentsMilo Valley Farm – abandoned bathtub, part 2
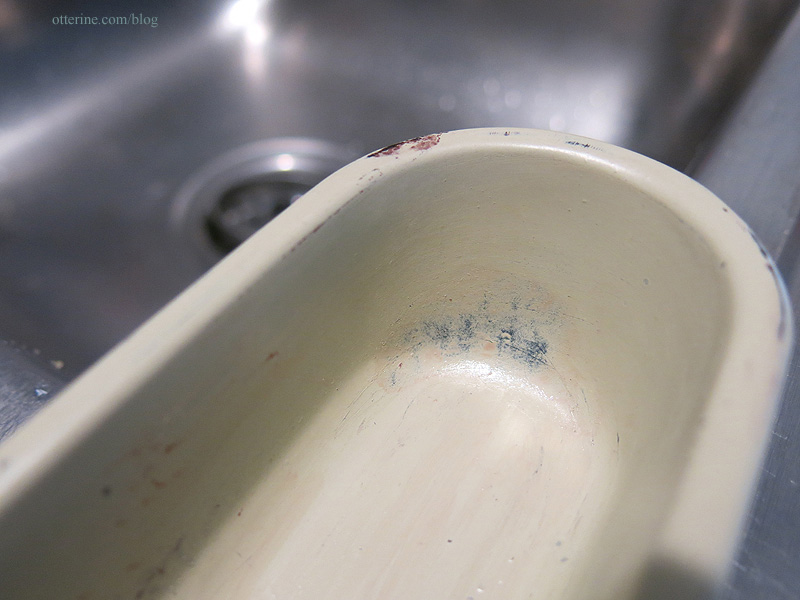
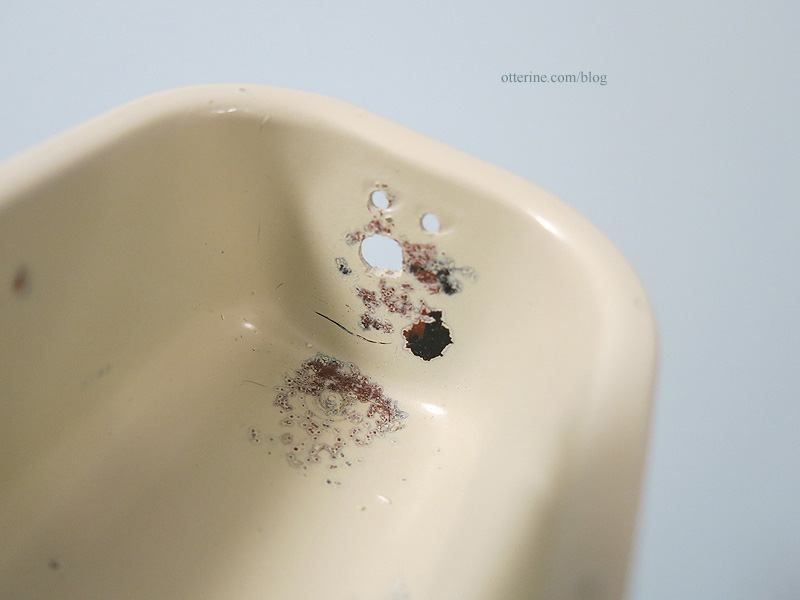
Continuing work on the abandoned bathtub. I sanded the entire piece to remove the sheen, which was glossier than it should be for an old tub exposed to the elements. In some places this left well delineated scratches.
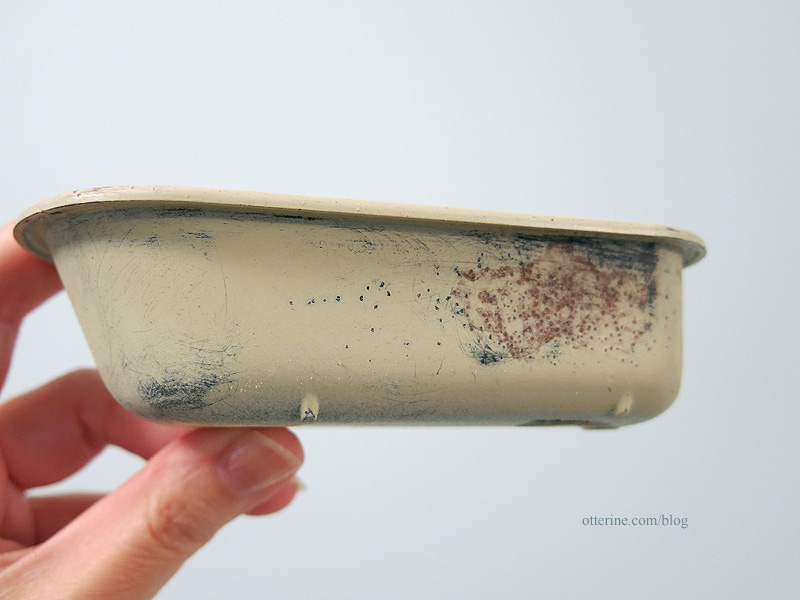
To bring back a lighter sheen, I applied nail polish remover to the entire surface.

To lift some of the paint in the rusted areas, I applied paint thinner with a Q-tip. This lifted the paint slightly.
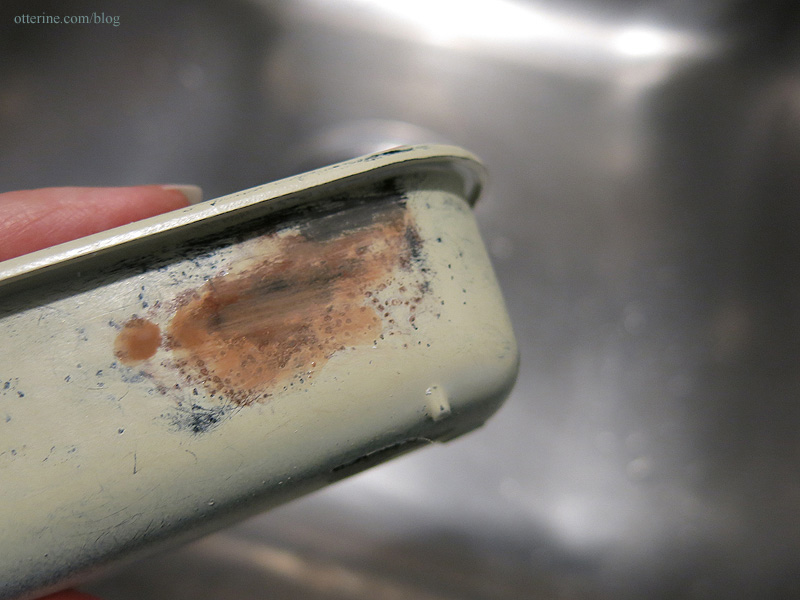
I used a paper towel to lift the paint entirely in areas.

I smoothed out the obvious scratches with paint thinner, this time just letting the paint dry without applying the paper towel.
After the paint dried, I washed the tub with soap and water and positioned it into a tray using a paper towel to angle it slightly.
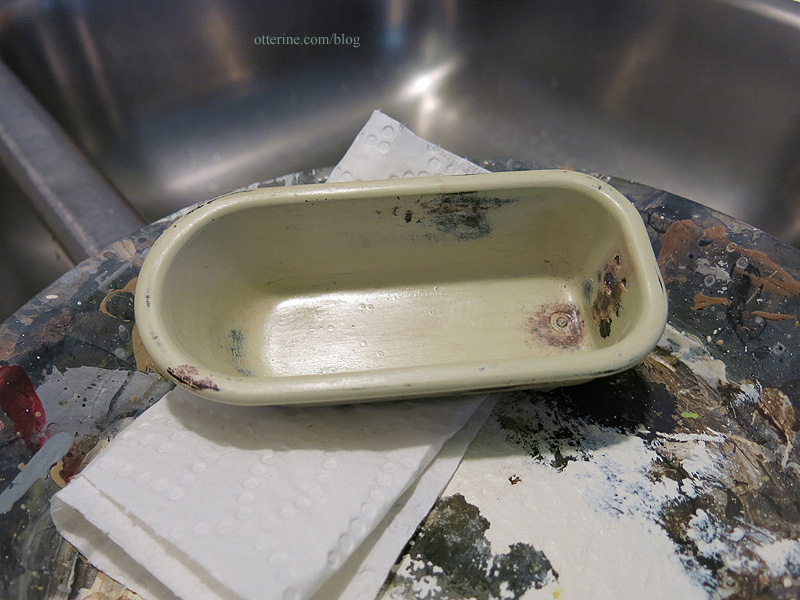
To get the tub to look like it had been filled with algae water a few times over, I made a mixture of brown and green paint (with a tiny dash of black) and poured it into the bath.
I kept removing a little bit of the mixture with a syringe and then dropping some back in.
After I had a good result, I left the remaining liquid to dry naturally.
To be continued….
Categories: Milo Valley Farm
April 25, 2015 | 0 commentsMilo Valley Farm – abandoned bathtub, part 1
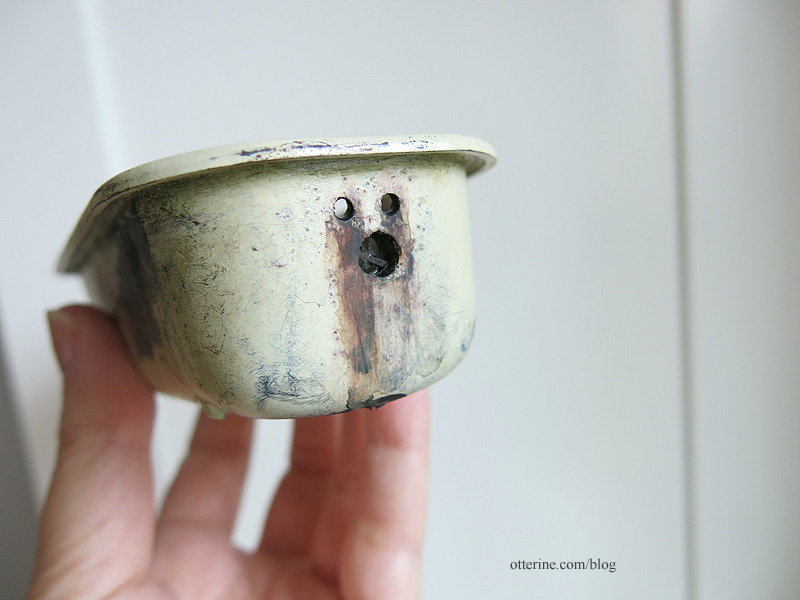
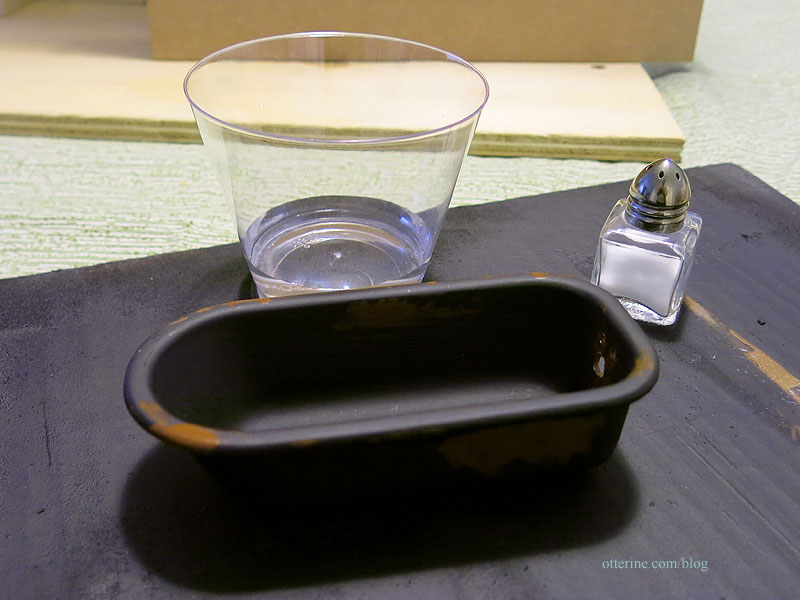
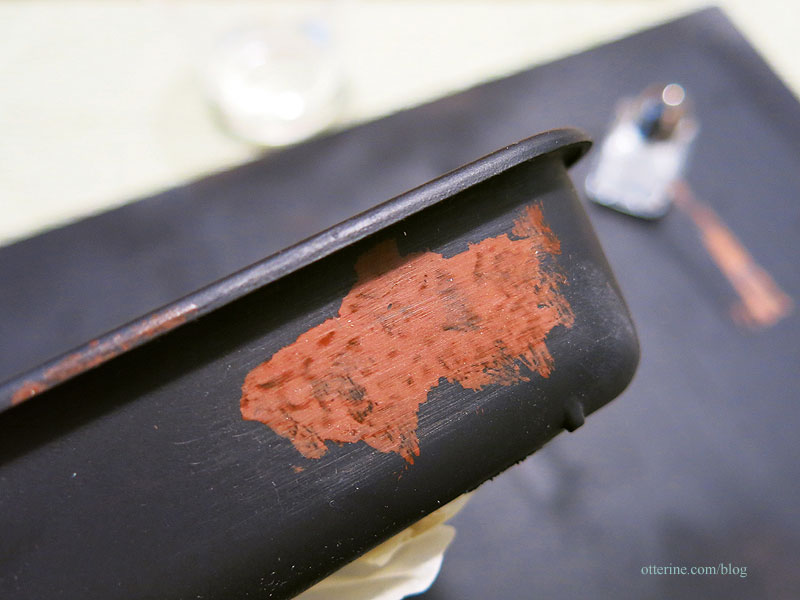
It wouldn’t be an old farm without an abandoned bathtub buried somewhere on the grounds. I’m using a spare tub picked up from Sir Thomas Thumb at last year’s Bishop Show. These are the same that come in the Chrysnbon kits, but there no hardware or accessories are included. I didn’t bother cleaning up the plastic at all, just started with a spray of flat black. I then added brushed on patches of Testors Rust paint.
I drilled out the holes for the plumbing in the back (not quite centered but this is easily fixed later), then touched up the paint on those areas. I didn’t do the drain for reasons I’ll get to.
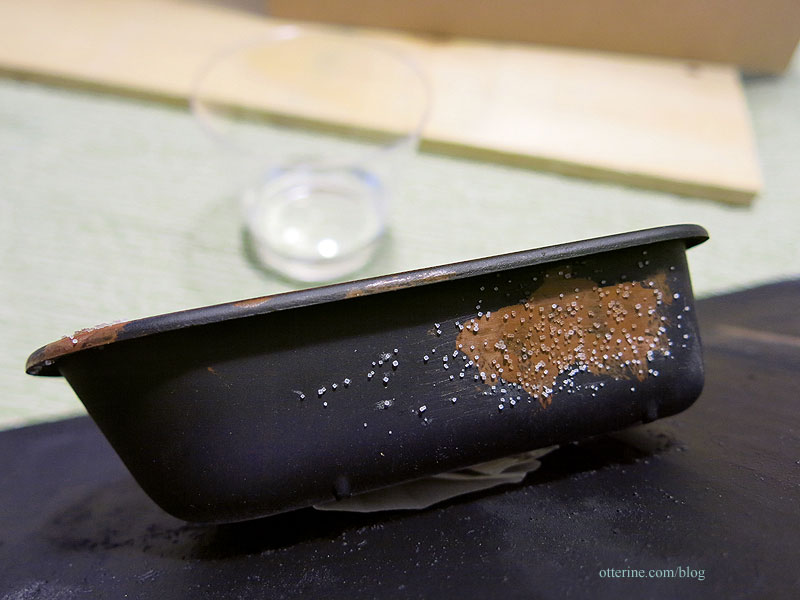
This tub is from Sir Thomas Thumb, bought at a local mini show. I gathered a cup of water and a salt shaker.
Since the rust paint dried with a slight sheen, the water beaded on the surface. I sanded it lightly to remove the sheen.
I added the salt as recommended in the tutorial, concentrating around the holes, the drain and the rust painted portions. It didn’t matter to me that some salt strayed.
I sprayed the tub Krylon Almond in satin finish, trying to use up some old paint on an item where overspray and splatters won’t matter at all. Of course, this old spray paint came out clean and crisp.
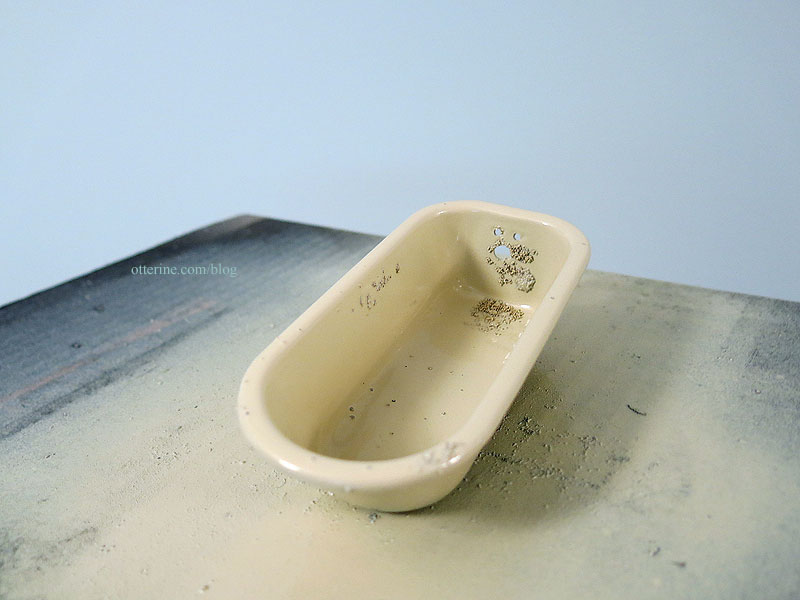
I let the spray paint dry thoroughly and then began the process of removing the salt by rubbing my finger over the grains. I did use a little water in some spots. It worked well, though not enough of the under layer showed for what I wanted.

It worked better in the areas where the salt application was denser, as expected.
Categories: Milo Valley Farm
April 24, 2015 | 0 comments
NOTE: All content on otterine.com is copyrighted and may not be reproduced in part or in whole. It takes a lot of time and effort to write and photograph for my blog. Please ask permission before reproducing any of my content. (More on copyright)