


NOTE: All content on otterine.com is copyrighted and may not be reproduced in part or in whole. It takes a lot of time and effort to write and photograph for my blog. Please ask permission before reproducing any of my content. (More on copyright)

Categories:
Milo Valley Farm – landscaping, part 1
I made the initial landscaping base from builders foam. Before going further, I went ahead and ran wiring for the barn since the landscaping will be put in place over it.
I used my floral lead wire that I had installed when I glued the floor board to pull one final wire and one scrap wire through the hole. Once those were through, I taped the final wire to hold it in place and used the scrap wire to bring another final wire and the floral wire back through the hole. I used the floral wire to bring one final wire back through. Why not do them all at once? For some reason, it never fits. I end up with the same amount of wire through the hole at any given time, but it never wants to budge. :D
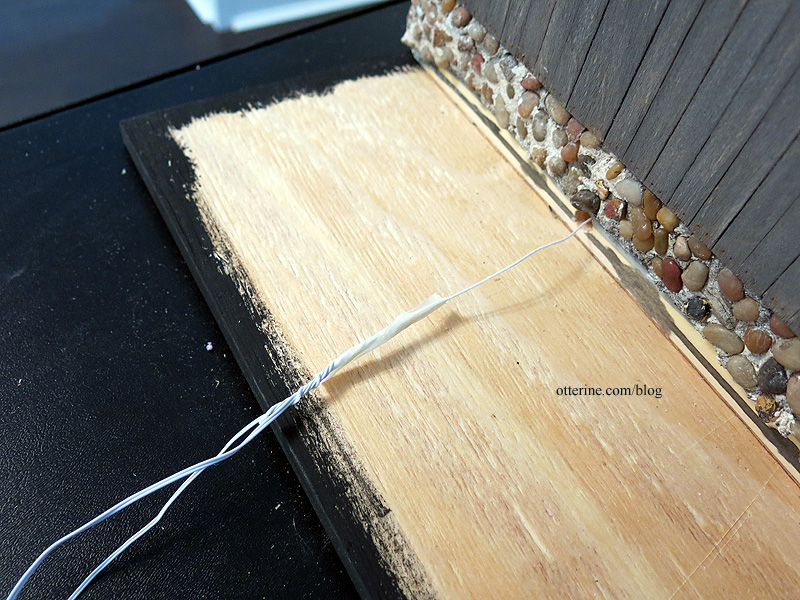
I opted for three wires though I am figuring on needing only two in the barn. I can always pull the extra out in the end or leave it curled in the sea chest in case inspiration strikes later.
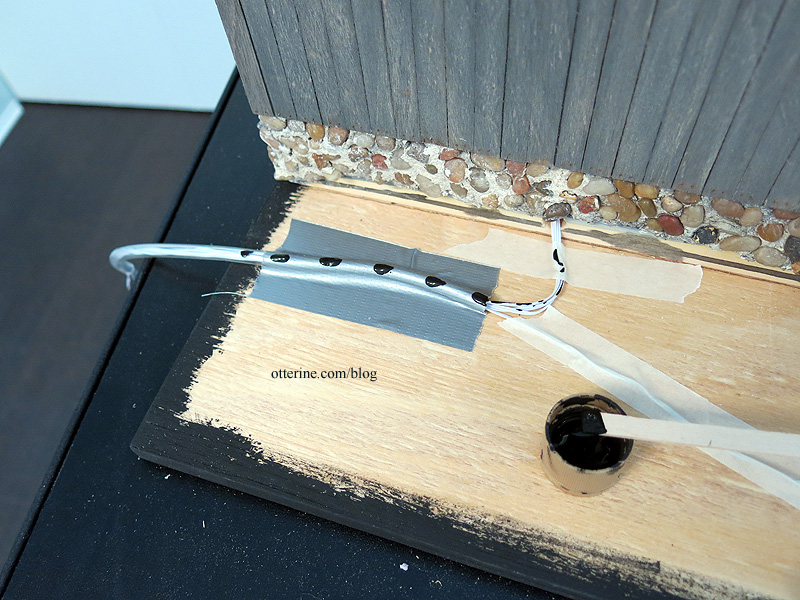
To protect the wires, I taped aquarium airline tubing to the main board near the end and over the edge. I don’t usually do this step, but there are so few wires that will come out of the building, and I wanted to make sure they didn’t pull or get damaged. I usually have a lot more wires.
I did need to make a channel in the foam for the tubing and wires going into the foundation. I dabbed black paint onto the tube and then pressed the foam over it.
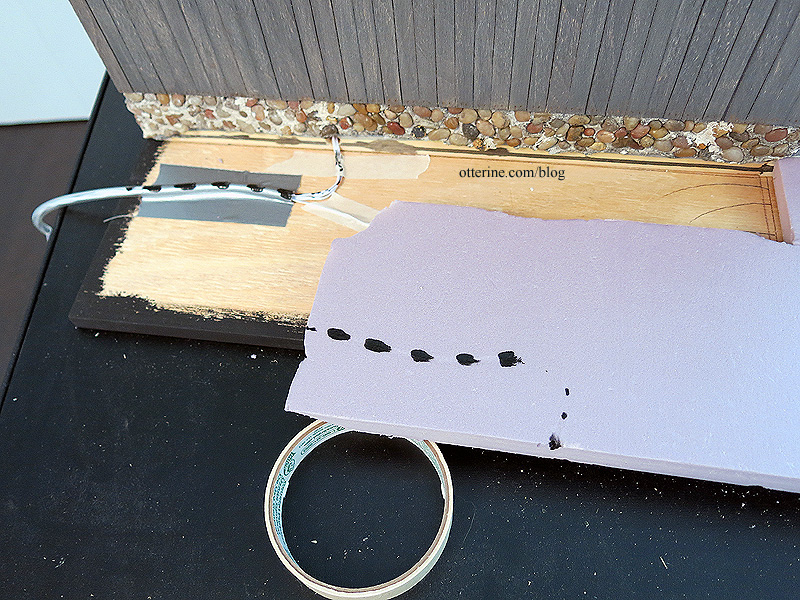
I cut where the paint line was. :]
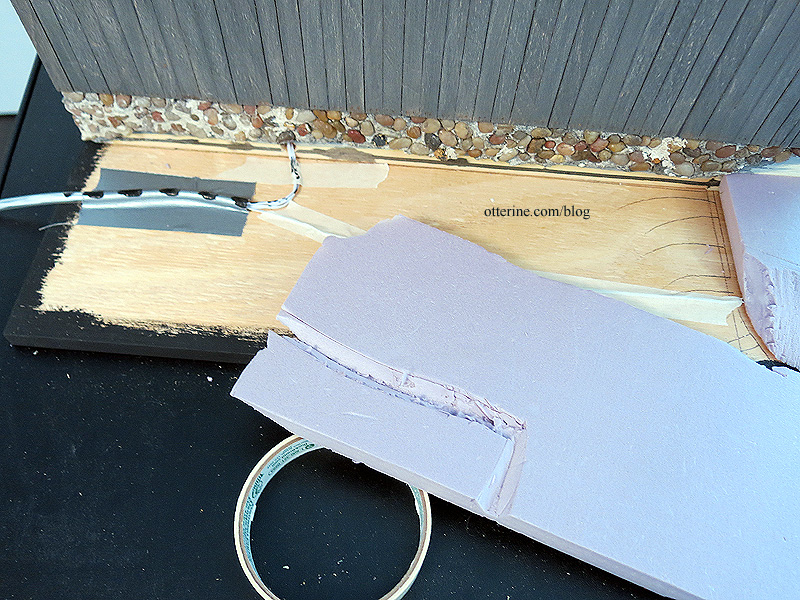
I glued the front lower foam piece to the landscaping board using Weldbond glue. I applied glue to the foam with a scrap of foam core board and then pressed it into place.
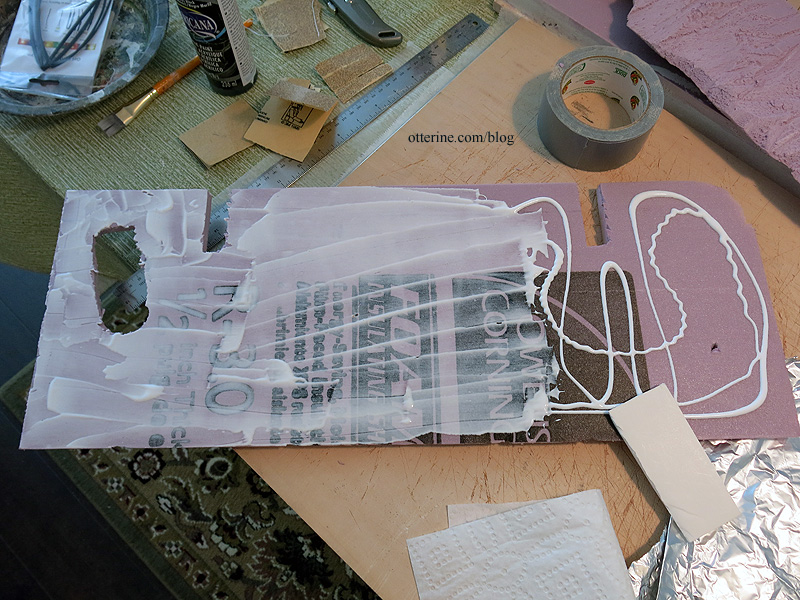
I painted the pieces with gesso. I had left the pieces closest to the building removable since I didn’t want to risk getting gesso or paint on the foundation.
Once dry, I painted them with a mix of black and brown. I won’t bother touching up the base trim until I’m done with the landscaping prep work. I glued the remaining pieces of foam in place.
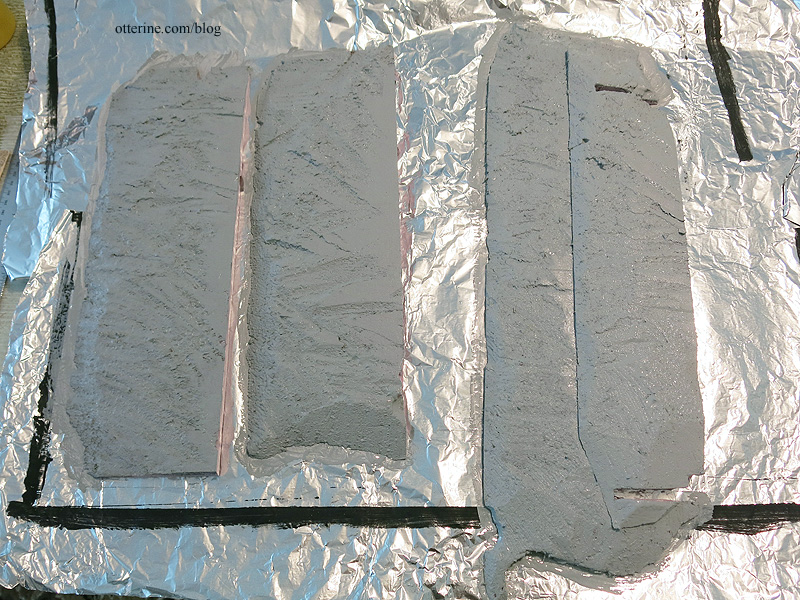
I added some stucco patch to fill in the gaps between the pieces and to even out the ramp. It will be easy enough to touch up the paint once it dries without marring the foundation.
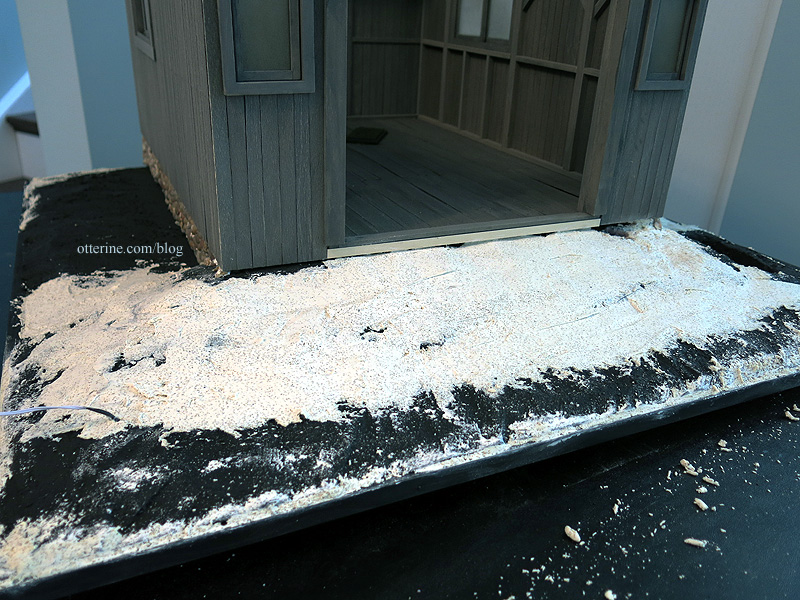
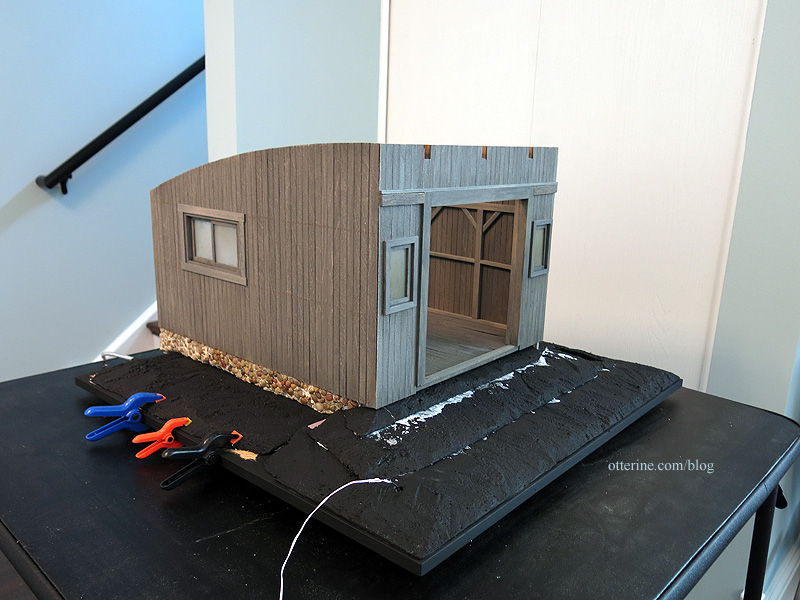
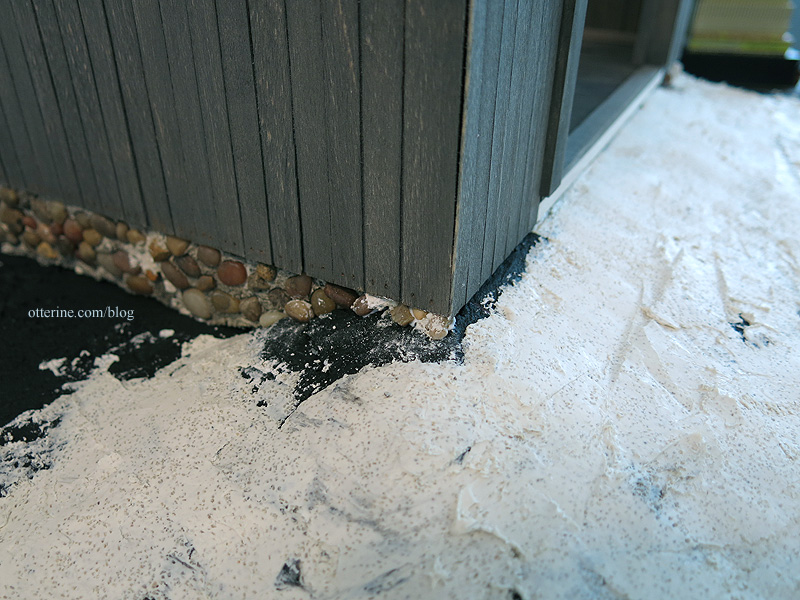
I added stone near the front edges where I hadn’t been able to apply earlier. This completes the stone foundation toward the front of the barn.
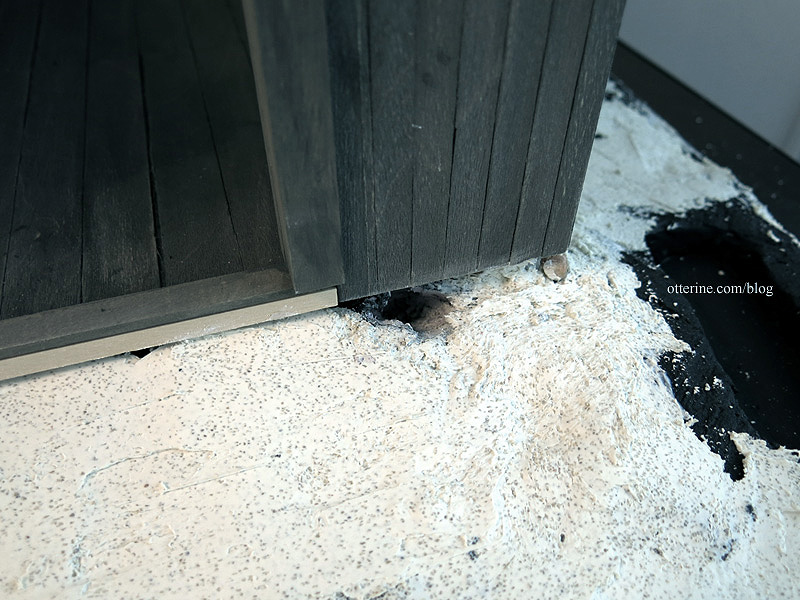
We need a rabbit hole, of course. :D
Categories: Milo Valley Farm
August 2, 2015 | 0 commentsMilo Valley Farm – the roof, part 1
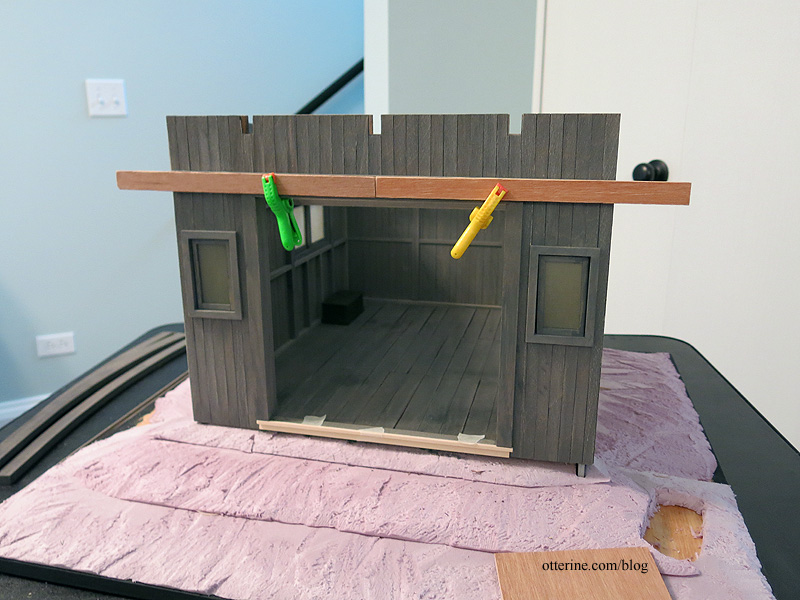
Well, more like “the ceiling” since that’s where I will start. I cut the roof board down since I had narrowed the building. I had to cut an additional piece for the back since I had made the building deeper. Interestingly enough, I ended up with an extra roof board since the one that came with the kit originally was damaged so I had enough to cut the extra piece for the back from the same material.

I flipped the board over and marked the side wall and curved beam locations.

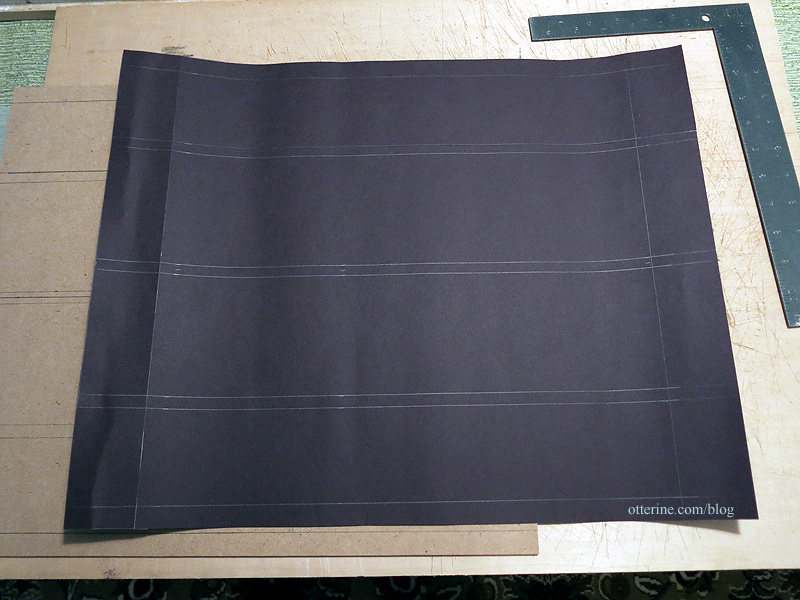
I made a template for the board from black paper, transferring the markings for the beams and side walls.
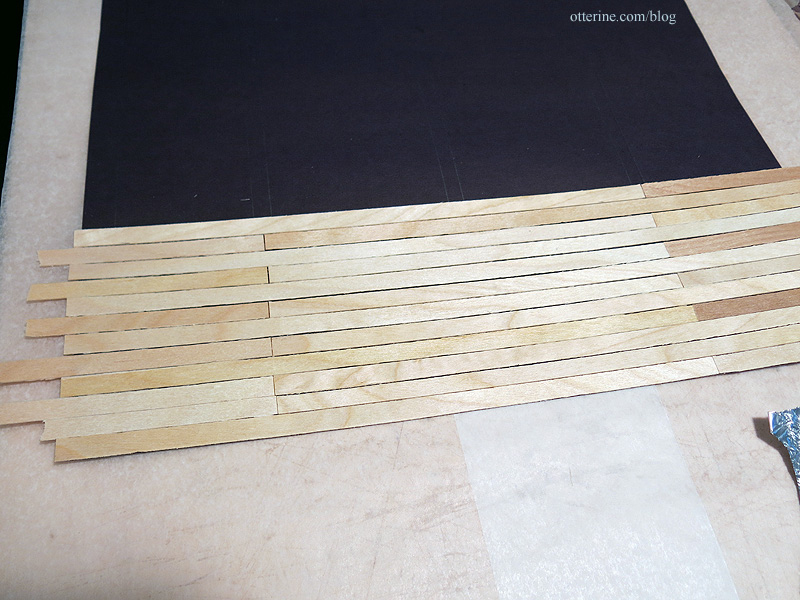
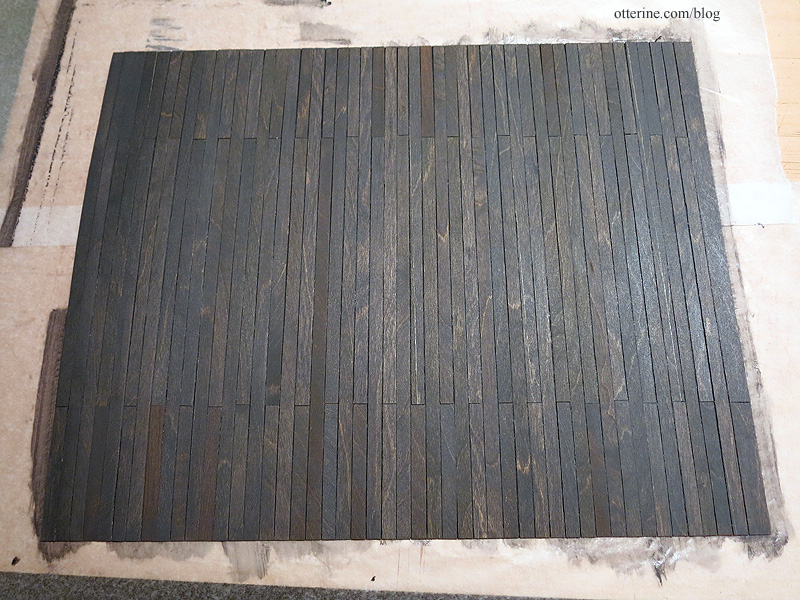
I used the same thin wood strips as I did for the siding to mimic a plank ceiling. I made sure seams hit where a beam would cover the gap, and I alternated the placement so it wouldn’t tend to bend along that break. I left a tiny bit of room between the boards to allow for the curve.
Painted…
And, propped in place to check the fit.
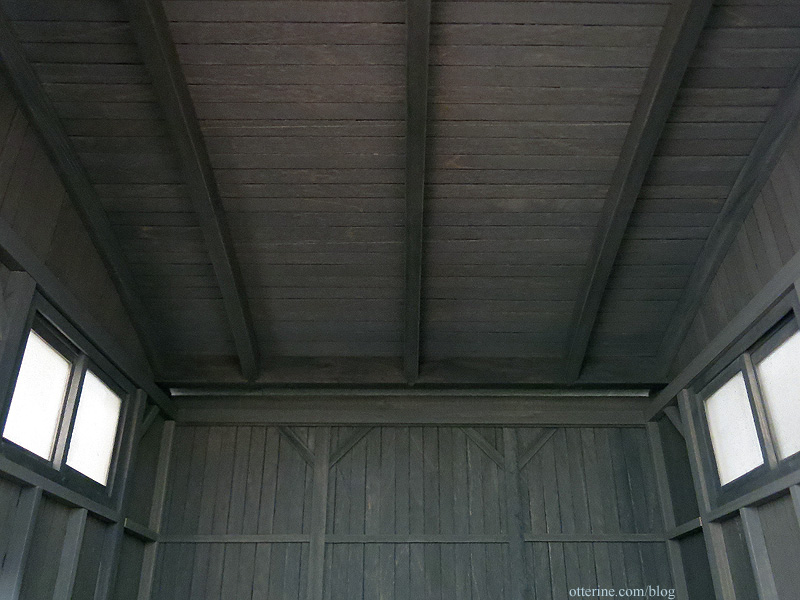
Marvelous, but we’re not ready to close up just yet. :]
Categories: Milo Valley Farm
July 30, 2015 | 0 commentsMilo Valley Farm – barn doors, part 1
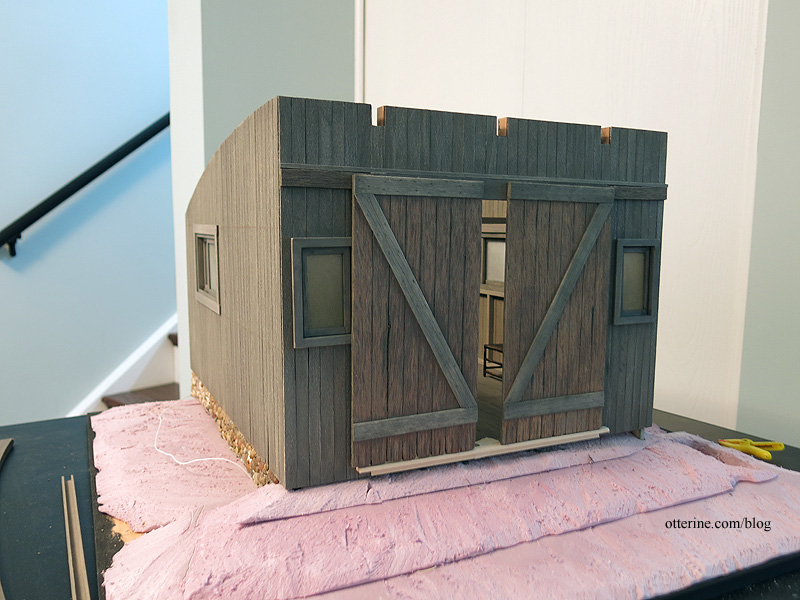
Sometimes during a build, I’ll get stuck on something and need to think for a bit while I work on other projects or even other aspects of a build. I don’t know how many barns I will make in my lifetime, and I wanted a sliding door for Milo Valley Farm. The problem arose when I narrowed the building. The door width required for the framed openings equates to two 4 1/8″ wide doors. The space on either side of the framed opening is only 2.75″ wide.
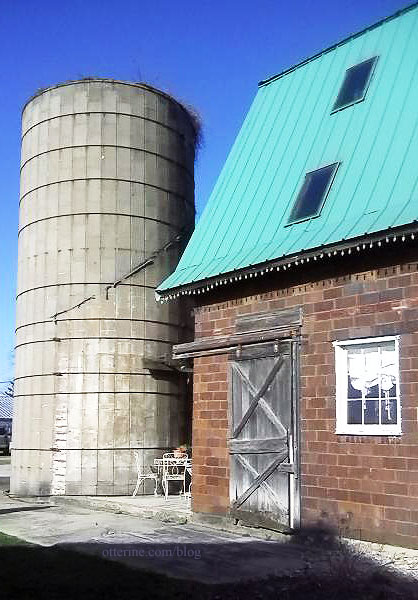
I’ve always said I need only one real life example to justify a solution used in miniature. This past weekend, I went to my cousin’s wedding and ran into just such an example. :D The event was held at Proven Ground Farm, and what an awesome place! The barn and grain bins were preserved and converted into a fabulous indoor-outdoor event space. I foolishly left my camera behind (not realizing the venue ahead of time), but mom lent me her phone which took adequate photos. :]
The door on the left side slides to the left, where it would extend past the building’s edge. The solution used was an elongated board to hold the hardware past that edge. :D
There was someone I didn’t know sitting here, so I had to crop the close-up, but that’s a great old door! :D The hardware gives me some ideas as well.

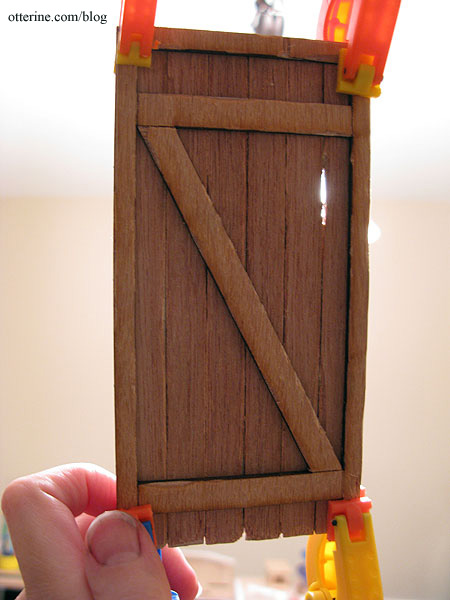
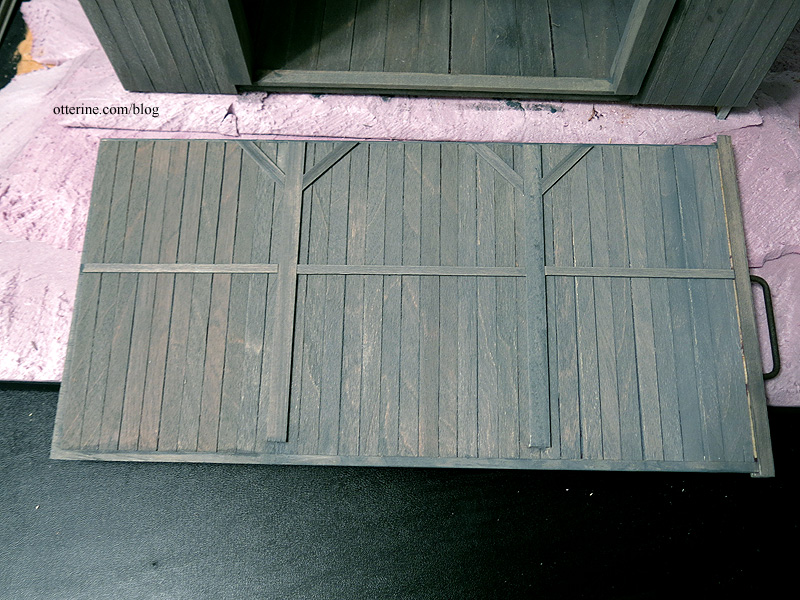
Before I get to that part, I need to build the barn doors. I’ve made weathered doors before for Baslow Ranch, and those were made from laser cut plywood. You can still get a good approximation starting there, so I used those as inspiration.
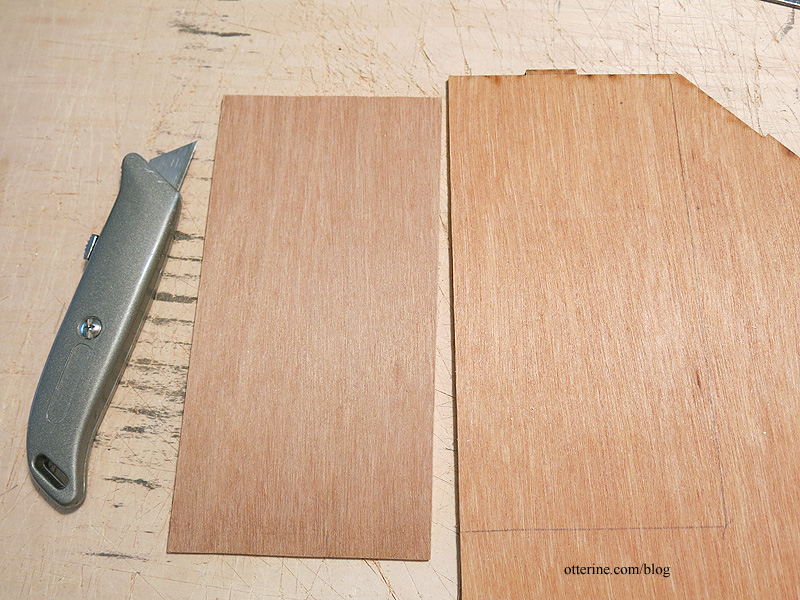
from Baslow Ranch I dug through my bins of scrap wood and cut two pieces of 1/8″ thick plywood measuring 4 3/16″ wide by8 3/8″ tall.
I measured and scored 1/2″ wide planks for each door on both sides. I cut, marred and applied strips of basswood to make the supports. Using the same technique as I had for the siding, I made fake nail holes.
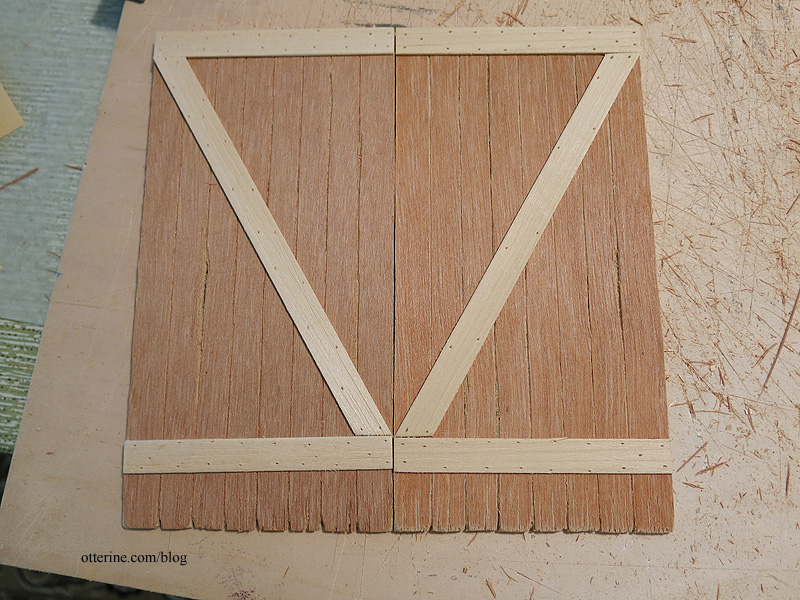
I painted the doors to match the barn. Since the wood started as a different color, the barn doors are slightly off from the rest. They are also still wet. We’ll see what they look like after drying.
I added support for the main cross boards.
I then cut the cross boards from the same wood as the doors and added basswood pieces to fill in under the door opening.
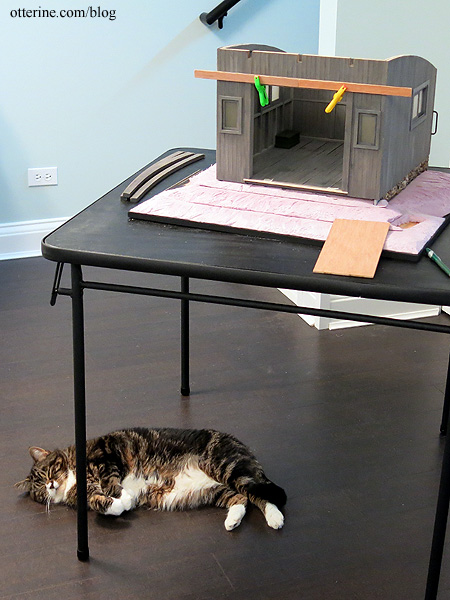
Meow. :D
Categories: Milo Valley Farm
July 26, 2015 | 0 commentsMilo Valley Farm – faking a structure
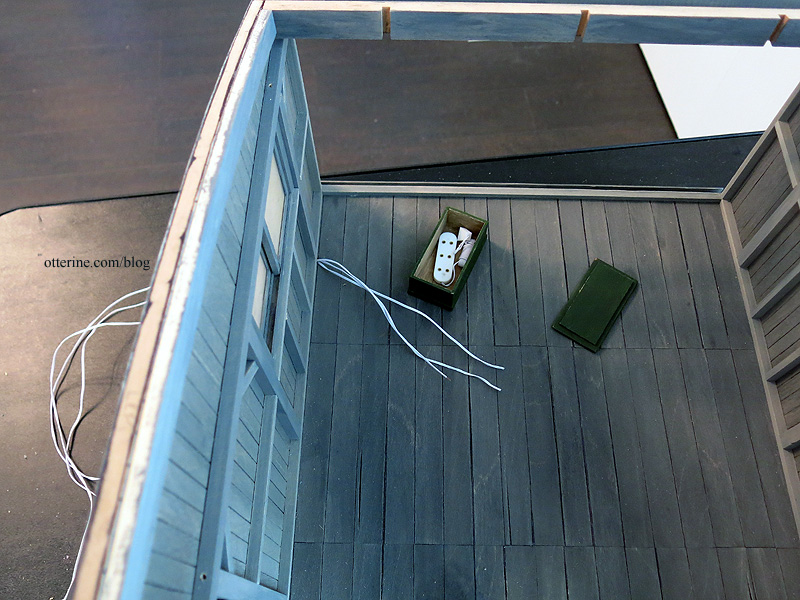
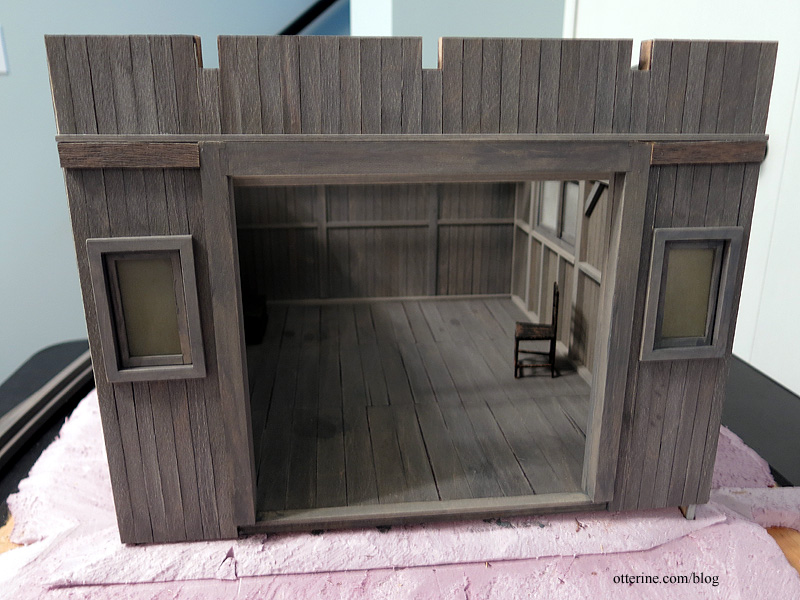
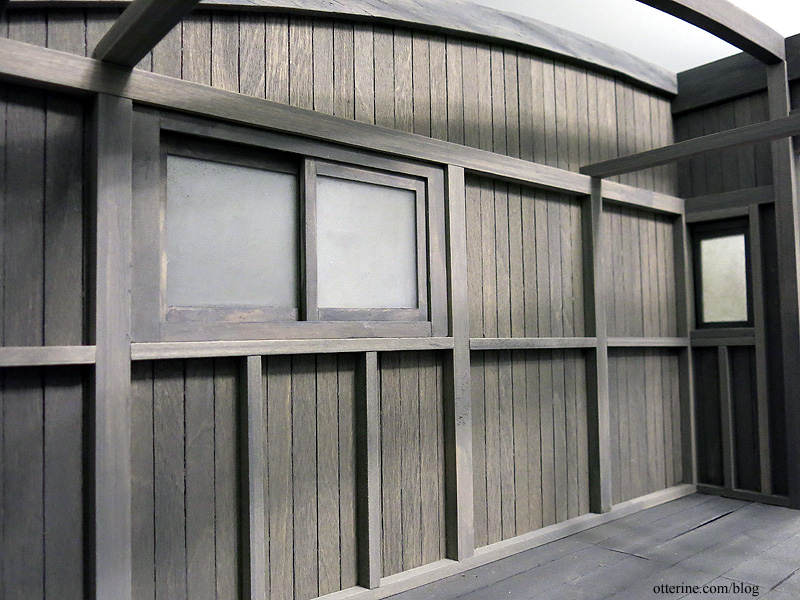
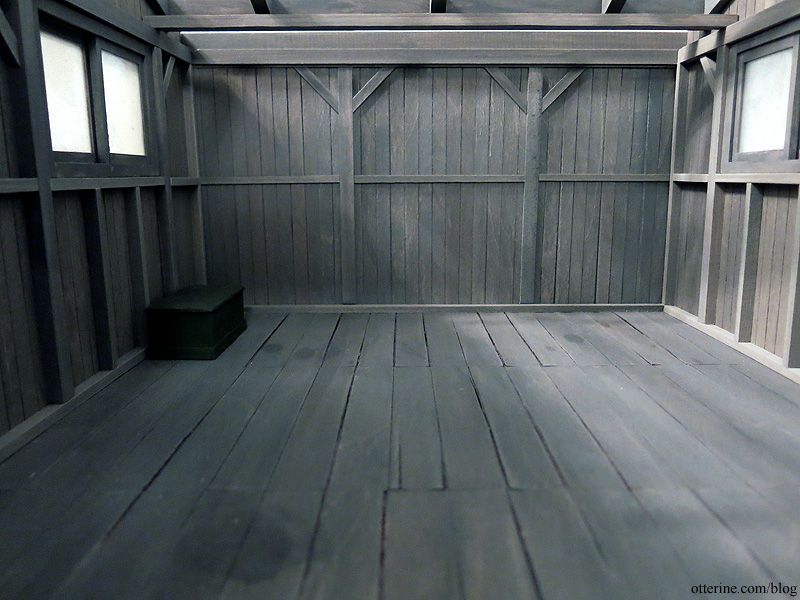
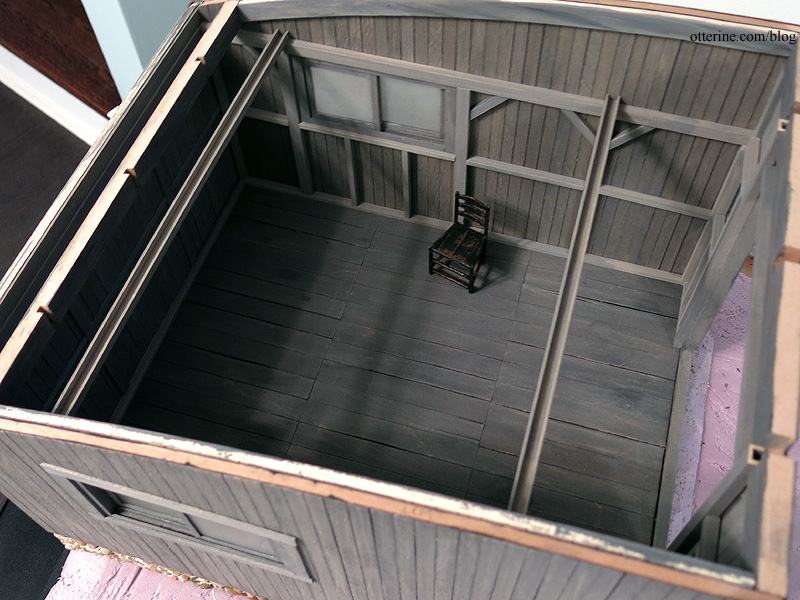
I roughed up the windows with sandpaper and added one last dark wash to the frames before gluing them in place. They sit flush on the outside and protrude on the interior. With the windows and flooring installed, I can now address the interior structure. This is by no means meant to be a precise carpentry replica. It’s meant to disguise seams and give the illusion of a structured barn as well as provide a way to hide the 12V wiring system. I painted all the pieces prior to cutting and gluing.
I started with adding 3/16″ x 1/4″ boards along the outside edges of the floor. For the board on the side with the electricity, I made sure not to cover the hole in the board with my floral wire lead. (This lead is for the actual 12V system.)
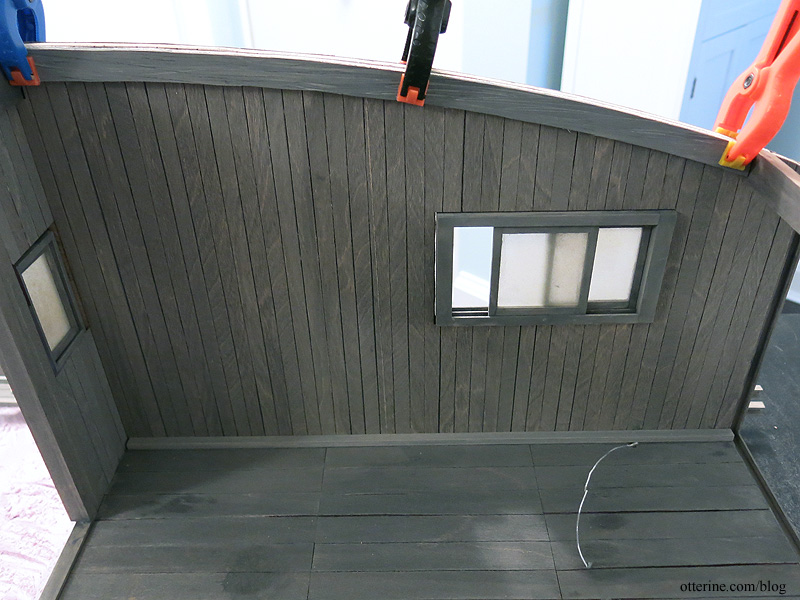
Along the roof line, I had to cut curved pieces from 3/16″ thick plywood since I didn’t have extra trim pieces to spare. I would have needed a double thickness of the supplied trim on each side to match the rest of the beams, and the kit comes with only two pieces. I used the kit exterior trim as a pattern then cut the pieces to fit inside.
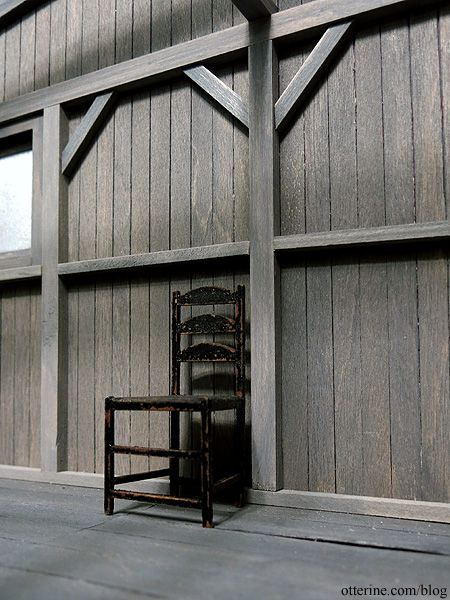
I used 1/4″ x 3/8″ channel molding along the top of the side windows and to make three main vertical supports, one each on either side of the window and one roughly centered toward the front. I added 3/16″ x 1/4″ vertical studs in the corners.
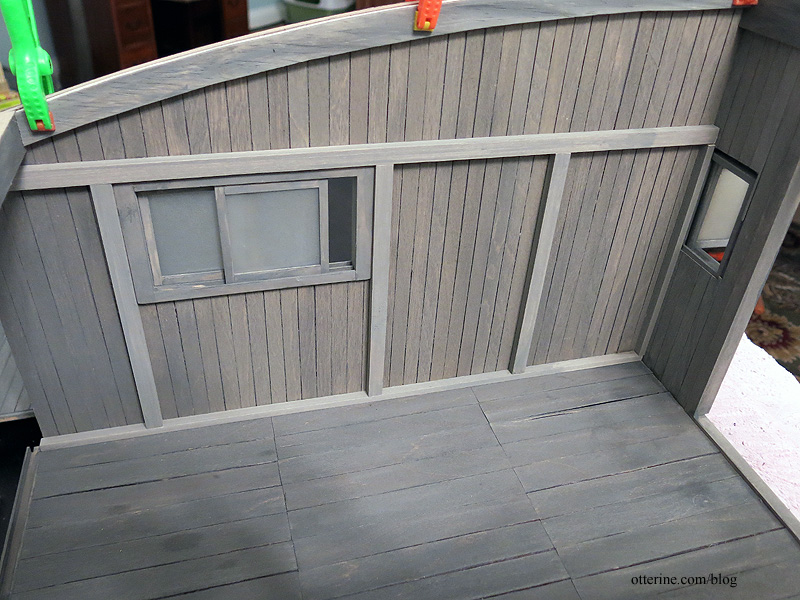
I cut channel molding pieces to span the room in two places, hitting at the tops of the two outer vertical supports. These cross beams are not glued and will hold the lighting fixtures when I get to that part (the wall beams on the electrical side were also left loose for now). I thought about adding a third, but with the curved ceiling beams yet to be added, this will be busy enough. These two will serve a purpose of holding lights whereas the middle one would just add visual clutter.
I added additional trim under the windows. You can somewhat see on the far right in the photo below that I also added channel trims from floor to ceiling on either side of the barn door opening.
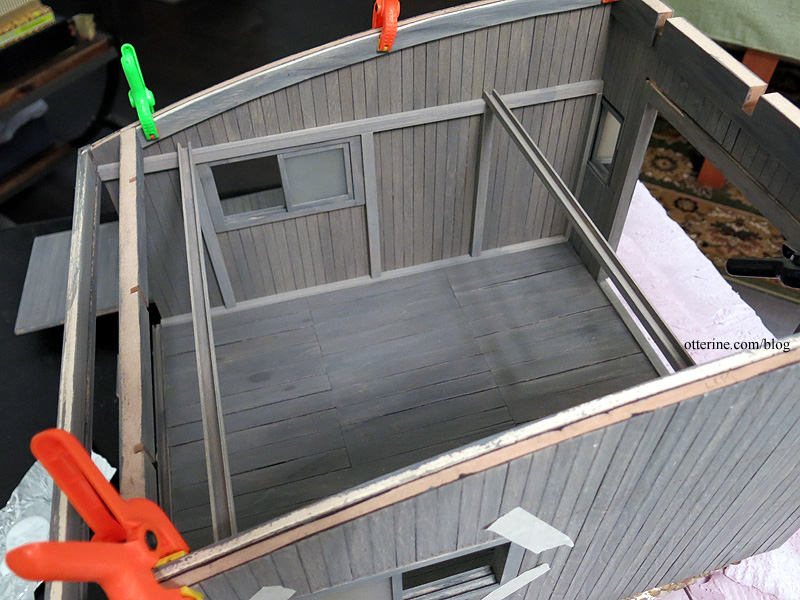
I made angled supports for the vertical beams. I will make angled supports for the cross beams later on.
To finish the upper part of the back wall, I just added a piece of strip wood instead of making tiny siding boards. The curved ceiling beams will remain removable until I am ready to put on the roof.
For the removable back wall, the floor trim is glued to the floor but not to the back wall and the top trim is glued to the channel that holds the sliding wall. The faux beam trim is thin and glued to the wall but doesn’t interfere with the functionality.
It’s a decent illusion at first glance and creates continuity with the side wall detailing.
I think we’re getting somewhere. :D
Categories: Milo Valley Farm
July 24, 2015 | 0 commentsMilo Valley Farm – landscaping – flowers, part 1
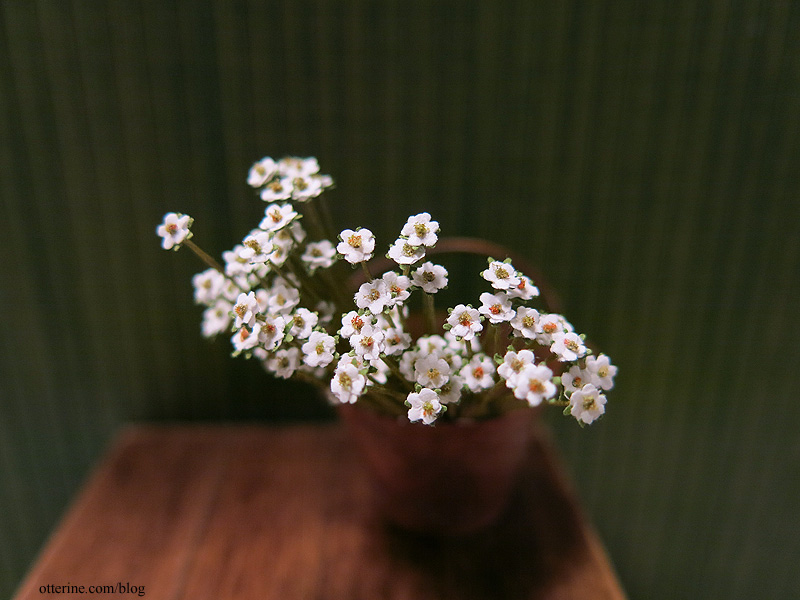
I’ve got something up my sleeve which will require a lot of tiny white flowers. *a lot* I’m starting with tiny pre-cut impatiens from Small Talk (no website, purchased at the local shows). They have some imperfections in punching, but they will work well overall. I’ll clean them up a bit as needed.

I also punched out tiny green stars using a Martha Stewart multi star punch.

Keli recommended some green origami paper for the calyxes. It’s a great paper, slightly textured and just the right weight. You get four pages each of 12 shades of green.

My punch makes multiple sizes of stars, but I saved the larger ones for projects down the line. I got 86 calyxes from one 6″ x 6″ sheet, which was a pretty good yield considering I used only the smallest stars.

I shaped each flower with a stylus.

I poked a hole in each tiny flower with a sewing pin. I found it easiest to put the flower on a paper towel and poke the pin through.

I cut wire stems 2 inches in length. This will give me room to trim when I put them in place. The wire is very thin, purchased at a local miniature show.

I topped the stem with a tiny drop of glue then dipped into fine landscaping foam.

The foam is from A Little More in Miniatures, purchased at the local miniature show.

I put two flowers on each stem, followed by one green star to form the calyx. I’ll worry about leaves later.

This will be one of those side projects to do until I’m ready for these. These are tiny, tiny, tiny, and I can stand to make only so many at a time. :D

I now have 81. It doesn’t look like a lot, though, so I will need to keep going. :]
Categories: Flowers, plants, and trees, Milo Valley Farm
July 20, 2015 | 0 comments
NOTE: All content on otterine.com is copyrighted and may not be reproduced in part or in whole. It takes a lot of time and effort to write and photograph for my blog. Please ask permission before reproducing any of my content. (More on copyright)