

Milo Valley Farm – landscaping – flowers, part 1
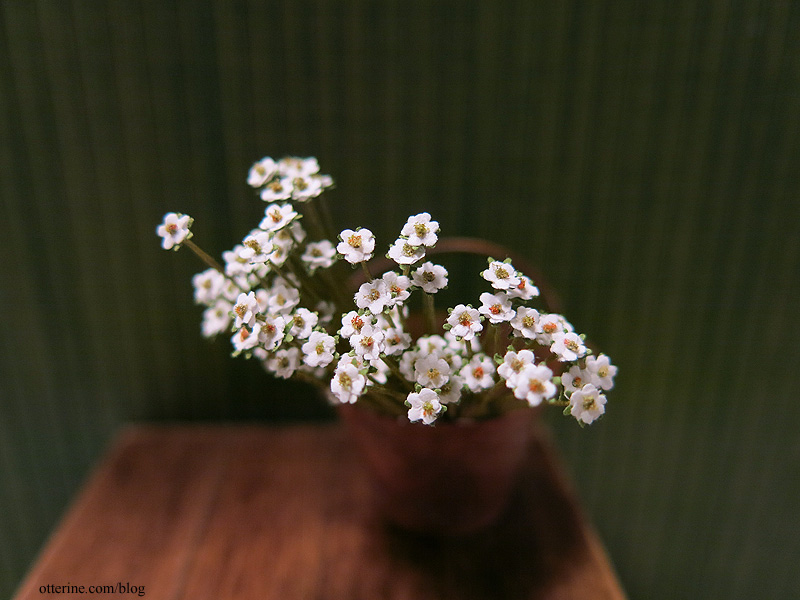
I’ve got something up my sleeve which will require a lot of tiny white flowers. *a lot* I’m starting with tiny pre-cut impatiens from Small Talk (no website, purchased at the local shows). They have some imperfections in punching, but they will work well overall. I’ll clean them up a bit as needed.

I also punched out tiny green stars using a Martha Stewart multi star punch.

Keli recommended some green origami paper for the calyxes. It’s a great paper, slightly textured and just the right weight. You get four pages each of 12 shades of green.

My punch makes multiple sizes of stars, but I saved the larger ones for projects down the line. I got 86 calyxes from one 6″ x 6″ sheet, which was a pretty good yield considering I used only the smallest stars.

I shaped each flower with a stylus.

I poked a hole in each tiny flower with a sewing pin. I found it easiest to put the flower on a paper towel and poke the pin through.

I cut wire stems 2 inches in length. This will give me room to trim when I put them in place. The wire is very thin, purchased at a local miniature show.

I topped the stem with a tiny drop of glue then dipped into fine landscaping foam.

The foam is from A Little More in Miniatures, purchased at the local miniature show.

I put two flowers on each stem, followed by one green star to form the calyx. I’ll worry about leaves later.

This will be one of those side projects to do until I’m ready for these. These are tiny, tiny, tiny, and I can stand to make only so many at a time. :D

I now have 81. It doesn’t look like a lot, though, so I will need to keep going. :]
Categories: Flowers, plants, and trees, Milo Valley Farm
July 20, 2015 | 0 commentsMilo Valley Farm – knob and tube wiring, part 1
Yeah, that’s some scary stuff, right there. :O bzzzzzzzzzzzzzzt
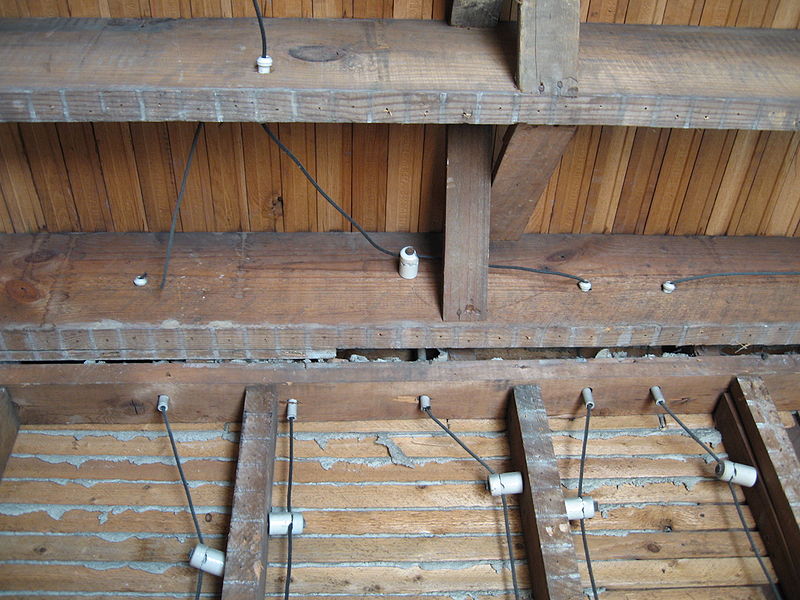
image from Wikipedia Knob and tube wiring is an old and outdated method of electrification, and if your home inspector finds it in your house, be prepared to spend a lot of money to remove and replace the electrical system. Here’s an excellent video on knob and tube from Edison Tech Center.
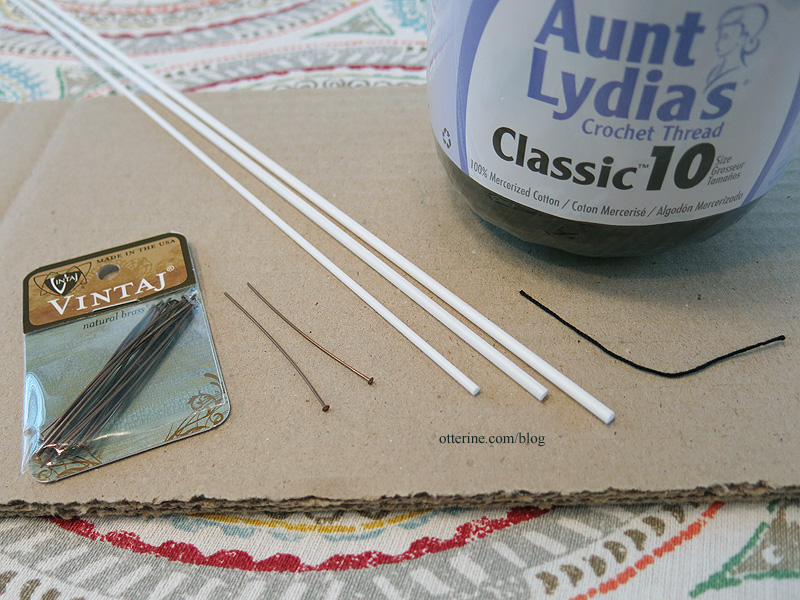
I have no idea when the barn on Milo Valley Farm was built. We’ll just say it’s way old since I don’t know when I will again have the chance to make this insanity in 1:12 scale. I have gathered crochet thread size 10, white plastic tubing in two diameters (I used only the smaller of the two), white plastic rod and copper colored head pins.
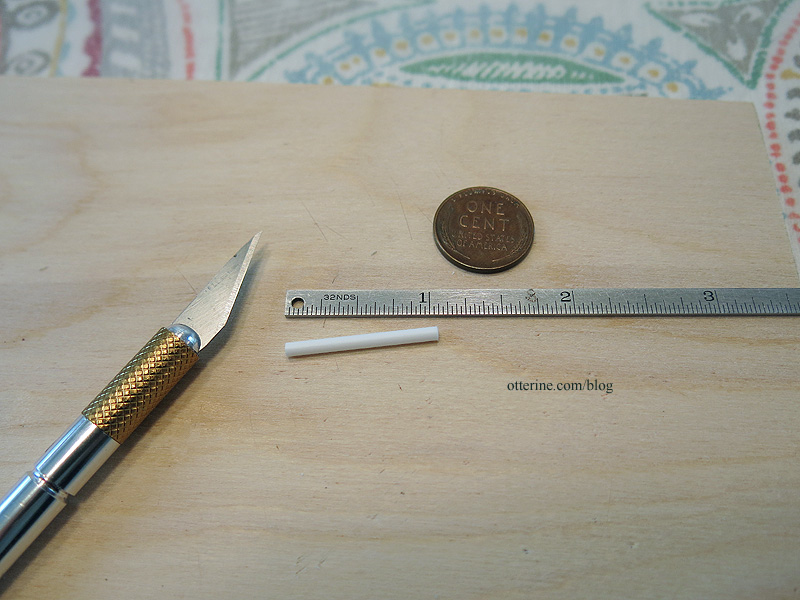
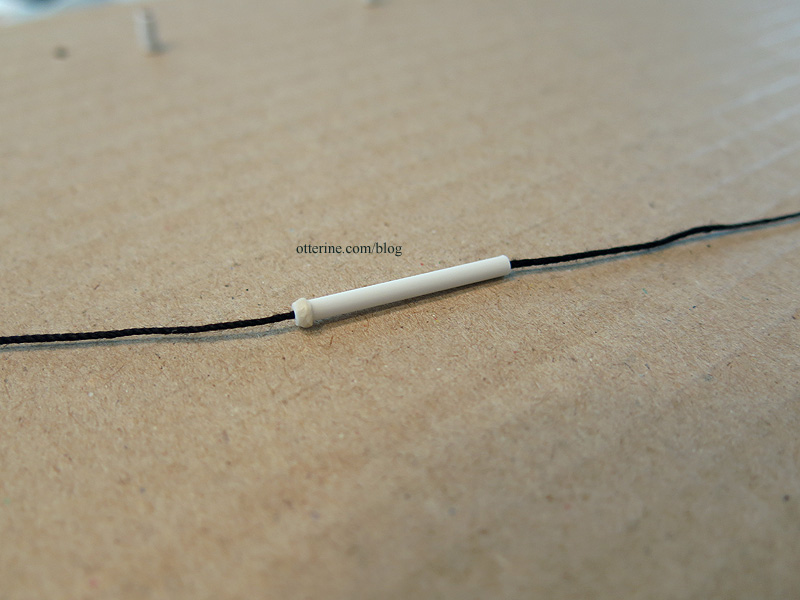
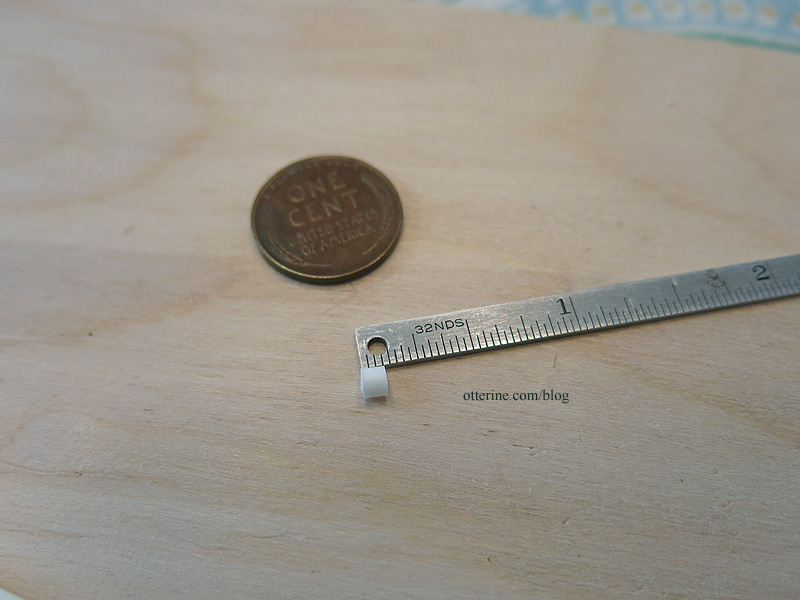
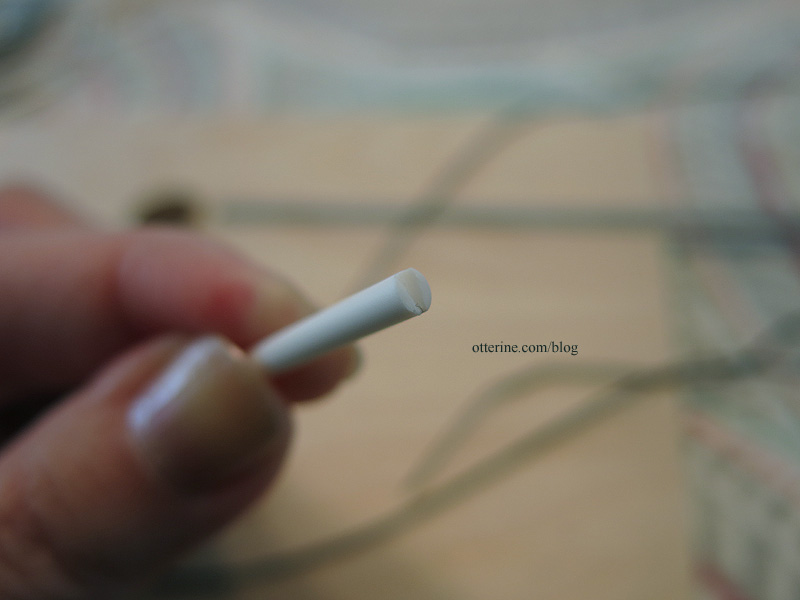
After some research, I was able to determine the dimensions for the knobs — just over 1″ wide and varying from 1.5″ to 2″ long with most being the longer measurement. Now, there’s true scale conversion and there’s just “getting the look” of something with proportional measurements. I’m going with the latter. To make the tubes, I cut 1″ lengths of 1/16″ plastic tubing. (The 1/16″ measurement would be 3/4″ in real life.)
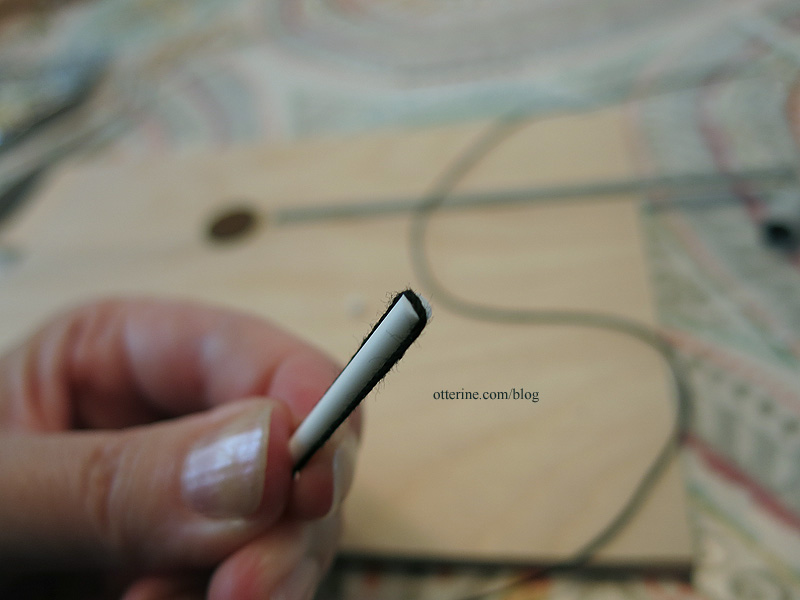
I applied Testors contour putty to the end with a toothpick and then shaped with my fingernail. The thread is fed through the tube. I applied glue to the thread end to make it stiff enough to go through the tube, but I might do this for the entire length when I install it since it makes it easier to handle and put in proper position. I will cut down the tubes to lengths needed to work in the various areas where I will install them.
To make the knobs, I cut two pieces of 1/8″ plastic rod — one 3/32″ long for the top and one 1/8″ long for the base. Here is the top.
I made a small channel on the top of the remaining length of rod to make room for the thread. It was easier to do this detailing while I was able to hold the length of rod in my hand. The real life examples have two channels to keep the wire from touching the nail holding the knob in place, but I am going to use the nail to secure the thread in place. In other words, I’d be causing fires and electrocuting people if I were a mini electrician. :O
I then cut the longer of the two pieces. I drilled holes in each knob set to make way for the headpins.
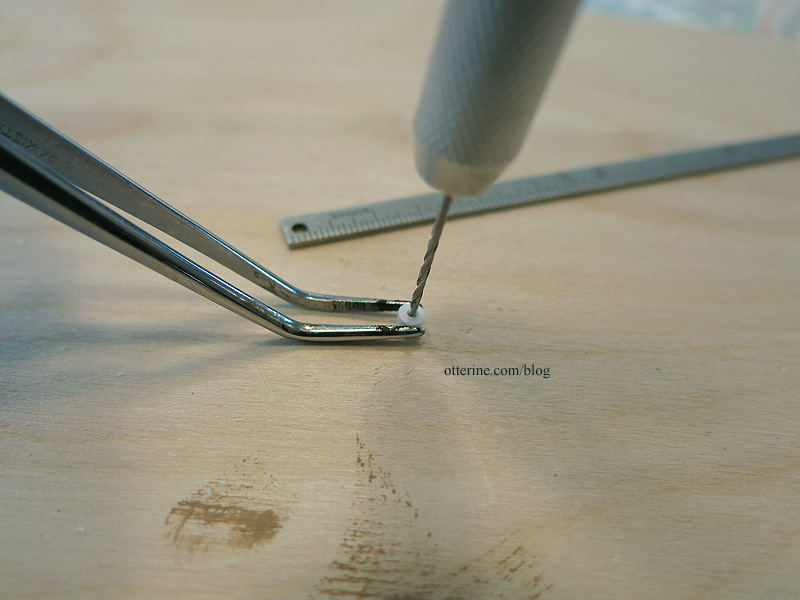
The reason I didn’t use open tubing for this is because I wanted a tight fit for the pins and the existing 1/8″ tubing had too large an opening. It was either fill in the open tubing or drill holes in the rods.
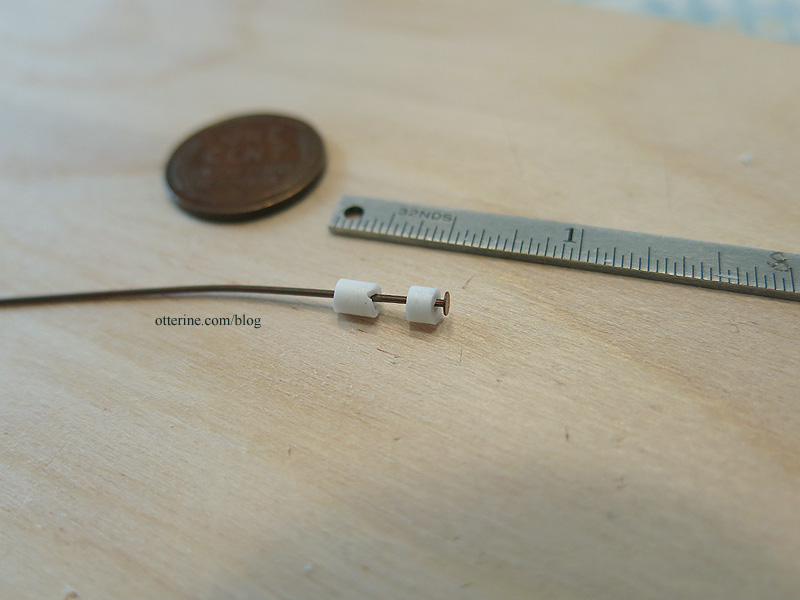
With a little give on the measurements, I ended up with a knob that would be 3″ long in real life.

The tube goes through the wall to bring in the wire. I fed the headpin through the thread to hold it in place.

I then pulled it tight on the other side of the cardboard test board. When I install these, I will glue and drill holes into the beam structure of the barn. The prototype worked out well. :D
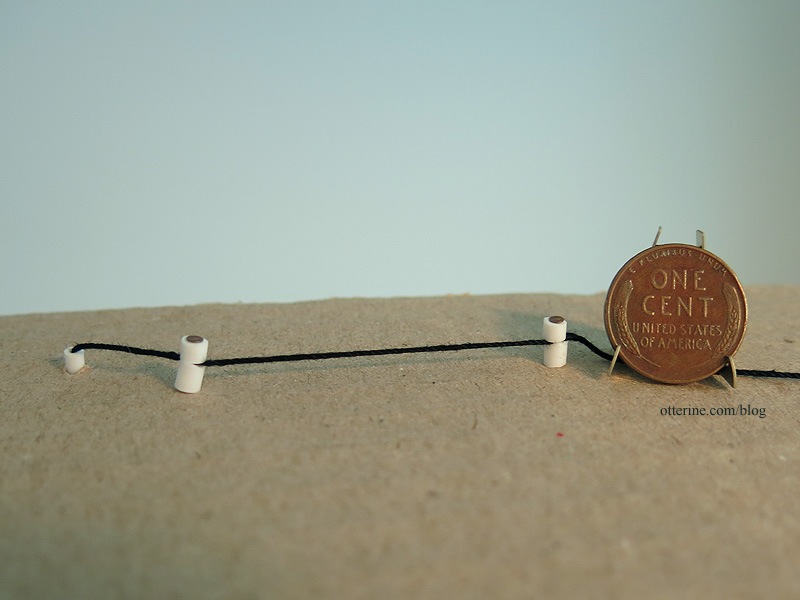
I don’t think I’ll bother painting these, even with the contour putty being a slightly different color. There won’t be more than a few tubes, besides. It seems a lot of hassle for very little return when they look good on their own.
Categories: Milo Valley Farm
July 19, 2015 | 0 commentsMilo Valley Farm – sea chest with a secret
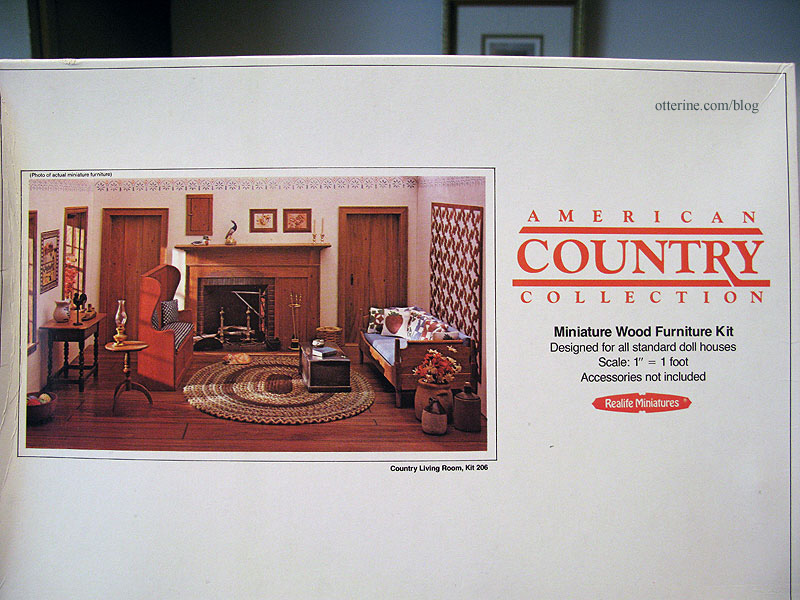
The sea chest is from a Realife Miniatures Country Living Room kit. I made the daybed from this kit for The Artist’s Studio. These kits have die cut wood compared to other kits such as The House of Miniatures and modern kits with their individual pieces, but they work well for rustic scenes right out of the box. For a finer finish, you’d have to spend a bit more time and effort.
This is a pretty straightforward box. :D
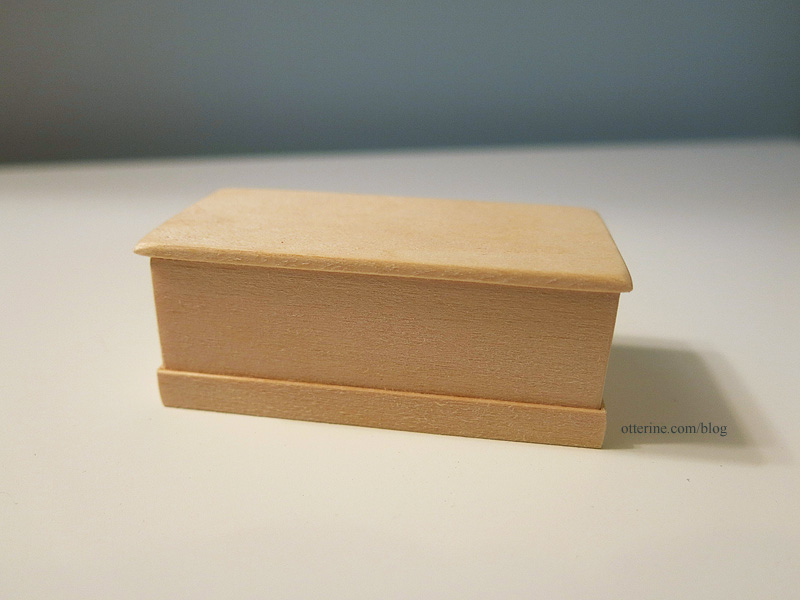
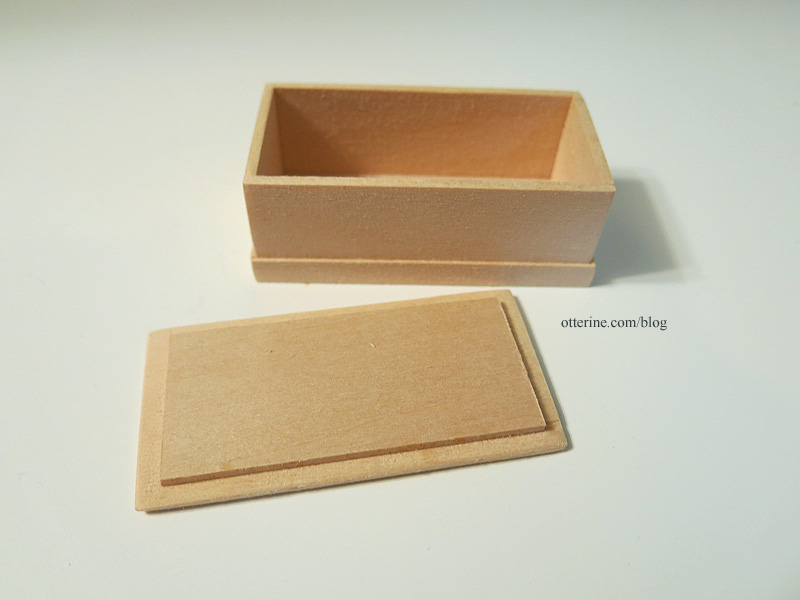
There is hardware included to hinge the top, but considering the use I have planned for it I opted to make a removable top. I added a piece of basswood cut to the size of the box opening and glued it to the underside of the lid. This will lock it in place but make for easy removal.
I spackled the rough joins to prep for painting.

I went with Plantation Pine by Americana with some aging. More aging will be added later, along with some hardware and maybe some logo and sticker detailing.
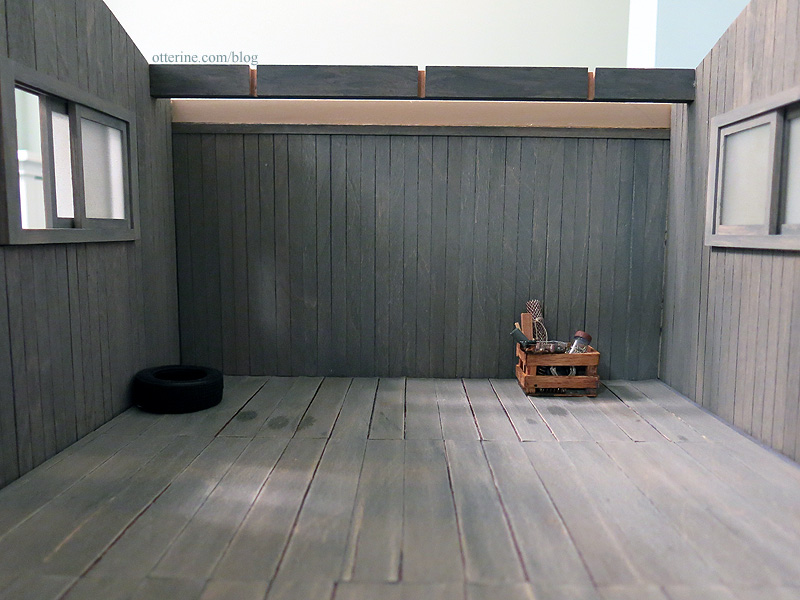
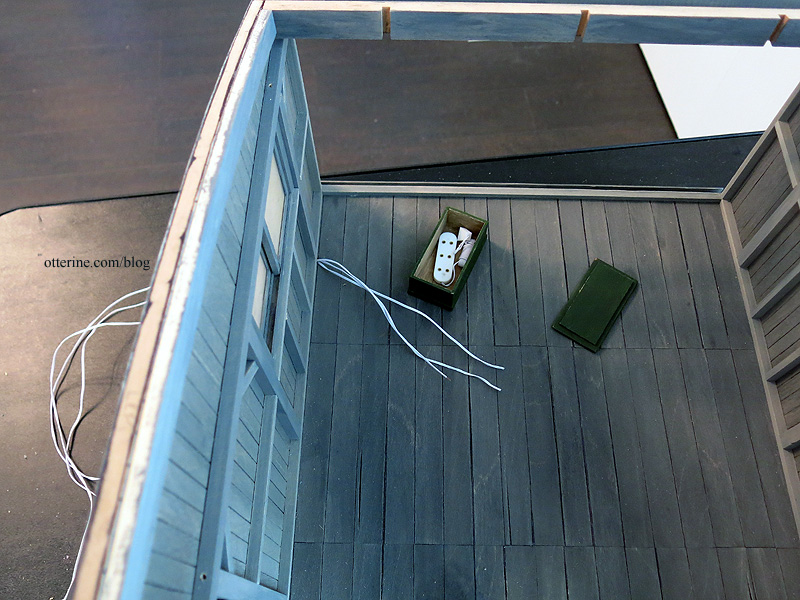
My trunk won’t hold old munitions (yikes) or mouse-riddled old clothing (bleh). Instead, it will disguise the Triple Receptacle Extension Cord with Plug from HBS. This way, I can lead all the wires from the lights to the sea chest, and one wire will exit the building to the power strip. You can see my floral wire lead behind the chest. I’ll drill holes in the chest as needed when I wire the lights.
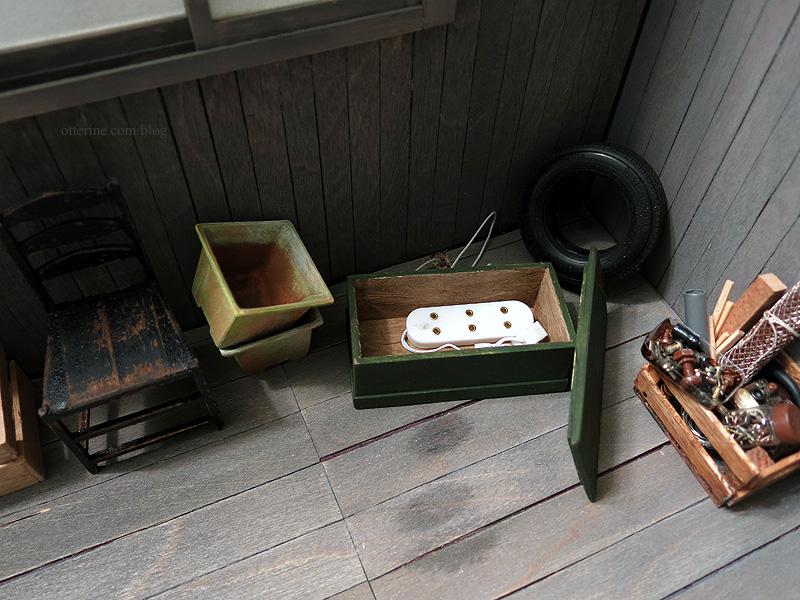
Having the receptacle inside the trunk will make it easier to deal with mishaps since I am using vintage lighting for some of the electrical work. When the lid is in place, it looks like any another random garage item. :]

Categories: Milo Valley Farm
July 15, 2015 | 0 commentsMilo Valley Farm – removable back wall, part 3
Continuing work on the removable back wall. I cut a new plywood wall for the back using the foam core board as a template.
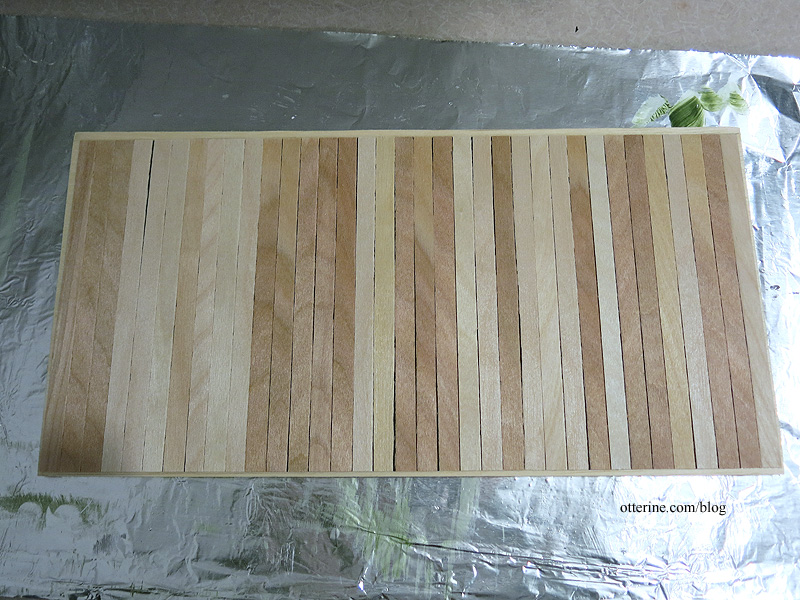
I made siding templates for the sliding back wall, interior and exterior.
I applied the siding to the templates and used the same paint glaze process as I had for for the side walls. Here it is in process.
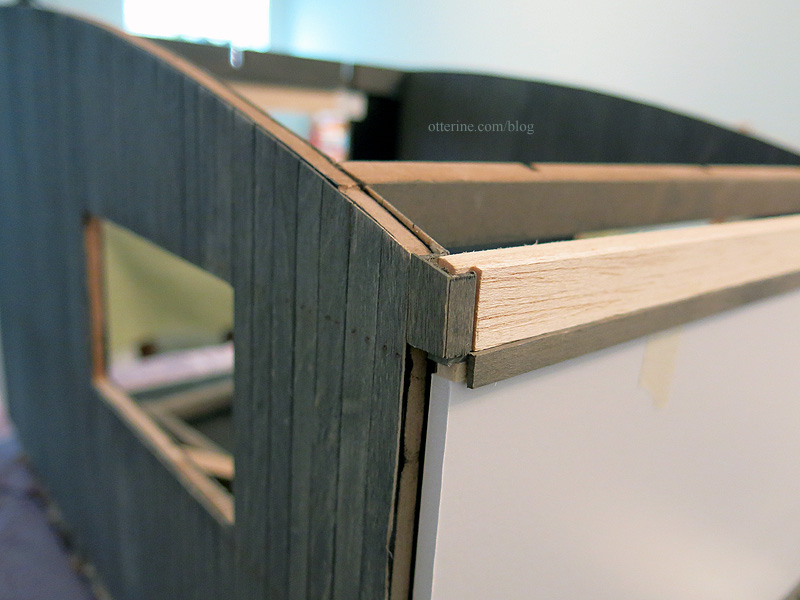
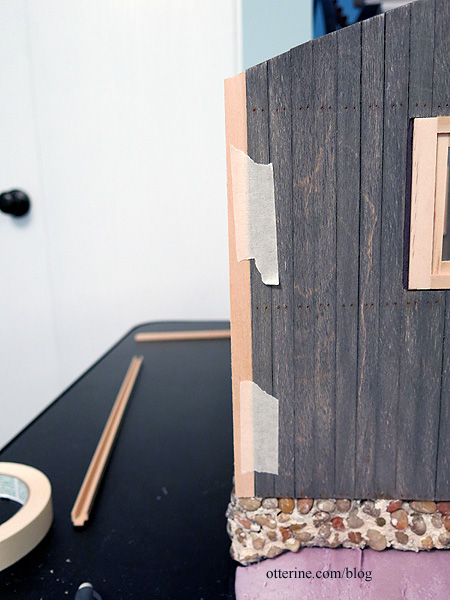
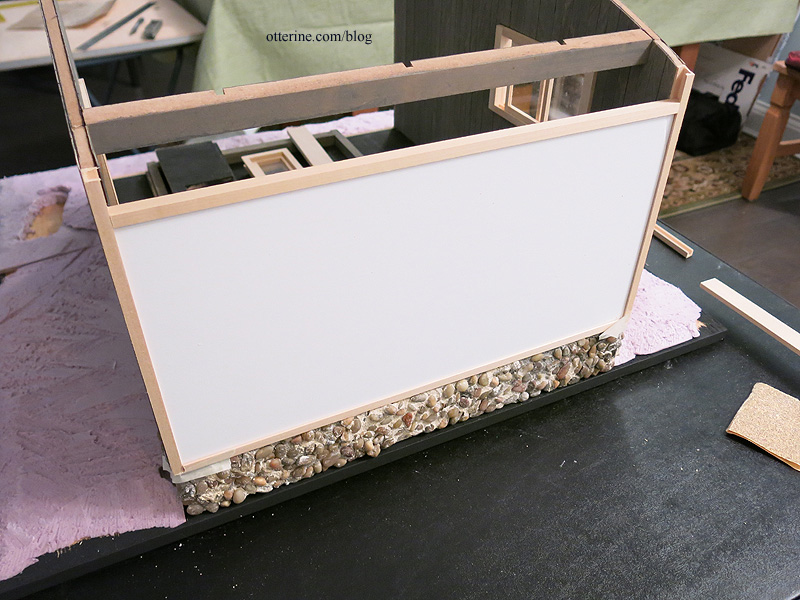
I glued the sliding wall panel to the free-moving side channel using Weldbond and super glue gel. This is the only place on the side wall that has a two-piece board, but it’s not an eyesore.
The final trim should disguise it even more. Plus, there will be other things going on that you might not notice at all.

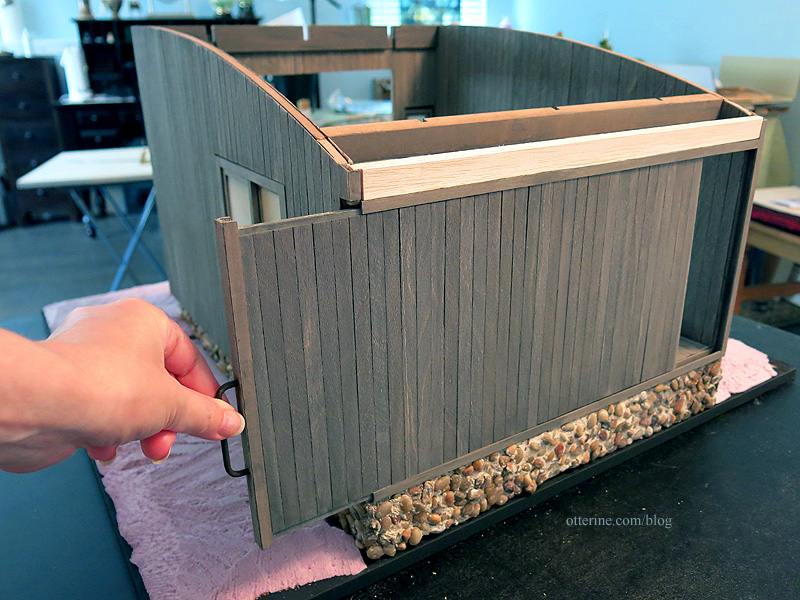
There will be finishing trim along the top back to hide the bare wood that’s there at the moment. The wall blends well on the outside. I spray painted the brass bar to look like old metal.
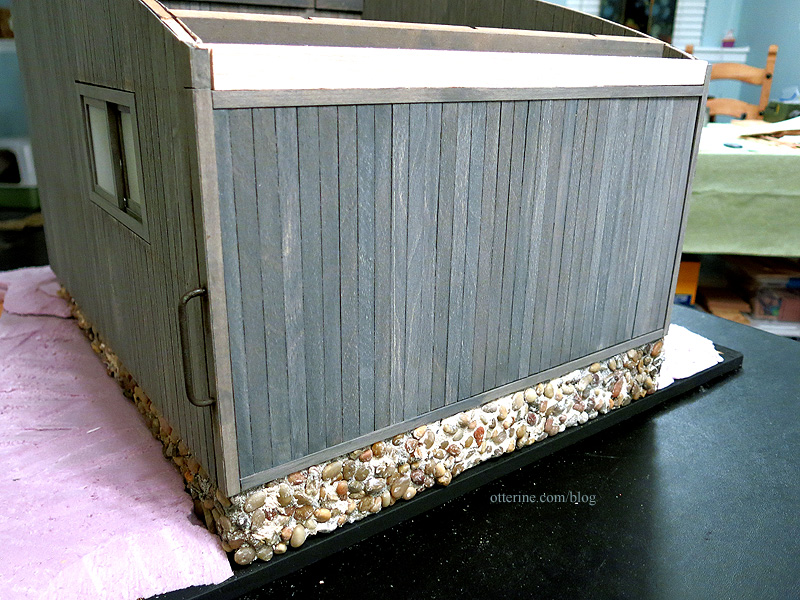
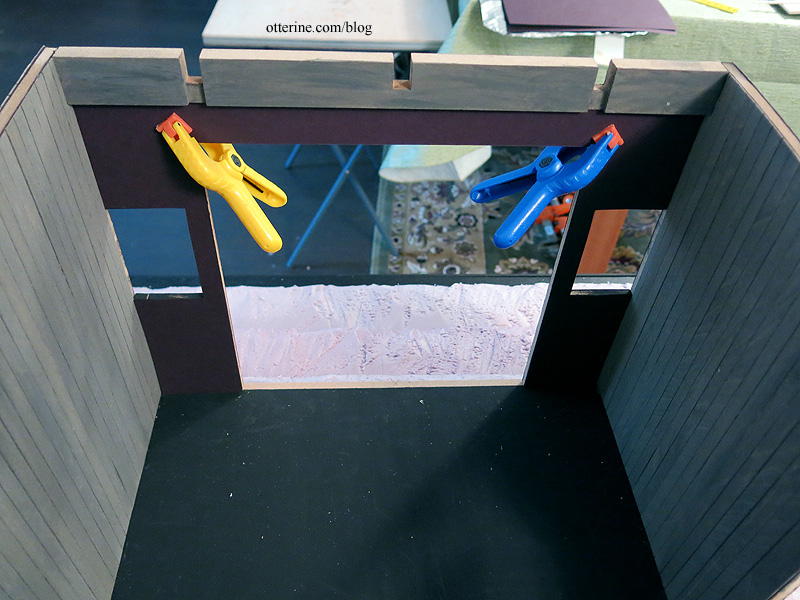
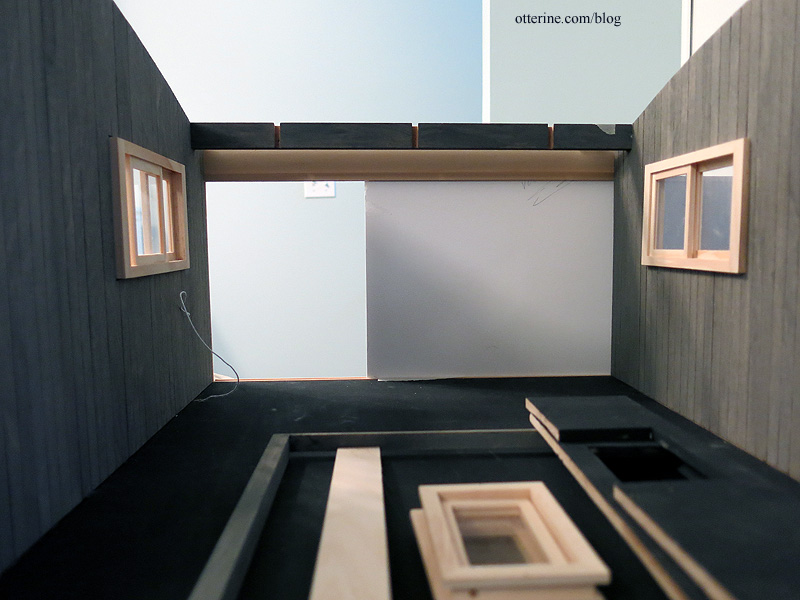
On the inside, the side breaks are mostly hidden. The studs and cross beams will disguise any remaining breaks. I will be finishing the bare wood here, too.
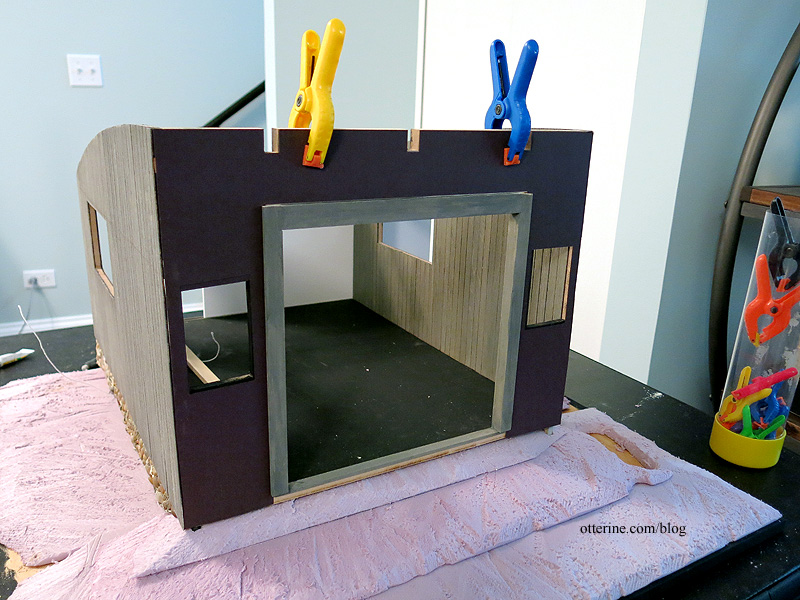
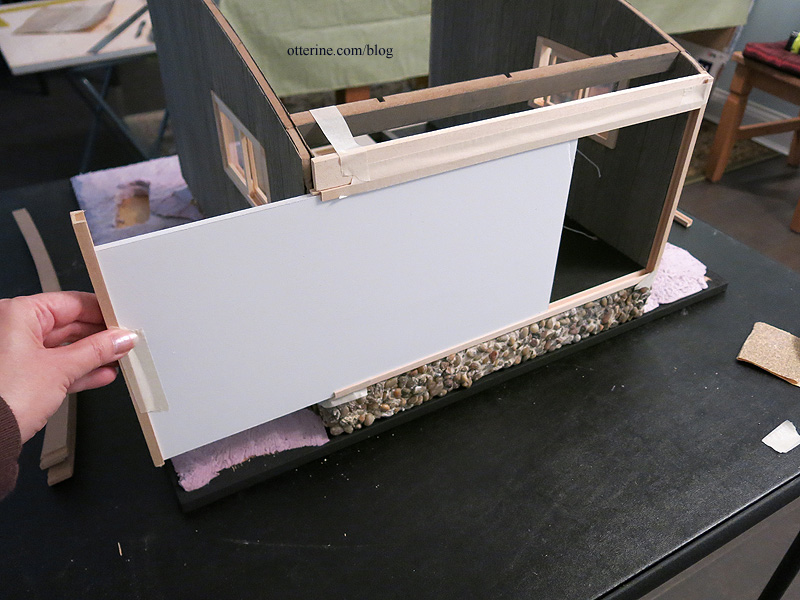
When open partially, it could serve as a back door opening for some interesting photos.

The mechanism runs relatively smoothly. :D
Categories: Milo Valley Farm
July 5, 2015 | 0 commentsMilo Valley Farm – siding, part 4
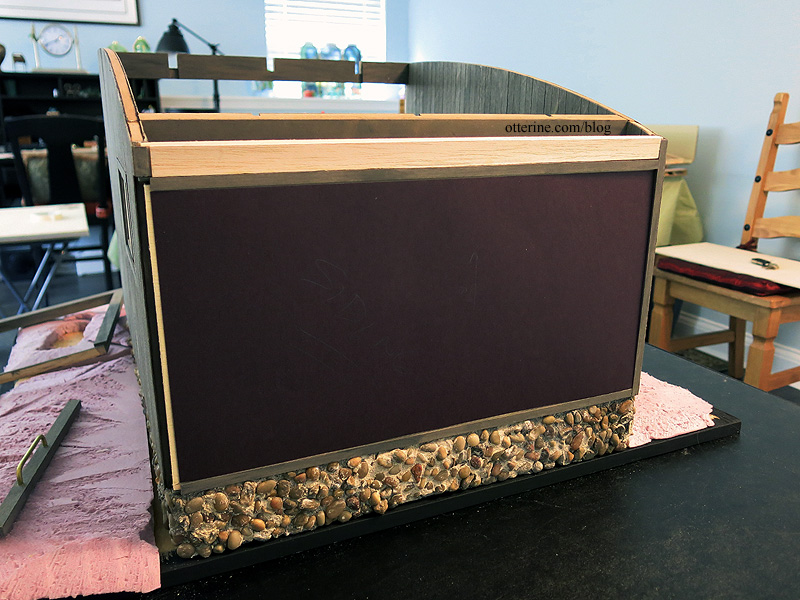
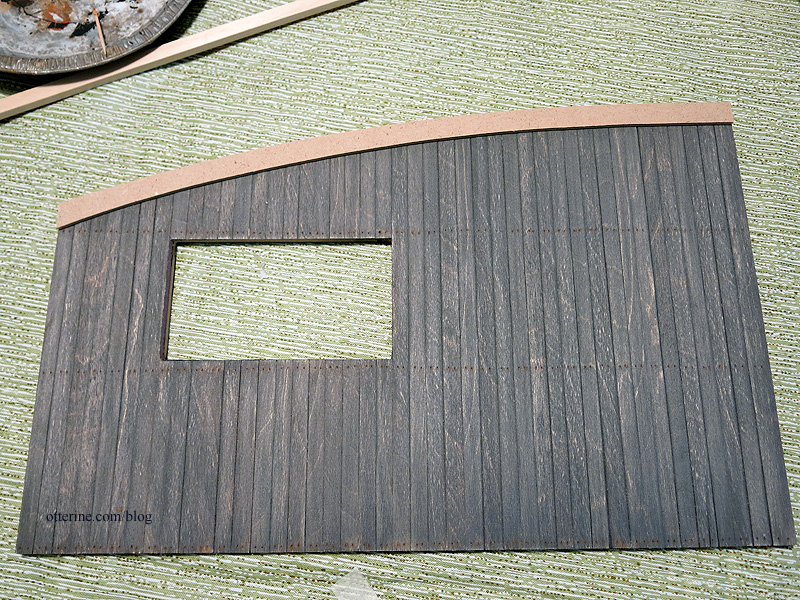
Continuing work on the siding. I glued the front insert walls to the middle upper insert while in dry fit, making sure not to glue any of the pieces to the main front cross beam. I used Tyvek pieces to reinforce the joins. The siding will cover the front cross beam on the exterior as well, so I made a single template to cover the entire front.
I made a similar template for the interior, leaving the main cross beam out.
I applied the siding to the templates and used the same paint glaze process as I had for for the side walls, while the walls were still able to be pressed flat for each step. The front piece, however, was left unattached until later. I will detail the back wall in a separate post.
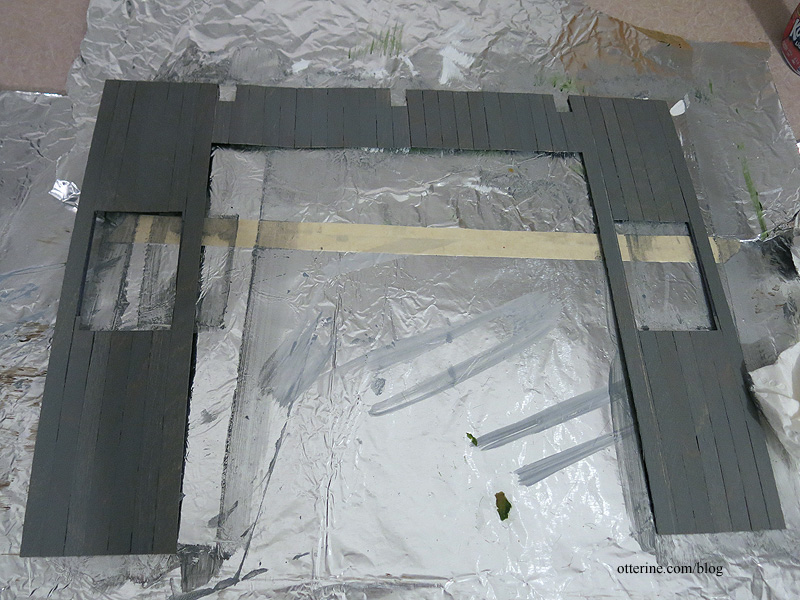
After gluing the interior siding template to the front wall, which stabilized the structure, I glued the wall in place. Here you can see the Tyvek reinforcements. There are also two of these on the other side under the siding.

I used 3M Super 77 spray adhesive to attach the front piece since it’s not water based and therefore would not warp or expand the paper backing or the wood. I haven’t added the nail detail to the front since I’m not sure how much of it will show once the trims and windows are in place. I plan to add it later.
It’s starting to look like an old shed. :D
Categories: Milo Valley Farm
July 3, 2015 | 0 commentsMilo Valley Farm – window prep
The windows for Denise’s City Cottage come already assembled. This is good and bad. Good in that you don’t start with an overwhelming amount of small pieces and have to ferret out a window (or four) from said pieces. Bad in that you have no way to remove the acrylic inserts for painting or staining.
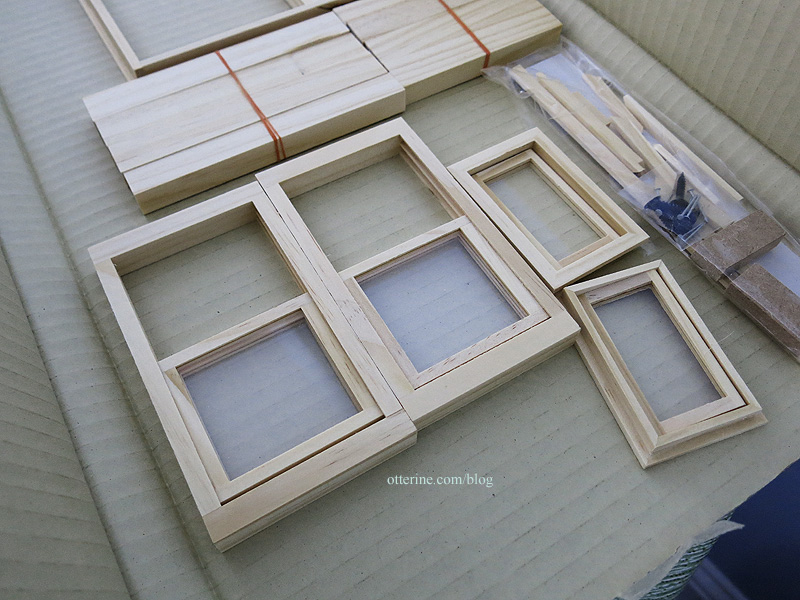
Some readymade windows on the market have solutions to this problem. They leave a hole to slip an insert in and out of a channel. Some I have seen have a thin piece of wood to remove to access the channel.
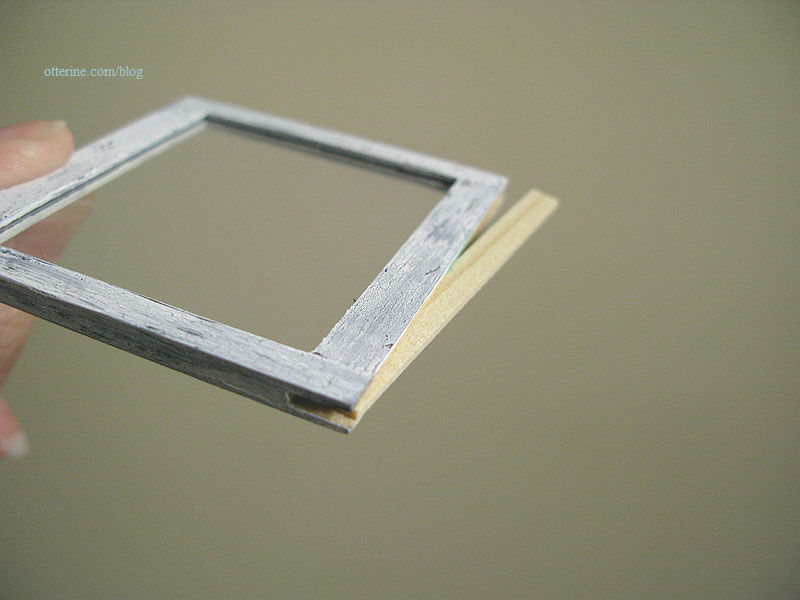
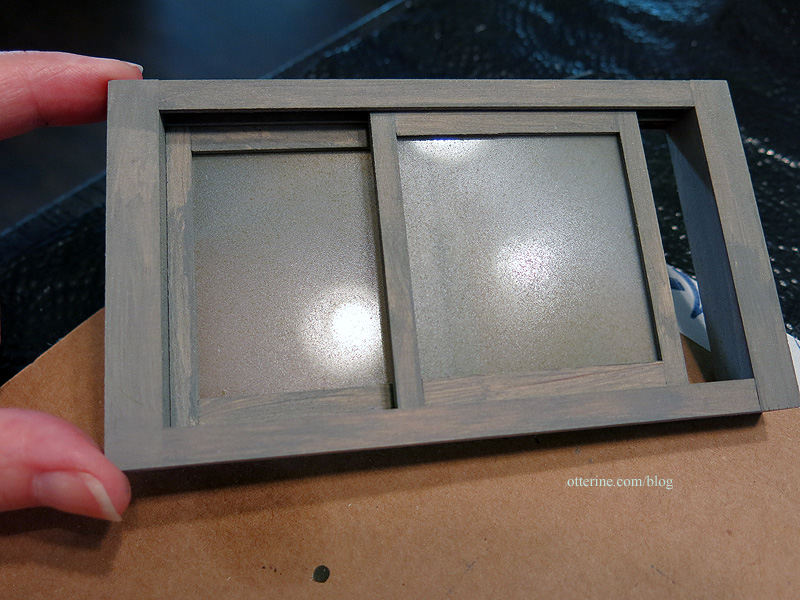
Twisting ever so lightly, I popped the sliding window frames apart.

For the swinging windows, I removed the hinge pins.

I added scant trim to the inside frame of the swinging windows to prevent the windows from swinging inward. This also added thickness. My front walls are thinner than the original kit walls, but I can use the extra depth. More on that later.

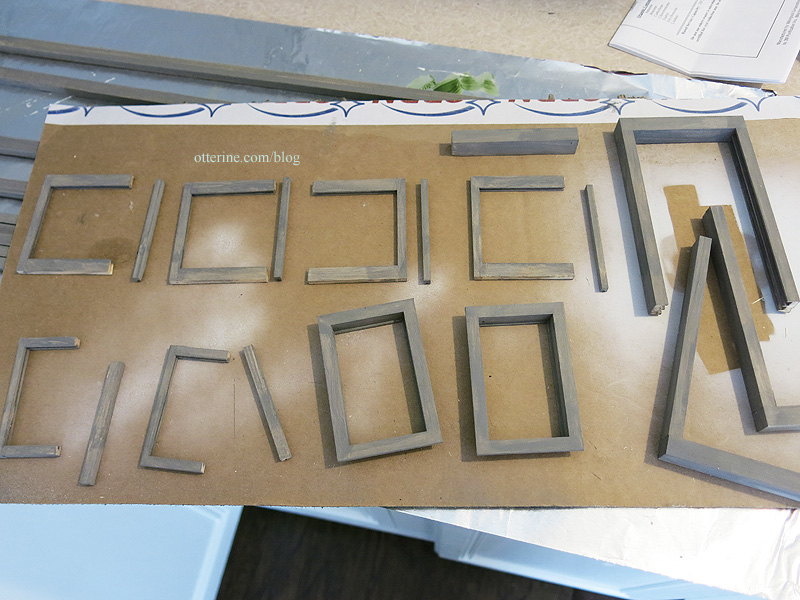
Masking does only so much since bare wood can show in the tracks around the window not to mention it takes so long to do a good masking job, so I took the individual panes apart as well. You can pop the windows into the microwave for a quick 10 second burst to loosen the glue. I keep each window with its completing piece in the proper direction throughout finishing to make sure they go back together easily.

I used the same painting technique as I had for the siding.
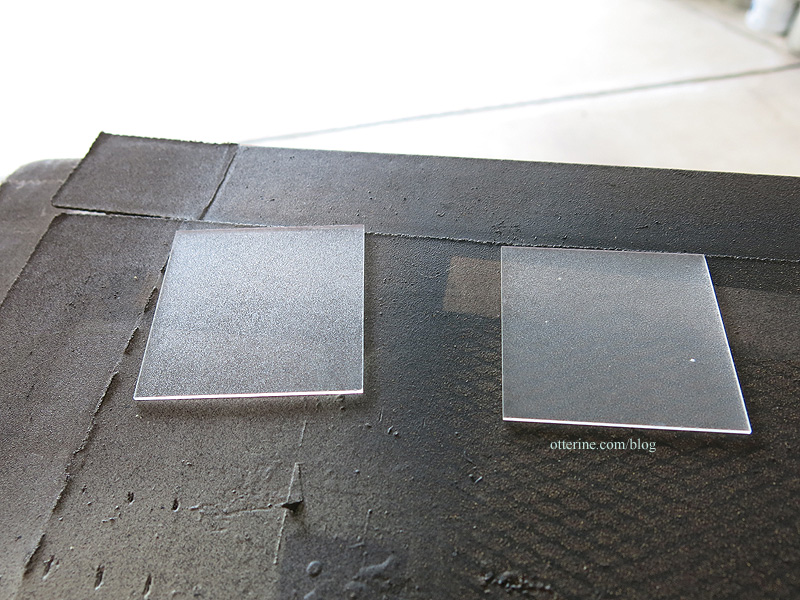
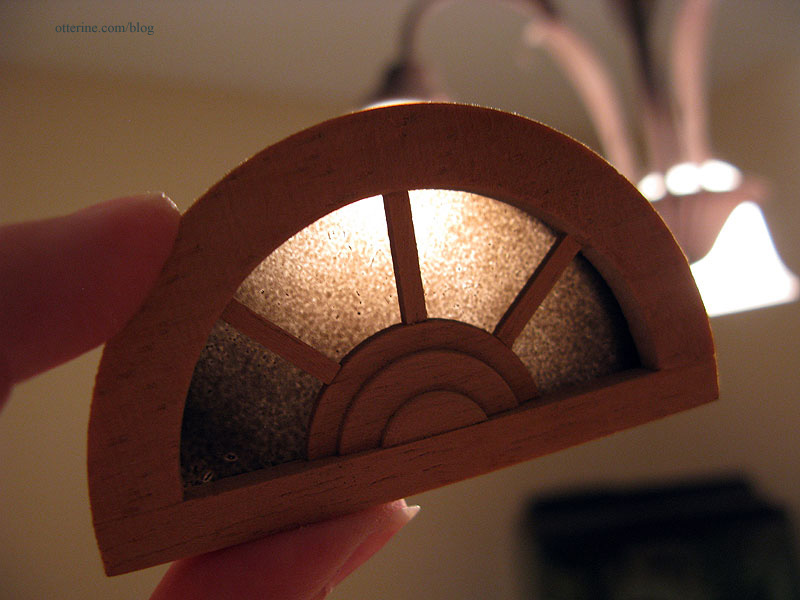
Now to mess up those clean inserts. I used Testors frosted glass, flat olive drab and Krylon grey primer. I didn’t wash the window inserts prior to finishing since any dirt or oil on them would just add to the imperfect finish in the end.

I first sprayed each side of the windows with the frosted glass finish. If you do this lightly, you will still have a moderate window reflection shine but a more obscured view through the glass.
For the two color spray paints, I sprayed under the windows on the board. This allowed for overspray to hit the glass. A few sweeps here and there are enough to cloud the glass, reduce the shine and add some color depth to the dust. You can always add more, but too much paint will look like…well…painted glass. These windows will be seen from the inside and outside, so I went with a lighter color to simulate dust.
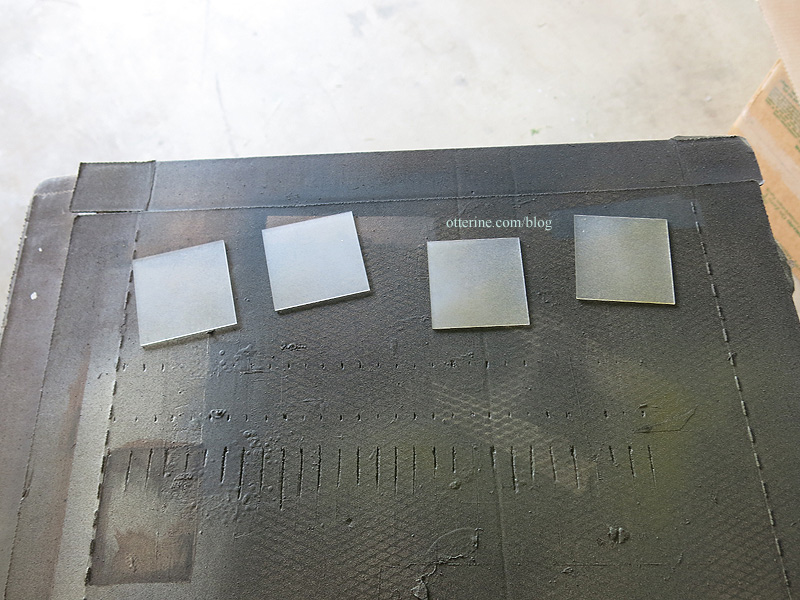
I used this technique on the cellar windows for the Heritage, but in that instance I used black paint and did only the interior portion.
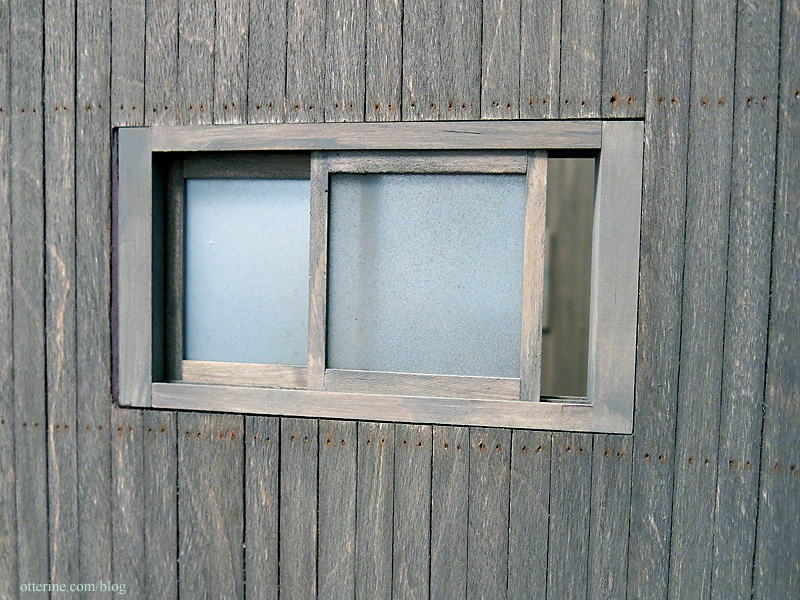
I put the windows back together once the inserts were dry. I left the shinier side on the outside and the dustier side on the inside. The exterior portions will be washed by rain from time to time.
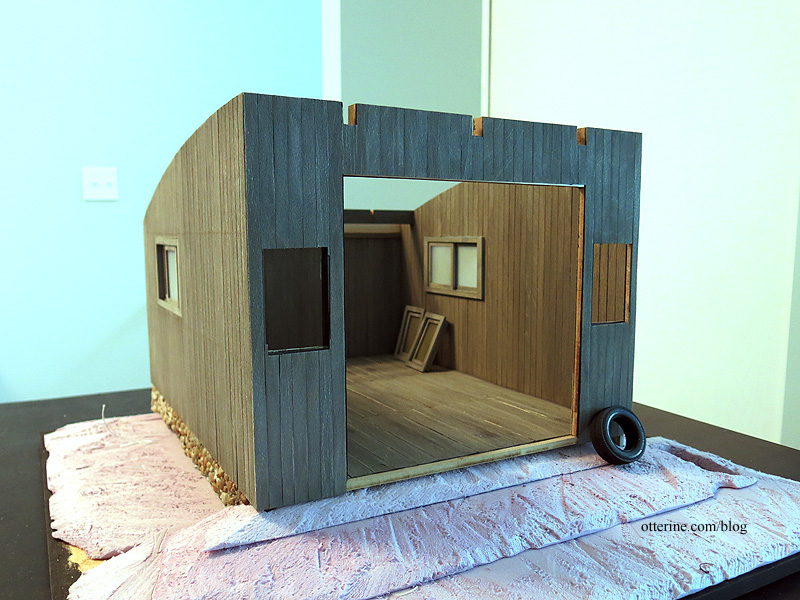
I’m not ready to install them just yet, but I tested them out on the building. Since the sliding windows were meant to be used with the thicker mdf of the front, they stick out inside. This won’t be an issue since I will be building a faux structure of studs.

The whole structure will get more aging later, including the windows. Looking good so far! :D
Categories: Milo Valley Farm
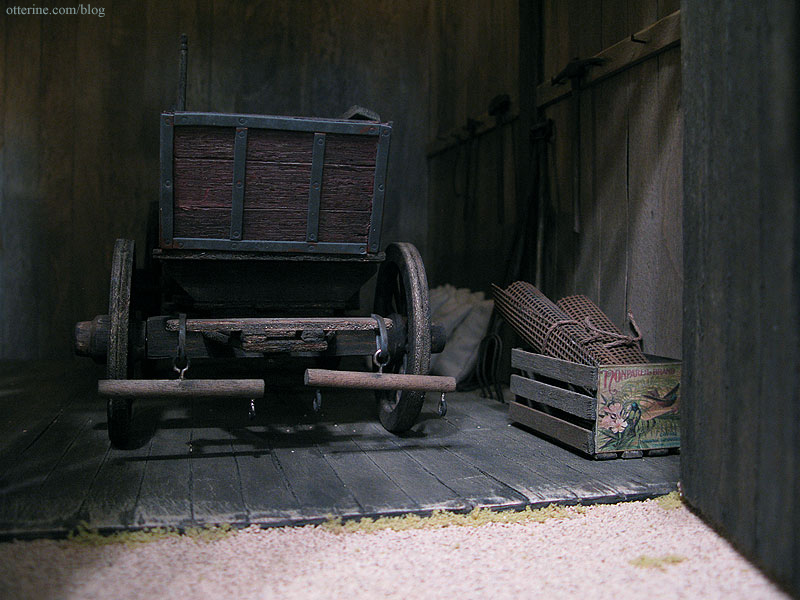
June 28, 2015 | 0 commentsMilo Valley Farm – random farm junk
Keli made me two crates full of delightfully grungy barn items. Her husband even made a pair of working battery cables, and though the clips are large for scale, they are fun!

Her crusty, leaking battery might just get me a fine from the EPA. :\

Her bike pump is simply awesome!

Bill has done it again! He has sent some of the most marvelous handmade miniatures and miscellaneous items for my barn find diorama! Our barn owner is a tool hoarder. He’s got all sorts of shipwright’s tools. I’m quickly learning about ship building and maintenance. We have caulking irons, chisels and mallets! Oh, my!

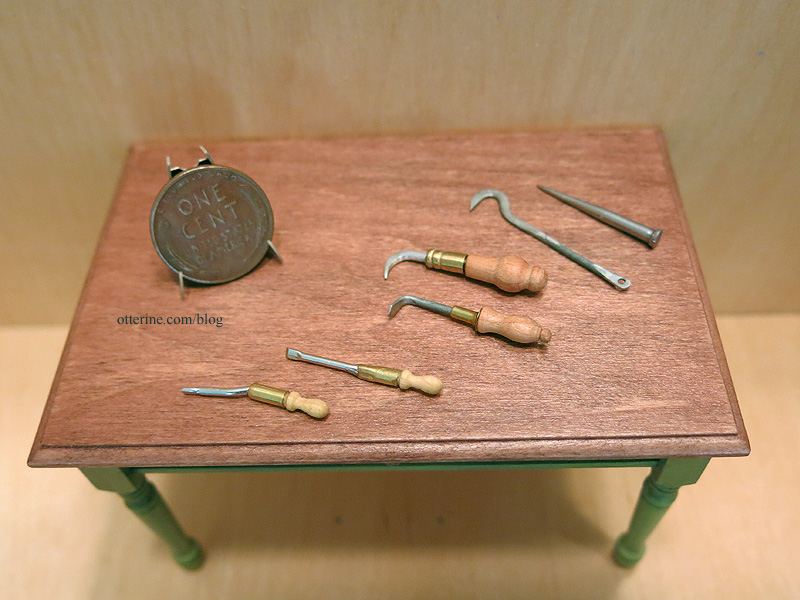


We even have a splitting froe! :D

Mom was over tonight, and she said grandpa had one of these large hand drills in real life. :]

Now for the random part. Bill picked up a ratty brass tiny trophy for $0.25 Canadian. He started the magic transformation and turned two bases for it. He’s left it unassembled for me to finish. With a hot car like the Datsun, it had to have been raced at some point!

This is a brass and leather barrel with big (in mini) dice.

It unscrews. errmmm. Any ideas on what this is? Bill and I are baffled.

And, it’s finally time for the trash to treasure part. I think he meant this first item as trash to treasure, but this has to be the coolest thing all on its own! It’s a tiny box of vintage dental burrs at least 60 years old. The box and burrs are in perfect condition. They may be out of true scale for tools, but closed up the box will blend in to the random tool stash. I will leave it as is.

The sanding disks almost look like free weights.

This box is so super cool I might use it as is, too. Maybe it’s a master box of individual boxes of nails. :D Bill suggested vintage signs, but I don’t think I can cut it. I like it too much just the way it is.

He was at the “free store” where there are bits and bobs to peruse. He found this and suggested it might be part of a machine, a feeder or a light fixture. I’m thinking an unsafe and completely out of code kerosene heater. :D Or, perhaps it’s meant to be a smudge pot. I believe I have some other bits and bobs around to finish it nicely.

He also visited the “not free store” and found some marvelous plastic toy barrels. He told the woman at the store about my mini projects, and she donated them to the barn for free! :D These will need a bit of painting magic.

Tiny spools of copper wire. The smaller is from a battery watch and the other is from a digital camera. Crazy small! :D

Thank you, Bill! You spoil me rotten!
Categories: Milo Valley Farm
June 2, 2015 | 0 commentsMilo Valley Farm – barn floor, part 2
Continuing work on the barn floor. As was completely expected, many of the boards warped during the drying process causing overlaps.

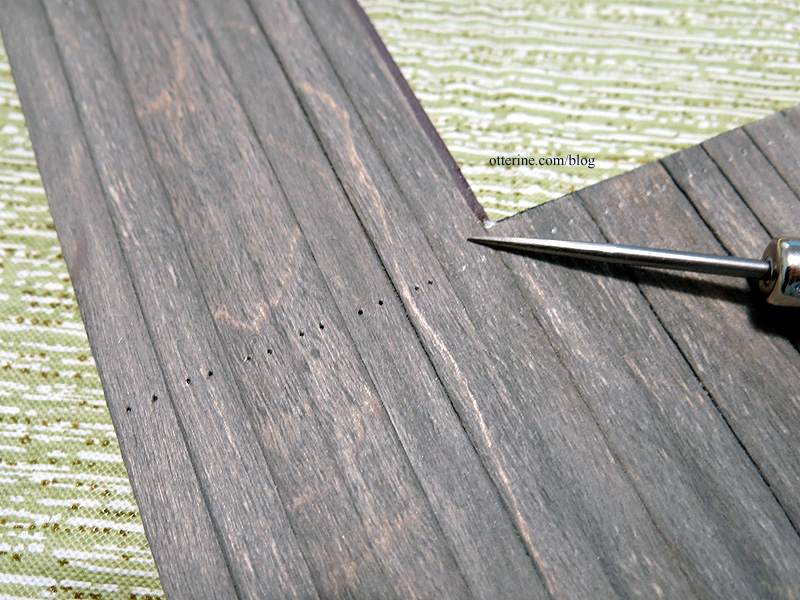
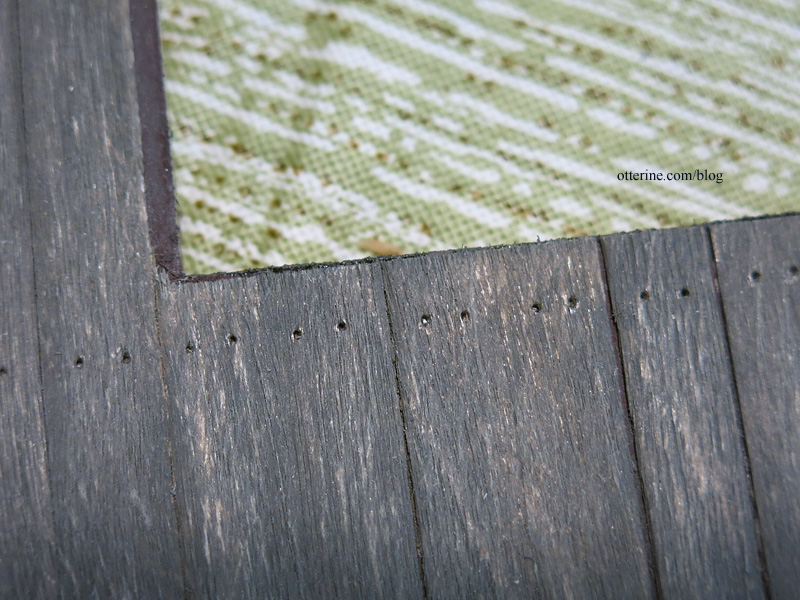
I cut slivers from the edges as well as a few interspersed holes.
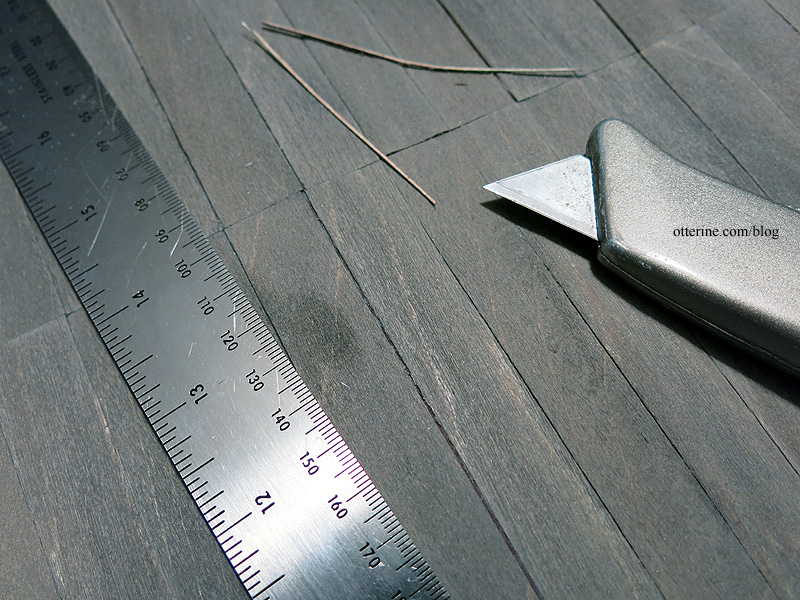
Using the utility blade, I scored tiny lines at the edges of the boards.

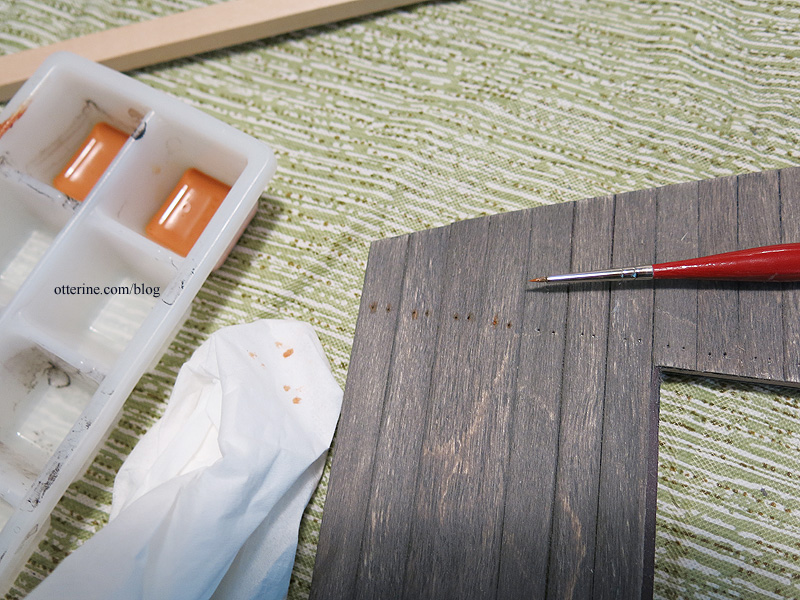
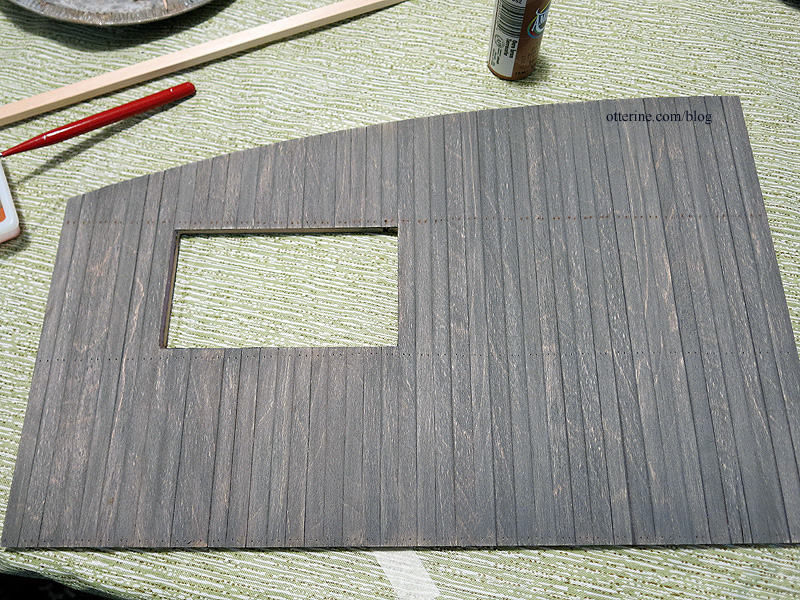
I spread Weldbond glue to attach the flooring.

To keep the warping to a minimum (some is wanted for realism), I spread magazines and photo albums over some plywood planks.

The rest of the aging will be done later.
Categories: Milo Valley Farm
May 31, 2015 | 0 commentsMilo Valley Farm – barn floor, part 1
I made a black paper template of the floor.

I did some math and determined 5.5″ x .75″ boards would work best, so I drew lines on the paper to test out the placement. Starting down the middle, I glued the boards in place. This is the same material used for the siding but left full width.

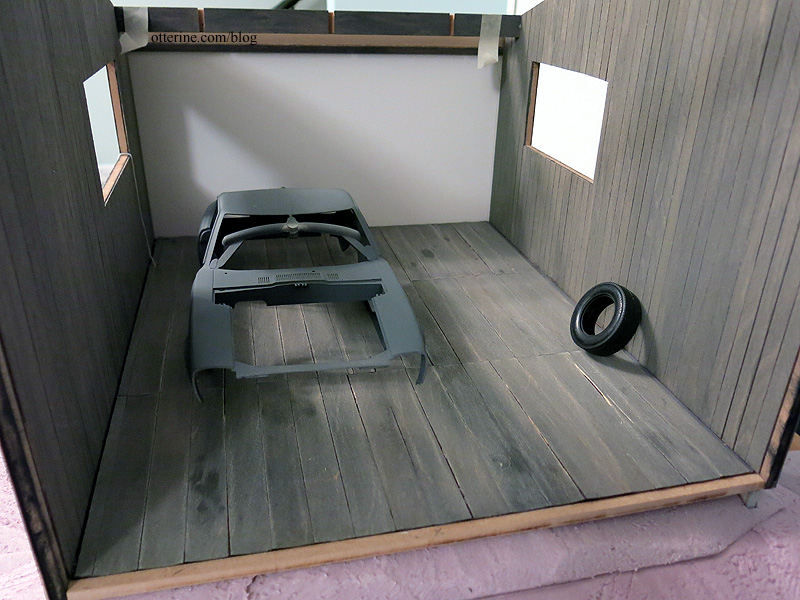
After drying under the weight of magazines, I tried the fit inside the barn. All good. There will be trim around the edges, so it didn’t have to be precise.

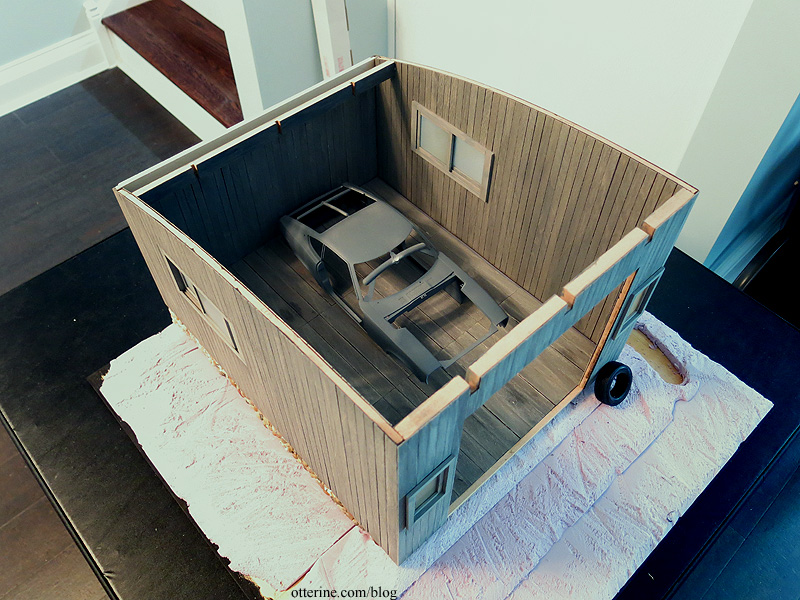
Testing it out with the Beetle.

I used the same painting technique as I had for the siding for the base color. I applied a few dark washes to age the planks, even dropping some puddles in places to make stains. These were lifted and reapplied a few times over.

I spread the glaze in my paint pan and pressed a paint bottle into it.

Here’s the ring of paint on the bottle.

I pressed it randomly in the corner of the floor.

It left some nice detailing there, where a bucket or paint can had once leaked.

I lifted the paint a little to make it less fresh.

The Datsun kit comes with 5 tires, so I took one and rolled it in black paint.

I pressed it onto the floor to leave a tread impression.

I lifted that as well and then spread a grey wash over the whole floor to tone down the stains. Then I added a few small newer ones. It’s easy to add more mess, but it’s hard to remove if you add too much.

It’s now back under magazines. We’ll see how it turns out! :D
Categories: Milo Valley Farm
May 30, 2015 | 0 commentsMilo Valley Farm – removable back wall, part 2
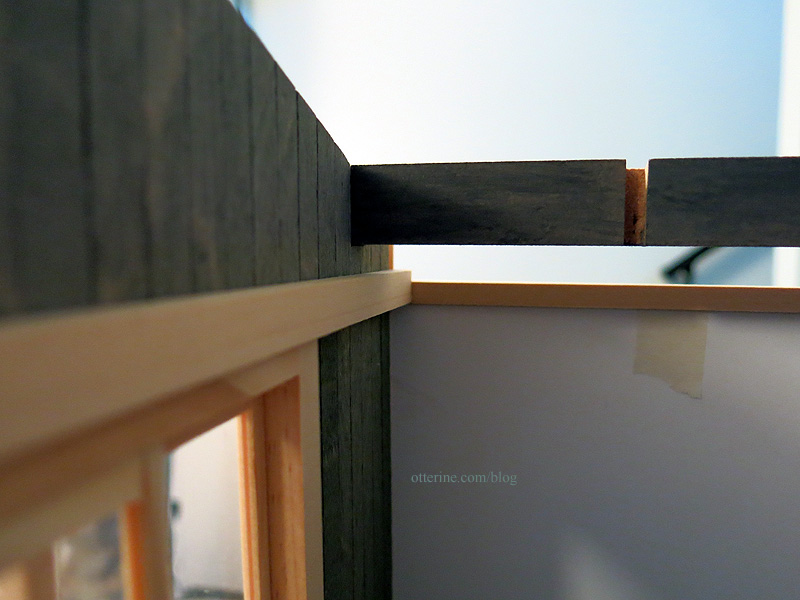
Continuing work on the removable back wall. After some further thinking, I realized I wanted my break in the wall to match up with the interior horizontal beams…so I would need to make my sliding wall taller and my anchored top shorter. Here it is adjusted.
I would also need to split the vertical channel on the moving side. The top portion would anchor my top wall; the bottom portion would move freely.
I covered the back of the vertical channels with siding strips cut to fit. I stained all the pieces to match the siding to prevent any bare wood from showing once finished.
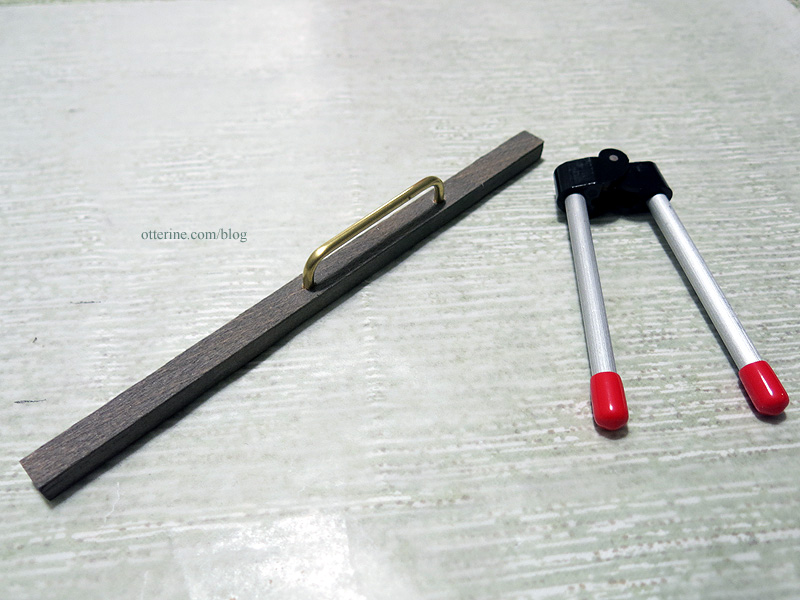
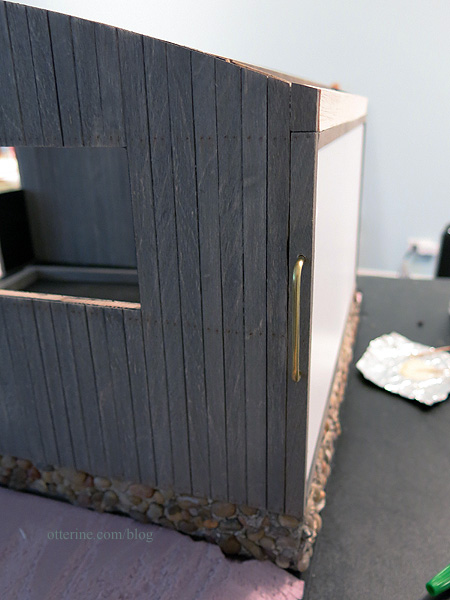
I will need a pull for the movable side, so I bent some brass tubing to serve as a handle using a Du-Bro Tubing Bender (here’s the post on how the tool works). I needed a handle large enough to grip and pull but in scale to look like a planned part of the build. Maybe this was an old bar used to tie up horse leads.
Eyelets will be glued on the inside to add stability. I’ll need to finish the metal to make it aged, so more on this later.
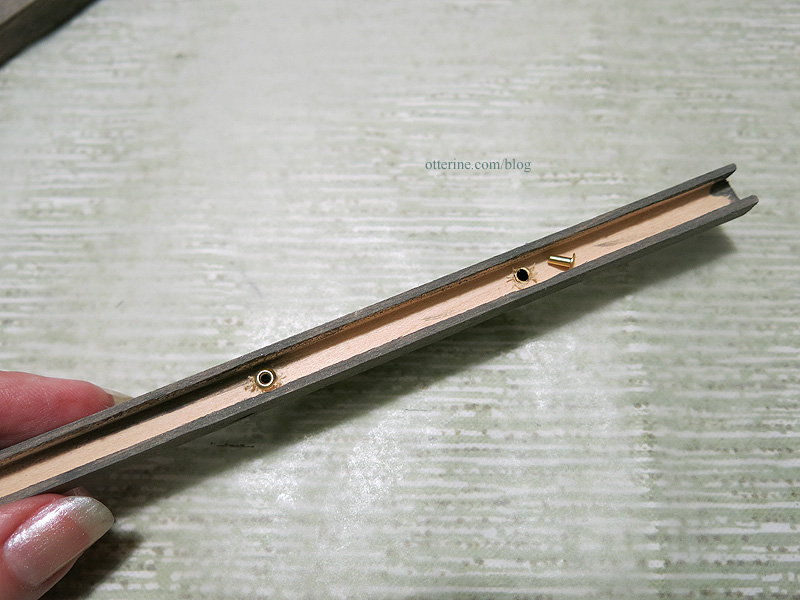
I glued the stationary side pieces and lower channel in place with the removable board inserted to keep things square.
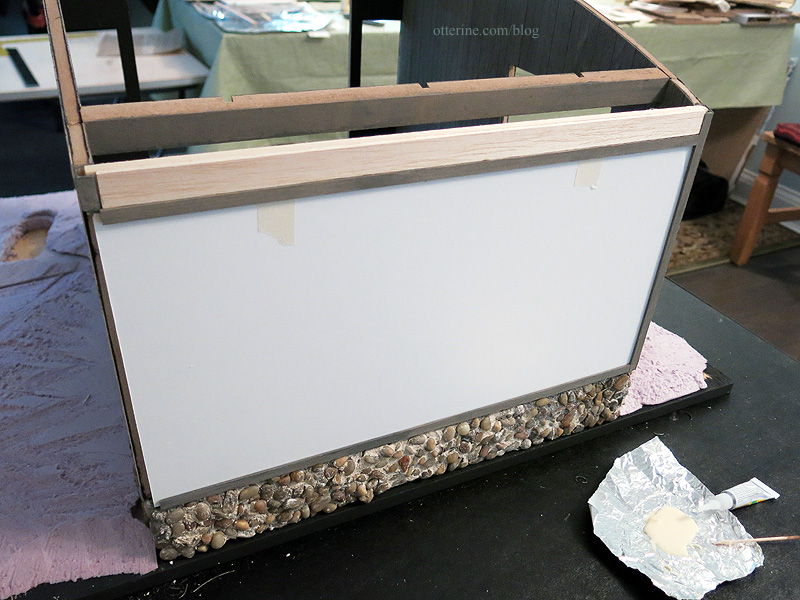
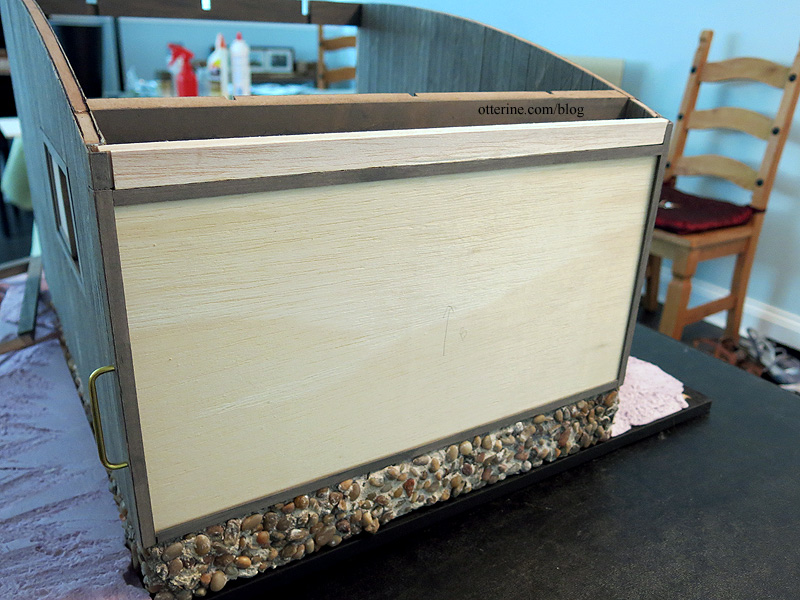
I padded the top stationary wall on the outside make a smooth surface across. Trim will cover this portion later.
The siding strips on the side channels make them blend in well, especially on the stationary side.
The side with the handle will have a break in the vertical siding board, but the upper trim should help disguise this. Besides, I’m hoping the build will be so awesome you won’t notice. :D
Categories: Milo Valley Farm
May 28, 2015 | 0 commentsMilo Valley Farm – siding, part 3
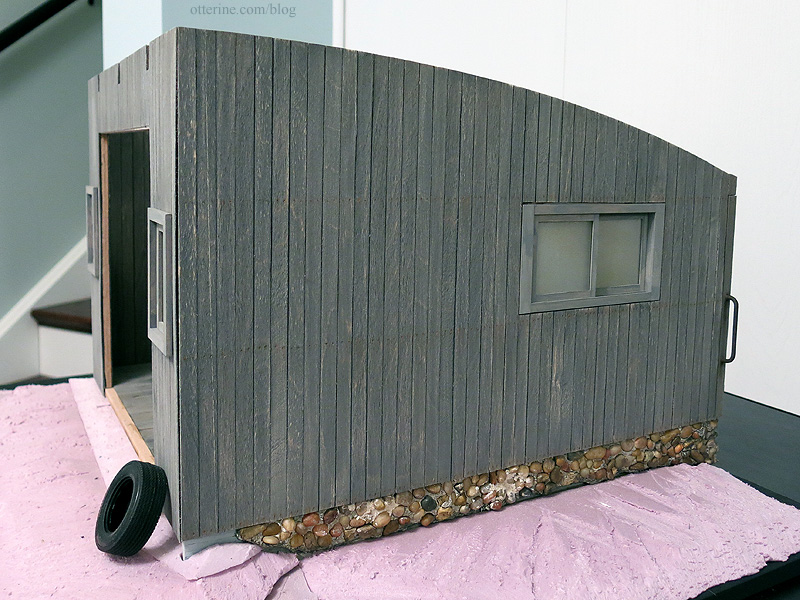
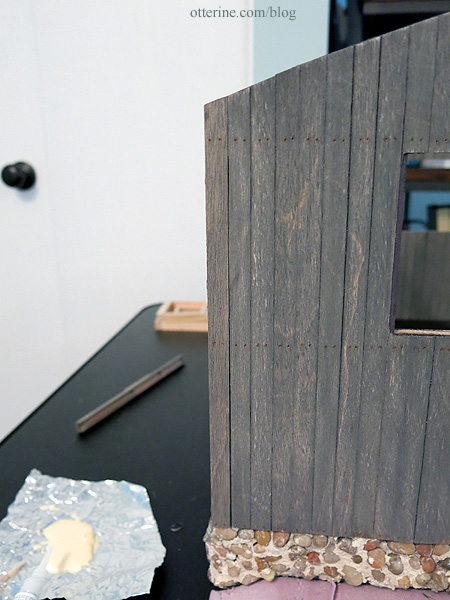
Continuing work on the siding. I sanded the exterior surface to age the wood and bring back some of the grain.

I marked where the interior wall beams will be on the outside with tiny pencil marks. I didn’t measure precisely since nails wouldn’t be completely even in real life.
I used an awl to indent each of these marks, two per board.
Interestingly, when I pushed on the pencil marks, the graphite remained reflective and looked like tiny nail heads. :D Happy accident.
I tapped my utility blade along the bottom edge to wear out the lower edge. It’s subtle but it’s a good texture.

I used a watery paint mixture of Terra Cotta and brown to make rusty nail halos with a tiny brush. The paint sank into the indentations, and I dabbed the excess with a tissue along the way.
Yes, it’s tedious…but the detail will add to the realism in the end. :]
I didn’t add this detailing to the top edge since the trim board will cover that area.
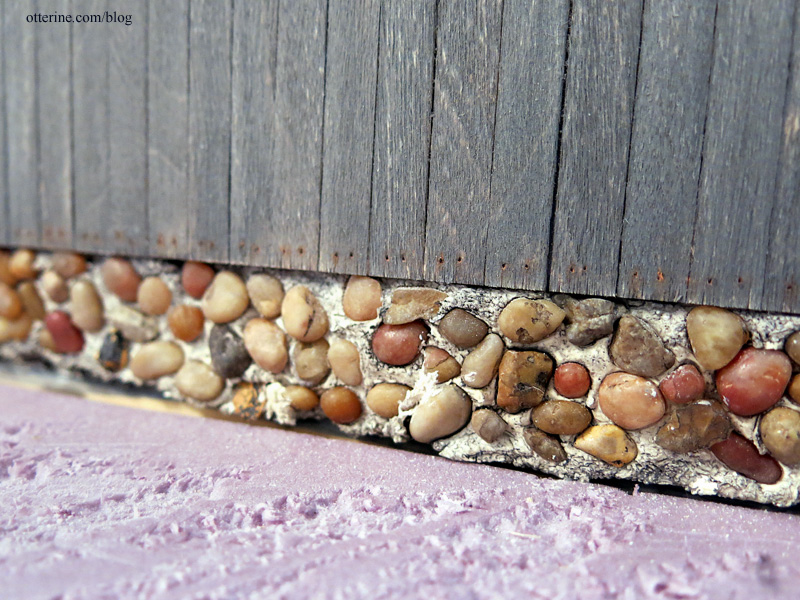
I think the siding looks fabulous with the stone foundation. :]
Categories: Milo Valley Farm
May 25, 2015 | 0 commentsMilo Valley Farm – removable back wall, part 1
When I constructed Baslow Ranch, I made a standalone board to enclose the open back when photographing from the front. It has siding on it just like the rest of the building.
However, it is not easy to prop in place and has warped over time with nothing to keep it stable. With Milo Valley Farm, I’m going to incorporate the back wall into the build. But, it has to remain removable to access the interior. To that end, I will make it a sliding wall using channel molding.
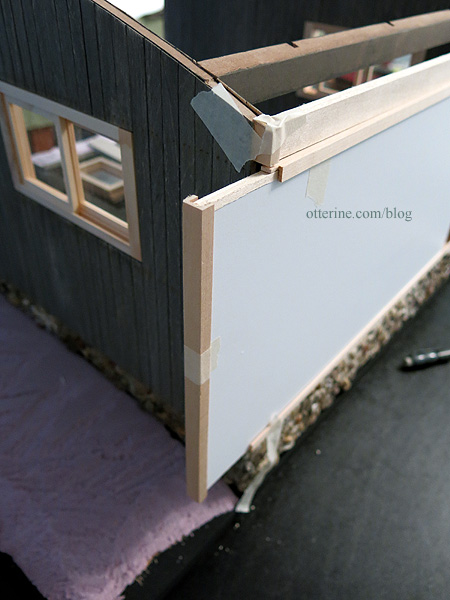
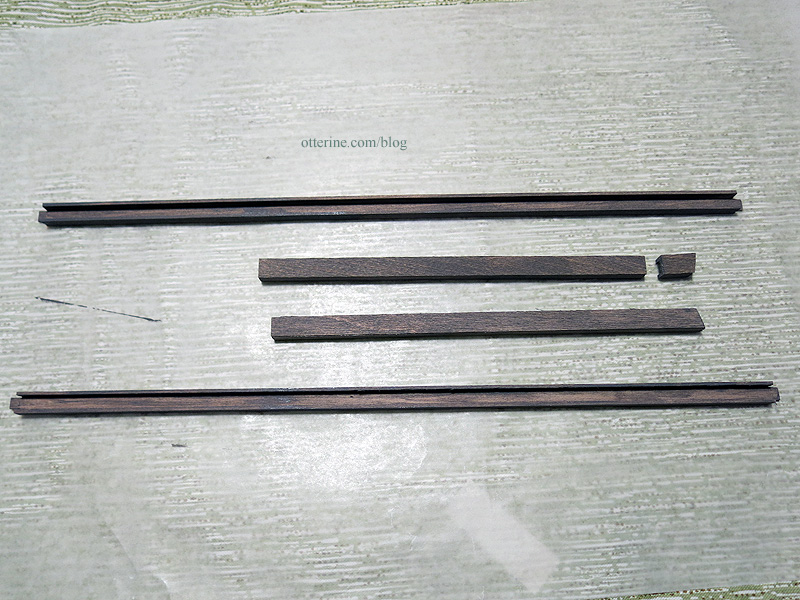
The channel molding measures 1/4″ x 3/8″ and holds a board 1/4″ thick. I left space for this trim on the foundation when planning. I cut two vertical boards floor to ceiling for the back edges.
I cut a piece of foam core board to serve as a template for my final wood wall. As you can see, I’m not making the removable part go all the way to the ceiling. I think having a static wall at the top and a removable wall on the bottom will work better for stability.
I cut two channel pieces to fit the width between the vertical boards. I notched the ends to fit inside the vertical channels. This will keep it locked in place when closed.
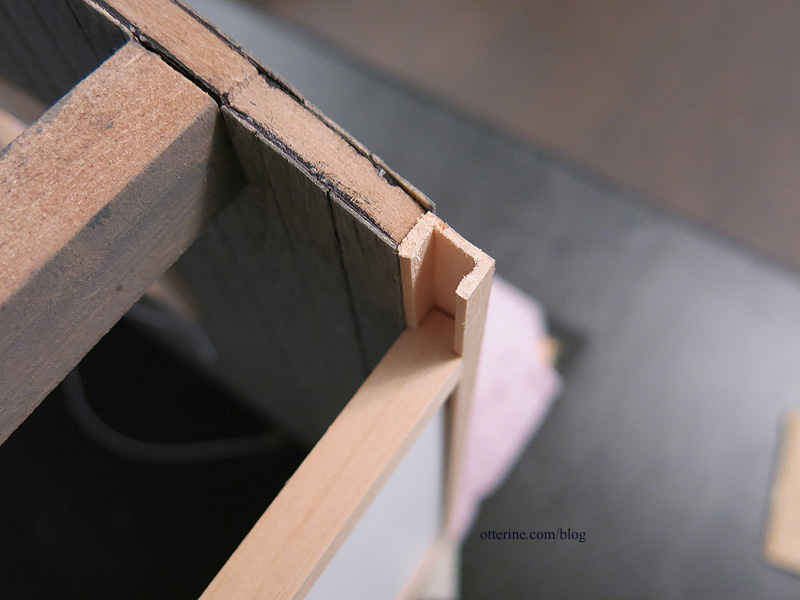
I cut a board from 3/16″ basswood to serve as the stationary upper wall base. I chose basswood since it was easy to sand into an angle along the upper edge.

The upper and lower channels will be glued in place as well as one side channel. The remaining side channel will be attached to the removable wall and will move with it.
We have a plan. Now to tinker until it works.
Categories: Milo Valley Farm
May 25, 2015 | 0 comments


NOTE: All content on otterine.com is copyrighted and may not be reproduced in part or in whole. It takes a lot of time and effort to write and photograph for my blog. Please ask permission before reproducing any of my content. (More on copyright)

Milo Valley Farm – barn doors, part 2
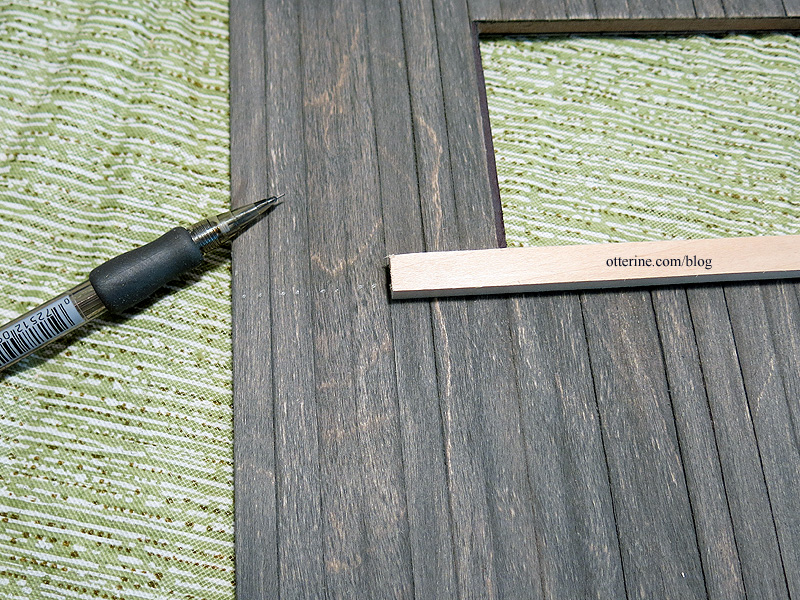
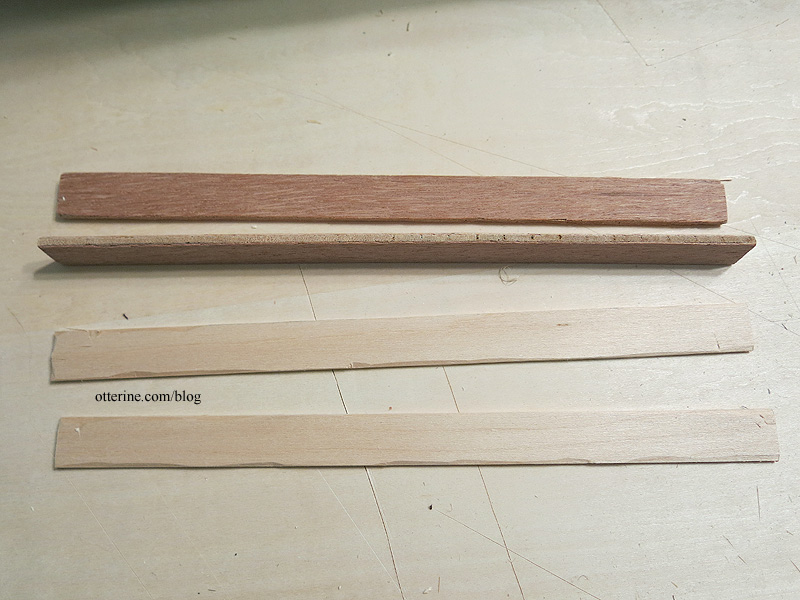
Continuing work on the barn doors. I cut new upper reinforcements from basswood since I didn’t like the texture of the plywood edges. I marred the basswood pieces to make them look like old wood.
I added all the nail detailing I needed to finish the overall look and then installed the pieces.
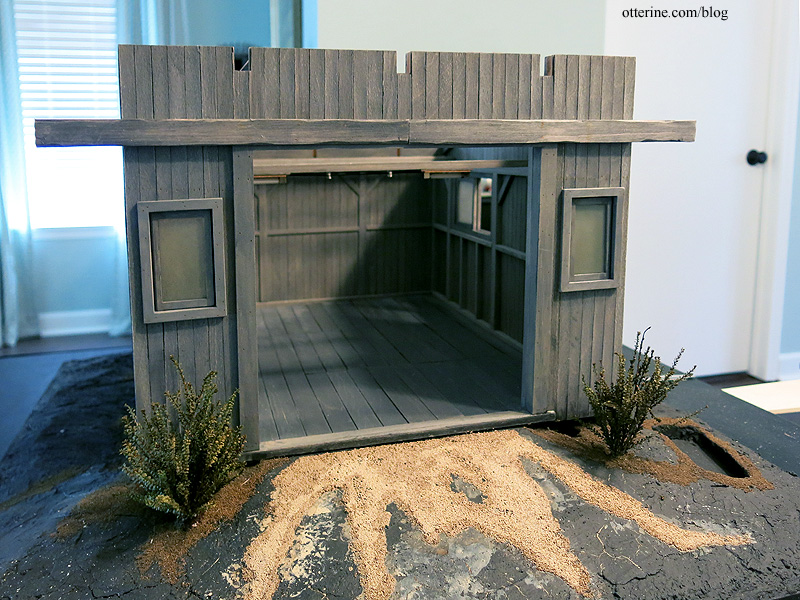
As noted previously, I will be making a rail that will extend past the end of the building on either side. I saw this setup in real life at a wedding locale — Proven Ground Farm. The real life version has a round metal pipe that houses the top part of the hardware attached to the barn. My best guess is there are rollers inside the pipe.
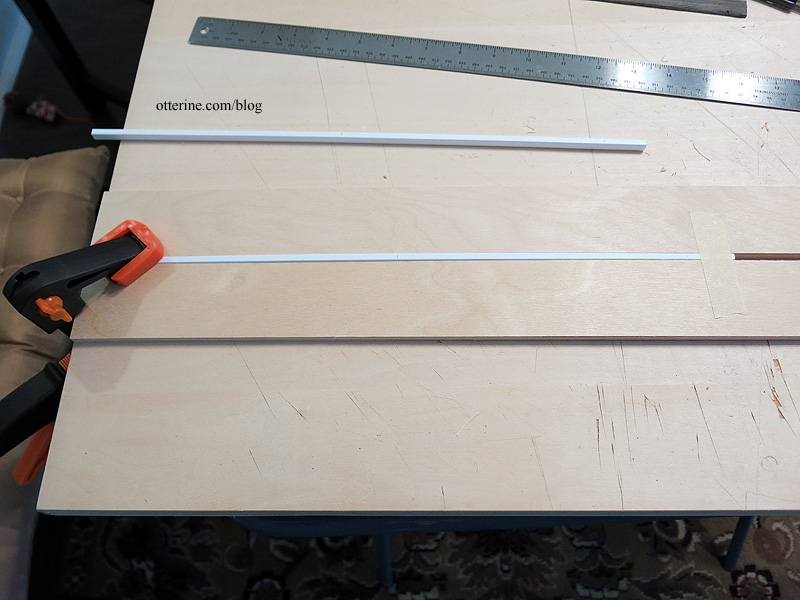
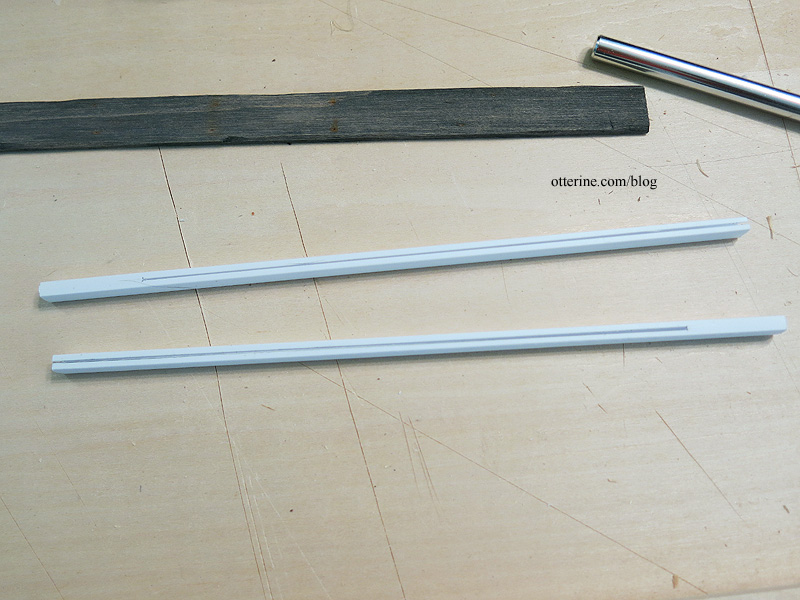
I’m using rectangular plastic tubing to have a larger surface to attach to the barn itself. The first order of business was to cut a track opening. I sandwiched the tube between two boards and taped everything together. I clamped the boards to my cutting table.
Using a sharp X-Acto blade and a metal ruler, I made a tiny channel in the tube.
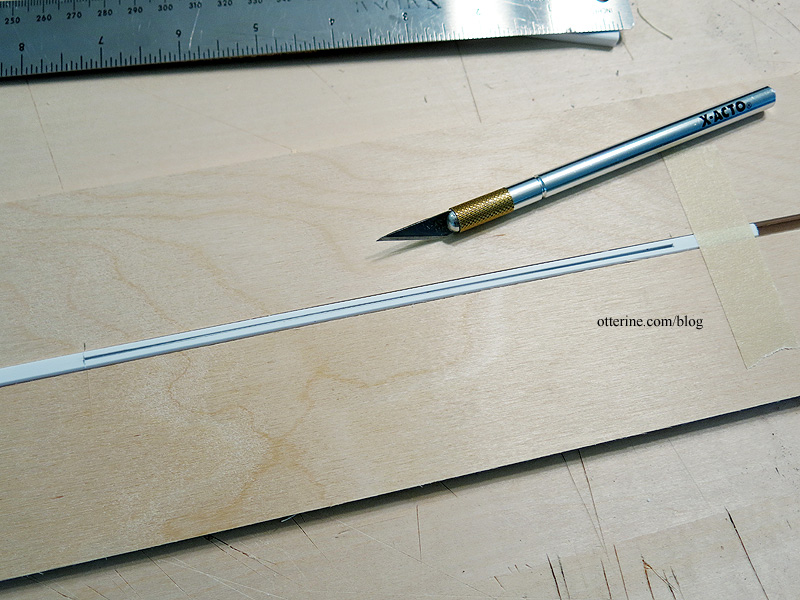
I left the tube long so I would have enough leverage to hold onto it. After the channels were in place, I cut the tubes to fit. Each tube has a channel that is closed on one end and open on the other.
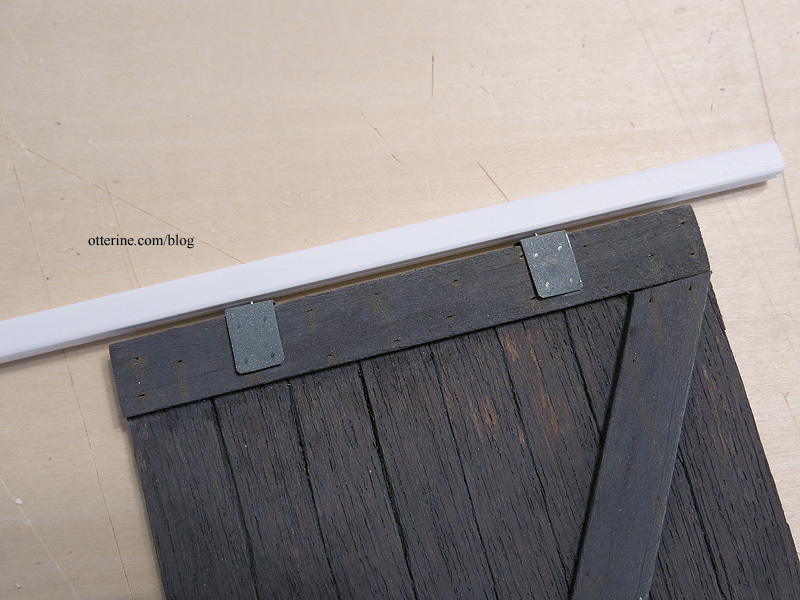
Bill sent me some zinc metal sheet awhile back. He likes working with it to make interesting minis. I haven’t worked with metal a lot, but this is a fine time to start! I cut four strips 5/16″ wide by 2″ long. I wanted some extra length since I was making things up on the fly.
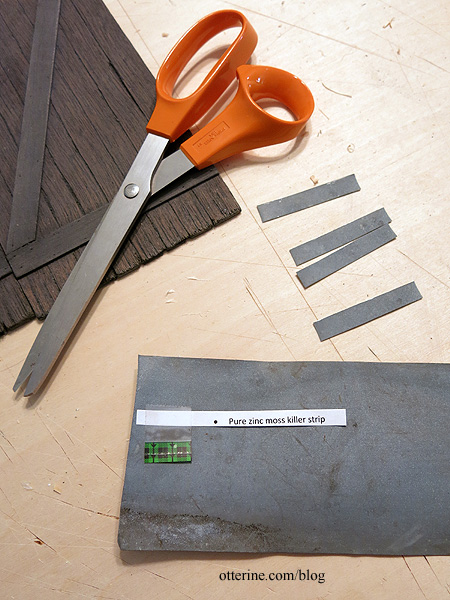
I bent the zinc over the tops of the barn doors, two per door. I marked and cut the excess, using nail clippers to smooth the corners.
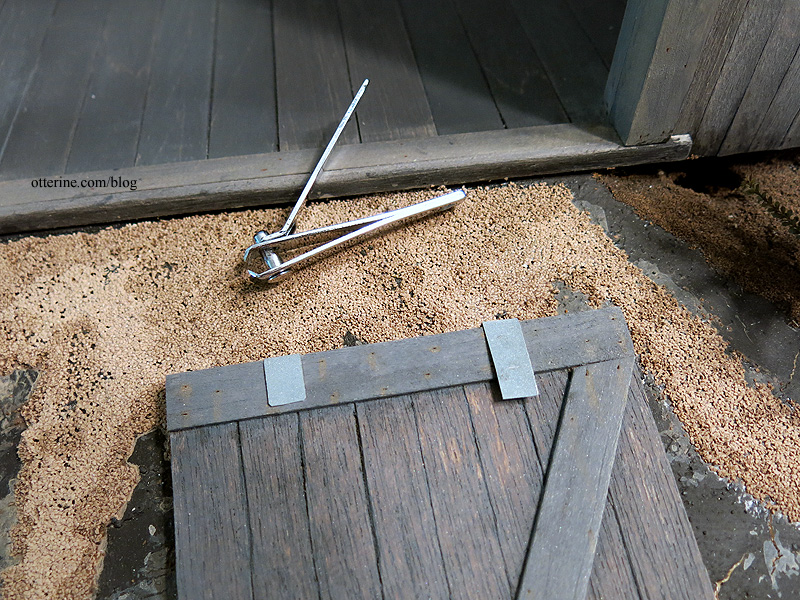
I marked the brackets for tiny brads on each side. The nails are on order and I have to paint the hardware anyway, so the slight delay won’t be for too long. I drilled a hole in each top center. This will hold a ball-top sewing pin, cut to fit.
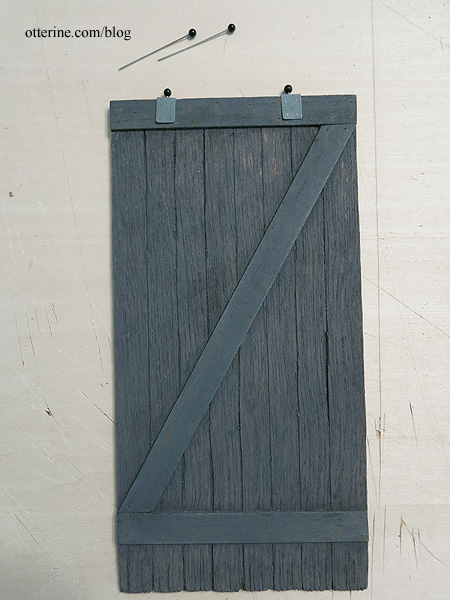
These will serve as the rollers inside the tubing.
Next up, painting the plastic, hardware and installing the doors.
Categories: Milo Valley Farm
February 6, 2016 | 0 commentsMilo Valley Farm – knob and tube wiring, part 4
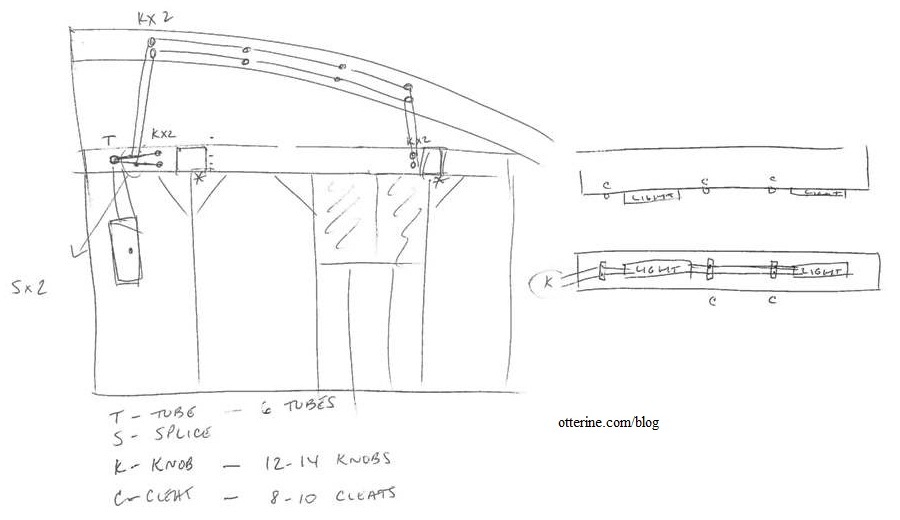
With the 12V lights wired, I continued the knob and tube system along the side wall. This was my initial map (I changed the cleats to knobs in the last post).
I started with the lower cord from the back cross beam. The process is the same as it was for the cross beam knobs: headpin through the upper knob portion, through the cord, into the lower knob portion and glued to the wall.
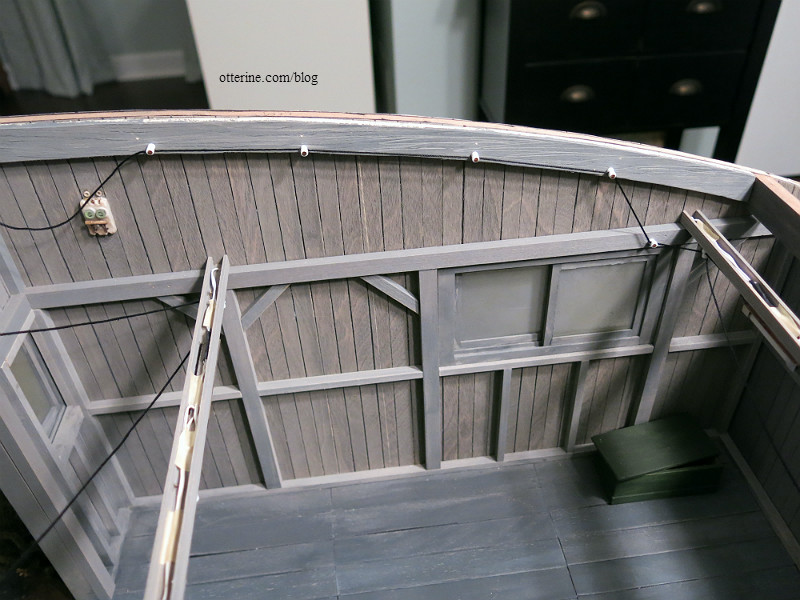
Once that track was in place, I addressed the upper cord from the back cross beam. After reaching the front of the barn, I had to splice the cord wires together. I used masking tape then painted it black.
Those four splices required an unusually high amount of curse words to fall into place. Anytime the two cords touched, I slipped a cut of plastic tube onto the cord. One splice is damn close to a knob nail — likely a scary feature of many a real barn. :O
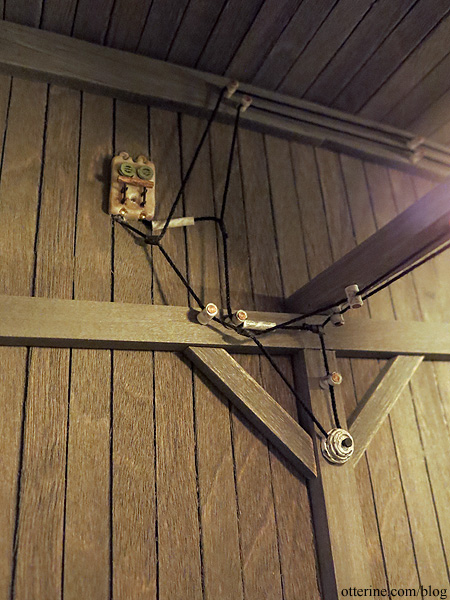
As I mentioned before, much of this exposed work would have been done with cleats instead of knobs, but I like the look of the knobs and perhaps the builder just used whatever he had the most of in the old barn. Here’s an excellent video on knob and tube from Edison Tech Center.
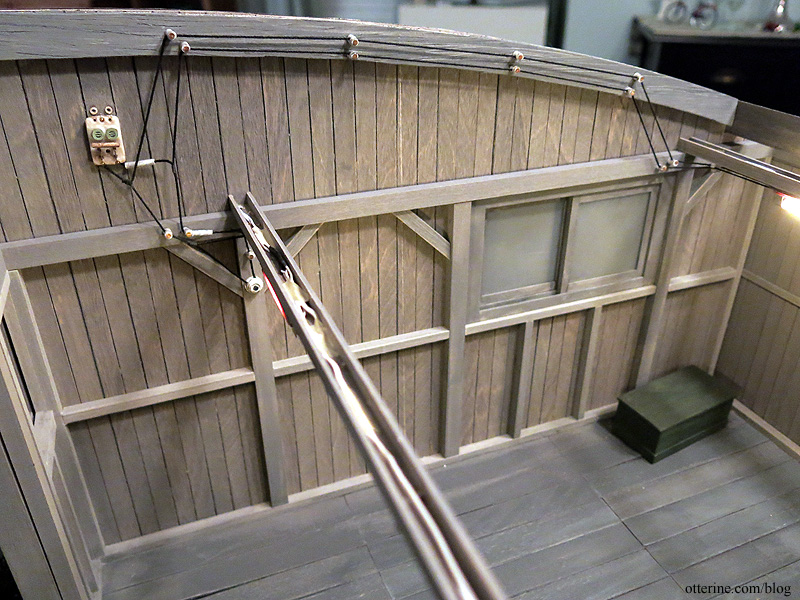
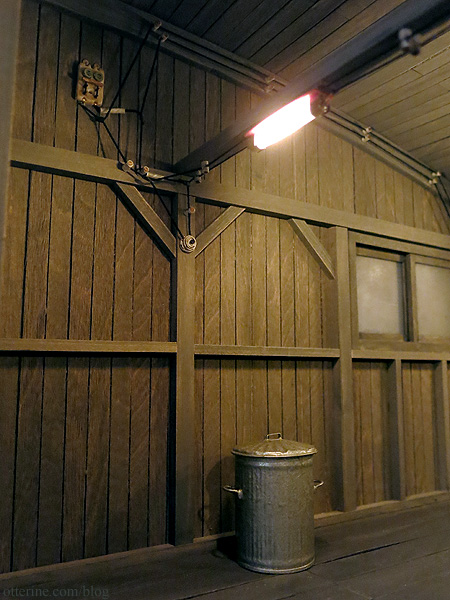
I led the wires down the wall to a key switch (made from a bell push from Sussex Crafts and a wood disc). I will add the “safety feature” rope to yank in case of disaster closer to the end since it will just be in the way when I attach the exterior electrical wires to the fuse block.

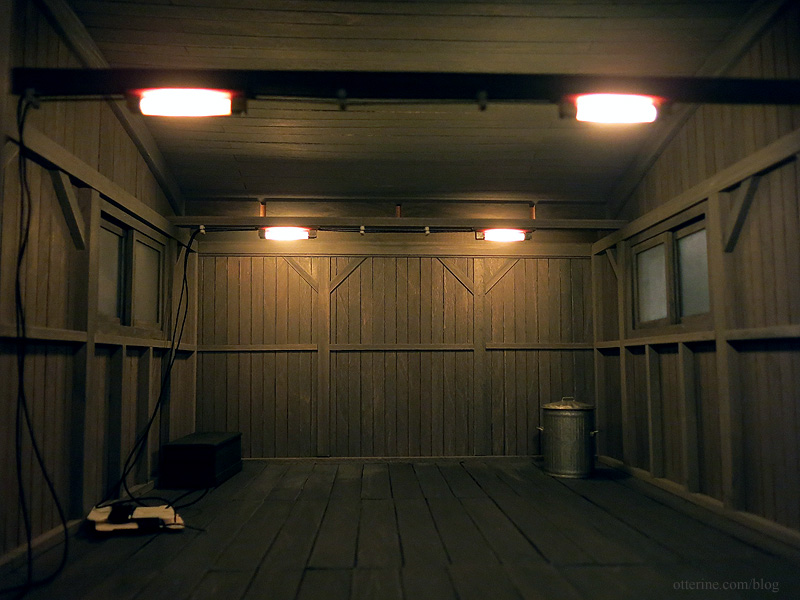
It may seem low, but it’s only because there’s nothing to show the spatial relation of the barn. :]

To age all of this madness, I scraped some chalk pastel dust into a bowl and then dusted it onto the cord. It toned down the true black of the cord material. I used some grey and brown paint mixed with Americana Staining Medium to dirty the knobs and tubes.

This whole setup is damn scary, so it’s a good thing it’s just for show.

A lot of this was guesswork since much of the knob and tube wiring examples I found are modern inspection photos of improper splicing with modern wiring. But, I think I managed to capture the essence of it, no? :D
image from Wikipedia Only a few things are left for the actual barn structure — barn doors, exterior electrical work, landscaping and roof. I think I’ll leave the roof off until I am done with the car, which will have to wait for spray painting weather. So, I’ll work on the barn doors next.
Categories: Milo Valley Farm
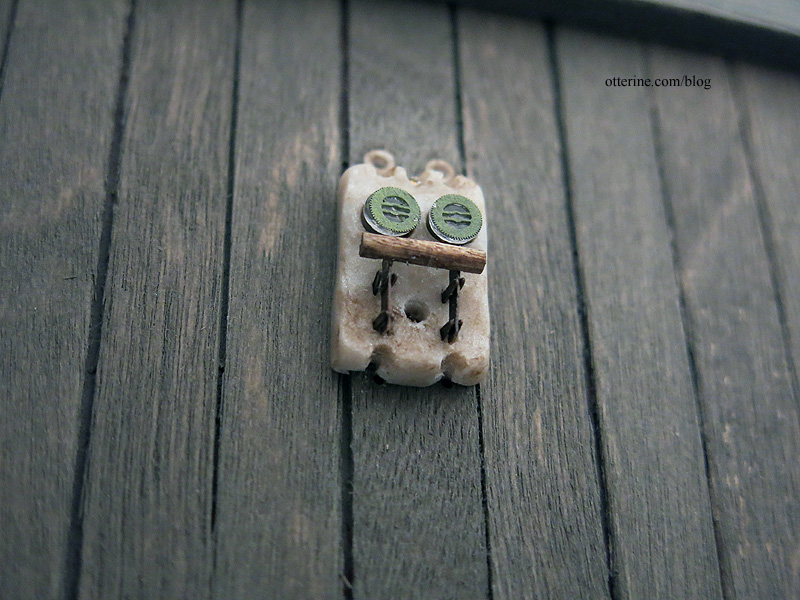
February 3, 2016 | 0 commentsMilo Valley Farm – porcelain fuse block
I worked on making a porcelain fuse block for the knob and tube system. This is for the service entrance. I used polymer clay (Sculpey in Pearl) since it was easiest to mold and shape and would look enough like porcelain to pass.
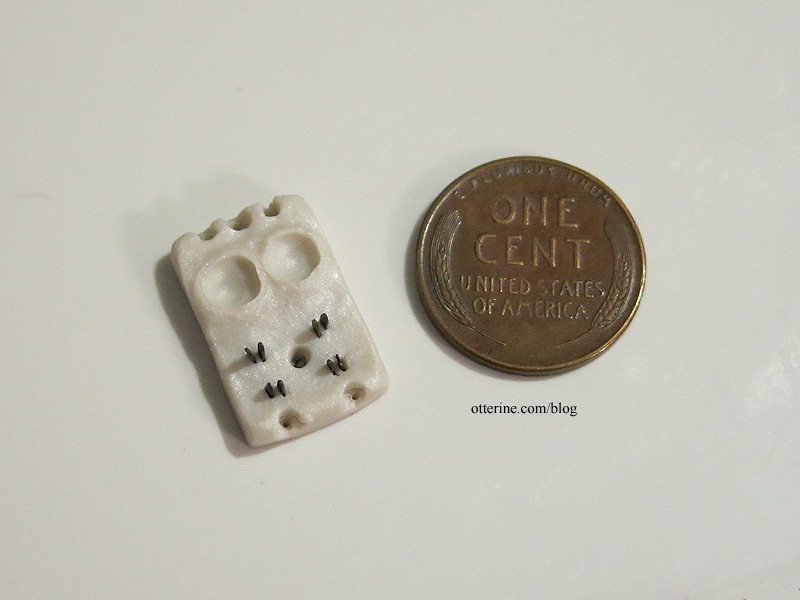
I used jewelry findings for the connectors. The measurements for the real deal are roughly 3″ x 6″ from the few I saw listed for sale. Mine is a little large for scale at 1/2″ x 3/4″, but it’s all relative in the barn and it shouldn’t make a difference for realism. I didn’t think I could successfully work any smaller. :D

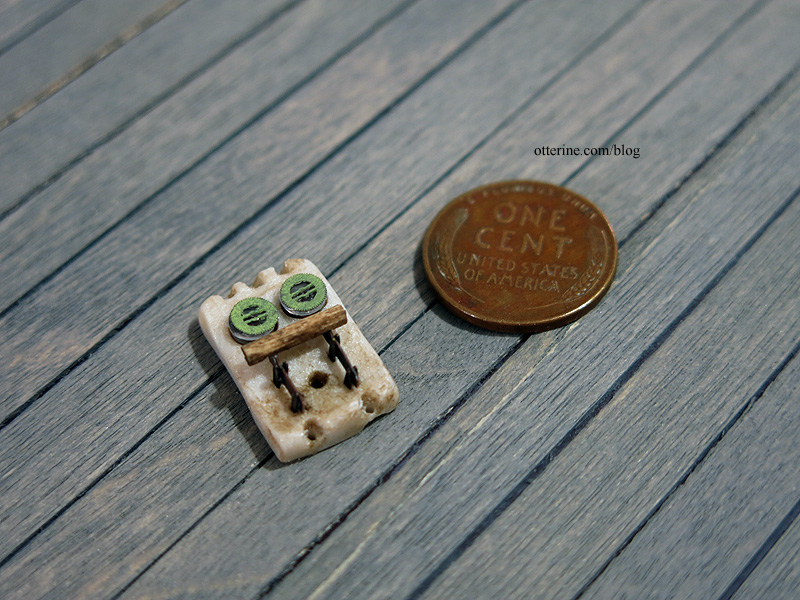
I finished the porcelain fuse block by adding the knife switch and two fuses. The fuses are made from brass and silver watch parts (painted) and two clear plastic discs. The switch doesn’t pivot; it’s glued in place. I mixed some brown paint with Americana Staining Medium to age the assembly.
I drilled holes through the wall to insert tubes to the exterior. I’ll address the exterior electrical portion later. My original attempt at mimicking the shaped end of the porcelain tube was done with contour putty.
It was too brittle and fell to pieces, so I cut the tubes and pressed one end onto an awl to stretch it a bit. This allows for a slight shape even if it’s not an exact replica.

I glued the box to the wall and then added two brass nails clipped short to fit. The bottom screw holes disintegrated when I drilled the larger holes, but you won’t see this once the final cording is in place.
I chose to mount the fuse block higher than I had it in initial map. From what I’ve read, it was difficult not to shock yourself (i.e., electrocute yourself) when throwing the switch. I figured it would be best to keep it in a place where nothing would lean on it by accident, something like a metal rake.
I’m now ready to finish up the cording through the remaining knobs and tubes.
Categories: Milo Valley Farm
January 24, 2016 | 0 commentsMilo Valley Farm – lighting, part 3
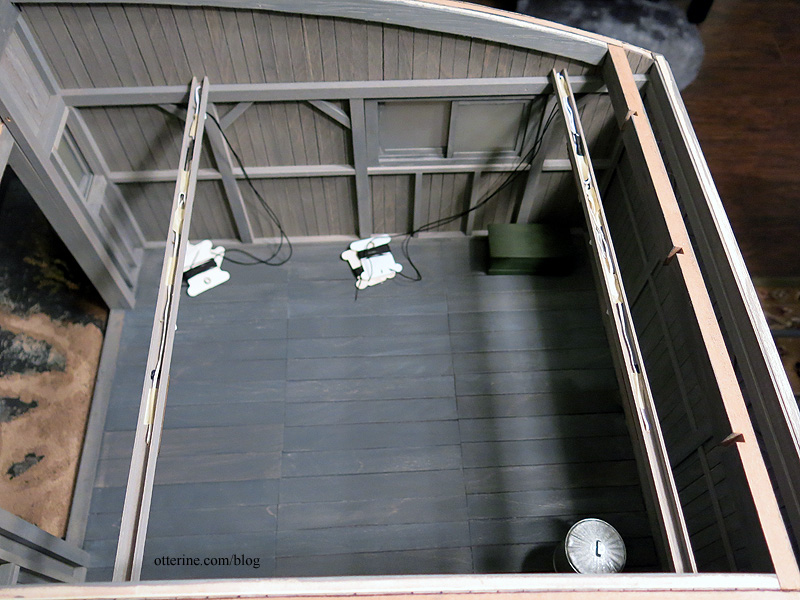
With the knobs installed on the cross beams, I could wire the 12V lights. As noted in this post, I ran three wires into the barn — one more than I thought I would need. I usually install one extra in case inspiration strikes later, and it has. More on that later.
Inside the sea chest, there will be a receptacle, which will use one of the wires. I can plug three light fixtures into the hidden receptacle, though I plan to plug in only two. That aspect will be addressed in a later post.
I chipped out a portion of the floor beam to run two wires up the wall.
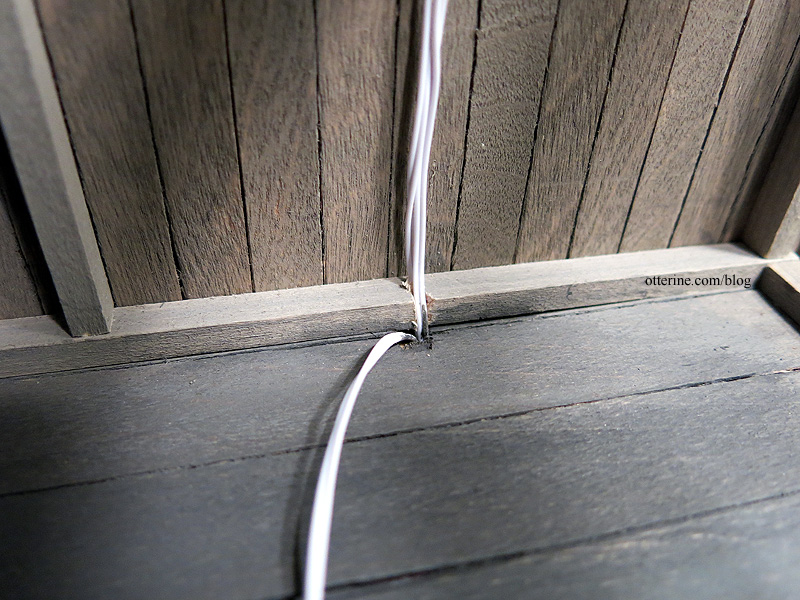
These are hidden by the vertical channel molding that looks like a support beam.

I spliced a length of wire to one of the lead wires and taped it along a route to the front of the building. This will be for any exterior lighting on the front of the barn. I’ll be undecided on that fixture until I get the barn doors installed, but I needed to pull the wire through now. I can disguise the wire with channel trim whether I use it or not.
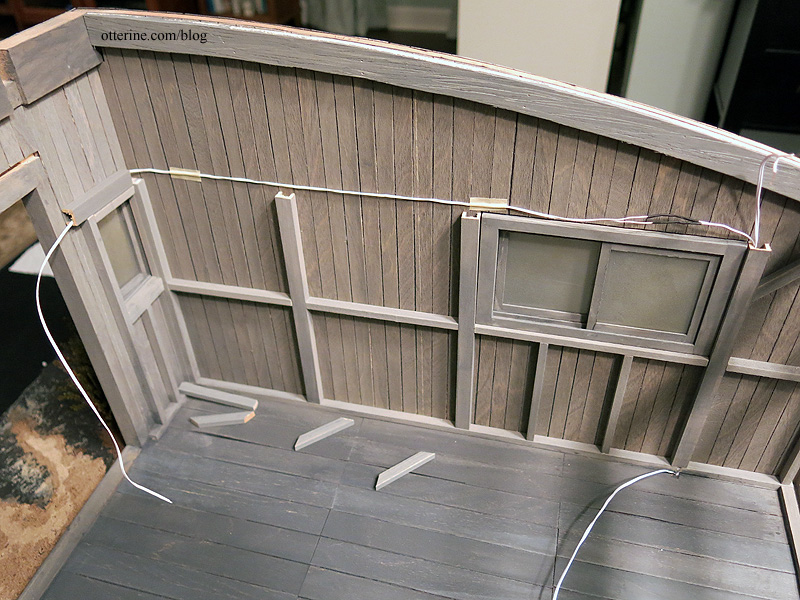
I spliced the two lights from each cross beam onto a single length of wire, taping the wires into the channels of the cross beams as I worked.
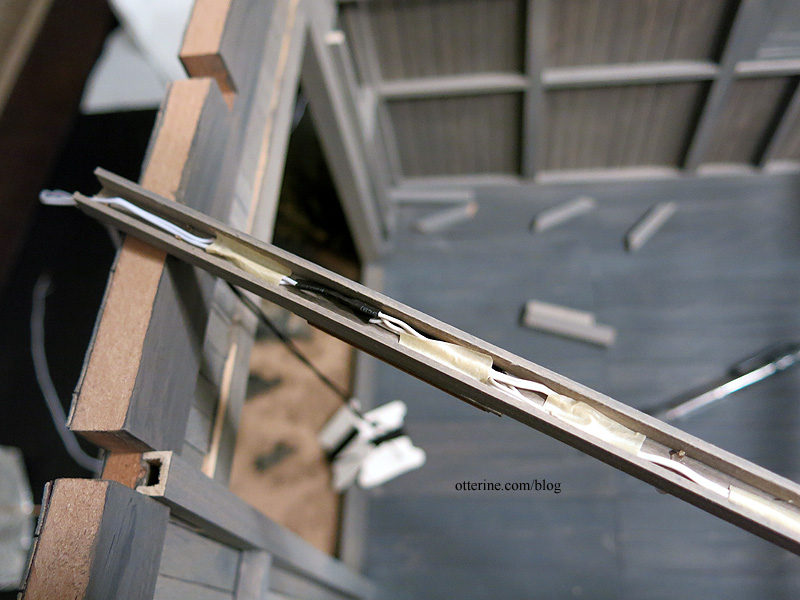
I fed the front cross beam end wire through a hole drilled in the channel that serves as the horizontal support beam and joined it with the end wire of the back cross beam.
I tacked the vertical support beam to the wall with small dabs of glue, but the horizontal support beam and two cross beams are held in place with tension alone. The pieces can be snapped out of place if I ever need to address any wiring issues.
I spliced the two cross beam lighting wires to the remaining lead wire. Once the roof is on, this wiring will be unseen but still accessible through the removable back wall. It will be a cramped space to work in, but it’s better than having no access.
You can’t see any of the channel wires from the barn door opening.
Next up, continuing the knob and tube system from the cross beams onto the side wall. We’re getting there!
It has been so cold here the past few days, with windchills well below zero. Jasper is one smart kitty. He’s left the kitty bed and cat tree behind for the comfort of sleeping directly on the heat register. :D

Categories: Milo Valley Farm
January 13, 2016 | 0 commentsMilo Valley Farm – knob and tube wiring, part 3
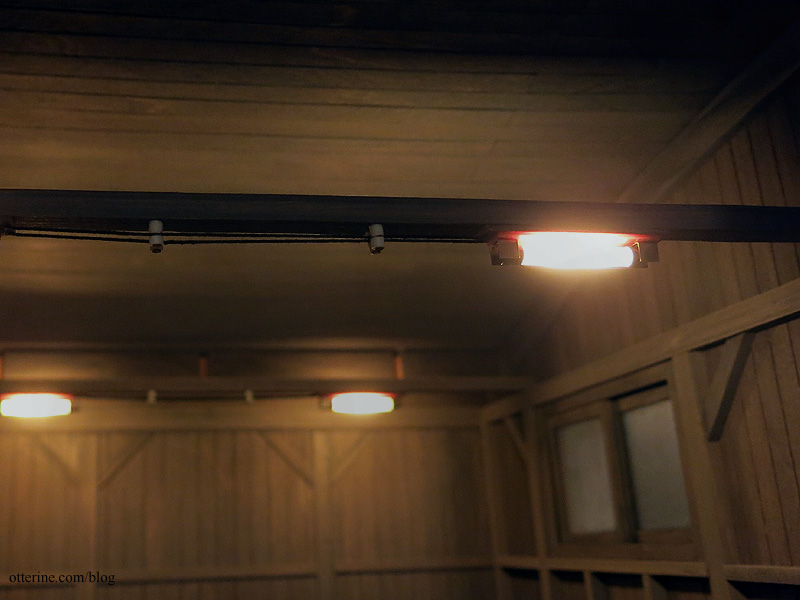
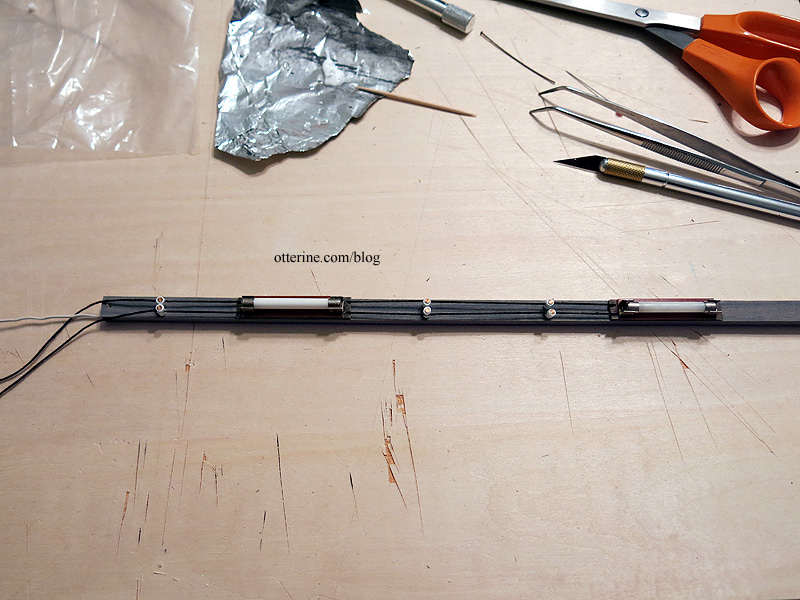
With the light fixtures installed, I could start running the cord wire for the knob and tube system. I started with the cross beams.
I mentioned adding cleats. These allow two wires to travel a parallel path. Knobs also carry wires parallel, but I believe the difference is that knobs can be enclosed whereas cleats are used for external use, like running along a ceiling out in the open. After some further consideration, I decided to skip the cleats and just go with knobs and tubes.
I drilled holes in the ends of the light fixture back plates.
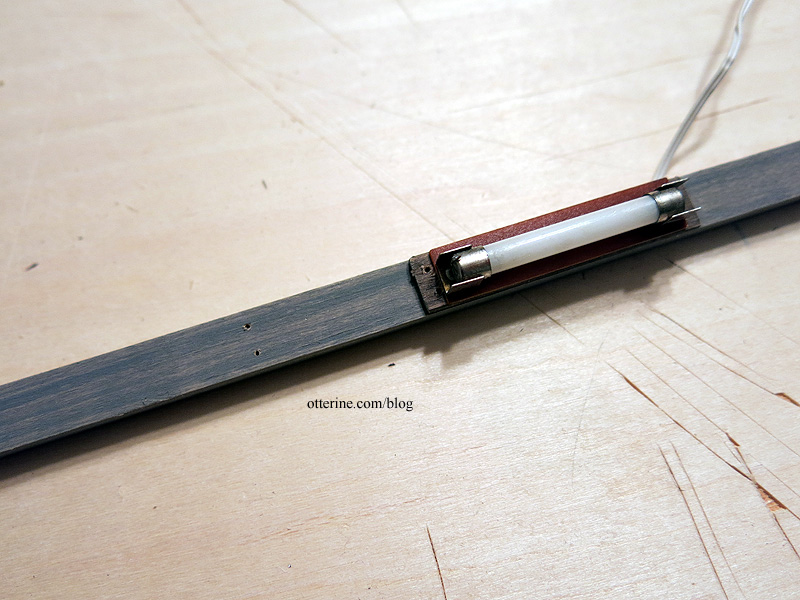
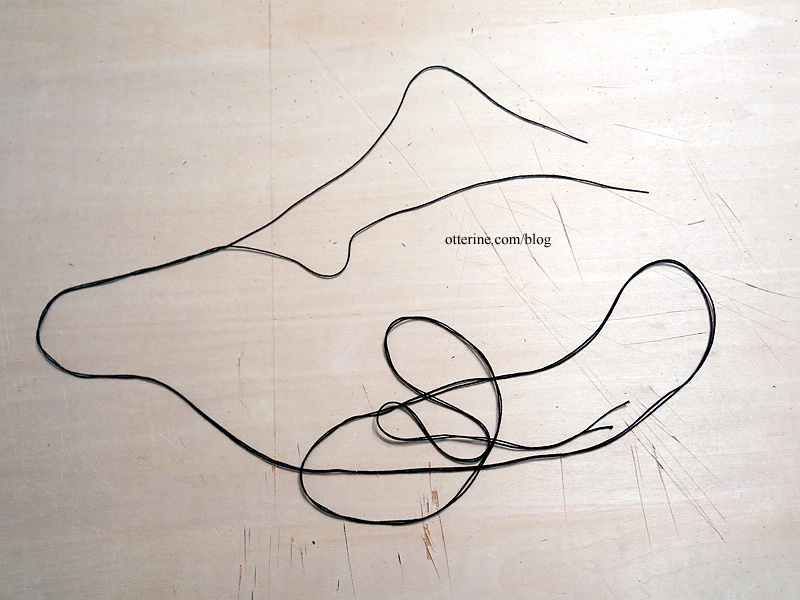
I cut two extra long pieces of crochet cord and knotted one end for each. I used glue to stiffen the leading end.
I fed the cord through the holes of the first light fixture, across the beam, into the holes of the next fixture and out the other side of the second fixture.
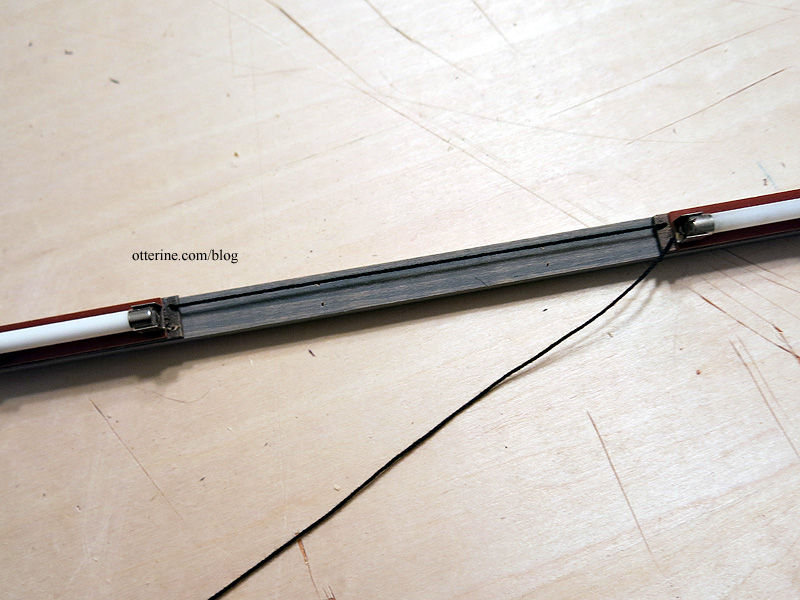
In real life, the nails would not touch or intersect the corded wire, but in my mini version, the nails keep it all in place. I’m using aged copper headpins for nails cut down to size. I fed the nails through the upper knob section, then through the cord and into the lower knob section, using a dab of glue to secure. I added larger globs of glue inside the channel.
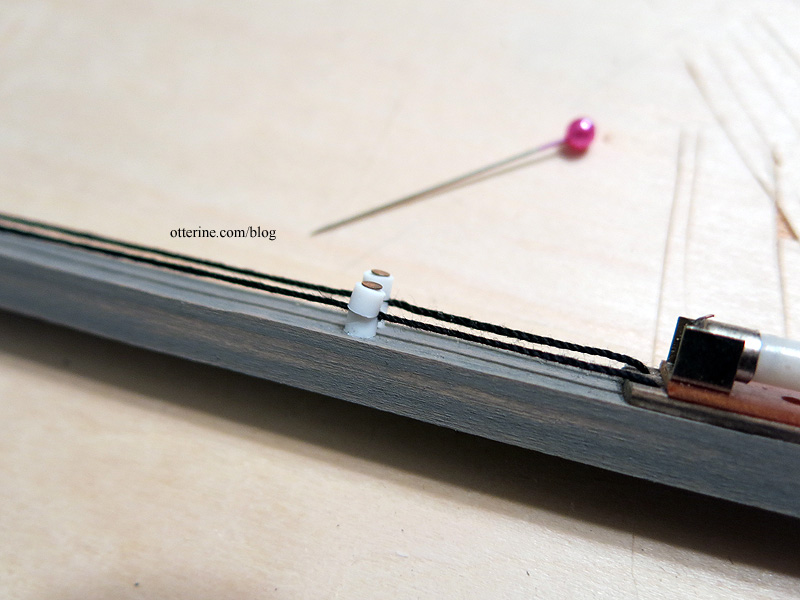
I tightened the cord as I secured the knobs in place and continued the length of the cross beam.
I used cardboard floss bobbins to keep the lengths of cord tidy.
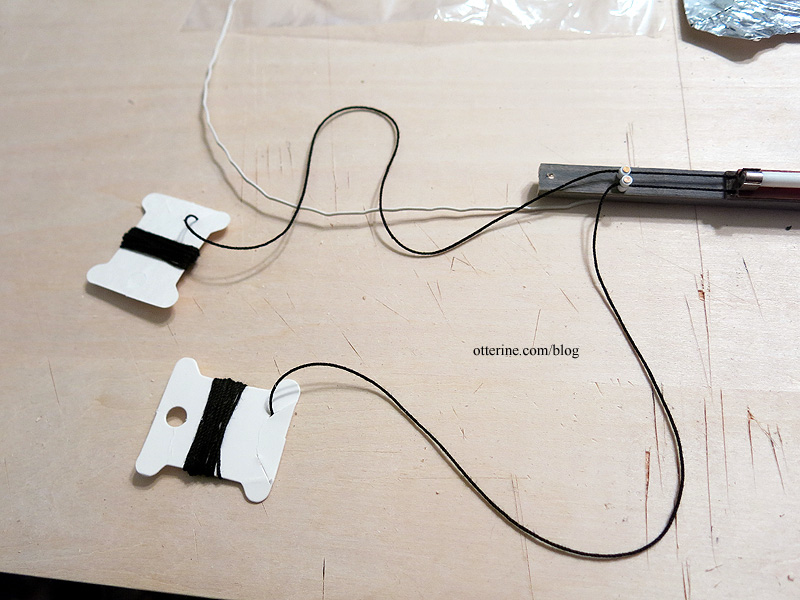
I repeated the process with the second beam. I made this cord just as long though I intend to splice them together once I get to the knobs on the side wall. I figured, just in case that didn’t work, I wouldn’t have to redo the whole thing. I would already have a good length of cord to work with.
Overall, it was a fiddly process, but the biggest obstacle was Jasper chasing the string ends as I worked.
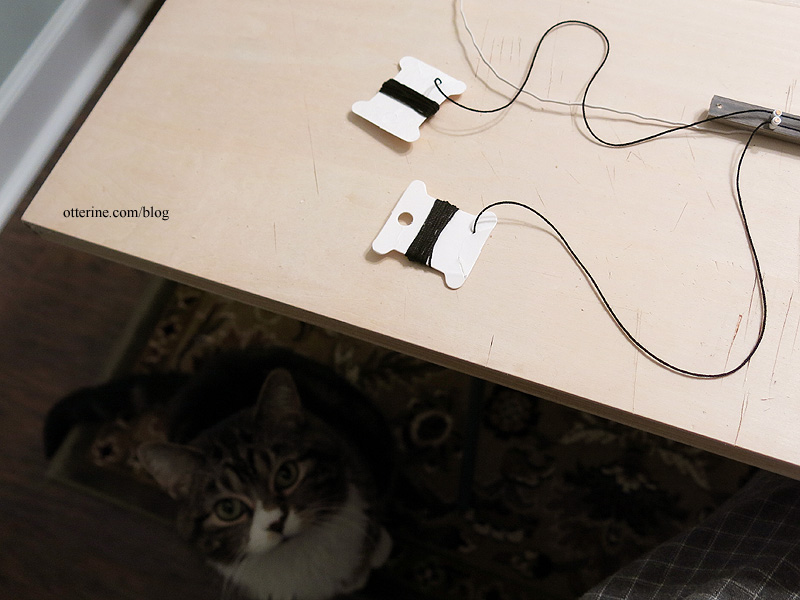
The cross beams are almost ready for installation. Next up, wiring the 12V lights.
Categories: Milo Valley Farm
January 12, 2016 | 0 comments
NOTE: All content on otterine.com is copyrighted and may not be reproduced in part or in whole. It takes a lot of time and effort to write and photograph for my blog. Please ask permission before reproducing any of my content. (More on copyright)