


NOTE: All content on otterine.com is copyrighted and may not be reproduced in part or in whole. It takes a lot of time and effort to write and photograph for my blog. Please ask permission before reproducing any of my content. (More on copyright)

Merry Christmas 2013
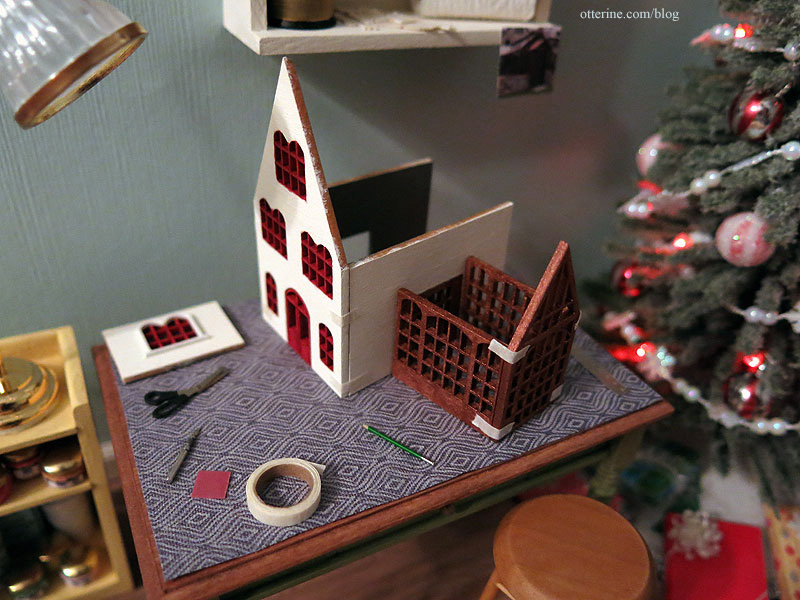
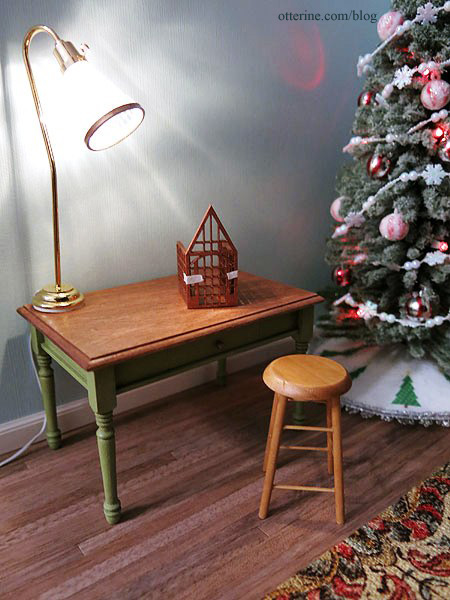
My tiny scene for Hampton House isn’t as complete as I wanted, but with the busy holiday schedule, it was the best I could do.

I started a House of Miniatures cabinet for the wall, leaving off the front doors. This still needs to be sanded and finished.
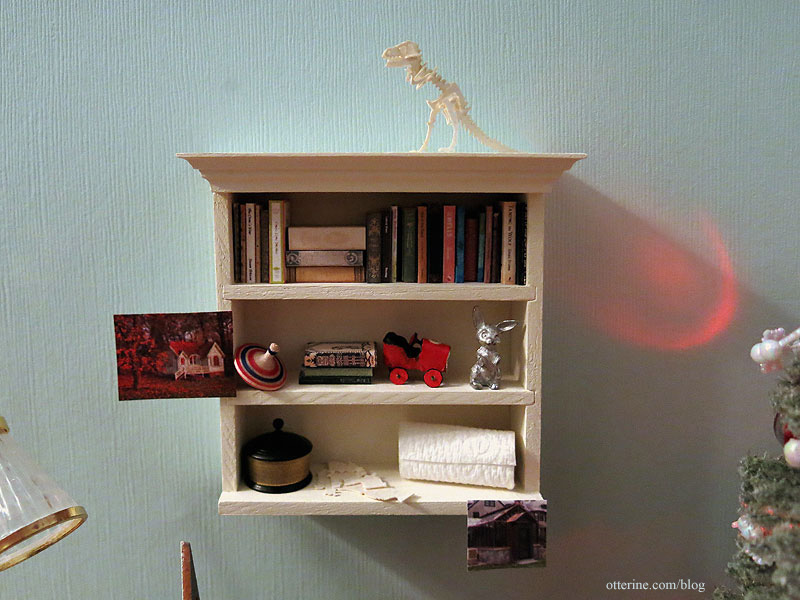
As with many of you, I often have more than one project going at a time. Hence, the partially completed Tinysaur T-Rex.

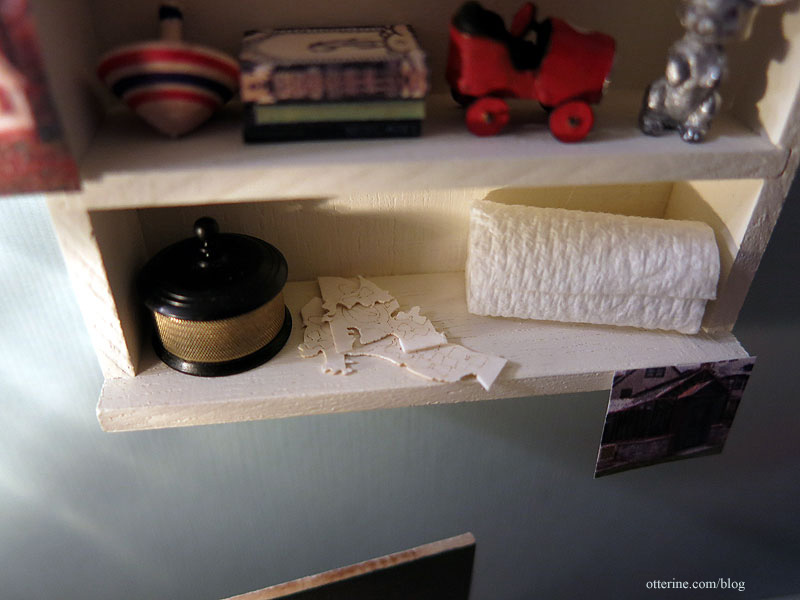
Look at those tiny pieces waiting to be cut from the frame. :D I will post about this project separately. The paper towels are from Lyssa.
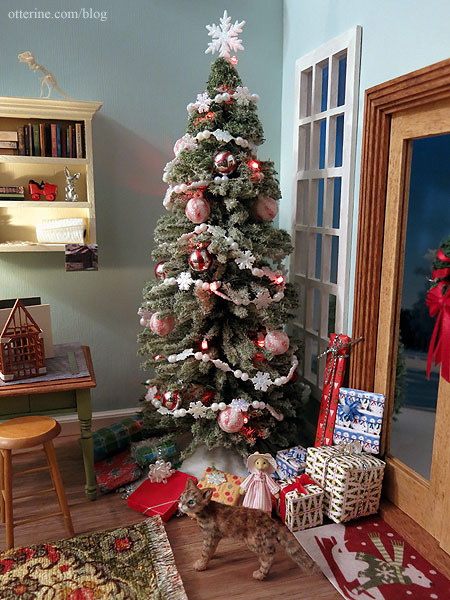
Cora is running around but staying out of trouble…so far. ;]
I made a tiny roll of masking tape for the work table.
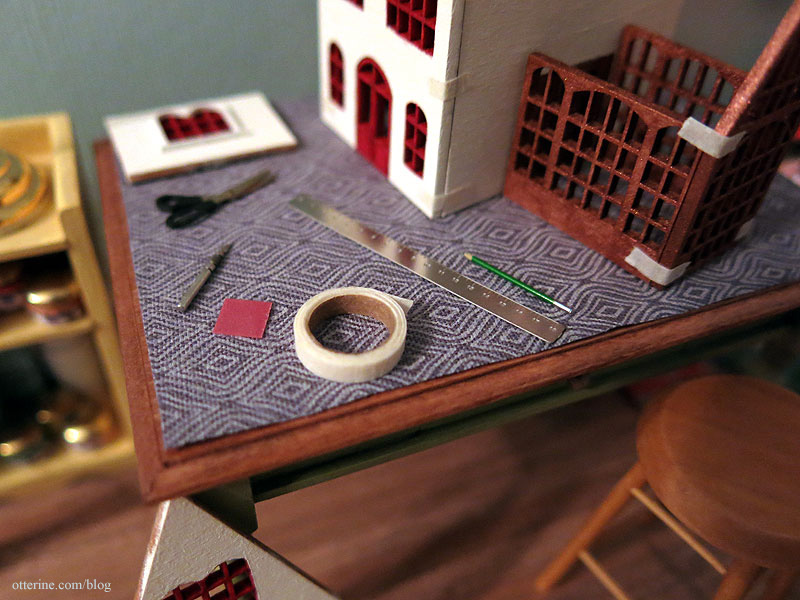
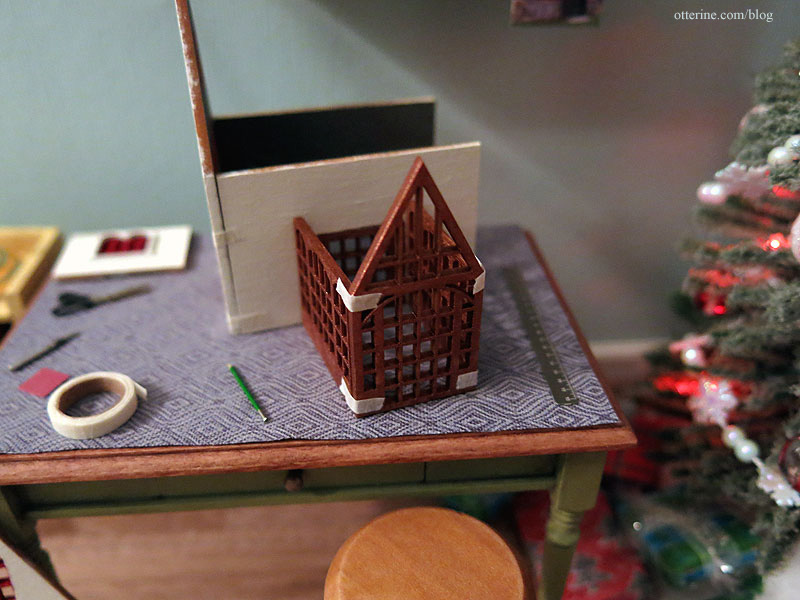
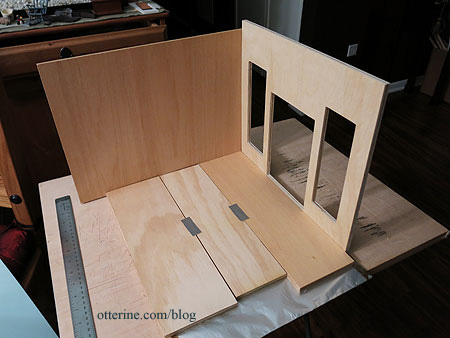
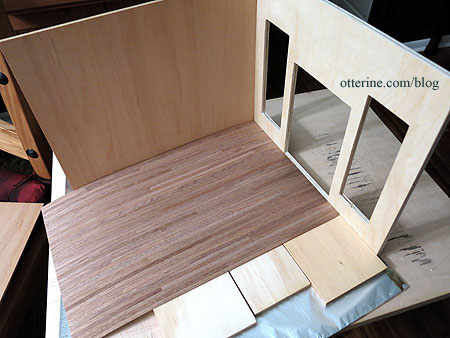
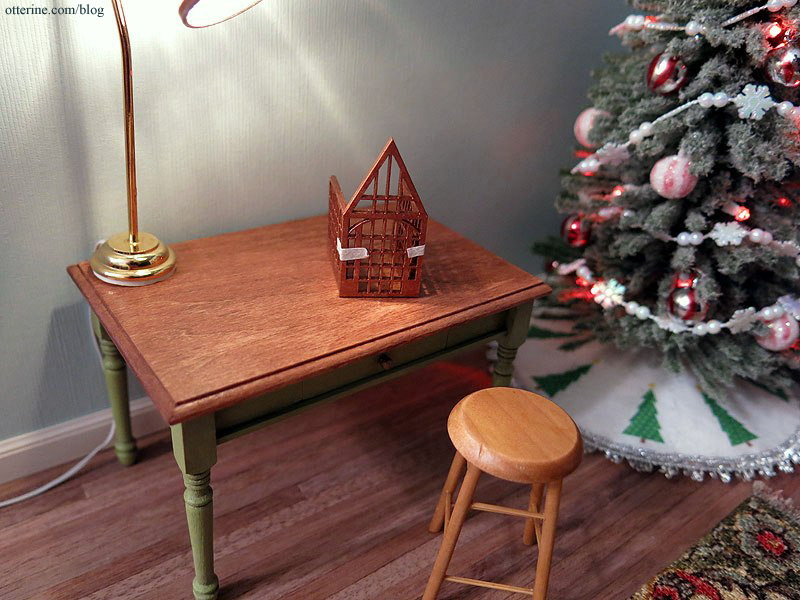
The Hampton House is in a state of dry fit to determine where the greenhouse will sit.
It was not easy getting the tape to stick.
Wishing you all a wonderful Christmas! :D

Categories: Micro Scale Models
December 25, 2013 | 0 commentsHampton House – window trim
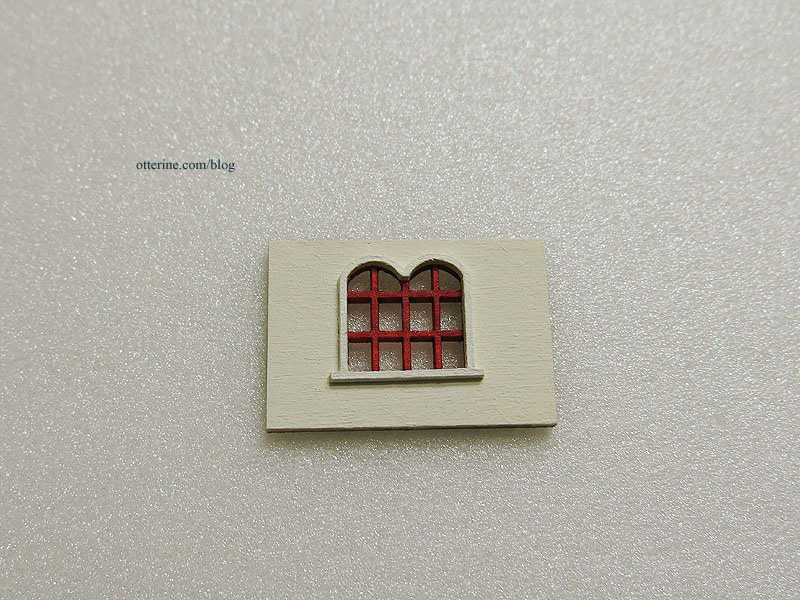
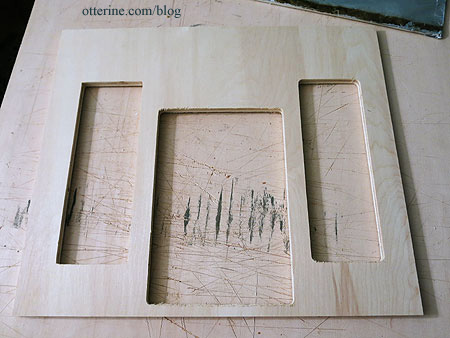
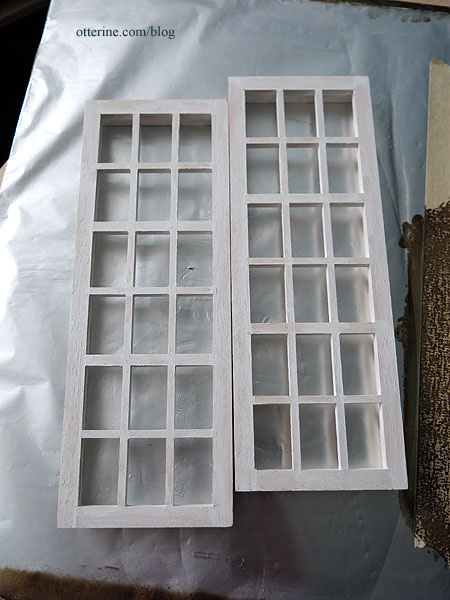
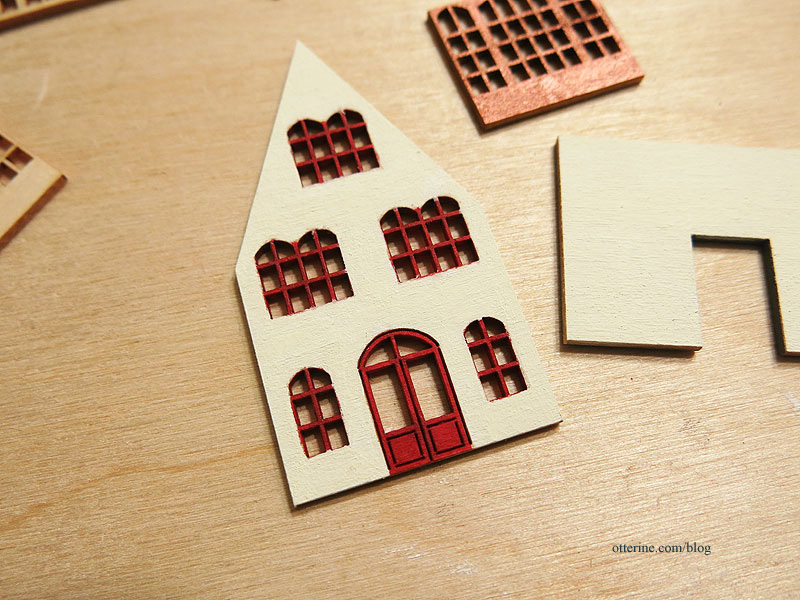
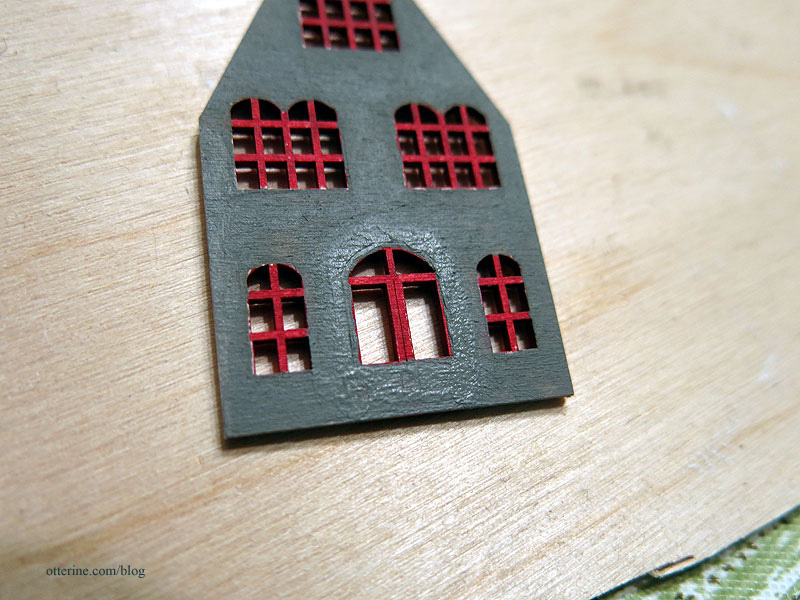
I have the main building pieces painted and ready for the window trim. I used a tiny brush to paint the trim while it was still on the frame. I tried to keep the paint only on the trim because I didn’t want to fuse the trim pieces to the frame or to each other.
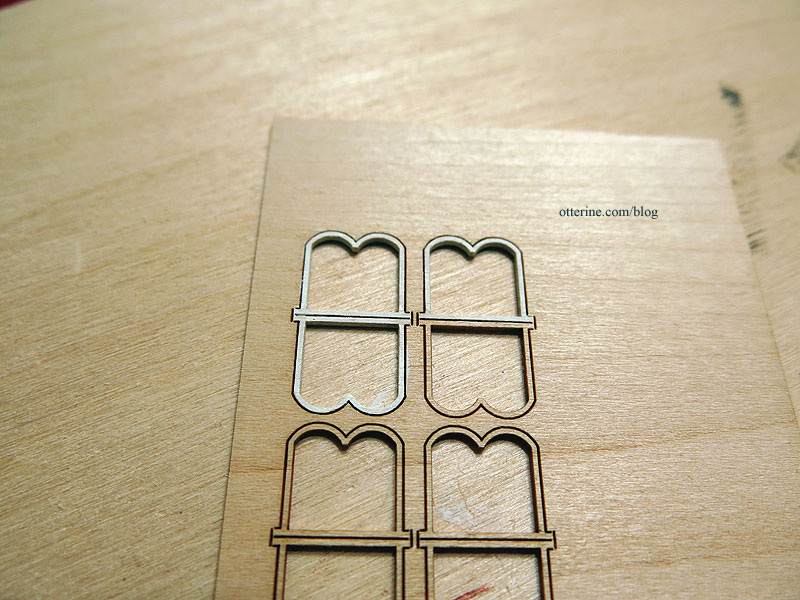
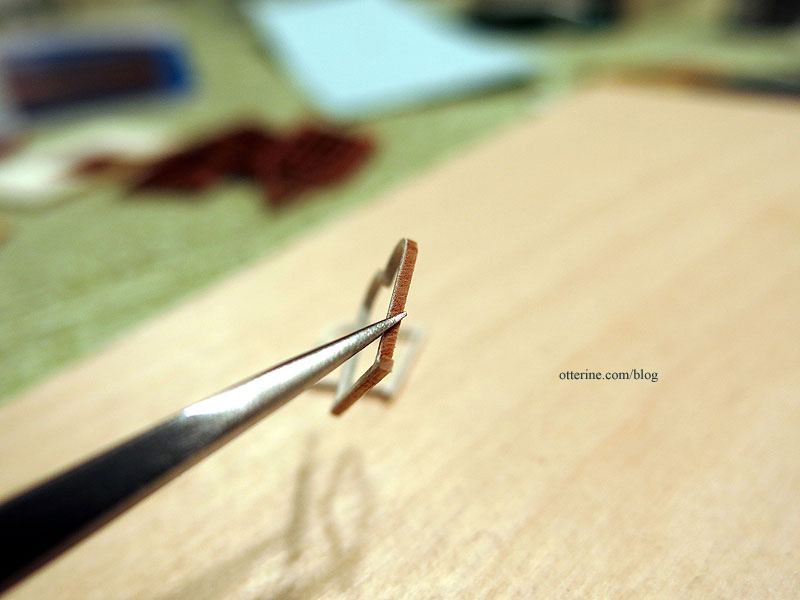
I used a brand new X-Acto blade to clip the trim pieces from the frame. Before I could glue them in place, I needed to paint the remaining edges.
Since I was using such thin layers of paint, the paint dried quickly and I could handle the pieces right away. But, this also caused the paint to coagulate on the brush. I just kept washing the brush as I worked, and that made painting much easier.
Only the tiniest amount of glue was needed to attach the trim. I cleaned away any excess with the tip of the X-Acto blade. The windows have two coats of Warm White which make them a shade brighter than the wall color.
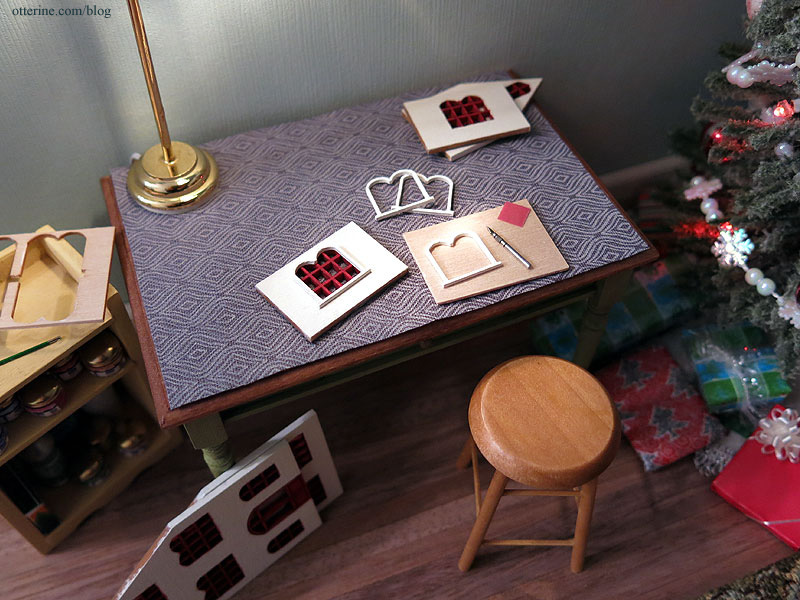
I made a quick tablecloth for the work table and cut a tiny corner of the sandpaper I’m using for the mini scene. I also added presents under the tree. :D
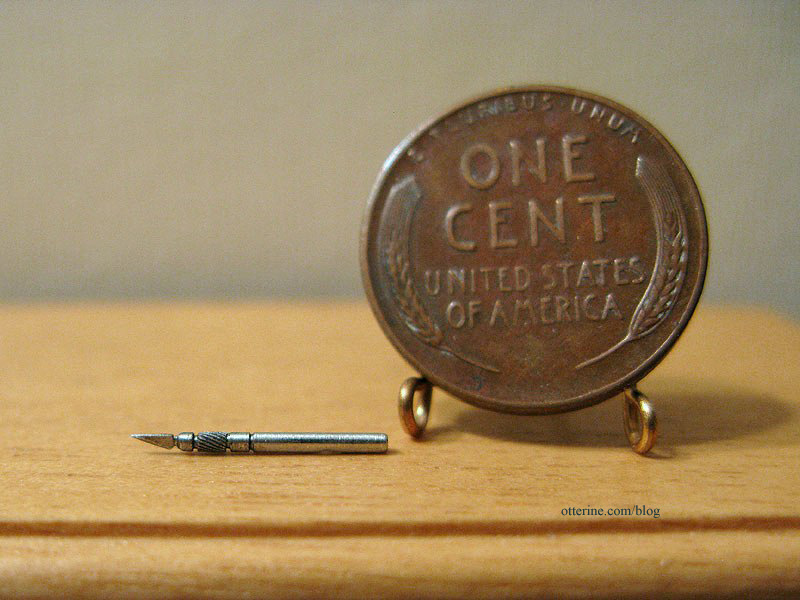
The marvelous mini X-Acto is from Ulus Miniaturas.
I have many more accessories I plan to add to the scene, so I will save the rest for the final Christmas post.
Categories: Micro Scale Models
December 22, 2013 | 0 commentsPrepping the Hampton House work room
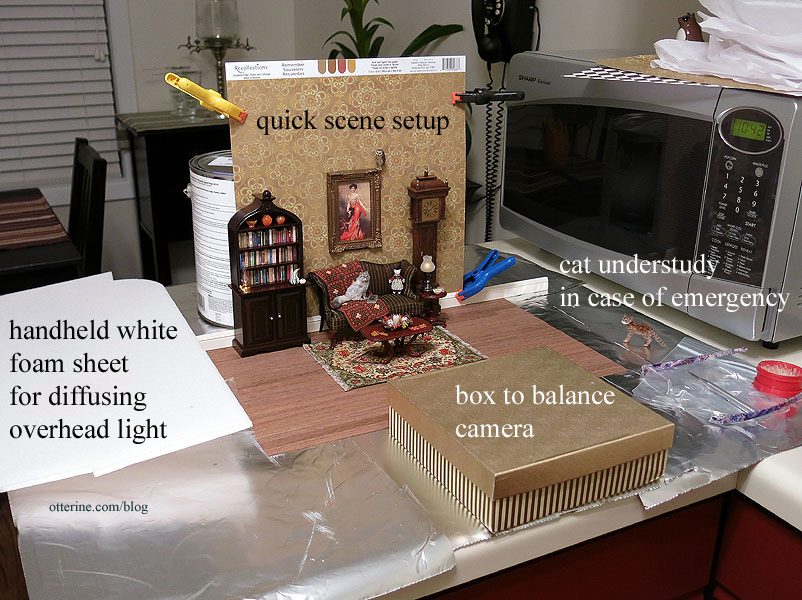
Time to set up the work room for Hampton House. When I set up my fly-by-night scenes, I use a lot of tape in addition to smoke and mirrors. These rooms aren’t meant to be permanent, so the materials I use are quick and plentiful. I don’t use limited papers (unless they are only clipped in place) or spend a lot of time on room design. It just needs to be a box with finishes that will blend into the background.
Here’s my Halloween 2013 scene, for instance. It was set up on the kitchen counter. I used a sheet of unfinished wood flooring, a scrapbook paper sheet clipped to a piece of plywood and held up by a can of paint and miscellaneous miniatures to create the scene. I have a box for balancing the camera in low light for the nighttime photos and a piece of white foam for diffusing the overhead light in normal lighting conditions.
Since I’ll be working on this new scene for a few days, I set it up on a board so I can move it around. For a room with sidewalls, I usually use the pre-cut piece from the Foxhall Conservatory I used to make the Newport garage. Unfortunately, it was one of the few things ruined in the lightning strike, but I have the front board from that kit as well as the windows. I could cut a new board, but this will work for now.
The windows have only a coat of primer, so perhaps I should take some time to finish them eventually. :D
I need one side wall for this setup, so I used duct tape to attach another spare board for better stability without permanence. I didn’t have a large 3/8″ thick board for the floor, so I used three smaller scraps.
I taped an unfinished flooring sheet in place since I don’t have any finished ones awaiting installation.
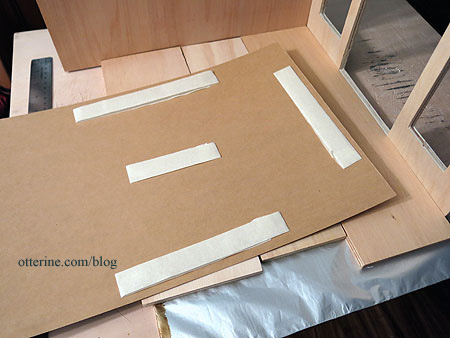
I use common cardstock paper in a neutral color when I cut for my temporary scenes. It’s replaceable after use, though I do try to keep it for future scenes if I can. I use double-sided tape to keep it in place.
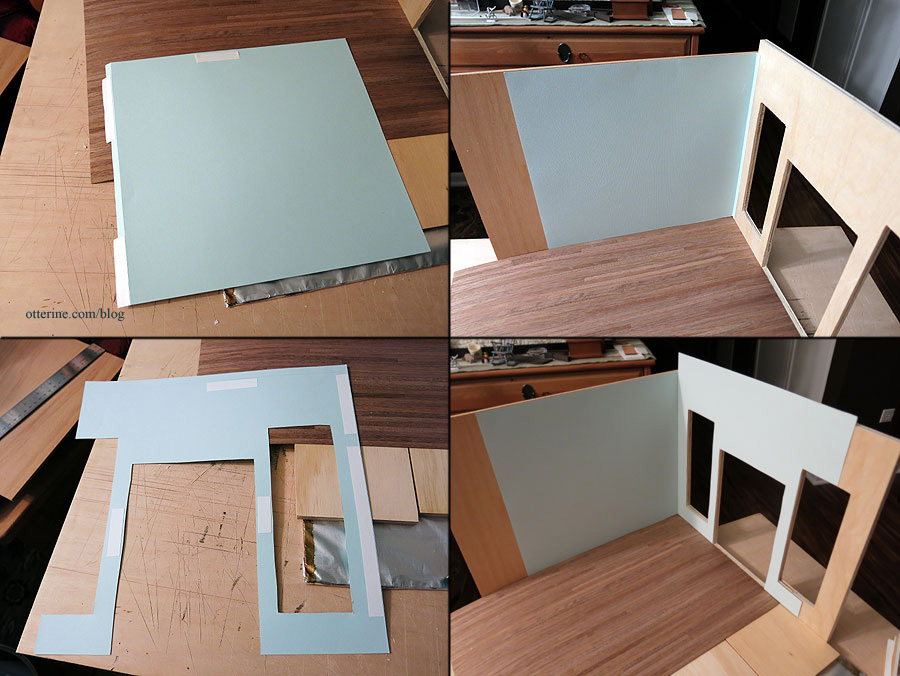
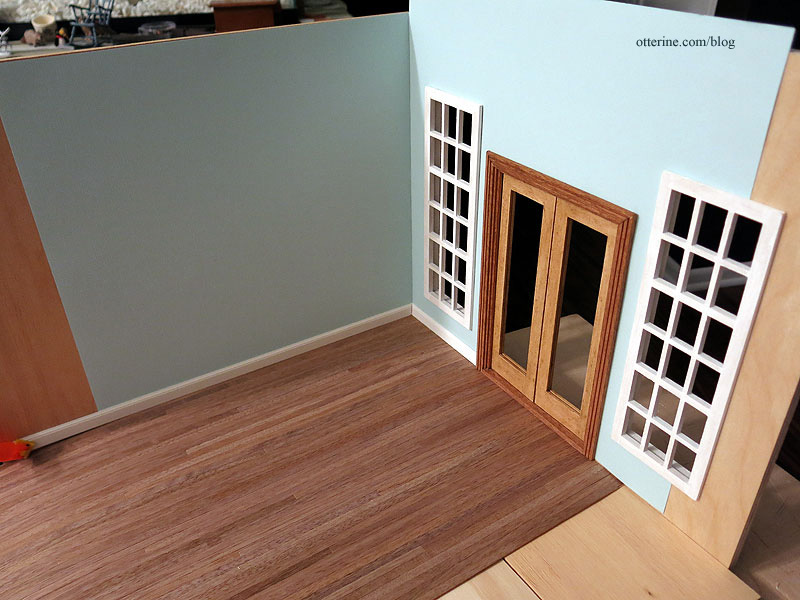
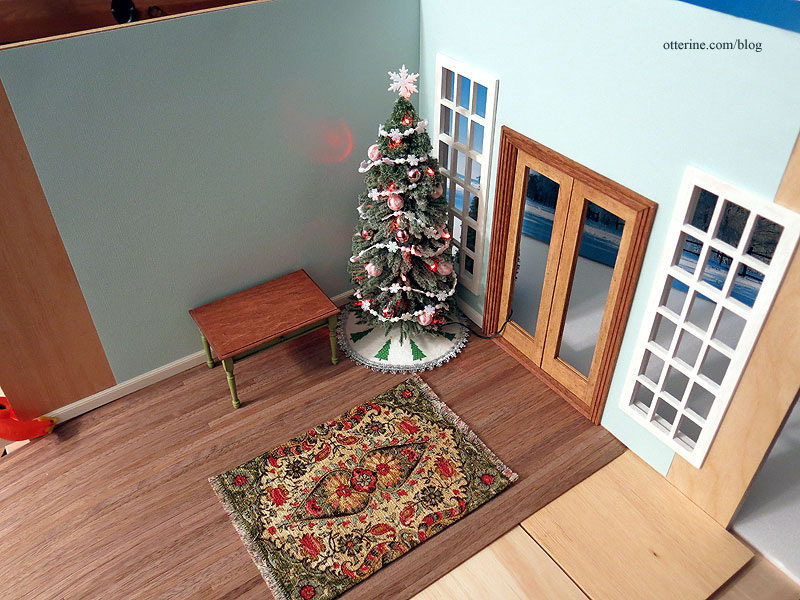
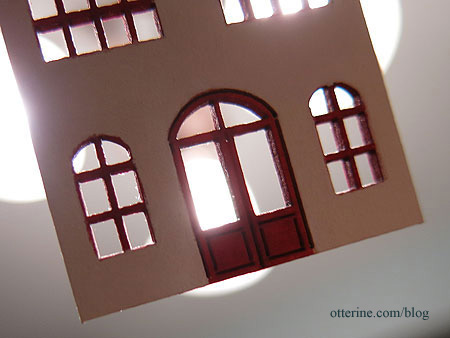
I install the windows backwards so I don’t have to worry about interior trim. I don’t have a double French door painted white, but I have one stained for the Chalet. I just hope it doesn’t offend anyone’s sensibilities to have white trim throughout, except for the door. I put the “glass” in the corner window but left it out of the door and far window. I happen to have some finished baseboard pieces, so I used mini hold wax and a clip to keep those in place.
To fill in the view through the windows and door, I placed a scrap of white foam on the work board to simulate a snowy ground. I added a smaller Lemax tree that I bought to decorate for the Heritage…looks like that won’t be happening this year. It’s a nice stand-in for an exterior tree seen through the window. I propped up my scene board with a printout of Winter Landscape and Trees by Icefront that I found on Crestock.com. I will try to find a new scene for this set-up, but this is the only winter one I have on hand.
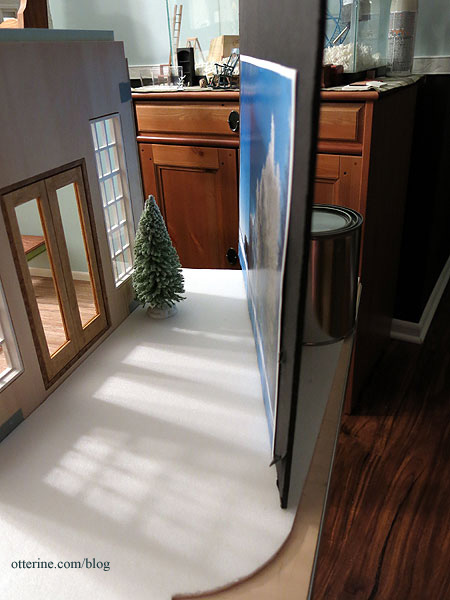
My decorated tree has lights operated by a large battery box. The rug is from Dale’s Dreams.
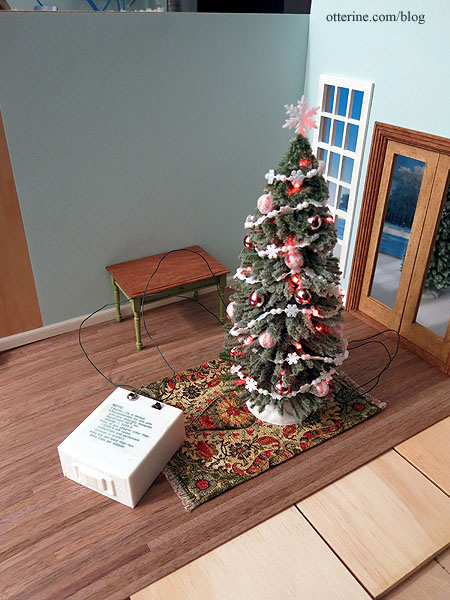
I set the tree in the corner and pulled the battery box through the door and around the solid side wall out of sight.
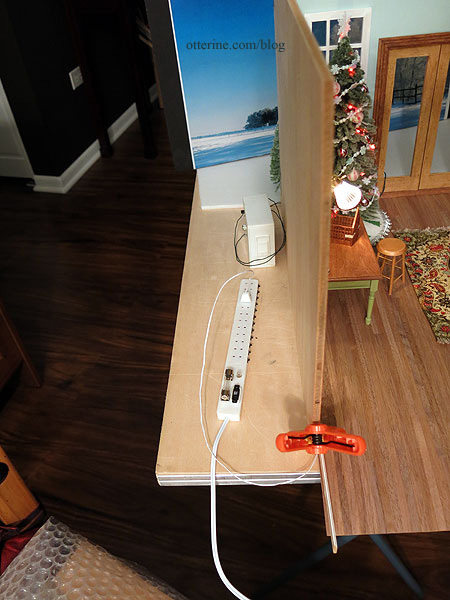
Now we’re getting somewhere! How to hide the wire going out the door? Two options…PhotoShop or a really huge present! :D

I tried out a work lamp (this is the lovely lamp Monique sent to me). The cord can exit stage left.
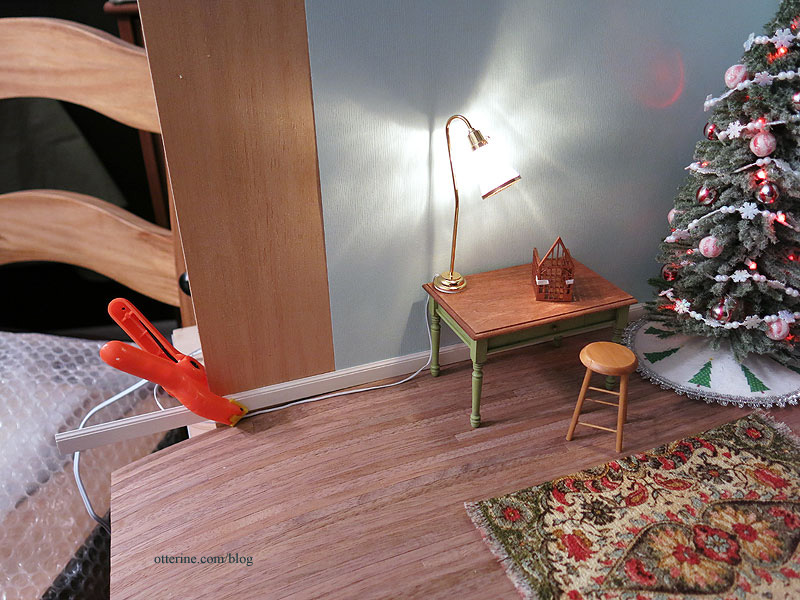
Both the power strip and the tree battery box are behind the scenes.
While I do love this lamp, I think it is going to glare too much for the scene. I’ll dig through my stash of lights to see what I have or I could whip up a new shade for it.
I have most of the Hampton House pieces painted. Soon it will be time for assembly. :]
Categories: Micro Scale Models
December 21, 2013 | 0 commentsHampton House – inspiration and painting
As I was trying to decide on colors and style direction for the tiny Hampton House, I found this lovely autumn photograph. It’s all over the internet, so the original source is impossible to guess. I was drawn to the red window panes especially.

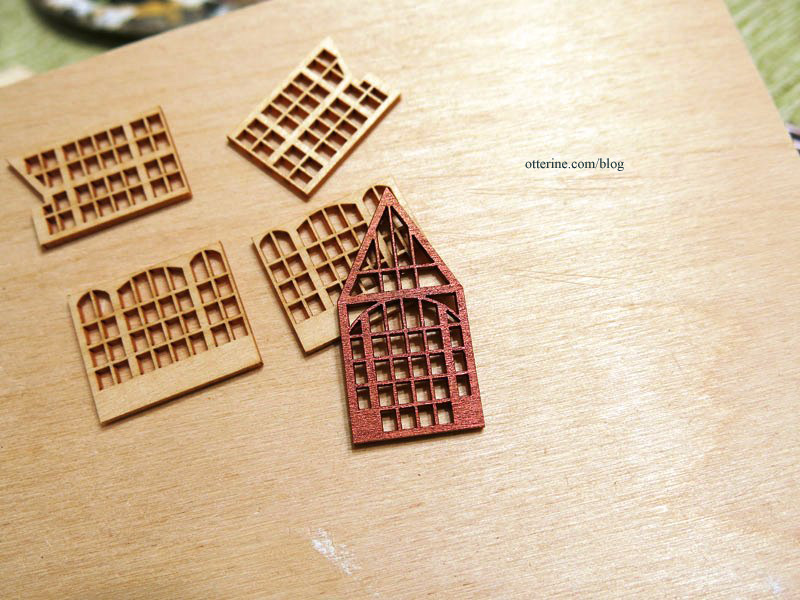
I started with the window panes, painting them Alizarin Crimson by Americana. I’ve been told it’s easier to paint these tiny pieces while they are still attached to the frames, but with laser cut pieces, they often come apart easily. Good for keeping damage to a minimum but bad if you want them to have more stability for painting. Ah, well. I’ve dealt with warped boards before.
As an aside, I’m not doing a whole lot of sanding on these pieces…just a little as needed to remove the tags where the pieces were connected and to tone down the browned edges that I want to paint in lighter colors. I bought some Testors sanding films.
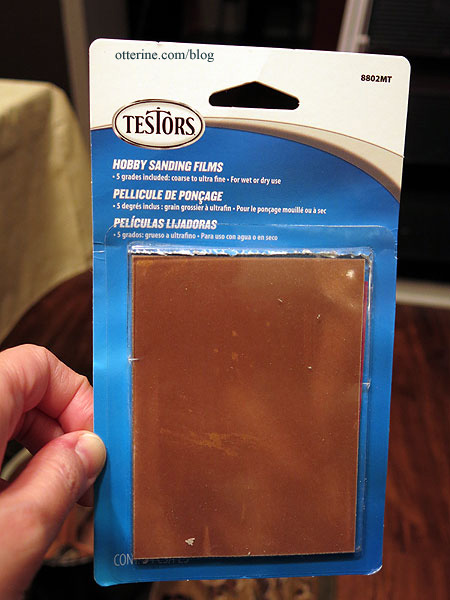
These are super thin and range from 150 to 600 in a single pack. I used the 600 on the surface of the pieces to remove any stray fibers.

For the exterior, I started with a coat of Warm White by Americana. I stippled the paint on instead of brushing it so the surface would have a subtle texture.

The color was rather stark in this scale, so I did the second coat Vintage White by Folk Art. This second color would have been too yellow on its own. Together, they make for a wonderful, vivid off white. Apparently, white chocolate and red velvet are my colors this year.
I painted the interior pieces Neutral Grey by Americana. I want the light to glow through the windows not light up the whole structure inside. Also, painting the backs helps keep the boards from warping as the fronts are painted.
Around the door on the interior, I painted some heavy layers to fill in the tiny gap that was allowing light to pass through. I might not use the front portico, so I wanted the door to appear solid.
No more draft! :D
The greenhouse will be painted Worn Penny by DecoArt. What a lovely color. I’ve always like the look of copper colored greenhouses.
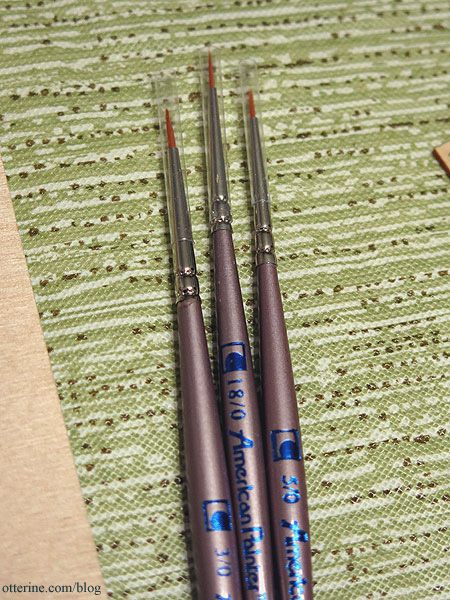
I already had these brushes in my stash.

But, Michaels had a 30% off coupon for today only, so I went and picked up three more tiny brushes: 3/0, 5/0 and 18/0. Most of the window sections are less than 1/8″ wide. It’s so much easier to paint with the right tools!
Categories: Micro Scale Models
December 20, 2013 | 0 commentsHampton House – the beginning
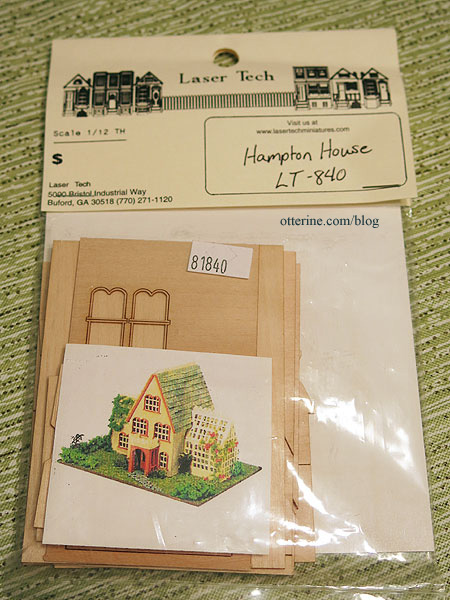
I bought the 1:144 scale the Hampton House a couple of years ago, and this will be my first foray into teeny weeny scale.

photo from miniatures.com website I plan to take my time with it, so I don’t intend to finish it in the next few days before Christmas. But, I’d like to make a holiday scene as I usually do, so I will incorporate the beginning stages in that scene. I’ve always liked the dollhouse for a dollhouse concept. My Christmas scene will be a dollhouse in progress for Christmas, so I can get as far as I do in the next few days and it will fit right in.
Hampton House is an enclosed structure, so I won’t worry about decorating the interior this time around. I would like to have it lighted, though. I bought LEDs and battery switches from true2scale at the Bishop Show this past year, so I’ll use one of those.

Here are two great examples of this house by EmmyNHiros and Yuri Munakata. Both artists transformed the kit into an open dollhouse with interior décor.
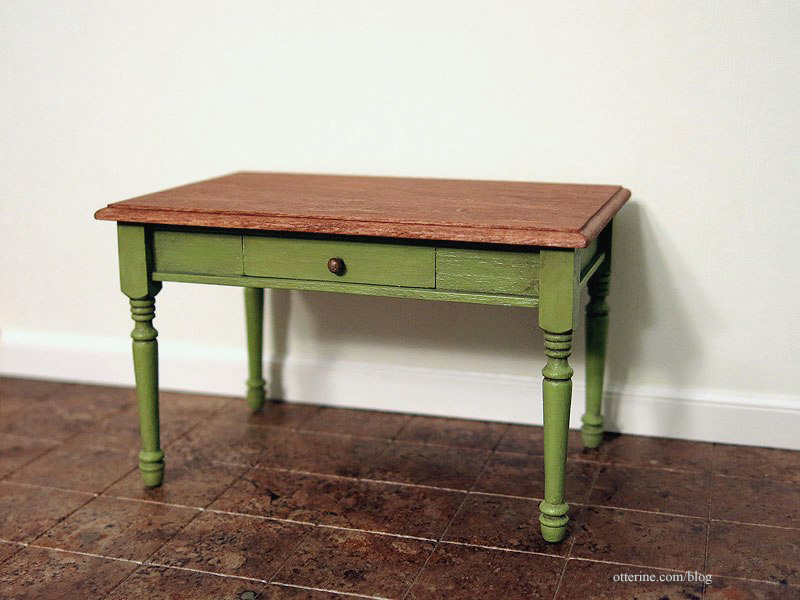
I’m starting my scene with a work table made from the Country Collection II Kitchen Table by B.H. Miniatures. I picked up three of these in a recent eBay auction, along with a few other B.H. Miniatures kits. The tabletop measures 2.5″ x 4″, so it will make for a great work table and maybe a final display table.
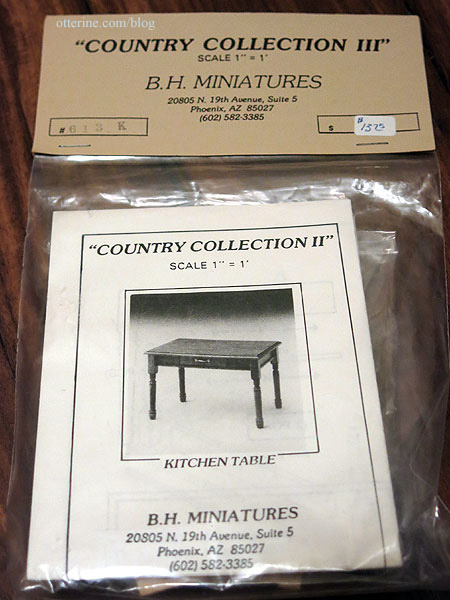
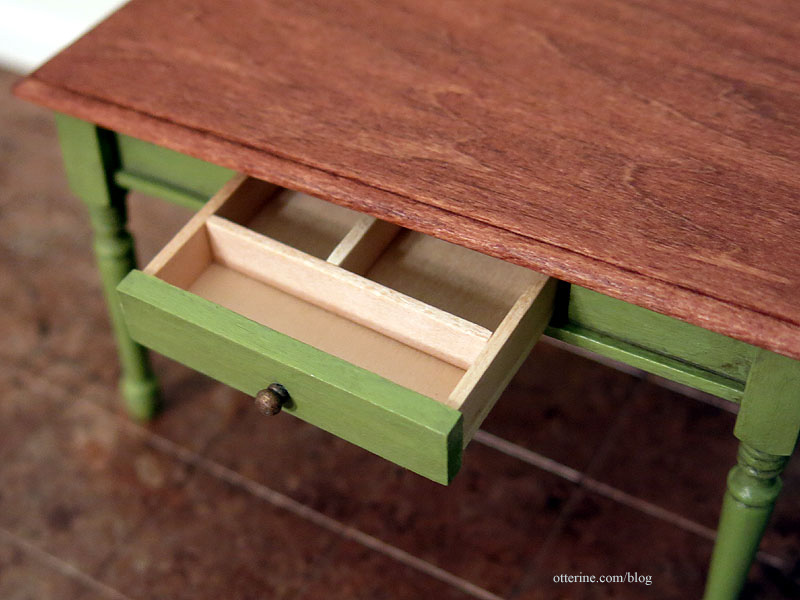
I chose Minwax Cherry to stain the top and painted the base an aged green, fitting for a country table.
I didn’t use all of the wood pieces to divide the drawer since I have an idea of what I’d like to house here. The original kit was meant to hold silverware, I imagine.
I opened the Hampton House kit to have a looksee.
The structure is larger than I expected so this table might not work for display long term. Hmm…no biggie…I love the table and can always find a home for it. :D

Categories: Furniture, Micro Scale Models
December 19, 2013 | 0 comments
NOTE: All content on otterine.com is copyrighted and may not be reproduced in part or in whole. It takes a lot of time and effort to write and photograph for my blog. Please ask permission before reproducing any of my content. (More on copyright)