

Spooky Hollow – Halloween 2022
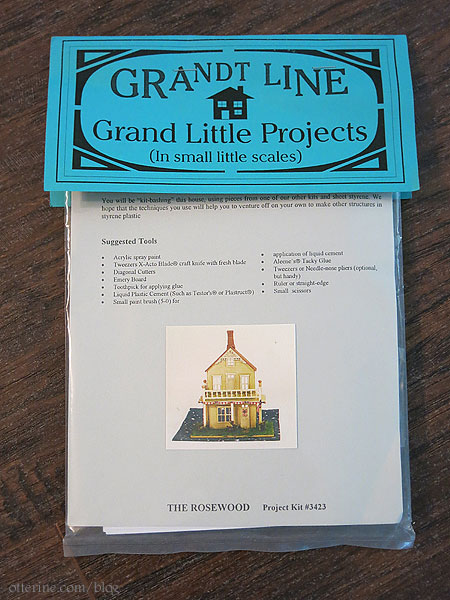
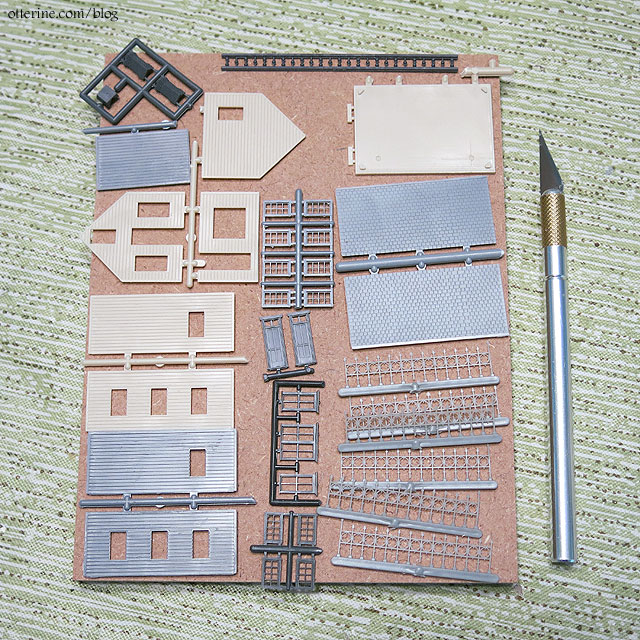
A couple of years ago, I started looking for a Grandt Line Spooky Hollow kit. While Grandt Line products are still around, these specialized kit bashing ensembles were apparently a limited run. Here is the kit photo. The project is N scale (1:160), which correlates to 1:144 scale or “dollhouse for a dollhouse” scale very well.
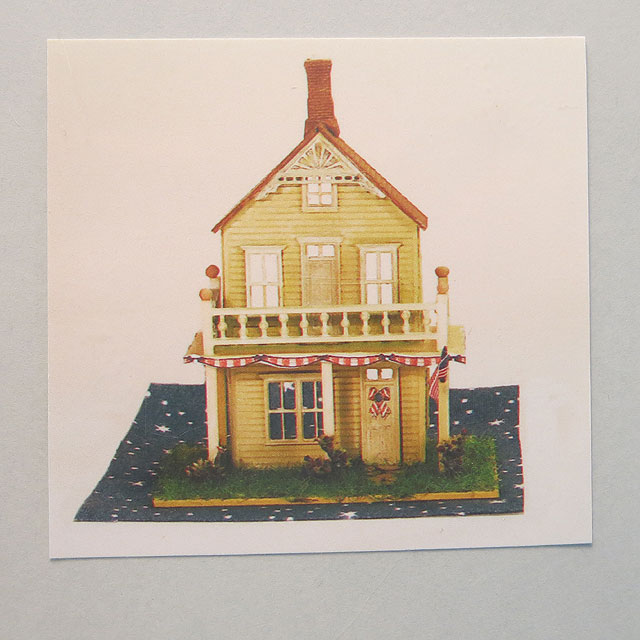
A friend made one awhile back and recognized that another kit was very similar in design. Rosewood Cottage is also one of the limited run kits, but I was able to find one at a good price.
Unfortunately, it had different parts and was made as an open back house opposed to a long side opening house.
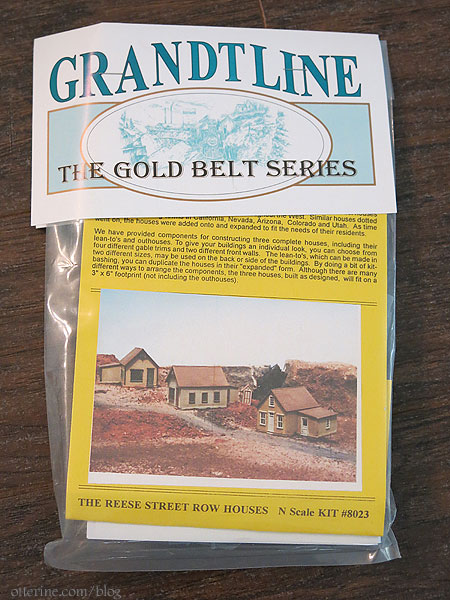
But, the instructions included a parts list that led me to find additional parts to make what I wanted. A huge thank you to San Juan Details for shipping me the Reese Street Row Houses kit so quickly.
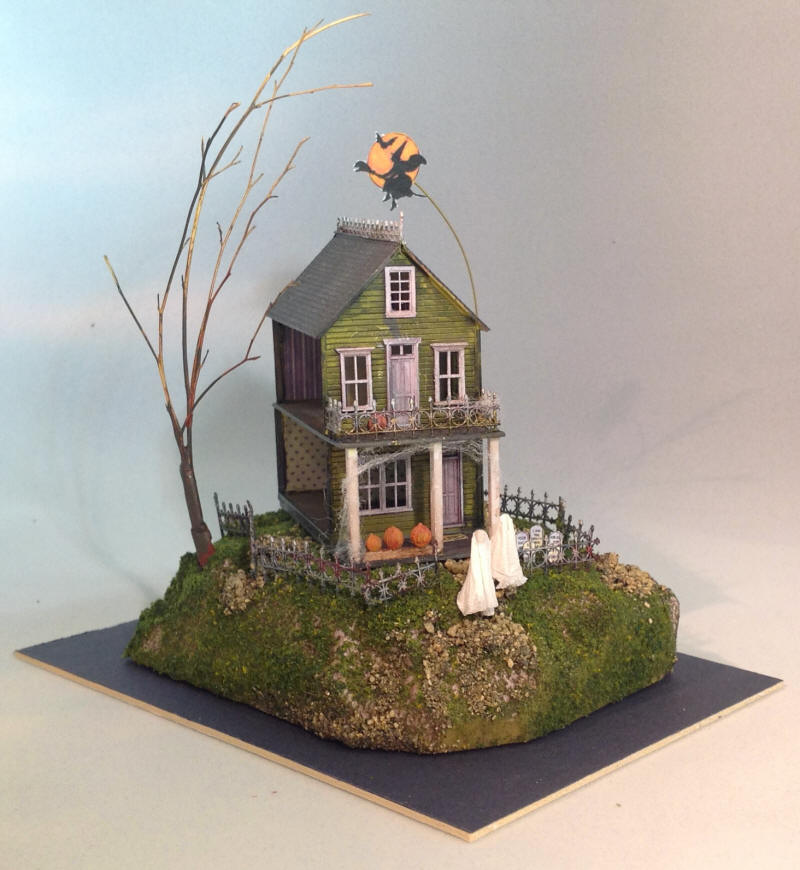
With all the parts now in hand, I could start making my own Spooky Hollow.
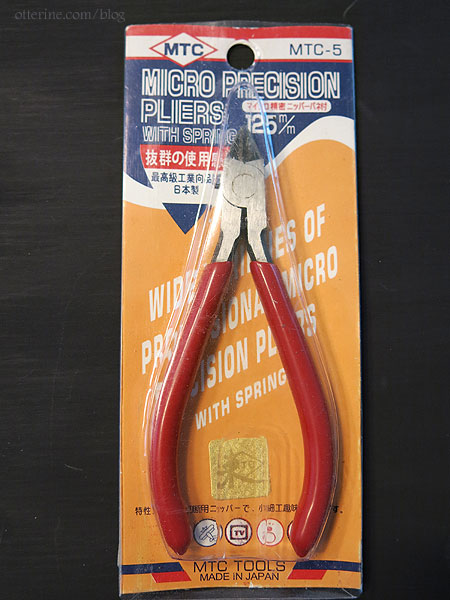
These MTC Tools Micro Precision Pliers are a lifesaver for snipping tiny and delicate parts.
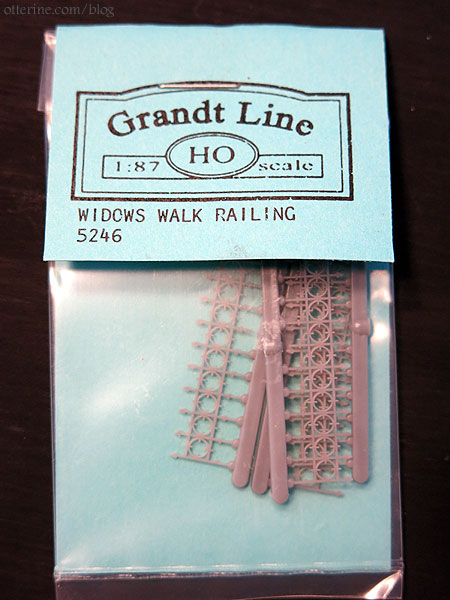
I bought the Grandt Line widow’s walk in HO scale to accent the build as well.
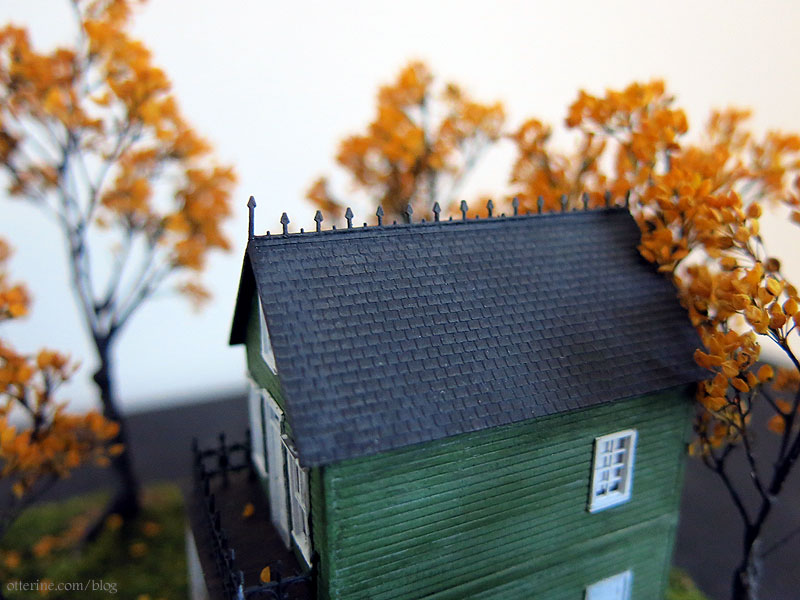
The widow’s walk on my house is just the very top of the molded part. It was a test of wills to get it to glue on straight and secure.
To finish the balcony and porch, I used some leftover adhesive backed micro wood from the Model T Van I built several years ago. In the end, the porch posts ended up a little wonky, but it’s an old, haunted house. I cut down more of the widow’s walk to make the balcony railing.
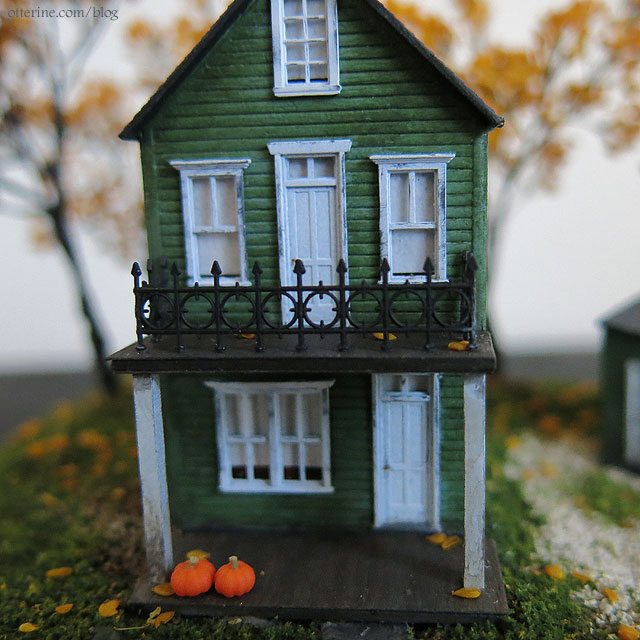
I used spray paint in moss green for the exterior, later adding some aging with acrylic paints for dimension. The windows and doors are primed in grey, then sprayed flat white.
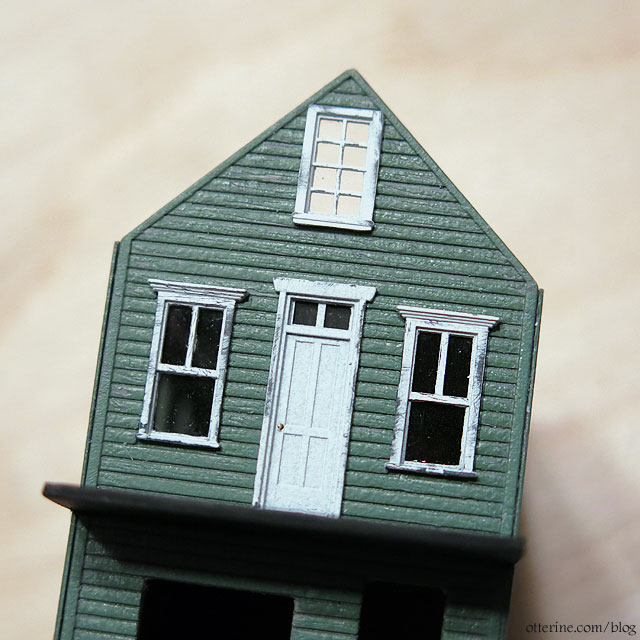
A little sanding brings forth the grey and adds a bit of age. Cutting, fitting and gluing the acetate film for the glass was an adventure. I used Testors clear parts cement, which made a bit of a mess. Good thing dirty windows are fitting for an old house.

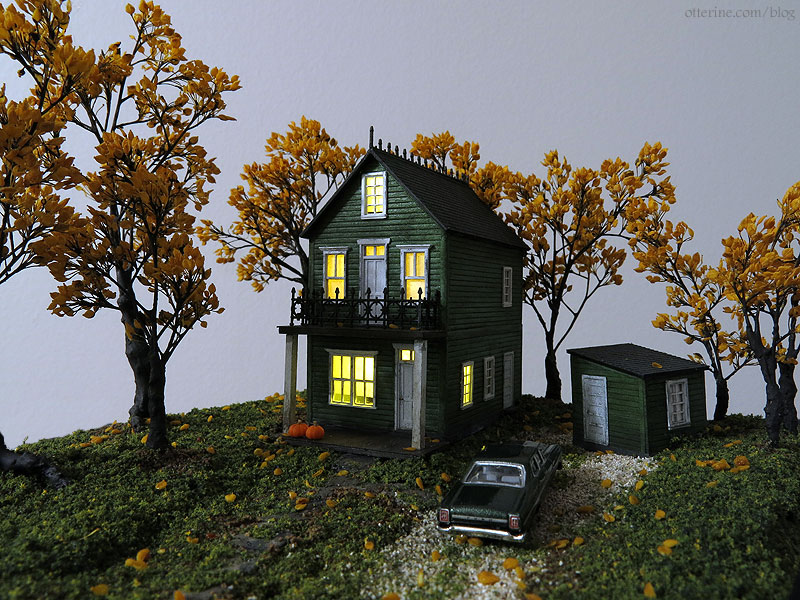
The LEDs are pico 3V in warm white from Evan Designs. I used some Gallery Glass paint to tone down the brightness, going for a warm glow on a chilly autumn evening.
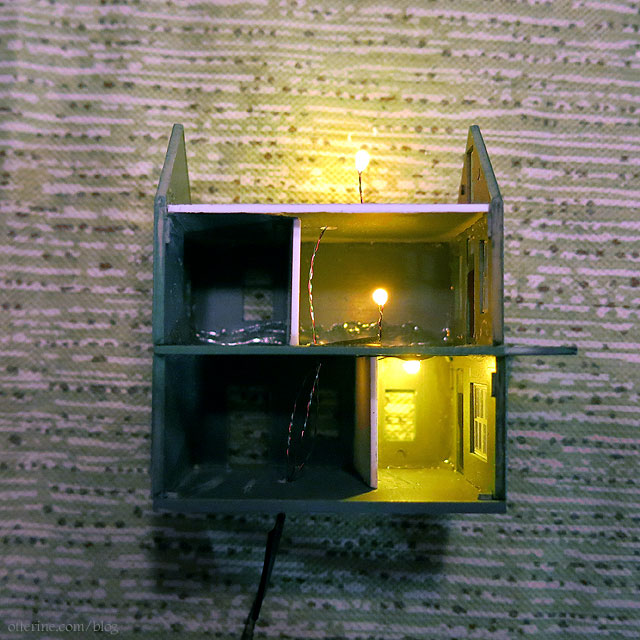
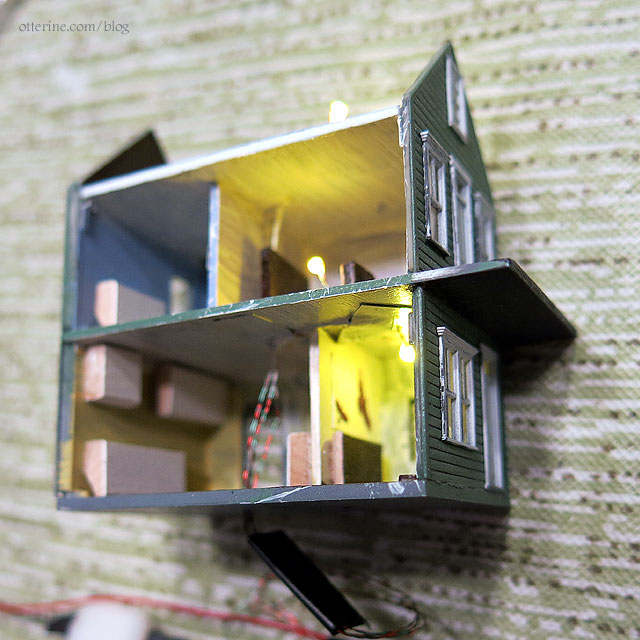
Since I would be adding LED lighting, I chose to enclose my tiny house. Once I had the lights in place and tested the look, I realized I needed to add paper shades to the windows or I would have to finish the interior. It’s rather amazing how much you can see through the tiny windows.
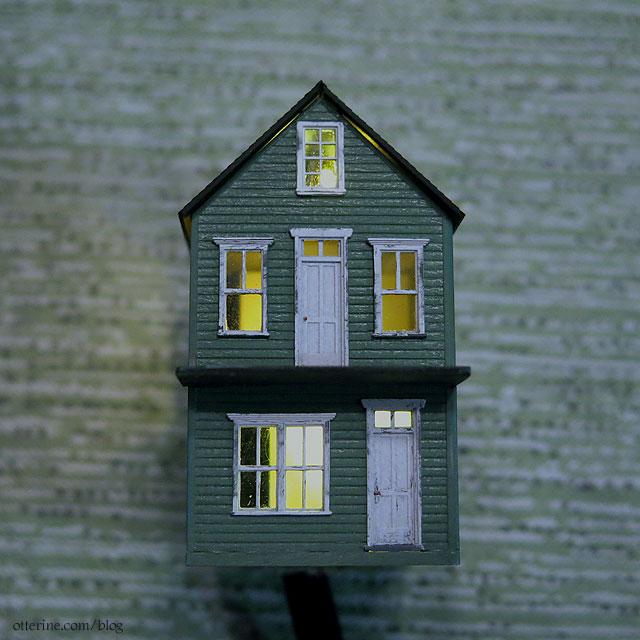
I painted the interior very roughly with acrylic paints and added some scraps of wood to represent furniture. The colors and shapes add dimension in reflected hues and shadows behind the thin window shades, some of which have a small gap at the bottom to allow you to almost peek inside. I even added some bird artwork on the foyer wall. You can discern it with the naked eye, but the camera doesn’t capture it well.
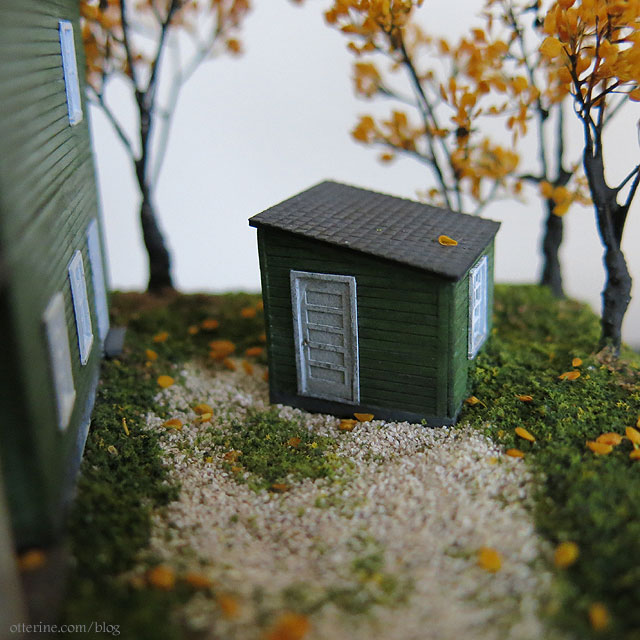
Since I had more than enough parts from the Reese Street kit, I made a matching shed.
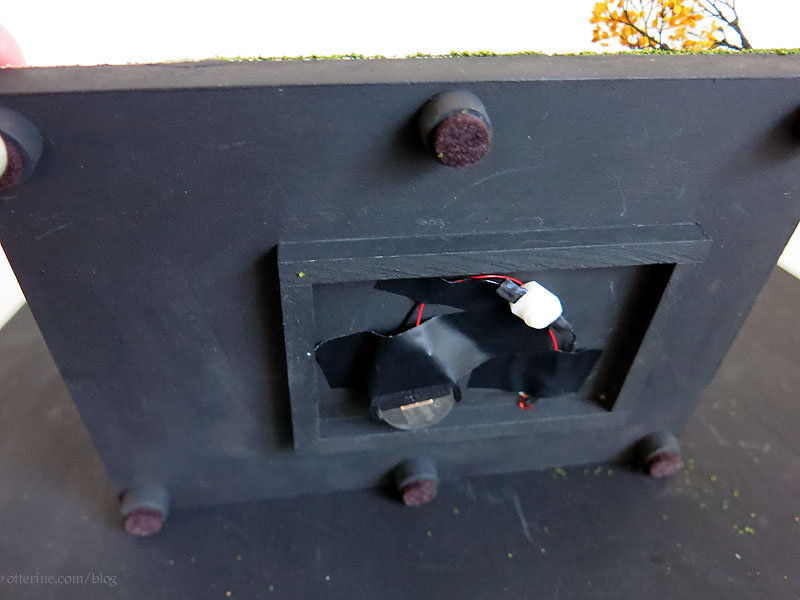
The base is a scrap of mdf with feet added so I could add a battery and switch underneath. I made a box from strip wood to disguise the battery, switch and excess wiring.
The trees are made using candytuft from Scenery Solutions. These are the same process I use for my large trees, using Durham’s Water Putty to build the trunks.

The landscaping was built up using thin sheets of styrofoam, including a stone walkway from the porch to the gravel driveway and road. Stucco patch applied unevenly over the styrofoam adds dimension to the landscape.
I used Woodland Scenics foliage, ballast and gravel, held in place by their Scenic Cement. I sprinkled some loose candytuft leaves on the ground as well.
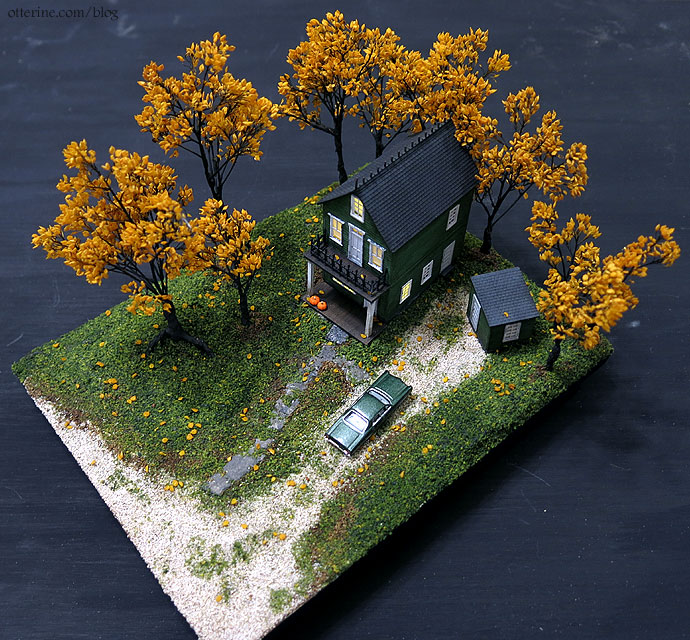
The tiny pumpkins were made by Kyle Lefort.

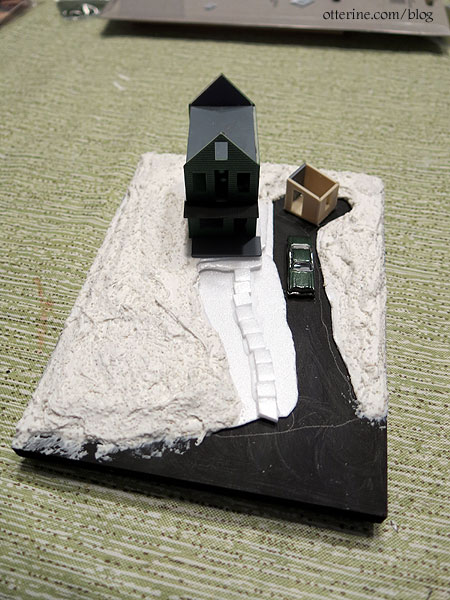
The car is a 1967 Ford Galaxie Custom 500 by Classic Metal Works. I ran across this when I was seeking small autos for the A-frame. I didn’t know then why I would need a Batmobile for the A-frame, but now I know it was meant to live at Sleepy Hollow.
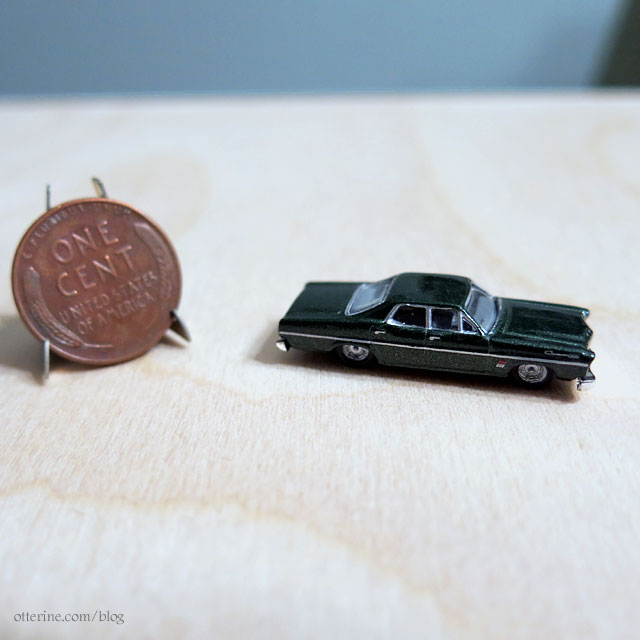
And, now to put the size in perspective….
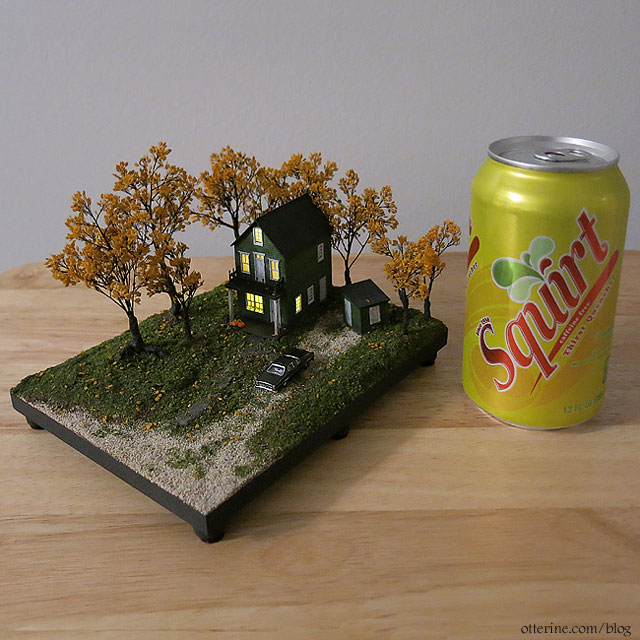
Happy Halloween, everyone! :D
Categories: Micro Scale Models
November 5, 2022 | 0 commentsRiverwood Cabin – colors and prep
Starting work on Riverwood Cabin. After viewing a lot of landscaping videos, I’ve decided it’s better for me to build the house first then do the landscaping to fit. I found this great inspiration house online. I love the colors and the water’s edge landscaping. I won’t be copying directly, like adding a chimney or making a bigger deck, but it gives me a good starting point for a color scheme and landscaping ideas.
Planning ahead, I bought shingles from Ultimatetrains. The kit shingles are printed and good quality, but I wanted to try true texture.
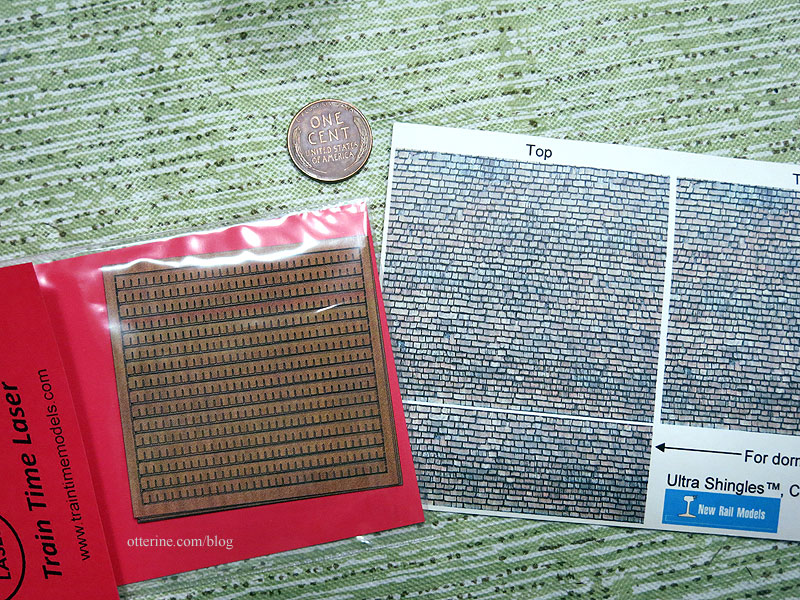
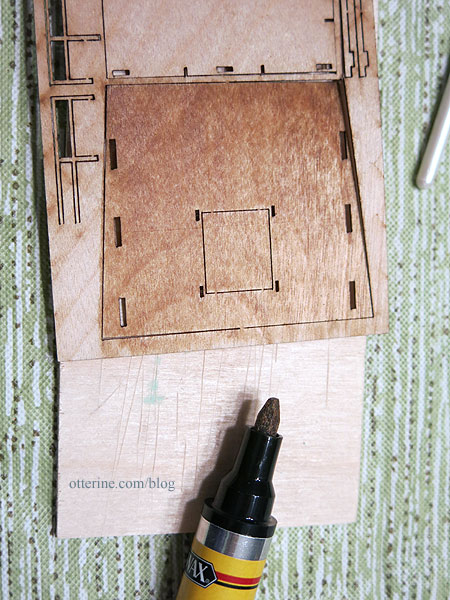
The kit manufacturer has included guide marks for shingle strips if you happen to buy them as a supplement to the kit, which is just awesome. :D Less prep work is always awesome.
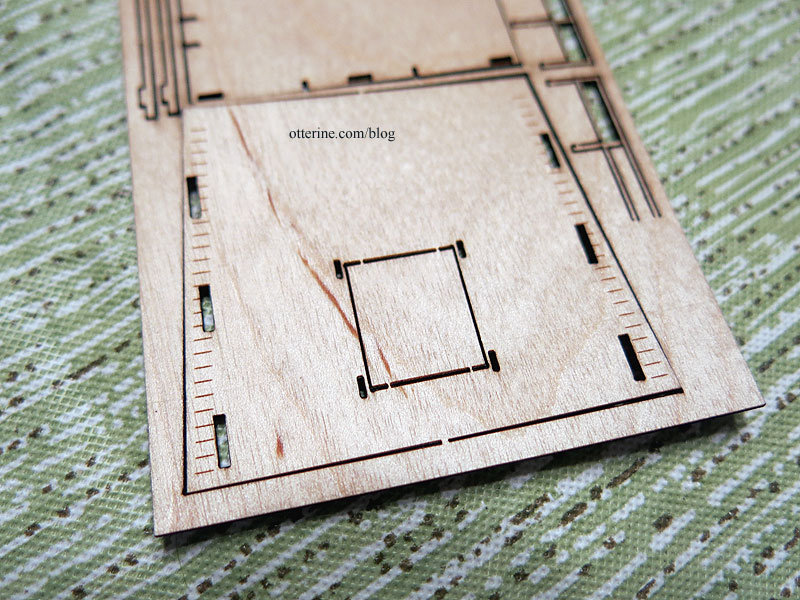
The patio is pretty warped on the frame. I foresee the use of many magic words in my future as I assemble that part. After I get it painted, I’ll press this and any other parts for a few days to see if I can get them flattened a bit more.
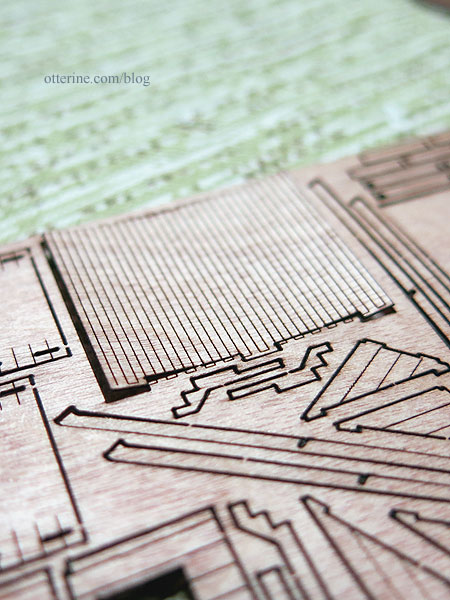
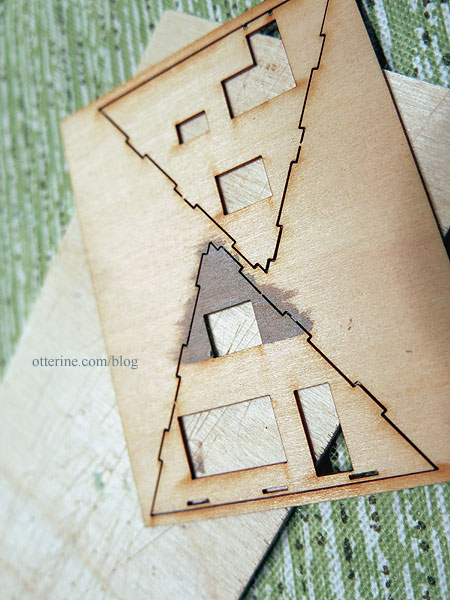
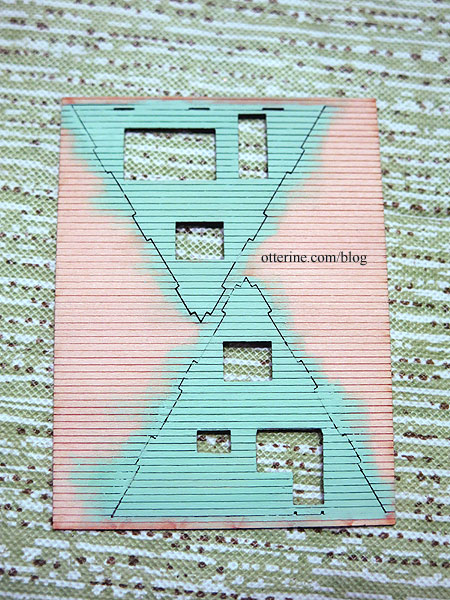
The instructions indicate that painting and staining work better before assembly, so I am going to start there. For the front and back siding, I’ve chosen Villa Green by Folk Art. Paint has to be applied in thin layers to keep the thin wood from warping.
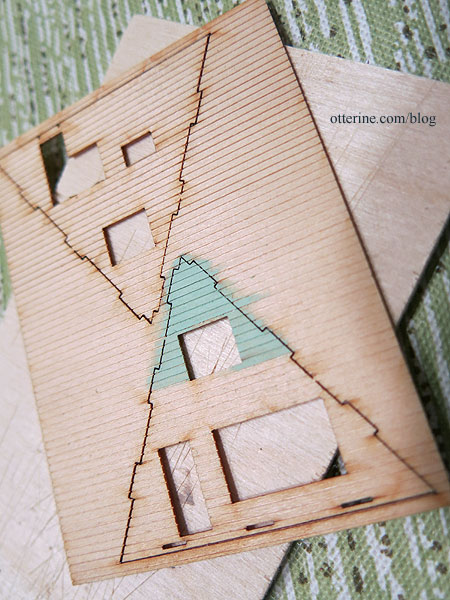
I would apply paint on a portion and then flip over to paint the other side. This kept the warping under control. There is an interior second floor that adds stability and a more realistic interior view. I’d also like to add some LED lighting to the interior. I painted the interior front and back Battleship by Americana so the light will glow through the windows and not light up the whole structure inside.
It’s a lovely teal/seafoam mix. Since it’s just the front and back, I didn’t think the brighter color would overwhelm.
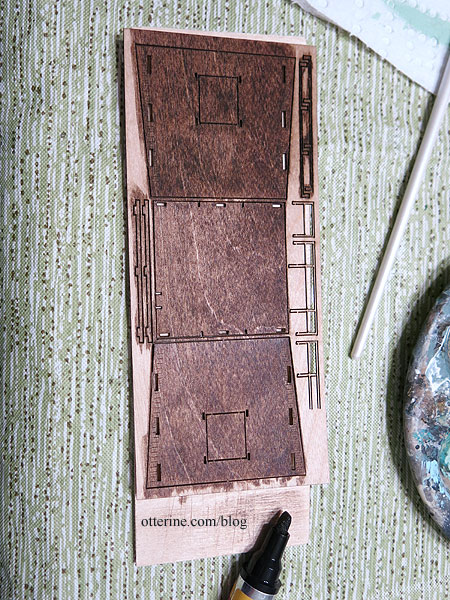
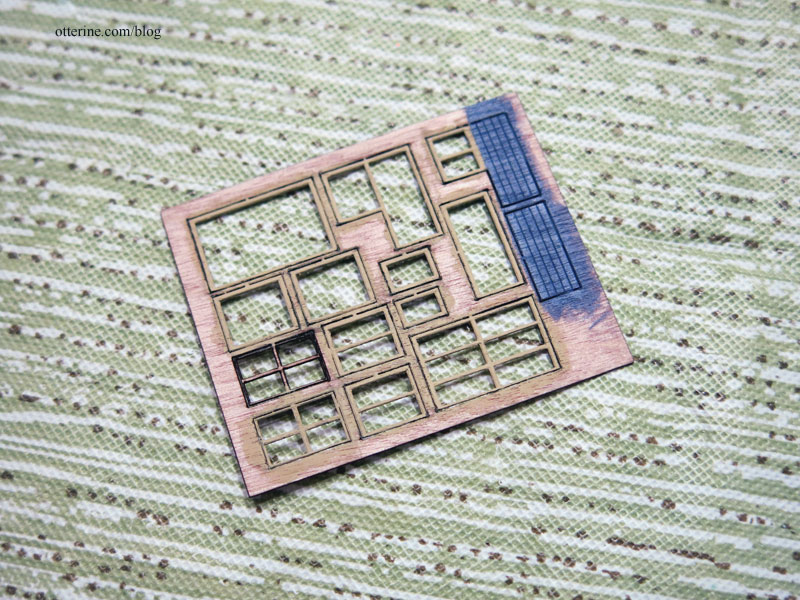
I stained some of the pieces using Minwax Staining Pens.
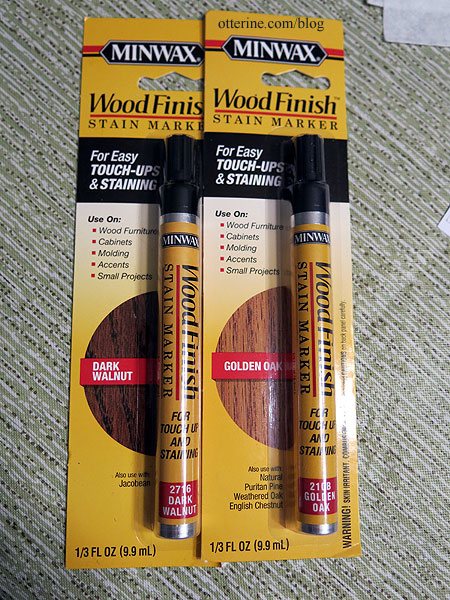
The exterior roof pieces, floors and lower floor supports are dark walnut.
The interior roof pieces are golden oak.
For the trims, deck and railings, I’ve chosen Camel by Folk Art. I’ll need to paint the outer edges as I remove the parts from the frame during construction since they are dark from the laser cutting process. I painted the front and back doors Night Sky by Americana, which I will likely change. These are very hard to paint, and they look a little uneven in the photo. I’ll try to fine tune them a bit more.
Categories: Micro Scale Models
February 7, 2019 | 0 commentsMicro Scale Models
A recap post to make it easier to find the micro scale models. Click the title links for additional details and photos.
———Riverwood Cabin – New Rail Models A-Frame Cabin kit in N-Scale – work in progress
Gustav’s Mill – Archistories Windmill “Marienfehn” in Z scale – work in progress

Hampton House – 1:144 scale – work in progress
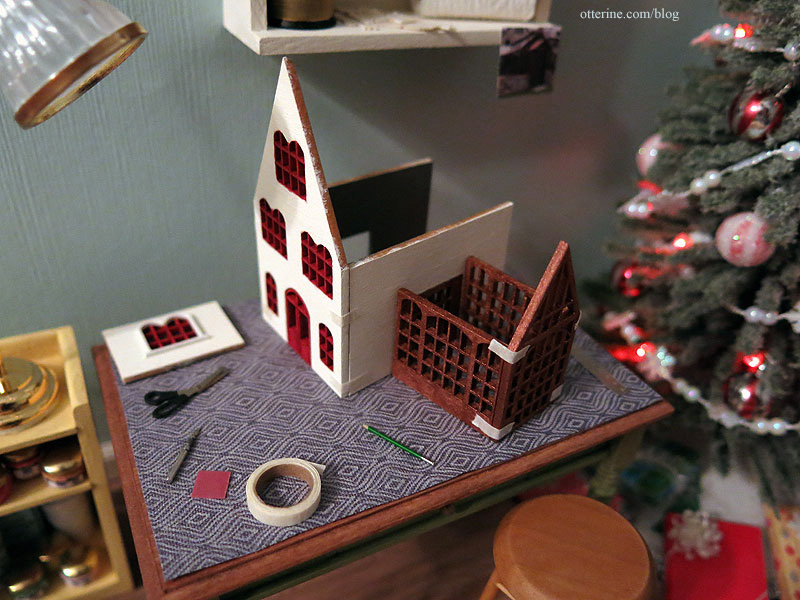
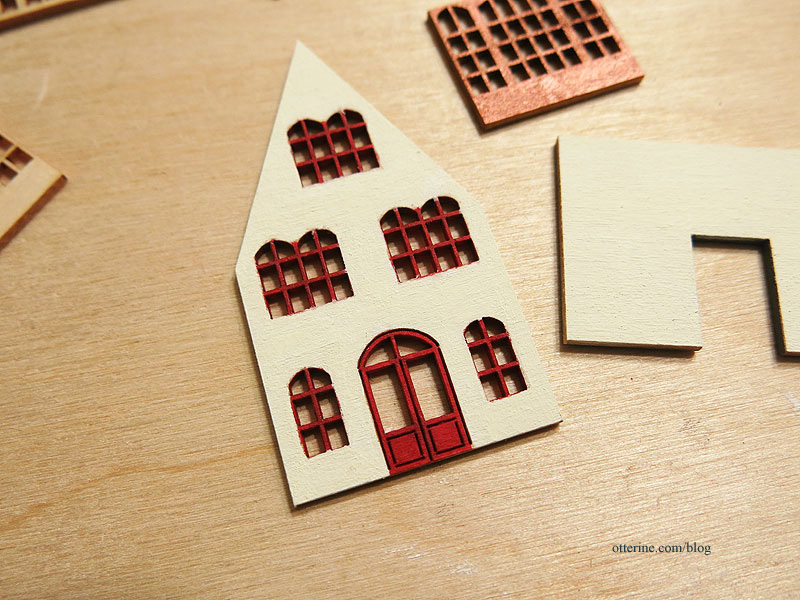

photo from miniatures.com website Categories: Micro Scale Models
February 6, 2019 | 0 commentsRiverwood Cabin – A-frame in N-Scale
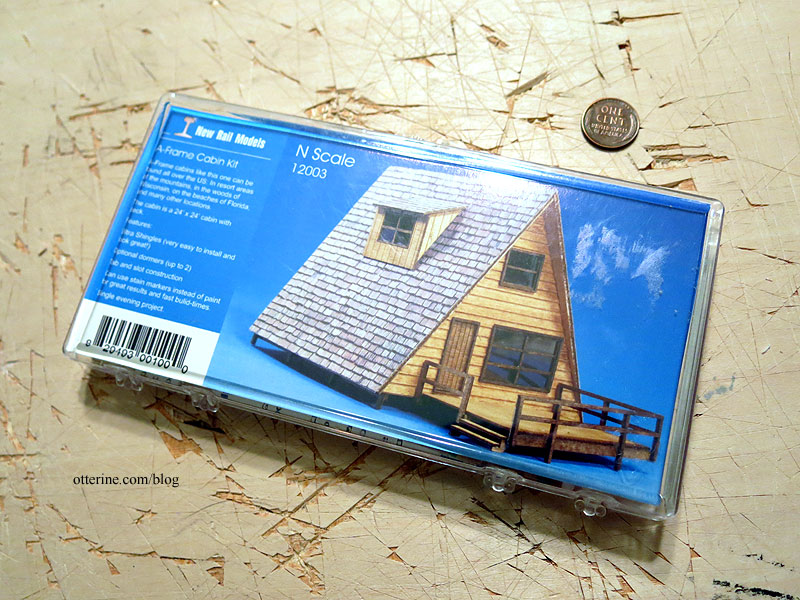
I’ve always wanted to build a mini A-frame since they are one of my favorite house designs in real life. I found this New Rail Models A-Frame Cabin kit in N-Scale on eBay after searching for some time. If you can find this kit in N-Scale, it can ratchet up in price quickly. I was lucky to find a Buy It Now listing for about $30 for a brand-new kit. It seems easier to find the HO Scale version.
The front piece for the house measures 1 15/16″ tall by 1 13/16″ wide. So wee. It comes with printed shingles, but I will see about a truer material.
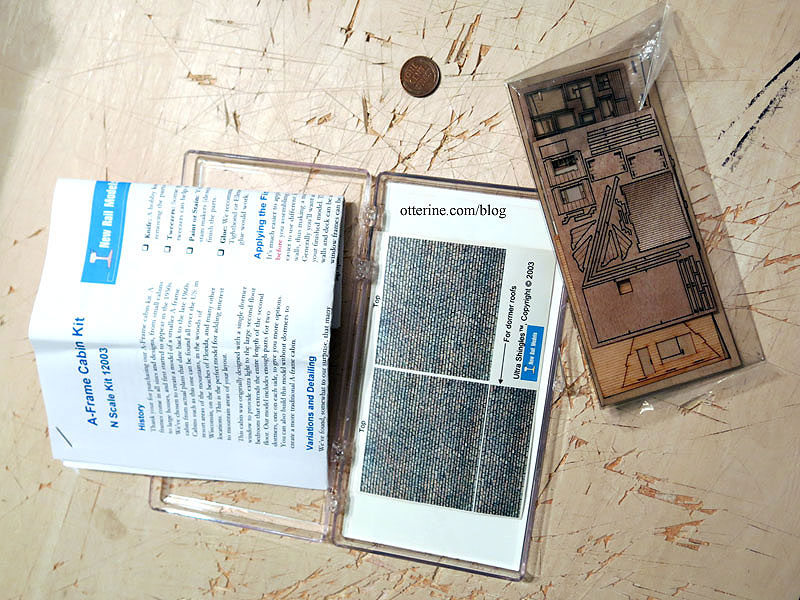
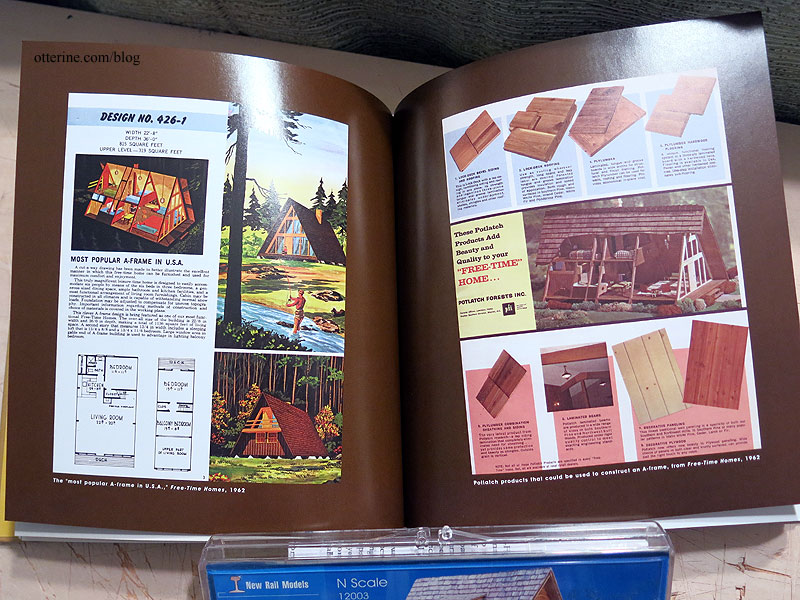
An excellent source of inspiration and information can be found in this delightful book appropriately titled A-frame by Chad Randl.
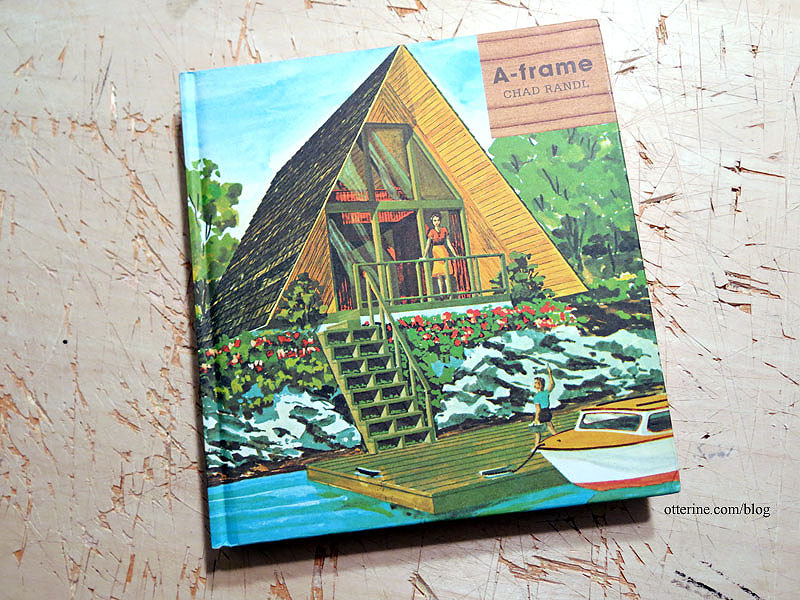
Even if I never made an A-frame, I wanted this book for my library. :]
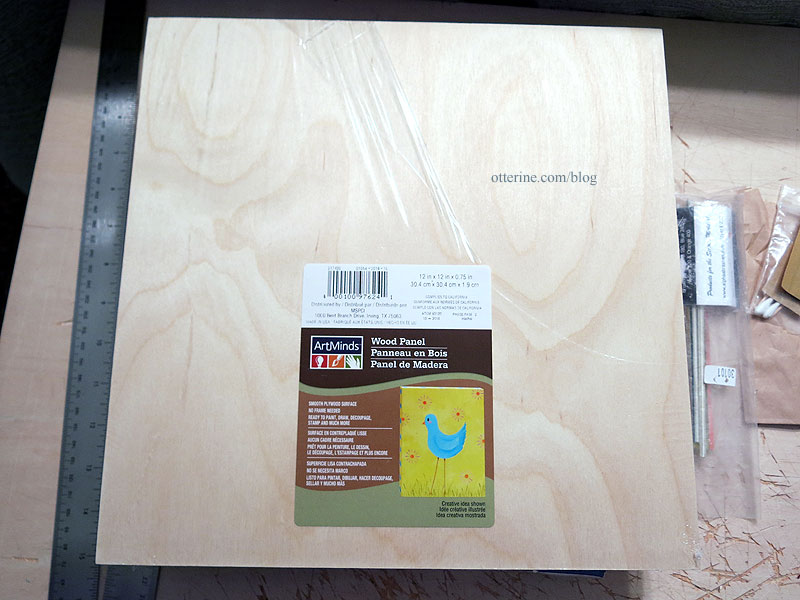
I bought a 12-inch square board to serve as the landscaping base. Since the house footprint is roughly two inches square, that will leave a lot of room for some new landscaping techniques, namely the kind used in model railroads. I want to try making a riverfront property, so I’ll be using styrofoam, sculpting materials and resin water. I’ve been watching videos on landscaping and picking up materials to test.
I also picked up some accessories to get me on the way. I was actually searching for a Jeep or equivalent, but fell for this beast. It was unnamed in the listing, but I am fairly sure this is a 1967 Ford Galaxie Custom 500 by Classic Metal Works. I don’t know why I would need a Batmobile for the A-frame, but I couldn’t resist. Yep, those wheels actually turn.

I also picked up a Mercedes SUV and Mini Cooper. I was thinking it might be fun to take some vintage photos with the big Ford and then modern photos with the newer cars.

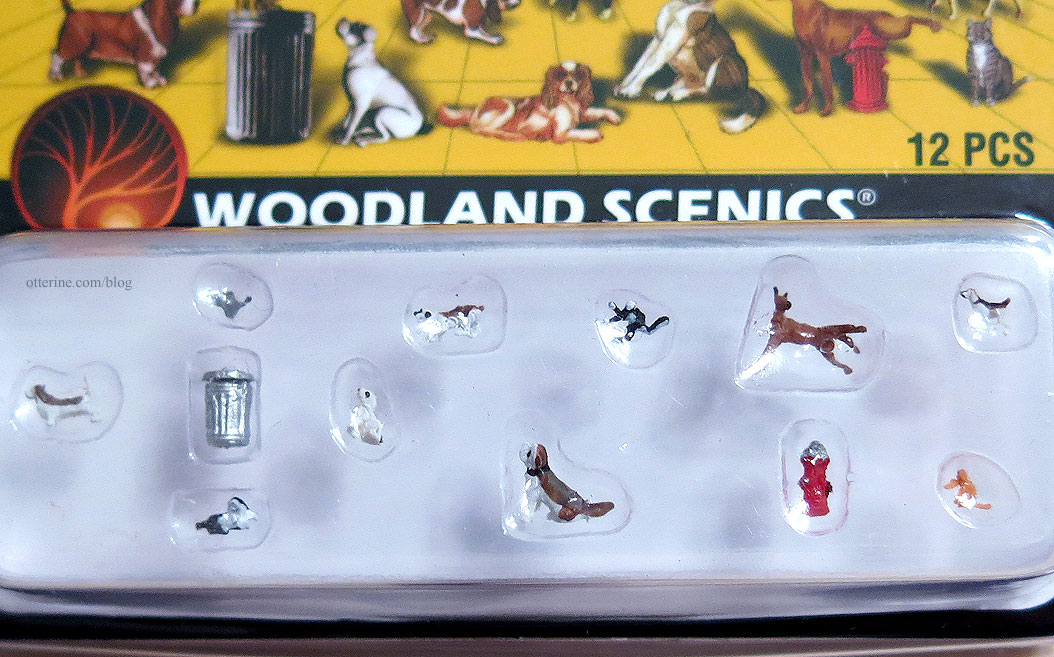
These cats and dogs are crazy small.
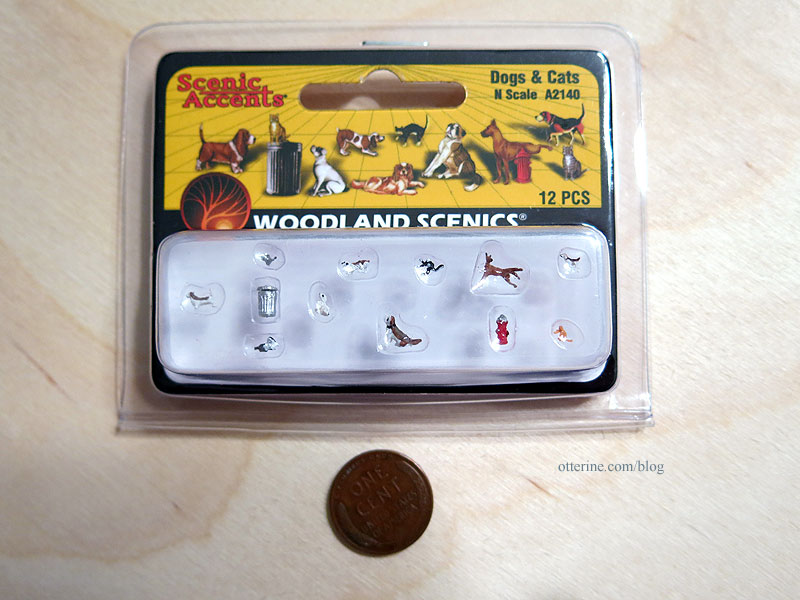
Honestly, the cats don’t look like anything beyond fuzz. haaaaaaaa So, we’ll likely use one of the dogs, but I especially love the hydrant (which would likely not be present in the woods) and the trash can.
Categories: Micro Scale Models
January 2, 2019 | 0 commentsGustav’s Mill
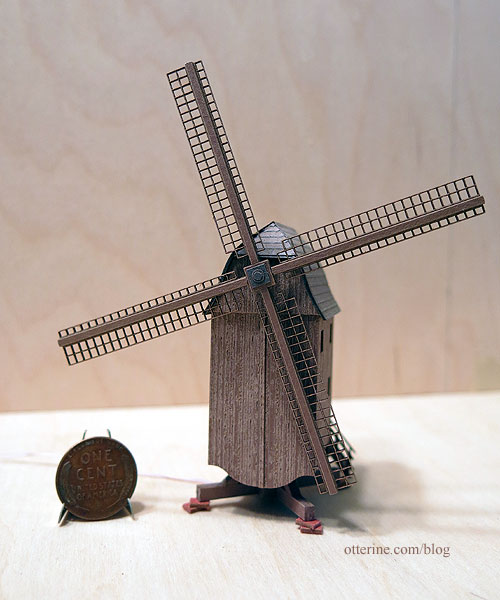
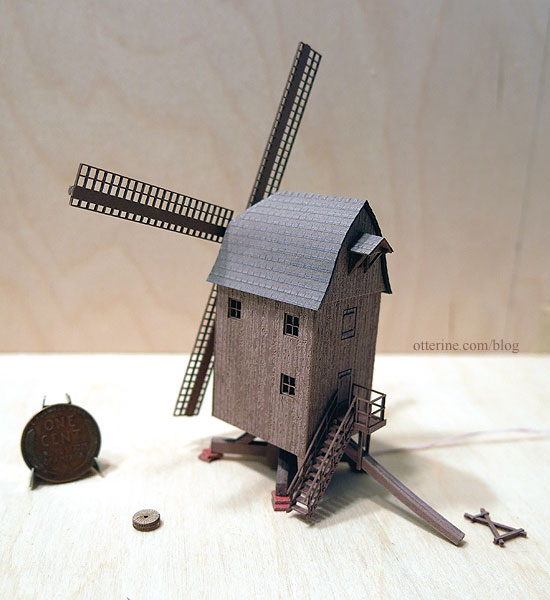
One of the reasons I cut new walls to make Watson Mill larger on the inside was to accommodate Gustav’s hobby. Turns out, in addition to avid reading, he’s a miniaturist. :D In researching mini mills, I found this delightful Archistories Windmill “Marienfehn” in Z scale.
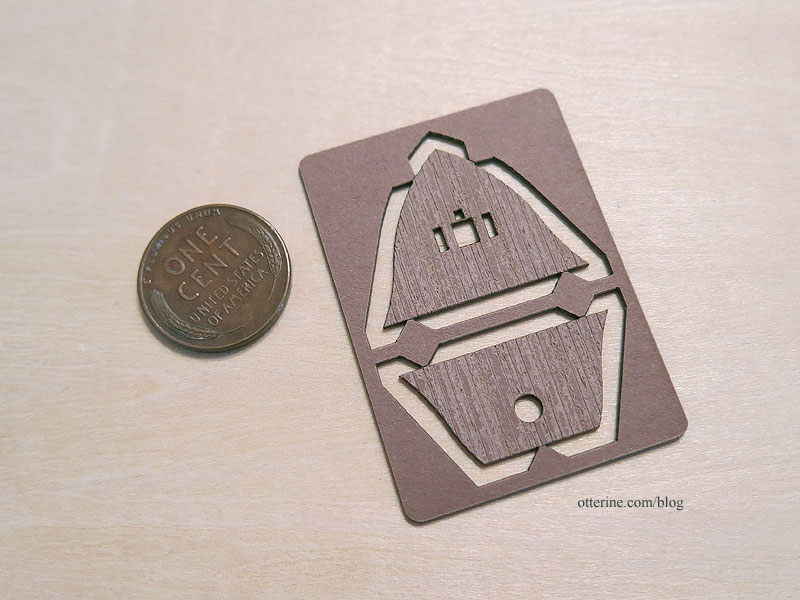
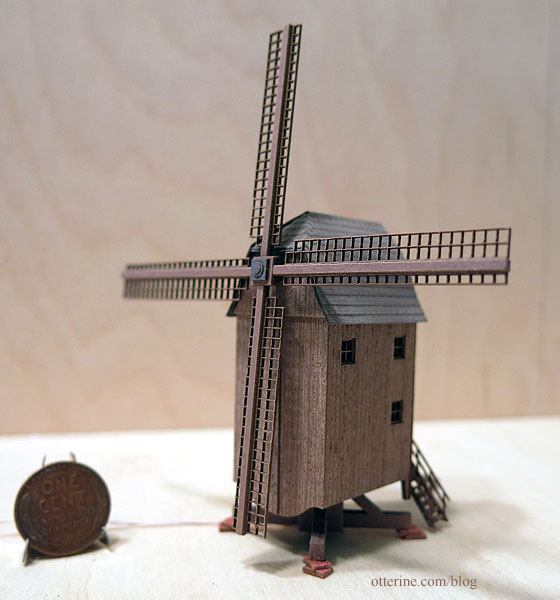
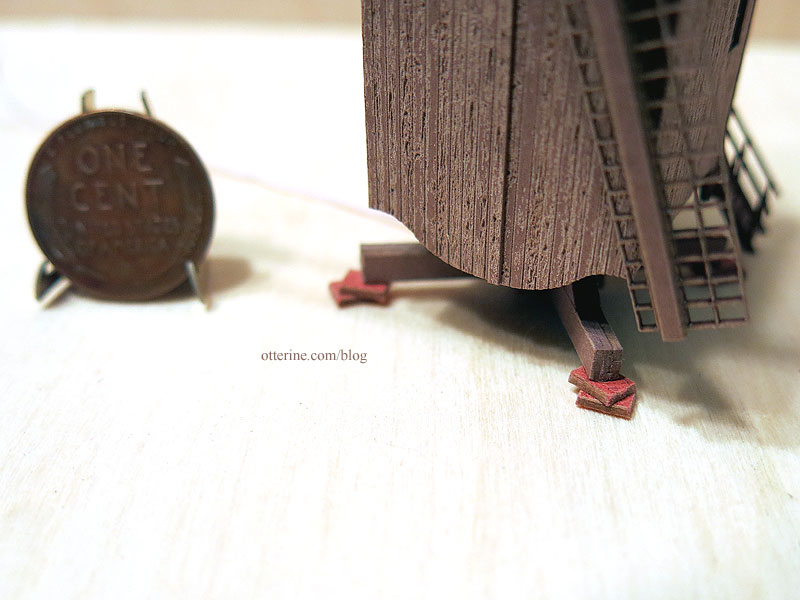
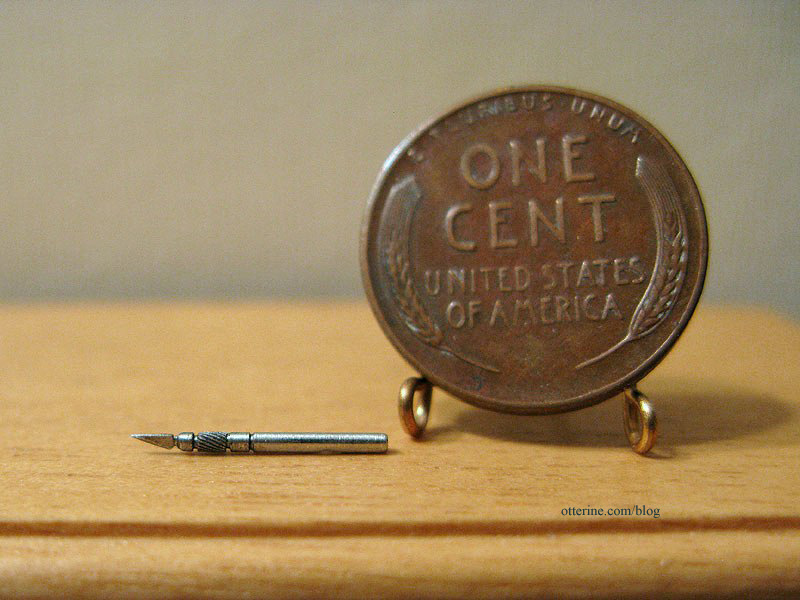
Here’s a penny to show the size of the pieces. There’s excellent detailing as well. The pieces seem to be made from some kind of chipboard material, and they recommend the use of wood glue. There are 10 pages of illustrated instructions, but it seems fairly straightforward.
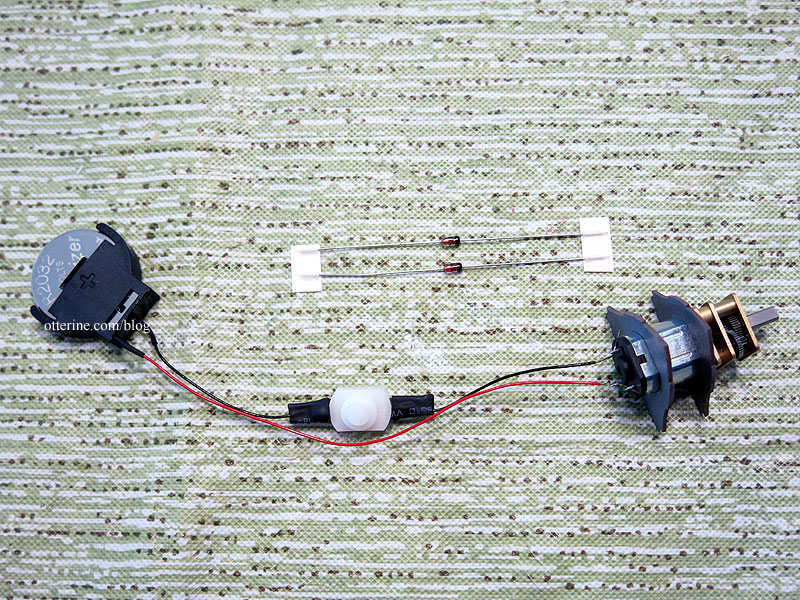
There’s even a motor for it. Yep, the sails go roundy roundy. :D It’s a DC 3V motor, so this should work with a battery holder and switch. I can build a work table to disguise the switch underneath.

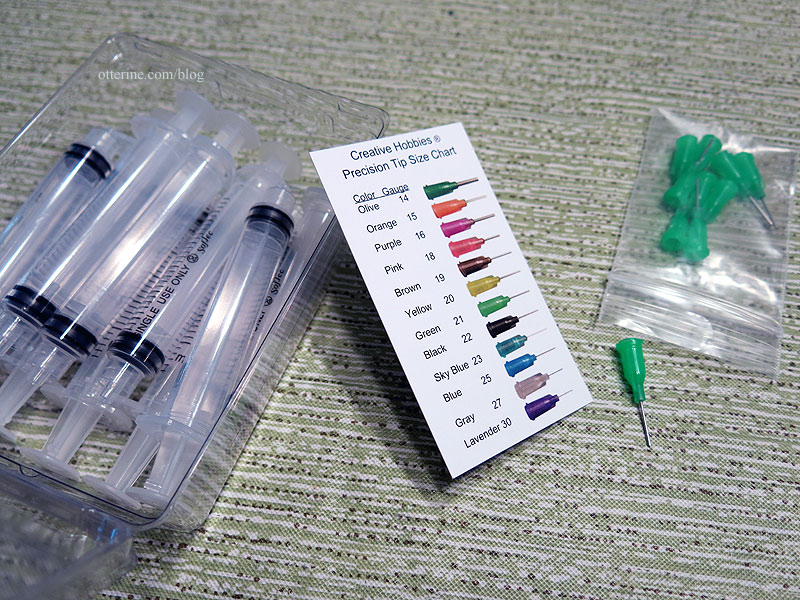
I bought some 21-gauge tipped glue syringes since the portions to be glued are so small. Elmer’s wood glue worked well with them.
The kit goes together easily since the parts are so accurate. The instructions are clear with good drawings.
The motor does work with a 3V battery holder. There are two diodes included to slow down the revolutions per minute (from 33rpm to 15 rpm according to the instructions). Those will be added later once I get the display table built for it. The motor has a quiet wind-up toy sound that’s rather satisfying.
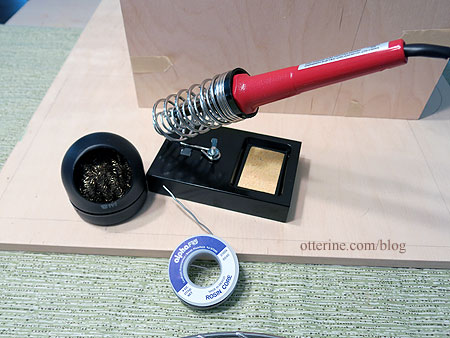
I got out my soldering materials to attach long wires to the motor. I left a lot of length so I can have more to work with later.
The X brace has been left unglued. I plan to make a modest landscape for the display, so I’ll add it once I get that in place.
I didn’t take many photos during the building process since the tiny dabs of glue dry too fast. :] The sails are also just lightly glued right now. I’ll add a stronger adhesive once I’m done. I want to be able to remove the sails during the landscaping process.
The tiny doors can be displayed open, but I like them closed. There was no breathing when handling those tiny hinge accents.
The hub looks so big and solid, but the centers are thin black paper circles applied with needle tip tweezers.
I love the wee windows. Yes, they have “glass” in them.
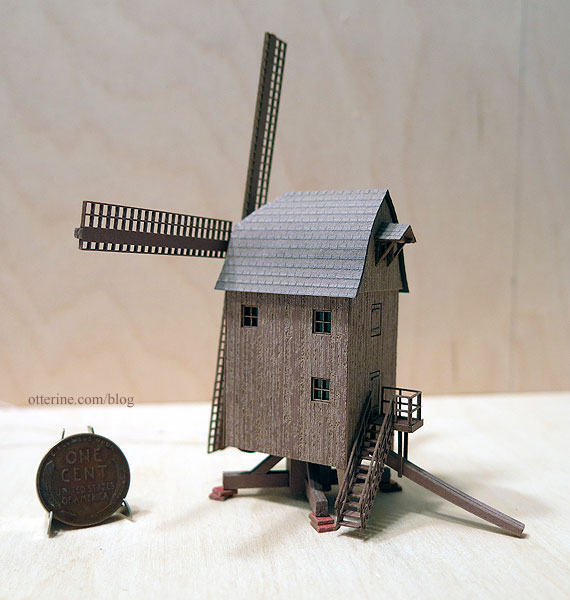
One of my favorite parts are the red stone slabs. Just a pop of color in the mix. You can also see the fine siding texture here.
Of course, I know you want a movie.:D This was taken with the two diodes taped in place, so this is the final speed of the sails.
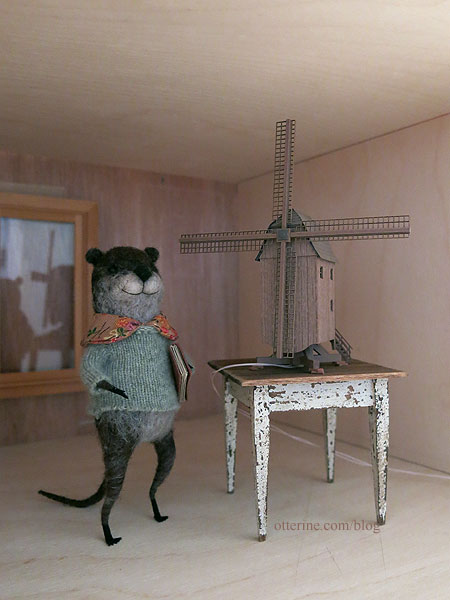
Unfortunately, Gustav’s Mill is too large for Watson Mill’s interior. So, we’ll just say Gustav built it to display elsewhere, a museum or gallery. :]
Categories: Micro Scale Models, Watson Mill
April 18, 2017 | 0 commentsMerry Christmas 2013
My tiny scene for Hampton House isn’t as complete as I wanted, but with the busy holiday schedule, it was the best I could do.

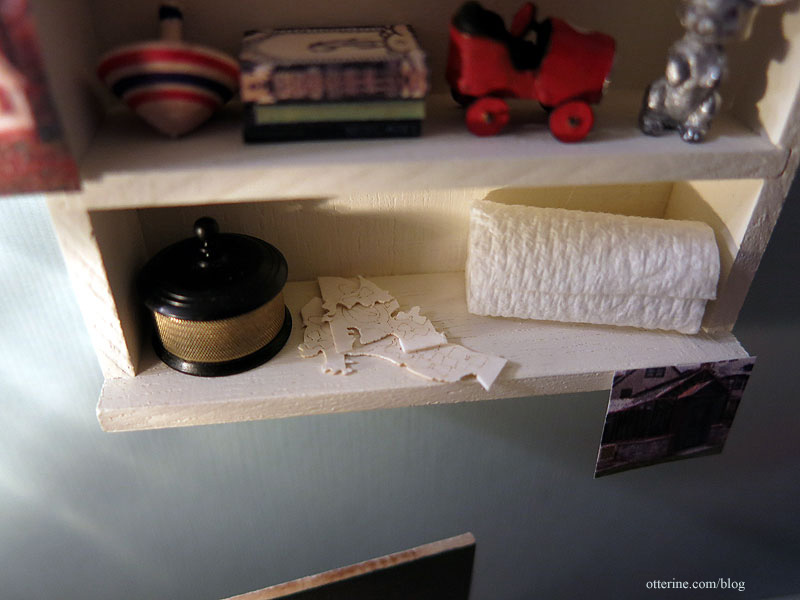
I started a House of Miniatures cabinet for the wall, leaving off the front doors. This still needs to be sanded and finished.
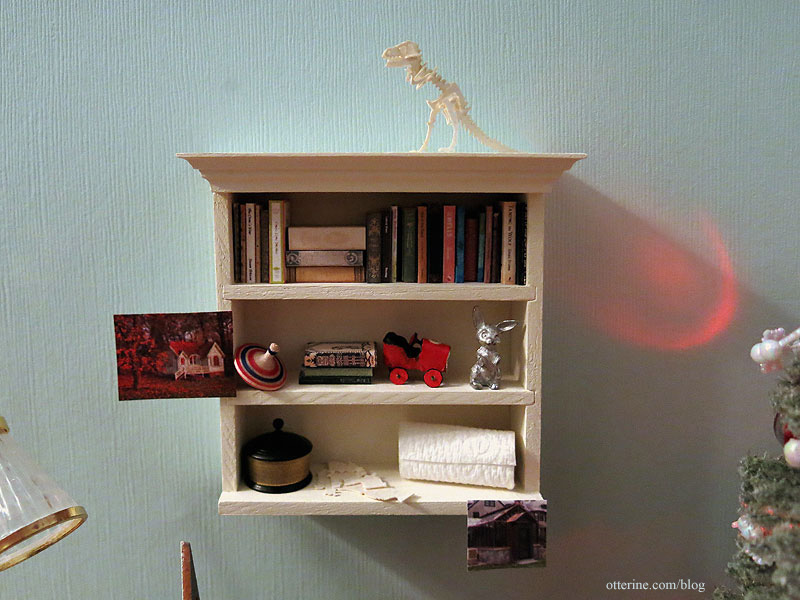
As with many of you, I often have more than one project going at a time. Hence, the partially completed Tinysaur T-Rex.

Look at those tiny pieces waiting to be cut from the frame. :D I will post about this project separately. The paper towels are from Lyssa.
Cora is running around but staying out of trouble…so far. ;]
I made a tiny roll of masking tape for the work table.
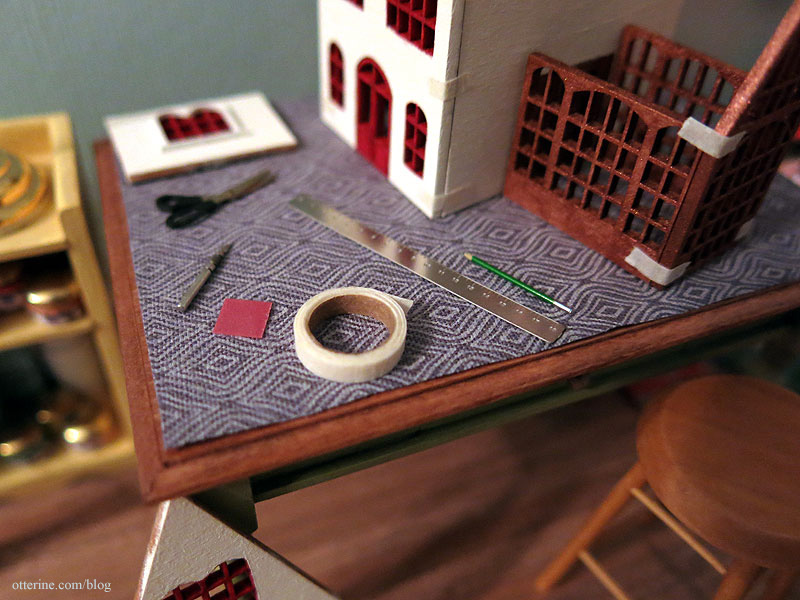
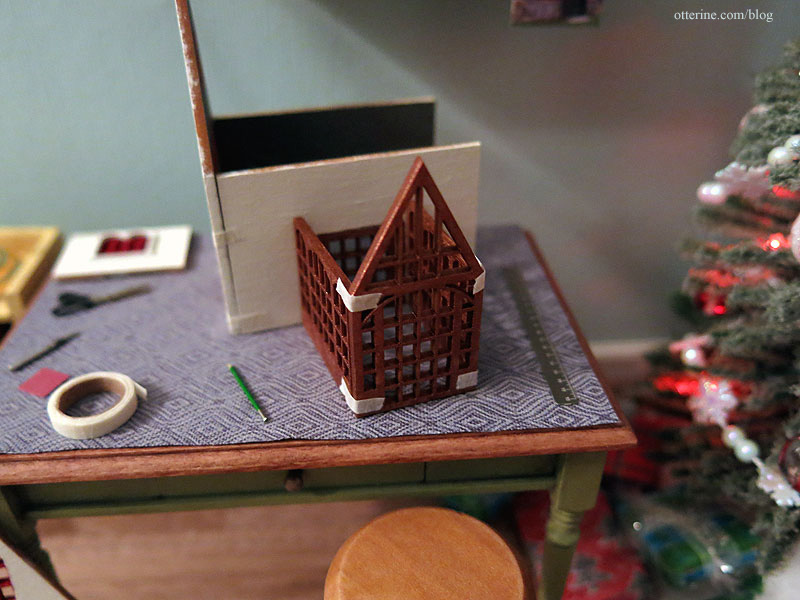
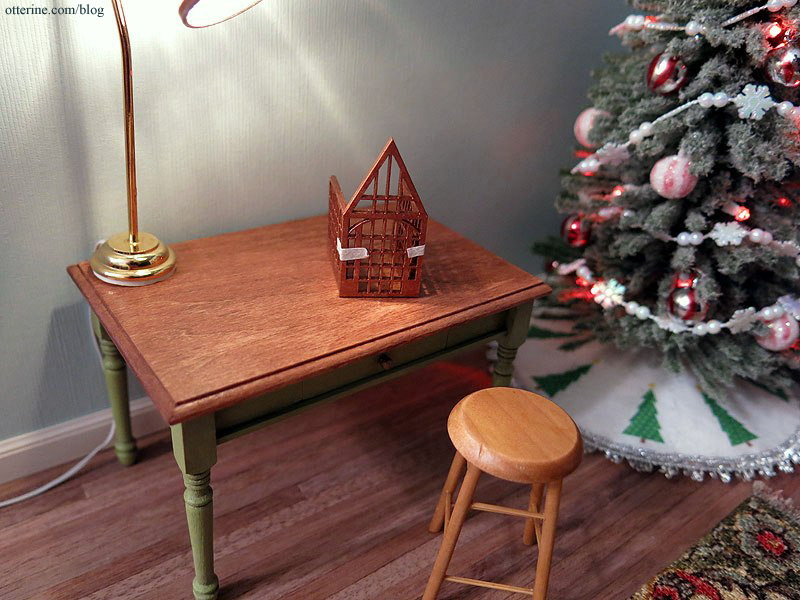
The Hampton House is in a state of dry fit to determine where the greenhouse will sit.
It was not easy getting the tape to stick.
Wishing you all a wonderful Christmas! :D

Categories: Micro Scale Models
December 25, 2013 | 0 commentsHampton House – window trim
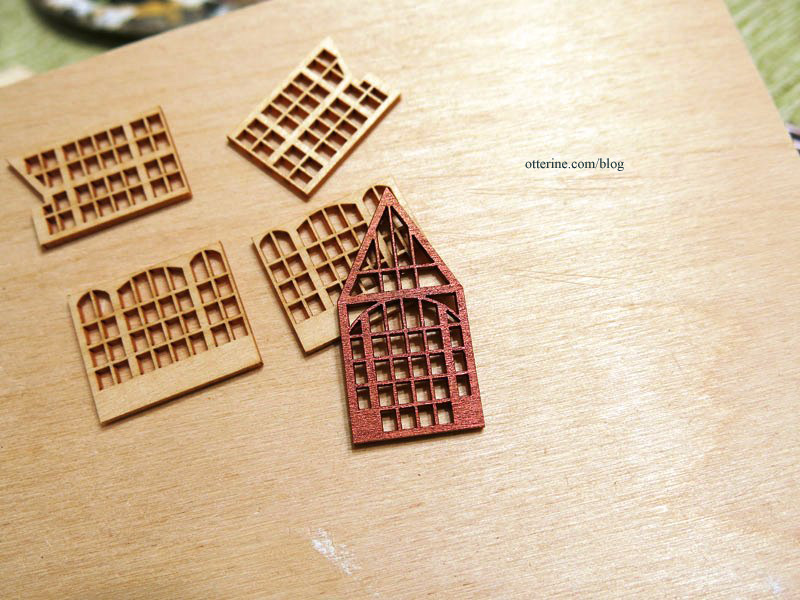
I have the main building pieces painted and ready for the window trim. I used a tiny brush to paint the trim while it was still on the frame. I tried to keep the paint only on the trim because I didn’t want to fuse the trim pieces to the frame or to each other.
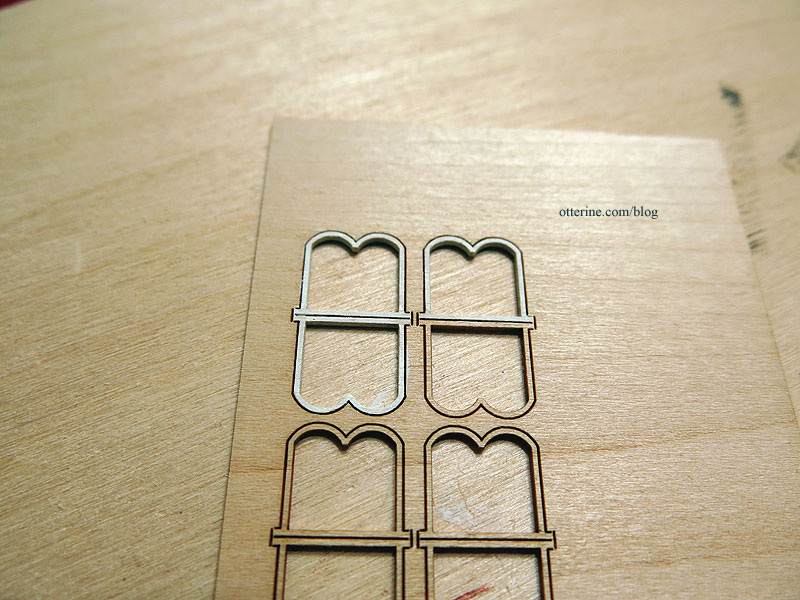
I used a brand new X-Acto blade to clip the trim pieces from the frame. Before I could glue them in place, I needed to paint the remaining edges.
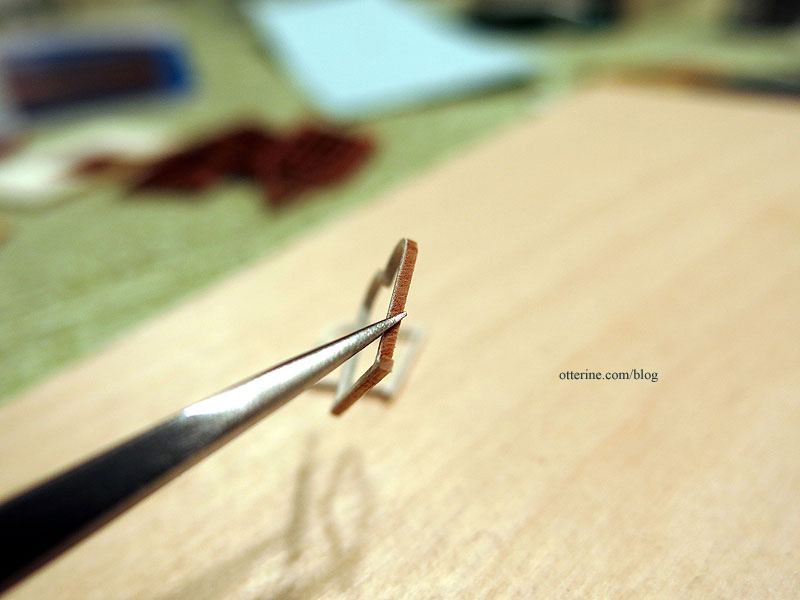
Since I was using such thin layers of paint, the paint dried quickly and I could handle the pieces right away. But, this also caused the paint to coagulate on the brush. I just kept washing the brush as I worked, and that made painting much easier.
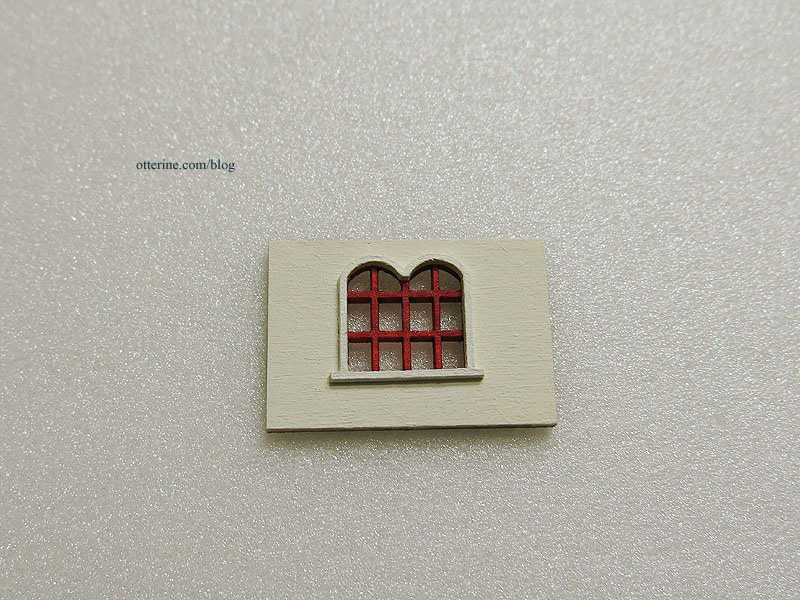
Only the tiniest amount of glue was needed to attach the trim. I cleaned away any excess with the tip of the X-Acto blade. The windows have two coats of Warm White which make them a shade brighter than the wall color.
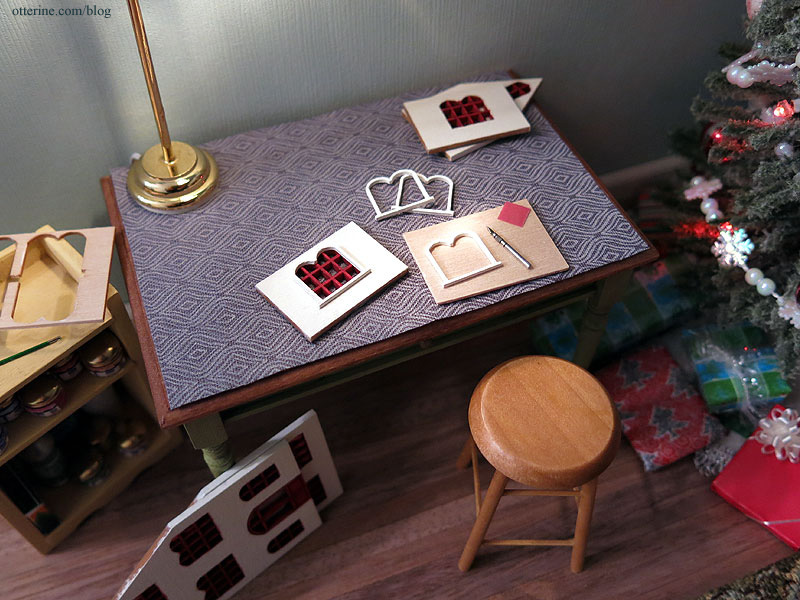
I made a quick tablecloth for the work table and cut a tiny corner of the sandpaper I’m using for the mini scene. I also added presents under the tree. :D
The marvelous mini X-Acto is from Ulus Miniaturas.
I have many more accessories I plan to add to the scene, so I will save the rest for the final Christmas post.
Categories: Micro Scale Models
December 22, 2013 | 0 commentsPrepping the Hampton House work room
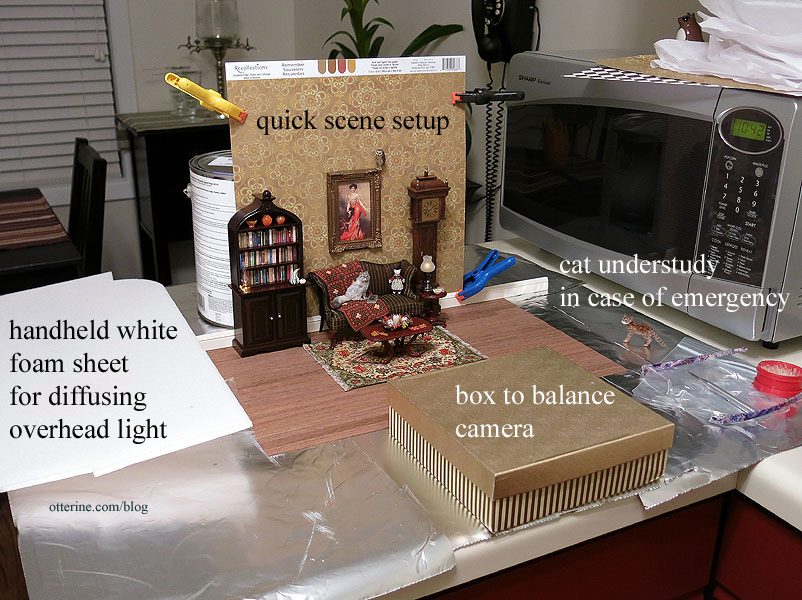
Time to set up the work room for Hampton House. When I set up my fly-by-night scenes, I use a lot of tape in addition to smoke and mirrors. These rooms aren’t meant to be permanent, so the materials I use are quick and plentiful. I don’t use limited papers (unless they are only clipped in place) or spend a lot of time on room design. It just needs to be a box with finishes that will blend into the background.
Here’s my Halloween 2013 scene, for instance. It was set up on the kitchen counter. I used a sheet of unfinished wood flooring, a scrapbook paper sheet clipped to a piece of plywood and held up by a can of paint and miscellaneous miniatures to create the scene. I have a box for balancing the camera in low light for the nighttime photos and a piece of white foam for diffusing the overhead light in normal lighting conditions.
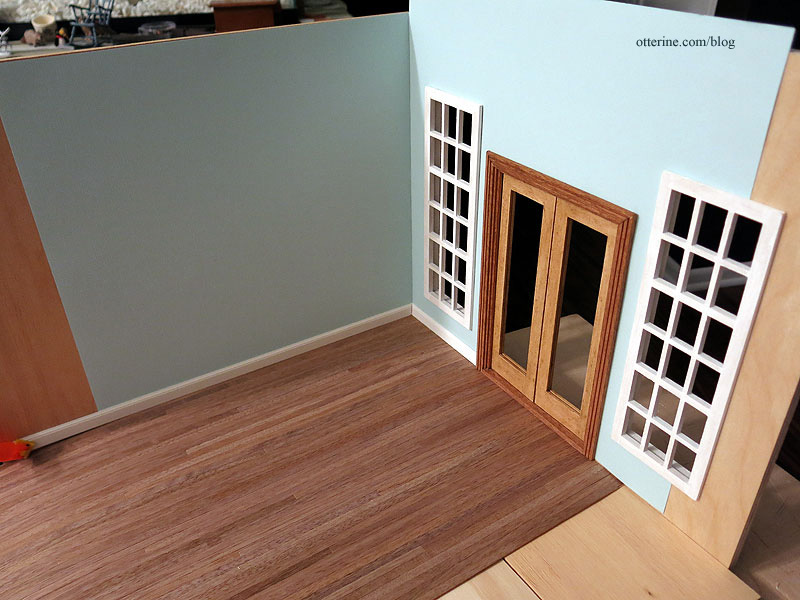
Since I’ll be working on this new scene for a few days, I set it up on a board so I can move it around. For a room with sidewalls, I usually use the pre-cut piece from the Foxhall Conservatory I used to make the Newport garage. Unfortunately, it was one of the few things ruined in the lightning strike, but I have the front board from that kit as well as the windows. I could cut a new board, but this will work for now.
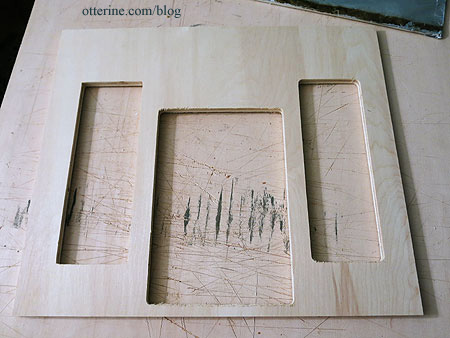
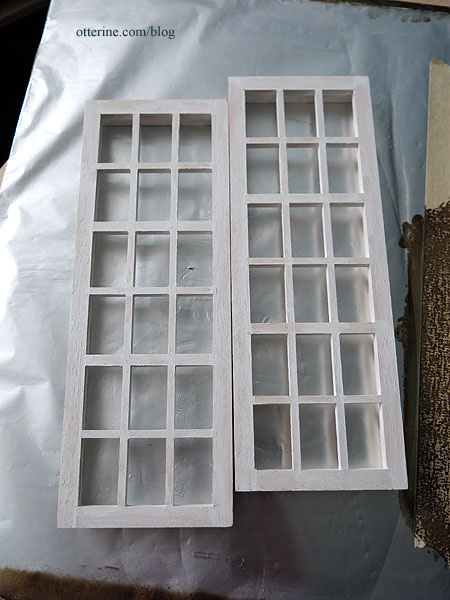
The windows have only a coat of primer, so perhaps I should take some time to finish them eventually. :D
I need one side wall for this setup, so I used duct tape to attach another spare board for better stability without permanence. I didn’t have a large 3/8″ thick board for the floor, so I used three smaller scraps.
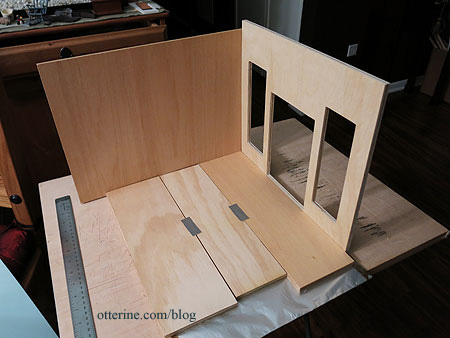
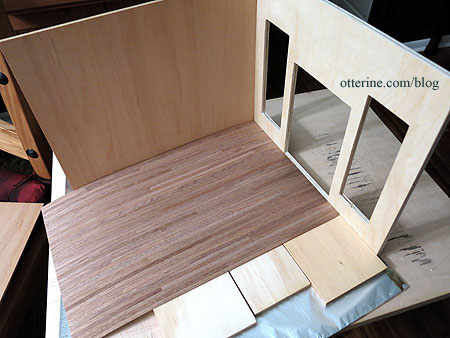
I taped an unfinished flooring sheet in place since I don’t have any finished ones awaiting installation.
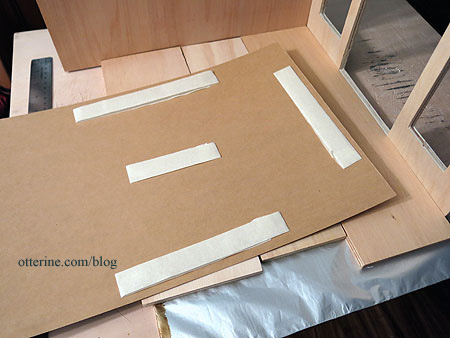
I use common cardstock paper in a neutral color when I cut for my temporary scenes. It’s replaceable after use, though I do try to keep it for future scenes if I can. I use double-sided tape to keep it in place.
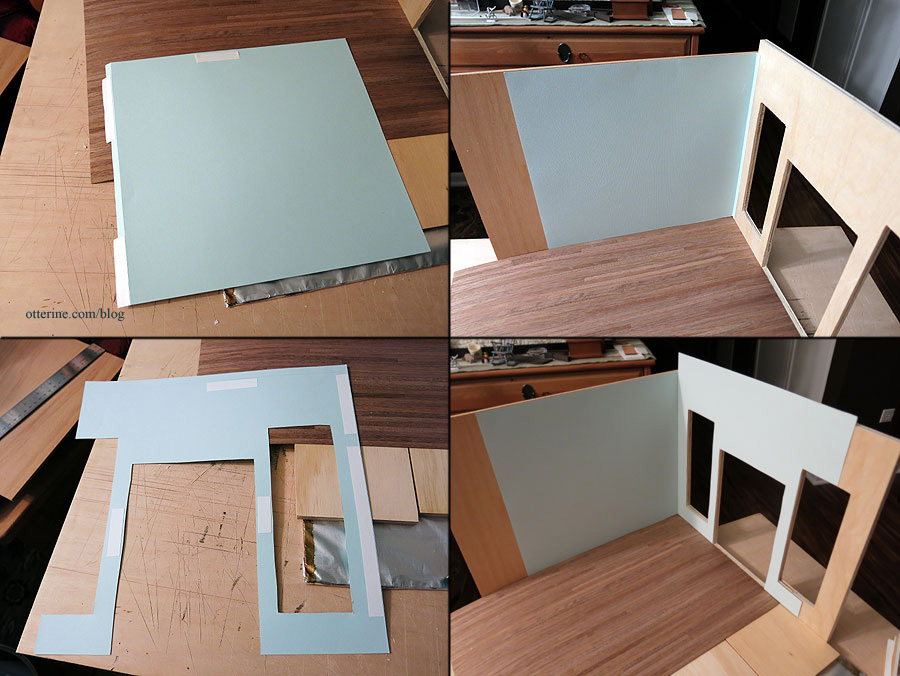
I install the windows backwards so I don’t have to worry about interior trim. I don’t have a double French door painted white, but I have one stained for the Chalet. I just hope it doesn’t offend anyone’s sensibilities to have white trim throughout, except for the door. I put the “glass” in the corner window but left it out of the door and far window. I happen to have some finished baseboard pieces, so I used mini hold wax and a clip to keep those in place.
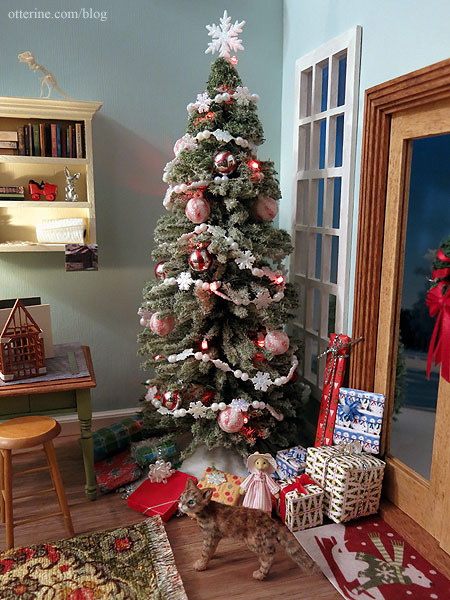
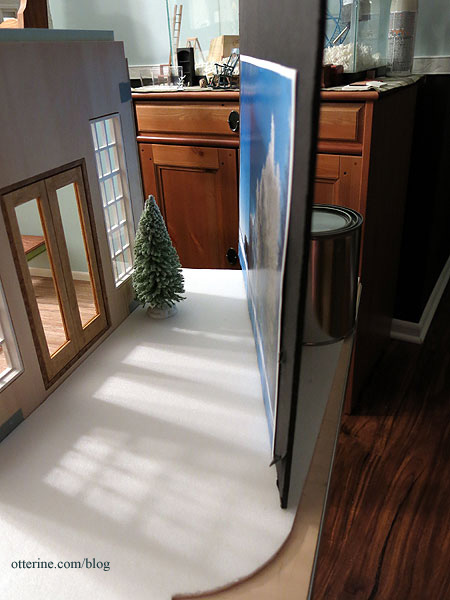
To fill in the view through the windows and door, I placed a scrap of white foam on the work board to simulate a snowy ground. I added a smaller Lemax tree that I bought to decorate for the Heritage…looks like that won’t be happening this year. It’s a nice stand-in for an exterior tree seen through the window. I propped up my scene board with a printout of Winter Landscape and Trees by Icefront that I found on Crestock.com. I will try to find a new scene for this set-up, but this is the only winter one I have on hand.
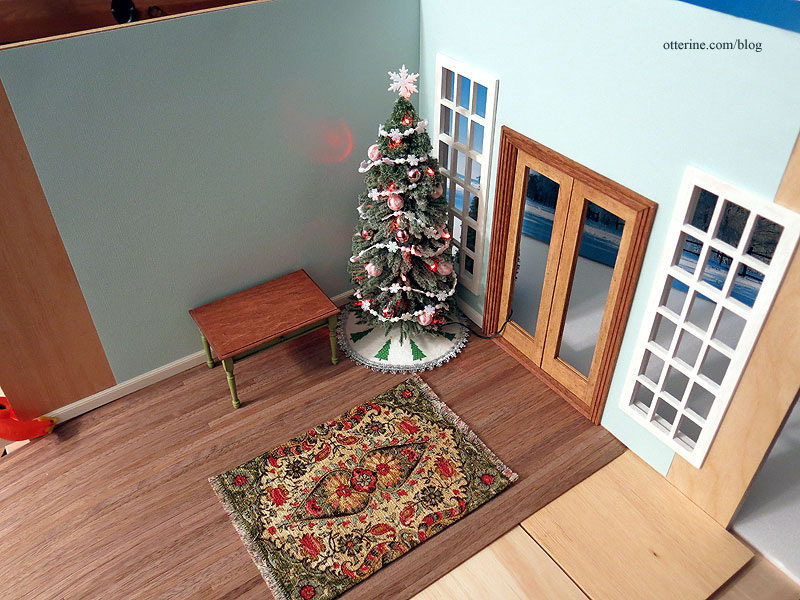
My decorated tree has lights operated by a large battery box. The rug is from Dale’s Dreams.
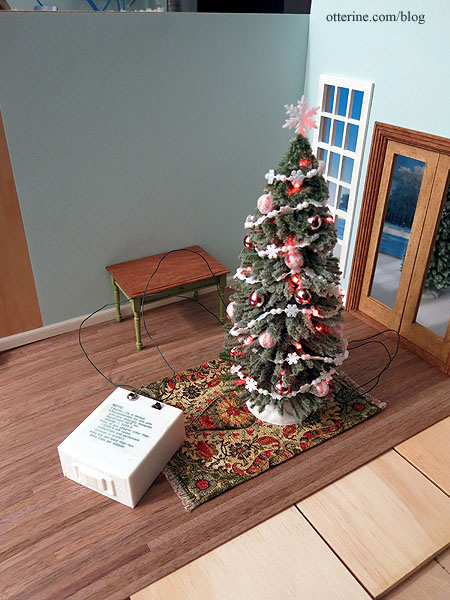
I set the tree in the corner and pulled the battery box through the door and around the solid side wall out of sight.
Now we’re getting somewhere! How to hide the wire going out the door? Two options…PhotoShop or a really huge present! :D

I tried out a work lamp (this is the lovely lamp Monique sent to me). The cord can exit stage left.
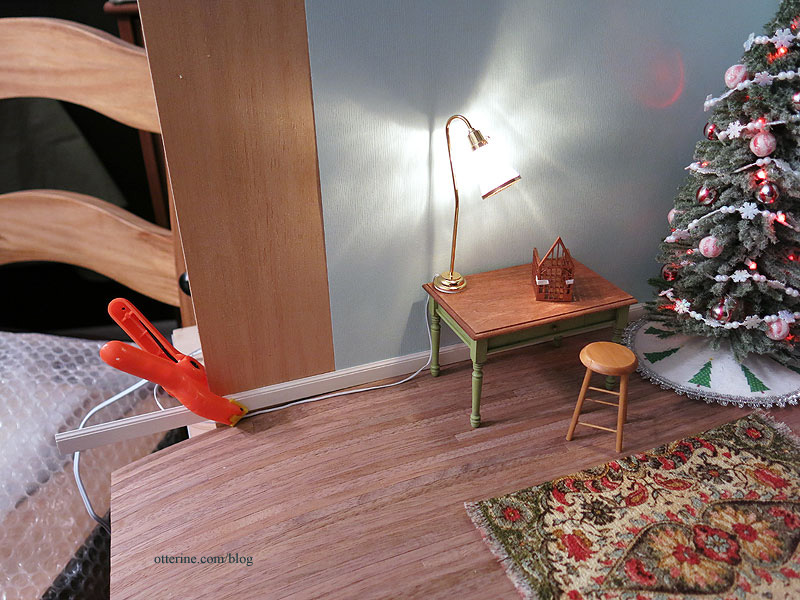
Both the power strip and the tree battery box are behind the scenes.
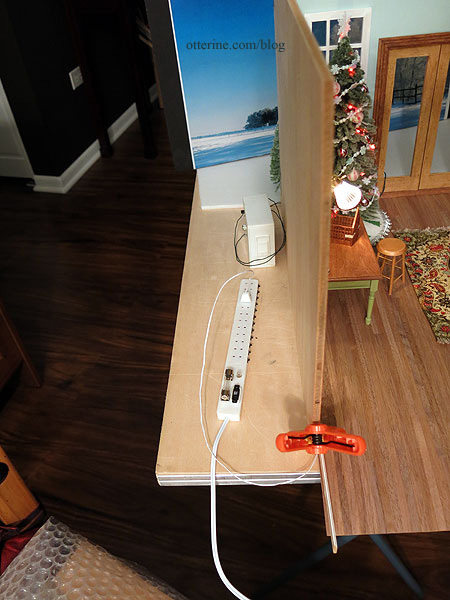
While I do love this lamp, I think it is going to glare too much for the scene. I’ll dig through my stash of lights to see what I have or I could whip up a new shade for it.
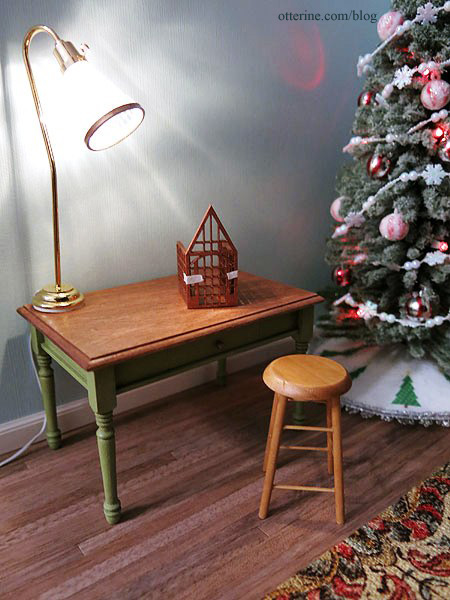
I have most of the Hampton House pieces painted. Soon it will be time for assembly. :]
Categories: Micro Scale Models
December 21, 2013 | 0 commentsHampton House – inspiration and painting
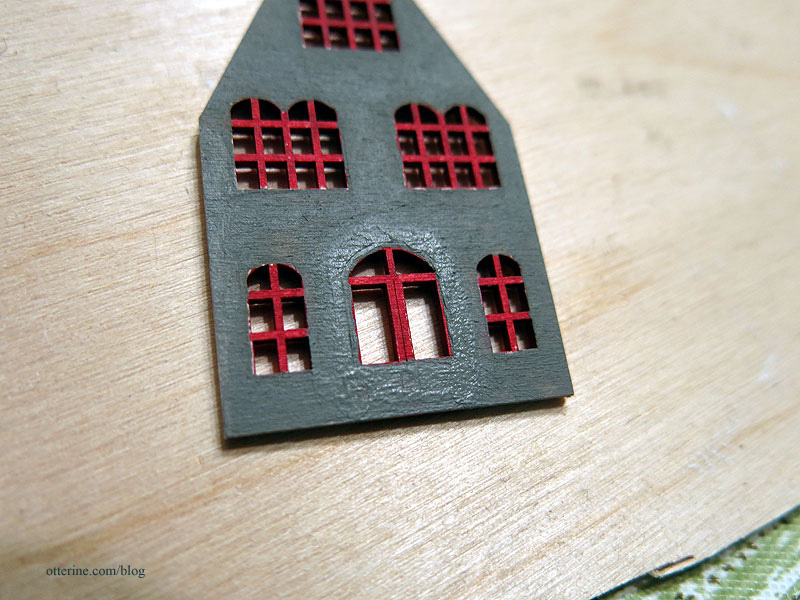
As I was trying to decide on colors and style direction for the tiny Hampton House, I found this lovely autumn photograph. It’s all over the internet, so the original source is impossible to guess. I was drawn to the red window panes especially.

I started with the window panes, painting them Alizarin Crimson by Americana. I’ve been told it’s easier to paint these tiny pieces while they are still attached to the frames, but with laser cut pieces, they often come apart easily. Good for keeping damage to a minimum but bad if you want them to have more stability for painting. Ah, well. I’ve dealt with warped boards before.
As an aside, I’m not doing a whole lot of sanding on these pieces…just a little as needed to remove the tags where the pieces were connected and to tone down the browned edges that I want to paint in lighter colors. I bought some Testors sanding films.
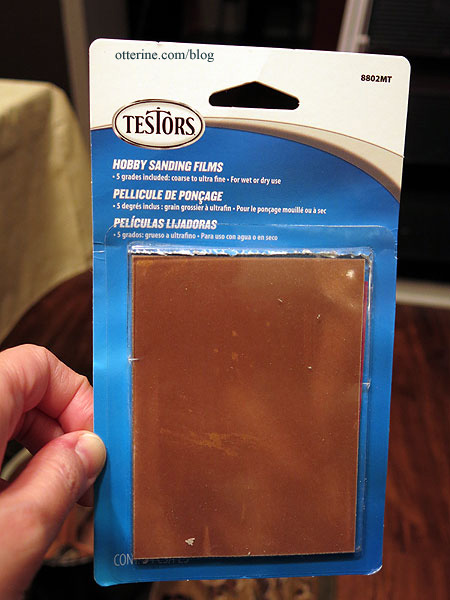
These are super thin and range from 150 to 600 in a single pack. I used the 600 on the surface of the pieces to remove any stray fibers.

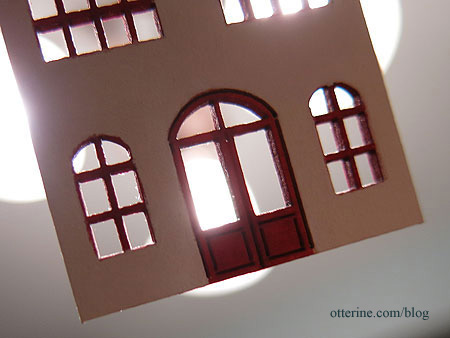
For the exterior, I started with a coat of Warm White by Americana. I stippled the paint on instead of brushing it so the surface would have a subtle texture.

The color was rather stark in this scale, so I did the second coat Vintage White by Folk Art. This second color would have been too yellow on its own. Together, they make for a wonderful, vivid off white. Apparently, white chocolate and red velvet are my colors this year.
I painted the interior pieces Neutral Grey by Americana. I want the light to glow through the windows not light up the whole structure inside. Also, painting the backs helps keep the boards from warping as the fronts are painted.
Around the door on the interior, I painted some heavy layers to fill in the tiny gap that was allowing light to pass through. I might not use the front portico, so I wanted the door to appear solid.
No more draft! :D
The greenhouse will be painted Worn Penny by DecoArt. What a lovely color. I’ve always like the look of copper colored greenhouses.
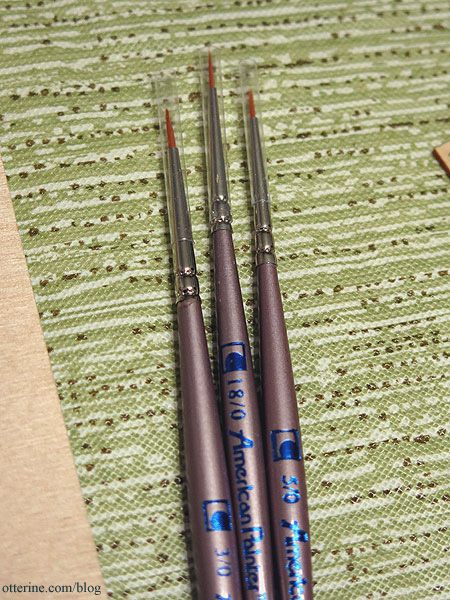
I already had these brushes in my stash.

But, Michaels had a 30% off coupon for today only, so I went and picked up three more tiny brushes: 3/0, 5/0 and 18/0. Most of the window sections are less than 1/8″ wide. It’s so much easier to paint with the right tools!
Categories: Micro Scale Models
December 20, 2013 | 0 commentsHampton House – the beginning
I bought the 1:144 scale the Hampton House a couple of years ago, and this will be my first foray into teeny weeny scale.
photo from miniatures.com website I plan to take my time with it, so I don’t intend to finish it in the next few days before Christmas. But, I’d like to make a holiday scene as I usually do, so I will incorporate the beginning stages in that scene. I’ve always liked the dollhouse for a dollhouse concept. My Christmas scene will be a dollhouse in progress for Christmas, so I can get as far as I do in the next few days and it will fit right in.
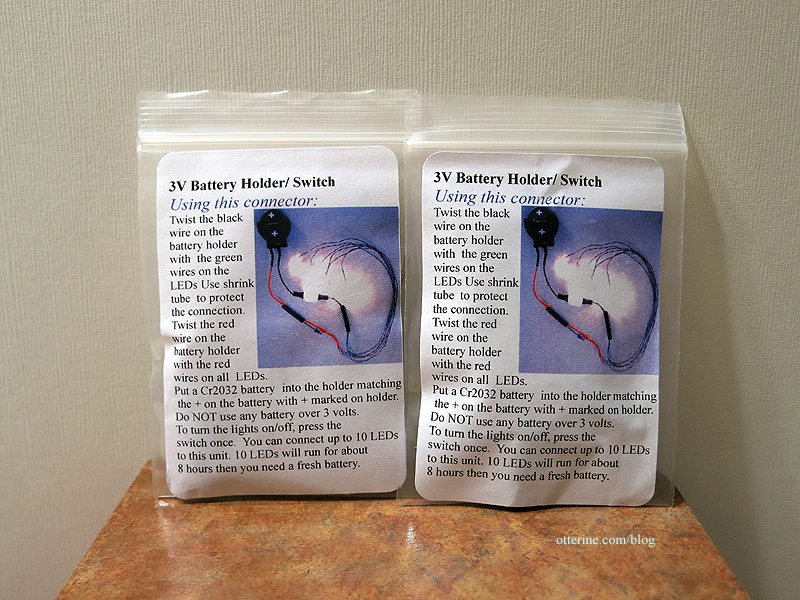
Hampton House is an enclosed structure, so I won’t worry about decorating the interior this time around. I would like to have it lighted, though. I bought LEDs and battery switches from true2scale at the Bishop Show this past year, so I’ll use one of those.
Here are two great examples of this house by EmmyNHiros and Yuri Munakata. Both artists transformed the kit into an open dollhouse with interior décor.
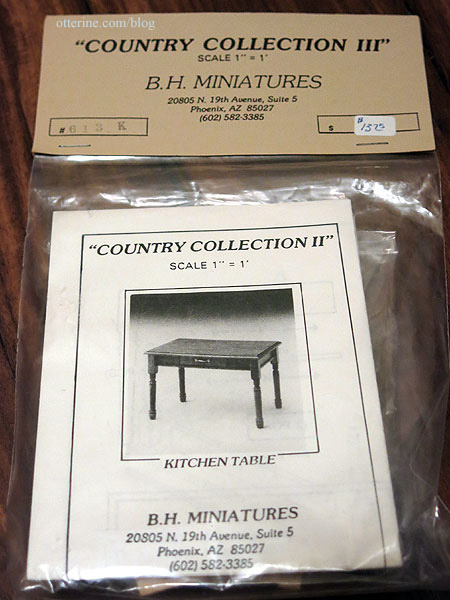
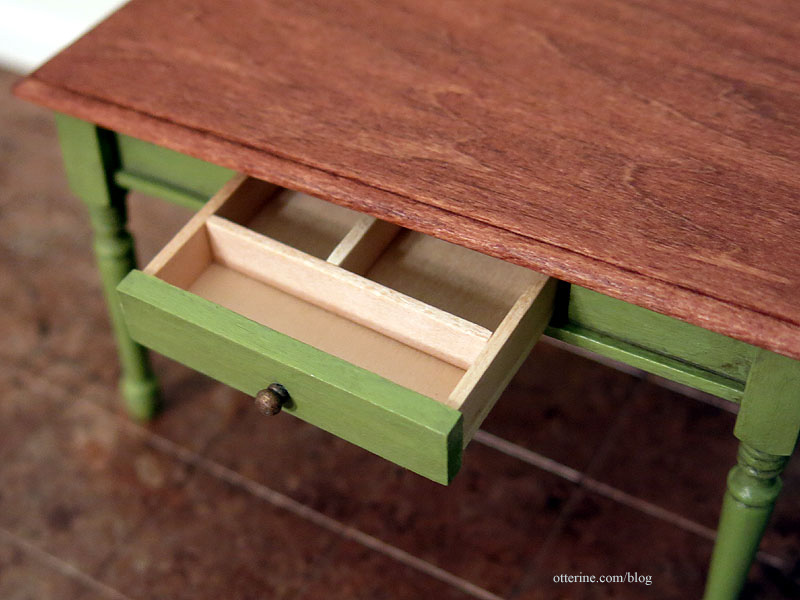
I’m starting my scene with a work table made from the Country Collection II Kitchen Table by B.H. Miniatures. I picked up three of these in a recent eBay auction, along with a few other B.H. Miniatures kits. The tabletop measures 2.5″ x 4″, so it will make for a great work table and maybe a final display table.
I chose Minwax Cherry to stain the top and painted the base an aged green, fitting for a country table.
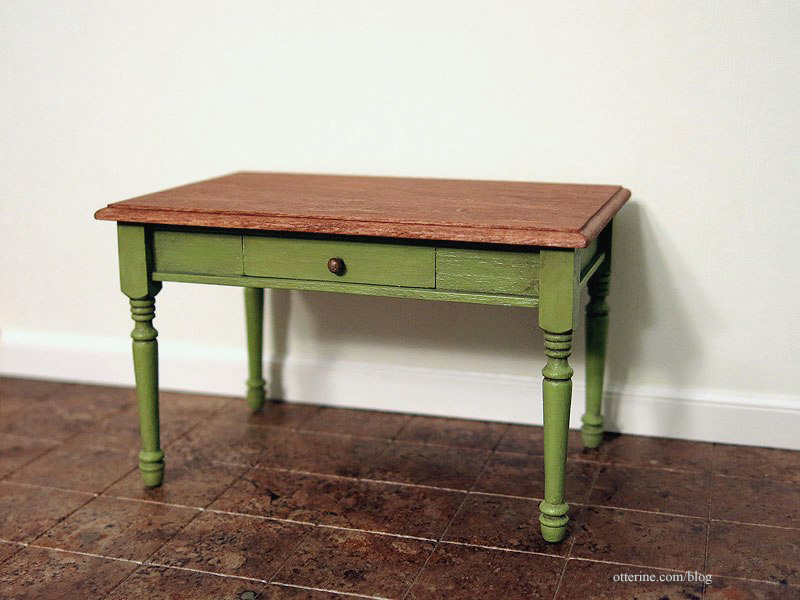
I didn’t use all of the wood pieces to divide the drawer since I have an idea of what I’d like to house here. The original kit was meant to hold silverware, I imagine.
I opened the Hampton House kit to have a looksee.
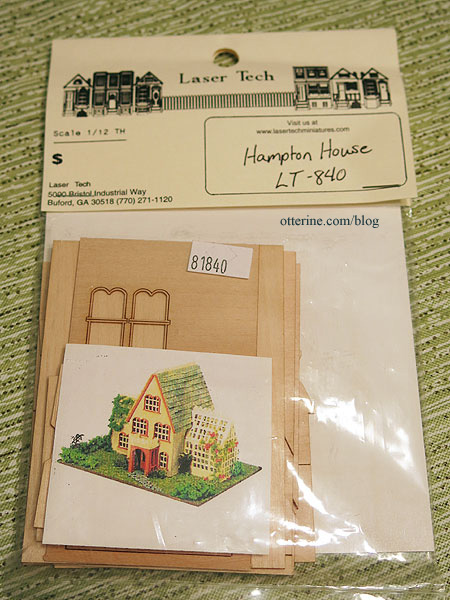
The structure is larger than I expected so this table might not work for display long term. Hmm…no biggie…I love the table and can always find a home for it. :D

Categories: Furniture, Micro Scale Models
December 19, 2013 | 0 comments


NOTE: All content on otterine.com is copyrighted and may not be reproduced in part or in whole. It takes a lot of time and effort to write and photograph for my blog. Please ask permission before reproducing any of my content. (More on copyright)

Spooky Hollow – Halloween 2022
A couple of years ago, I started looking for a Grandt Line Spooky Hollow kit. While Grandt Line products are still around, these specialized kit bashing ensembles were apparently a limited run. Here is the kit photo. The project is N scale (1:160), which correlates to 1:144 scale or “dollhouse for a dollhouse” scale very well.
A friend made one awhile back and recognized that another kit was very similar in design. Rosewood Cottage is also one of the limited run kits, but I was able to find one at a good price.
Unfortunately, it had different parts and was made as an open back house opposed to a long side opening house.
But, the instructions included a parts list that led me to find additional parts to make what I wanted. A huge thank you to San Juan Details for shipping me the Reese Street Row Houses kit so quickly.
With all the parts now in hand, I could start making my own Spooky Hollow.
These MTC Tools Micro Precision Pliers are a lifesaver for snipping tiny and delicate parts.
I bought the Grandt Line widow’s walk in HO scale to accent the build as well.
The widow’s walk on my house is just the very top of the molded part. It was a test of wills to get it to glue on straight and secure.
To finish the balcony and porch, I used some leftover adhesive backed micro wood from the Model T Van I built several years ago. In the end, the porch posts ended up a little wonky, but it’s an old, haunted house. I cut down more of the widow’s walk to make the balcony railing.
I used spray paint in moss green for the exterior, later adding some aging with acrylic paints for dimension. The windows and doors are primed in grey, then sprayed flat white.
A little sanding brings forth the grey and adds a bit of age. Cutting, fitting and gluing the acetate film for the glass was an adventure. I used Testors clear parts cement, which made a bit of a mess. Good thing dirty windows are fitting for an old house.
The LEDs are pico 3V in warm white from Evan Designs. I used some Gallery Glass paint to tone down the brightness, going for a warm glow on a chilly autumn evening.
Since I would be adding LED lighting, I chose to enclose my tiny house. Once I had the lights in place and tested the look, I realized I needed to add paper shades to the windows or I would have to finish the interior. It’s rather amazing how much you can see through the tiny windows.
I painted the interior very roughly with acrylic paints and added some scraps of wood to represent furniture. The colors and shapes add dimension in reflected hues and shadows behind the thin window shades, some of which have a small gap at the bottom to allow you to almost peek inside. I even added some bird artwork on the foyer wall. You can discern it with the naked eye, but the camera doesn’t capture it well.
Since I had more than enough parts from the Reese Street kit, I made a matching shed.
The base is a scrap of mdf with feet added so I could add a battery and switch underneath. I made a box from strip wood to disguise the battery, switch and excess wiring.
The trees are made using candytuft from Scenery Solutions. These are the same process I use for my large trees, using Durham’s Water Putty to build the trunks.
The landscaping was built up using thin sheets of styrofoam, including a stone walkway from the porch to the gravel driveway and road. Stucco patch applied unevenly over the styrofoam adds dimension to the landscape.
I used Woodland Scenics foliage, ballast and gravel, held in place by their Scenic Cement. I sprinkled some loose candytuft leaves on the ground as well.
The tiny pumpkins were made by Kyle Lefort.
The car is a 1967 Ford Galaxie Custom 500 by Classic Metal Works. I ran across this when I was seeking small autos for the A-frame. I didn’t know then why I would need a Batmobile for the A-frame, but now I know it was meant to live at Sleepy Hollow.
And, now to put the size in perspective….
Happy Halloween, everyone! :D
Categories: Micro Scale Models
November 5, 2022 | 0 commentsRiverwood Cabin – colors and prep
Starting work on Riverwood Cabin. After viewing a lot of landscaping videos, I’ve decided it’s better for me to build the house first then do the landscaping to fit. I found this great inspiration house online. I love the colors and the water’s edge landscaping. I won’t be copying directly, like adding a chimney or making a bigger deck, but it gives me a good starting point for a color scheme and landscaping ideas.
Planning ahead, I bought shingles from Ultimatetrains. The kit shingles are printed and good quality, but I wanted to try true texture.
The kit manufacturer has included guide marks for shingle strips if you happen to buy them as a supplement to the kit, which is just awesome. :D Less prep work is always awesome.
The patio is pretty warped on the frame. I foresee the use of many magic words in my future as I assemble that part. After I get it painted, I’ll press this and any other parts for a few days to see if I can get them flattened a bit more.
The instructions indicate that painting and staining work better before assembly, so I am going to start there. For the front and back siding, I’ve chosen Villa Green by Folk Art. Paint has to be applied in thin layers to keep the thin wood from warping.
I would apply paint on a portion and then flip over to paint the other side. This kept the warping under control. There is an interior second floor that adds stability and a more realistic interior view. I’d also like to add some LED lighting to the interior. I painted the interior front and back Battleship by Americana so the light will glow through the windows and not light up the whole structure inside.
It’s a lovely teal/seafoam mix. Since it’s just the front and back, I didn’t think the brighter color would overwhelm.
I stained some of the pieces using Minwax Staining Pens.
The exterior roof pieces, floors and lower floor supports are dark walnut.
The interior roof pieces are golden oak.
For the trims, deck and railings, I’ve chosen Camel by Folk Art. I’ll need to paint the outer edges as I remove the parts from the frame during construction since they are dark from the laser cutting process. I painted the front and back doors Night Sky by Americana, which I will likely change. These are very hard to paint, and they look a little uneven in the photo. I’ll try to fine tune them a bit more.
Categories: Micro Scale Models
February 7, 2019 | 0 commentsMicro Scale Models
A recap post to make it easier to find the micro scale models. Click the title links for additional details and photos.
———Riverwood Cabin – New Rail Models A-Frame Cabin kit in N-Scale – work in progress
Gustav’s Mill – Archistories Windmill “Marienfehn” in Z scale – work in progress
Hampton House – 1:144 scale – work in progress
photo from miniatures.com website Categories: Micro Scale Models
February 6, 2019 | 0 commentsRiverwood Cabin – A-frame in N-Scale
I’ve always wanted to build a mini A-frame since they are one of my favorite house designs in real life. I found this New Rail Models A-Frame Cabin kit in N-Scale on eBay after searching for some time. If you can find this kit in N-Scale, it can ratchet up in price quickly. I was lucky to find a Buy It Now listing for about $30 for a brand-new kit. It seems easier to find the HO Scale version.
The front piece for the house measures 1 15/16″ tall by 1 13/16″ wide. So wee. It comes with printed shingles, but I will see about a truer material.
An excellent source of inspiration and information can be found in this delightful book appropriately titled A-frame by Chad Randl.
Even if I never made an A-frame, I wanted this book for my library. :]
I bought a 12-inch square board to serve as the landscaping base. Since the house footprint is roughly two inches square, that will leave a lot of room for some new landscaping techniques, namely the kind used in model railroads. I want to try making a riverfront property, so I’ll be using styrofoam, sculpting materials and resin water. I’ve been watching videos on landscaping and picking up materials to test.
I also picked up some accessories to get me on the way. I was actually searching for a Jeep or equivalent, but fell for this beast. It was unnamed in the listing, but I am fairly sure this is a 1967 Ford Galaxie Custom 500 by Classic Metal Works. I don’t know why I would need a Batmobile for the A-frame, but I couldn’t resist. Yep, those wheels actually turn.
I also picked up a Mercedes SUV and Mini Cooper. I was thinking it might be fun to take some vintage photos with the big Ford and then modern photos with the newer cars.
These cats and dogs are crazy small.
Honestly, the cats don’t look like anything beyond fuzz. haaaaaaaa So, we’ll likely use one of the dogs, but I especially love the hydrant (which would likely not be present in the woods) and the trash can.
Categories: Micro Scale Models
January 2, 2019 | 0 commentsGustav’s Mill
One of the reasons I cut new walls to make Watson Mill larger on the inside was to accommodate Gustav’s hobby. Turns out, in addition to avid reading, he’s a miniaturist. :D In researching mini mills, I found this delightful Archistories Windmill “Marienfehn” in Z scale.
Here’s a penny to show the size of the pieces. There’s excellent detailing as well. The pieces seem to be made from some kind of chipboard material, and they recommend the use of wood glue. There are 10 pages of illustrated instructions, but it seems fairly straightforward.
There’s even a motor for it. Yep, the sails go roundy roundy. :D It’s a DC 3V motor, so this should work with a battery holder and switch. I can build a work table to disguise the switch underneath.
I bought some 21-gauge tipped glue syringes since the portions to be glued are so small. Elmer’s wood glue worked well with them.
The kit goes together easily since the parts are so accurate. The instructions are clear with good drawings.
The motor does work with a 3V battery holder. There are two diodes included to slow down the revolutions per minute (from 33rpm to 15 rpm according to the instructions). Those will be added later once I get the display table built for it. The motor has a quiet wind-up toy sound that’s rather satisfying.
I got out my soldering materials to attach long wires to the motor. I left a lot of length so I can have more to work with later.
The X brace has been left unglued. I plan to make a modest landscape for the display, so I’ll add it once I get that in place.
I didn’t take many photos during the building process since the tiny dabs of glue dry too fast. :] The sails are also just lightly glued right now. I’ll add a stronger adhesive once I’m done. I want to be able to remove the sails during the landscaping process.
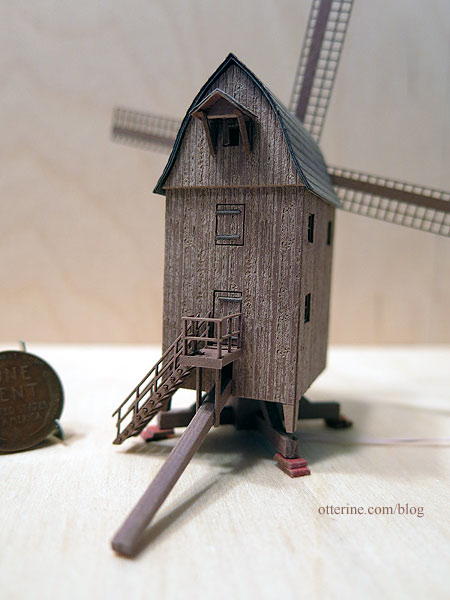
The tiny doors can be displayed open, but I like them closed. There was no breathing when handling those tiny hinge accents.
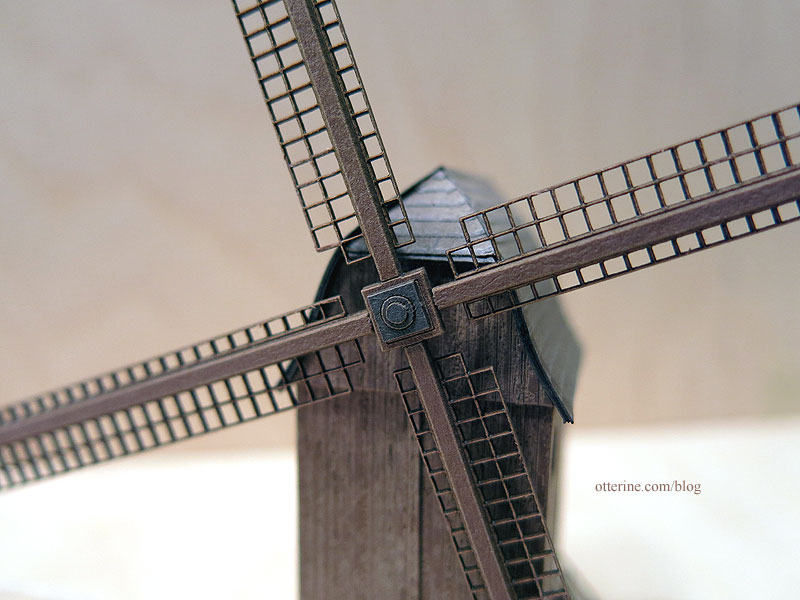
The hub looks so big and solid, but the centers are thin black paper circles applied with needle tip tweezers.
I love the wee windows. Yes, they have “glass” in them.
One of my favorite parts are the red stone slabs. Just a pop of color in the mix. You can also see the fine siding texture here.
Of course, I know you want a movie.:D This was taken with the two diodes taped in place, so this is the final speed of the sails.
Unfortunately, Gustav’s Mill is too large for Watson Mill’s interior. So, we’ll just say Gustav built it to display elsewhere, a museum or gallery. :]
Categories: Micro Scale Models, Watson Mill
April 18, 2017 | 0 comments
NOTE: All content on otterine.com is copyrighted and may not be reproduced in part or in whole. It takes a lot of time and effort to write and photograph for my blog. Please ask permission before reproducing any of my content. (More on copyright)