
Mail Wagon – part 3
Continuing work on the Mail Wagon. I’m starting with the Doctor’s Buggy by Model Trailways. What I like about the kit are the well made parts, the detailed instructions and good pictures. I’m not much of a fan of the huge blueprint sized diagrams, though. I suppose it is easier from a manufacturing standpoint, but there isn’t always a lot of room to spread these things out while working. I have to keep them in another room and walk over to view them since I don’t want to keep clearing my workspace as I move back and forth between steps. As nice as it is to have large diagrams, the huge sheets are cumbersome. As usual, though, I made a photocopy of the regular sized instructions and diagrams so I can mark them up as needed.
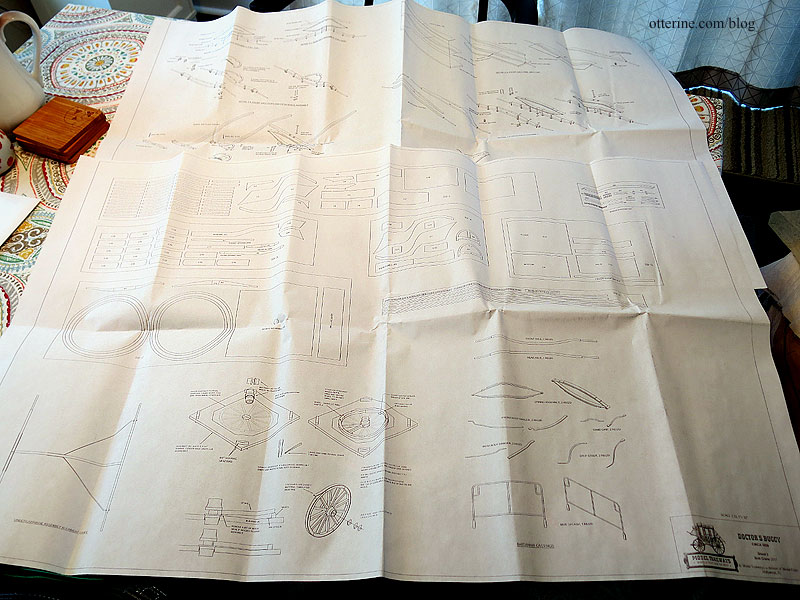
Another issue is the lack of numbering on the individual parts on the wood sheets as well as the detailed diagrams. The detailed diagrams call the parts by their functional name but don’t indicate a number, so you have to look for a part that resembles the drawing among the wood sheets. It’s doable but inefficient. If I didn’t have the model building experience I do, this might be a bigger issue.
As noted before, I plan to make the front and rear axle assemblies, including the wheels, and then build my wagon cabin to suit. The instructions start with the axle assemblies, so that’s where I begin. You make a jig to help with drilling an accurate bolt hole. It’s a great feature of the kit.
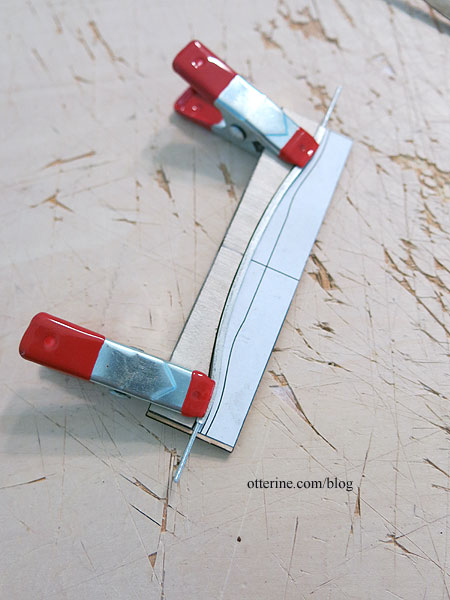
The laser cut front axle cap is longer than the metal front axle, so I had to trim it to match the photo. The instructions mention nothing about this trimming, so luckily I had studied the photo.
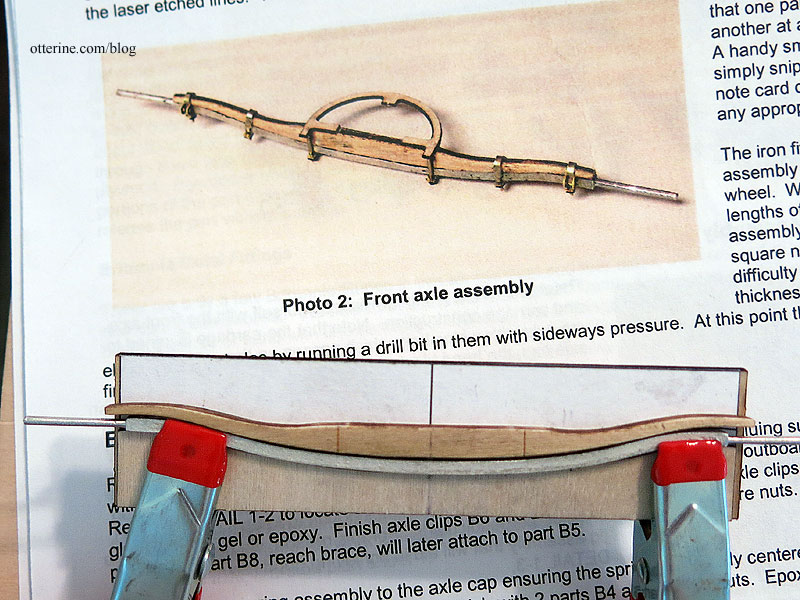
In addition, the laser cut front axle cap and the metal front axle have slightly different bends. While the metal is somewhat pliable, it wasn’t possible to get a bond without gaps. After painting, this should be no issue. Since clamping was not possible without a lot of shifting (I used my fingers to hold the parts until the epoxy set), I glued the middle portion first.
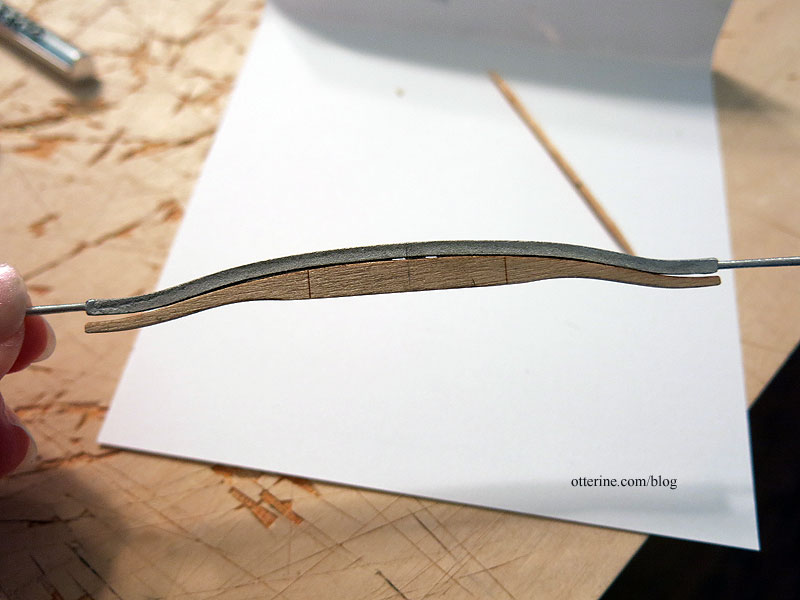
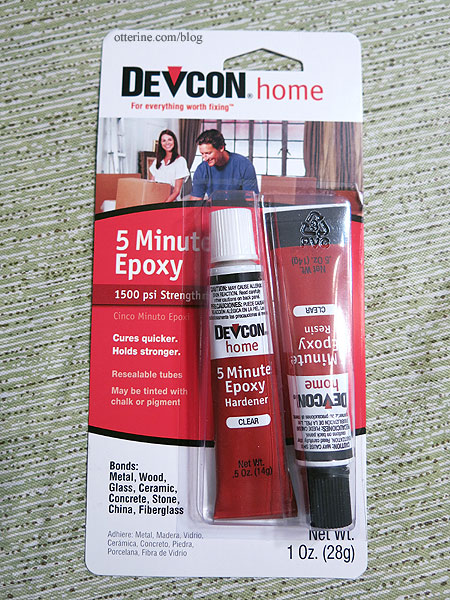
I used Devcon 5 Minute Epoxy from amazon (as an Amazon Associate, I earn from qualifying purchases). This stuff stinks to high heaven with the hardener smelling like rancid, rotten eggs, but it is as advertised.
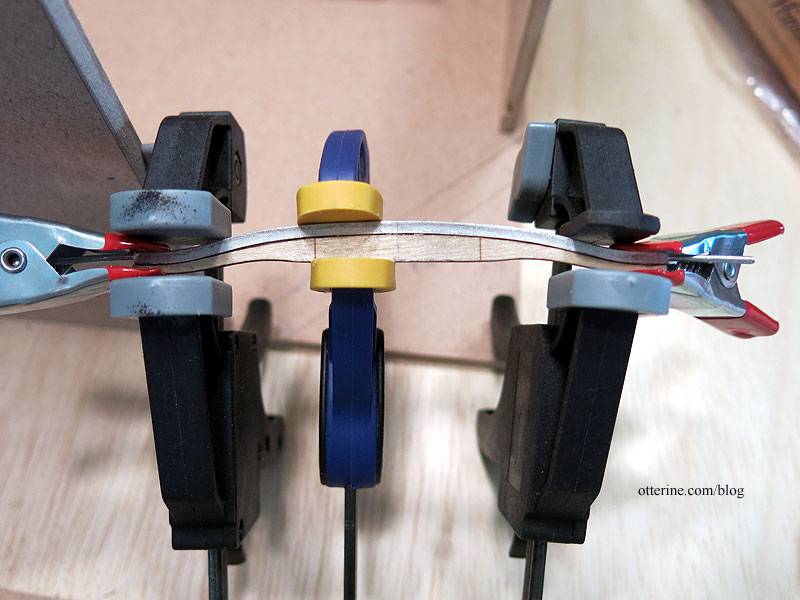
Once the epoxy set on the middle portion, I was able to go back and glue the ends. I held the pieces until the epoxy set, then for the final curing time, I clamped the hell out of it. :D
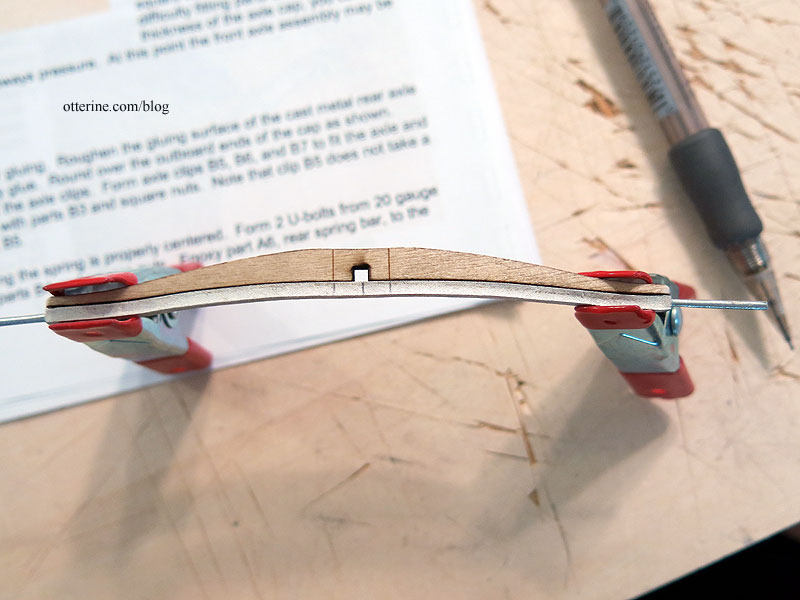
The rear axle cap and rear axle fit much better, but I had to trim the ends of the wood part here as well.
I need to swear at the instructions some more to figure out the next steps. Back soon…
Categories: Ivy Hollow RFD, Model Cars, Vehicles
May 25, 2019 | 0 commentsIvy Hollow – screen door, part 2
Continuing work on the screen door. I’m likely going to jump around a lot as I get going on the post office structure, furnishings, mail wagon and horse.
I had already ordered the Aluminum Black when Sheila said it worked well for her. She was right about the fumes, so into the garage this went. Bleh. (As an Amazon Associate, I earn from qualifying purchases.)
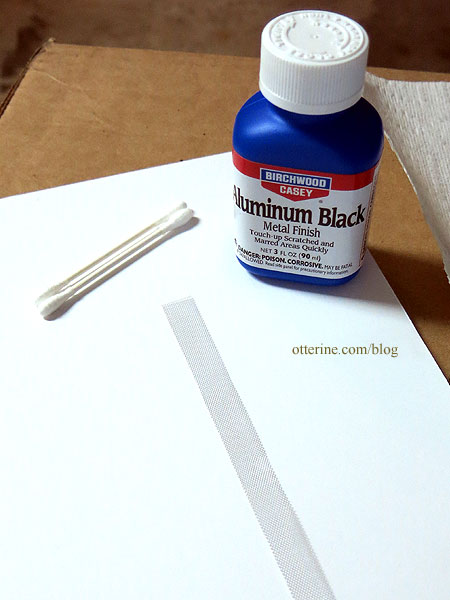
I did test it on a scrap first and the color seemed great.
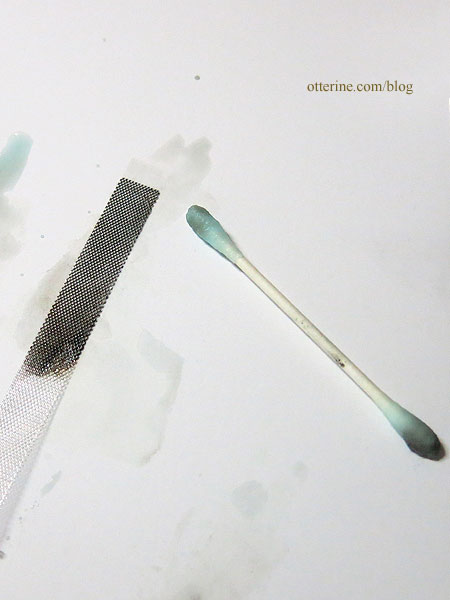
I applied to the larger piece, and it was splotchy. I added a couple of coats, and that caused some issues. I even saw a puff of smoke or vapor at one point. :\
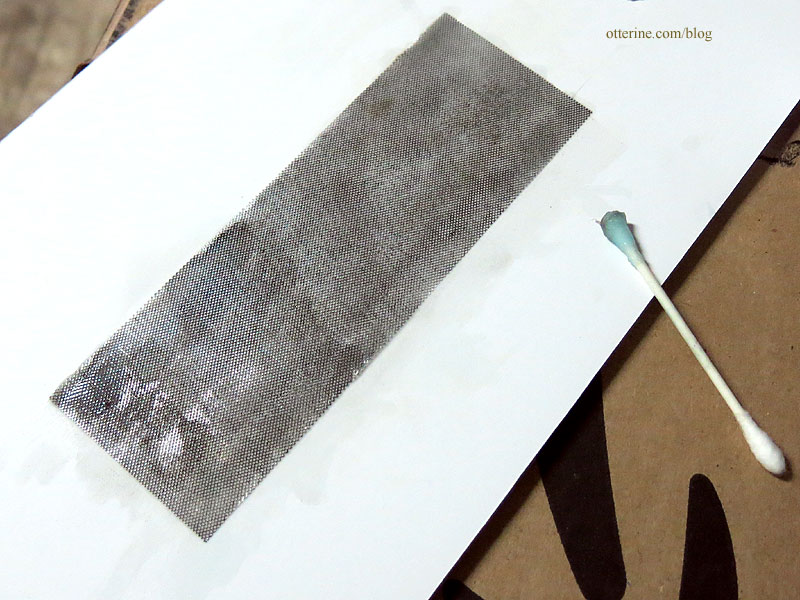
In the end, it didn’t work because the chemical was caustic enough to weaken the delicate screen. I can see how this would work well for more substantial material, but this material was just too thin. I cut a new screen insert and decided to just go with the original finish. I considered pouring some of the chemical into a dish, dipping it and then removing it, but I worried the finish would be splotchy again. Plus, it might still weaken the metal with only a quick dip. I have a few ideas.
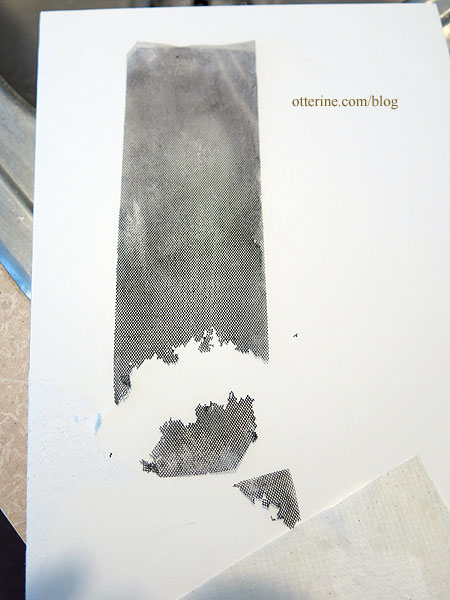
Of course, now I know how to make an old deteriorating screen. :D
Categories: Ivy Hollow RFD
May 17, 2019 | 0 commentsMail Wagon in real life
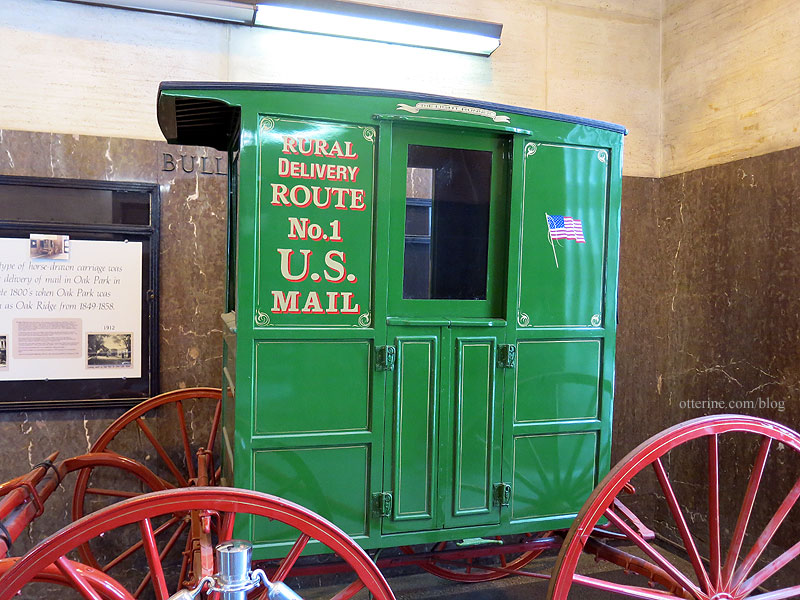
After discovering the Wesley W. Jung Carriage Museum, I figured I would try to find the real deal within road trip distance. As luck would have it, there’s one at an old post office about 40 minutes south of me. And, further to my good fortune, a lovely blog reader generously offered me her collection of miniatures magazine and a few books. Since she was also south of me, I made a morning of it. I met with her to pick up the magazines and then headed over to the Oak Park post office. This is a beautiful building, but there is no dedicated parking. Luckily, it was a nice day and the library parking garage was just across the street.
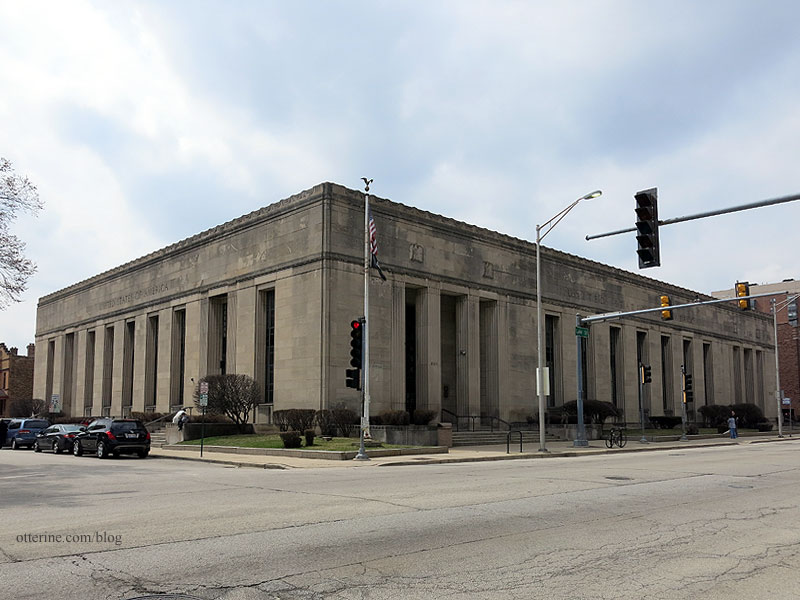
The mail wagon did not disappoint. :D
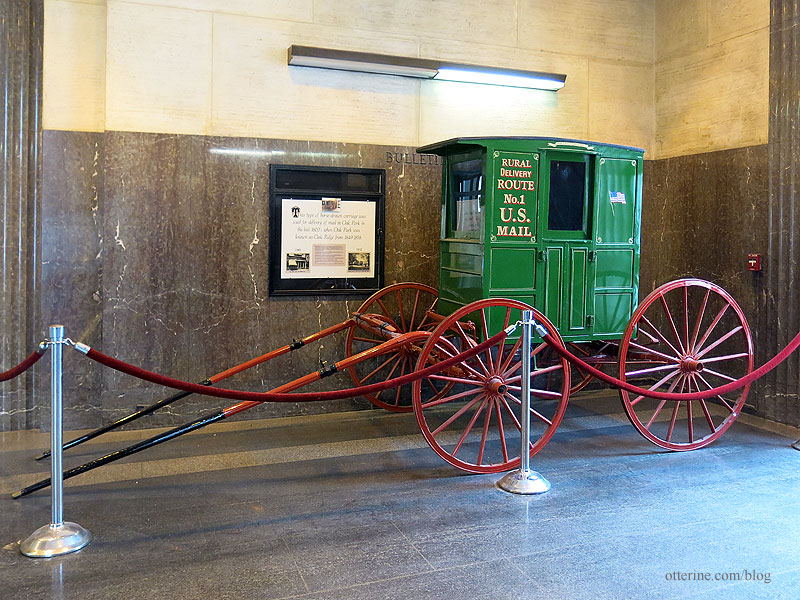
I knew the cabin itself would be skinny, but you can see just how wide the wheel axles are in relation.
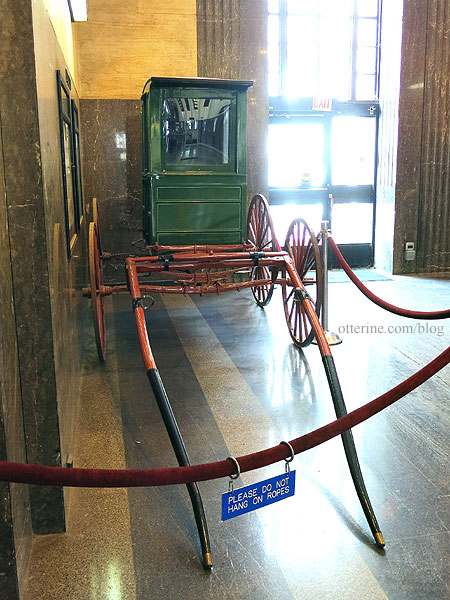
It’s very shiny, so I had to be mindful of not getting my own reflection.
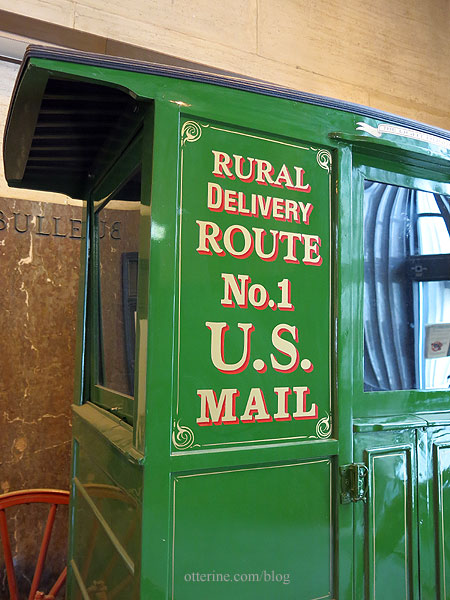
Now I have detailed pics of the undercarriage and detailing of an actual mail wagon.
Categories: Ivy Hollow RFD, Model Cars, Vehicles
April 6, 2019 | 0 commentsIvy Hollow – screen door, part 1
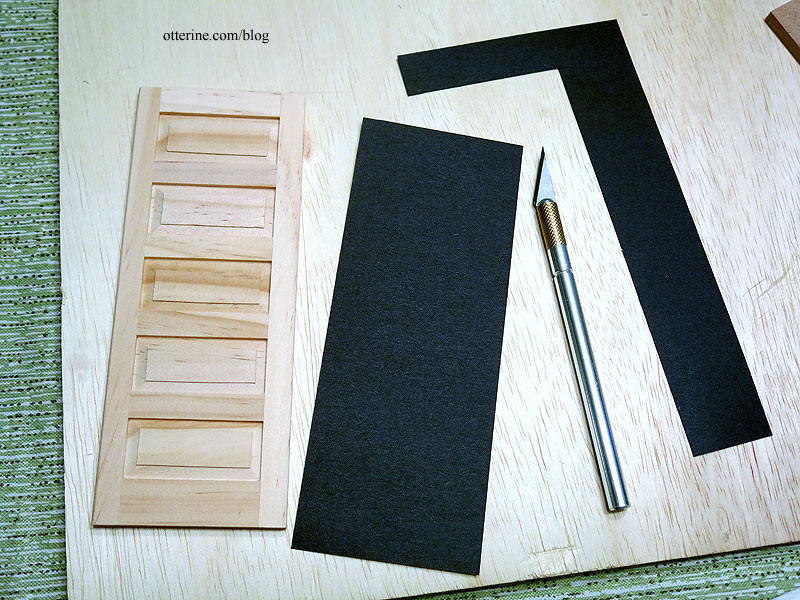
Before I can build a new frame for my Houseworks door and screen door, I need to build said screen door. I’ll want the screen door to be fairly thin but stable enough for hinges. I’m using the sandwich method I used on the Otter Cove modern door with a few changes. In fact, the solid door I’ll be using is the leftover part from Otter Cove’s door frame.
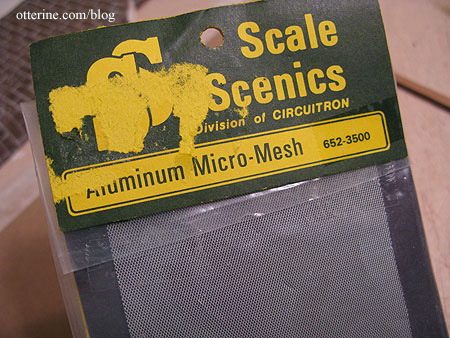
I started with a new package of Aluminum Micro-Mesh by Scale Scenics. This material is finer and stiffer than the screen material that came with the Greenleaf screen door, though I do like the black a little better. I have tried painting this mesh before without success, so perhaps I will try some blackening product on it to see if that will work. If not, I hope the silver metal won’t be too much for a darker color door. If so, I might have to change my planned trim colors.
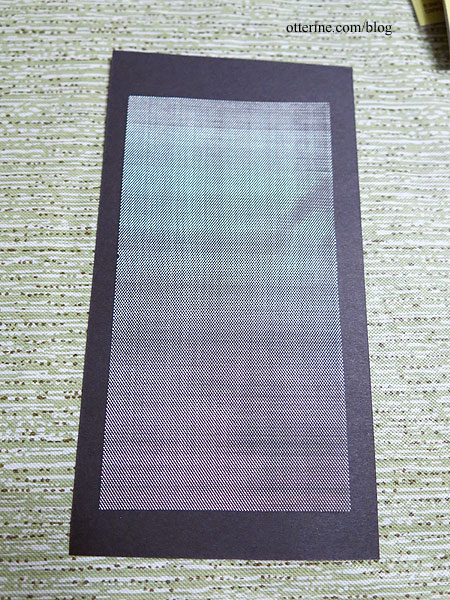
The package comes with black cardstock to show off the mesh, so I used that for my inner portion. Nothing that can serve a purpose goes to waste. :]
I cut a rectangle the size of the Houseworks door.
I cut the mesh to fit as best as possible over the Houseworks door. I will build an outer frame similar to the solid door.
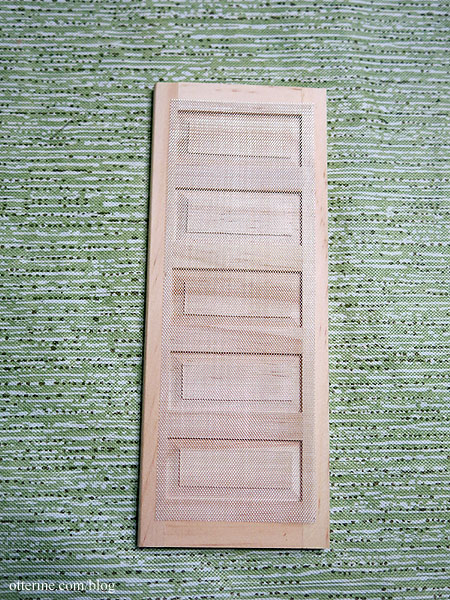
I marked the rough placement on the black card stock.
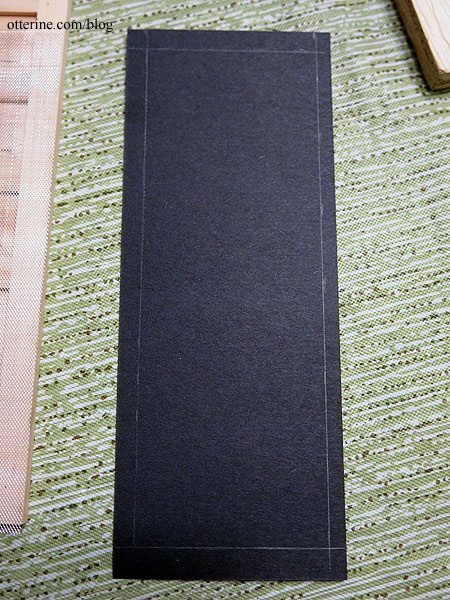
I cut out an inner rectangle that would encompass the mesh.
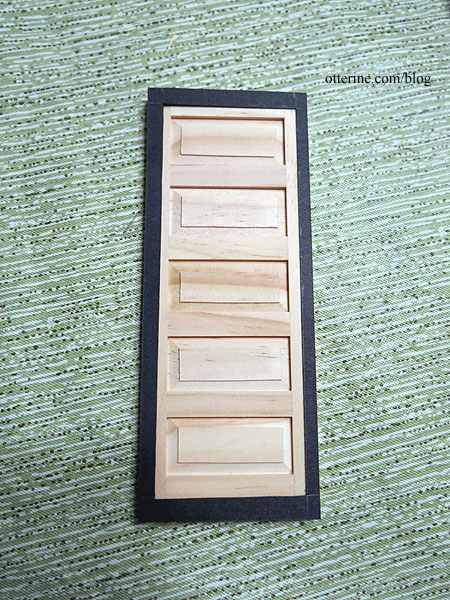
Using the solid door as a guide, I cut a border from 3/8″ by 1/16″ strip wood for the top and sides, and 1/2″ by 1/16″ strip wood for the bottom. I went with wider boards not only because the mesh is limited in size but also because I need the door to be substantial enough to function. If you look up vintage wood screen doors, you’ll find a lot of heavy, substantial doors. I can hear the bang as it slams shut in the wind.
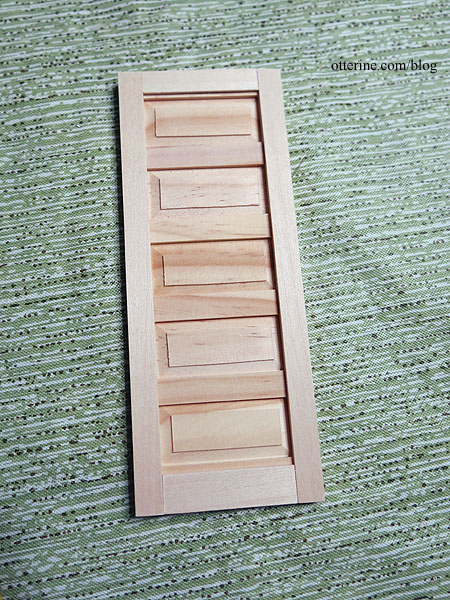
The cardstock fits over the strip wood, and the piece of mesh fits inside the cardstock.
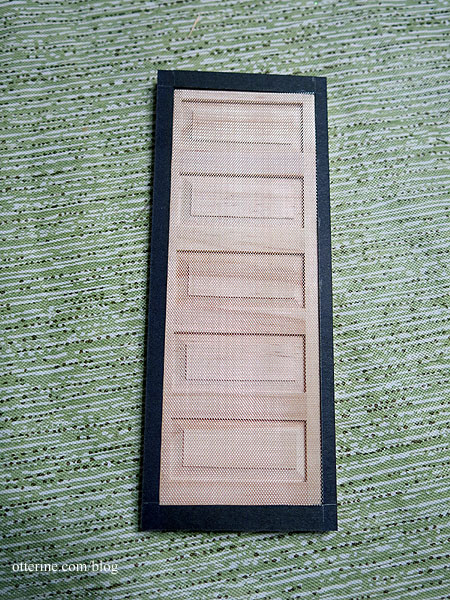
Another set of matching wood strips completes the other side of the door sandwich. :] I’ll add some crossbars and supports later during the final assembly.
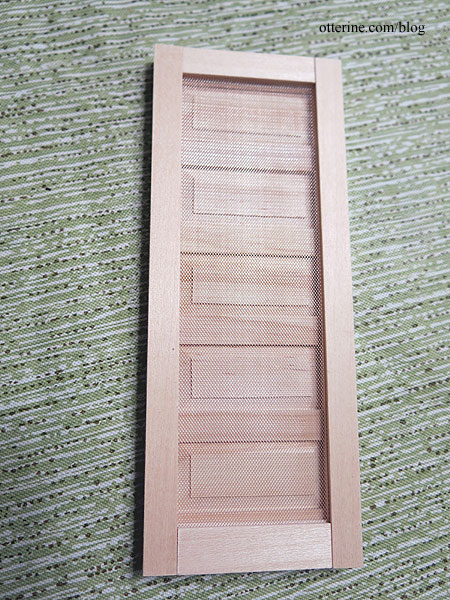
None of this is glued, because it would never stay together during the painting process. I’ll paint the initial coat on these pieces (and crossbar strips) and attempt to darken the mesh next, then I will assemble and touch up the paint.
Categories: Ivy Hollow RFD
April 2, 2019 | 0 commentsRare find
Along the way of researching, I often run into old books due to the era I choose to emulate in my builds. Making a turn of the century mail wagon led me on such a journey. There are other books I’ll mention, but this one is a true gem. It’s called Plans and Dimensions of U.S. Mail Wagon of 1880 by A.S. Dodd. In 1951, Jack D. Rittenhouse published a reprint of the article from a magazine called The Hub and limited it to 295 copies. Given the rarity, it’s not surprising to find that there are only seven libraries that have a copy, six of which are universities.
I tried to obtain a copy through interlibrary loan, but the request was denied due to the item’s status as non-circulating. The closest locale was over 700 miles away, so a road trip wasn’t really in the cards. I wrote to the Wyoming State Library to see if their copy was circulating since it didn’t indicate that it was not. A staff member replied that they would send it out of state but it would have to be kept on the premises of my local library. That was perfectly acceptable to me, so off my request went.
It showed up a short time later, and the library staff indicated I could see it on my usual Bookmobile stop since the Bookmobile was considered library property. But, I wanted to be able to take my time and perhaps make some copies if it turned out to be a good resource, so I waited until the upcoming weekend to head to the library. My boyfriend and I went to the library and saw an amazing bit of history. While not particularly useful for my project, the booklet was simply wonderful.

The booklet was set into a card folder to protect it, but it was still worn from handling and age. I don’t know if libraries still stamp due dates with the modern barcode technology, so it might have been checked out since 2003, or maybe not.

The copy was held together with tape in some places, so we gingerly made copies and took photos.

When we got home after dinner, I did another quick google search and a copy popped up on amazon. The listing indicated it was in like new condition and included a 1981 stamp of the very mail wagon featured in the booklet. It was pricey, but when it arrived, it was more than worth it.

There’s a little separation of the outer page along the fold, but other than that it is perfect. The stamp sleeve has been signed by the publisher.

Such a great addition to the original reprint.

So, now we know there are eight still floating around for sure – seven at libraries and mine. :)

Categories: Books and media, Ivy Hollow RFD
March 28, 2019 | 0 commentsMail Wagon – part 2
Continuing work on the Mail Wagon. After my visit to the Wesley W. Jung Carriage Museum, I was even more inspired to make the mail wagon as realistic as possible. If you do a google search for RFD mail wagons, you will find a wide array of vehicles. Some are tiny and some are posh, and even the suspensions vary. This is because the carriers were to buy, store and maintain their own vehicles (and horses). I’m choosing to make what appeals to me aesthetically as well as what I think will be a reasonable build to attempt. Since most cabins were basic boxes, the more challenging part is emulating the suspension.
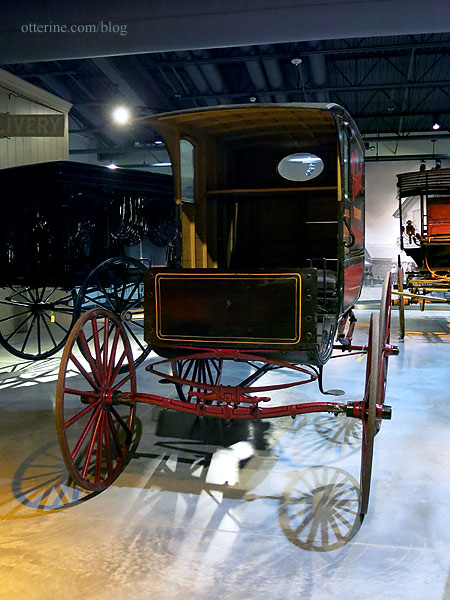
Tobacco wagon at the Wesley W. Jung Carriage Museum with similar suspension The Rondell mail wagon kit is completely lacking these suspension details, and after seeing the real life examples, I’m thinking the wheels from that kit would be too bulky as well. The farm wagons and other utility vehicles had substantial wheels, but the mail wagon wheels were rather slight and dainty.
During my research this week, I happened upon a 1:12 scale Doctor’s Buggy by Model Trailways. This can be pricey depending on the retailer, but I found a great deal on amazon for $50 plus free shipping (as an Amazon Associate, I earn from qualifying purchases).
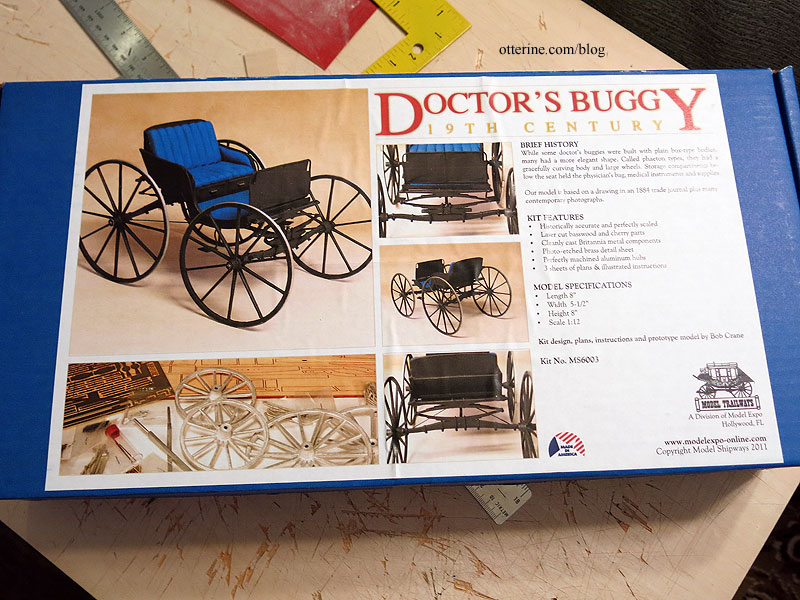
It has the exact suspension I need and daintier wheels than the Rondell kit.
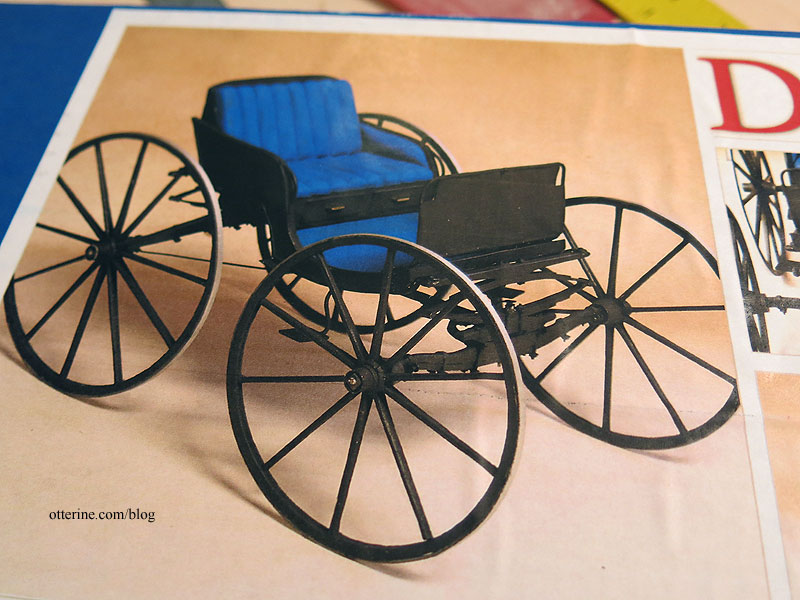
Considering the time and effort I would expend to recreate these parts, the kit is worth it for those parts alone.
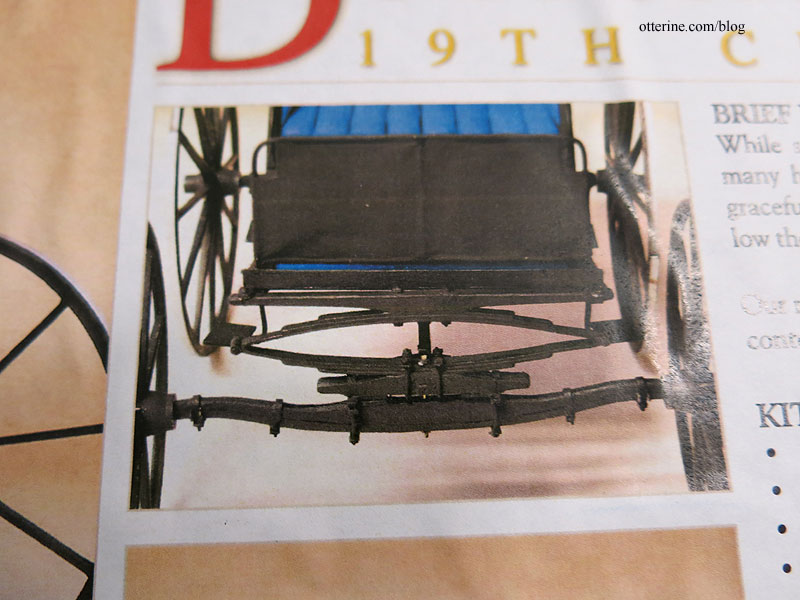
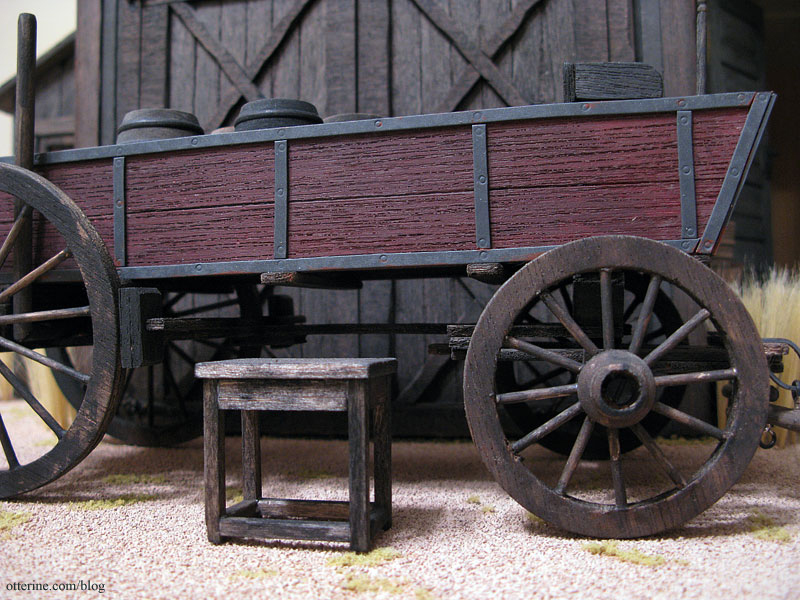
The springs and axles are actually metal in this kit. The wheels will spin and turn, which is just fabulous! I think it should be fairly straightforward for me to extend the suspension front to back to accommodate a mail cabin that will likely be longer than the kit’s buggy compartment. Those compartment parts are equally fabulous – laser cut and precise.
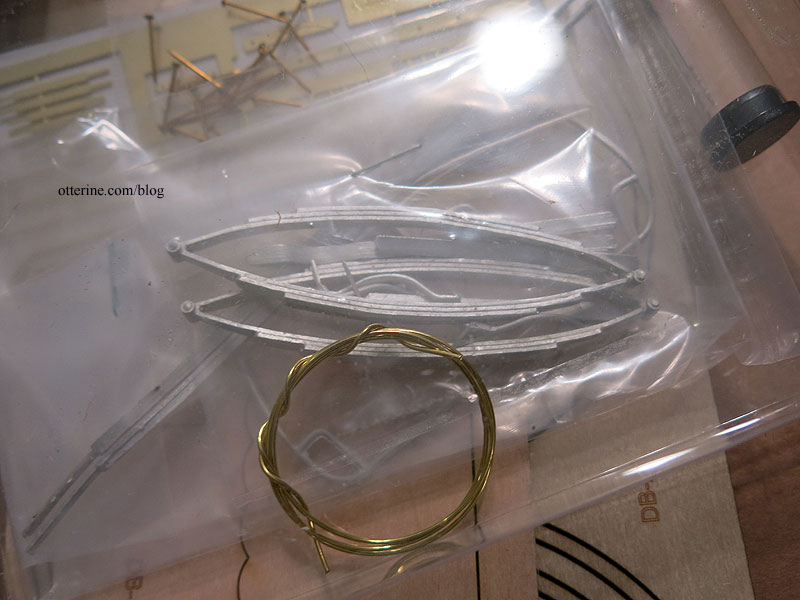
Now, the reviews say these are challenging kits, but I’m up for it. :D Plus, I’ve made many model cars, so I’m used to confusing, vague and outright erroneous instructions. I’ll start by making the front and back assemblies independently, including the wheels, then build my mail cabin to fit before I make adjustments to the length of the suspension. I’ll need to be mindful of adding too much weight in case the metal parts are more delicate than they seem. I’ll weigh the doctor’s buggy parts as a guide.
Categories: Ivy Hollow RFD, Model Cars, Vehicles
March 15, 2019 | 0 commentsWesley W. Jung Carriage Museum
This past weekend, my boyfriend and I visited the Wesley W. Jung Carriage Museum at the Wade House historical site in Greenbush, WI. It’s a 20,000 square-foot museum with some of the finest carriages and displays I’ve seen. It has been cold and snowy in the area, so I hope that is why there weren’t many visitors. It’s a great place that maybe people take for granted. But, maybe it’s more seasonal when people can tour the grounds and partake in festivities in warmer months. Even though we didn’t go to the other places in the complex, the carriage museum alone was worth the visit.
There’s a gorgeous stagecoach before you reach the ticket counter, and you can climb inside. There’s an automated speaker that gives you a fun experience, and a gift shop with a lot of vintage candies.
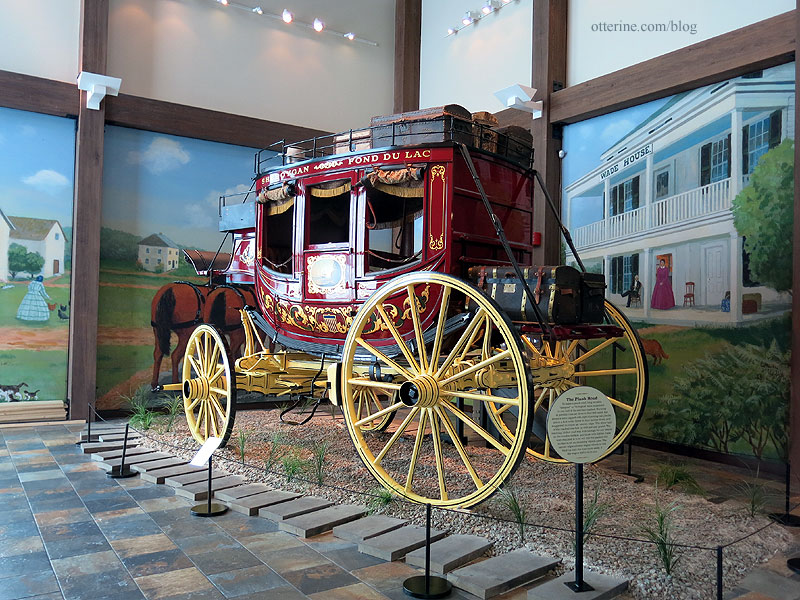
Since we were the only visitors, the curator Jim gave us a guided tour of some of the more relevant carriages for my RFD build. While they didn’t have an actual mail wagon in the collection, there were a couple that had similar suspensions and features to various mail wagons I’ve seen in my research. After this helpful start, we roamed the museum, making two full laps to take it all in.
This tobacco wagon was the closest in size and type of suspension, at least for the front.
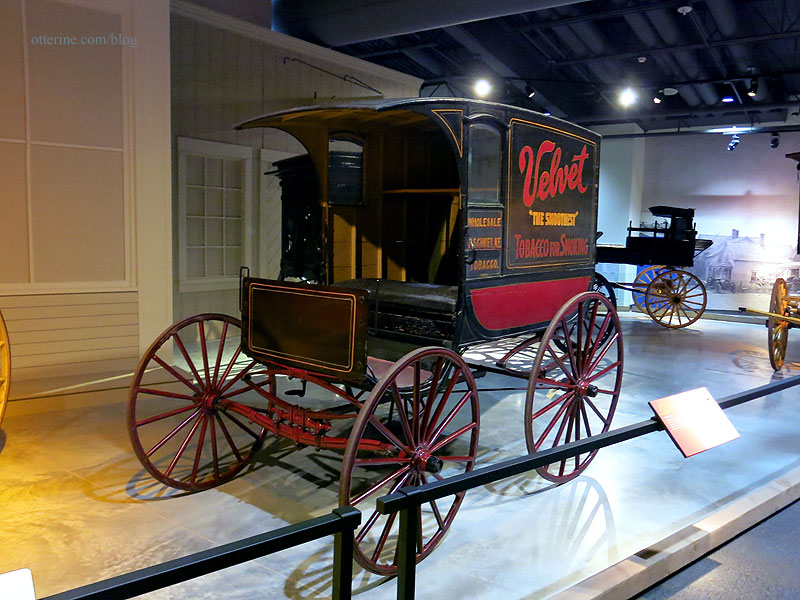
I was able to get some great photos of the underside that showed me how it was all put together. Much of this was made from metal. I don’t plan to recreate in metal, but I think I can get a nice replication in other materials.

There was a great side room that showed the springs and wheel construction, as well as how it was all put together.
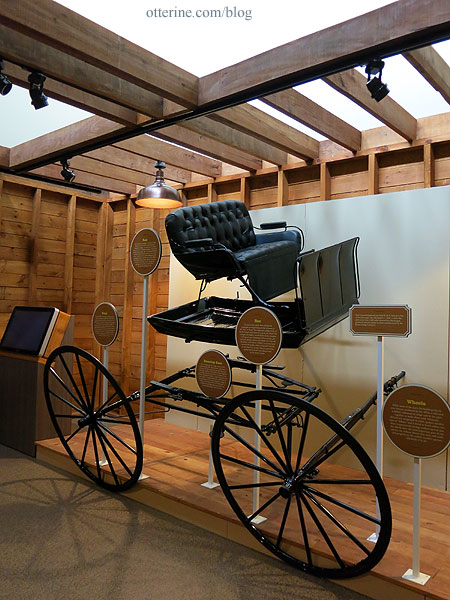
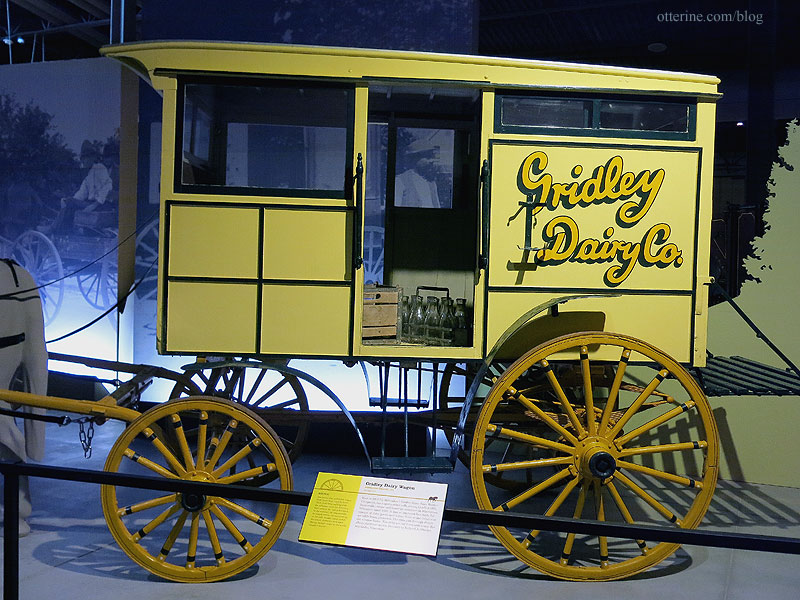
This milk wagon has sliding interior doors, which I’ve seen in some of the mail wagons.
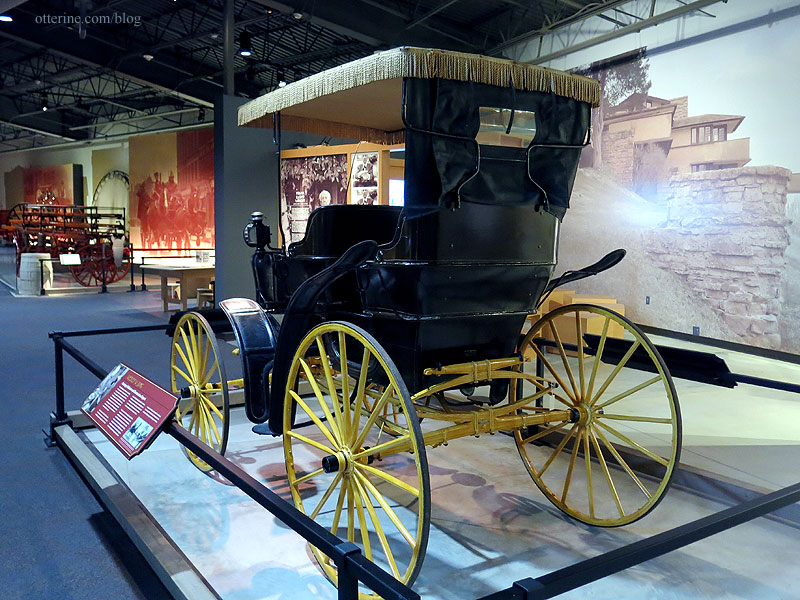
This carriage has a closer match to the back suspension I’ve seen in mail wagons.
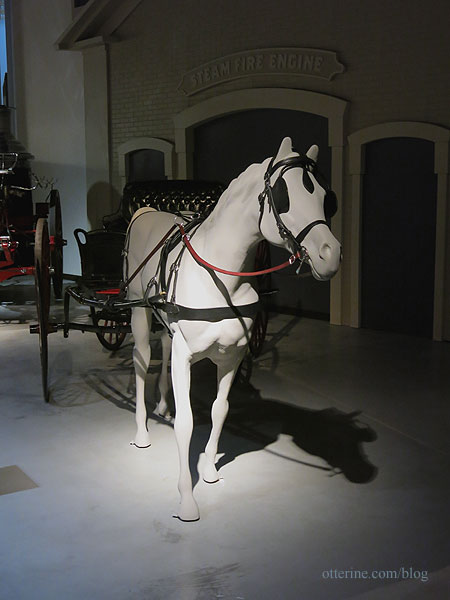
There were a few horse models on display, so I was also able to get some great shots of the harness setup.
I have some library books to peruse as well, which I will detail separately, but it was awesome to see examples in person.
Categories: Ivy Hollow RFD
March 11, 2019 | 0 commentsRealife Country Store fixtures – part 1
Realife kits are no longer produced, but they are fairly easy to find at mini shows and on eBay. Some cost more than others, but you can usually find a deal eventually with some patience. My post office will need a post office teller/sorter, and I love the one shown on the cover.
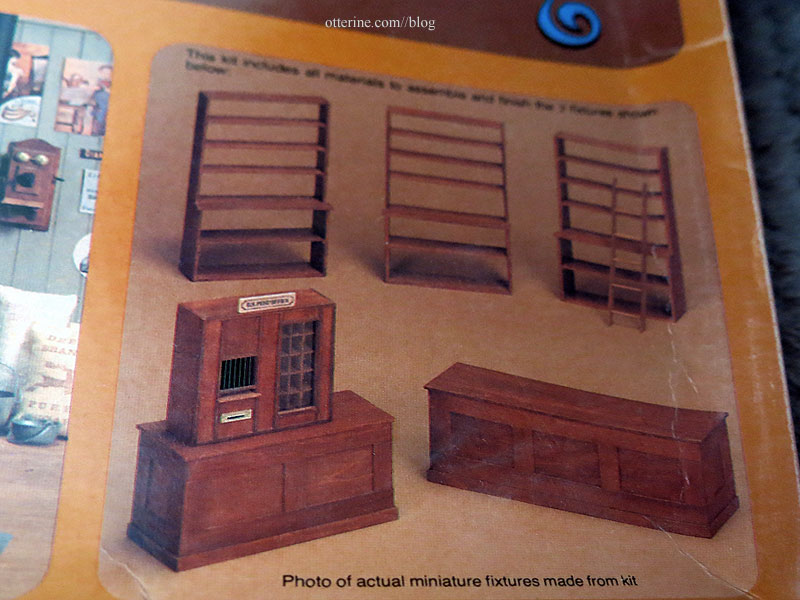
While not overly complicated, Realife kits are easier to work with once you’ve made a few other types of kits, like The House of Miniatures kits. Realife kits require more patience and prep work. The kits are usually die cut basswood with some other materials included depending on the kit.
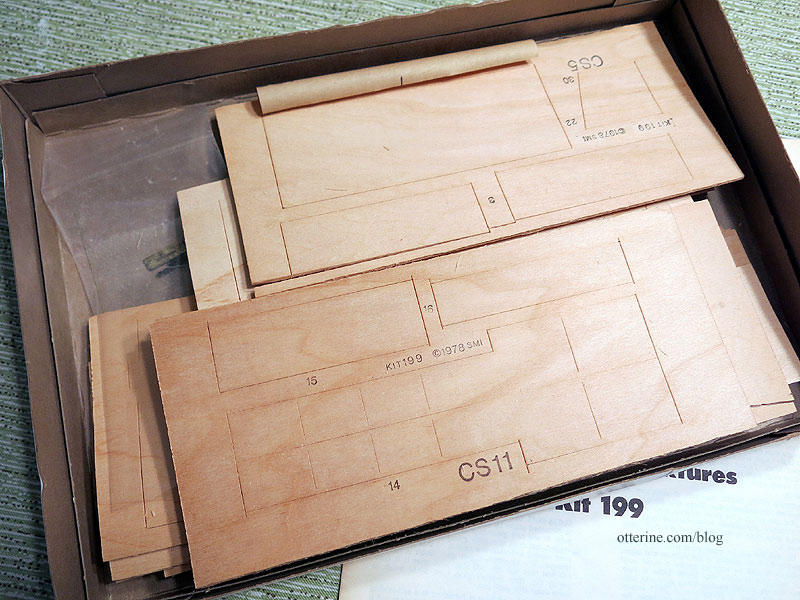
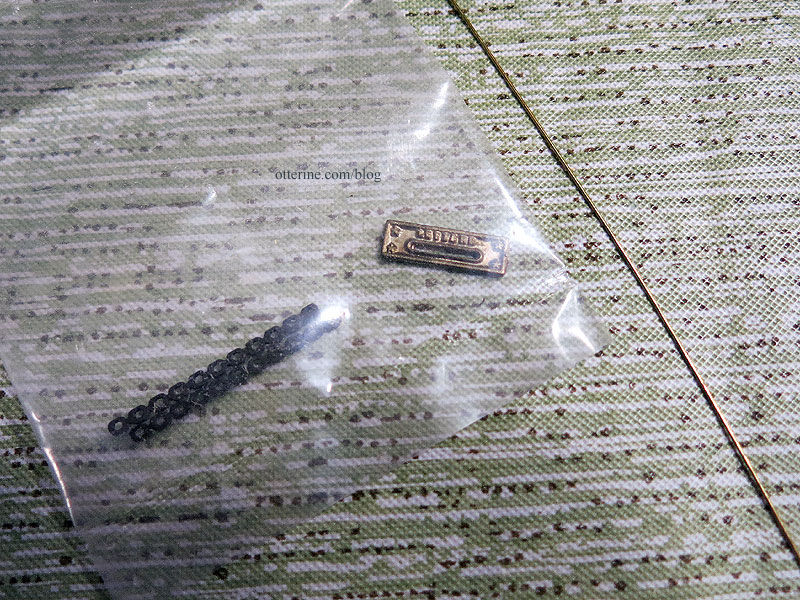
This one includes a letter slot cover, brass wire and a guide for the window bars.
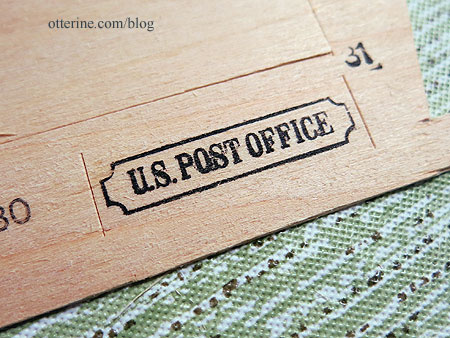
Love the printed detail, but it’s a little sloppy. I’ll print a new sign.
The kit includes “strip wood” which are widths pre-cut from a single sheet. For the trim, you cut the lengths you need from these various sheets.
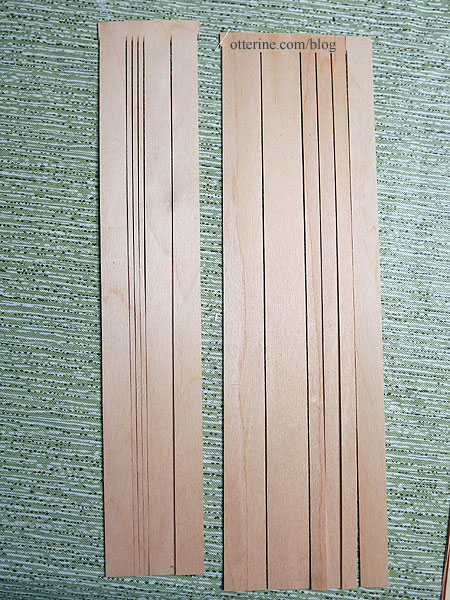
The die cuts are rarely all the way through, as you can see here. The wood will require lots of sanding. The wood is raw at best, and the age can change the quality over time as well. I don’t usually bother sanding until I am assembling in case a part doesn’t work and I need to replace it. No sense in working to smooth a piece you’ll discard.
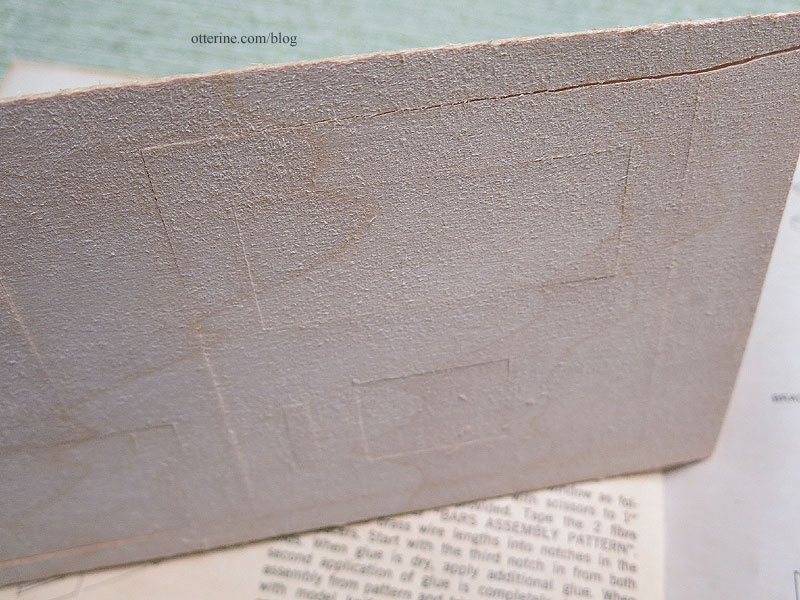
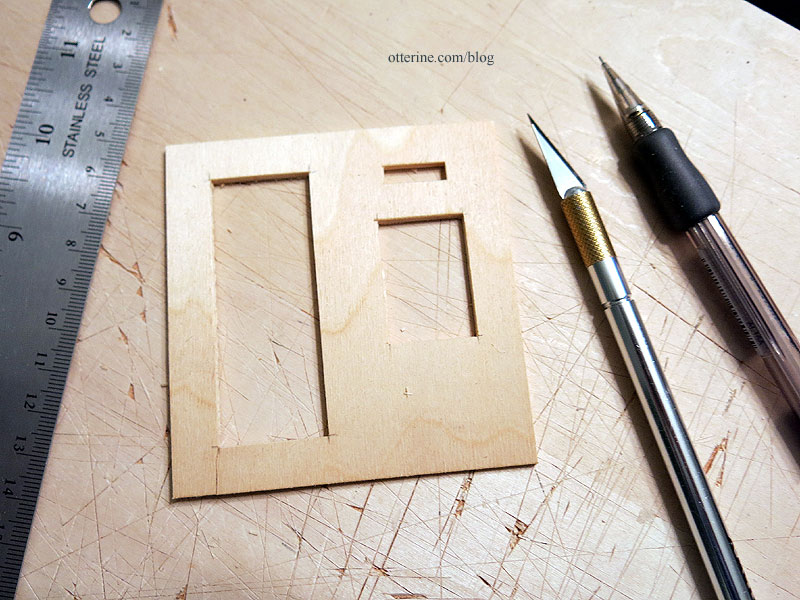
You need to use an X-Acto blade to carefully release the parts and any openings. Sometimes, the wood is fine, but the pieces are cracked, like this front piece. Depending on trim placement and load that will be on that piece, sometimes you can just repair the broken piece. In this case, I will repair the piece since it won’t show in the end. (The instructions even indicate this piece is prone to breakage and suggest repair.)
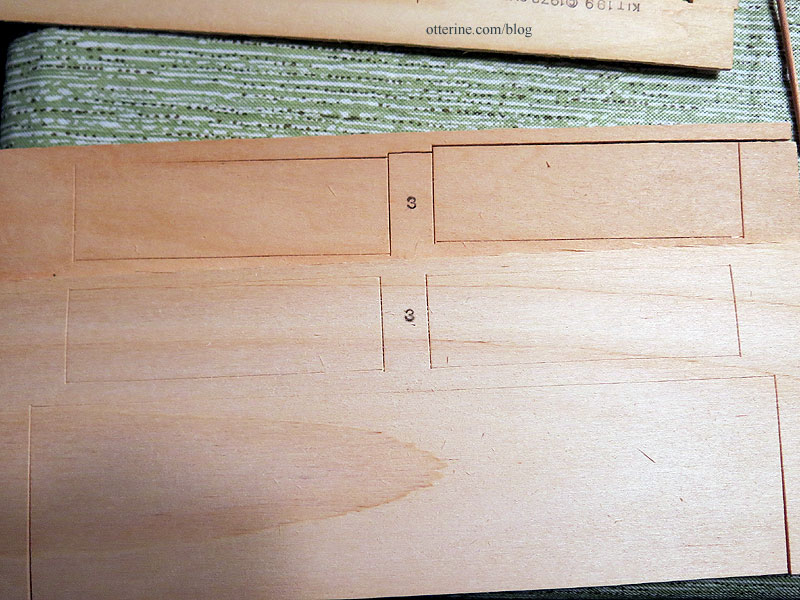
The parts are sometimes marked incorrectly, though it’s rare. In this case, I have four Part-3 pieces and zero Part-2 pieces when I should have a pair of each. Showing them side by side, you can see they are not the same length. So, one set must be Part-2. I mark all pieces with their number in pencil as I cut them from the sheets. Otherwise, you end up with a bunch of rectangles in a jumbled mess.
Dry fittings are a must. As you can see, there are gaps that will need to be addressed during assembly with sanding to fit, clamping as glue is applied and/or replacing parts.
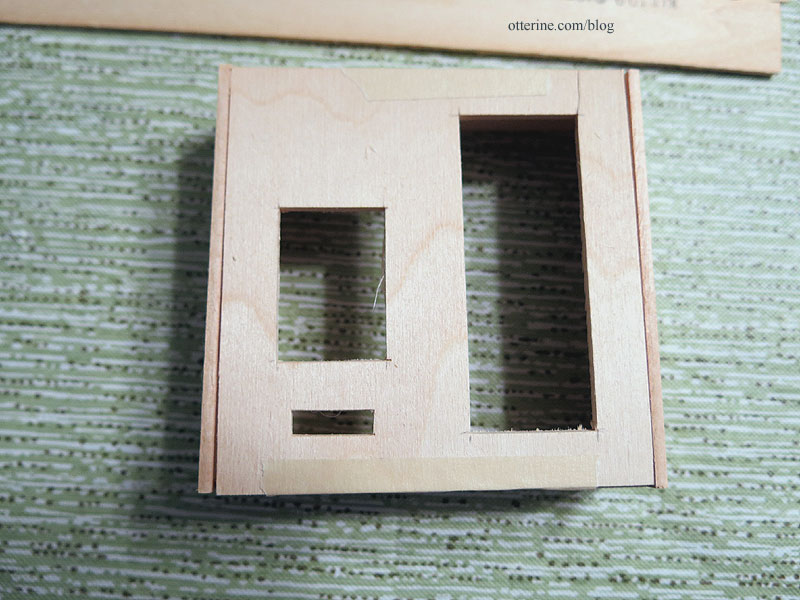
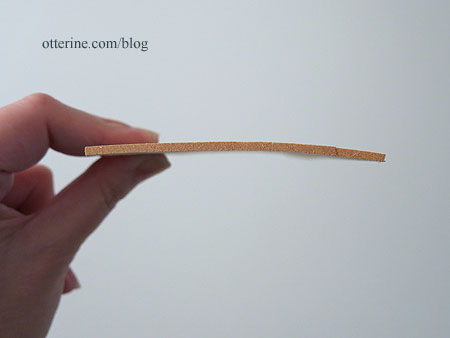
The old wood can sometimes be warped, so you might need to cut replacements from new materials using the pieces as a guide. This is the front of the counter the post box teller will sit on, so I’m going to cut it from new wood instead of trying to fight the warp. The same with the countertop which is warped and has a rather large wood grain that will be out of scale.
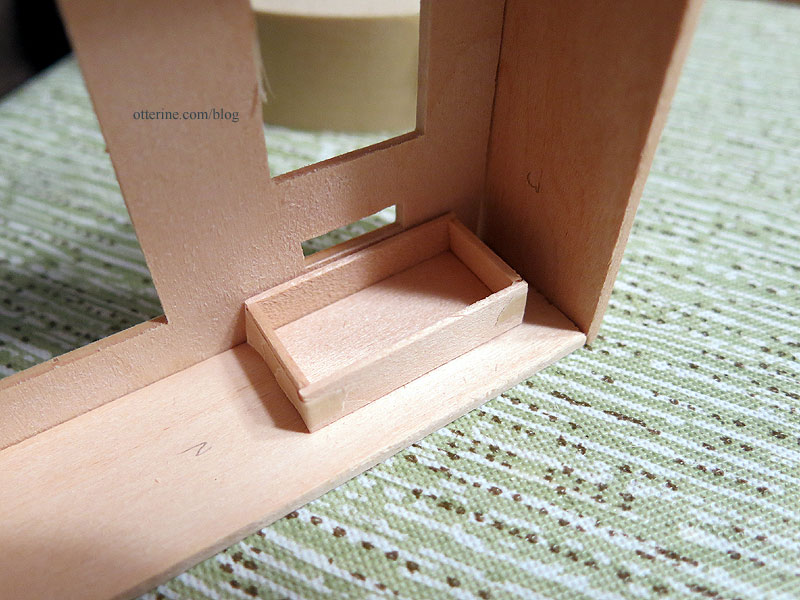
I will make the letter box that catches the mail larger to better fill the space. It seems to me, you would insert the mail in lengthwise through the slot, but the box is oriented the opposite. Don’t need customers overshooting the box and having mail all over the floor.
As for the pigeon holes, I think the kit pieces are a loss. Die cutting doesn’t work well for tiny details.
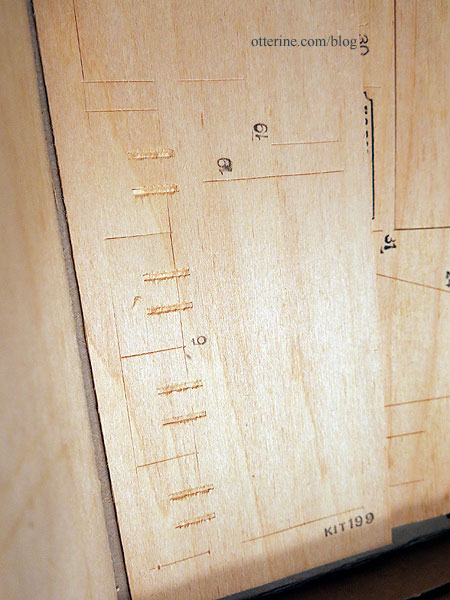
Then, cutting away the excess in the notches tends to cause a lot of breakage.
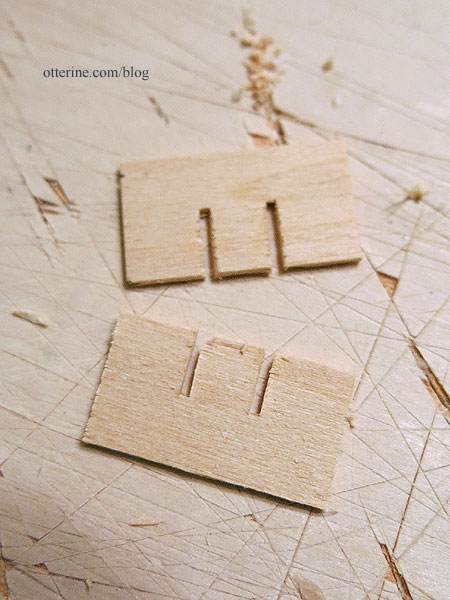
The pieces just don’t fit, and sanding will likely cause more breakage. I will need to re-cut these from scratch. Time-consuming, but a better result in the end.
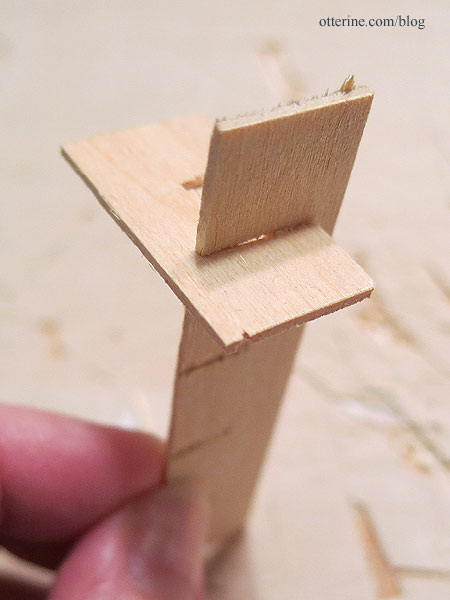
You might ask why bother with these old kits, but some are better than others. The companion country store accessories kit has a lot of great parts in various materials. The Realife Country Living Room kit has a fantastic daybed, printed fabrics, turned pieces, etc. So, it really depends on the kit, the price, the condition it’s in and the extras included. Here, I have the patterns for the post teller and counter units, the metal letter slot and some usable parts. For me, it’s worth the effort.
Categories: Ivy Hollow RFD
March 3, 2019 | 0 commentsMail Wagon – part 1
Today, I did a dry fit of the mail wagon. To say the instructions are lacking is an understatement. You are given a blueprint drawing and a typed list of instructions.
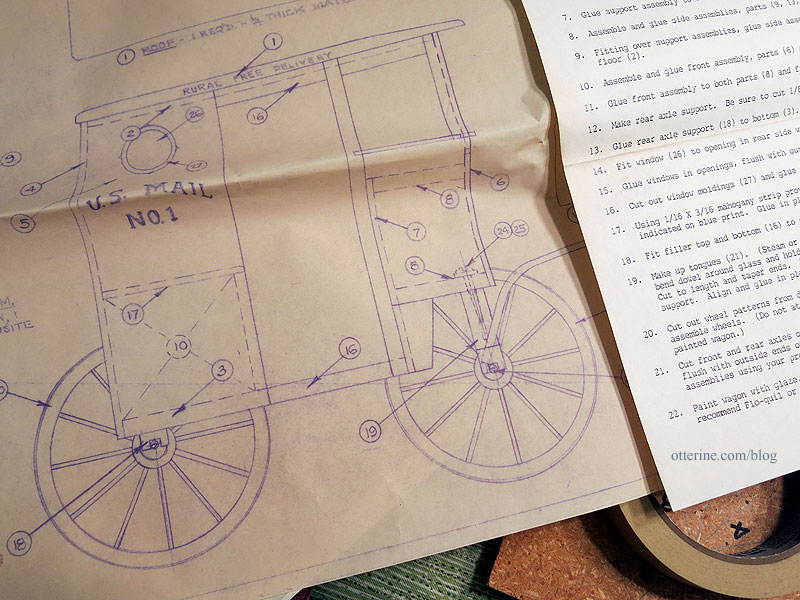
There are no photos or diagrams of the steps, and the kit photo is minuscule and not at all detailed.
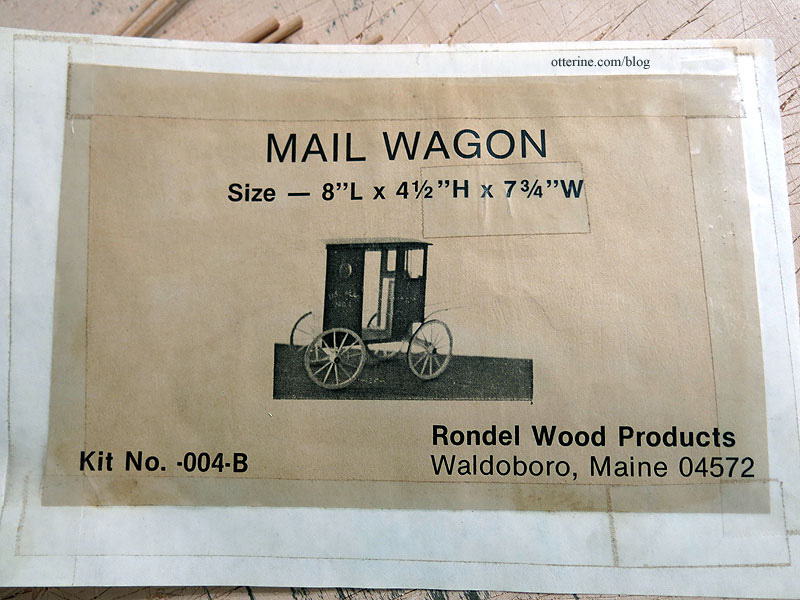
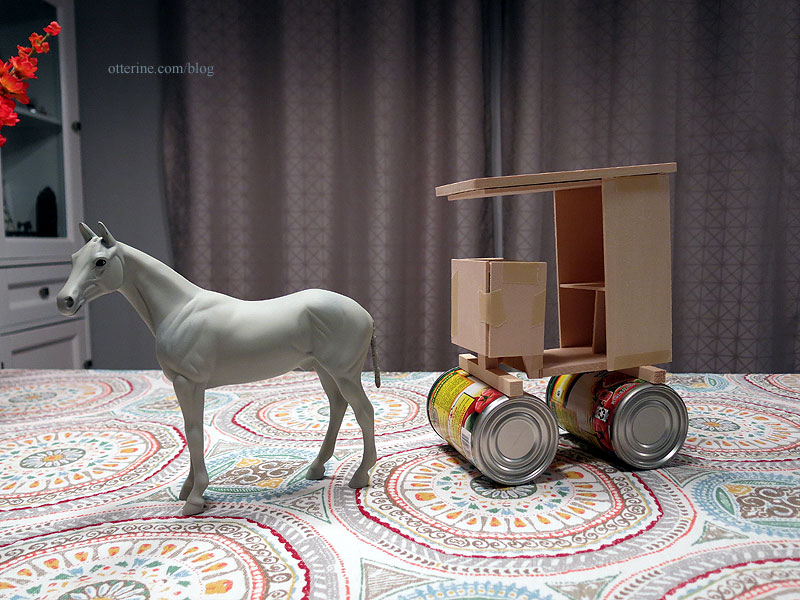
I blundered my way through a dry fit, and one piece still made no sense and didn’t seem to fit properly. But, it does give me a good basis for size and how far away the wheels are supposed to be from the passenger compartment. It’s a very simplistic kit, so you know me…I’ll probably end up building most of it from scratch and using this as only a guide.
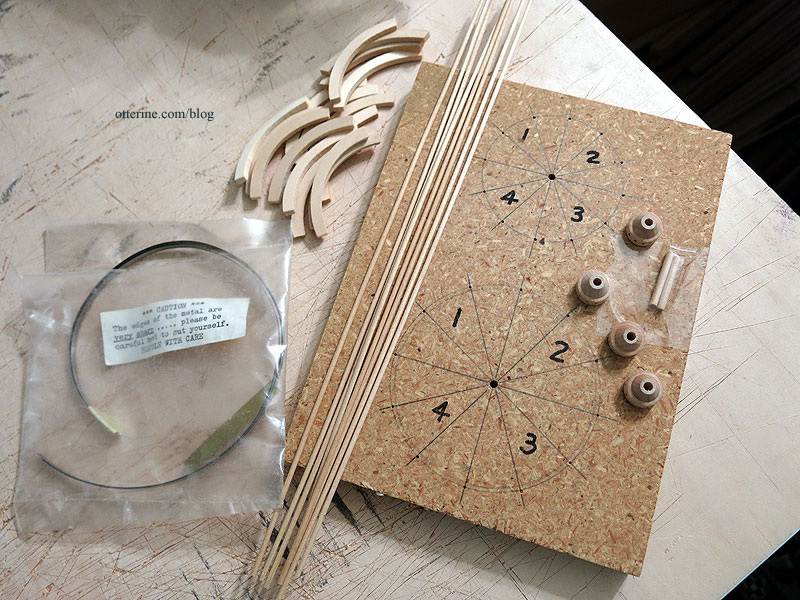
The wheels are incredibly detailed in their assembly, much like the real deal. If I can get them to work, the wheels alone will be worth having bought the kit.
However, this is the extent of the chassis – two wood blocks. The front wheels will turn, but the lack of detail is disappointing.
Here’s a real life mail wagon for example. This is more complicated than I want to attempt, but there has to be a happy medium.
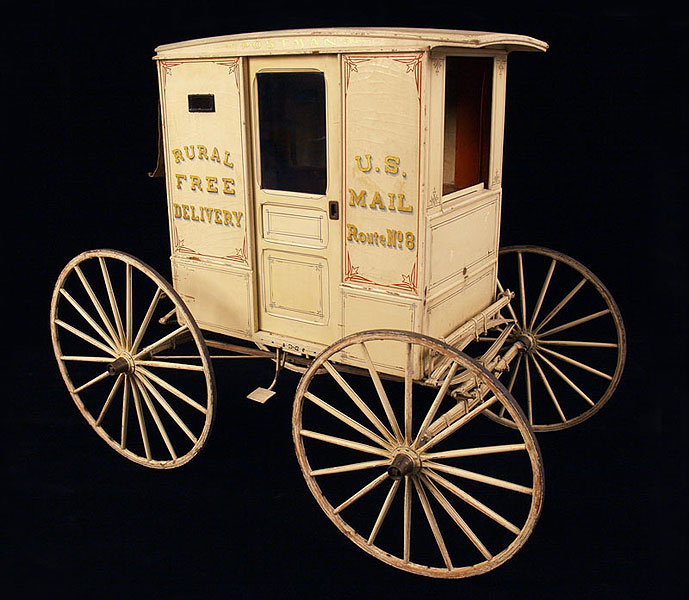
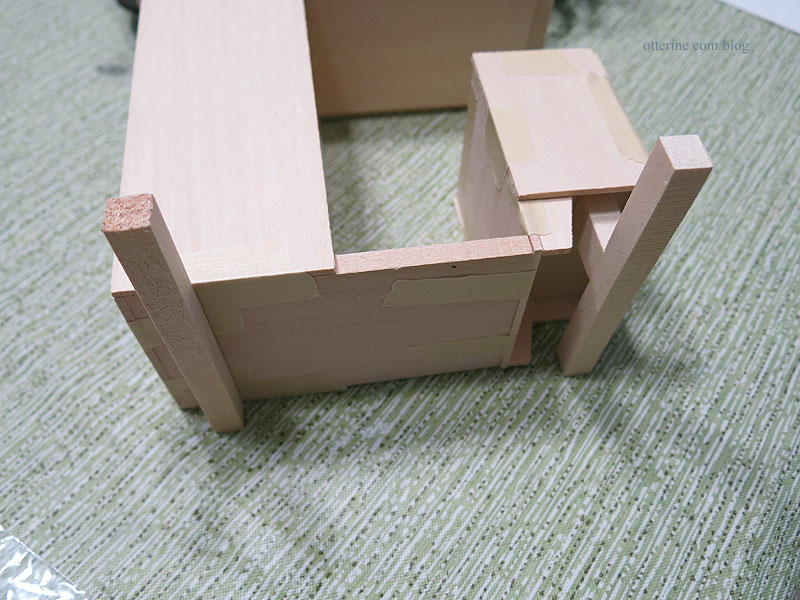
image from The Smithsonian The inexpensive wagon kit I put together for Baslow Ranch has better detailing without being overly complicated.
It’s longer than the mail wagon, but I could likely customize something better than two simple wood blocks. I do have another of these kits, but I could cut pieces myself using the general pattern.
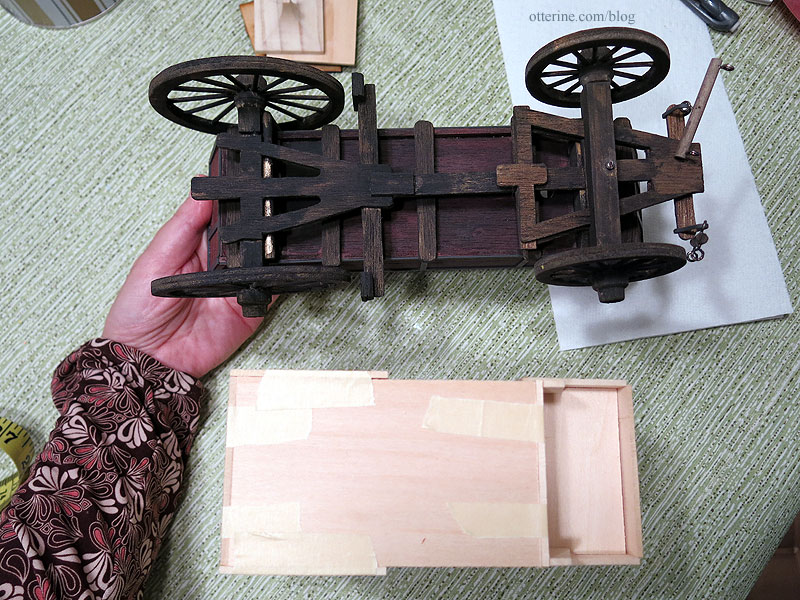
I’m checking some other sources for ideas. Plus, I’m planning a trip to a local museum that has carriages for in-person study and better photographs.
Categories: Ivy Hollow RFD, Model Cars, Vehicles
March 2, 2019 | 0 commentsCreatin’ Contest 2019: Yay or neigh
Or, should that be yay AND neigh? :D This year, I’m going to openly blog about the Creatin’ Contest. I enjoy blogging about my builds as I go, figuring out the yays and neighs along the way, and I suppose it really has been a self-imposed limit to keep it all under wraps. We might love a good reveal, but the journey itself is also pretty great. What’s my idea, you ask?
First, the horse….
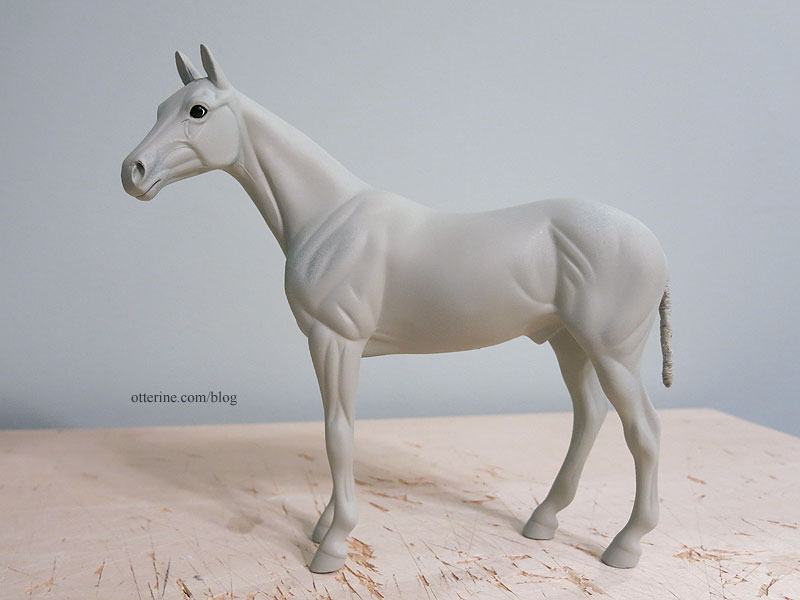
Then the cart….

Then the RFD. :D This is a postcard from 1917 showing a post office with the RFD horse wagons picking up the mail. I love the awnings and the angled doorway especially. The postcard itself is a very interesting piece. The print is almost like a daguerreotype on paper. It has that weird metallic shimmer at a certain angle.
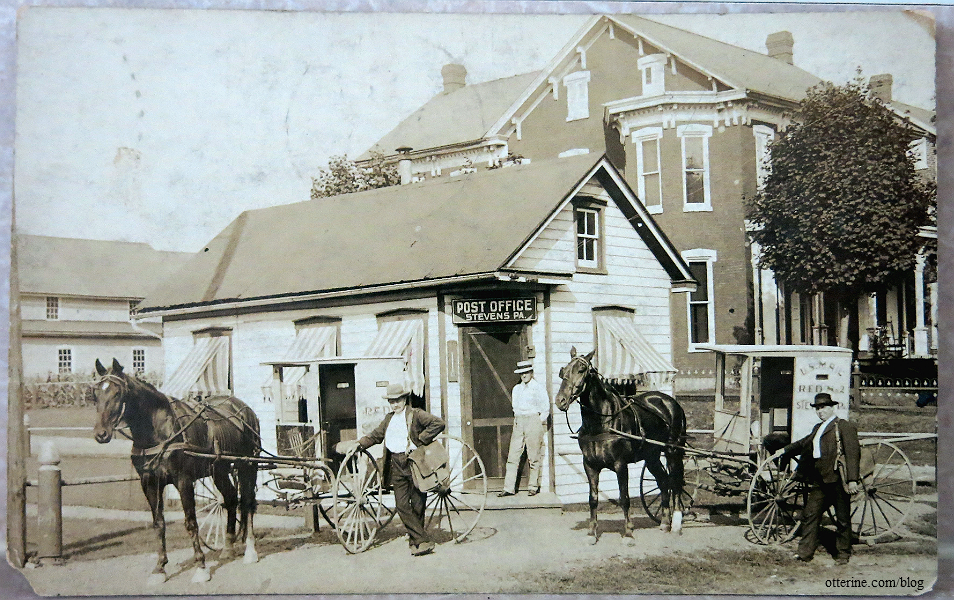
Rural Free Delivery was started because rural folk would have to go to town to get their mail, which was often far and not easy in poor weather. While free mail delivery existed in the cities by 1863, rural free delivery didn’t truly begin until 1896 with five riders in West Virginia. This video from SmithsonianNPM gives great overview. Those five rural routes spawned better roads all over the country. Fascinating!
Check out this awesome video showing the delivery in action in 1903. I know how excited I get when the mail arrives now, and you can’t give sugar cubes to the mail truck! :D
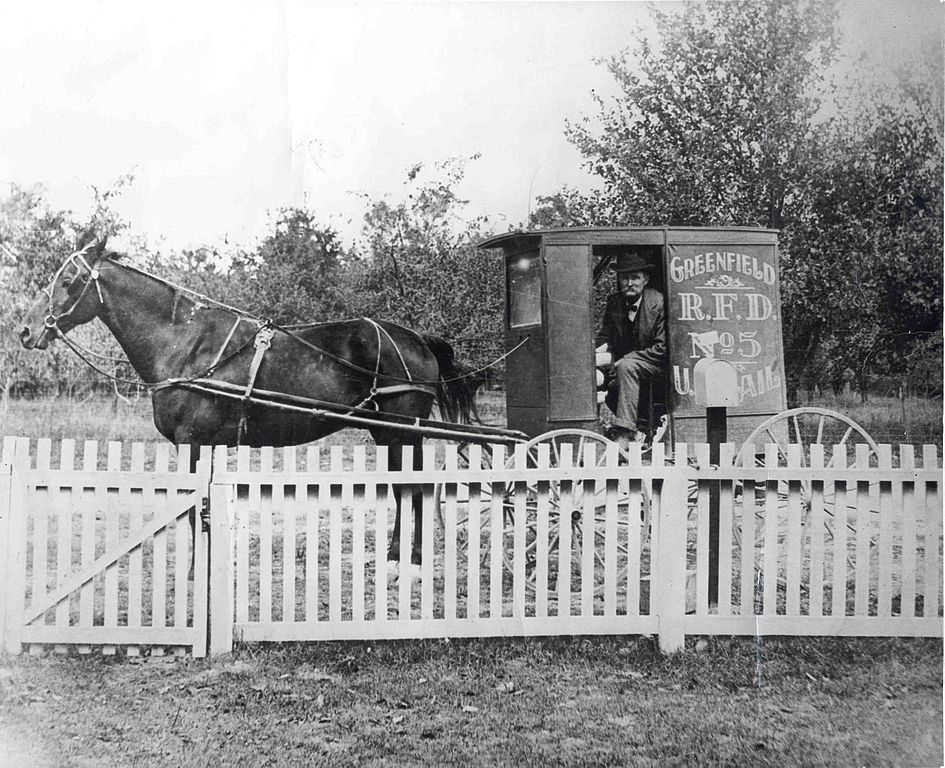
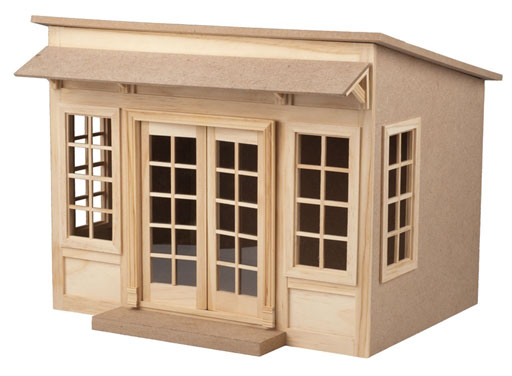
image from wiki I think the Serendipity Shed will be a great starting point for my RFD post office stop. I have yet to buy the kit, but soon! A name for my town has already been chosen as well, but I will keep that until later in case I want to change things up as I get going.
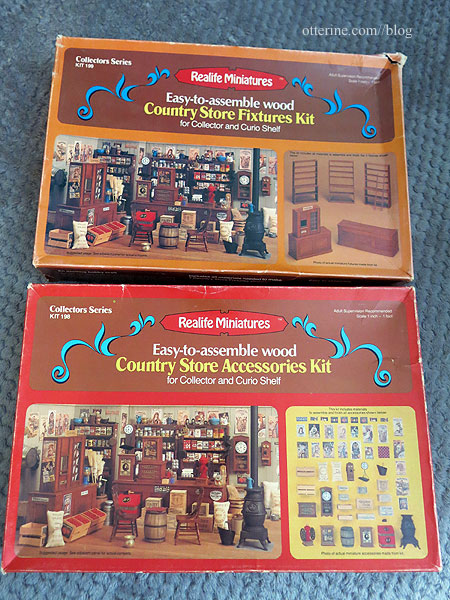
I also have these two Realife kits, which will offer a lot of great already-in-the-stash filler for the interior.
I’ll need to build the shelving first to determine any alterations to the basic structure. I’ll also look through my stash of windows since the kit ones are more modern.

So, back to the horse, the wagon and the tack required to make it all work. I’m busily getting materials from the library and online. More to come soon….
——
Additional sources: Encyclopaedia Britannica; RFDTV; WikipediaCategories: Ivy Hollow RFD
February 28, 2019 | 0 commentsMaking a 1/12 scale horse – part 4
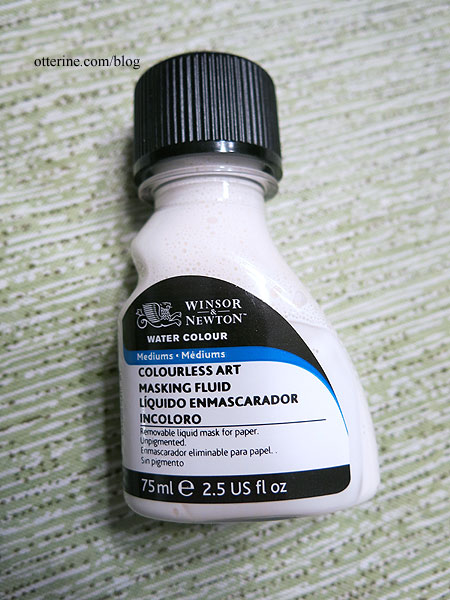
Continuing work on the 1/12 scale model horse. Once the putty set, the tail seemed pretty solid so I sanded the putty areas lightly with 320 grit to smooth it further. I then covered the eyes with Winsor & Newton Masking Fluid since I want to protect them during the painting process.
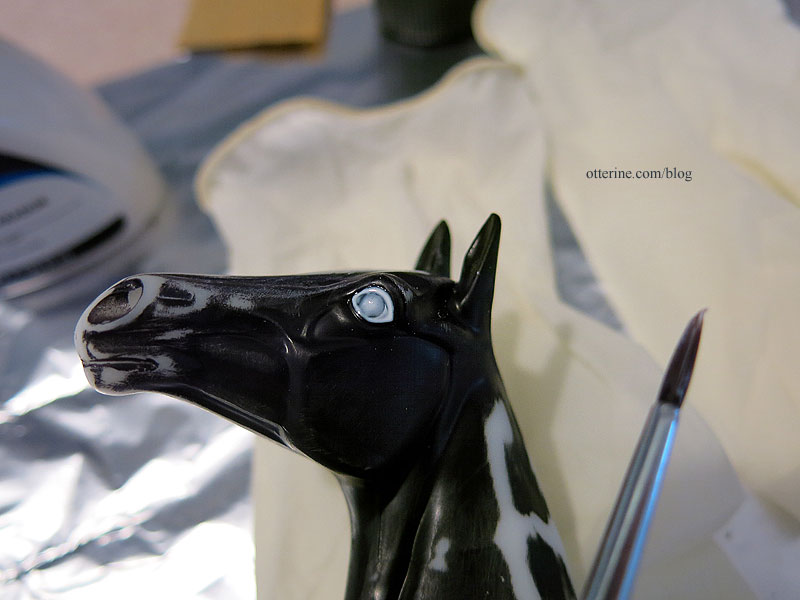
This is a pricey fluid used for watercolor painting; it covers any space you want to remain white on a painting. You use an eraser to remove it from the paper after the paint has dried. I used a 50% off coupon at Michaels. It’s a good crossover product that will work on other things beyond paper.
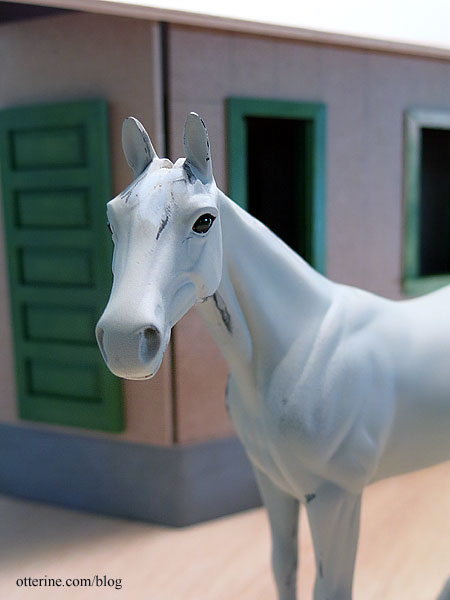
I sprayed the horse with Testors Flat Light Aircraft Grey to have a light primer coat to start. Priming brings out any flaws that were unnoticeable before, so I will sand those once the primer cures.
I’m making a grey/roan horse, so I looked online for reference photos. I’ve never mastered the airbrush, but I am pretty good with a regular brush. The next part will involve painting the base details. Even though I plan to add fur, the color underneath will show through so I couldn’t leave it black and bare white plastic. I’ve removed the masking on the eyes just in case leaving it on a long time caused issues; I can always add more when I paint the face detailing.

I also have some good leads on tack, which will need to be made before fur is added so I don’t mar the final finish. I want to be able to just buckle any tack onto the horse for pictures and remove it immediately. So, it might be awhile before you see the horse again. I’ll update on the tack as I work through it.
I also chose a name for my horse: Jebediah McCants. Maybe I’m wrong, but I doubt anyone guessed it. I looked up the meaning of Jebediah, and it means “beloved friend.” McCants is some distant ancestral name, and I thought the names sounded good together. I’m figuring our RFD carrier is Mr. McCants, since the carriers were charged with supplying their own transportation, therefore caring for their own horses. Jebediah looks eager to get on with things, no?
Categories: Animals and birds, Ivy Hollow RFD
February 25, 2019 | 0 commentsMaking a 1/12 scale horse – part 3
Continuing work on the 1/12 scale model horse. I found a great tutorial about removing the tail and building up with Apoxie Sculpt, though this technique ends with a sculpted tail instead of fiber. This site directed me to two additional tutorials on Rio Rondo – one for adding a tail and one for hairing (these links are no longer active as of 2024). The hairing for this example does not drill holes for the mane, so I will be on my own for that, but it is good to see the prep work involved.
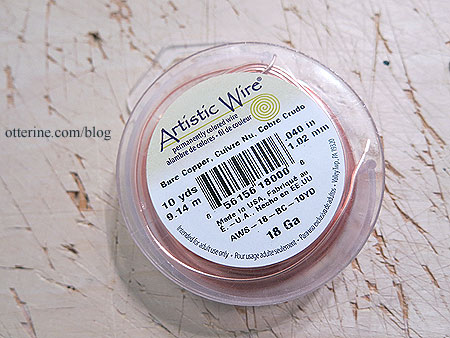
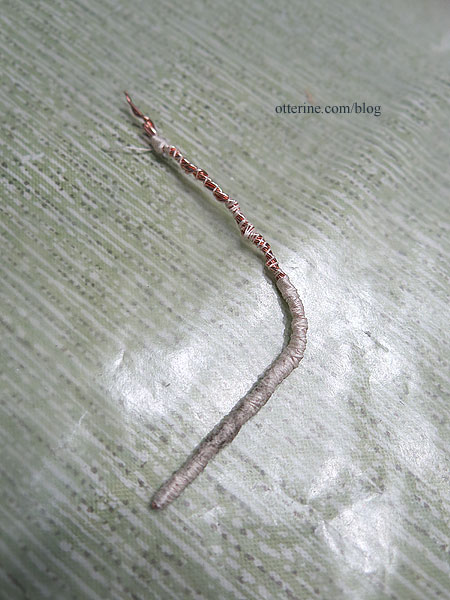
I ended up going with the wrapped wire tail from the second tutorial using 18 gauge copper wire (as an Amazon Associate, I earn from qualifying purchases).
I followed the tutorial, but mine ended up looking a little different.
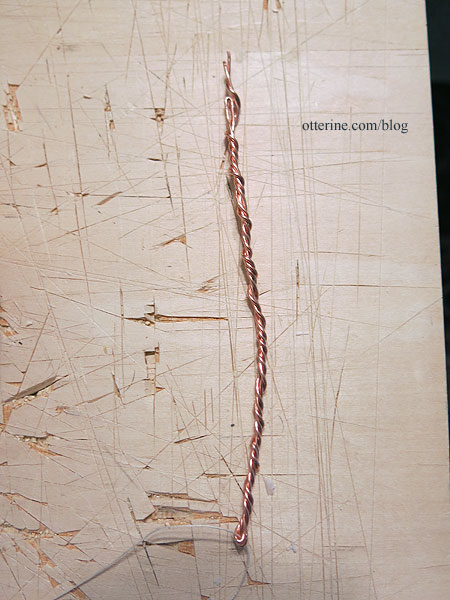
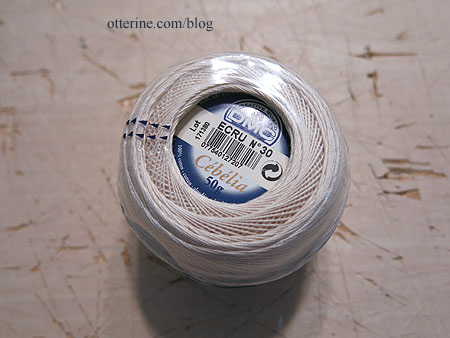
I wrapped the wire with DMC cotton using Weldbond adhesive.
I left it long since the horse body is partially hollow, and I thought the added length would be good for stability. When I inserted the wire, I added Weldbond and super glue gel to the top since it would likely come in contact with the body inside. Every bit helps.
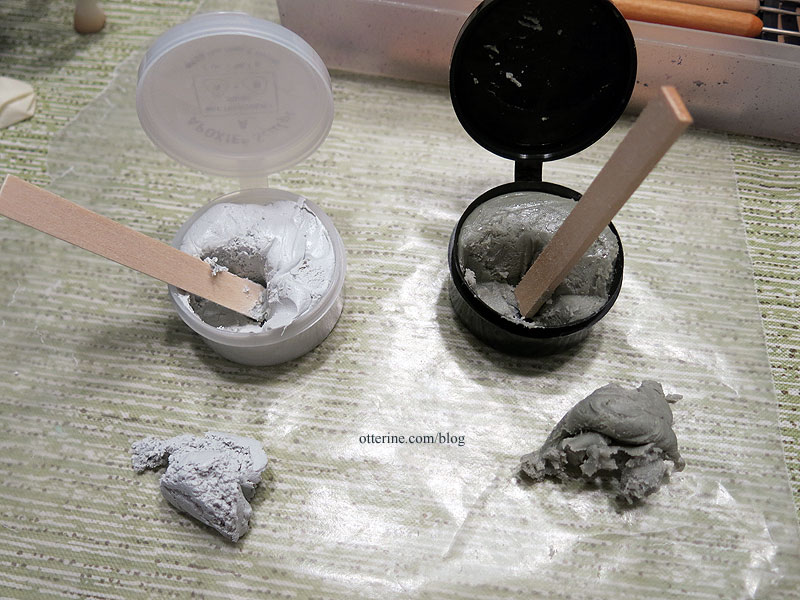
I used Apoxie Sculpt for the next part (as an Amazon Associate, I earn from qualifying purchases).
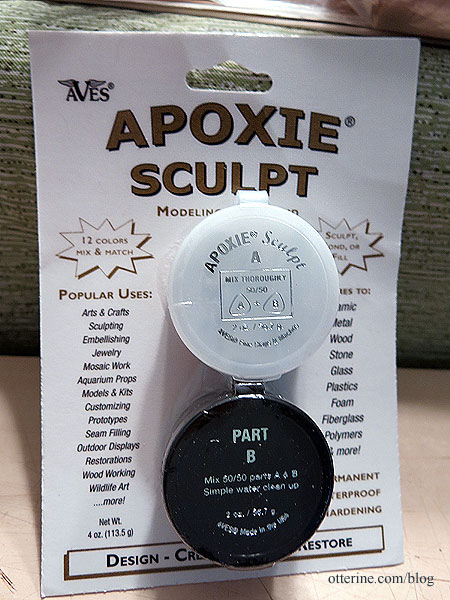
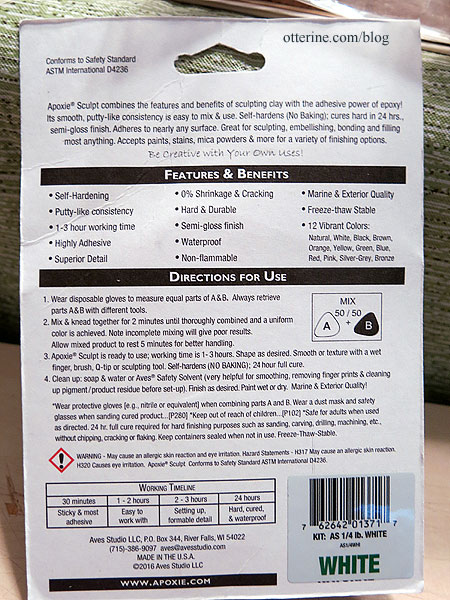
Some of the attributes listed on the back are promising: highly adhesive, 0% shrinkage and cracking, 1-3 hour working time, and 24-hour full cure. There’s a nifty table showing how the putty changes over the working time. It also comes in colors, which is less of an issue for me since I plan to paint the whole horse anyway. I’m using white putty.
Part B was very stiff and sticky coming out of the cup, but it mixed easily. (Yes, I made way more than I needed, but I didn’t want to have to start over if I needed more.) I did use latex gloves while mixing but used my bare hands when working the putty into place. You can use water to smooth it, and the website recommends freezing unused portions to extend the life.
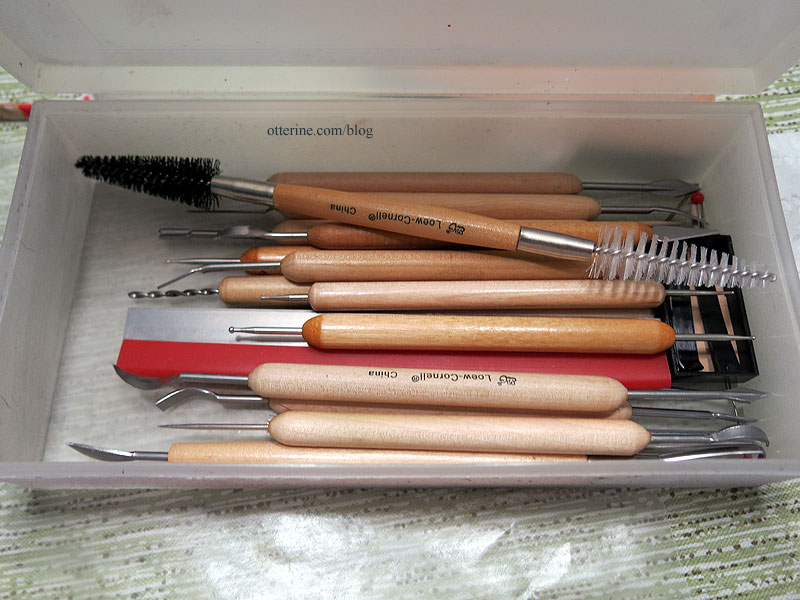
I also have a good set of sculpting tools from way back in my art days. :]
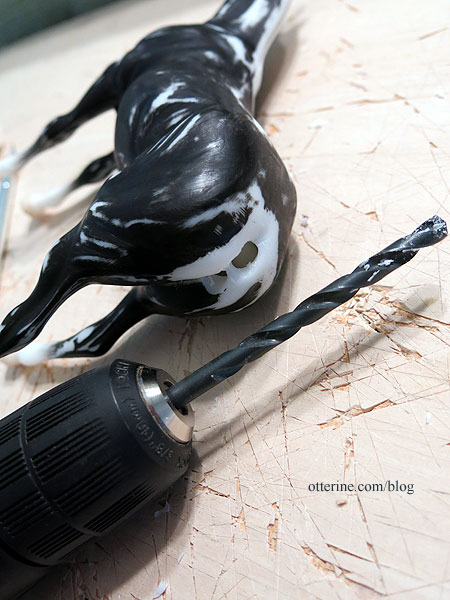
Using a 1/4″ drill bit, I drilled a hole for the wire, making it large enough to also add the putty. As you can see, I got the first hole too low. The drill bit wanted to slip on the smooth plastic.
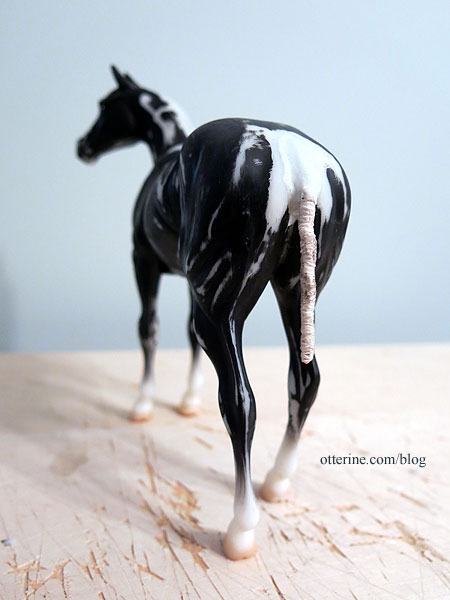
I sculpted the tail definition from the body to the wire and plugged the extra hole. Mine looks different from the tutorial, but I think it will work just fine. You can sand the putty once it’s cured, so I will smooth it out even more later.
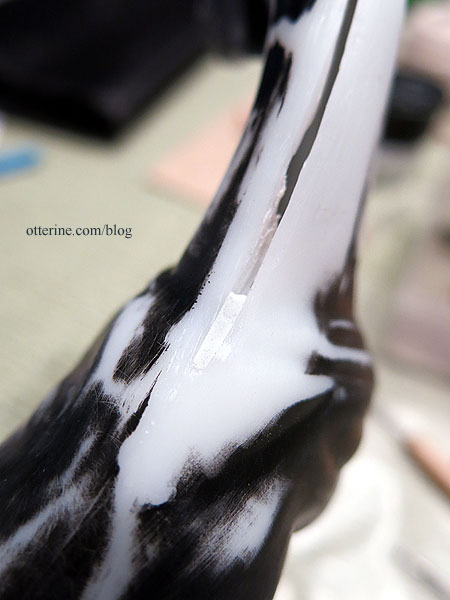
I used the same putty to fine tune the slit along the neck at the withers…
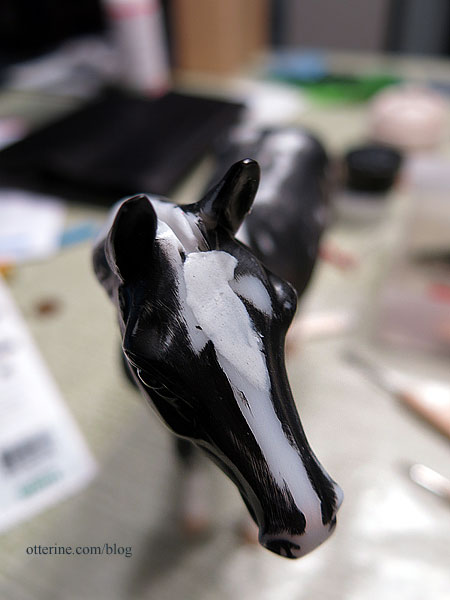
…and at the forehead.
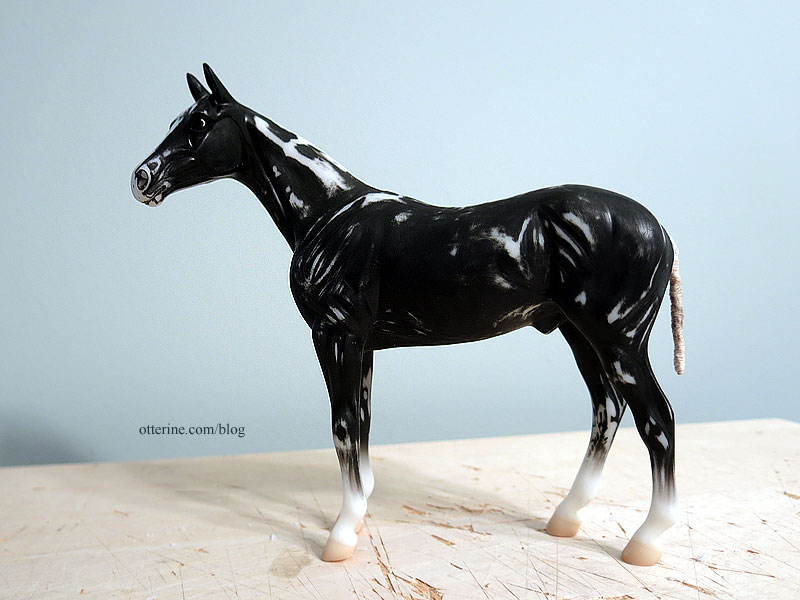
Now, I leave the putty to set.
Categories: Animals and birds, Ivy Hollow RFD
February 21, 2019 | 0 comments
NOTE: All content on otterine.com is copyrighted and may not be reproduced in part or in whole. It takes a lot of time and effort to write and photograph for my blog. Please ask permission before reproducing any of my content. (More on copyright)
Categories:

Ivy Hollow – postmaster’s desk wall, part 1
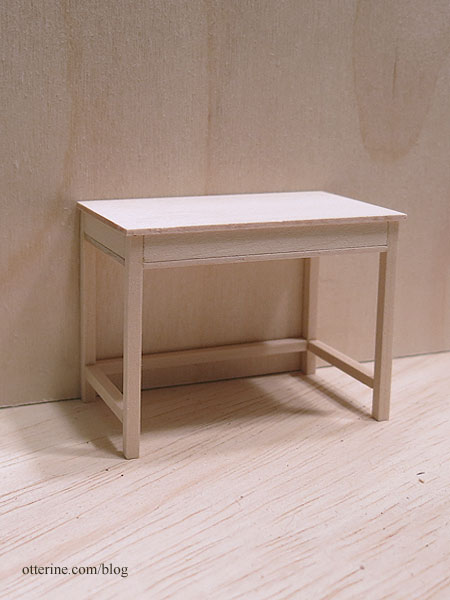
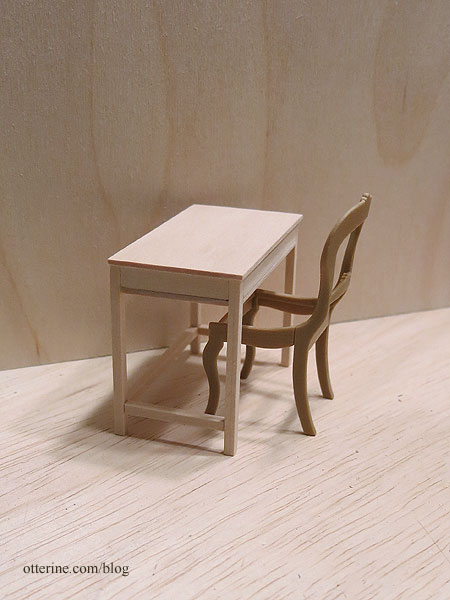
The desk is adapted from a table pattern in the book Finishing Touches by Jane Harrop. Clean, simple design with a false drawer to save time (knobs to come after finishing).
Barbara sent me some Chrysnbon kits for seating options, and I’m choosing the Victorian chair for the postmaster’s desk. It’s fancy, but I plan to age it a little to look like a hand-me-down.
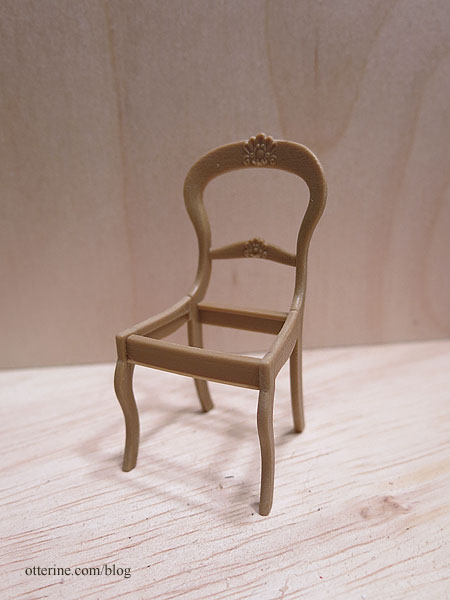
These kits are more delicate in style and often smaller in stature than other 1:12 scale chairs, which works well for the small interior.
The boards of the shelving units in the Realife Country Store fixtures kit weren’t salvageable due to warping – not even as wood scraps, but they would have required modification to fit the space anyway. Easier to just work from scratch.

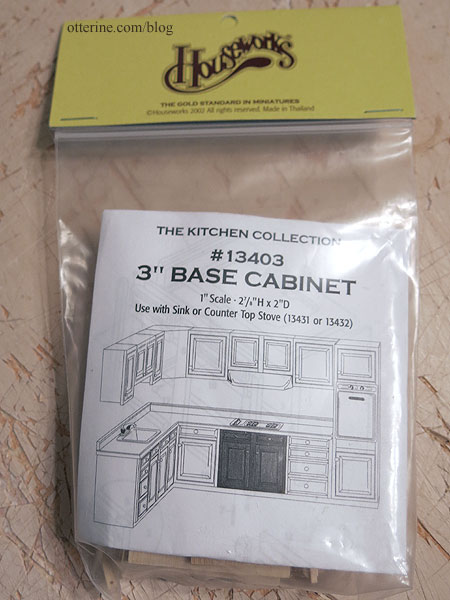
After deciding I needed another window on the already finished back wall, I cut an opening without damaging the siding. Whew. But, I measured the back wall window opening incorrectly…it’s off-center. Oy. Guess what, my brain was apparently ahead of me since it knew I needed three inches of space on the left. Had the window been centered, my idea of adapting a 3″ Houseworks kitchen cabinet kit wouldn’t have worked. Double whew! :D
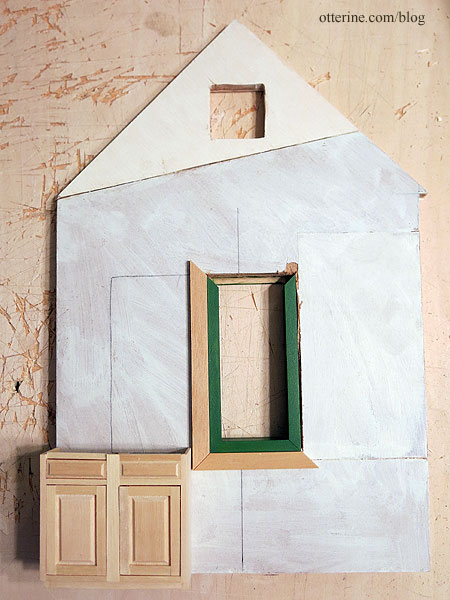
I cut the depth down considerably and altered the construction a bit since this was originally a sink/stove cabinet with false drawer fronts. I used surplus parts from an identical kit I had scavenged before and cut some new pieces as needed.
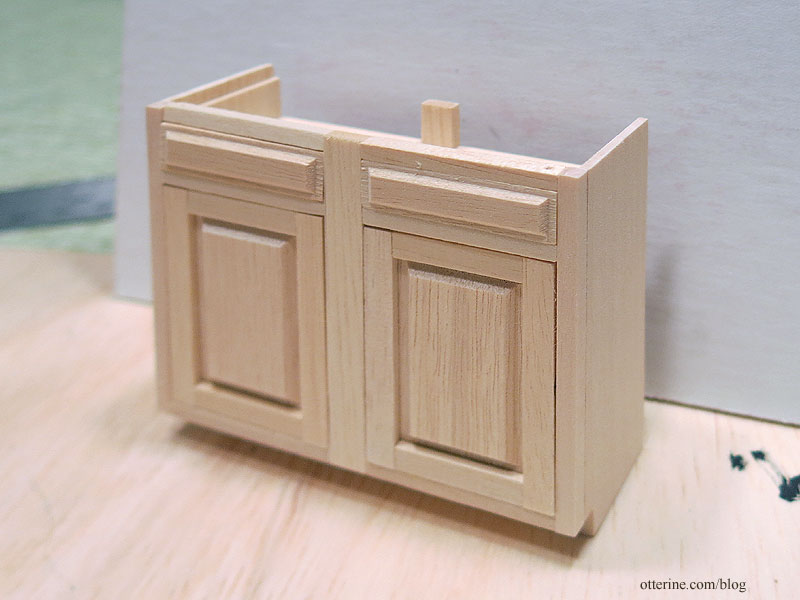
These are great kits, but I usually buy the partially assembled versions if I plan to use them without modification.
The cabinet fills the bottom space, adding storage, but I don’t have to actually fill said space with minis that won’t be seen (nor will I have to dust this space).
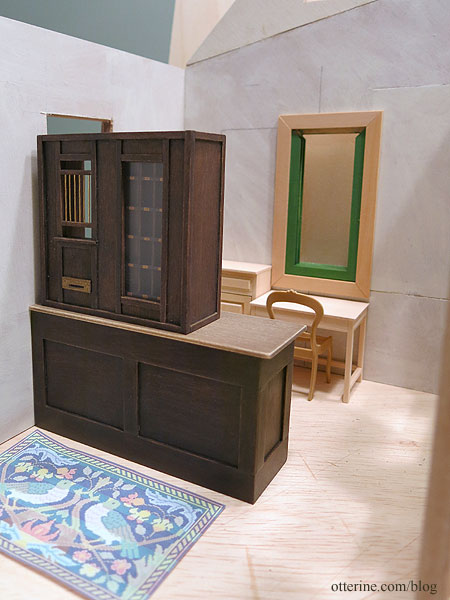
More is planned for the space to the right, of course. :]
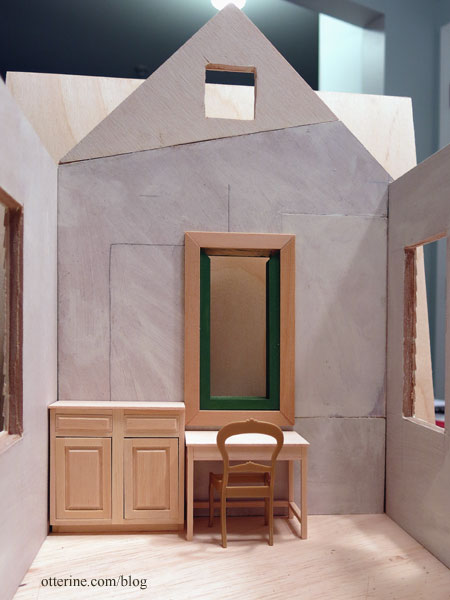
These pieces all fit well, but that window placement next to the postal teller is going to bug me. :\ When I flipped the house structure and furniture arrangement, I neglected to reconsider the window placement. This is when my penchant for leaving a house in dry fit until the end works in my favor. This is a relatively simple fix…cut a new rectangular wall, add siding and paint. It’s a task that I can do in the background while moving forward and using the existing wall for planning, etc. Plus, I will keep the old wall for whatever may come up.
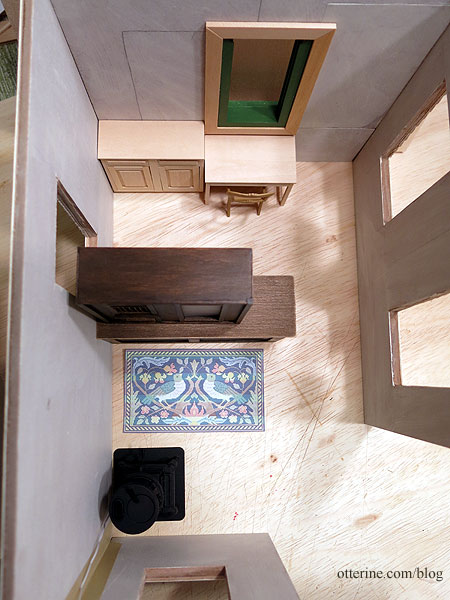
Categories: Ivy Hollow RFD
October 13, 2019 | 0 commentsWe’ve got mail!
Today, my car needed its scheduled maintenance, so I packed my bag of minis and headed over there for a three-hour tour (Gilligan’s Island theme song now firmly in my head.) They have a desk/office area cordoned off for some privacy, so I was able to work comfortably. Sometimes I sit in one of the comfy lounge chairs and stitch, but today was Mail Call day.
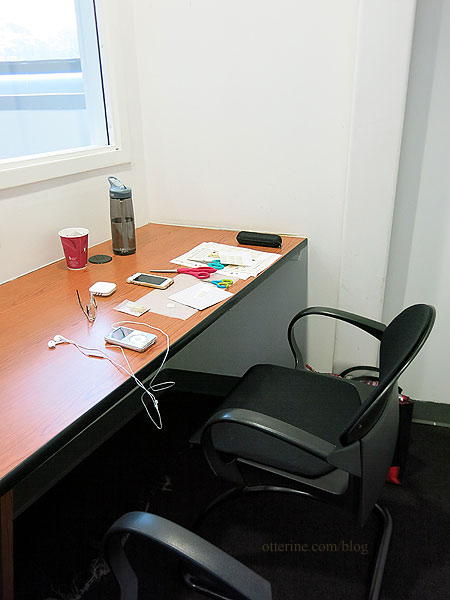
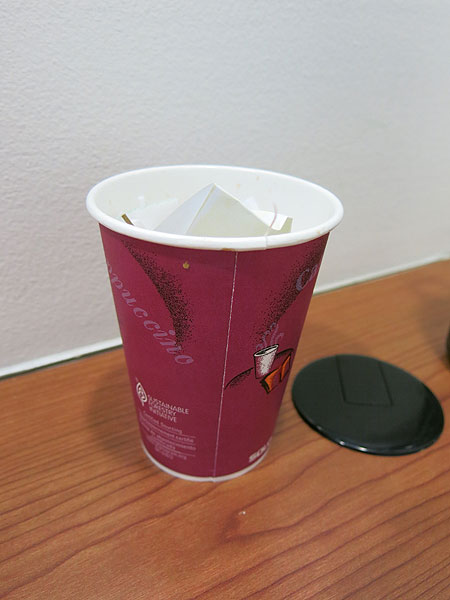
Someone was kind enough to leave their dirty coffee cup behind, but it worked well for a mini trash can. Kismet litter (good punk band name). haaaaaaaaaa
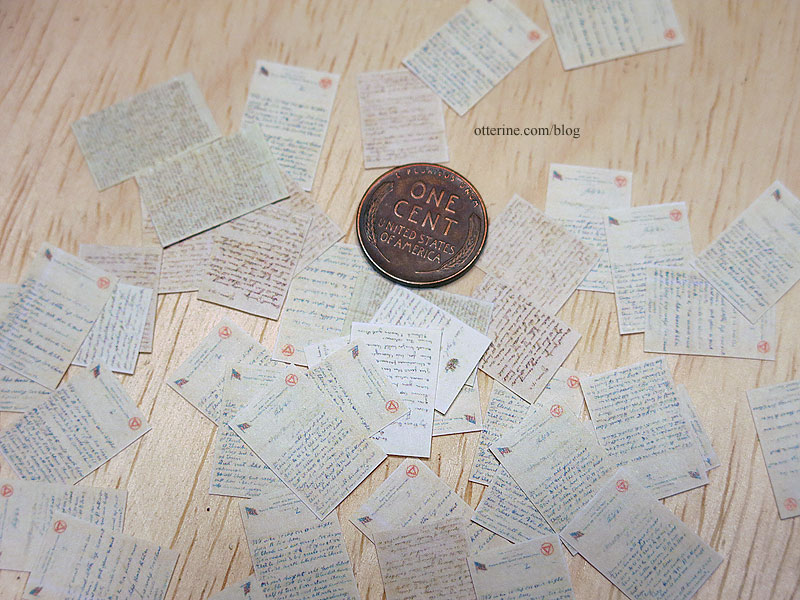
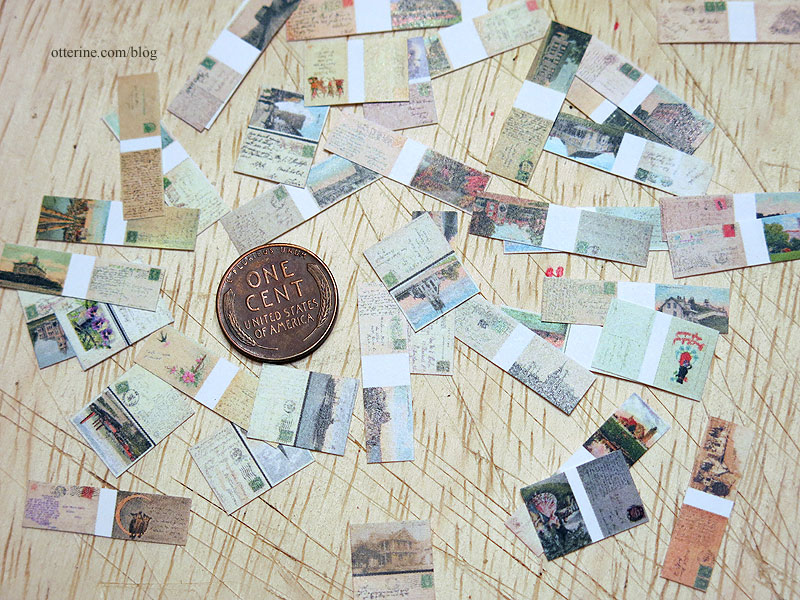
For the past couple of weeks, I’ve done some scouting about online and found a few different sites that had scanned letters and their corresponding envelopes. There is also a wealth of postcards, both mailed and unused, listed for sale online. I tried to limit the ones I printed to true 1917 dates, except for a few that I loved and wanted to include. Here are the letters. They are true to scale and not legible, but they add a nice touch.
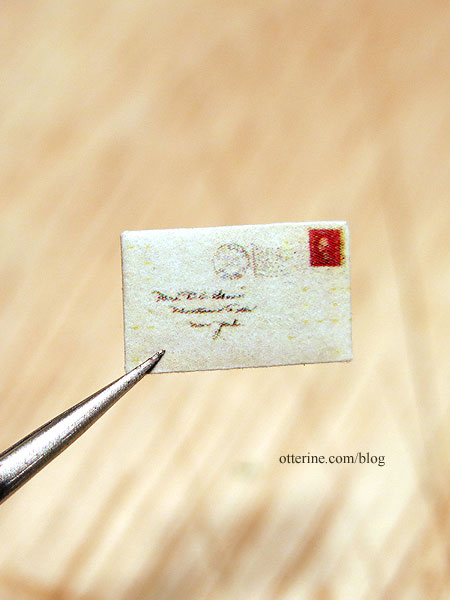
I did print envelopes, but my guidelines were so faint that I am going to reprint those for another day. I did manage to get one matched reasonably well.
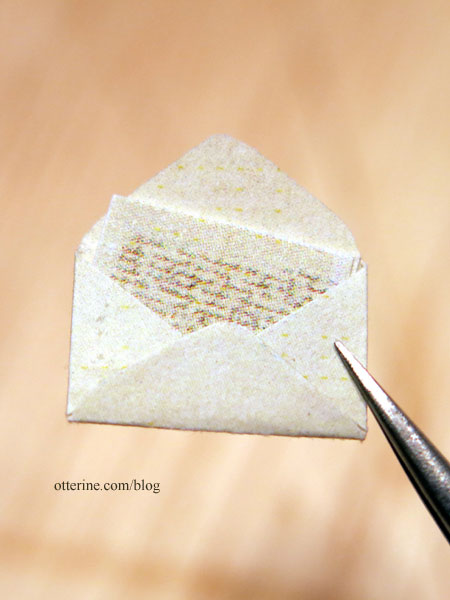
The letters are glued shut, but I like knowing there is a true letter inside.
I cut out the postcard fronts and corresponding backs as pairs so I wouldn’t have to play an impossible match game later.
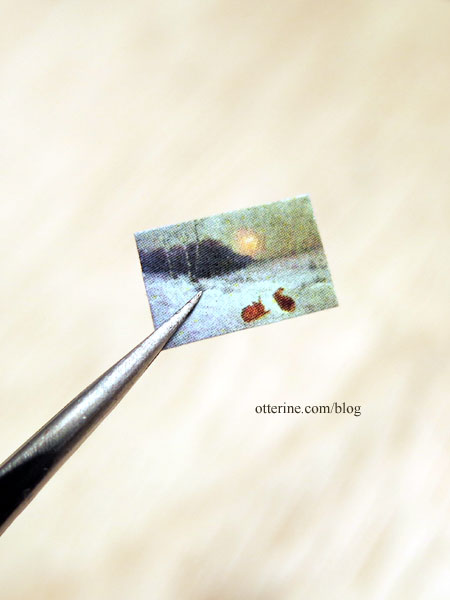
I pasted them back to back for a true postcard facsimile. This is one I fudged – this is a postcard that had a blank back, but I needed the bunnies in my post office.
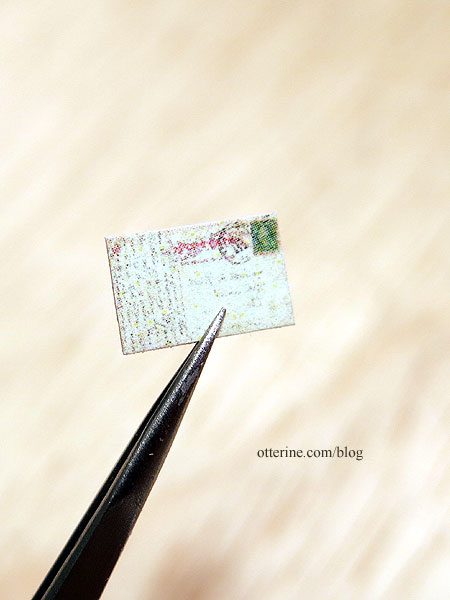
Assembling these will be good busy work for TV time.
Miniature Collector magazine had printies in their magazines, and I pulled a whole bunch from the recent magazine stash that was gifted to me by a generous reader. One was a sampling of the 1902 Burpee’s Farm Annual. The magazine has a copyright date of March 2007.
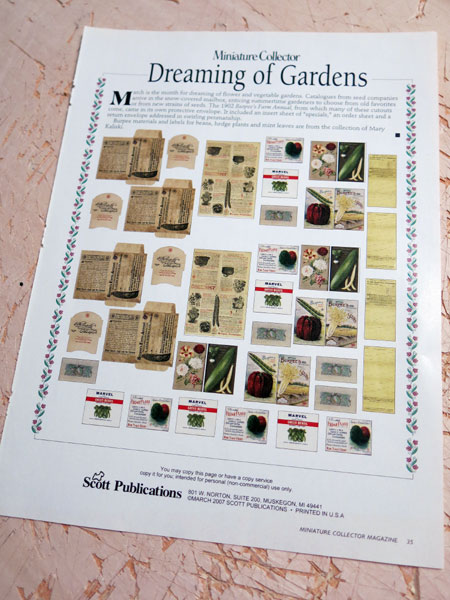
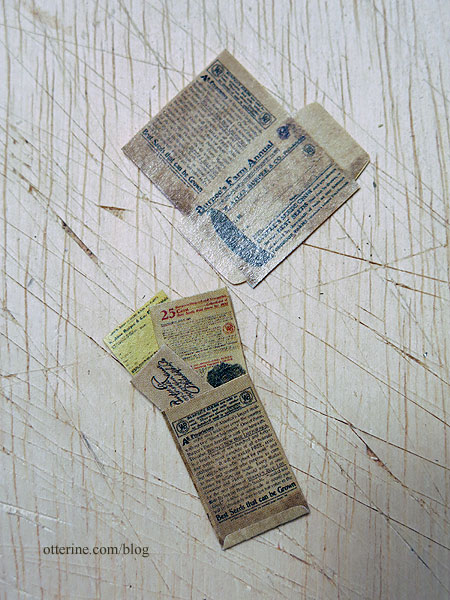
It included a large envelope to hold the mailer, an order form and a return envelope.
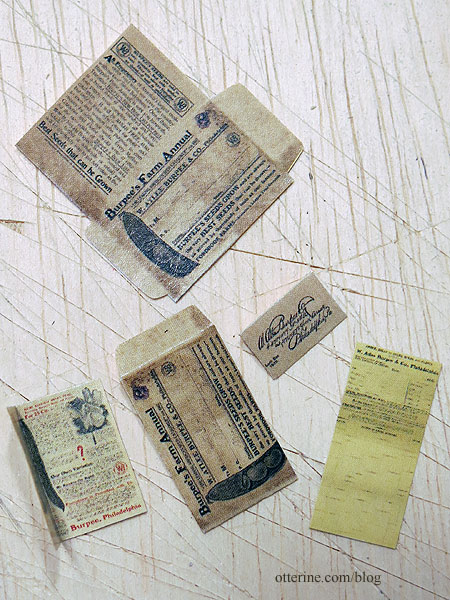
It’s a lovely set, and the notes indicate you are allowed to copy or have a copy service reprint for personal use. Since the magazine paper is a little shinier than I would like, I think I will do just that and make up a bunch. :]
Categories: Ivy Hollow RFD
October 6, 2019 | 0 commentsRealife Country Store fixtures – part 4
Continuing work on the Realife Country Store fixtures. After getting the parts stained and sealed, it was time for main assembly. I’m still holding off on the countertop until I get ready to set the furnishings in place. The brass rod supplied with the kit was smaller in diameter than the fiber guide holes. I didn’t know how this was supposed to work with that much give.
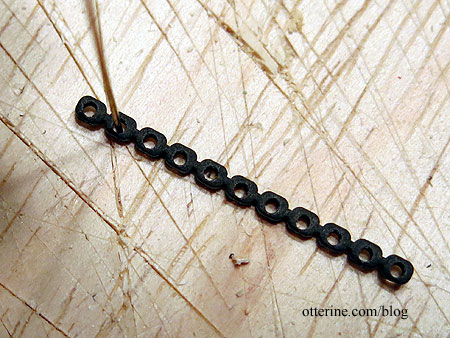
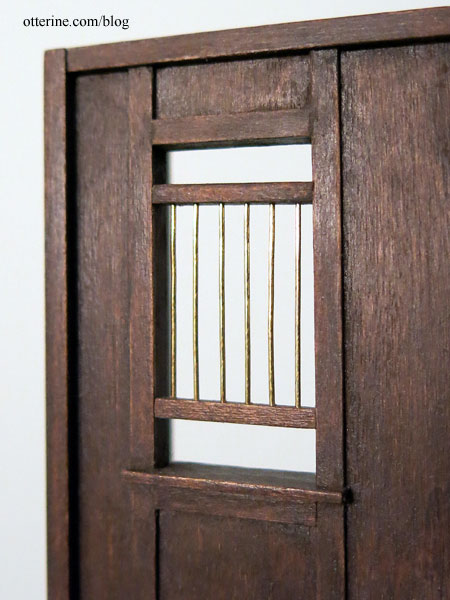
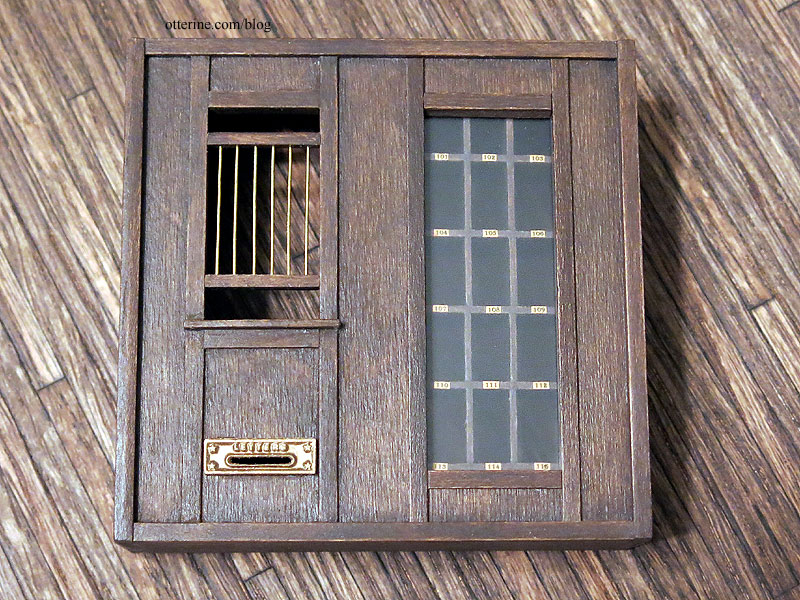
Instead, I replaced the guides with strip wood, measured the placement for the brass bars and drilled holes with a pin vise. The window bars were fiddly, to say the least, but this worked better. It might seem silly to have an open counter and easily thwarted gate then have bars on the post teller window, but I love the look of this piece.
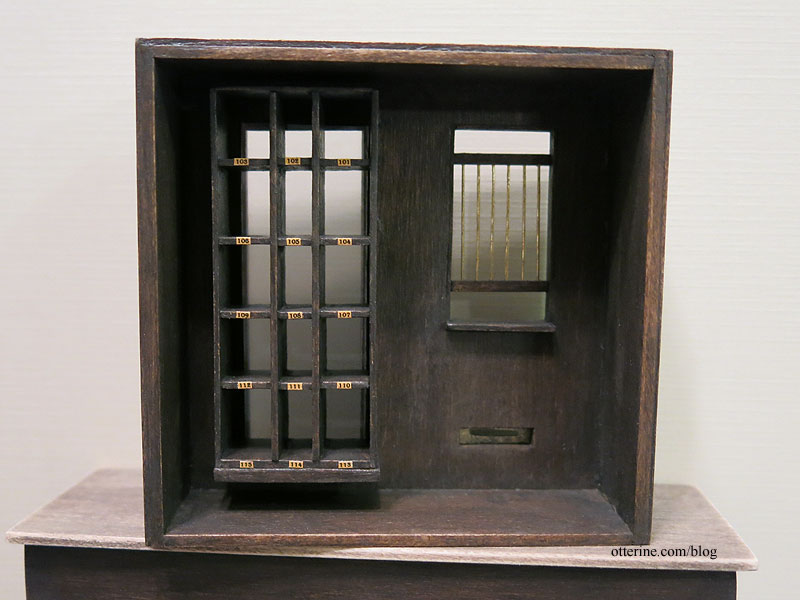
I added numbers to the 15 pigeon holes in the mail sorter. Yep, on the back, too, so the postmaster and the customer can see which box is which.
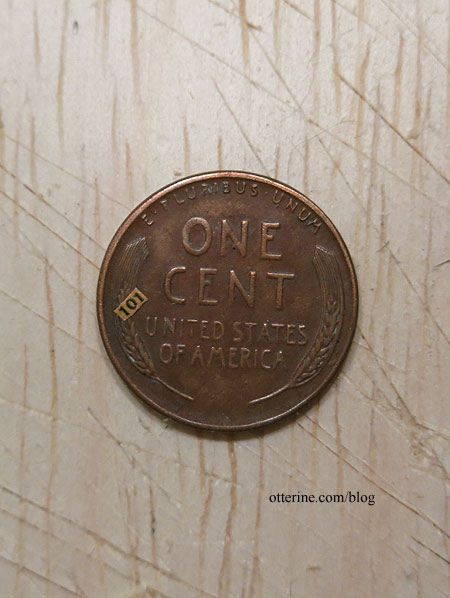
These are 3.5 point type. :O
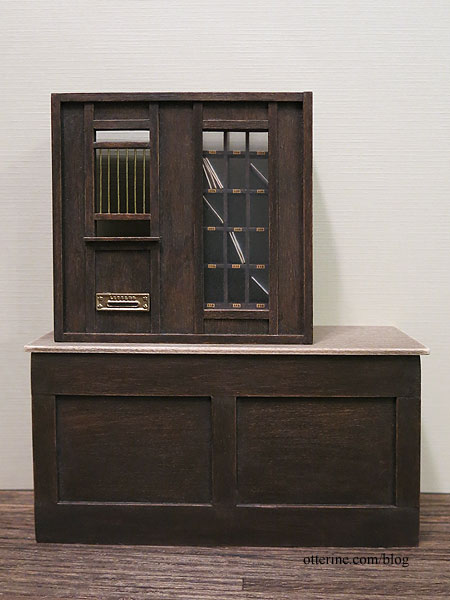
I cut a piece of thin acrylic sheet for the sorter window and then glued trim to hold it in place. I opted to lightly frost the glass to cut down on the glare that would prevent good pictures. I used Testors Dullcote.
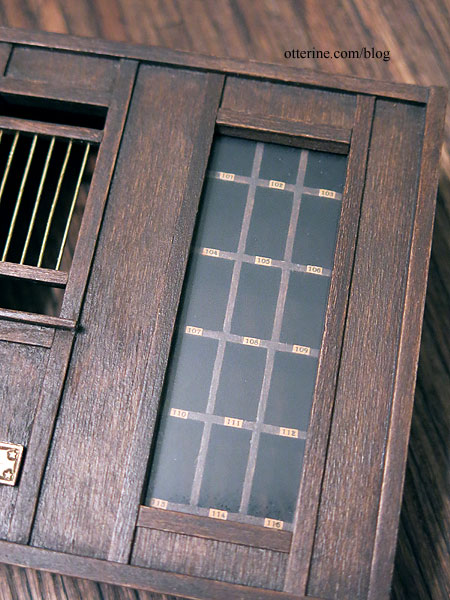
This piece took a lot of work to get a good result, but I’m very pleased with the results.
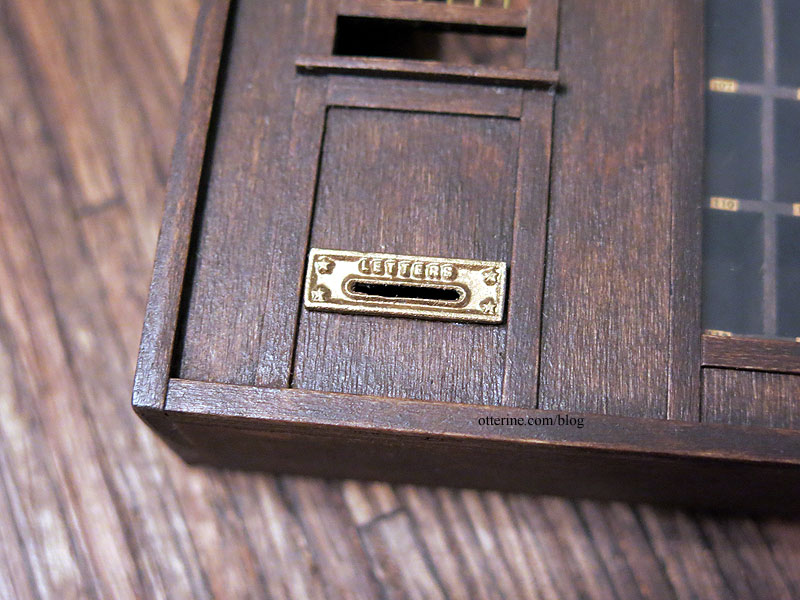
The brass letter slot is a wonderful detail. I had to smooth the edges and carve away some excess metal from the slot, so I touched up the paint overall with bronze acrylic.
I added a few larger letters just to see. I have some smaller mail planned as well.
Categories: Ivy Hollow RFD
October 2, 2019 | 0 commentsRealife Country Store fixtures – part 3
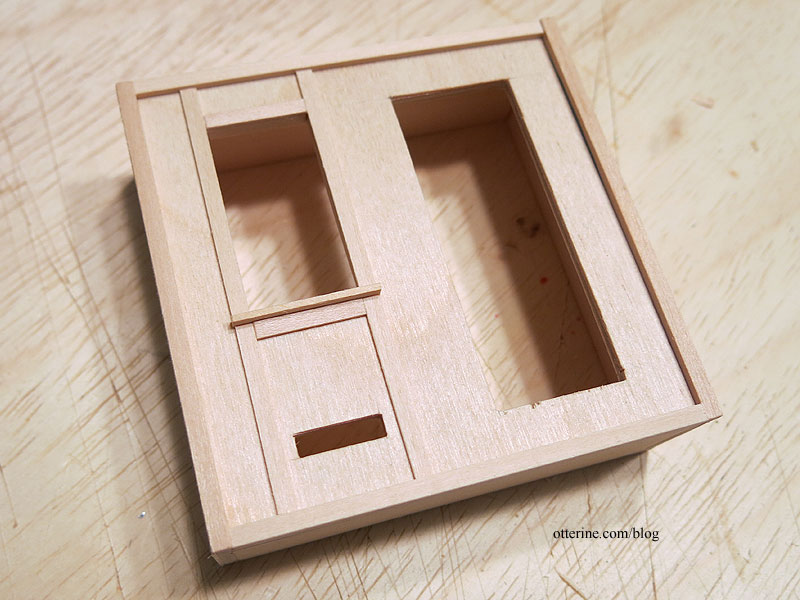
Continuing work on the Realife Country Store fixtures. I cut more away from the window opening and cut new sides to replace the warped kit pieces. I was mistaken about the window shelf – there was a ledge included in the kit. I just hadn’t cut that piece out or gotten that far in the instructions. It’s a usable piece as is, as long as I don’t break it. I trimmed the window since I had used plywood for the front (for stability). This covers the striated edges.
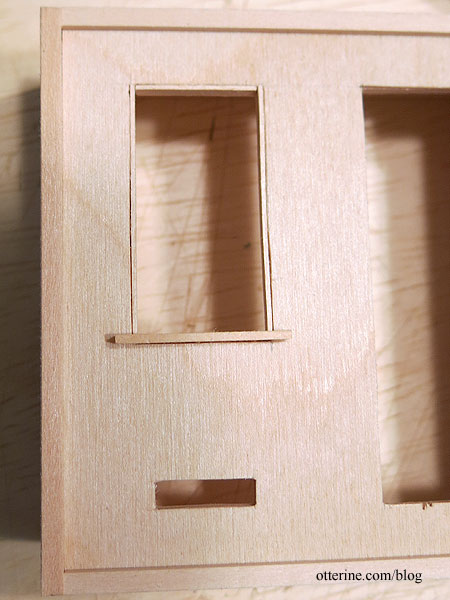
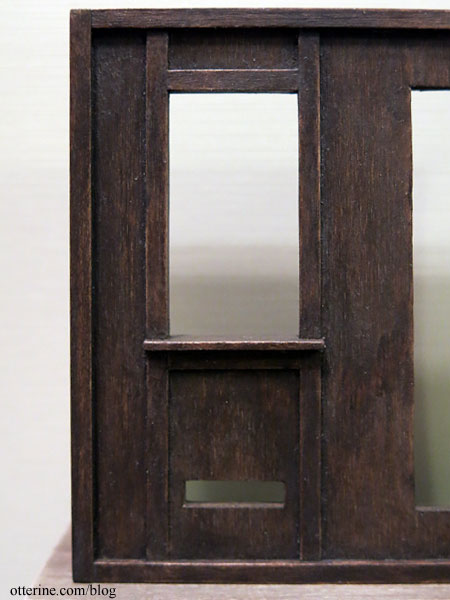
I added trims to finish the postal teller window side, revamping some of the design with trims from my stash. Just a little pizzazz. The sorter side will need to wait until I finish and install the pigeon holes.
For finishing, I’ve opted for Bittersweet Chocolate mixed with Staining Medium, both by Americana. Actual stains can be harder to work with in small spaces, and the Staining Medium makes paint behave like a stain without the fumes or the long drying time. There’s the benefit of stained wood grain without as much mess. Acrylic paint also helps bind the wood fibers to make sanding between coats more effective.
I sanded after the first application and then reapplied to complete the staining portion. For any glue mishaps or large grain, I added undiluted paint. I then sealed the pieces with satin varnish, making the finish less than perfect to add some character.
Painting the pigeon holes was the worst part. Tiny brush, 15 compartments, four sides each, from the front, then the back – two coats of paint, one coat of varnish. And, they still need touching up. Oy. Good thing the tiny mail will distract. :D
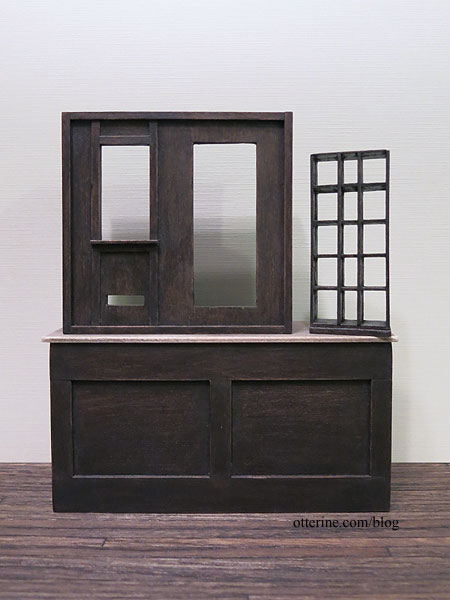
I did paint the first coat on the countertop followed by sanding, though I have work to do on that before I can finish it. It won’t be a contrasting lighter tone in the end.
Categories: Ivy Hollow RFD
September 28, 2019 | 0 commentsRealife Country Store fixtures – part 2
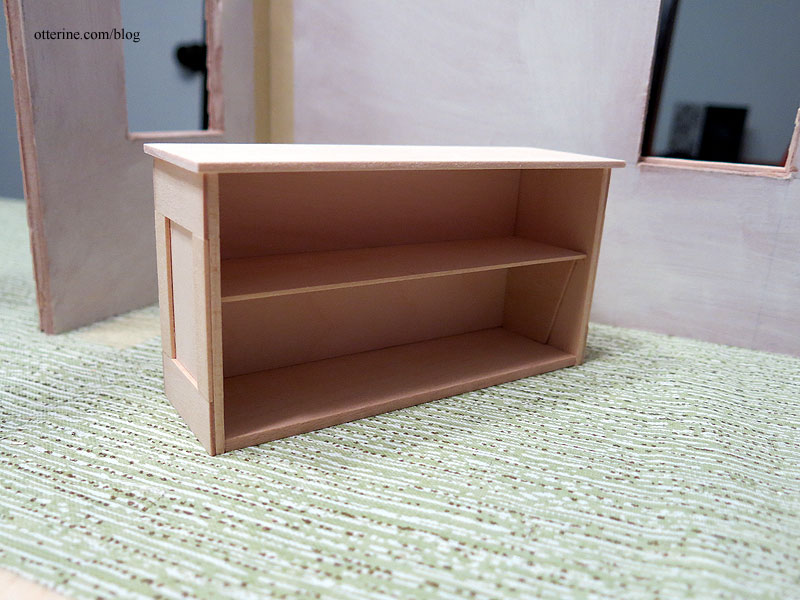
Continuing work on the Realife Country Store fixtures. Due to the old, warped wood in the kit, I had to cut a few new parts for the counter, including an added bottom, which was not part of the original construction. Adding a bottom gives the piece more stability. I reduced the depth overall by 3/8″ to give myself more floor space. It’s still a usable depth in scale but gives a little breathing room for my small interior. I made some adjustments to the trim for proper proportion to the final look. The trim around the base will be added after I install the flooring and baseboards.
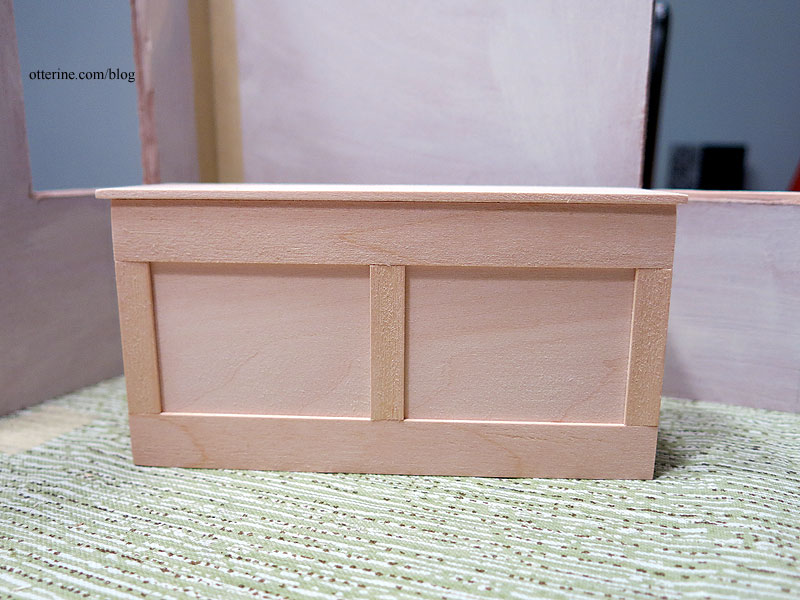
I’m thinking of adding a routed edge to the countertop, so I’ll leave that unattached for now while I brush up on my drill press class notes. Plus, I will need to have some flexibility with the placement along the window and the gate.
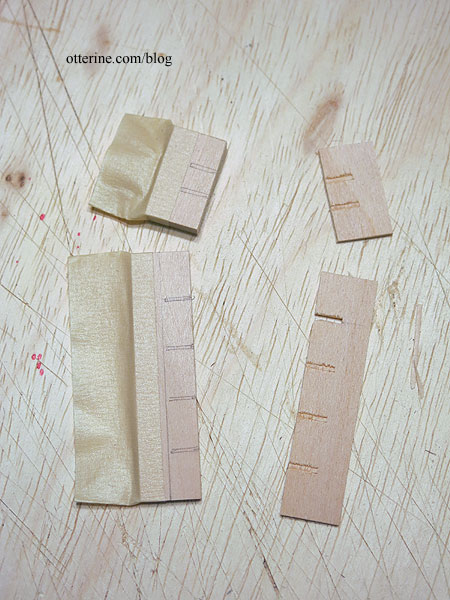
I needed to make new parts for the pigeon holes for the post box teller, because die cuts are splintery and uneven. Die cutting doesn’t work well for tiny details, and the wood was fragile beyond that.

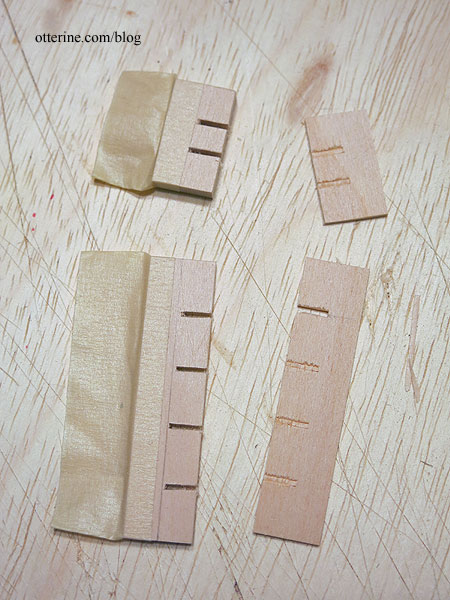
First, I cut new strips the size of the originals and marked the location of the notches. I taped the like pieces together and used the scroll saw to make the cuts. Taping the pieces together helps keep the pieces close to being the same.
Just a little clean up, and we’re ready to go. :D
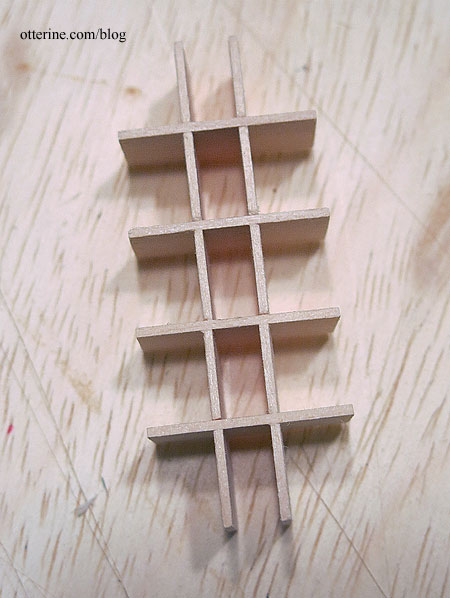
This is nowhere near perfect, but it is better than what could have been achieved with the original pieces. A laser cut version might better, though I think the pieces would still be fragile.
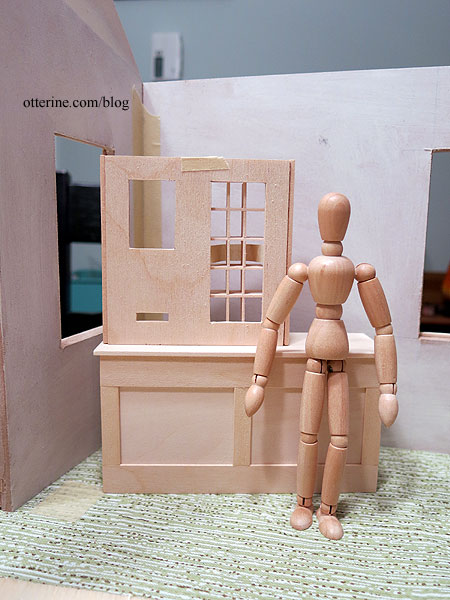
The original facade for the post box teller was split in the kit, before removing it from the die cut sheet. (The instructions even indicate this piece is prone to breakage and suggest repair.) I was originally going to repair it, until I set the dry fit on the counter just to see. Well, this low window will give our postmaster some back issues, won’t it?
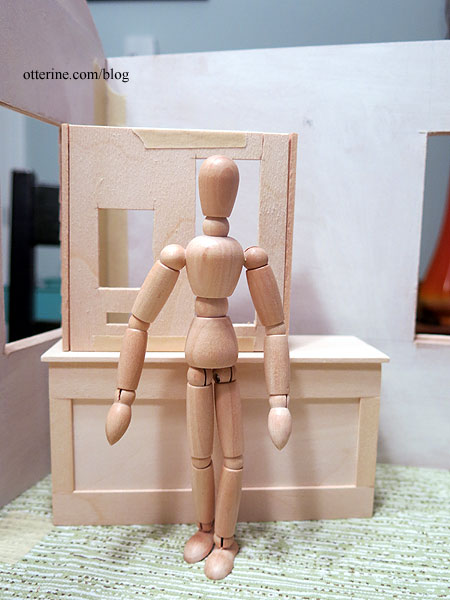
I cut a new facade from 1/8″ thick plywood, making the window in line with the top of the sorting window and leaving the letter slot in its original location. The top and sides are too warped to keep, but they work well enough for a dry fit. I might have gone a little higher than needed with the window, but it’s much better. I’ll probably cut more from the bottom portion to make the window longer and add a shelf.
Categories: Ivy Hollow RFD
September 23, 2019 | 0 comments
NOTE: All content on otterine.com is copyrighted and may not be reproduced in part or in whole. It takes a lot of time and effort to write and photograph for my blog. Please ask permission before reproducing any of my content. (More on copyright)


