
Ivy Hollow – screen door, part 5
Continuing work on the screen door. I sprayed the screen on both sides with the Rust-Oleum Self-Etching Primer as tested last time. The coverage wasn’t quite as uniform over a larger patch of the material, but it’s pretty great. It looks like a dusty screen, perfect for my rural setting.
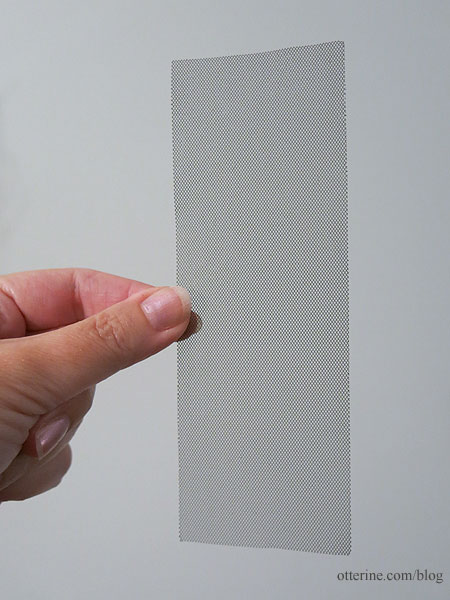
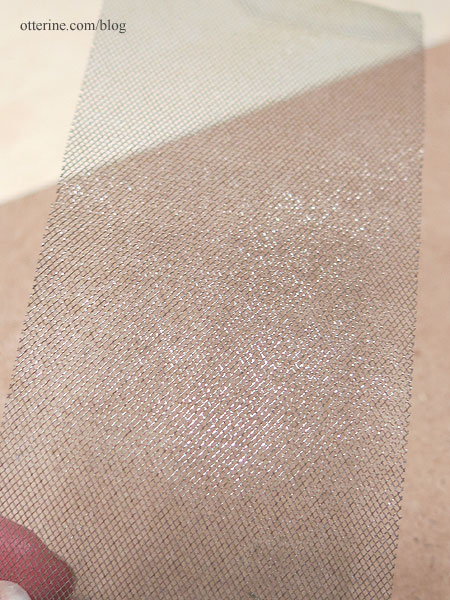
It’s even a little shinier on the interior side, where it would be more protected from the elements. This might have been why I had trouble painting it in the past. I might have tried to paint the shinier side instead of the dull side.
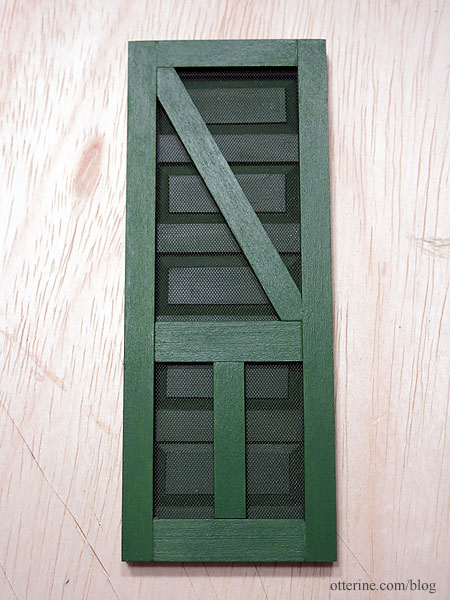
I glued the screen door boards together, then cut cross board detailing.
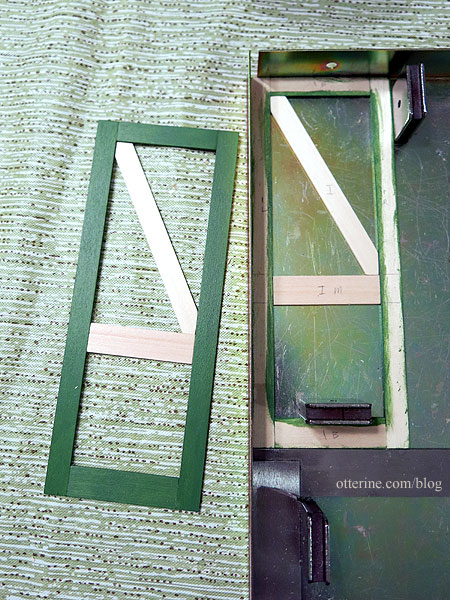
I painted those pieces while unattached, then added them to the previous assembly. I glued the three layers together – two wood frames with a cardstock/screen portion sandwiched between.
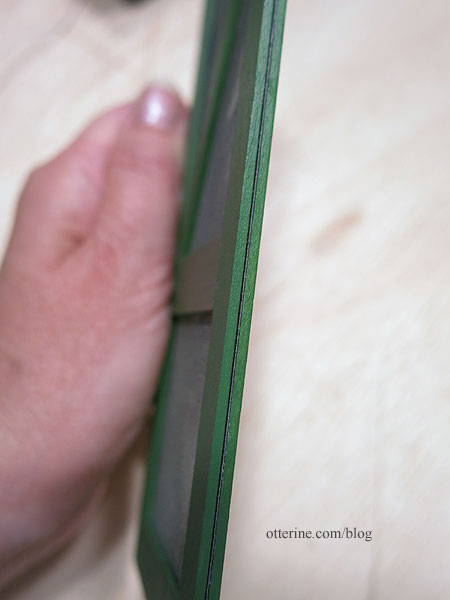
Here’s a reminder of the middle layer setup since I had to work fast and couldn’t photograph that part.
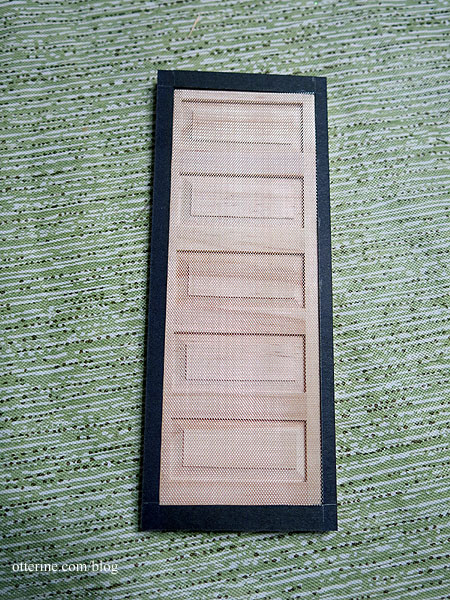
Once thoroughly dry, I gently sanded the four outer edges.
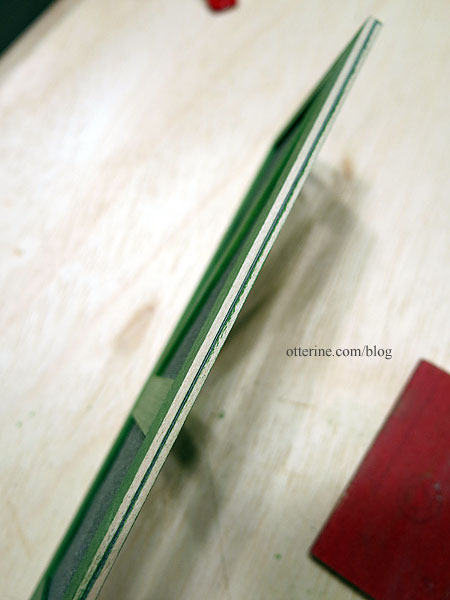
I filled any minor gaps with spackling.
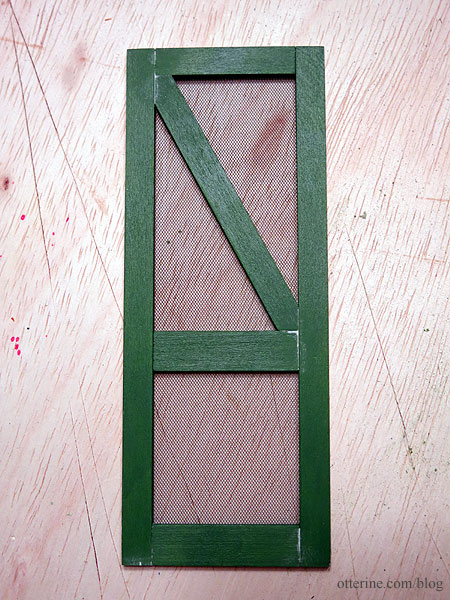
I touched up the paint overall and painted the sides of the door.
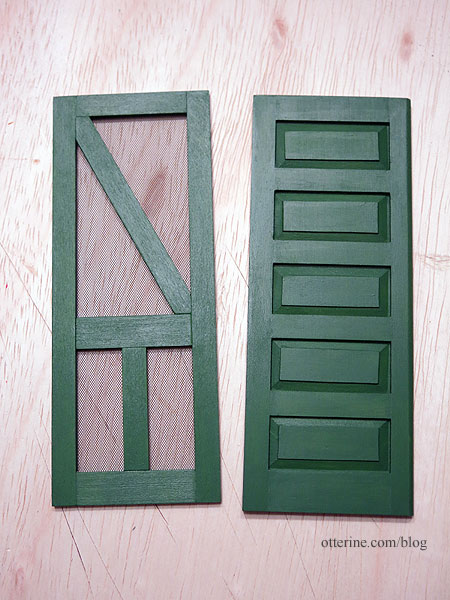
Next up, building a frame to house both the screen and solid doors.
Categories: Ivy Hollow RFD
August 15, 2019 | 0 commentsIvy Hollow – potbelly stove, part 3
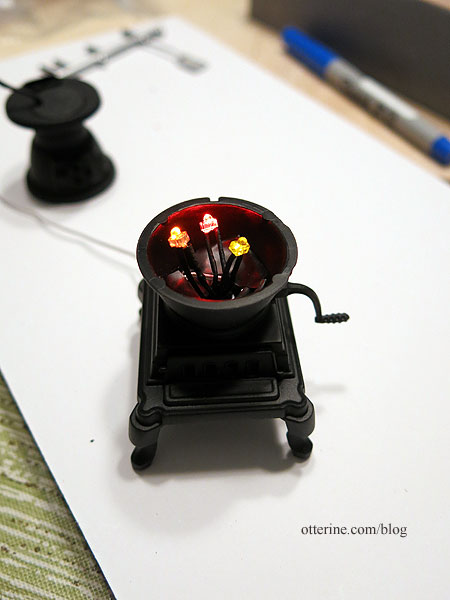
Continuing work on the potbelly stove. I left the glue and ice cubes to dry for roughly a day and a half. The glue turned out not clear/not white, which was just fine. There were a couple of bare spots, so I glued in a couple of ice cubes with super glue gel. I super glued the wire into the groove of the front leg. This will be painted black and go through the floor then to the power strip in back, sight unseen once the stove is installed.
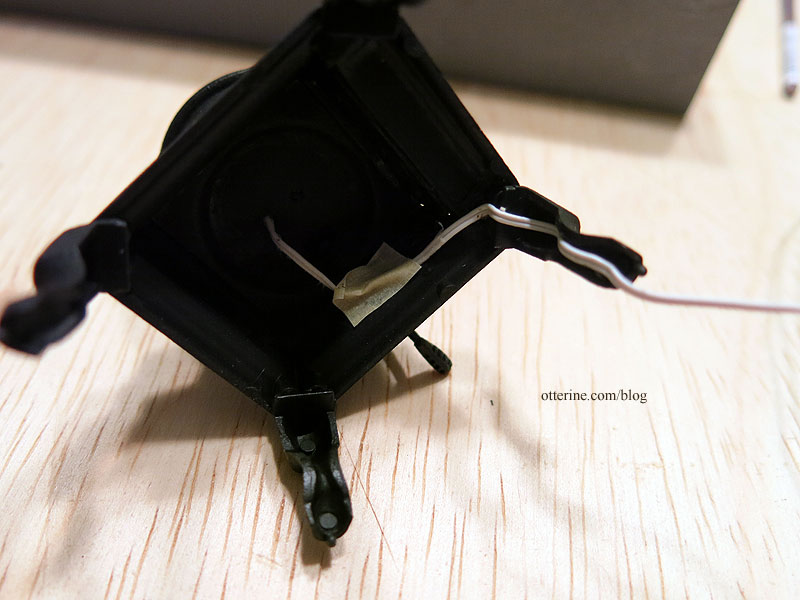
I added some texture to the inside of the stove where it might be seen. I glued the front door shut, though the kit does allow for a swinging door. I find it simpler to just keep it closed with the damper glued in the open position to see the lights inside. The stove lid is removable, though.
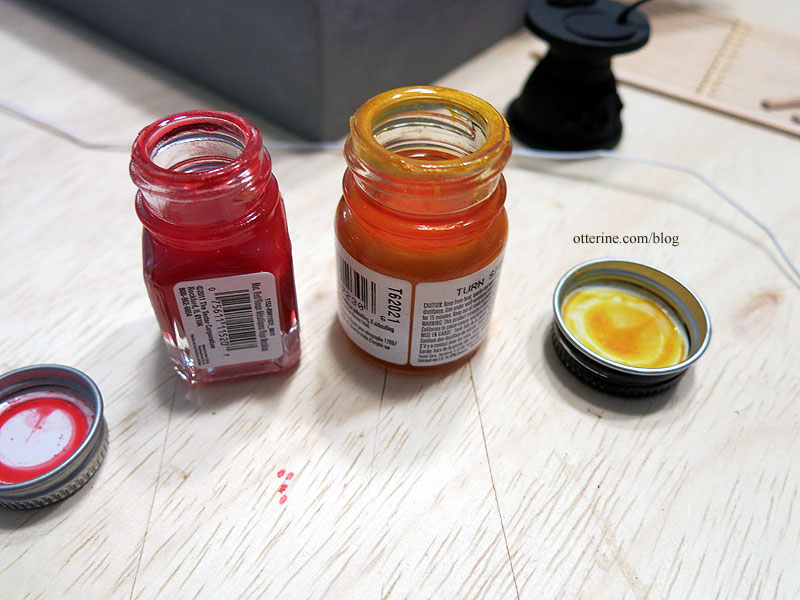
I used Testors model paints to add red and orange over the top of the ice cube/glue surface and let that dry completely. The trick is not to shake or stir the paint but use the transparent colored liquid after the paint has settled. This was taught to me by the helpful folks at the local HobbyTown USA.
Mmm…watermelon candies! :D
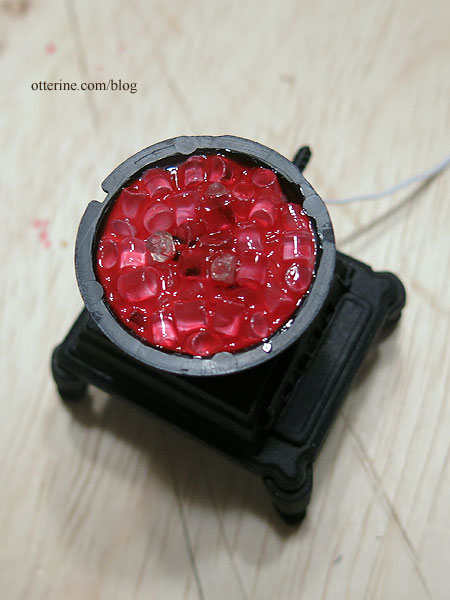
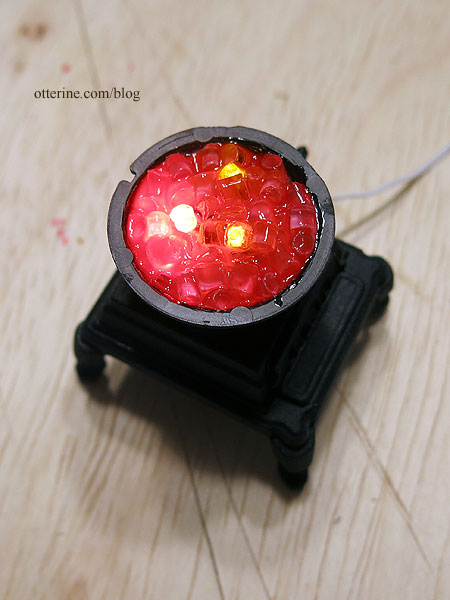
Working slowly with a small paintbrush and the lights on, I painted the surface flat black in spots. It’s easier to add more paint than take it away.
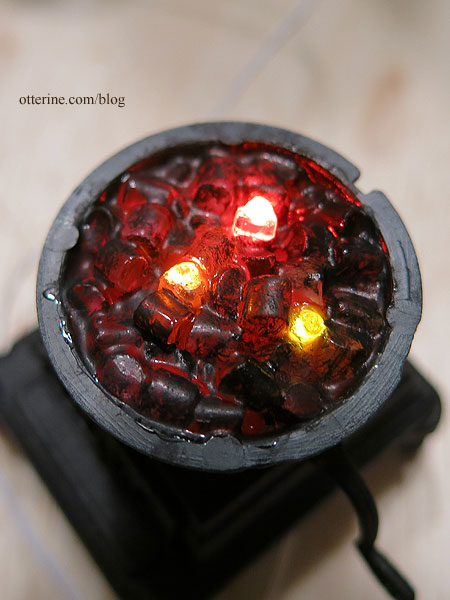
I carefully removed the masking from the bulbs. The yellow LED was a bit too bright in relation, so I toned it down with the Testors paint. If I were to do this again, I would make the third flickering bulb orange instead of yellow.
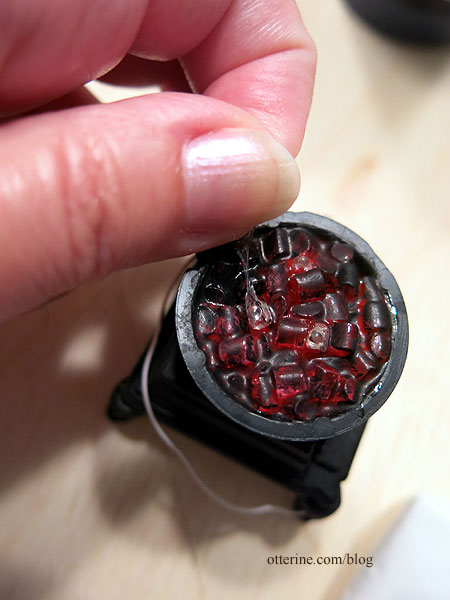
I fine-tuned the surface with greys and a bit more black, covering the tops of the LEDs to mask them.
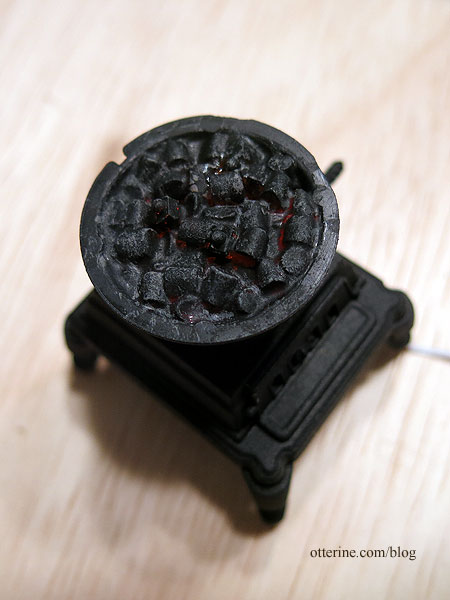
It might seem too dark in the photo, but the effect in real life is lovely.
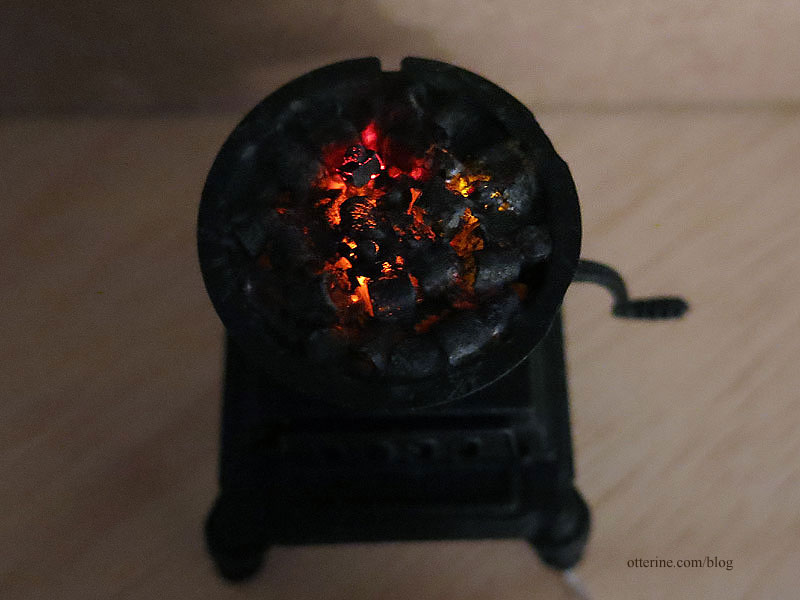
Glowing embers…
Of course, you really won’t be able to see much of them once the stove is in place, but I know they are there…and the next time I need embers, this is the method I will use.
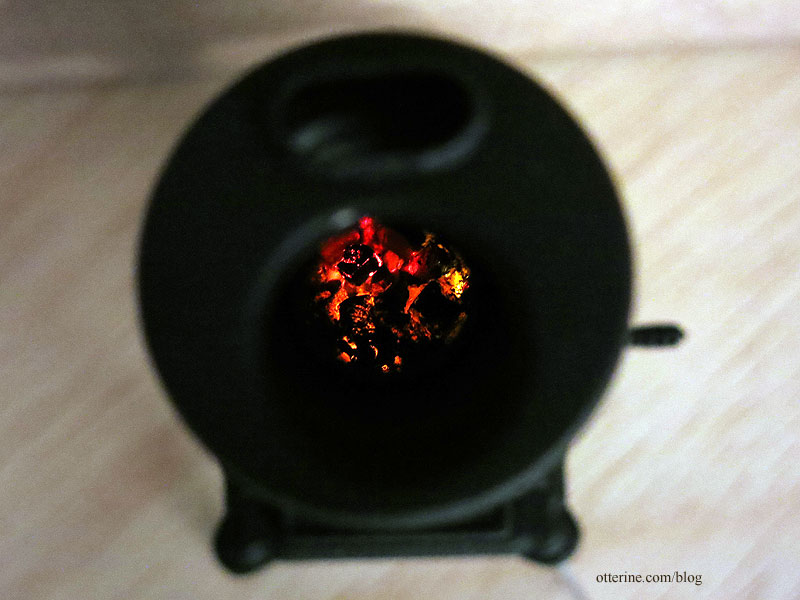
Next up is the stove pipe and adding a smidgen of dust.
Categories: Ivy Hollow RFD
August 13, 2019 | 0 commentsMail Wagon – part 7
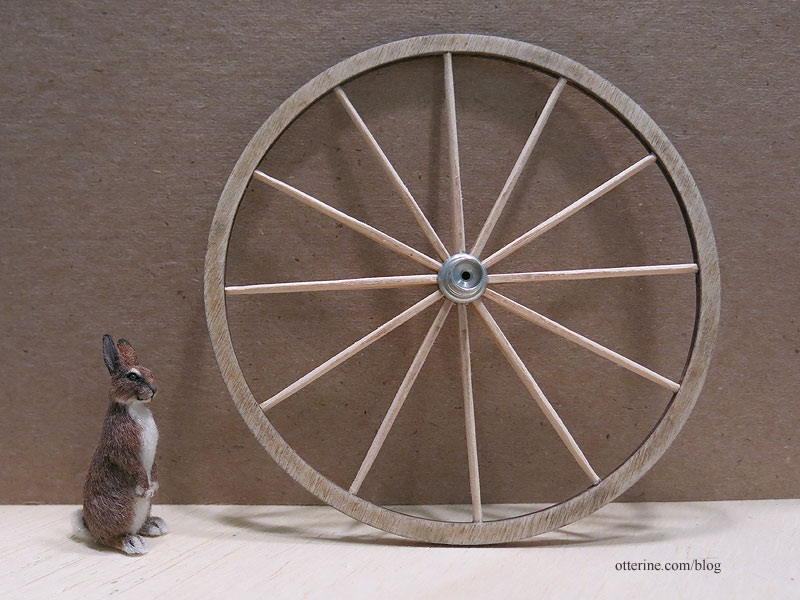
Continuing work on the Mail Wagon. With the replacement wheel parts received, I was able to assemble all four wheels. I decided to use the “scrap” wheels that were cut between the thin true parts. The scrap wheels are more substantial for a mail wagon versus a doctor’s buggy, and I will be handling the wagon and therefore the wheels a lot during the cabin construction. As expected, the replacement scrap wheels are slightly smaller than the original wheels, but this works without issue. I’ve seen mail wagons with all the same size wheel and those with smaller wheels in the front.
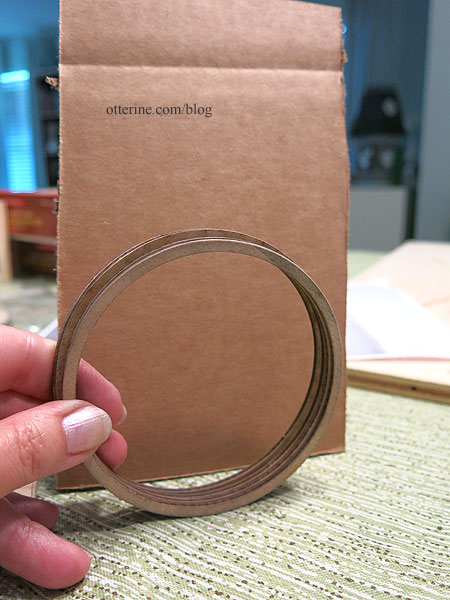
I left the previous large wheel on the jig and fit its corresponding scrap wheel inside since the paper pattern isn’t meant as a guide for the scrap wheels. I’m using only the long spokes, measuring and cutting them to fit one at a time. While there are two extras in each set of spokes in case of disaster, I am assembling the larger wheels first. If I get a spoke too short for these, those shortened pieces will likely work for the smaller wheels.
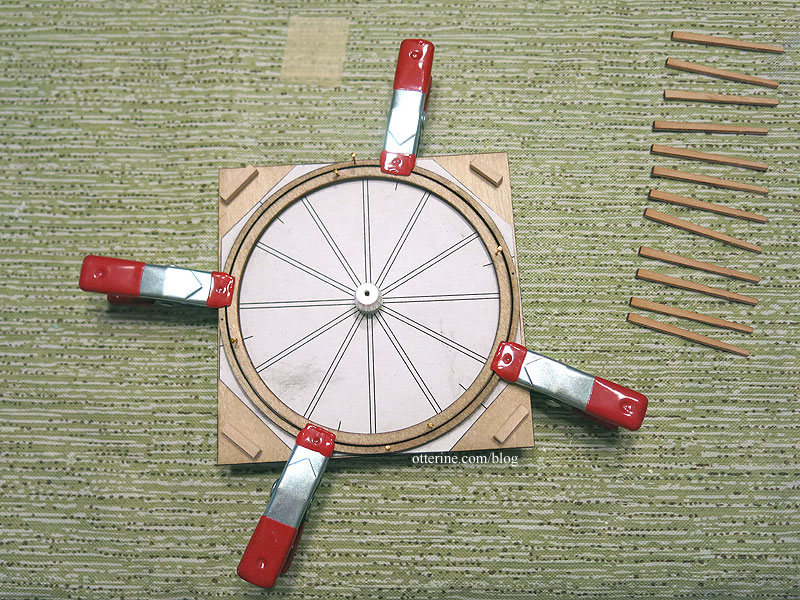
You are to complete the spokes in opposing pairs so the wheel stays uniform and flat. I built in a little tension to help the minimal amount of super glue gel used, but too much tension can make the wheel buckle.
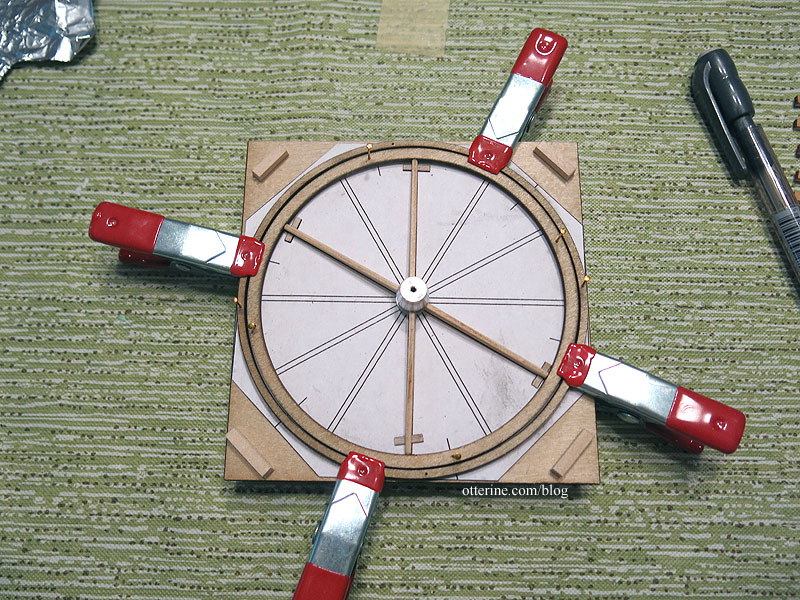
The assembly was actually very sturdy once removed from the jig.
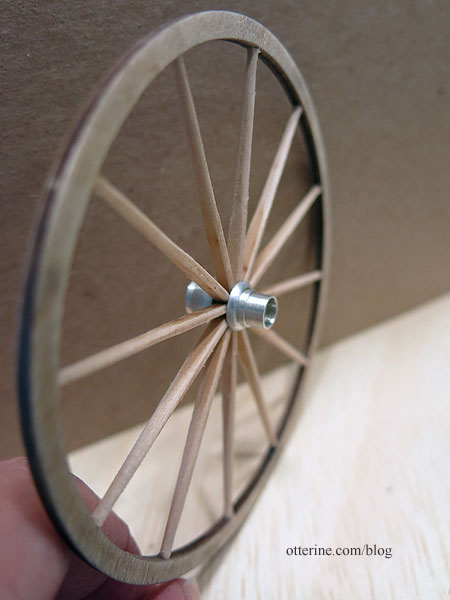
While I did round the edges a touch before assembly, the instructions indicate to fine-tune the small ends into rods. This worked only so well in that each one will always turn out differently. Once painted and with added grime, they should be fine. I filled the nail holes with wood putty.
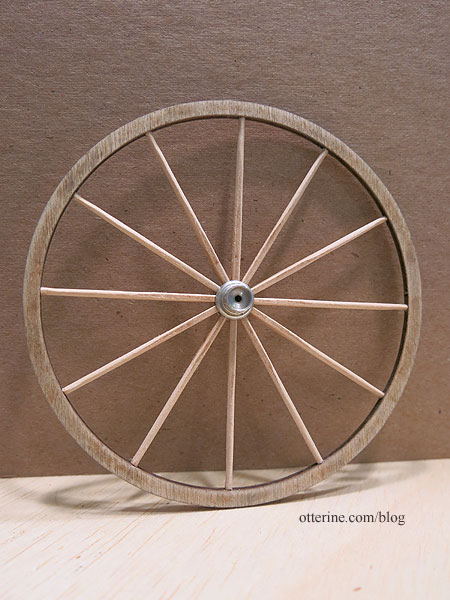
Three more to go….
Categories: Ivy Hollow RFD, Model Cars, Vehicles
August 10, 2019 | 0 commentsIvy Hollow – potbelly stove, part 2
Continuing work on the potbelly stove. This is the reference photo for the finish I’m after (under the dust).
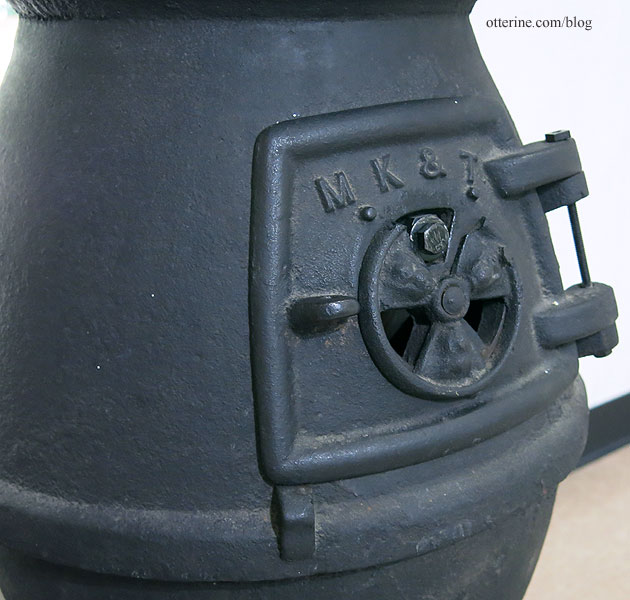
Even the sanding and flat black spray paint didn’t take away all of the sheen and smoothness of the plastic stove, so I stippled on a base coat of satin black by Americana. I then stippled on alternating layers of flat black and satin black, ending on flat black. Using the satin finish base made it look more like iron, which does have a slight sheen. My Baslow Ranch stove doesn’t have this texture, because I didn’t think of it at the time, but all the grime on it disguises that fact.
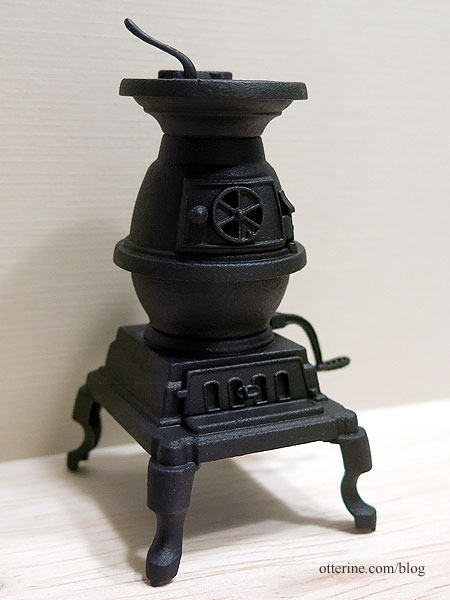
The stippling effect was important to do in thin layers to make sure the texture was in scale. I’ve turned plastic into iron. :]
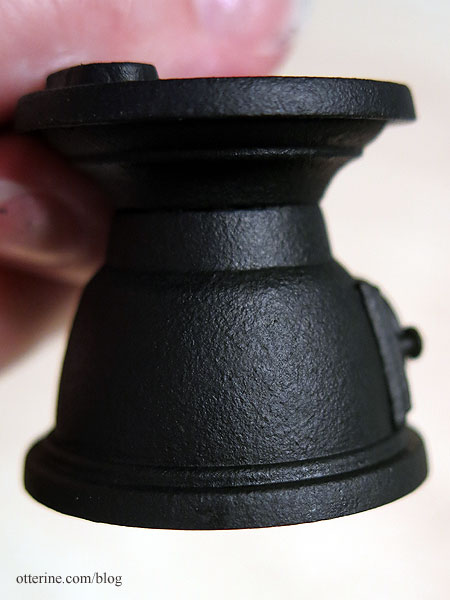
I patched the open holes in the pot except the one for the wire using Squadron Products White Putty, then painted the patches black once dry.
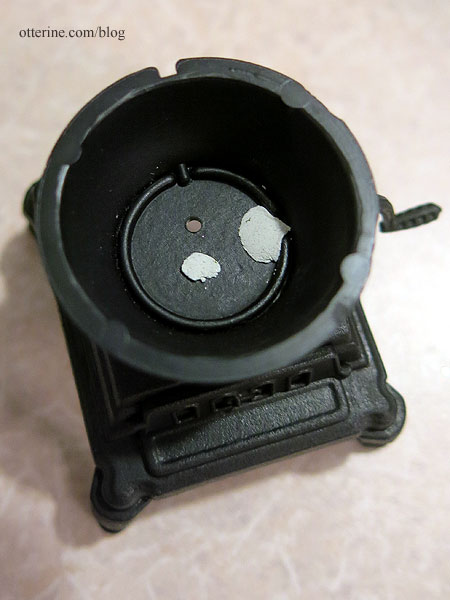
After feeding the wire through the remaining hole, I glued in the wire bundle with Aleene’s Quick Dry supplemented with super glue gel. I kept the lights on the 3V battery while working so I would know if any of the LEDs failed during the process.
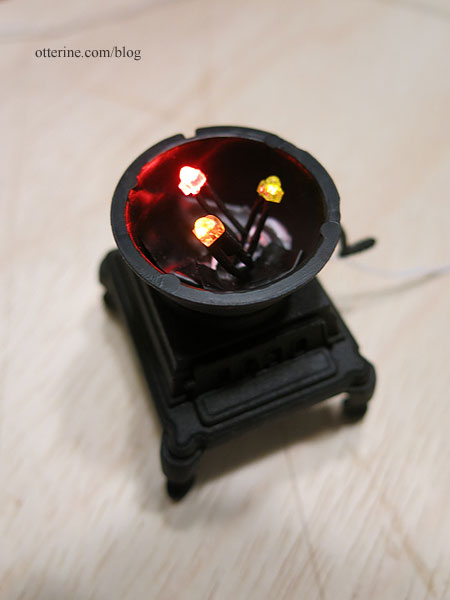
I had dabbed Winsor & Newton Masking Fluid on the LEDs to protect them for the next steps. Here the fluid is still wet; it dries clear.
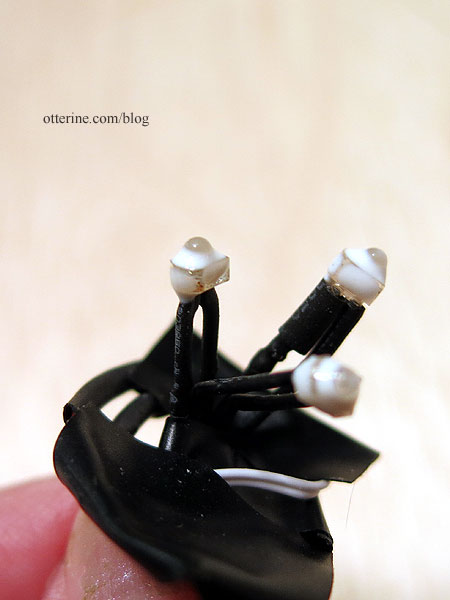
Working in two layers, I added some Aleene’s Quick Dry glue then poured in some ice cubes from Alpha Stamps into the pot, using a toothpick to arrange and settle the pieces.
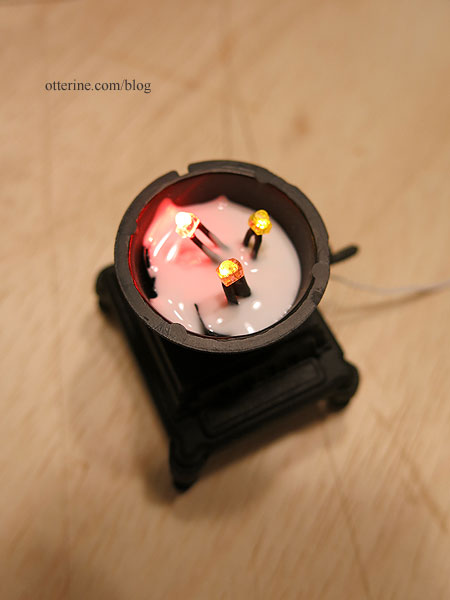
The upper layer of ice cubes is even with the bulbs.
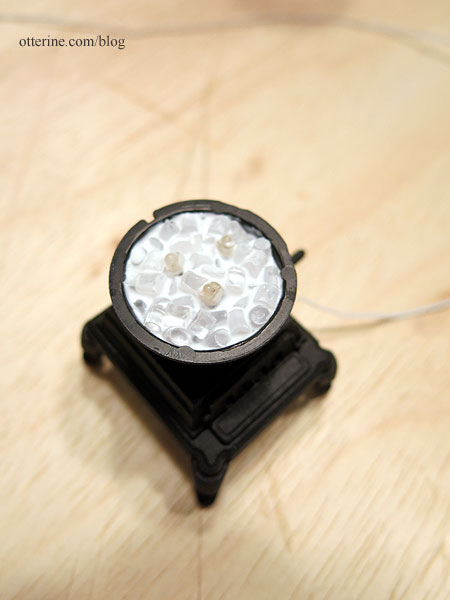
The steady red bulb is the strongest of the three (showing as near white on the left below), but the flickering yellow (upper right) and flickering orange (lower right) bulbs add some nice depth already.
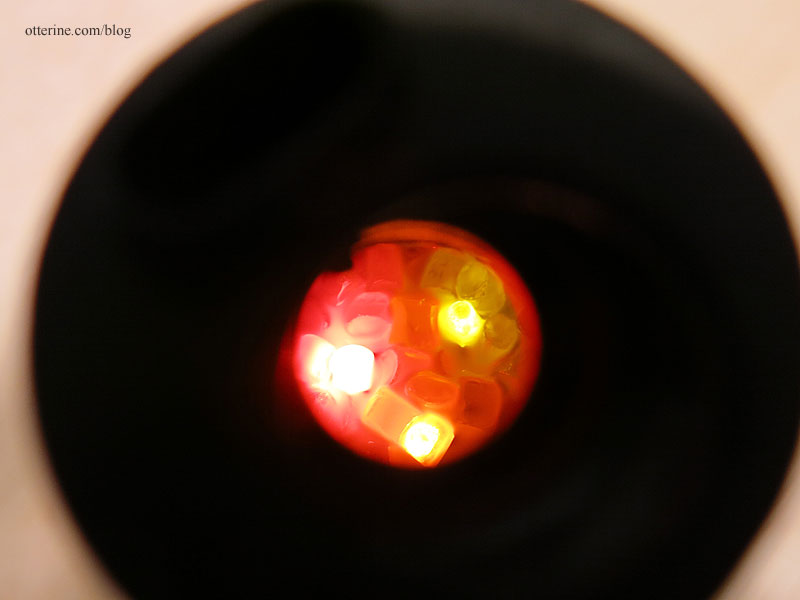
Next up, turning Malt-O-Meal into burning embers. :D
Categories: Ivy Hollow RFD
August 9, 2019 | 0 commentsIvy Hollow – screen door, part 4
Continuing work on the screen door. I was already leaning toward the micro mesh, but the overwhelming votes for it helped seal the deal! :D I tried a couple more tests to see if I could tone down the sheen. I tried to spray paint the mesh once before, but I figured I’d try some other types.
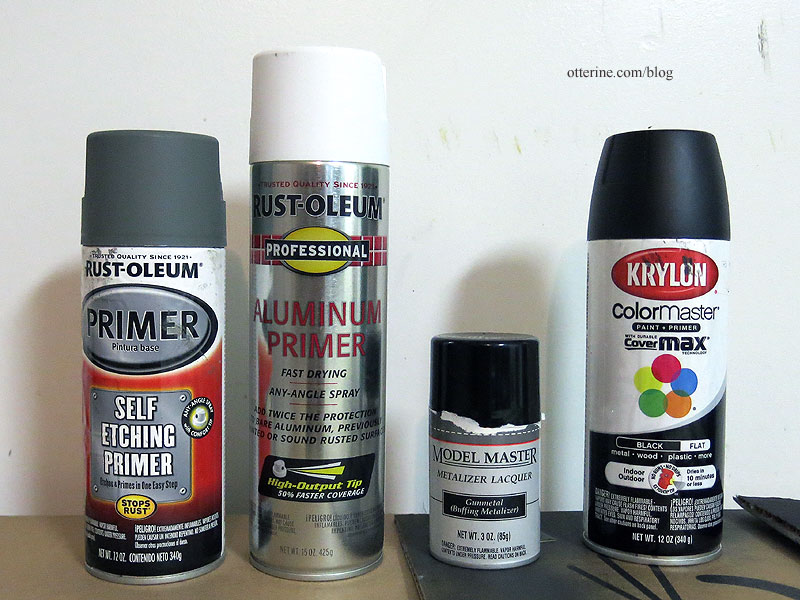
Left to right:
- Rust-Oleum Self-Etching Primer, which is a grey-green. It bonds to metal to serve as a base for better paint adhesion.
- Rust-Oleum Aluminum Primer, which is light grey. It bonds specifically to aluminum, which is the mesh material. I bought this to prime the wagon wheel hubs, which are aluminum.
- Model Master Metalizer Lacquer in Gunmetal, which is…errrmmm…gunmetal grey. :D It’s a buffing paint meant to give a true metallic finish, so the finish is also meant to rub off.
- Krylon Paint/Primer in flat black. The standard base coat.
And, here are the test samples. All very nice colors and no more sheen. Apparently, I was the problem when I tried painting this mesh before. haaaaaaaa. The paint adhered just fine without clogging the holes.
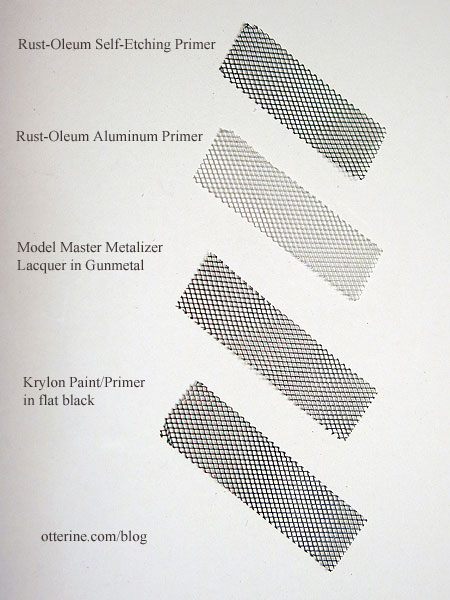
On the door, I think the clear choices for color are the Rust-Oleum Self-Etching Primer and Model Master Metalizer Lacquer in Gunmetal. Both remove the sheen and the results are not too light or too dark.
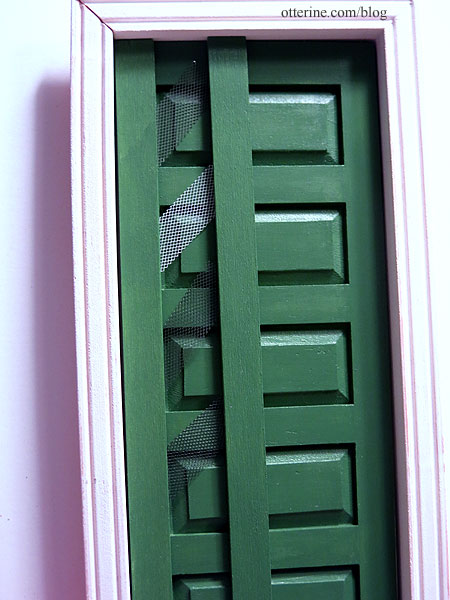
I think I will go with the Rust-Oleum Self-Etching Primer for the simple fact that it is made to bond to metal. The Model Master Metalizer Lacquer did rub off easily when I ran a paper towel across it, while the Rust-Oleum Self-Etching Primer stayed put.
Categories: Ivy Hollow RFD
July 30, 2019 | 0 commentsIvy Hollow – screen door, part 3
Continuing work on the screen door. When I left the screen door last, I had tried to darken the aluminum micro mesh without success. I moved on to the wood parts. I marked where the glue joins would be and left those unpainted as I gave the screen door boards a first coat of Woodland Green by Americana. It’s a satin paint, which means no need for a final varnish, but it goes on very thin and needs multiple coats. I painted the solid door the same color.
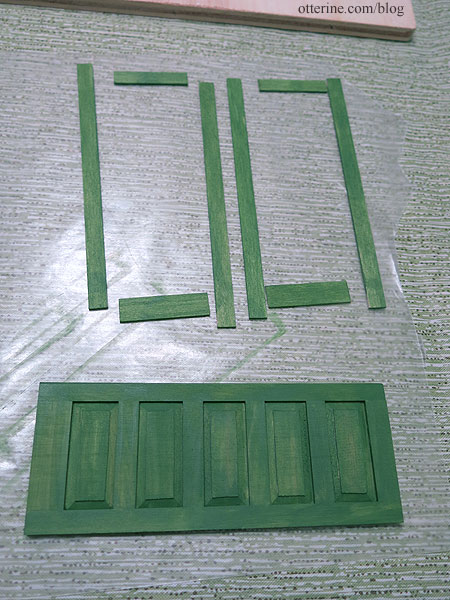
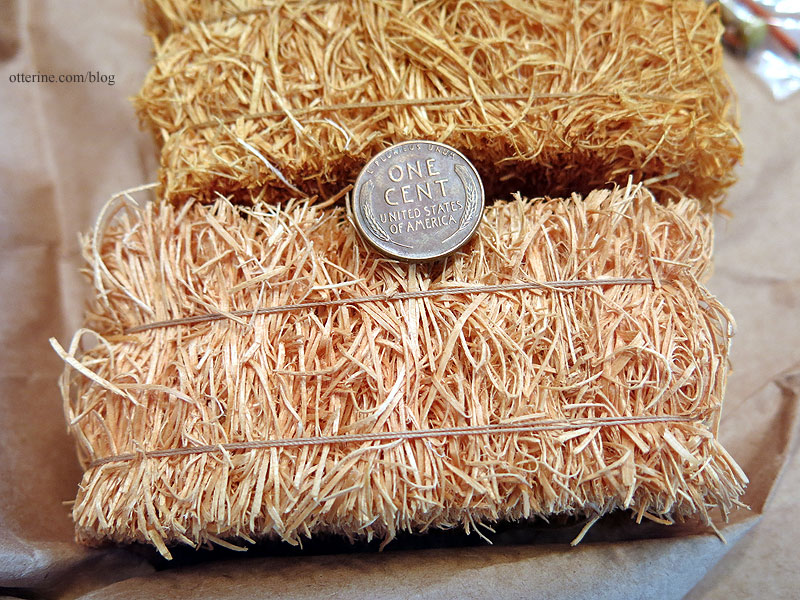
In the meantime, I continued my research and window shopping, happening across the best hay bales I had seen in miniature at Maple Leaf Miniatures. I wrote to the shop owner, and she got back to me with availability. Aren’t they marvelous? :D
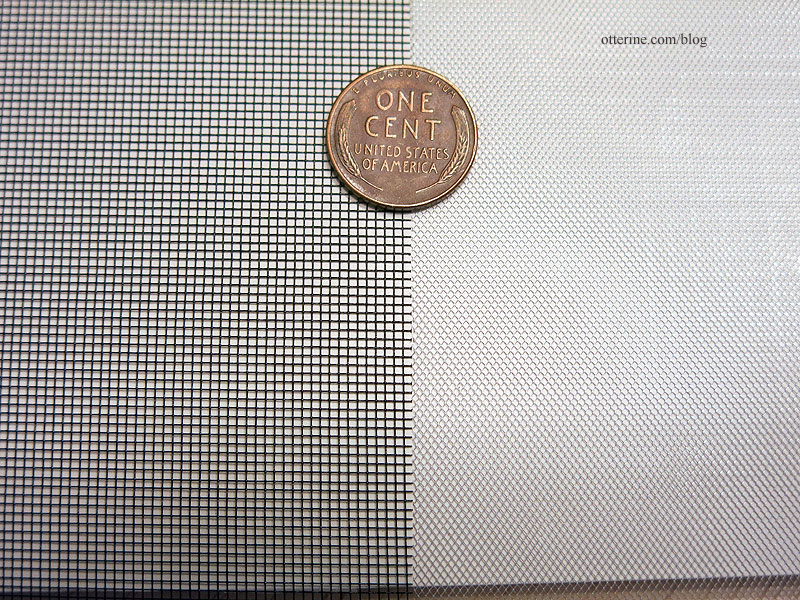
While discussing my project, she offered some black screen material. Here it is next to the micro mesh. The scale is a bit larger, but the color is great. It also doesn’t get damaged just by looking at it the way the micro mesh does.
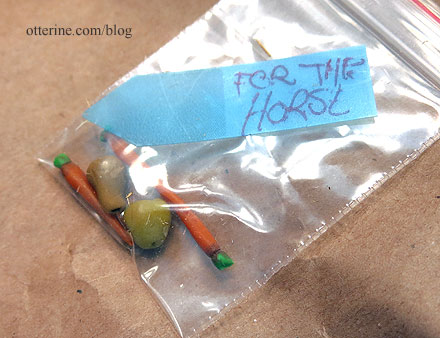
She also included some snacks for Jebediah! :D
Anyway, today I tested the two materials with the painted door.
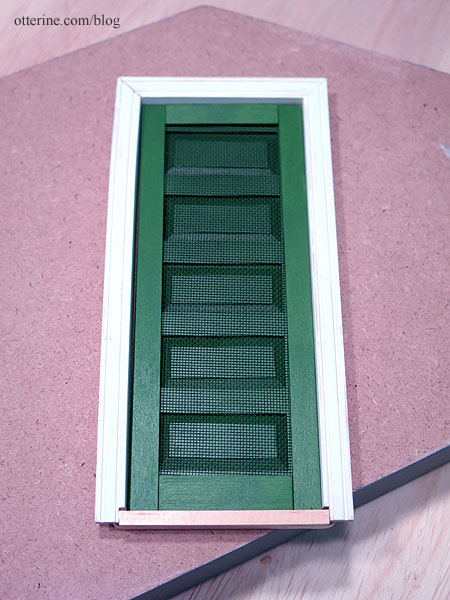
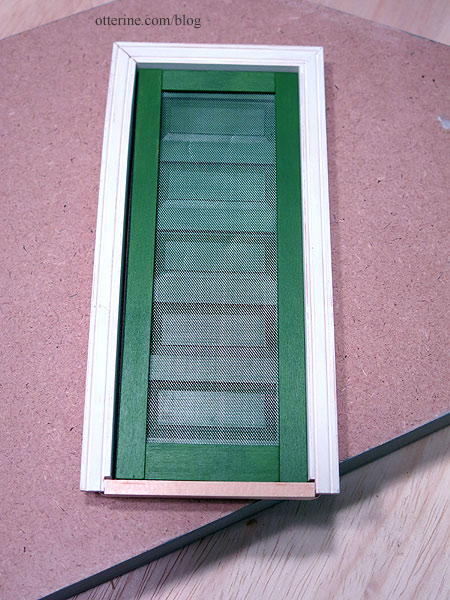
It’s a hard choice. On the one hand, the black screen will be more durable and less obvious. But, the micro mesh is better for scale, and honestly, the damaged bits here and there rather add to the realism. There will be a cross bar in the middle and likely an angled brace, too. I think I will need to see how it looks with the door in dry fit with the building to make a final decision.
Categories: Ivy Hollow RFD
July 28, 2019 | 0 commentsIvy Hollow – potbelly stove, part 1
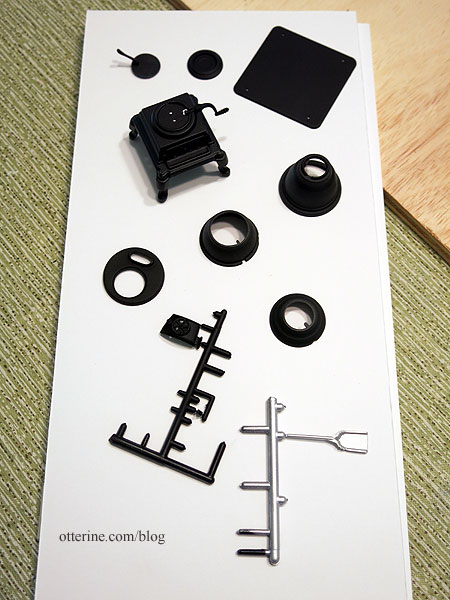
Many moons ago, I building a decrepit potbelly stove from a Chrysnbon kit for Baslow Ranch.
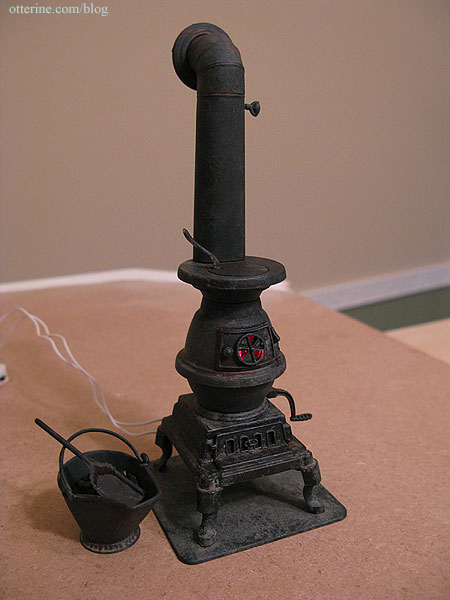
It’s a great kit, with a skinny stove that is perfect for a small structure. Typically, these would be placed in the middle of the building, but we’ve already planned the layout with the stove in the corner. This will have a newer look to it than the Baslow Ranch stove, but I still sanded the pieces with a fine grit sanding paper to remove the shine from the plastic.
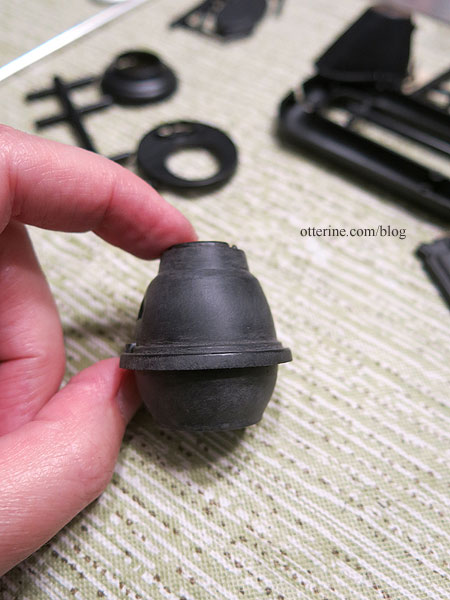
I spray painted the pieces flat black, including the few factory silver parts included. I sprayed the scoop with Model Masters Aluminum Plate Metalizer. More on that in a later post. I assembled the bottom and top halves of the stove, then left them separate for now.
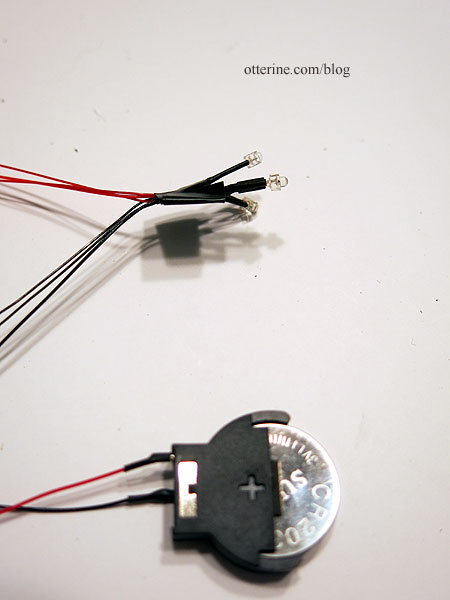
I want my stove to have coal light, but I have learned a lot since I made the Baslow Ranch stove. I used the red bulb included with the kit in that instance, but now I very rarely use anything with non-replaceable bulbs. LEDs and replaceable bulbs make for easier replacement if or when bulbs burn out. I wound three 1.8mm LEDs together – 3V flickering orange and yellow and a 7-19V separated steady red with a rectifier/resister. Since these are all 3V until they are connected to the rectifier/resistor, I am testing the lights with a 3V battery switch. [Note: If I were to do this again, I would make the third flickering bulb orange instead of yellow since the yellow was too bright in the end.]
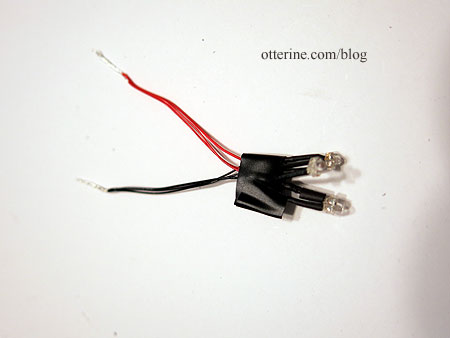
I shortened the wires, combined the red and black bundles and spliced a new, single end wire to the bunch.
I wound the wires to form a base and taped it together with electrical tape.
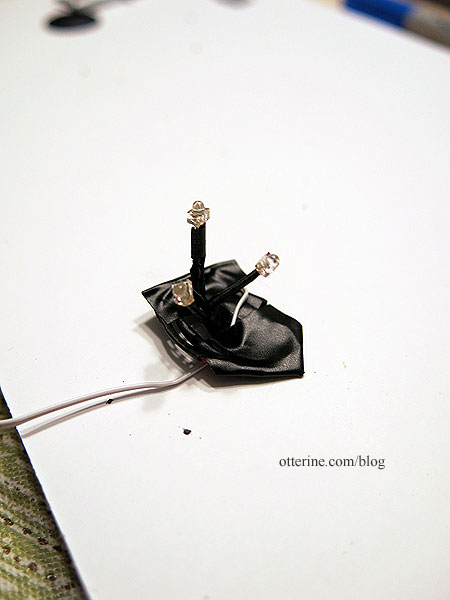
I pulled the single end wire through the bottom of the stove and situated the lights inside. The assembly is not fixed in place just yet.
The light through the damper looks nice already, especially with the orange and yellow flickering over the steady red glow.
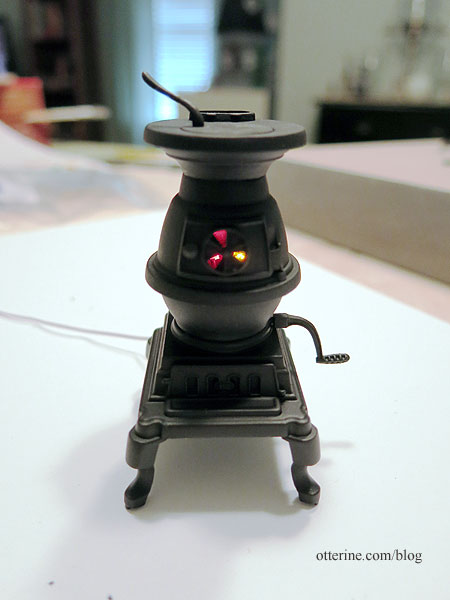
I will work on simulated coals next to diffuse the light a bit more, because you can see the bulbs from certain angles.
Categories: Ivy Hollow RFD
July 28, 2019 | 0 commentsMail Wagon – part 6
Continuing work on the Mail Wagon. With the front and rear axle assemblies started, it was time to work on the wheels. Most instructions tell you to read through the whole process before starting. This is to familiarize yourself with the parts and process. In this case, the instructions indicate it was noticed during the prototype stage, the manufacturer found it was easier to sand the spokes after assembly. That saves a lot of initial prep work on individual fiddly parts.
The wheels are made from laser cut wood parts, aluminum hubs and a jig.
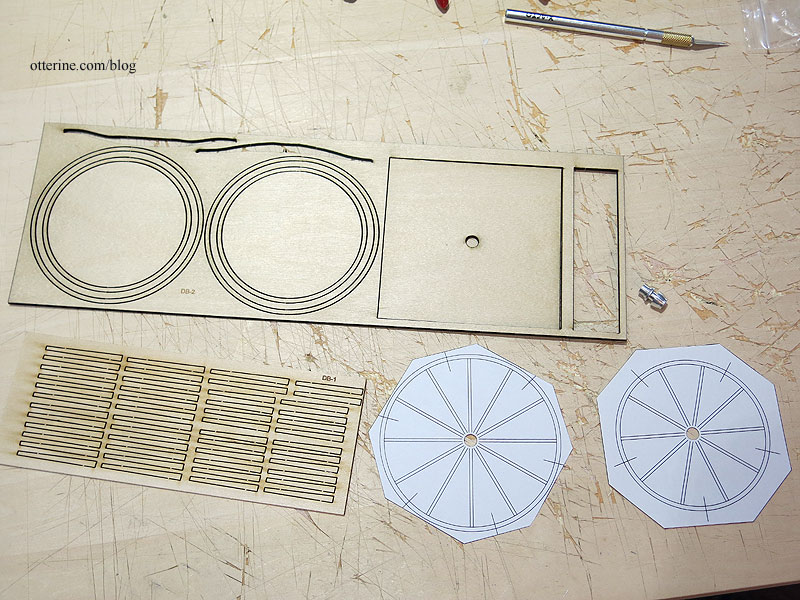
I used MiniGraphics Wallpaper Mucilage to apply the paper patterns to the wood base. Here is the smaller wheel pattern. The larger wheel pattern is on the reverse, but in reality, you would work on one wheel at a time so it’s not an issue.
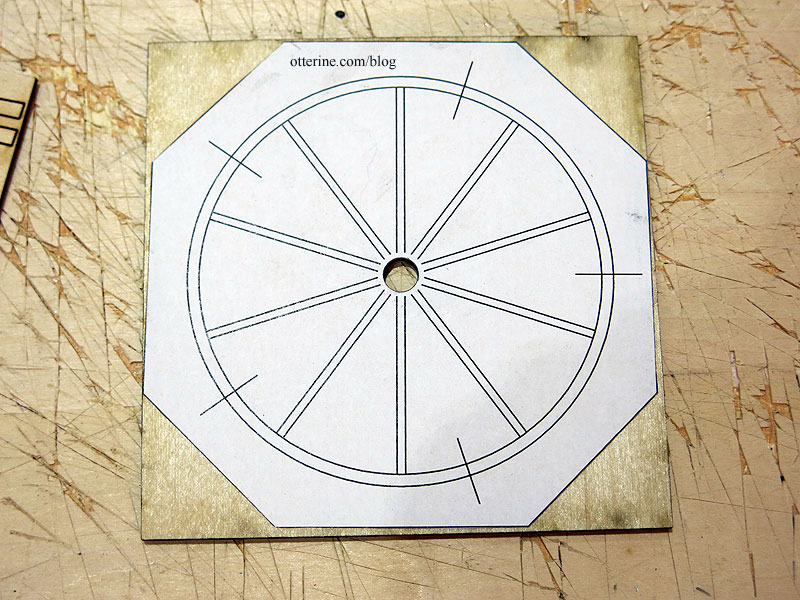
Another nice thing is the intact inner circle and middle “wheel” waste pieces. I saved those in my stash. Never know when I might need pieces like these. :]
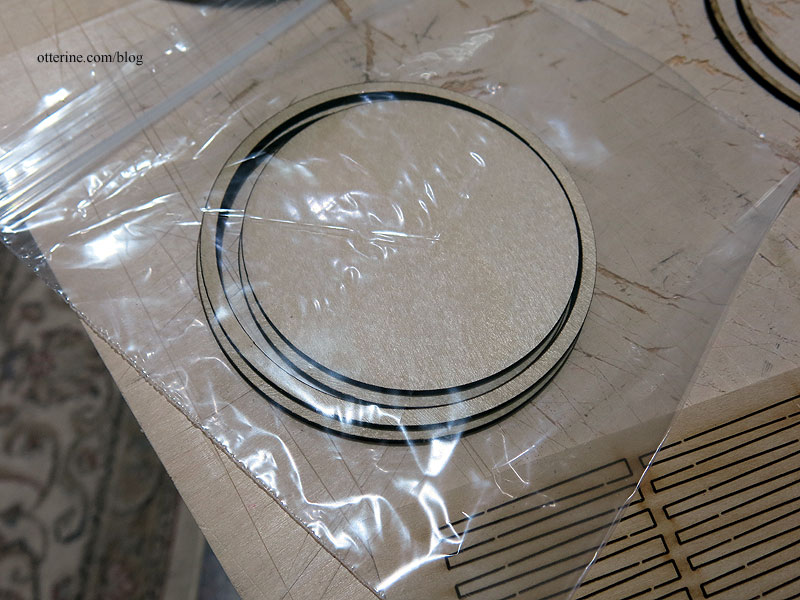
I decided to use the recommended nails to hold the wheels in place while assembling. The paper pattern did not match up with the wheel size, so I centered as best as I could. Using the nails also helped keep the circular shape while working whereas clamps might not have.
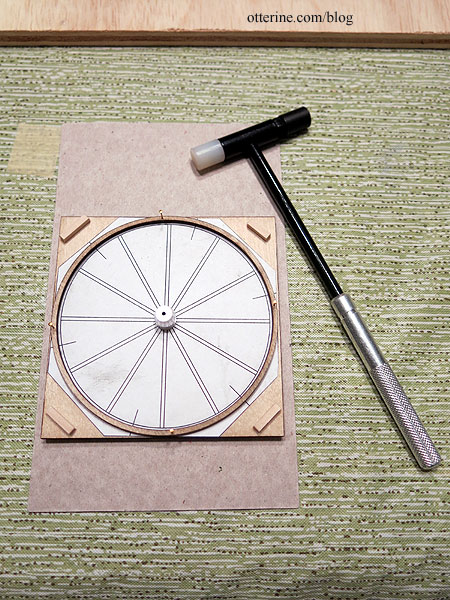
Even though I will be doing the final shaping after assembly, I did clean the laser char from the edges of the spokes beforehand.
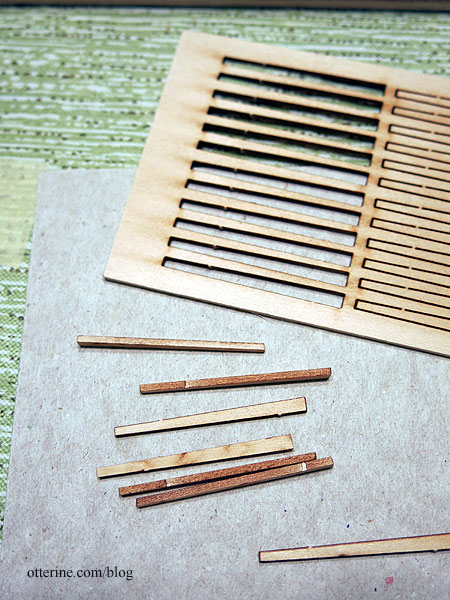
I did the same for the wheels to have a cleaner gluing surface.
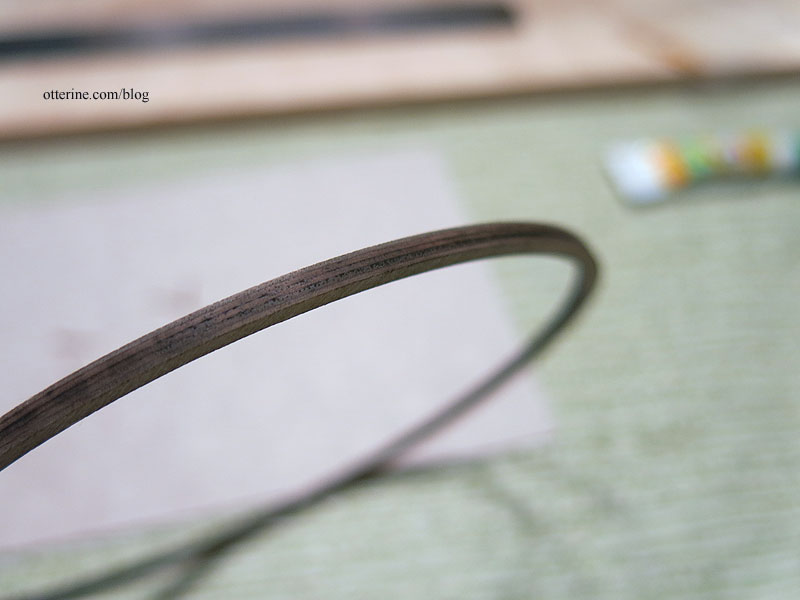
That’s when things went off the rails. The spokes fit well into the hub, but overall the wheels, hubs and spokes simply did not work together. (These will have a snug fit, but I was just testing parts at this point and didn’t trim the spoke ends to fit all the way into the hub groove.)
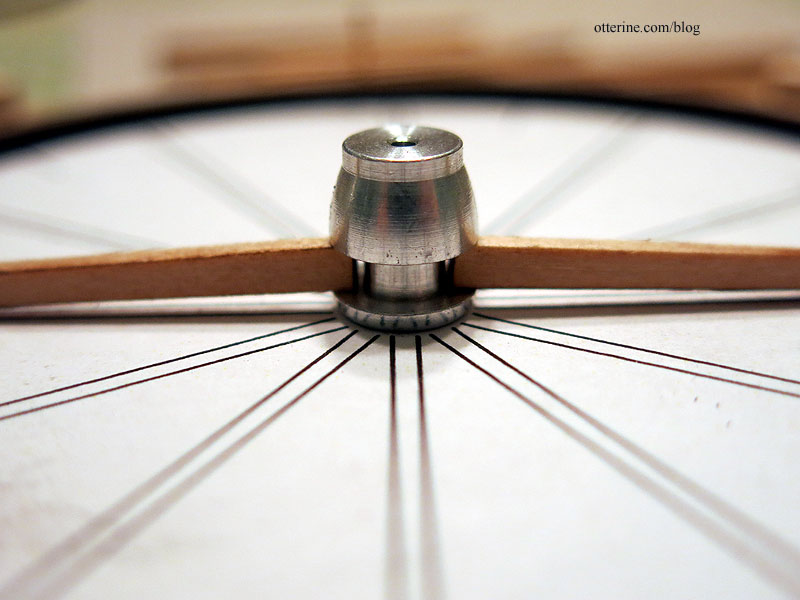
The wheels are larger than the jig pattern as noted, and the spokes are too short. I am putting the parts together as instructed and have removed the parts precisely from the laser cut sheets without removing any length from the spokes.
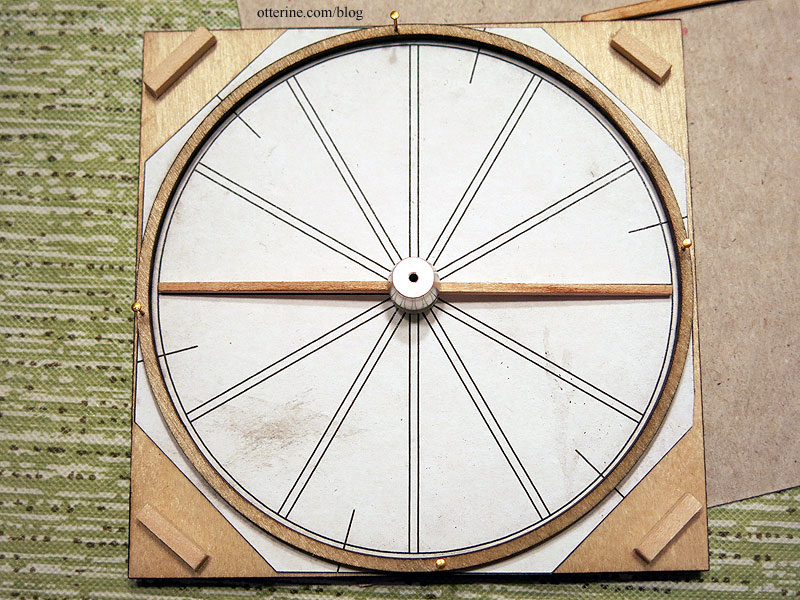
I could use the “scrap” wheels between the two true wheels with the longer spokes, but that would give me only two wheels instead of four.
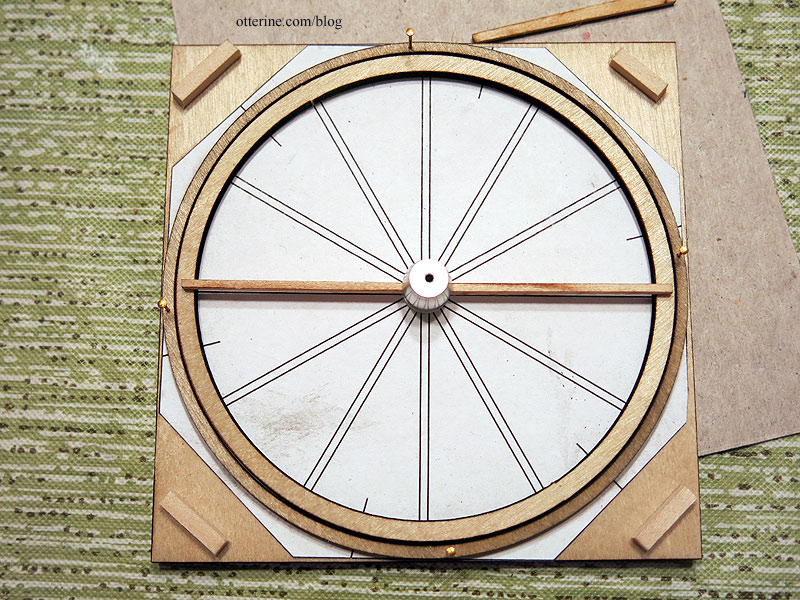
Luckily, this kit is made by a company still in business, so I sent them these photos and told them about my issues. They checked their production, and what they have now is correct. Mine must have been an errant batch. They sent me a new wheel sheet, another spoke sheet and four hubs just to make sure it all worked well together. It’s fantastic when a company will stand behind its product. :]
Now, I need to prep the new parts for assembly. Back soon….
Categories: Ivy Hollow RFD, Model Cars, Vehicles
July 17, 2019 | 0 commentsIvy Hollow – siding and gable bump out
Here’s a refresher on the postcard from 1917 showing a post office with RFD horse wagons picking up the mail. I want to keep most of the details of the original with a few changes.
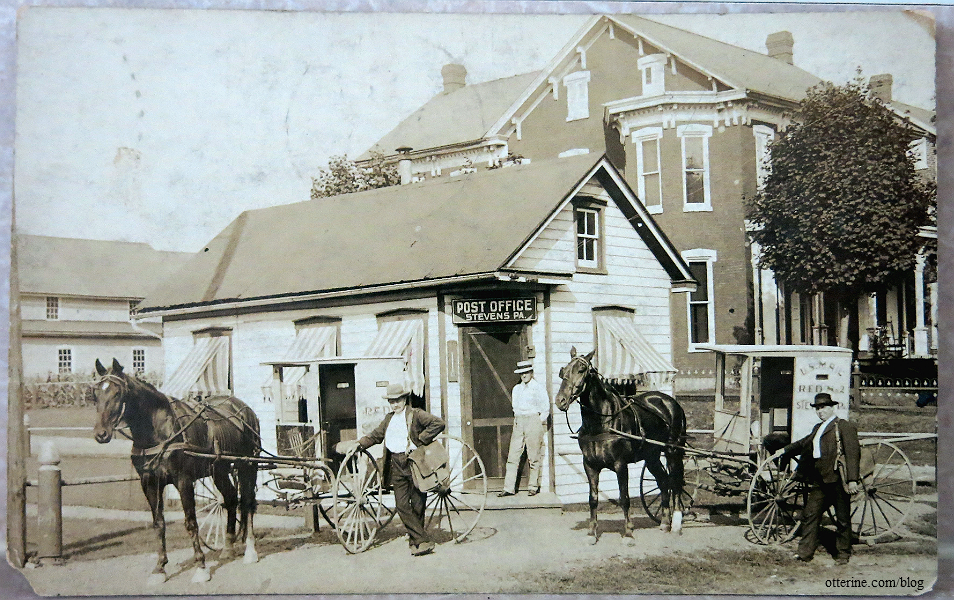
I bought some half-scale Alessio Miniatures windows for the gables from Manchester Dollhouse and Wood Works. They are square instead of rectangular, but they fit my smaller, shorter structure well.
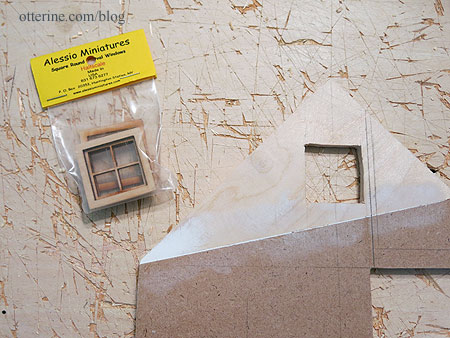
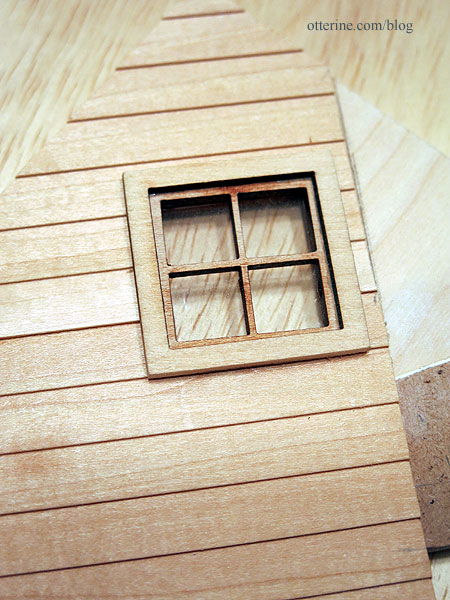
They fit perfectly with the 1/4″ thick walls, but I will need to adjust the depth with the siding in place.
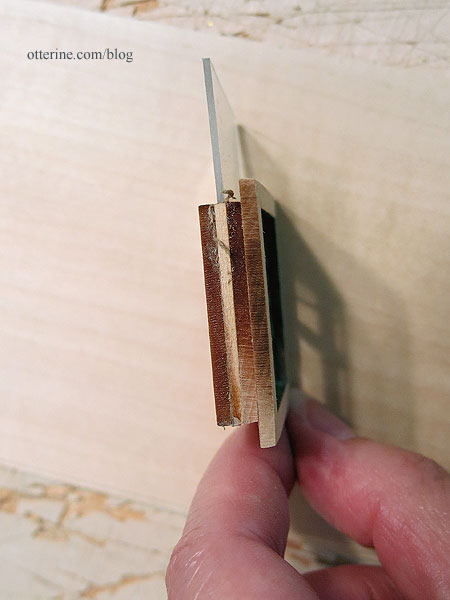
The acrylic insert lifts out for easier finishing.
When HBS had their April Fool’s sale, I bought a pack of siding. It was way more than I needed for this building, but it’s a material I know I will use in the future and it was a great deal at 40% off.
I like to apply siding while the walls can be pressed flat for the best results, but if you do that, you have to take the corner joins into account. I’ve left excess on the overlapping edges – not to cover completely but enough to aid in construction later. The corners will be covered with trim. I use Elmer’s wood glue supplemented with dots of super glue gel to apply siding, taping the joins and edges, then pressing flat under magazines and books for at least 24 hours. Makes for a nice, flat wall.
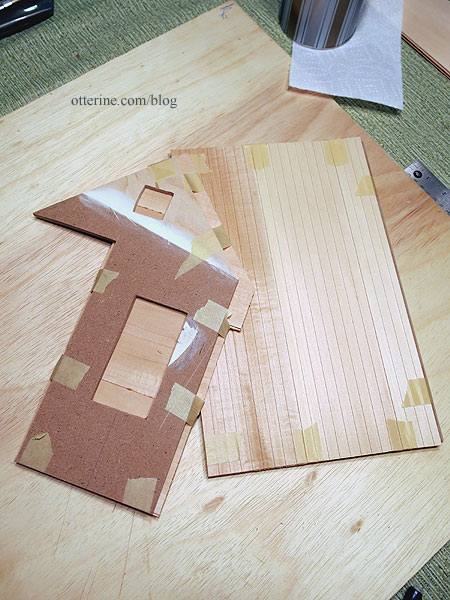
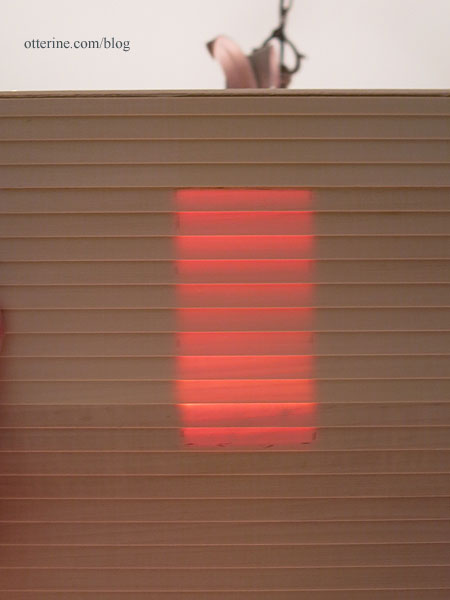
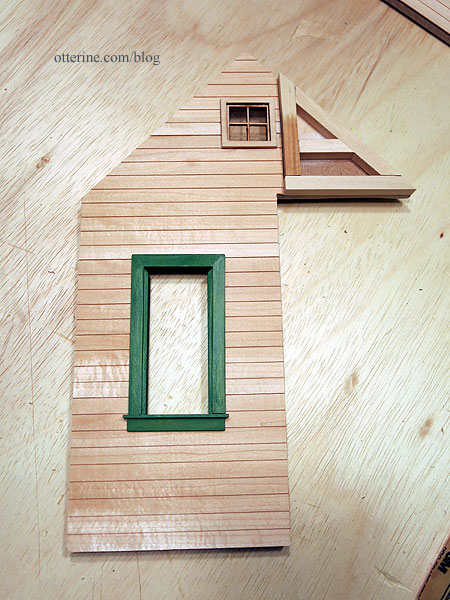
For the window openings, I usually just cover the whole wall. I’ve tried piecing before, and it doesn’t end up saving you much in the long run for all the hassle. To get a cleaner cut, I hold the board up to the light to trace the outline.
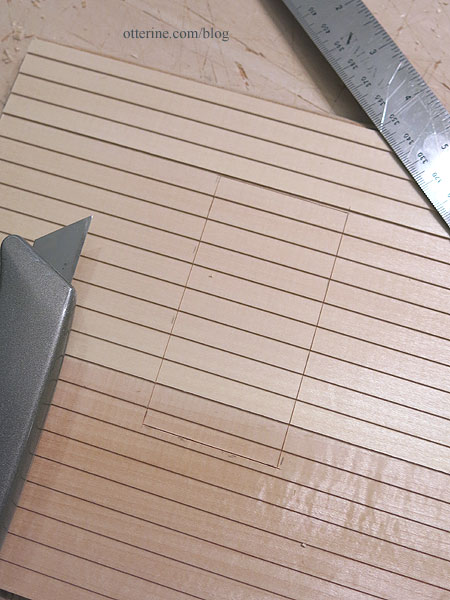
I then make a scored cut along those marks with a fresh blade.
I finish cutting the window opening out from the back side.
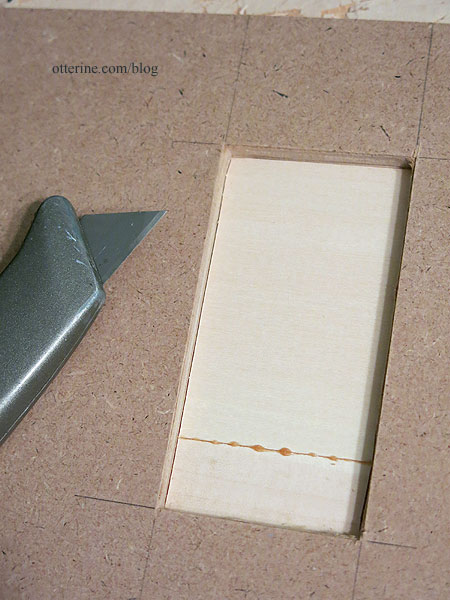
This keeps the siding from splintering. The window trims cover any minor blemishes.
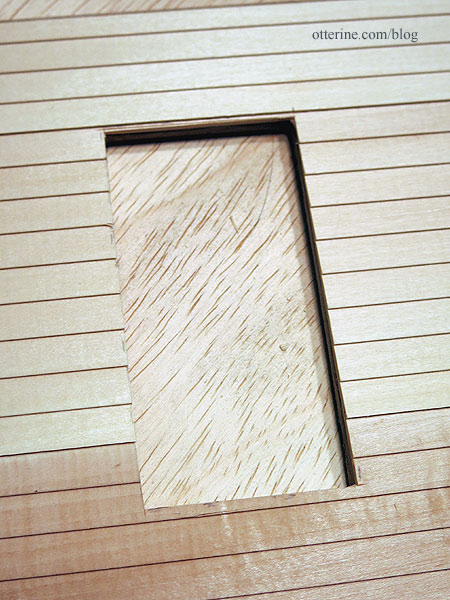
As you recall, I’ve flipped the building construction to better fit the horse. In the original, there’s a bump out in the gable over the angled door. I made a base for this from scrap wood. I’ll determine the final depth I need, add a surface board and then apply siding. I left enough space to apply siding to the part adjacent to the gable window.
Categories: Ivy Hollow RFD
July 10, 2019 | 0 commentsIvy Hollow – new foundation
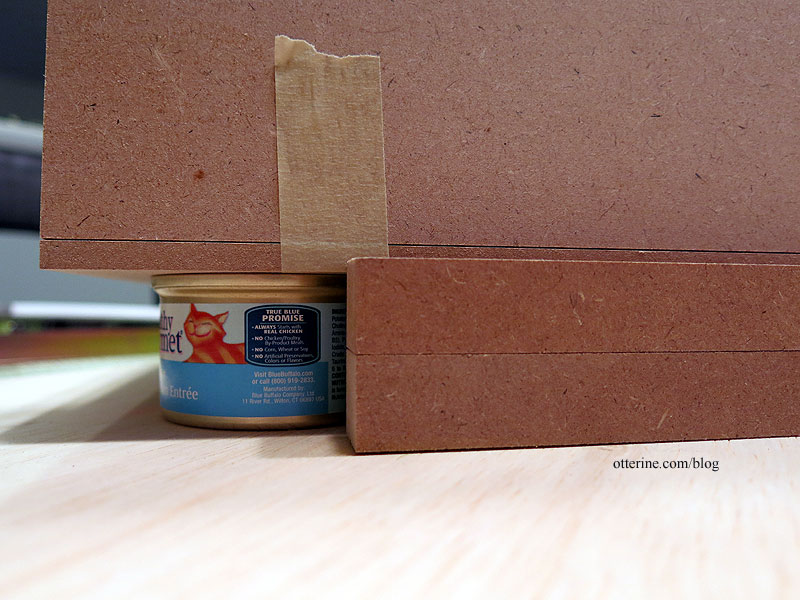
The first order of business is building up the foundation. I had to raise the base because the horse is so tall, and the building looked out of proportion with the horse standing in front. I will build up the landscaping in the ends so the height of the foundation is not quite so obvious.
The cat food cans are 1 15/32″ tall. I had some square lengths of mdf from a former Creatin’ Contest kit foundation that measure 1 17/32″ tall when double stacked. I don’t think I can get closer than that.
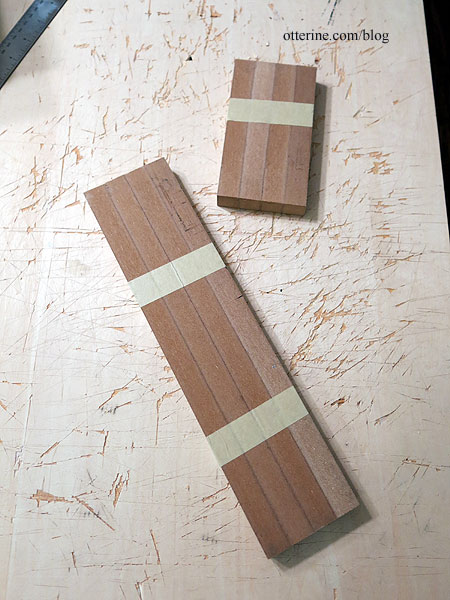
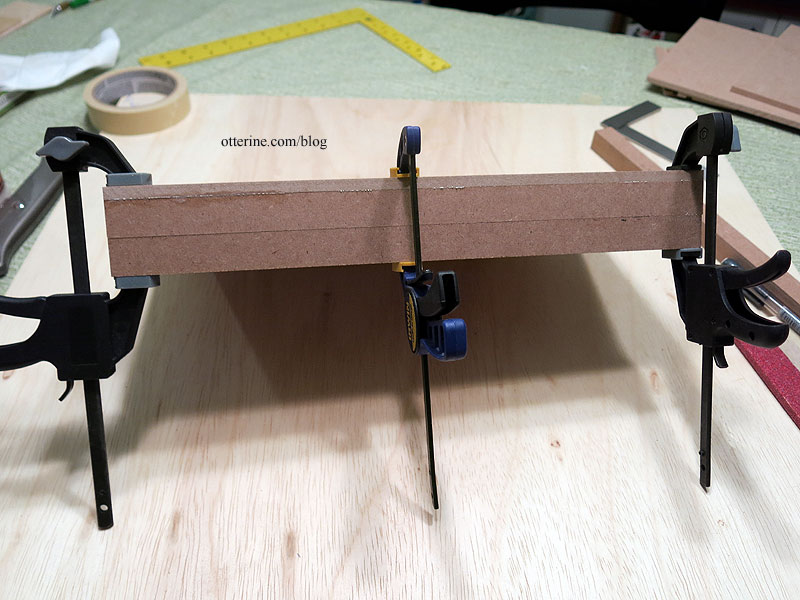
I taped four lengths together to cut at the same time. While the scroll saw is not the best tool for the job, it gives a reasonably straight cut with some patience. There will be a final finish on these, so close is good enough.
I glued two lengths together…
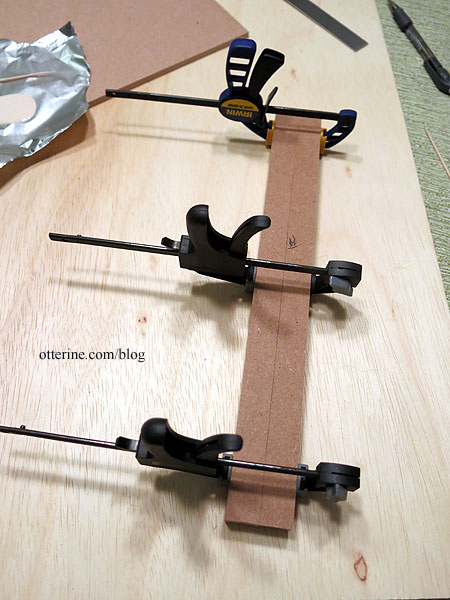
…and then to the floor board.
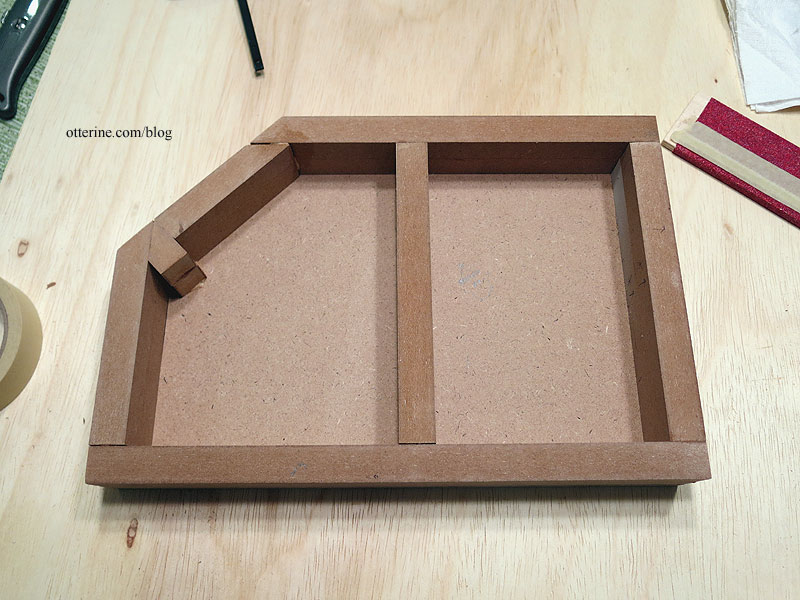
I continued with the rest of the cuts to fit the altered floor board. Since the scraps from the angle cuts fit reasonably well, I decided to use them as is instead of cutting “full” lengths for the space. This portion will be covered by the front step anyway. I also added an inner set of supports for stability.
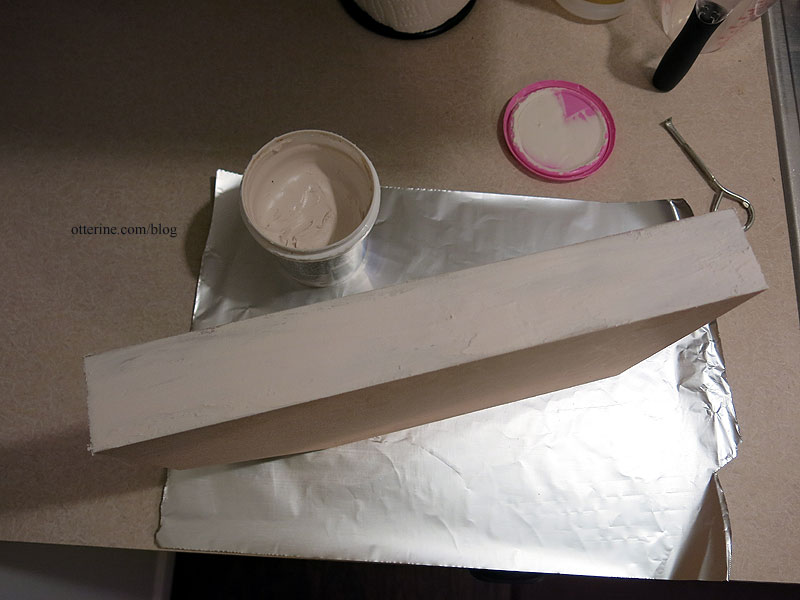
After looking up the history of concrete to make sure it would be appropriate for 1917, I coated the edges with spackling. I put it on thick so I can work with it after it dries.
I sanded the foundation just enough to remove the roughness and excess spackling from the base.
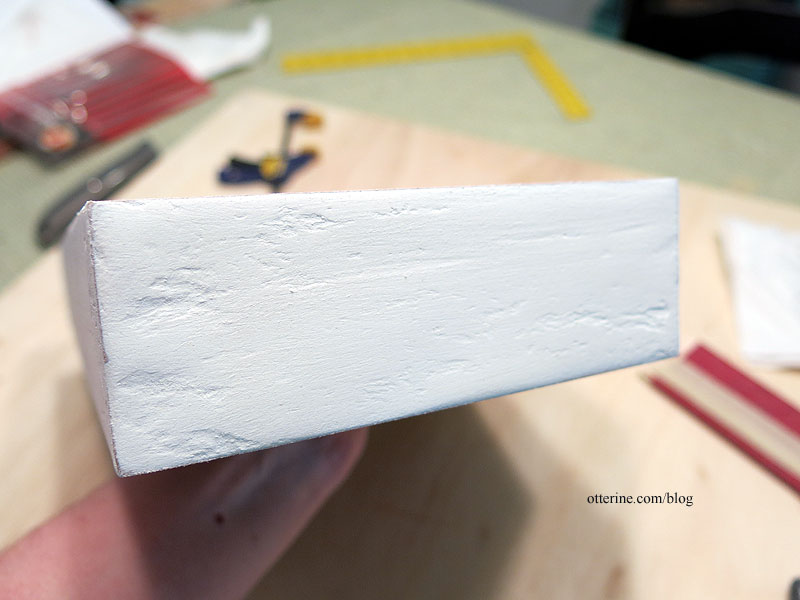
After wiping it down with a damp cloth, I patted on some matte gel medium. This added texture that was more in scale than the original spackling roughness.
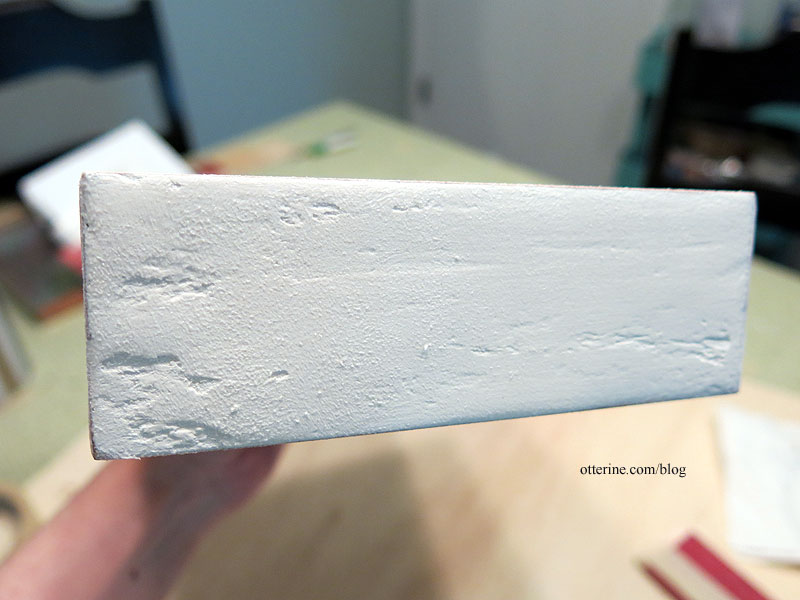
I then painted a base coat of neutral grey. After some washes, the finish is now varied and has more depth. I sprayed the base with Testors Frosted Glass spray to move the acrylic paint sheen. I’ll add dust and dirt during the landscaping phase.
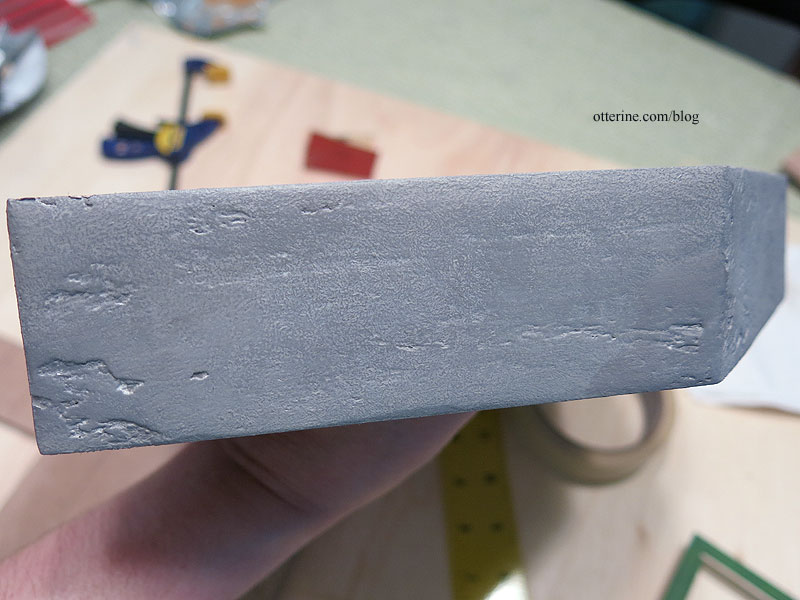
Now it will sit until I put the building on it.
Categories: Ivy Hollow RFD
June 29, 2019 | 0 commentsMail Wagon – part 5
Continuing work on the Mail Wagon. I put together the rear axle assembly.
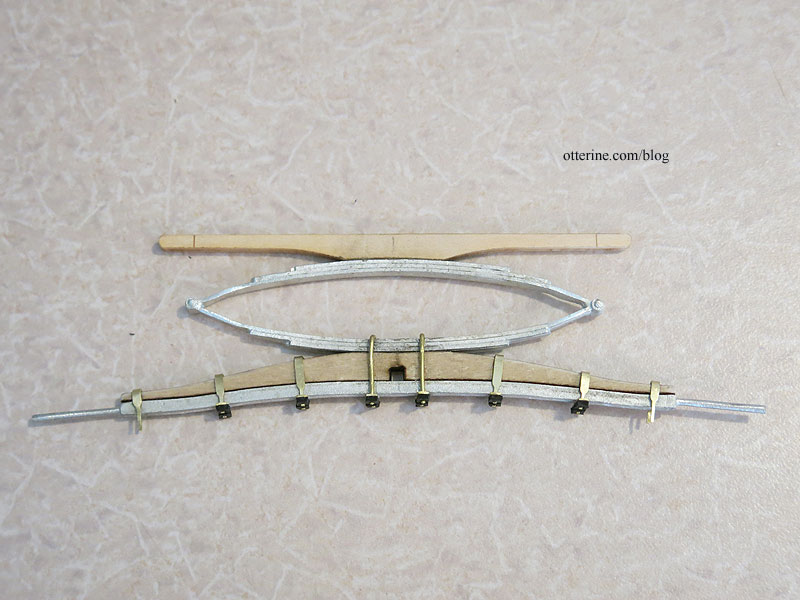
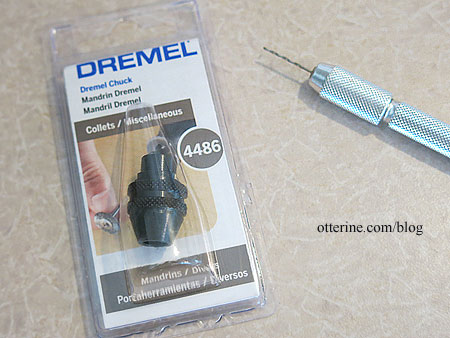
The front assembly required drilling a hole using the provided jig. I was able to use my hand tools – a pin vise – to make this hole. For the rear assembly, the metal was thicker and the pinvise was no match. I got a blister and two shallow pilot holes for my efforts. :\
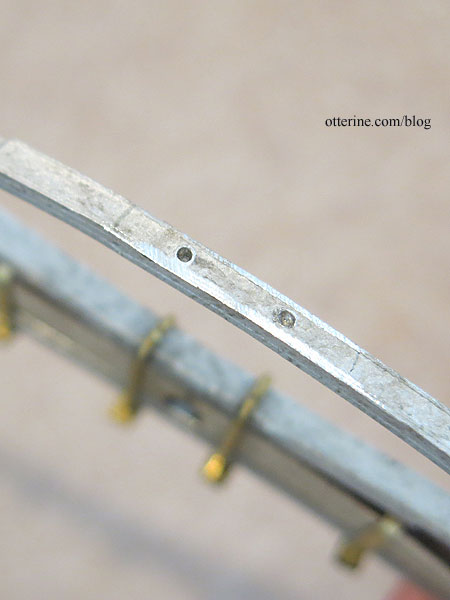
To finish drilling the holes, I bought the Dremel chuck #4486, which holds bits with 1/32″ to 1/8″ shanks. The buggy kit provides a 1/32″ drill bit (shown here in the pin vise).
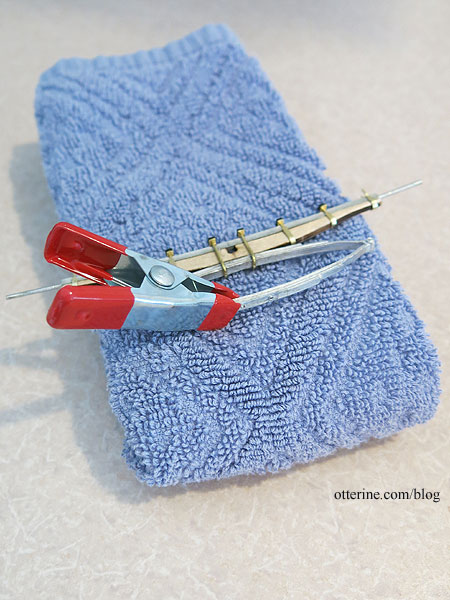
Since the metal parts are delicate and easily marred by pliers, I had to figure out a way to safely hold the assembly while also not breaking any of the parts already assembled. I folded a small hand towel to protect and brace the assembly. I attempted to drill, and the metal wagon spring heated up fast, so I added a tipped clamp to hold and protect my fingers from the heat.
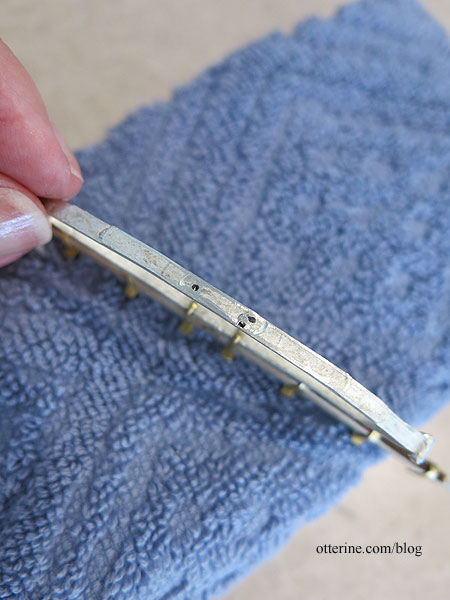
The first hole worked great since I had been able to get further into the metal with the pin vise. The other hole wanted to wander, so I had to work more with the pin vise to get the pilot hole deeper and in the right line. The excess hole will not be visible after assembly.
I reapplied the epoxy to the wood piece that sits on top of the wagon spring. I added the brass rods right away to make sure everything lined up properly while the epoxy set.
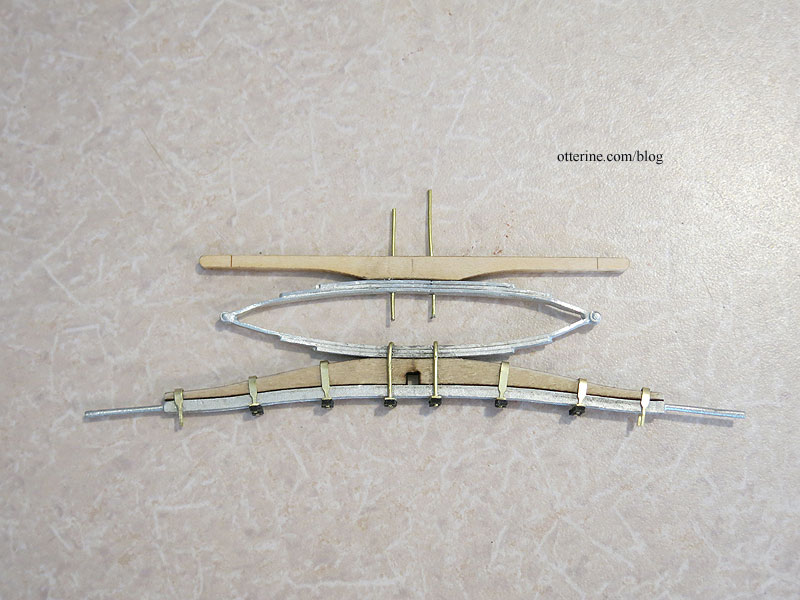
I added the square nuts and trimmed the brass rod to complete the rear axle assembly. It’s not very level or straight, but that is a limitation of the cast metal spring. It’s somewhat pliable, so it doesn’t want to hold the proper shape. I think it will be barely noticeable once the parts are painted a uniform color and the wagon cabin is added.
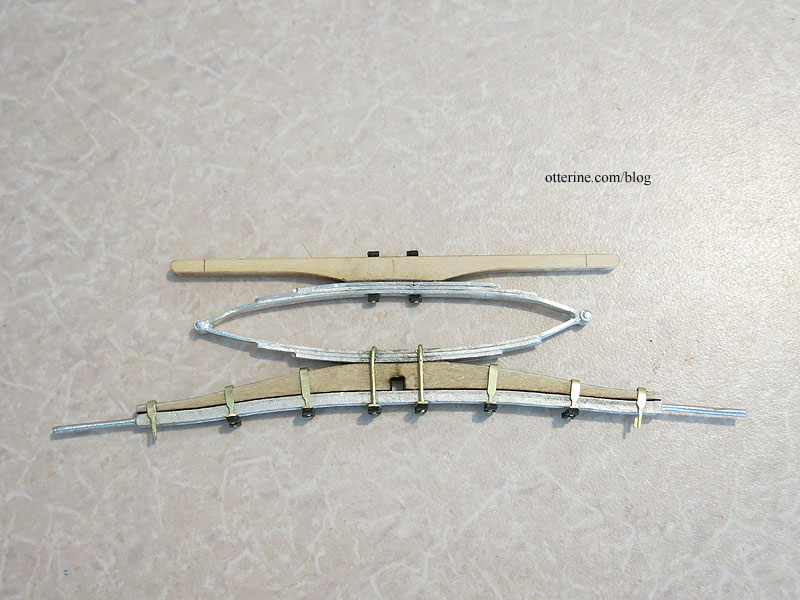
There is a spring for the front axle assembly, but that will have to be added later since I’m not using the reach (the rod that connects the front and rear axle assemblies). I’ll be making my own reach once I have the wagon cabin built, so the front spring will have to wait for now. Next up will be working on the wheels, which seems like it will labor intensive. If all turns out, they should be beautiful.
Categories: Ivy Hollow RFD, Model Cars, Vehicles
June 9, 2019 | 0 commentsMail Wagon – part 4
Continuing
to swear atwork on the Mail Wagon. To make it easier to work on the next part, I took closeup photos of the large schematics and printed the sections I needed. This eliminated the need to keep walking into the kitchen to look at the blueprint sized papers. I could sit and work in one area.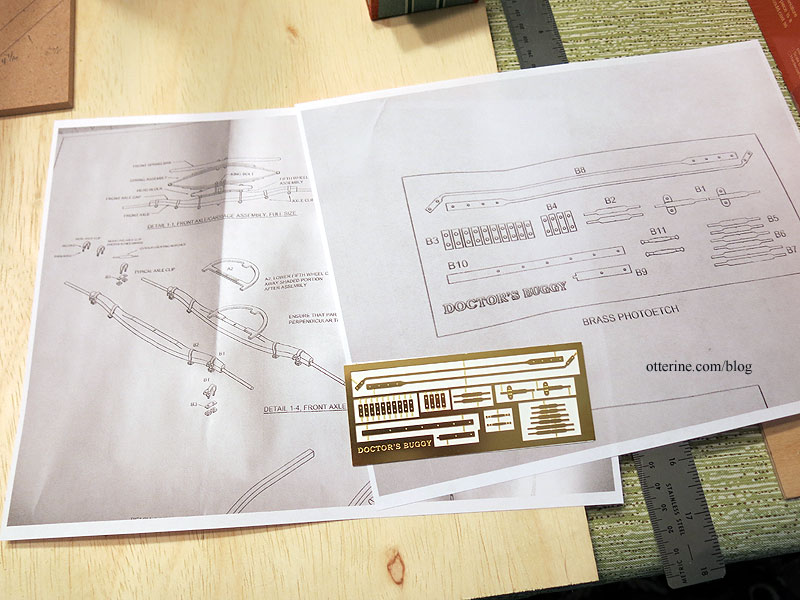
The laser etched brass pieces add fantastic detail, but they are tiny and challenging to work with.
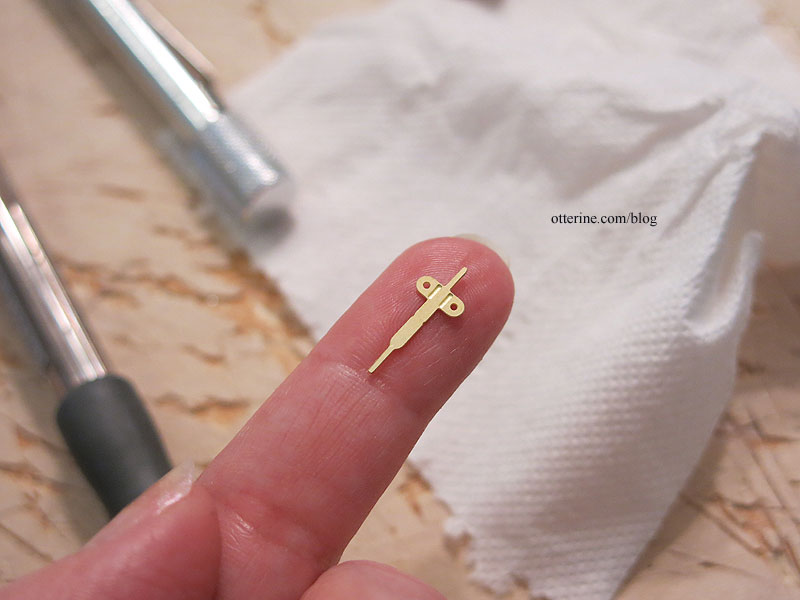
They fit well once you wrangle them into submission. I do worry about the longevity, even with using super glue. I think that’s because of how delicate the parts seem.
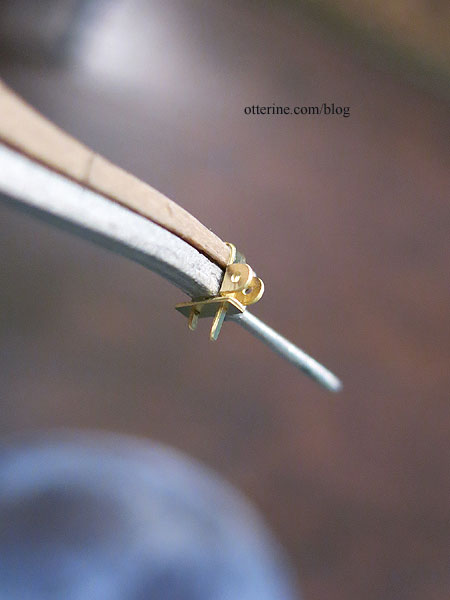
The bolts are made from another type of laser cut material. Fiddly, but again the detailing is wonderful.
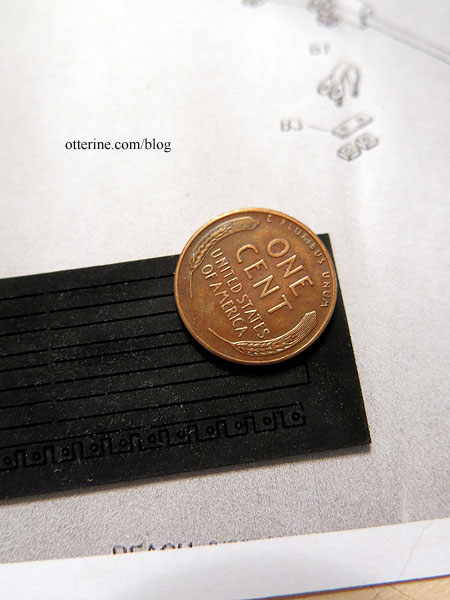
I clipped the excess brass as recommended, and they do now look like tiny bolts. :]
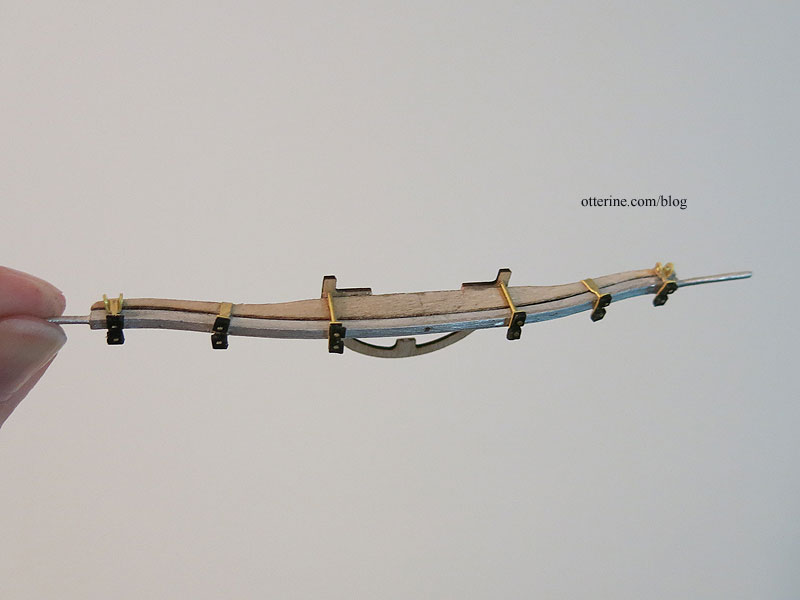
The front axle assembly is done.
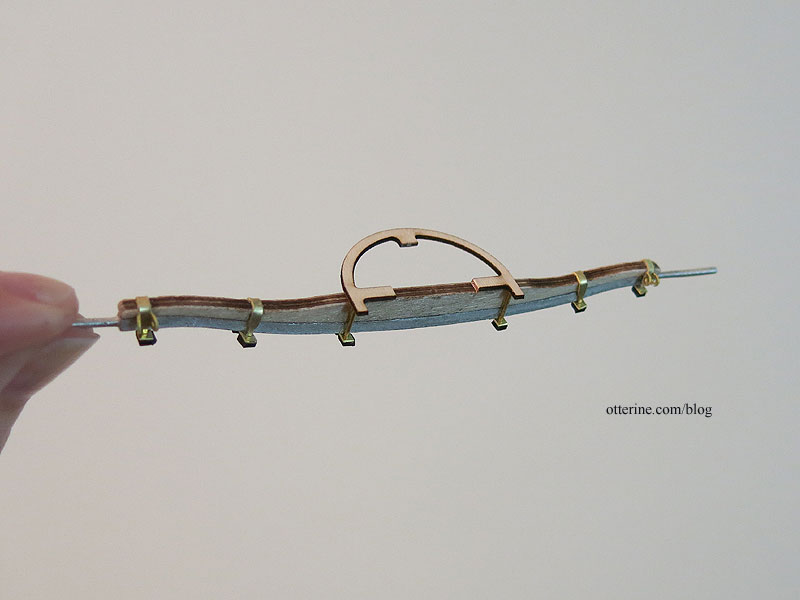
Next up, the rear axle assembly and wheels.
Categories: Ivy Hollow RFD, Model Cars, Vehicles
June 8, 2019 | 0 comments
NOTE: All content on otterine.com is copyrighted and may not be reproduced in part or in whole. It takes a lot of time and effort to write and photograph for my blog. Please ask permission before reproducing any of my content. (More on copyright)

Ivy Hollow – tiny parcels
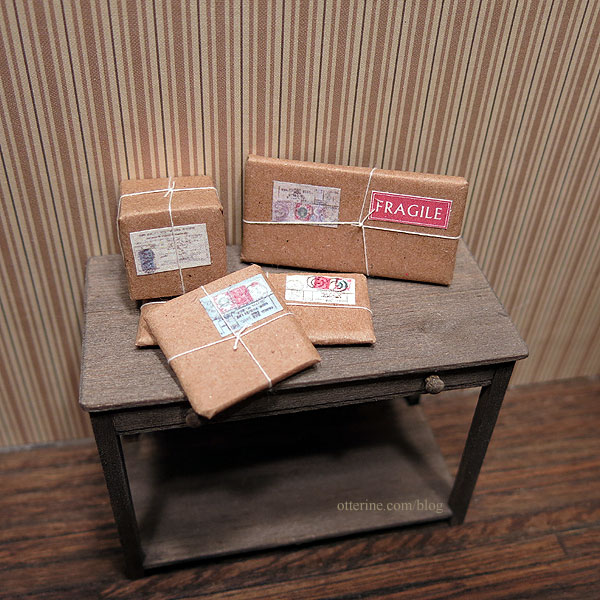
Now that we have seed order form mailers and catalogs, we are receiving packaged goods! At The Miniature Show in April, I bought some packaging kits from Looking Glass Miniature.
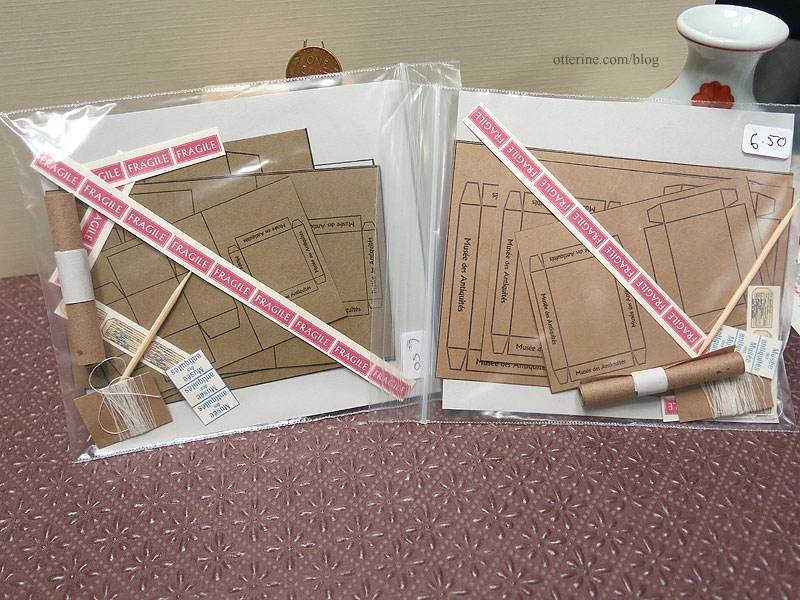
I used this kit for its parts. It was nice to have the Fragile labels and shipping tags for post office stock. For parcels, I wrapped wood blocks in the kit’s kraft paper and twine, using old labels found online. Obviously, parcel post labels are harder to find than old letters and postcards as the wrapping would usually have been discarded. :]
Categories: Ivy Hollow RFD
November 18, 2019 | 0 commentsIvy Hollow – postmaster’s desk wall, part 2
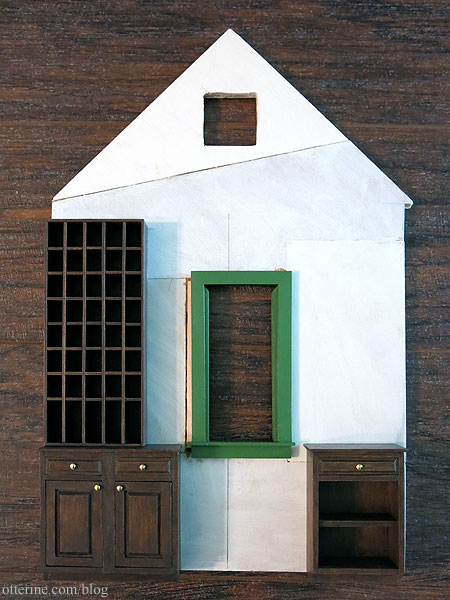
Continuing work on the back wall. I figured I would need more pigeon holes, because having a post office for only 15 mail customers seemed a bit of an extravagance. I modeled the additional pigeon holes after the ones made for the postal teller, making them a little deeper and having 40 on this back wall unit. I think I held my breath while cutting the thin slits to fit the parts together, but it worked! There was so much cutting and prep work beforehand, I was not looking forward to having to do it all over again.
I think 55 post boxes is more in line for a one-wagon rural post office. It might not be enough for a true post office, so I remind myself this is a mini approximation. :D
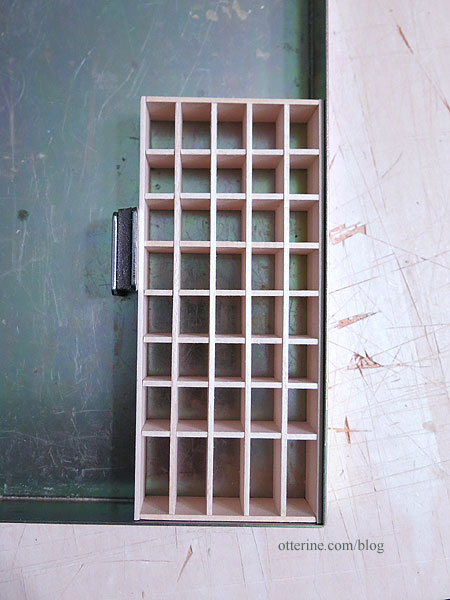
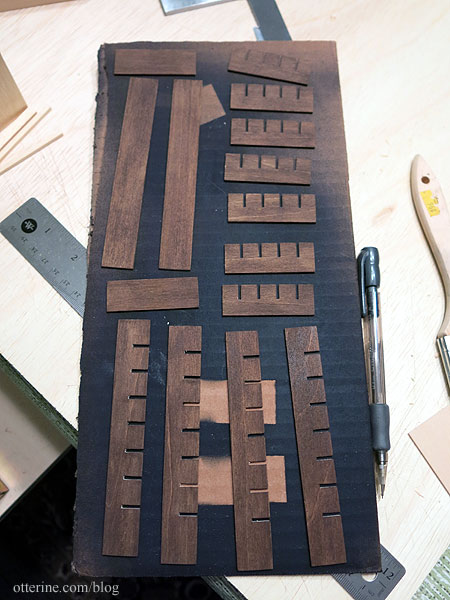
Instead of painting after assembly like I did with the postal teller, I painted and sealed the strips individually. This was so much easier than trying to get a good finish in the tiny pigeon holes. Wish I had considered this when I made the teller.
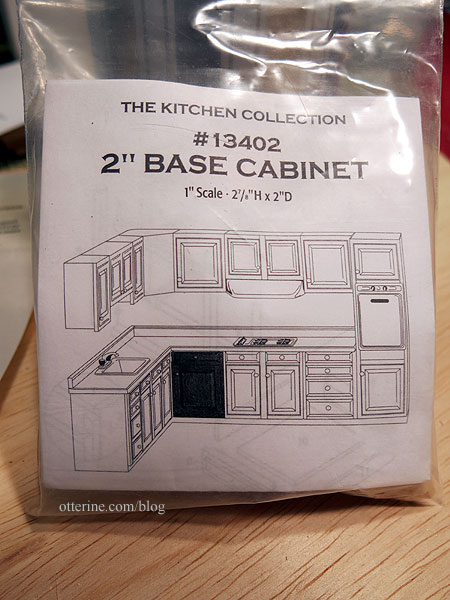
On the opposite side has shelves for packages. The postmaster could put a package slip in the box for mail that wouldn’t fit. I adapted a 2″ Houseworks kitchen cabinet for these shelves, mirroring the modifications I made on the opposite side of the window, but this one does have a working drawer.
I painted the cabinets to match the other woodwork. Right now, the pigeon holes are not attached to the base cabinet. I need to add the box numbers.
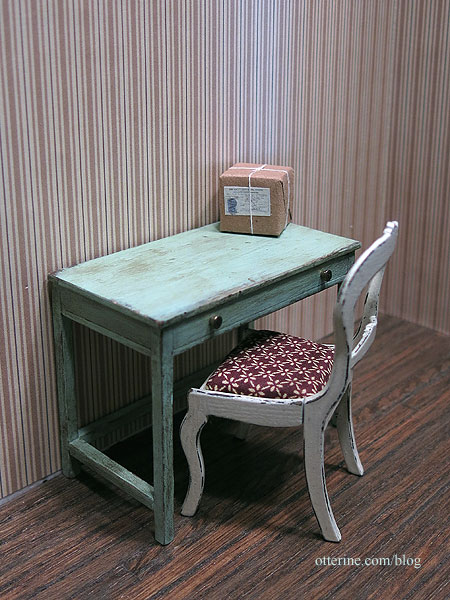
Our rural post office has good cabinets and a postal teller in newish condition, but the desk and chair are hand me down pieces. They are still perfectly usable, after all. :]
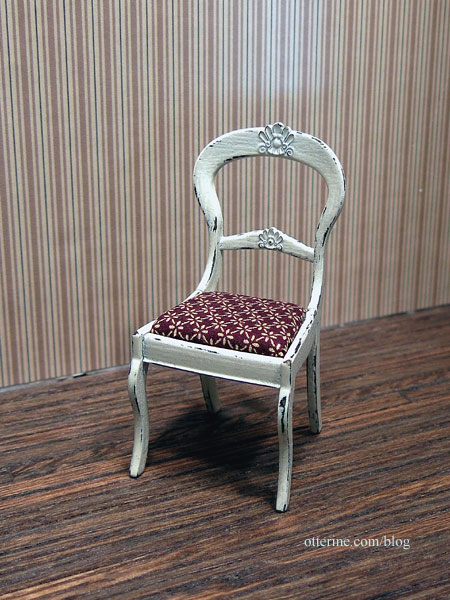
The Chrysnbon Victorian chair kit was a gift from Barbara.
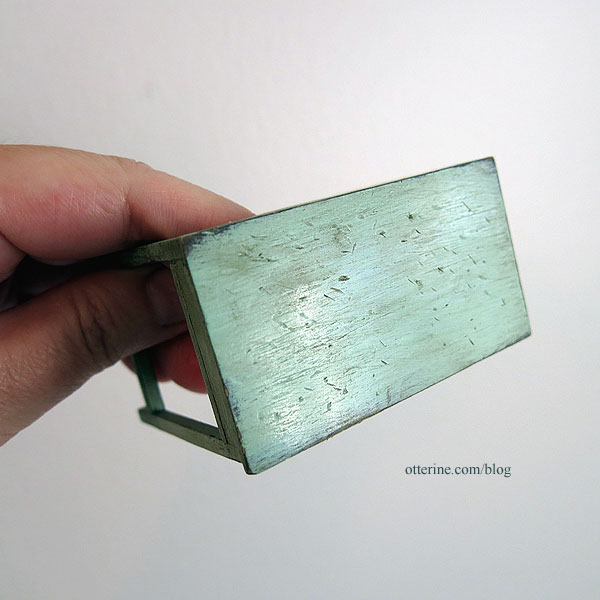
The desk is adapted from a table pattern in the book Finishing Touches by Jane Harrop. I beat it up with every tool on my work table. Look at that delightfully ratty finish! :D
Categories: Ivy Hollow RFD
November 16, 2019 | 0 commentsWe’ve got more mail!
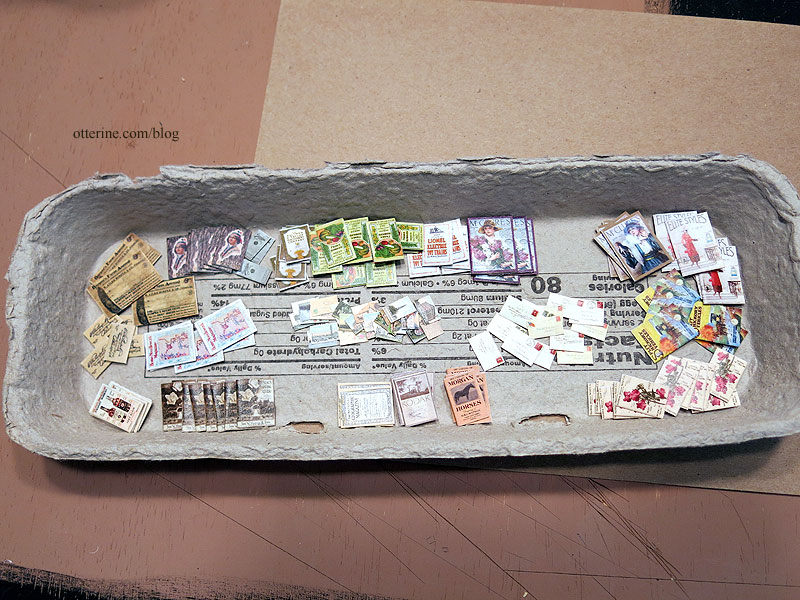
After the letters, envelopes and postcards, I still needed mailers and catalogs. Rural Free Delivery meant businesses could expand and reach more customers, and people in rural areas would have access to goods far from home.
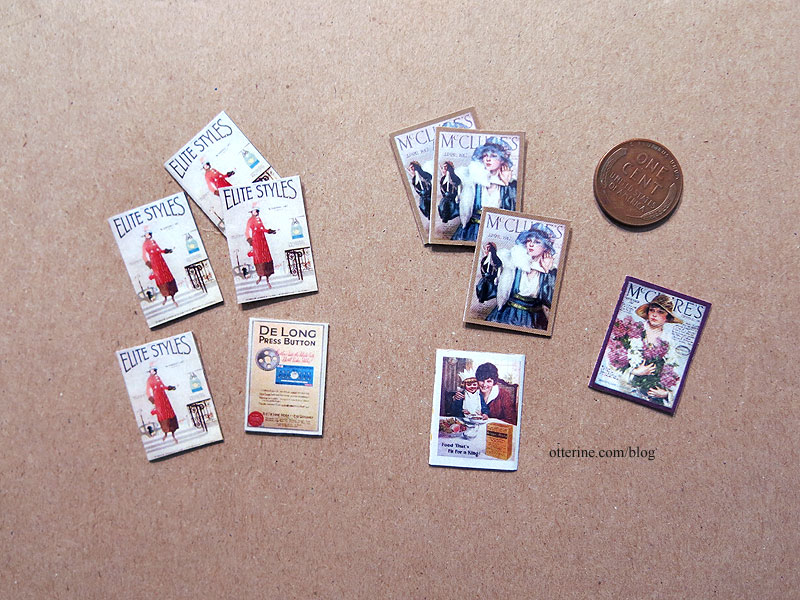
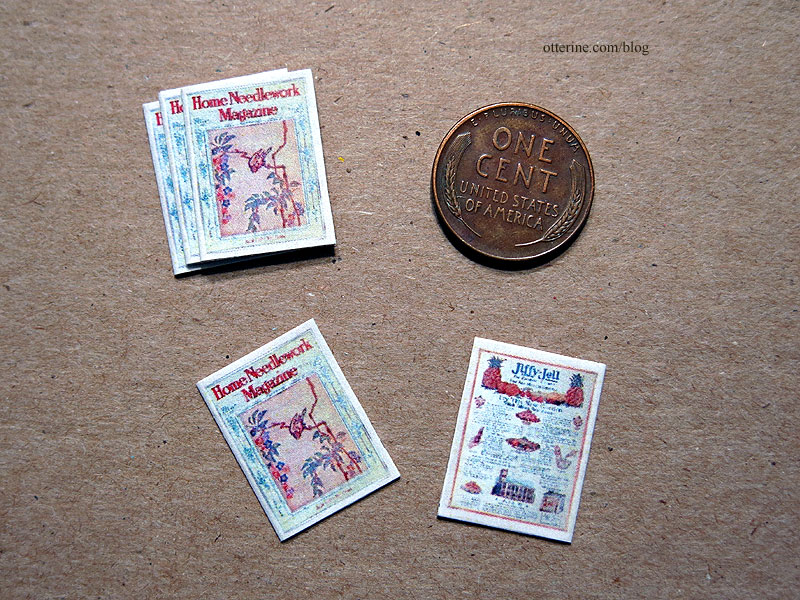
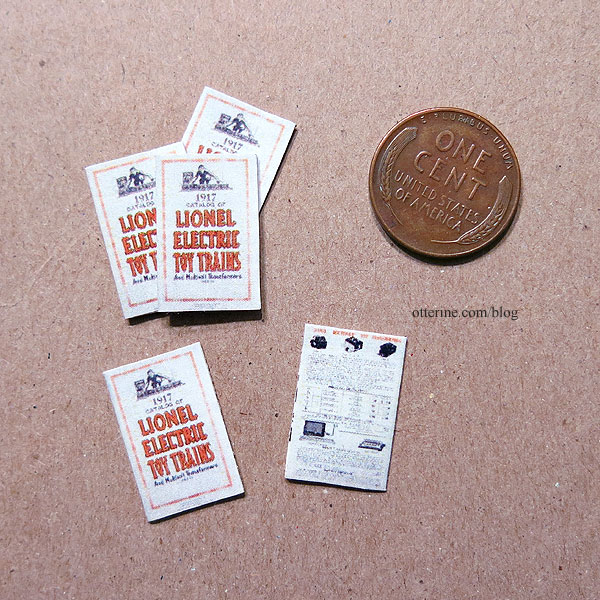
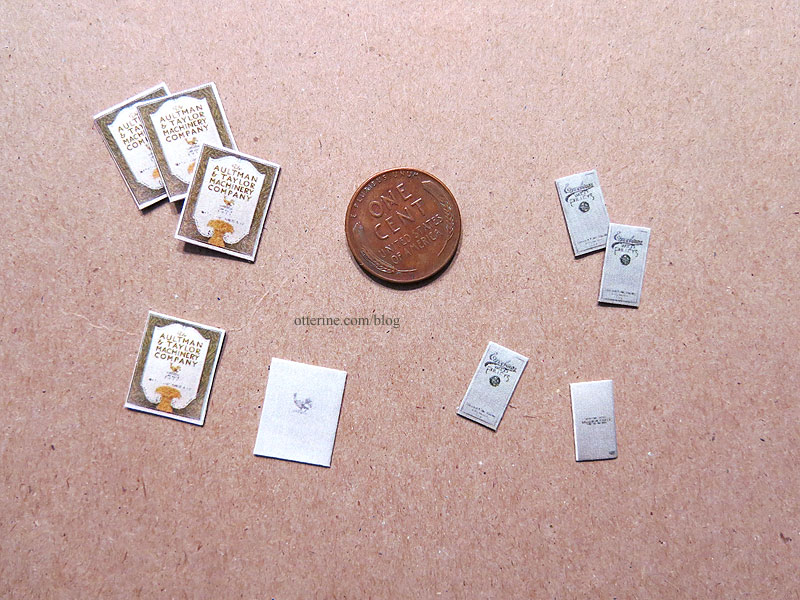
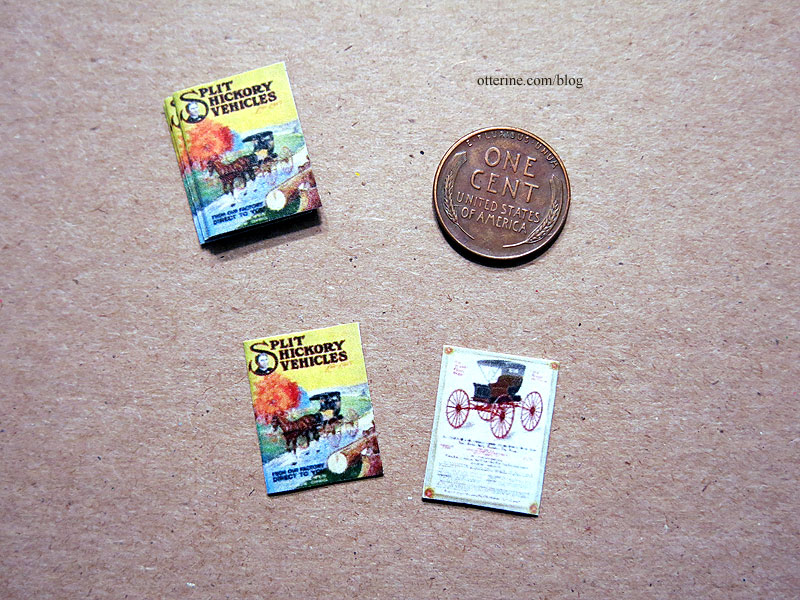
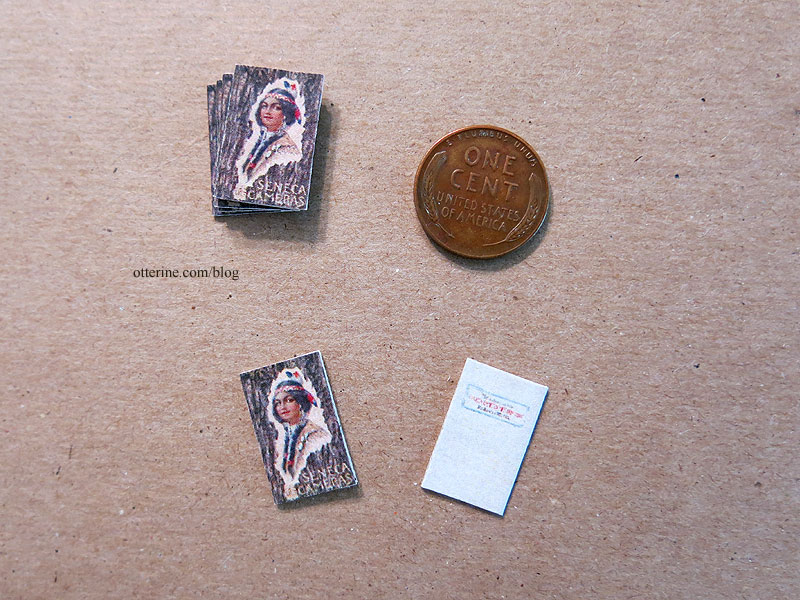
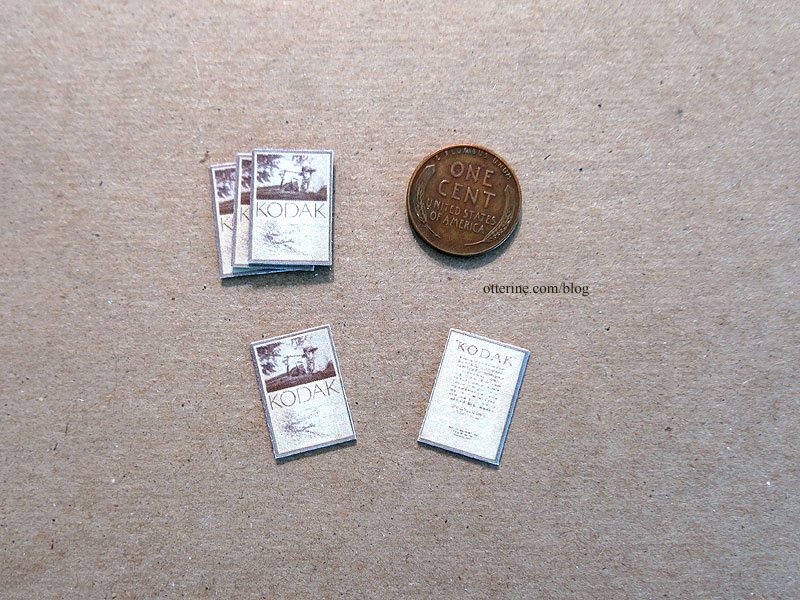
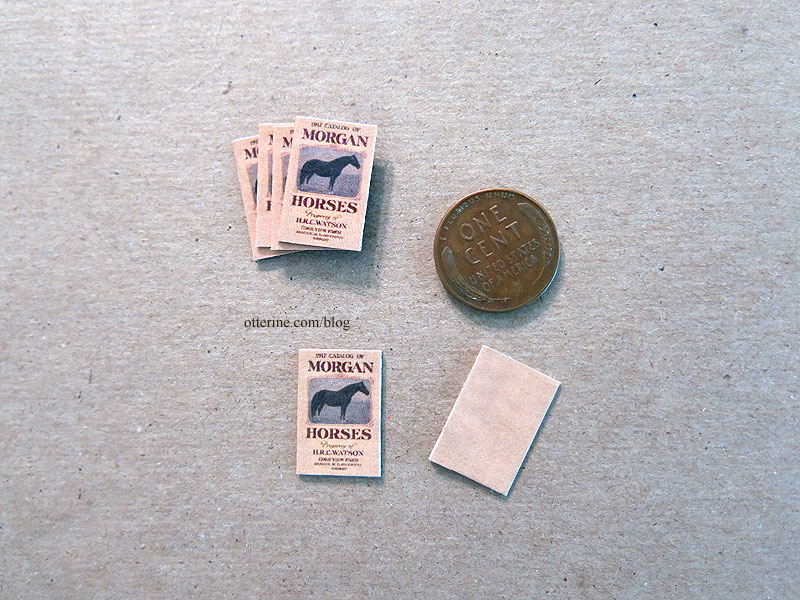
Again, I turned to online image searches, trying to limit those chosen to 1917, give or take a year. Though I was able to find some fully scanned catalogs including the inner pages, I focused on covers and glued each one shut with inserts. These would be placed in the pigeon holes and not opened for viewing. Some of these came from sale listings, so I was able to get accurate measurements for scale, though I had to increase the scale size to get a good print in some instances. Some required more sprucing up in PhotoShop than others as well.
I’m not completely sure, but I would imagine many magazines were sent in envelopes with handwritten addresses. Since I spent so much time researching and working on the catalogs and magazines, I didn’t want to hide them away in envelopes.
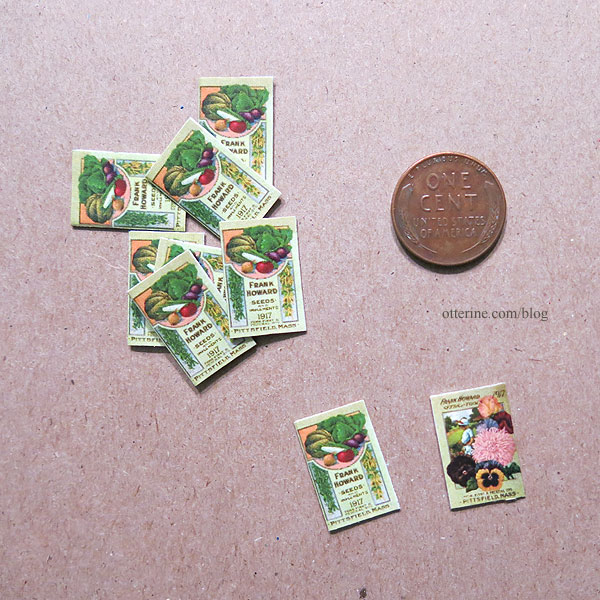
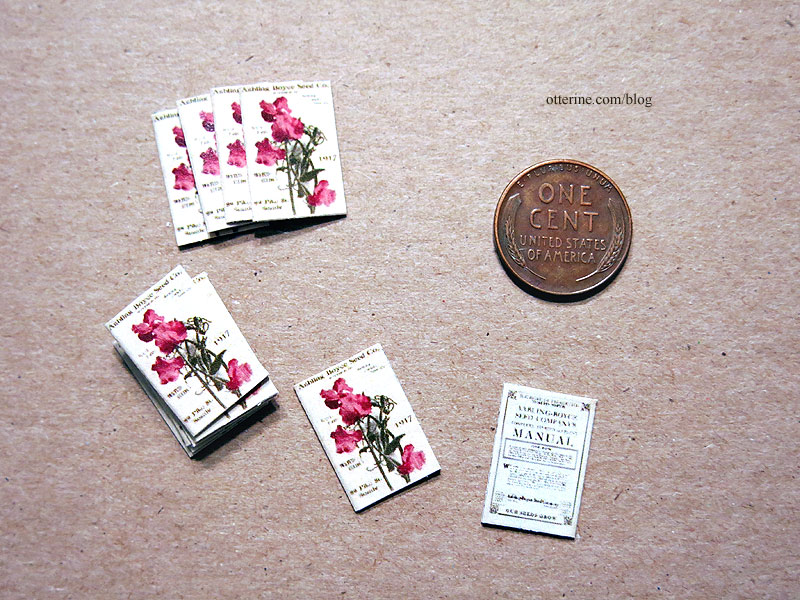
Seed catalogs.
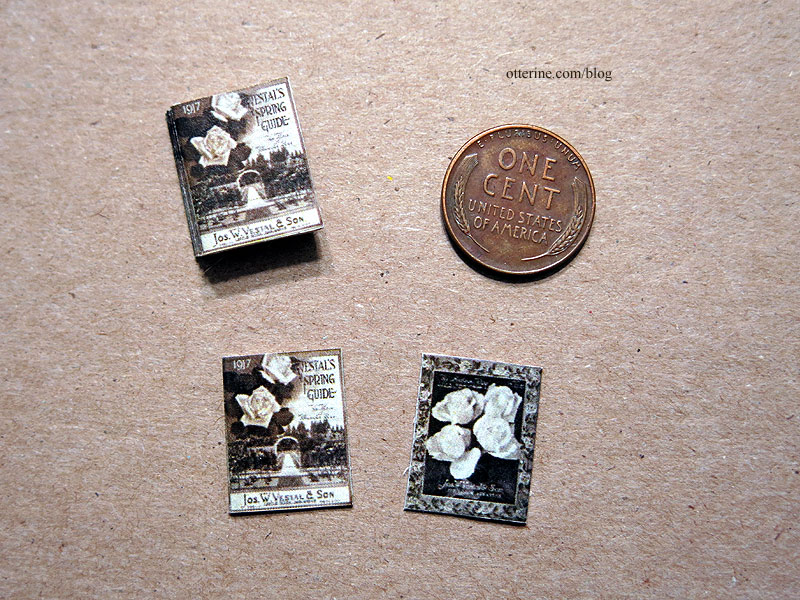
This one is a 1916 with a changed date. I could not pass up that cover!
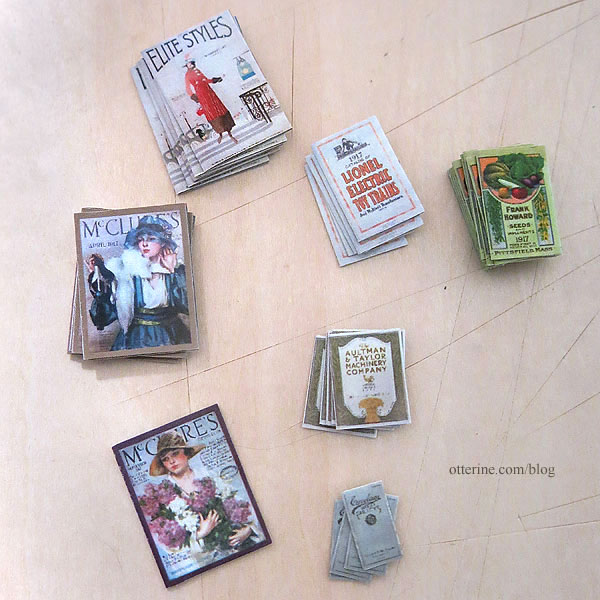
Ladies magazines.
Needlework.
Lionel electric toy trains.
Machinery and pulleys.
Buggies.
Photography.
Horses.
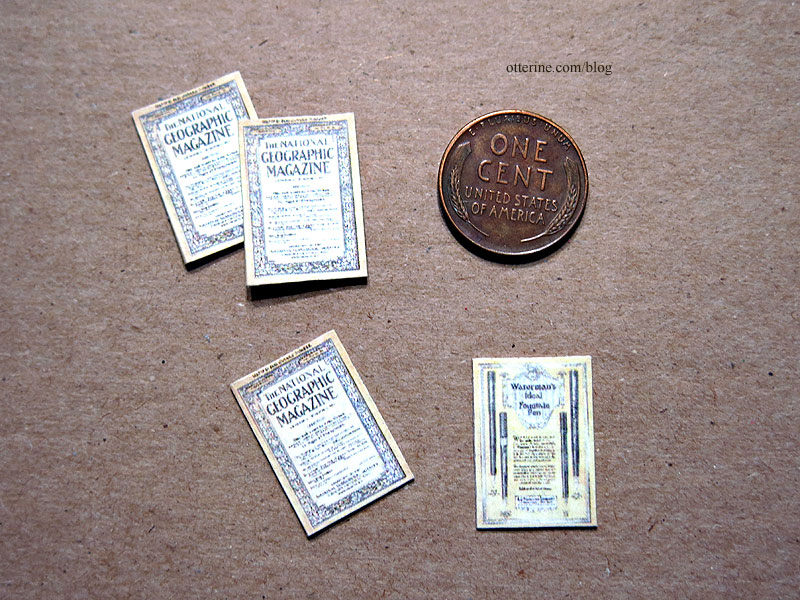
National Geographic.
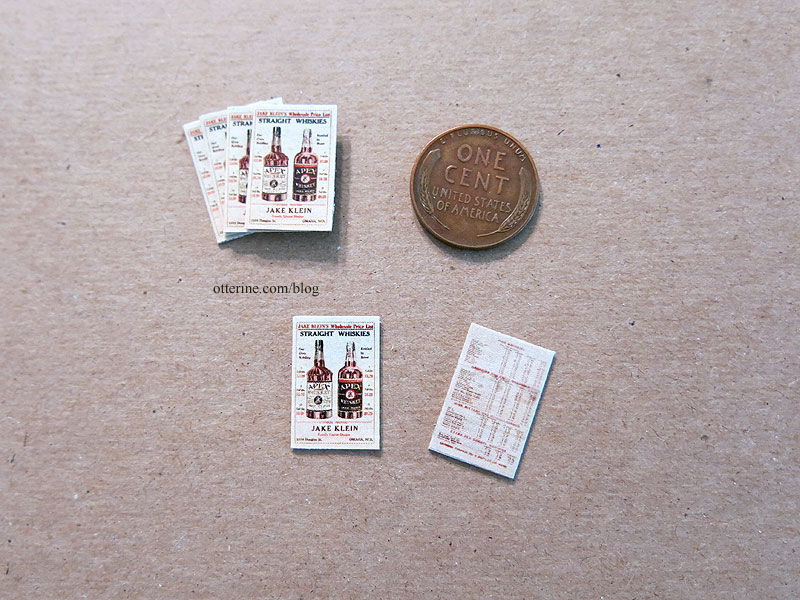
Booze. Prohibition is coming!
I used true real life magazine pages for the inserts for the magazines. The color and variation add more realism.
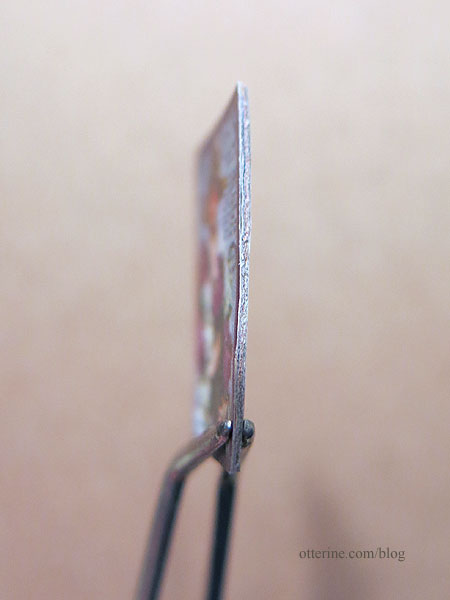
For the catalogs, I used black and white printed pages. While many of these would not have been printed to the edges of the pages in reality, I liked the look better than plain card stock or paper.
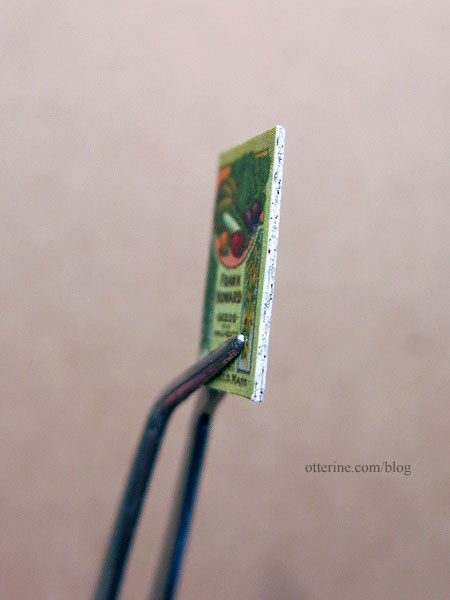
I’m still making many more envelopes with letters, but this is the mail I have on hand, along with a few gifted letter sets not shown here. Like flowers, you always need more filler than you think…so I might be making even more in the end. I also plan to add packages.
Categories: Ivy Hollow RFD
November 10, 2019 | 0 commentsIvy Hollow – hot off the press
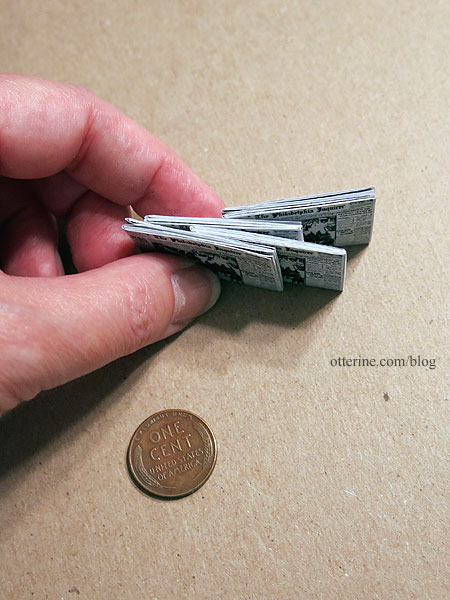
I’ve made up a mini newspaper stack for the post office. I settled on a midyear 1917 edition of The Philadelphia Inquirer because it had horse drawn carriages on the front page above the fold. Again, these are in scale and not really legible.
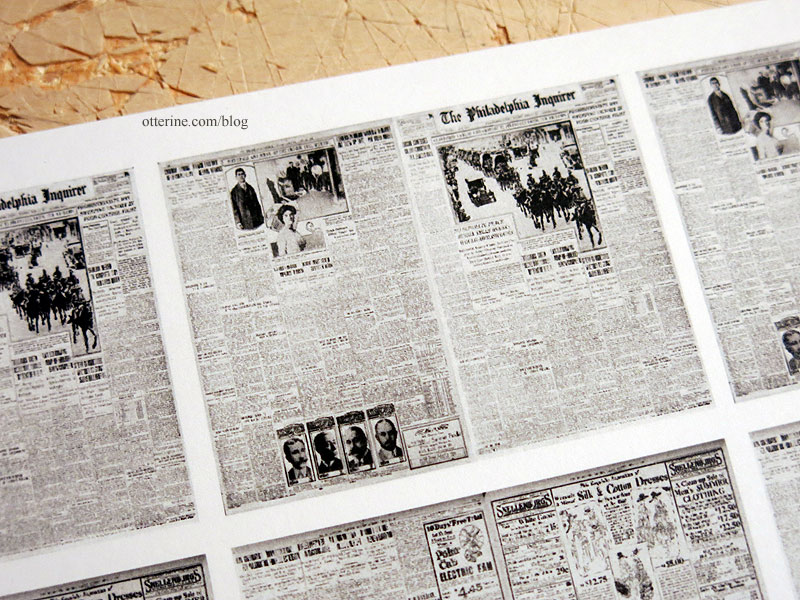
I printed two other styles of interior pages just to have print throughout, though the backs of each image are blank.
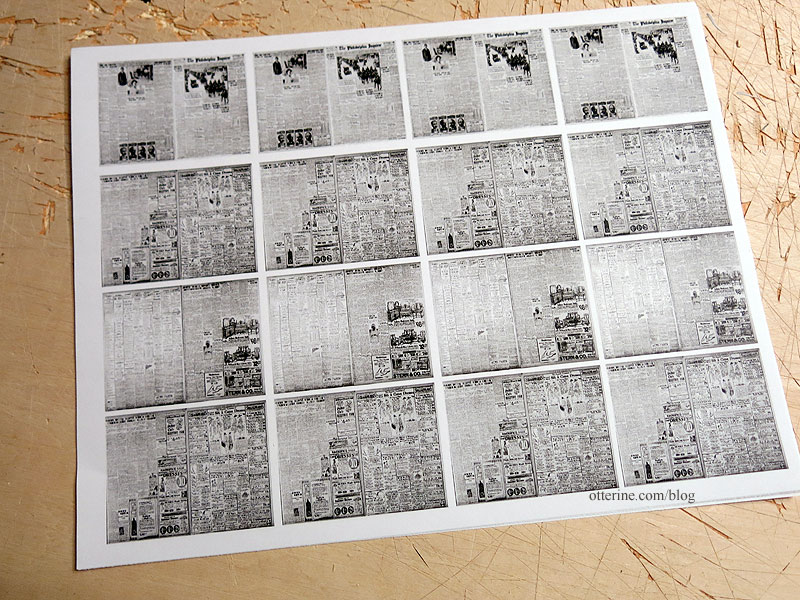
I cut the various spreads then folded each individually.
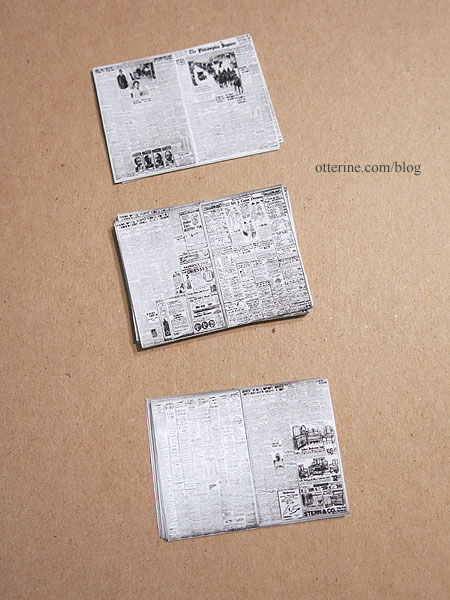
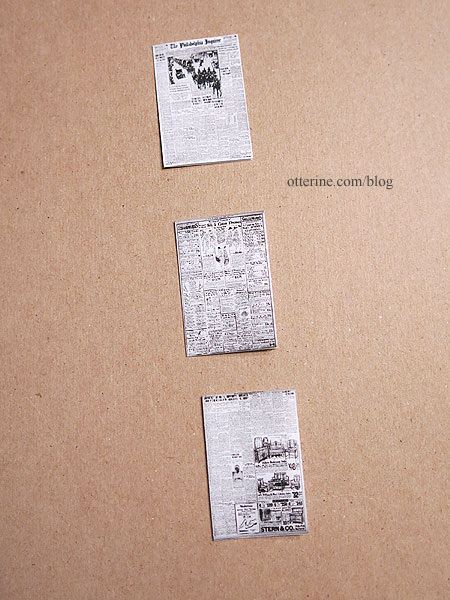
I placed the two inserts inside the cover and folded into shape. I glued the main fold on the inside and then a few random corners to hold the shape a bit.
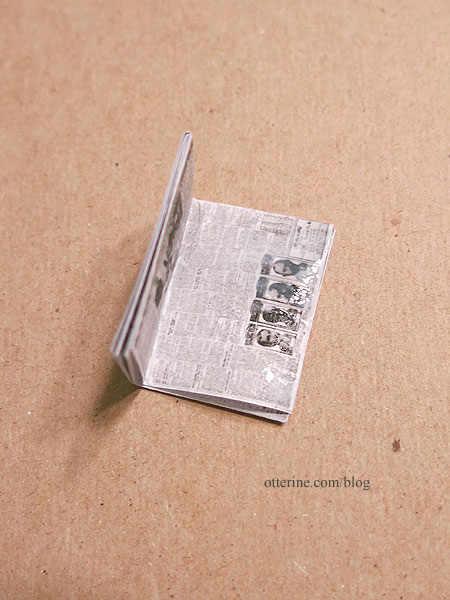
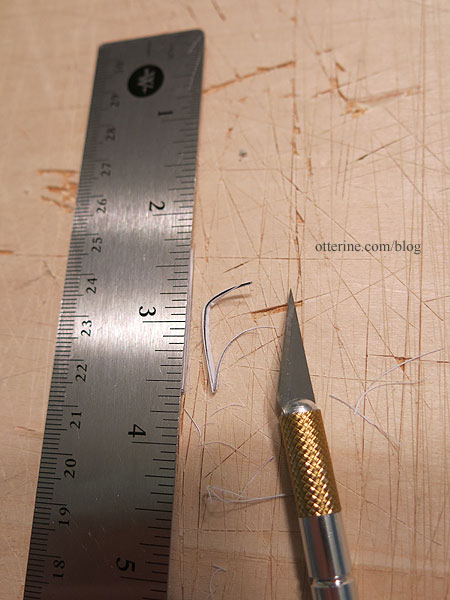
I rolled the paper again and trimmed the non-folded edges with an X-Acto knife.
I tried to get them as consistent as possible, but I really needed only one near perfect one for the top of the stack.
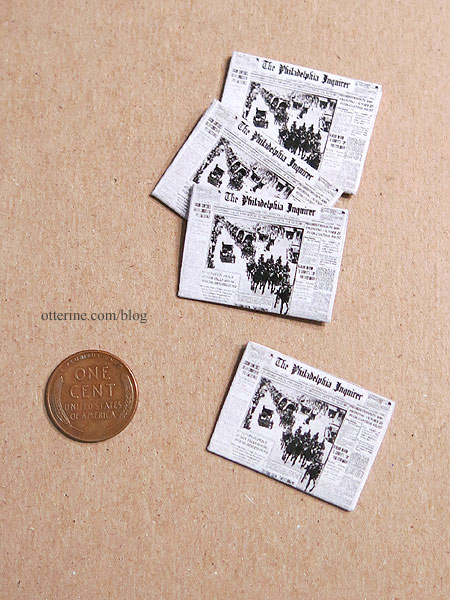
As long as they were all relatively close in size, they would work as a stack.
Once I had a stack of ten, I used buttonhole thread to tie the stack.
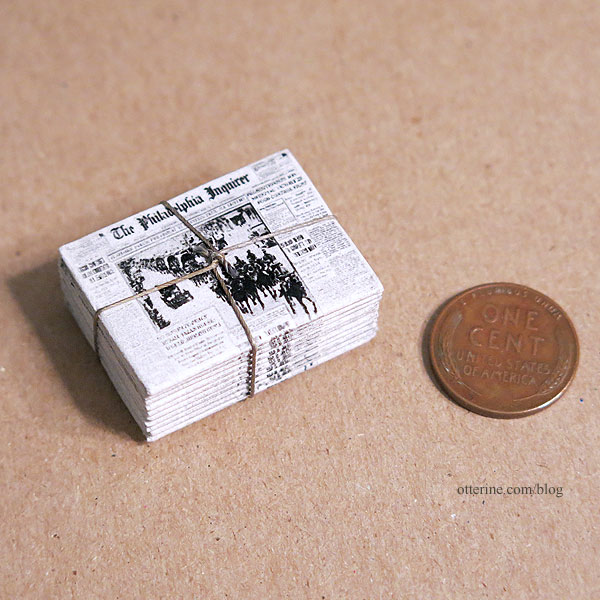
Hooray! :D
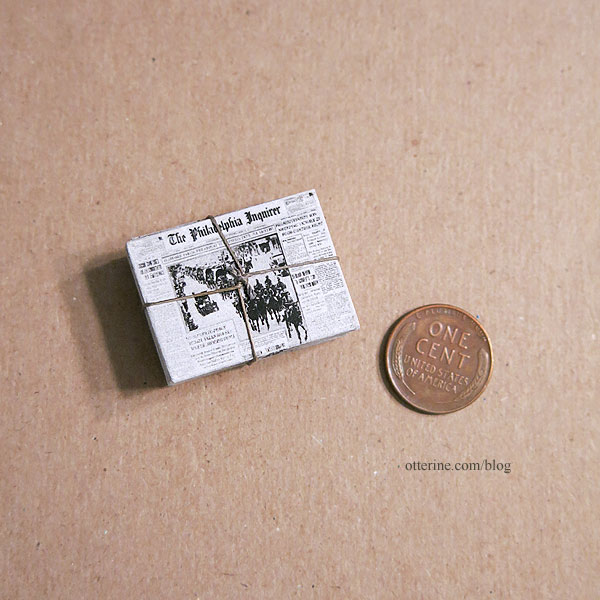
Categories: Ivy Hollow RFD
November 3, 2019 | 0 commentsIvy Hollow – brass plaque
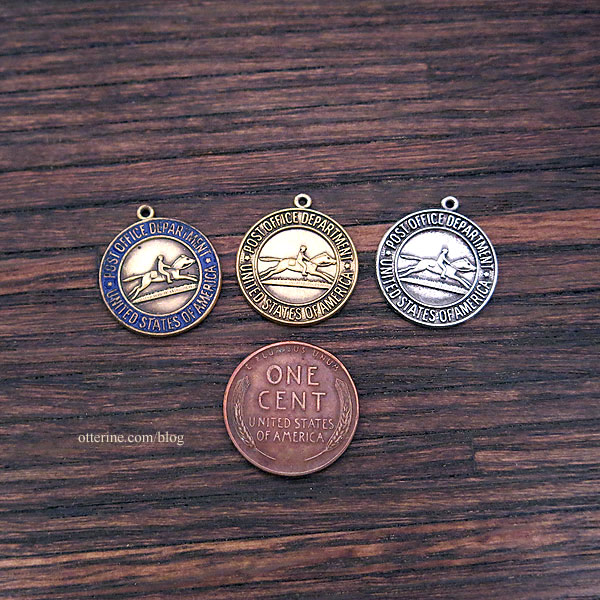
I bought a 42-piece lot of vintage charms of the logo for the United States Post Office Department, which was the original name of the United States Postal Service.
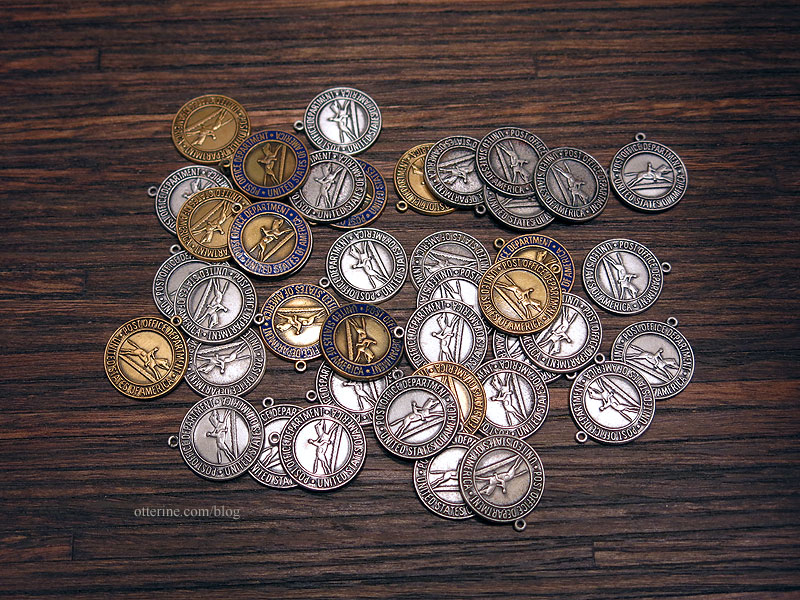
No, I didn’t need 42 of these suckers, but how perfect for a plaque.
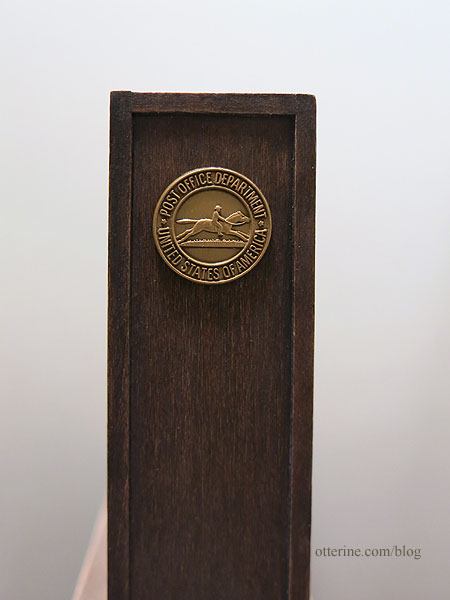
I was going to make a sign to resemble a porcelain plaque, but this is delightful at 5/8″ diameter.
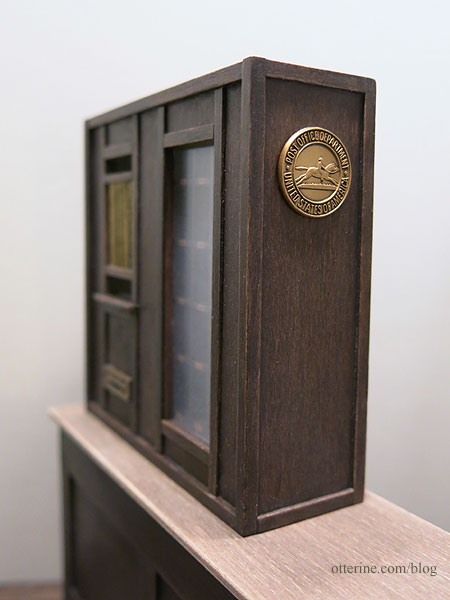
I didn’t want to wait to ask the seller for a smaller lot, because I couldn’t find anything like these online in a smaller quantity and I would have been sad had I missed out on this perfect detail. There are three styles, and one has already made its way to a new home. I’ll list these in my etsy shop once I reopen (all sold out now).
Categories: Ivy Hollow RFD
October 24, 2019 | 0 comments
NOTE: All content on otterine.com is copyrighted and may not be reproduced in part or in whole. It takes a lot of time and effort to write and photograph for my blog. Please ask permission before reproducing any of my content. (More on copyright)


