
Ivy Hollow – mailbags
We have to receive our mail in bulk at the tiny post office, mostly likely by rail. I printed and sewed a simple mailbag design.

It’s one thing to put actual letters in tiny envelopes that will never be opened; it’s entirely different to hide all that work away in a mailbag that will never be opened. But, I needed to be mindful of the weight and shape overall. I started with faux letter bundles.

I then made wood parcels.

I arranged the parcels in the middle and bottom, filling in the letter bundles around them.
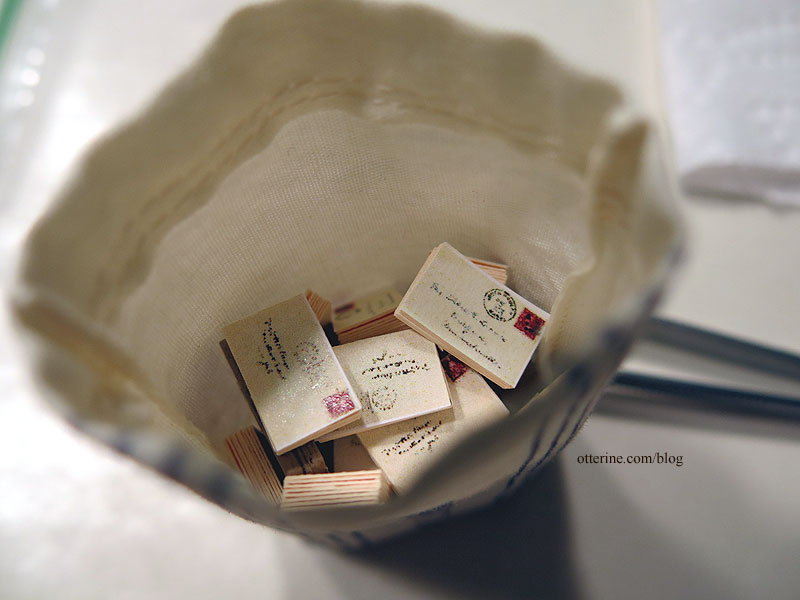
I used a double layer of regular sewing thread to draw the bag closed and tied a bow.

Though it’s hard to tell in the photo, the fabric is just thin enough that the colors and patterns of the faux mail add to the realism of what’s inside.
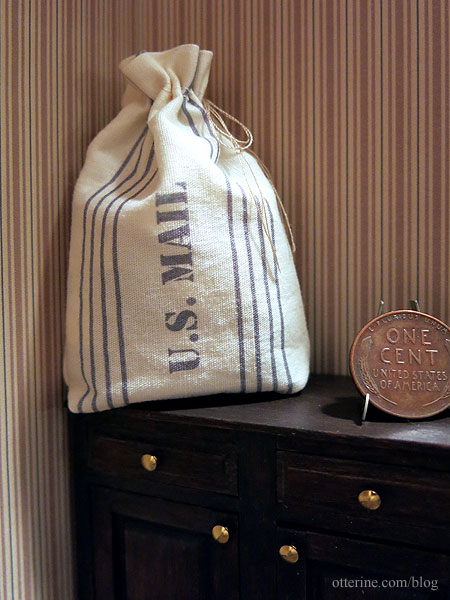
You’ll be happy to know I am not making dolls in satchels to represent the children sent parcel post (article one, article two). haaaaa!
Categories: Ivy Hollow RFD
November 28, 2019 | 0 commentsIvy Hollow – gate
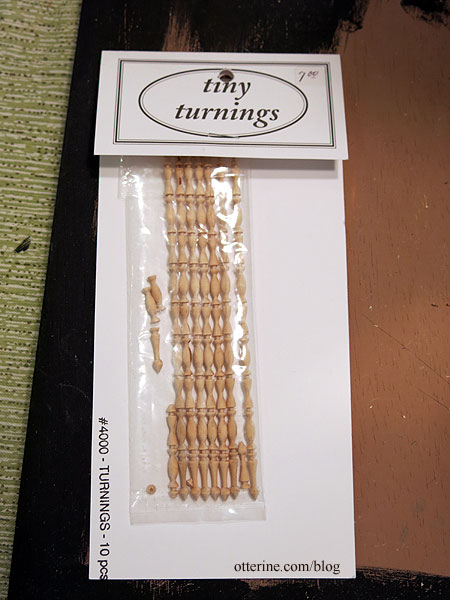
I made a gate from scrap wood and Tiny Turnings, making it up as I went along.
I thought the spindles probably could have been closer together, but it turned out well so I went with it.
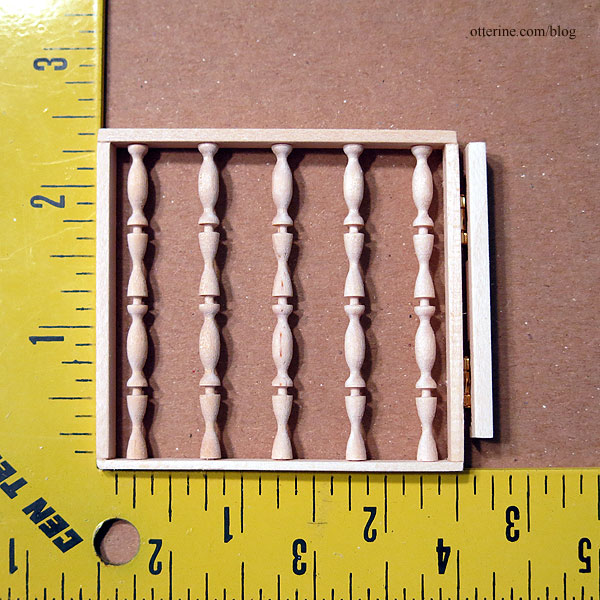
The stain is Minwax Dark Walnut. I used brass Houseworks hinges to make it operational.
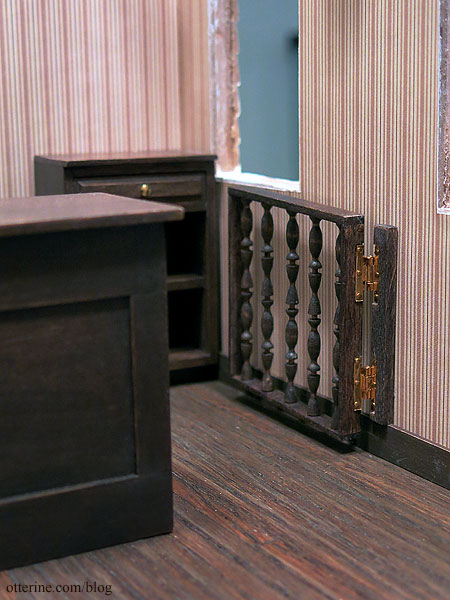
Right now, I have it propped in place with wax. Once I have the final layout, I’ll add a stop on the side of the counter to keep the gate from swinging too far.
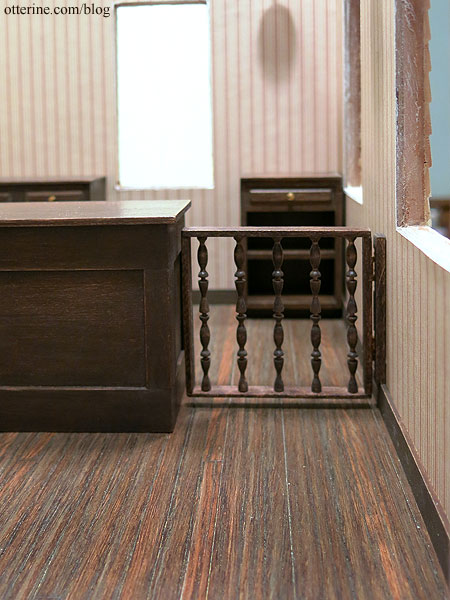
In the end, I like that the spindles are sparse – allows more to be seen through it.
Categories: Ivy Hollow RFD
November 26, 2019 | 0 commentsMail Wagon – part 11
Continuing work on the mail wagon. Here is the mock-up from last time.
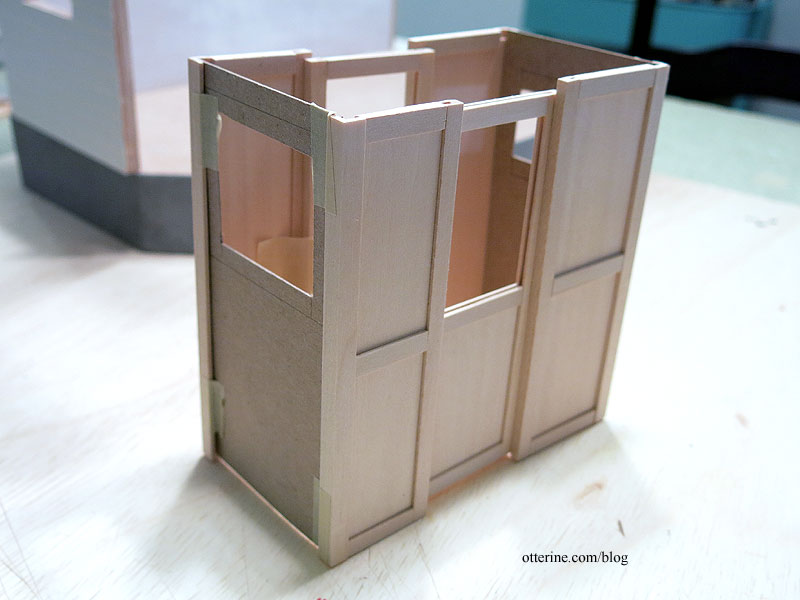
I originally intended to build a working window for the front, but after considering that the small space would make it difficult to actually operate the window, I opted for faking the window instead. I cut a front following the cardboard template from the mock-up and then built the trim to fit. I will enclose acrylic sheet inside the window frame during final assembly. No sense in risking marring the acrylic as I continue to work. Even though the window doesn’t operate, I did add the holes for the horse reins.
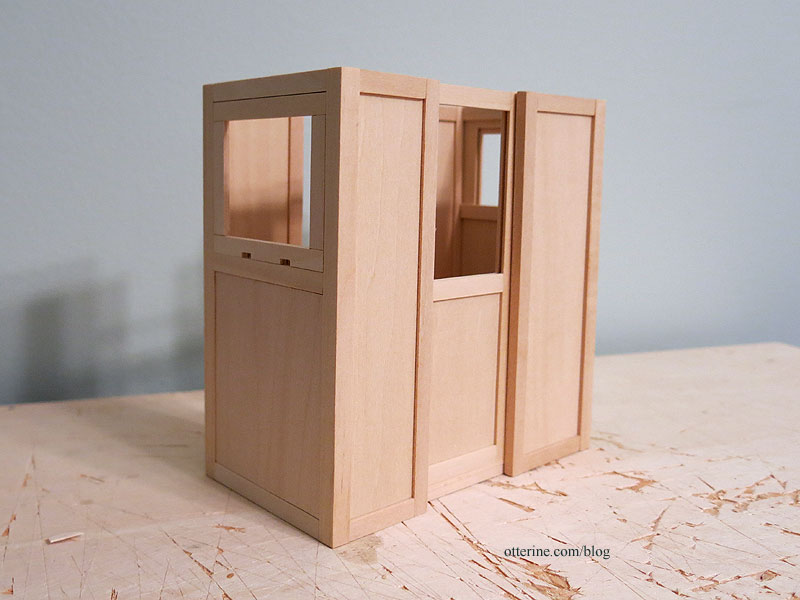
The back wall has a slightly smaller window and is also non-opening.
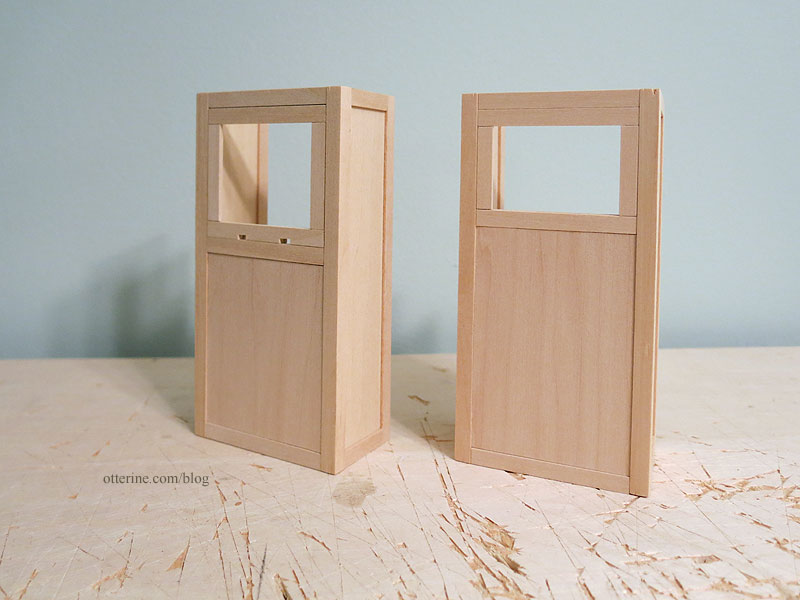
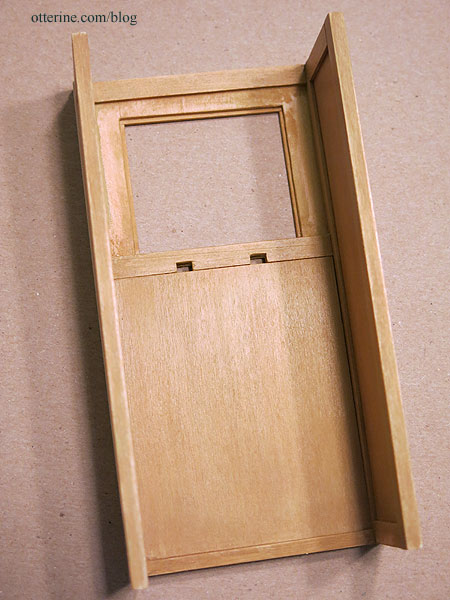
After building the front, back and doors, I figured it was easier to prime and paint what I could before assembly. I started with the interior since I could start putting things together as I painted if I wanted to do so. The first coat on the interior was Camel by Folk Art mixed with Staining Medium by Americana. After a light sanding, I added a second coat using Honeycomb by Folk Art mixed with Staining Medium by Americana. I followed that with a light coat of Delta Ceramcoat Satin Varnish. These layers give the look of varnished wood.
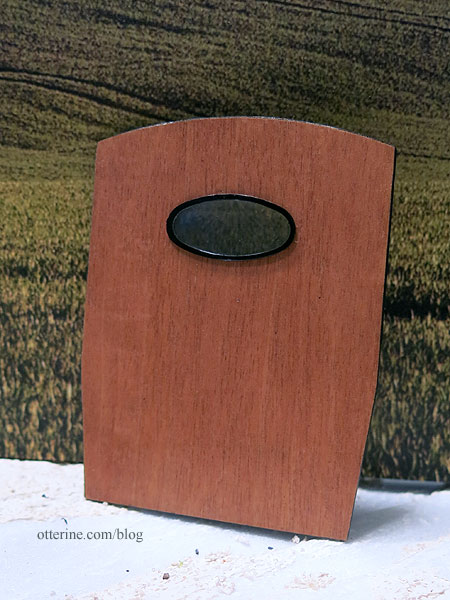
It reminded me a lot of the Model T wood portions as shown below, which would fit the era well.
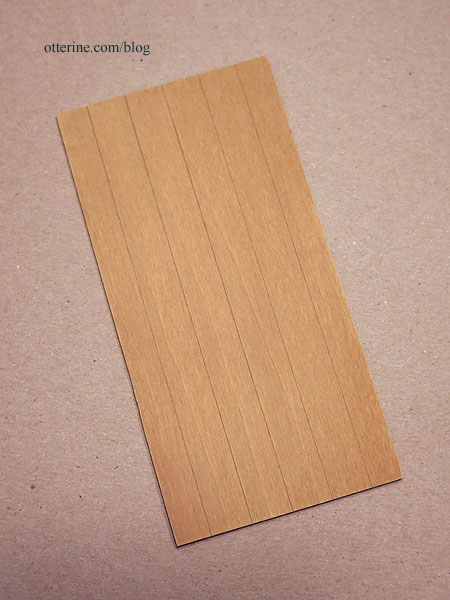
I cut a solid floor and then scored lines to mimic individual boards. Much less fiddly than trying to use actual planks. This is painted to match the remaining interior.
Categories: Ivy Hollow RFD, Model Cars, Vehicles
November 21, 2019 | 0 commentsIvy Hollow – tiny parcels
Now that we have seed order form mailers and catalogs, we are receiving packaged goods! At The Miniature Show in April, I bought some packaging kits from Looking Glass Miniature.
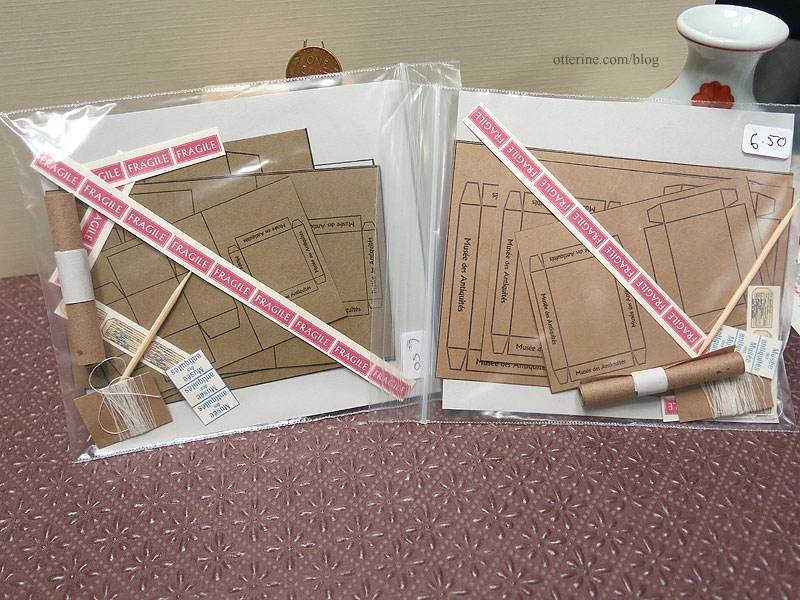
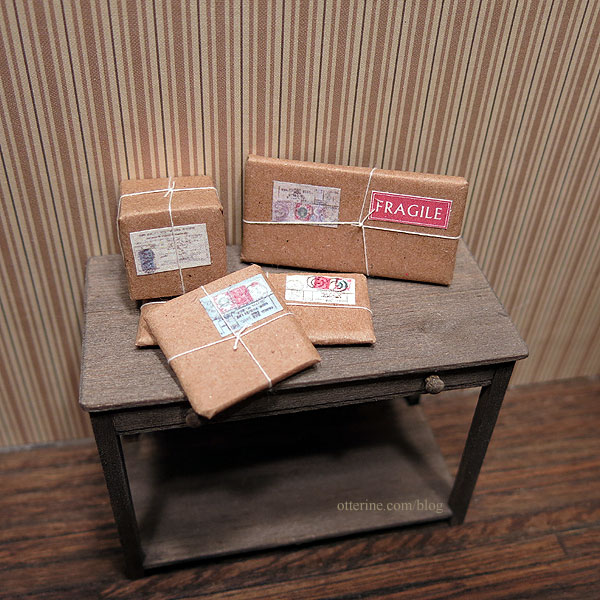
I used this kit for its parts. It was nice to have the Fragile labels and shipping tags for post office stock. For parcels, I wrapped wood blocks in the kit’s kraft paper and twine, using old labels found online. Obviously, parcel post labels are harder to find than old letters and postcards as the wrapping would usually have been discarded. :]
Categories: Ivy Hollow RFD
November 18, 2019 | 0 commentsIvy Hollow – postmaster’s desk wall, part 2
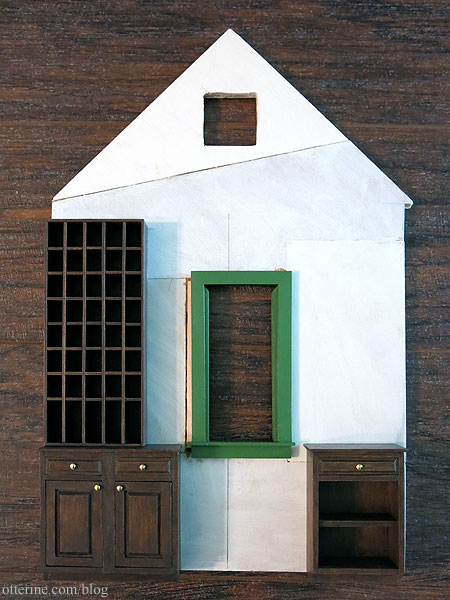
Continuing work on the back wall. I figured I would need more pigeon holes, because having a post office for only 15 mail customers seemed a bit of an extravagance. I modeled the additional pigeon holes after the ones made for the postal teller, making them a little deeper and having 40 on this back wall unit. I think I held my breath while cutting the thin slits to fit the parts together, but it worked! There was so much cutting and prep work beforehand, I was not looking forward to having to do it all over again.
I think 55 post boxes is more in line for a one-wagon rural post office. It might not be enough for a true post office, so I remind myself this is a mini approximation. :D
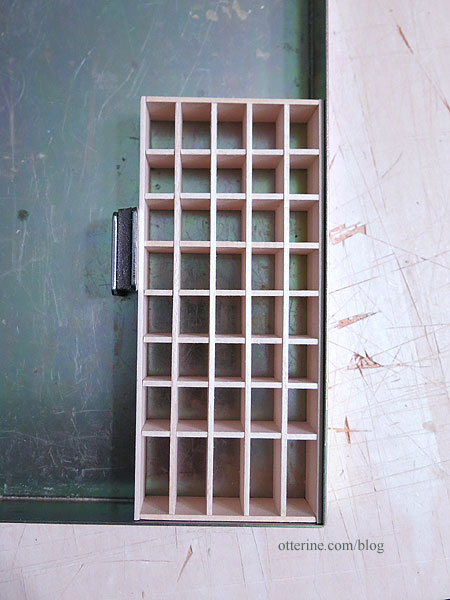
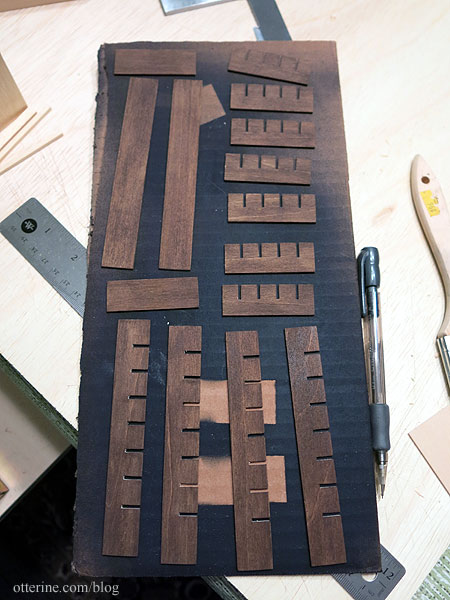
Instead of painting after assembly like I did with the postal teller, I painted and sealed the strips individually. This was so much easier than trying to get a good finish in the tiny pigeon holes. Wish I had considered this when I made the teller.
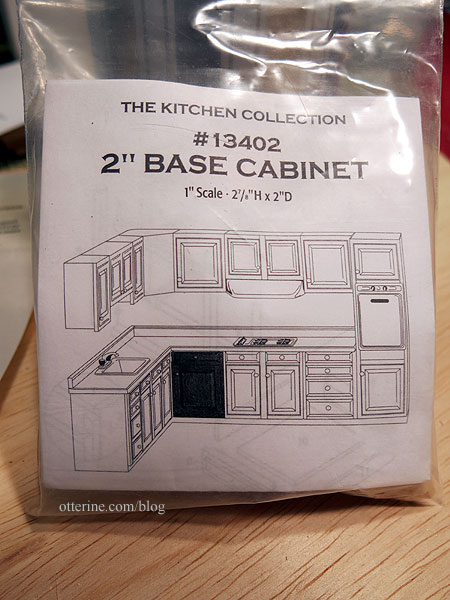
On the opposite side has shelves for packages. The postmaster could put a package slip in the box for mail that wouldn’t fit. I adapted a 2″ Houseworks kitchen cabinet for these shelves, mirroring the modifications I made on the opposite side of the window, but this one does have a working drawer.
I painted the cabinets to match the other woodwork. Right now, the pigeon holes are not attached to the base cabinet. I need to add the box numbers.
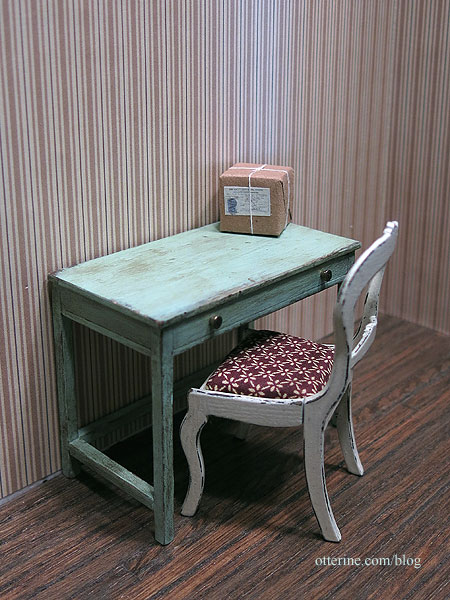
Our rural post office has good cabinets and a postal teller in newish condition, but the desk and chair are hand me down pieces. They are still perfectly usable, after all. :]
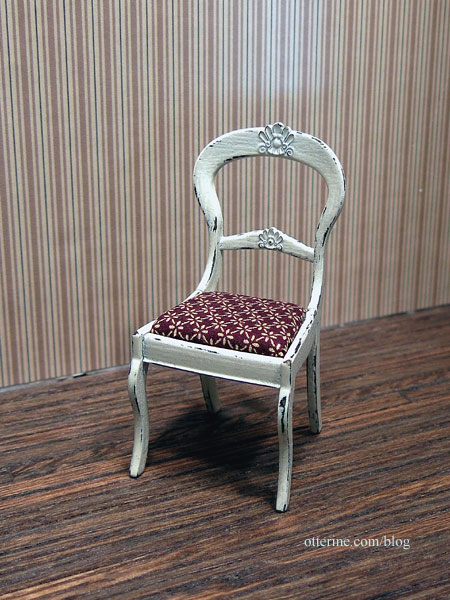
The Chrysnbon Victorian chair kit was a gift from Barbara.
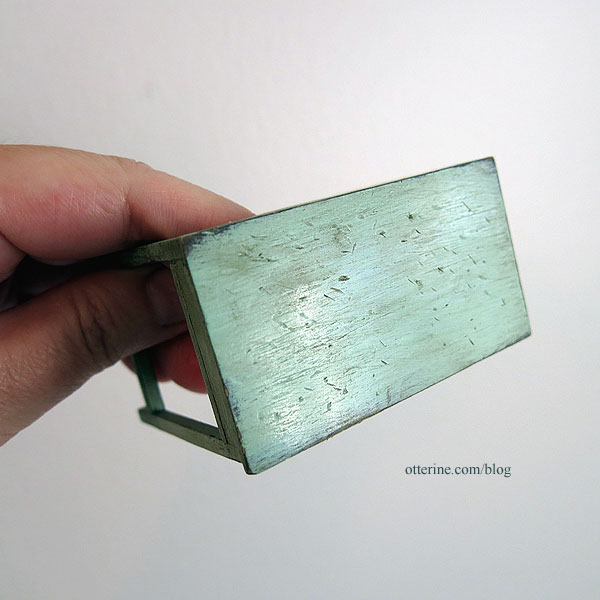
The desk is adapted from a table pattern in the book Finishing Touches by Jane Harrop. I beat it up with every tool on my work table. Look at that delightfully ratty finish! :D
Categories: Ivy Hollow RFD
November 16, 2019 | 0 commentsWe’ve got more mail!
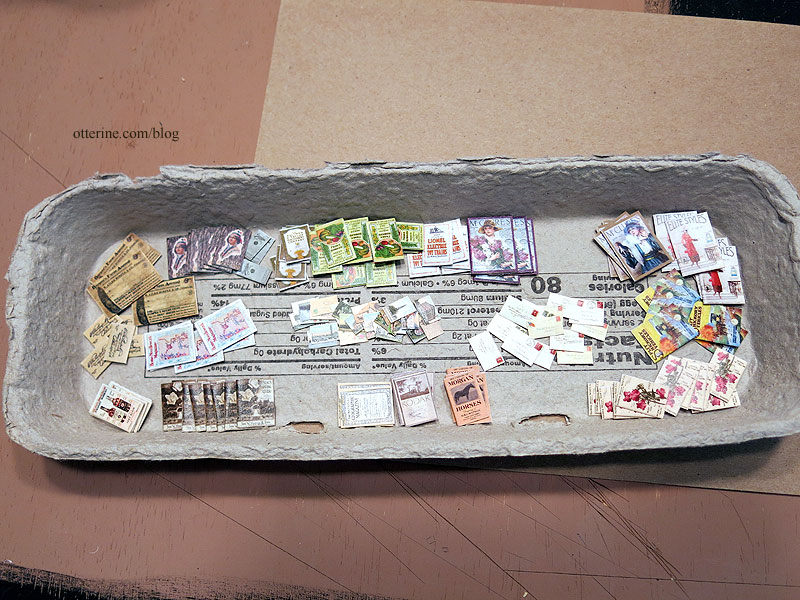
After the letters, envelopes and postcards, I still needed mailers and catalogs. Rural Free Delivery meant businesses could expand and reach more customers, and people in rural areas would have access to goods far from home.
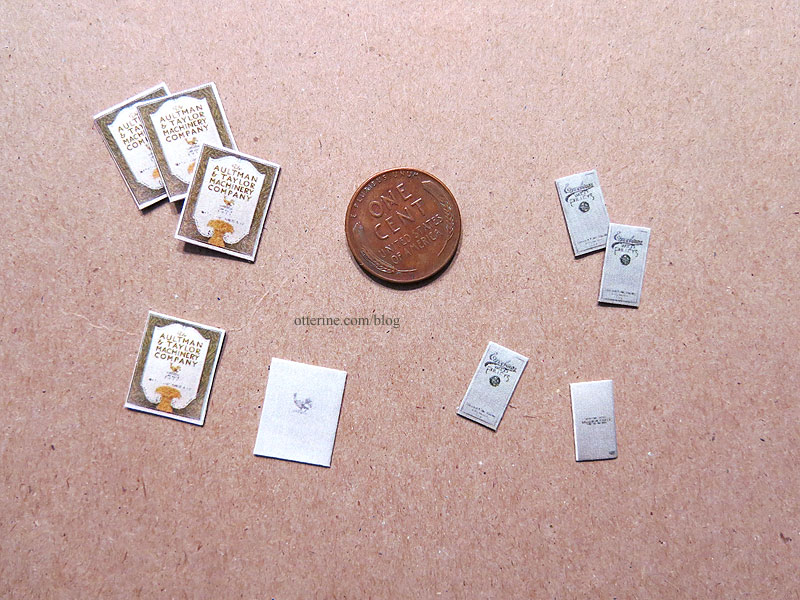
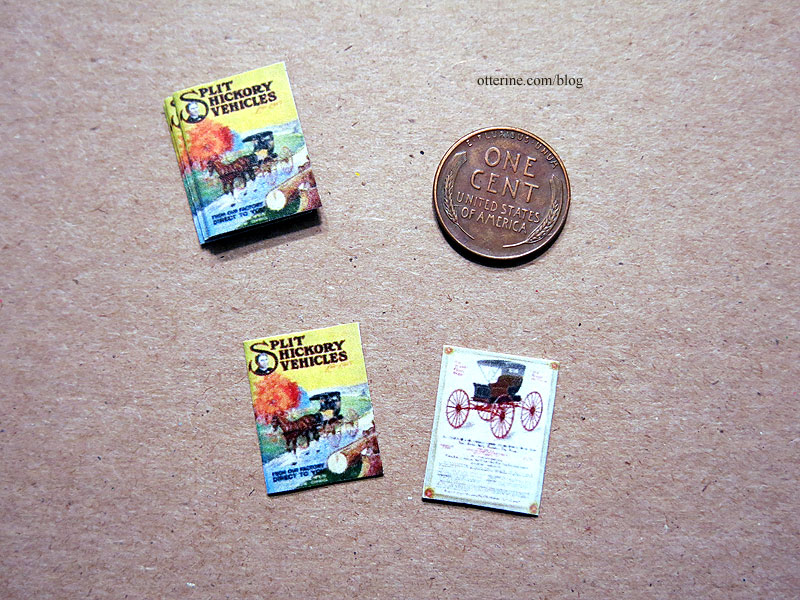
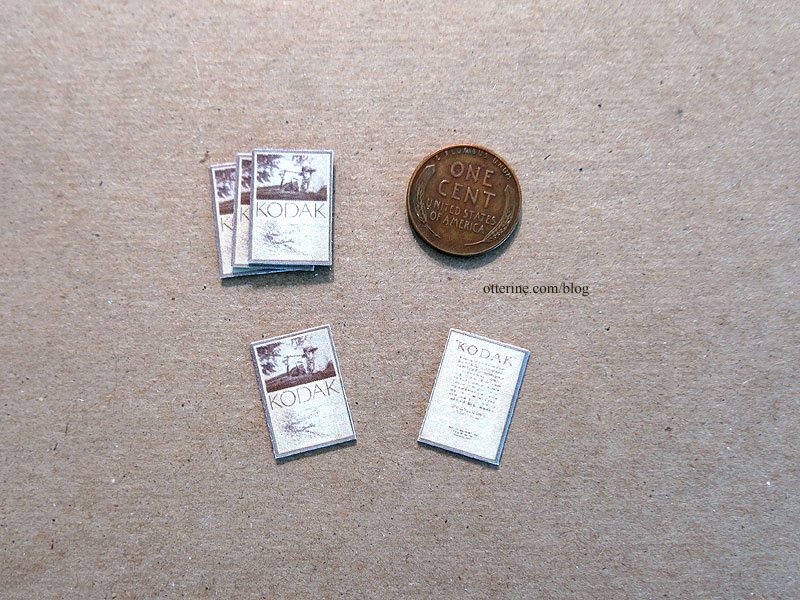
Again, I turned to online image searches, trying to limit those chosen to 1917, give or take a year. Though I was able to find some fully scanned catalogs including the inner pages, I focused on covers and glued each one shut with inserts. These would be placed in the pigeon holes and not opened for viewing. Some of these came from sale listings, so I was able to get accurate measurements for scale, though I had to increase the scale size to get a good print in some instances. Some required more sprucing up in PhotoShop than others as well.
I’m not completely sure, but I would imagine many magazines were sent in envelopes with handwritten addresses. Since I spent so much time researching and working on the catalogs and magazines, I didn’t want to hide them away in envelopes.
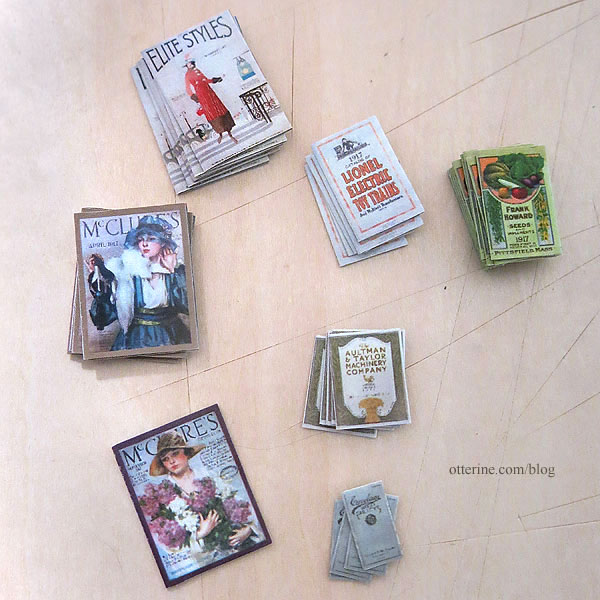
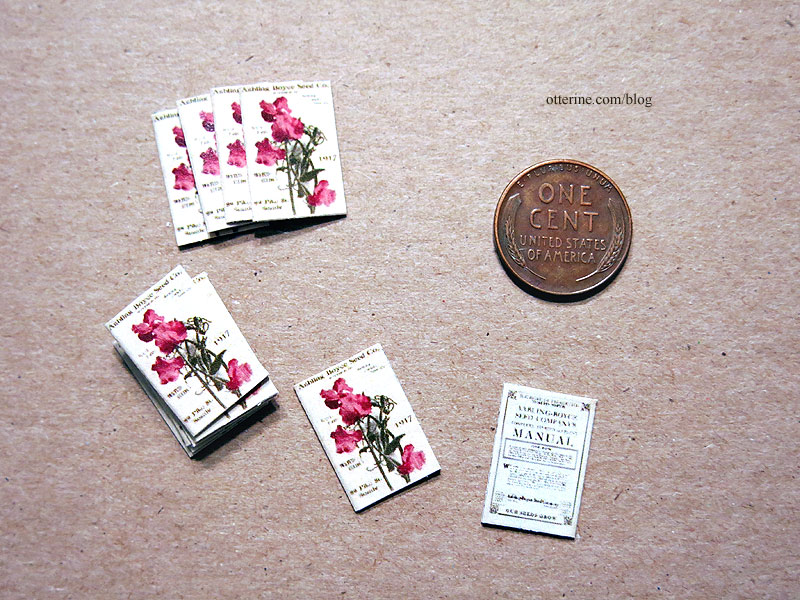
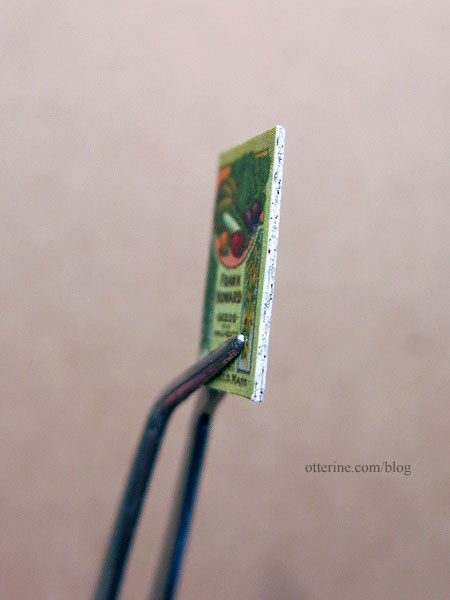
Seed catalogs.
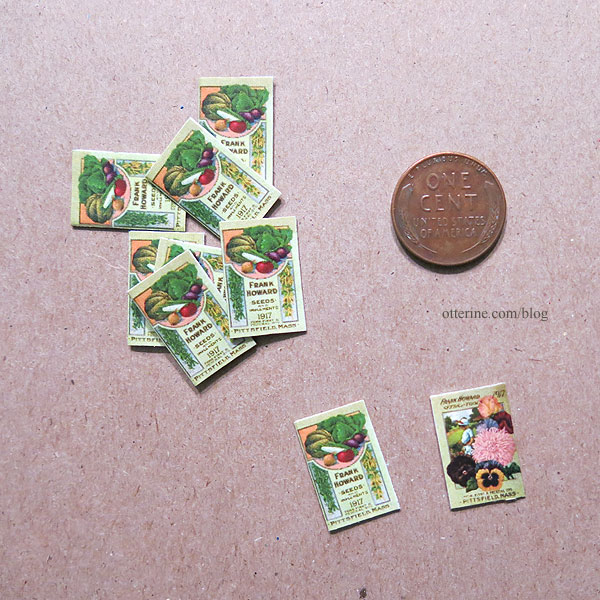
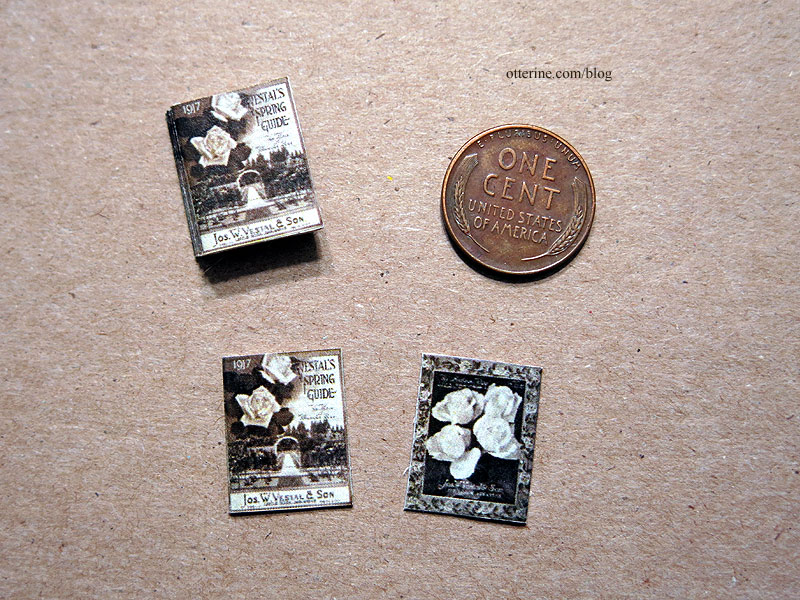
This one is a 1916 with a changed date. I could not pass up that cover!
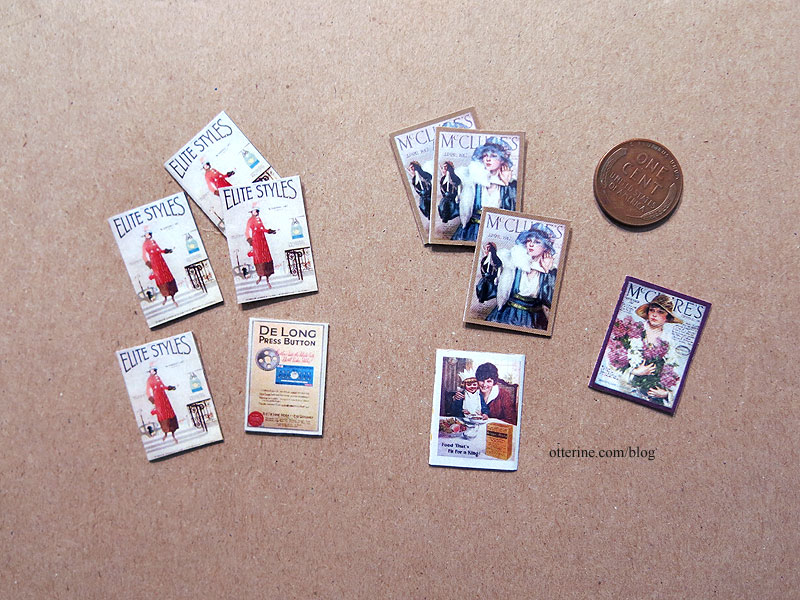
Ladies magazines.
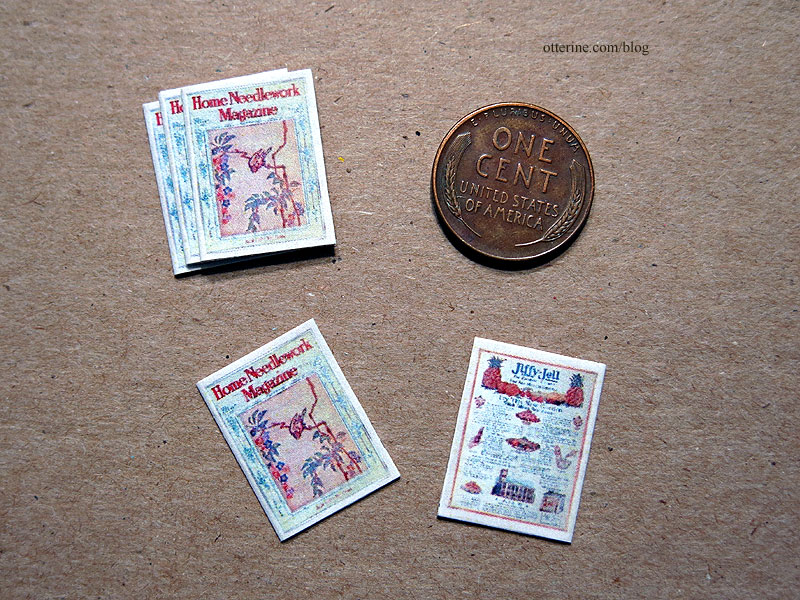
Needlework.
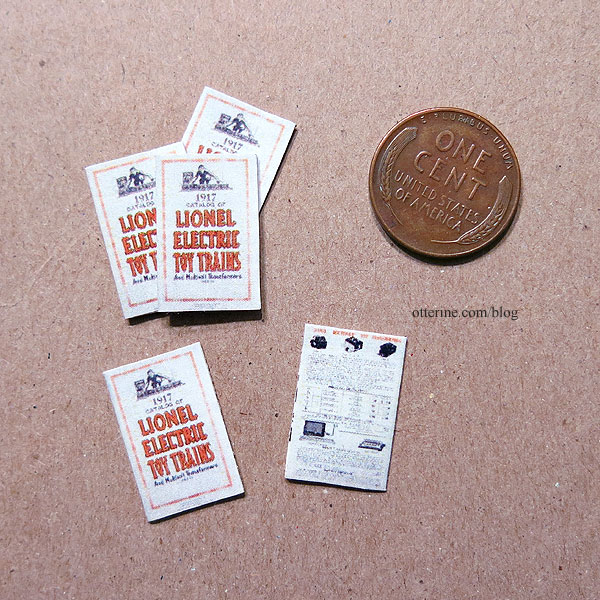
Lionel electric toy trains.
Machinery and pulleys.
Buggies.
Photography.
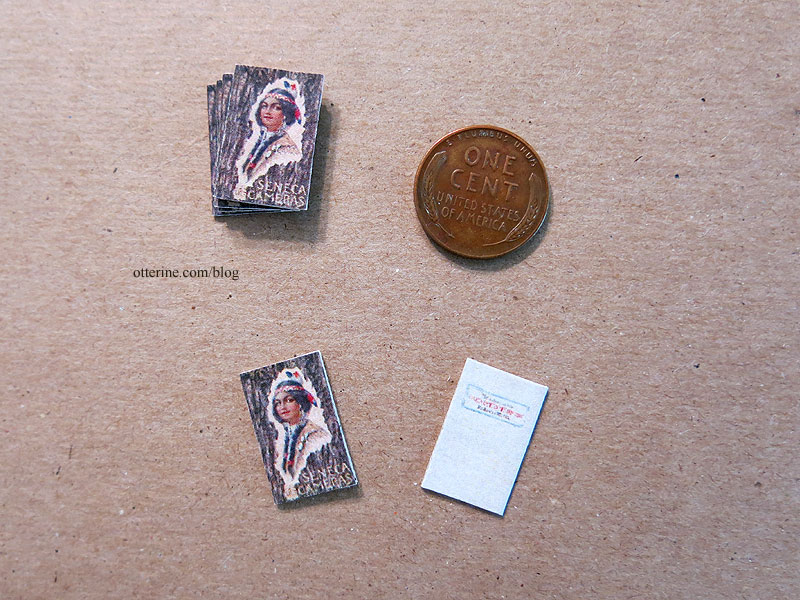
Horses.
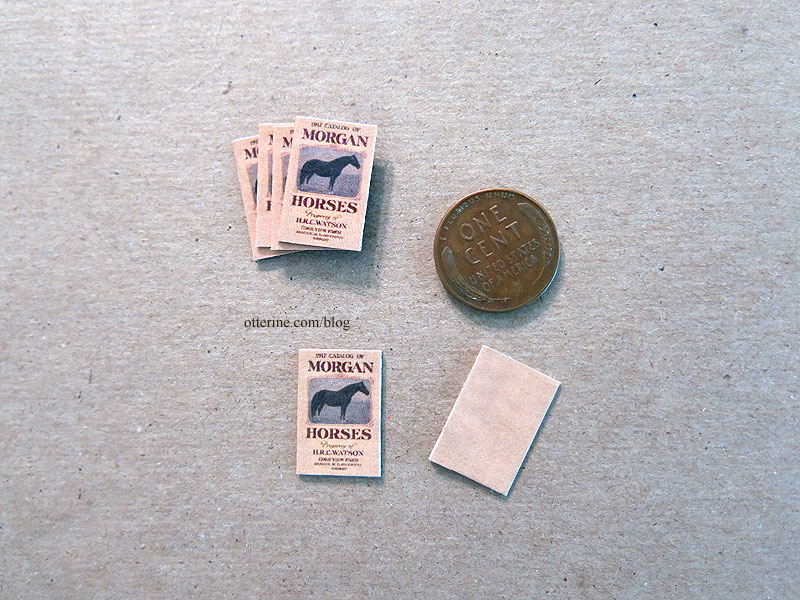
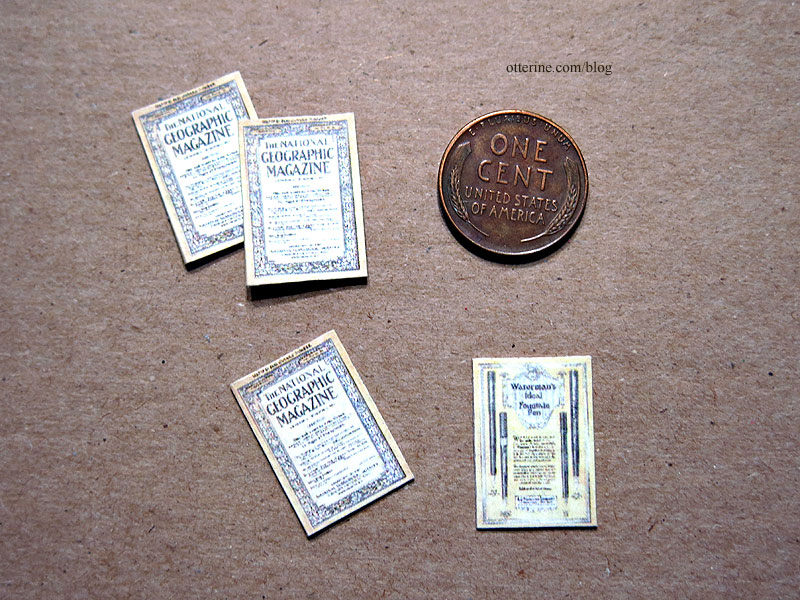
National Geographic.
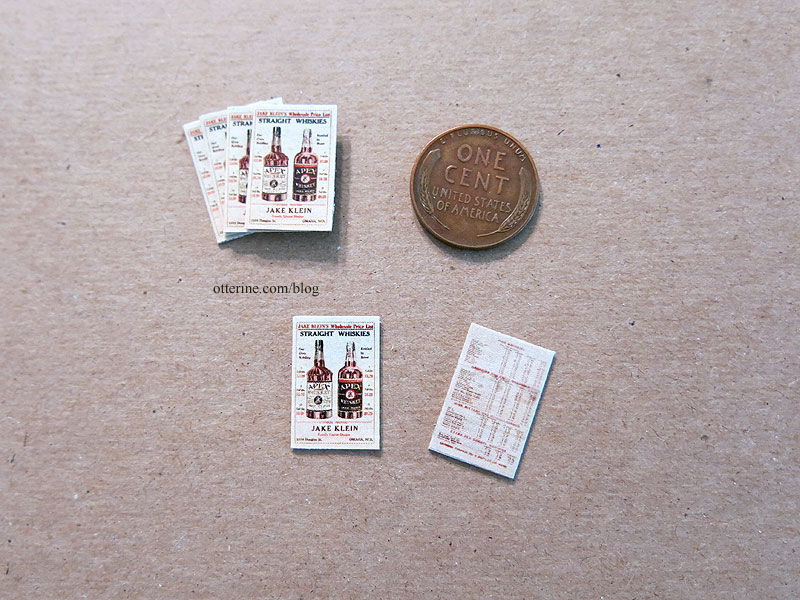
Booze. Prohibition is coming!
I used true real life magazine pages for the inserts for the magazines. The color and variation add more realism.
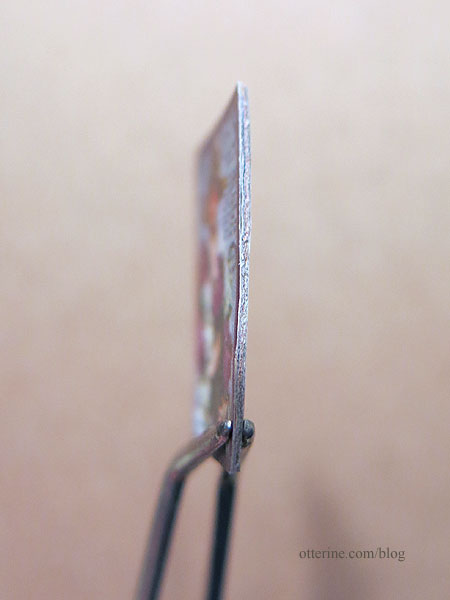
For the catalogs, I used black and white printed pages. While many of these would not have been printed to the edges of the pages in reality, I liked the look better than plain card stock or paper.
I’m still making many more envelopes with letters, but this is the mail I have on hand, along with a few gifted letter sets not shown here. Like flowers, you always need more filler than you think…so I might be making even more in the end. I also plan to add packages.
Categories: Ivy Hollow RFD
November 10, 2019 | 0 commentsIvy Hollow – hot off the press
I’ve made up a mini newspaper stack for the post office. I settled on a midyear 1917 edition of The Philadelphia Inquirer because it had horse drawn carriages on the front page above the fold. Again, these are in scale and not really legible.
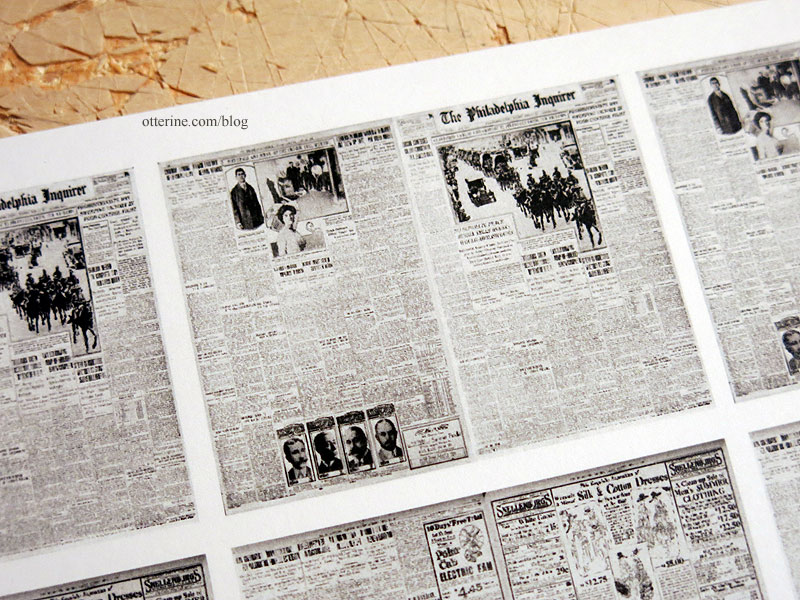
I printed two other styles of interior pages just to have print throughout, though the backs of each image are blank.
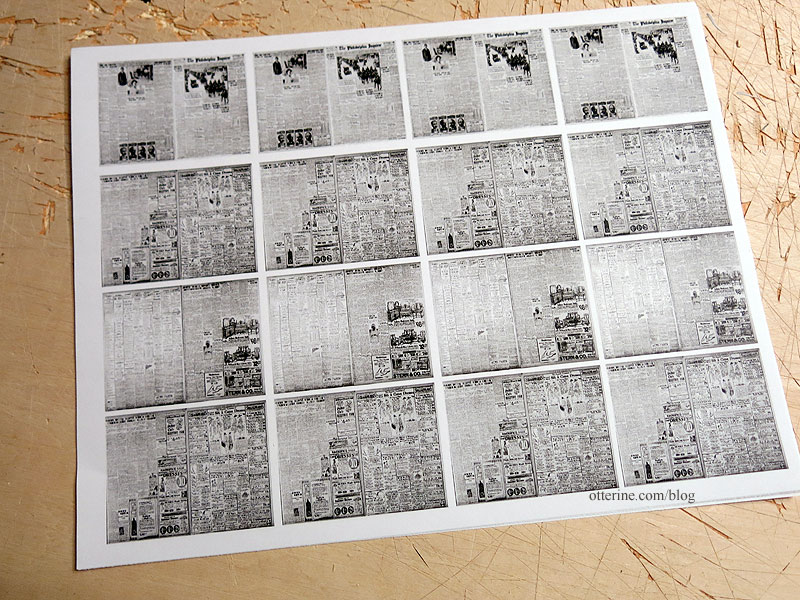
I cut the various spreads then folded each individually.
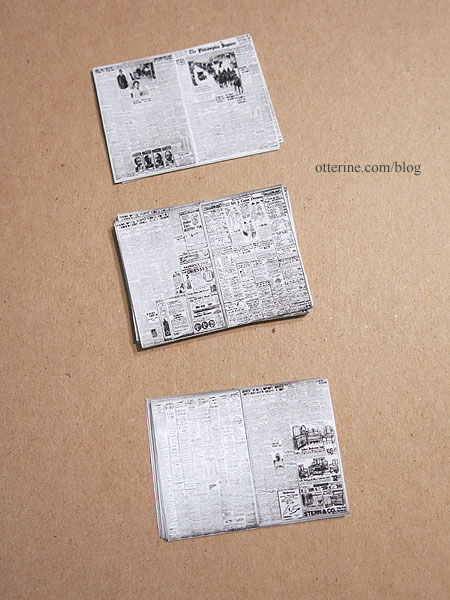
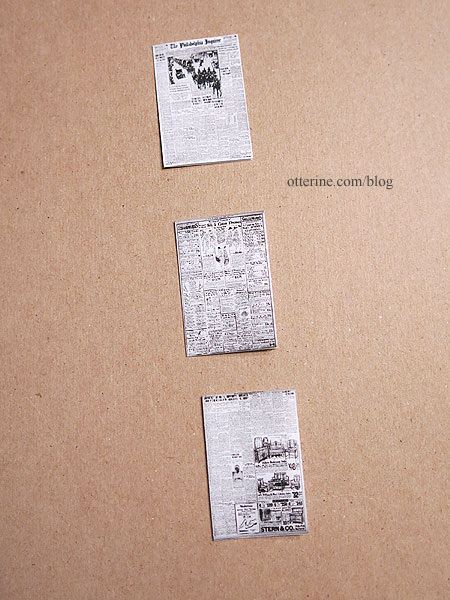
I placed the two inserts inside the cover and folded into shape. I glued the main fold on the inside and then a few random corners to hold the shape a bit.
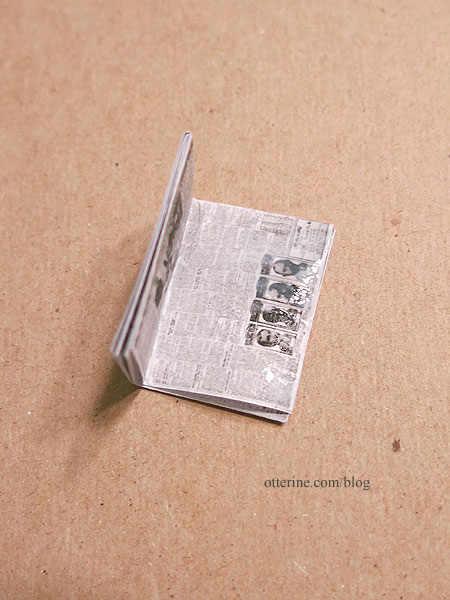
I rolled the paper again and trimmed the non-folded edges with an X-Acto knife.
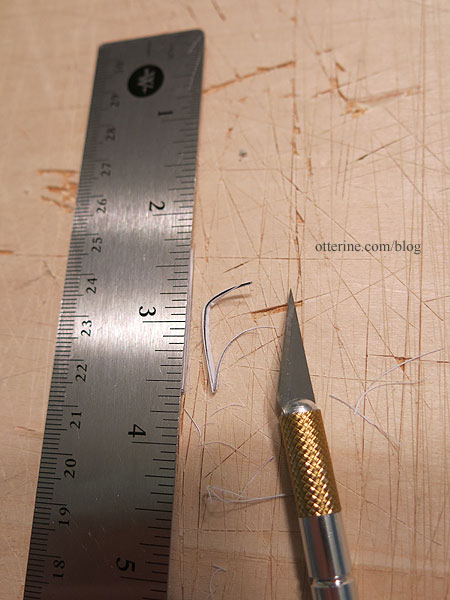
I tried to get them as consistent as possible, but I really needed only one near perfect one for the top of the stack.
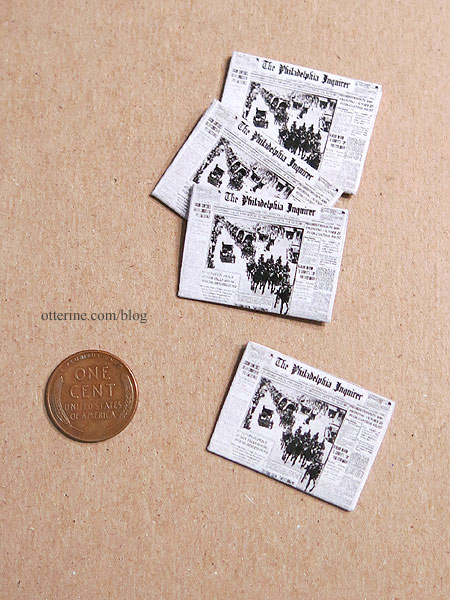
As long as they were all relatively close in size, they would work as a stack.
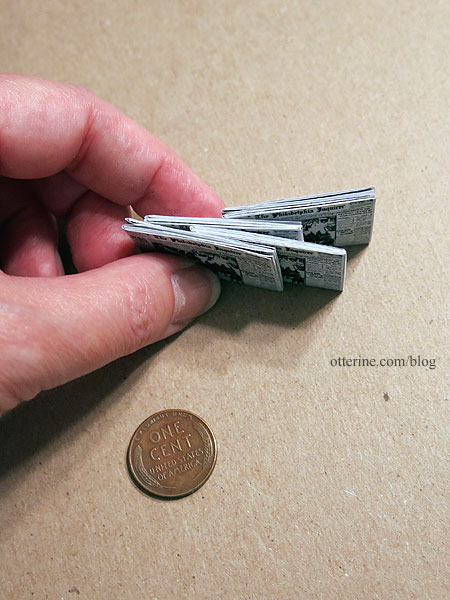
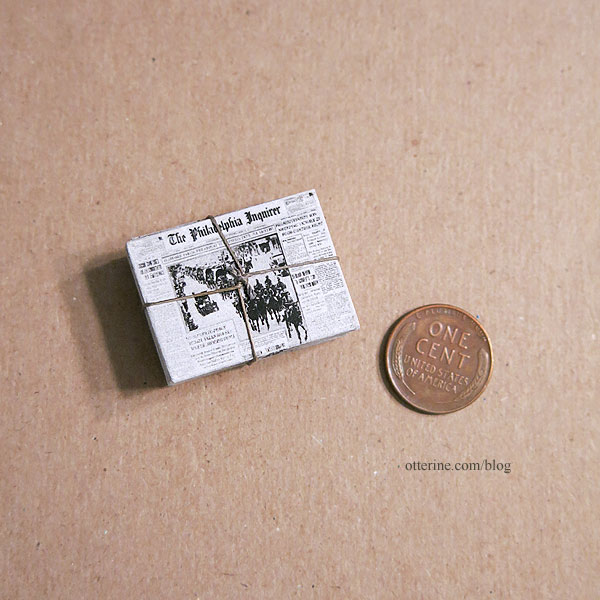
Once I had a stack of ten, I used buttonhole thread to tie the stack.
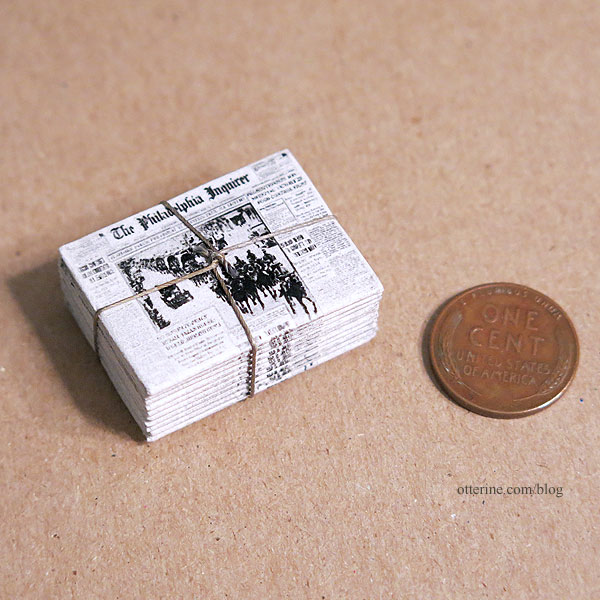
Hooray! :D
Categories: Ivy Hollow RFD
November 3, 2019 | 0 commentsIvy Hollow – brass plaque
I bought a 42-piece lot of vintage charms of the logo for the United States Post Office Department, which was the original name of the United States Postal Service.
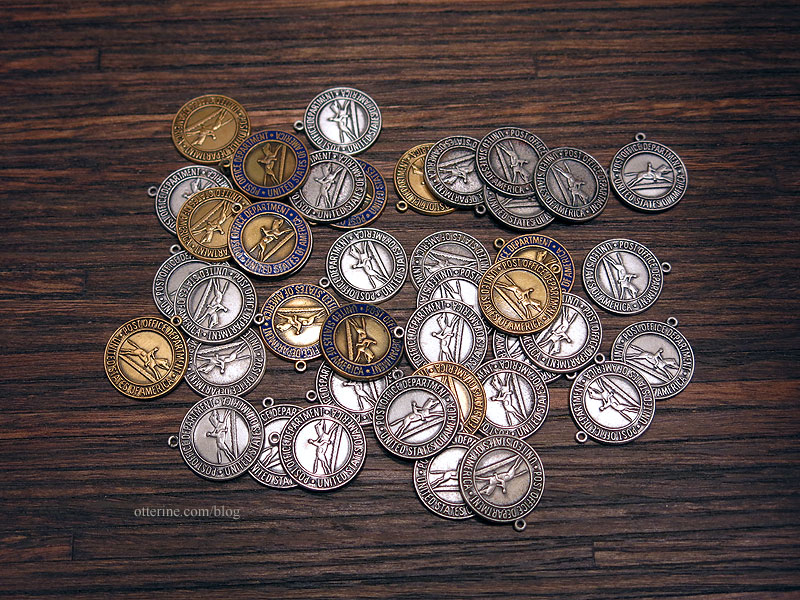
No, I didn’t need 42 of these suckers, but how perfect for a plaque.
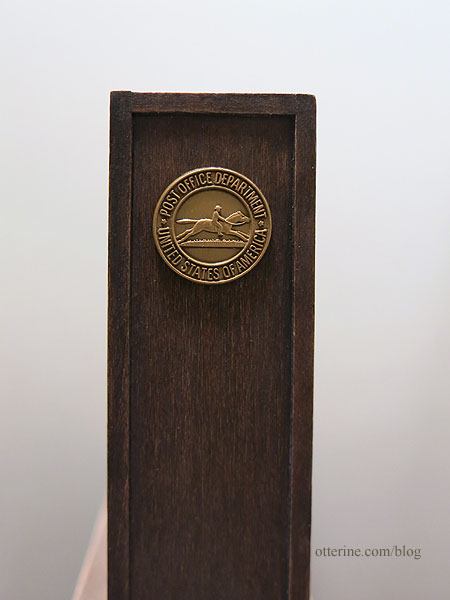
I was going to make a sign to resemble a porcelain plaque, but this is delightful at 5/8″ diameter.
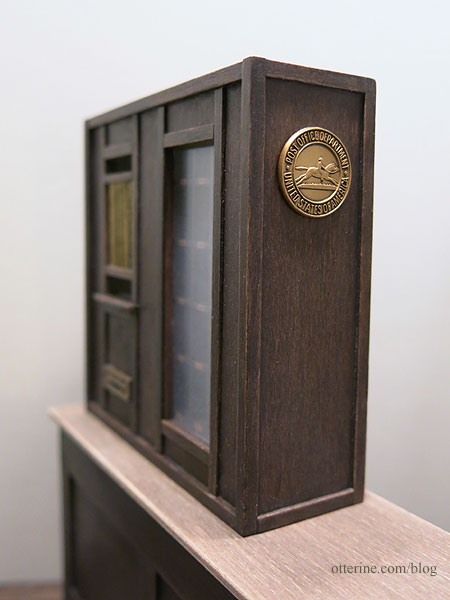
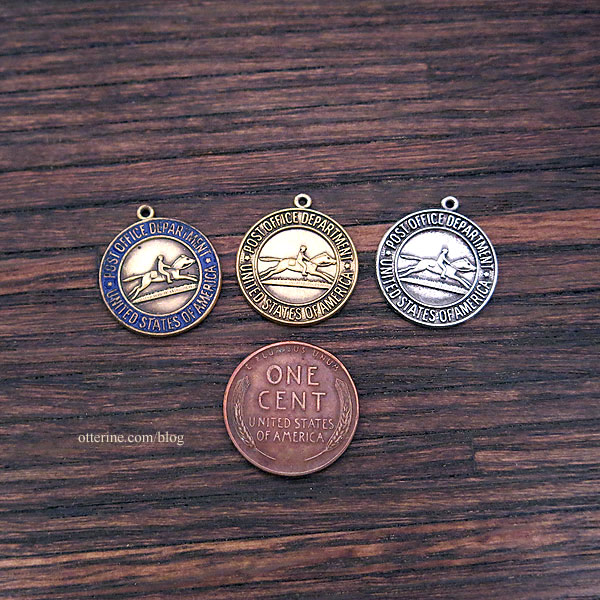
I didn’t want to wait to ask the seller for a smaller lot, because I couldn’t find anything like these online in a smaller quantity and I would have been sad had I missed out on this perfect detail. There are three styles, and one has already made its way to a new home. I’ll list these in my etsy shop once I reopen (all sold out now).
Categories: Ivy Hollow RFD
October 24, 2019 | 0 commentsIvy Hollow – postmaster’s desk wall, part 1
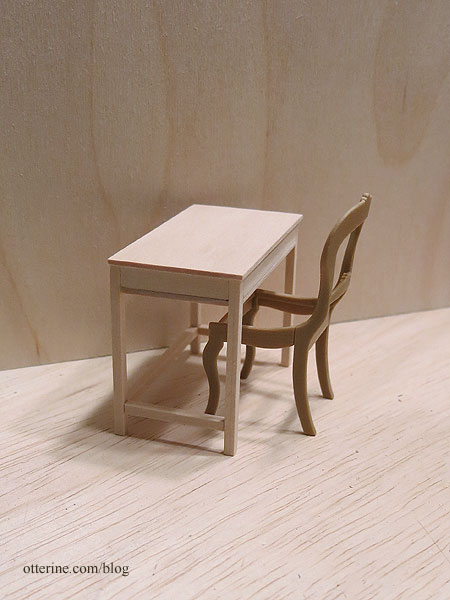
The desk is adapted from a table pattern in the book Finishing Touches by Jane Harrop. Clean, simple design with a false drawer to save time (knobs to come after finishing).
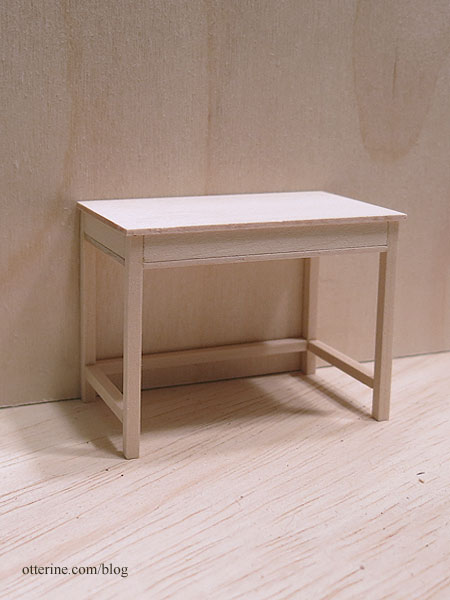
Barbara sent me some Chrysnbon kits for seating options, and I’m choosing the Victorian chair for the postmaster’s desk. It’s fancy, but I plan to age it a little to look like a hand-me-down.
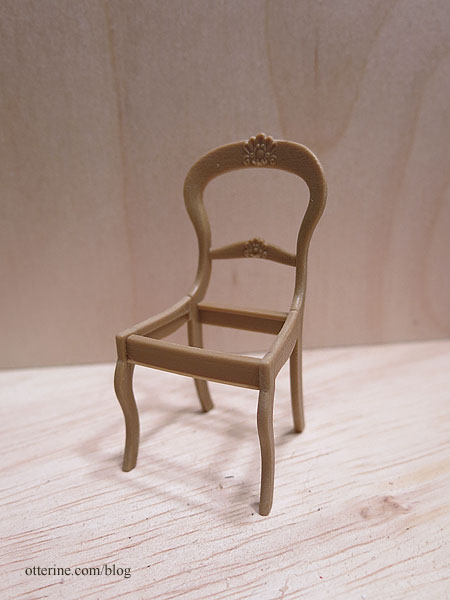
These kits are more delicate in style and often smaller in stature than other 1:12 scale chairs, which works well for the small interior.
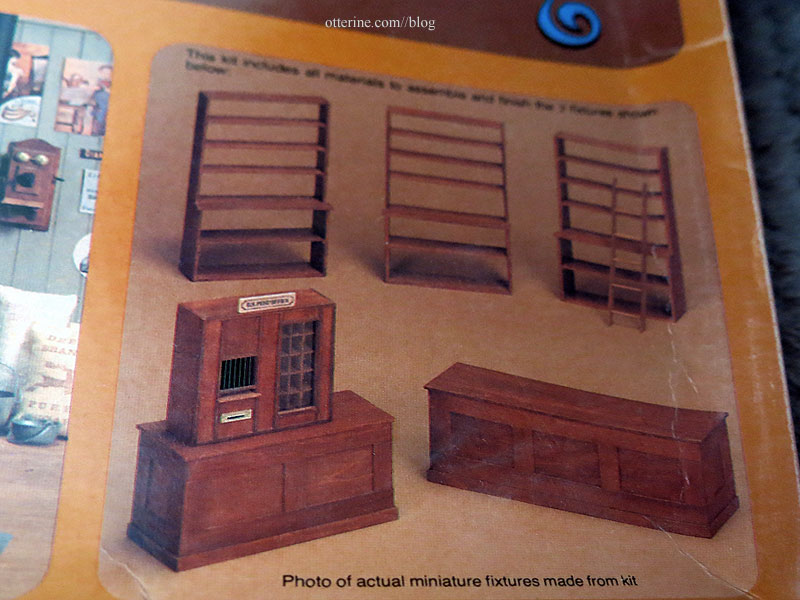
The boards of the shelving units in the Realife Country Store fixtures kit weren’t salvageable due to warping – not even as wood scraps, but they would have required modification to fit the space anyway. Easier to just work from scratch.
After deciding I needed another window on the already finished back wall, I cut an opening without damaging the siding. Whew. But, I measured the back wall window opening incorrectly…it’s off-center. Oy. Guess what, my brain was apparently ahead of me since it knew I needed three inches of space on the left. Had the window been centered, my idea of adapting a 3″ Houseworks kitchen cabinet kit wouldn’t have worked. Double whew! :D
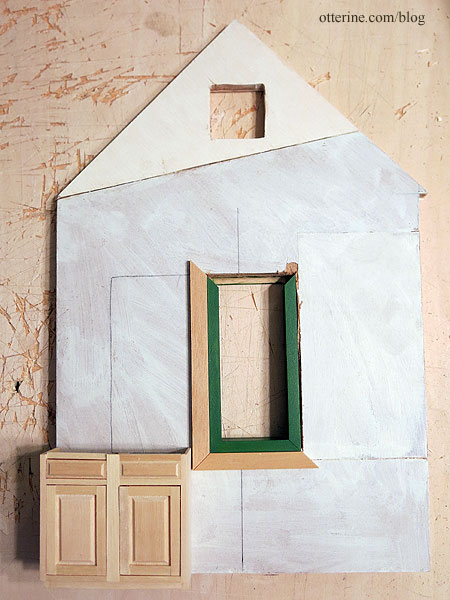
I cut the depth down considerably and altered the construction a bit since this was originally a sink/stove cabinet with false drawer fronts. I used surplus parts from an identical kit I had scavenged before and cut some new pieces as needed.
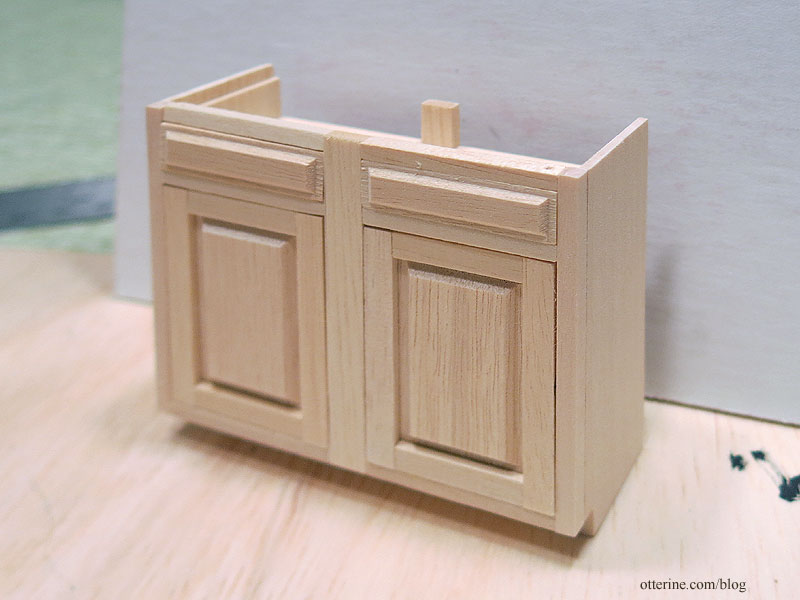
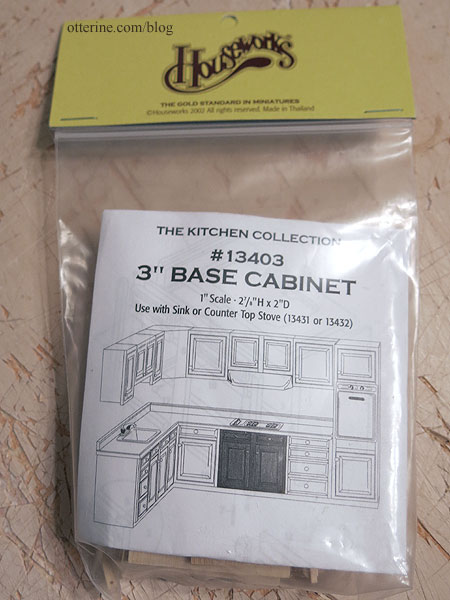
These are great kits, but I usually buy the partially assembled versions if I plan to use them without modification.
The cabinet fills the bottom space, adding storage, but I don’t have to actually fill said space with minis that won’t be seen (nor will I have to dust this space).
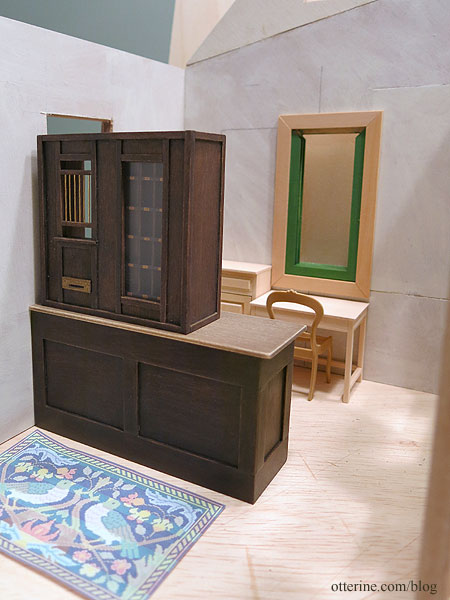
More is planned for the space to the right, of course. :]
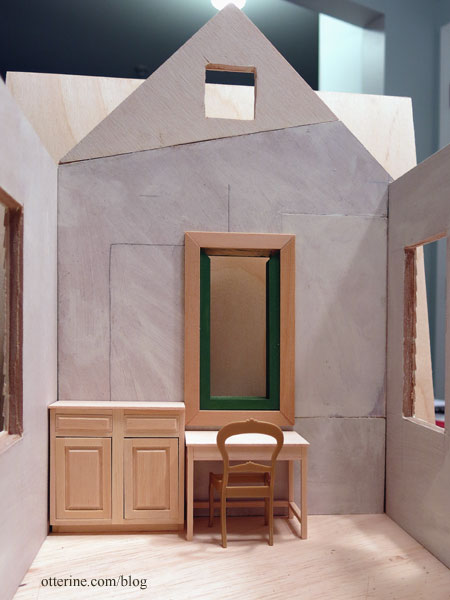
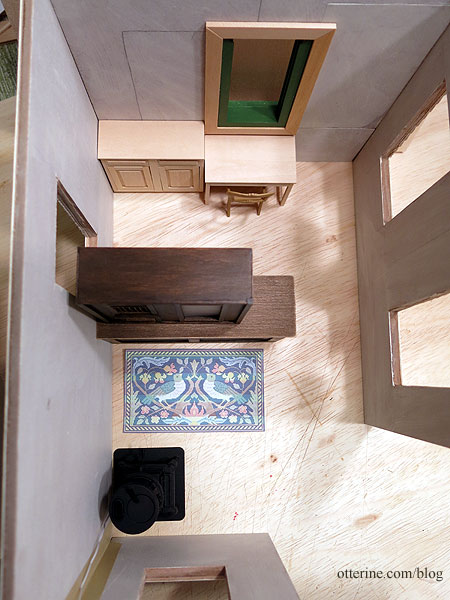
These pieces all fit well, but that window placement next to the postal teller is going to bug me. :\ When I flipped the house structure and furniture arrangement, I neglected to reconsider the window placement. This is when my penchant for leaving a house in dry fit until the end works in my favor. This is a relatively simple fix…cut a new rectangular wall, add siding and paint. It’s a task that I can do in the background while moving forward and using the existing wall for planning, etc. Plus, I will keep the old wall for whatever may come up.
Categories: Ivy Hollow RFD
October 13, 2019 | 0 commentsWe’ve got mail!
Today, my car needed its scheduled maintenance, so I packed my bag of minis and headed over there for a three-hour tour (Gilligan’s Island theme song now firmly in my head.) They have a desk/office area cordoned off for some privacy, so I was able to work comfortably. Sometimes I sit in one of the comfy lounge chairs and stitch, but today was Mail Call day.
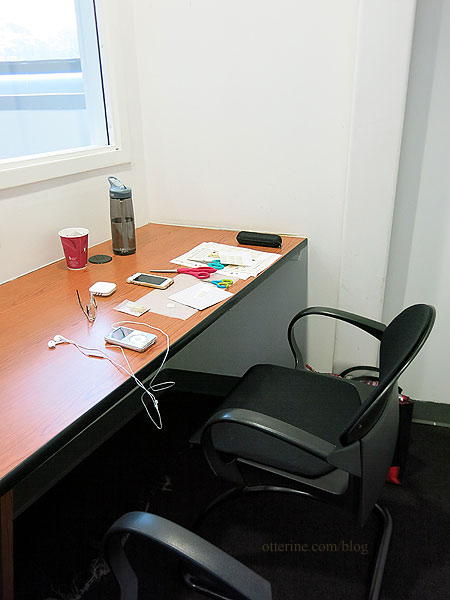
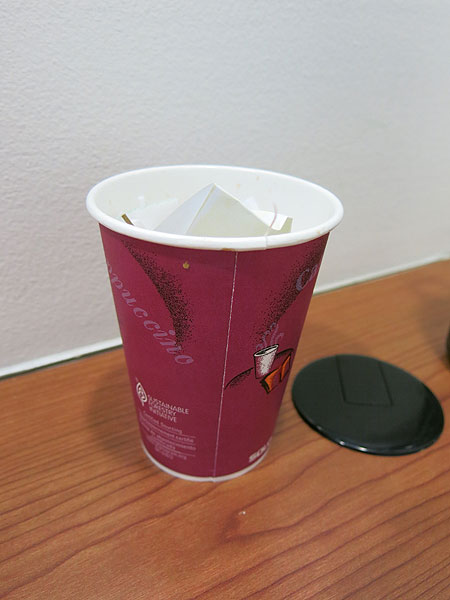
Someone was kind enough to leave their dirty coffee cup behind, but it worked well for a mini trash can. Kismet litter (good punk band name). haaaaaaaaaa
For the past couple of weeks, I’ve done some scouting about online and found a few different sites that had scanned letters and their corresponding envelopes. There is also a wealth of postcards, both mailed and unused, listed for sale online. I tried to limit the ones I printed to true 1917 dates, except for a few that I loved and wanted to include. Here are the letters. They are true to scale and not legible, but they add a nice touch.
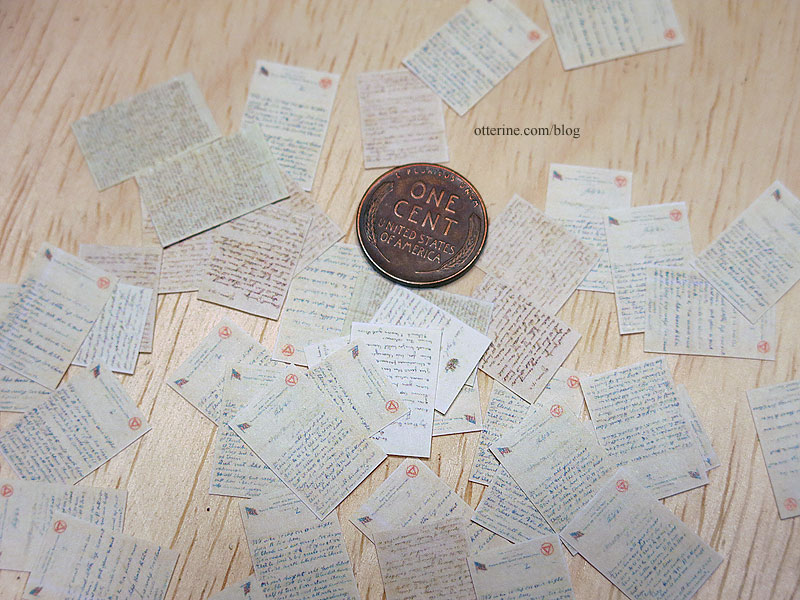
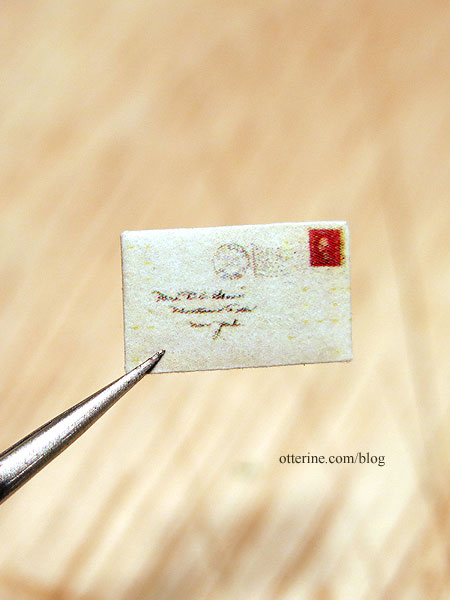
I did print envelopes, but my guidelines were so faint that I am going to reprint those for another day. I did manage to get one matched reasonably well.
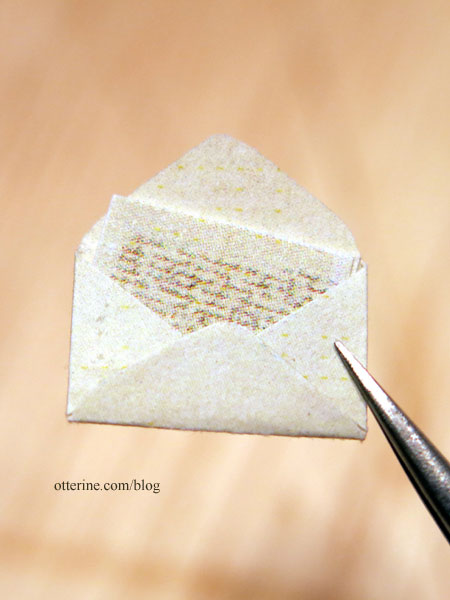
The letters are glued shut, but I like knowing there is a true letter inside.
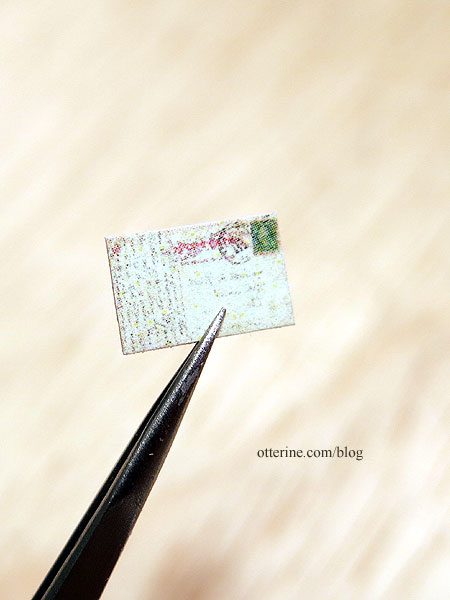
I cut out the postcard fronts and corresponding backs as pairs so I wouldn’t have to play an impossible match game later.
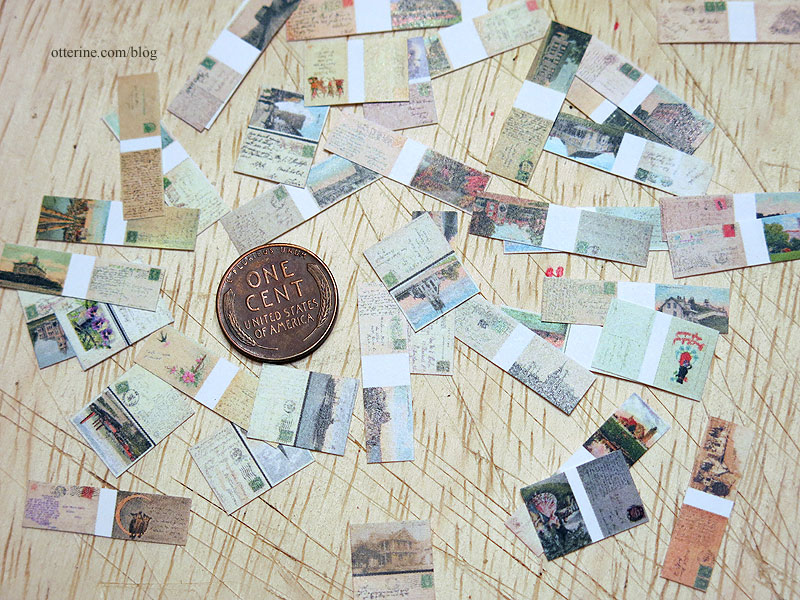
I pasted them back to back for a true postcard facsimile. This is one I fudged – this is a postcard that had a blank back, but I needed the bunnies in my post office.
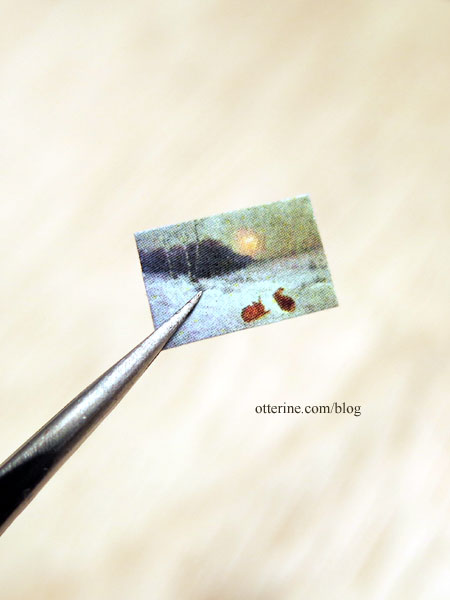
Assembling these will be good busy work for TV time.
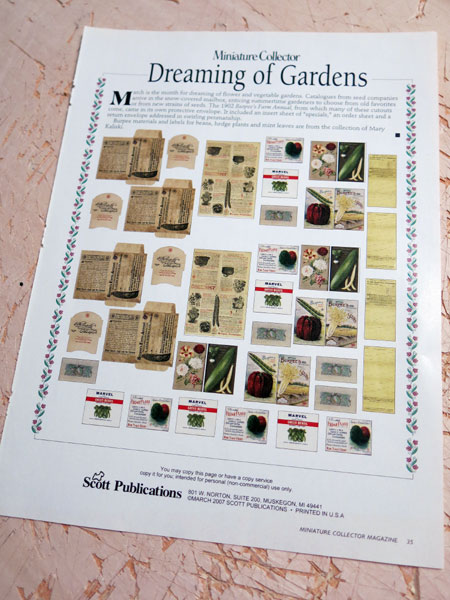
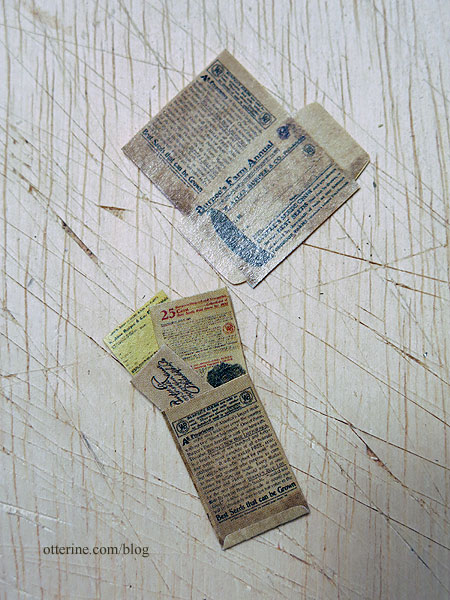
Miniature Collector magazine had printies in their magazines, and I pulled a whole bunch from the recent magazine stash that was gifted to me by a generous reader. One was a sampling of the 1902 Burpee’s Farm Annual. The magazine has a copyright date of March 2007.
It included a large envelope to hold the mailer, an order form and a return envelope.
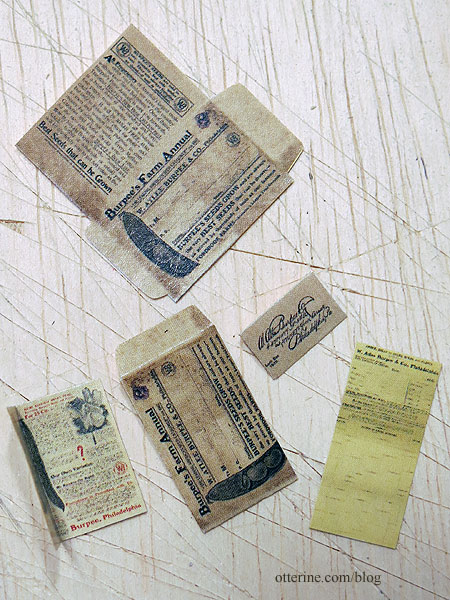
It’s a lovely set, and the notes indicate you are allowed to copy or have a copy service reprint for personal use. Since the magazine paper is a little shinier than I would like, I think I will do just that and make up a bunch. :]
Categories: Ivy Hollow RFD
October 6, 2019 | 0 commentsRealife Country Store fixtures – part 4
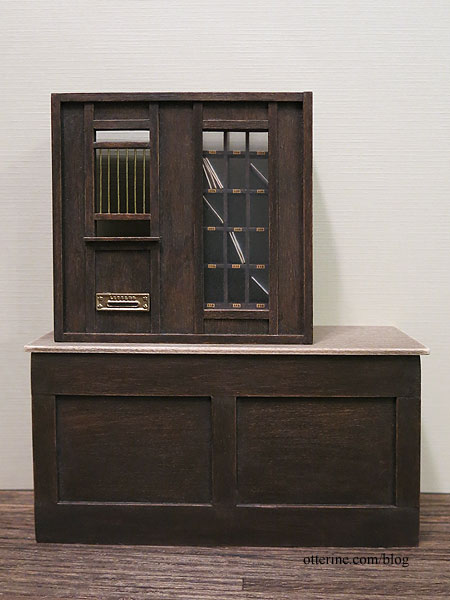
Continuing work on the Realife Country Store fixtures. After getting the parts stained and sealed, it was time for main assembly. I’m still holding off on the countertop until I get ready to set the furnishings in place. The brass rod supplied with the kit was smaller in diameter than the fiber guide holes. I didn’t know how this was supposed to work with that much give.
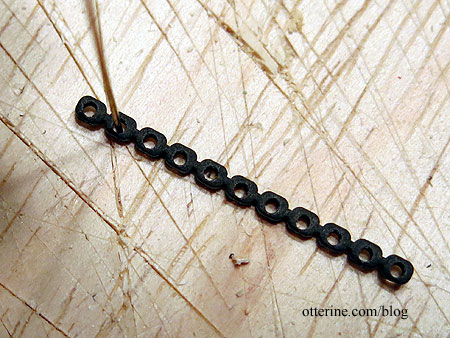
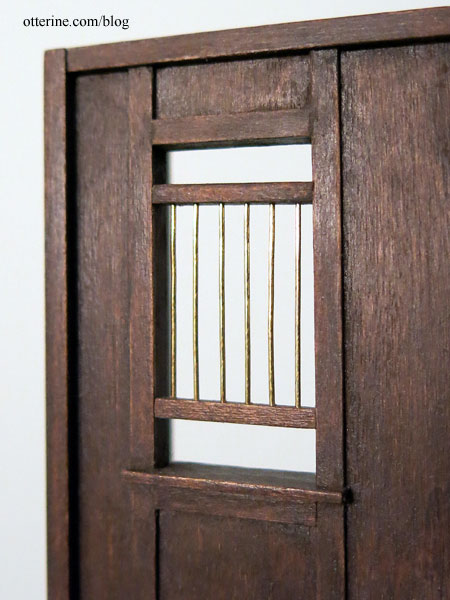
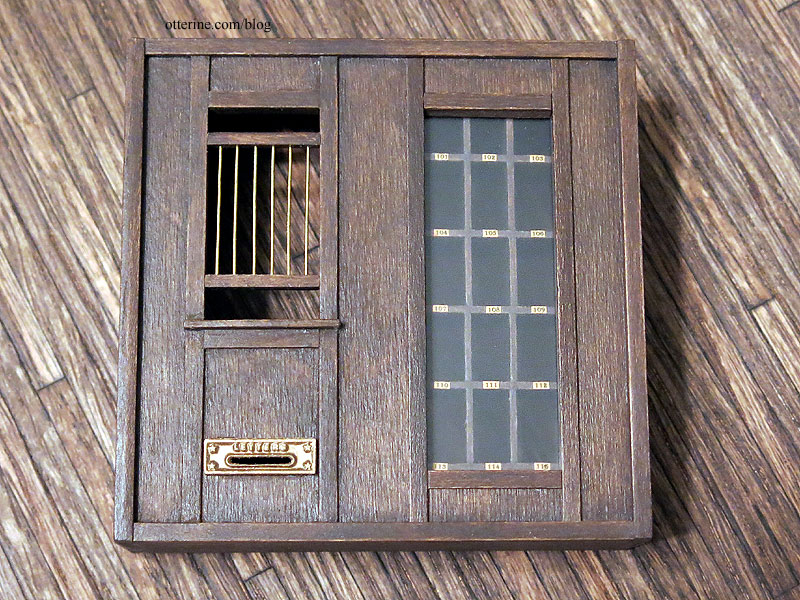
Instead, I replaced the guides with strip wood, measured the placement for the brass bars and drilled holes with a pin vise. The window bars were fiddly, to say the least, but this worked better. It might seem silly to have an open counter and easily thwarted gate then have bars on the post teller window, but I love the look of this piece.
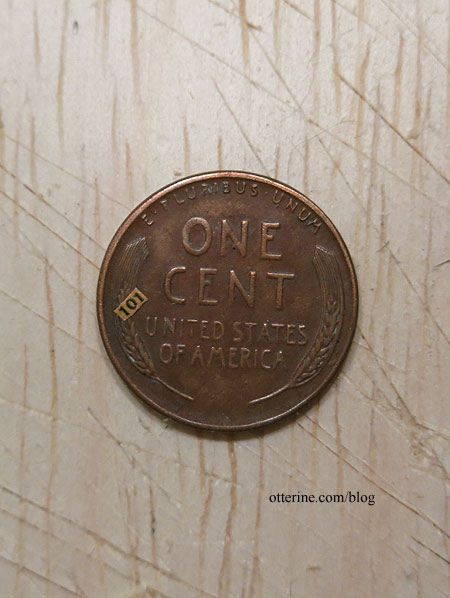
I added numbers to the 15 pigeon holes in the mail sorter. Yep, on the back, too, so the postmaster and the customer can see which box is which.
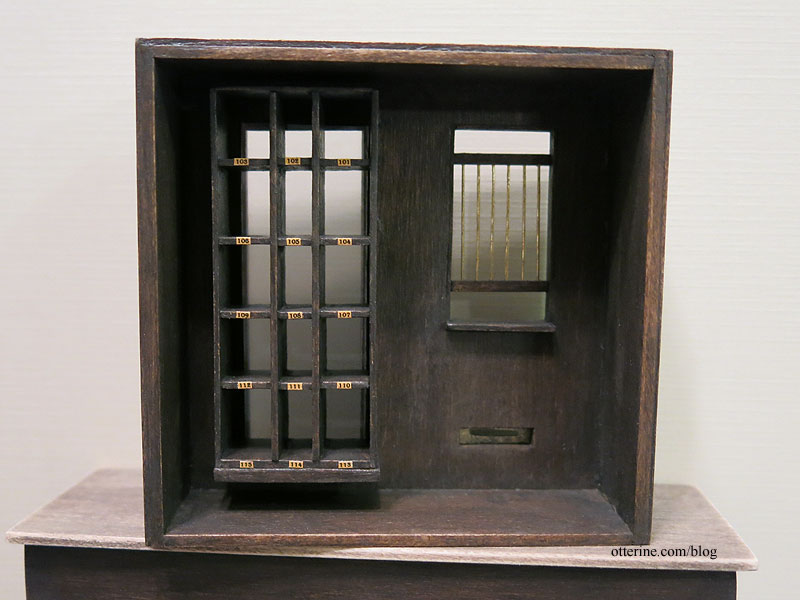
These are 3.5 point type. :O
I cut a piece of thin acrylic sheet for the sorter window and then glued trim to hold it in place. I opted to lightly frost the glass to cut down on the glare that would prevent good pictures. I used Testors Dullcote.
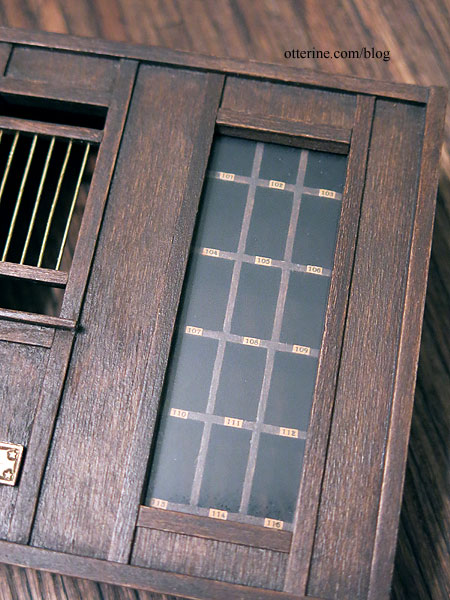
This piece took a lot of work to get a good result, but I’m very pleased with the results.
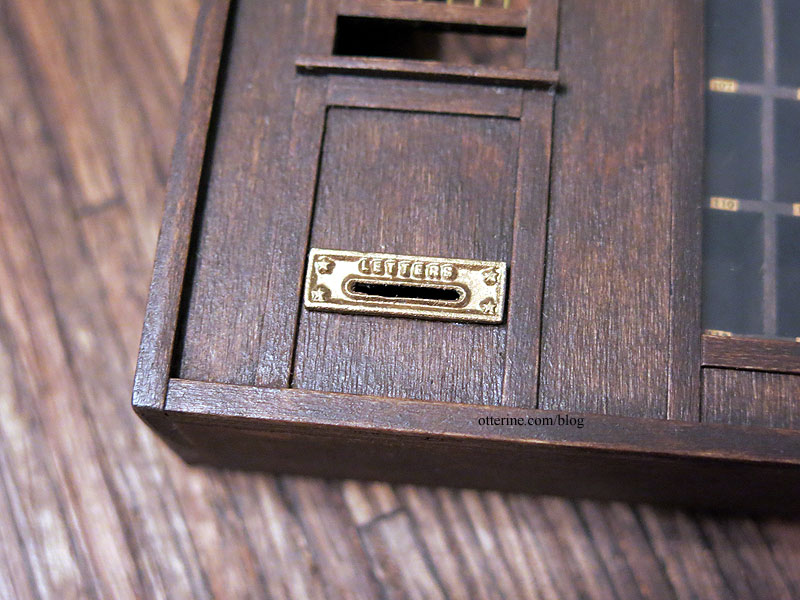
The brass letter slot is a wonderful detail. I had to smooth the edges and carve away some excess metal from the slot, so I touched up the paint overall with bronze acrylic.
I added a few larger letters just to see. I have some smaller mail planned as well.
Categories: Ivy Hollow RFD
October 2, 2019 | 0 commentsRealife Country Store fixtures – part 3
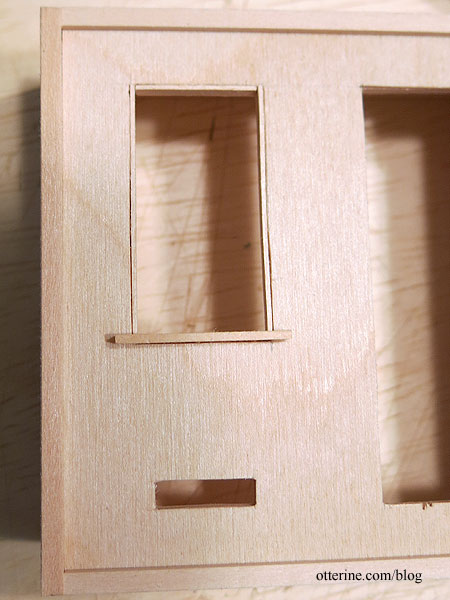
Continuing work on the Realife Country Store fixtures. I cut more away from the window opening and cut new sides to replace the warped kit pieces. I was mistaken about the window shelf – there was a ledge included in the kit. I just hadn’t cut that piece out or gotten that far in the instructions. It’s a usable piece as is, as long as I don’t break it. I trimmed the window since I had used plywood for the front (for stability). This covers the striated edges.
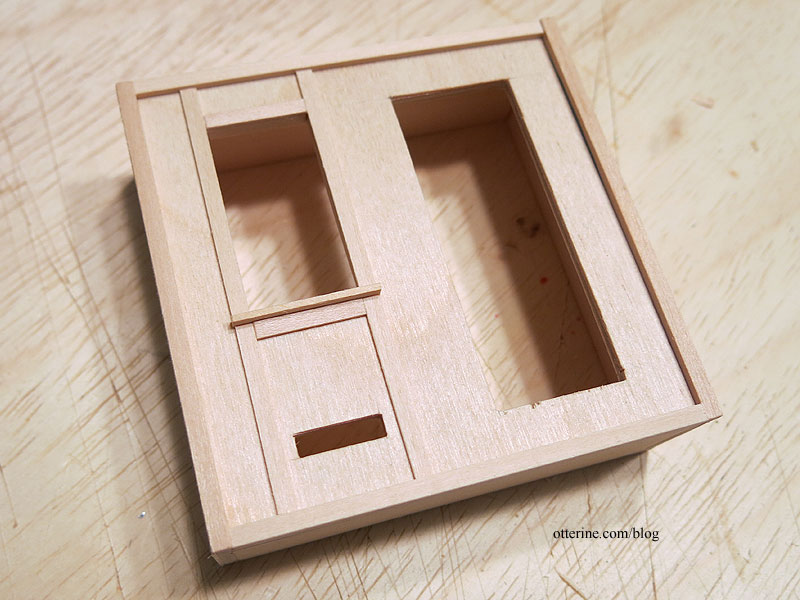
I added trims to finish the postal teller window side, revamping some of the design with trims from my stash. Just a little pizzazz. The sorter side will need to wait until I finish and install the pigeon holes.
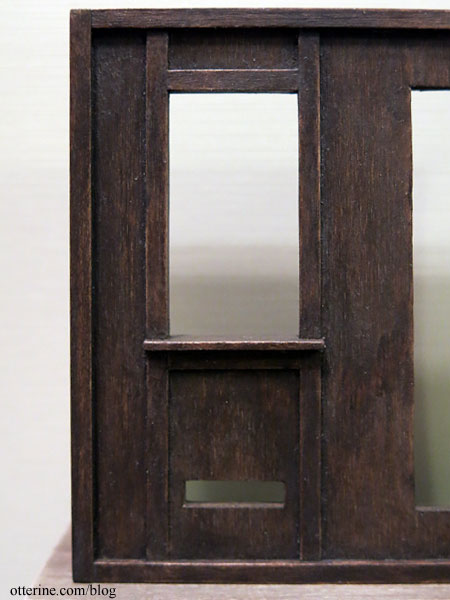
For finishing, I’ve opted for Bittersweet Chocolate mixed with Staining Medium, both by Americana. Actual stains can be harder to work with in small spaces, and the Staining Medium makes paint behave like a stain without the fumes or the long drying time. There’s the benefit of stained wood grain without as much mess. Acrylic paint also helps bind the wood fibers to make sanding between coats more effective.
I sanded after the first application and then reapplied to complete the staining portion. For any glue mishaps or large grain, I added undiluted paint. I then sealed the pieces with satin varnish, making the finish less than perfect to add some character.
Painting the pigeon holes was the worst part. Tiny brush, 15 compartments, four sides each, from the front, then the back – two coats of paint, one coat of varnish. And, they still need touching up. Oy. Good thing the tiny mail will distract. :D
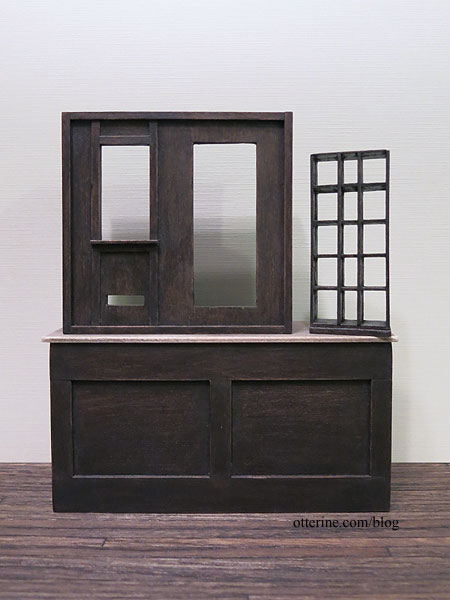
I did paint the first coat on the countertop followed by sanding, though I have work to do on that before I can finish it. It won’t be a contrasting lighter tone in the end.
Categories: Ivy Hollow RFD
September 28, 2019 | 0 comments
NOTE: All content on otterine.com is copyrighted and may not be reproduced in part or in whole. It takes a lot of time and effort to write and photograph for my blog. Please ask permission before reproducing any of my content. (More on copyright)

Ivy Hollow – tiny stamps and a postal cat
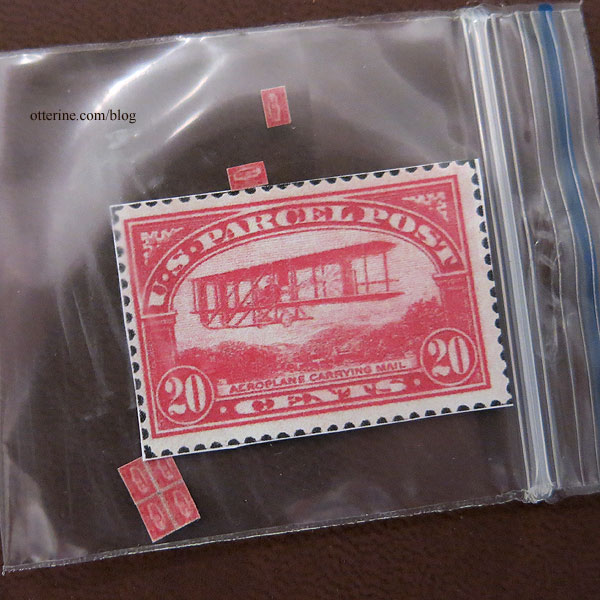
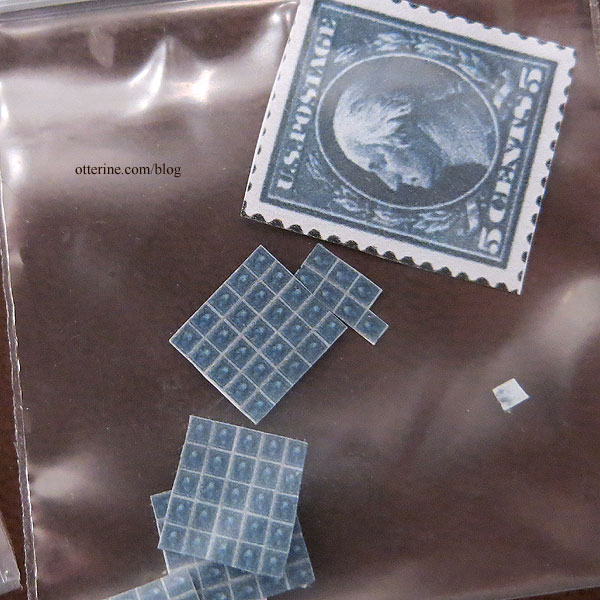
As I was building, the delightfully talented Anna sent me some mini stamps she made. She included real life size prints of the original inspirations as well.
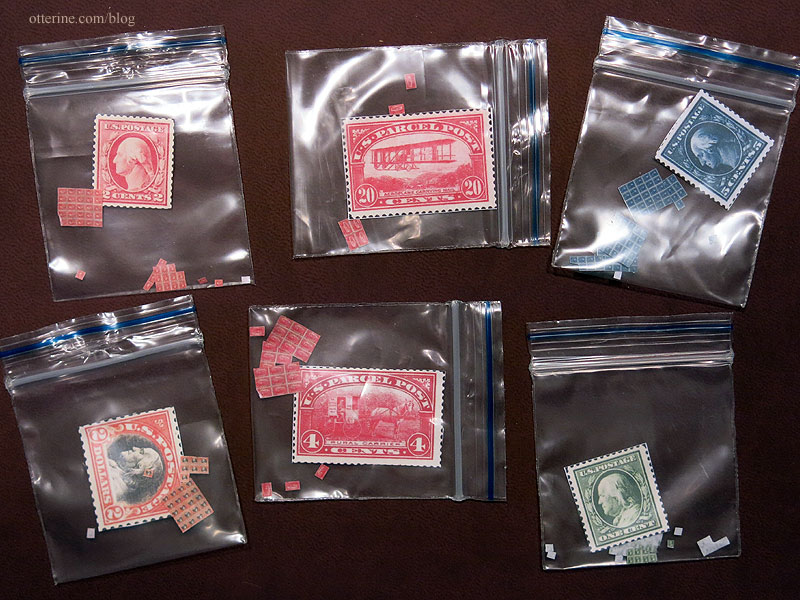
One has a biplane in honor of The Aero Squadron Lounge.
Another has an RFD wagon.
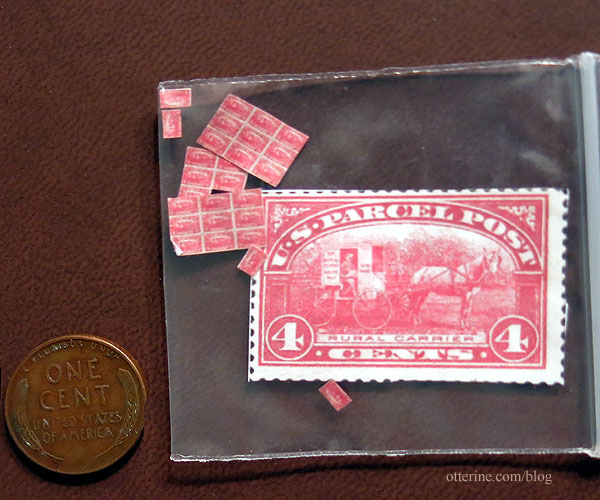
There’s even a book to keep them organized for the postmaster. :D
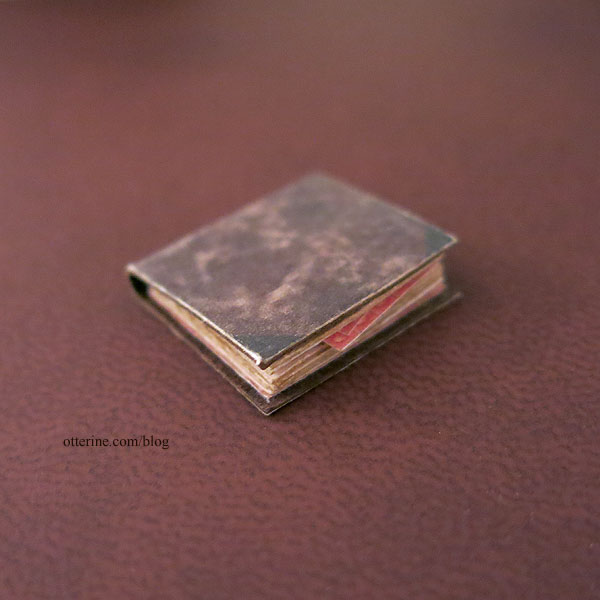
Thank you, Anna, for your wonderful and generous gift!
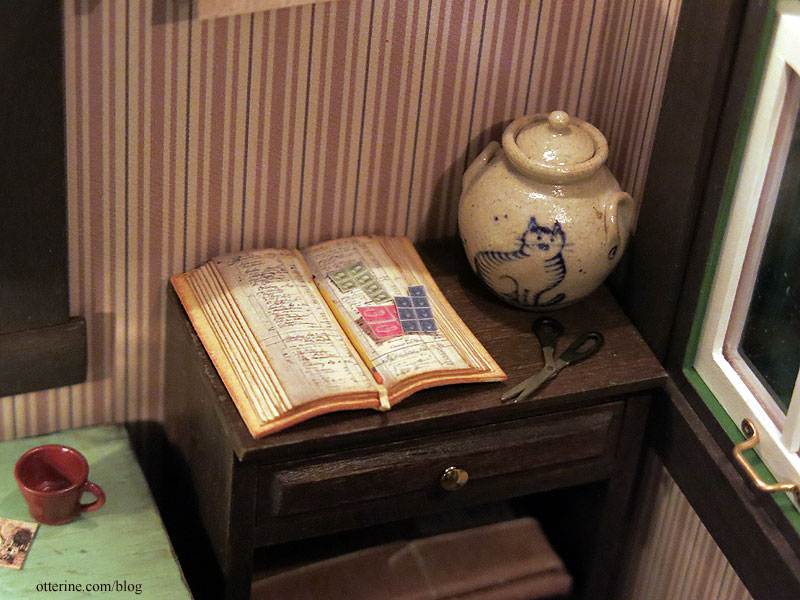
I’ve set a few on the ledger from Looking Glass Miniature. There’s also a cat food jar by Jane Graber for when Chester gets the munchies.
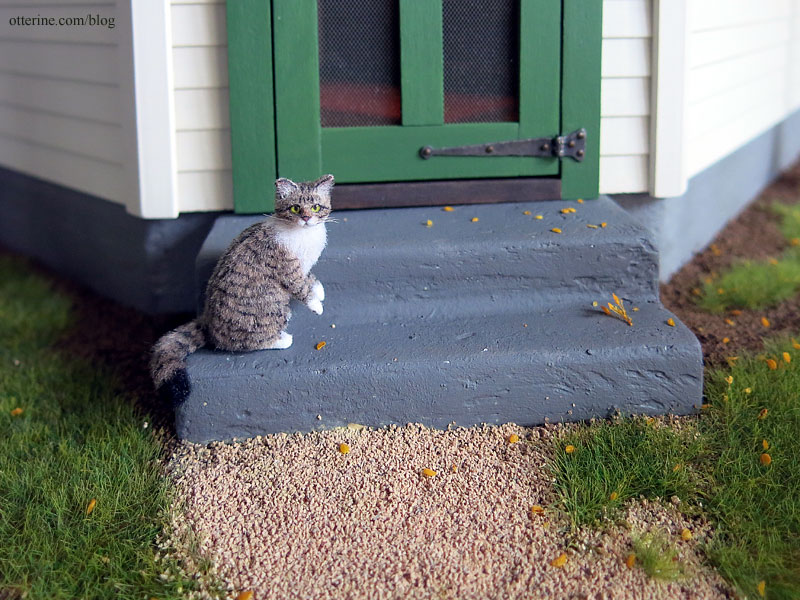
And, you know cats do! Chester was made by 2014erok. I had so much fun playing in the mini dirt this time around – the landscaping got to be a lot less manicured.
Categories: Animals and birds, Ivy Hollow RFD
December 19, 2019 | 0 commentsMaking a 1/12 scale horse – part 5
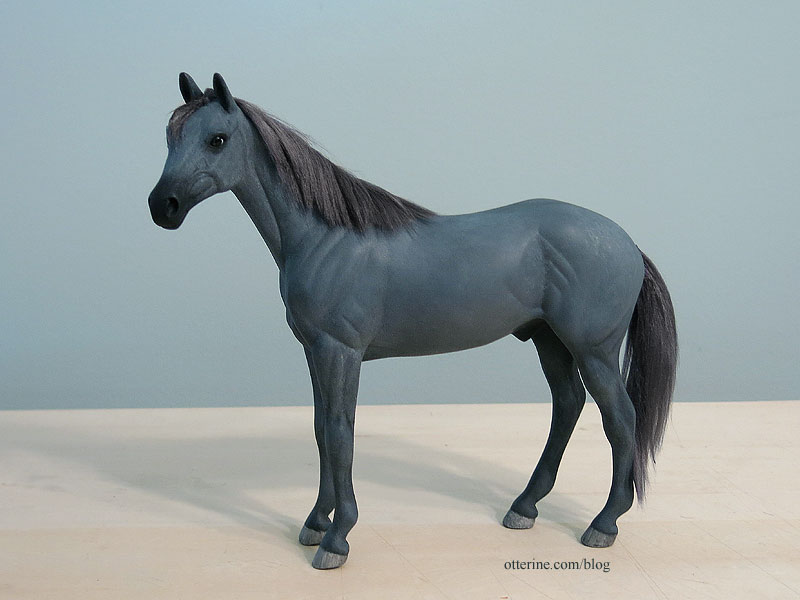
Continuing work on the 1/12 scale model horse. After the initial primer coat, I fine-tuned the body and then did a final primer coat.
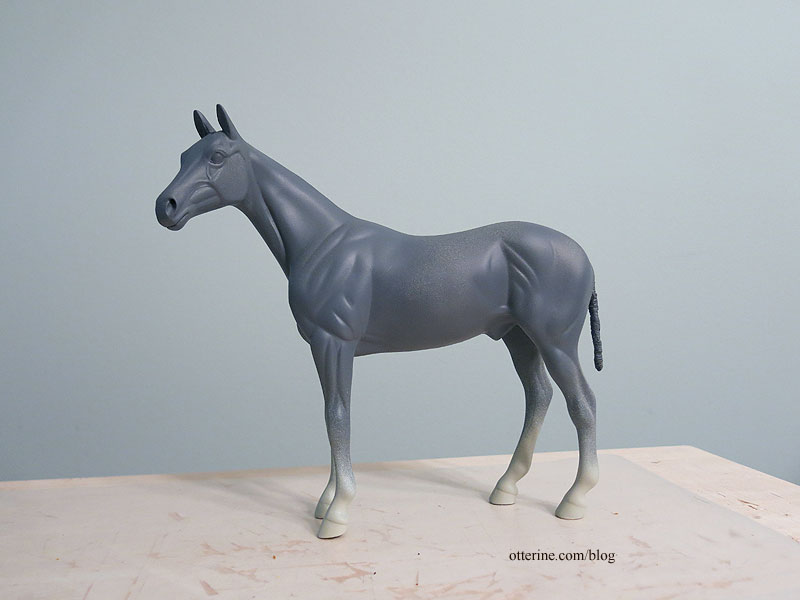
I started the final paint with some shadowing. I thought he looked like Batman right here.
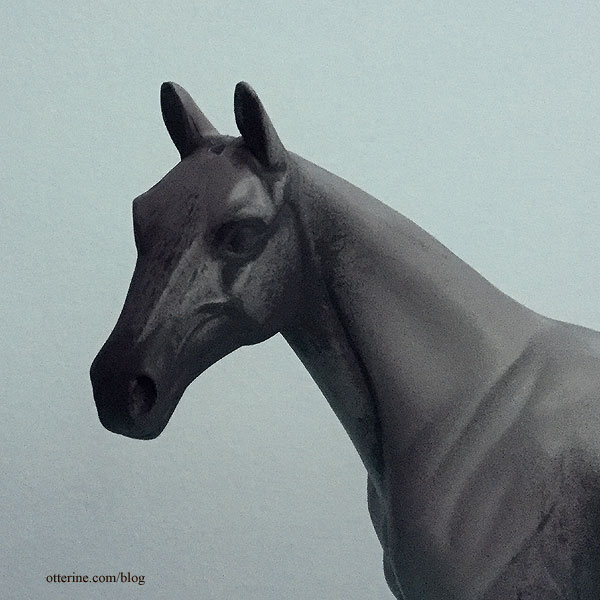
The hair was accomplished with multiple layers of paint using small and large brushes. I made a lot of it up as I went.
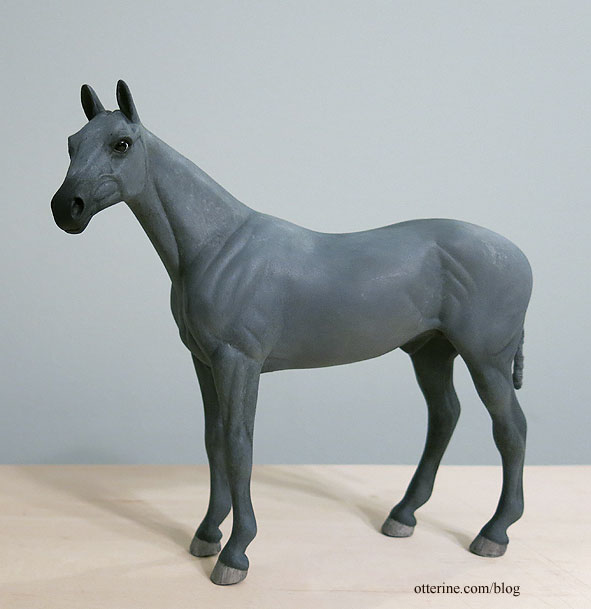
Some areas on the body turned out better than others, and I can always rework later…but I was pleased enough to move on. I do really like the face.
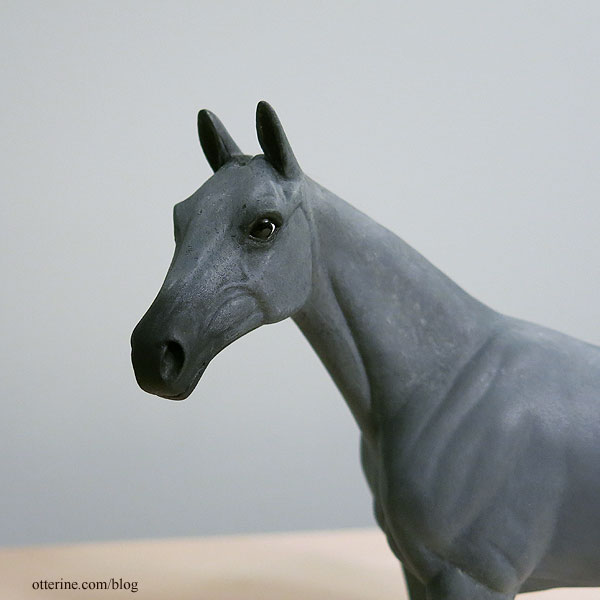
The mohair I bought photographs as muted purple, but it looks charcoal grey in person. Even with the mismatched color, I can see just how having the mane will transform the look overall.
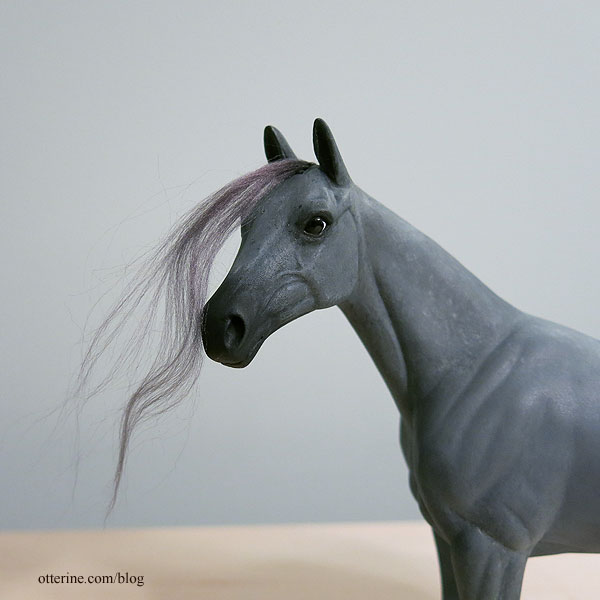
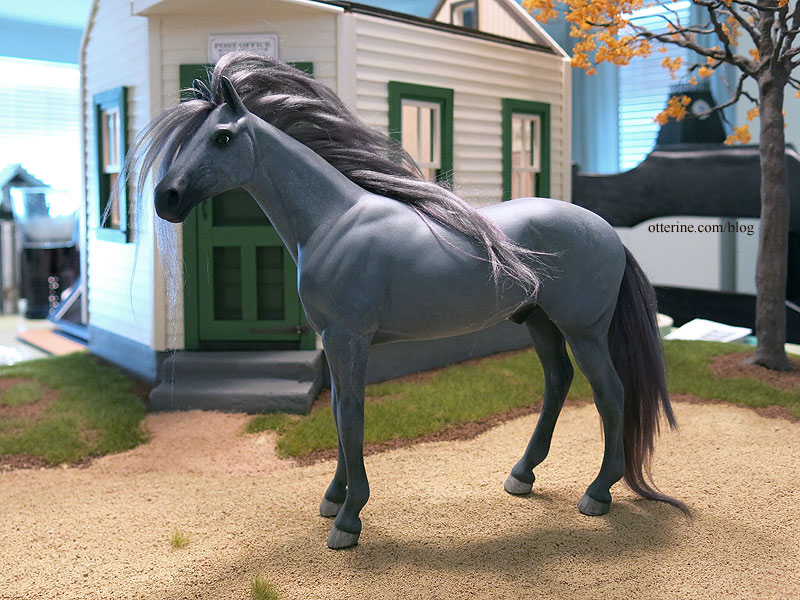
Since I was on a tight deadline, I completed Jebediah with the purple grey mohair, but I can always redo the mane and tail in the future. Here’s what he looked like right after the hair was applied.
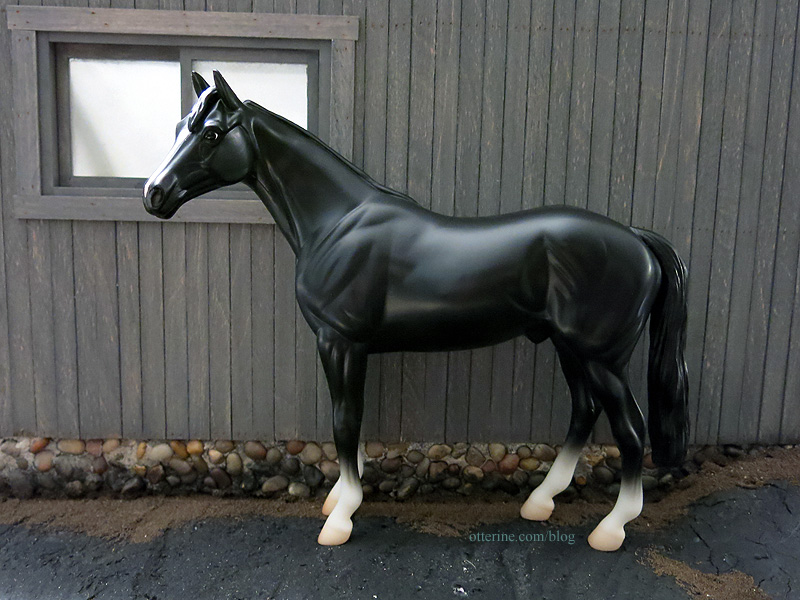
As a reminder, this is where I started – a 1:12 scale Breyer Thoroughbred.
The fibers curled a little when I wet them for styling and cutting, but they flattened out as it dried. It’s less wispy and artificial than it looked out of the package. I’m not a fan of the purple hue of the hair (below I’ve color corrected in PhotoShop, which is a pain), and I think a darker hair would look better overall. This was my first time hairing a horse, and I think it turned out pretty well. :]
Modeled with a driving harness by Tiki from Kulp Model Horse Store. I would like to make my own harness someday, but it is definitely an art that requires a good deal of study and practice.
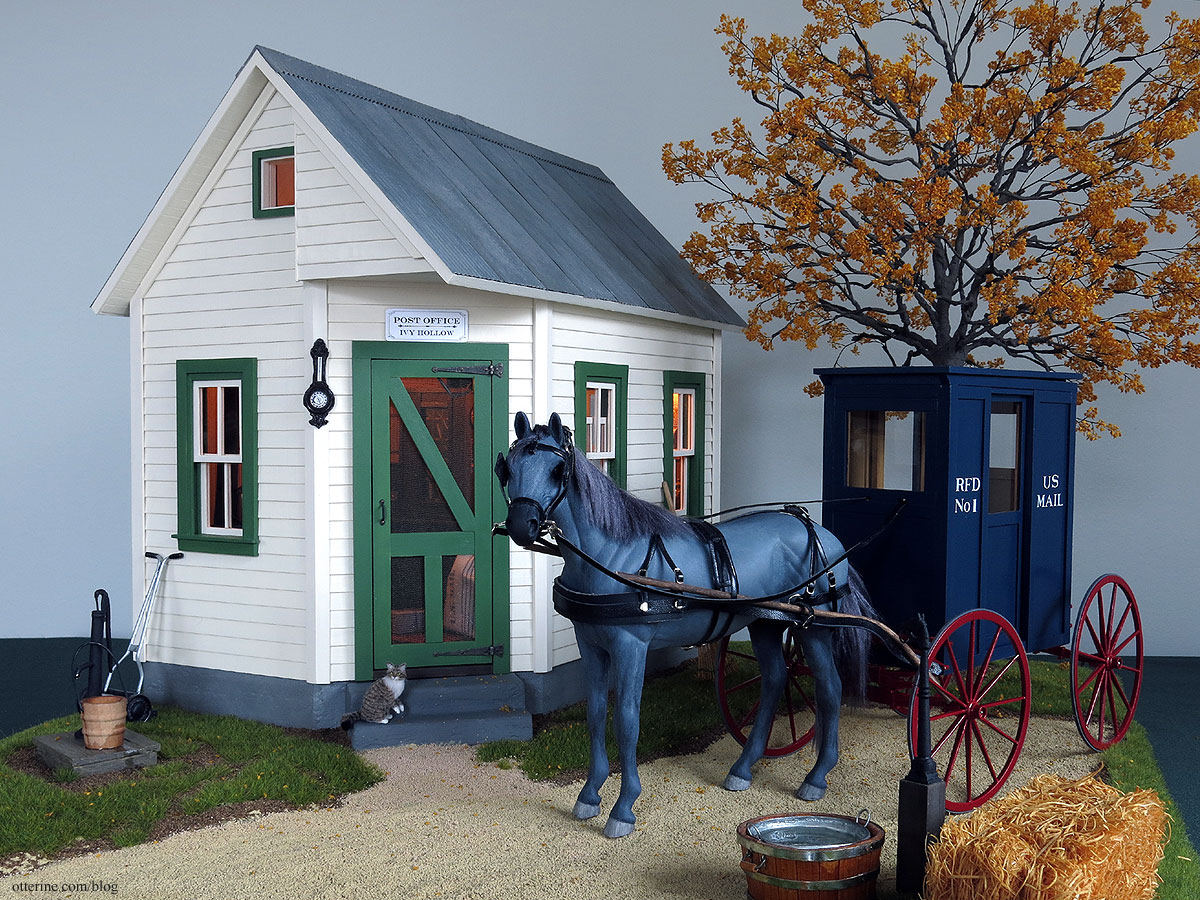
Categories: Animals and birds, Ivy Hollow RFD
December 15, 2019 | 0 commentsIvy Hollow – windows
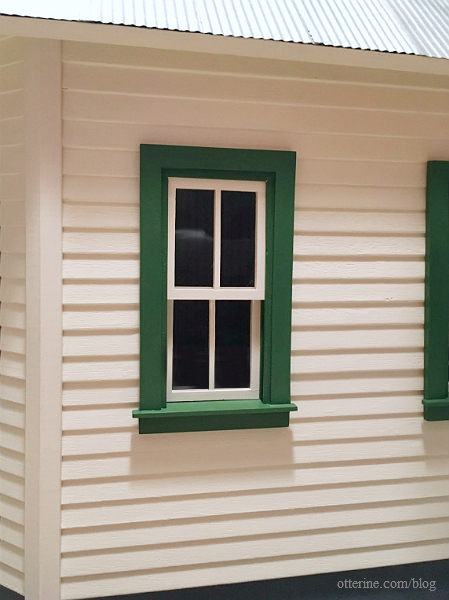
I’m using five attic windows for my tiny post office since they are in better proportion to the building overall. I love working with pre-made components for their time-saving appeal, but they do require some work to get in top shape. One of my favorite aspects is the way the windows come apart completely for finishing. I label the parts per window (including direction, too) since I already know they fit well right out of the package. Labeling them keeps the parts straight during the painting process.
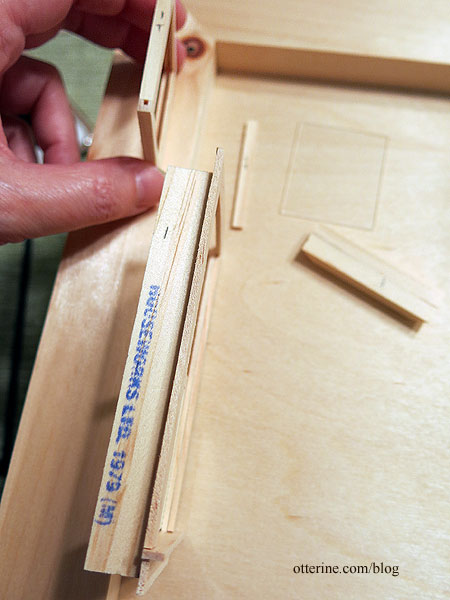
I added 1/16″ thick strip wood under the edge of the outer casing since my walls were thinner than the required depth.
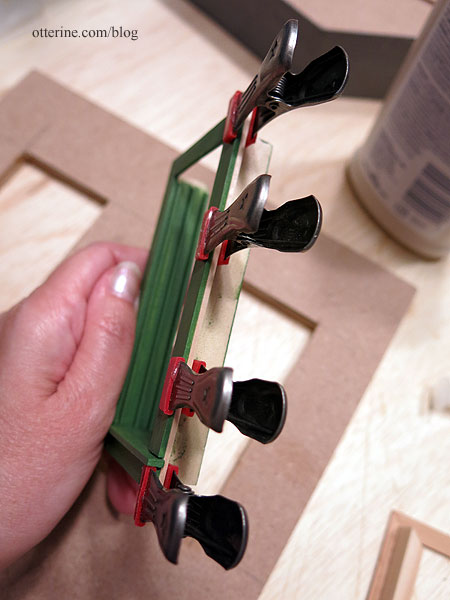
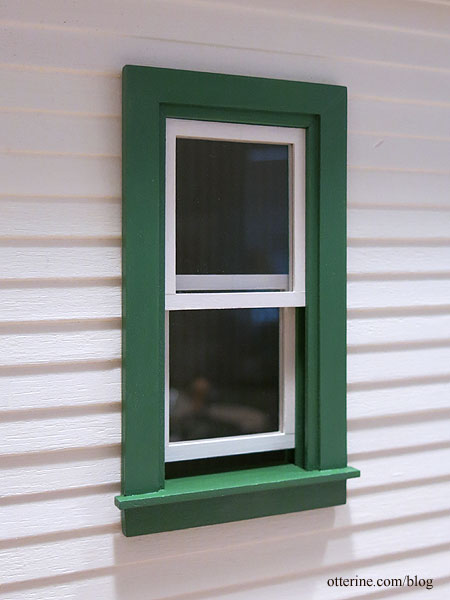
I painted the frames Woodland Green satin paint by Americana. Here you can see the added thickness of the outer frame isn’t even noticeable or out of proportion.
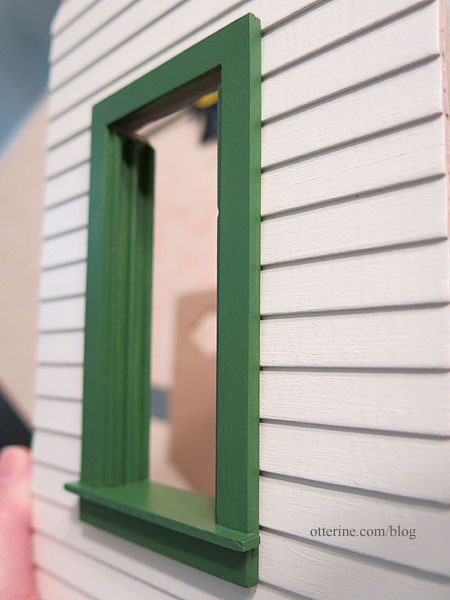
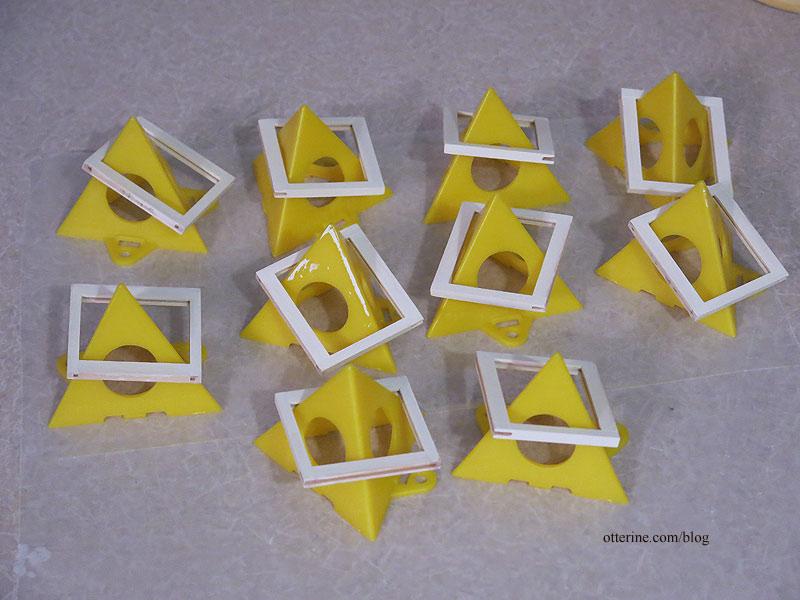
I painted the sashes Vintage White by Folk Art. Here I’m using my Painter’s Pyramids to hold the sashes while they dry (this previous post shows how to use them when painting walls to counteract warping).
This is the first time I’ve painted a window two different colors! I doubt I will ever do this on a deadline again.
But, my original inspiration had two-tone windows.
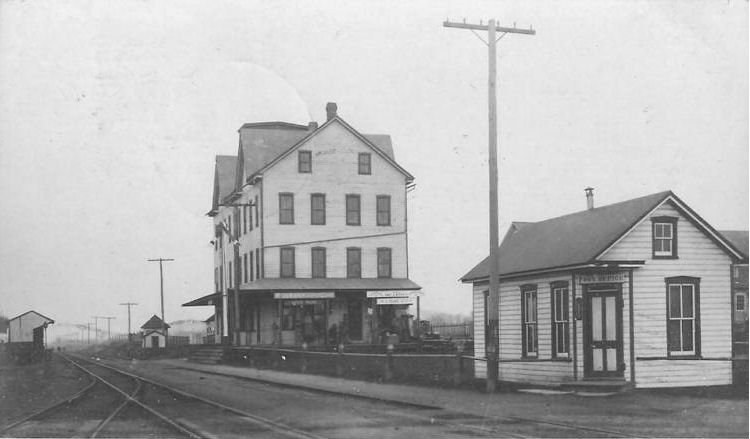
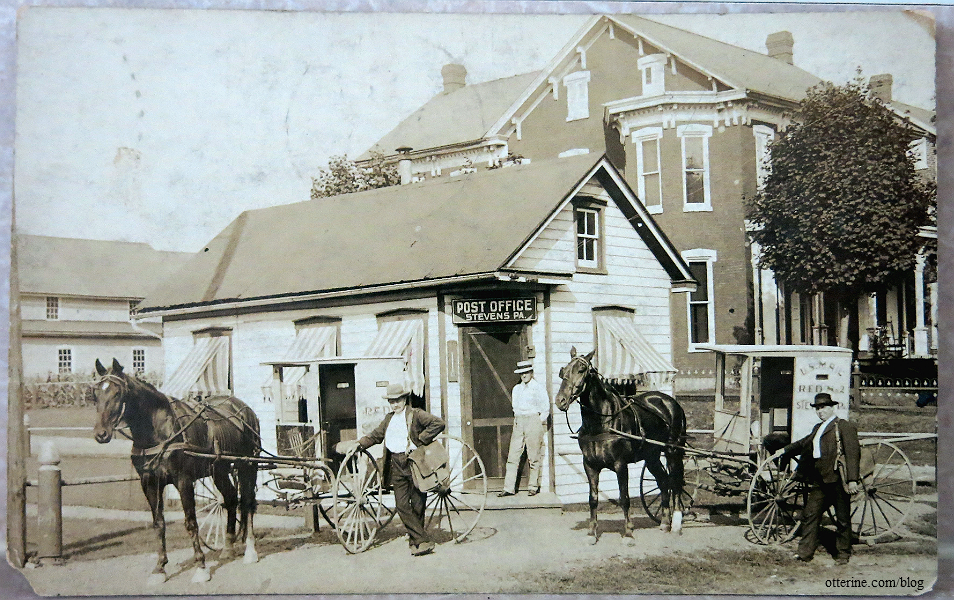
image from West2K, used with permission I’m skipping the awnings (shown in the original postcard below) not necessarily for time constraints as I would love to make awnings, but you will be able to see into my post office only through the windows and front door unless you lift off the roof. Adding awnings would restrict viewing.
I ended up adding the mullions, and it transformed the windows instantly. :D
Categories: Ivy Hollow RFD
December 11, 2019 | 0 commentsIvy Hollow – autumn tree
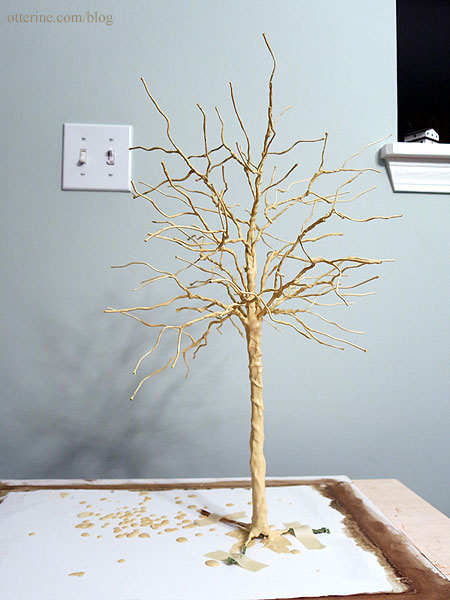
I’m working on another tree this year. I used the same wire and putty technique I’ve used in the past for the trunk, and candytuft for the foliage – notes at the bottom.
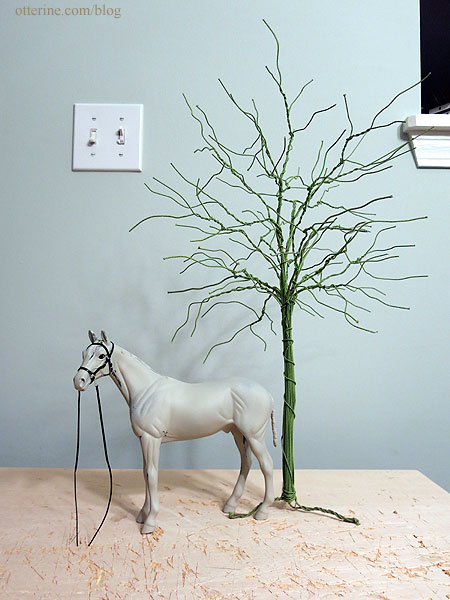
The first layer of putty is on with at least one more to go, where I will add texture.
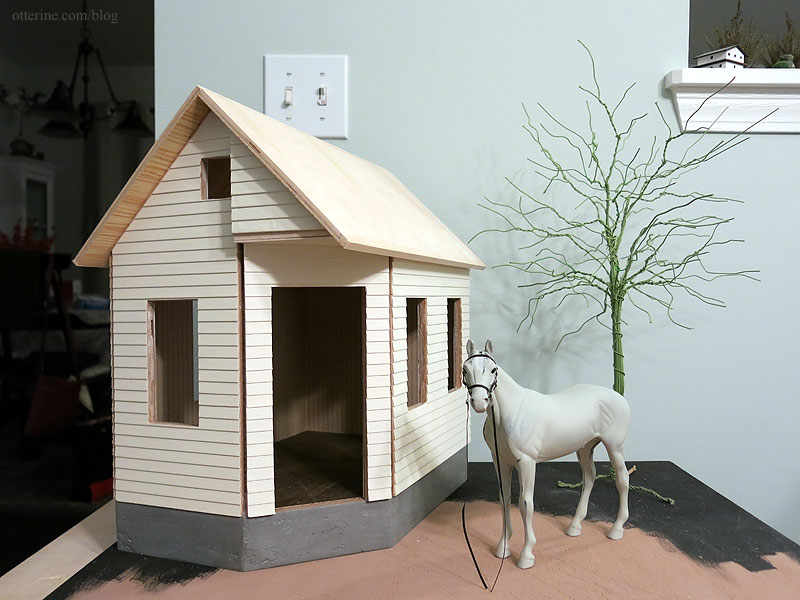
I like how the tall tree forces the perspective. Jebediah looks more in scale with the tree in place.
I used candytuft for the foliage. This is autumn gold candytuft from Scenery Solutions (no longer available).
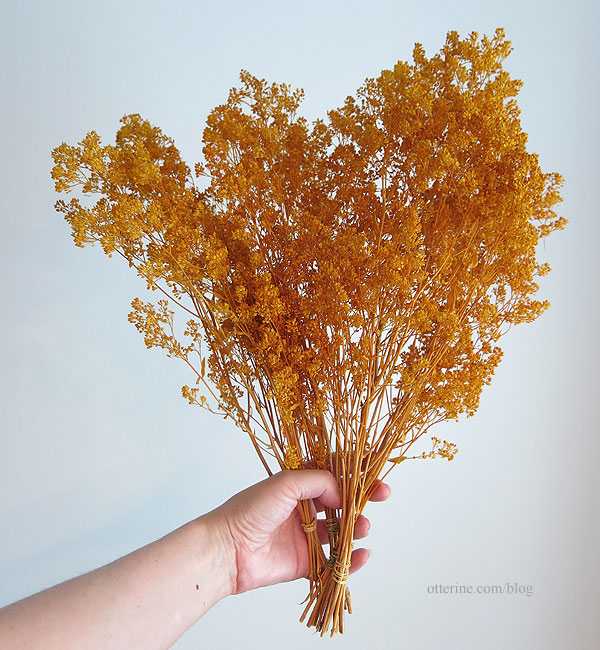
I painted and detailed the trunk and separated the foliage branches from two bundles of candytuft. Too bad I can’t just say “alakazam” and have the foliage appear on the tree.
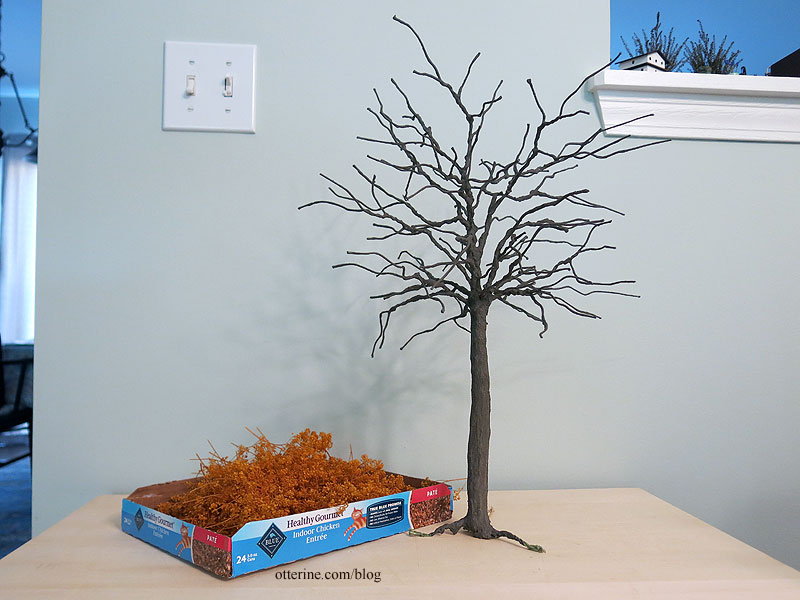
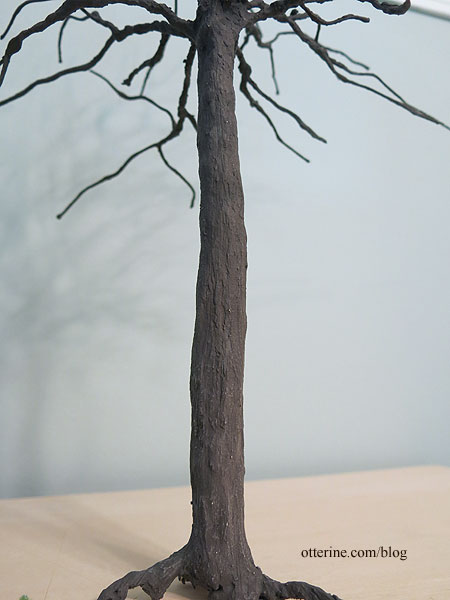
The trunk is somewhere between grey and brown. I mix at random and fine-tune until I get there since there isn’t a good color straight out of the bottle.
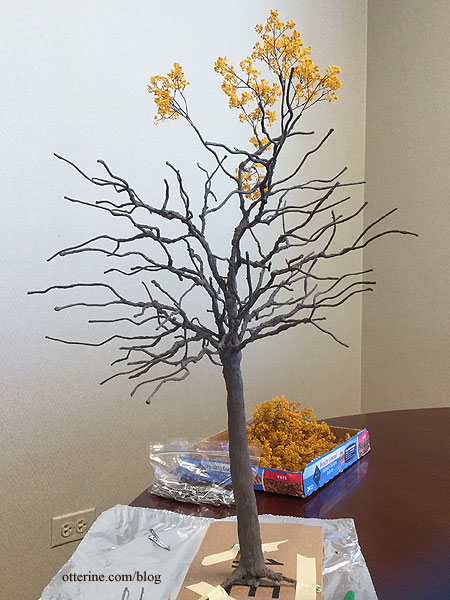
Good thing I chose autumn, so my tree can be sparse.
And, finished….
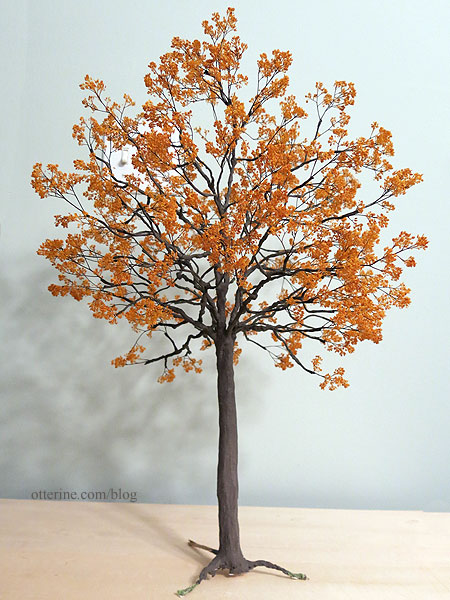
Love looking up through the branches.
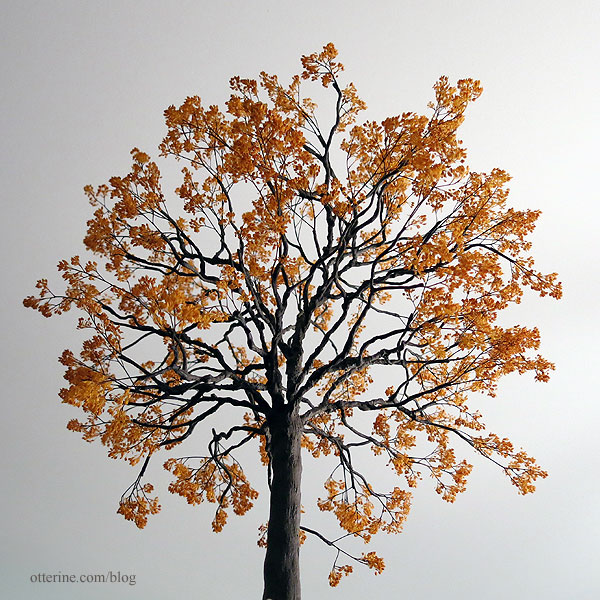
———
Notes: Link to the first tree I made using this technique – follow the links in the first sentence back through the process. For the trunk, a good starting source if you can find it is the DVD Master Miniaturists: Landscaping Primer with Diane Myrick. I found mine through interlibrary loan. This whole series is just awesome! For the foliage, I used a tutorial by Connie Sauve on using candytuft, but the tutorial link is no longer active. I bought the candytuft from Scenery Solutions, but they no longer sell it.Categories: Flowers, plants, and trees, Ivy Hollow RFD
December 11, 2019 | 0 commentsIvy Hollow – tin roof
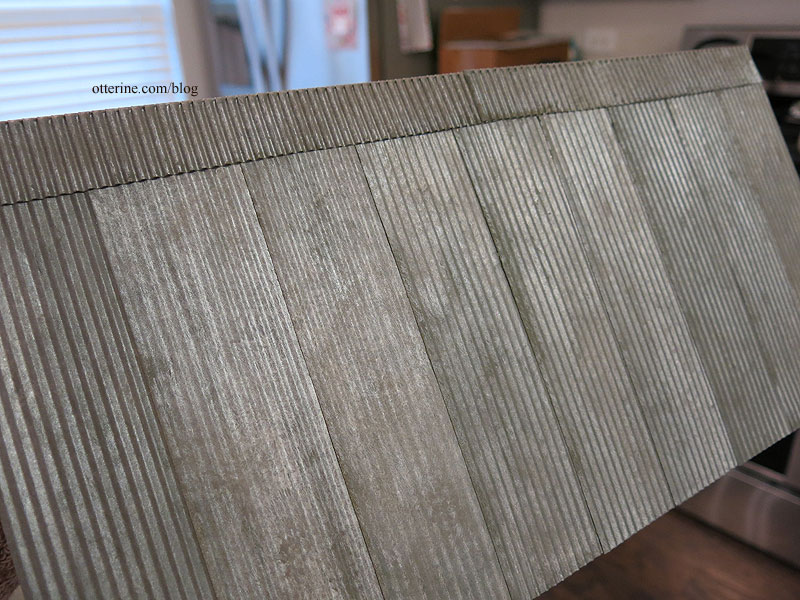
I’ve made a rusted roof in the past, but this time I needed something that wasn’t new but wasn’t too old. I used QUICKUTZ We R Memory Keepers adhesive backed metal sheets. Back in 2010, I purchased a similar material in a 12-pack from Hobby Lobby. I would say the current ones are very similar in quality though fewer sheets come in the pack for a higher price.
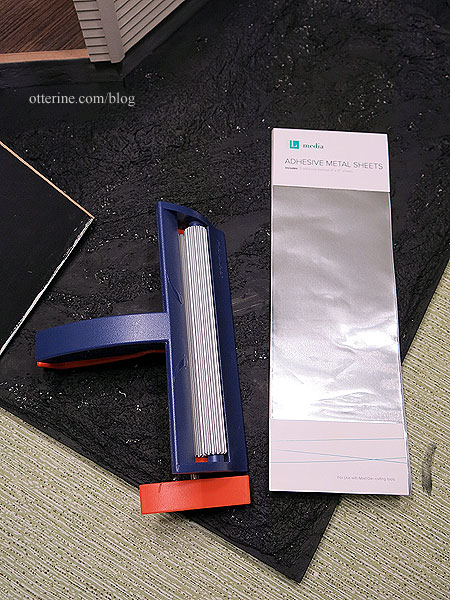
I used a paper crimper by Fiskars, though they have others on the market now that will make wider sheets. I was able to make my old one work for my current project.
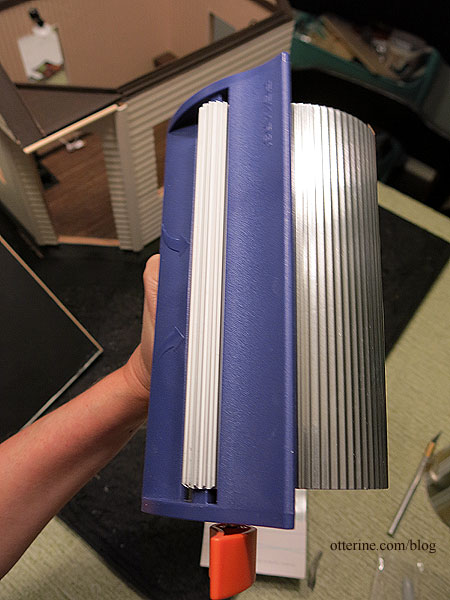
The material is very shiny as is.
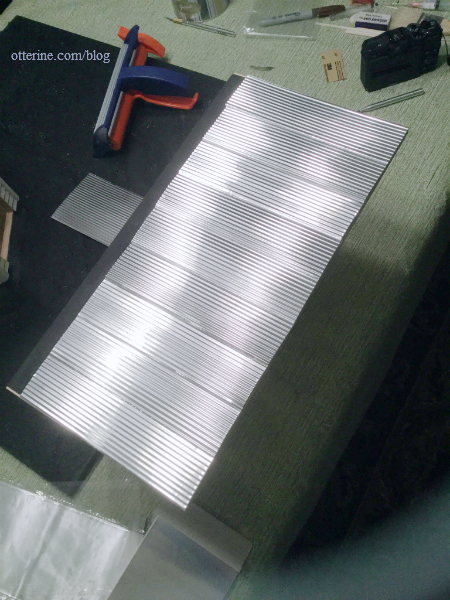
I used Rust-Oleum Self-Etching Primer once I had the pieces measured and cut.
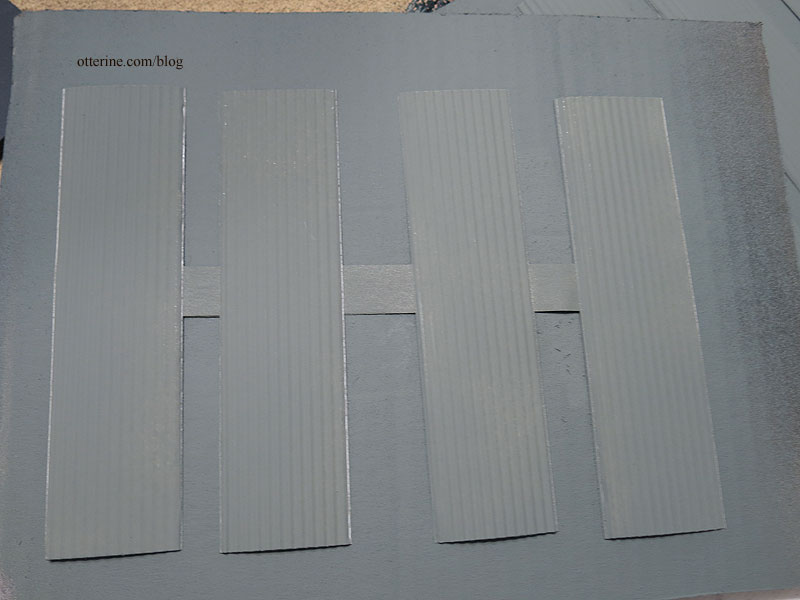
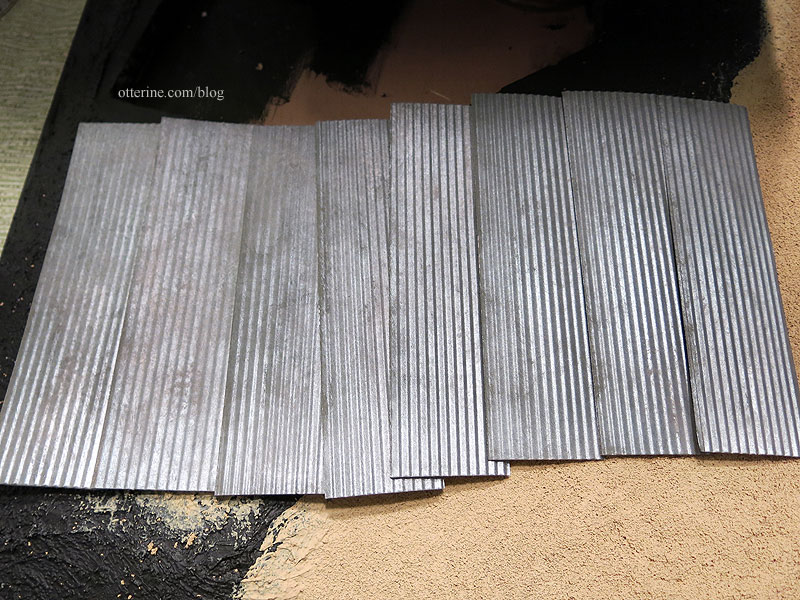
Once that was dry, I stippled on a layer of Liquitex silver and then a layer of Neutral Grey mixed with Staining Medium, both by Americana.
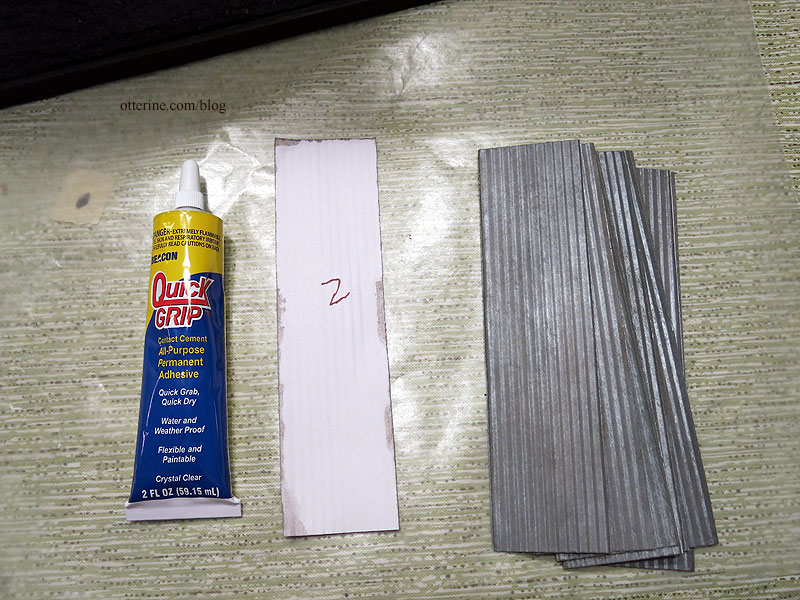
I had labeled the prepared sheets and used Quick Grip as the main adhesive. It’s not the easiest glue to use, but it gives you some time to work. I supplemented the glue with Aleene’s Quick Dry and super glue gel. (As an Amazon Associate, I earn from qualifying purchases.)
I like the middle ground finish – not new, not old. :]
Categories: Ivy Hollow RFD
December 9, 2019 | 0 comments
NOTE: All content on otterine.com is copyrighted and may not be reproduced in part or in whole. It takes a lot of time and effort to write and photograph for my blog. Please ask permission before reproducing any of my content. (More on copyright)


