
Miss Lydia Pickett Cottage Clock – part 7
Completing work on the Miss Lydia Pickett Cottage Clock in 1:12 scale by Robin Betterley’s Miniatures.
A dear blog reader suggested the face didn’t look right, and I thought it was just me who felt that way – or because the hands weren’t on yet. So, I decided to print two more versions with smaller dials. You’ll see this revised face for the rest of the build. Instead of digging out the pasted face, I just added another cardstock circle to bring it forward a bit more and pasted the new face over the top. I applied a thin layer of Delta Ceramcoat Satin Varnish as a sealer for the paper face and previously applied artwork adapted from The Graphics Fairy.
The hands are Susanne Russo brasses, a lovely find of new old stock at a local show. The package indicates the color is black, but they are brass. One side was tarnished, so I used that for my clock.

I drilled winding holes as accents, lining them with a bit of paint. I added tiny bits of black wire at the top and bottom to allow the acrylic to float over the hands.

I cut the middle face trim to accommodate an additional 3/16″ hinge.

There’s a small nail for the knob. I dabbed these with Taupe Metallic by Folk Art to match the other detailing. Since the hinges don’t function, the paint won’t matter. Now it looks like you can open the glass to wind the clock.
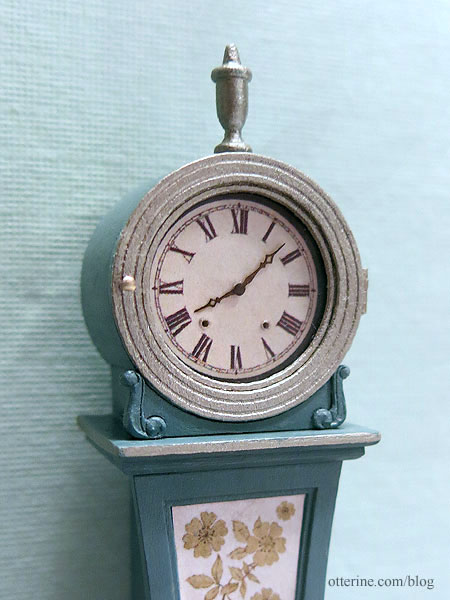
The acrylic that came with the kit had an imperfection that was large enough to bother me. Instead of digging out the Cricut, I managed to cut a new insert by hand. :D

I added a small keyhole from a Classics door knob set and fashioned a key from a laser cut brass hook from The Ironworks.

This is one of my favorite details. :D

Here you can see the door hinges on the body.
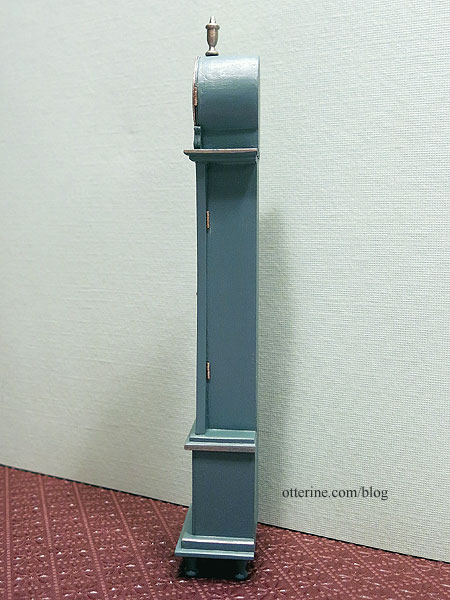
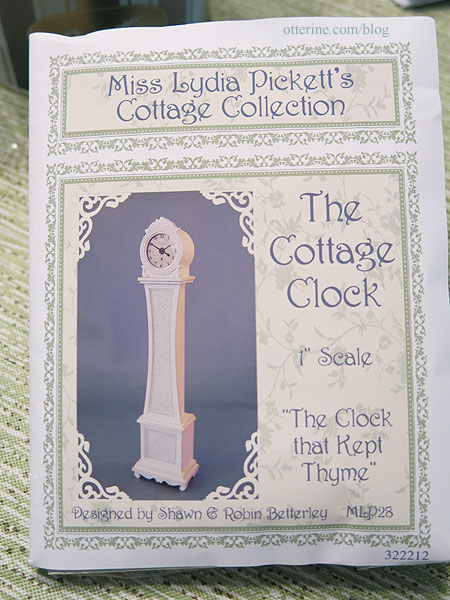
Here’s a reminder of what the kit photo suggested for finishing.
And, here is my finished version. :]
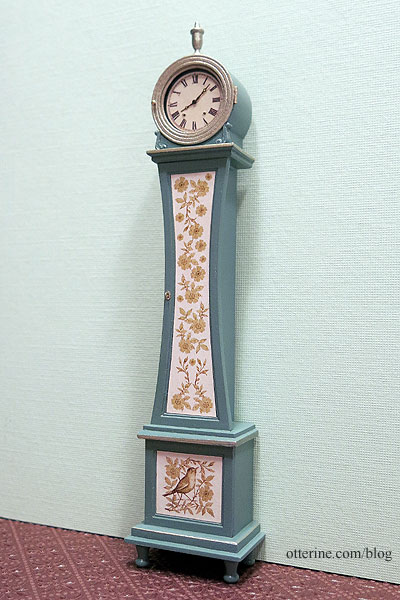
I had a lot of fun with this kit and wish they were still available.

Categories: Half Clocked
May 23, 2018 | 0 commentsMiss Lydia Pickett Cottage Clock – part 6
Continuing work on the Miss Lydia Pickett Cottage Clock in 1:12 scale by Robin Betterley’s Miniatures.
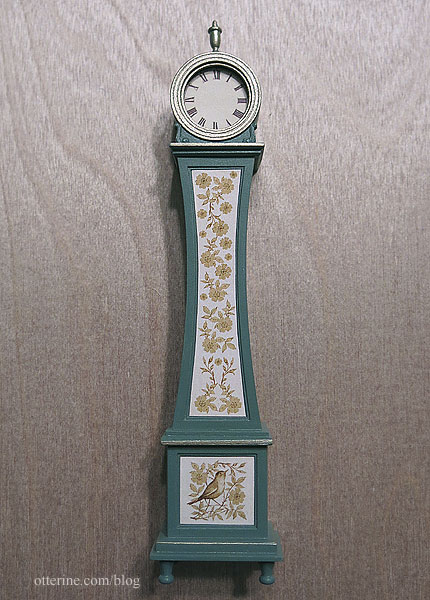
After sanding down the gesso primer coat, I painted the clock Greenscape by Folk Art and finished with Delta Ceramcoat Satin Varnish. The artwork for the body and base is from The Graphics Fairy. I used the image as is for the base but then used elements from the original to create a design for the body in PhotoShop.
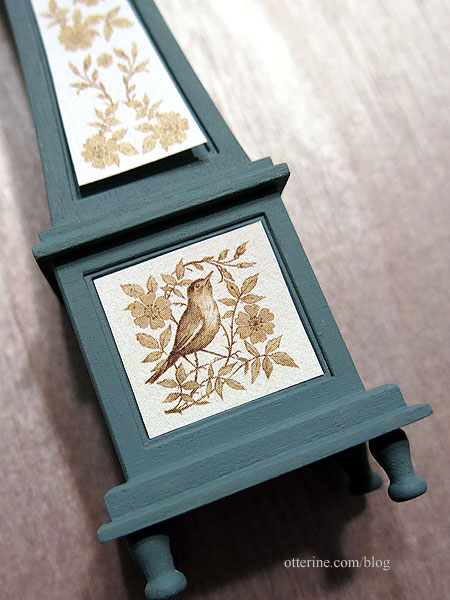
I printed on paper and then cut the pieces to fit. The inserts were later glued in place using Mini Graphics Wallpaper Mucilage. As you can see, the clock face pendant no longer worked since it was darker than the artwork and seemed to be lost.
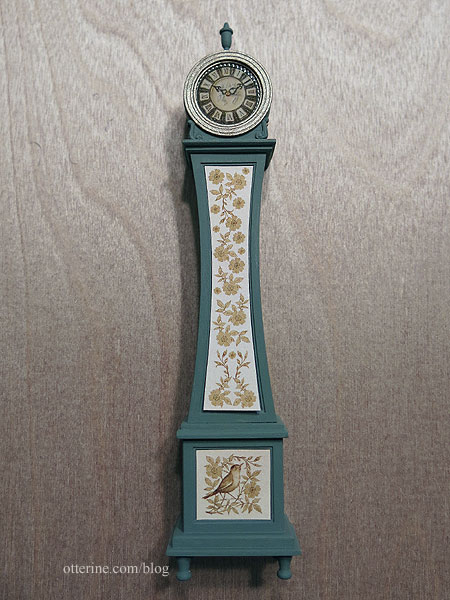
I printed a regular clock dial in a similar color to the body art as a replacement. Much better.
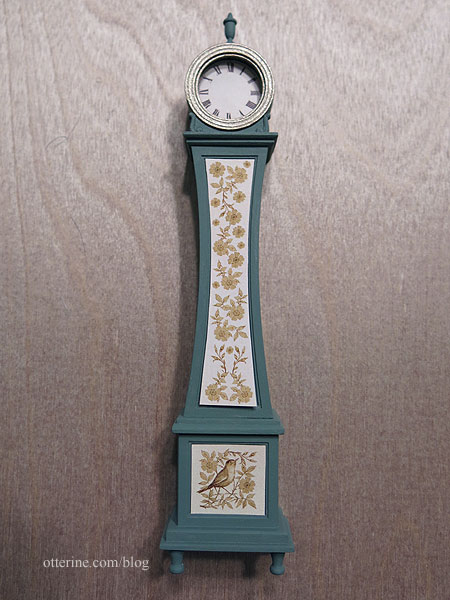
I painted the clock face trims and the finial Taupe Metallic by Folk Art. I painted some accents in the same color on the body and base.
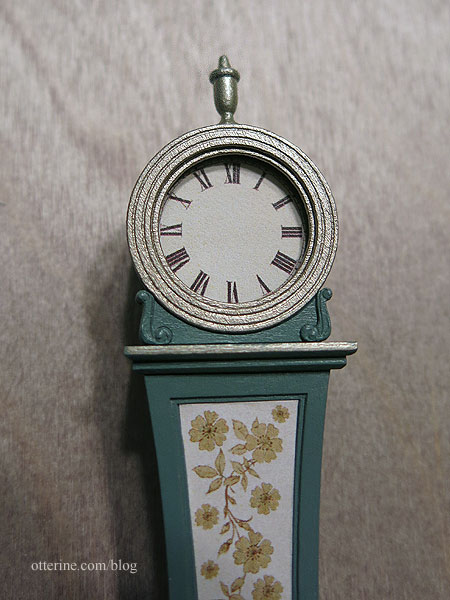
I used the Cricut to cut cardstock circles to fill in the upper hole. I glued these in place with tacky glue before gluing the clock face with Mini Graphics Wallpaper Mucilage.
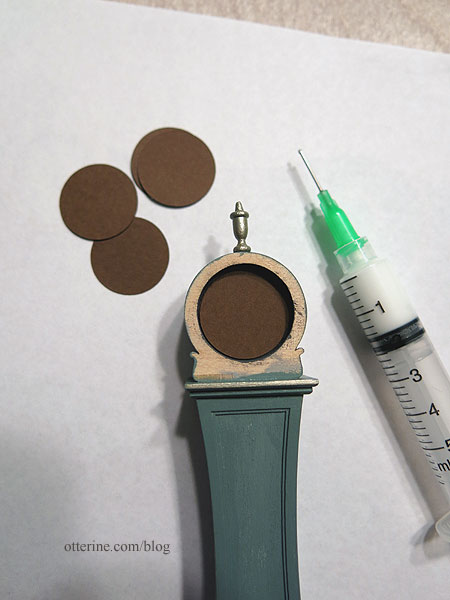
The final steps include adding the hands, the glass insert and other small details that are too much for tonight. :D Back soon…
Categories: Half Clocked
May 22, 2018 | 0 commentsMiss Lydia Pickett Cottage Clock – part 5
Continuing work on the Miss Lydia Pickett Cottage Clock in 1:12 scale by Robin Betterley’s Miniatures.
I primed the main body, finial and feet with gesso. This helped me to see any flaws that needed to be addressed. I rather like the grey. :]
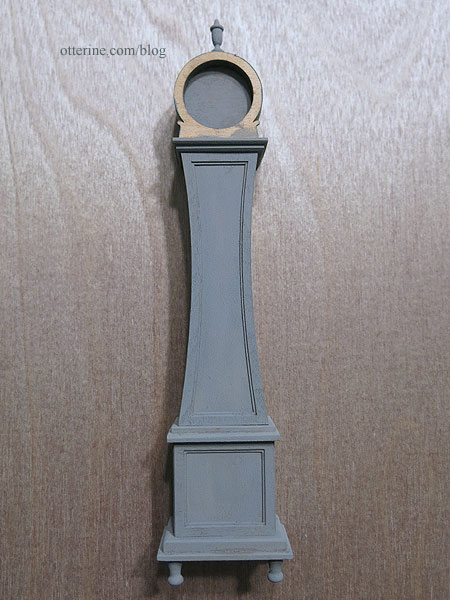
I glued the scroll pieces to the main face trim, leaving the final circle trim unattached. In order to give the scrolls more depth, I built them up with dabs of Golden Molding Paste.
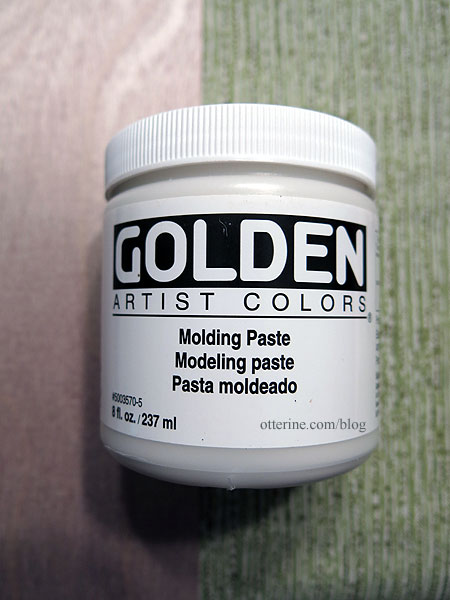
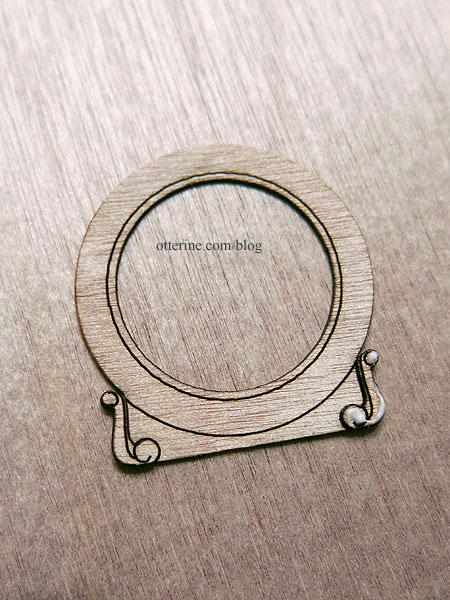
Once primed, they look more dimensional. I’ve painted an initial coat of Liquitex Iridescent Bronze to the circle trims. This will all get some fine-tuning, but it’s a good start.
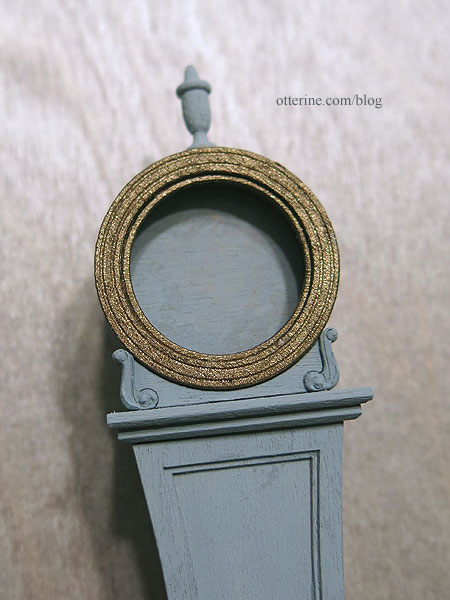
I applied spackling with a toothpick and smoothed it into gaps and partially exposed mortises.
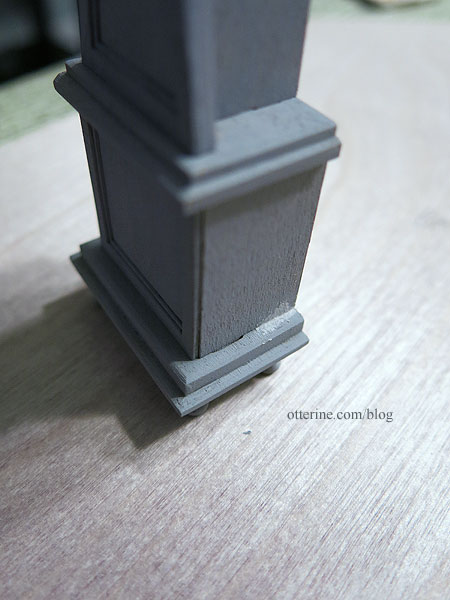
The spackling smooths the edges where multiple layers are joined as well, like the sides of the curved front.
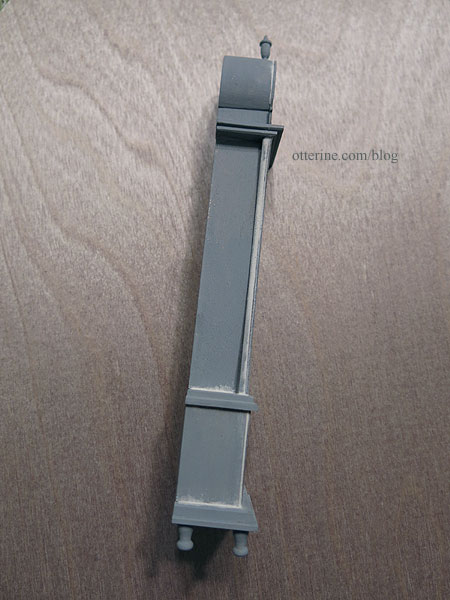
Next up, painting and artwork. :]
Categories: Half Clocked
May 16, 2018 | 0 commentsMiss Lydia Pickett Cottage Clock – part 4
Continuing work on the Miss Lydia Pickett Cottage Clock in 1:12 scale by Robin Betterley’s Miniatures.
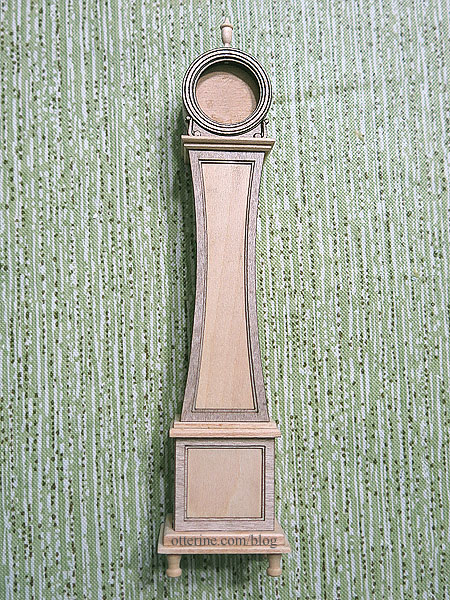
The top has been sanded smooth. I didn’t do the best job keeping the bottom portion straight, but there is trim to cover it. :]
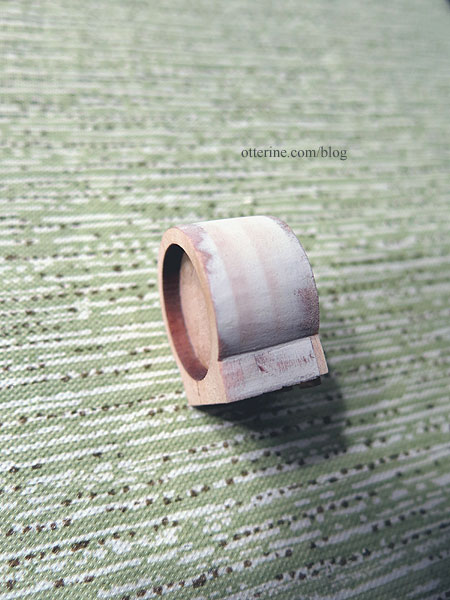
I cut the first layer of trim to a rounded top to match but left the small scrolls on the sides. I could not have left those on the original front piece since I glued it second in line. I think it will still work as delicate detailing since there are two more layers to build it up. You are to leave the clock face trims off until final assembly since they hold the clock face in place. That worked anyway since I want to paint it a different color from the body. I later cut the top scroll on this piece as well.
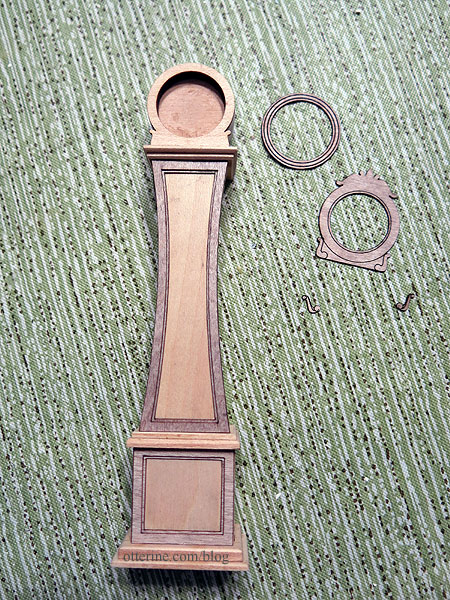
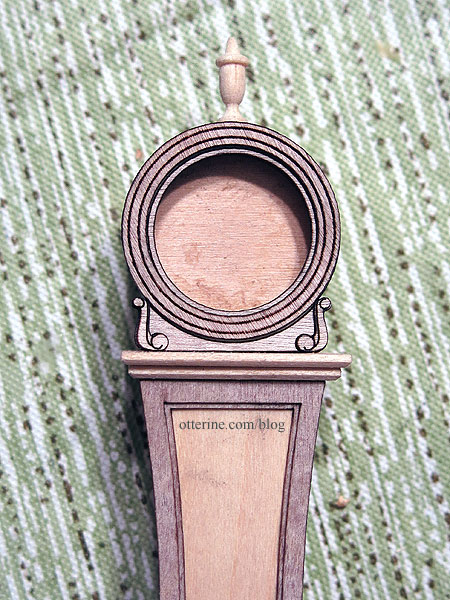
I love the round top, but it is missing something without the scrollwork there. A modified Houseworks finial on top finishes it off perfectly. I drilled a hole to keep it in place but won’t glue it until the end since it’s easier to sand separately (and in case I break it and have to make another). Here the clock face trims are just set in place without glue.
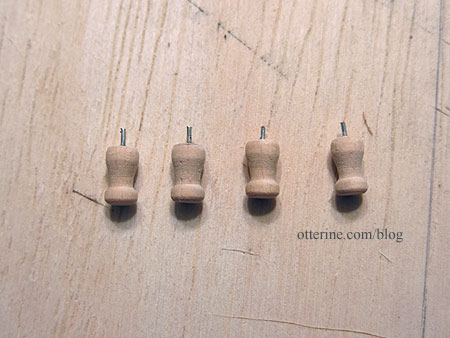
I added pins for the bun feet, leaving these unglued until the end as well.
So far, it’s turning out as I hoped. :D I have some art in mind for the body and base, though the original kit art is still an option. Now I have to visit the craft store to find that perfect shade of dusty teal.
Categories: Half Clocked
May 14, 2018 | 0 commentsMiss Lydia Pickett Cottage Clock – part 3
Continuing work on the Miss Lydia Pickett Cottage Clock in 1:12 scale by Robin Betterley’s Miniatures.
While I was looking through my stash of craft goodies, I found this package of clock face pendants.
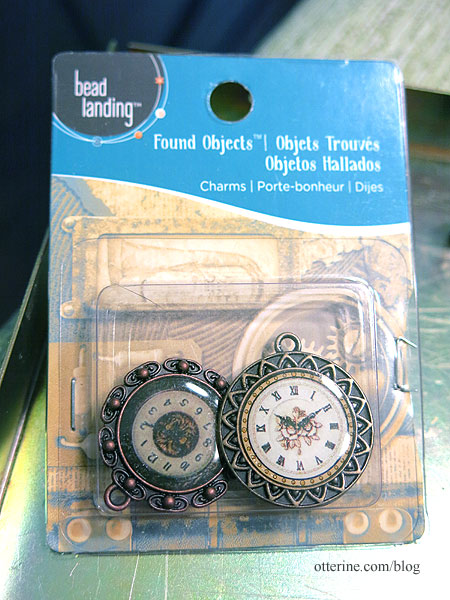
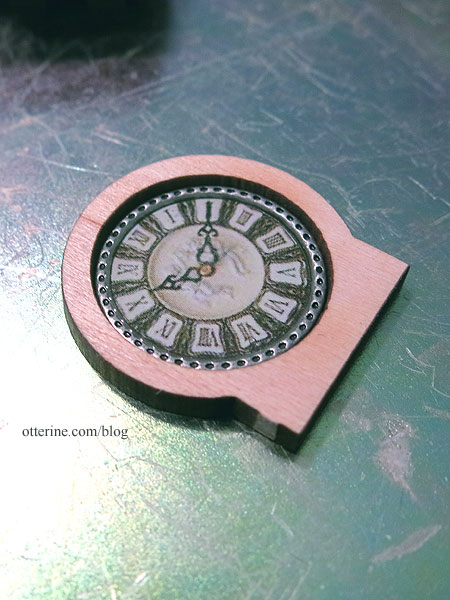
I cut the bails from the sides and filed the edges smooth. It fits perfectly, so perhaps it was meant to be. I’ve set it aside as a strong possibility for the final clock face. I know there are watch movements that can be added, but I’m opting to forego making this a working clock.
The instructions have you bevel the top edge of the base, but I beveled the top edges of the lower base, lower top and body base for added detailing.
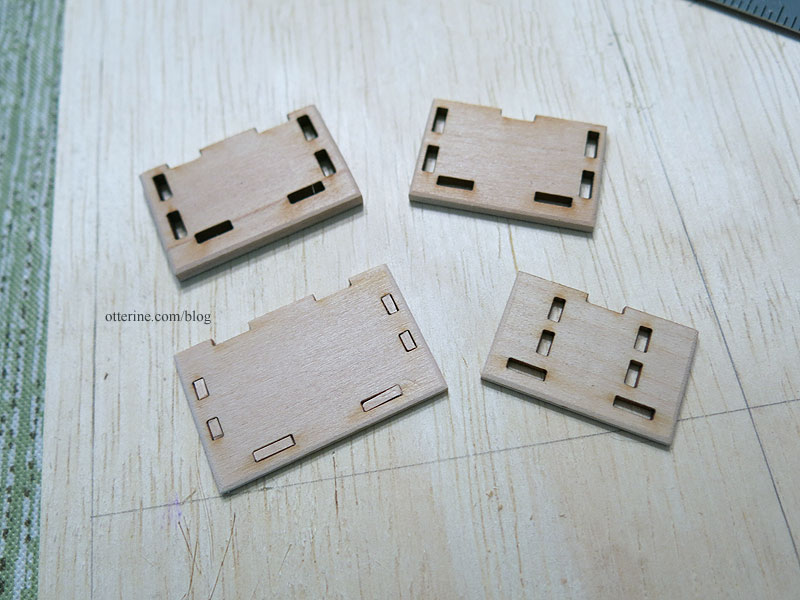
For the top part of the clock, I beveled the lower edge of the body top and head base.
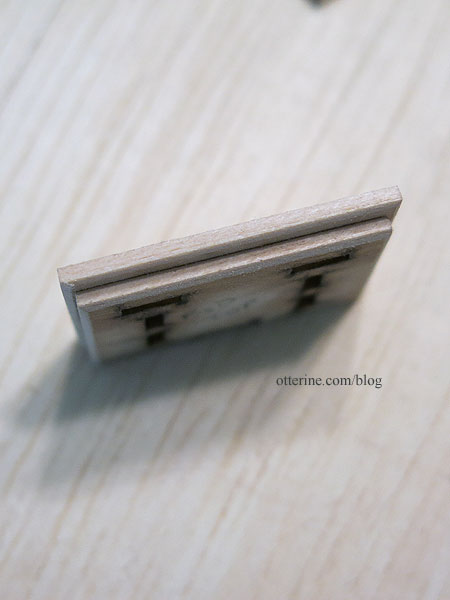
The base and body are simple boxes that needed very little adjustment before gluing.
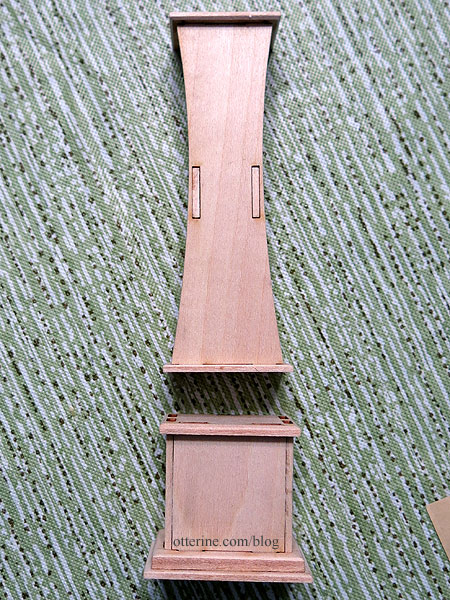
The curved door doesn’t open and making opening doors wasn’t something I wanted to spend time on, but there’s no reason you can’t add faux detailing. :D I took some 3/16″ hinges and made notches to insert them later after painting.
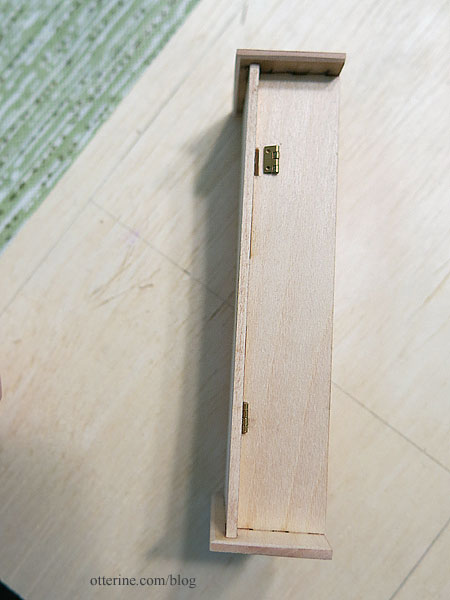
I added the body and base trims, beveling them slightly on the inside edges.
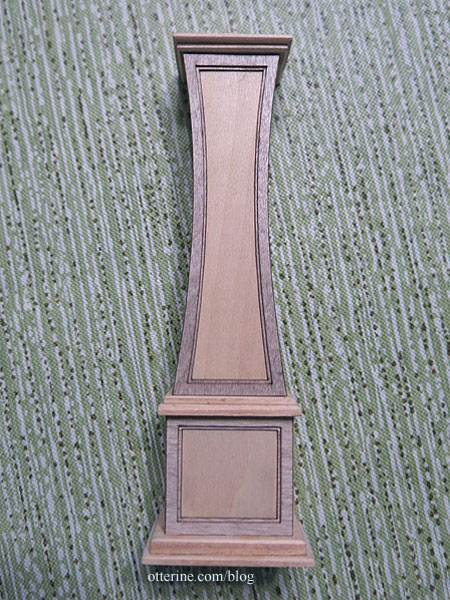
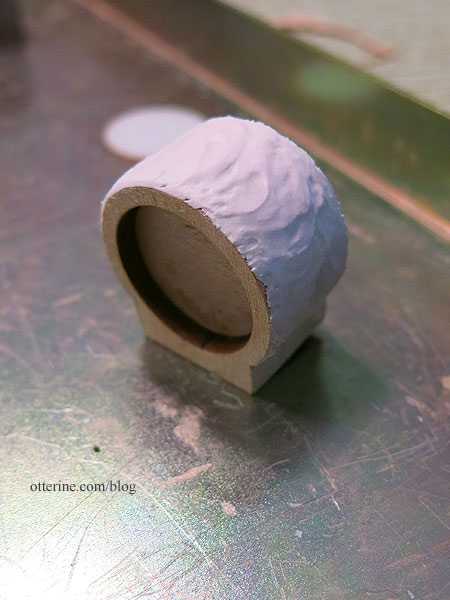
I got the clock head glued together and slathered it with spackling after the initial sanding. It rather looks like a petit four. :D The spackling should make the curve smoother once sanded.
Categories: Half Clocked
May 13, 2018 | 0 commentsMiss Lydia Pickett Cottage Clock – part 2
Starting work on the Miss Lydia Pickett Cottage Clock in 1:12 scale by Robin Betterley’s Miniatures.
The instructions are very clear and have photos to help with assembly. I will make a few changes, though, first in omitting the scrollwork at the base. Instead, I made bun feet from Houseworks 2 1/2″ legs (Item No. 12009).
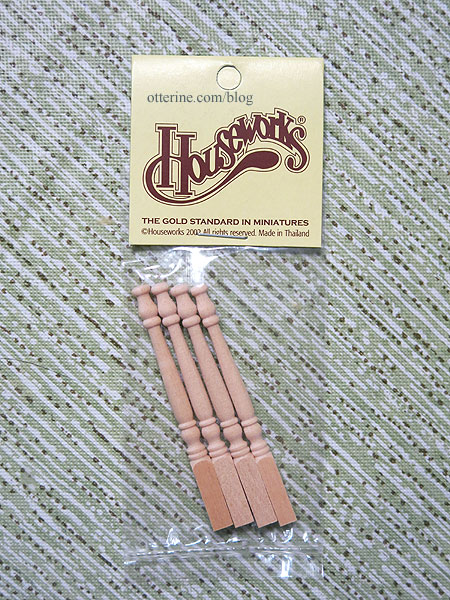
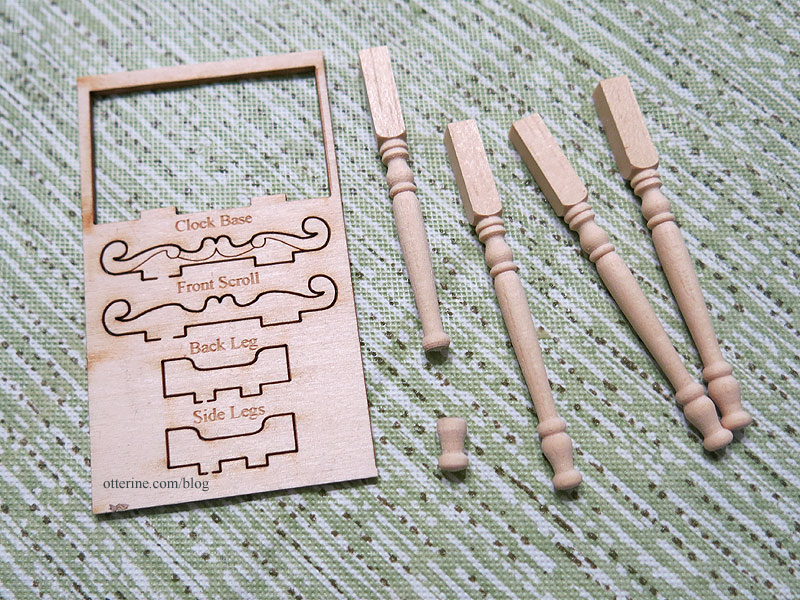
I added some bits of wood to the base to fill in the mortises to increase the gluing surface. They won’t show later, but it should keep glue from oozing later on. I’ll fill in the back mortises later since those will show.
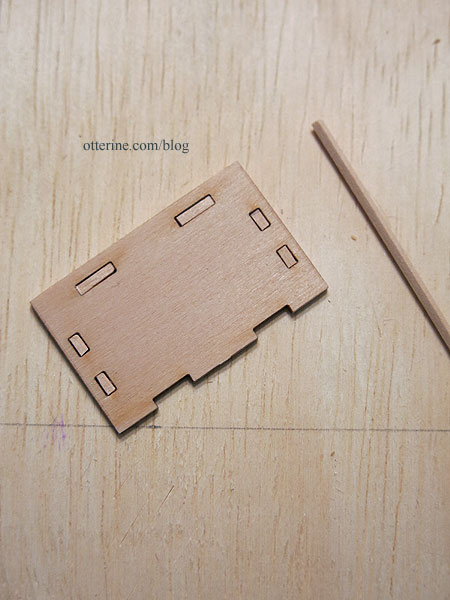
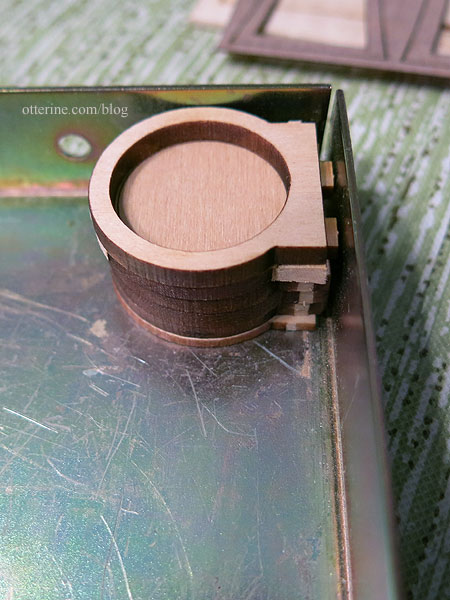
While I like the scrollwork on the top of the original kit, a fully round head appeals to me more. So, I used the back as a template, and altered the front piece to match. It didn’t have to be a perfect cut since you sand this assembly as a whole once it’s glued together.
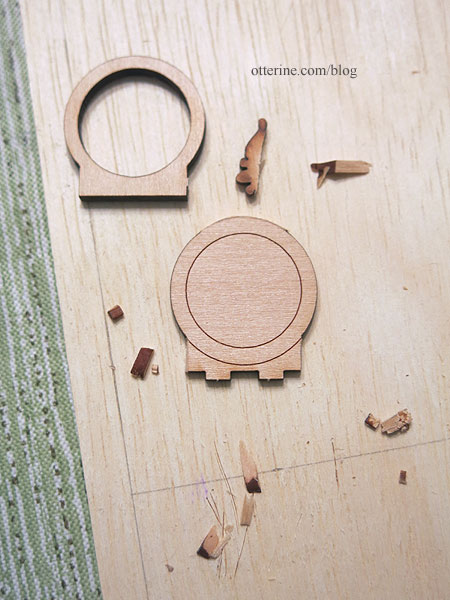
Thinking ahead (always read the instructions through and stare at the kit cover photo before starting), I wondered about giving the clock face more realism. The front piece is solid in order to have a gluing surface for the clock face artwork. An acrylic circle sits over the art to give the illusion of glass. While the included art is convincing, I wanted to go a step further and add actual hands. This would require more clearance behind the acrylic. Since I altered the front to match the other pieces, I could glue the front piece second in line. If I need to bump the clock face forward, I can just cut circles from paper until I reach the appropriate depth.
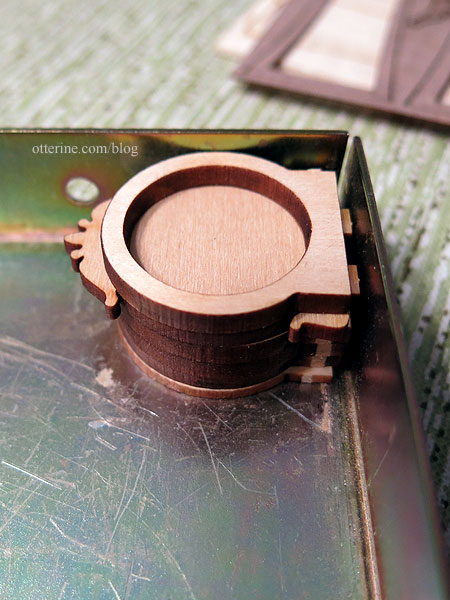
I’ll have to cut the tabs off the front piece now that it is in second position because the base has mortises already cut.
Categories: Half Clocked
May 12, 2018 | 0 commentsMiss Lydia Pickett Cottage Clock – introduction
Your first sneak peek! I plan to make the Miss Lydia Pickett Cottage Clock in 1:12 scale by Robin Betterley’s Miniatures. They used to have kits in 1:12 and 1:24 scales, but now they are exclusively quarter scale and smaller. You can sometimes find the old stock on eBay or etsy, and local mini shows.

This is a laser cut kit with artwork included, but I will likely use my own since I have a few changes in mind. I like that it includes plant stakes just because. :D
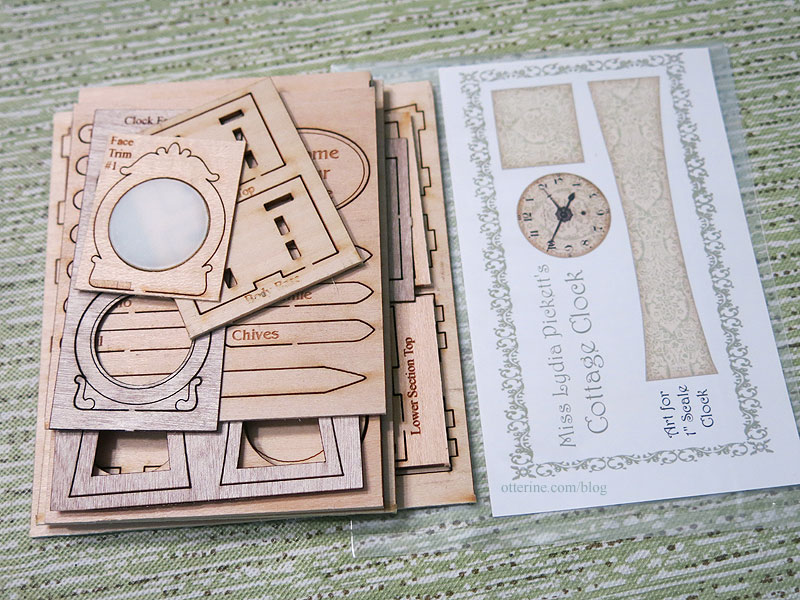
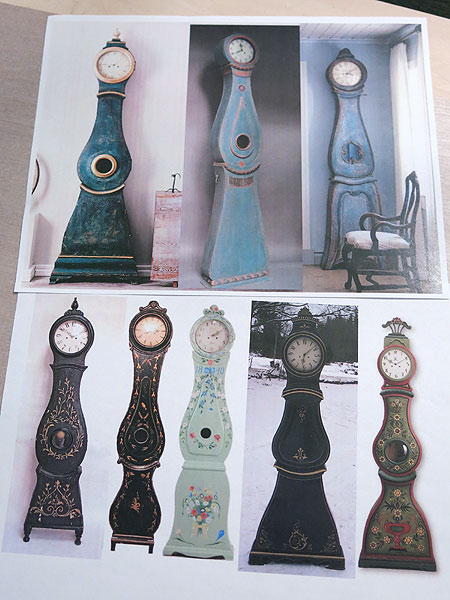
I love Swedish Mora clocks, and if you do a google image search you will find an array of colors and styles. I’ve always been drawn to blue ones, but it can be so striking in black. Since black might overpower in mini, I will opt for blue with some hand painted detailing. I know the kit clock isn’t the traditional shape for the Mora clock, but it lends itself well to modification with that style in mind.
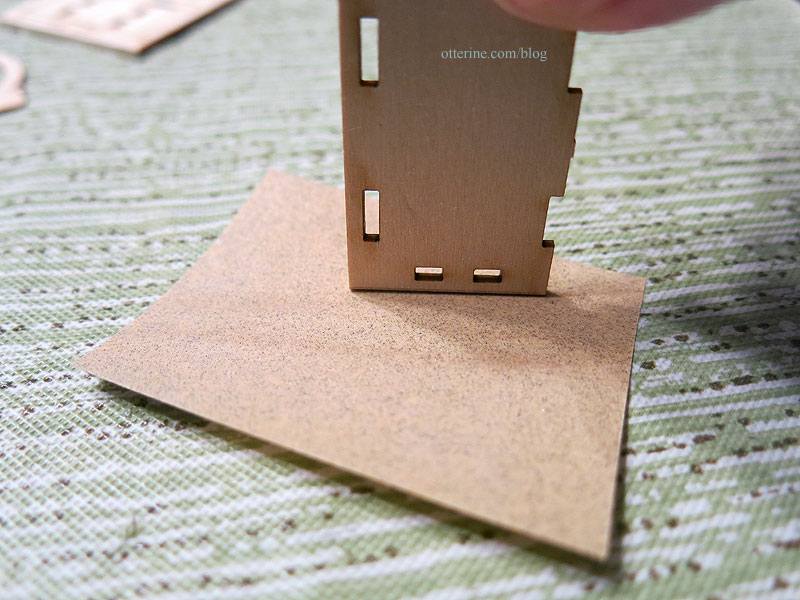
The most tedious part of any laser cut kit is removing the burned edges without altering the size, shape or fit of the pieces. The best way to sand the straight edges is to put a piece of light sandpaper on a flat surface and lightly move the piece over the sandpaper. Keep checking that you aren’t removing too much. If you plan to paint, you don’t have to remove every bit of the soot, just enough to keep it from bleeding through lighter colors. Priming will help as well.
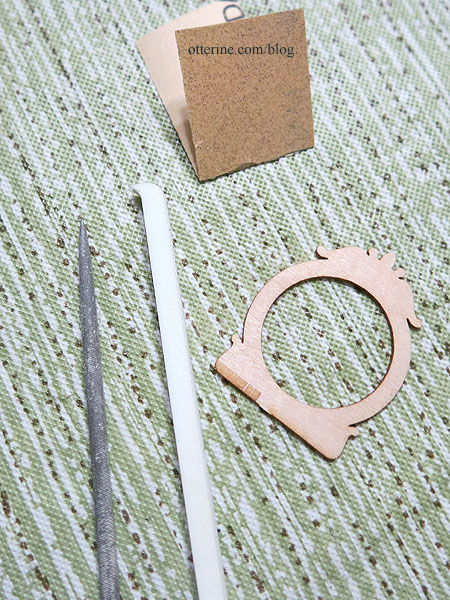
For curves and indentations, I use thin sanding sticks and pieces of folded sandpaper, even sometimes files. You have be especially careful since free hand sanding can remove too much wood if you don’t pay attention.
Back soon…once the sanding is done. Scritch, scritch, scritch…
Categories: Half Clocked
May 10, 2018 | 0 comments
NOTE: All content on otterine.com is copyrighted and may not be reproduced in part or in whole. It takes a lot of time and effort to write and photograph for my blog. Please ask permission before reproducing any of my content. (More on copyright)

Half Clocked – roof, part 2
Continuing work on the roof. I glued on the front roof boards. So scary to be completely out of dry fit. For the most part, the pieces fit pretty well. The one minor gap will be easily disguised with shingles.
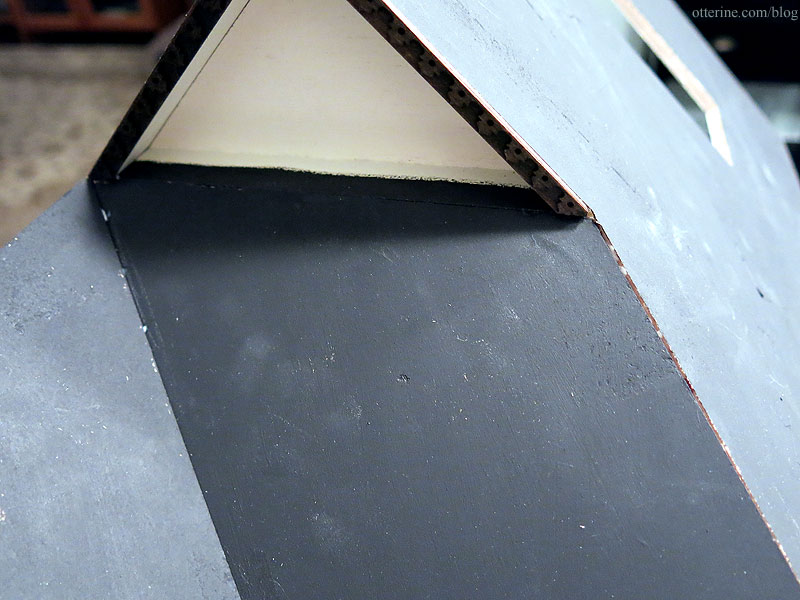
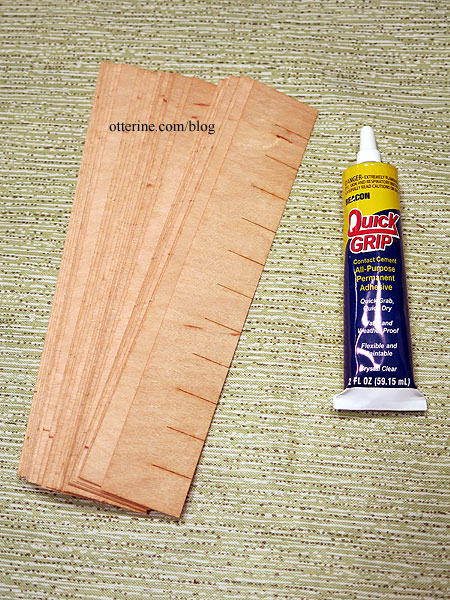
I am using Greenleaf speed shingles for the HC roof. These are laser cut, thin wood. I use Quick Grip glue, which is stinky and messy, just the way a fun project should be. I also utilize movies and/or TV in the background.
There’s one valley on the roof, so I lined that with Tyvek.
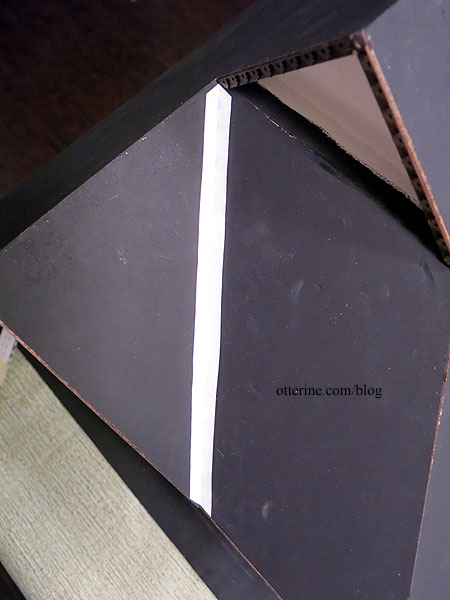
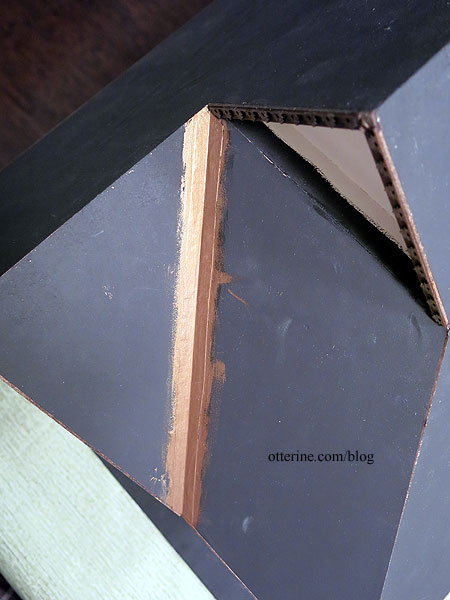
I painted it Liquitex Iridescent Bronze.
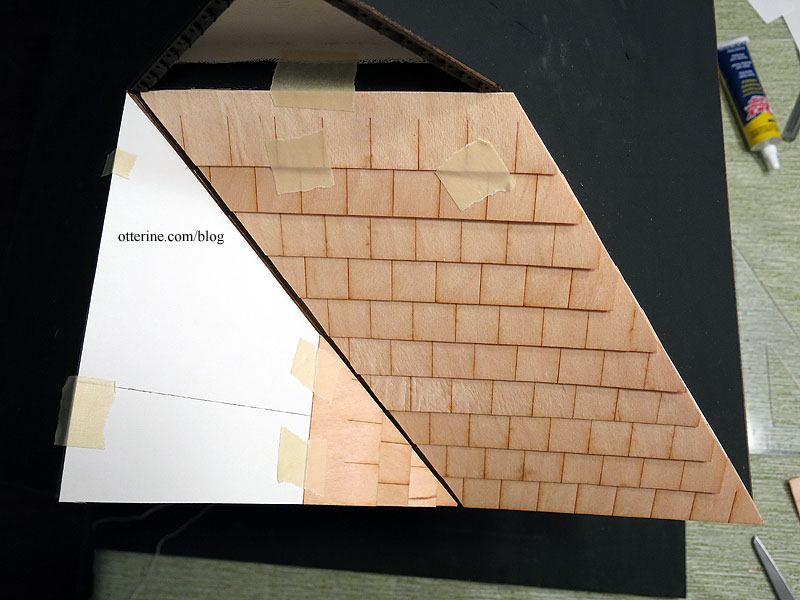
The templates for the front help a great deal. I find it’s easier to start with the small, complicated sections. You can even out placement on a long run, but in a small space you need accuracy and consistency. If the two small sections are off, it will be more obvious. I started with the parallelogrammatic template. (There’s a $175 word for ya!) I taped and cut each row, continually testing it on the actual roof. While I use the template to cut the strips, I glue the strips directly to the roof.
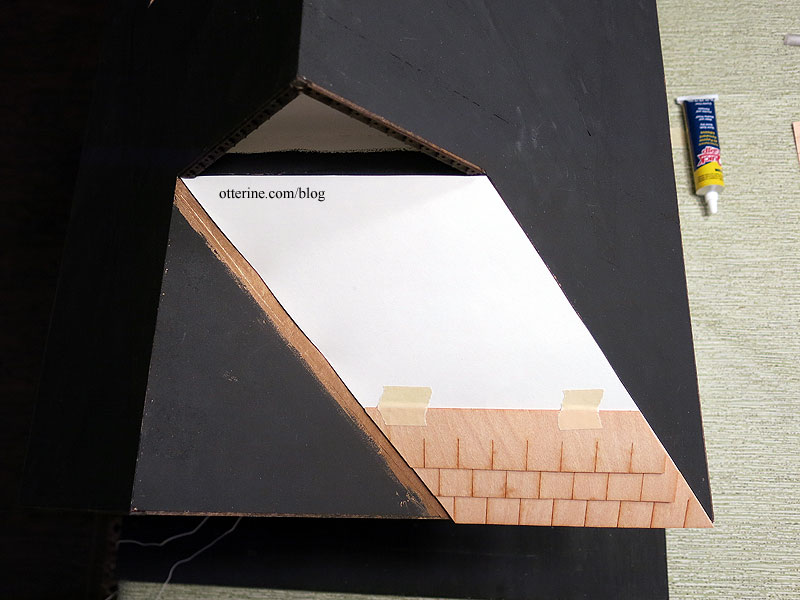
Next, I marked the rows on the triangular template. The spacing is not the same as it was on the first template, but the alignment is more important.
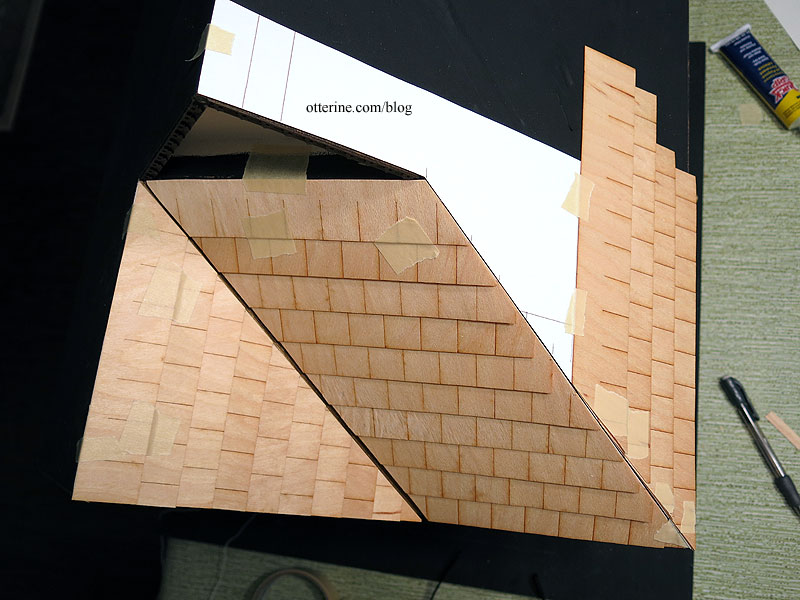
Next up was the remaining angled piece. I used only a partial template since the remaining portions will just follow the length of the roof.
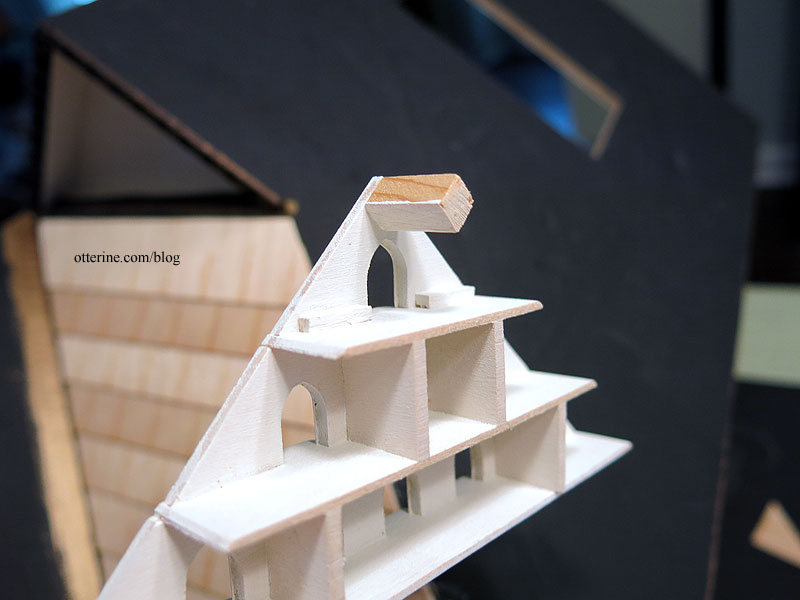
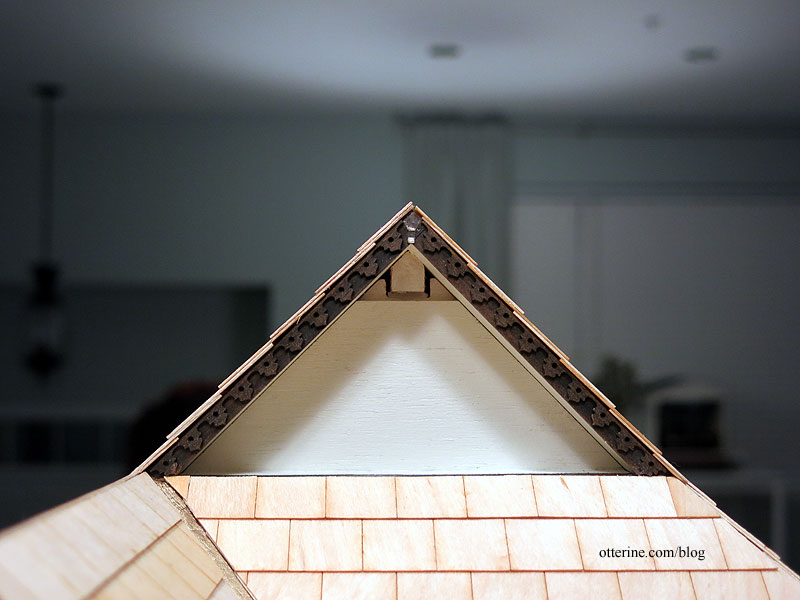
I added a post to the top of the dovecote to stabilize the apex.
To finish the edge below the dovecote, I glued a strip of Tyvek painted Liquitex Iridescent Bronze.
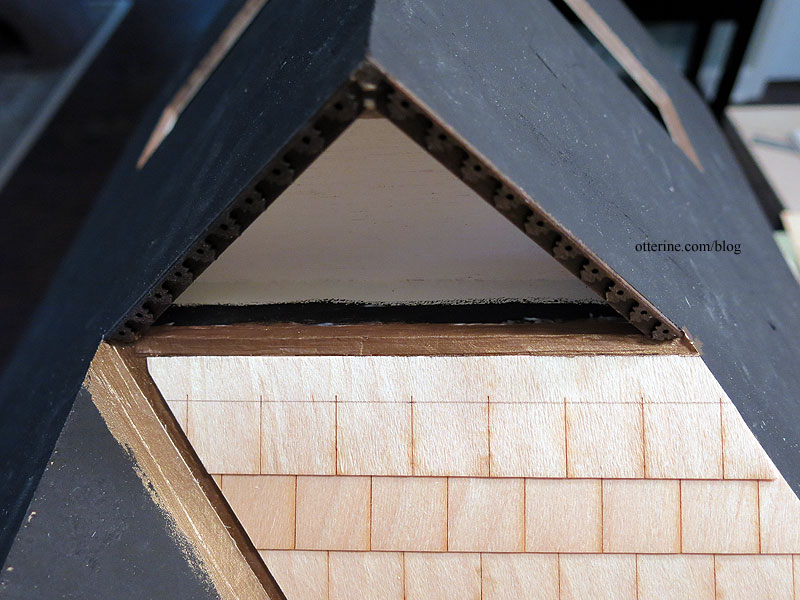
It was a long day, but I got all the shingles in place.
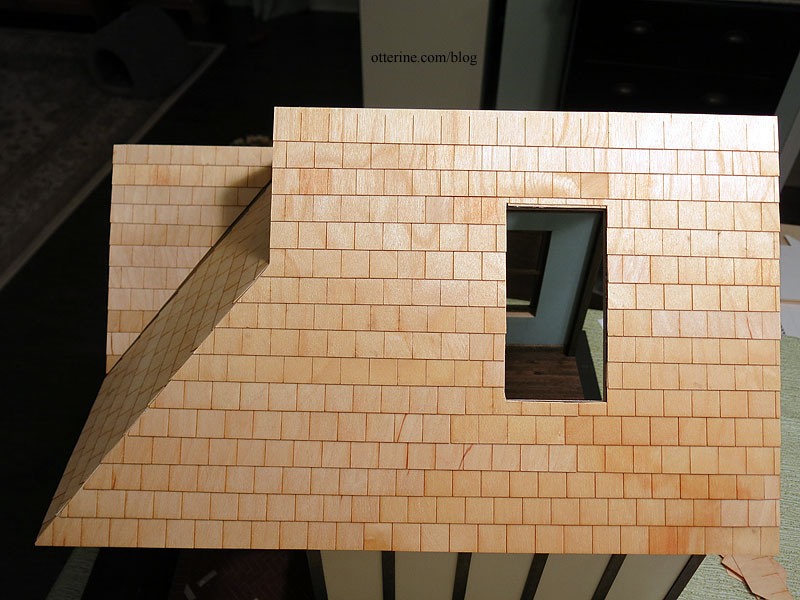
I ran out of Quick Grip and switched to Shoe Goo since that was all I had on hand and I didn’t want to run to the store. It’s thicker than Quick Grip but just as smelly.
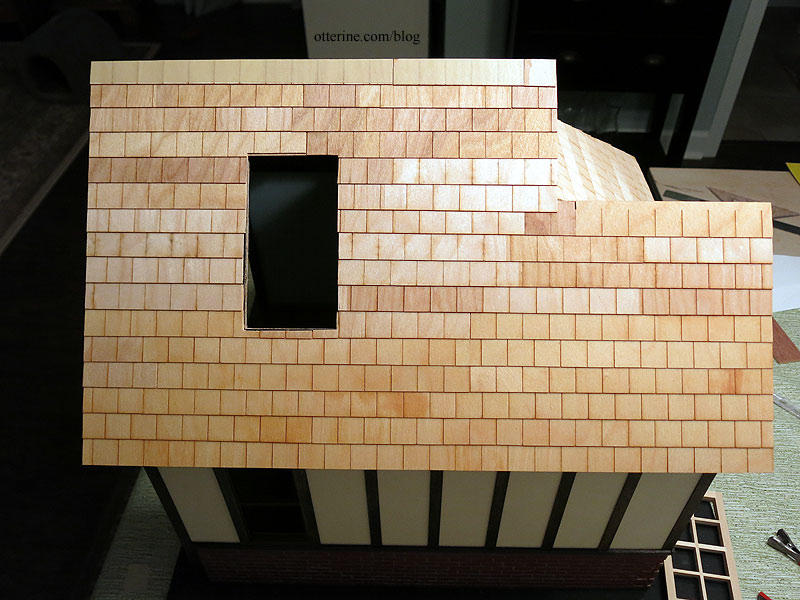
The one thing I didn’t think to do was measure the remaining long edge, so my rows differ in height from the opposite side. The rows are straight and uniform, so it’s not really obvious. Noted for next time.
Categories: Half Clocked
November 17, 2018 | 0 commentsHalf Clocked – back wall
In the past, I’ve made sliding walls like the one for Ye Olde Taxidermist. For the current build, I don’t want a large gable blocking the interior view from the back. For Ye Olde Taxidermist, the narrow gable doesn’t block much of the interior.
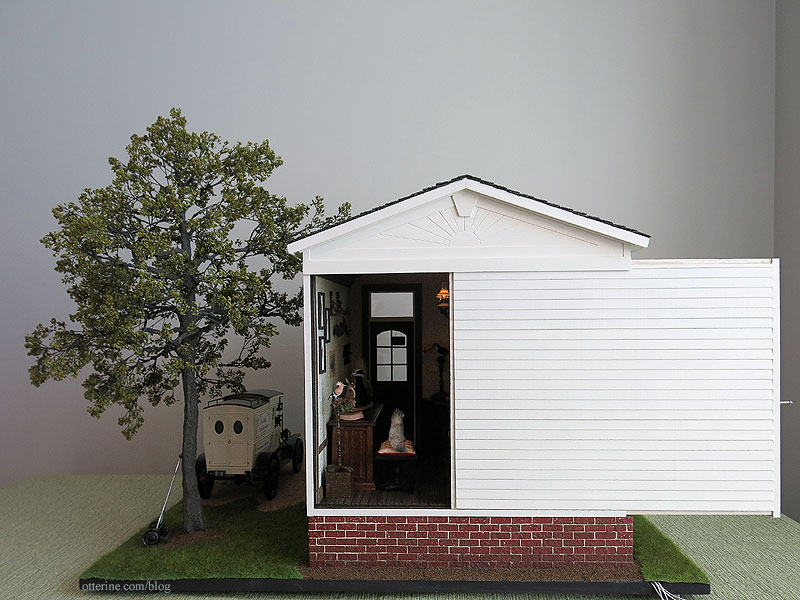
Milo Valley Farm has no gable to get in the way.
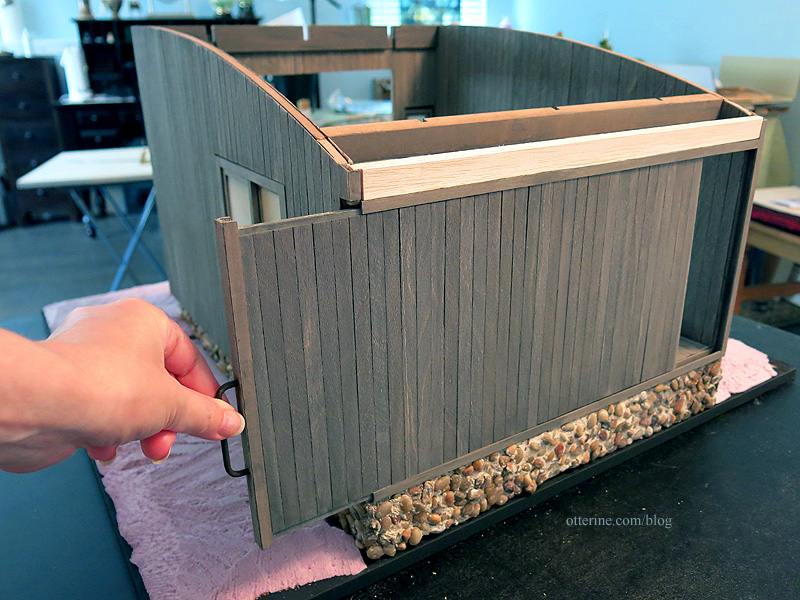
Since I decided to have an eave on the back, hinging the house-shaped wall would not work. It would bind on the roof overhang. Next solution, magnets.

These stick to each other as well and come marked positive and negative.

Super thin, which is perfect. The ruler is in 1/64″ increments. They are 3/8″ in diameter.

The wall is just a bit shorter than actual opening to remove it easily. The interior trim on the ceiling blocks any light that might shine through. The beautiful barrel was made by Bill. :]

I used a spade bit to make shallow holes for the round magnets. This was no problem for the lower area where it doesn’t matter if the bit pokes through the other side. On the sides just below the eave, I had to be careful because the bit is longer than the material is thick. The interior trims add to the thickness, but I had to cut just what I needed and not a smidge more. :\

For the apex, the magnet sits in the space I left at the end of the ceiling beam. Hmm, looks like I need a touch up. :\

There will be six magnets. Here the holes have been painted brown.

I will epoxy these in place, but just pushed in you can see they sit flush.

For the wall, I will cut small pieces of K&S 0.008 thickness tin sheet left over from the Otter Cove kitchen.

One magnet is strong enough to hold this partial sheet. Since the wall will be able to rest on the landscaping board, I think the six magnets will work well to keep it from shifting or falling away from the structure.
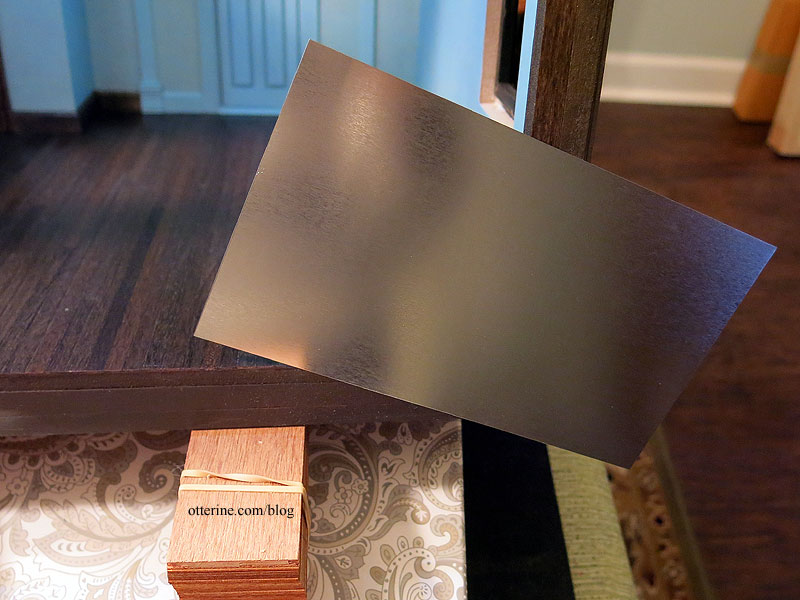
Before I go further, though, I need to work on finishing the wall inside and out. Considering I don’t need the back wall for the final build to make sense, I will leave this for later and continue on the main structure. It’s not a priority, but I wanted to get the prep work done before the structure was attached to the landscaping base.
Categories: Half Clocked
November 16, 2018 | 0 commentsHalf Clocked – ceiling beams
Since I had cut a new gable from thinner wood, I had to pad the exterior portion where the gable shelf was located to keep the gable shelf properly aligned with the front of the roof. But, since I am including the dovecote, I cut the front hook off the ceiling beam.
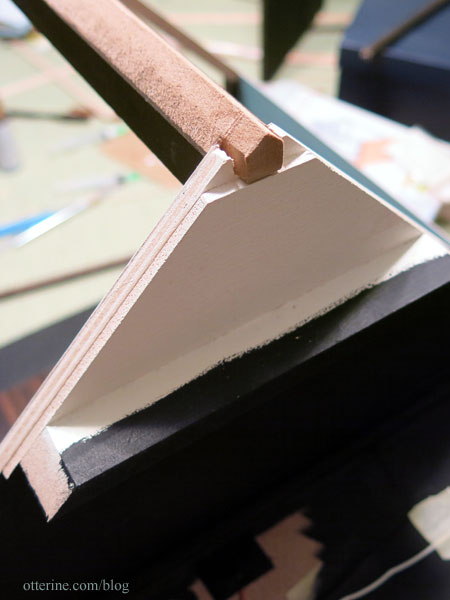
Since I had taken off some depth from the building, I needed to also cut down the length of the center beam. The back wall will abut the structure, so I cut the hook off this end as well. I originally cut new support beams from 3/8″ strip wood, but I didn’t like it in the end. So, I modified the kit support instead. There’s some space between the end of the beam’s notch and outer edge of the support beam. I’ll explain that later. You can also see the shim I needed to raise the center beam to sit flush with the glued roof panels.
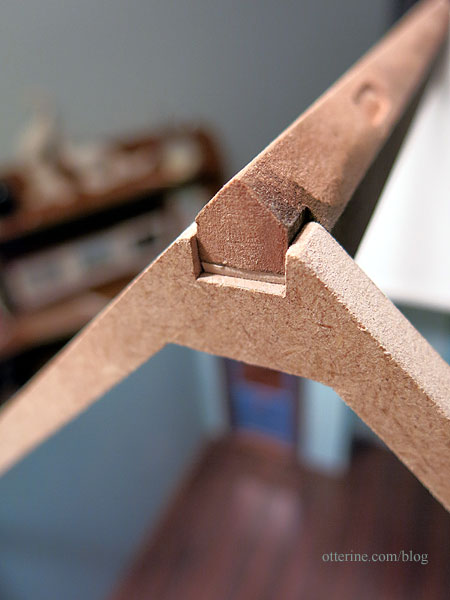
I painted the beam and support Bittersweet Chocolate by Americana to coordinate the stained back beams and other trims. It’s not a perfect match but it blends well enough.
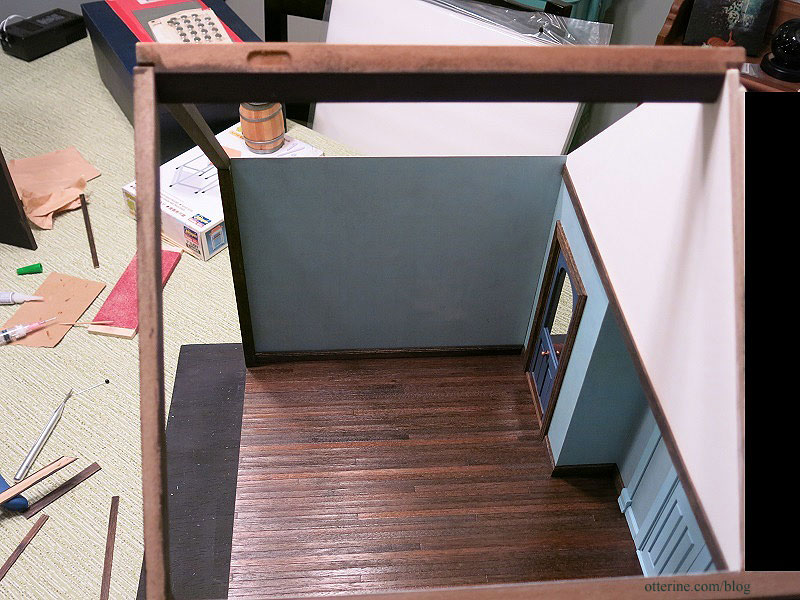
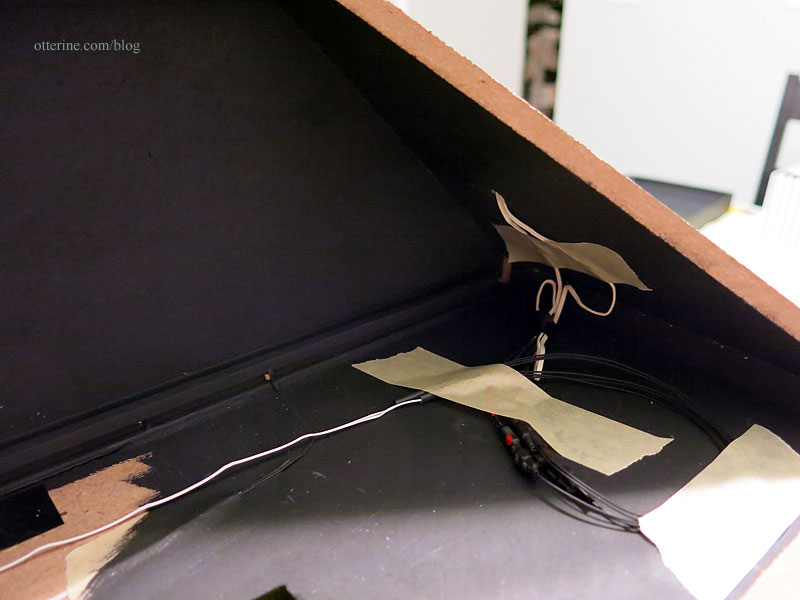
Before I could glue it all in place, I wanted to mark and cut the gable and side trims. I won’t install these until the roof is glued on to make sure there’s a good fit, but it was easier to measure while things were still in dry fit. I glued the main roof on next, then attached my ceiling wires to the lead wires already in place from previous work. I painted these black afterward.
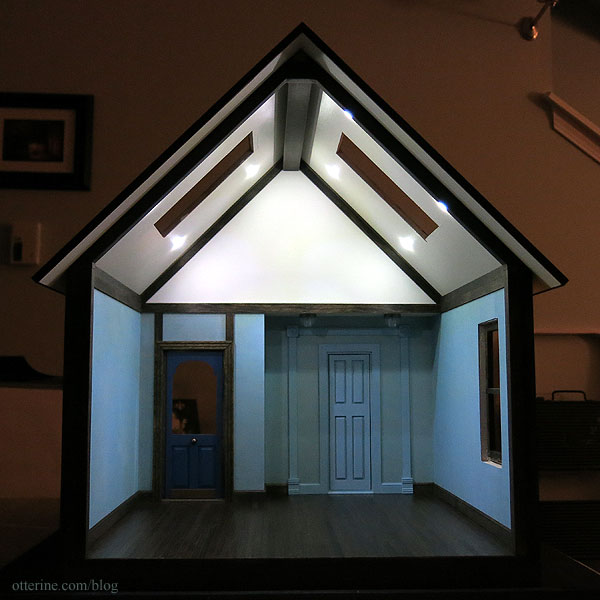
With the roof firmly in place, I finished up the interior trims. All that is left is the side window, but I want to save that until later once the messier parts of the landscaping are done.
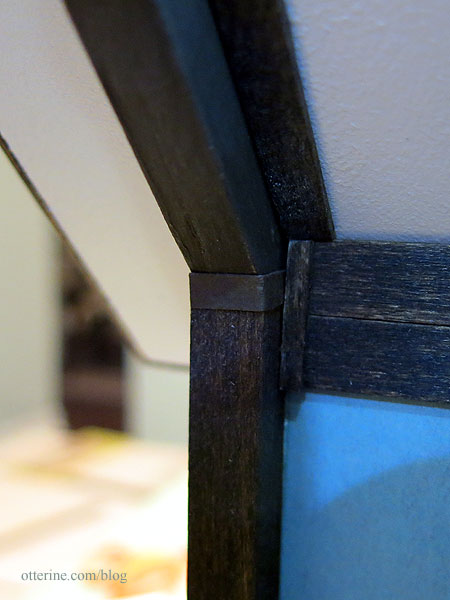
Since the joins for the back beams were a little off, I made brackets from paper.
Categories: Half Clocked
November 15, 2018 | 0 commentsHalf Clocked – insert wall, part 3
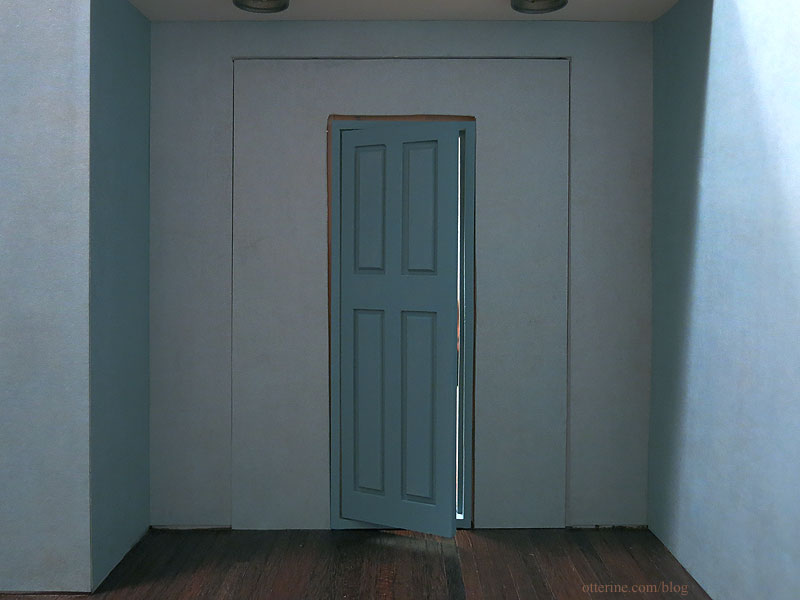
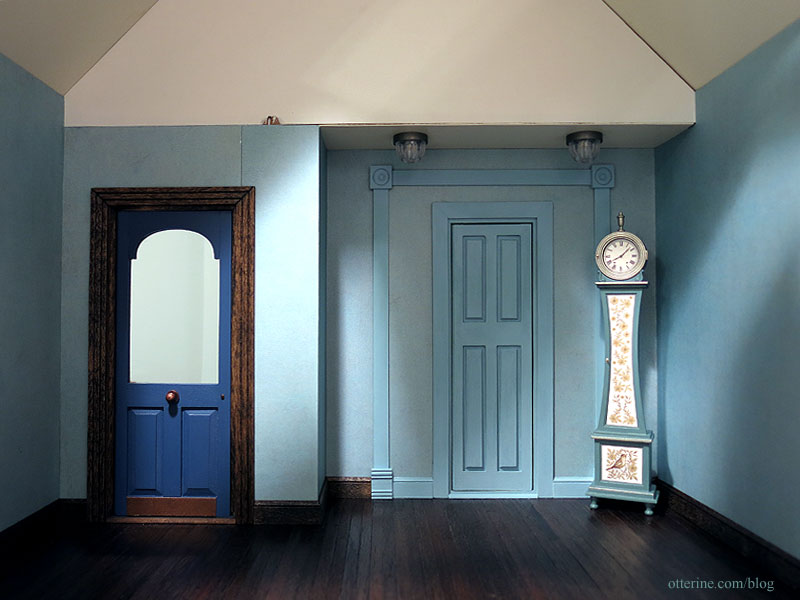
Continuing work on the insert wall. I am using scrapbook paper Happenstance – Fluke by The Paper Loft. It is flat paper, but it has a printed design that looks like old fresco. You might recognize it from the first floor of Watson Mill. Since I will have to trim around the removable wall insert and didn’t want a highly contrasting border, I bought Ceramcoat Waterfall to paint the door and trims. It should complement well without fading into the background or being overpowering. I haven’t cut the trims yet.
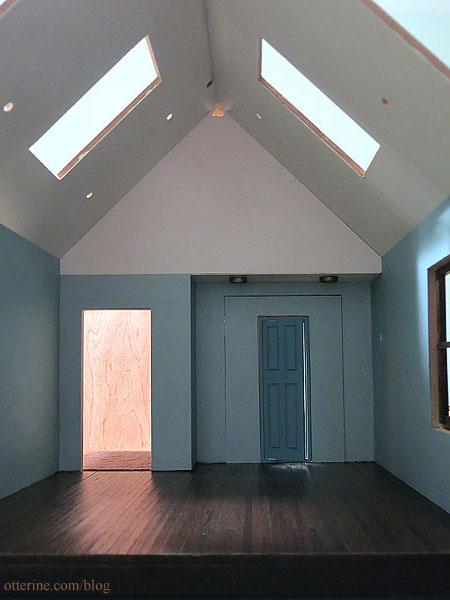
For the enclosed gable, I’ve opted for plain drawing paper. It’s not pure white, so it works well for the space without being too much of a contrast. Since I plan to have a warm white vaulted ceiling, I didn’t think a big blue triangle would look right.
After mulling it over, I decided the Ceramcoat Waterfall paint was nice, but it was darker than I wanted once in place. I was trying to make the door blend more with the wall as if to say, nothing to see here. I mixed the Ceramcoat Waterfall with Ceramcoat Blissful Blue to get a lighter color. I painted over the base coat of Ceramcoat Waterfall, and the result was much closer to my original idea. For the trims, I started with a base coat of plain Ceramcoat Waterfall since I needed it all to match the door.
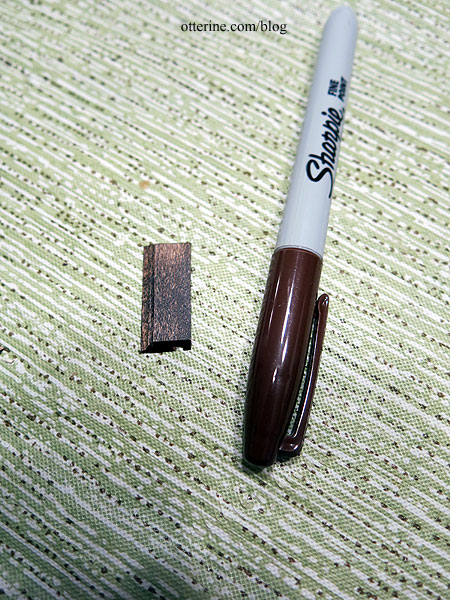
The baseboards around the room are Minwax Jacobean, so to disguise the mitres I used a dark brown Sharpie on the cut edges before gluing the boards in place.
I thought it might end up looking weird to have dark baseboards on the removable wall. Typically, when you’re painting a door the same color as the walls, the trims are also the same color. I didn’t want blue trims throughout, so I mixed the styles. Somehow, it works and looks relatively seamless.
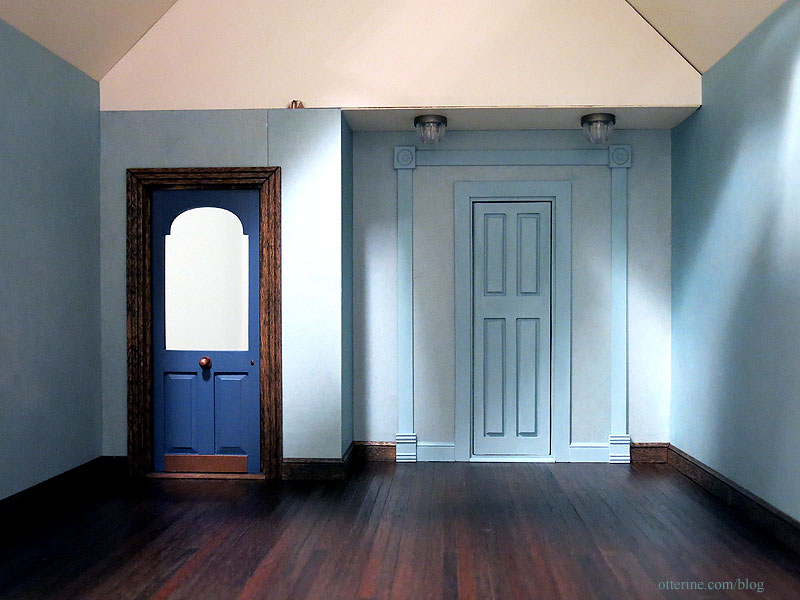
It will also fade more into the background once furnishings and the dark gable trims are added. It might not be the cleanest solution, but I just didn’t want dark trim to interfere with the line of sight when the structure is filled and I needed that large of an opening.
The wall is a tight fit, which is just fine. This won’t need to be removed often.
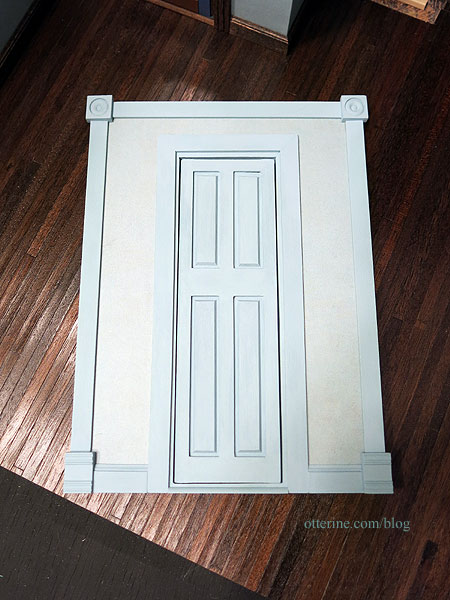
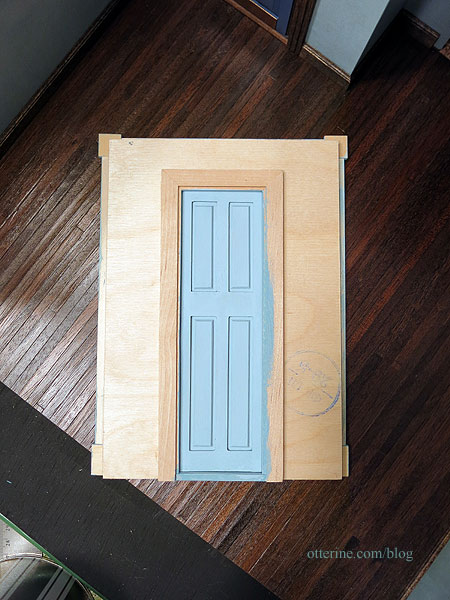
And, the back….
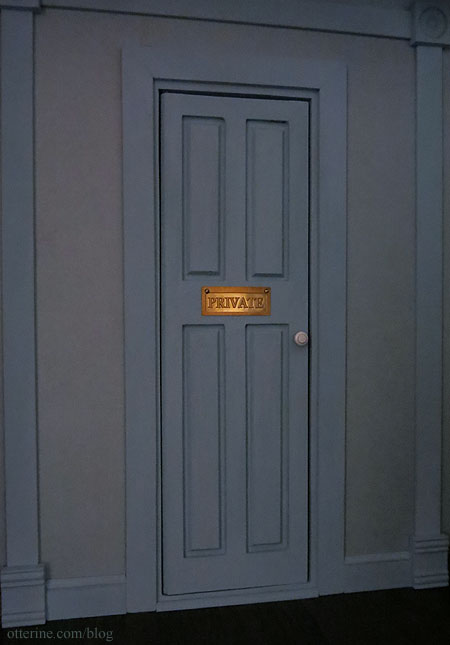
I added a brass plaque and white doorknob for final finishing.
Categories: Half Clocked
November 13, 2018 | 0 commentsHalf Clocked – roof, part 1
Thanks to Sheila, we know what bargeboards are. So, today, I am working on the fascia and bargeboards. I stained lengths of 1/16″ x 1/4″ basswood to attach to the exposed edges of the roof. I used Minwax Jacobean. On top of that, for the gables, I’m adding Paulina trim from Heritage Laser Works. These are only 1/32″ thick and very delicate, so I had to come up with a way to stain them without breaking them.

I used a piece of foam core board and drenched the trim with stain using a brush.

I then turned it over to drench the other side.

Gently picking up the trim, I wiped the excess from the board.

I placed paper towels on the board long enough to cover the length of trim.

I pressed the trim in the paper towel a couple of times until very little stain lifted from the wood.


I installed the basswood trims first.

Then came the fancy trims. I always keep scraps of any fancy trims I use in my projects, and it worked well for tiny finials for the apices. These are parts from laser cut railings from Laser Tech that I used for Walnut Bay Light.

I’ll have to finish this up once the remaining smaller roof pieces are attached.
Categories: Half Clocked
November 5, 2018 | 0 comments
NOTE: All content on otterine.com is copyrighted and may not be reproduced in part or in whole. It takes a lot of time and effort to write and photograph for my blog. Please ask permission before reproducing any of my content. (More on copyright)


