
NOTE: All content on otterine.com is copyrighted and may not be reproduced in part or in whole. It takes a lot of time and effort to write and photograph for my blog. Please ask permission before reproducing any of my content. (More on copyright)
Categories:

Vintage display cabinet
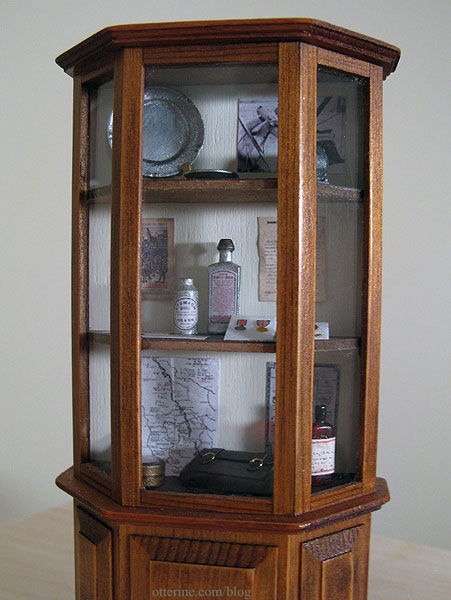
I was going to build a display cabinet, but with the projects still to be completed and the due date in just over a month, I started looking around for something ready-made. I stumbled across this vintage curio cabinet on etsy at Vintage Calico Garden. Perfect!
Here is it after a good cleaning. There are no maker or manufacturer markings as far as I can tell.

The piece is in excellent condition overall, though the shelves were a bit rough for what I needed.

Heather helped me by sending some scraps of paper for the Heritage bedroom, and she included some coordinating dark striped paper in the package. I used this striped paper to make liners for the shelves. I colored the edges for the top two shelves with a marker (not seen here), because the white paper edges would have shown through the front and side glass panels.

The cabinet needed a backer to complete it, so I cut a piece of spare Heritage plywood.

The wood backer just slides in place and is held straight by the shelves.

Knowing I would never be able to match the stain of the outside, I painted the backer Vintage White by Folk Art. The items I put in the cabinet will stand out nicely against the pale backdrop. Perhaps one or two of these things might stay in the cabinet, but I just filled it quickly with items I had around to take photos.

Update: Here it is after being filled with items appropriate for The Aero Squadron Lounge. It really is a lovely piece. :D
Categories: Furniture, The Aero Squadron Lounge
July 29, 2012 | 0 commentsFarmhouse hutch reproduction, part 2
Continuing work on the farmhouse hutch I found on European Paint Finishes. With the hutch mostly built, I needed to stain the entire surface. I plan to paint all except the back and counter top, but I will sand that top layer down to show the stain color underneath. One of my favorite materials is Staining Antiquing Medium by Americana. It acts somewhat like a glaze, looks a little like an ointment, and makes acrylic paint behave like a liquid stain.

You can use any color you want and still have the wood grain show through. And, you don’t have to buy a whole can of stain every time you need just a little color. Here I’ve used Coffee Latte by Folk Art, which has a warm honey color.

The hutch looks rather rustic, though I will neither confirm nor deny if that is my intention. :D

I let the stain/paint dry overnight then sanded all the pieces smooth and reapplied the stain as needed.

I painted all of the pieces except the counter top and the hutch back boards Slate Green by Americana.

It’s close to the color used on the inspiration piece.

I sanded the pieces to reveal some of the stained wood underneath the top coat and then sealed with Delta Ceramcoat satin varnish. The knobs are clear flower-shaped beads held in place by silver pins. The faux drawer fronts look convincing, no?

I added the notched detail on the shelves. Fran suggested this might be for displaying spoons, and even though I don’t intend to display mini spoons, I liked the detailing. The lovely flowers are by Michelle from Little Rabbit Miniatures.

I moved the crown molding up slightly during final finishing, so the entire unit measures 6 1/4″ W x 7 5/8″ H x 1 1/16″ D.

I think it turned out very close to the original. :D

Now to fill it. I won’t be using these items with it, but I wanted to show the relative size with some minis.

Basket by Lyssa. :D
Categories: Furniture, The Aero Squadron Lounge
July 15, 2012 | 0 commentsFarmhouse hutch reproduction, part 1
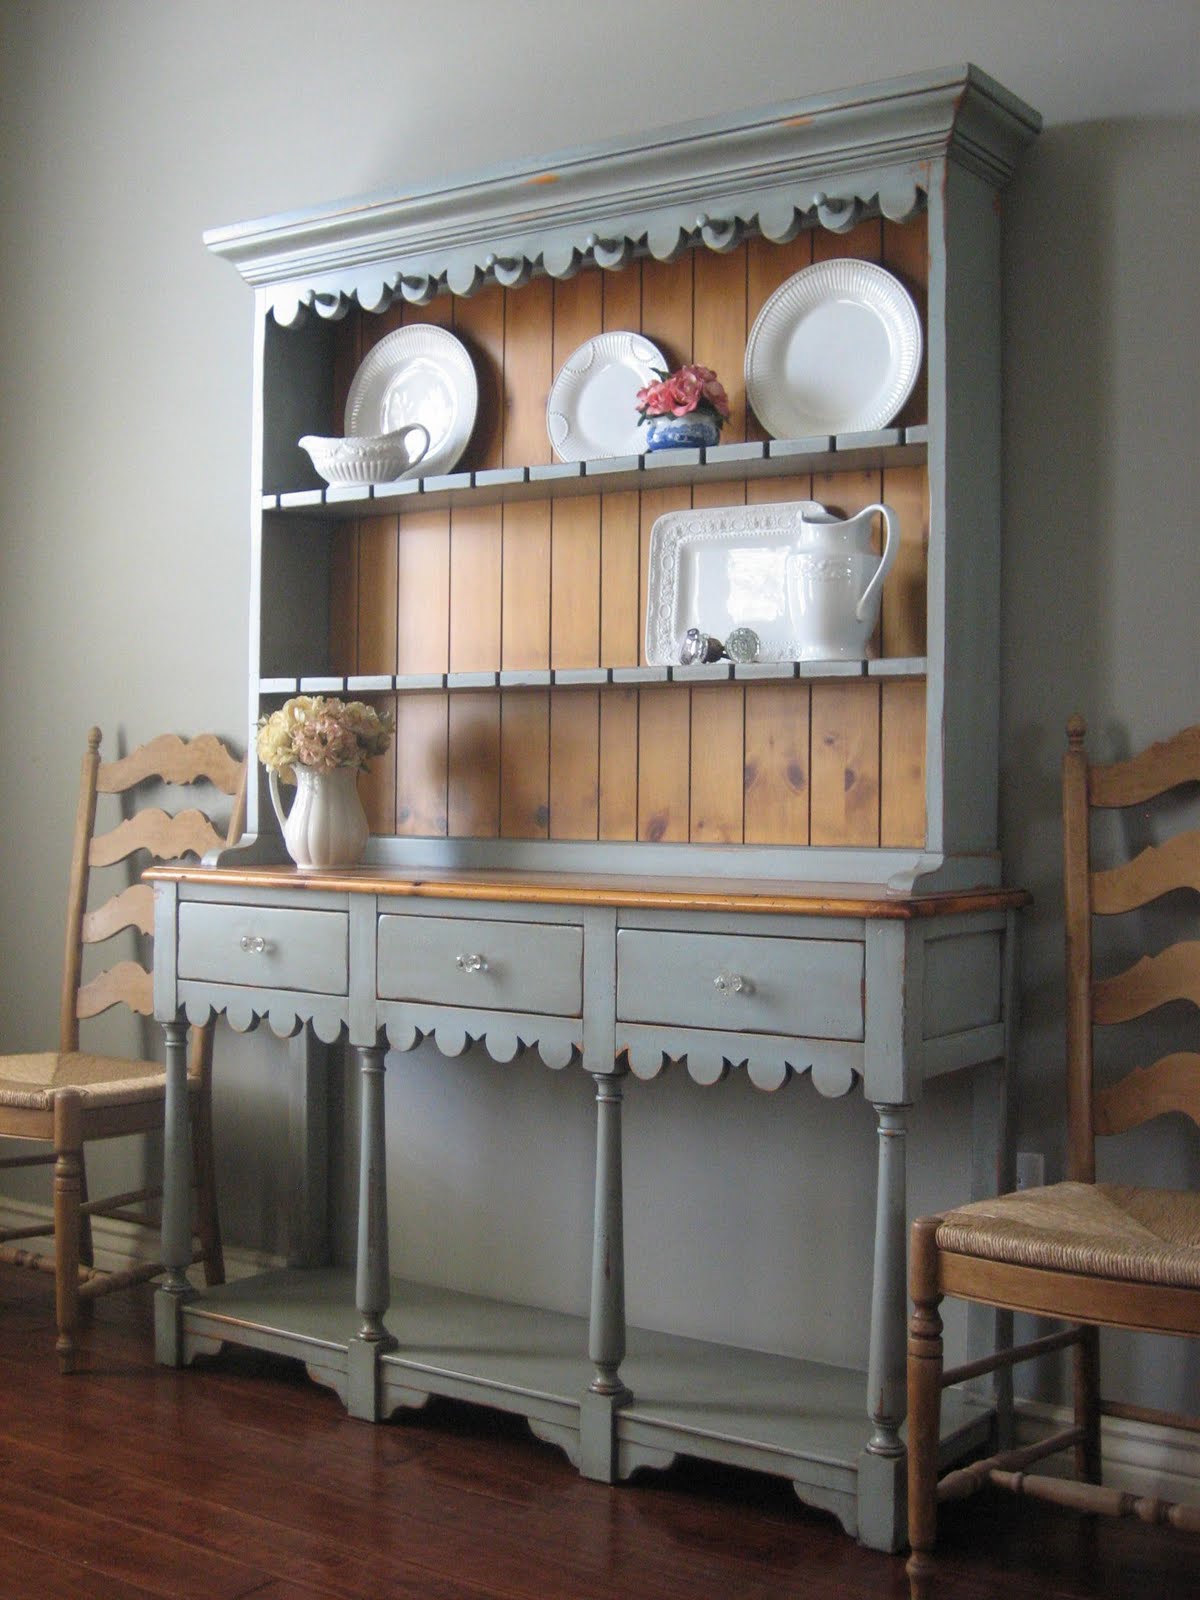
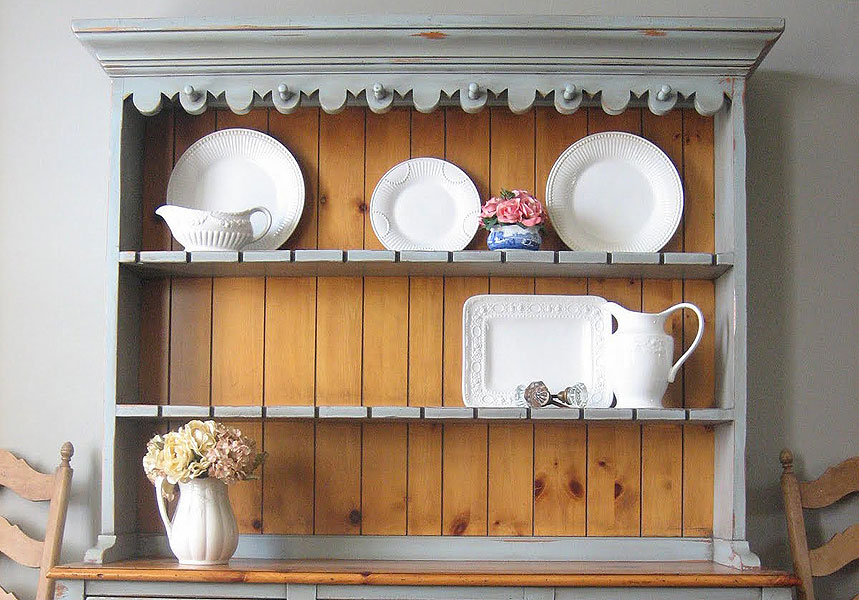
I have started my miniature reproduction of a farmhouse hutch I found on European Paint Finishes. Here’s the original farmhouse hutch for reference.
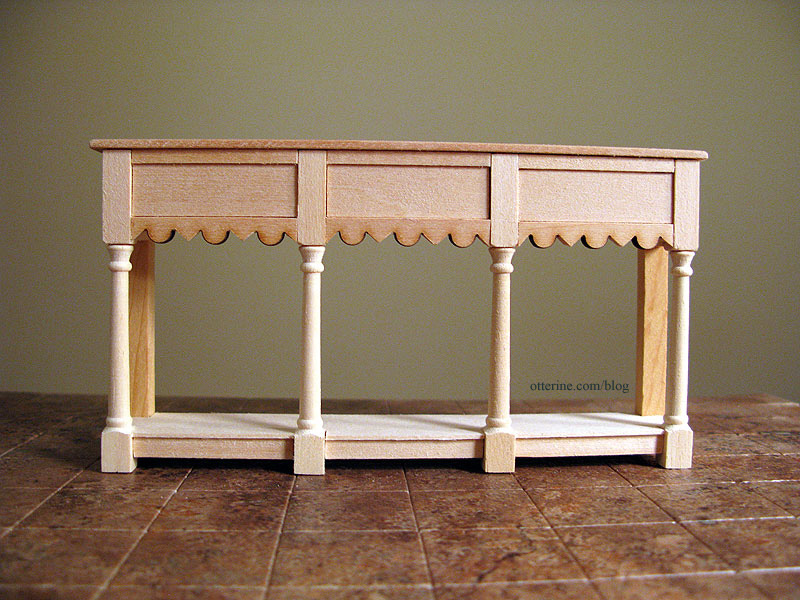
I have the base assembled and ready for paint and stain. The counter top is separate since I plan to stain it and paint the rest.
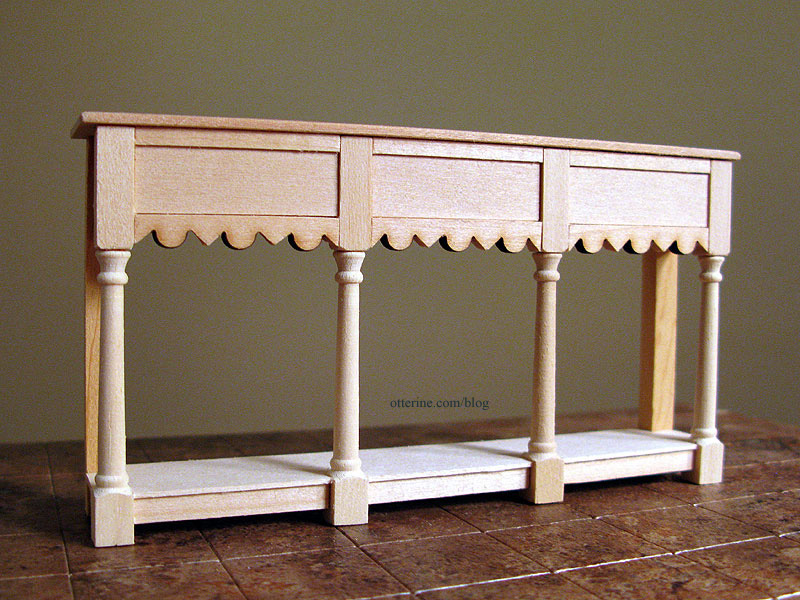
The drawers in my version are not functional, so I’ve recessed the front portions for now. I will make faux fronts to “float” in these openings to make the drawers more convincing.
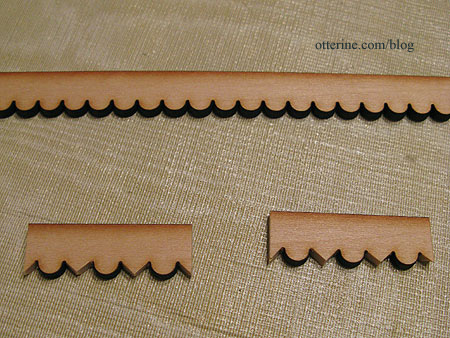
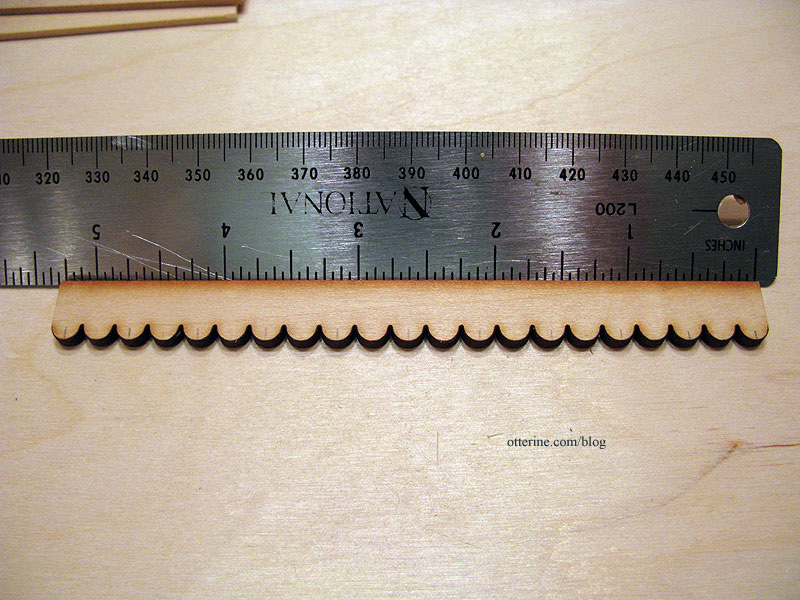
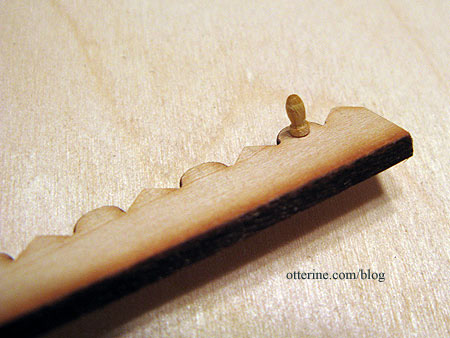
I used laser cut scallop trim from Heritage Laser Works, cutting every other scallop to a point to mimic the original. Mine has three complete scallops instead of four like the original to maintain the look of proper proportions.
Below is a more detailed shot of the original. The hutch is shown on a similarly colored wall, so at first I thought the bottom was enclosed on the back. It’s actually open between the back two square posts.
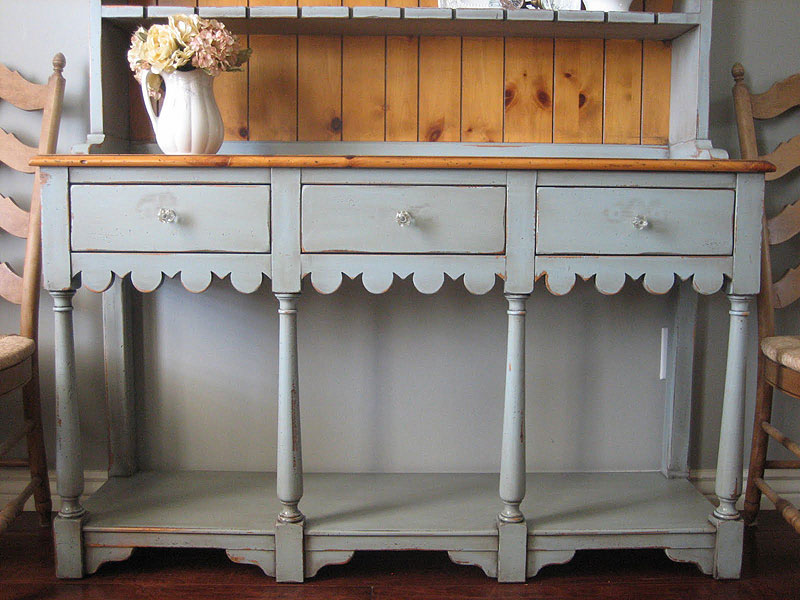
The front posts are Houseworks newel posts cut to fit. I may or may not add the bottom brackets. I have an idea how to make them, but they will be tiny and perhaps more trouble than they’re worth. I was trying to keep the height down on the overall piece and haven’t left much room for them.
This part of the hutch measures 5 3/4″ W x 3″ H x 1 1/16″ D.
I forgot to mention that Patie of minisx2, where I found that delightful and whimsical modern cabinet, sent me some Dura-Craft wood from my want ad and included two bundles of cut wood for projects. It’s very nice wood, unlike what I’ve been finding in the craft and hobby stores lately. I’ve used it for the counter top of the base and the back of the hutch top.
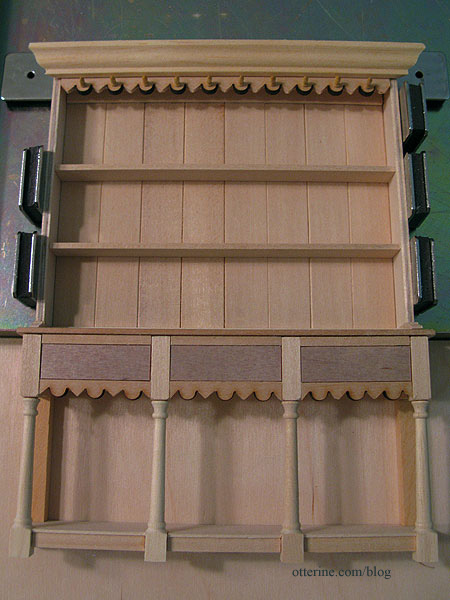
Very little of the top is glued since the back will be stained and the rest painted, so it’s being held together with magnets in my gluing jig. Here’s an approximation of what it will look like with lower portion. As you can see, I’ve cut the veneer inserts for the faux drawers.
My first measurement for the top had to be the scallop trim since I needed complete scallops all the way across. Having them uneven, with one chopped off on one side and another whole on the opposite side would have offended my sensibilities. ;D
I order wood trims and parts from Manchester Wood Works quite often, and they include a small sample bag of various wood trims. I use these samples all the time when I just need a little bit of something to add to a project.
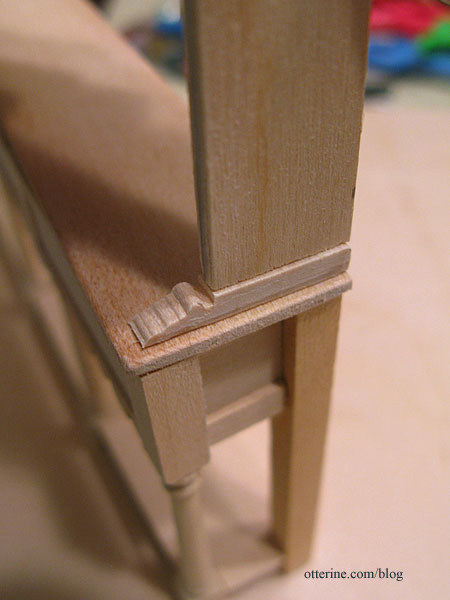
To create the decorative bases for the side panels, I used 1 1/16″ tall baseboard trim – a sample from Manchester Wood Works. I am guessing this might be for play scale. I’ve used half scale and quarter scale items in my full scale builds before, too. I cut thin cross sections, then measured the depth I would need based on my side panels.
Now I have wonderfully decorative bases without having to carve them individually. This was the method I had planned to use to make the lower brackets, but the space is just too small. Until I delve into quarter scale building, cutting wood that small just eludes me. :D
The pegs on the upper trim are model ship belaying pins. Just a quick drilled pilot hole and some glue, and there you have it!
Here is a close up of the original hutch top.
I ended up with 1 1/4″ spaces between my shelves to accommodate what the hutch will eventually hold. I’ll cut sides for the crown molding on top after it is all painted, stained and assembled. Things have a way of shifting during the building process and I find it’s best to fit that final trim at the end. I still need to add the notched details on the shelves, but I’m taking a break from the project for now. I can fiddle with these things only so long.
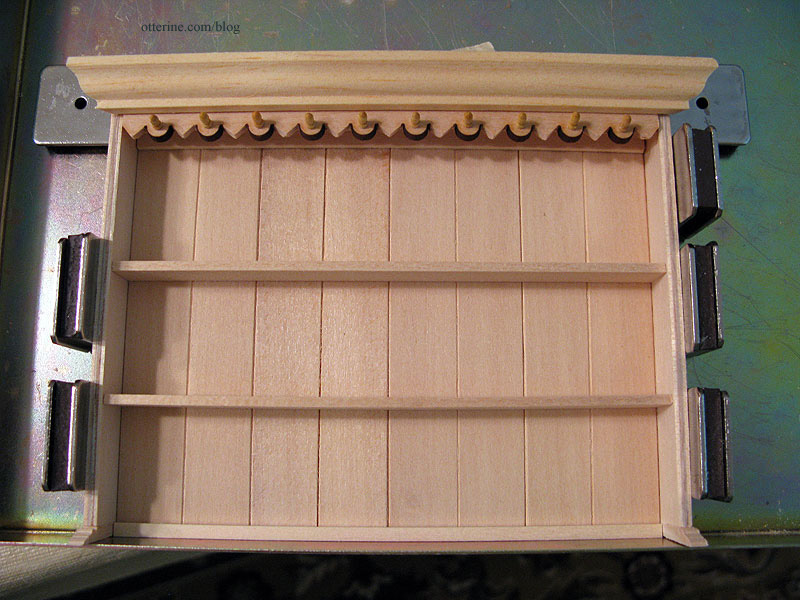
The hutch top measures 5 1/2″ W (not including the crown molding) x 4 1/2″ H x5/8″ D (not including the decorative bases), making the total unit 6 1/4″ W (with the crown molding) x 7 1/2″ H x 1 1/16″ D.
Categories: Furniture, The Aero Squadron Lounge
July 7, 2012 | 0 commentsFancy bow front dresser, part 1
What I like most about the Heritage bedroom is while all required pieces are accounted for — fancy bed, nightstands and vanity — nothing matches exactly. I don’t mind a bedroom suite, but I rather like the idea that grandma has chosen pieces simply because they spoke to her not because they made up a matched set.
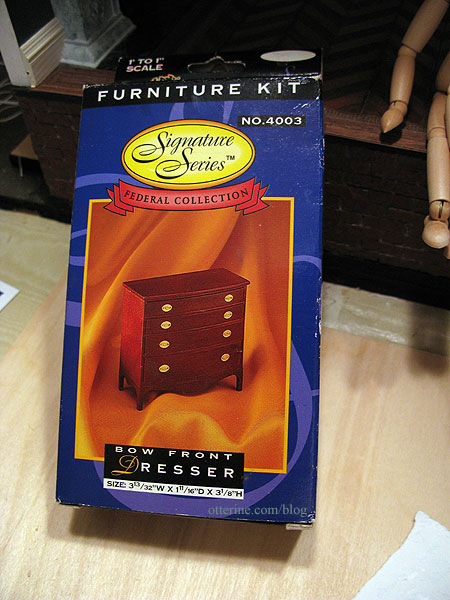
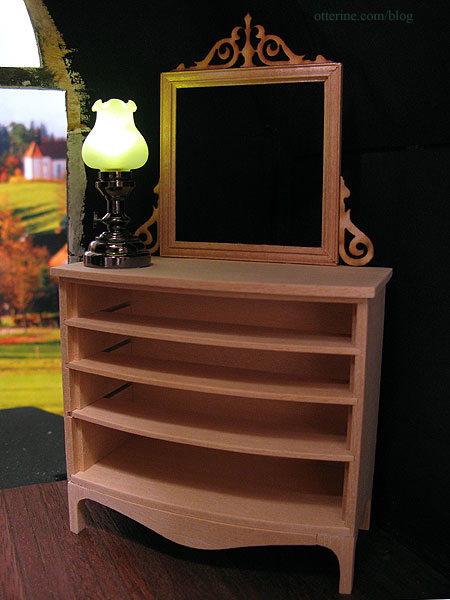
To that end, grandma still needed a dresser. I picked up a furniture and accessories lot from craigslist some time ago, and in it was a Houseworks bow front dresser kit.
I made no changes to the base kit, though I did add a mirror made of frame strip wood.
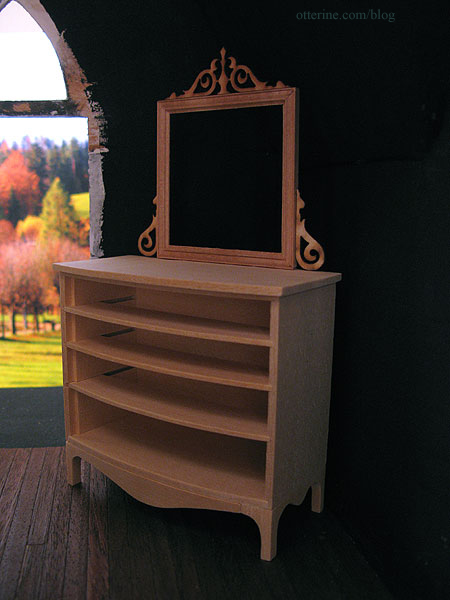
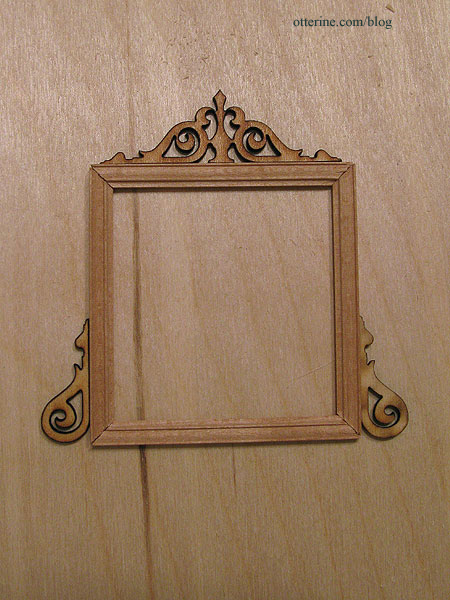
To fancy up the mirror, I added laser cut embellishments from Heritage Laser Works. They have such great things!
I made sure the dresser wouldn’t be too tall for the corner with the added mirror. I plan to angle the dresser so I can see more of it when looking into the room from the open back. Here I’ve used The Chair from the parlor as a stand in for the one I plan to make. I think everything will fit well in the room without seeming crowded.
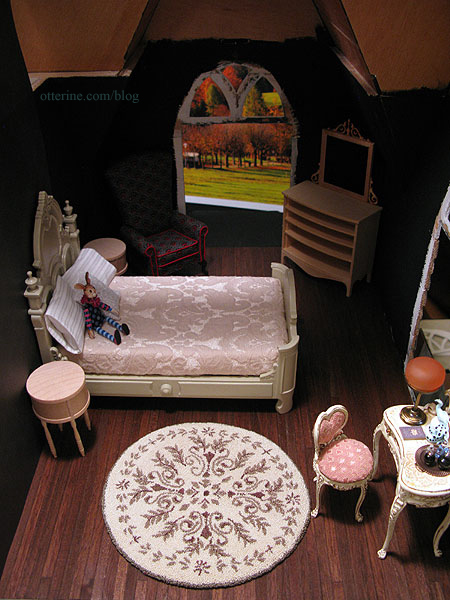
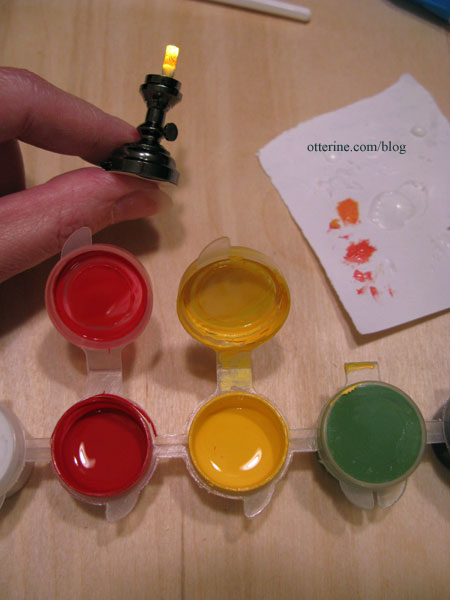
I wasn’t keen on wiring this corner, so I picked up a battery operated LED lamp for the dresser. It’s been noted on other blogs and forums that these lights have a blue cast that’s not like candlelight or incandescent bulbs. A Greenleaf forum member, Debora, found a wonderful fix for it. She dotted some peach/orange glass paint on the tip of the bulb. The complementary color softens the blue and makes for much better light. The light from this lamp is actually a bit green.
The paint I had on hand for glass and ceramics wasn’t transparent, but I used just a little bit of it so it didn’t block out too much light. I had to mix red and yellow, but it worked! :D
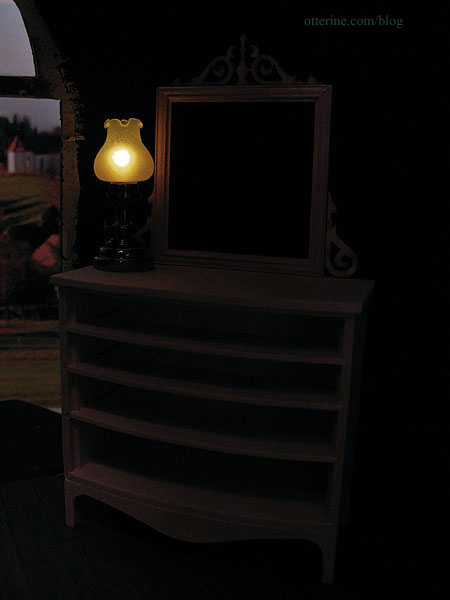
The red paint on the bulb is somewhat visible when the lamp is off, but I’d rather have a closer approximation of candlelight when the lamp is on, so it’s not really an issue for me.
Categories: Furniture, The Haunted Heritage
May 23, 2012 | 0 commentsAntique drum nightstands, part 1
I’ve been thinking awhile on the type of side tables I wanted for the Heritage bedroom. With the ornate bed and feminine vanity and chair, I needed something with antique style while not being overpowering.
My artist models came with round wood bases and metal pins to hold them up, though they stand on their own just fine. I removed these bases when I first got the models, but I kept them since they were smooth round wood shapes and I knew they would make a fabulous trash to treasure project some day.
The bases measure 1 3/8″ in diameter and 9/16″ tall. I grouped them with 1 1/2″ x 1/8″ wood circles and Houseworks 1 9/16″ long spindles.
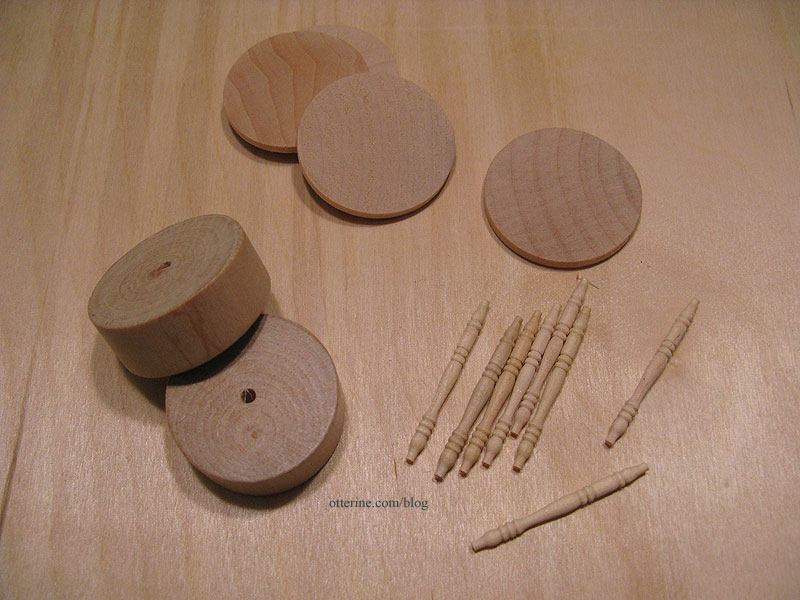
I first glued two circles to the top and bottom of the base.
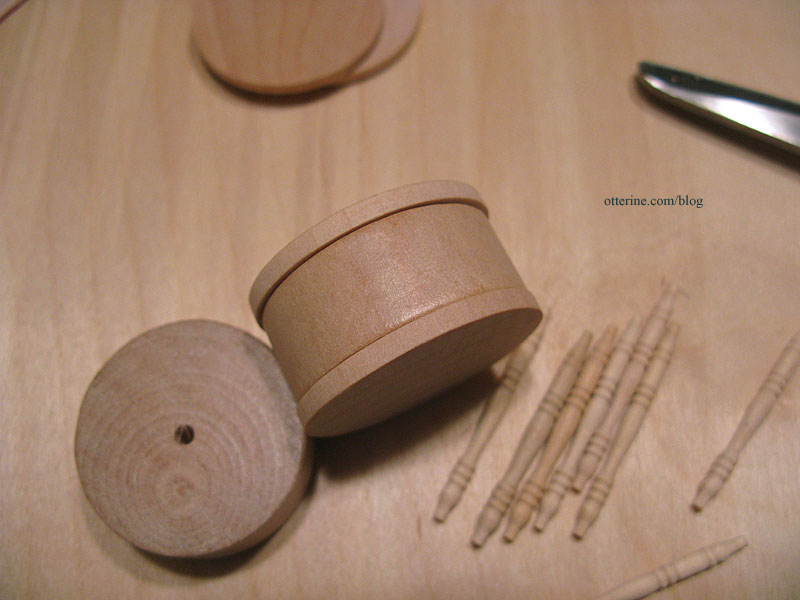
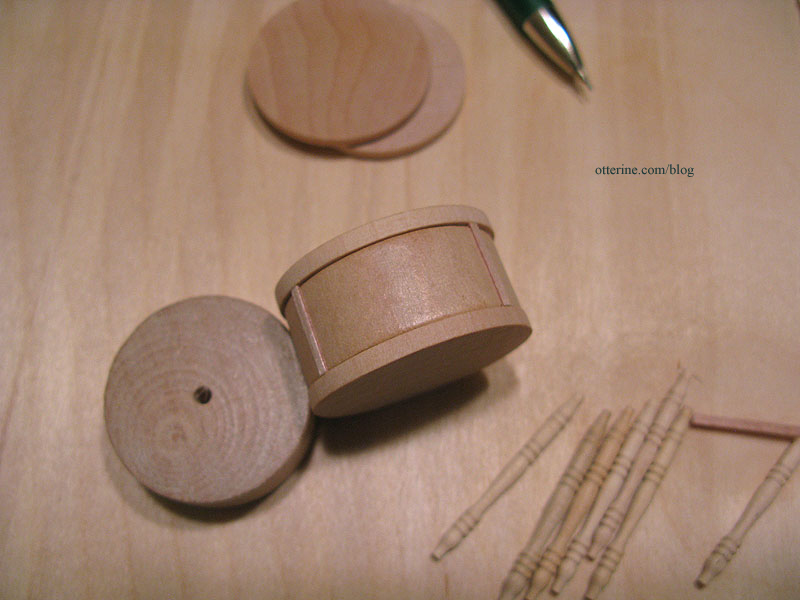
I then added thin veneer strips to delineate a front drawer.
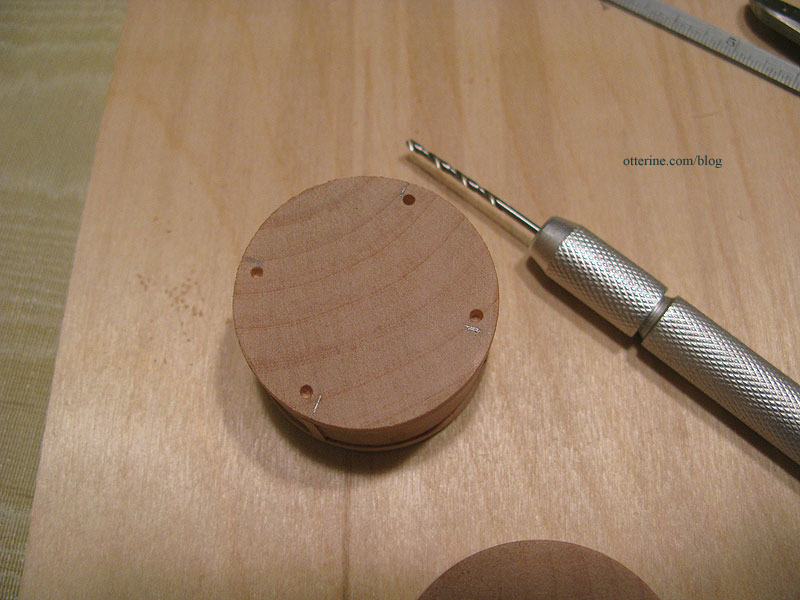
I drilled pilot holes for the four legs.
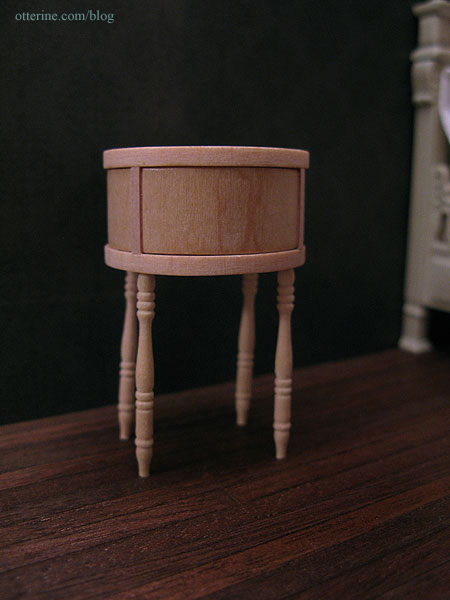
For now, I’ve just pushed the legs into place. I need a clear head and a steady hand to get these glued in straight and even since I like the tables without cross supports.
The pillows were made by me, and Mr. Rabbit is by K. Kuti. I still haven’t replaced the stock bedding that came with the Bespaq bed I’m in the process of refinishing.
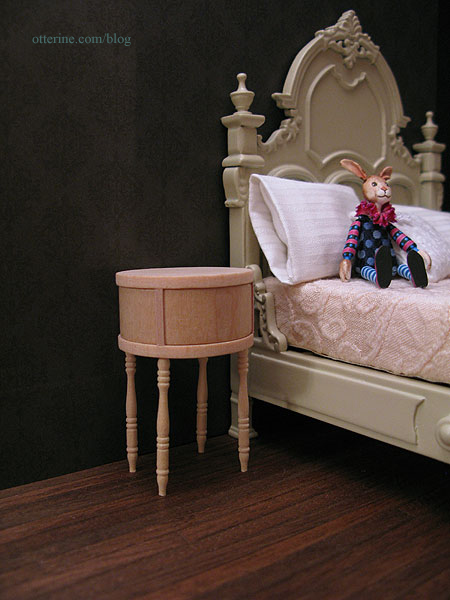
With some fancy painting and antique knobs, the nightstands will fit right in! :D They don’t take up much room but have a nice style.
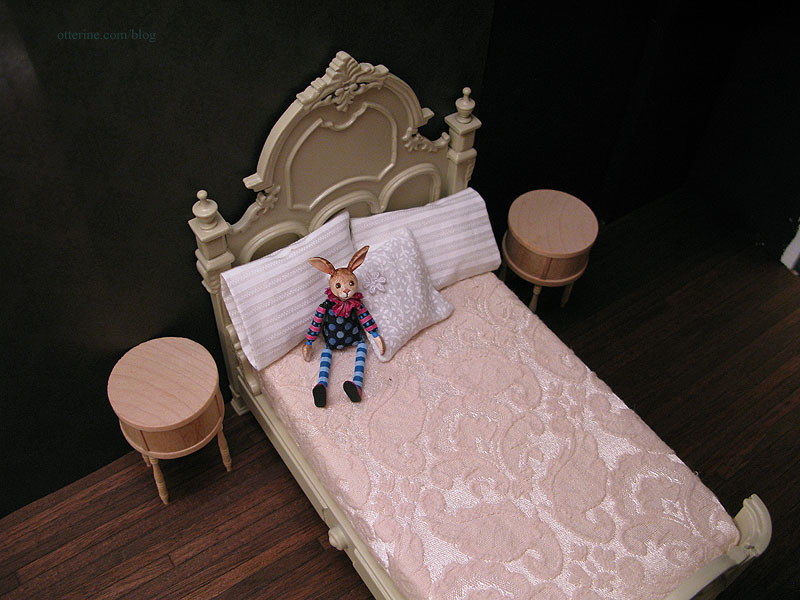
The nightstands received a light spackling to remove some of the imperfections in the wood pieces as well as the rough grain that was showing through the paint. They will need at least one more coat of paint.
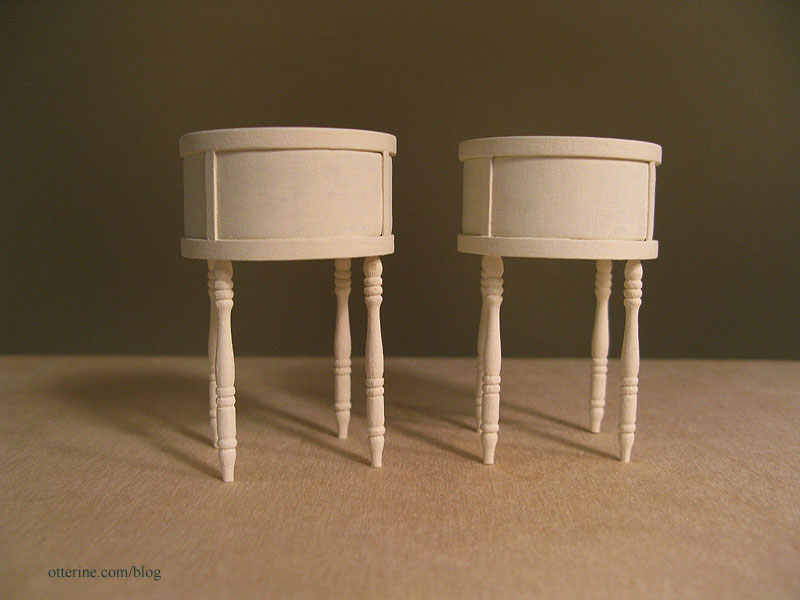
Even though the base coat is lighter than that of the bed, I think the pieces will coordinate well in room. As I mentioned before, I don’t want everything to match but be a collection of well-loved items.
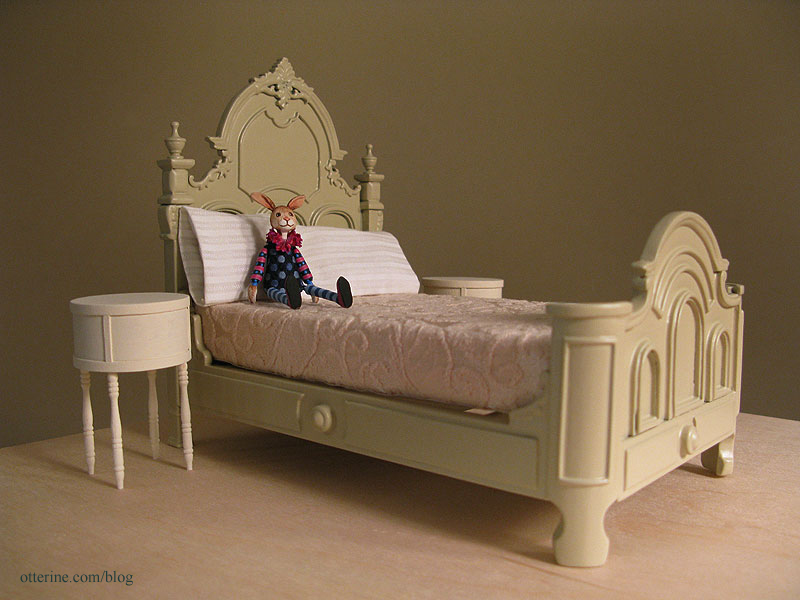
I might give hand painting designs a try for these pieces. They seem to call out for fancying up beyond just pretty hardware, don’t they? I will practice on scraps first, though. I don’t want to have to start all over!
Categories: Furniture, The Haunted Heritage
May 22, 2012 | 0 comments
NOTE: All content on otterine.com is copyrighted and may not be reproduced in part or in whole. It takes a lot of time and effort to write and photograph for my blog. Please ask permission before reproducing any of my content. (More on copyright)


