
Newport – guest bed, part 2
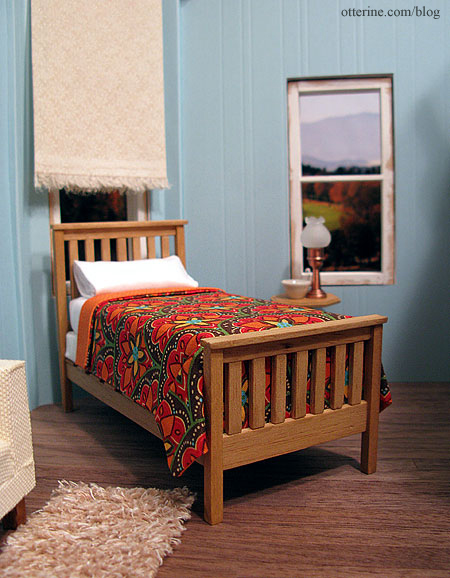
Continuing work on the guest bed. I had originally planned to follow the same method that I used for the Baslow Ranch bed but decided to make the mattress with foam core board as I had done with the box springs. I tried dressing the mattress I made for Baslow Ranch as a mockup for the guest room, but it didn’t look right. There needed to be more structure under the bed coverings, and foam core board provided that. It also allowed me to use up some of the scraps I had laying around.
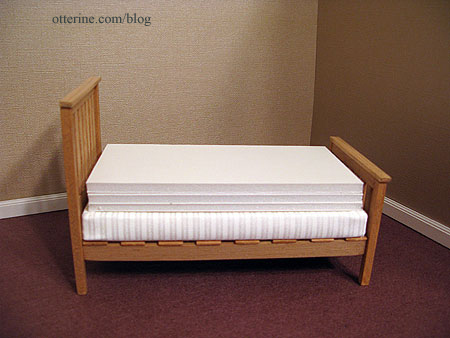
I cut three layers of foam core board slightly smaller than the box springs to allow for fabric coverings.
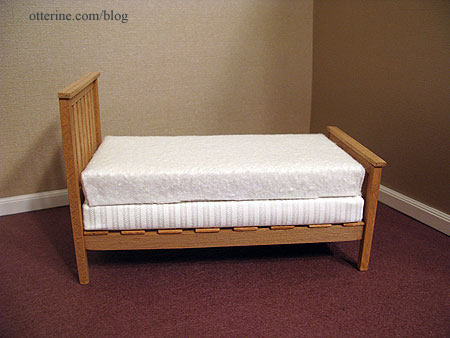
Using the thin batting I had used to stuff the Baslow Ranch bed, I covered the top and sides of the foam core board to give the mattress a softer appearance.
I pinned a scrap of white cotton sateen over the covered mattress and then sewed the corners to make a fitted sheet.
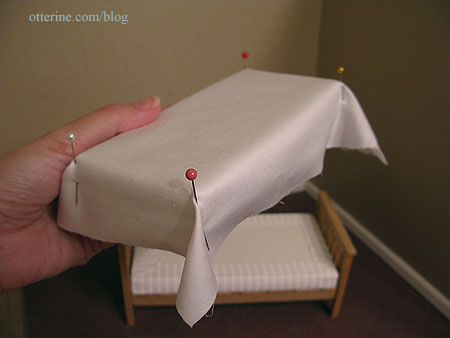
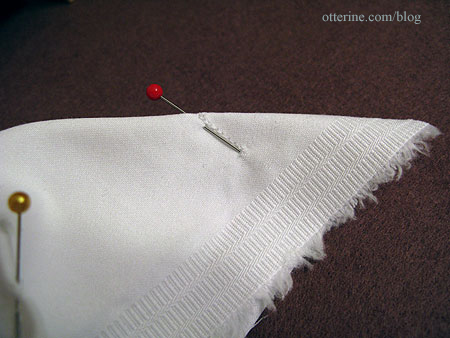
I turned it right side out, stretched it over the mattress and then glued the excess under the mattress.
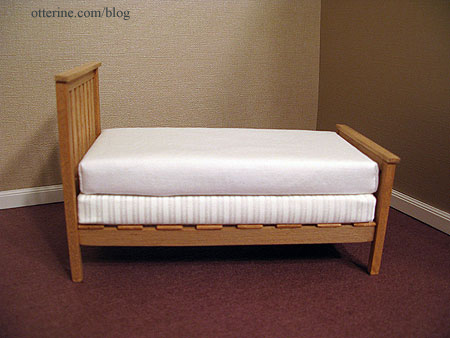
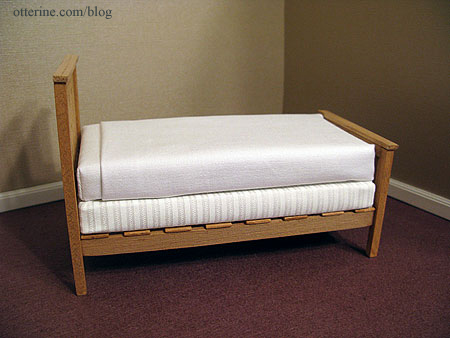
Using the same fabric, I made a flat sheet, turning the edge under near the head of the bed. I didn’t sew the corners on this sheet. Instead, I folded the corners and glued the excess under the mattress.
I made a blanket for the bed using two coordinating cotton prints that came in a set from Joann Fabrics. I didn’t use any batting since the double thickness seemed to have enough weight. I pressed it into shape on the bed and dabbed a tiny bit of glue where needed to keep the blanket flat on the bed.
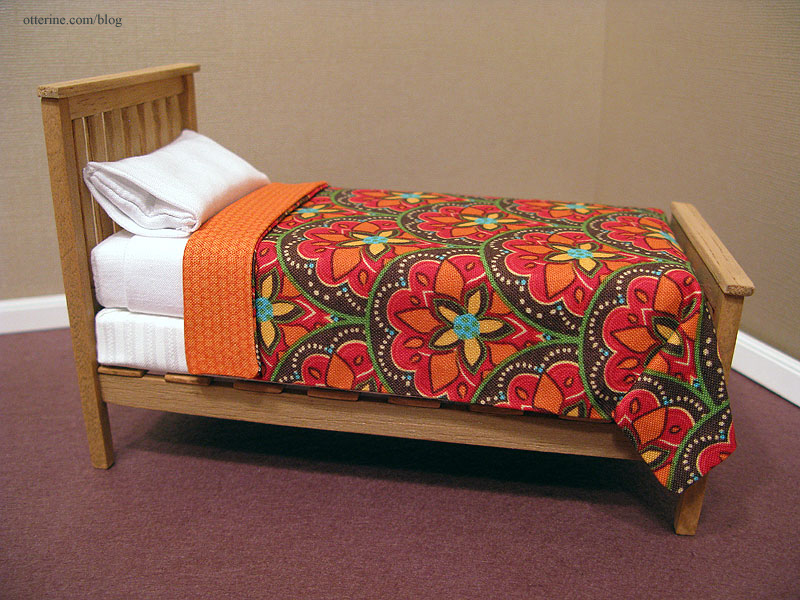
I made a pillow for the bed using the white sateen, filling it with beads. I then sewed a pillowcase out of the same fabric and squeezed the stuffed pillow into it. I like the way the pillow is bowed inside the crisp pillowcase; I think it adds a bit of realism.
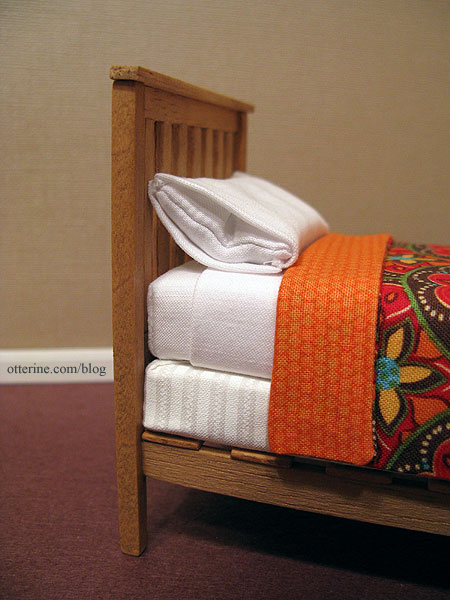
My first dressed bed! Hooray!
Categories: Furniture, The Newport
July 21, 2010 | 0 commentsNewport – master bedroom bed and box springs
I bought a Daisy House full bed kit before I knew I had the knack for scratch building furniture, but I still like it and think it was worth it. :D The wood in the kit was high quality, and it went together beautifully. The kit even comes with sandpaper, toothpicks and cotton swabs to help with assembly and finishing.
Instead of finishing the headboard and footboard with the supplied flat wood, I used the leftover carved post toppers from the House of Miniatures single bed kit I used for Baslow Ranch. I painted the bed black and sealed it with satin varnish by Delta Ceramcoat.

Interestingly enough, it looks a lot like our real life bed! :]

Even though I am mainly working on the guest room for the moment, I wanted to finish the master bed so I could complete some of the same steps needed for both beds at the same time…namely the mattresses and box springs.
For the box springs, I used three layers of foam core board glued together with tacky glue. I cut them smaller than the bed frames to leave room for fabric coverings.

I prepared a long strip of fabric by using HeatnBond (a fabric adhesive) to create a double thickness of material. The fabric would have been too thin to use a single layer.

After gluing one end of the strip to one of the shorter ends of the foam core board stack, I wrapped the strip all the way around the bed without using any glue until I got back to where I started. I didn’t want the sides to look glued down or for the layers of board to show through.

I clipped the corners on the top and bottom edges and then glued the flaps down on either side.

The result is a covered box spring pretty enough to show. The mattresses will cover the tops, so only the pretty fabric sides will show.

Categories: Furniture, The Newport
July 18, 2010 | 0 commentsHouse of Miniatures Chippendale 3-Drawer Chest
I scratch built a mirror from frame strip wood and plastic mirror sheet by Darice. This inexpensive material is awesome…it is thin enough to be cut with scissors to any size or shape and it has a perfect mirror finish. Much easier than using real glass mirrors for minis. The mirror looks scratched and cloudy in the photos since I haven’t removed the protective film yet.

The House of Miniatures dresser is mocked up here without the drawers…or glue for that matter. :]

I finished the pieces with IKEA antique pine stain to match the bed and side table, also shown in the photo.

I sealed the stain with satin varnish by Delta Ceramcoat. It gives the wood a soft, subtle finish that I think looks very realistic in miniature.

The dresser kit went together flawlessly. I’ve used jewelry findings for the knobs.

I just love the finish and details of this dresser…

Categories: Furniture, The Newport
July 17, 2010 | 0 commentsBaslow Ranch – Mattress construction
My mattress tutorial was featured in the June edition of the Greenleaf Gazette! :D There is a wealth of information in their newsletter so be sure to check out the archive as well.
———
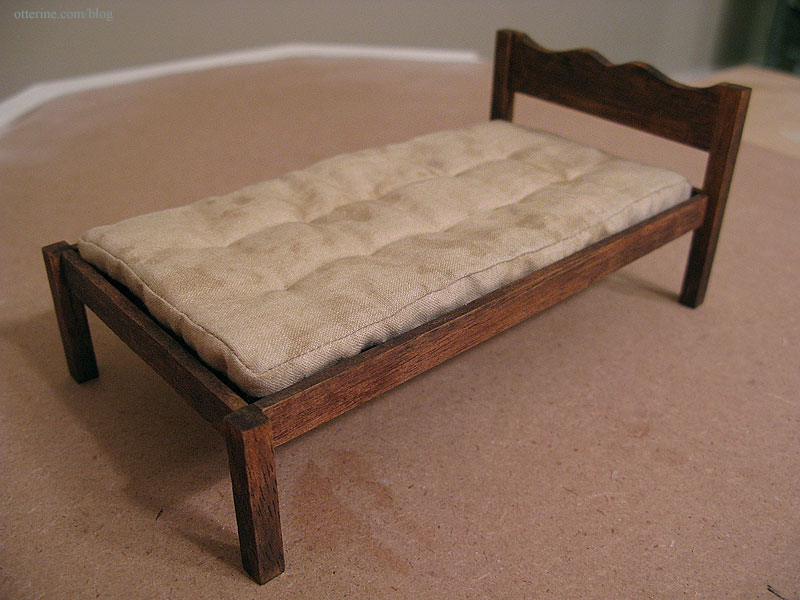
For my Greenleaf 2010 Spring Fling entry Baslow Ranch, I made a mattress to fit the House of Miniatures single bed. I started with calico cotton fabric that had an old, stained look to it but this method can be used with newer looking fabric as well.
The inner measurements of the bed frame were approximately 3 1/4″ x 6 3/8″ so I cut two pieces of fabric measuring 3 1/2″ x 6 3/4″ (figuring in a 1/4″ seam allowance). I also cut a 19″ long strip of fabric 3/4″ wide; this gave me a mattress about 1/4″ thick.
For a different sized bed, I am afraid to say there will be math involved. If you want to cover the mattress with thick bedding, you will need to make your mattress smaller than the bed frame. You’ll also need a longer strip of fabric to make it all the way around a larger mattress. If you want a thicker (taller) mattress, you will need to cut a wider strip of fabric.
Here are the steps I used to put the mattress together. Use a small stitch so it will look more in scale when complete. With right sides together, pin the two ends of the fabric strip together and sew a 1/4″ seam. This will give you a loop of fabric. Pin one edge of this loop to the edge of one of the base pieces, clipping at the corners.

Sew all the way around using a 1/4″ seam and then clip the excess fabric across the corners. This will cut down on the bulk in the corners when the mattress is turned right side out.

Pin and sew the second base piece to the remaining edge of the long loop of fabric (again clipping at the corners), leaving about two to three inches open in the seam for stuffing the mattress.

Turn the mattress right side out. Use a pointy (but not sharp) object to make sure the corners are squared and open completely.

For the stuffing, I used thin batting that is meant for millinery (I had some left over from previous projects). It’s similar to felt and can usually be found in fabric stores. Felt would work just as well, though you may need more or less depending on the thickness of the material. I cut four pieces measuring 3″ x 5 3/4″ of the millinery batting for my mattress. I rolled them all together into a tube shape, inserted the tube into the opening and then flattened the batting out inside the mattress cover. It will take a bit of effort to get them straight and flat inside, but you won’t get the right look without it.

Once stuffed, I blind stitched the opening to close up the mattress.

I marked a grid of one inch squares on the mattress and used thread knots through all thicknesses to quilt the mattress. You can make the grid smaller or larger to suit your tastes.

Here’s the completed mattress on the bed. Though it doesn’t translate in photos, this really feels like an old, lumpy mattress. But, I bet it would feel perfect after a hard day’s work at the ranch! :D
Categories: Baslow Ranch, Furniture
July 13, 2010 | 0 commentsNewport – guest bed, part 1
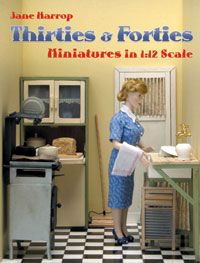
One of my favorite dollhouse furniture books is Thirties & Forties Miniatures in 1:12 Scale by Jane Harrop. There are a lot of great projects in this book that are both classic in design and usable in a more modern setting. I plan to make several of the items, but I decided to start with one of the more straightforward designs listed as “beginner” level: the single bed.
I used balsa wood for the build since I am not sure where I would find the obechi wood the book indicates. Balsa can damage easily, but I love the way it looks once stained. It’s also very easy to cut. (Note from the future – I would no longer use balsa to build, and this bed has suffered damage over the years.)
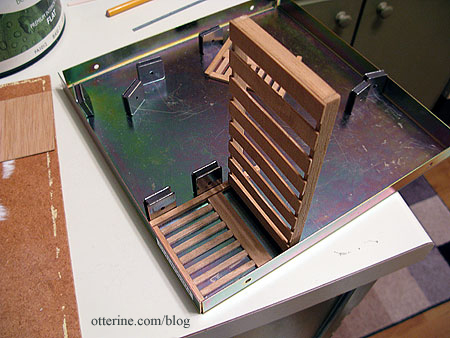
I love the look of the bed with the high headboard. I used antique pine stain from IKEA.
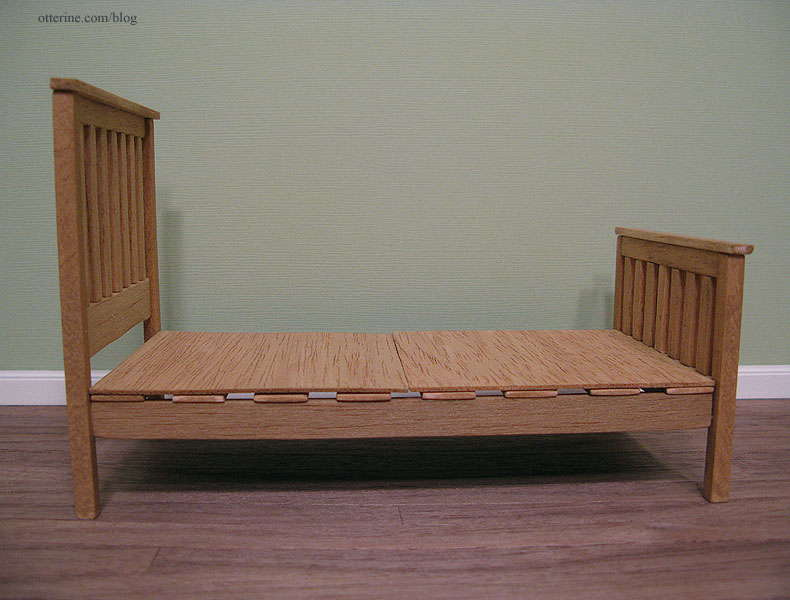
The most difficult part of the whole process was making sure the slats on the headboard and footboard were measured exactly.
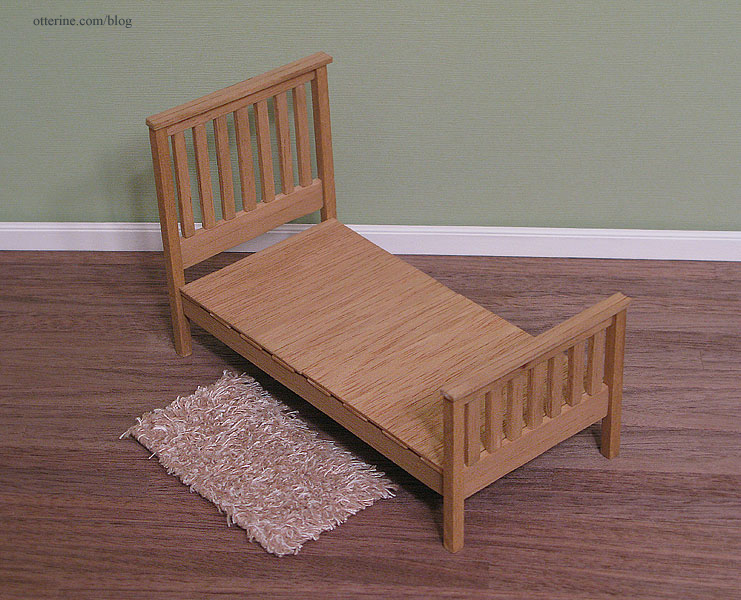
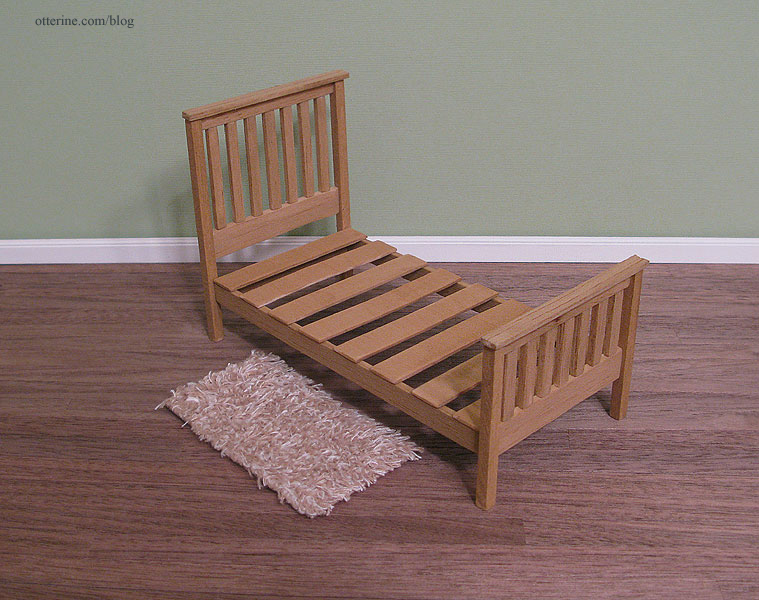
The bed has two flat boards (shown above) that I left unattached. Once I figure out the bedding, I’ll decide if I need them or not.
Categories: Furniture, The Newport
April 10, 2010 | 0 commentsPlant stand and mannequin
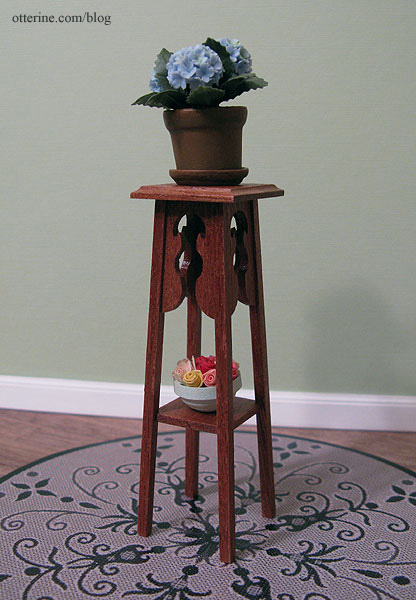
While buying supplies from a shop in the UK, I added a plant stand kit by McQueenie Miniatures to my order. It’s a beautiful kit made from mahogany that was very easy to put together. I sealed the wood with satin varnish by Delta Ceramcoat to bring out the grain of the wood.
The hydrangea plant is by Falcon Miniatures. I made the roses and bowl from quilling paper many years ago. The rug is a paper printout of the Piazza rug by Dynamic Rugs.
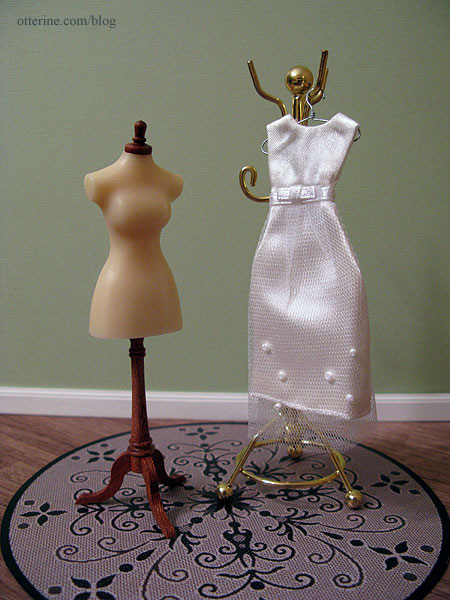
The other kit came from Hazel Dowd, a different supplier in the UK. The mannequins are sold premade as well, but I bought it unassembled at a lower cost. It was a very easy kit, again with a wood base and cap beautiful enough to varnish without modification.
The wire hanger is by Handley House and the dress is a scrapbooking item by Jolee’s by You. I plan to make some clothing myself but couldn’t pass up this beautiful dress in perfect scale. :D The brass coat rack came from a furniture lot a friend gave to me.
Categories: Furniture, Miniatures
March 13, 2010 | 0 commentsDivan and tray
I had no idea what a divan was, but when I saw one in Dolls’ House Furniture: Easy-to-make projects in 1/12 scale by Freida Gray I knew I had to have one. :D

I used the instructions in the book as a starting point but ended up making my divan a different size and height. I also changed the way it was put together compared to the book’s construction.
I eyeballed the size I wanted and cut the top and base from 1/2″ balsa. I added a frame of 1/4″ balsa to the base to make it thicker.

I used 1/2″ wood blocks for the feet, painting them Bittersweet Chocolate by Americana.

I hemmed a strip of fabric and wrapped it around the base, leaving just a tiny bit of the legs exposed.

This project was made much easier by using Peel-n-Stick Fabric Fuse. It’s an adhesive on a paper backing that you stick on, peel away the backing to expose the other side of the adhesive and then press in place. It comes in different widths; I bought a 5/8″ wide roll. I tacked the excess fabric on top of the base with tacky glue and set it aside.
I put a thin layer of batting on the top piece.

I have a vintage Tot 50 stapler by Swingline, and this is the first time I’ve used it in years. :] It made it very easy to upholster the top and get a taught surface over the batting.

I glued the top to the base with tacky glue and set the assembly aside.
In order to create the band to cover the seam between the top and bottom pieces, I used a strip of crinoline covered by fabric. Crinoline is a stiff fabric that makes it very easy to get a crisp band of fabric with no wrinkles.

I used the Peel-n-Stick fabric fuse to attach the band. There is a seam for both the bottom fabric and the band, but you would have that on a real life upholstered piece as well.

I love it! It now serves as the coffee table for the study.
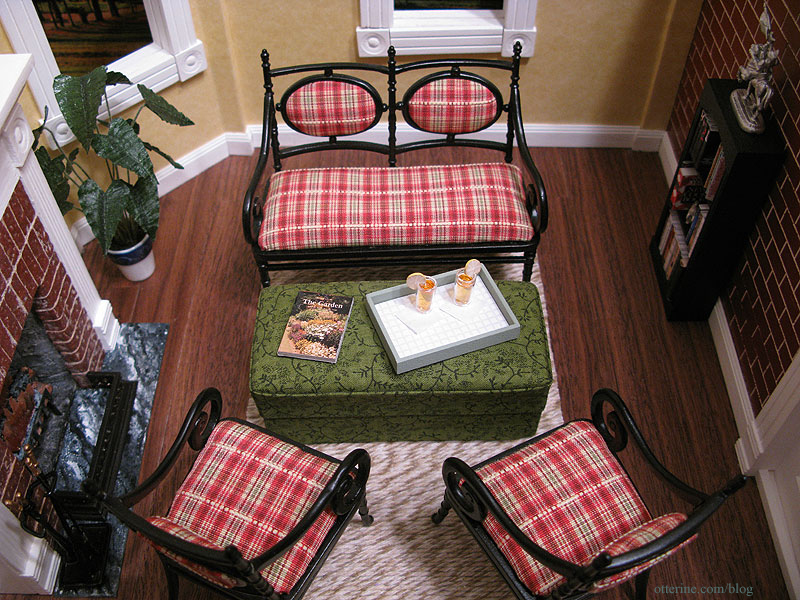
The green of the divan fabric brings out the green in the Bespaq plaid furniture in the room.

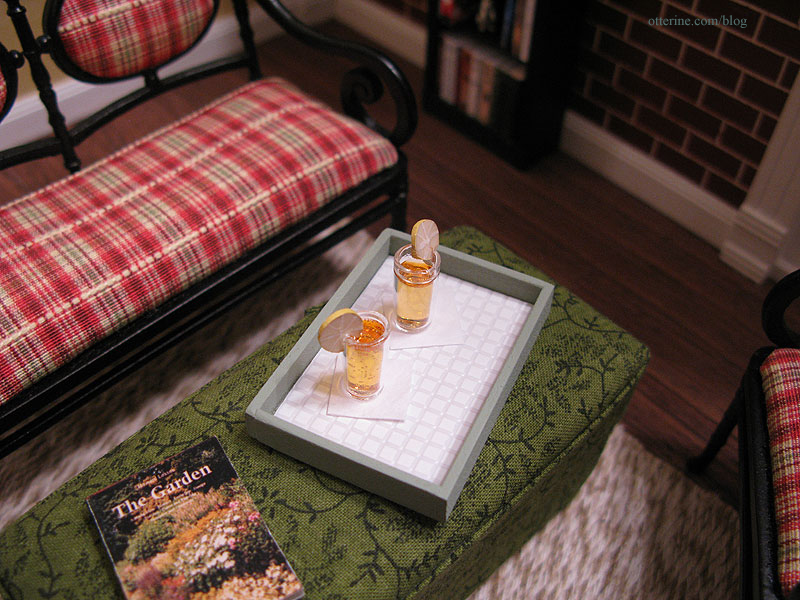
The tray is a replica inspired by the shabby chic trays made by Pei Li, an artisan who makes some absolutely beautiful 1:12 scale miniatures.
Categories: Furniture
February 15, 2010 | 0 commentsScratch built sofa
I borrowed Dollhouse Magic by P. K. Roche from the library, and it turned out to be a rather simplistic book of miniature making, such as using thread spools for tables. But, the instructions on using kitchen sponges to make sofas and chairs inspired an idea. I wanted the living room to be more modern, and I thought using sponges would be a great way to achieve the shape a modern sofa. It would be easier than trying to cut and shape pieces of wood while still being firm enough for structure. I could add thin pieces of wood where I needed extra support and then upholster the piece with batting and fabric.
After scouring (er…nevermind) the internet for ideas, I decided to go with the Dream Velvet Sofa by Graham & Green, a home furnishing company in the UK.
I bought cellulose sponges in different shapes and sizes at Target. I had to leave them out on the counter for a few days to let them dry out. In the process of drying, they shrank a bit so I was glad I hadn’t used right them out of the package.

Using the overall real life dimensions as a guide, I started cutting the sponges into thinner pieces. I used the curved sponge to make the arms of the sofa, cutting it into thinner sections using a serrated kitchen knife. It was rather like cutting really stale bread. :D

I used a large sponge for the base of the sofa. It had dried to an uneven thickness, so I marked all four sides with a sharpie and used the knife to shave off the excess and shape the base.

Below is my initial basic sponge structure. The cushions are cut small to leave room for batting and fabric. I’ve used some wooden beads to mockup the legs, but I’ll shape some legs from wood during the finishing process.

The back cushions on the original sofa were taller than the back, so I think my side angle is a bit steep. I’ll have to cut that down before upholstering. The coffee table here is just a placeholder; it’s a bit traditional for this modern room.

For the upholstery, I chose chocolate brown micro suede. I’ve been sewing for a long time, but this was my first time upholstering…mini or otherwise. It took me quite some time to figure out the best way to get the fabric on the sponge and wood frame. I sewed some, glued some…swore some. :]
I used batting to smooth out the front edge of the base and the seat cushions. I glued a thin sheet of balsa wood to the back to have a smooth surface under the upholstery. Here it is in mid-assembly.

Here it is mostly complete. I need to tweak the fit of the cushions and adjust the legs, but overall I like the way it turned out. :]
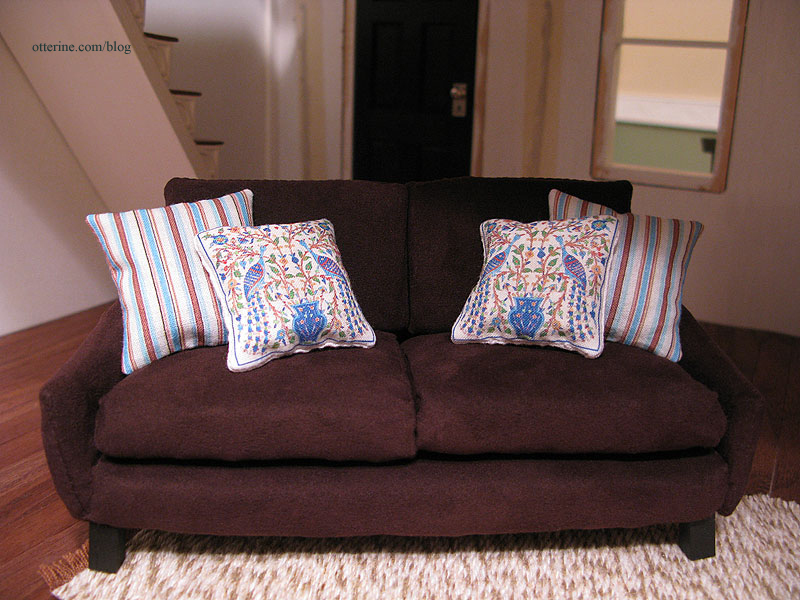
The striped pillows were created by finding designs online, resizing in PhotoShop and printing on fabric. The bird pillows are actually made from a resized image of tiles by Jerusalem Pottery, which I then printed on fabric.
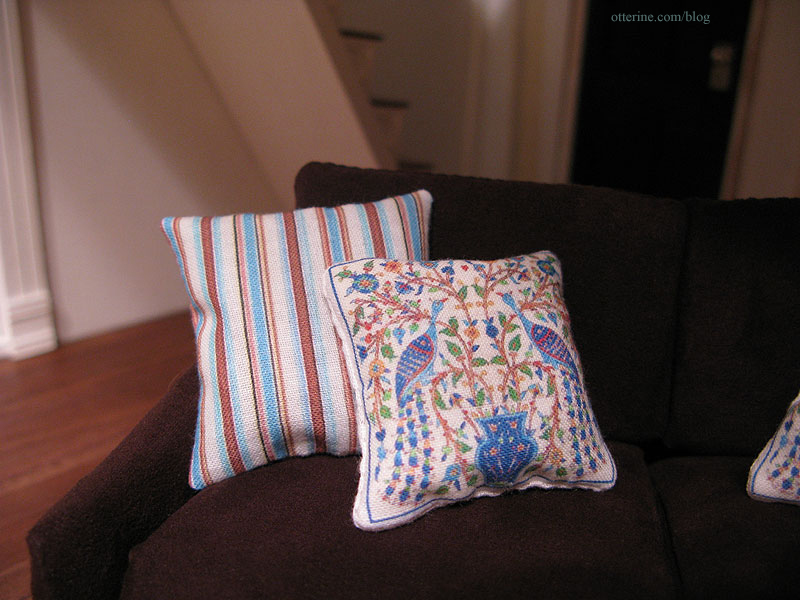
Filling the pillows with beads gave them some weight and made it easier to shape them.
Categories: Furniture
February 12, 2010 | 0 comments
NOTE: All content on otterine.com is copyrighted and may not be reproduced in part or in whole. It takes a lot of time and effort to write and photograph for my blog. Please ask permission before reproducing any of my content. (More on copyright)
Categories:

House of Miniatures Chippendale Desk
I have my final layout for furnishings figured out, and I need a desk! I’m working with a House of Miniatures Chippendale Desk kit.
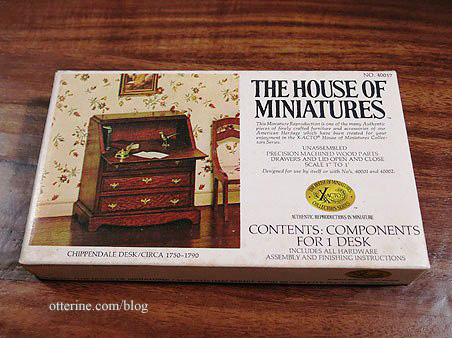
I built the desk without modification and painted it black to start. I sanded the finish smooth and then planned to add two coats of a lighter color, sanding to pull the black through in areas. But, now I’m torn. I love the distressed finish!
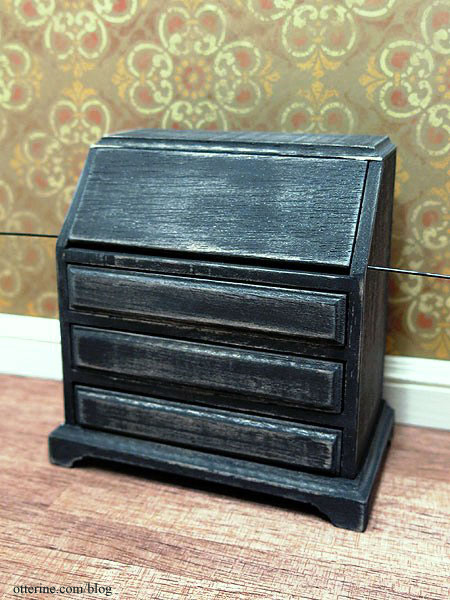
I could seal it as is to deepen the black and preserve the rustic look.
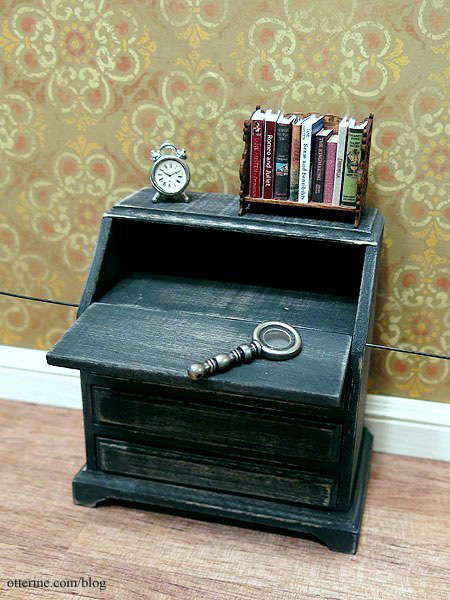
I left it for awhile and decided to keep it. A miniaturist on the Greenleaf forum suggested a stain to deepen the look, so I added a brown-black wash to tone down the lightness of the exposed wood. I then sealed the piece with Delta Ceramcoat Satin Varnish.
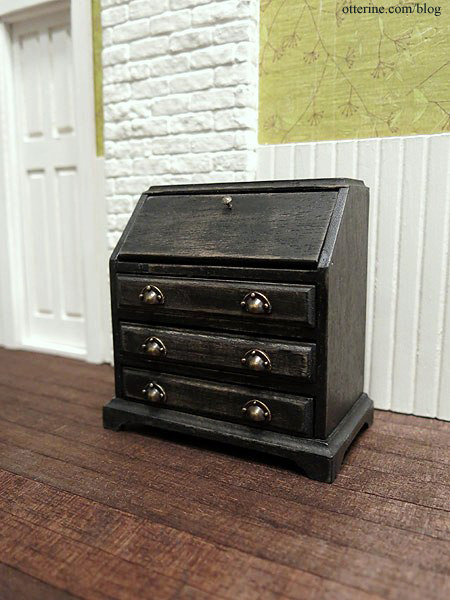
The drawer pulls are by Dijon Limited, and the knob is brass painted with Liquitex Iridescent Bronze.
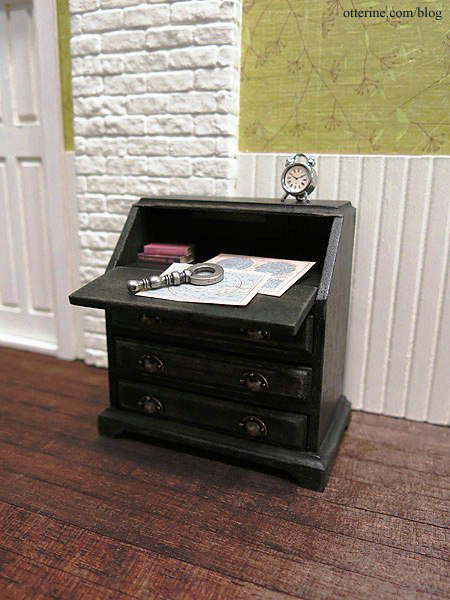
The clock is from Manor House Minis, the star charts are from L Delaney, and the magnifying glass is a jewelry finding. I made the books.
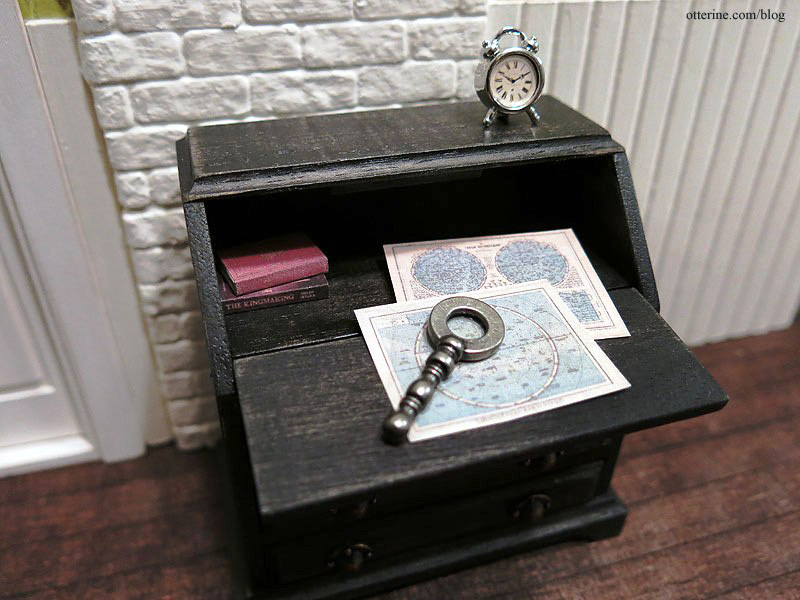
Yep, I love it! :D
Categories: Furniture, Walnut Bay Light
November 23, 2013 | 0 commentsChrysnbon parlor stove, part 1
This stove is fancier than I care for, so I have a few changes in mind to tone down the bling.
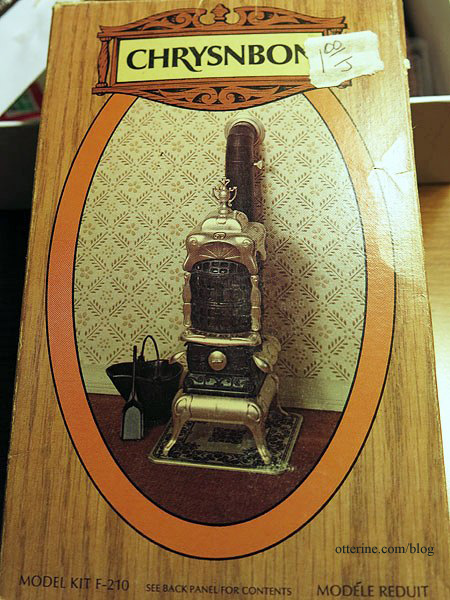
I left out the acetate window films included with the kit for now. Here’s a real life example of this stove showing these window inserts.
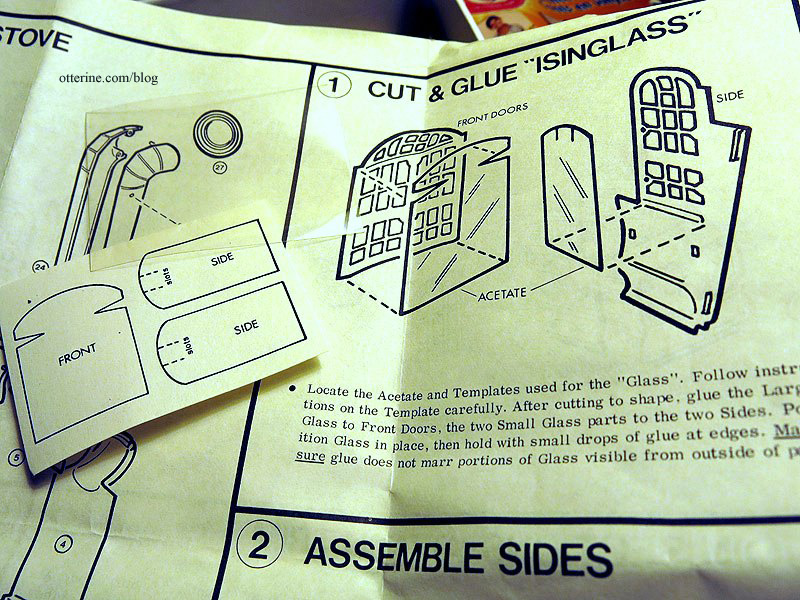
I plan to paint the stove to a uniform black, so adding the acetate would end up covered up with paint. A lot of the silver pieces had the finish worn away in places, so it was a good thing I didn’t plan to make this kit straight out of the box. It was still worth the $1 I paid for it.
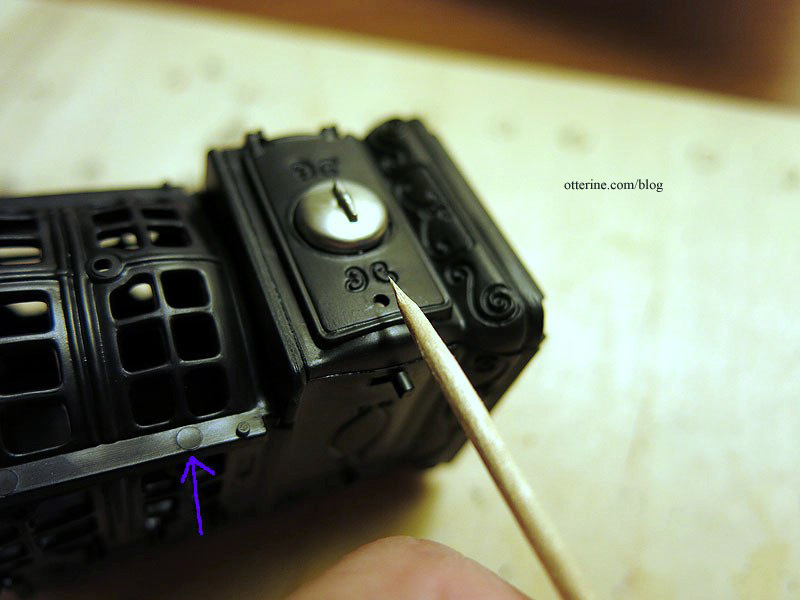
One nice thing about this kit is that the injection marks are mostly located in places that are covered by other pieces. There was very little prep work needed to address those. To make it easier to apply glue into the tiny holes, I tapered a toothpick with my X-Acto blade.
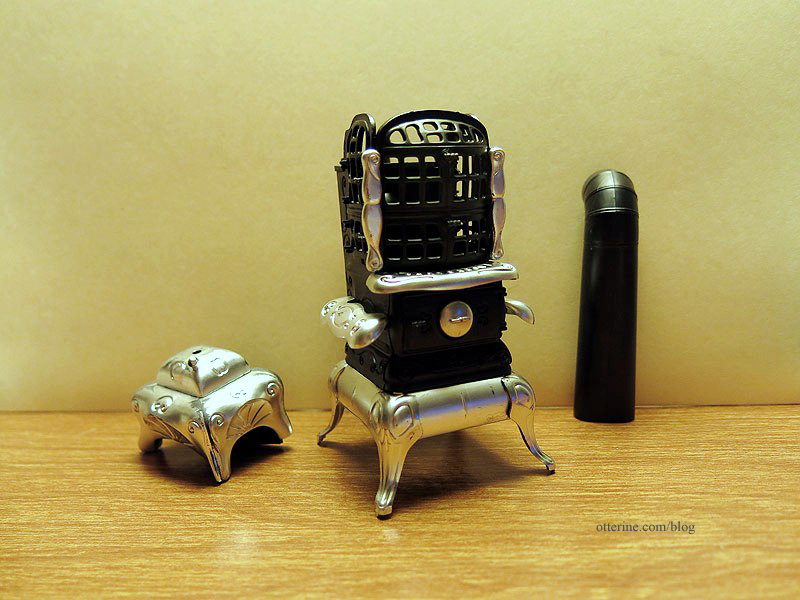
I assembled the main lower body and left the pipe, dome top, base and topper separate. This method will allow for easier painting and addressing the windows afterward.
I spray painted the stove with Krylon Fusion flat black. I have the stovepipe also painted, but I didn’t photograph it because it was drying on another board.
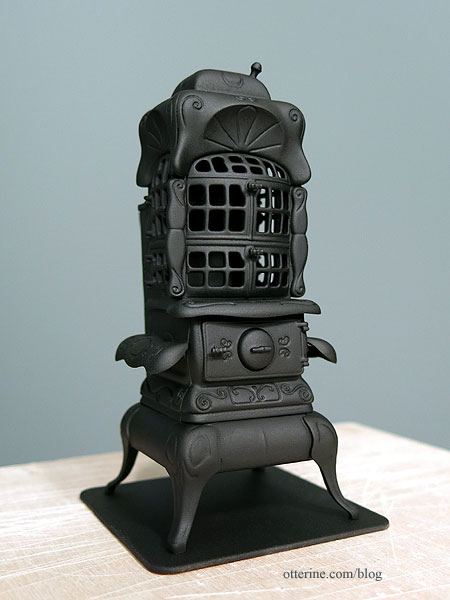
It toned down the super fancy look of the stove while still maintaining a lot of character. In fact, the silver accents it had distracted from all the intricate detailing.
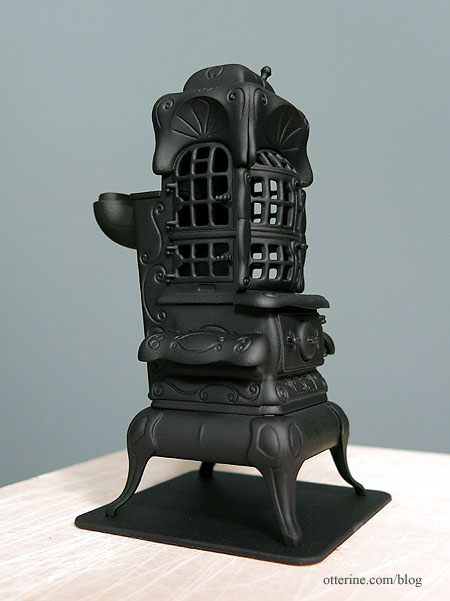
Finishing to come….
Categories: Furniture
November 22, 2013 | 0 commentsAntique drum nightstands, part 2
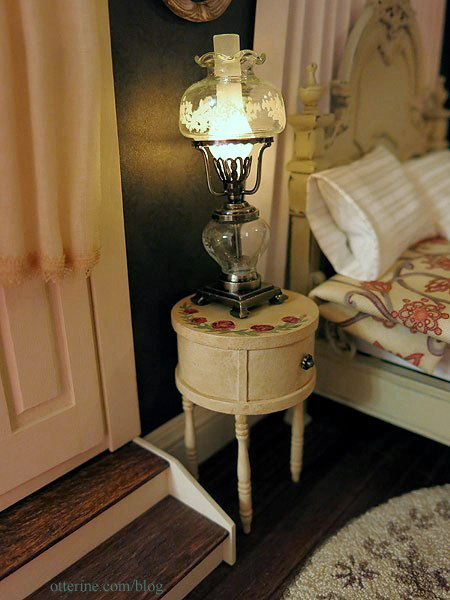
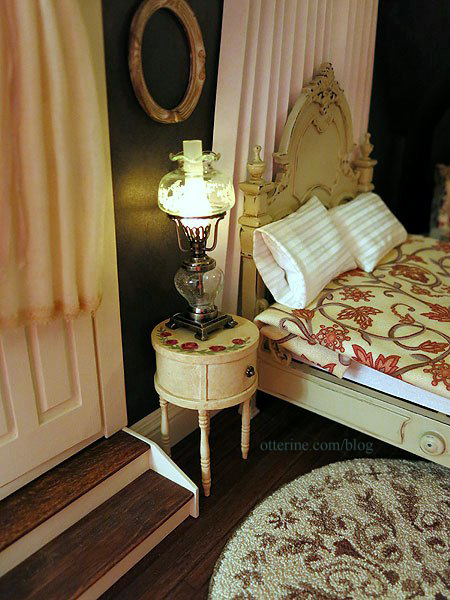
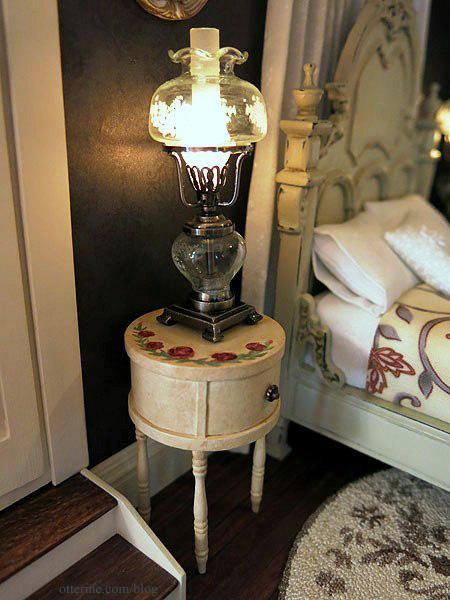
Continuing work on the antique drum nightstands. Instead of matching the painted bow front dresser, I chose a different design for the nightstands.
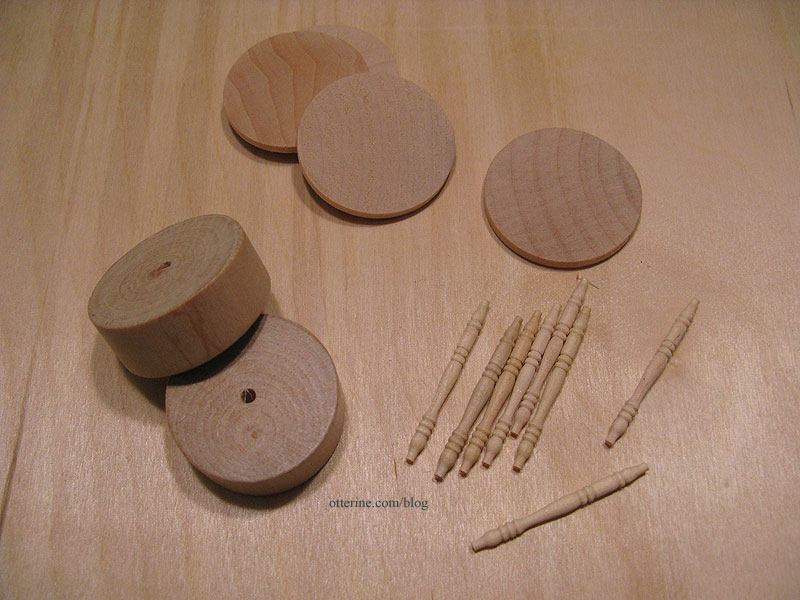
As a reminder, the nightstands were made from the round stands that came with my artist models, 1 1/2″ x 1/8″ wood circles and Houseworks 1 9/16″ long spindles.
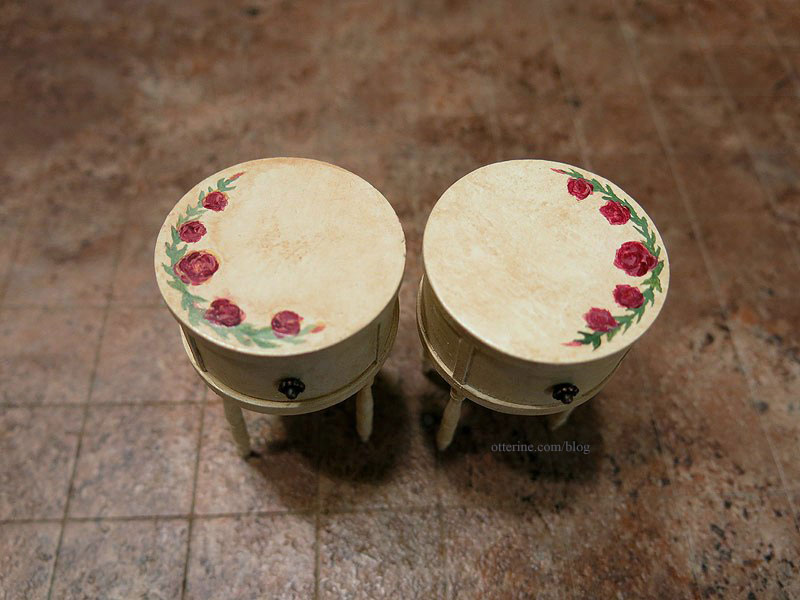
I painted them with a base coat of Tapioca by Folk Art then added an aging wash of light brown. I then painted the green vines, followed by red and yellow for the roses.
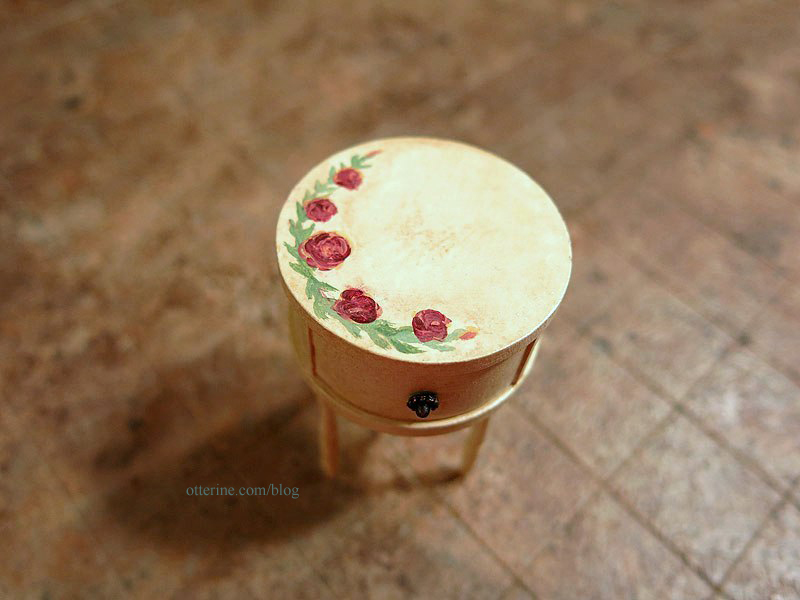
The knob is the fancy end of an antique copper headpin. I love the way it turned out.
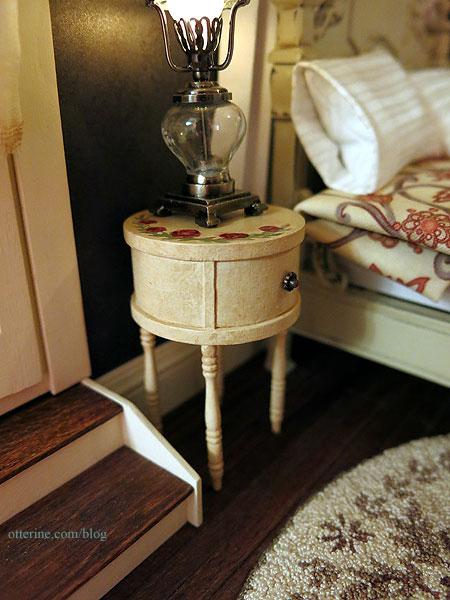
It fits in well with the rest of the furnishings.
I finished painting the second nightstand, and they are a pretty close match to one another.
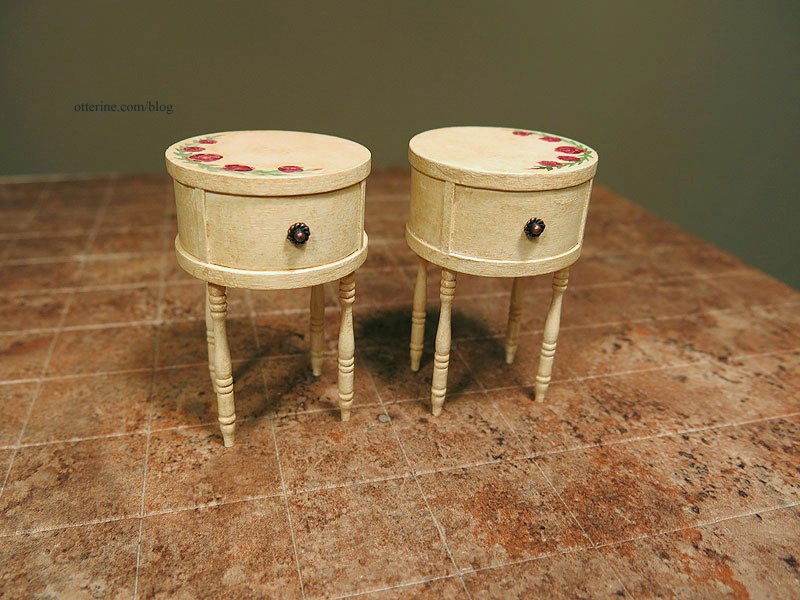
I opted for doing mirror image painting so they would look more like a planned set than two of the same table.
There’s not much room on them for anything besides the lamps, but it all seems to work well together.
With these completed, this room is almost finished! :D
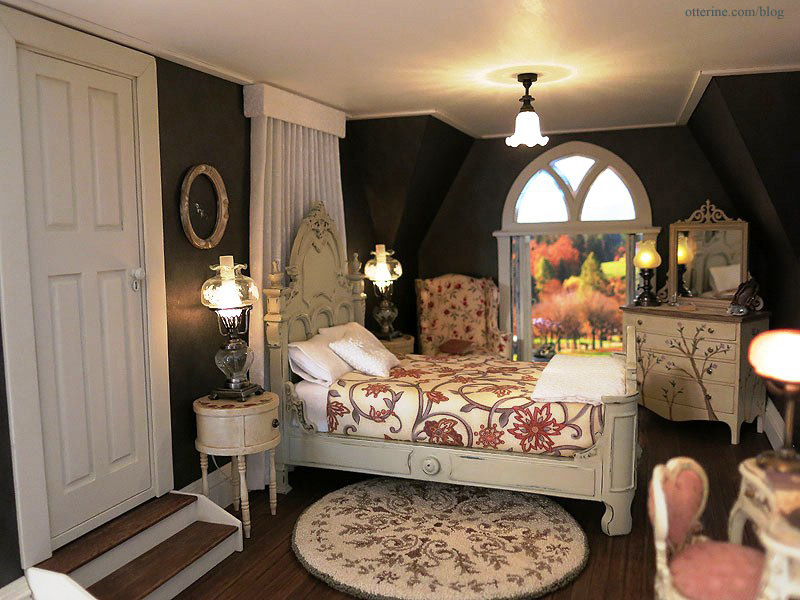
Of course, it hasn’t been fully accessorized yet, so stay tuned!
Categories: Furniture, The Haunted Heritage
August 1, 2013 | 0 commentsBespaq bed makeover, part 2
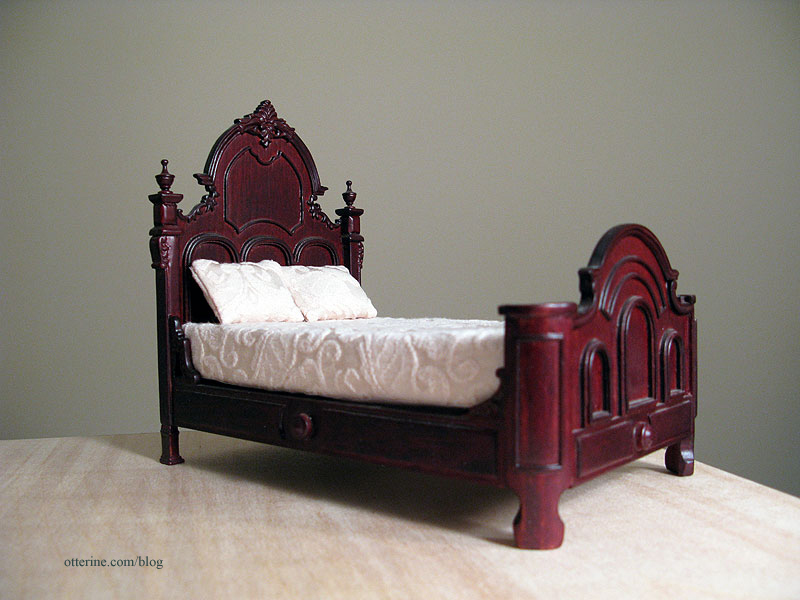
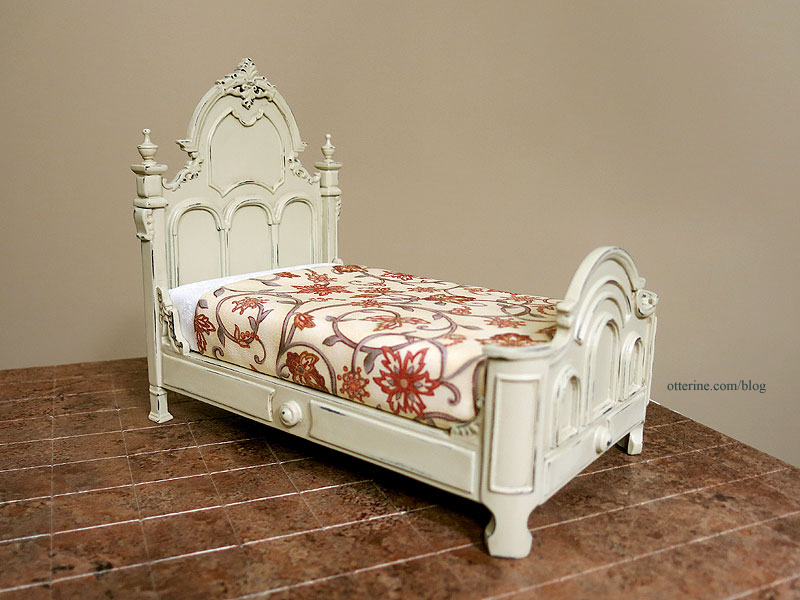
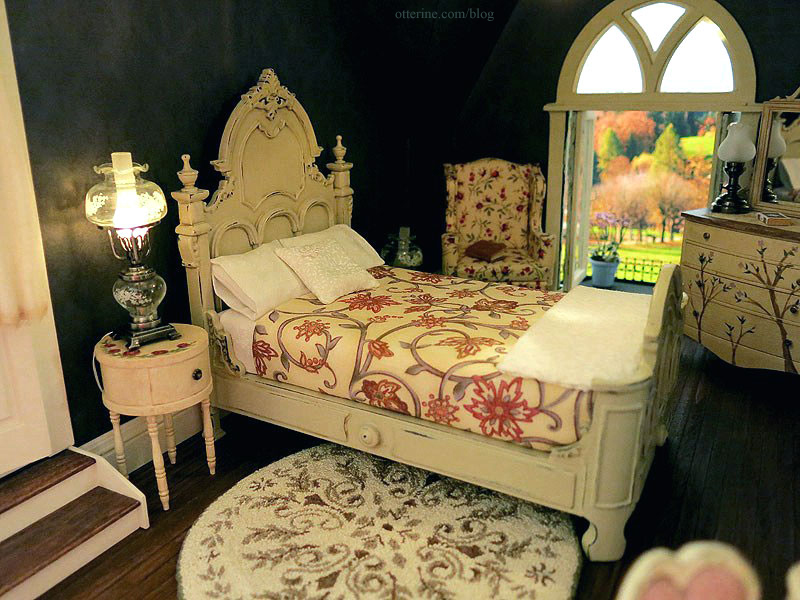
The Bespaq bed makeover is done!
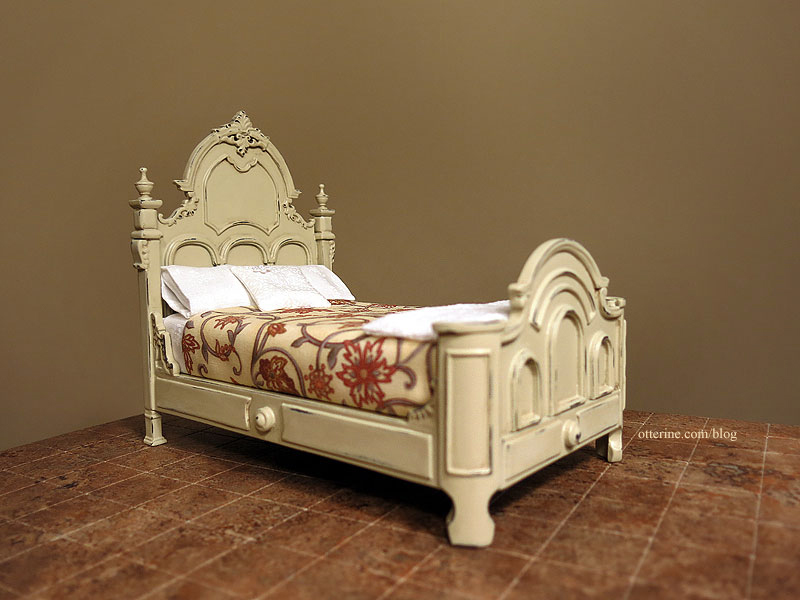
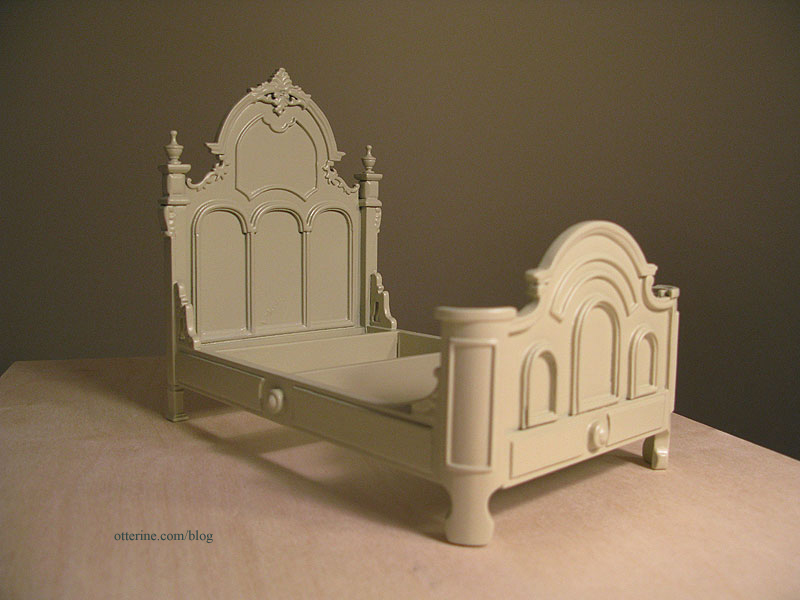
This is where the bed started.
Then primed (grey) and painted with Krylon Almond in satin finish.
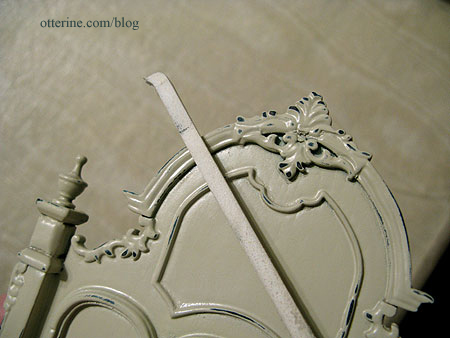
Then aged by sanding.
I cut new foam core board pieces to replace the original mattress.
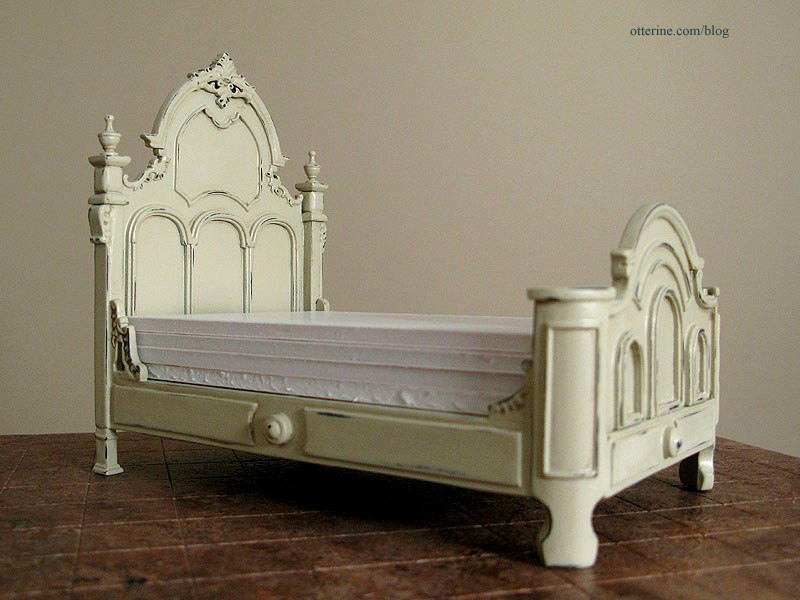
I started the bedding, first by applying a layer of millinery batting to the foam core board mattress base.
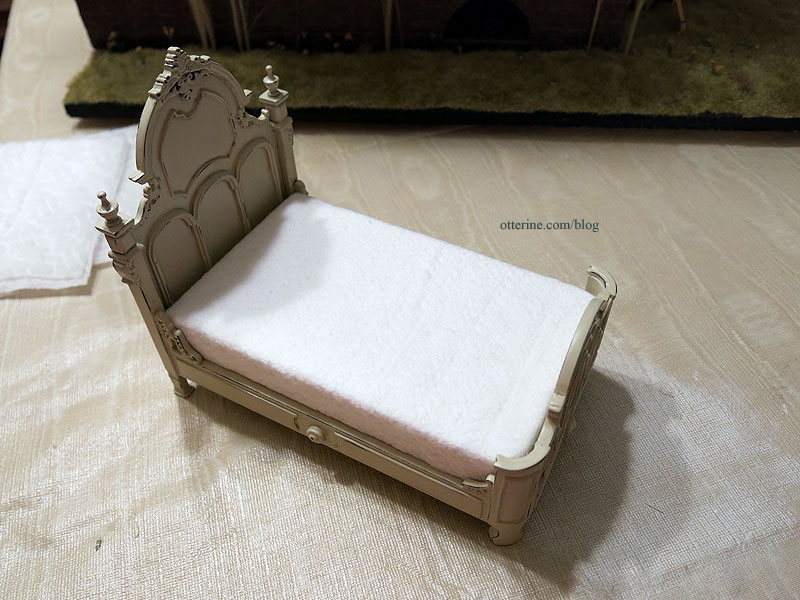
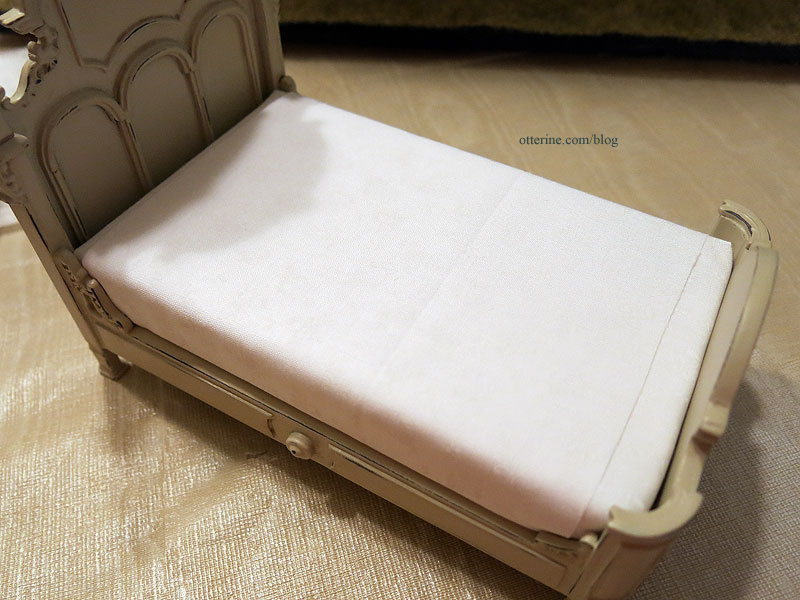
I added sheets made from sheer white floral fabric. Since there would be a coverlet, I opted to keep the top sheet short to cut down on the bulk.
I sewed the coverlet from the fabric April sent to me, adding a plain white backer. I would like to try my hand at an unmade bed, but in the interest of time I went with my standard treatment.
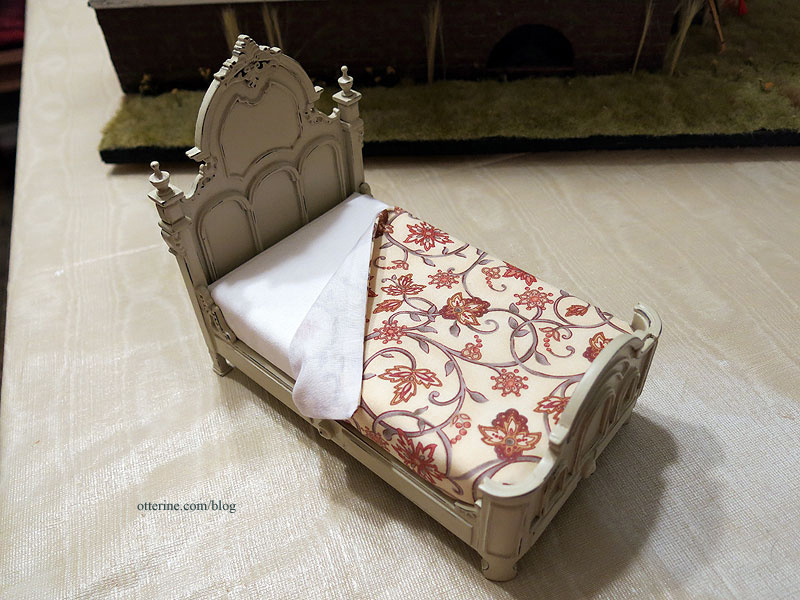
I like the way it pulls in the colors of the other furnishings, and the large scale of the flowers balances out the busier patterns throughout the room.
I sewed some pillows and made pillowcases from the same sheer white floral fabric as the sheets. I added one small white printed floral pillow to complete the bedding. It has a tiny venise lace flower attached in the corner.
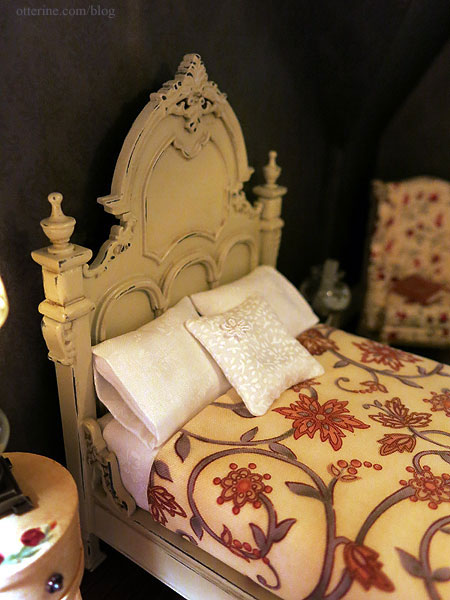
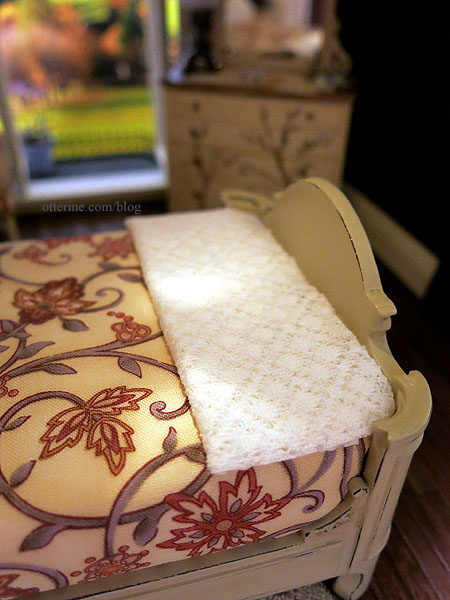
I made a small lace throw from some open weave fabric. It is full sized to cover the entire bed when opened, but I’ve pressed it flat to sit at the end of the bed as an extra blanket for those chilly autumn evenings.
Hooray for a successful makeover! :D
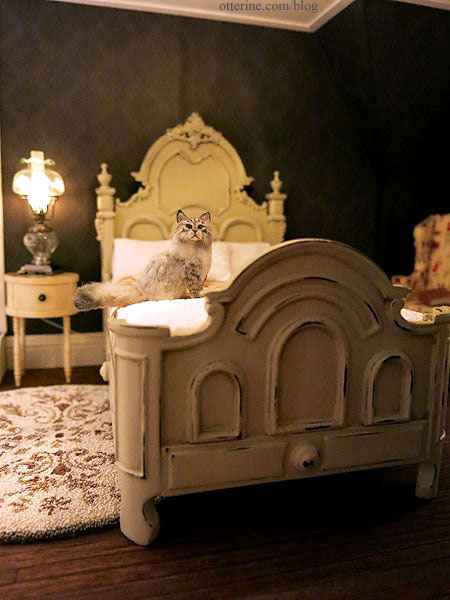
Now, who wants to take a cat nap with Ophelia?! :D
Categories: Furniture, The Haunted Heritage
July 30, 2013 | 0 commentsFancy bow front dresser, part 3
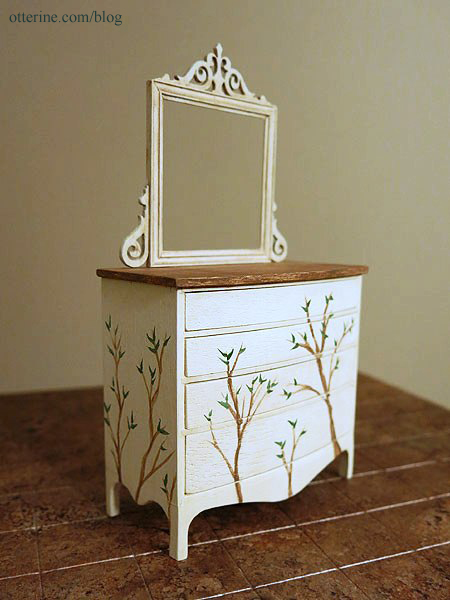
Continuing work on the fancy bow front dresser. As much as I loved the bare branches, I decided to go ahead with more painted details on the bow front dresser for the Heritage bedroom.
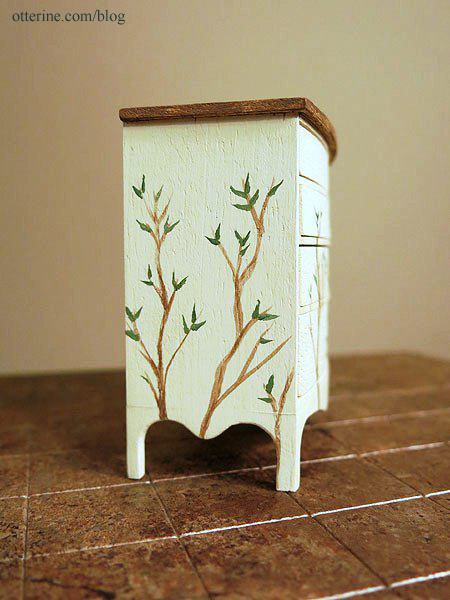
I added a smattering of leaves.
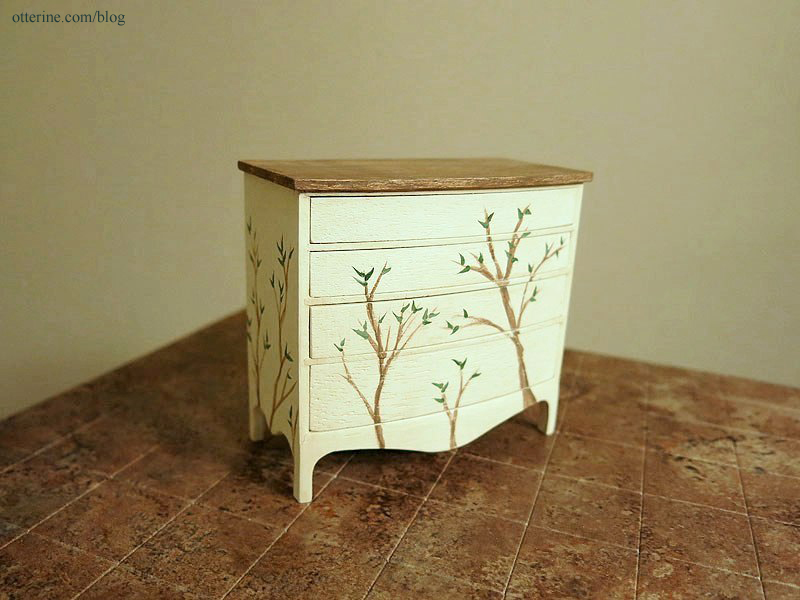
It softened the look overall.
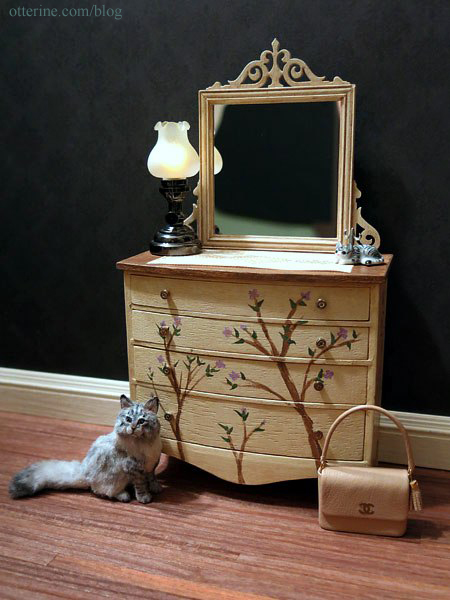
I added pale lavender flowers and then added a satin varnish. I would like to add a bird and left space for one, but I need to practice painting that small. The knobs are vintage hardware I bought from The Little Dollhouse Company at the Bishop Show.
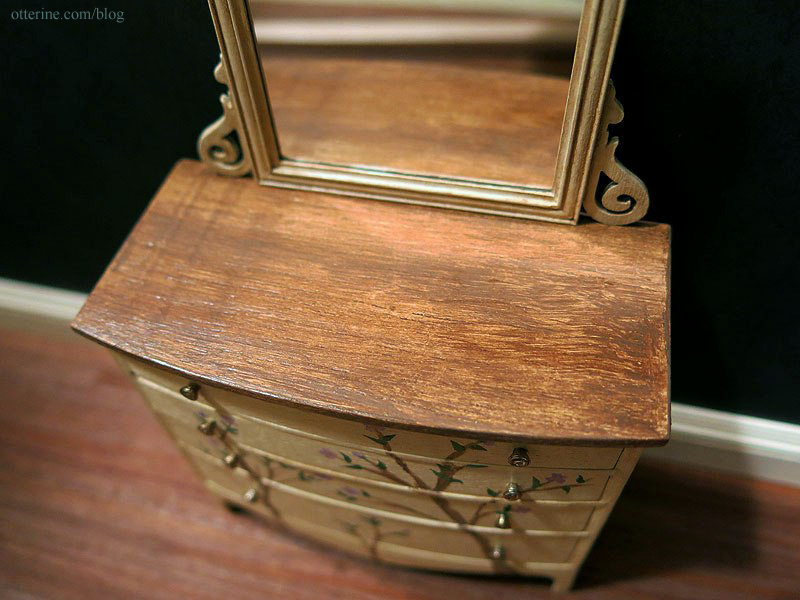
I love the worn wood top.
The paper lace doily is from Stewart Dollhouse Creations. The cat figurine, ring holder and doily were purchased at the local mini shows.
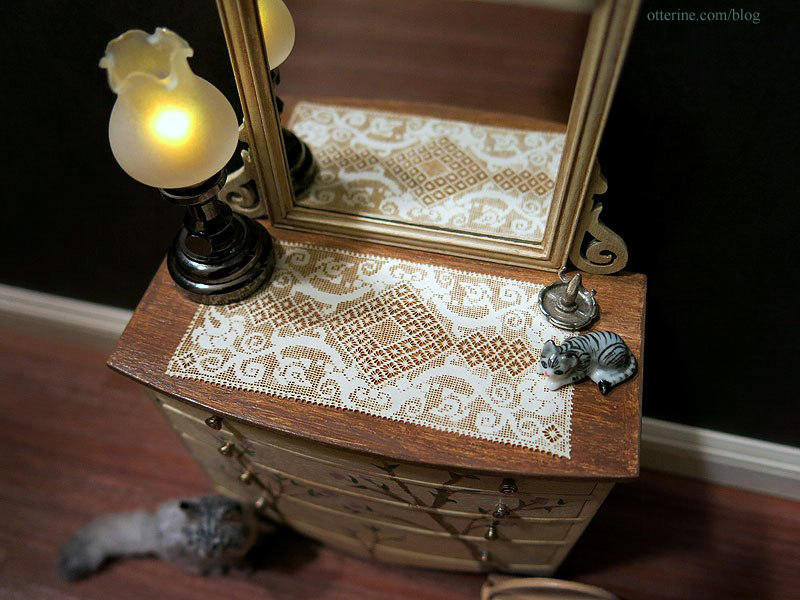
The Bentham Tulip Table Lamp by Houseworks is from miniatures.com, and I painted the LED to make the light more natural — a tip picked up on the Greenleaf forum.
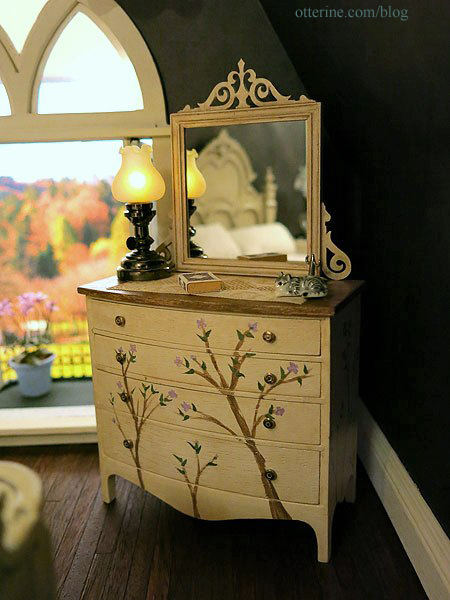
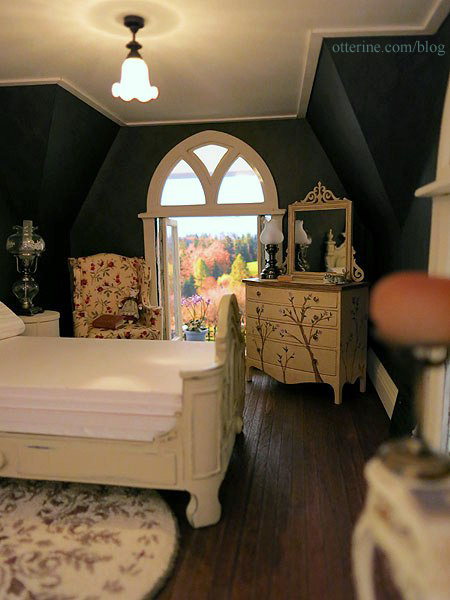
I think the dresser fits wonderfully with the bedroom furnishings.
Categories: Furniture, The Haunted Heritage
July 18, 2013 | 0 comments
NOTE: All content on otterine.com is copyrighted and may not be reproduced in part or in whole. It takes a lot of time and effort to write and photograph for my blog. Please ask permission before reproducing any of my content. (More on copyright)


