
House of Miniatures Hepplewhite Side Table
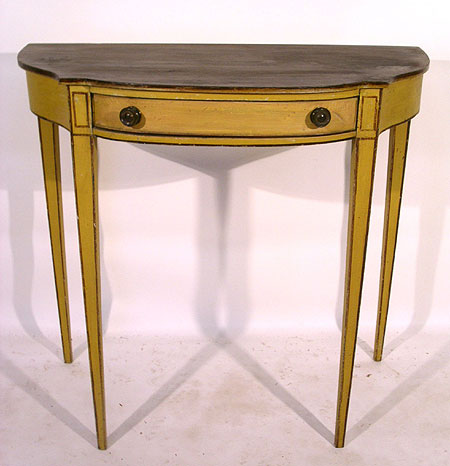
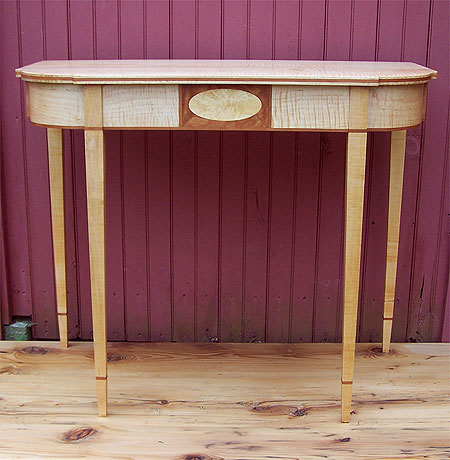
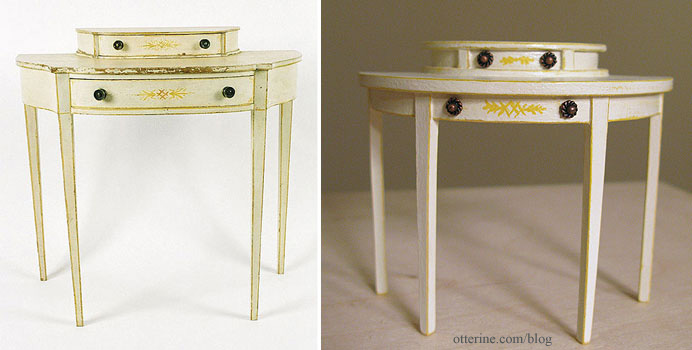
I did a quick google search for painted Hepplewhite tables and found three great inspiration pieces. I was looking for lighter finishes to stand out in the hallway. For a fantastic painted version of this table kit, check out Wasting Gold Paper. Fabulous!
First, this lovely c.1790 North Shore, Massachusetts Hepplewhite side table from Wiederseim.com. This real life table sold at auction for $3,000.
Second, a contemporary version by Craig Thomas White.
And, lastly, this c.1790 American Hepplewhite dressing table from antiques.com.
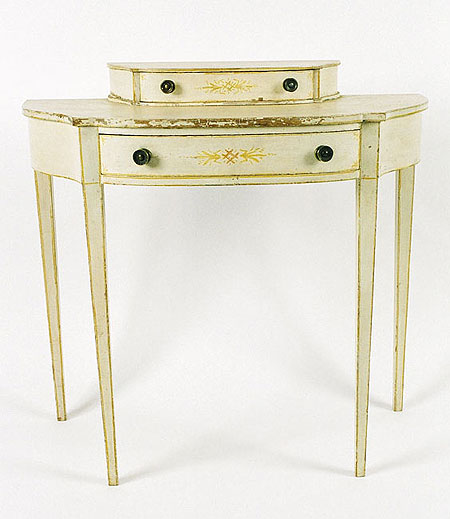
The last one is the clear winner for me. There is no drawer on the House of Miniatures table, but there’s no reason it can’t be faked with some drawer pulls.
For the additional top detail, I used a Woodsies circle. To get the true center, I slipped it into a circle template I had from my art school days.
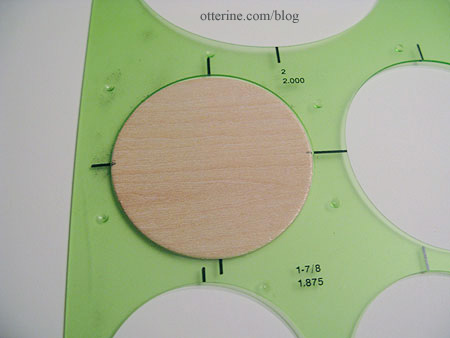
These markings then allowed me to measure how much of the circle I wanted for the top using some of the items I might use for display.
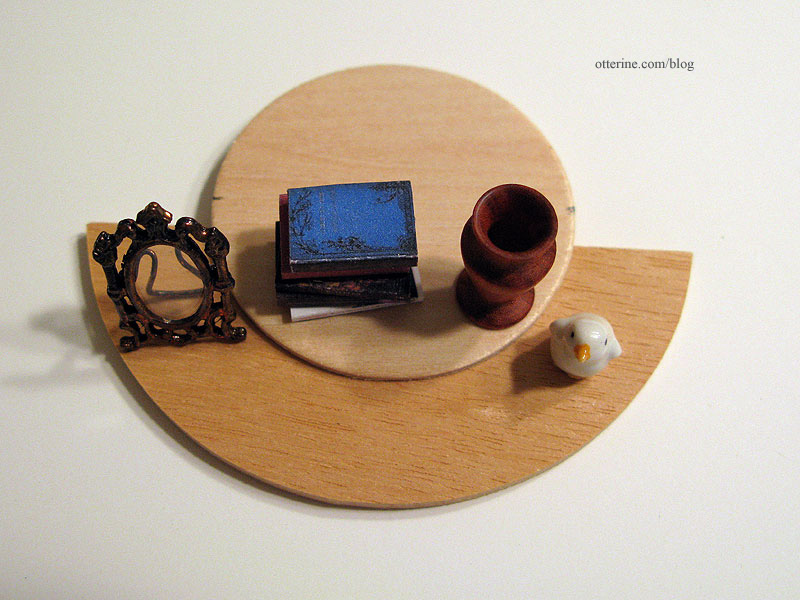
The middle is a scrap of balsa cut slightly smaller than the Woodsies half circles.
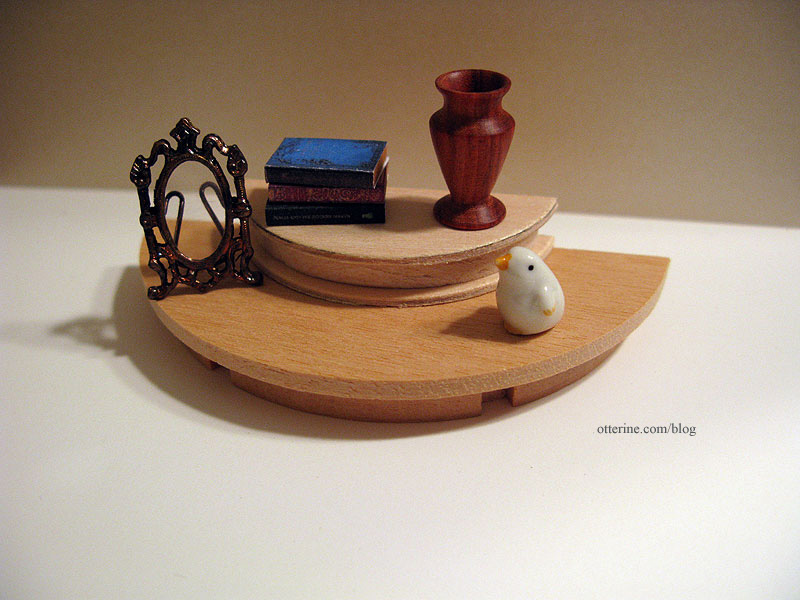
Since I wasn’t sure if I would like my addition once finished, I made another quick vignette with the border trim in place. I had to move the artwork up on the wall and added some of the accessories. As you can see, I added two small scraps of wood on the smaller top assembly to delineate the faux drawer. I think it’s going to be lovely.
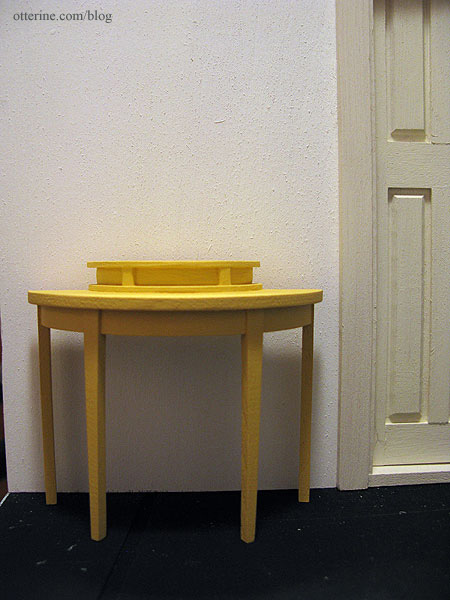
I didn’t think I’d have a steady enough hand to paint only the edges with the yellow detailing, so I started with a full under layer of Moon Yellow by Folk Art. This took two thin coats of paint with a light sanding in between.
I covered this with Tapioca by Folk Art. Again, two thin coats of paint were needed. I used fine sandpaper to lift the lighter top coat to reveal the yellow beneath, some parts to the original wood for an extra bit of wear.
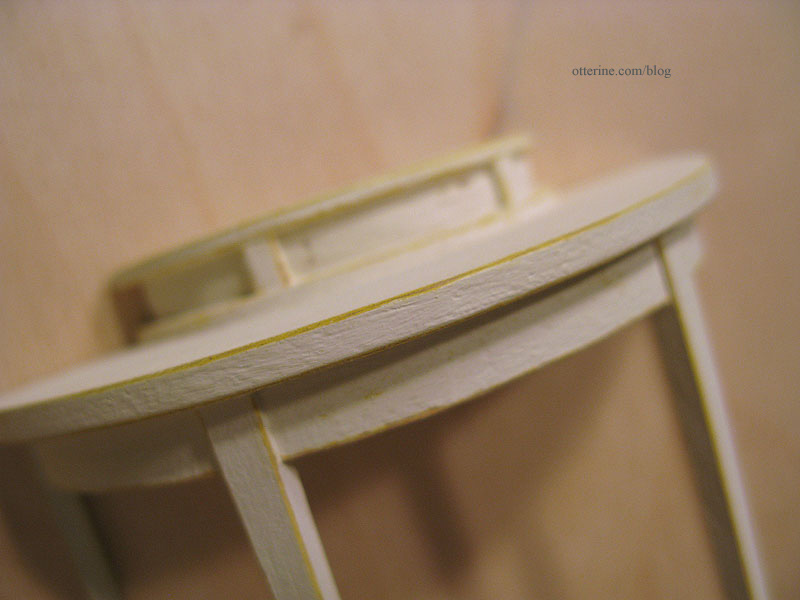
I added aged copper knobs (fancy head pins for making jewelry) and painted the wheat and crisscross details with a fine tip brush. I don’t think I did a half bad job considering I’ve not painted freehand tiny designs before.
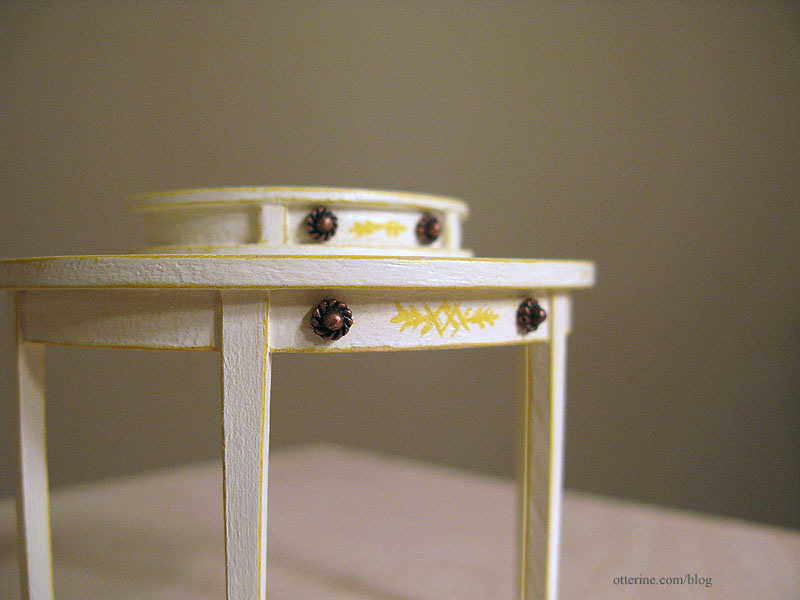
I then covered the table with a very thin coat of Delta Ceramcoat satin varnish.
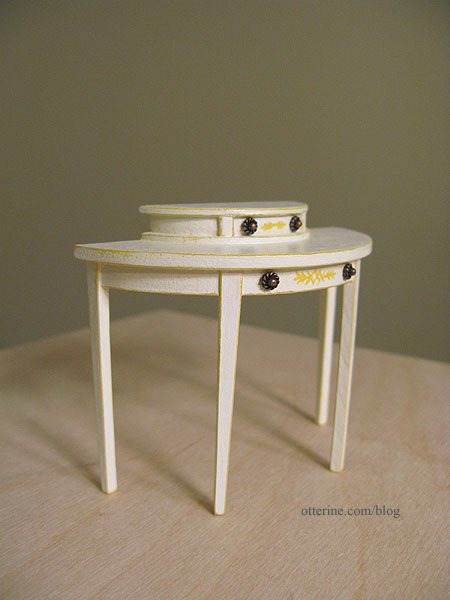
I love the way this table turned out! :D
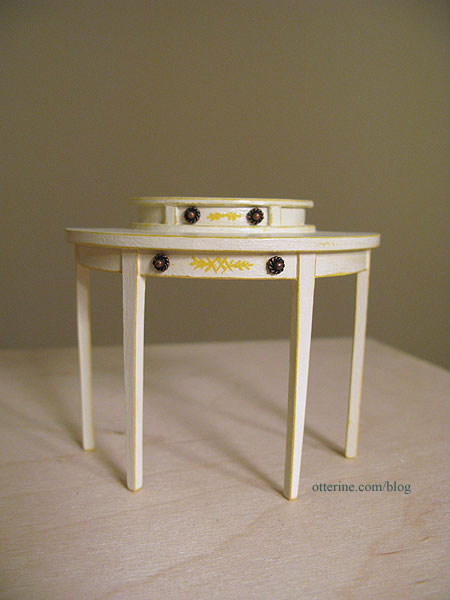
It has the same delicate look as the original.
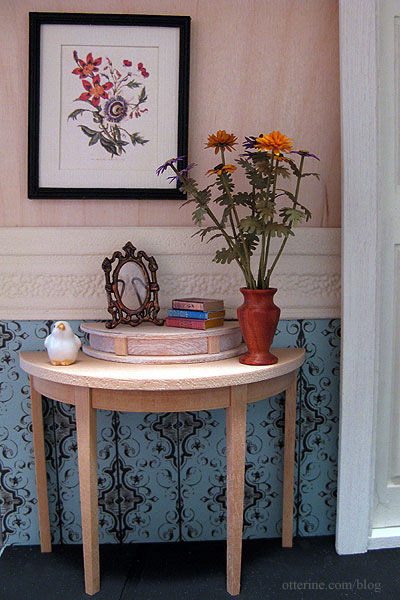
Here it is later in the finished upstairs hallway.
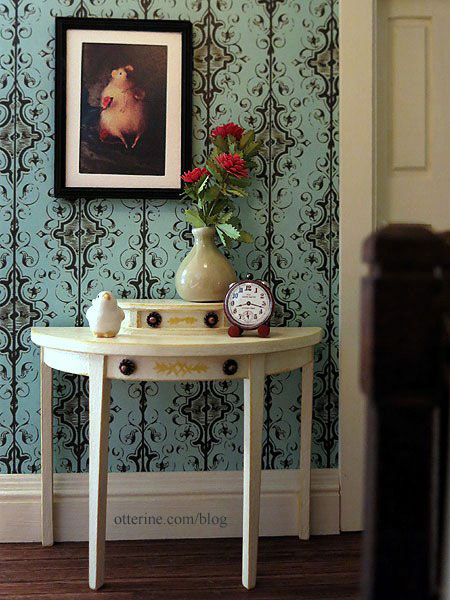
The artwork is a photograph from artisan Natasha Fadeeva. She makes the most amazing little animals. I just swoon over her mice!!! :D I contacted her about using the vintage mice photos in the Heritage, and she graciously gave me her permission. I made the tiny red alarm clock and the Bonnie Lavish red dahlias. The vase and bird figurine were purchased awhile ago, but I’m no longer sure of the vendor.
Categories: Furniture, The Haunted Heritage
April 4, 2012 | 0 commentsBeautiful Bespaq vanity and heart-shaped chair
Those of you who know me in real life know that I wear skirts and dresses 360 days a year, even in the dead of a Chicago winter. But, my home isn’t excessively girly or feminine. It’s more New England cottage meets French Country rustic.
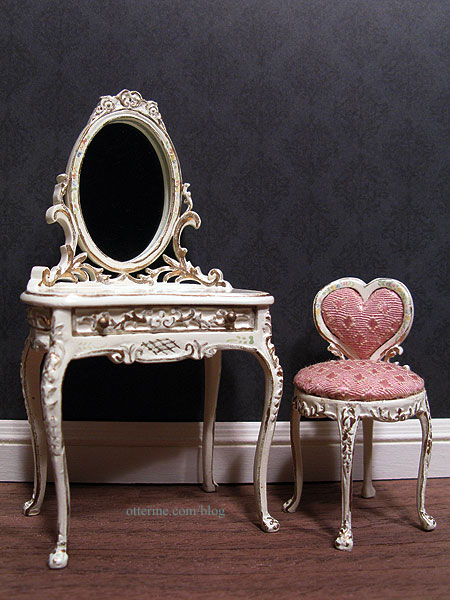
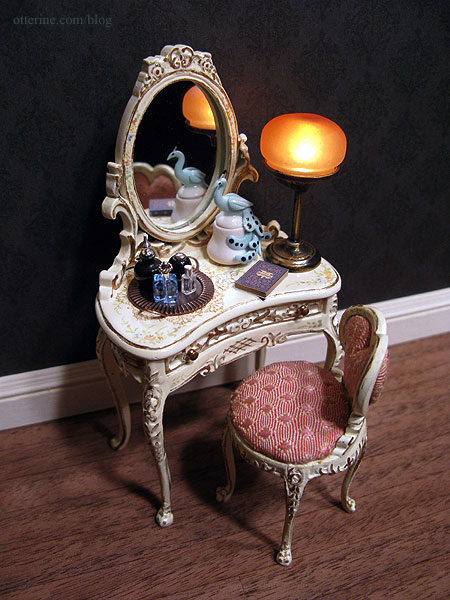
However, I am head over heels for this tiny, ultra feminine Bespaq vanity and heart-shaped chair. :D It’s from Small World Miniatures. I think they look wonderful against the Out of Time scrapbook paper by Recollections that I plan to use as wallpaper in the bedroom. The hand painted details are incredible.
The vanity tray I made fits perfectly on one side with the C. Rohal peacock box and Art of Mini lamp on the other. Not much room for anything else besides a small book. At first I thought the lamp might be too big for the vanity, but I rather like it. It has a warm glow and the perfect vintage feel.
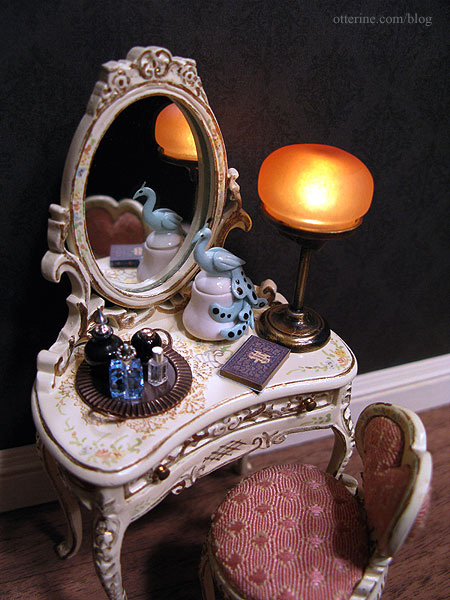
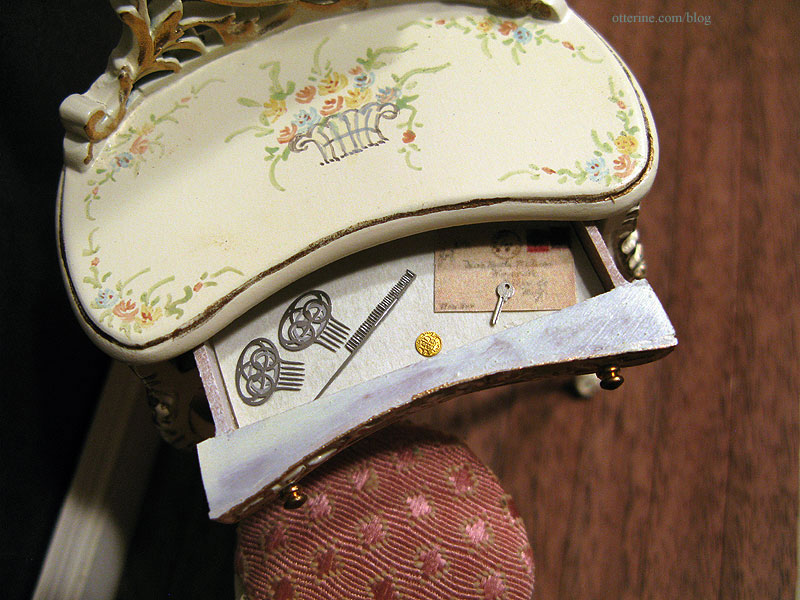
I’ve lined the drawer with pretty parchment paper and added a few things I had on hand. The laser cut hair combs are from The Dolls House Mall. The letter is just a paper cutout for now, but I’ll have to make a pretty opening envelop and letter for the drawer. The laser cut key is by le mini di Pierliugi, purchased at one of the Bishop shows. Grandma’s lucky gold coin is made by Phoenix Models.
The vanity and chair are the perfect pieces I was looking for and will be wonderful in the Heritage bedroom!
Categories: Furniture, The Haunted Heritage
March 8, 2012 | 0 commentsBespaq furnishings and lovely handbags
I was fortunate enough to win Audra‘s giveaway recently. As the prize, she offered a gift certificate to a miniatures shop called Happily Ever After.
Some time ago, I bought a Bespaq Royal Marrakesh settee in walnut and have been searching for a matching chair since. I saw that Happily Ever After that a photo of the entire living room set on their site, so I wrote to Lori there to see if she had what I was looking for. She sent me a photo and a few days later, it arrived! :D
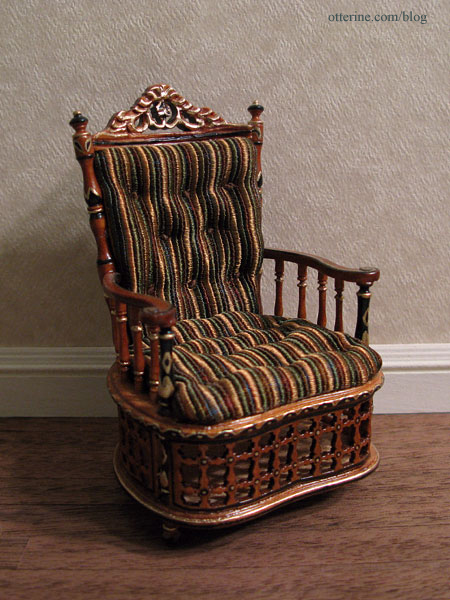
Here’s the new chair with settee I already had. This set will be for a future build.
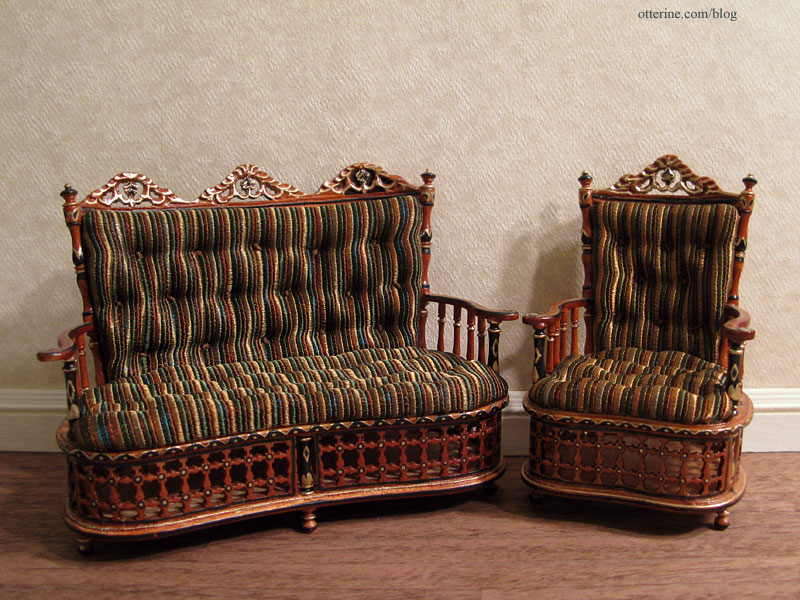
The wood and painted details match perfectly, though there is a slight difference in the fabrics. No matter to me since they are very close so dollhouse lighting and added accessories should make up that difference. Thank you Audra and Lori for a wonderful giveaway!
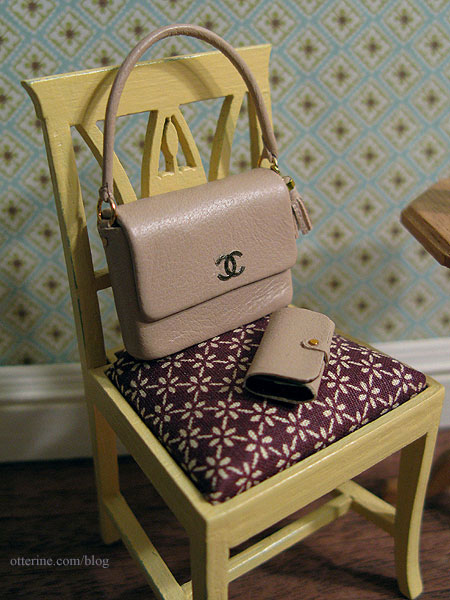
Another package arrived with the new chair today. In it were two handbag sets from Dollhouse Ara. The first is a pale pink Chanel replica handbag and wallet. They are so well made and have a nice weight to them. Included in the package was a lovely vase with dried natural flowers. Very pretty.
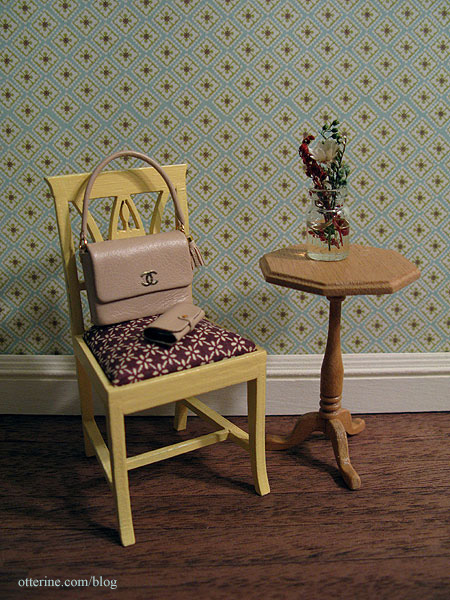
This set will go in the Heritage since they are a nice classic style that shouldn’t interfere with the era of the house. Grandma has good taste! :D
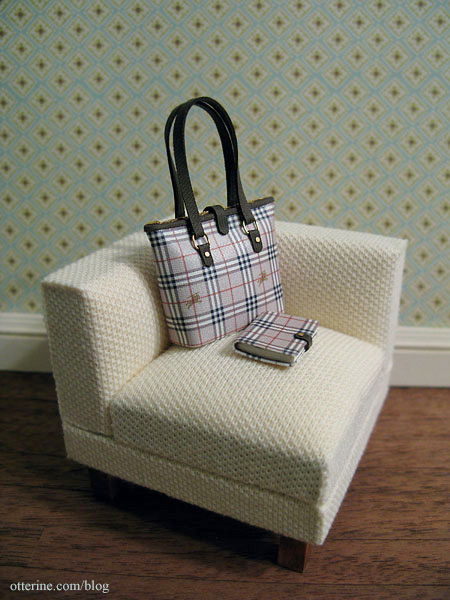
The other set is a Burberry tote bag with a covered journal. So lovely. This set will be included in a more modern build to come.
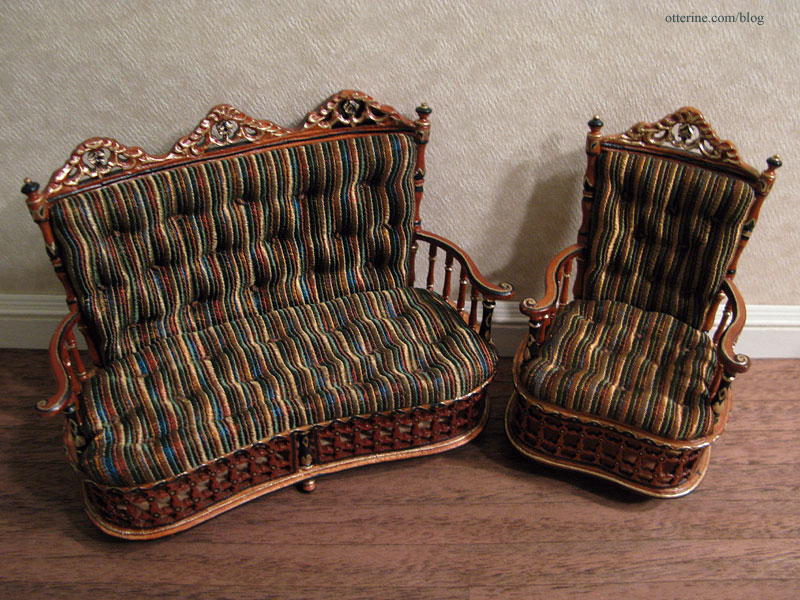
Next up, a beautiful green striped Bespaq sofa and matching chairs. Dejoux Miniatures had an awesome sale right before Christmas, and since I’ve had my eye on these for some time now, I took the plunge. I added a Bespaq coffee table to complete the set, though the color doesn’t work all that well.
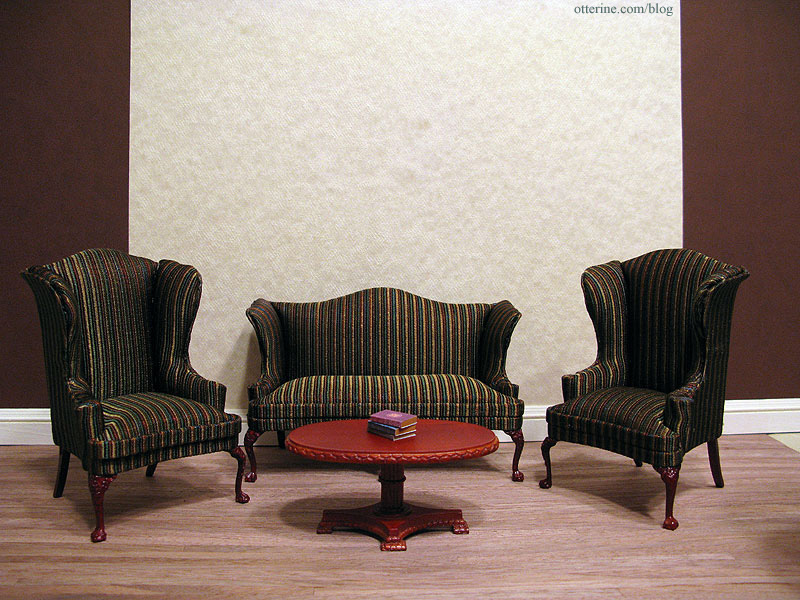
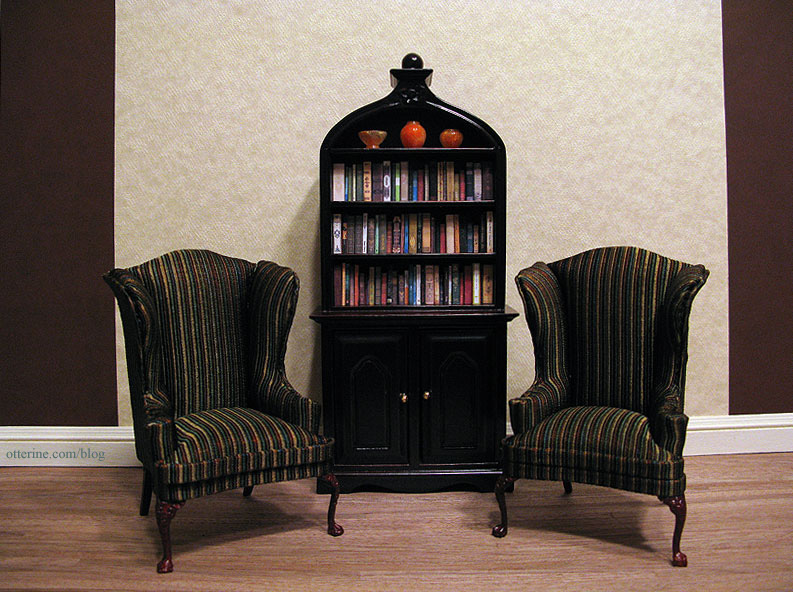
Quite honestly, I’m considering breaking up the set to use the pieces in separate projects. I could see a fine study with the two chairs. The chairs somewhat overpower the sofa when used as a whole set.
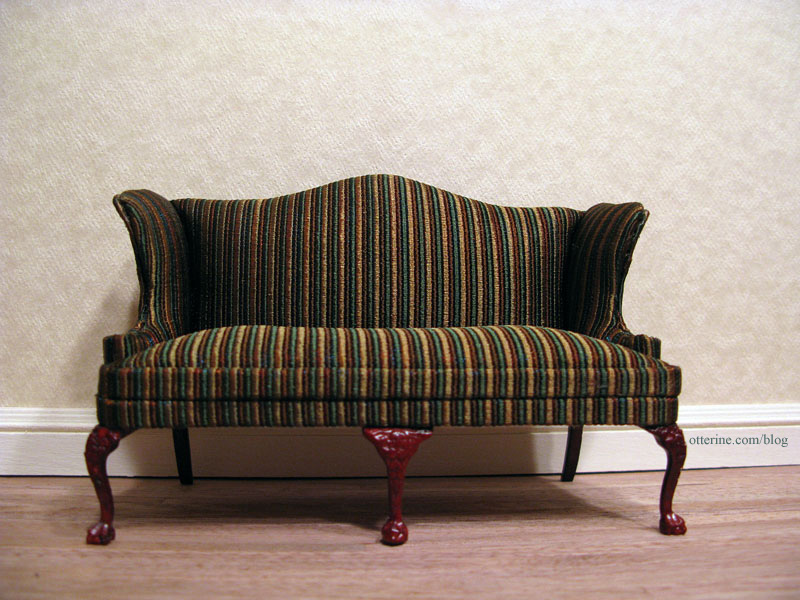
The sofa is beautiful and a perfect standalone piece. It could be easily coordinated with wood carved accent chairs.
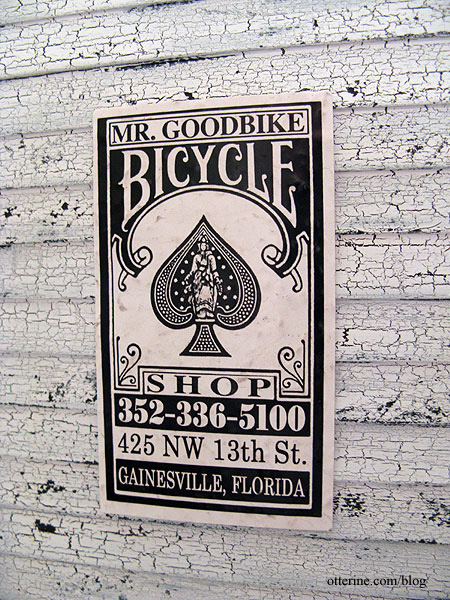
The next item is not a purchase but a lucky find…sometimes the best kind of mini. I went to visit Lyssa in Florida. When I returned to the hotel one night, this card caught my eye. It’s a business card made with vintage playing card imagery. It had been run over a bit but the gloss finish is intact.
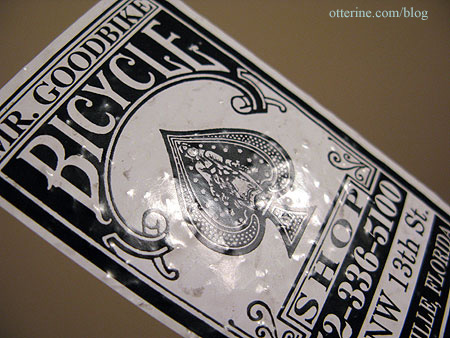
It reminds me of an old metal sign you’d see on the side of a building. :D Into the mini stash it goes!
Categories: Furniture, Miniatures
March 3, 2012 | 0 commentsBagnall tall case clock
I am a huge fan of House of Miniatures kits because they can become anything you want – traditional or modern. I stumbled upon the Bagnall clock when I was searching for other House of Miniatures kits and started stalking eBay for a good price. This is a more difficult kit to find.
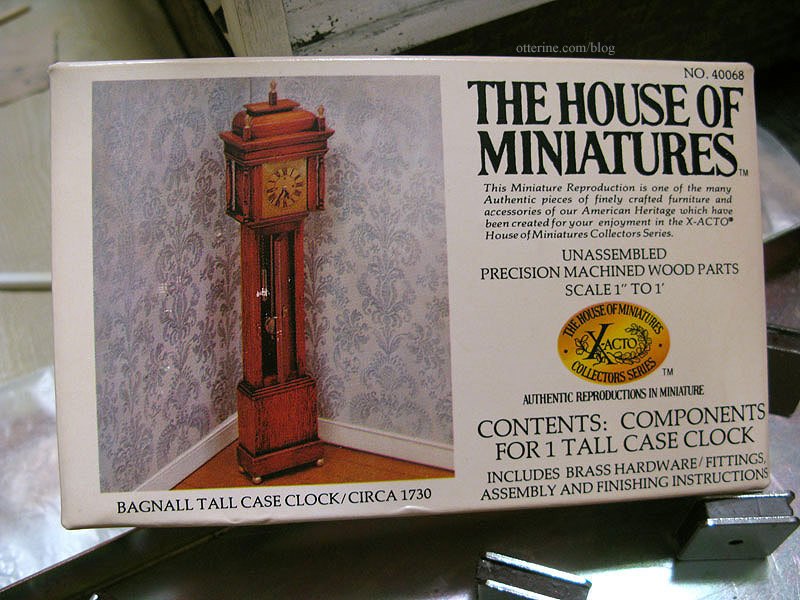
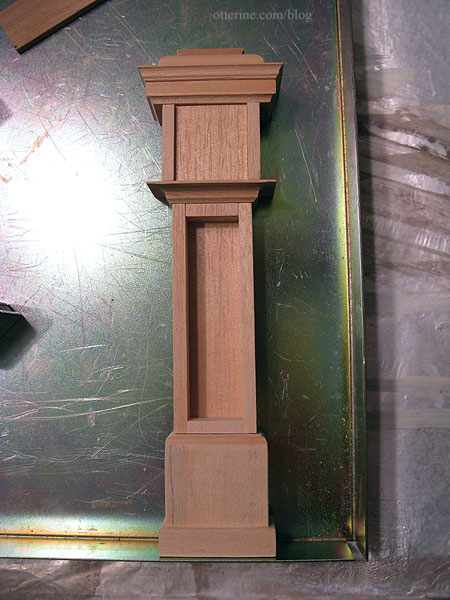
The assembly is more challenging than other House of Miniatures kits I’ve put together, but I am taking my time and using Minwax wood filler to smooth any rough edges and mask the seams. So far so good.
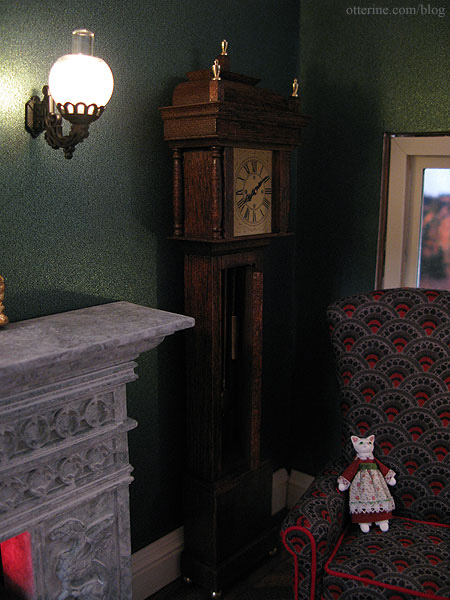
I knew it would be perfect for the Haunted Heritage, but I couldn’t wait to put it in the parlor just to check the size and positioning. The stained finish will be darker than the natural wood shown here, but I think it will brighten the far corner in this dark-walled room.
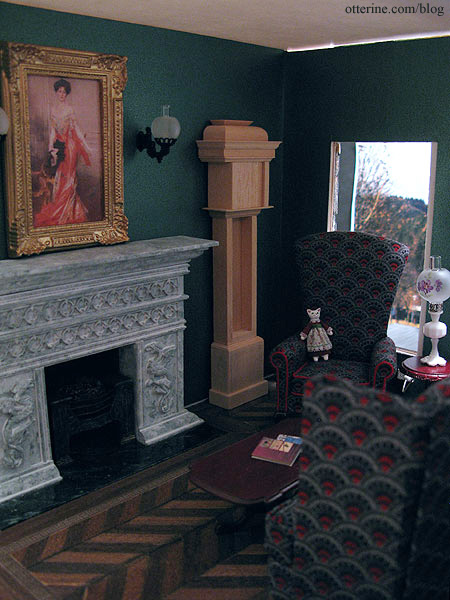
It might be a shame to stick it in the corner between the fireplace and The Chair, but I can just imagine hearing the gentle clicks and whirs of a clock in this room. My grandparents had clocks in their house, and I loved when it was quiet and all you could hear were the subtle sounds of the various clock movements.
I finished the preliminary assembly by adding the turned posts and toppers.
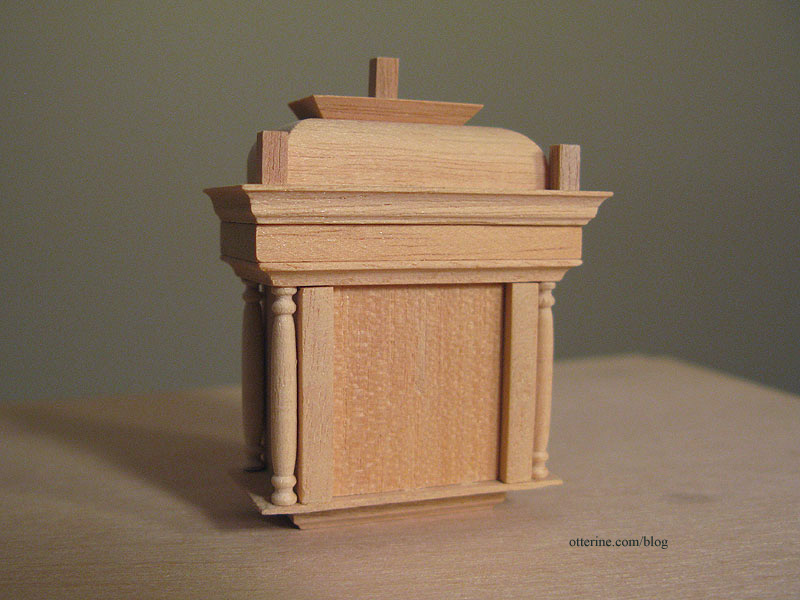
Marlene mentioned making the kit a working clock, but I hadn’t even thought to do that since I liked the face that came with the kit. Interestingly enough, I stumbled across a blog post detailing how to make a House of Miniatures grandmother clock kit into a working clock. I bought a pocket watch from Hobby Lobby and took it apart the same way.
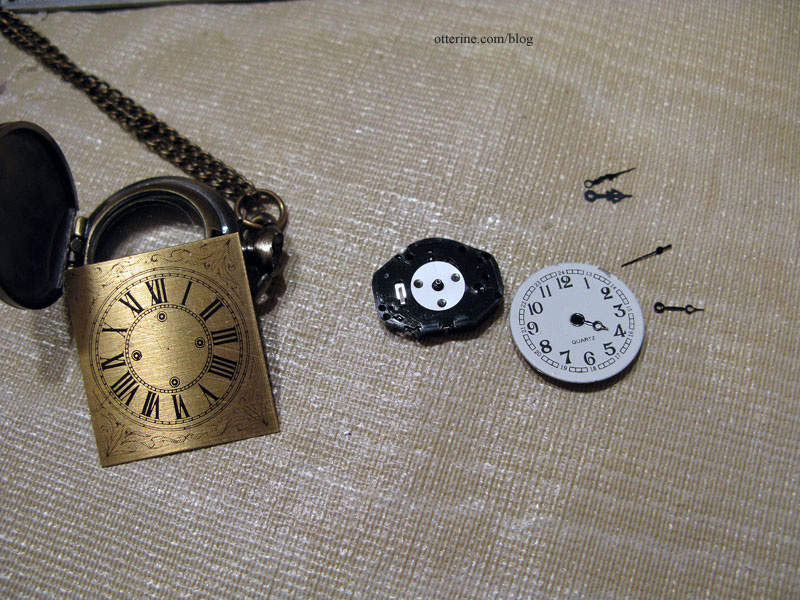
I had even bought one with fancy hands so I could use the mechanism as a complete unit.
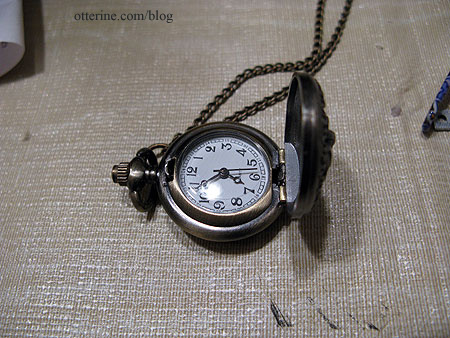
Unfortunately, it wasn’t that simple to just swap out the faces. At least, I don’t know enough about watch movements and placement to get it to work. I could see what needed to be done. It just didn’t work for me. (What didn’t work for me was that the pocket watch face had two metal spacers on the back keeping it a certain distance from the mechanism. The kit face didn’t have these spacers, so there was no way to keep the face the right distance from the mechanism. Too close, and the hands couldn’t move correctly. Too far away, and the hands would just hang loosely and not turn at all.)
All was not a waste, though, since I was able to salvage the watch battery for the Reutter Porzellan clock I bought awhile ago, and I’ll keep the clock hands and chain from the watch in my materials stash.
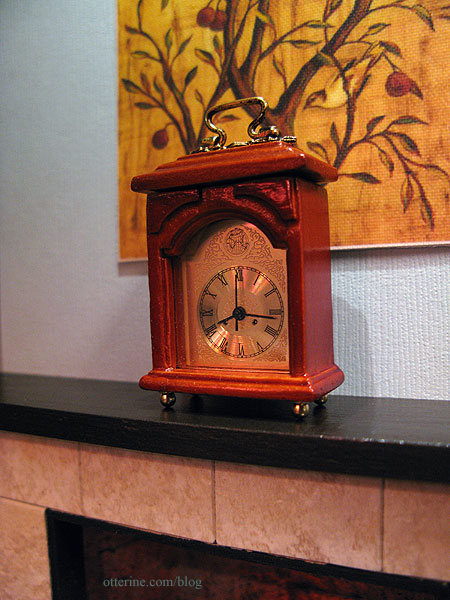
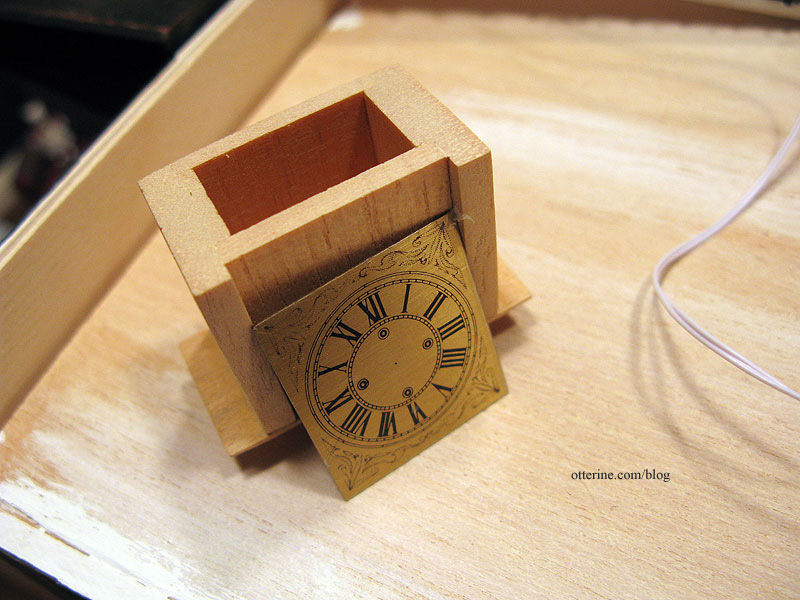
I thought about buying another Reutter clock just for the face, but it really wasn’t that important to me to make the Bagnall clock a working clock. It was the overall design that drew me in to begin with, including the beautiful face included with the kit (shown here with the plastic protective covering still in place).
So, I’ve gone ahead and stained the parts with Minwax English Chestnut to keep moving forward with the project. I had used this stain on the parlor floor, but I originally bought it for this clock kit.
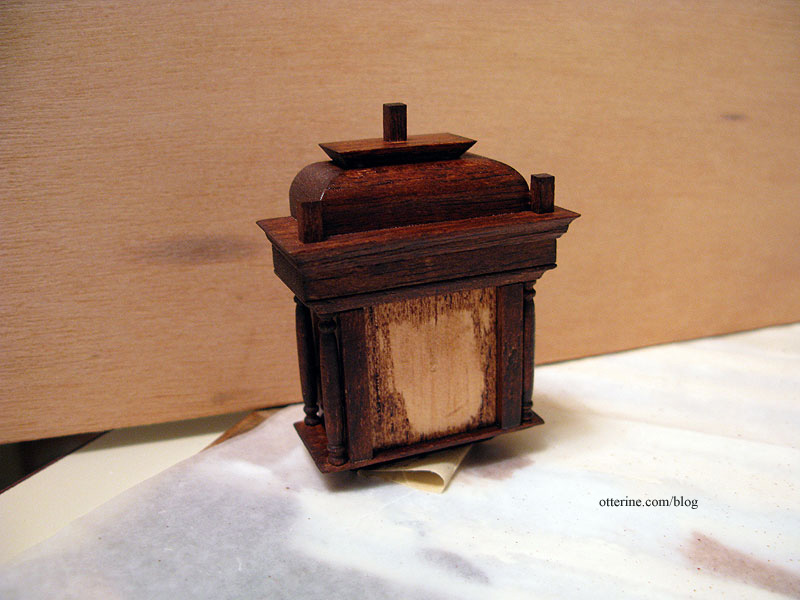
The wood took the stain unevenly because some of the surfaces are the “ends” of the wood and some are the “faces” of the wood grain. I’ll address that once the stain dries, but so far I love it!
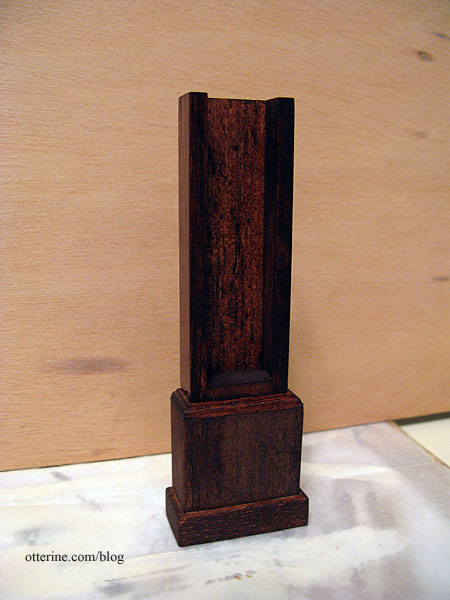
After the stain dried, I used antiquing medium to fill in the more obvious portions of uneven stain and then sealed the wood with two thin coats of Delta Ceramcoat satin varnish. It brought out the beauty of the wood and deep color of the stain for a perfect antique finish.
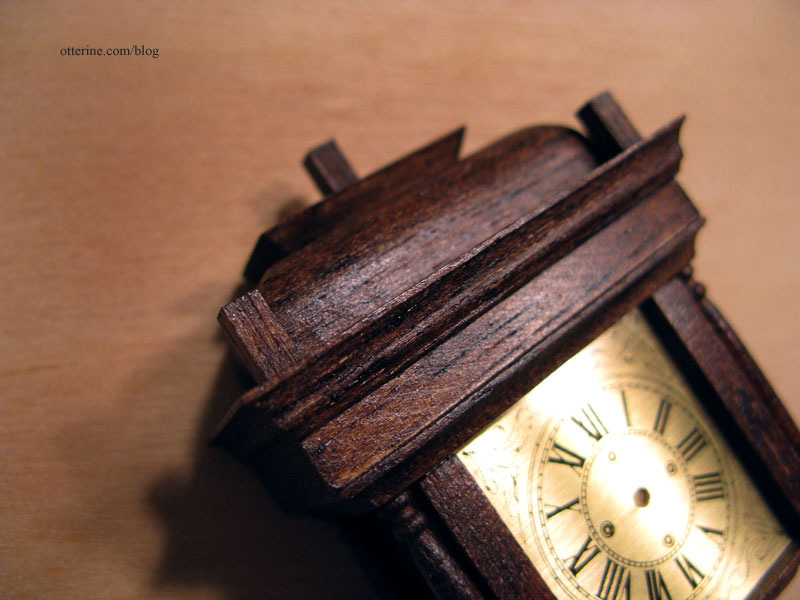
Since I had attempted to make this a working clock and drilled a hole in the kit face, I had to use a brass brad to fill in the middle point where the hands met. It still looks natural to me.
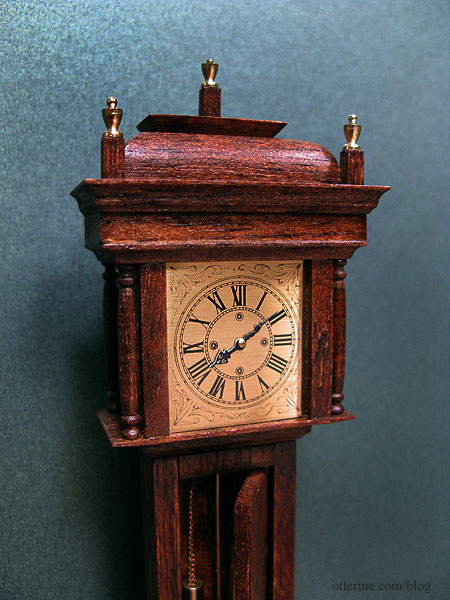
The brass components included with the kit, while not easy to install, are high quality and really make all the difference.
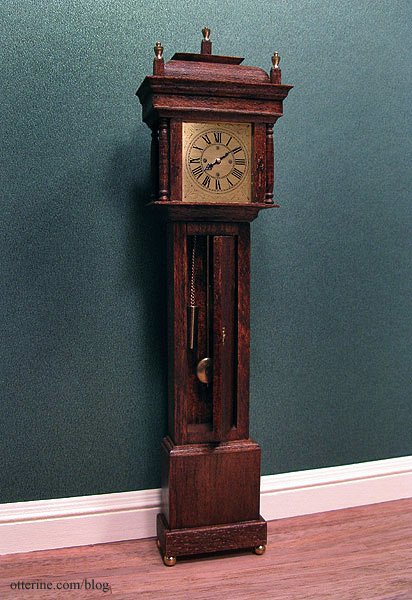
The door hides the weights and pendulum, but it looks beautiful closed as well. One of the things I liked about the kit was you could assemble it so the door could open the other way – say, if you were putting it on a wall where you couldn’t see the pendulum when the door was open.
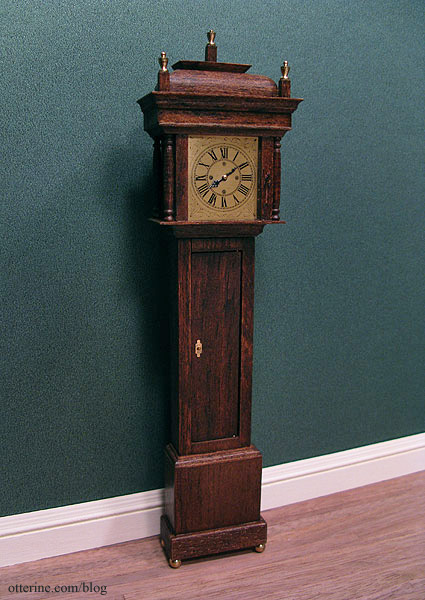
It fits the parlor wonderfully. :D
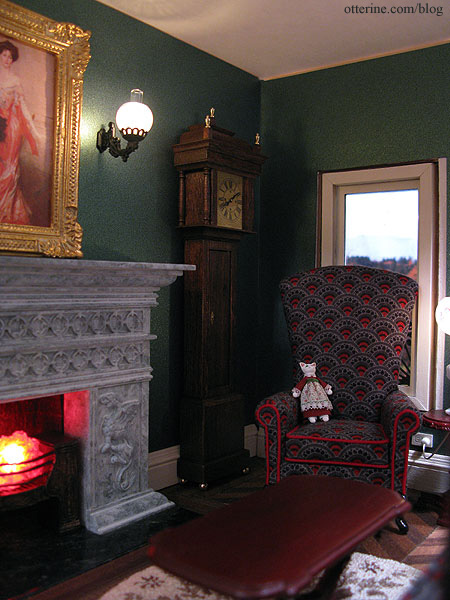
It’s a beautiful clock.
Categories: Furniture, The Haunted Heritage
February 17, 2012 | 0 commentsHeritage – kitchen table and chairs
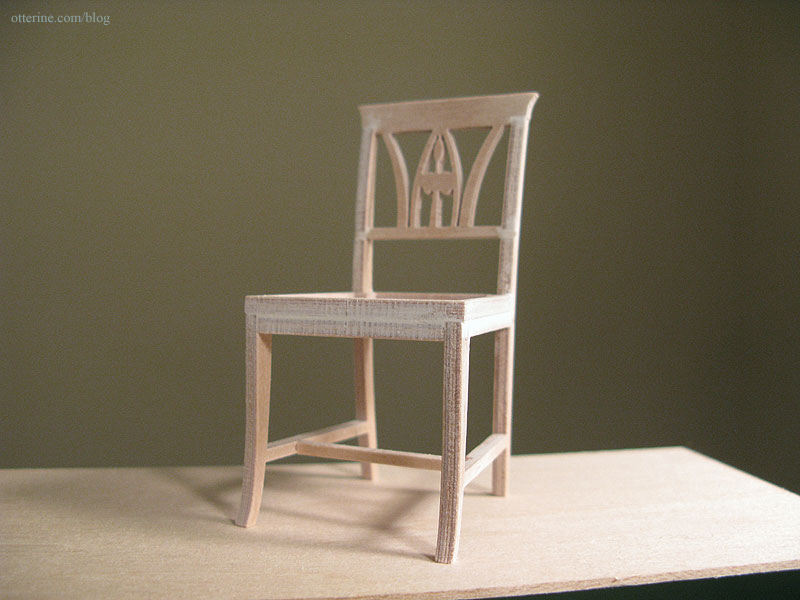
The Lilje chairs kit from Art of Mini is similar to the laser cut kits I’ve worked with, but they are made using what is described as a “water cut technique.”
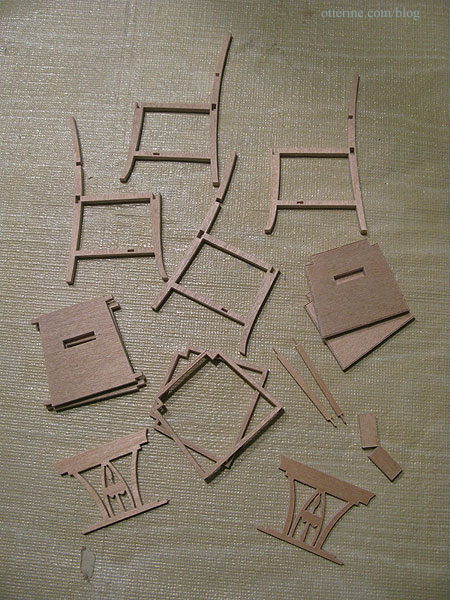
They don’t have the dark ashen residue of laser cut kits but have the same clean and precise cuts.
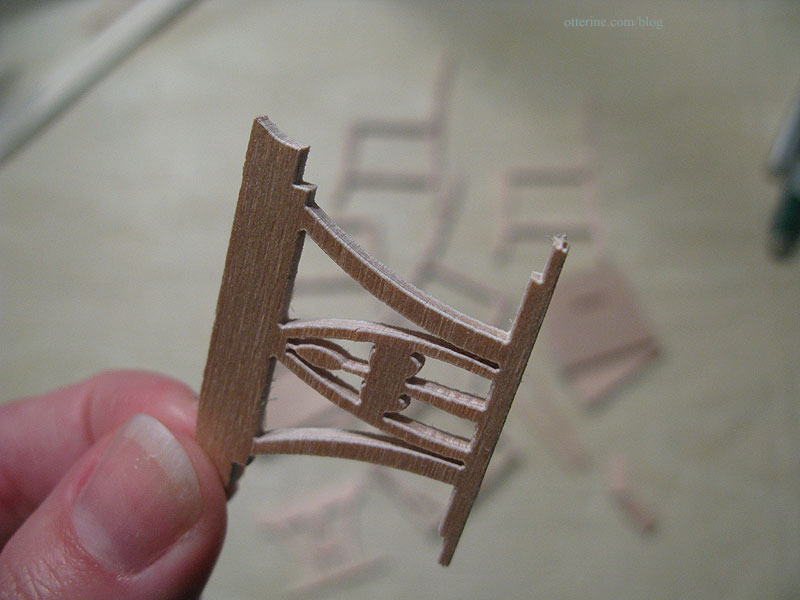
The instructions were in Dutch, but I was able to scan the document, use OCR on the file and paste the text into google translate for a reasonable translation. ;] It also helped that I had made similar items before.
With just a light sanding, the parts were clean and easily fit together. This is a very high quality kit.
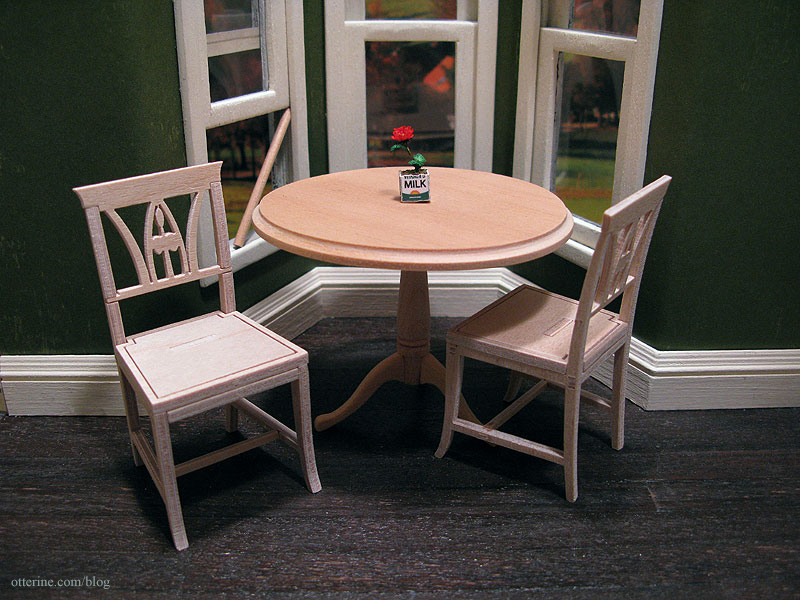
These seem a good match with the House of Miniatures dining table. The seats will be upholstered and the entire set painted.
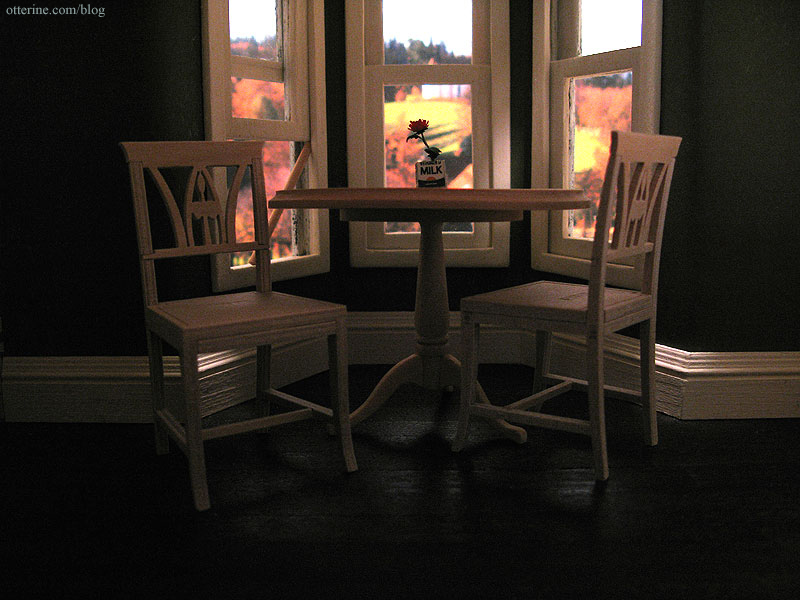
They have a wonderful cottage feel, perfect for my vintage kitchen.
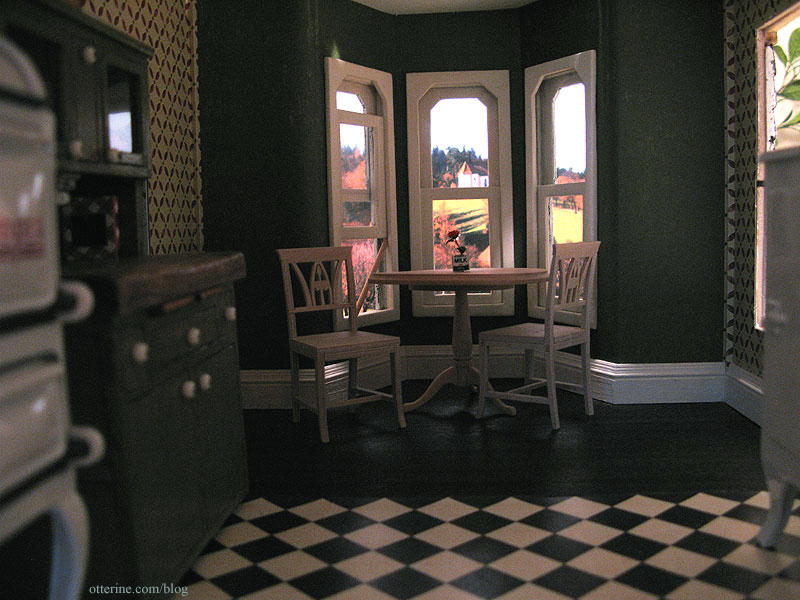
Some gaps show due to the way they are assembled from parts, so I added a bit of spackling to minimize the appearance and sanded smooth before painting.
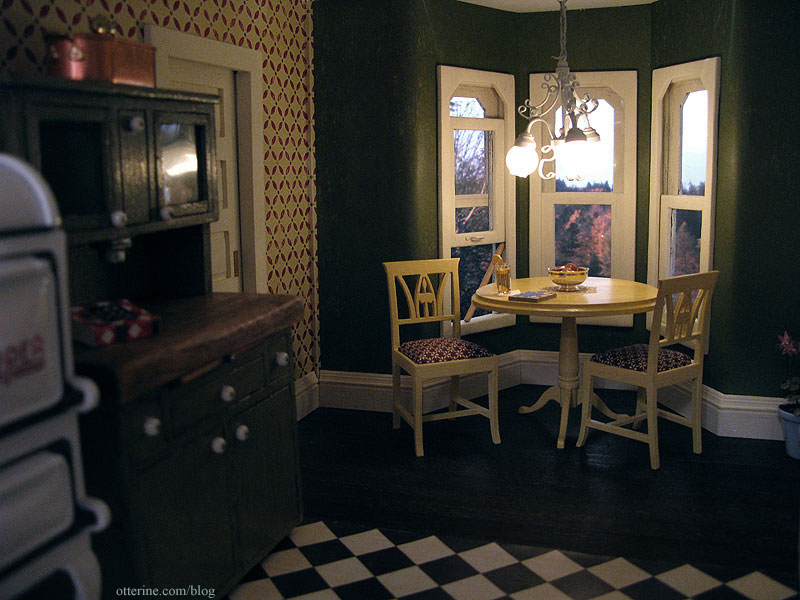
I painted the table and chairs Italian Sage by Folk Art. I wanted to keep the table and chairs lighter in hue so they wouldn’t be lost in the deep room, though I do plan to install a light above the table. Here they are shown with only one coat of paint and a swatch of the plaid I had intended for the upholstery.
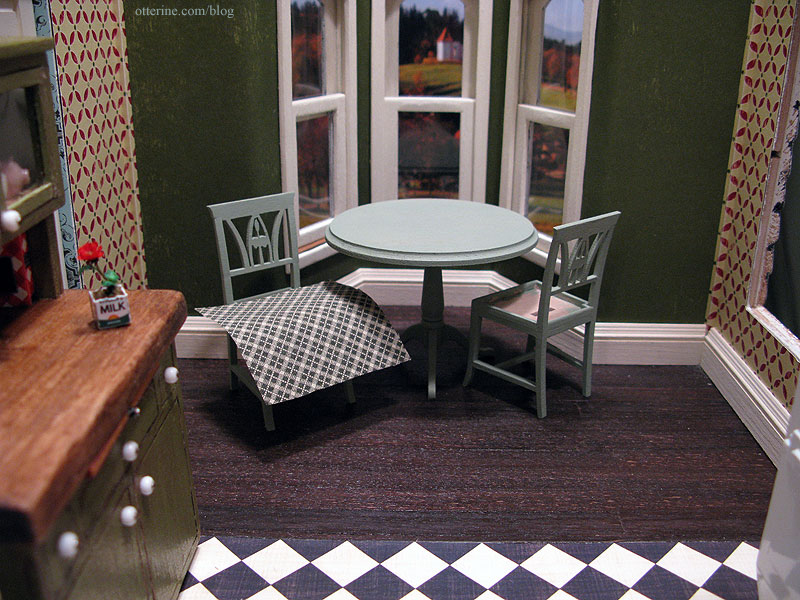
But, in the room, the set was lost and the green didn’t work well.
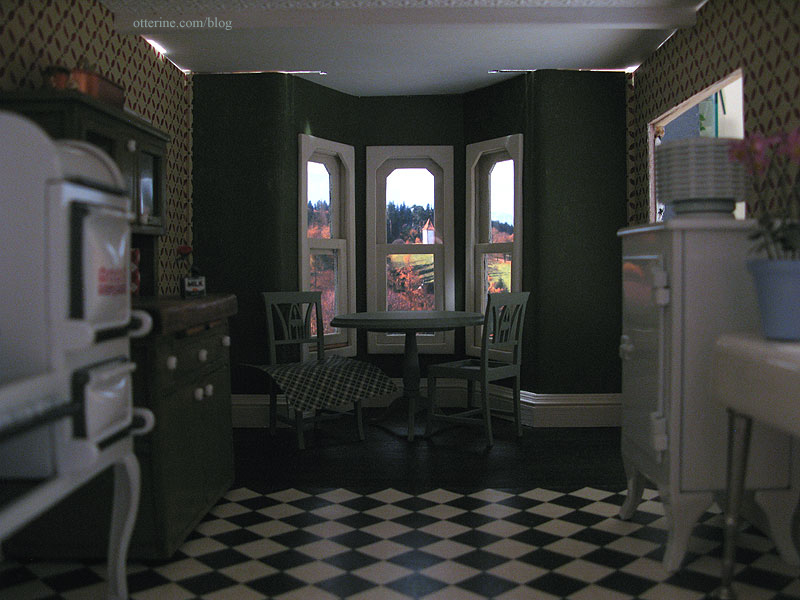
I opted for Sunflower by Folk Art to cover the Italian Sage used originally.
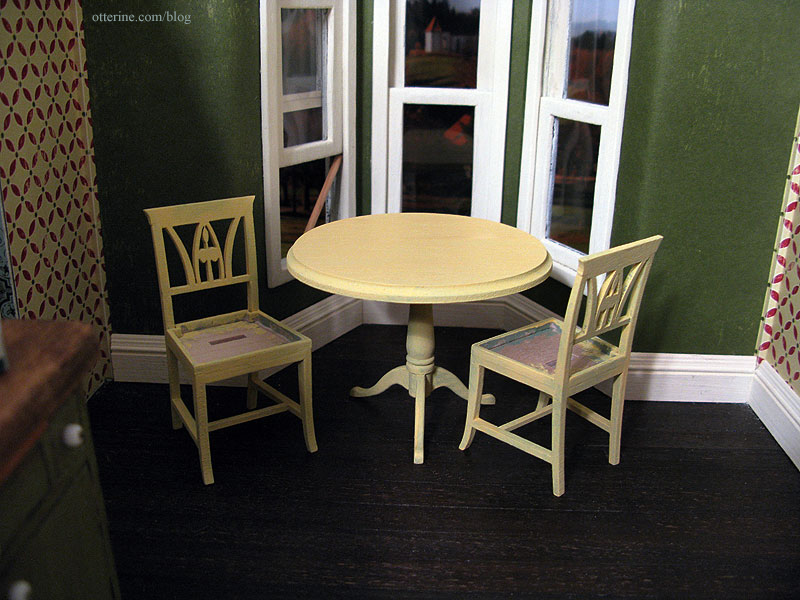
I was sloppy and heavy handed with the paint for a few reasons. First, I still haven’t sanded it after painting so the wood is rough anyway. I didn’t want to sand the sage paint and create green dust to mix with the new yellow paint. Second, I wanted to see if it even made things better. And, lastly, if it still wasn’t the right color, the yellow is still light enough to cover.
I do like it better already. I discovered the secret to making things look like they’ve been painted over and over. Just paint them over and over. :D
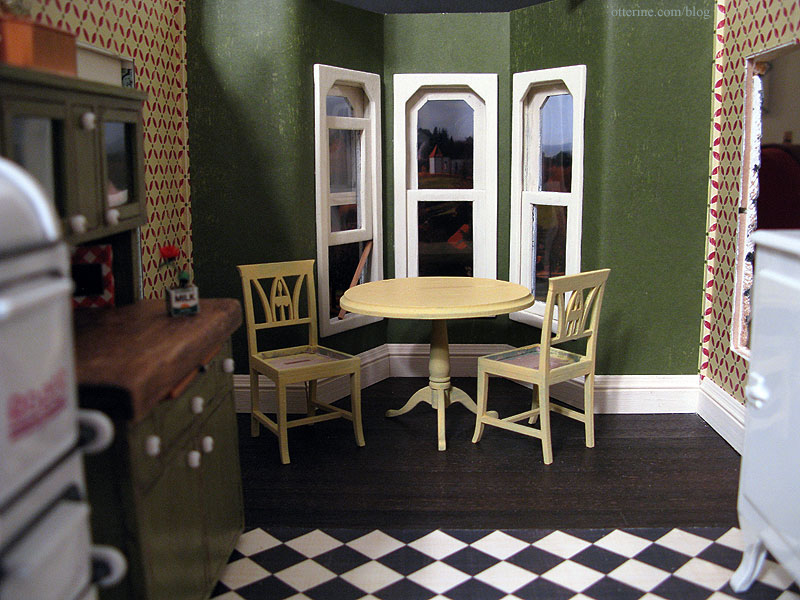
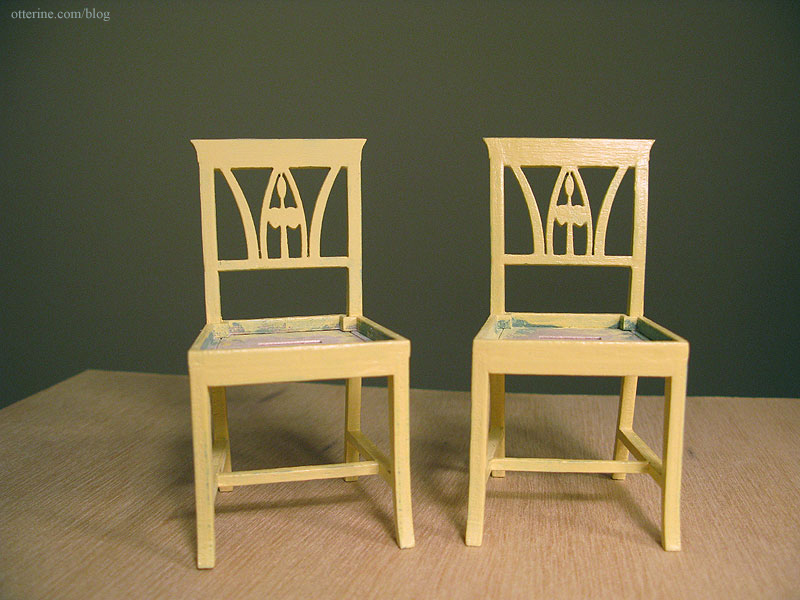
Since these are meant to be old chairs, likely repainted over the years, I rubbed a bit of the yellow off the top to let the green show through. I then added a light coat of Delta Ceramcoat satin varnish. It darkened the yellow and gave the set a nice, hand-painted look. The one on the right is the finished chair.
There are a lot of great quilting cottons in the fabric stores, but finding the right scale isn’t always easy. There are some great miniature fabrics on the market, but they are most often found online and sometimes you just want to be able to see them in person. I printed out a sheet of paper with a 1 inch square opening, a 1.5 inch square opening, and a 1″ x 4″ rectangular opening to take to the local fabric store. Looks like robot! :[]
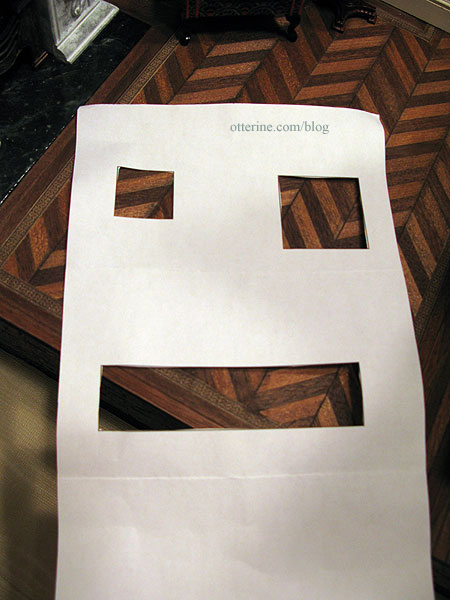
The 1.5 inch square is roughly the size of an upholstered chair seat or a throw pillow.
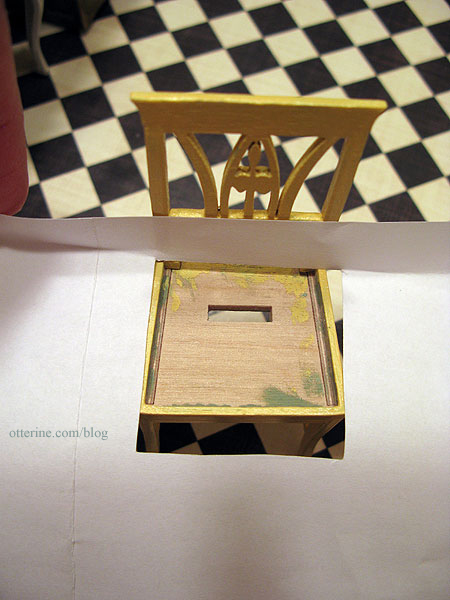
Holding these over various fabrics allows me to see how small or large the patterns would be in miniature.
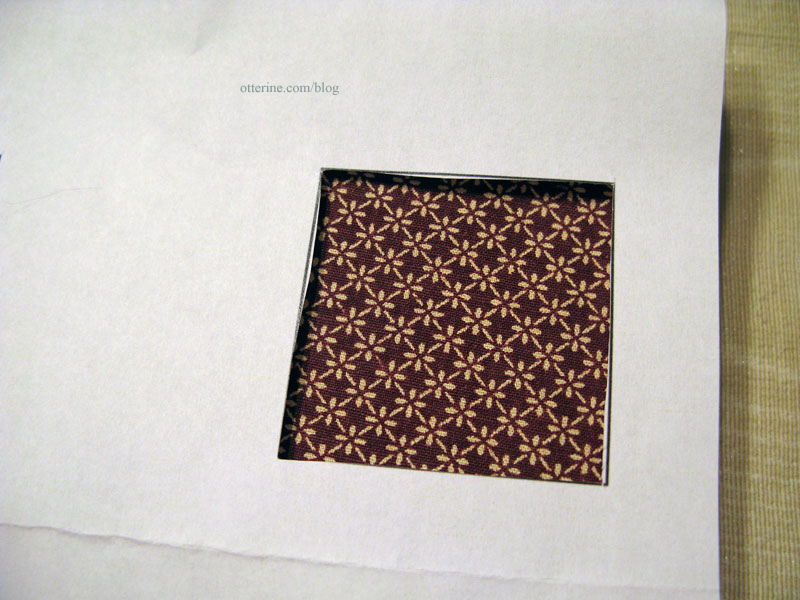
For the kitchen chairs, I chose a brown and ivory print. I think it is close enough to the dark red to tie in well with the wallpaper.
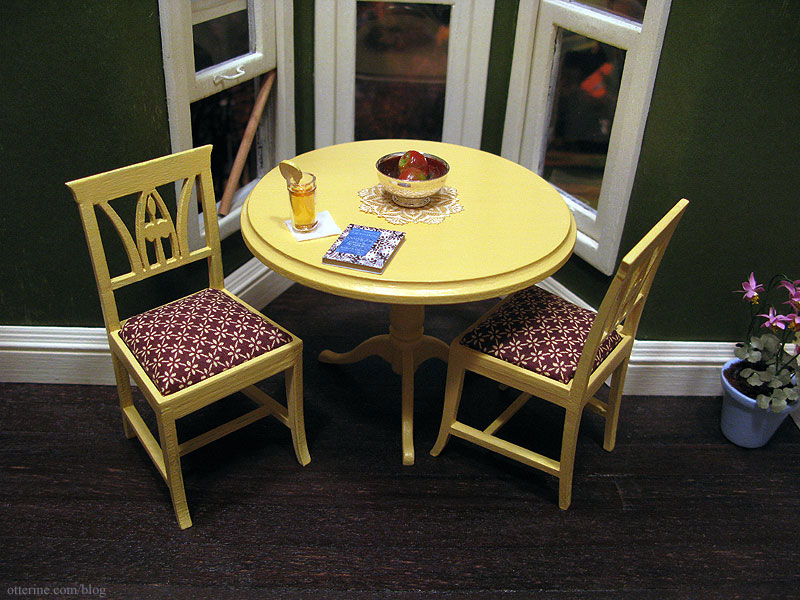
Grandma is enjoying an iced tea and reading about lacemaking. The paper doily is from miniatures.com, and the Clare Bell Brass silver Revere bowl is from Green Gables Dollhouse. The apples were purchased some time ago, though I can’t recall where. The flowers are from Michelle at Little Rabbit Miniatures.
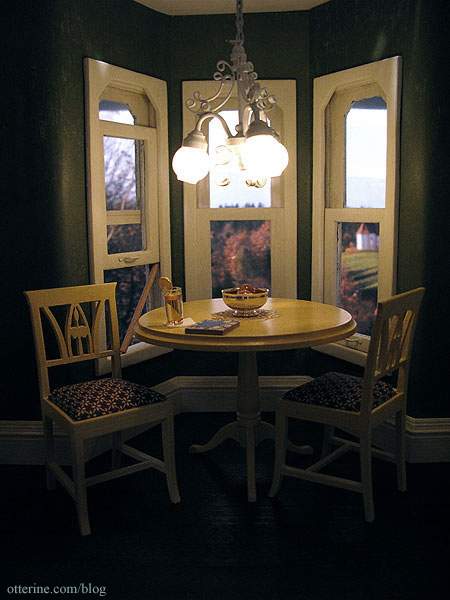
I love the soft sheen on the table from the satin varnish, and those cushions sure look comfy! :D
Categories: Furniture, The Haunted Heritage
February 14, 2012 | 0 commentsBespaq bed makeover and bedroom layout
It’s fun to take a piece of unfinished furniture and spruce it up just so. It’s even good to take a relatively inexpensive piece and change it, even paint it, to make it fit into a scene better. But, I feel as though I am going to get a collective GASP when I say I intend to redo this Bespaq bed, including the finish, which I intend to paint.
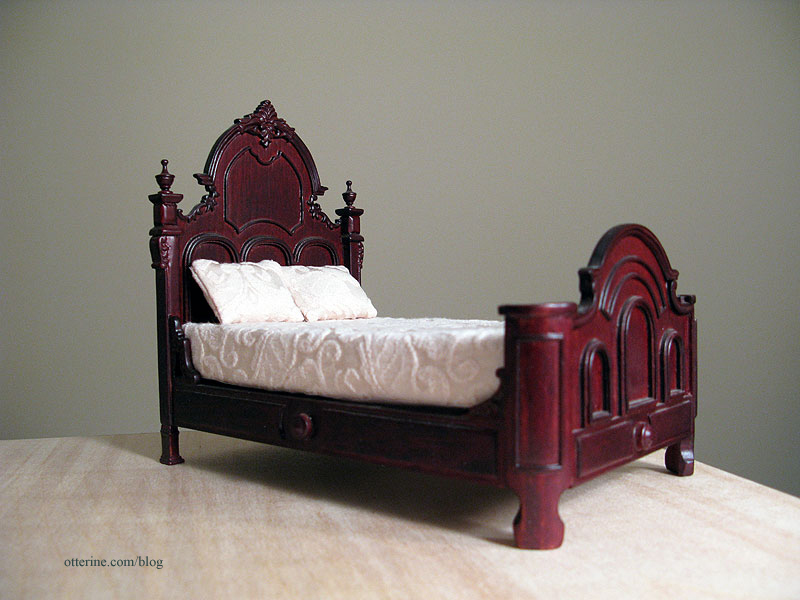
I love the bones of it, and the detailing is wonderful. But, the stain is all wrong, and the bedding is just deplorable for scale. Changing the bedding alone still wouldn’t fix the problem with the color.
As a refresher, here is the paper for the bedroom. This is by Recollections and has the macabre name of Out of Time.

To cover the varnished surface, I first sprayed the bed with grey primer. This is how it will stay until probably after the first of the year when I get a chance to paint it.
Since the kitchen is the same shape as the bedroom, I’ve used it to determine the general layout of the bedroom. You’ll need to do some imagining here with me. If you look at the top of the front and side walls, you can see where the two swinging windows will be — there won’t be a bay window up front. The rest will be solid walls.
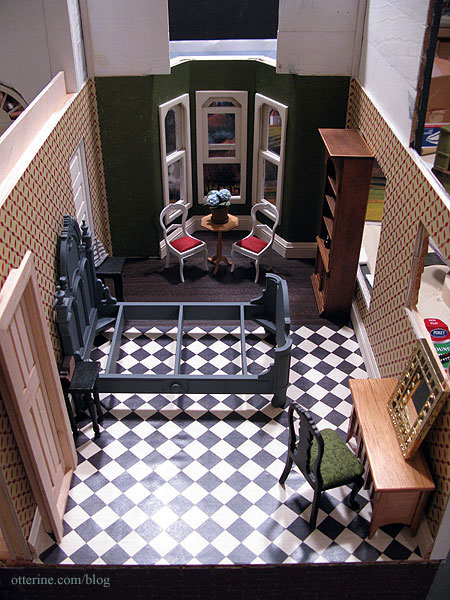
This leaves room for the big bed, one or two small nightstands on either side, and the narrow door on the inside wall. There won’t be a door where you see the pocket door, of course. I’d like to have seating, so maybe I will set up the Chrysnbon Victorian chairs and small table in front of the swinging window.
On the outer wall, there will be a wardrobe (where the bookcase is) and a vanity and chair (where the Mackintosh sideboard, Lundby mirror and black chair are).
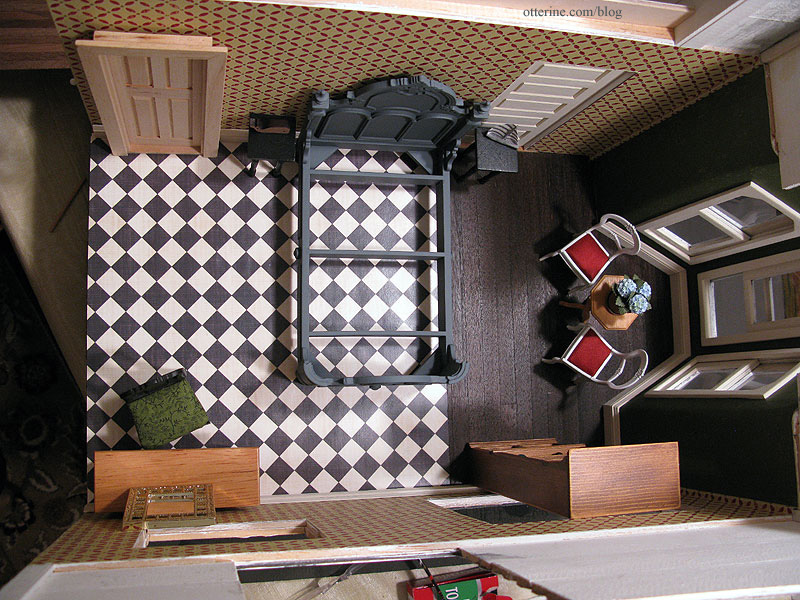
I think the layout works well, though there are the roof peaks to deal with concerning the height of the wardrobe. I might end up with a shorter dresser instead.
Categories: Furniture, The Haunted Heritage
December 22, 2011 | 0 commentsThe Sofa
As you’ve seen before, I bought the beautiful conversation piece known as The Chair made by Kris of 1 Inch Minis. She was kind enough to send me the extra fabric she had and let me know where she bought it. Unfortunately, there wasn’t enough for more than pillows and curtains or maybe an ottoman, and I really wanted to make a sofa to match. The Heritage just would not stand for mismatched furniture in the parlor. What would people say?! ;D
Sarah, a fellow member of the Greenleaf forum, mentioned that she saw the fabric at her local Joann store. I was unable to find any in my area, and she was kind enough to buy some for me during her next visit and sent it to me. Hooray!
I went back through my idea file to see what would be able to hold its own with The Chair and still have a similar style to it. I found this beautiful high back sofa from AT Design Group.
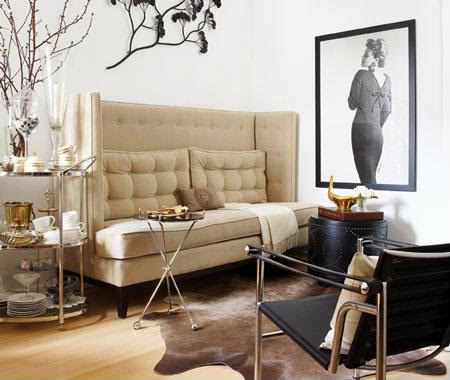
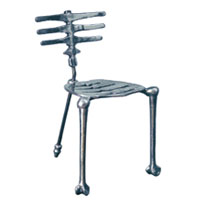
As an aside, check out their skeleton chair! :D I foresee a plastic Halloween decoration becoming a 1:12 scale chair in the future. Ha ha! Creeptastic!
I used my knowledge from the Millie August sofa kit I put together and my initial attempt at an upholstered couch made with dried out (new) kitchen sponges.
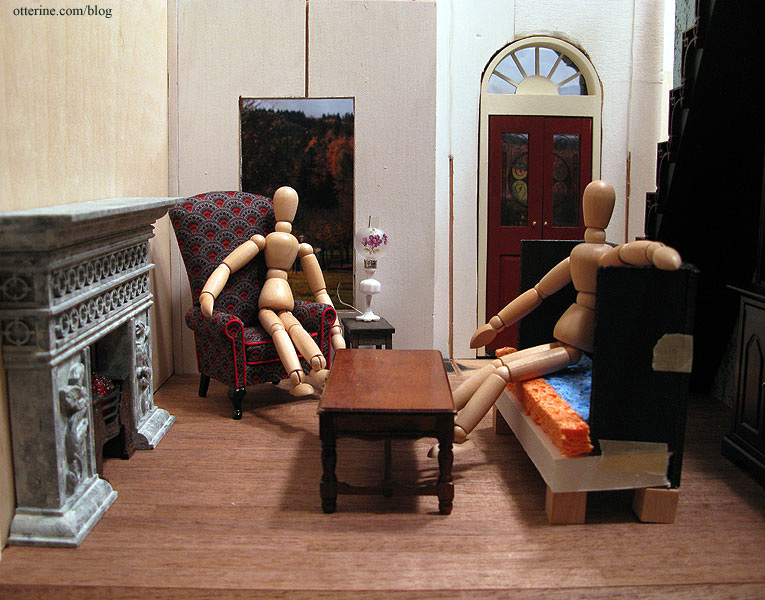
I built a quick mockup in 1/2″ foam core board, 1/8″ foam core board and kitchen sponges (new and dried before using), leaving a bit of wiggle room for batting and fabric upholstery. I used 1/2″ wood cubes for the feet, though I planned to make legs like the original later in the build. I had to piece the sponges since the ones I bought were not long enough, though they were the perfect thickness.
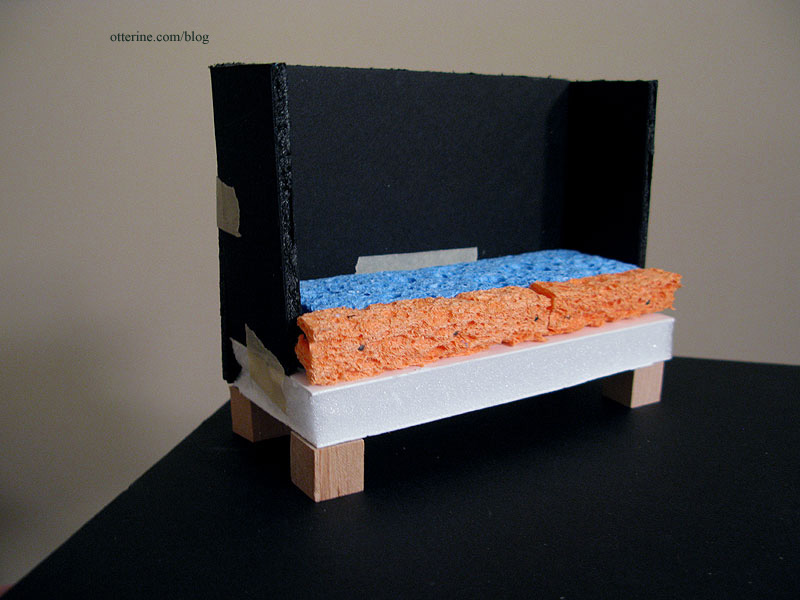
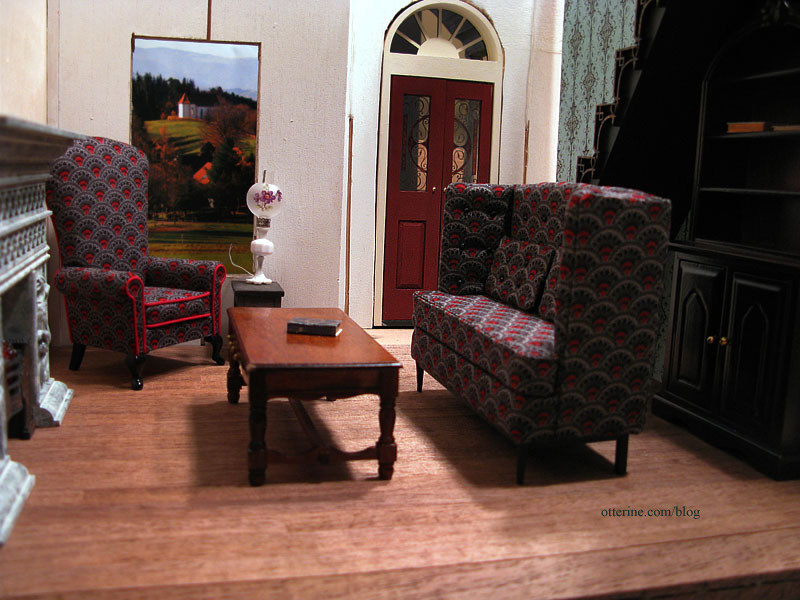
I put the mockup in the parlor to see if the size was good in relation to the chair and for the room itself. I made it shorter than The Chair since it looked off being the same height. As the models show, it works well have a tall chair and a slightly shorter sofa.
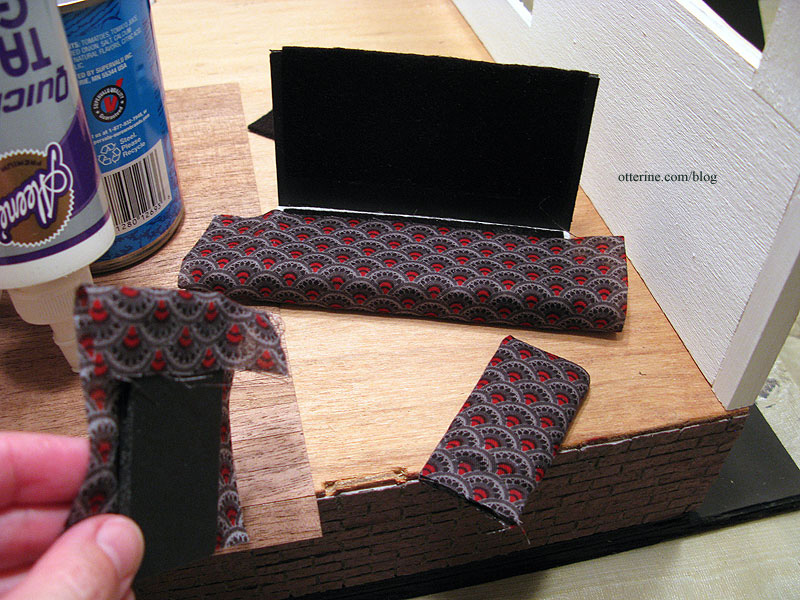
I then began putting the sofa together, first by covering most of the pieces with a layer of black felt under the printed fabric. I usually use millinery batting, but since this is a darker fabric I went with a darker under layer. It’s also thin enough cotton that I worried the lighter batting would show through. I didn’t take step by step photos here mainly because I had to work fast with the quick dry glue and parts of the assembly process were rather fiddly. :D
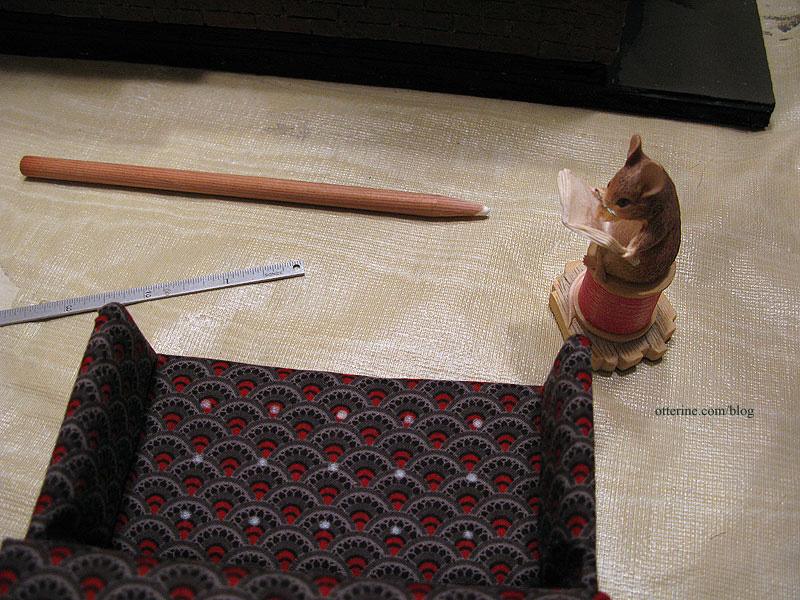
I added three rows of buttons to recreate the tufted appearance of the original by looping thread through the fabric and tying in the back. Shown here is the layout marked with a chalk pencil. Looks like my secret is out, too…I have a mouse tailor for guidance. ;]
The tufting was a lot of work, but it was worth the effort. I just love the effect. I foresee other tufted minis in my future.
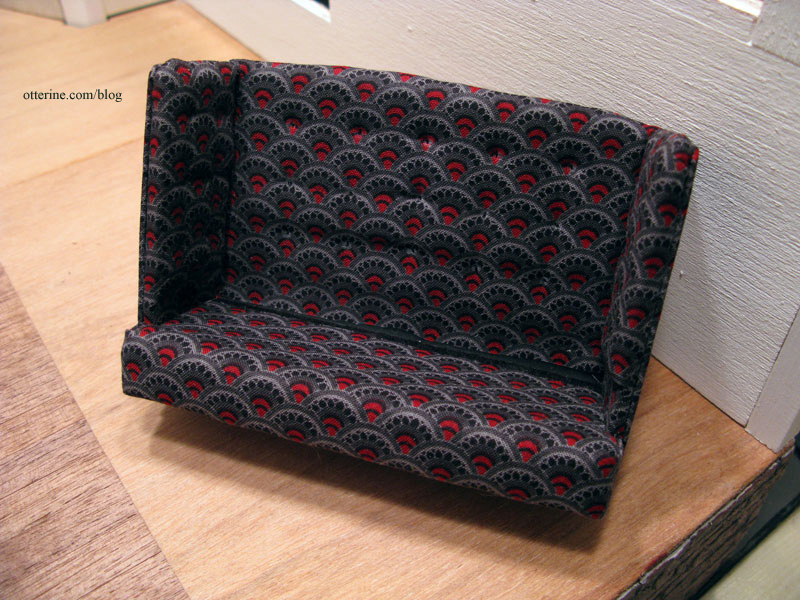
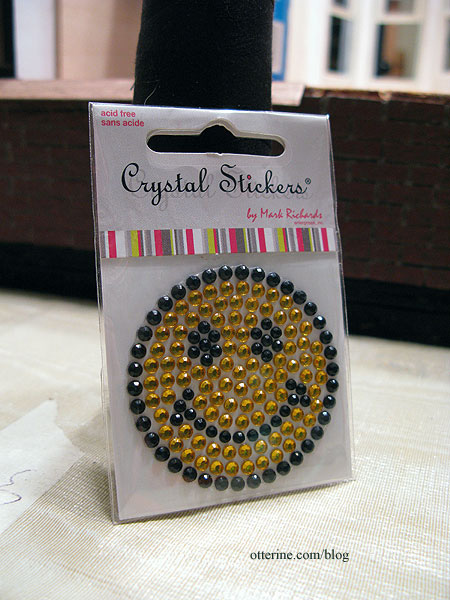
Using a glittery bead smiley face I bought for a dollar, I made buttons to cover the threads creating the tufts by gluing the crystals in place.
I made the tufted cushions using sewn pillows stuffed with flat pieces of felt and tufted with the same thread and buttons I had used for the tall back and sides. I like that they ended up a bit misshapen as though they’ve been used and moved about over the years.
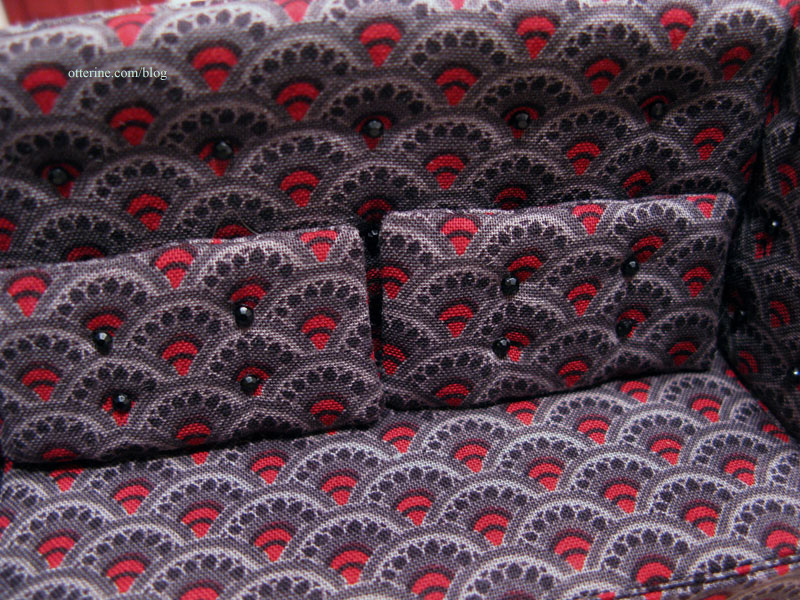
I think the crystal buttons work rather well, though I’ll need to buy another sticker not only because there were not enough to complete all the tufts (the missing ones are hidden behind the pillows) but also in case these pop off as time goes by. I’d never be able to match them otherwise.
The original appears to have a wood base, and I liked this detail. I built a frame and legs from bass wood and painted the assembly black followed by a satin varnish.
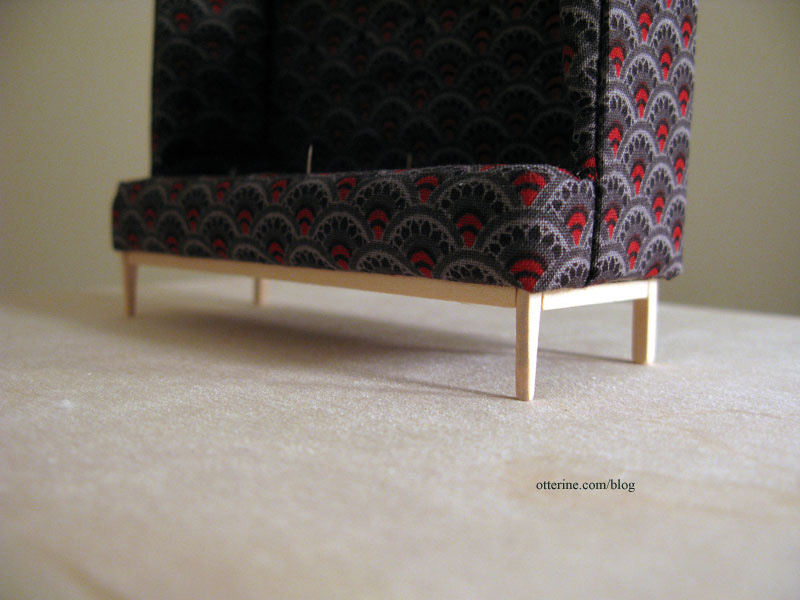
For the main cushion made from the kitchen sponges, I used the method of making cording that I learned from the Millie August kits to add a bit of realism. I opted for self fabric cording instead of red as on The Chair. Not only would it be unlikely to match, but there is so much going on with The Sofa that I worried contrast cording would detract from it. I may add a small red throw pillow or blanket over the back when I get further into the decorating phase to tie it in more with The Chair.
And, here is The Sofa!!! It is my second “from scratch” upholstered piece. :D Love!
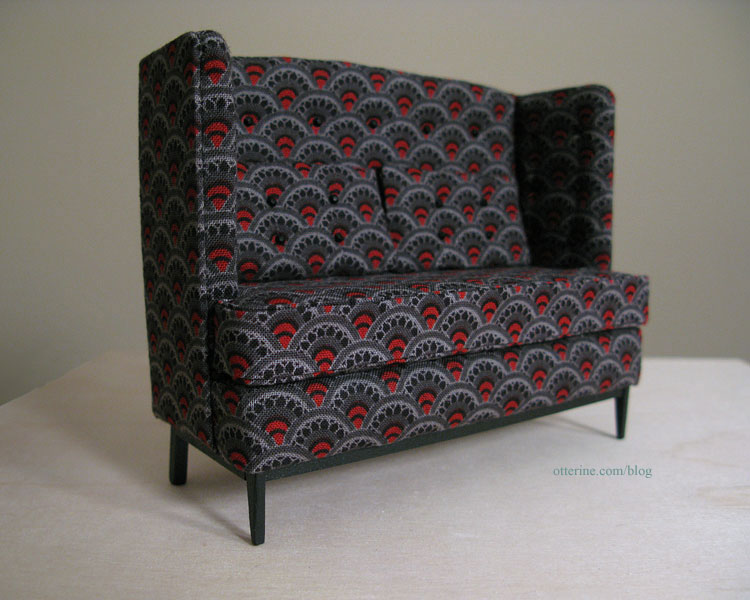
And, here it is with The Chair.
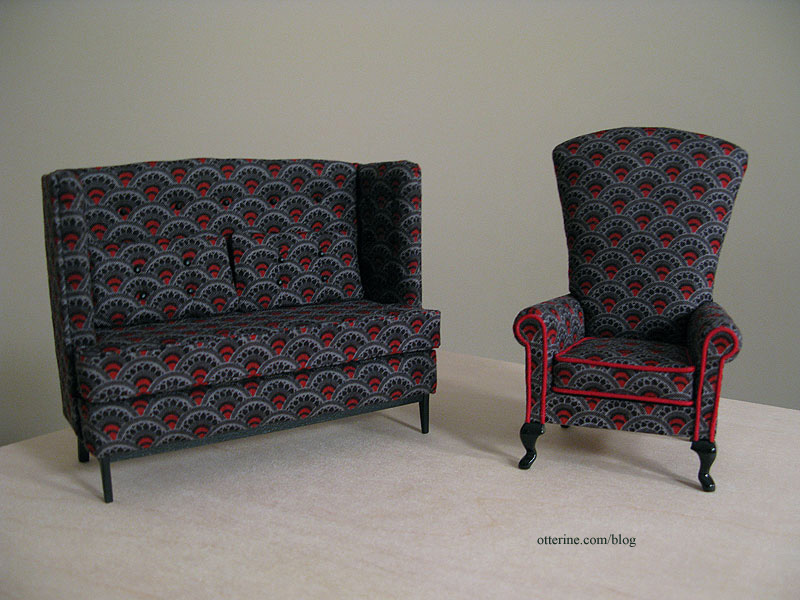
The lack of red in The Sofa is a little glaring with them side by side, but it’s less intrusive when in place in the parlor. Plus, there will be a lot of other things going on in the room as well.
Categories: Furniture, The Haunted Heritage
November 8, 2011 | 0 commentsCustom built wine rack
I am so brimming with excitement over how this turned out that I just needed to share. :D This wine rack is attached to a Houseworks cabinet, so I built a box from 1/8″ thick bass wood to mimic the structure of that cabinet. I painted just the lead edges of the inside as well as the entire exposed side of this addition.
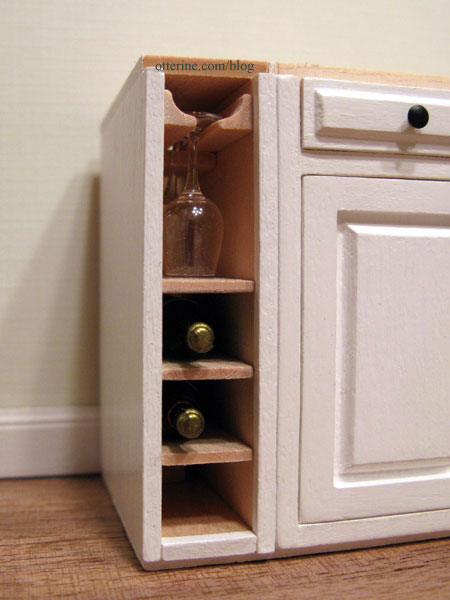
Inside, I have a place to hang wine glasses and to store three bottles of wine. I bought these items at the Bishop show even though they were a little large for scale. I think they work wonderfully here since they aren’t sitting next to anything else that would give away that fact.
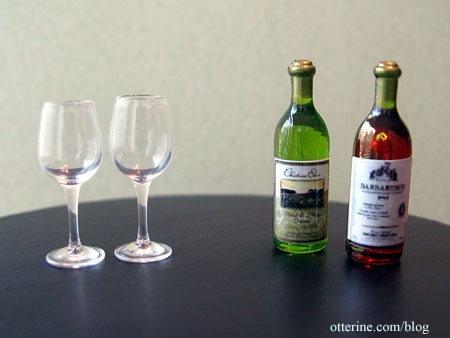
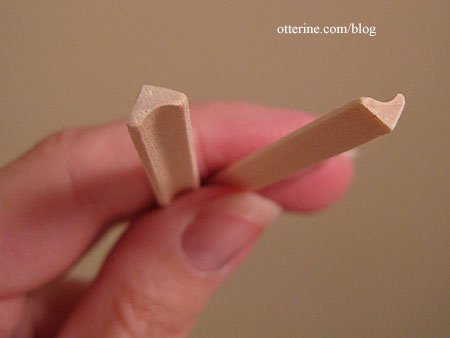
I made the glass holder from mini cove molding…it was actually a sample from a dollhouse wood supplier. There was exactly the amount I needed for this project. Score!
To keep the glasses from sliding too far back, I glued in a block right behind where the second sits. I left the holder and the shelves in natural wood.
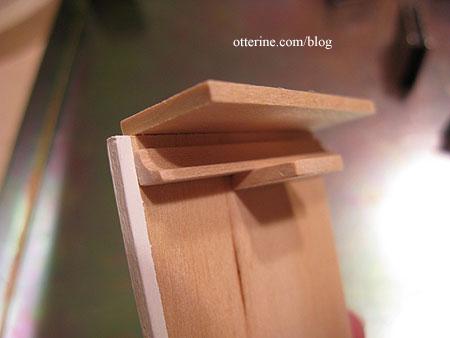
Each shelf is made from 1/16″ thick bass wood. Just as with the glass holder, I put in a stopper to keep the bottles from sliding back too far.
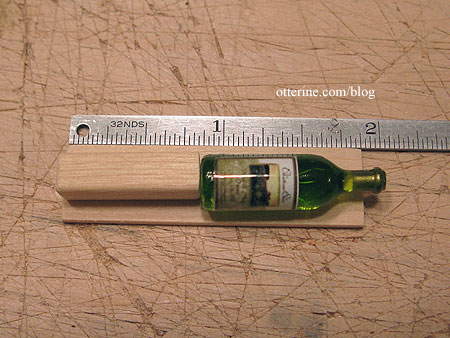
To keep the shelves in straight while the glue dried, I used a 3/8″ post as a spacer.
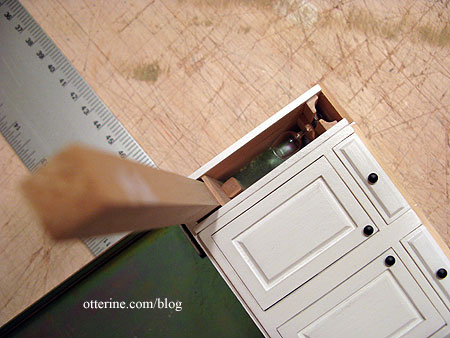
Now, who wants a glass of wine? :D
Categories: Baxter Pointe Villa, Furniture
June 12, 2011 | 0 commentsOly Studio Ichibad Side Table in miniature
Here is the side table I built, inspired by the Oly Studio Ichibad Side Table (as of 2024, the link to the square top table no longer works, but they have this round version).

My version was made from a premade wood square that measured 1 1/4″ across and 1/8″ thick and wood spindles by Tiny Turnings. Mine is a bit larger than a direct 1:12 scale conversion, but that actually works better for the scene it’s intended for.

I first drew a 1/8″ grid on the square with pencil and then used an X-Acto knife to score along those lines.

I painted the edges and back of the square with black acrylic and then started washing on various paint colors watered down to keep the color transparent (Coffee Bean, Black Cherry and Sunflower by Folk Art; Terra Cotta by Americana; and Barn Red by Apple Barrel).
I had to go over the scored lines again after painting with the X-Acto knife. I then used two coats of Triple Thick Gloss Glaze by Americana on the top and one coat of Delta Ceramcoat Satin Varnish on the sides. My scored lines aren’t as obvious as in the inspiration table, but I still like the way it turned out. Too much surface texture on a mini table can also make it difficult to display things on it.
For the legs, I cut the Tiny Turnings into 2″ lengths with the connectors intact. For the separators, I cut 1 3/16″ lengths also with the connectors intact.

I sanded around the ends of the separators with an emery board to make a smaller dowel that would fit into a drilled hole in the leg.


I cut one of the separators in half, splitting the connector in half. I sanded around the outer ends of the separators but left the inner connector halves as is.

I am not really a fan of brass or gold finishes, so I painted the bottom portion with two coats of Iridescent Silver by Liquitex. It was a little shiny and new, so I applied a black paint wash over the finish and dabbed away the excess. It was just enough to add some depth to the color.
I then drilled holes in the bottom of the table for the tops of the legs.

I think it turned out pretty well! :] It’s a bit rickety from being top heavy, but that’s the nature of lightweight materials in miniature.
Categories: Furniture
June 2, 2011 | 0 commentsVintage Millie August furniture kits
I found these two kits at a local hobby store that was having a moving sale. The fabric seemed a bit rough for scale, though the finished photos on the kits looked wonderful.
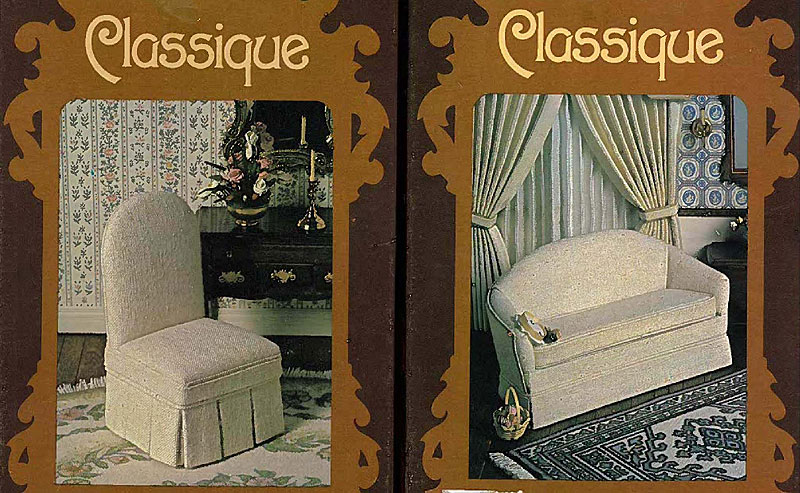
I had some ivory muslin in my fabric stash that seemed softer, but I stuck with the original fabric in the end and was glad I did. :D
My general impression was these kits are very thorough and have excellent detailed instructions, though there were parts that had no illustrations when you could have used some. I chose to make a photocopy of the pattern pieces before cutting them just in case I had to start over with my muslin fabric. I also copied the figure drawings so I didn’t have to keep flipping the paper over between the instructions and the drawings, which happened to be on opposite sides from one another.
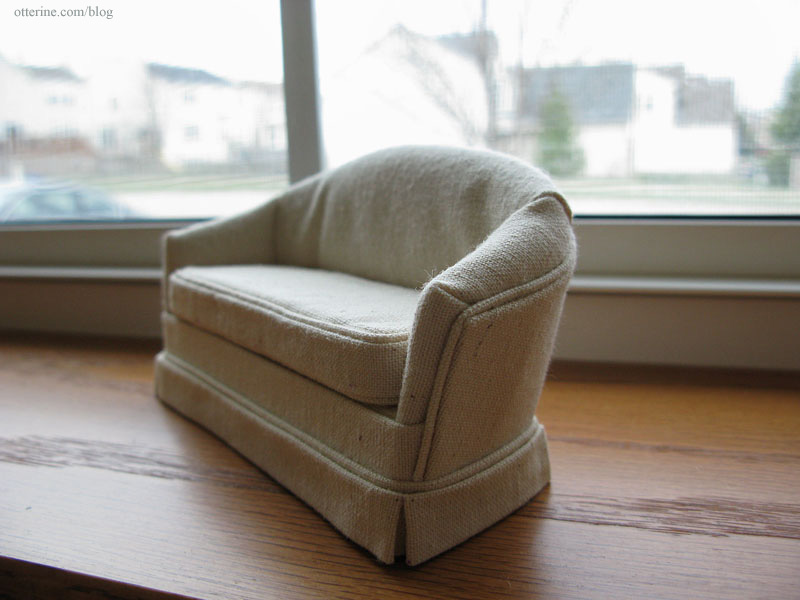
I tackled the couch first, and it went well from the start. Since the kit was old, the foam had yellowed significantly, so I lined the sides and front of the couch with natural muslin before adding the finished fabric. I didn’t want to take the chance that the yellow would show through once the couch was complete.
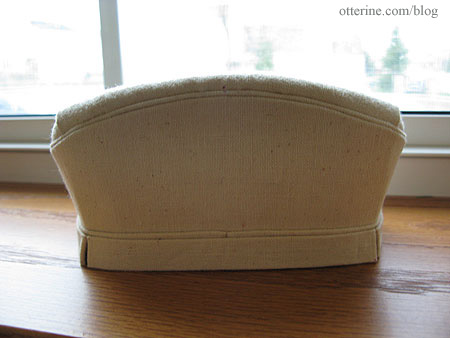
The most challenging part was creating the welting, or cording, but it’s the one element that really adds to the realism of the piece. Real life sized upholstered furniture has this detailing and it was worth the frustration and effort to get it to work.
All in all, the couch took me the better part of a day to put together, so I haven’t gotten to the chair just yet.
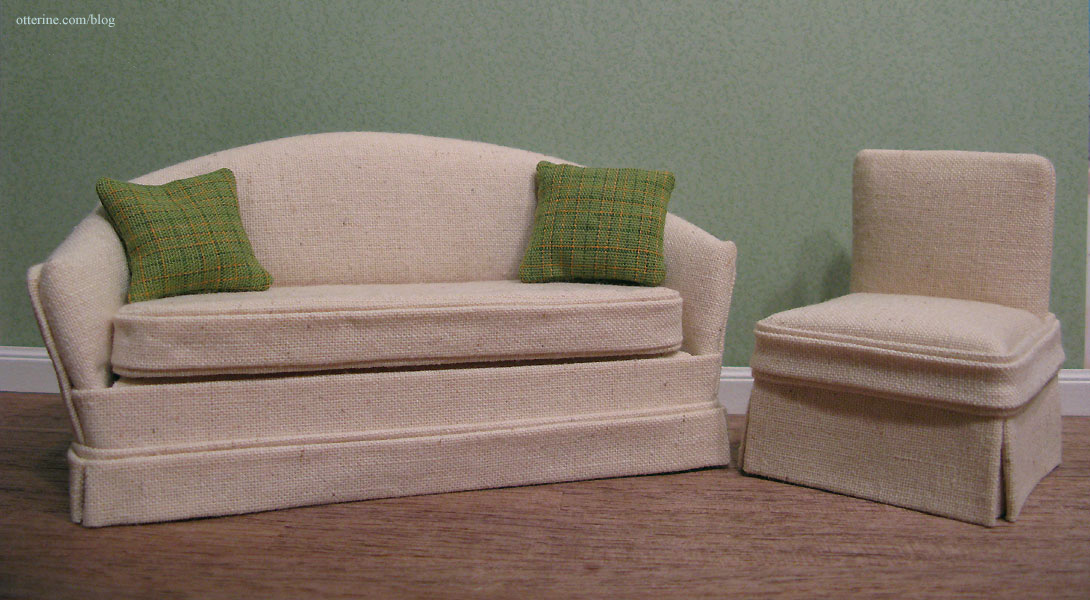
I added some green plaid pillows.
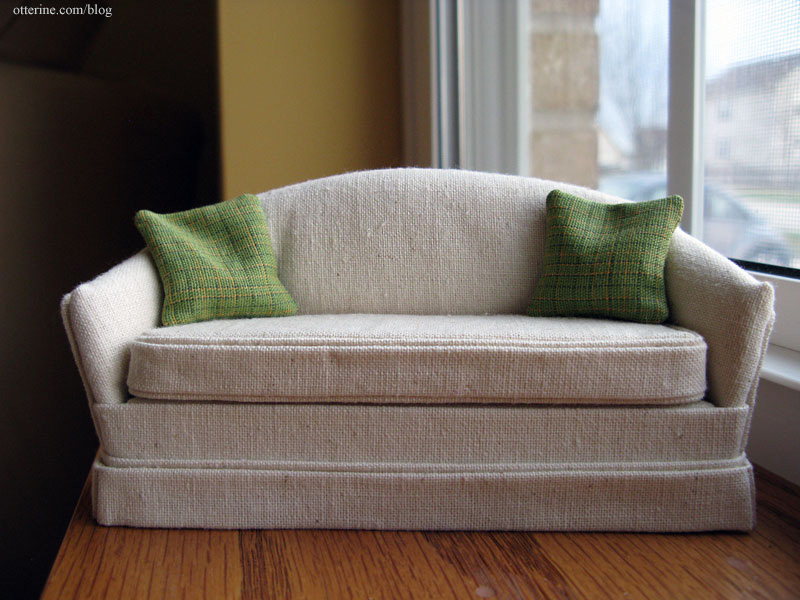
The kit has you build the couch as you would build one in real life size. I learned a lot putting this kit together and will put these skills to use the next time I make an upholstered item.
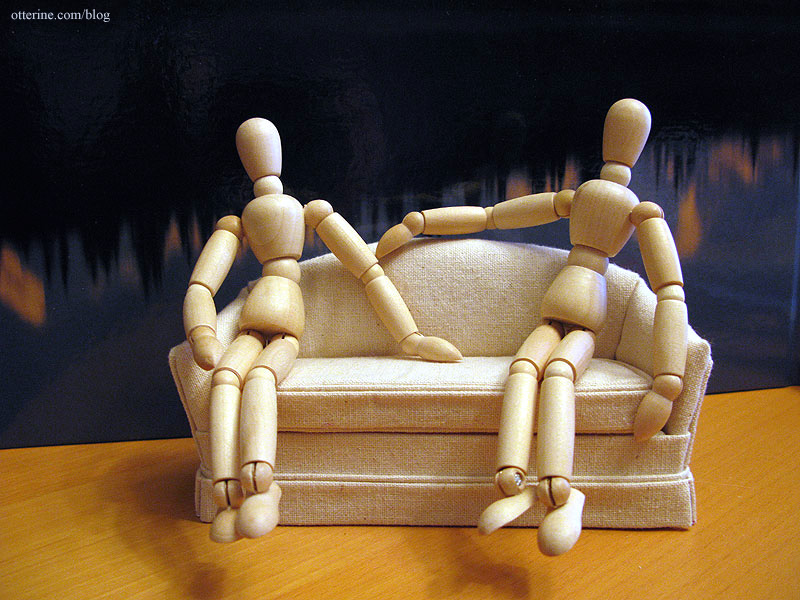
Ara, who has a blog called Addams Family Mini-Mansion, uses a small wood artist’s model when she builds custom furniture. I thought this was a brilliant idea, so I bought a couple myself from Barnes & Noble to use when either making kits as in this case or for when I get around to scratch-building more furniture. They are 5 3/4″ tall, so they equate to a person about 5’9″, which is perfect for getting the proper scale of things. They don’t articulate all that well, but they do a good job for me since I have no actual dolls to put in my miniature dwellings. :]
For the chair, I found the instructions to be a little lacking in comparison to the couch, so I was glad I finished the other kit first. It helped me figure out what to do when I wasn’t sure about the directions. The couch didn’t have an exact side chair counterpart, but I thought this would work well as an alternative. But, I didn’t want it to look like a vanity chair so much as a comfortable modern chair.
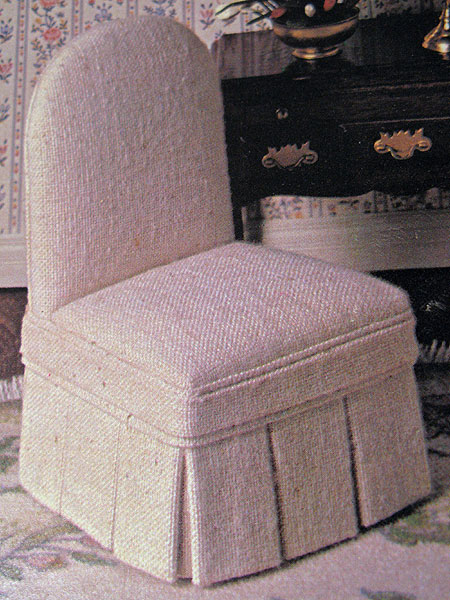
To that end, I cut off the top curve on the back.
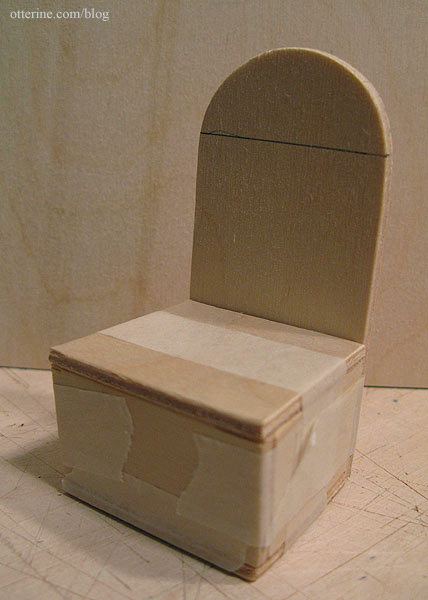
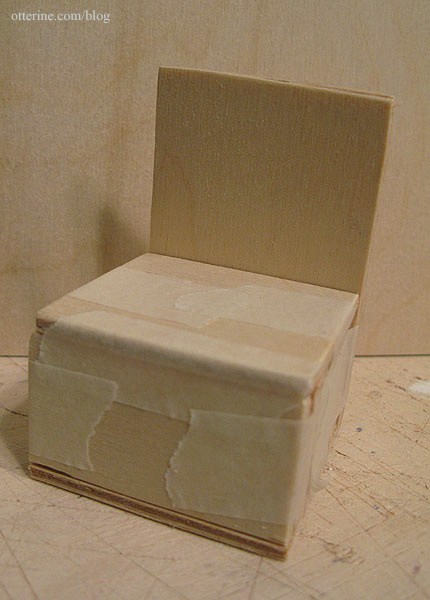
Initially, instead of doing the multiple pleats around the chair, I mimicked the skirting I had done for the sofa to tie the two pieces together.
It turned out okay, but I felt it didn’t have the same polish as the couch. The problem was that the original design took all the extra fabric from pleated skirts into consideration and therefore the seat was cut large. I didn’t cut the seat down when that step came around not thinking about this end result…so my skirts ended up looking too thin for the overall lines of the chair. I didn’t care for the bulge in the middle.
My only real option was to remove the outer trim and the skirts and cut new pieces from the spare fabric included in the kit, because removing the seat assembly to cut it down would have meant tearing the whole thing apart. Not at all tempting.
I still didn’t want the multiple pleats, but I had to assemble one to see how thick it was. Once I had that measurement, I was able to figure out how much thickness I needed to add around the base to make up for the lack of the pleats. I added 1/16″ thick balsa wood around the sides and front.
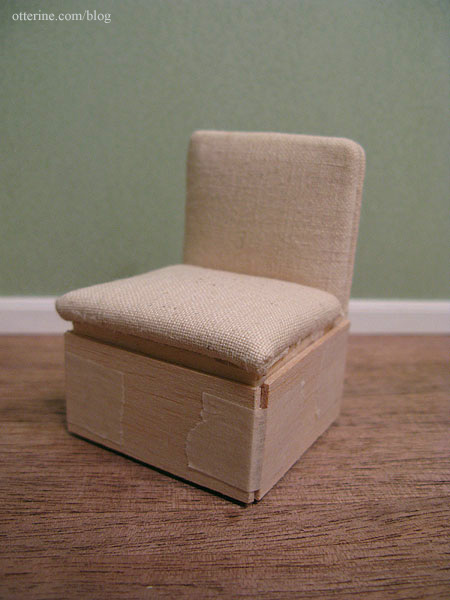
I cut new corner pieces, skirts and the thin finishing trim. I was able to salvage one piece of trim from the first go around, but it was a little short in the back once fully assembled…but we won’t look at the back. I reassembled the skirts and trim and ended up with a much better result.
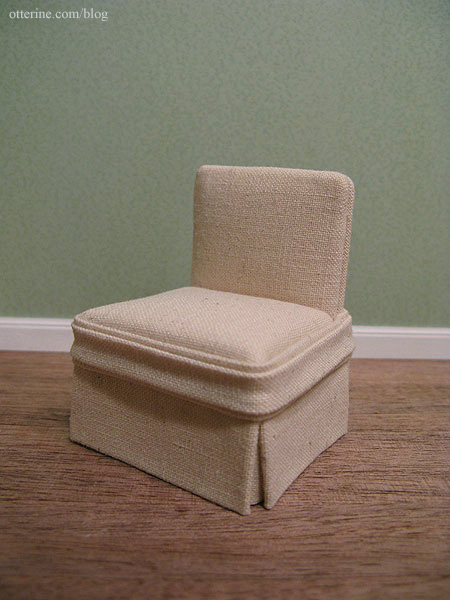
I still like the couch better overall, but the chair fits with the couch nicely enough, I think.
Categories: Baxter Pointe Villa, Furniture
April 10, 2011 | 0 commentsNewport – master bedroom bed linens
In a previous post, I wrote about making the box spring for the Daisy House double bed kit I built. Tonight, I started dressing the bed. Using the same process as I had for the guest bed, I made a fitted sheet and flat sheet to cover the mattress. This time, I used the same fabric as I had for the box spring.
The pillows are made from white cotton sateen and filled with beads. Here they are uncovered.

The fitted sheet is glued in place, but the top sheet is only taped down. I am still deciding on bedding materials, so I need it to be removable for now.

I made the pillow cases a little larger this time around. I like the way they’re a little baggier than the one on the guest bed.

Anyone else feel suddenly sleepy? ;]
Categories: Furniture, The Newport
August 6, 2010 | 0 commentsHouse of Miniatures Chippendale Chest of Drawers
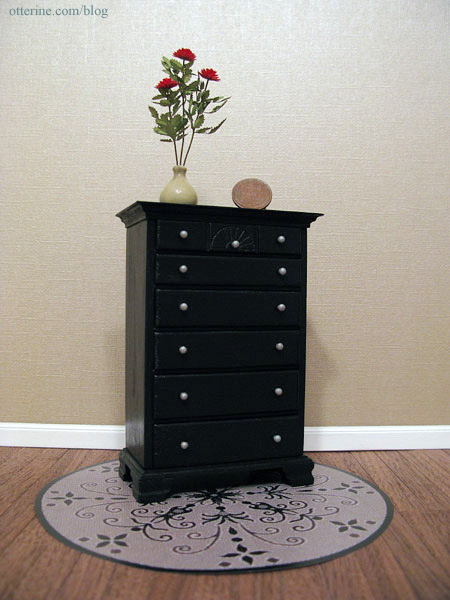
I’ve officially decided I love House of Miniatures kits! :D If you finish an antique piece in a more modern color scheme and update the hardware, you end up with something that works well in a contemporary setting. It’s like thrifting in mini!
Here’s the box image for the master bedroom dresser. Very traditional.
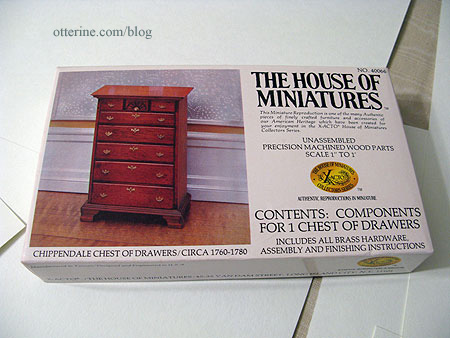
And, here is the kit after finishing. I used black paint followed by a satin varnish and wooden knobs painted silver for the hardware. The flowers are part of the Bonnie Lavish dahlias I made last week.
Categories: Furniture, The Newport
July 31, 2010 | 0 comments
NOTE: All content on otterine.com is copyrighted and may not be reproduced in part or in whole. It takes a lot of time and effort to write and photograph for my blog. Please ask permission before reproducing any of my content. (More on copyright)

One settee, two settee, and always an animal on it…
Last year, I used HBS’s generous 40% off April Fools coupon on the Greenleaf lighthouse kit for Walnut Bay Light. This year, I bought the Alayna Settee, an item that is a little out of my usual style. Something about it just drew me in.

Ophelia seems to like it and another settee I picked up on eBay awhile back.

I acquired this beautiful Bespaq settee awhile ago, and I don’t recall exactly where. I love this green stripe. I have several Bespaq pieces with this same fabric.

Hey, what are you doing, Sherwood?!
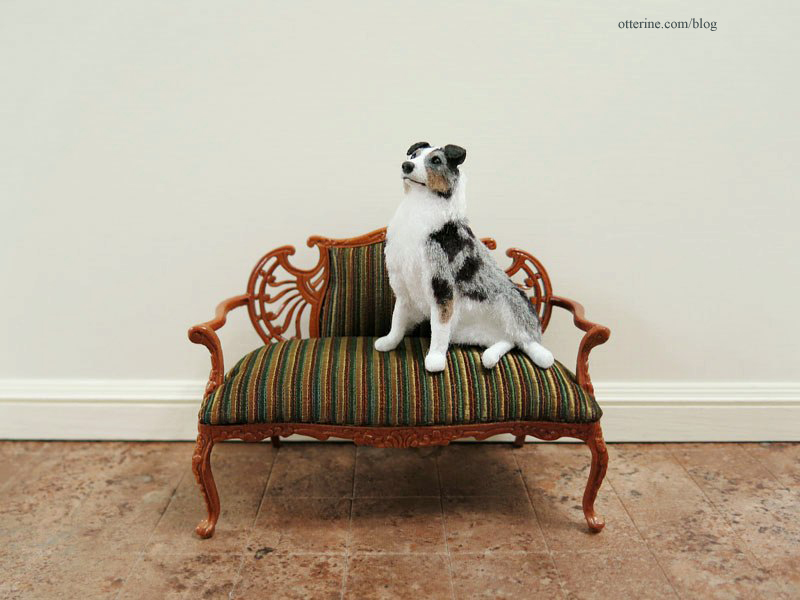
I don’t know why I like miniature settees so much. There are more on my wish list. Maybe because they can be so impractical in real life, but in mini I can have as many as I choose. Looks like I might have to build a miniature store and call it Brae’s Settee Emporium. :D
Categories: Furniture
March 13, 2014 | 0 commentsBodo Hennig sewing machine
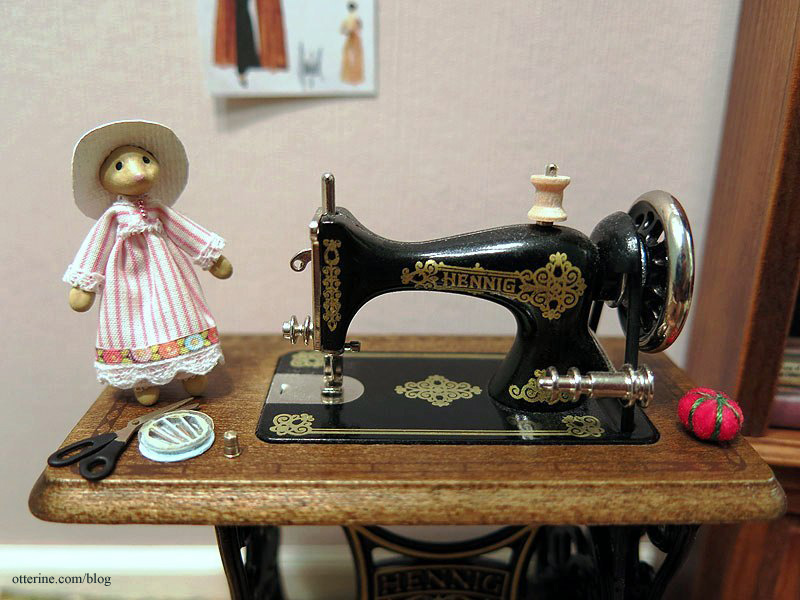
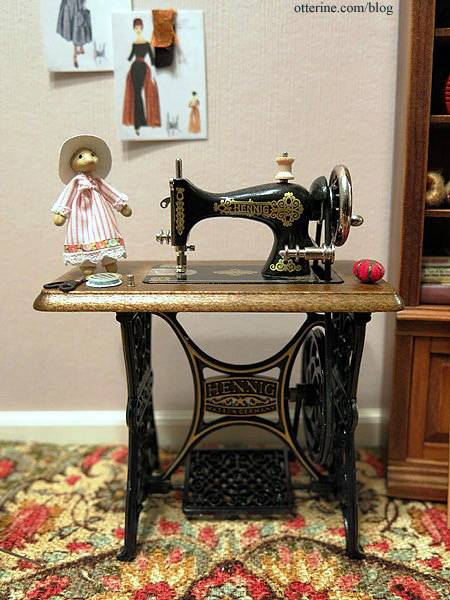
Sharee featured her beautiful Bodo Hennig sewing machine last fall, and while it had been on my wish list already, seeing hers sent me on the search for one. The retail price is hefty, though I’m not saying it isn’t worth it. It’s a beautiful item, but I had hoped to find a better deal…and I finally did. This beauty was found on eBay for a nice price in pristine condition. It has a black rubber band that moves the needle and pedal when you crank the wheel. Miss Charlotte is a mouse doll from PamelaJunksMinis. The scissors and pin cushion are purchased minis from local shows.
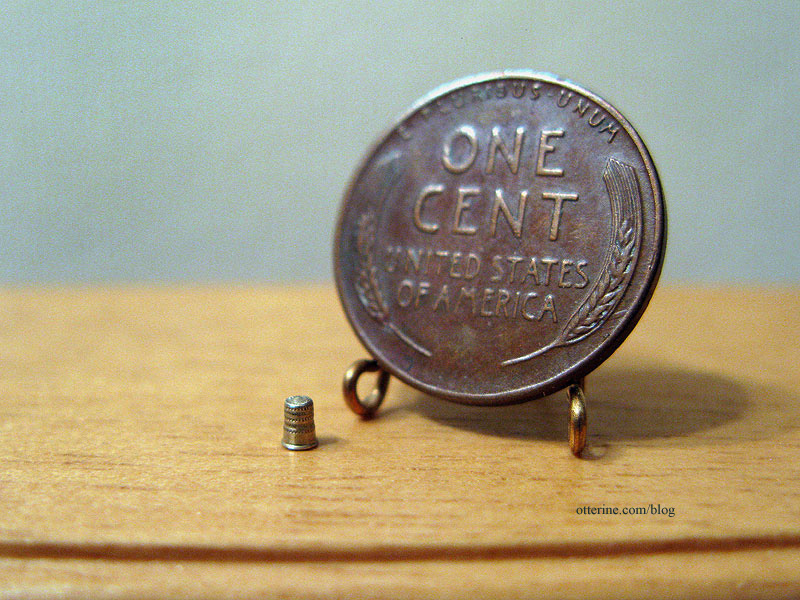
The thimble is from Vilia Miniatures. It’s impossibly tiny with wonderful detail.
The box of needles is also from Vilia Miniatures.
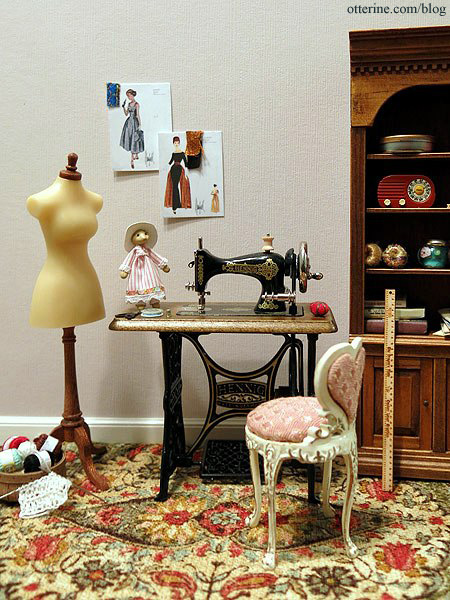
I borrowed the vanity stool from the Heritage, and the mannequin was made from a Hazel Dowd kit. The fashion drawings and large books are from L Delaney, and the rug is from Dale’s Dreams. The vintage radio is from Halls Miniature Clocks (I have one in dark green, too). The yardstick was purchased at the local shows, and the cabinet was a local craigslist find.
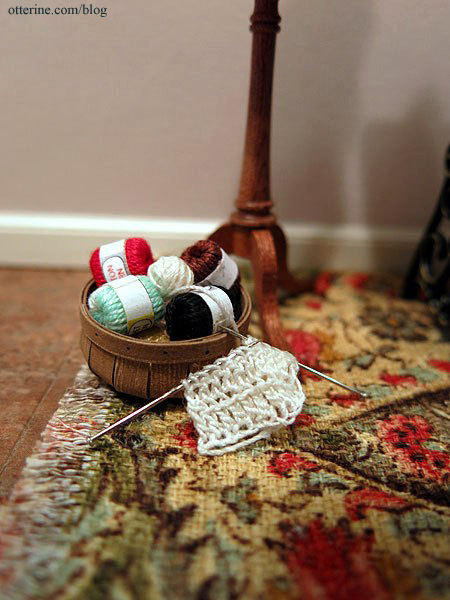
I purchased the skeins of yarn over the years, but the knitting is from Small Talk (a vendor at one of the local mini shows). The basket is by Al Chandronnait.
It looks so real! :D
Categories: Furniture
February 20, 2014 | 0 commentsHampton House – the beginning
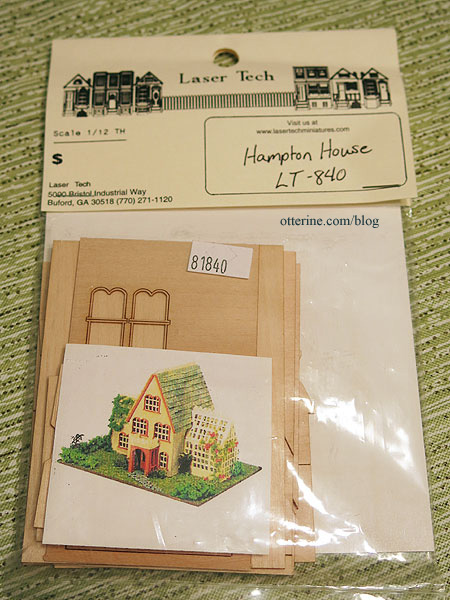
I bought the 1:144 scale the Hampton House a couple of years ago, and this will be my first foray into teeny weeny scale.
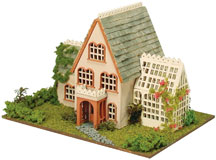
photo from miniatures.com website I plan to take my time with it, so I don’t intend to finish it in the next few days before Christmas. But, I’d like to make a holiday scene as I usually do, so I will incorporate the beginning stages in that scene. I’ve always liked the dollhouse for a dollhouse concept. My Christmas scene will be a dollhouse in progress for Christmas, so I can get as far as I do in the next few days and it will fit right in.
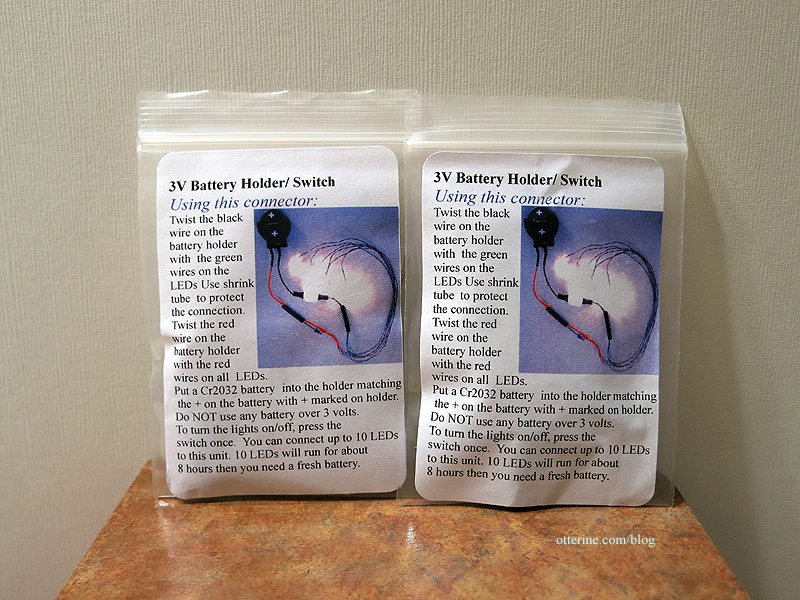
Hampton House is an enclosed structure, so I won’t worry about decorating the interior this time around. I would like to have it lighted, though. I bought LEDs and battery switches from true2scale at the Bishop Show this past year, so I’ll use one of those.
Here are two great examples of this house by EmmyNHiros and Yuri Munakata. Both artists transformed the kit into an open dollhouse with interior décor.
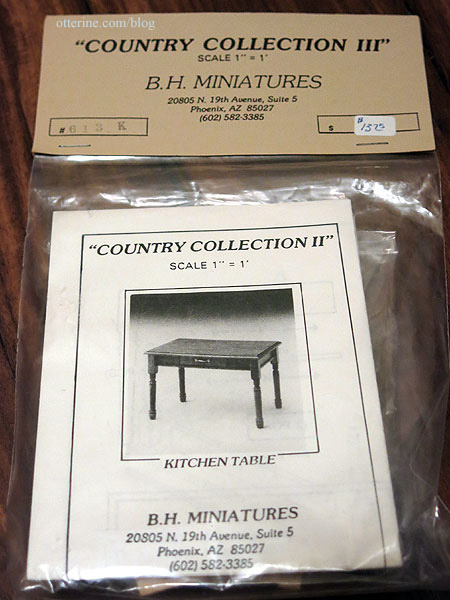
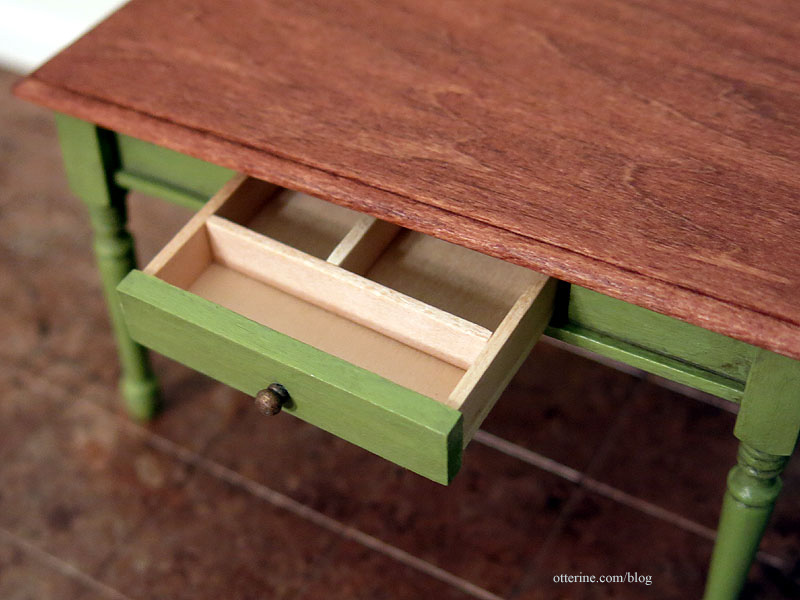
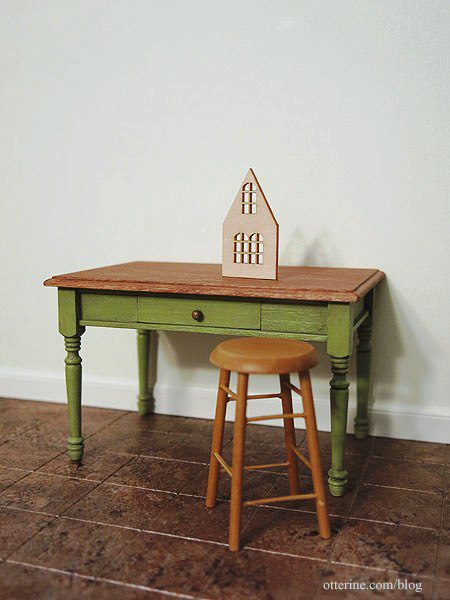
I’m starting my scene with a work table made from the Country Collection II Kitchen Table by B.H. Miniatures. I picked up three of these in a recent eBay auction, along with a few other B.H. Miniatures kits. The tabletop measures 2.5″ x 4″, so it will make for a great work table and maybe a final display table.
I chose Minwax Cherry to stain the top and painted the base an aged green, fitting for a country table.
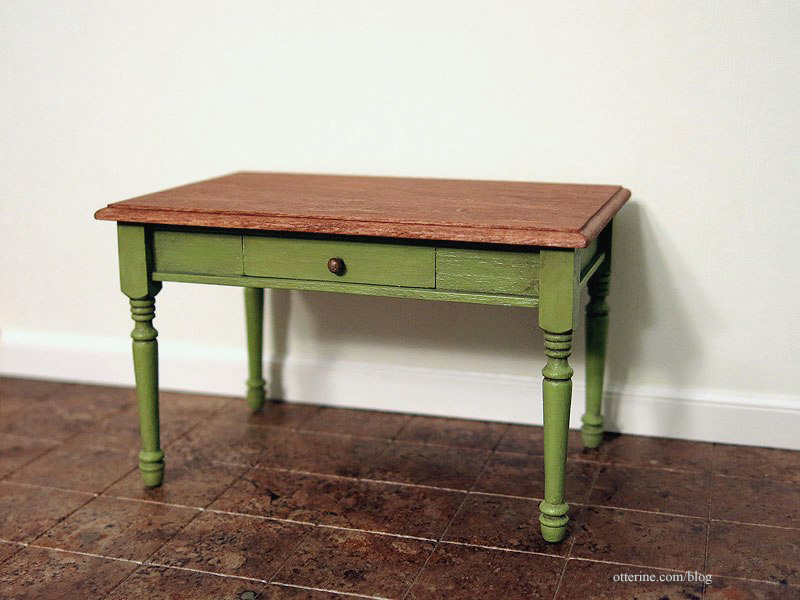
I didn’t use all of the wood pieces to divide the drawer since I have an idea of what I’d like to house here. The original kit was meant to hold silverware, I imagine.
I opened the Hampton House kit to have a looksee.
The structure is larger than I expected so this table might not work for display long term. Hmm…no biggie…I love the table and can always find a home for it. :D
Categories: Furniture, Micro Scale Models
December 19, 2013 | 0 commentsSuitcase valet
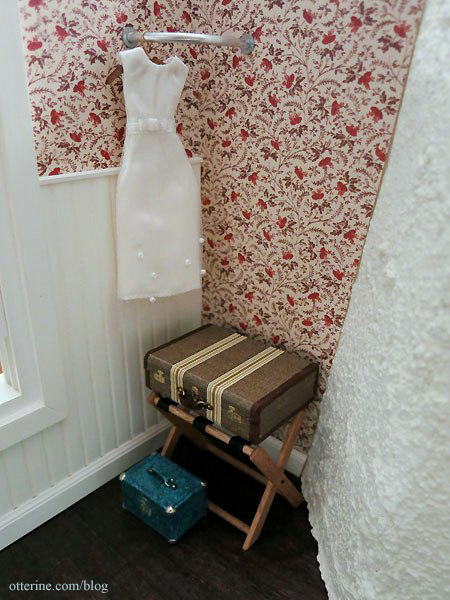
This is one of those Plan B items that is probably better than the original idea. I ran out of time for the original wardrobe plan.

The suitcases made by Fran are borrowed from the Heritage attic.

Yes, it folds for storage! :D
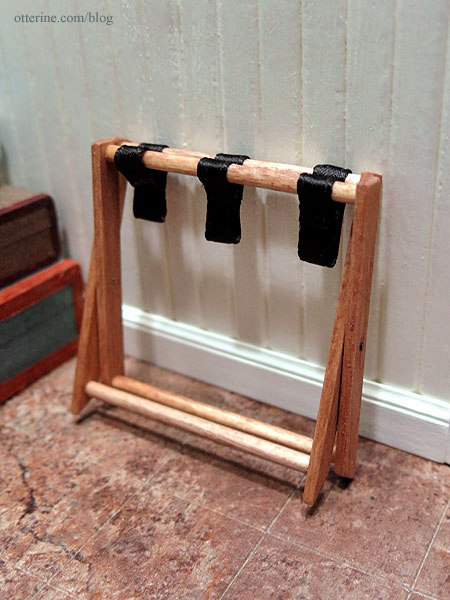
I might have to make some of these for my etsy shop — but it won’t be until the New Year! I am going to need a breather (and a cleanup crew)!
Categories: Furniture, Walnut Bay Light
December 12, 2013 | 0 commentsColonial Four Post Double Bed
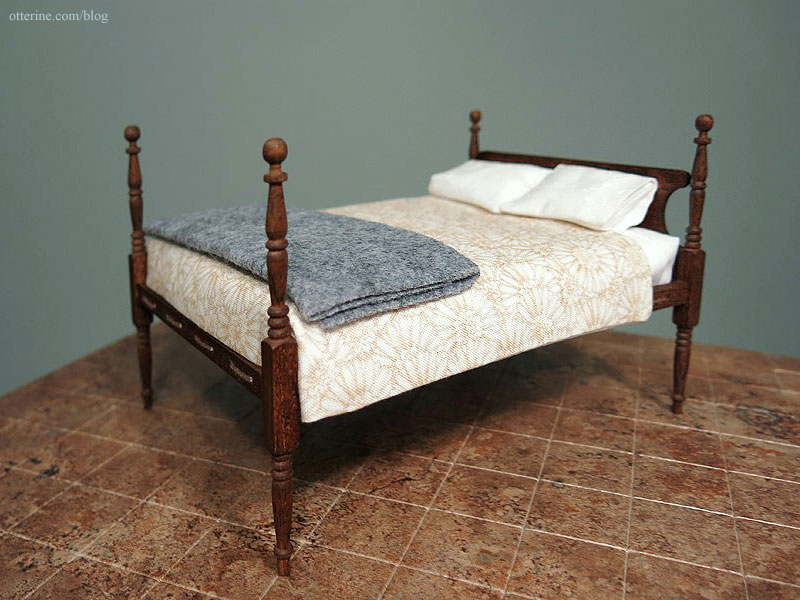
I had planned to make a different bed, but time constraints called for Plan B. This is a kit from HBS, and it went together quickly and easily. I used Minwax English Chestnut for the finish.

The kit included white twine to rope the bed. The instructions tell you to cut the twine in equal parts, but the rope wasn’t long enough. :\ So, I used DMC 841 Light Beige Brown. Saved me the trouble of having to tea stain the rope, and it worked just as well. That’s a House of Miniatures side table in progress, and the rug is from Manor House Minis.

I used the kit’s foam mattress, covered it with millinery batting, plain white sheets, a sunflower printed bedspread and a wool blanket made from heather grey felt.
Categories: Furniture, Walnut Bay Light
December 6, 2013 | 0 comments
NOTE: All content on otterine.com is copyrighted and may not be reproduced in part or in whole. It takes a lot of time and effort to write and photograph for my blog. Please ask permission before reproducing any of my content. (More on copyright)


