
Teddy bears just want to have fun
This settee from Sandy McHenry at the 3 Blind Mice show kept calling my name since I have the 1:12 scale version in the Heritage attic. This one is half scale and the perfect size for a couple of buddies to enjoy. :D I bought it before I even knew how I would use it.
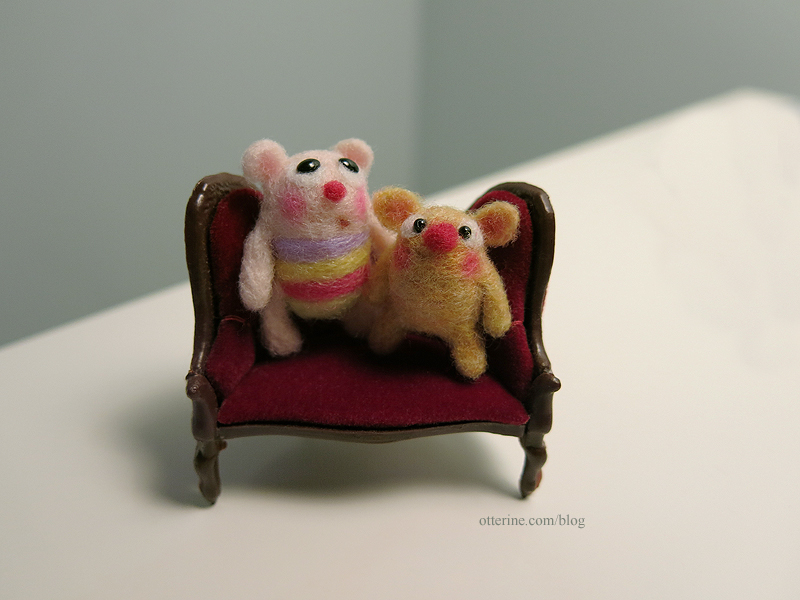
Wally and Boo have settled in nicely, but, oh, the non-stop giggling! :D
Categories: Animals and birds, Furniture
April 21, 2015 | 0 commentsArjen Spinhoven Miniaturen
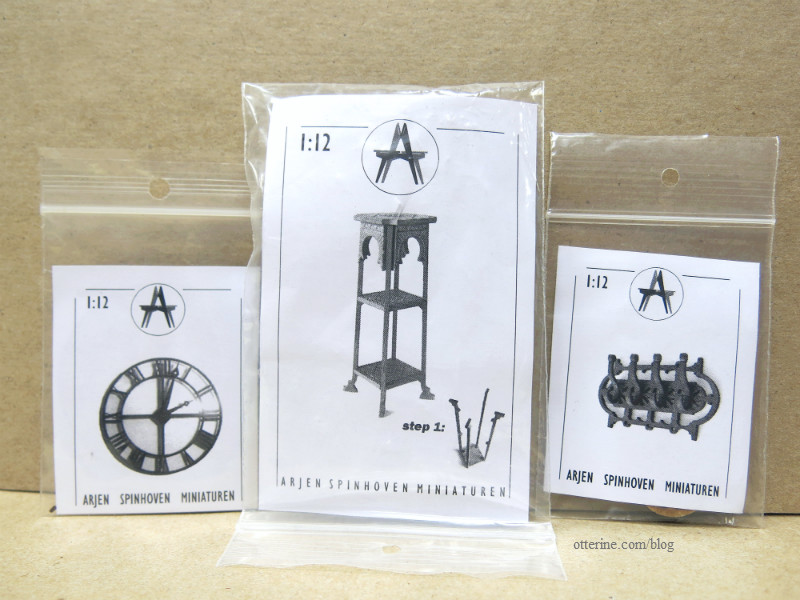
I apologize in advance to your wallets. I recently discovered a new kit supplier Arjen Spinhoven Miniaturen and all I can say is, “Wow!” Even if you resist spending the cash, you will be spending plenty of time admiring the beautiful offerings. He has a direct website and an etsy shop.
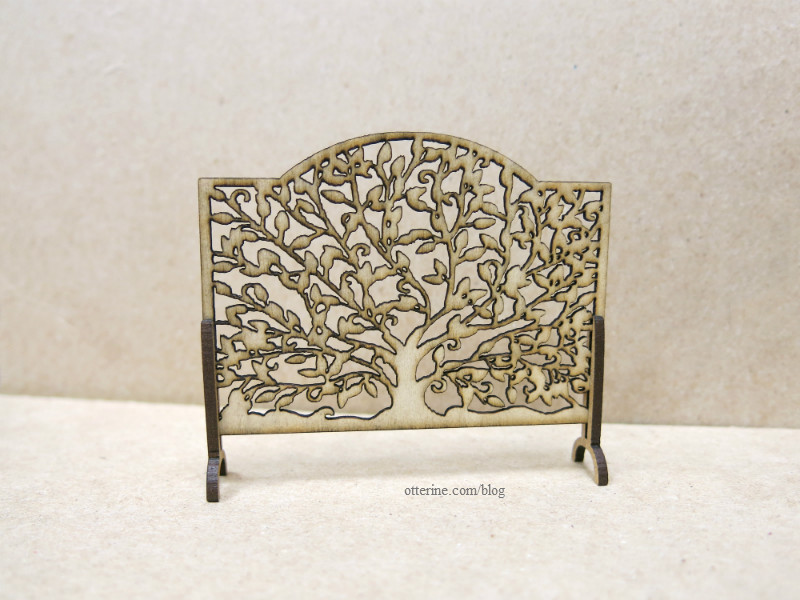
Tree firescreen
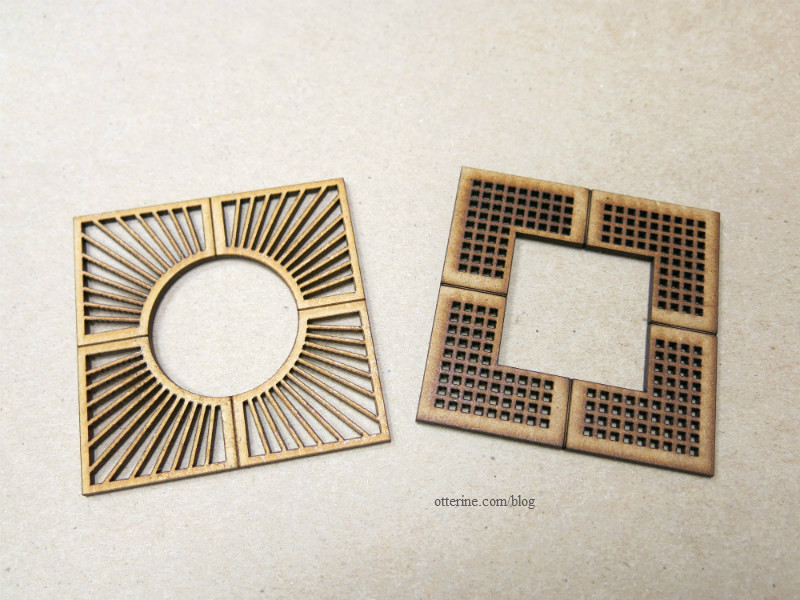
Tree surrounds in bar square and square holes.
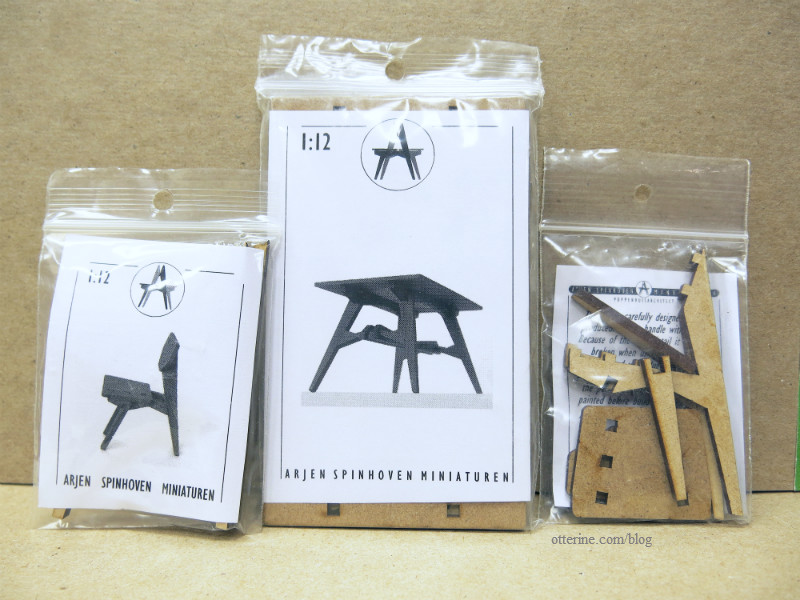
Arts & Crafts table and chairs kits.
Plant stand kit – Clock – Coat rack.
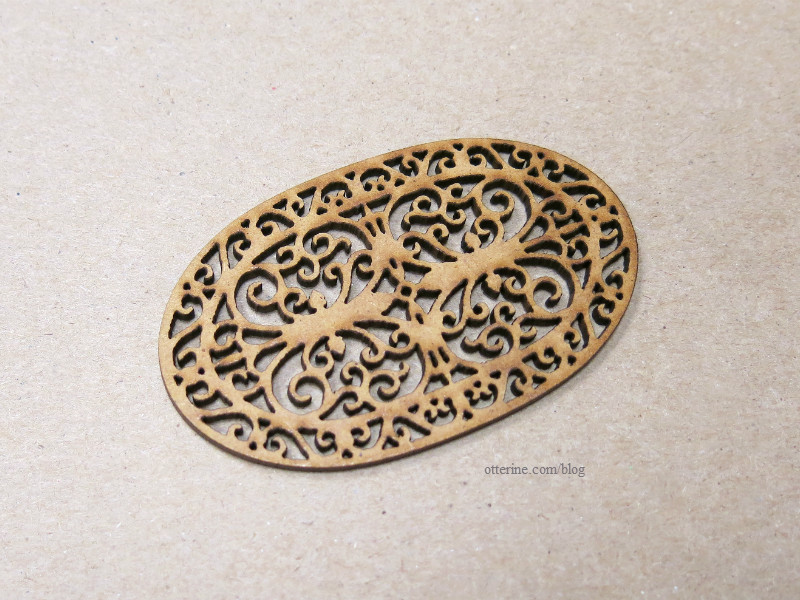
Oval doormat
Categories: Furniture, Miniatures
April 13, 2015 | 0 commentsCathode Ray Tube
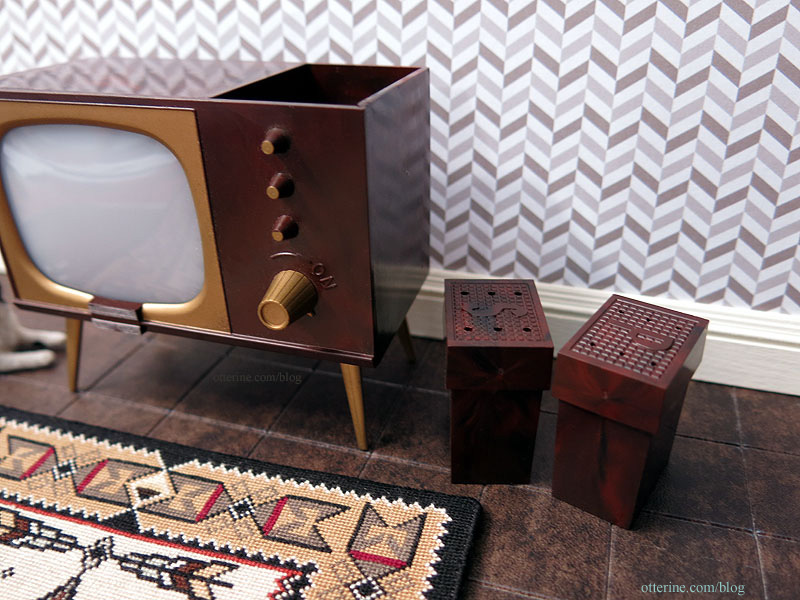
Found this fun little gem on etsy while searching for mini television sets. I’ve always liked the Hallmark ornament versions, but those can be pricey. This is a plastic salt and pepper set, but the size is great for a dollhouse retro TV.
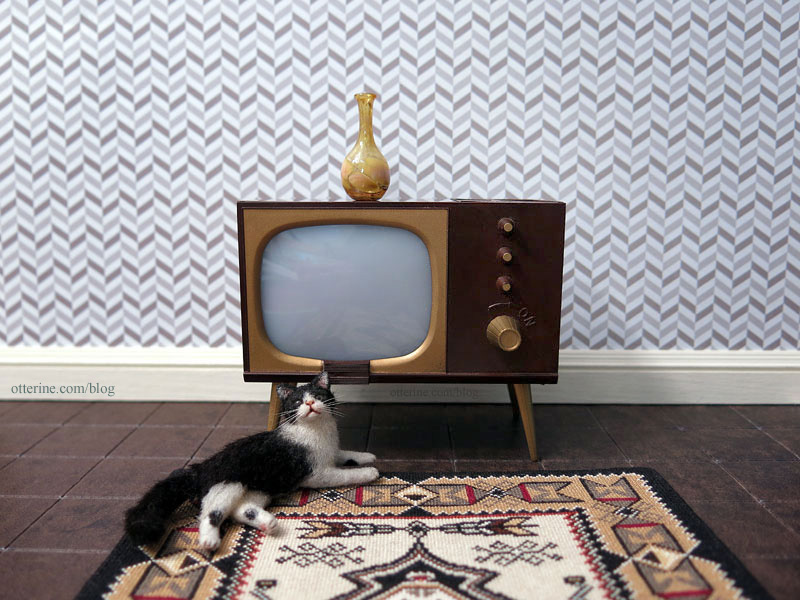
The shakers look like speakers when in place, and you can’t see them from the front. You turn the knob to lift the shakers.
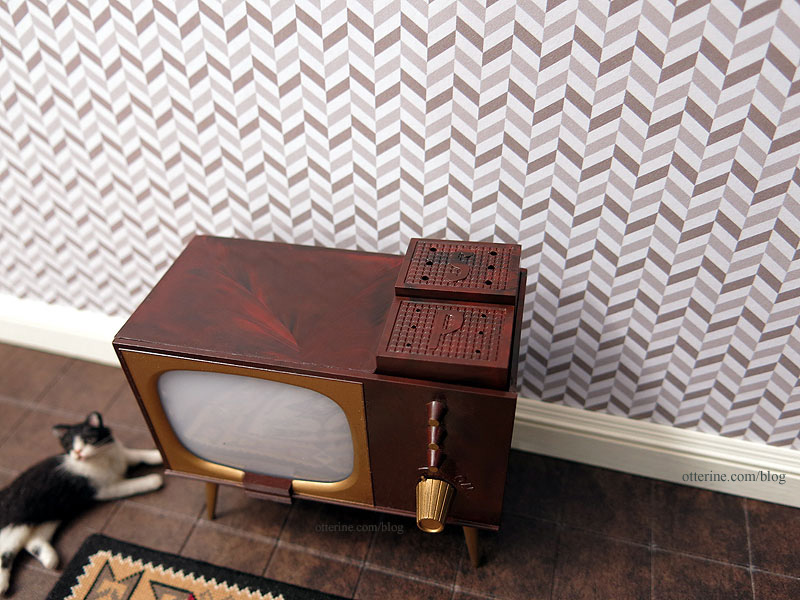
This set is in great shape, so I don’t think it was ever used on a tabletop.
Even the box is in great condition.
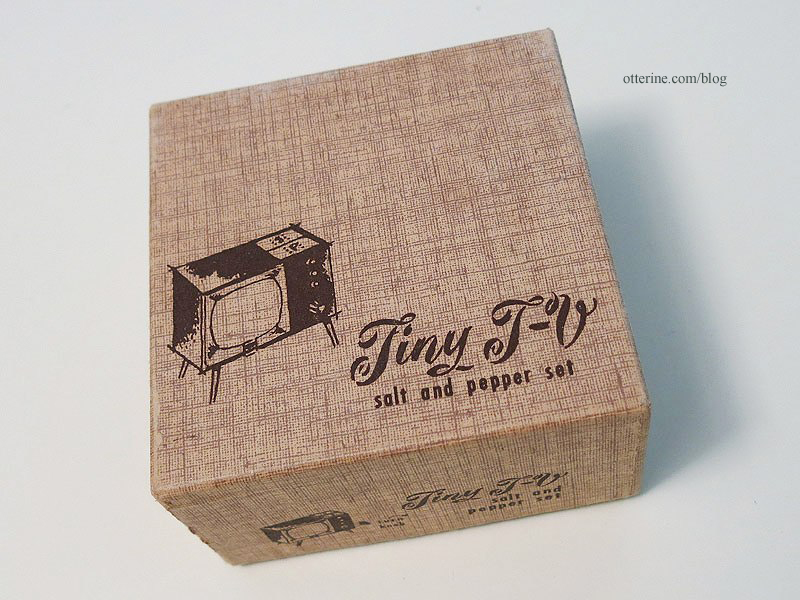
It shows you how to operate the shaker.
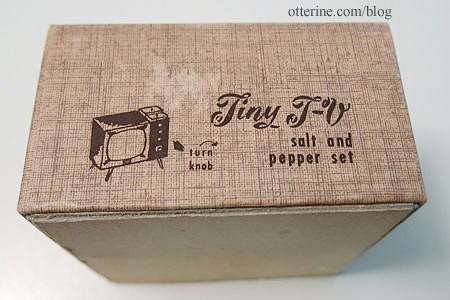
And, there’s a note about putting a photo in front of the screen.
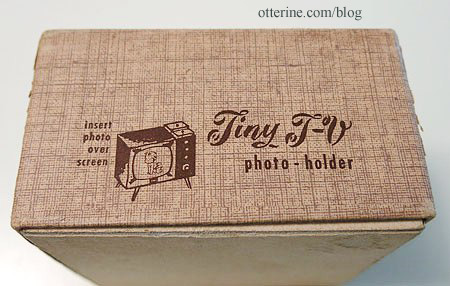
All it needs is rabbit ears! :D
Categories: Furniture
July 11, 2014 | 0 commentsOne settee, two settee, and always an animal on it…
Last year, I used HBS’s generous 40% off April Fools coupon on the Greenleaf lighthouse kit for Walnut Bay Light. This year, I bought the Alayna Settee, an item that is a little out of my usual style. Something about it just drew me in.

Ophelia seems to like it and another settee I picked up on eBay awhile back.

I acquired this beautiful Bespaq settee awhile ago, and I don’t recall exactly where. I love this green stripe. I have several Bespaq pieces with this same fabric.

Hey, what are you doing, Sherwood?!
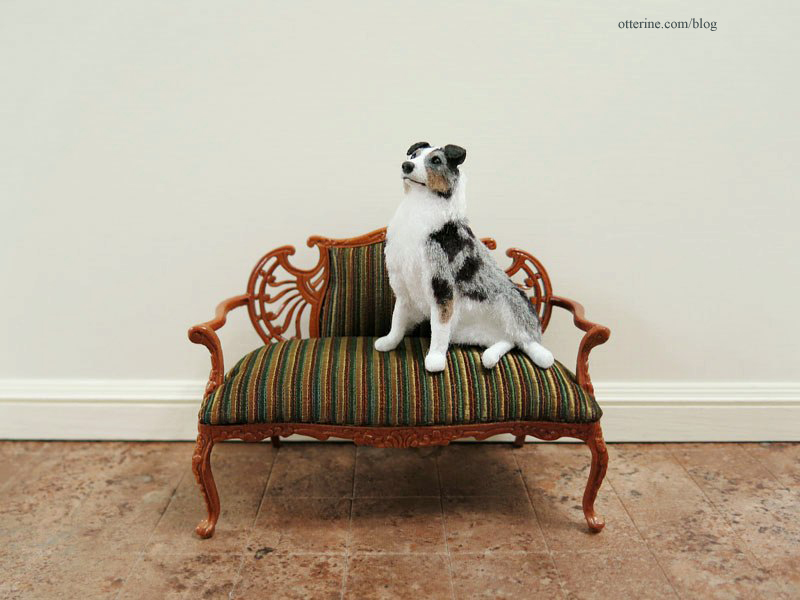
I don’t know why I like miniature settees so much. There are more on my wish list. Maybe because they can be so impractical in real life, but in mini I can have as many as I choose. Looks like I might have to build a miniature store and call it Brae’s Settee Emporium. :D
Categories: Furniture
March 13, 2014 | 0 commentsBodo Hennig sewing machine
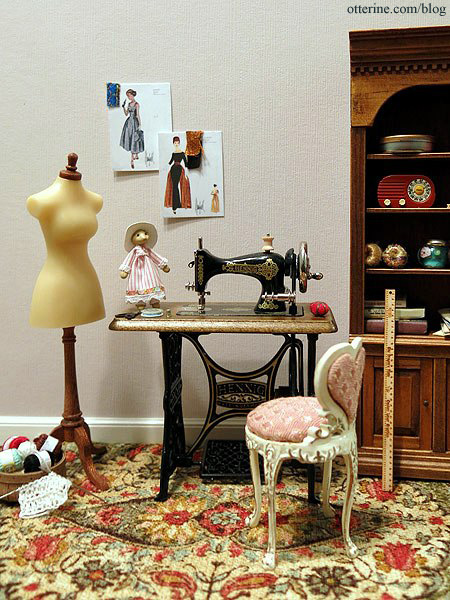
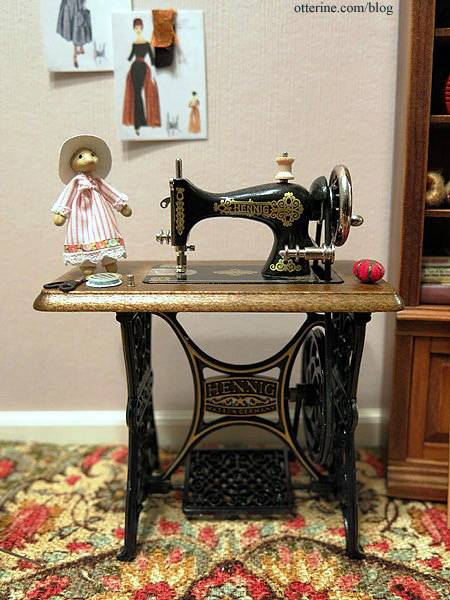
Sharee featured her beautiful Bodo Hennig sewing machine last fall, and while it had been on my wish list already, seeing hers sent me on the search for one. The retail price is hefty, though I’m not saying it isn’t worth it. It’s a beautiful item, but I had hoped to find a better deal…and I finally did. This beauty was found on eBay for a nice price in pristine condition. It has a black rubber band that moves the needle and pedal when you crank the wheel. Miss Charlotte is a mouse doll from PamelaJunksMinis. The scissors and pin cushion are purchased minis from local shows.
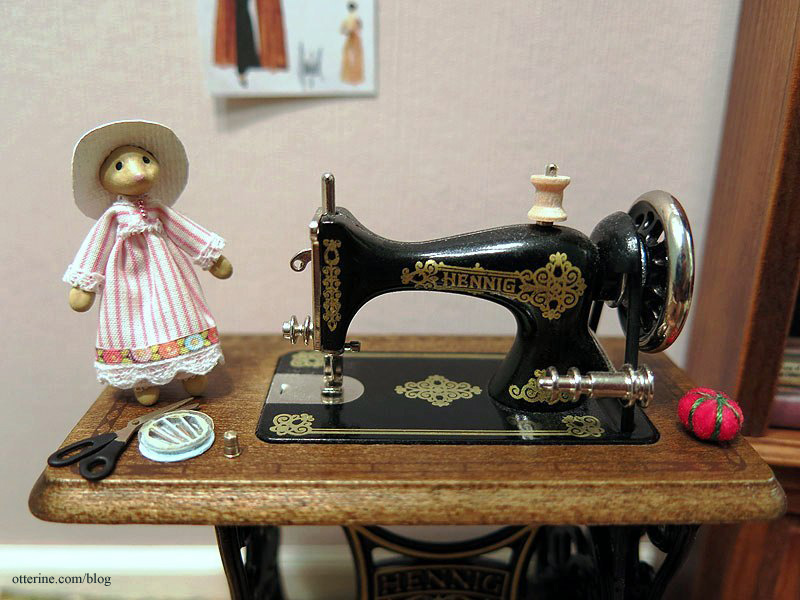
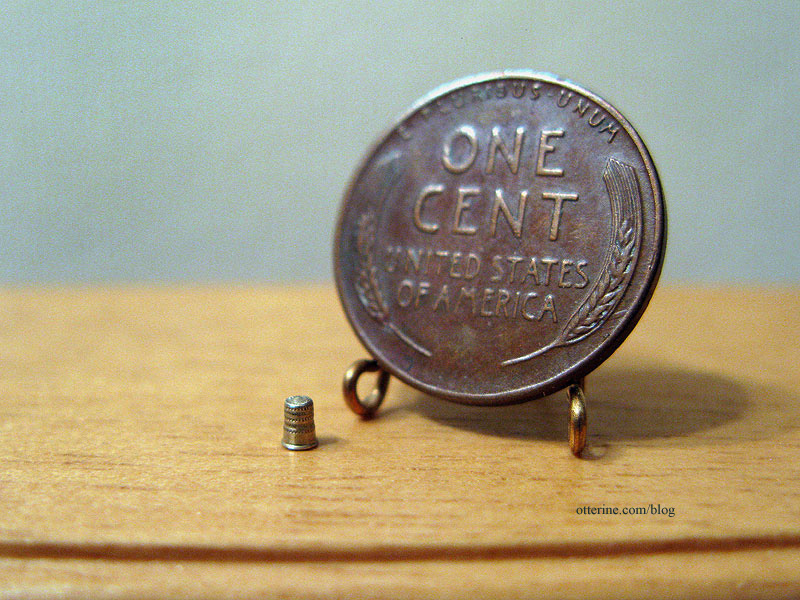
The thimble is from Vilia Miniatures. It’s impossibly tiny with wonderful detail.
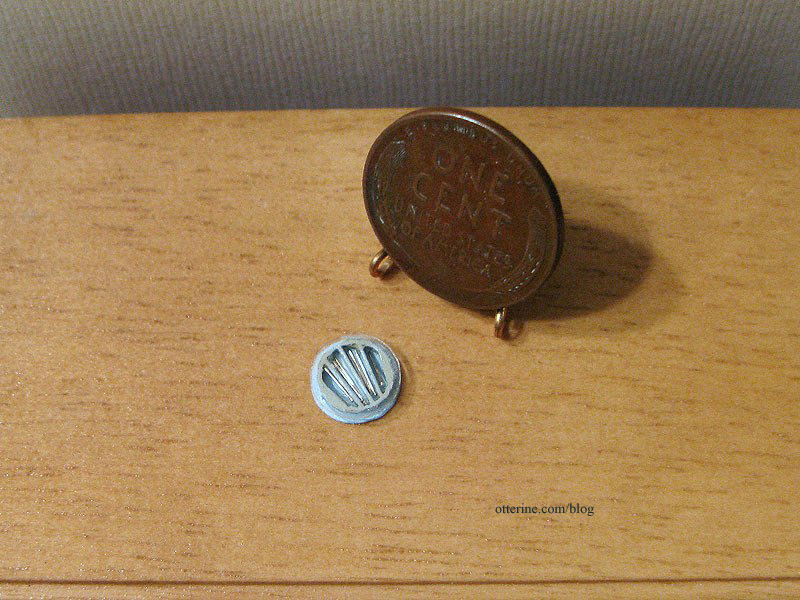
The box of needles is also from Vilia Miniatures.
I borrowed the vanity stool from the Heritage, and the mannequin was made from a Hazel Dowd kit. The fashion drawings and large books are from L Delaney, and the rug is from Dale’s Dreams. The vintage radio is from Halls Miniature Clocks (I have one in dark green, too). The yardstick was purchased at the local shows, and the cabinet was a local craigslist find.
I purchased the skeins of yarn over the years, but the knitting is from Small Talk (a vendor at one of the local mini shows). The basket is by Al Chandronnait.
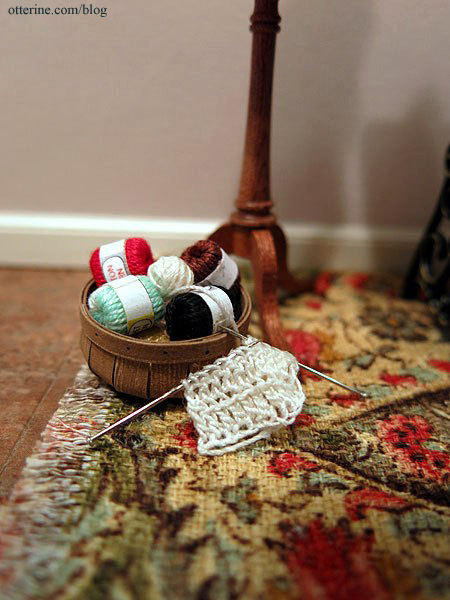
It looks so real! :D
Categories: Furniture
February 20, 2014 | 0 commentsHampton House – the beginning
I bought the 1:144 scale the Hampton House a couple of years ago, and this will be my first foray into teeny weeny scale.
photo from miniatures.com website I plan to take my time with it, so I don’t intend to finish it in the next few days before Christmas. But, I’d like to make a holiday scene as I usually do, so I will incorporate the beginning stages in that scene. I’ve always liked the dollhouse for a dollhouse concept. My Christmas scene will be a dollhouse in progress for Christmas, so I can get as far as I do in the next few days and it will fit right in.
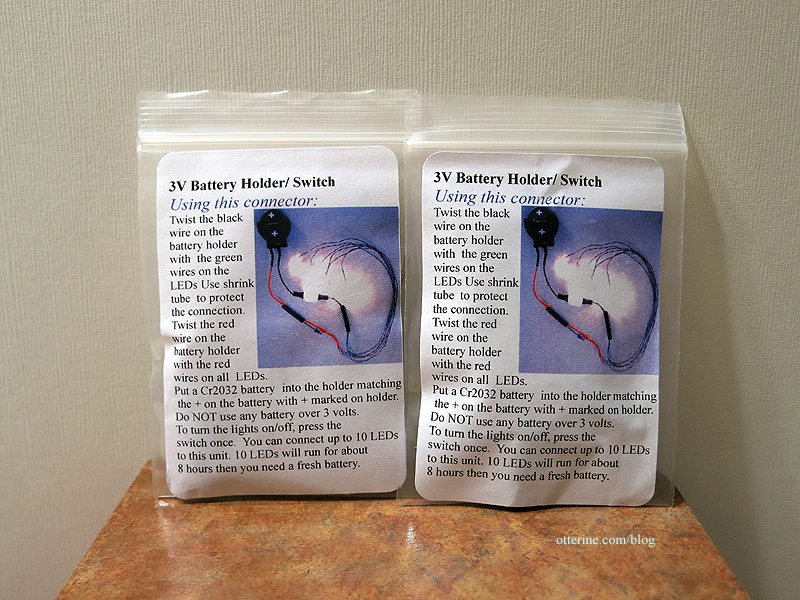
Hampton House is an enclosed structure, so I won’t worry about decorating the interior this time around. I would like to have it lighted, though. I bought LEDs and battery switches from true2scale at the Bishop Show this past year, so I’ll use one of those.
Here are two great examples of this house by EmmyNHiros and Yuri Munakata. Both artists transformed the kit into an open dollhouse with interior décor.
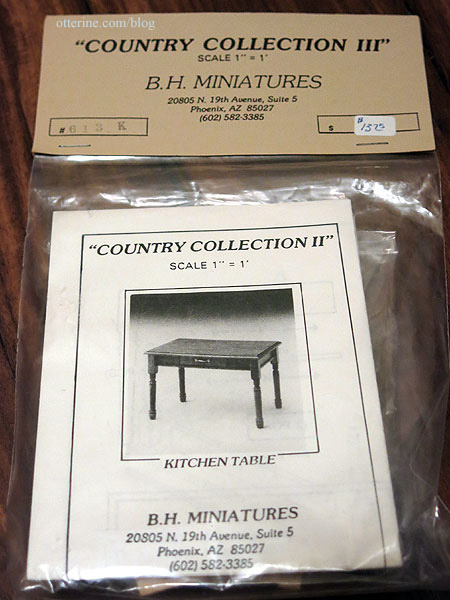
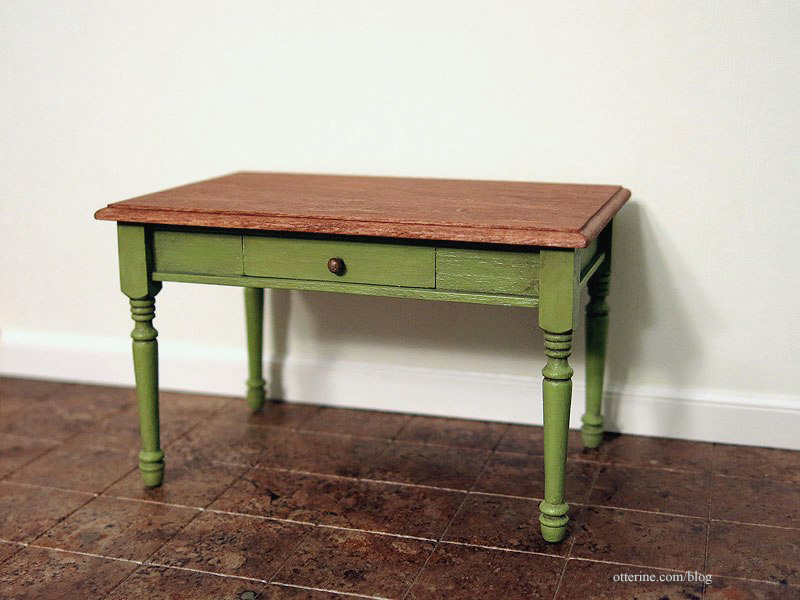
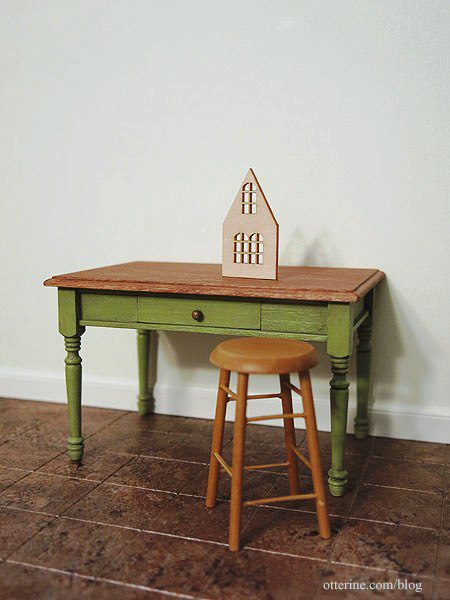
I’m starting my scene with a work table made from the Country Collection II Kitchen Table by B.H. Miniatures. I picked up three of these in a recent eBay auction, along with a few other B.H. Miniatures kits. The tabletop measures 2.5″ x 4″, so it will make for a great work table and maybe a final display table.
I chose Minwax Cherry to stain the top and painted the base an aged green, fitting for a country table.
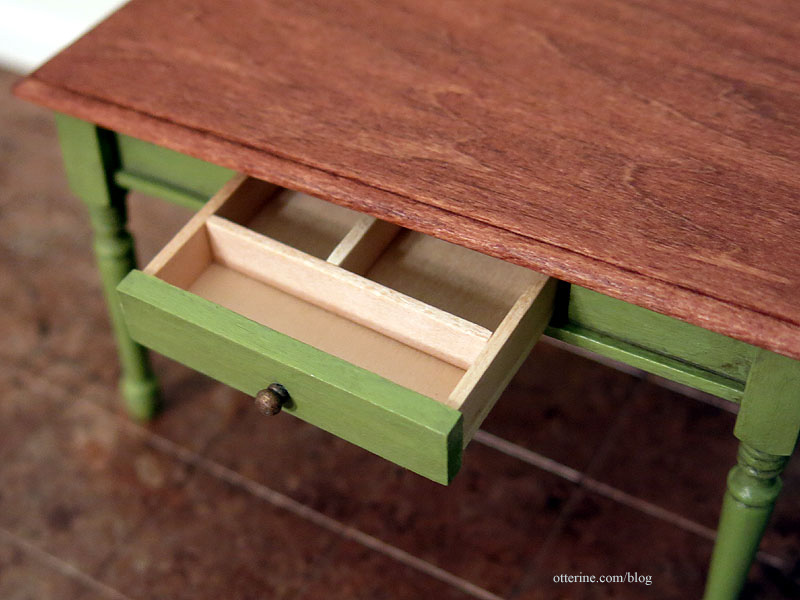
I didn’t use all of the wood pieces to divide the drawer since I have an idea of what I’d like to house here. The original kit was meant to hold silverware, I imagine.
I opened the Hampton House kit to have a looksee.
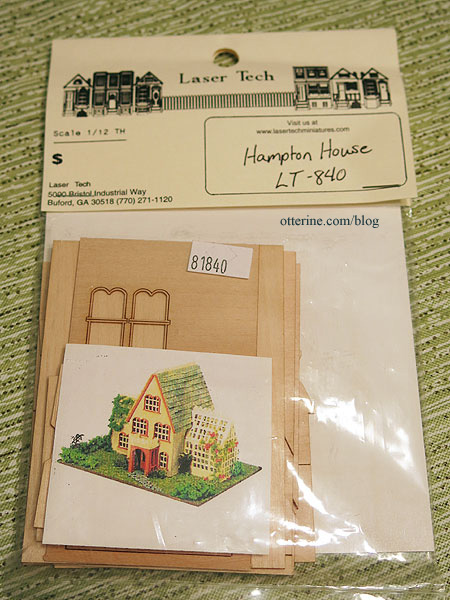
The structure is larger than I expected so this table might not work for display long term. Hmm…no biggie…I love the table and can always find a home for it. :D
Categories: Furniture, Micro Scale Models
December 19, 2013 | 0 commentsSuitcase valet
This is one of those Plan B items that is probably better than the original idea. I ran out of time for the original wardrobe plan.

The suitcases made by Fran are borrowed from the Heritage attic.

Yes, it folds for storage! :D
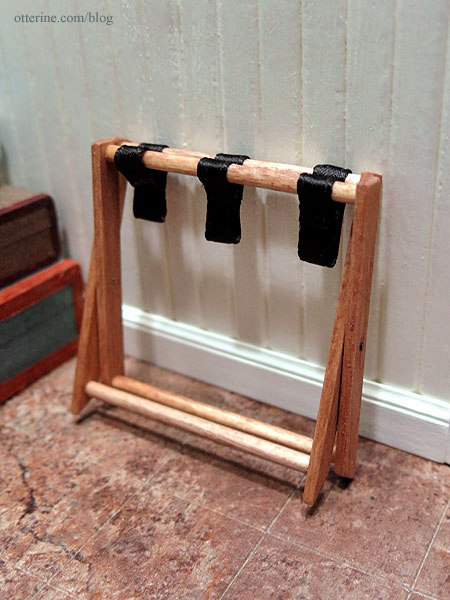
I might have to make some of these for my etsy shop — but it won’t be until the New Year! I am going to need a breather (and a cleanup crew)!
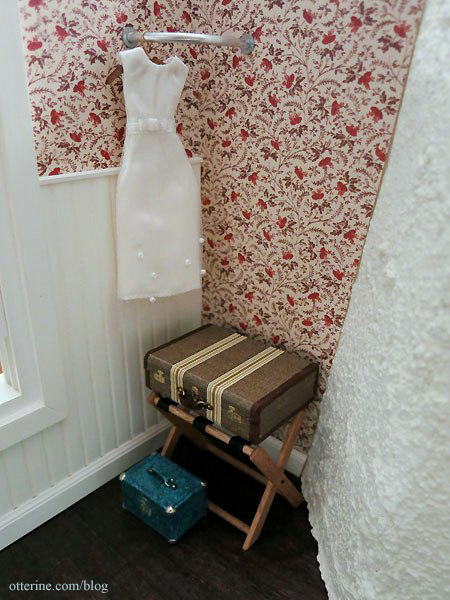
Categories: Furniture, Walnut Bay Light
December 12, 2013 | 0 commentsColonial Four Post Double Bed
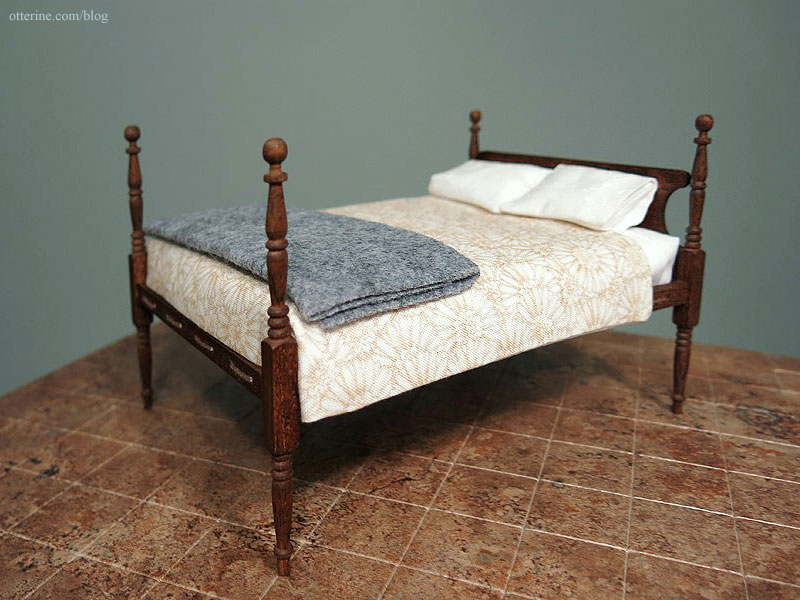
I had planned to make a different bed, but time constraints called for Plan B. This is a kit from HBS, and it went together quickly and easily. I used Minwax English Chestnut for the finish.

The kit included white twine to rope the bed. The instructions tell you to cut the twine in equal parts, but the rope wasn’t long enough. :\ So, I used DMC 841 Light Beige Brown. Saved me the trouble of having to tea stain the rope, and it worked just as well. That’s a House of Miniatures side table in progress, and the rug is from Manor House Minis.

I used the kit’s foam mattress, covered it with millinery batting, plain white sheets, a sunflower printed bedspread and a wool blanket made from heather grey felt.
Categories: Furniture, Walnut Bay Light
December 6, 2013 | 0 commentsHouse of Miniatures Chippendale Desk
I have my final layout for furnishings figured out, and I need a desk! I’m working with a House of Miniatures Chippendale Desk kit.
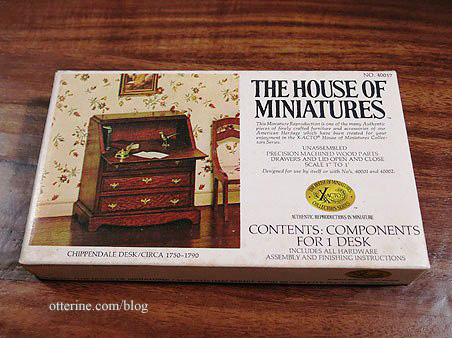
I built the desk without modification and painted it black to start. I sanded the finish smooth and then planned to add two coats of a lighter color, sanding to pull the black through in areas. But, now I’m torn. I love the distressed finish!
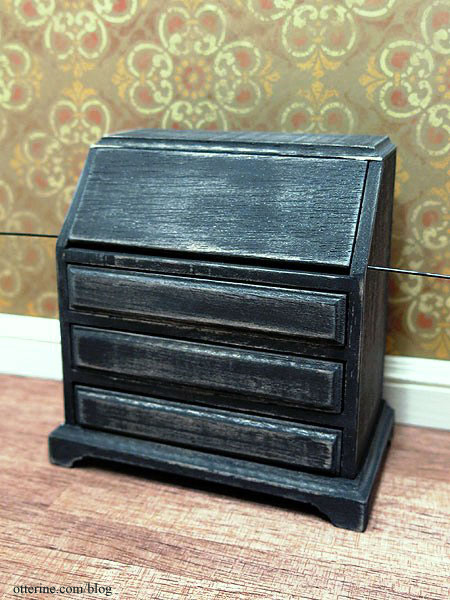
I could seal it as is to deepen the black and preserve the rustic look.
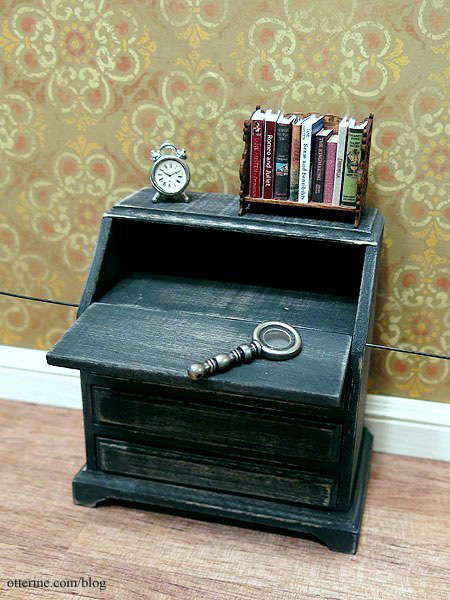
I left it for awhile and decided to keep it. A miniaturist on the Greenleaf forum suggested a stain to deepen the look, so I added a brown-black wash to tone down the lightness of the exposed wood. I then sealed the piece with Delta Ceramcoat Satin Varnish.
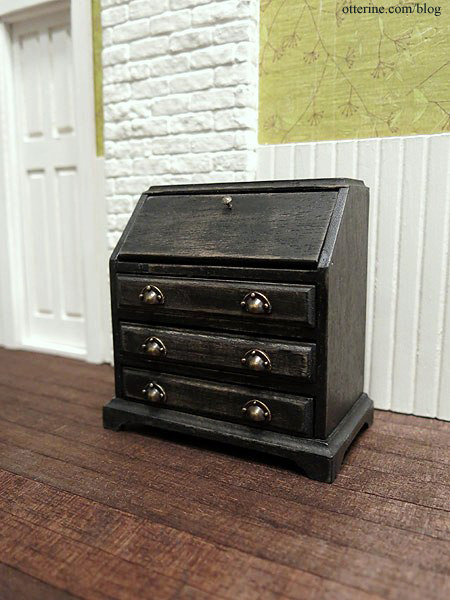
The drawer pulls are by Dijon Limited, and the knob is brass painted with Liquitex Iridescent Bronze.
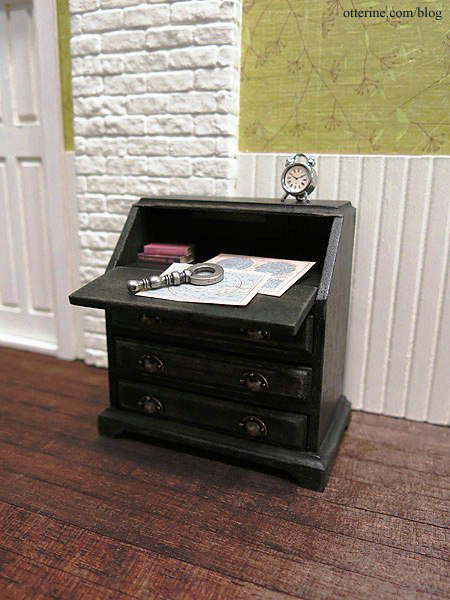
The clock is from Manor House Minis, the star charts are from L Delaney, and the magnifying glass is a jewelry finding. I made the books.
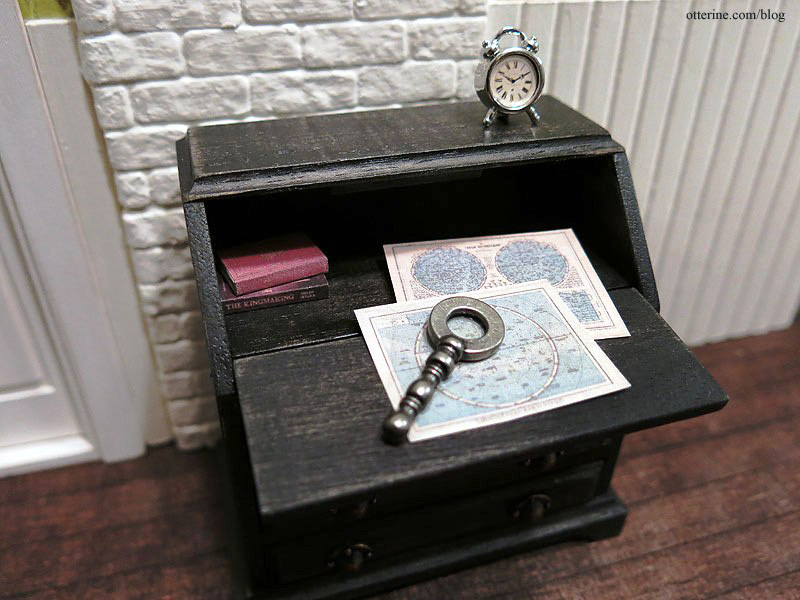
Yep, I love it! :D
Categories: Furniture, Walnut Bay Light
November 23, 2013 | 0 commentsChrysnbon parlor stove, part 1
This stove is fancier than I care for, so I have a few changes in mind to tone down the bling.
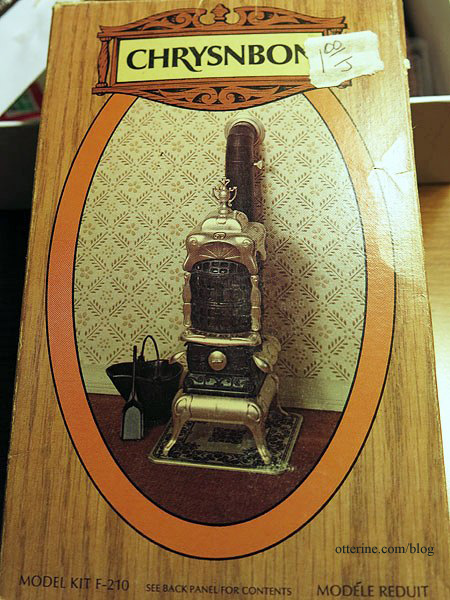
I left out the acetate window films included with the kit for now. Here’s a real life example of this stove showing these window inserts.
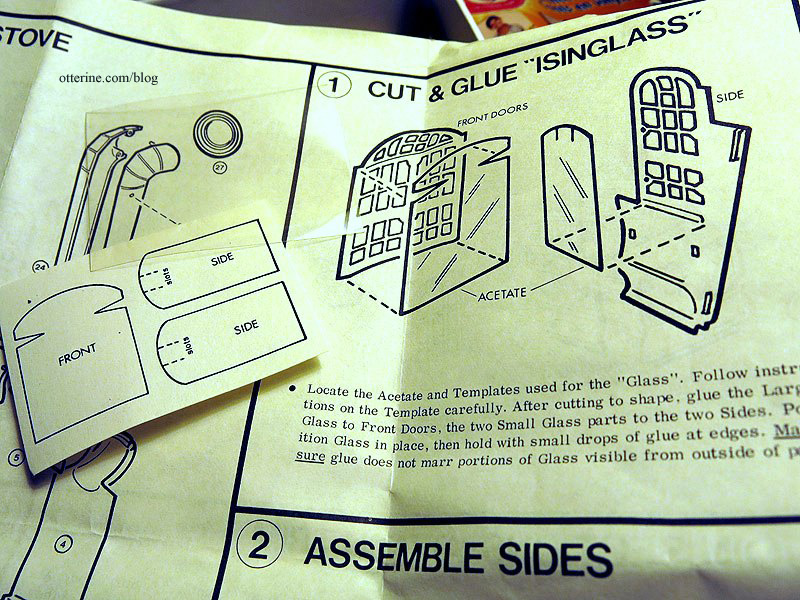
I plan to paint the stove to a uniform black, so adding the acetate would end up covered up with paint. A lot of the silver pieces had the finish worn away in places, so it was a good thing I didn’t plan to make this kit straight out of the box. It was still worth the $1 I paid for it.
One nice thing about this kit is that the injection marks are mostly located in places that are covered by other pieces. There was very little prep work needed to address those. To make it easier to apply glue into the tiny holes, I tapered a toothpick with my X-Acto blade.
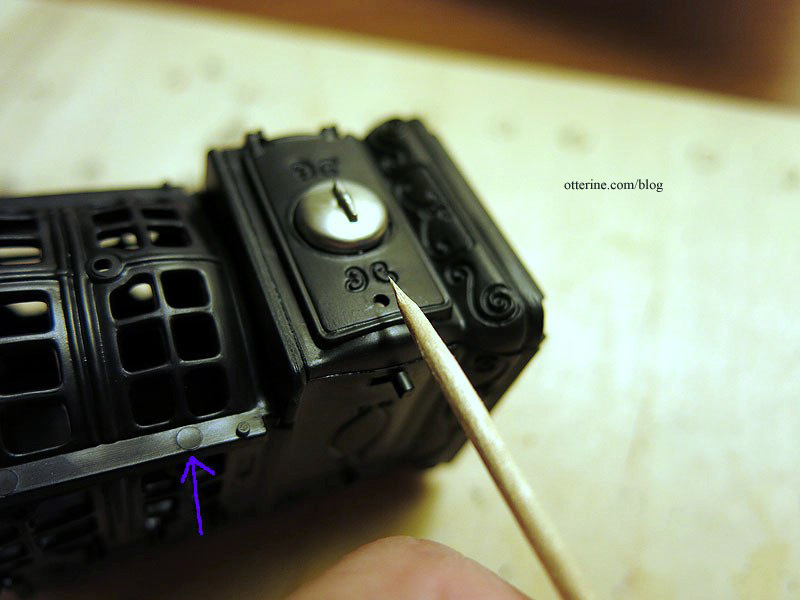
I assembled the main lower body and left the pipe, dome top, base and topper separate. This method will allow for easier painting and addressing the windows afterward.
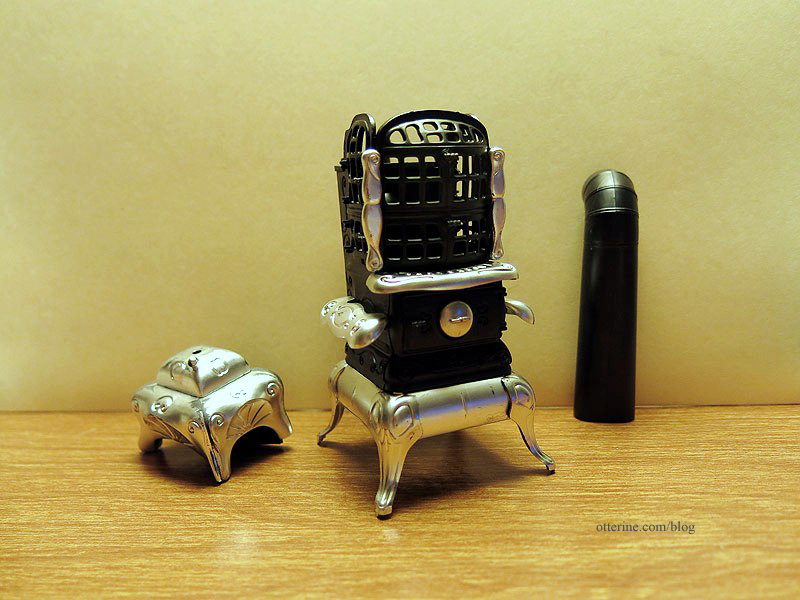
I spray painted the stove with Krylon Fusion flat black. I have the stovepipe also painted, but I didn’t photograph it because it was drying on another board.
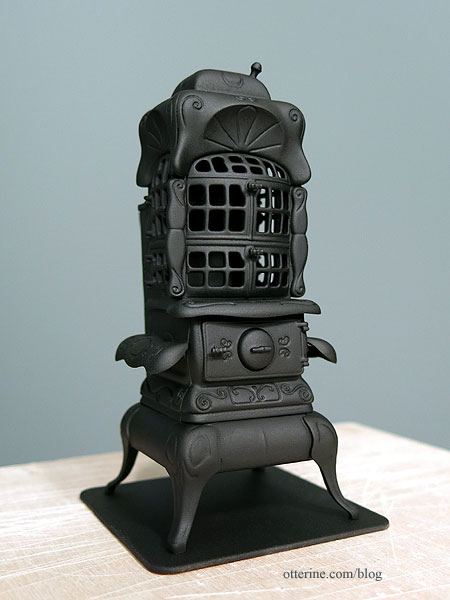
It toned down the super fancy look of the stove while still maintaining a lot of character. In fact, the silver accents it had distracted from all the intricate detailing.
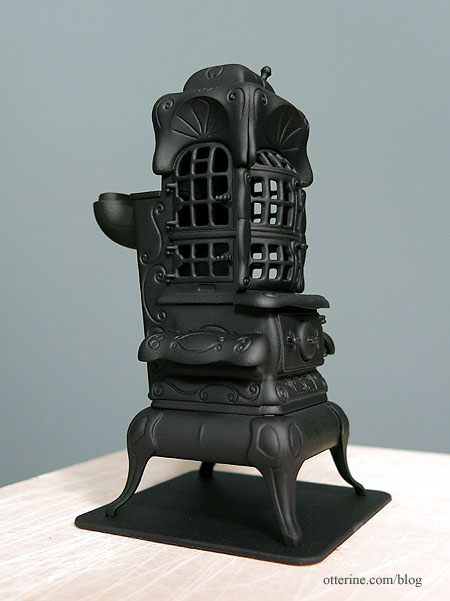
Finishing to come….
Categories: Furniture
November 22, 2013 | 0 commentsAntique drum nightstands, part 2
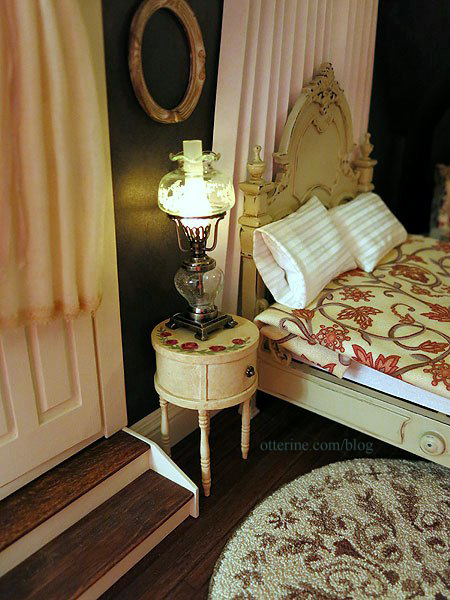
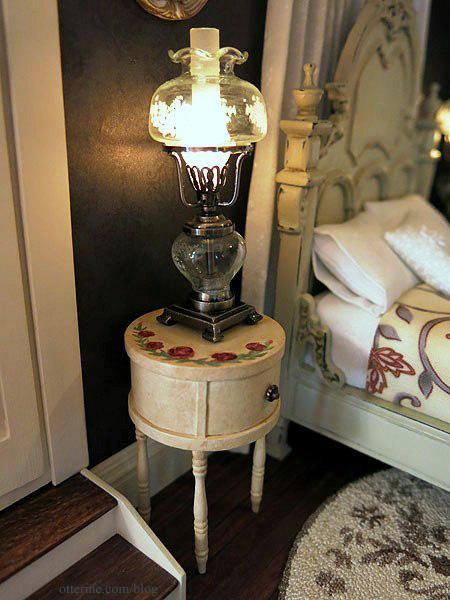
Continuing work on the antique drum nightstands. Instead of matching the painted bow front dresser, I chose a different design for the nightstands.
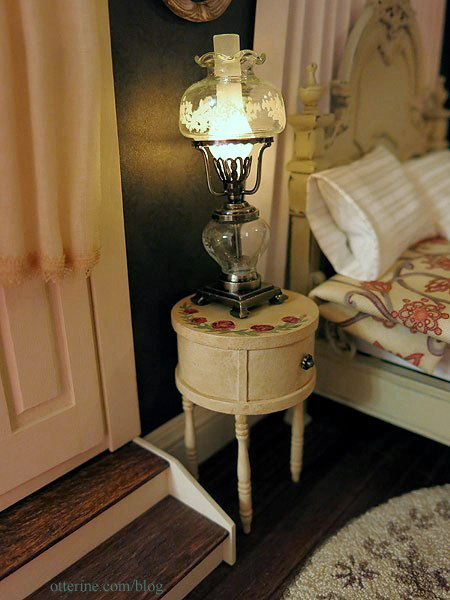
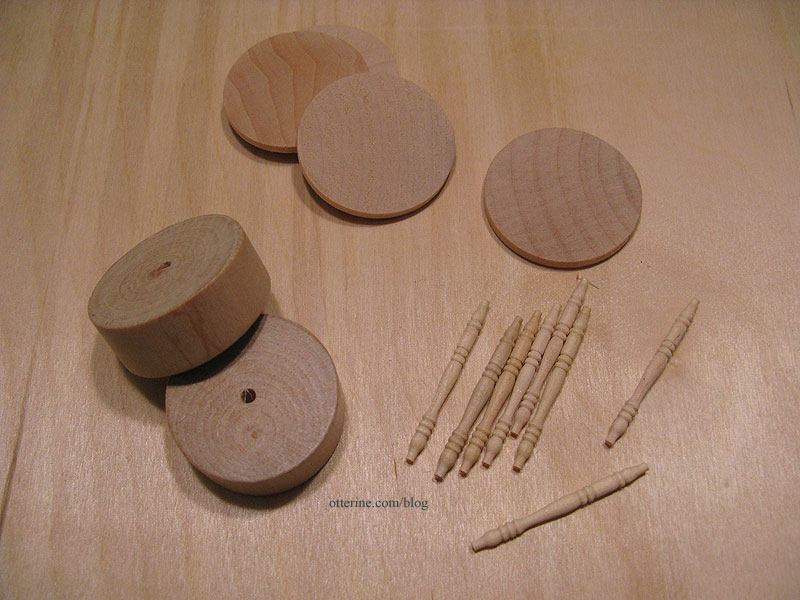
As a reminder, the nightstands were made from the round stands that came with my artist models, 1 1/2″ x 1/8″ wood circles and Houseworks 1 9/16″ long spindles.
I painted them with a base coat of Tapioca by Folk Art then added an aging wash of light brown. I then painted the green vines, followed by red and yellow for the roses.
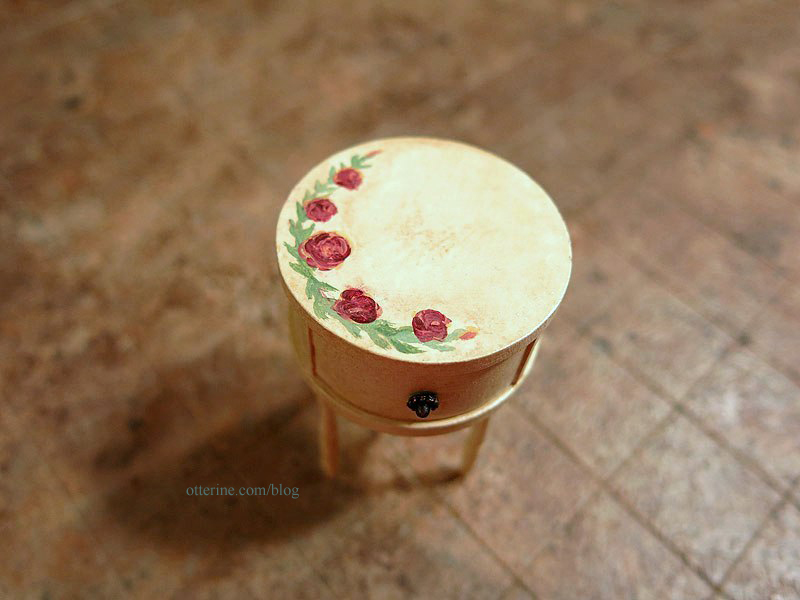
The knob is the fancy end of an antique copper headpin. I love the way it turned out.
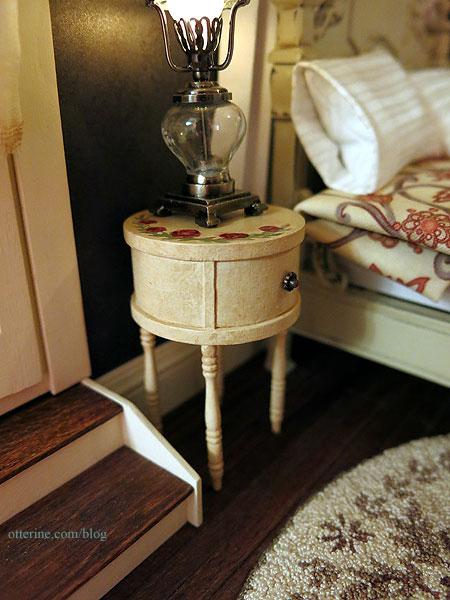
It fits in well with the rest of the furnishings.
I finished painting the second nightstand, and they are a pretty close match to one another.
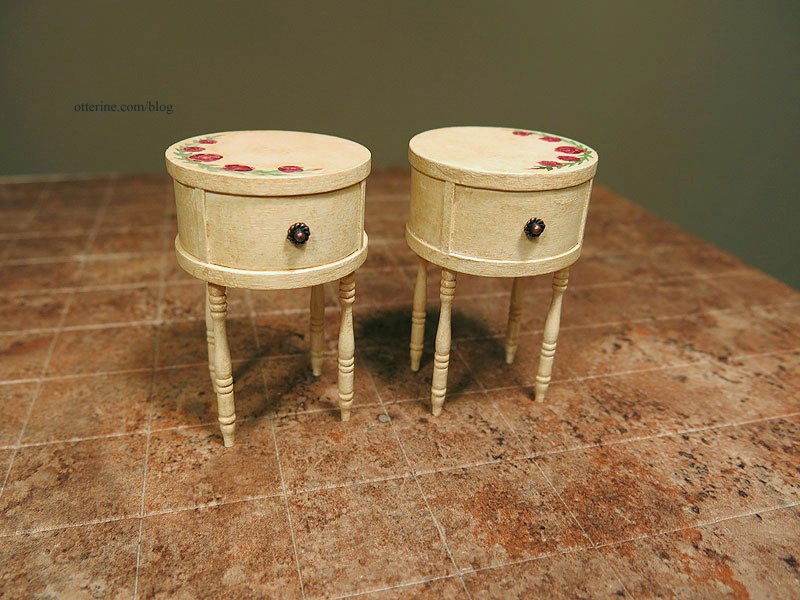
I opted for doing mirror image painting so they would look more like a planned set than two of the same table.
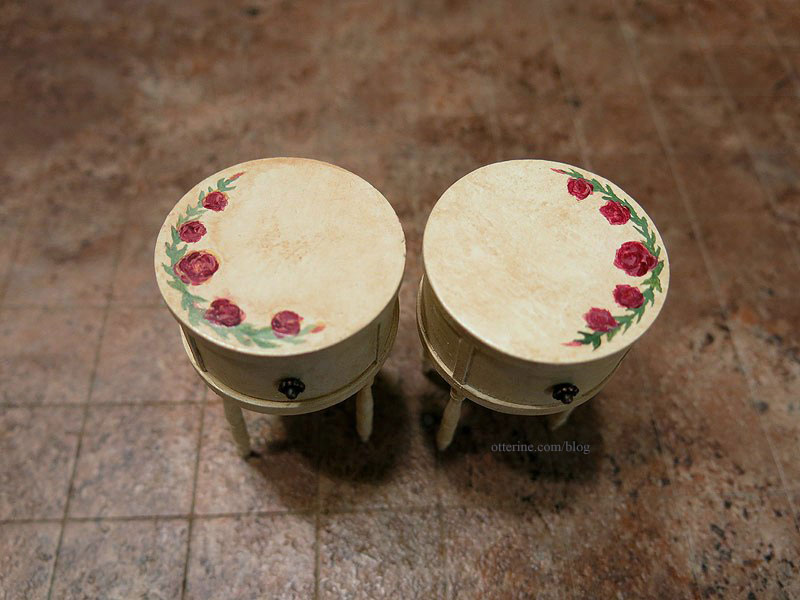
There’s not much room on them for anything besides the lamps, but it all seems to work well together.
With these completed, this room is almost finished! :D
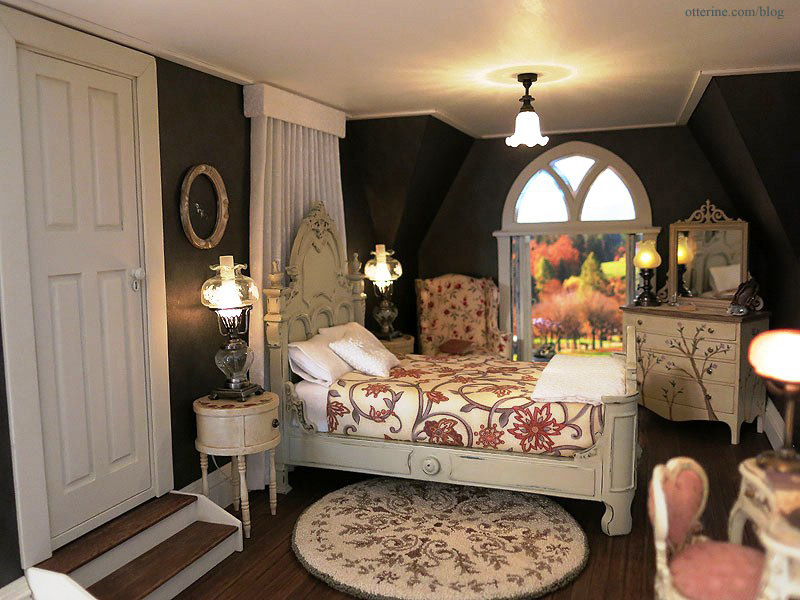
Of course, it hasn’t been fully accessorized yet, so stay tuned!
Categories: Furniture, The Haunted Heritage
August 1, 2013 | 0 commentsBespaq bed makeover, part 2
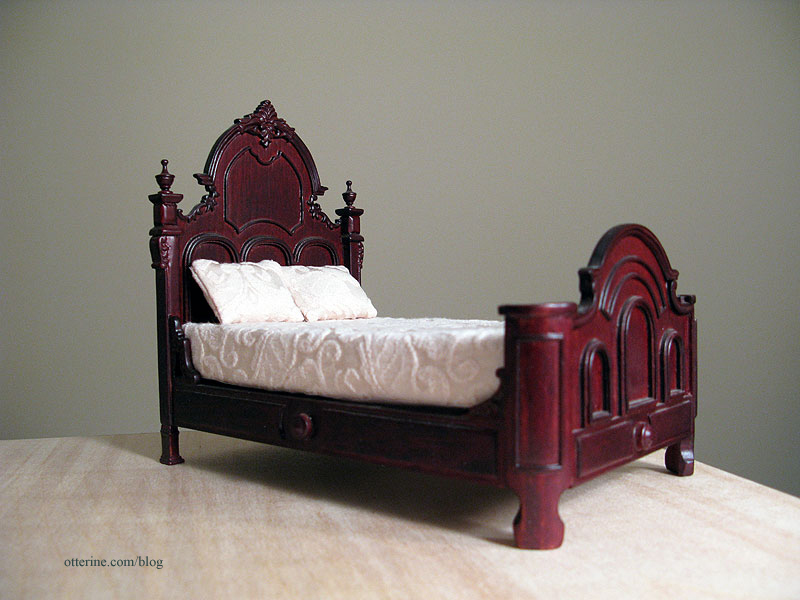
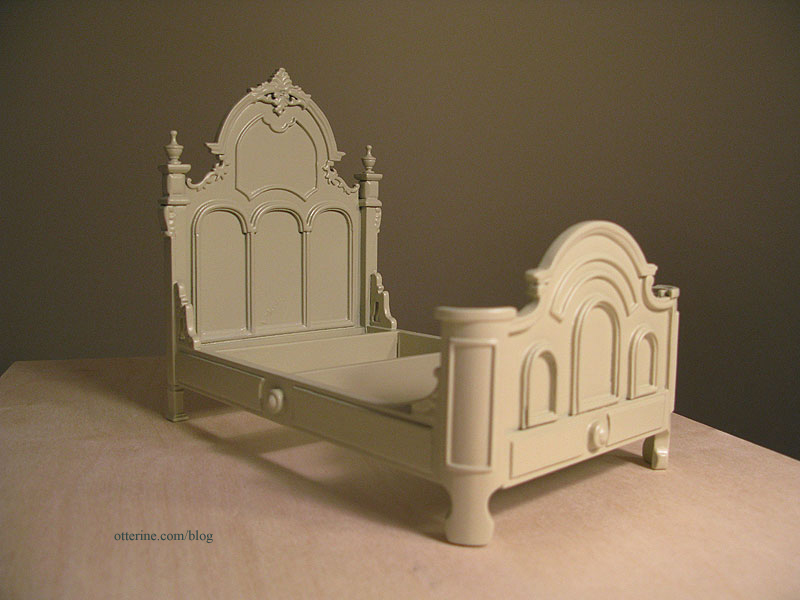
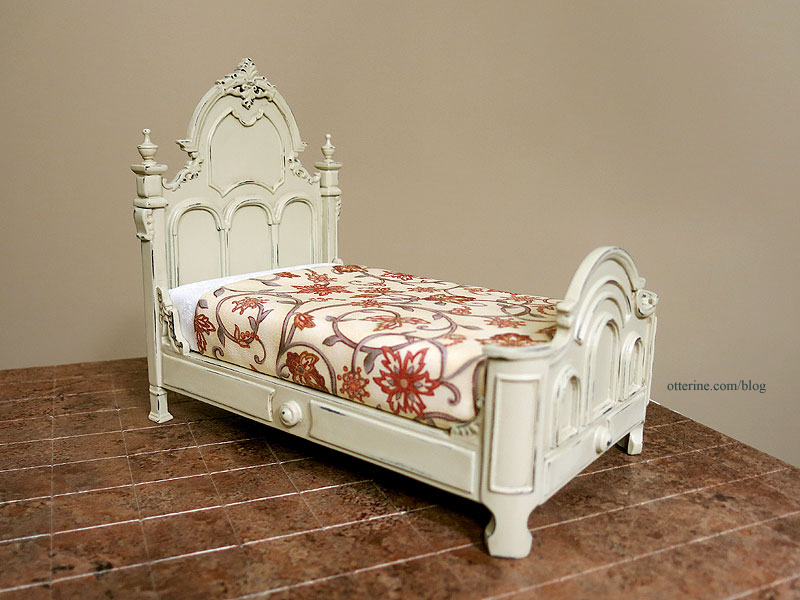
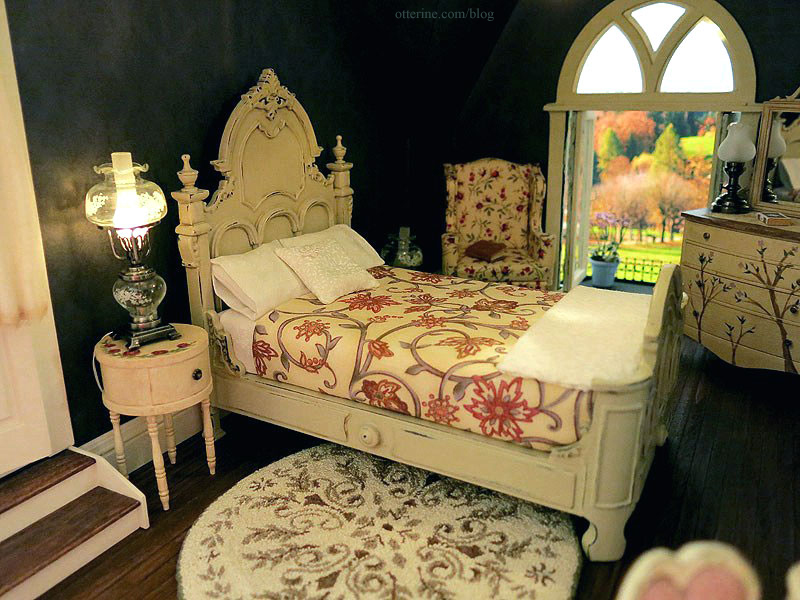
The Bespaq bed makeover is done!
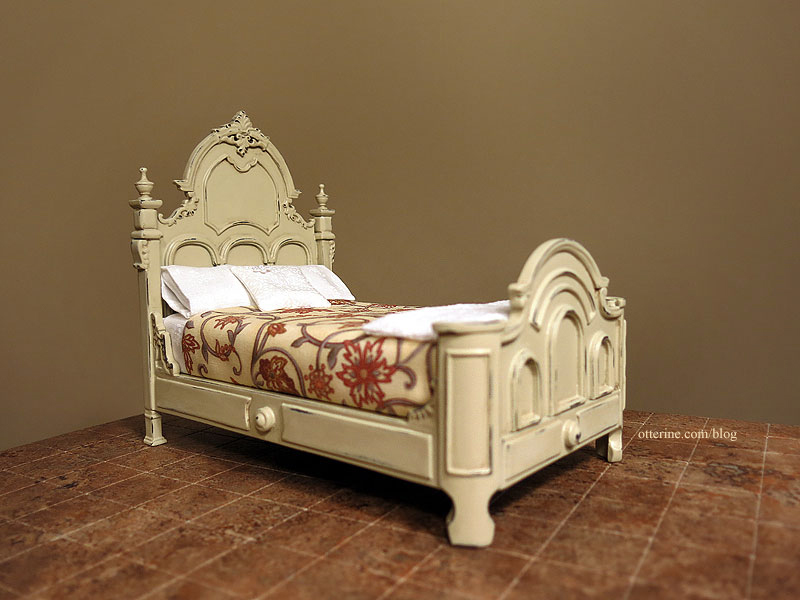
This is where the bed started.
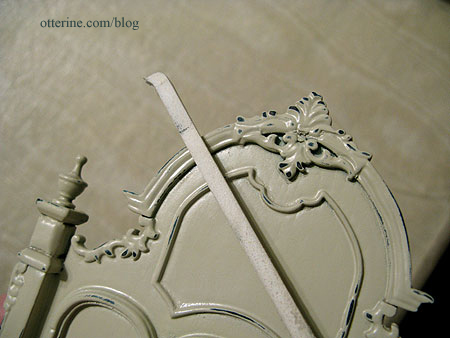
Then primed (grey) and painted with Krylon Almond in satin finish.
Then aged by sanding.
I cut new foam core board pieces to replace the original mattress.
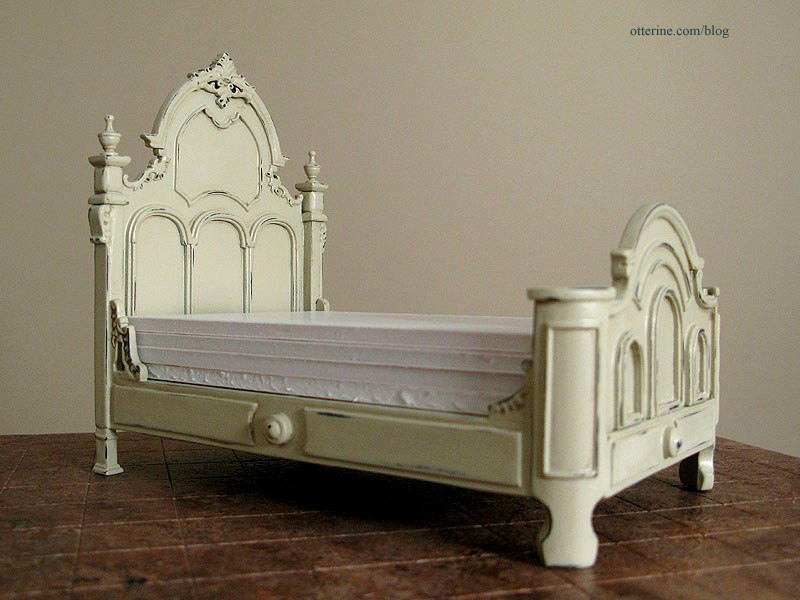
I started the bedding, first by applying a layer of millinery batting to the foam core board mattress base.
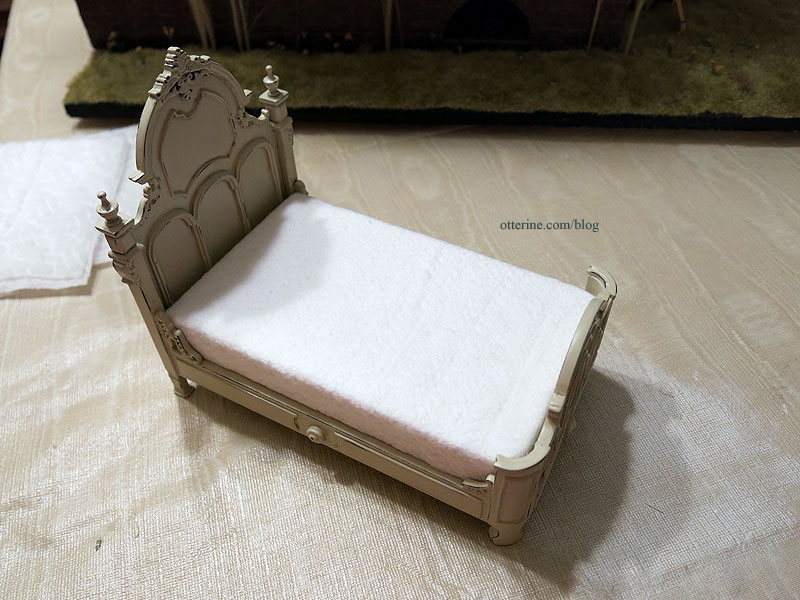
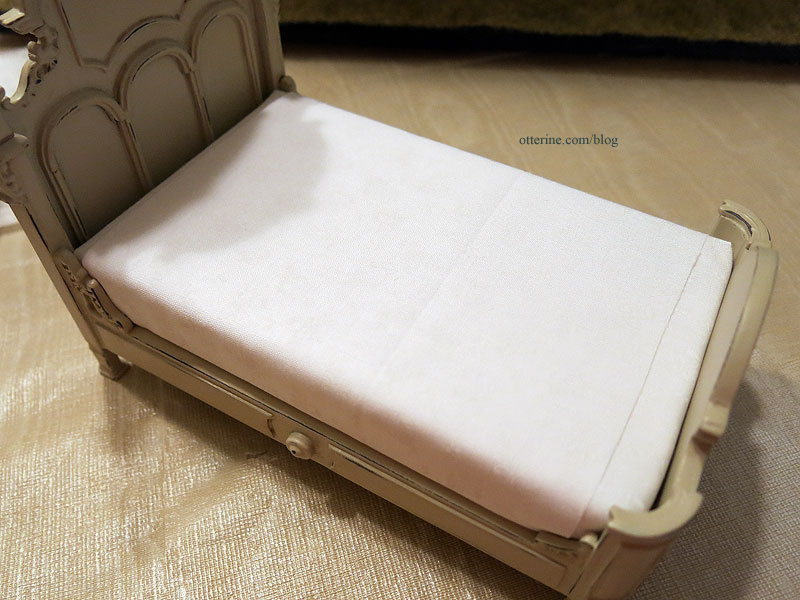
I added sheets made from sheer white floral fabric. Since there would be a coverlet, I opted to keep the top sheet short to cut down on the bulk.
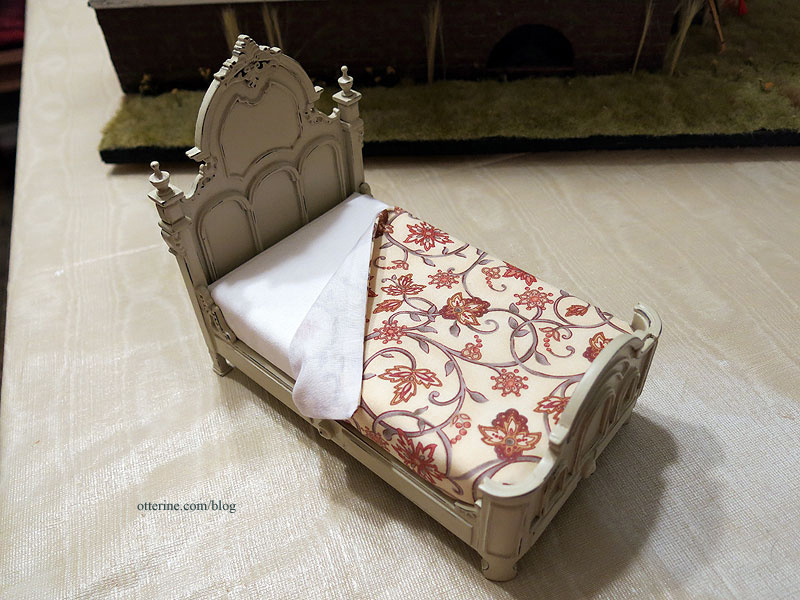
I sewed the coverlet from the fabric April sent to me, adding a plain white backer. I would like to try my hand at an unmade bed, but in the interest of time I went with my standard treatment.
I like the way it pulls in the colors of the other furnishings, and the large scale of the flowers balances out the busier patterns throughout the room.
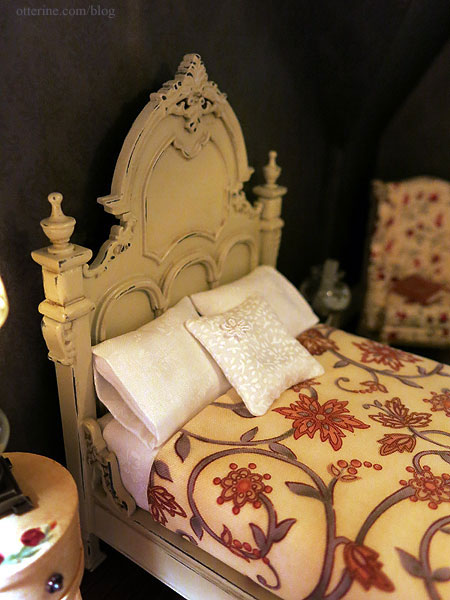
I sewed some pillows and made pillowcases from the same sheer white floral fabric as the sheets. I added one small white printed floral pillow to complete the bedding. It has a tiny venise lace flower attached in the corner.
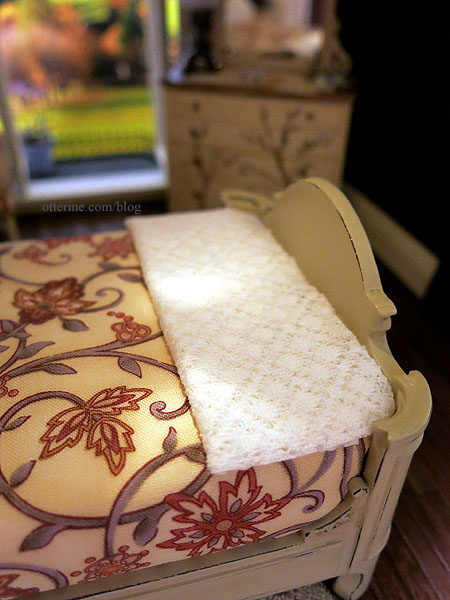
I made a small lace throw from some open weave fabric. It is full sized to cover the entire bed when opened, but I’ve pressed it flat to sit at the end of the bed as an extra blanket for those chilly autumn evenings.
Hooray for a successful makeover! :D
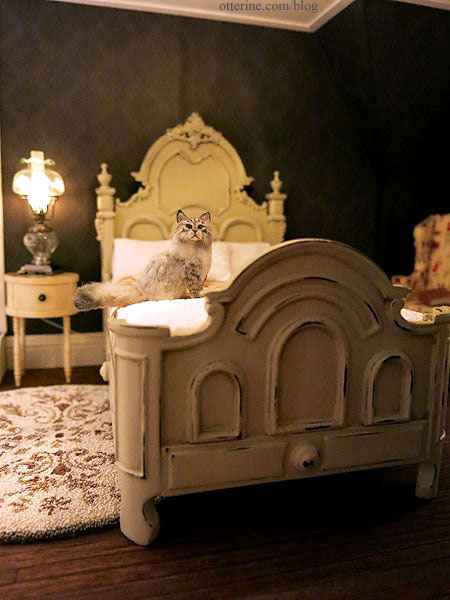
Now, who wants to take a cat nap with Ophelia?! :D
Categories: Furniture, The Haunted Heritage
July 30, 2013 | 0 comments
NOTE: All content on otterine.com is copyrighted and may not be reproduced in part or in whole. It takes a lot of time and effort to write and photograph for my blog. Please ask permission before reproducing any of my content. (More on copyright)

Corner cupboard and tea trolley
The first two items I’m making are a corner cupboard from Art of Mini and a tea trolley by Daisy House.
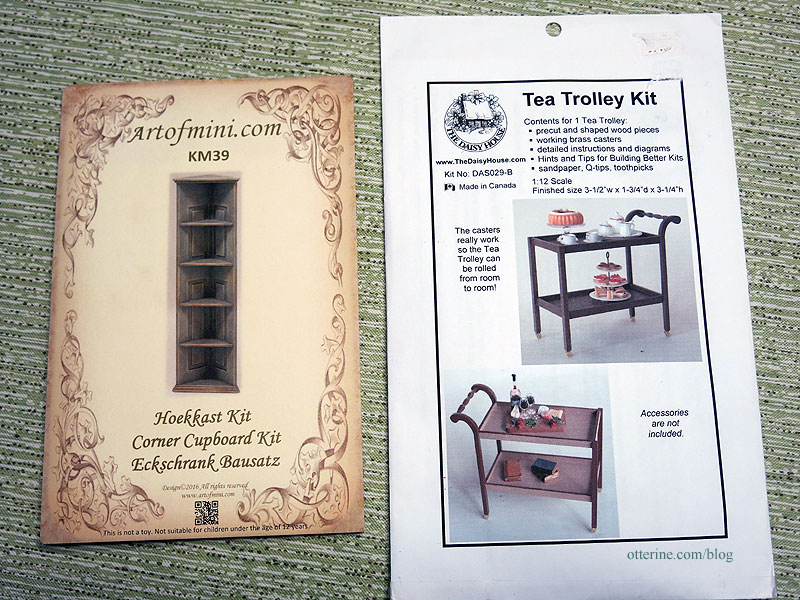
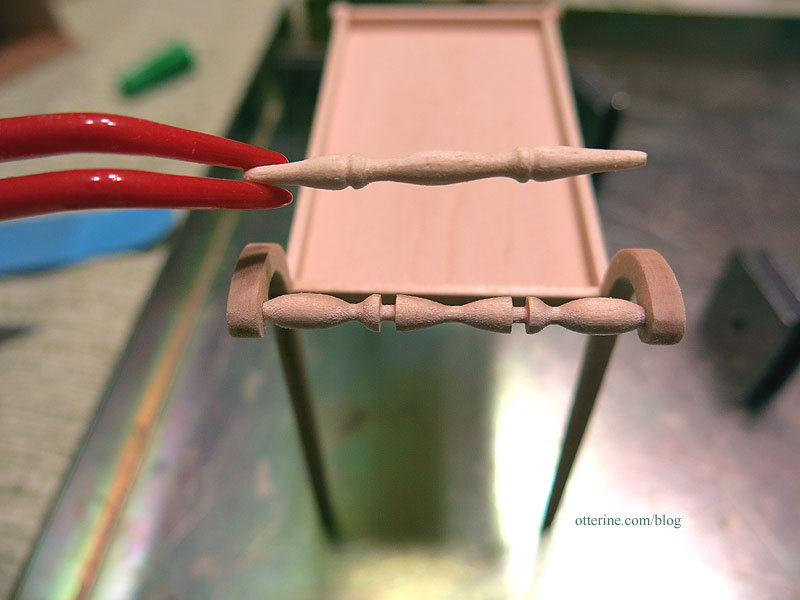
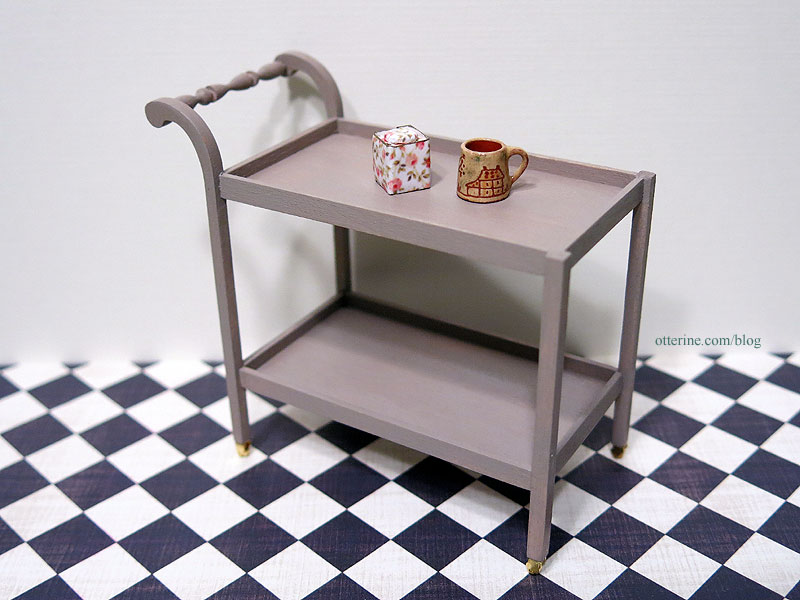
The tea trolley was fiddly, but it ended up being rather sturdy for such a delicate piece. It has casters so it can be wheeled anywhere it is needed. It can be a shelf for storage as well as a table for meals. The spreader bar included in the kit was not in good condition, so I cut a new section from Tiny Turnings.
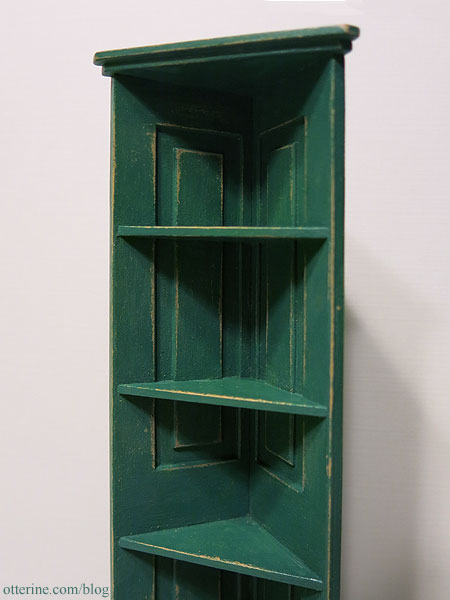
I sanded the edges of the cupboard pieces prior to assembly. This softened the overall look and made it seem assembled from old doors. I mounted my doors opposite to the kit photo since I liked that aesthetic better. I painted it a base coat of Camel by Americana and then followed that with custom mixed color using Turquoise by Anita’s and Plantation Pine by Americana. I sanded the edges to expose the color beneath for a worn look.
I painted the tea cart a mix of Battleship with Staining Medium, both by Americana. Where the glue prevented staining, I touched up with undiluted paint. I love the sun-bleached look to the color achieved after a very light sanding. For now, I’ve just pushed in the brass casters. I want to try a blackening solution on them before I glue them permanently. I’ll write up the results on that separately.
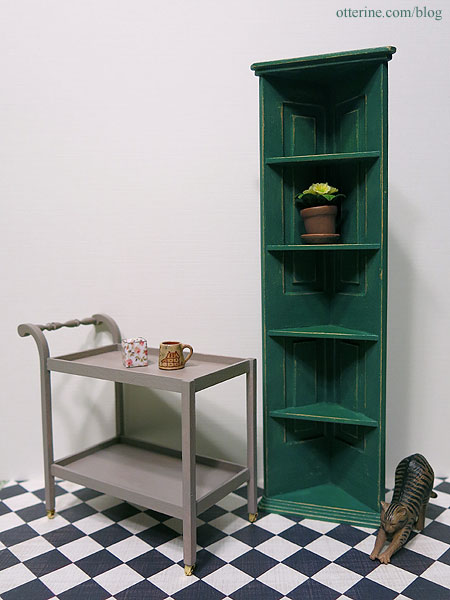
I finished both pieces with Delta Ceramcoat Satin Varnish.
Categories: Furniture
April 27, 2017 | 0 commentsBlanket Chest from Minimum World
The fine folks at Minimum World Dolls House Furniture Ltd contacted me about doing a feature on their unfinished furnishings and sent me a bare wood blanket chest free to try.

The wood was in great condition and needed minimal sanding to prep. I did use my Tweezerman tweezers to remove the hinge pins to make finishing easier, though this might not be possible for everyone to do.

I painted the chest a base color of Heritage Brick mixed with Staining Medium, both by Americana.

It’s a rusty red that will fit with just about any décor. I lightly sanded the chest with a scrap of paper bag material to smooth the surface raised by the paint application.

As with many pieces of unfinished furniture, there can be glue spots on the wood that don’t take stain well. Painting is no issue in covering these, and I’ve detailed methods for covering these spots in a past post. For me, it didn’t much matter since I wanted to try a different type of finishing. I scanned the front and sides of the chest and then printed templates from those scans.
I found wonderful art on The Graphics Fairy to add to the chest. I have hand painted designs previously, but I wanted to give this technique a try. I always print a few copies of the final images and then cut the panels to fit until I am happy with the end result.

I didn’t worry too much about being precise because the final finishing will cover minor mistakes and the shadow of the overhang will help disguise as well. I skipped the side panels, keeping the focus on the front. The panels are glued in place using MiniGraphics Wallpaper Mucilage and covered in a thin layer of Delta Ceramcoat Satin Varnish.

I also cut pieces of parchment paper for the interior and glued them in place with the same mucilage and varnish layer. I used a tiny bit of Antiquing Medium to age the crevices and give some depth to the piece. By varnishing the paper first, I could wipe away excess without marring the paper or over-staining it.

After a final coat of Delta Ceramcoat Satin Varnish inside and out, I was ready to reattach the lid. Blocks from Andrea Thieck.

Now I have a delightful country blanket chest for books and other treasures. The books are from L. Delaney, and the tin man doll is from Sir Thomas Thumb.

I am very pleased with the end result and would definitely recommend giving their unfinished furniture a try. Thank you, Minimum World! :]

As for the Putitto tabby cat, I blame Keli (and a complete lack of will power). :D

Categories: Furniture, Miniatures
March 1, 2017 | 0 commentsBird perches
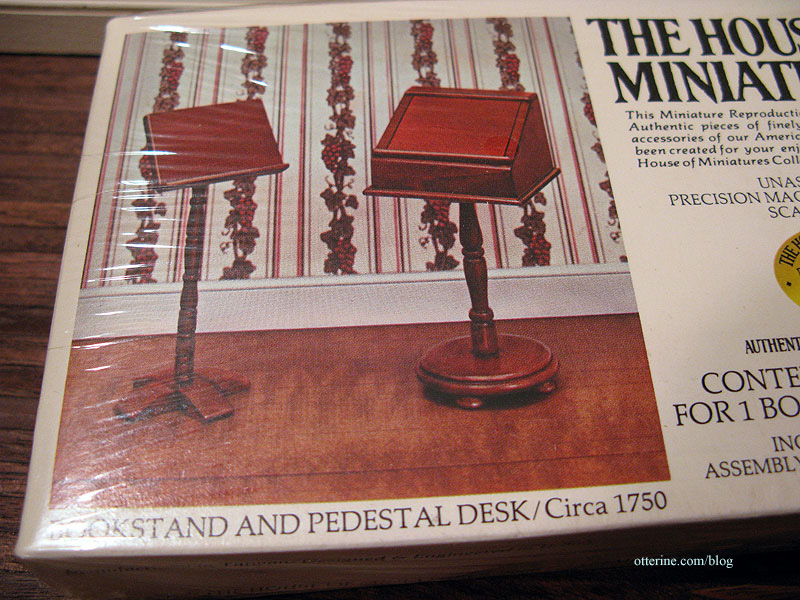
I re-purposed two House of Miniatures kits for Clyde and Sam — a bookstand and pedestal desk. I’ve kept the tops for other uses.
I finished them in dark walnut with a satin varnish. Pretty birdies!

To make the perches, I used pieces from the old tree branch I used in The Artist’s Studio. The wood is stained to match.
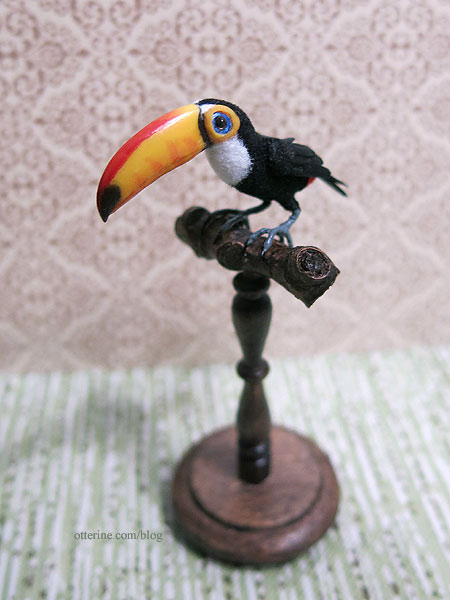
Now I can have them on the bookshelf instead of packed away in their boxes. :D
Categories: Animals and birds, Furniture
October 13, 2016 | 0 commentsStaining and painting unfinished furnishings
I love kits, but sometimes a partially built or fully built unfinished furniture piece fits the bill. First, there are some rather fancy unfinished pieces on the market that have no kit equivalent. Second, sometimes the built piece saves headaches as well as time.
Today, I finished a store counter from miniatures.com. These are great pieces at a great price, but all unfinished furniture pieces have their issues. Sometimes, the grain of a piece is too large for scale. In other instances, glue has seeped out during assembly. When you build furniture from kits, mishaps with glue are always a problem so it’s best to stain before assembly, masking off the areas to be glued.
My counter had large obvious stripes in the grain but only minor glue mishaps. I sanded the pieces smooth and removed the glue as best as possible before staining the piece with Minwax English Chestnut (two coats). I wait until the stain is completely dry before doing the touch-ups described below.
Here you can see the large grain on the top of the counter. I took this photo after starting the touch-up process, but you can see the thin, light lines across.

To fix these issues, I used a tiny brush to apply thin strokes of Traditional Burnt Umber by Americana. I applied only a small section at a time.

Working quickly so the paint did not dry, I used a bristle brush to pull the paint in the direction of the grain. If you get things too dark, you can wipe away the paint with a damp cloth but then you’ll have to wait for the area to dry before trying again.
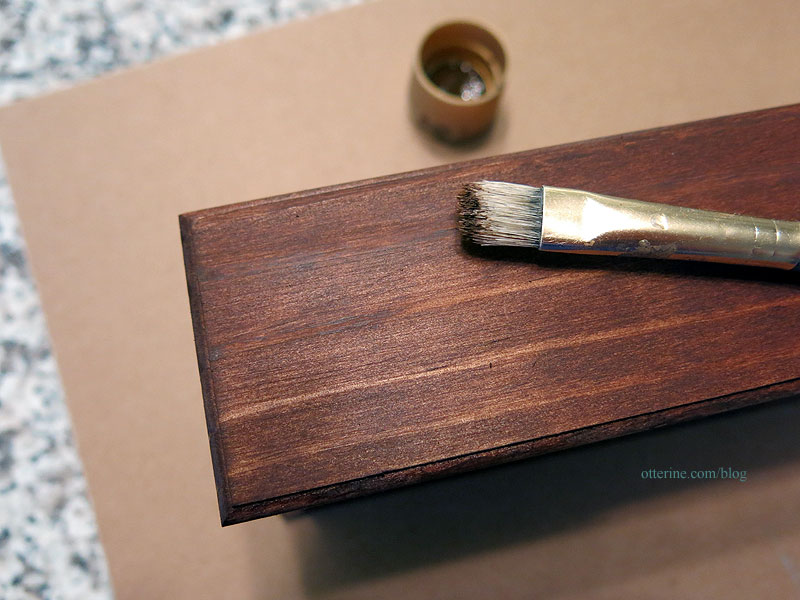
This method takes some practice, but it covers bare spots and large grain while keeping in line with the wood grain. The top now has a more even and subtle grain finish.

Here is the front with the light grain portions painted over. The stain leaves a sheen while the paint is matte, so the fixes look obvious at this stage.

I rubbed the surfaces with a torn bit of paper bag to soften the painted spots without lifting the color the way sandpaper would.

I applied Delta Ceramcoat Satin Varnish.

Now the paint and stain look like one grain.

Categories: Furniture
July 17, 2016 | 0 commentsTicking stripe in miniature
I worked on replicating ticking stripe in miniature and ordered some test swatches from Spoonflower. One was a clear success. It was in scale and had the detail I was seeking. The fabric in the upper part of the photo is the one I like best.
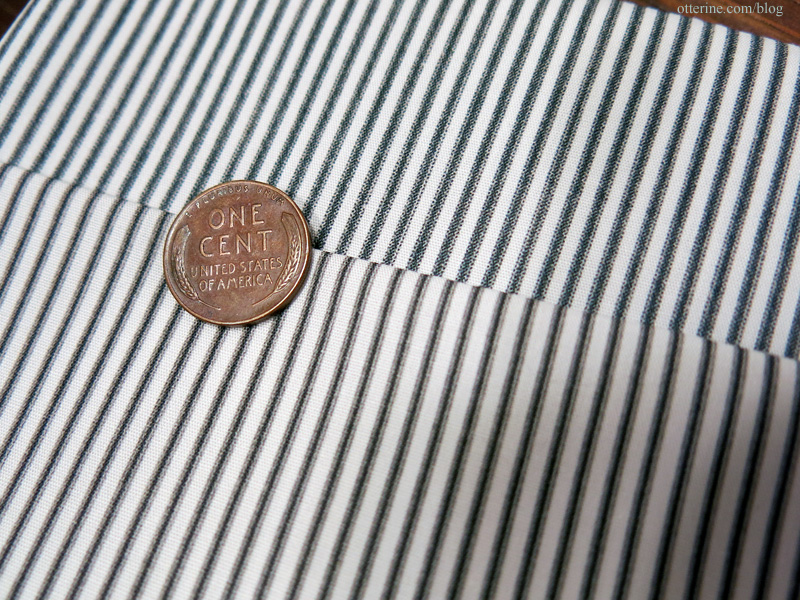
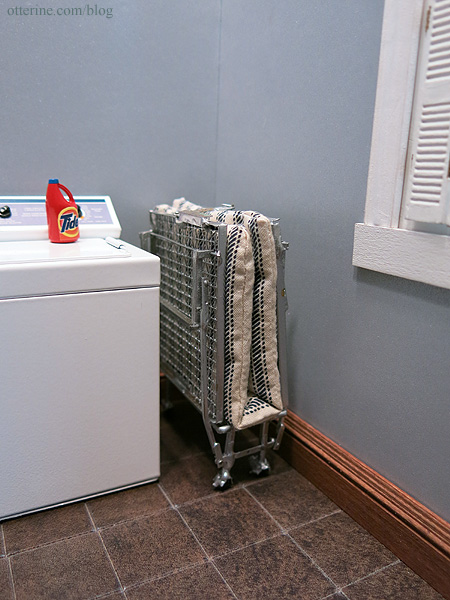
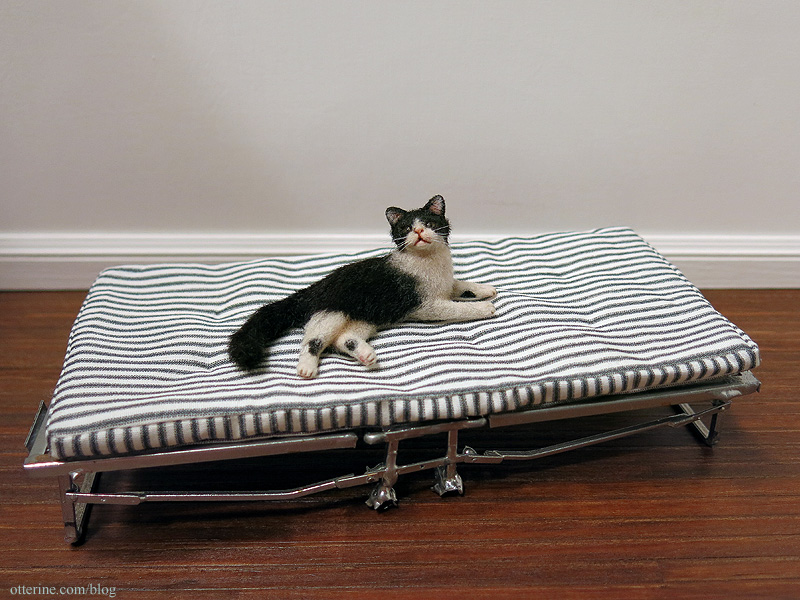
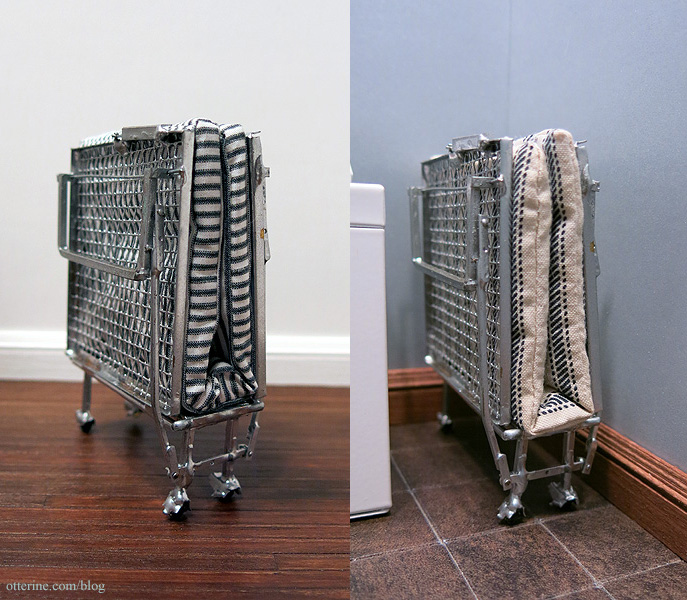
I then ordered a full yard to add to my mini fabric stash. Time to make a new mattress for the roll-away bed. Here’s the original as a reminder of the large, out of scale fabric.
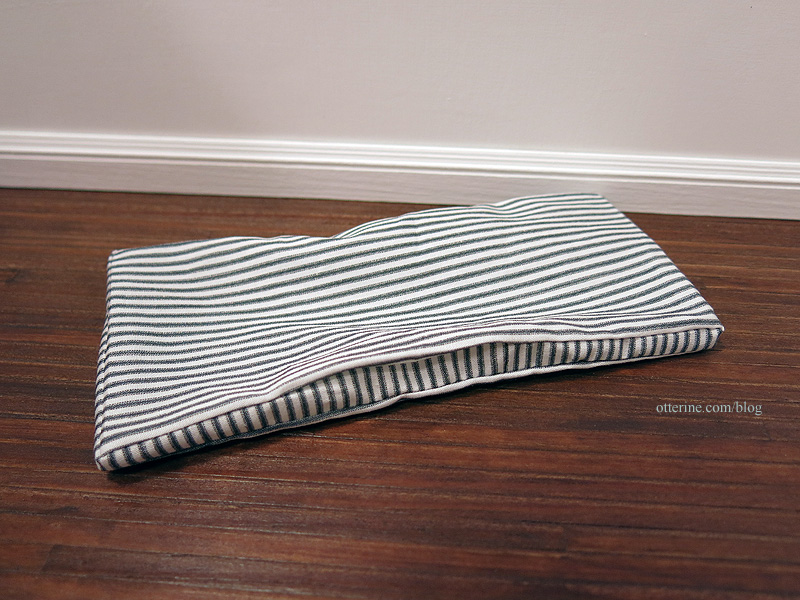
Following the process I used for the Baslow Ranch mattress, I cut two pieces 3 1/4″ x 6 1/2″ to fit this bed while assuming a 1/4″ seam allowance. To make this a structured mattress instead of a flat one like the original, I cut a 3/4″ wide strip 18″ long. Here it is sewn but empty.
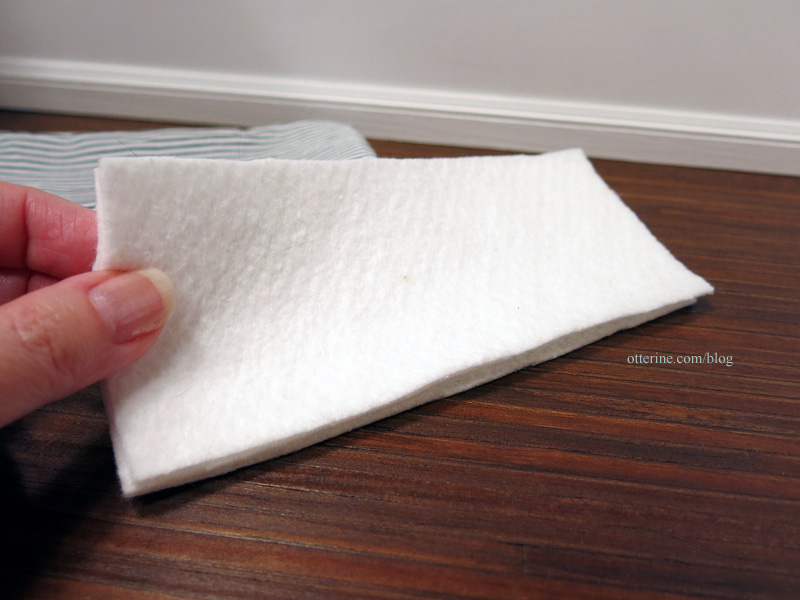
I used three layers of millinery batting to fill the mattress.
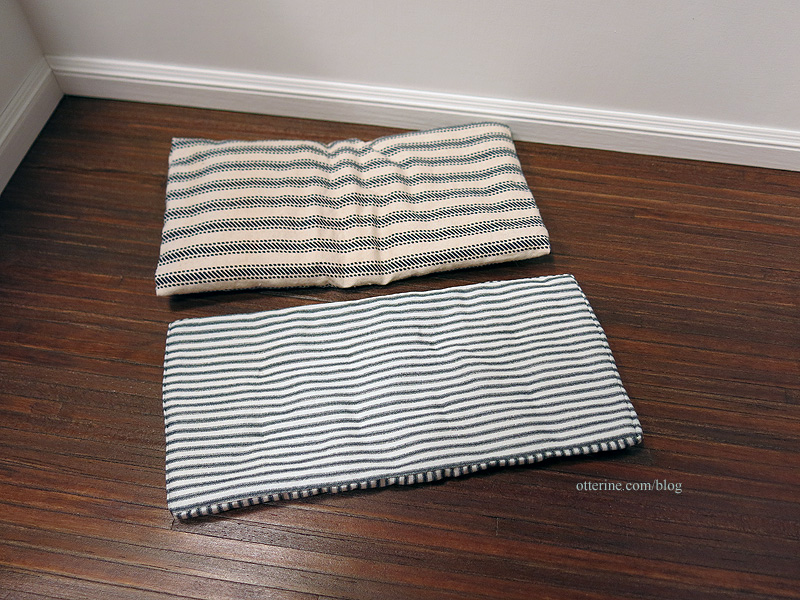
Better. :D
Endora certainly approves.
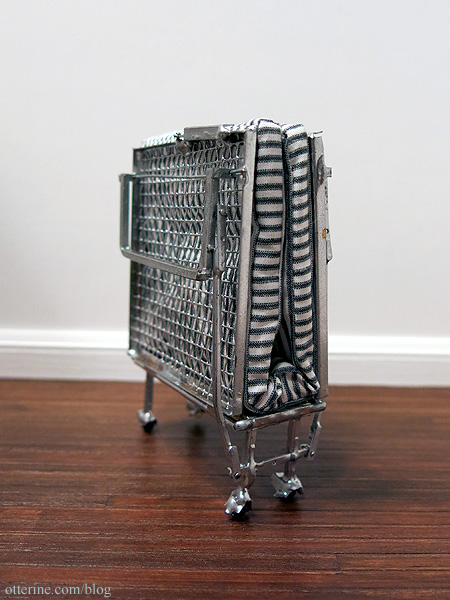
And, it still folds up and latches closed.
A subtle change makes a big difference in the perception of scale.
Categories: Furniture
June 14, 2015 | 0 comments
NOTE: All content on otterine.com is copyrighted and may not be reproduced in part or in whole. It takes a lot of time and effort to write and photograph for my blog. Please ask permission before reproducing any of my content. (More on copyright)


