
Chippendale Straight-top Highboy
One of the rarer kits in the House of Miniatures line is the Chippendale Straight-top Highboy. I love the lines of it with the flat top, and I have seen some wonderfully updated highboys in real life. A coat of paint, a change of hardware, removing the finials on the base for a cleaner look….seems like a good place to start.

There are a lot of parts, and this kit was missing only one. I can’t recall if this was a sealed kit since I had it open a bit before starting, but it’s not uncommon for these kits to have missing or extra parts even if sealed.

Some parts are harder to replace. As luck would have it, since I’ve put together other House of Miniatures kits together before and always save unused parts, I had the very part I needed! :O

I did things a little out of order in that I saved adding the legs until last. They are just too delicate to attach during the cabinet assembly. I also don’t sand cabriole legs to a perfectly round finish. I like an elephant head top with its trunk descending into a webbed duck foot. :D

I sand and fill as I go, making adjustments as needed. I added trim to the upper sides to cover the ends of the shaped top. Ends of boards never take stain the same way as a flat grain face.

To that end, I moved the corbels over slightly and needed to change the trim on the side fronts since it wasn’t wide enough to compensate for the adjustment. I cut a piece of matching trim for the top but didn’t glue it right away. I needed to address the top drawers first.

While these kits are lovely and well made, they are not always the best fitting right out of the box even if you follow the steps precisely. If you look at real life example of highboys, you will see that the drawers are not inset. They have faces that cover each hole. This would be a better look overall, but this is not how these kits are designed. The upper three drawers were the most problematic.
The upright supports dividing the three upper drawers did not align well with the actual drawer front dimensions. The supports were glued into dados, so it wasn’t something I could have prevented, but the supports also ended up crooked, which was my error. Some gaps I could live with, but this was too much.

I used a chisel to remove the original supports.

I cut new, thicker ones and set them in better position relative to the drawer widths. I first taped the drawers in relatively centered positions.

I set the new boards in place and used the drawers to fine tune.

The below picture is before I added wood filler but you can see the new dividers are already much better. Making this adjustment was going to be relatively invisible only because I planned to use black stain.

I then glued in the added trim to the top and attached the legs.


The stain I chose is Ebony by Rust-Oleum. I used a wood conditioner first, which evens out the stain application. I sanded with 600 grit between coats and buffed the finish with a paper towel before sealing with matte varnish. The dark color helps mask the gaps around the drawers and imperfections in the wood.

For hardware, I used fancy headpins. They are so-so in quality but photograph reasonably well. I will search for something to replace them eventually, so I didn’t glue them in permanently. For a kit I started in January of last year, I can finally call it done! :D

Categories: Furniture
January 23, 2022 | 0 commentsFishy Bench
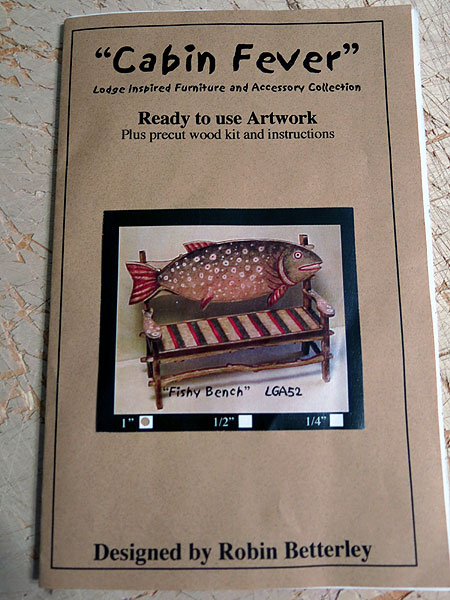
This week I assembled the Fishy Bench kit by Robin Betterley. I removed as much of the laser soot as possible and stained the wood Driftwood by Minwax.
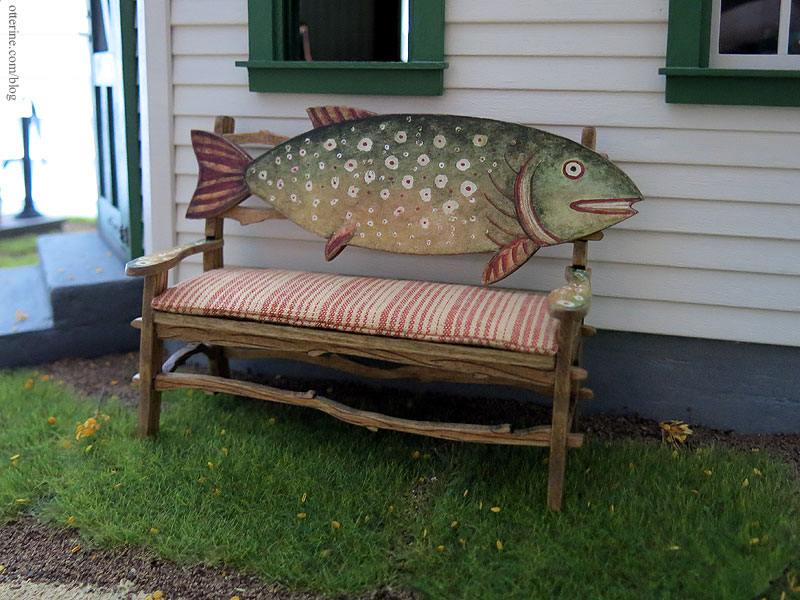
I opted for a fabric seat cushion instead of the included artwork. I like the way it mimics the fin stripes.
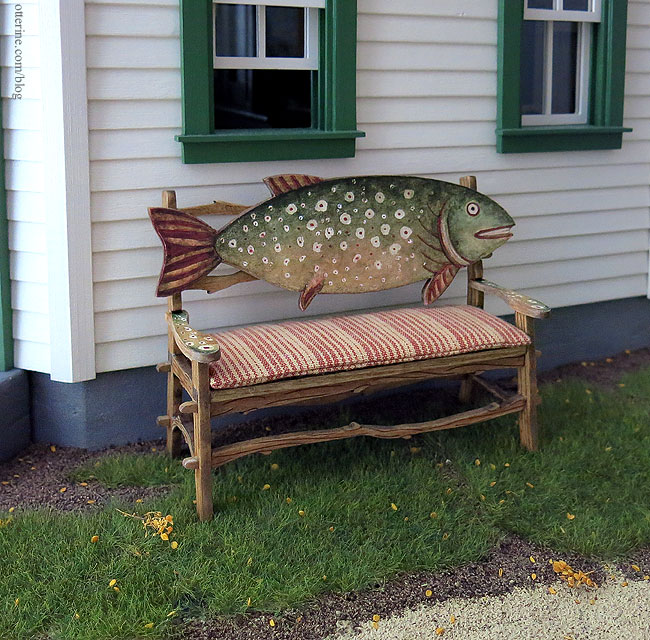
This was such a fun kit to build.
Categories: Furniture
January 16, 2022 | 0 commentsChrysnbon kitchen hutch to desk
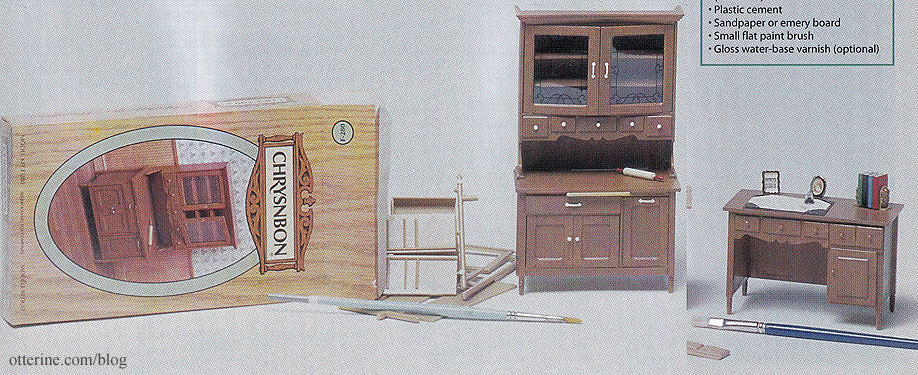
In the large group of magazines gifted to me recently, there are numerous articles on how to make more from a kit than what is presented in the instructions. I’ve modified kits before, but some of these are truly remarkable and have opened my eyes to even greater possibilities. I bought this Chrysnbon kitchen hutch kit at a local mini show.
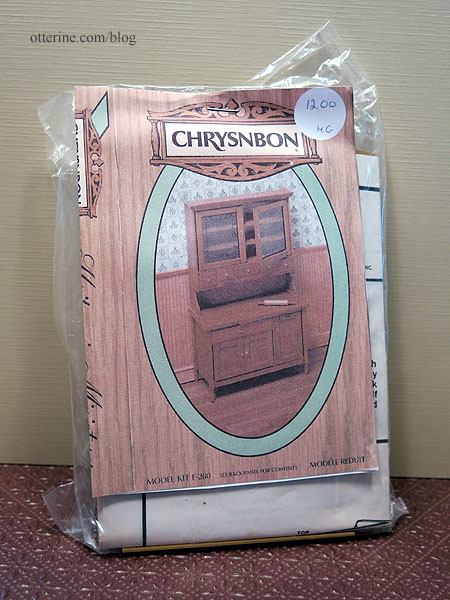
In the November 2000 issue of Dollhouse Miniatures magazine, there are instructions for converting this hutch into a desk (and a shelving unit if you want to use all of the pieces). I think the vintage style is perfect.
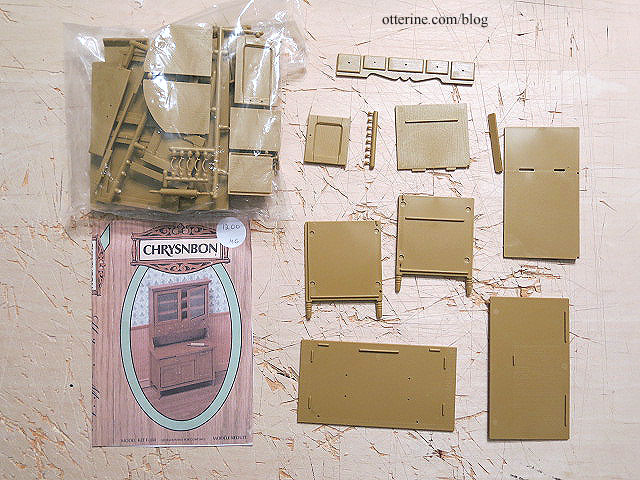
I sorted the parts and have a nice bunch left over for later projects. I don’t know that I’ll make the wall cabinet from the spare parts, but you never know.
The instructions indicate to use the base back piece, but it has some issues with injection marks and you are to remove the ribs with a knife. These would not be highly visible under the desk, but they would be unsightly enough to bother me.
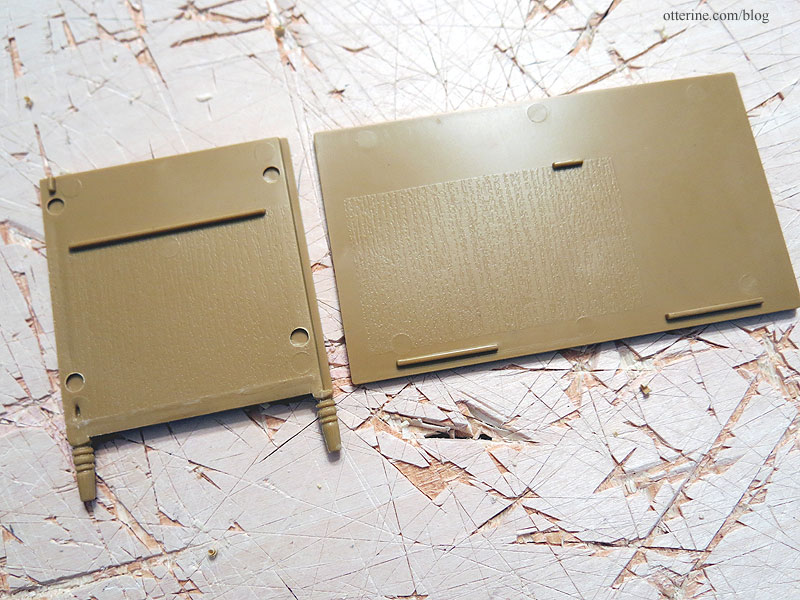
I could turn the piece around, but then the back would be rather ragged. Granted, the back the desk isn’t visible when in the room, but why bother with these issues at all when there’s a large piece in the leftovers that has wood texture on both sides?
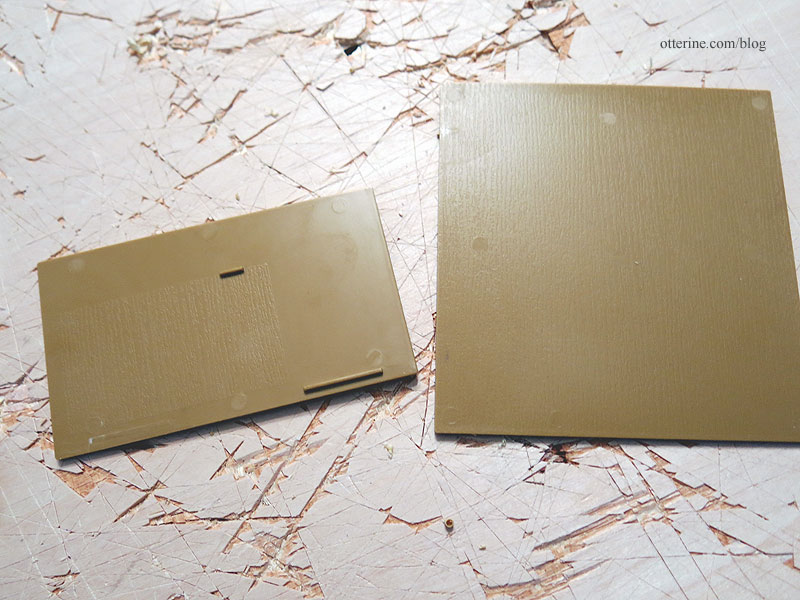
I cut the large piece to minimize the injection marks. Much better. :]
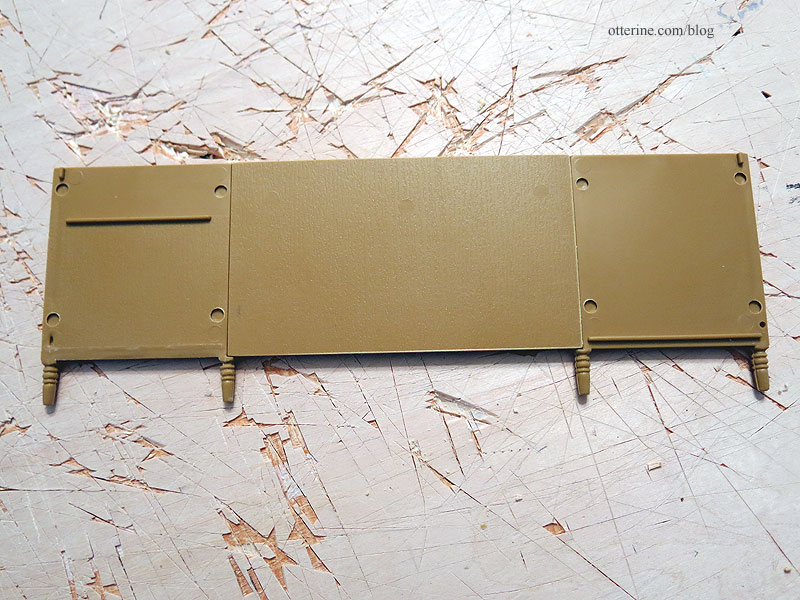
After gluing the top to the sides and back using Testors plastic cement, I went my own direction using the magazine instructions as a general guide. Since I didn’t care about making the top cabinet, I used the spare parts as needed. It simplified things for me. I built a box for the side drawer and door.
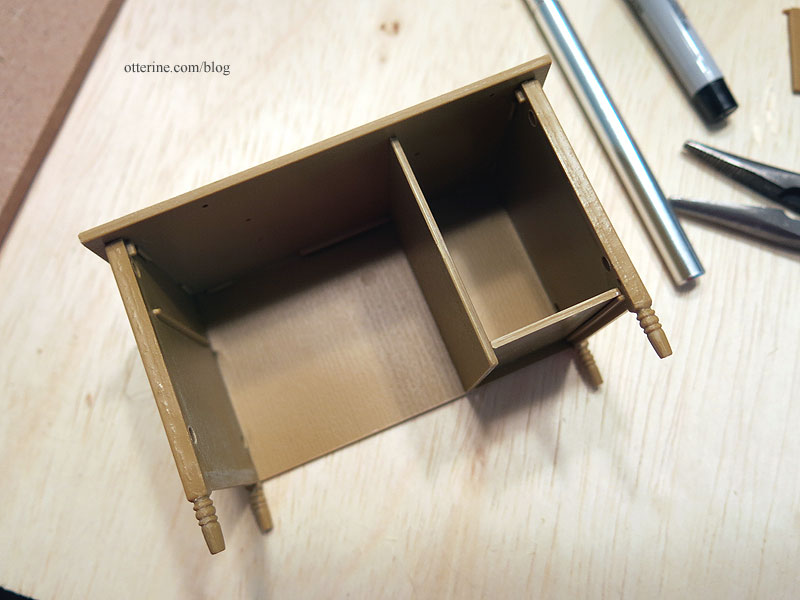
I cut the original skirt as meant in the bash, but I made a solid piece for the right side.
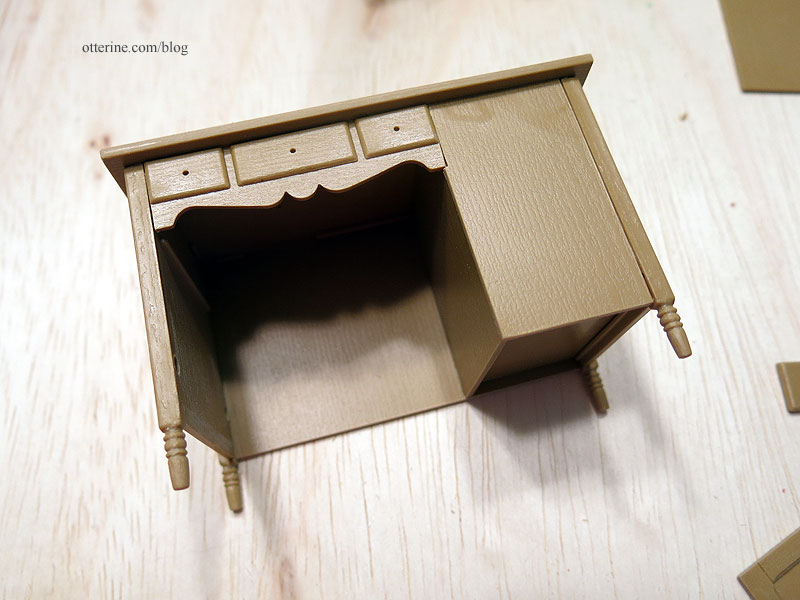
Instead of using the remaining small drawers, I cut a new one from the spare parts.
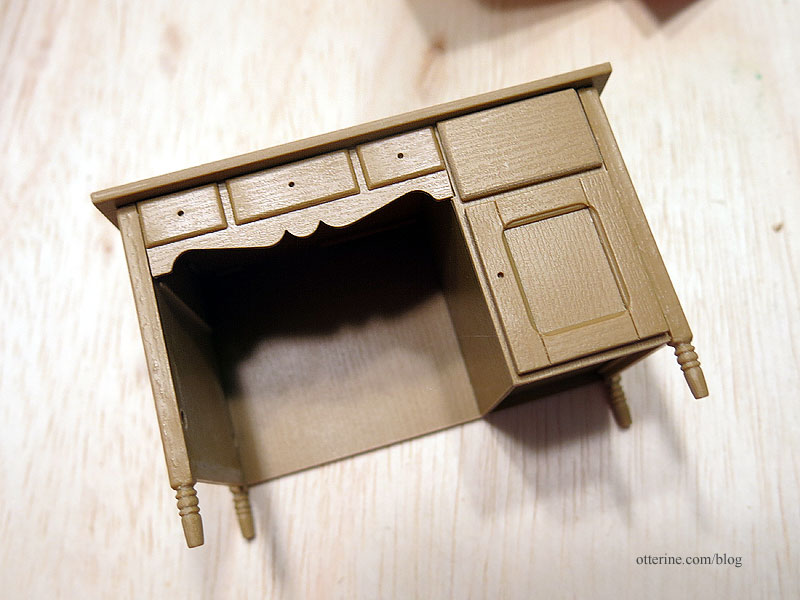
I sanded the back of the door smooth so it would sit more in line with the new drawer. The one on the left shows what it looked like before the sanding.
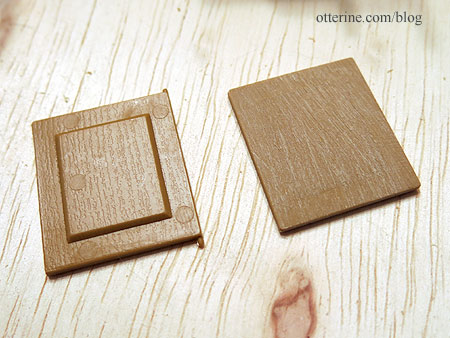
That left the holes and imperfections on the left inner panel.
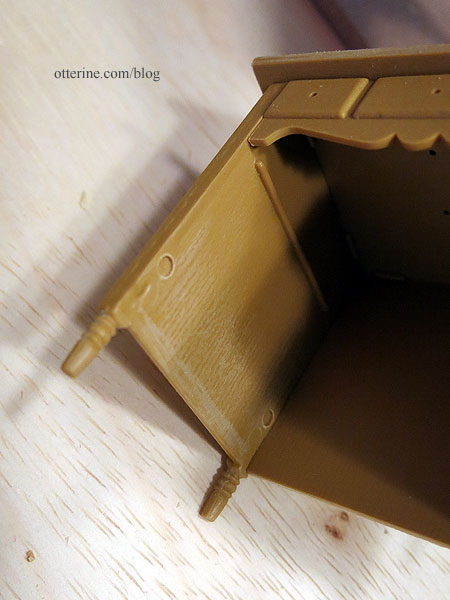
I thought it would be more difficult to fill with putty and get a good result, so I cut a board to cover the entire lower portion. Once painted, it will be less obvious.
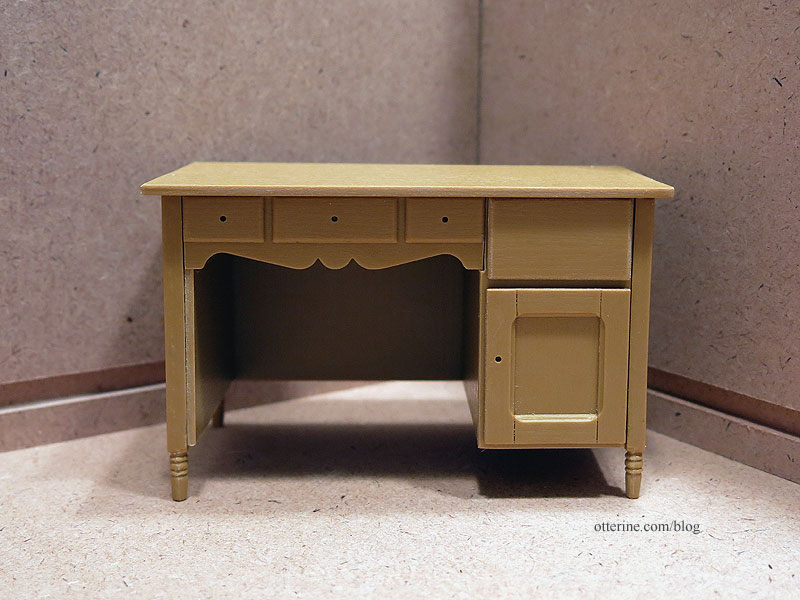
More to come….
Categories: Furniture
May 12, 2019 | 0 commentsHalf Clocked – furnishings and such
Here is where we left off with the kits.

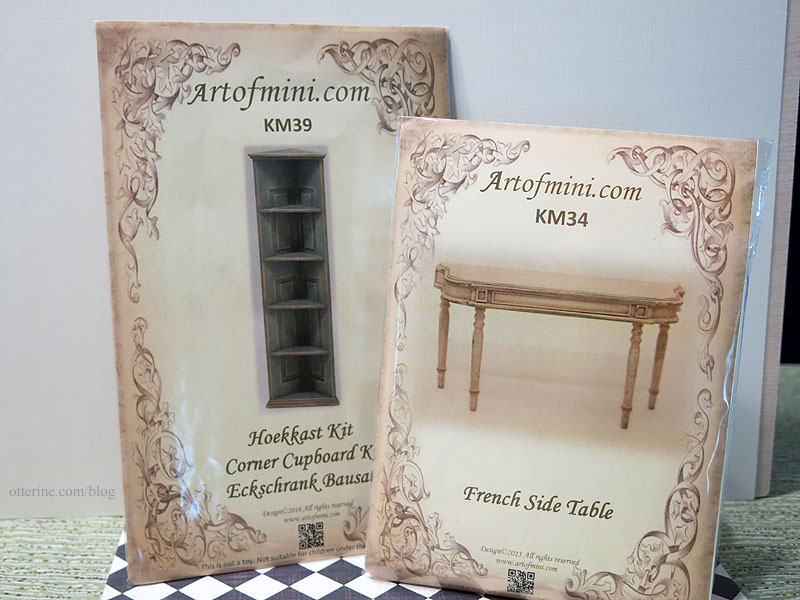
I also started a French side table kit by Art of Mini (shown on the right below; the corner cupboard is for Watson Mill).
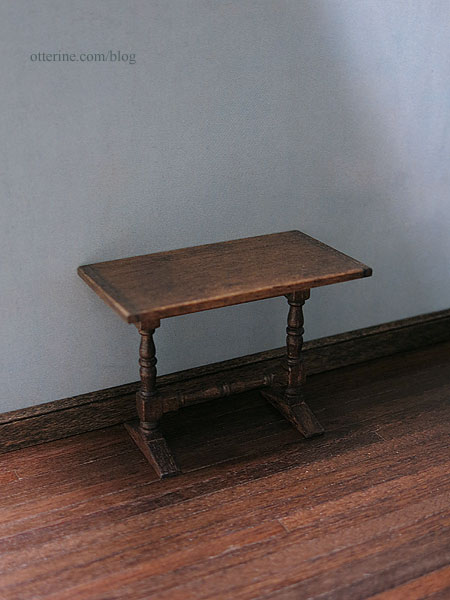
For the trestle table, I opted for a stained finish. After filling in any minor gaps with wood putty, I stained the piece Minwax Dark Walnut. I touched up any glue/putty areas with brown paint and then added a coat of Delta Ceramcoat Satin Varnish.
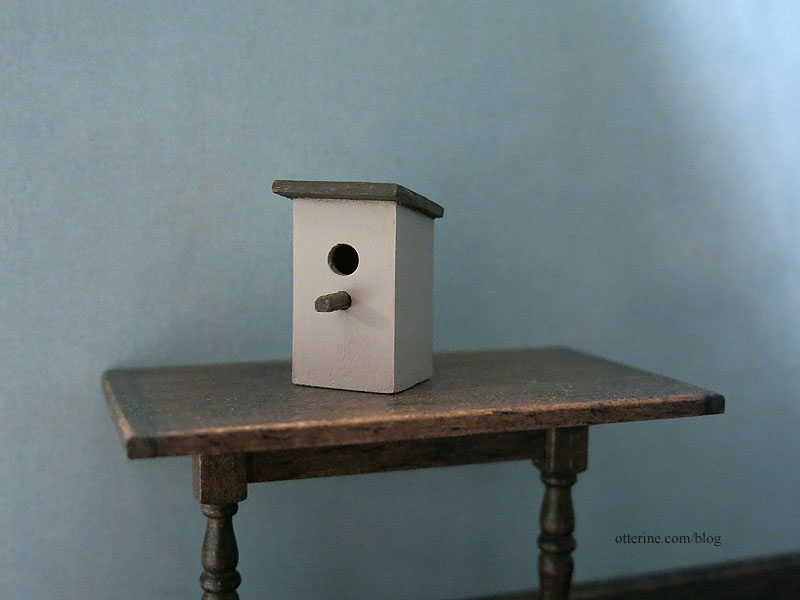
I painted the birdhouse green, but then I thought, “Why is just about every birdhouse I make green? I’m sure birds like other colors.” So, I painted over that with Battleship and painted the roof Bittersweet Chocolate, both by Americana. Now it’s a house suited for the unassuming bird who doesn’t like to draw attention. :D
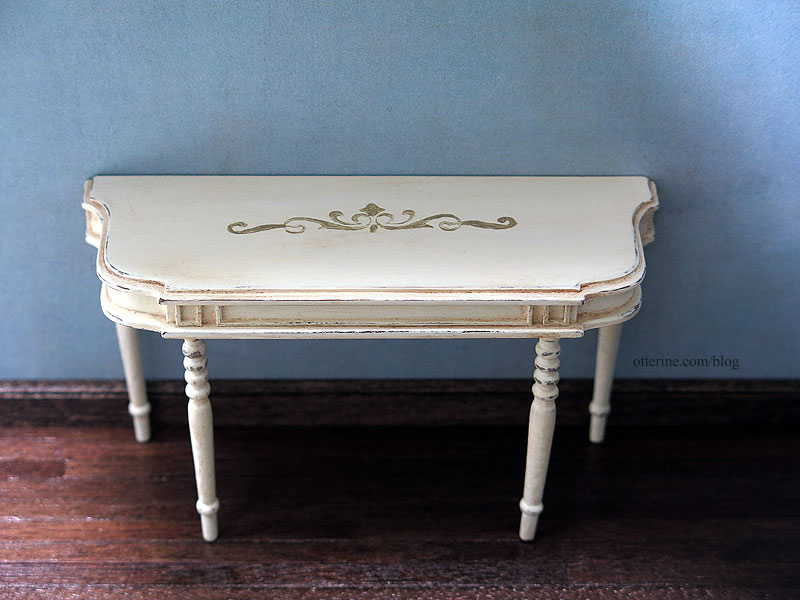
For the French side table, I started with a coat of Bittersweet Chocolate by Americana. I want this to be an old table, perhaps once stained and lovely then re-purposed with a coat of paint (or three).

The Folk Art Vintage White paint I had was very thick for being rather old, so I added some water. With the dark undercoat, it took several layers to even out. That added to the refinished look unexpectedly, so a nice happy accident. I rubbed the paint with a piece of brown paper bag to remove the high spots. Then I used a light grit sanding stick to bring out some of the dark details from underneath.
I added metallic detailing with Taupe by Folk Art. I used a rubber stamp and the same paint on the top (technique detailed here). I rubbed the piece again with a piece of brown paper bag until I had a nice sheen.


The legs warped a little, but that adds to the antique feeling…at least that’s what I tell myself. :D
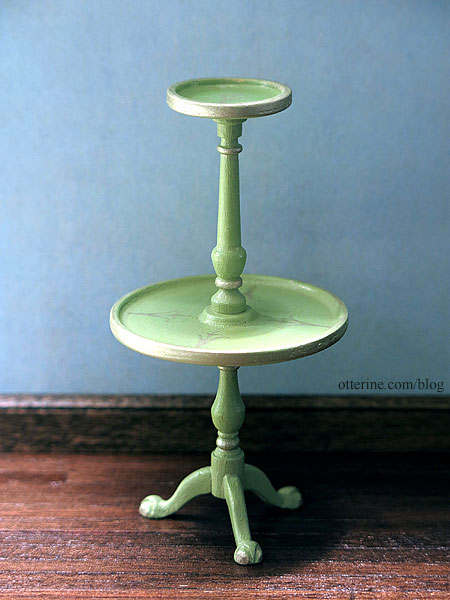
The tiered server started with a coat of Basil Green by Folk Art. I had to paint this since I always get glue everywhere when putting together any three-legged stand. I used one of the small rubber stamps with the same paint as the French side table to add some detailing.

This piece was also prone to warping, but I like the way it turned out. :]
I have a few more furnishings in mind, so more on that to come….

Categories: Furniture, Half Clocked
November 28, 2018 | 0 commentsHalf Clocked – kits in progress
I’ve been working on some stash kits to fill the HC build. I have a birdhouse from Art of Mini.

And, two new old stock kits – Shenandoah Designs tiered server and House of Miniatures trestle table.

Sanding them took the most time, but I have them built and ready for finishing.

I hate assembling any three-legged stand, but they look so nice I just swear through the process to get it done. I inevitably get glue all over, so I almost always end up painting these types of bases.

I’m not sure of colors yet, though I do really like the aged military green shown on the birdhouse kit cover. I might end up going with that for this piece.

The trestle stand was a pretty clean assembly glue-wise, so I might use some stainable wood filler for the few gaps and end up staining this piece.

Categories: Furniture, Half Clocked
June 10, 2018 | 0 commentsCorner cupboard and tea trolley
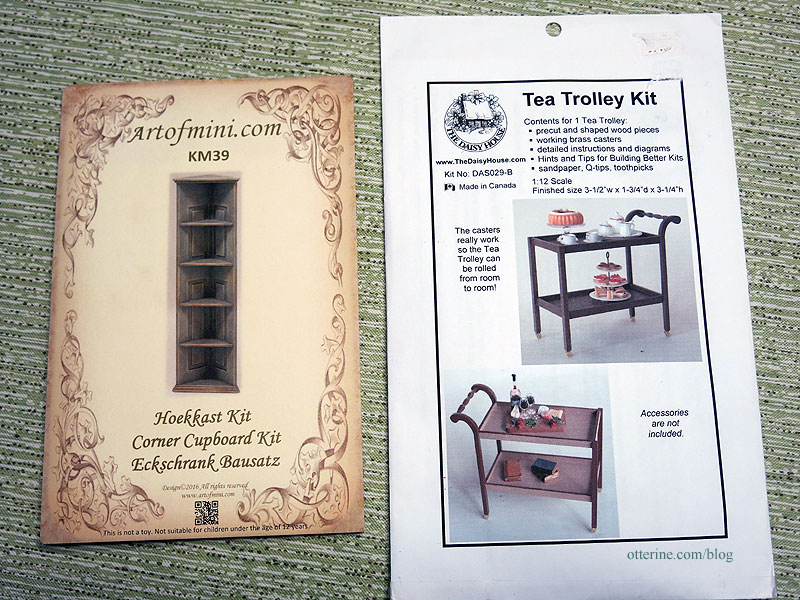
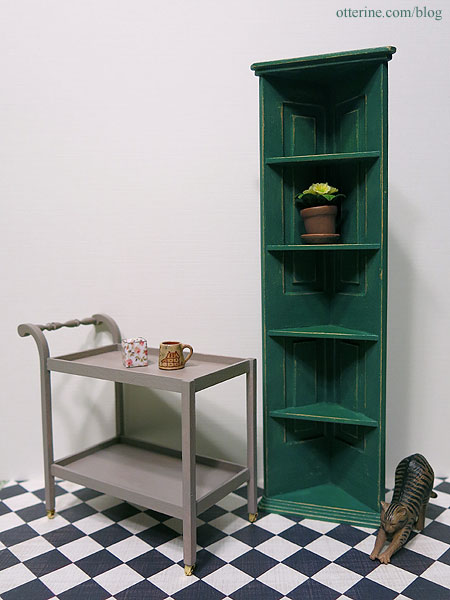
The first two items I’m making are a corner cupboard from Art of Mini and a tea trolley by Daisy House.
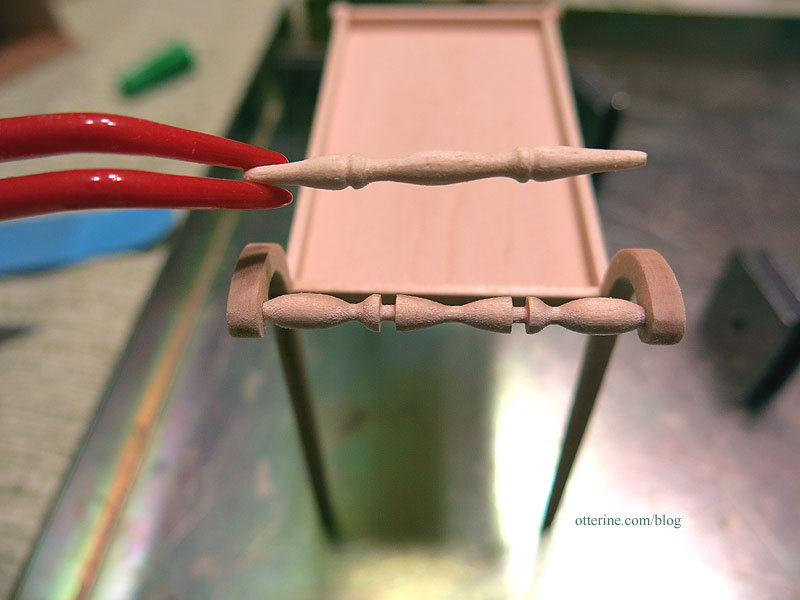
The tea trolley was fiddly, but it ended up being rather sturdy for such a delicate piece. It has casters so it can be wheeled anywhere it is needed. It can be a shelf for storage as well as a table for meals. The spreader bar included in the kit was not in good condition, so I cut a new section from Tiny Turnings.
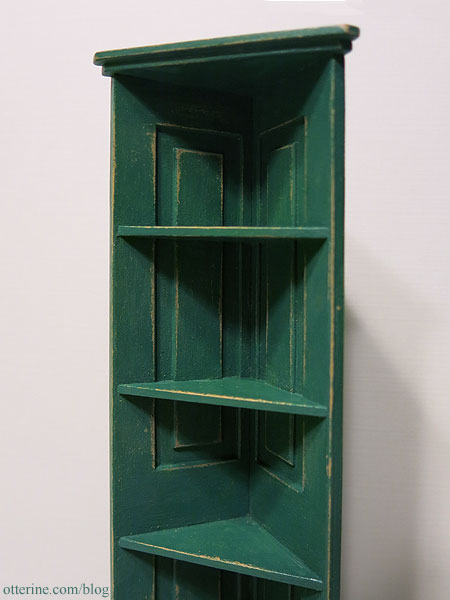
I sanded the edges of the cupboard pieces prior to assembly. This softened the overall look and made it seem assembled from old doors. I mounted my doors opposite to the kit photo since I liked that aesthetic better. I painted it a base coat of Camel by Americana and then followed that with custom mixed color using Turquoise by Anita’s and Plantation Pine by Americana. I sanded the edges to expose the color beneath for a worn look.
I painted the tea cart a mix of Battleship with Staining Medium, both by Americana. Where the glue prevented staining, I touched up with undiluted paint. I love the sun-bleached look to the color achieved after a very light sanding. For now, I’ve just pushed in the brass casters. I want to try a blackening solution on them before I glue them permanently. I’ll write up the results on that separately.
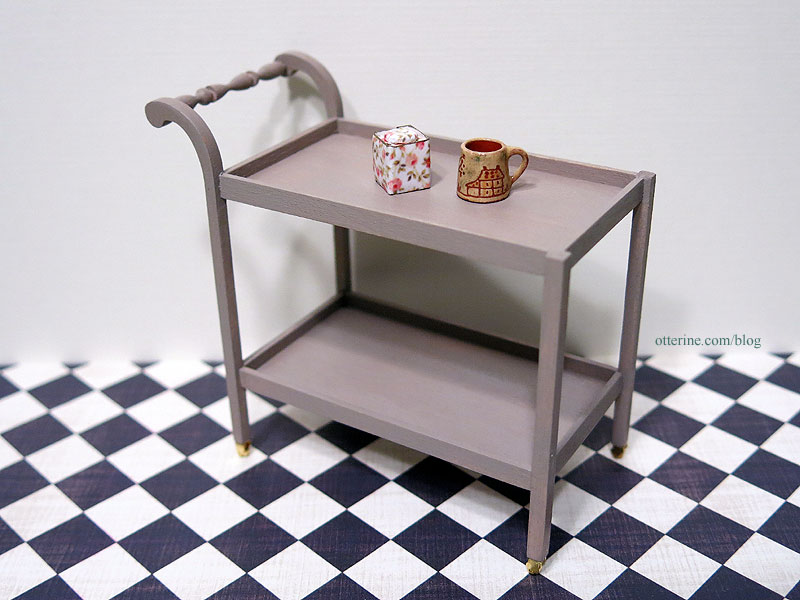
I finished both pieces with Delta Ceramcoat Satin Varnish.
Categories: Furniture
April 27, 2017 | 0 commentsBlanket Chest from Minimum World
The fine folks at Minimum World Dolls House Furniture Ltd contacted me about doing a feature on their unfinished furnishings and sent me a bare wood blanket chest free to try.

The wood was in great condition and needed minimal sanding to prep. I did use my Tweezerman tweezers to remove the hinge pins to make finishing easier, though this might not be possible for everyone to do.

I painted the chest a base color of Heritage Brick mixed with Staining Medium, both by Americana.

It’s a rusty red that will fit with just about any décor. I lightly sanded the chest with a scrap of paper bag material to smooth the surface raised by the paint application.

As with many pieces of unfinished furniture, there can be glue spots on the wood that don’t take stain well. Painting is no issue in covering these, and I’ve detailed methods for covering these spots in a past post. For me, it didn’t much matter since I wanted to try a different type of finishing. I scanned the front and sides of the chest and then printed templates from those scans.
I found wonderful art on The Graphics Fairy to add to the chest. I have hand painted designs previously, but I wanted to give this technique a try. I always print a few copies of the final images and then cut the panels to fit until I am happy with the end result.

I didn’t worry too much about being precise because the final finishing will cover minor mistakes and the shadow of the overhang will help disguise as well. I skipped the side panels, keeping the focus on the front. The panels are glued in place using MiniGraphics Wallpaper Mucilage and covered in a thin layer of Delta Ceramcoat Satin Varnish.

I also cut pieces of parchment paper for the interior and glued them in place with the same mucilage and varnish layer. I used a tiny bit of Antiquing Medium to age the crevices and give some depth to the piece. By varnishing the paper first, I could wipe away excess without marring the paper or over-staining it.

After a final coat of Delta Ceramcoat Satin Varnish inside and out, I was ready to reattach the lid. Blocks from Andrea Thieck.

Now I have a delightful country blanket chest for books and other treasures. The books are from L. Delaney, and the tin man doll is from Sir Thomas Thumb.

I am very pleased with the end result and would definitely recommend giving their unfinished furniture a try. Thank you, Minimum World! :]

As for the Putitto tabby cat, I blame Keli (and a complete lack of will power). :D

Categories: Furniture, Miniatures
March 1, 2017 | 0 commentsBird perches
I re-purposed two House of Miniatures kits for Clyde and Sam — a bookstand and pedestal desk. I’ve kept the tops for other uses.
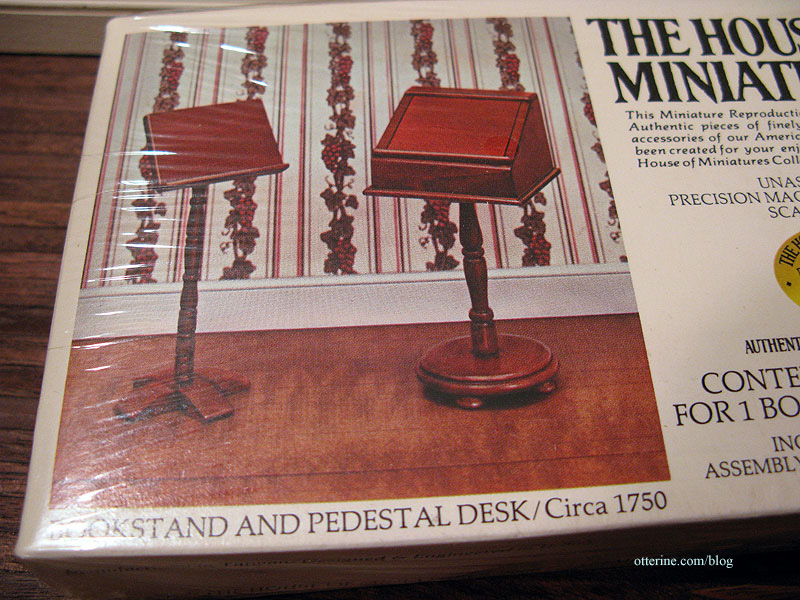
I finished them in dark walnut with a satin varnish. Pretty birdies!

To make the perches, I used pieces from the old tree branch I used in The Artist’s Studio. The wood is stained to match.
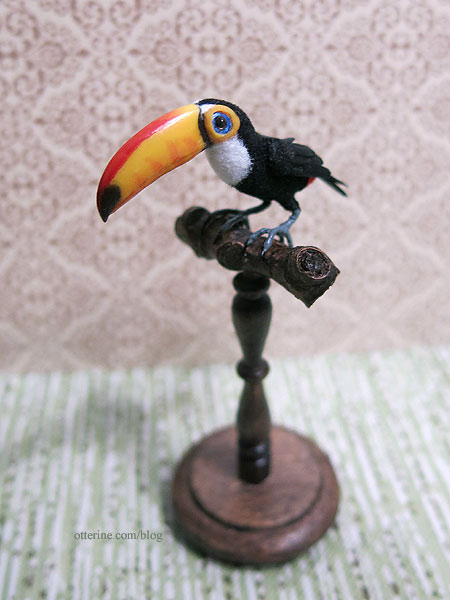
Now I can have them on the bookshelf instead of packed away in their boxes. :D
Categories: Animals and birds, Furniture
October 13, 2016 | 0 commentsStaining and painting unfinished furnishings
I love kits, but sometimes a partially built or fully built unfinished furniture piece fits the bill. First, there are some rather fancy unfinished pieces on the market that have no kit equivalent. Second, sometimes the built piece saves headaches as well as time.
Today, I finished a store counter from miniatures.com. These are great pieces at a great price, but all unfinished furniture pieces have their issues. Sometimes, the grain of a piece is too large for scale. In other instances, glue has seeped out during assembly. When you build furniture from kits, mishaps with glue are always a problem so it’s best to stain before assembly, masking off the areas to be glued.
My counter had large obvious stripes in the grain but only minor glue mishaps. I sanded the pieces smooth and removed the glue as best as possible before staining the piece with Minwax English Chestnut (two coats). I wait until the stain is completely dry before doing the touch-ups described below.
Here you can see the large grain on the top of the counter. I took this photo after starting the touch-up process, but you can see the thin, light lines across.

To fix these issues, I used a tiny brush to apply thin strokes of Traditional Burnt Umber by Americana. I applied only a small section at a time.

Working quickly so the paint did not dry, I used a bristle brush to pull the paint in the direction of the grain. If you get things too dark, you can wipe away the paint with a damp cloth but then you’ll have to wait for the area to dry before trying again.
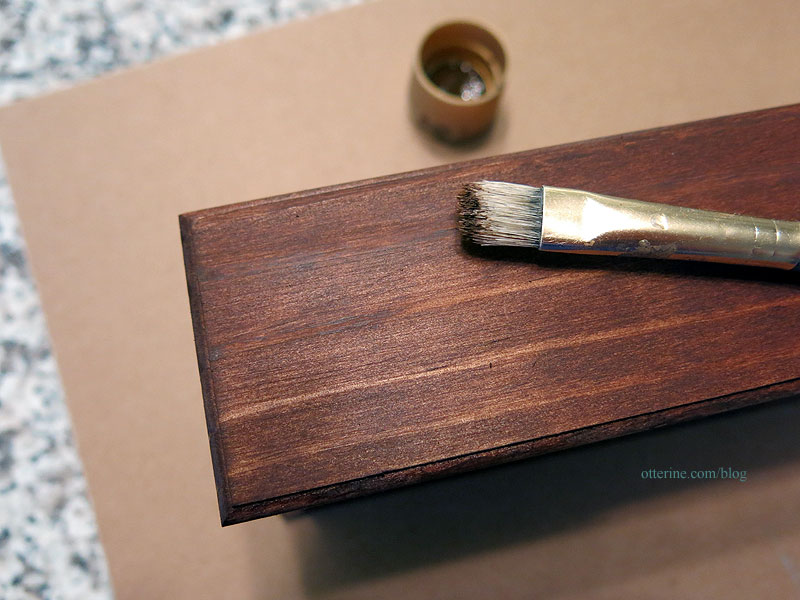
This method takes some practice, but it covers bare spots and large grain while keeping in line with the wood grain. The top now has a more even and subtle grain finish.

Here is the front with the light grain portions painted over. The stain leaves a sheen while the paint is matte, so the fixes look obvious at this stage.

I rubbed the surfaces with a torn bit of paper bag to soften the painted spots without lifting the color the way sandpaper would.

I applied Delta Ceramcoat Satin Varnish.

Now the paint and stain look like one grain.

Categories: Furniture
July 17, 2016 | 0 commentsTicking stripe in miniature
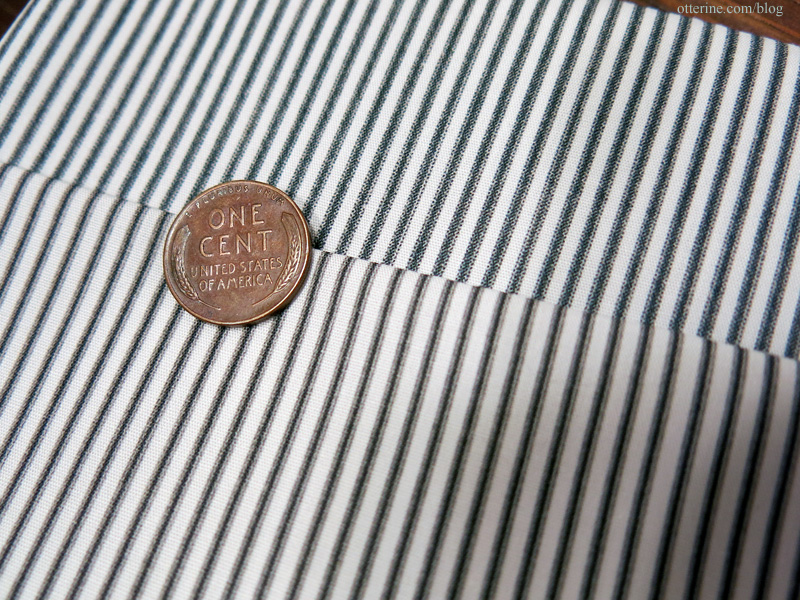
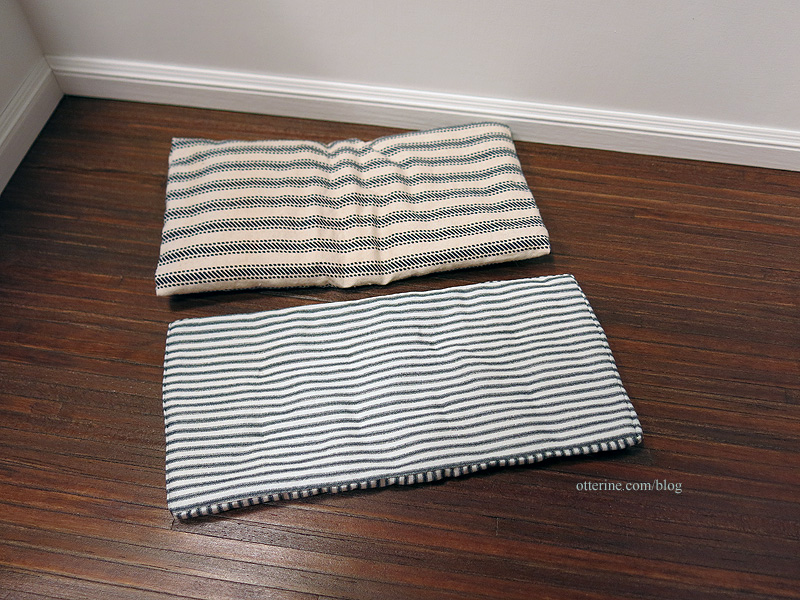
I worked on replicating ticking stripe in miniature and ordered some test swatches from Spoonflower. One was a clear success. It was in scale and had the detail I was seeking. The fabric in the upper part of the photo is the one I like best.
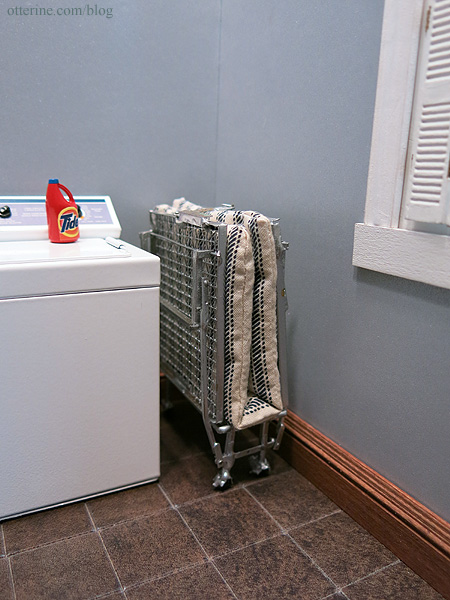
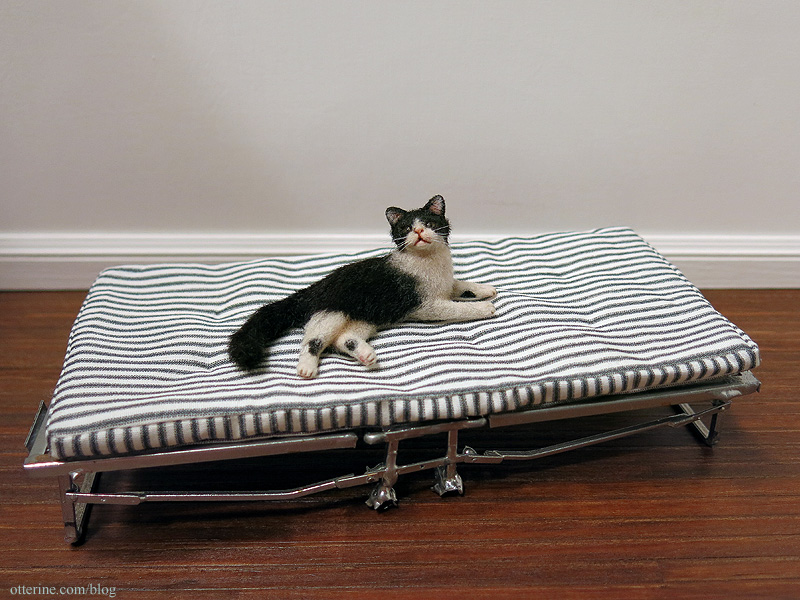
I then ordered a full yard to add to my mini fabric stash. Time to make a new mattress for the roll-away bed. Here’s the original as a reminder of the large, out of scale fabric.
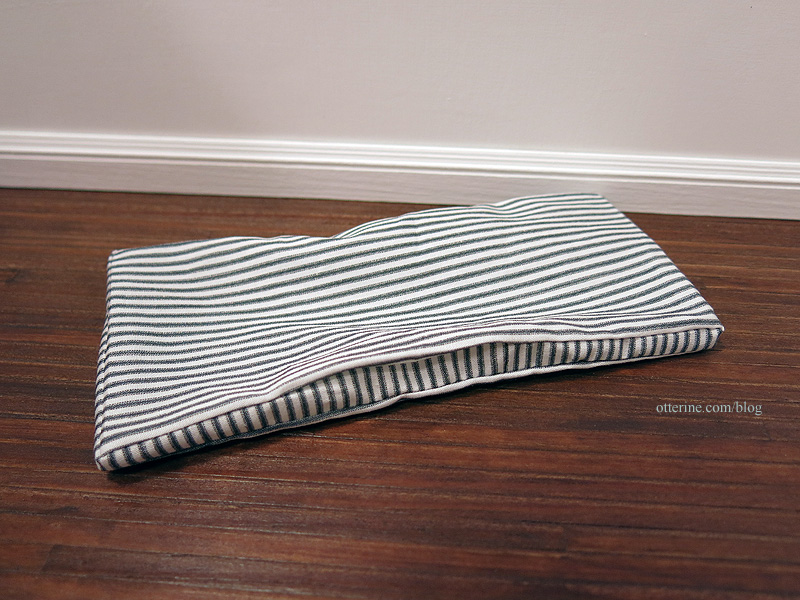
Following the process I used for the Baslow Ranch mattress, I cut two pieces 3 1/4″ x 6 1/2″ to fit this bed while assuming a 1/4″ seam allowance. To make this a structured mattress instead of a flat one like the original, I cut a 3/4″ wide strip 18″ long. Here it is sewn but empty.
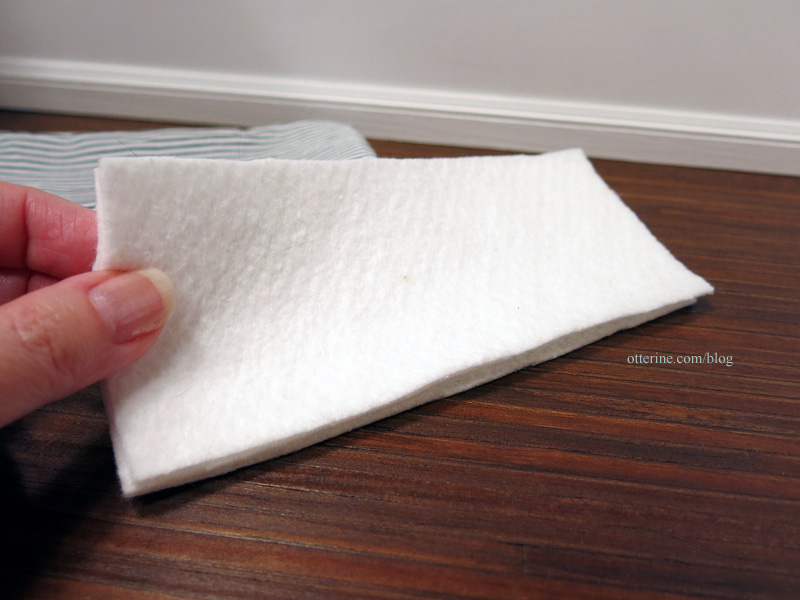
I used three layers of millinery batting to fill the mattress.
Better. :D
Endora certainly approves.
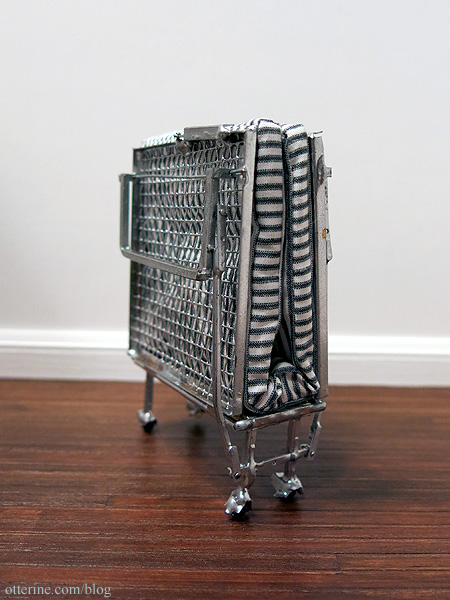
And, it still folds up and latches closed.
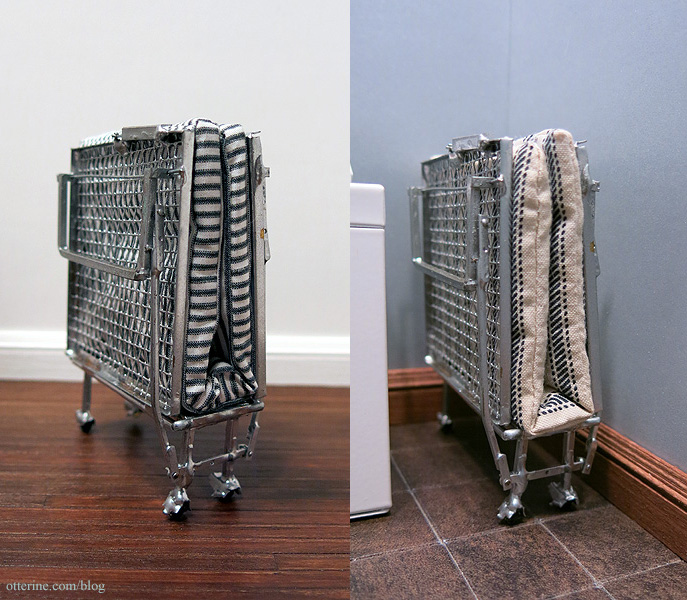
A subtle change makes a big difference in the perception of scale.
Categories: Furniture
June 14, 2015 | 0 commentsMac Tools 1:12 scale tool locker
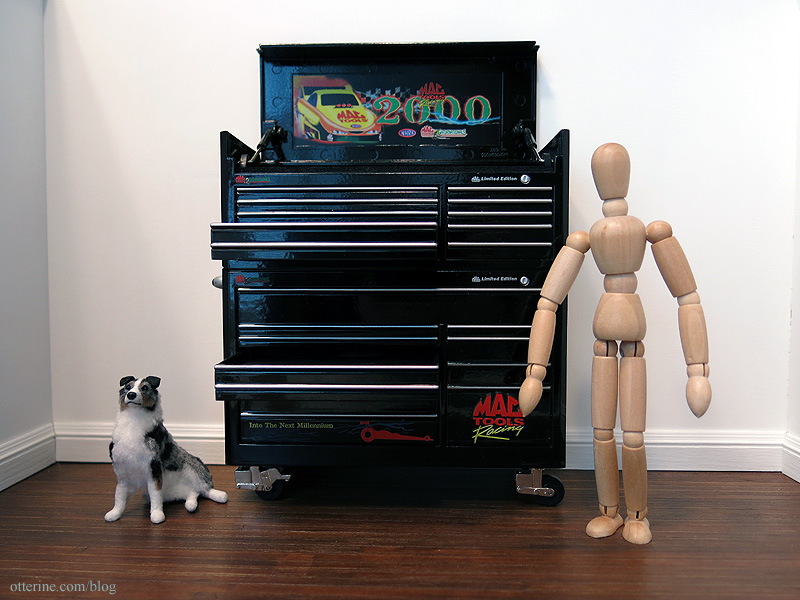
Behold the behemoth that is the Mac Tools Racing 1:12 scale tool locker! My 5’9″ equivalent model isn’t male-model tall but he’s no munchkin, either. This piece is 6″ tall and 5.5″ wide.
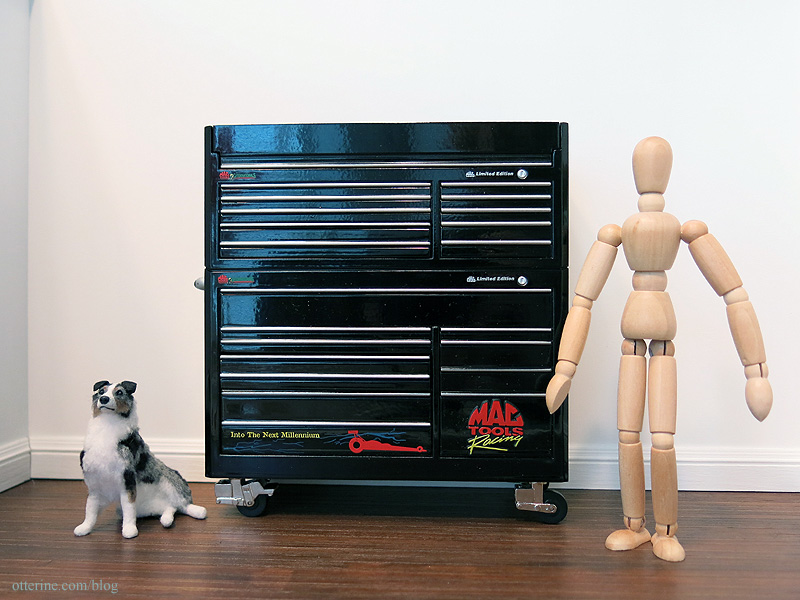
To me, it seems like he would behead himself with that heavy top in real life. However, I found several online photos of the real deal that illustrate just how perfectly in scale it is.
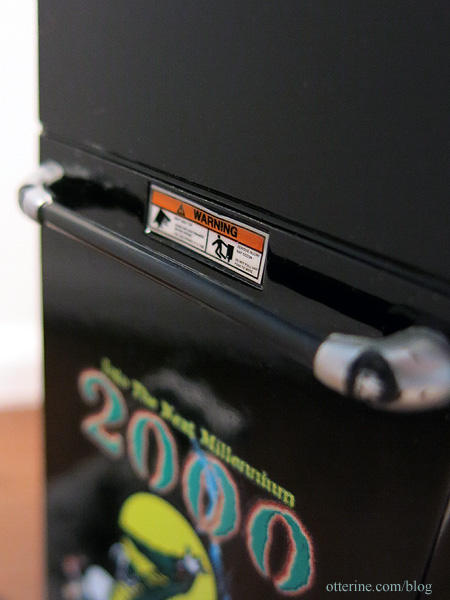
This piece is actually a limited edition collectible coin bank, but it has all the exterior detailing of the original right down to the warning labels. I can’t decipher the text, but I think the gist is, “This beast will kill you if you let it fall on you.”
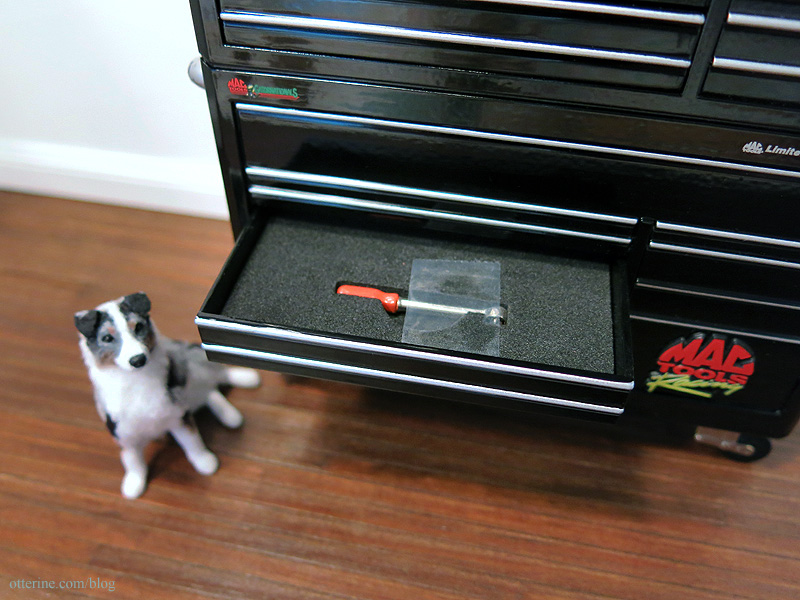
It’s a great piece to display on its own. Only two drawers open using buttons inside the top, so while a decent display piece I don’t know how many tools you could reasonably keep in it. The included tool in one of the drawers is used to open the bank.
Categories: Furniture
June 13, 2015 | 0 commentsVintage roll-away bed
I picked up an interesting lot on eBay and included was a roll-away bed. We had one of these when I was young (might still be in my parents’ garage for all I know). It was a weird grey green, but it was just like this.
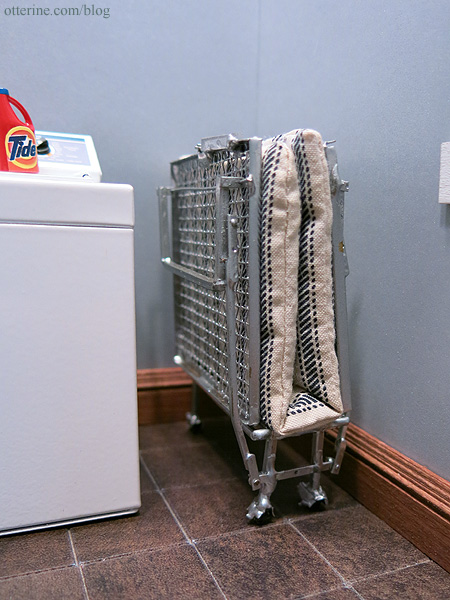
It’s a super cute item…one of those random bits from the past. I know they still sell these, but they just scream vintage to me.

To me, it looks best closed up. When open, it loses some of its realism mainly because the mattress isn’t really working for me. Endora seems to think it’s just peachy as is. :D Crazy cats.
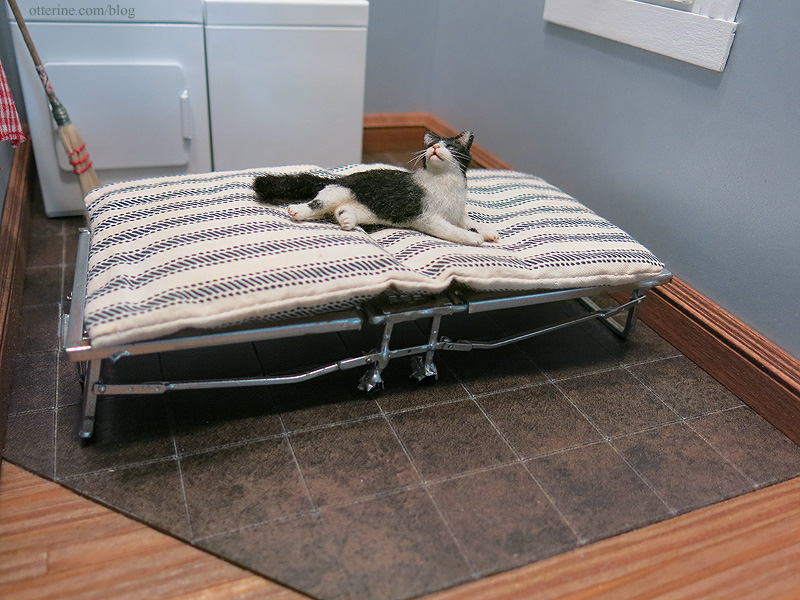
Don’t gasp, but when I first saw it online I thought I’d like to paint it. Now, I do like it in the silver, to a point. I would have to be careful since there are so many working parts. It might be best to use a product that will simply darken of the metal. There are some sharp parts that will need to be sanded so I don’t cut myself even if I don’t change the color.
I will make a new mattress for it with fabric in better scale. It would be nice to display new and old, so I will make one of each type of mattress. Here is the ratty Baslow Ranch mattress just to try. Better, though I want one in ticking stripe. :D
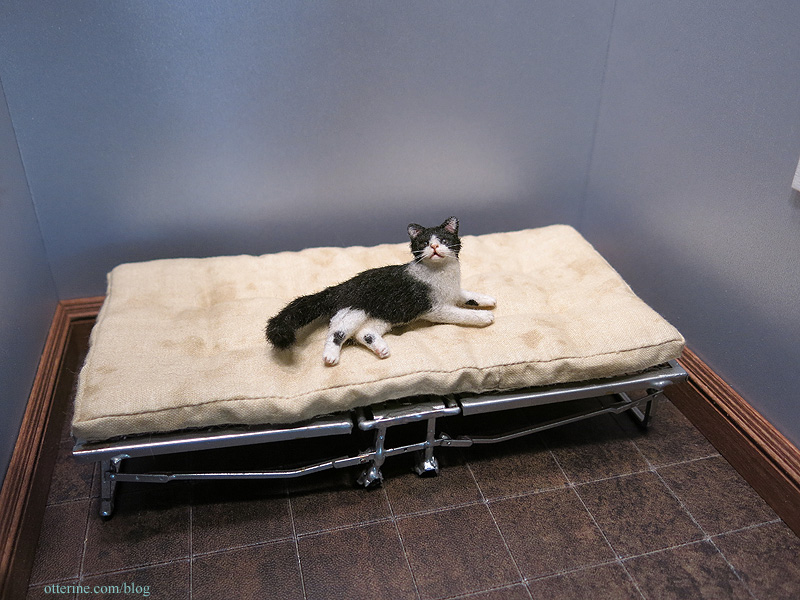
These always make me think of an asylum, too. Maybe I’ll need to make a creepy room box someday.
Update: see the new ticking stripe mattress here.
Categories: Furniture
April 29, 2015 | 0 comments
NOTE: All content on otterine.com is copyrighted and may not be reproduced in part or in whole. It takes a lot of time and effort to write and photograph for my blog. Please ask permission before reproducing any of my content. (More on copyright)

Chippendale Straight-top Highboy
One of the rarer kits in the House of Miniatures line is the Chippendale Straight-top Highboy. I love the lines of it with the flat top, and I have seen some wonderfully updated highboys in real life. A coat of paint, a change of hardware, removing the finials on the base for a cleaner look….seems like a good place to start.

There are a lot of parts, and this kit was missing only one. I can’t recall if this was a sealed kit since I had it open a bit before starting, but it’s not uncommon for these kits to have missing or extra parts even if sealed.

Some parts are harder to replace. As luck would have it, since I’ve put together other House of Miniatures kits together before and always save unused parts, I had the very part I needed! :O

I did things a little out of order in that I saved adding the legs until last. They are just too delicate to attach during the cabinet assembly. I also don’t sand cabriole legs to a perfectly round finish. I like an elephant head top with its trunk descending into a webbed duck foot. :D

I sand and fill as I go, making adjustments as needed. I added trim to the upper sides to cover the ends of the shaped top. Ends of boards never take stain the same way as a flat grain face.

To that end, I moved the corbels over slightly and needed to change the trim on the side fronts since it wasn’t wide enough to compensate for the adjustment. I cut a piece of matching trim for the top but didn’t glue it right away. I needed to address the top drawers first.

While these kits are lovely and well made, they are not always the best fitting right out of the box even if you follow the steps precisely. If you look at real life example of highboys, you will see that the drawers are not inset. They have faces that cover each hole. This would be a better look overall, but this is not how these kits are designed. The upper three drawers were the most problematic.
The upright supports dividing the three upper drawers did not align well with the actual drawer front dimensions. The supports were glued into dados, so it wasn’t something I could have prevented, but the supports also ended up crooked, which was my error. Some gaps I could live with, but this was too much.

I used a chisel to remove the original supports.

I cut new, thicker ones and set them in better position relative to the drawer widths. I first taped the drawers in relatively centered positions.

I set the new boards in place and used the drawers to fine tune.

The below picture is before I added wood filler but you can see the new dividers are already much better. Making this adjustment was going to be relatively invisible only because I planned to use black stain.

I then glued in the added trim to the top and attached the legs.


The stain I chose is Ebony by Rust-Oleum. I used a wood conditioner first, which evens out the stain application. I sanded with 600 grit between coats and buffed the finish with a paper towel before sealing with matte varnish. The dark color helps mask the gaps around the drawers and imperfections in the wood.

For hardware, I used fancy headpins. They are so-so in quality but photograph reasonably well. I will search for something to replace them eventually, so I didn’t glue them in permanently. For a kit I started in January of last year, I can finally call it done! :D

Categories: Furniture
January 23, 2022 | 0 commentsFishy Bench
This week I assembled the Fishy Bench kit by Robin Betterley. I removed as much of the laser soot as possible and stained the wood Driftwood by Minwax.

I opted for a fabric seat cushion instead of the included artwork. I like the way it mimics the fin stripes.

This was such a fun kit to build.

Categories: Furniture
January 16, 2022 | 0 commentsChrysnbon kitchen hutch to desk
In the large group of magazines gifted to me recently, there are numerous articles on how to make more from a kit than what is presented in the instructions. I’ve modified kits before, but some of these are truly remarkable and have opened my eyes to even greater possibilities. I bought this Chrysnbon kitchen hutch kit at a local mini show.

In the November 2000 issue of Dollhouse Miniatures magazine, there are instructions for converting this hutch into a desk (and a shelving unit if you want to use all of the pieces). I think the vintage style is perfect.

I sorted the parts and have a nice bunch left over for later projects. I don’t know that I’ll make the wall cabinet from the spare parts, but you never know.

The instructions indicate to use the base back piece, but it has some issues with injection marks and you are to remove the ribs with a knife. These would not be highly visible under the desk, but they would be unsightly enough to bother me.

I could turn the piece around, but then the back would be rather ragged. Granted, the back the desk isn’t visible when in the room, but why bother with these issues at all when there’s a large piece in the leftovers that has wood texture on both sides?

I cut the large piece to minimize the injection marks. Much better. :]

After gluing the top to the sides and back using Testors plastic cement, I went my own direction using the magazine instructions as a general guide. Since I didn’t care about making the top cabinet, I used the spare parts as needed. It simplified things for me. I built a box for the side drawer and door.

I cut the original skirt as meant in the bash, but I made a solid piece for the right side.

Instead of using the remaining small drawers, I cut a new one from the spare parts.

I sanded the back of the door smooth so it would sit more in line with the new drawer. The one on the left shows what it looked like before the sanding.

That left the holes and imperfections on the left inner panel.

I thought it would be more difficult to fill with putty and get a good result, so I cut a board to cover the entire lower portion. Once painted, it will be less obvious.

More to come….
Categories: Furniture
May 12, 2019 | 0 commentsHalf Clocked – furnishings and such
Here is where we left off with the kits.

I also started a French side table kit by Art of Mini (shown on the right below; the corner cupboard is for Watson Mill).

For the trestle table, I opted for a stained finish. After filling in any minor gaps with wood putty, I stained the piece Minwax Dark Walnut. I touched up any glue/putty areas with brown paint and then added a coat of Delta Ceramcoat Satin Varnish.

I painted the birdhouse green, but then I thought, “Why is just about every birdhouse I make green? I’m sure birds like other colors.” So, I painted over that with Battleship and painted the roof Bittersweet Chocolate, both by Americana. Now it’s a house suited for the unassuming bird who doesn’t like to draw attention. :D

For the French side table, I started with a coat of Bittersweet Chocolate by Americana. I want this to be an old table, perhaps once stained and lovely then re-purposed with a coat of paint (or three).

The Folk Art Vintage White paint I had was very thick for being rather old, so I added some water. With the dark undercoat, it took several layers to even out. That added to the refinished look unexpectedly, so a nice happy accident. I rubbed the paint with a piece of brown paper bag to remove the high spots. Then I used a light grit sanding stick to bring out some of the dark details from underneath.
I added metallic detailing with Taupe by Folk Art. I used a rubber stamp and the same paint on the top (technique detailed here). I rubbed the piece again with a piece of brown paper bag until I had a nice sheen.


The legs warped a little, but that adds to the antique feeling…at least that’s what I tell myself. :D

The tiered server started with a coat of Basil Green by Folk Art. I had to paint this since I always get glue everywhere when putting together any three-legged stand. I used one of the small rubber stamps with the same paint as the French side table to add some detailing.

This piece was also prone to warping, but I like the way it turned out. :]

I have a few more furnishings in mind, so more on that to come….

Categories: Furniture, Half Clocked
November 28, 2018 | 0 commentsHalf Clocked – kits in progress
I’ve been working on some stash kits to fill the HC build. I have a birdhouse from Art of Mini.

And, two new old stock kits – Shenandoah Designs tiered server and House of Miniatures trestle table.

Sanding them took the most time, but I have them built and ready for finishing.

I hate assembling any three-legged stand, but they look so nice I just swear through the process to get it done. I inevitably get glue all over, so I almost always end up painting these types of bases.

I’m not sure of colors yet, though I do really like the aged military green shown on the birdhouse kit cover. I might end up going with that for this piece.

The trestle stand was a pretty clean assembly glue-wise, so I might use some stainable wood filler for the few gaps and end up staining this piece.

Categories: Furniture, Half Clocked
June 10, 2018 | 0 comments
NOTE: All content on otterine.com is copyrighted and may not be reproduced in part or in whole. It takes a lot of time and effort to write and photograph for my blog. Please ask permission before reproducing any of my content. (More on copyright)


