
NOTE: All content on otterine.com is copyrighted and may not be reproduced in part or in whole. It takes a lot of time and effort to write and photograph for my blog. Please ask permission before reproducing any of my content. (More on copyright)
Categories:

Dogwood Tree
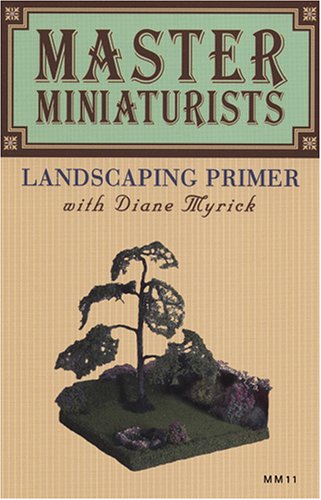
I am following the same DVD tutorial as I did for the Heritage tree: Master Miniaturists:
Landscaping Primer with Diane Myrick. This tree, however, is fuller, shorter and much less
knobby. Here’s the tree after adding the water putty and paint washes. The tree stands just under 11″ tall.
Who’s that there? Looks like Grahame the badger has wandered over. :D

Instead of using the foliage techniques used in the DVD tutorial, I wanted to use a technique to make a dogwood tree that would allow for close-up photos. This is what the flowers look like on a real dogwood.

Image from James Hawkins I decided to use scrapbooking punches to make flowers and leaves. I have just under 100 branch tips on my tree, so I punched out 400 white flowers using the mini Hydrangea punch by Punch Bunch and colored each of them individually with markers. I ended up dumping about 20 or so for bad marker wielding. :D
I had two leaf choices – both with multiple leaves from each punch. This is the small ash punch by Punch Bunch with flowers.

This is the small tri leaf punch by Punch Bunch with flowers.

Both leaf sprigs are 5/8″ high, but the tri leaf sprig seems to work better overall in scale and shape. I will shape these to add vein texture and then glue the flowers and leaf sprigs to the tree skeleton. I’m also planning to add some dimension to the flower centers.

I knew I needed lighter color leaves, but none of my markers were the right shade of green. I ended up painting the strips of paper which resulted in a slight variation of greens. I think that’s okay considering it might add to the dimensionality instead of having a uniform green as the backdrop for the flowers.
Here they are…165 leaf sprigs. I’m not sure if I will need more flowers and leaves, but it seemed a good place to start.

I colored each stem with a brown marker. With the green paint base color, it turned the stems greyish green…perfect for matching the trunk. I then added veins to each leaf on the sprigs with a ball stylus. I had a few leaf casualties, but I kept the sprigs and the loose leaves.

The middle of a dogwood flower is actually a cluster of smaller flowers. To add dimension to mimic these clusters, I glued landscaping material by Woodland Scenics to the centers of my shaped flowers.


I glued flowers to a leaf sprig and then glued that assembly to the tree branch using Aleene’s Fast Grab. I usually use Aleene’s Quick Dry for just about everything, but this is a thicker glue that does what it says…it grabs fast! :D


Okay…164 more to go!

I finished putting on as many leaves and flowers on the dogwood tree as I thought looked good. I have a bunch left over, which is fine since this tree may need touching up from time to time and I won’t have to start the process of making new leaves and flowers from scratch.

The bench is by Phoenix Models. The “kit” comes with two white metal bench ends that you can paint, and you supply the wood in whatever length you wish. It’s a perfect solution when you need a completely custom size bench. It’s a sturdy little piece once you manage to wrangle all the wood ends into place.
I used some leftover Dura-Craft trim wood for the seat slats and skinny sticks for the back rest, stained with Minwax English Chestnut. I cut the boards 3.25″ in length, so the seat ended up at 3″ wide — a perfect loveseat under a pretty tree. :D

From the back, the tree looks a little fuller since there are more branches on this side. I had made it sparse on the front since I planned to have a bench there from the beginning.
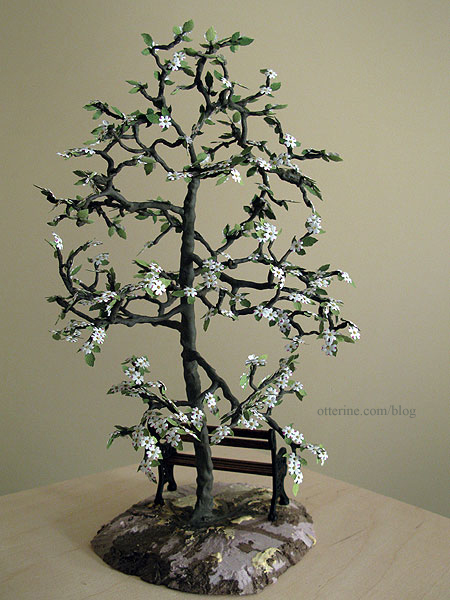
It looks fullest from an aerial view (and in person since you can walk around it at the right level).

Overall, I love the way it turned out. It’s full but still allows you to see the building behind it.
Categories: Flowers, plants, and trees, The Aero Squadron Lounge
July 19, 2012 | 0 commentsHeritage – The Tree, part 2
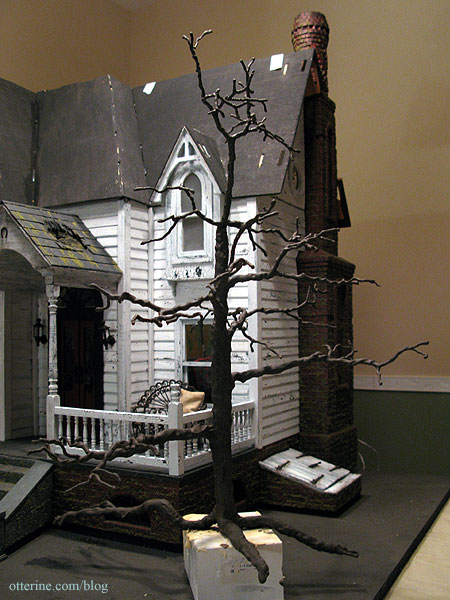
Continuing work on The Tree. I had considered carving bark texture into the putty but decided it was probably more work than it was worth. Instead, I did a quick sanding over the main trunk with 60 grit sandpaper. This removed the obvious smoothness and provided a nice texture. I also cleaned up any excess putty from around the roots.
Diane says most trees are more grey than brown, and when I was out today I noticed what she was talking about. :D
I started with an undiluted mix of Neutral Grey and Traditional Burnt Umber, both by Americana. This initial dark coat of paint really brought the tree to life!
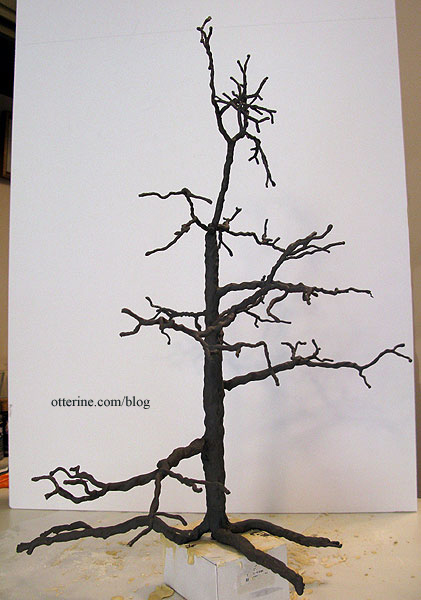
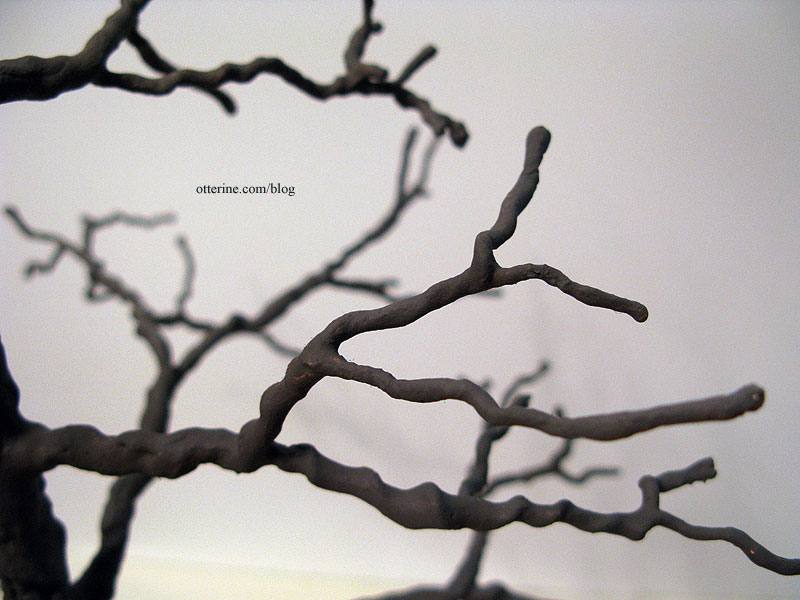
The branches twist and turn just like the real thing. I stippled the paint on to create additional texture which you can see here on the branches.
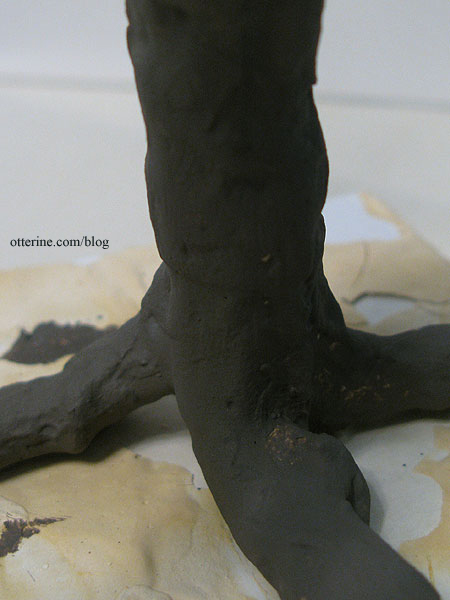
I think the lower trunk and root structure turned out great! :D
The next few steps were messy, so I didn’t take photos throughout. I did my second coat of paint with an undiluted mix of Asphaltum and Neutral Grey by Americana, with a dash of black. It darkened the tree too much. I followed that with a heavily diluted wash of Traditional Burnt Umber. It made the tree too brown. I followed that with a heavily diluted wash of Neutral Grey and Traditional Burnt Umber (like my first coat of paint), and that seemed to set things right. All these layered washes bring out a depth not achieved with a single application of regular paint.
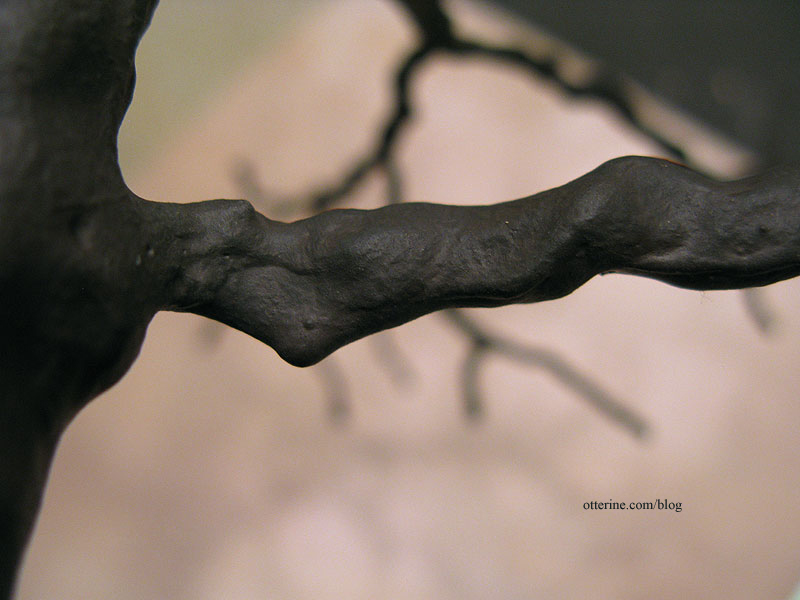
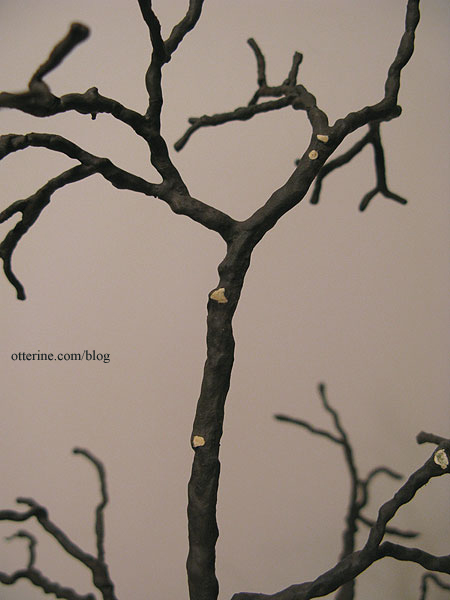
On some of the bare portions, I scraped away where branches have fallen from the tree during its lifetime.
Some I made larger than others, carving out an actual hole.
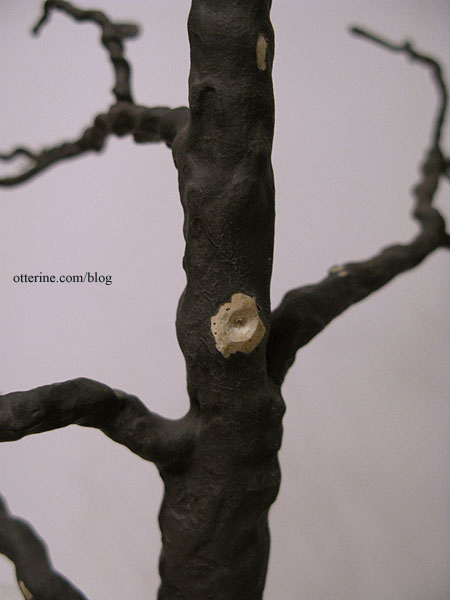
I then painted these individually to darken them. Now, if I wanted it to look like the village just came through to trim the trees along the street, I could have left them. :D
I love the texture on this tree! I am so pleased with the results.
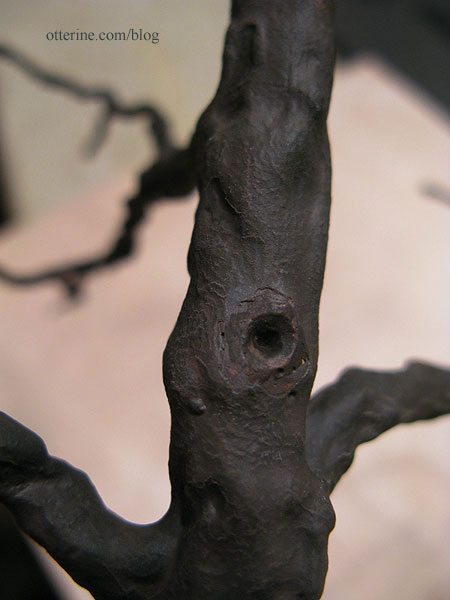
Love, love, love it!
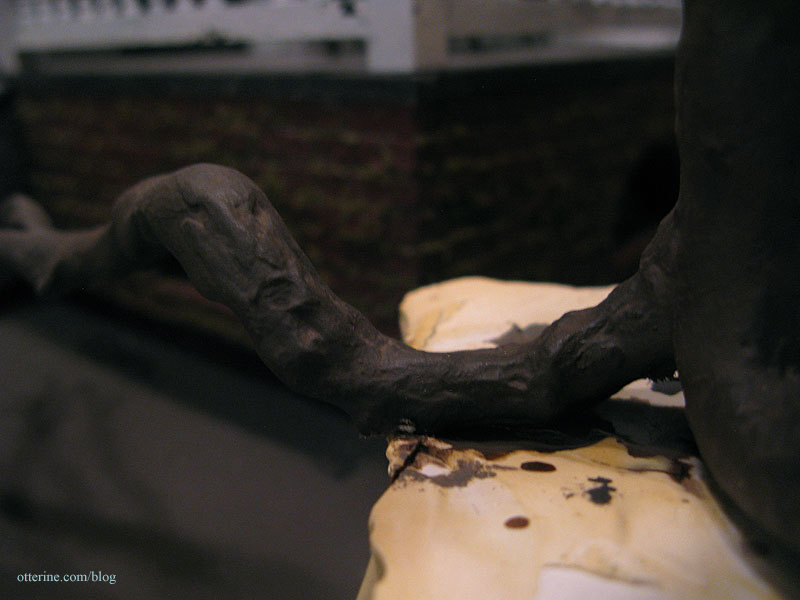
And, like any good haunted tree, you should be able to see faces in it. :O
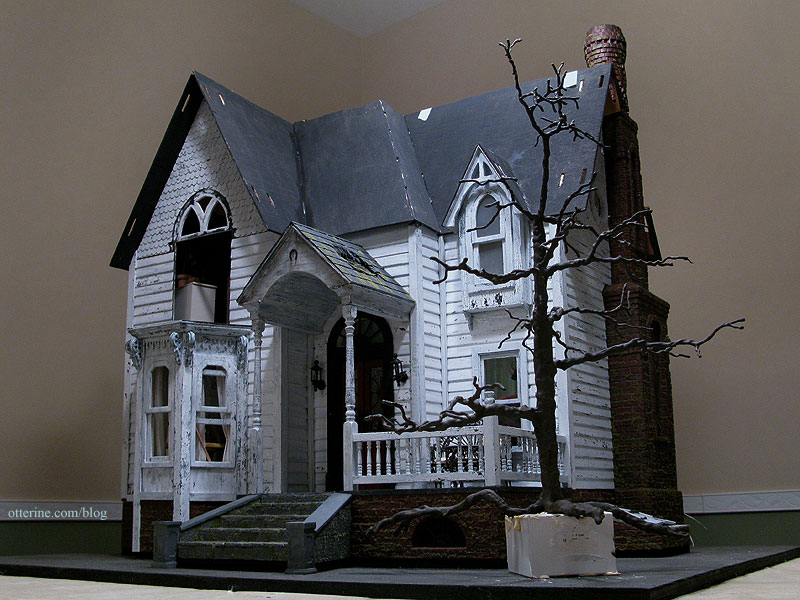
The tree will remain dormant for now, until I get to the landscaping part. I need to finish up the interior and shingle the roof first. I don’t need to be reaching over a tree trying to work! :D
Update: foliage added here.
Categories: Flowers, plants, and trees, The Haunted Heritage
July 1, 2012 | 0 commentsHeritage – The Tree, part 1
What’s a haunted farmhouse without a big ol’ creepy tree in the yard? :O
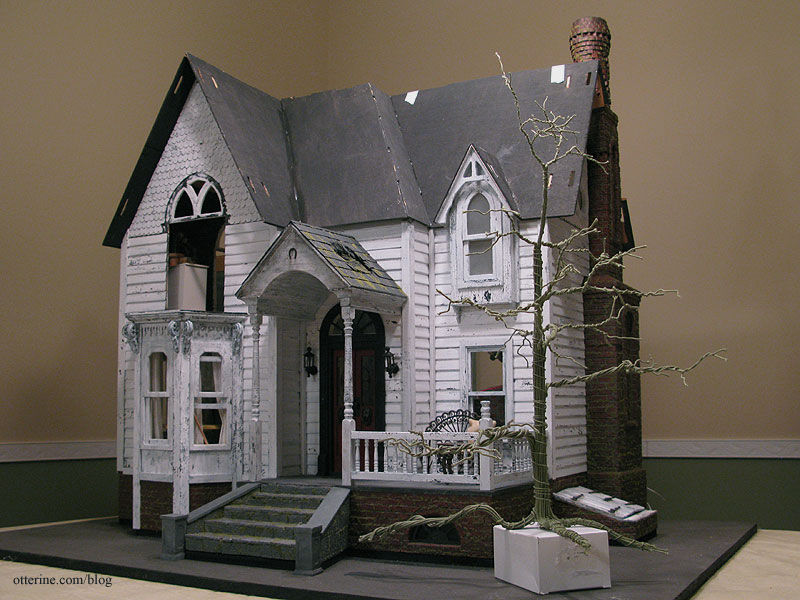
To build my tree, I used the tutorial from the DVD Master Miniaturists: Landscaping Primer with Diane Myrick. This whole series is just awesome!
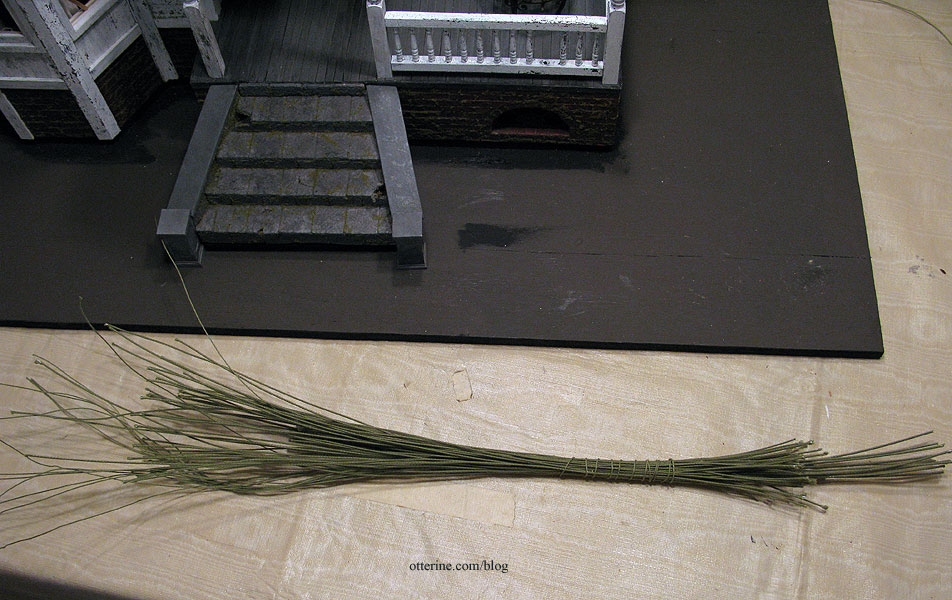
Diane made her tree from 40 pieces of floral wire, but I used 66 pieces: a mixture of 18″ pre-cut floral wire in 18 and 22 gauge. I supplemented the height with 14 pieces of 32 gauge floral wire purchased on a spool that I cut into 20″ lengths.
I wanted roots on mine, so I staggered the wires so that the thinnest wires were loose at the top and the thickest wires stuck out at the bottom. I wanted one long root, so I made sure I had a bundle for that as well.
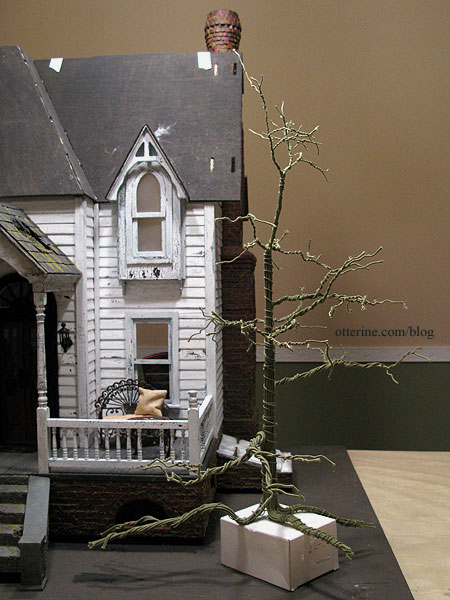
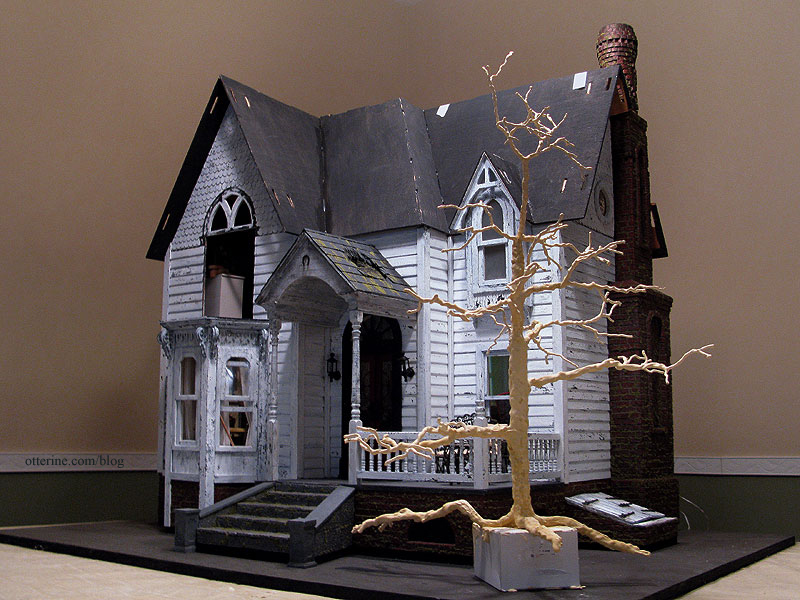
Diane’s tutorial shows a tree with foliage. Since the Heritage is set in the autumn, my tree will be mostly bare (I think). Ha ha. To that end, I spent a lot of time shaping the branches. I also left the house side minus a branch, which might have hit the portico at some point. ;]
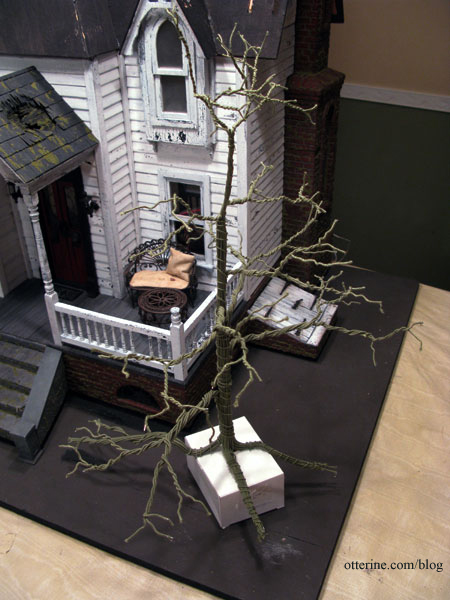
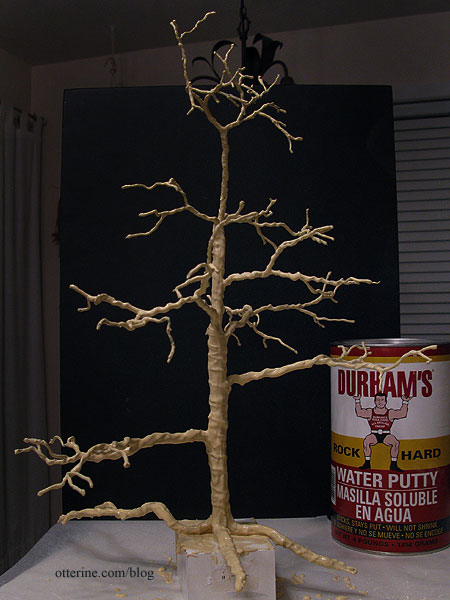
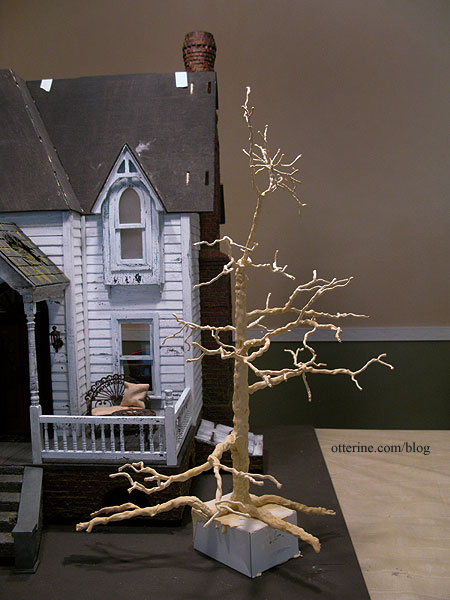
Here’s a nice aerial view of the tree, which stands 18″ tall. The tree has a spindle on the bottom that’s inserted into a box for right now. I will be adding a foam base when I get to the yard portion of landscaping for the tree to sit on, and the root tips will disappear into the ground.
In the tutorial, Diane used Durham’s Water Putty. I ended up with a 4-pound container of it from Home Depot. Did I need four pounds of water putty powder? Uh, no, but it was what was available locally (no shipping) and I had a Home Depot giftcard with enough on it to cover the modest $7.98 price tag. :D
Here it is just after the application.
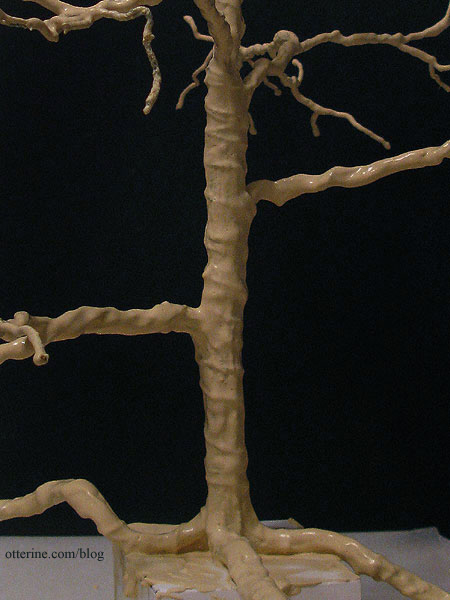
This was the first time I had worked with the putty and I found it to be a great material. The binding wires around the tree still show under the putty more than I think I want them to, so I might add another thin layer once this one sets. I do like the texture overall, though.
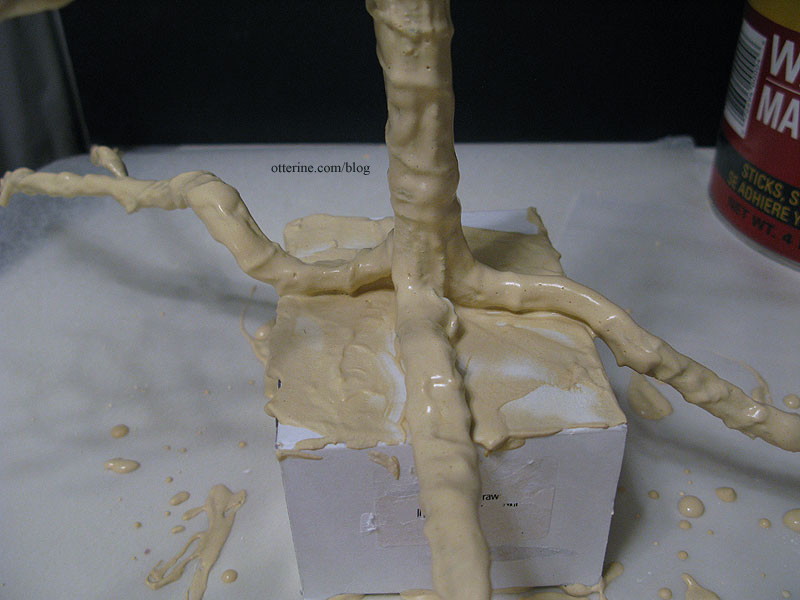
I scraped the excess putty from around the roots to keep them rounded and separate as the putty dried.
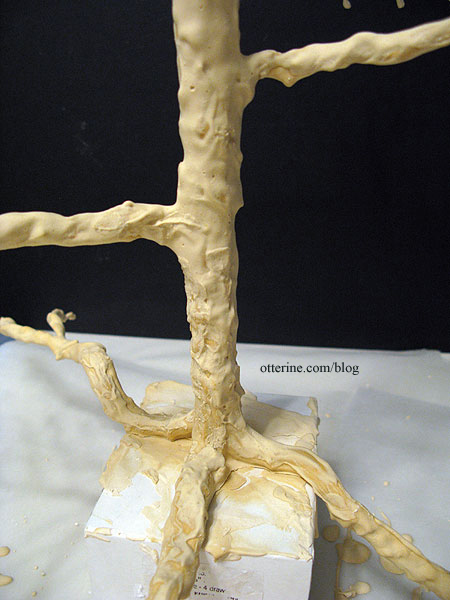
I left it overnight, and it dried hard and treelike! :D Some of the binding wires had softened in appearance but others still looked unnatural. I added another layer of putty over the areas that needed blending.
I had kept the cup from the night before, so I just mixed more putty in there. I used a fresh foam brush, though, because the other had hardened. You can’t put this stuff down the drain, so the cups and brushes you use must be thrown away in the trash.
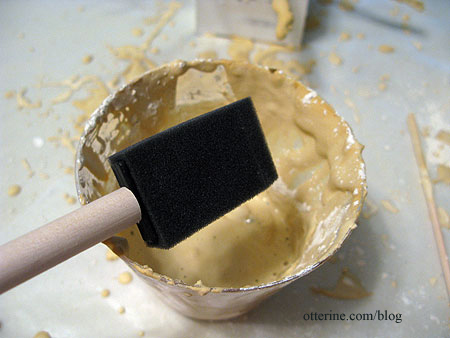
Mike had recently used this material for making river rocks, so I asked him about the properties of it, namely whether you could carve it. He sent me to the Durham’s Water Putty site, and apparently you can do all sorts of things with it.
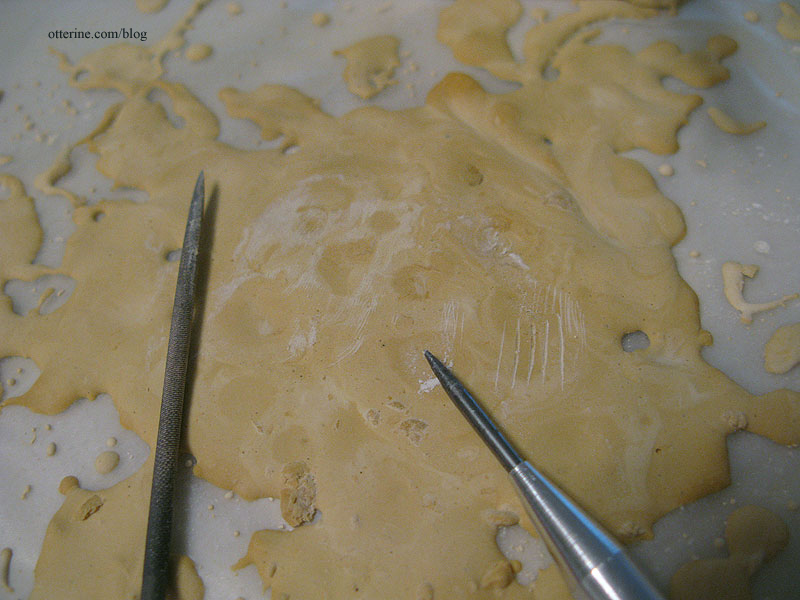
I used an awl and a file on the dried puddle from last night to see what it was like. It took the carved texturing very easily.
Even with the yellow coloration, it already looks like a real tree.
Next up will be painting once the second layer of putty dries.
Part 2 here.
Categories: Flowers, plants, and trees, The Haunted Heritage
June 30, 2012 | 0 commentsAfrican violets for my great grandma
My great grandma was a wonderful woman who lived to 104 years of age, nearly 105. She was warm and kind, the type of person you just loved to be around.
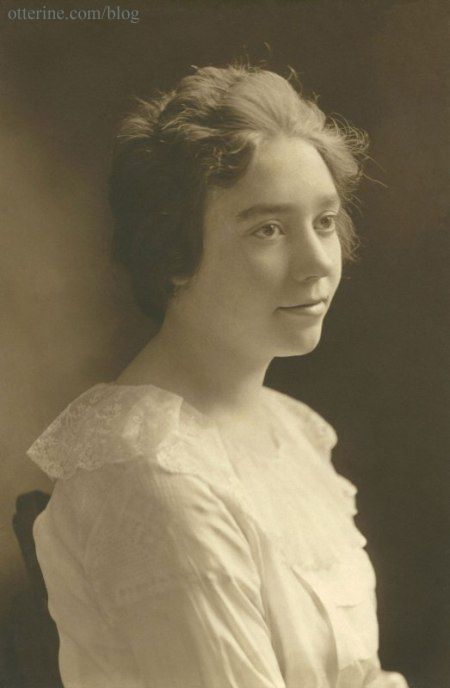
Mary Jane Bartlett (nee Watson) – 1900 – 2005 I’ve included her photo in miniature in Baslow Ranch along with a photo of her grandparents. :]
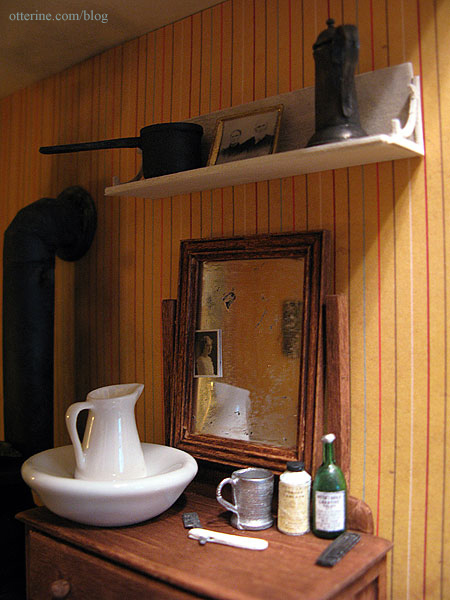
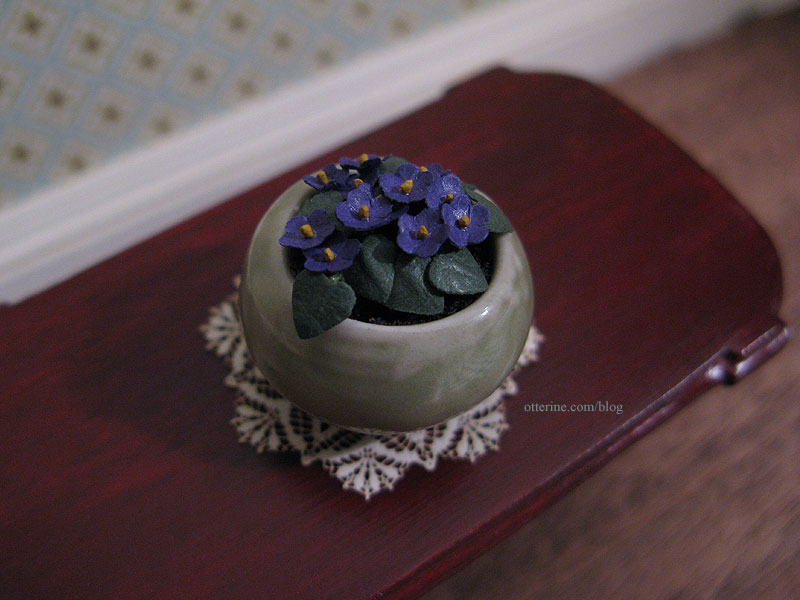
She was a very crafty person, crochet being her main creative outlet, and she taught me to sew when I was young. She loved African violets, so I bought a kit from Georgie at The Miniature Garden and made them up in honor of my great grandma.
The kit makes three colors of violets, but I chose the darkest purple since those are the ones my great grandma kept. Now, my camera just does not understand purple. It sees blue. I insist purrrrrrrrple, and it says baaaaalllloo. =shakes head=

I’ve had plenty of practice shaping tiny leaves, so I used the same technique for these using a ball stylus.

I added a bit of styrofoam inside the bowl and then glued loose tea over the top for dirt. The stems of the leaves and flowers are glued and pressed into the styrofoam core.

I’m not sure where in the Heritage these will end up, but for now I’ve photographed them on the coffee table in a separate vignette. The bowl might be a little big for this particular plant, but I really like it. This was my first time putting together one of Georgie’s kits, and I must say they are wonderful to work with!
I think my great grandma would have loved my miniature hobby. I definitely channel some of her warmth and energy into the Heritage build.
Categories: Flowers, plants, and trees
March 1, 2012 | 0 commentsBeautiful flower in a milk carton planter
I’ve added a little bit of life to the Heritage from a True2Scale kit. It comes with the glossy printed milk carton bottom, clay, synthetic soil, a stem and a little paper sheet with leaves and flower petals you color yourself. I chose to make mine a vibrant red orange, my favorite color. I added a bit of the soil included with the kit to the center of the flower as well as a light sprinkling of the foam I’ve been using as moss on the chimney.
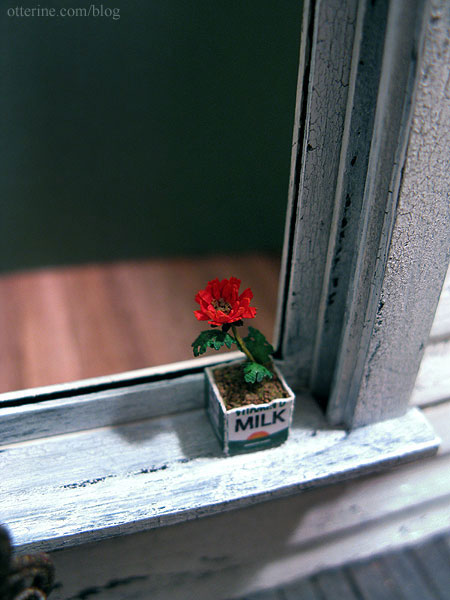
The kit was very simple to put together and the results are so realistic! :D Love!!!!

Categories: Flowers, plants, and trees
November 28, 2011 | 0 comments
NOTE: All content on otterine.com is copyrighted and may not be reproduced in part or in whole. It takes a lot of time and effort to write and photograph for my blog. Please ask permission before reproducing any of my content. (More on copyright)


