
Quilling
I recently inherited a large tub of quilling supplies that included tools, paper packs and kits. The art of paper quilling is a beautiful decorative art that can cross over into the miniature realm. My grandma Grace taught me this art when I was young.
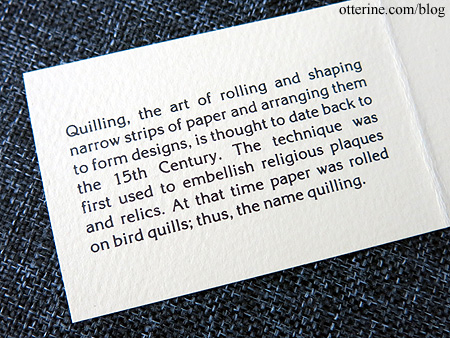
I always liked the miniature flowers the best, especially paper roses. Here’s a bowl of roses I made with grandma.

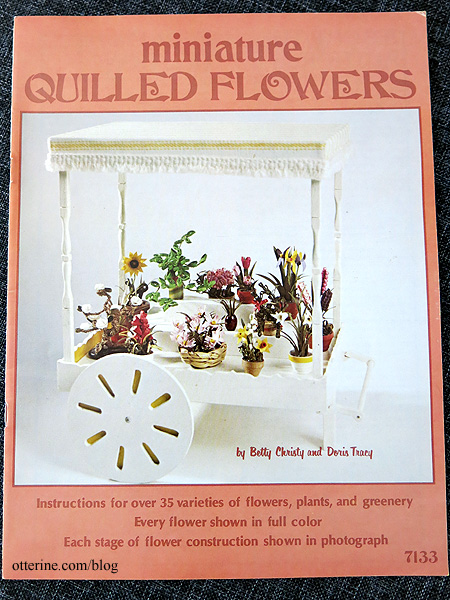
I remember this book from my art sessions with her. :]
I always loved the crimper tool since it looks like an owl. :D

I will be listing some of the decorative art kits on eBay, but these are the ones I am keeping for future projects.
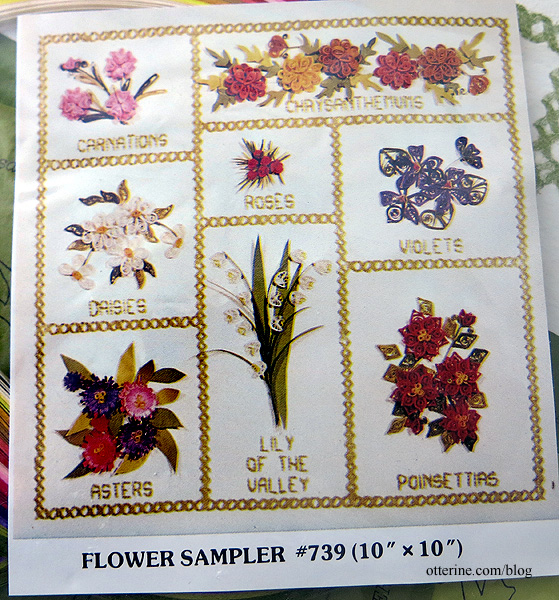
Some plants are more realistic than others, but I even like the appeal of the more artful ones.
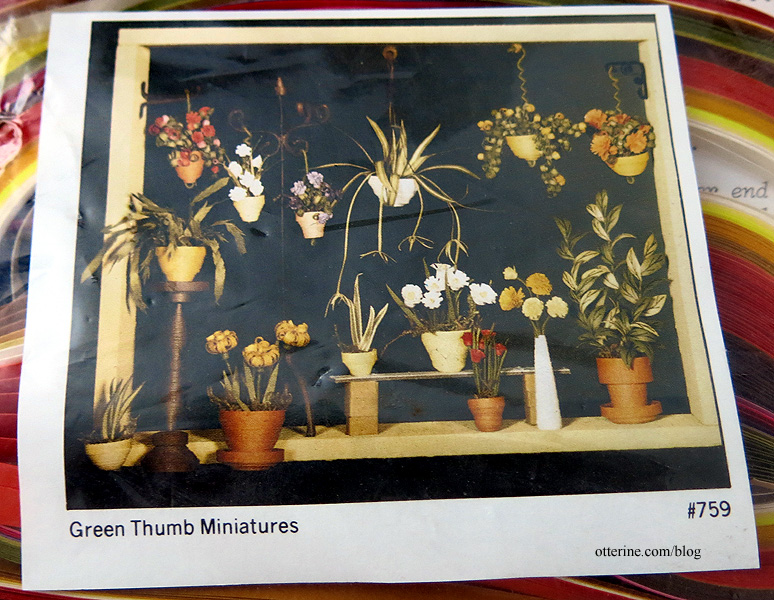
I haven’t opened them, but I think some of the kits have the materials to make the wall boxes, too.
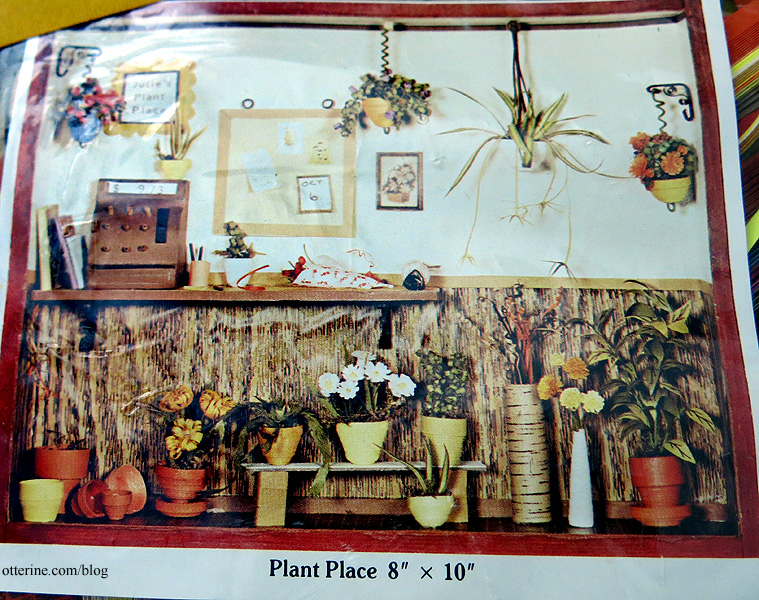
Even if I don’t make quilled paper bowls, the plants themselves will work well in miniature scenes.
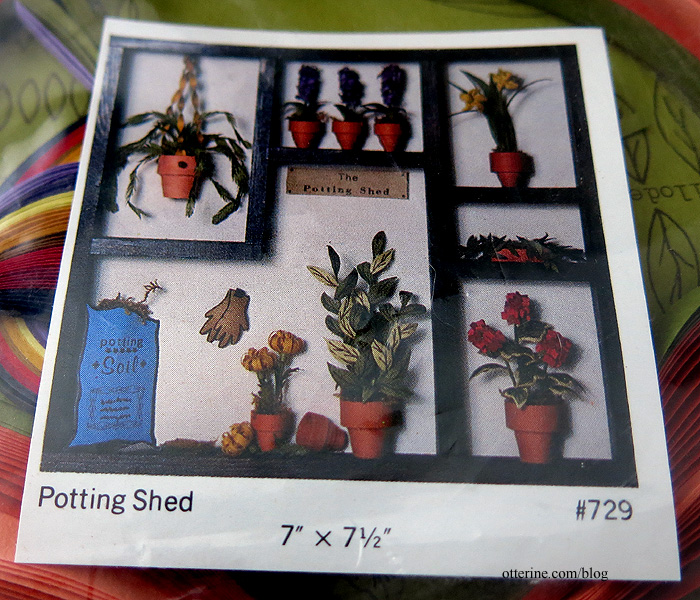
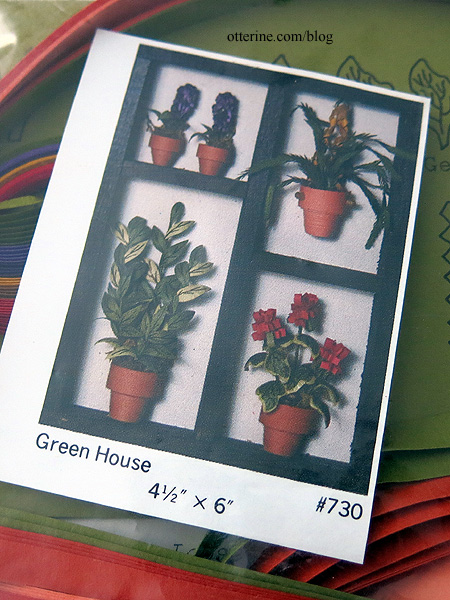
With my true miniature flower kit experience, I am sure these can be made into some great plants.
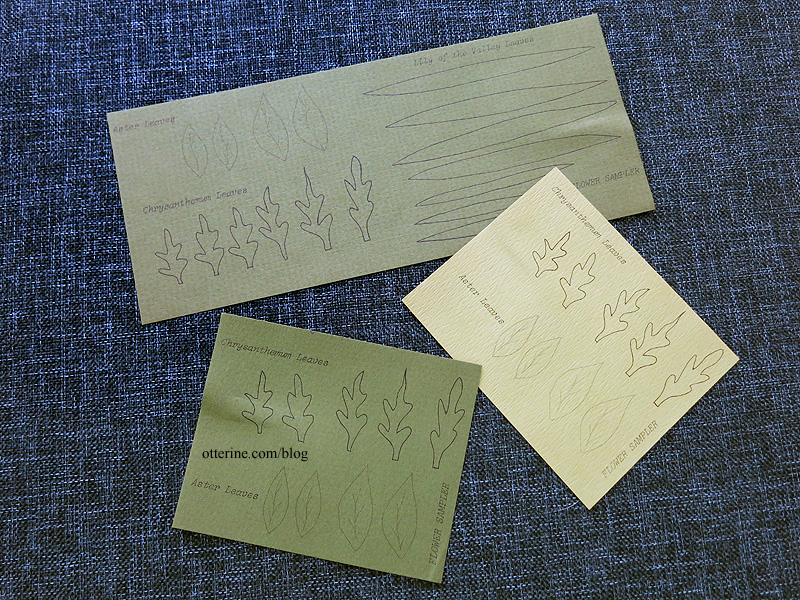
In addition to the kits, there were several sample packs of pre-drawn leaves. These will come in handy for miniature plants.
There were also loose instruction sheets for plants. I have plenty of color paper packs to make these in any combo I like.
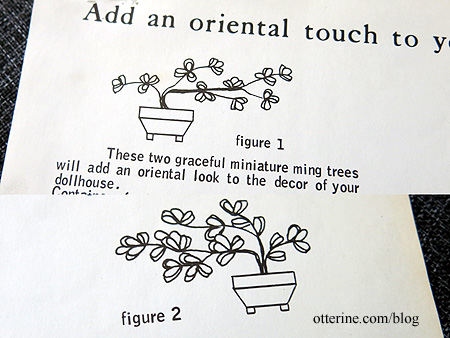
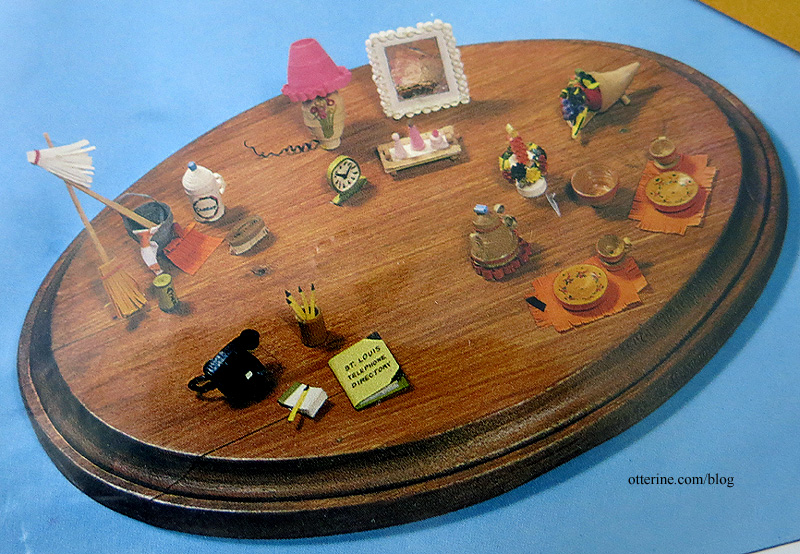
There were also two kits with miniature accessories.
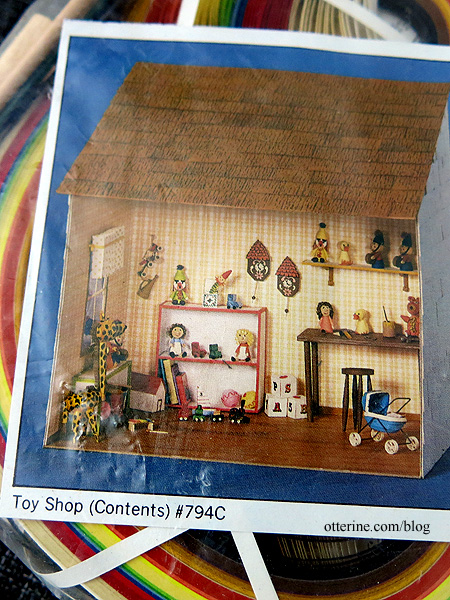
I think these are just paper kits without the minis included.
Categories: Flowers, plants, and trees, Miniatures
January 23, 2016 | 0 commentsRetro snake plant
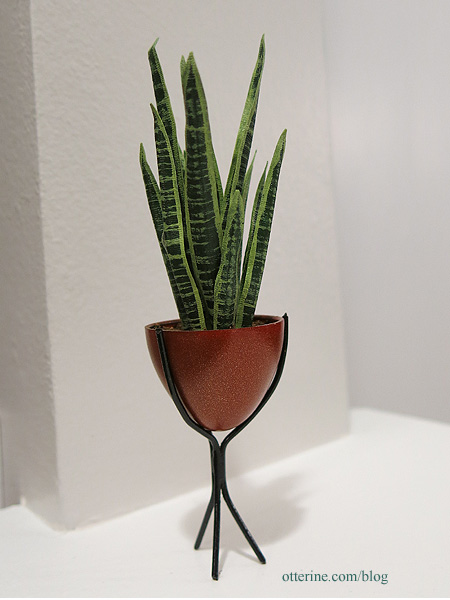
I made a smaller snake plant back in 2011. I used the technique found in a book on making miniature plants out of florist tape called Miniature House Plants by Ruth Hanke. In the book example, while the author did include painting the rough stripes of the plant, she didn’t include the wide light green outer edges so I added those based on the real deal. :D I then sealed the leaves with Delta Ceramcoat Satin Varnish.

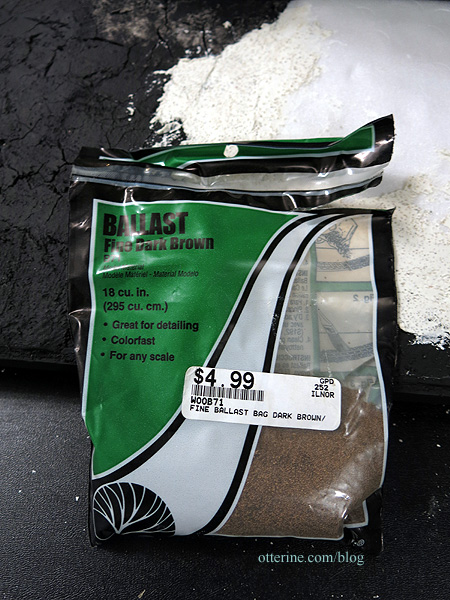
Last time, I used tea for the dirt. This time, I used fine ballast from Woodland Scenics and used Scenic Cement to keep it all together.
The pot and stand came from Mod Pod Miniatures, but I sprayed the bucket a deep metallic orange.
Categories: Flowers, plants, and trees
December 11, 2015 | 0 commentsMilo Valley Farm – landscaping – flowers, part 1
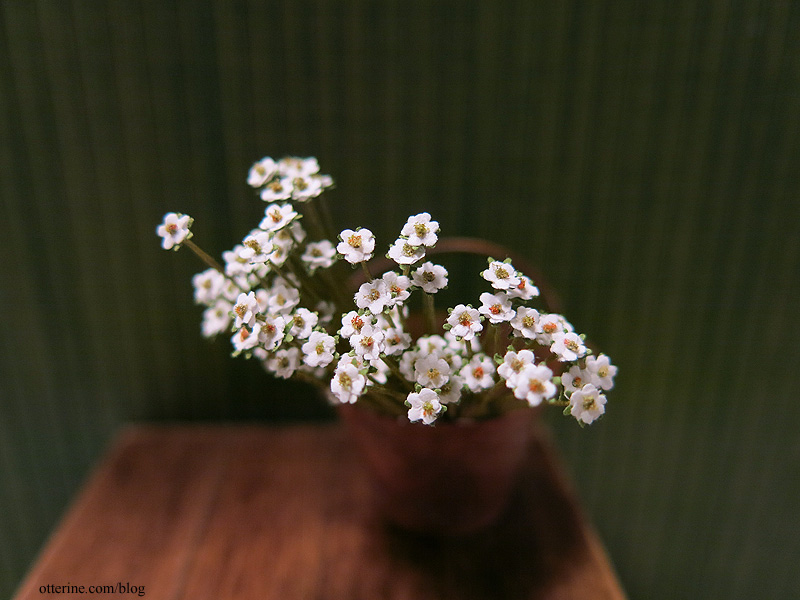
I’ve got something up my sleeve which will require a lot of tiny white flowers. *a lot* I’m starting with tiny pre-cut impatiens from Small Talk (no website, purchased at the local shows). They have some imperfections in punching, but they will work well overall. I’ll clean them up a bit as needed.

I also punched out tiny green stars using a Martha Stewart multi star punch.

Keli recommended some green origami paper for the calyxes. It’s a great paper, slightly textured and just the right weight. You get four pages each of 12 shades of green. (As an Amazon Associate, I earn from qualifying purchases.)

My punch makes multiple sizes of stars, but I saved the larger ones for projects down the line. I got 86 calyxes from one 6″ x 6″ sheet, which was a pretty good yield considering I used only the smallest stars.

I shaped each flower with a stylus.

I poked a hole in each tiny flower with a sewing pin. I found it easiest to put the flower on a paper towel and poke the pin through.

I cut wire stems 2 inches in length. This will give me room to trim when I put them in place. The wire is very thin, purchased at a local miniature show.

I topped the stem with a tiny drop of glue then dipped into fine landscaping foam.

The foam is from A Little More in Miniatures, purchased at the local miniature show.

I put two flowers on each stem, followed by one green star to form the calyx. I’ll worry about leaves later.

This will be one of those side projects to do until I’m ready for these. These are tiny, tiny, tiny, and I can stand to make only so many at a time. :D

I now have 81. It doesn’t look like a lot, though, so I will need to keep going. :]
Categories: Flowers, plants, and trees, Milo Valley Farm
July 20, 2015 | 0 commentsMore leaves!
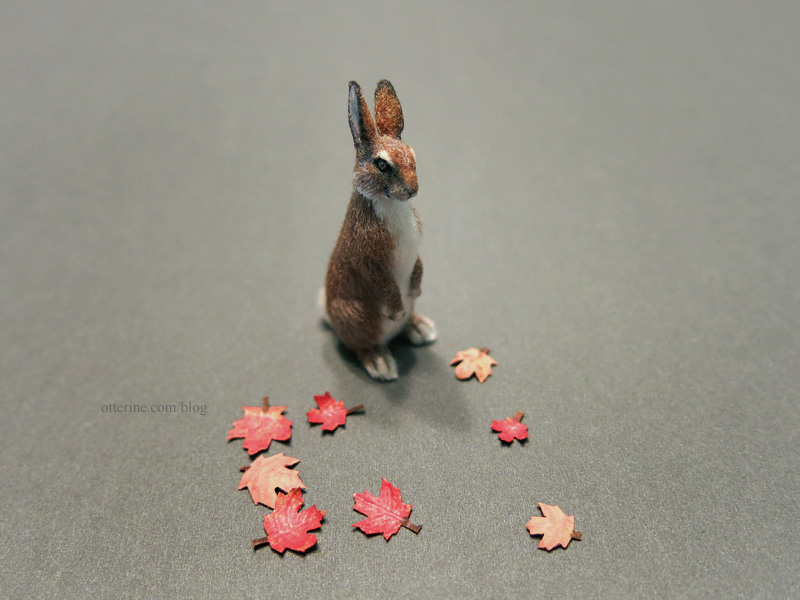
I’ve made leaves from scratch in the past, but this time I am using a different approach. I bought two packets of pre-cut maple leaves in brown paper. These are by Marcy Jaffe, but I bought them from a secondary seller on eBay. I decided to make up one packet, which includes two sheets, to start.

The instructions tell you to stipple on paint to add depth, so I used Calico Red by Americana, making several passes with lightly added paint.

I added Camel to the red for the reverse side to make the backs of the leaves pale pink.

I colored each stem while the leaves were still on the frame using thinned brown paint.

I then cut the leaves from the frame. I think this is the right amount for the small lawn around the barn, so I will keep the second packet in my stash.

I began shaping them with a stylus, adding veins as well. I like to use magazines or catalogs since they are just soft enough to allow for good veining and they can transfer some ink onto the backs of the leaves. That little pop of color helps define the leaves more. And, then I can just recycle the magazine once I’m done.

I haven’t officially decided that this will be an autumn landscape, but in mini-land you can have autumn leaves and blooming flowers all at the same time. I just think it will be nice to have some color on the scene.
And, no, I don’t have plans to build another maple tree at this moment.
Categories: Flowers, plants, and trees
July 4, 2015 | 0 commentsMini seed packets — shake, shake, shake
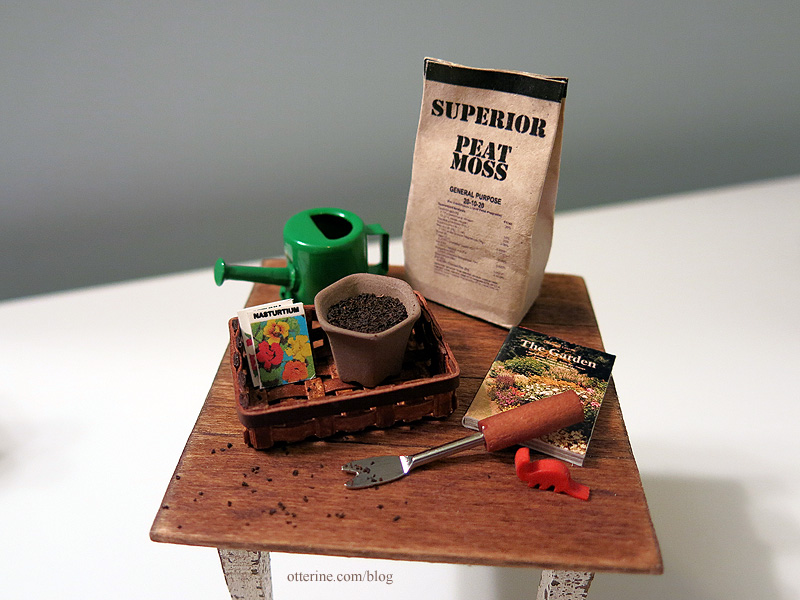
I bought a package of pre-printed seed packets by Farrow Industries at one of the local shows.
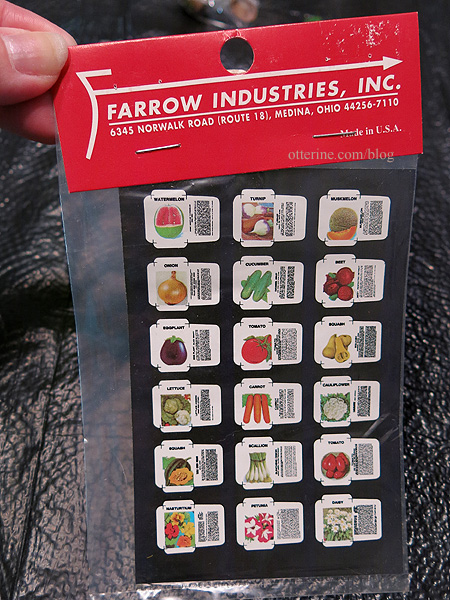
These were made before laser cutters became all the rage, so you have to cut them out individually. I used scissors to do this part.
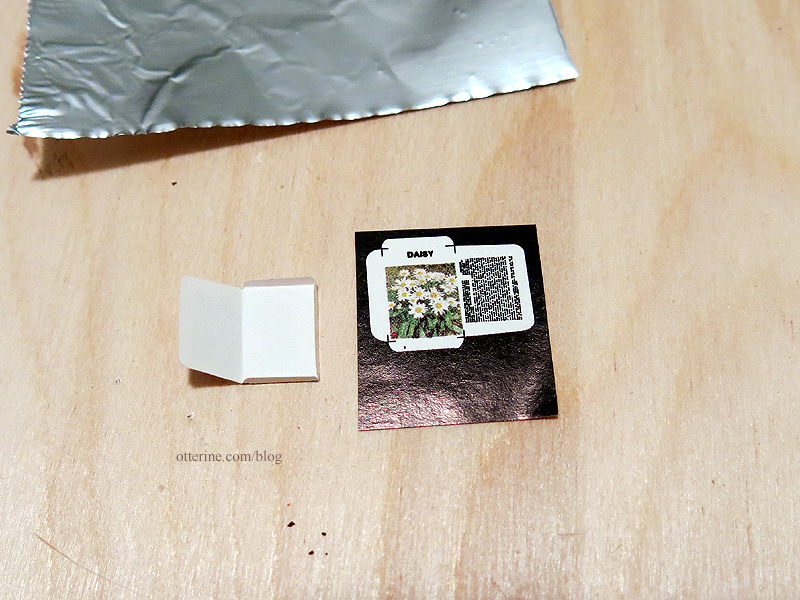
I scored lines with an X-Acto blade, using the small guidelines printed in the design.
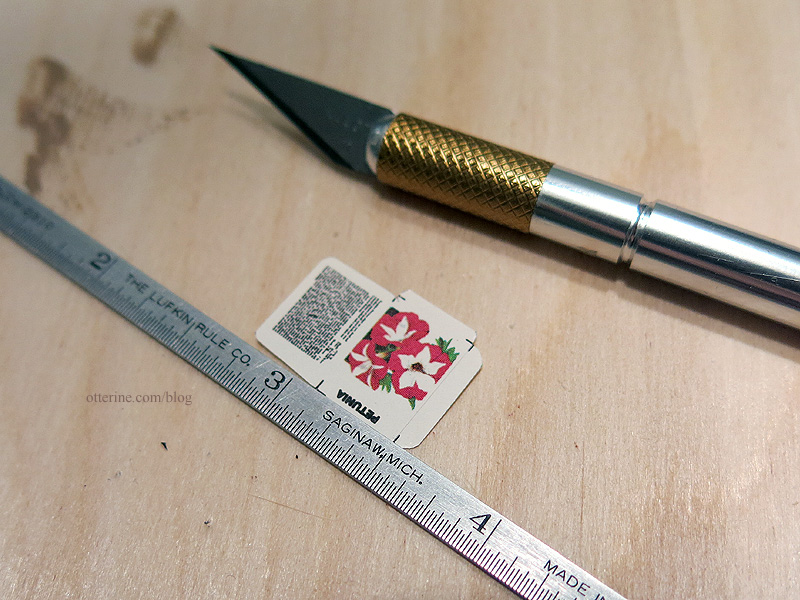
I added a little something before gluing them closed. When you shake, shake, shake the package, it sounds like the real deal! Little “seeds” rattle inside the package.
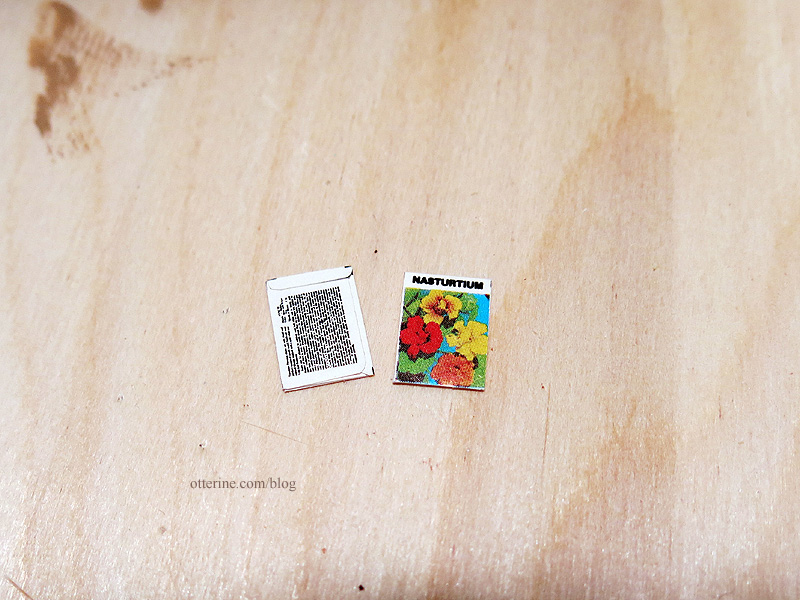
These are wonderfully detailed. The sheen of the paper is very much like real life seed packet material, not too glossy.
Categories: Flowers, plants, and trees, Miniatures
May 19, 2015 | 0 commentsNew mini delights
In the midst of all the madness of completing The Artist’s Studio, I didn’t have the chance to write about some recent mini acquisitions and gifts.
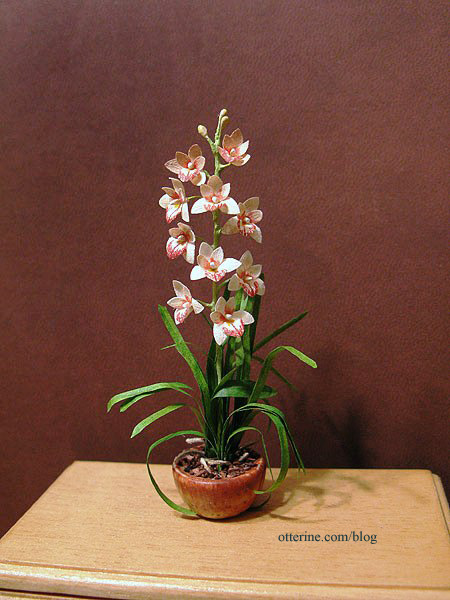
April sent me the most fabulous orchid as a gift. I’m blown away by her mini green thumb. It’s a stunning plant! :D Thanks so much, my friend!
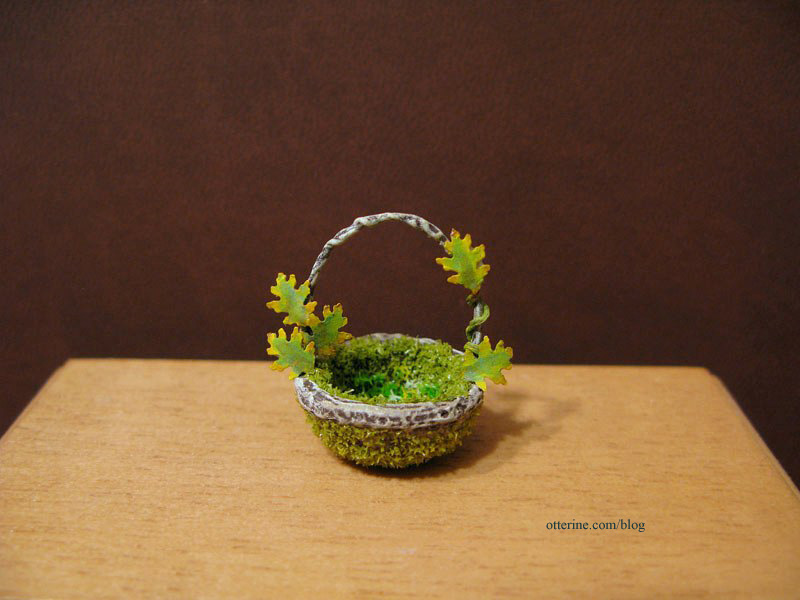
I bought two items from Nikki Rowe, who has unfortunately decided to stop selling miniatures for the time being. The first item is a lovely little basket. It’s calling for a chocolate bunny, I believe.
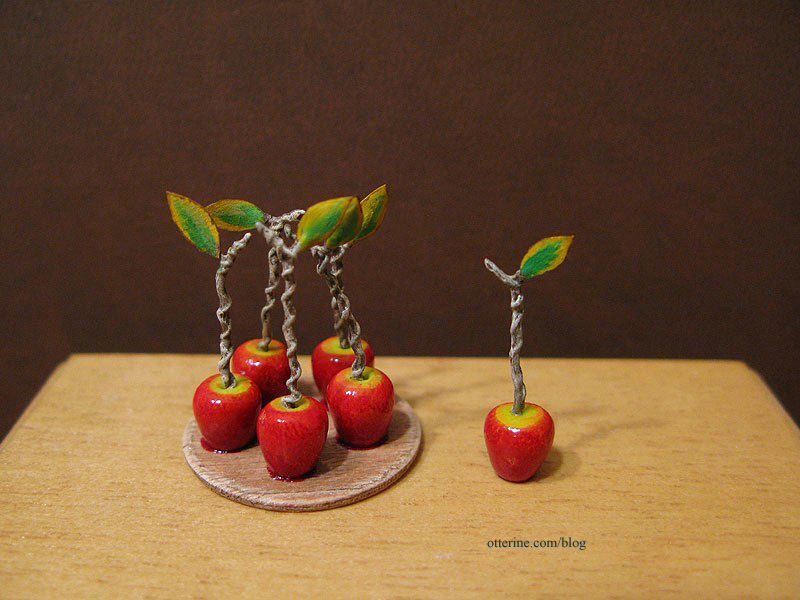
The second is a set of candied apples, one of which is loose to display however I like. :D They are wonderfully made items…very much out of a fairy tale.
I also caved in and bought the Art Nouveau Mantle Clock by Halls Miniature Clocks. So beautiful!

Categories: Flowers, plants, and trees, Miniatures
May 7, 2013 | 0 commentsHeritage – The Tree, part 3
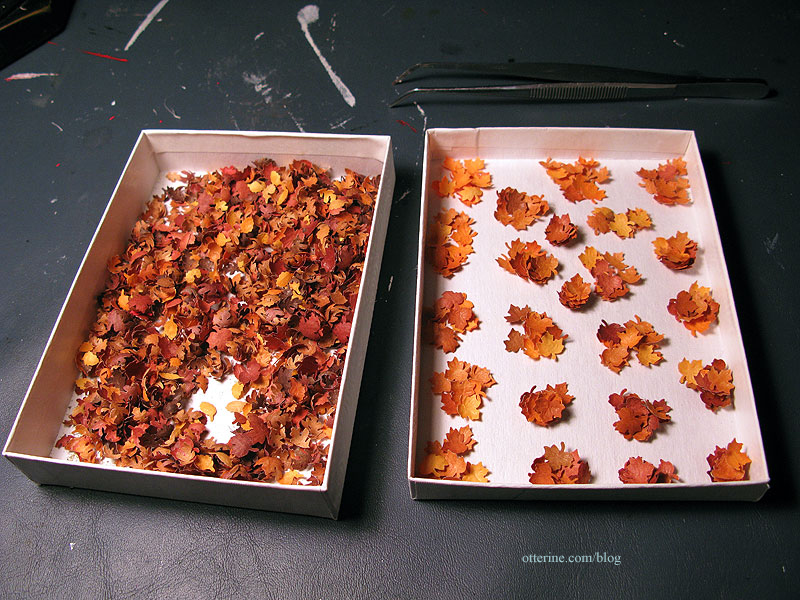
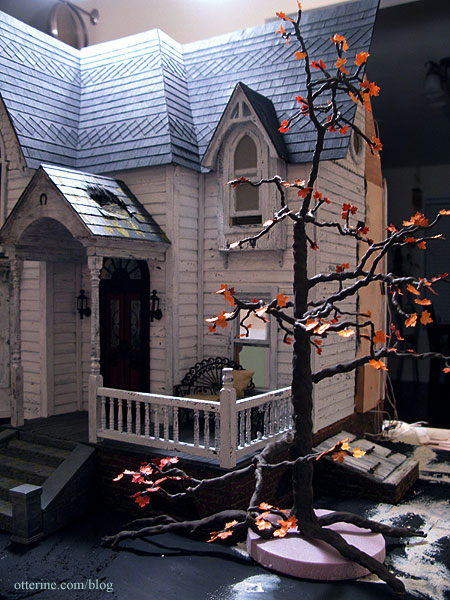
Continuing work on The Tree. After building the dogwood tree, with its individual leaves and flowers, I didn’t think The Tree would stand for foam foliage. Plus, I will be scattering the realistic leaves I took so much time to make, so the leaves on the ground should match those on The Tree.
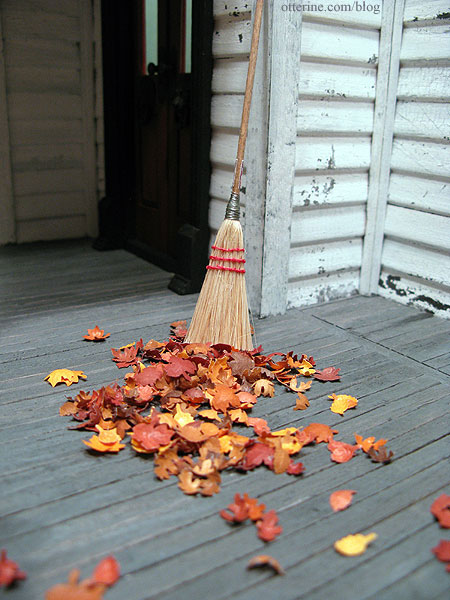
Instead of making more right from the start, I filtered out the maple leaves from the bunch I already had. There are 88 branches, so I figured 1-3 leaves per. Mid to late October often sees sparse trees with more leaves on the ground than on the branches.
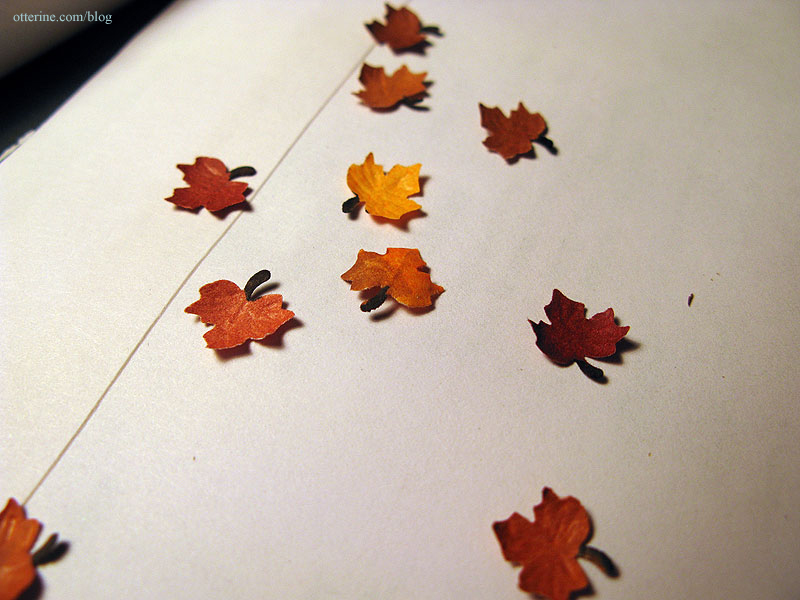
I colored the stems on these leaves with a brown marker so they would blend in more with the branches. I’ll leave the ones for the ground as is since those look better without the darker stem.
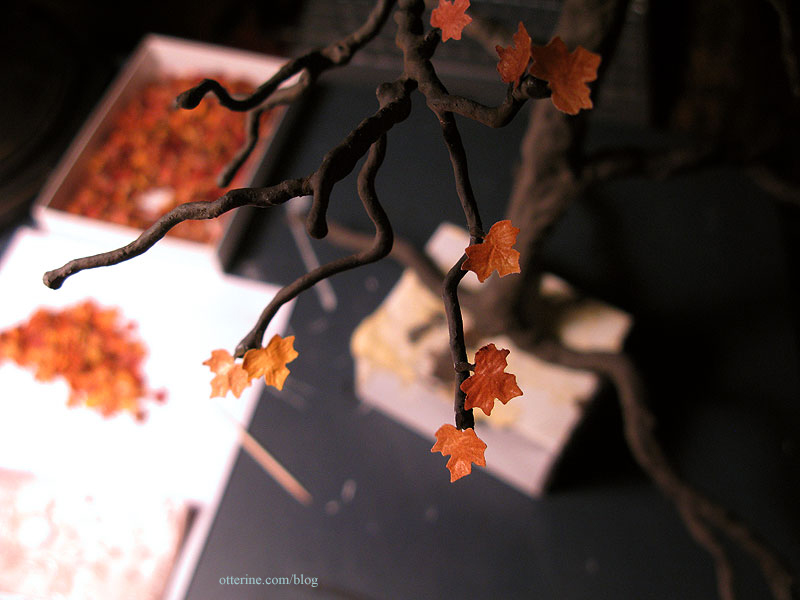
I glued them on individually, just enough to give The Tree a pop of color and some life. Having leaves on the ends of the branches also disguises the non-tapered ends resulting from the water putty process.
This old tree isn’t dead or dying by any means. It’s just ready for its winter slumber. zzzzzzzzzzzzzzzzz
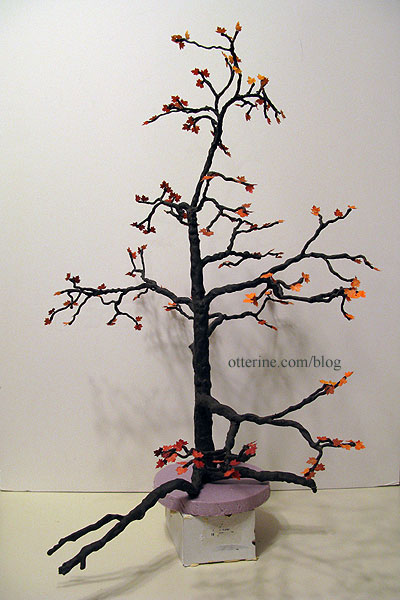
Once I have the roof finished, I’ll plant it and sculpt around the roots. :]
Categories: Flowers, plants, and trees, The Haunted Heritage
October 11, 2012 | 0 commentsMaking pretty plants
The one on the left is a verbascum plant by The Miniature Garden, and the one on the right has three daisies by Bonnie Lavish with some greenery from A Little More in Miniatures.
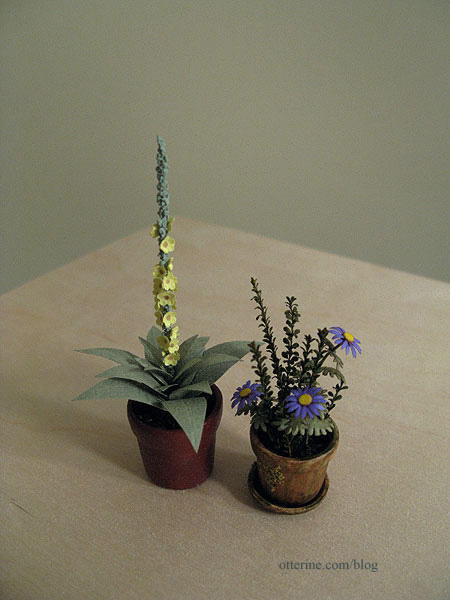
I’ve made the daisies before. They are quick and easy to put together. The aged and mossy pot was purchased.

The verbascum plant took longer, but the results are lovely. The kit had a lot of steps but it was very easy to follow and didn’t take as long as I thought it would. I put it in one of the terracotta pots I painted and glazed. Both plants have styrofoam inserts under Earl Grey tea dirt.

I made more plants. From left to right:
– Bonnie Lavish pansies
– Lavender and Erica moss from The Miniature Garden
– Bonnie Lavish cushion mums
– Greenery (yes, I am aware it’s orange) from A Little More in Miniatures
As it turns out, they were too crowded in the planter so one gets to sit on the ground. :D

I love minis and mini-ing. :D But, the best part of starting this creative outlet for me has been the friendships I’ve discovered, from all around the world. Some of you I know only through our respective blogs, some of you I know through forums as well. Some I’ve conversed with outside of the online communities and some I’ve met and formed friendships in person.
I have one such friendship with Lyssa. She and I met through the mini forums, and she is one of the best people I’ve met in my life. So young and so devoted to her young children, she is an inspiration to me. And, when I am feeling blue, she cheers me up and helps me get back on my feet. She even sent me a care package some time ago with books, movies, tissues, chocolate, Scotch and even some minis in need of makeovers. It made a blue period in my life better, and I treasure the friendship minis have brought to me.
One of the minis was this gaudy and rickety brass thing we both had a laugh about. I am not sure if it was meant as a crib or shelf, but I saw it as a planter. After a makeover, it became an old rusty plant stand. Thank you, Lyssa, not only for the minis and Scotch but especially the friendship!

Categories: Flowers, plants, and trees, The Aero Squadron Lounge
August 3, 2012 | 0 commentsDogwood Tree
I am following the same DVD tutorial as I did for the Heritage tree: Master Miniaturists:
Landscaping Primer with Diane Myrick. This tree, however, is fuller, shorter and much less
knobby. Here’s the tree after adding the water putty and paint washes. The tree stands just under 11″ tall.
Who’s that there? Looks like Grahame the badger has wandered over. :D

Instead of using the foliage techniques used in the DVD tutorial, I wanted to use a technique to make a dogwood tree that would allow for close-up photos. This is what the flowers look like on a real dogwood.

Image from James Hawkins I decided to use scrapbooking punches to make flowers and leaves. I have just under 100 branch tips on my tree, so I punched out 400 white flowers using the mini Hydrangea punch by Punch Bunch and colored each of them individually with markers. I ended up dumping about 20 or so for bad marker wielding. :D
I had two leaf choices – both with multiple leaves from each punch. This is the small ash punch by Punch Bunch with flowers.

This is the small tri leaf punch by Punch Bunch with flowers.

Both leaf sprigs are 5/8″ high, but the tri leaf sprig seems to work better overall in scale and shape. I will shape these to add vein texture and then glue the flowers and leaf sprigs to the tree skeleton. I’m also planning to add some dimension to the flower centers.

I knew I needed lighter color leaves, but none of my markers were the right shade of green. I ended up painting the strips of paper which resulted in a slight variation of greens. I think that’s okay considering it might add to the dimensionality instead of having a uniform green as the backdrop for the flowers.
Here they are…165 leaf sprigs. I’m not sure if I will need more flowers and leaves, but it seemed a good place to start.

I colored each stem with a brown marker. With the green paint base color, it turned the stems greyish green…perfect for matching the trunk. I then added veins to each leaf on the sprigs with a ball stylus. I had a few leaf casualties, but I kept the sprigs and the loose leaves.

The middle of a dogwood flower is actually a cluster of smaller flowers. To add dimension to mimic these clusters, I glued landscaping material by Woodland Scenics to the centers of my shaped flowers.


I glued flowers to a leaf sprig and then glued that assembly to the tree branch using Aleene’s Fast Grab. I usually use Aleene’s Quick Dry for just about everything, but this is a thicker glue that does what it says…it grabs fast! :D


Okay…164 more to go!

I finished putting on as many leaves and flowers on the dogwood tree as I thought looked good. I have a bunch left over, which is fine since this tree may need touching up from time to time and I won’t have to start the process of making new leaves and flowers from scratch.

The bench is by Phoenix Models. The “kit” comes with two white metal bench ends that you can paint, and you supply the wood in whatever length you wish. It’s a perfect solution when you need a completely custom size bench. It’s a sturdy little piece once you manage to wrangle all the wood ends into place.
I used some leftover Dura-Craft trim wood for the seat slats and skinny sticks for the back rest, stained with Minwax English Chestnut. I cut the boards 3.25″ in length, so the seat ended up at 3″ wide — a perfect loveseat under a pretty tree. :D

From the back, the tree looks a little fuller since there are more branches on this side. I had made it sparse on the front since I planned to have a bench there from the beginning.
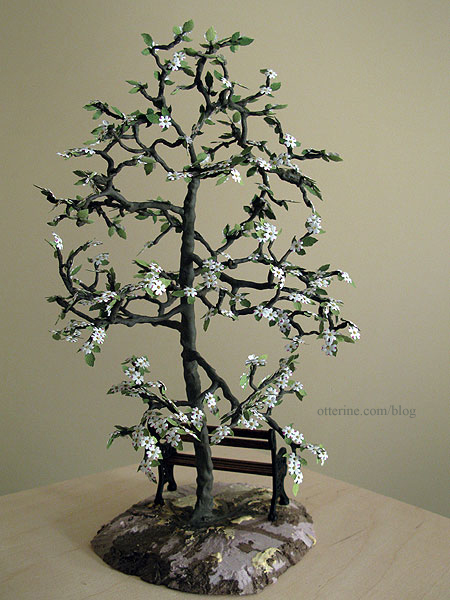
It looks fullest from an aerial view (and in person since you can walk around it at the right level).

Overall, I love the way it turned out. It’s full but still allows you to see the building behind it.
Categories: Flowers, plants, and trees, The Aero Squadron Lounge
July 19, 2012 | 0 commentsHeritage – The Tree, part 2
Continuing work on The Tree. I had considered carving bark texture into the putty but decided it was probably more work than it was worth. Instead, I did a quick sanding over the main trunk with 60 grit sandpaper. This removed the obvious smoothness and provided a nice texture. I also cleaned up any excess putty from around the roots.
Diane says most trees are more grey than brown, and when I was out today I noticed what she was talking about. :D
I started with an undiluted mix of Neutral Grey and Traditional Burnt Umber, both by Americana. This initial dark coat of paint really brought the tree to life!
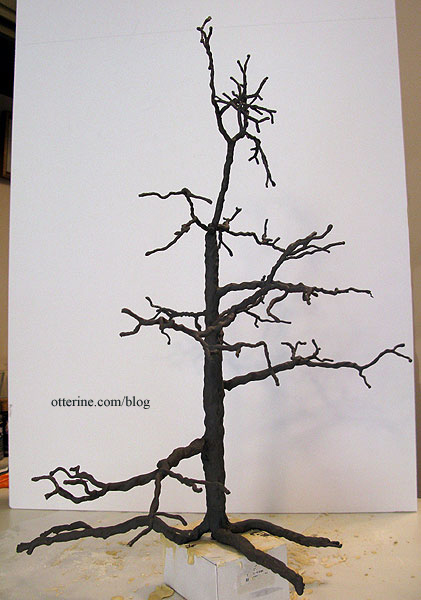
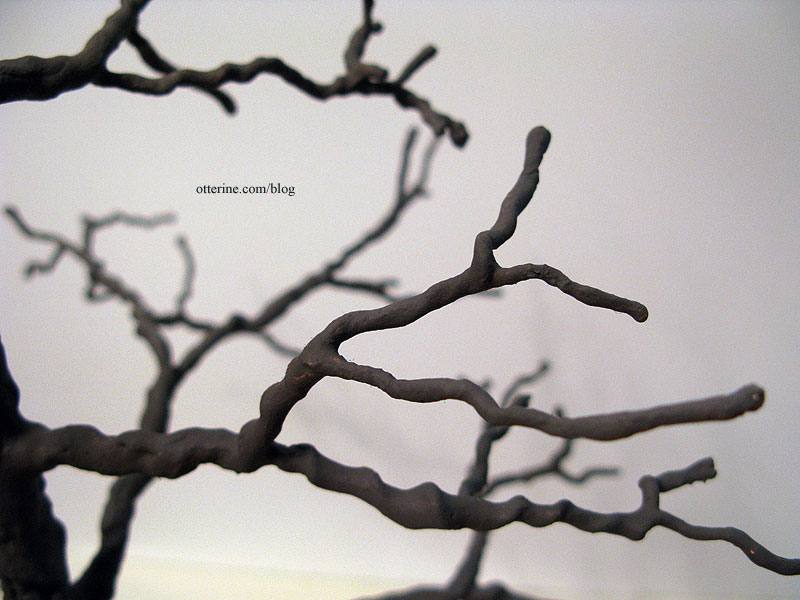
The branches twist and turn just like the real thing. I stippled the paint on to create additional texture which you can see here on the branches.
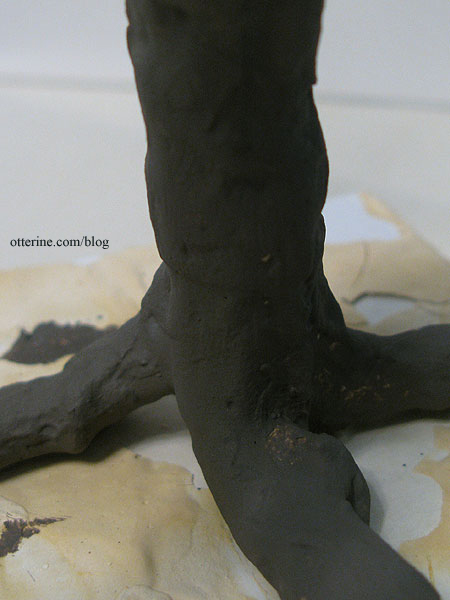
I think the lower trunk and root structure turned out great! :D
The next few steps were messy, so I didn’t take photos throughout. I did my second coat of paint with an undiluted mix of Asphaltum and Neutral Grey by Americana, with a dash of black. It darkened the tree too much. I followed that with a heavily diluted wash of Traditional Burnt Umber. It made the tree too brown. I followed that with a heavily diluted wash of Neutral Grey and Traditional Burnt Umber (like my first coat of paint), and that seemed to set things right. All these layered washes bring out a depth not achieved with a single application of regular paint.
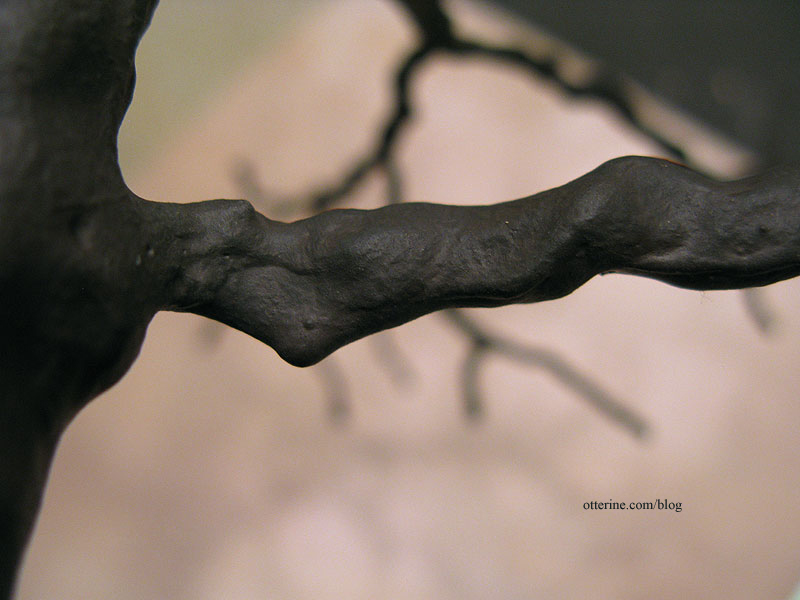
On some of the bare portions, I scraped away where branches have fallen from the tree during its lifetime.
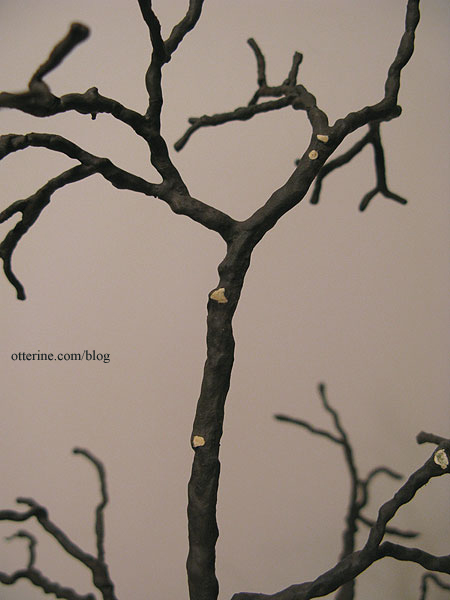
Some I made larger than others, carving out an actual hole.
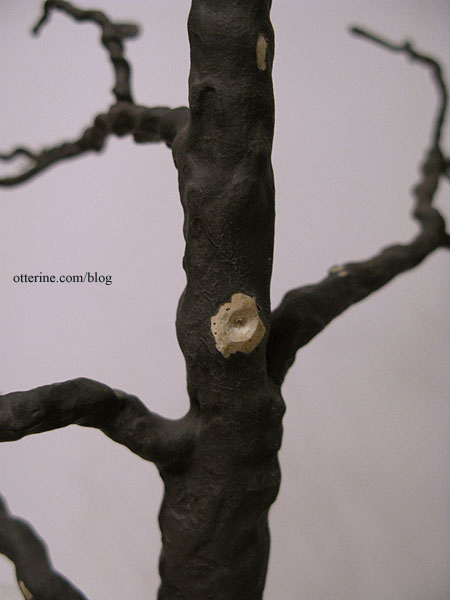
I then painted these individually to darken them. Now, if I wanted it to look like the village just came through to trim the trees along the street, I could have left them. :D
I love the texture on this tree! I am so pleased with the results.
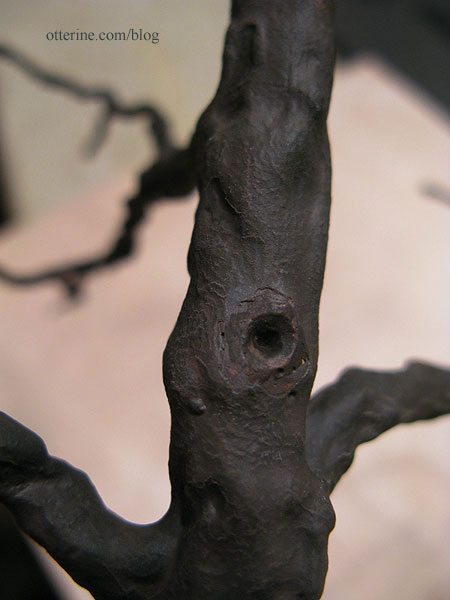
Love, love, love it!
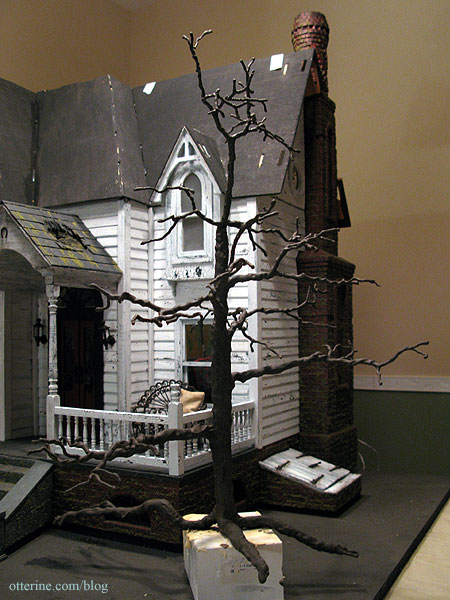
And, like any good haunted tree, you should be able to see faces in it. :O
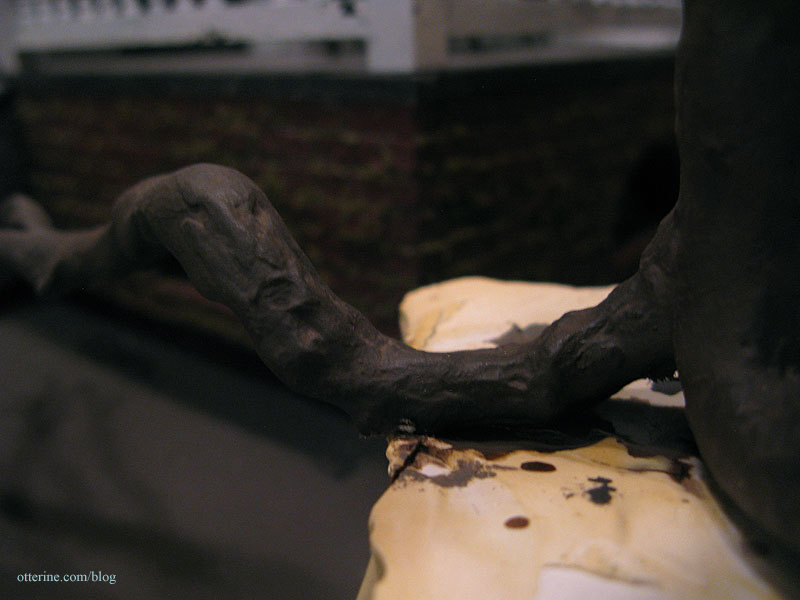
The tree will remain dormant for now, until I get to the landscaping part. I need to finish up the interior and shingle the roof first. I don’t need to be reaching over a tree trying to work! :D
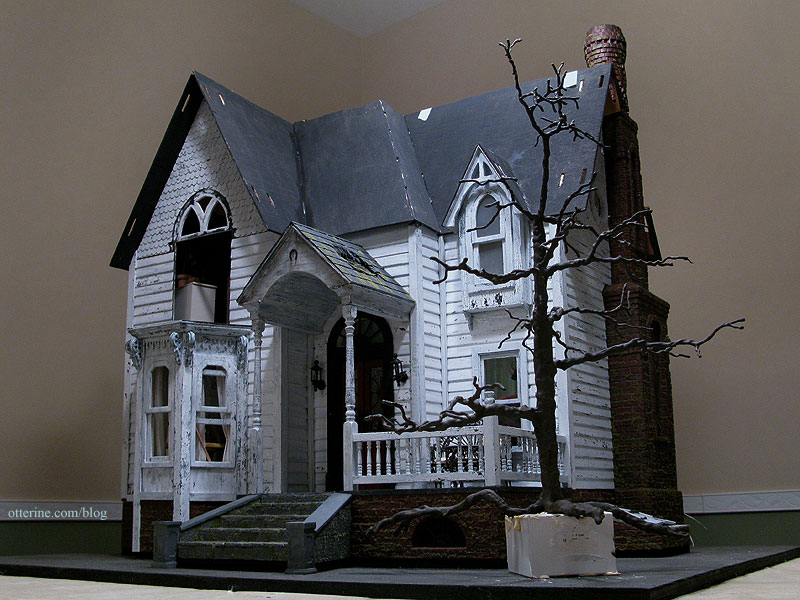
Update: foliage added here.
Categories: Flowers, plants, and trees, The Haunted Heritage
July 1, 2012 | 0 commentsHeritage – The Tree, part 1
What’s a haunted farmhouse without a big ol’ creepy tree in the yard? :O
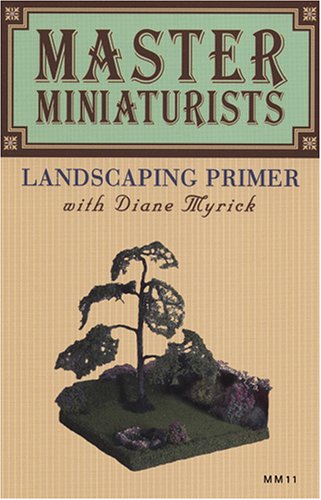
To build my tree, I used the tutorial from the DVD Master Miniaturists: Landscaping Primer with Diane Myrick. This whole series is just awesome!
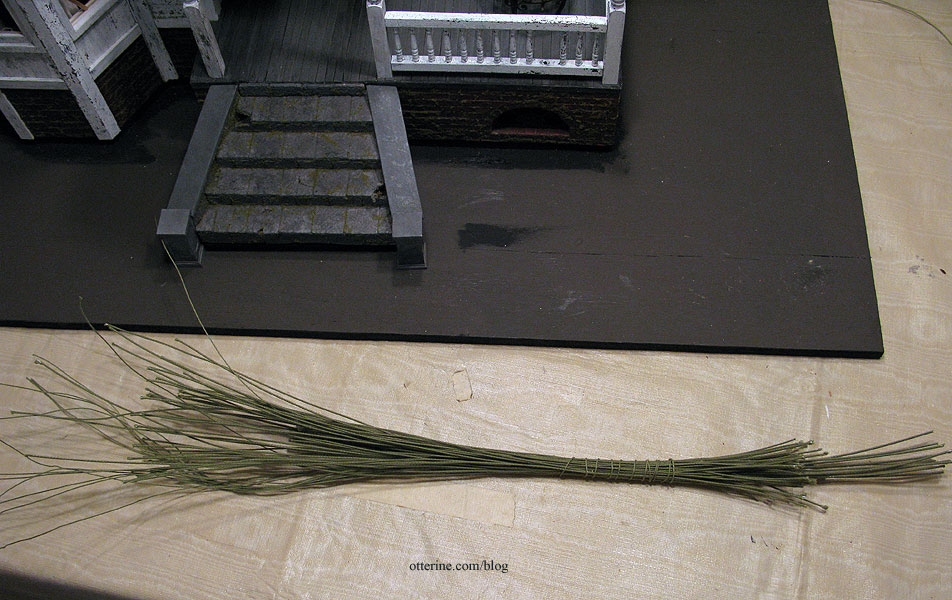
Diane made her tree from 40 pieces of floral wire, but I used 66 pieces: a mixture of 18″ pre-cut floral wire in 18 and 22 gauge. I supplemented the height with 14 pieces of 32 gauge floral wire purchased on a spool that I cut into 20″ lengths.
I wanted roots on mine, so I staggered the wires so that the thinnest wires were loose at the top and the thickest wires stuck out at the bottom. I wanted one long root, so I made sure I had a bundle for that as well.
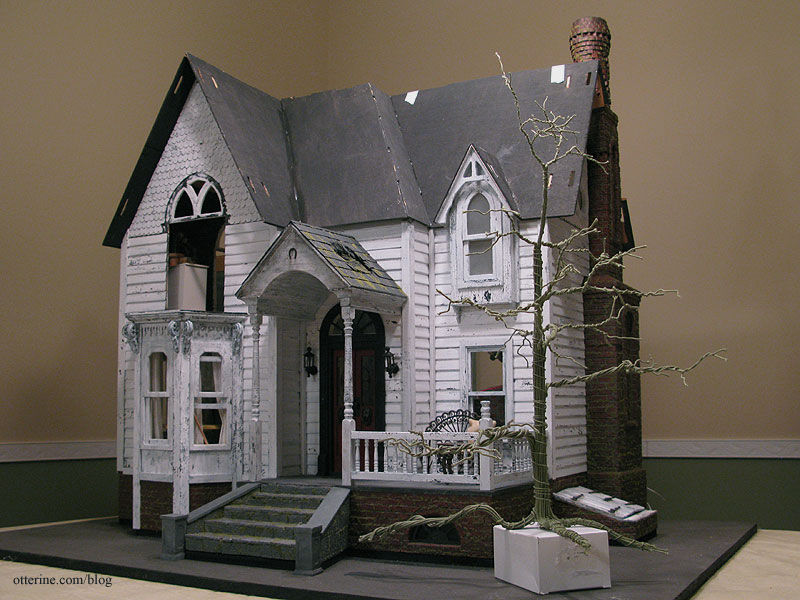
Diane’s tutorial shows a tree with foliage. Since the Heritage is set in the autumn, my tree will be mostly bare (I think). Ha ha. To that end, I spent a lot of time shaping the branches. I also left the house side minus a branch, which might have hit the portico at some point. ;]
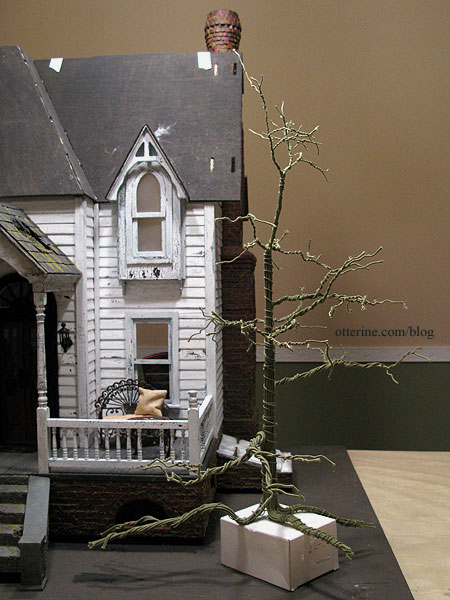
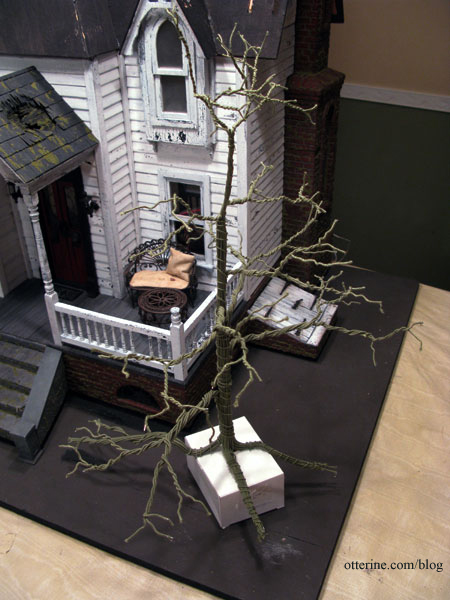
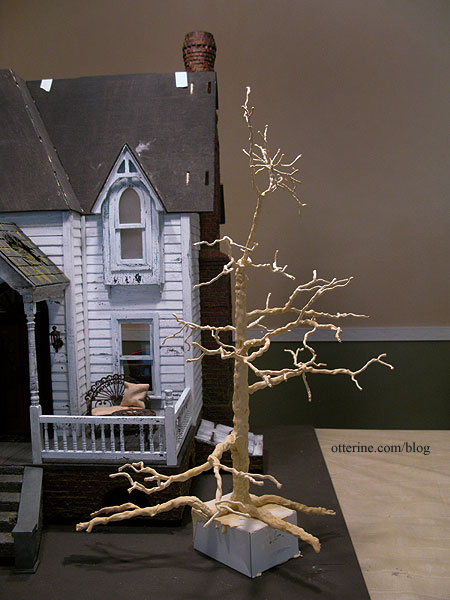
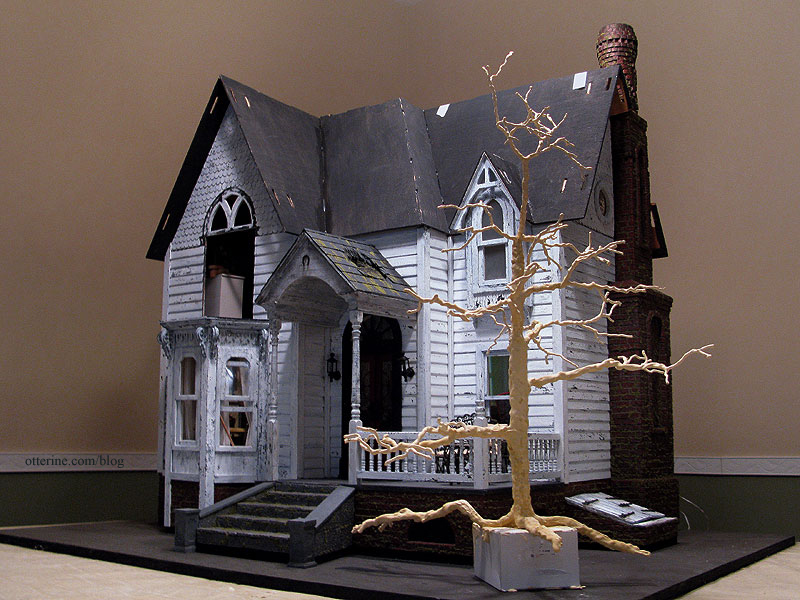
Here’s a nice aerial view of the tree, which stands 18″ tall. The tree has a spindle on the bottom that’s inserted into a box for right now. I will be adding a foam base when I get to the yard portion of landscaping for the tree to sit on, and the root tips will disappear into the ground.
In the tutorial, Diane used Durham’s Water Putty. I ended up with a 4-pound container of it from Home Depot. Did I need four pounds of water putty powder? Uh, no, but it was what was available locally (no shipping) and I had a Home Depot giftcard with enough on it to cover the modest $7.98 price tag. :D
Here it is just after the application.
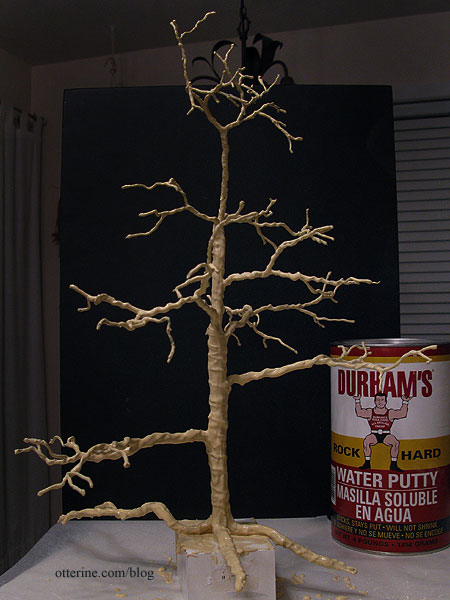
This was the first time I had worked with the putty and I found it to be a great material. The binding wires around the tree still show under the putty more than I think I want them to, so I might add another thin layer once this one sets. I do like the texture overall, though.
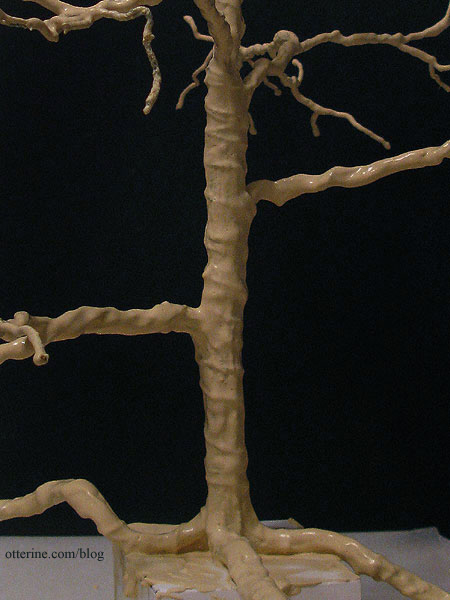
I scraped the excess putty from around the roots to keep them rounded and separate as the putty dried.
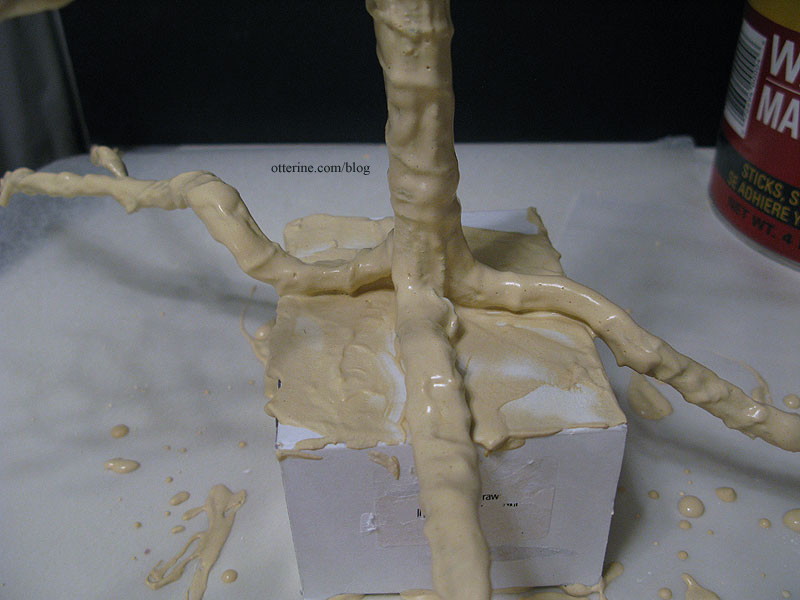
I left it overnight, and it dried hard and treelike! :D Some of the binding wires had softened in appearance but others still looked unnatural. I added another layer of putty over the areas that needed blending.
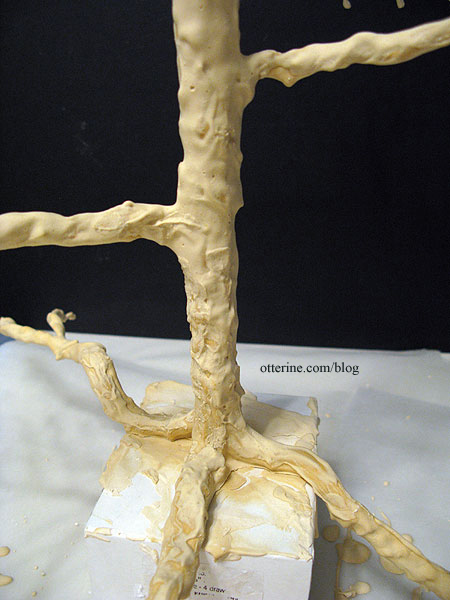
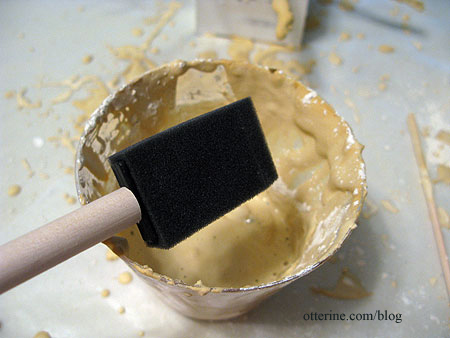
I had kept the cup from the night before, so I just mixed more putty in there. I used a fresh foam brush, though, because the other had hardened. You can’t put this stuff down the drain, so the cups and brushes you use must be thrown away in the trash.
Mike had recently used this material for making river rocks, so I asked him about the properties of it, namely whether you could carve it. He sent me to the Durham’s Water Putty site, and apparently you can do all sorts of things with it.
I used an awl and a file on the dried puddle from last night to see what it was like. It took the carved texturing very easily.
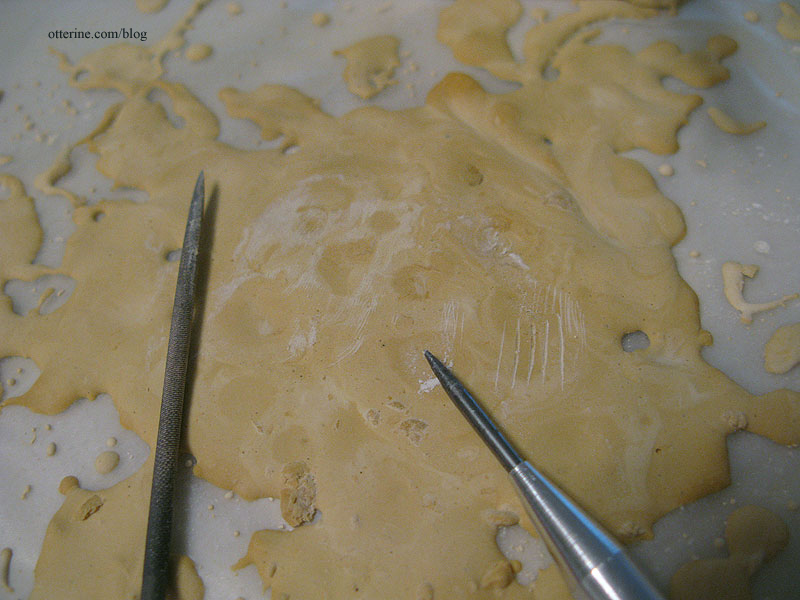
Even with the yellow coloration, it already looks like a real tree.
Next up will be painting once the second layer of putty dries.
Part 2 here.
Categories: Flowers, plants, and trees, The Haunted Heritage
June 30, 2012 | 0 commentsAfrican violets for my great grandma
My great grandma was a wonderful woman who lived to 104 years of age, nearly 105. She was warm and kind, the type of person you just loved to be around.
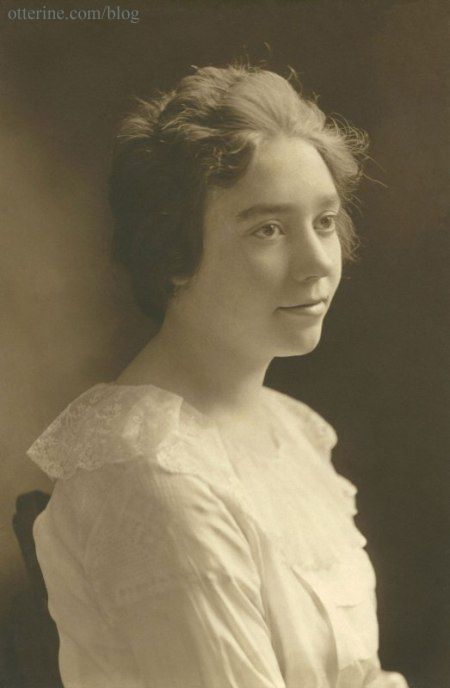
Mary Jane Bartlett (nee Watson) – 1900 – 2005 I’ve included her photo in miniature in Baslow Ranch along with a photo of her grandparents. :]
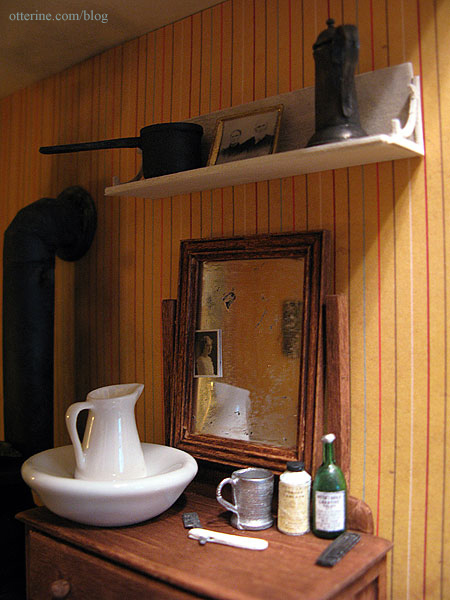
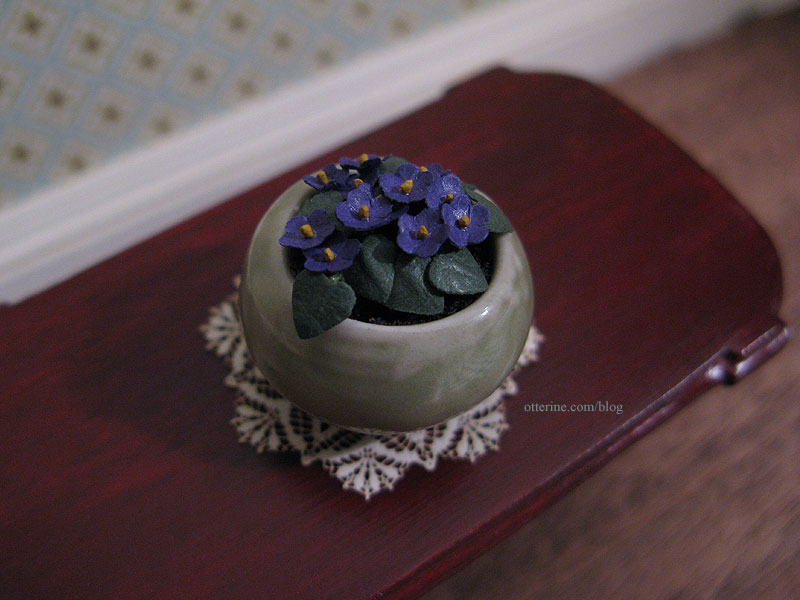
She was a very crafty person, crochet being her main creative outlet, and she taught me to sew when I was young. She loved African violets, so I bought a kit from Georgie at The Miniature Garden and made them up in honor of my great grandma.
The kit makes three colors of violets, but I chose the darkest purple since those are the ones my great grandma kept. Now, my camera just does not understand purple. It sees blue. I insist purrrrrrrrple, and it says baaaaalllloo. =shakes head=

I’ve had plenty of practice shaping tiny leaves, so I used the same technique for these using a ball stylus.

I added a bit of styrofoam inside the bowl and then glued loose tea over the top for dirt. The stems of the leaves and flowers are glued and pressed into the styrofoam core.

I’m not sure where in the Heritage these will end up, but for now I’ve photographed them on the coffee table in a separate vignette. The bowl might be a little big for this particular plant, but I really like it. This was my first time putting together one of Georgie’s kits, and I must say they are wonderful to work with!
I think my great grandma would have loved my miniature hobby. I definitely channel some of her warmth and energy into the Heritage build.
Categories: Flowers, plants, and trees
March 1, 2012 | 0 comments
NOTE: All content on otterine.com is copyrighted and may not be reproduced in part or in whole. It takes a lot of time and effort to write and photograph for my blog. Please ask permission before reproducing any of my content. (More on copyright)

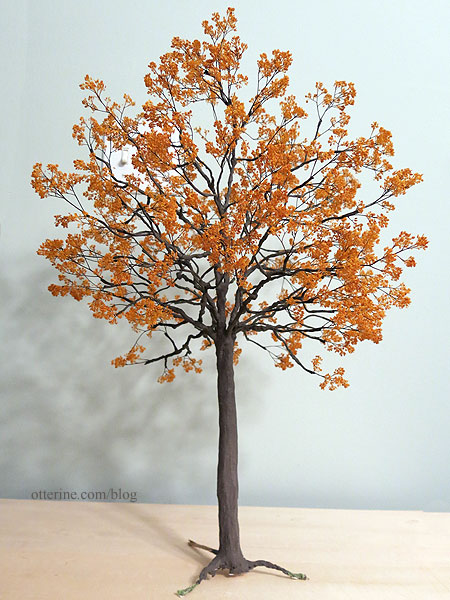
Ivy Hollow – autumn tree
I’m working on another tree this year. I used the same wire and putty technique I’ve used in the past for the trunk, and candytuft for the foliage – notes at the bottom.
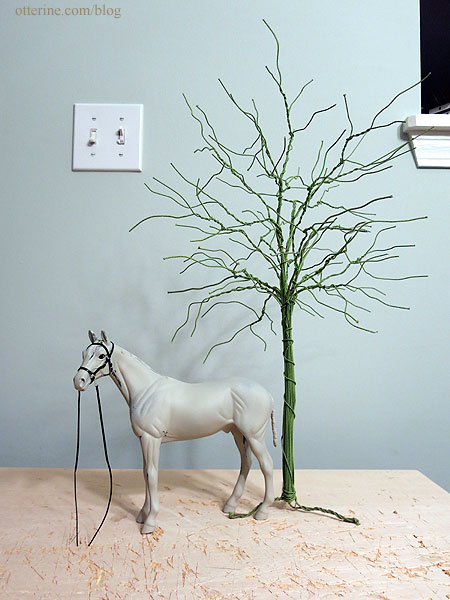
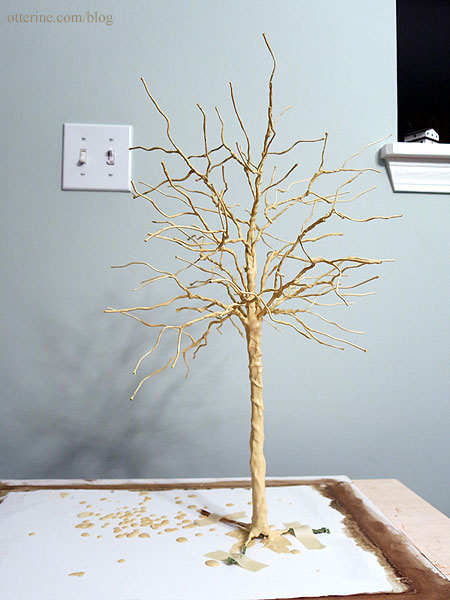
The first layer of putty is on with at least one more to go, where I will add texture.
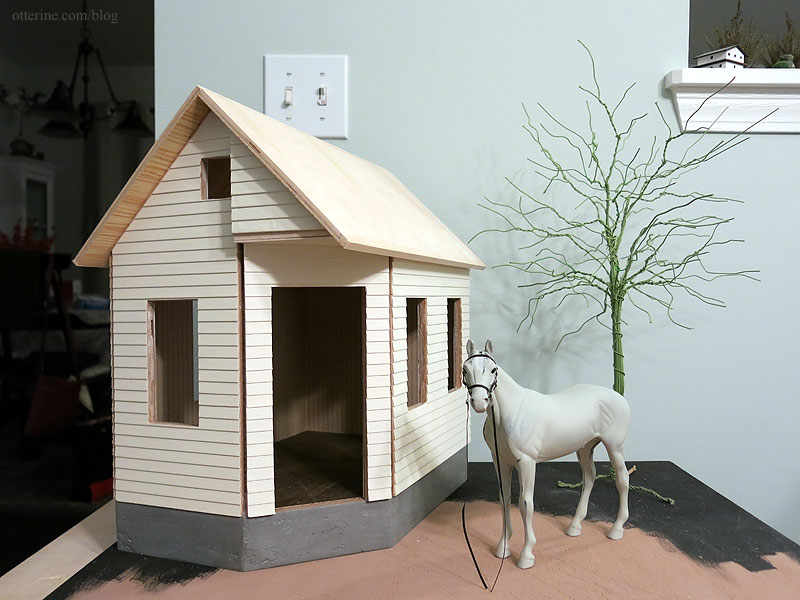
I like how the tall tree forces the perspective. Jebediah looks more in scale with the tree in place.
I used candytuft for the foliage. This is autumn gold candytuft from Scenery Solutions (no longer available).
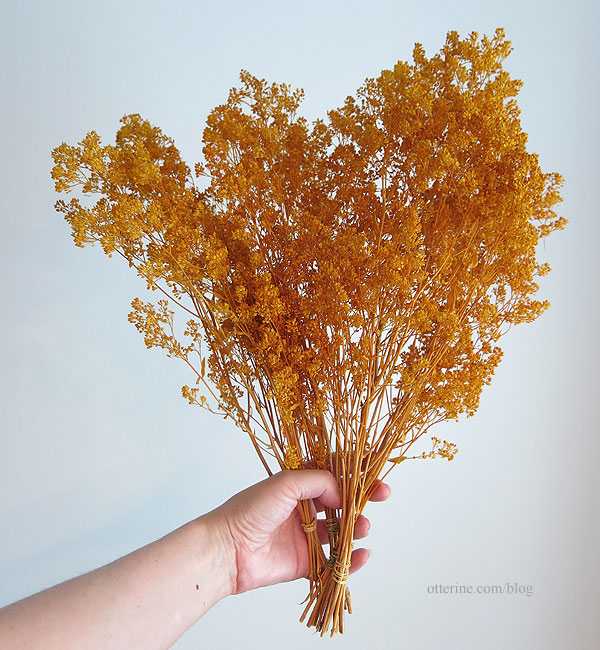
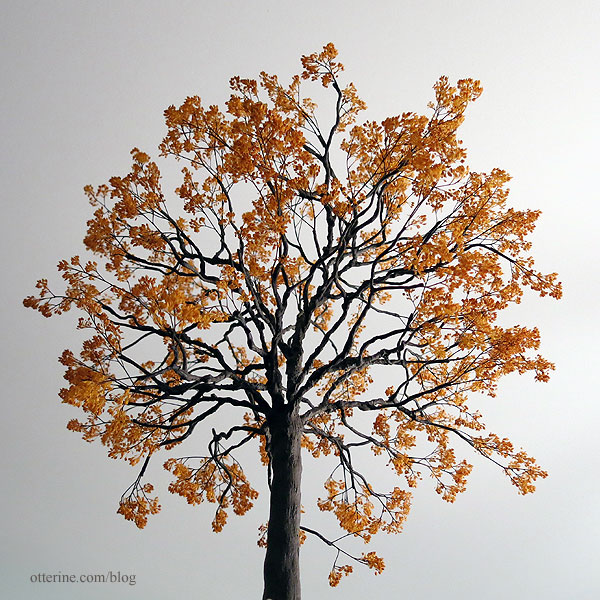
I painted and detailed the trunk and separated the foliage branches from two bundles of candytuft. Too bad I can’t just say “alakazam” and have the foliage appear on the tree.
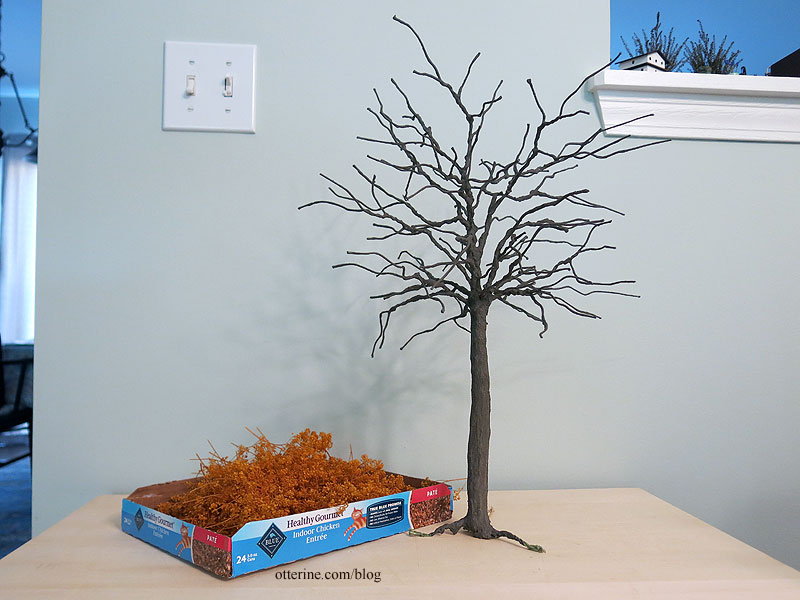
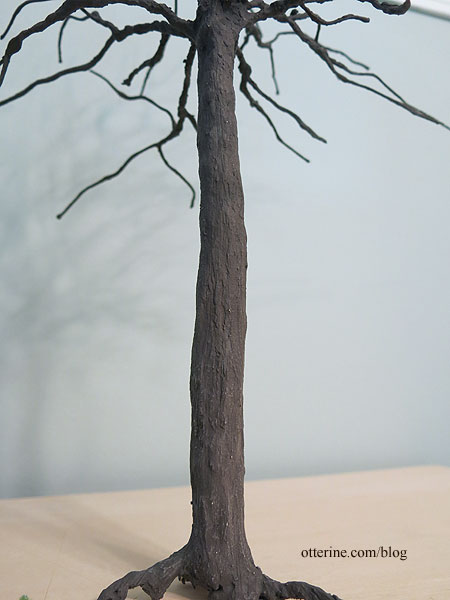
The trunk is somewhere between grey and brown. I mix at random and fine-tune until I get there since there isn’t a good color straight out of the bottle.
Good thing I chose autumn, so my tree can be sparse.
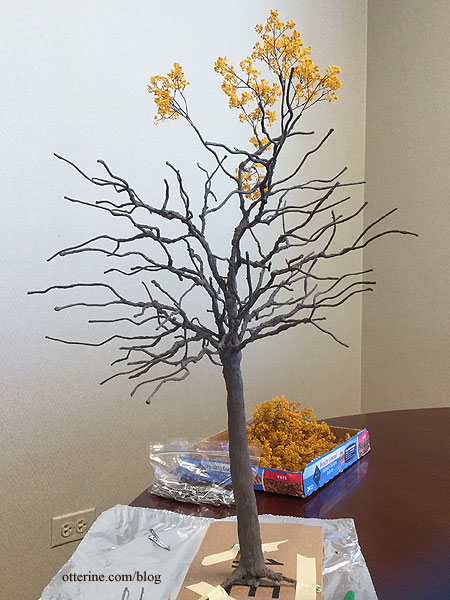
And, finished….
Love looking up through the branches.
———
Notes: Link to the first tree I made using this technique – follow the links in the first sentence back through the process. For the trunk, a good starting source if you can find it is the DVD Master Miniaturists: Landscaping Primer with Diane Myrick. I found mine through interlibrary loan. This whole series is just awesome! For the foliage, I used a tutorial by Connie Sauve on using candytuft, but the tutorial link is no longer active. I bought the candytuft from Scenery Solutions, but they no longer sell it.Categories: Flowers, plants, and trees, Ivy Hollow RFD
December 11, 2019 | 0 commentsWatson Mill – tulips
What else could Gustav need for Watson Mill but tulips? Debora made me tulips for my birthday last year, and I have had them in mind for the Mill.
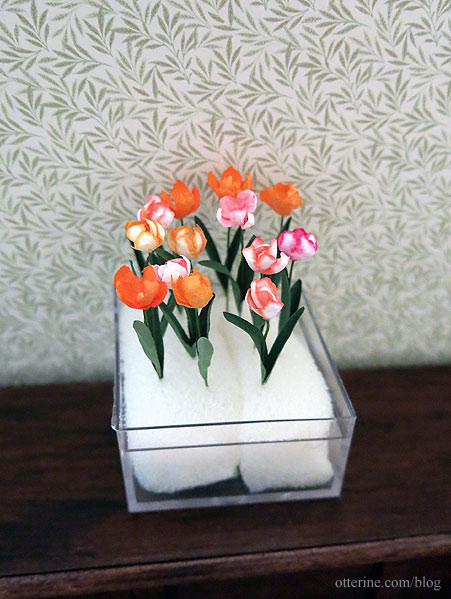
She offered to make some more, and they just arrived. :D So beautiful! Thank you, Debora!
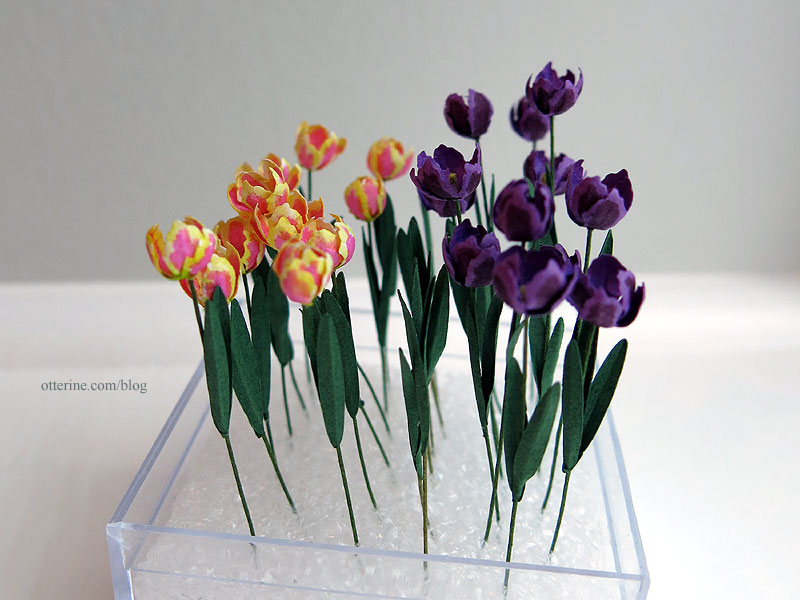
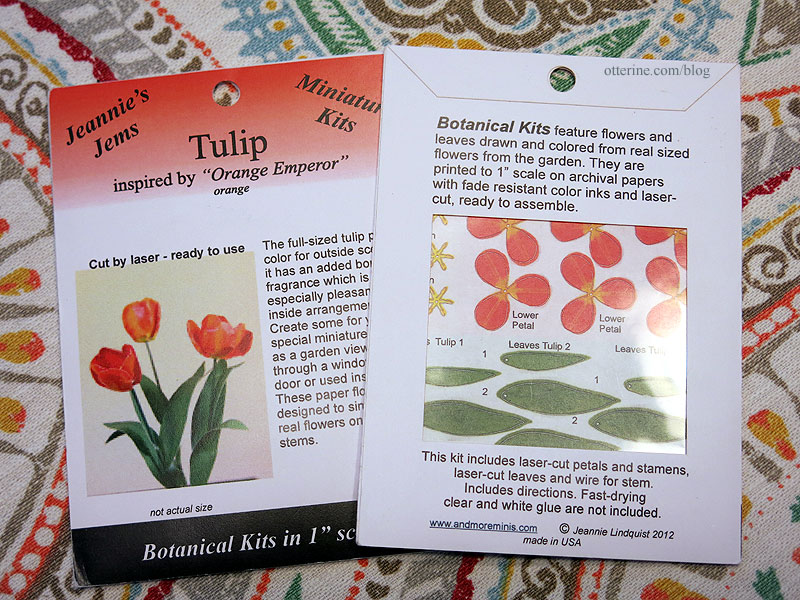
I have two paper kits, which will add another 6 tulips to the bunch.
Categories: Flowers, plants, and trees, Watson Mill
June 29, 2017 | 0 commentsMaking a tree – part 4
I stumbled across a wonderful tutorial by Connie Sauve on making realistic trees. (As of 2024, it seems her tutorial is no longer online.) She used a natural leaf material called candytuft.
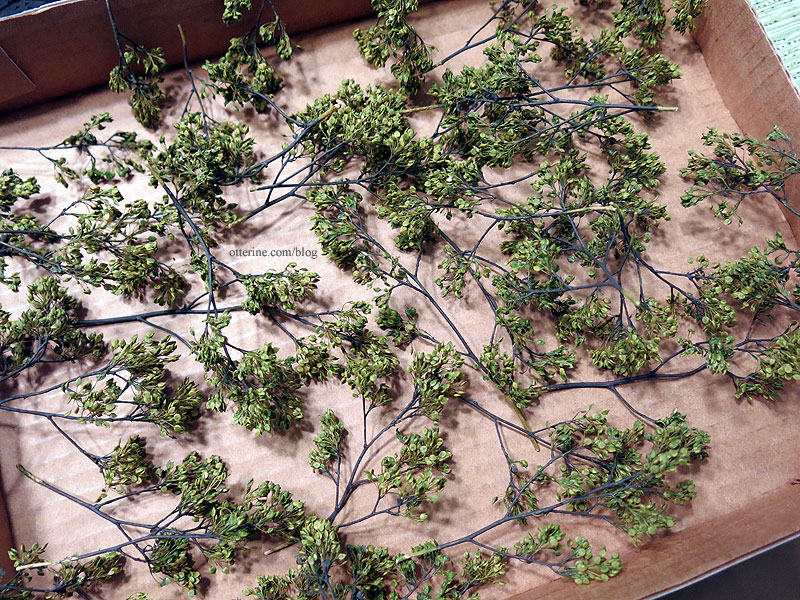
I ordered candytuft in basil green from Scenery Solutions. I looked at the local floral shops, but the floral sprays they had were different and not really workable. I bought two bunches since I wasn’t sure how much I would need. I probably should have ordered more for this tall tree in the first place, and I did end up ordering three additional bunches. I will likely use three bunches overall, so I’ll have some leftover for next time and other projects.

Detail of the “leaves” shows the variegated color that works well for visual interest. (Unfortunately, as of 2024, candytuft is no longer readily available.)

Since I started with green, I had to paint only the stems. Quick and dirty, no fine detailing here. It transformed them immediately. I can certainly see why these are so popular in model railroading.
Since I changed the type of foliage, I ended up clipping a lot of the wire branches I added since the candy tuft flares out and works better with a shorter base branch. I bought clips at Michaels and used Aleene’s Quick Dry.

Adding the branches was actually less of a pain than one-at-a-time leaves with a quicker payoff.

I touched up the paint around the glued bits to blend in with the tree branch tips. Hooray! :D

Looks full until I turn it to the side.

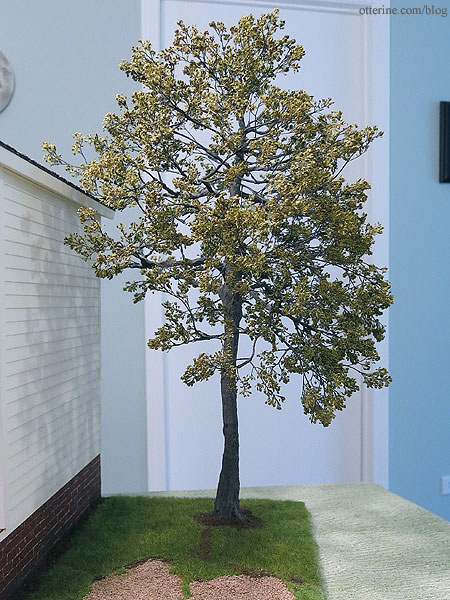
Once the additional candytuft arrived, I was able to finish the tree and plant it.
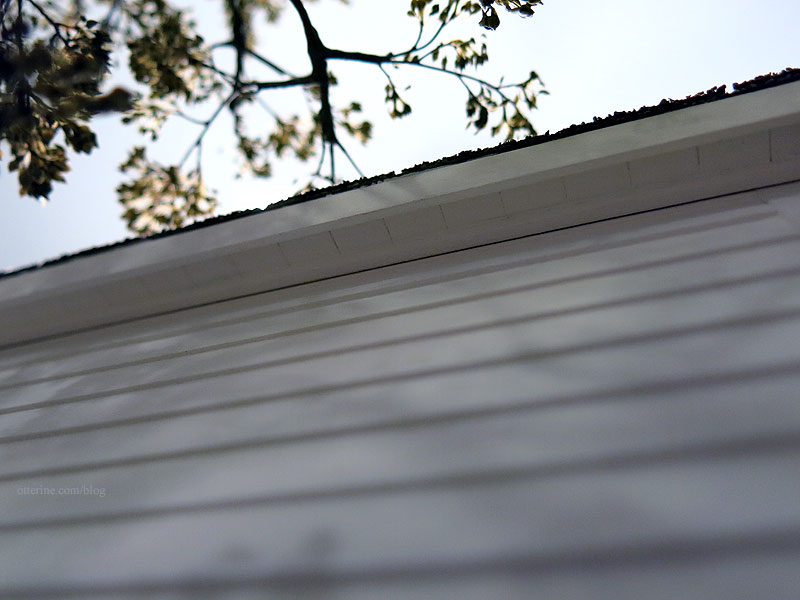
I made one branch to fit over the roof, because who is going to climb a ladder to trim it?
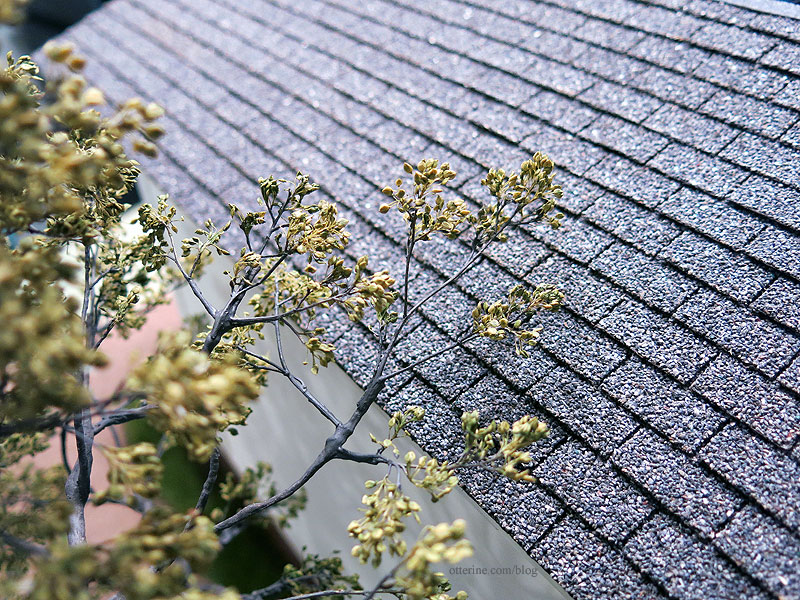
After trying out this method of foliage, I will have a hard time going back to any other way.
Categories: Flowers, plants, and trees, Ye Olde Taxidermist
November 26, 2016 | 0 commentsLovely flowers and garage minis
I received a birthday package from Debora today. She sent me some of her gorgeous handmade flowers along with some Chrysnbon kits (she knows my weakness). These are all ready for planting, so I’ll have to decide whether they will go in a planter or be part of the landscaping for a build. Thank you so much, Debora! :D

Jasper helped unwrap, of course.

I also picked up two fun eBay items for Milo Valley Farm this past week: a compressor and a drill press. These are heavy items, but there are no maker marks.

Categories: Flowers, plants, and trees, Miniatures
August 12, 2016 | 0 commentsMaking a tree – part 3
Continuing work on the tree. I filled the bottom of the trunk with water putty to make a solid base. I wasn’t worried about it toppling over, but I didn’t want the outer shell to crack if it were bumped or squeezed in the wrong way.

To achieve a good base color for the bark, I mixed Zinc and Bittersweet Chocolate by Americana. I stippled the paint onto the tree to avoid leaving obvious brush marks. After letting the paint dry, it was easier to see which areas were missed in the first go around.

I dry brushed some Zinc mixed with Mississippi Mud to highlight.
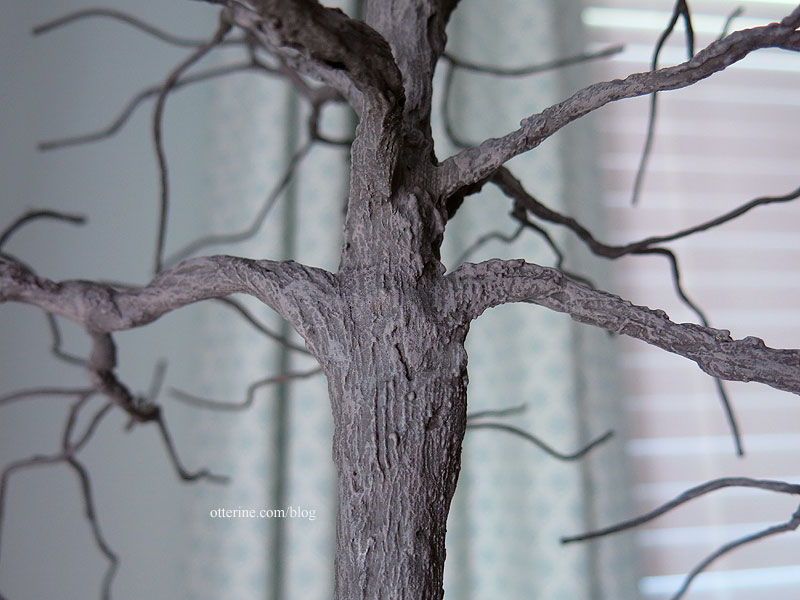
The lighter paint brought out the bark detail. It looks solid and treelike, no? :D
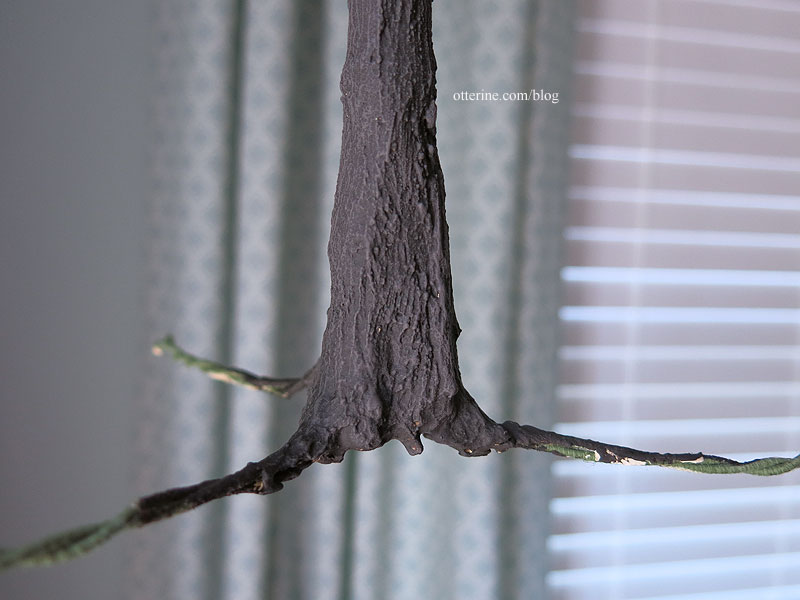
I like the slight bend in the trunk…seems much more natural.

A real tree has a great deal more branches than the base I’ve created, and those branches taper into batches of leaves. My purpose is to get the general feel of a tree and to accent the landscaping.
I have 95 base branches, which may seem like a lot, but there will be bare spots if I leave it as is. Adding branches after the putty has dried is not impossible, but there are some drawbacks and limitations. Yes, you can start out with more wires to have more base branches, but then you end up with more of the bulky base branches and not thin branches at the ends where they are needed the most. Carrying thin wires with the larger wires still adds bulk to the base branches.
I took short lengths of 30 gauge brown wire and curled them around the base branches where needed, adding 120 small branches. Now I have 215 branches for a much fuller tree.

I mixed Durham’s Water Putty again and covered the joins. This does create bulk and you can somewhat see the twists since I didn’t go overboard with the application, but this shouldn’t be a focal point once the putty is painted to match the bark and the foliage is added. I didn’t add these before finishing the base tree and branches because it is hard to paint the interior with all these fiddly branches on the outer surface. Much easier to just touch up the paint where needed.

Categories: Flowers, plants, and trees, Ye Olde Taxidermist
June 2, 2016 | 0 comments
NOTE: All content on otterine.com is copyrighted and may not be reproduced in part or in whole. It takes a lot of time and effort to write and photograph for my blog. Please ask permission before reproducing any of my content. (More on copyright)


