
Flipping the opening direction of a door
Houseworks has some of the best dollhouse components on the market, and their doors are fabulous in that they are premade and hung in frames. All you have to do is slide them into place. But, sometimes you want the door to open the other direction. As they are currently made, if the premade door is facing you, the door opens in to the right.

Here’s how I flipped one to open in to the left. First, I used masking tape to indicate the “up” direction and sides 1 and 2.

Since you are always keeping the “up” side in the right direction, this will work with other paneled doors where there is an obvious up direction. It’s less important with this type of door where the style is uniform up and down.

I removed the hinge pin on the bottom but left the pin at the top in the door.

I then measured where the original holes were and marked that same measurement on the opposite side. These need to be precise. I then used a pinvise to make the new holes. I slid my drill bit into the original hole to make sure I had the right size before drilling on the opposite side.

top of door frame 
bottom of door frame I installed the original door with side 2 facing me. The door now opens in to the left. The original holes can be filled or left in case you change your mind again.

Categories: Baslow Ranch, Miniatures
April 2, 2010 | 0 comments
NOTE: All content on otterine.com is copyrighted and may not be reproduced in part or in whole. It takes a lot of time and effort to write and photograph for my blog. Please ask permission before reproducing any of my content. (More on copyright)

Baslow Ranch – Furnishings and Accessories
The bed was made from a House of Miniatures single low post bed kit. I left off the fancy post tops for a more rustic look. The mini bedside table is also from a House of Miniatures kit, from a set of two side tables. I stained both with IKEA antique pine stain and then weathered with Antiquing Medium by Folk Art and a slight wash of black and brown paint.
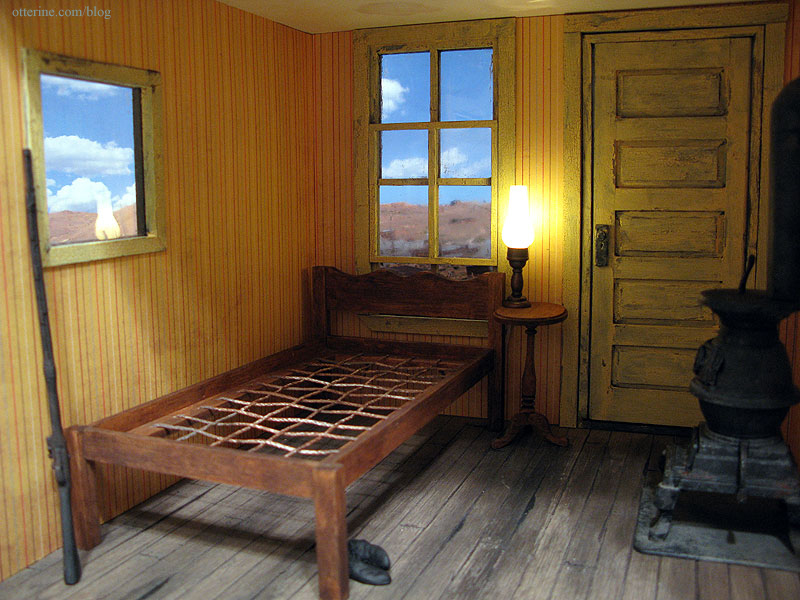
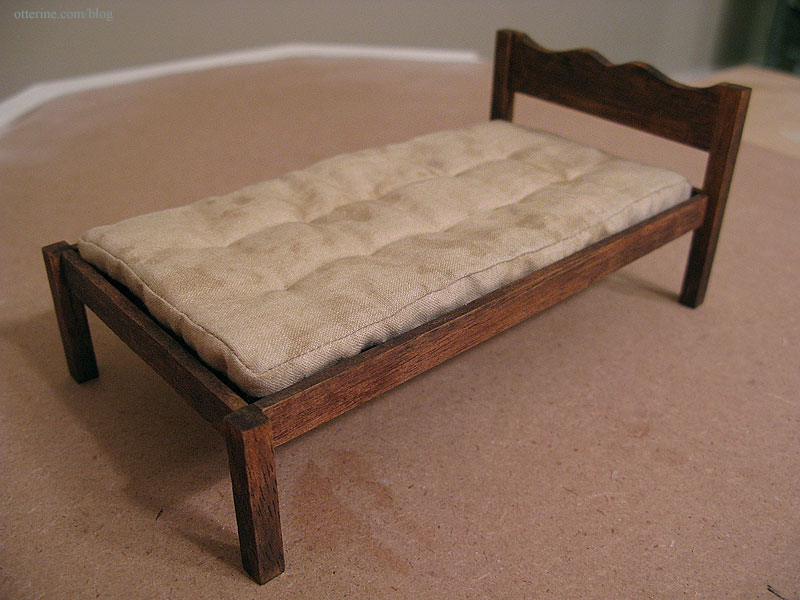
The mattress was made from fabric that had an old, stained look to it, stuffed with four layers of a felt-like batting and quilted. I love the way the bed looks with the ropes exposed, but I wanted the option to show it either empty or fully dressed.
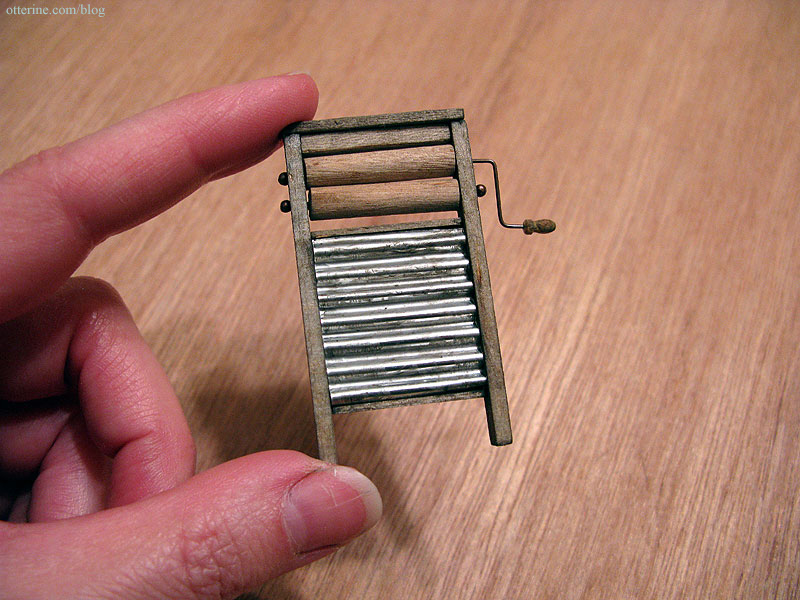
The washboard was made from a pattern in Thirties & Forties Miniatures in 1:12 Scale by Jane Harrop. Here are the pieces, cut and weathered with a wash of black and brown paint.

The parts are all fixed in place, but I love this piece. It turned out better than I had hoped. The metal is the same material I used for the roof, run through a Fiskars crimper.
I found a lot of great images online for old time mail, bank notes, newspapers and pharmacy items. I printed the majority of my minis for this project on parchment paper. The newspapers ended up in the attic, the letter on the dresser and the bank notes in a drawer unseen.

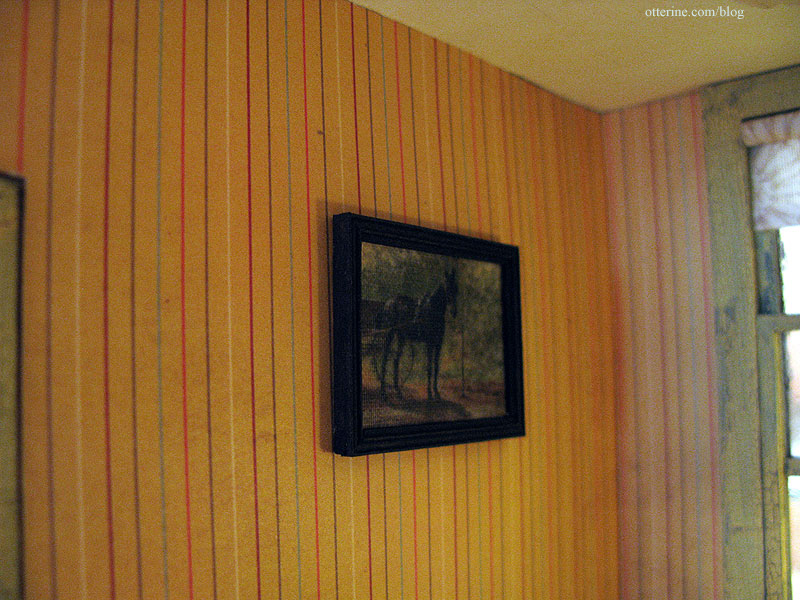
The horse painting is Horse with Wagon at Hitching Post by Edward Lamson Henry. I sharpened the image a bit and then printed it on Art Canvas, a specialty paper by The Crafty PC. I made the frame from strip wood. There’s no particular significance to the painting – I just liked it. :]
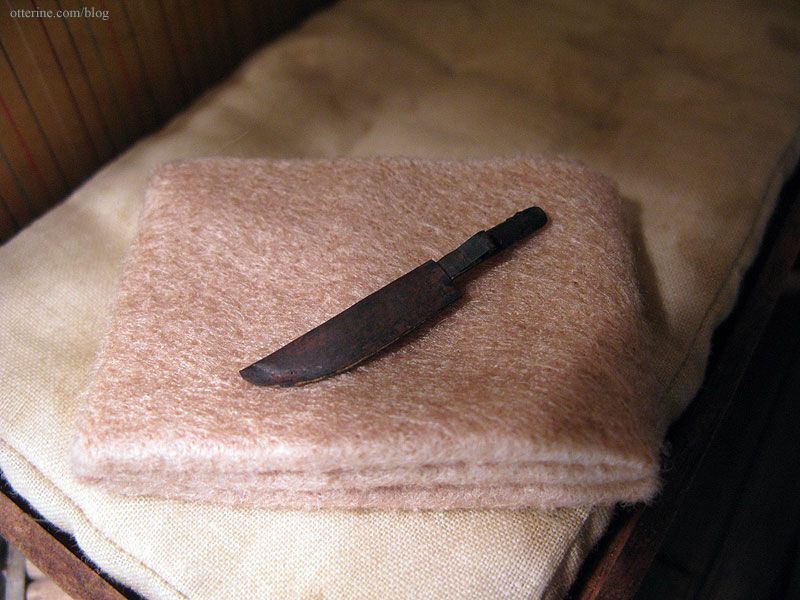
There are a few artisan-made knives with leather sheaths on the market, but I decided to give it a try myself. I started out with a kitchen knife with a red handle.

I painted the handle black and then made a sheath with a belt loop out of scrapbook paper called Buckskin Brown by The Paper Company. I used a bit of black paint to age the paper once the glue was dry. The blanket is a folded piece of felt pressed into shape with an iron.
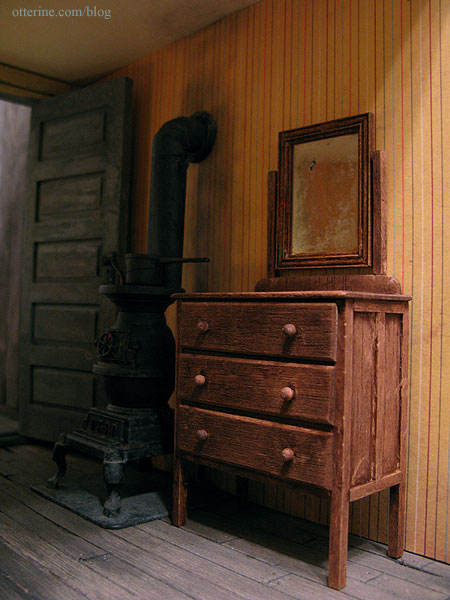
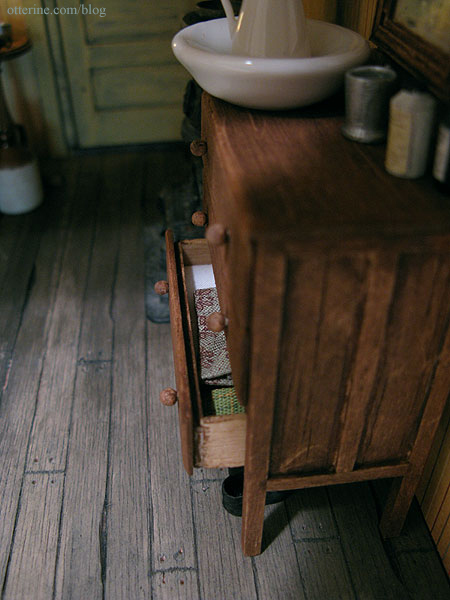
The dresser with the mirror was made from a pattern in Thirties & Forties Miniatures in 1:12 Scale by Jane Harrop. This project was labeled advanced, and though it was a real bear cutting all the pieces precisely, I love the way it turned out. I stained all of the pieces with IKEA antique pine stain before assembly and then aged it with Antiquing Medium by Folk Art after it was built.
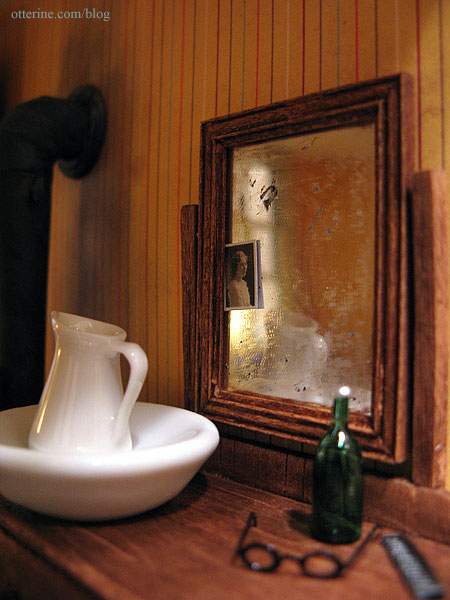
The mirror is made from plastic mirror sheet by Darice. This material was great to work with. The finish was pristine when I pulled it from the package, so I had to beat it up a bit for it to blend with the old dresser. I used an X-Acto knife to scrape some of the backing away.

This created spots in the reflection.

Using the same process as I had for the windows, I brushed on some Gloss Varnish by Delta Ceramcoat and then wiped away the excess. I painted the wood backer black as well. Now it looks like an old weathered mirror.
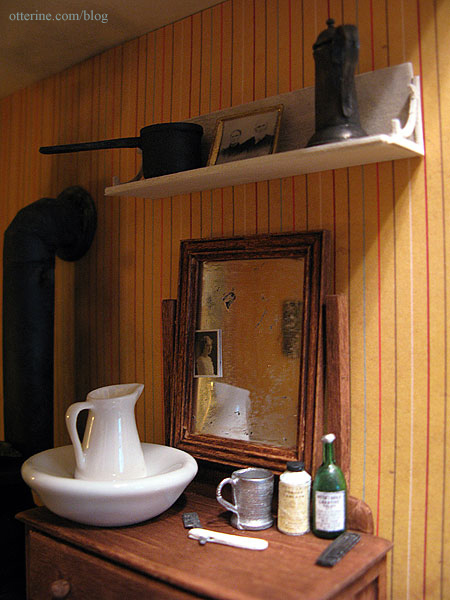
The apothecary items were made from a glass bottle and an unpainted metal miniature. I used brown paint to dirty the glass and painted the metal bottle with acrylics. I then glued on tiny antique medicine labels I found online. I crinkled the label on the metal bottle before gluing it since the bottle itself seemed a bit beat up. The razor and shaving mug were unpainted metal minis that I detailed. The shelf was made using pieces from my scrap wood bag.
I’m a big fan of hidden elements, so while I didn’t make any actual miniature clothing, I did place some folded fabric scraps in the drawers. :D
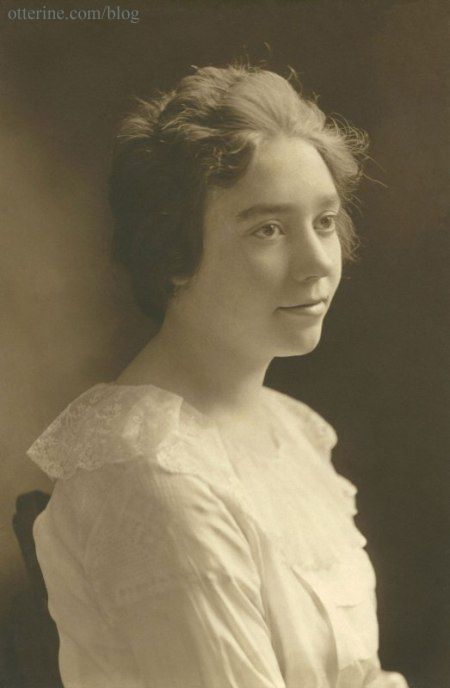
A couple of more personal details I included are the photographs of my own ancestors. The young woman on the mirror is my great grandmother Mary Jane Bartlett (nee Watson) in her graduation photo. She was born in 1900 and passed away in 2005 just shy of her 105th birthday. She was young at heart and lived on her own until a few months before she passed. She wasn’t even hard of hearing; she cooked her own meals and cleaned her own home. She was a remarkable woman with a terrific laugh, and I am lucky to have known her well into my adult life.
The second photo is that of her grandparents: Augustus Samuel Watson (1827-1901) and Mary Jane Cameron (1827-1900). That would make them my great, great, great grandparents.
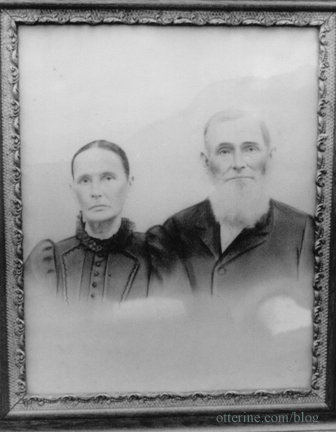
My reproductions might be a bit large for proper 1:12 scale, but I wanted them to show well in the room.

Categories: Baslow Ranch
June 1, 2010 | 0 commentsBaslow Ranch – Barn interior details
I covered the interior roof panels with the 3/4″ siding used for the walls, only cut in half lengthwise. Here are the pieces after the wash, just before putting weights on them to dry. You can see how the siding would lift and create gaps. Once pressed and dry, however, they were perfectly flat.
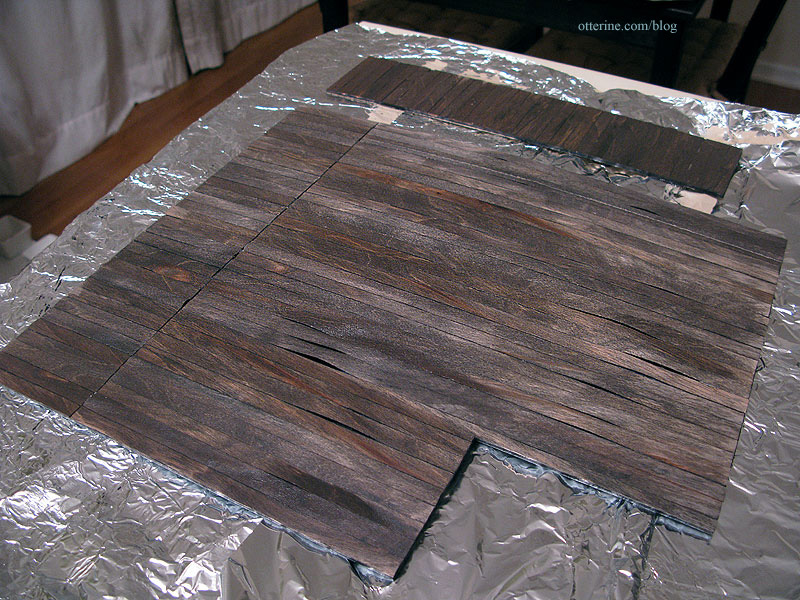
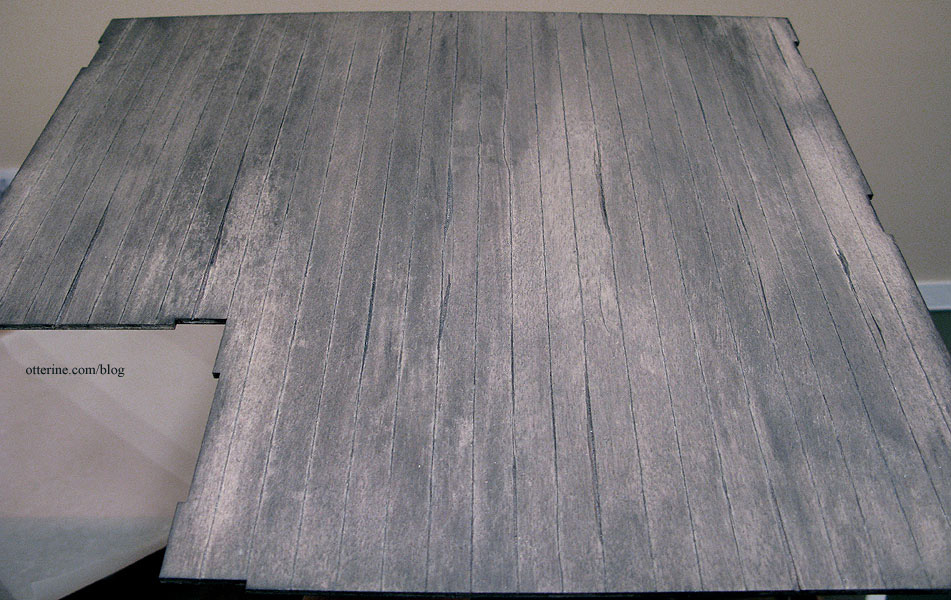
I scored the kit floor piece to simulate plank flooring. Using an X-Acto blade, I cut out some sections along the lines to create broken and worn boards. I then used a paint wash on them to bring out the grain.
I added some strip wood at regular intervals to simulate support beams; these were cut and pounded to weather them. Most of my wiring ran from on top of the garage roof to the underside of the side room.
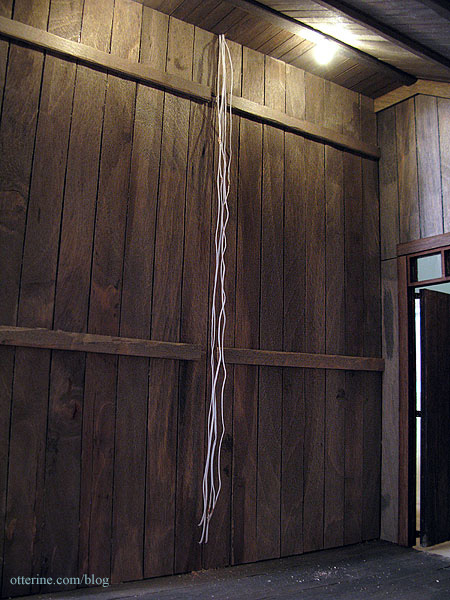
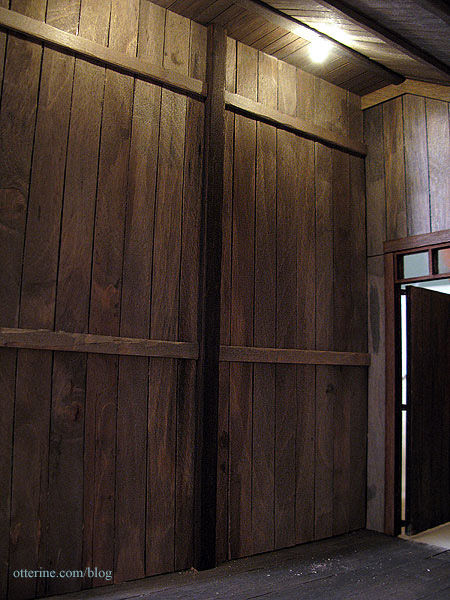
I used channel molding to hide the wires. It has a drop of glue holding it flat against the boards, but it can be easily removed for access to the wires. The power strip resides under the room addition.
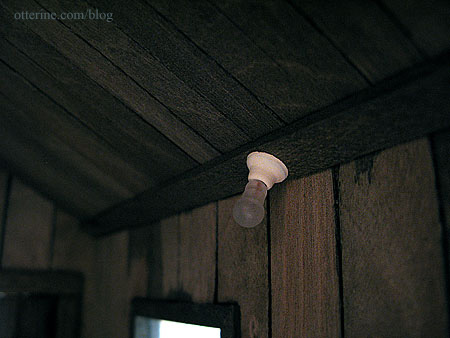
The light fixtures are frosted bare bulbs. Though the bases were molded in white plastic, I painted them with Tapioca paint by Folk Art to give them a more opaque finish.
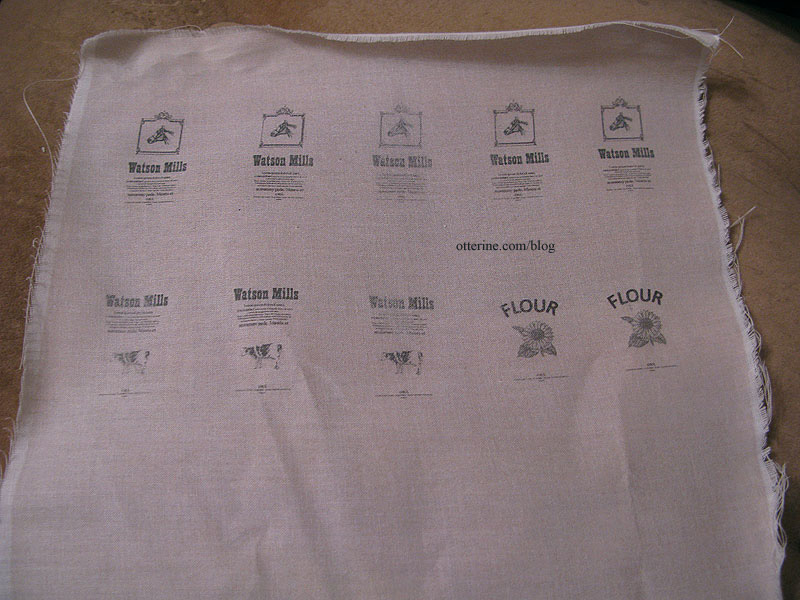
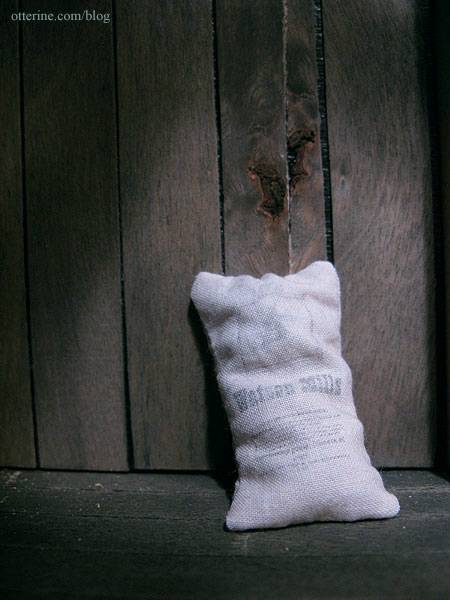
The feed and flour sacks have my own custom made designs printed on fabric. The horse and cow are rubber stamp images I found online; the sunflower is clipart. I designed the text and layout in Word. Since water will ruin the printed images, I first ran the fabric through the printer using a tea-stain color. I then printed my images on that darkened and aged background. I left the bottom half of the fabric sheet plain so I would have excess for the backs.
I filled the bags with beads to make them easier to position. I have no idea if these are historically accurate, but I just love the way they look! I also love the knot in the plank – I just had to use that piece when I found it.
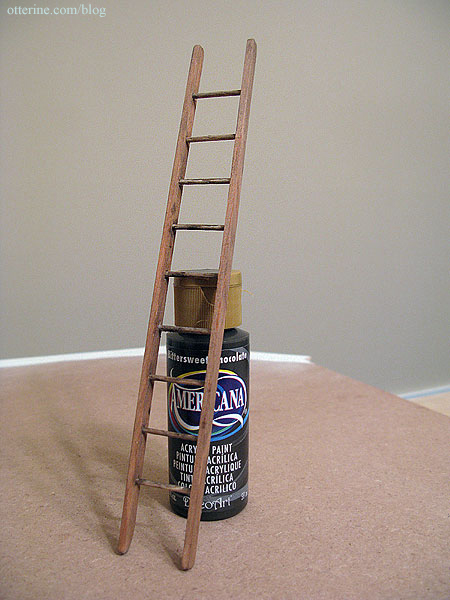
I made a ladder based on a pattern from Making Miniature Gardens by Freida Gray.
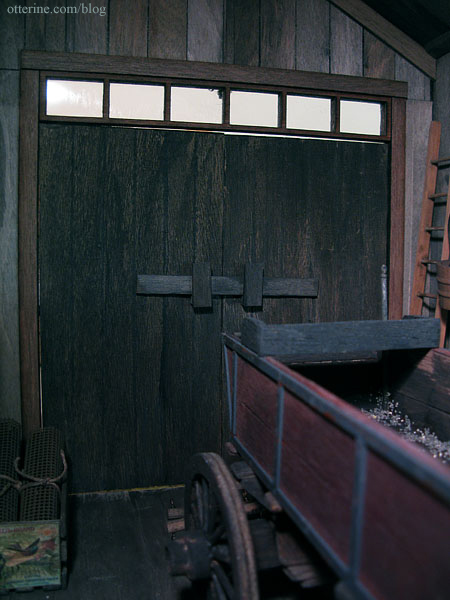
I used a scratch built board latch on the inside of the main door; the small metal latch I had used on the side door wasn’t substantial enough.
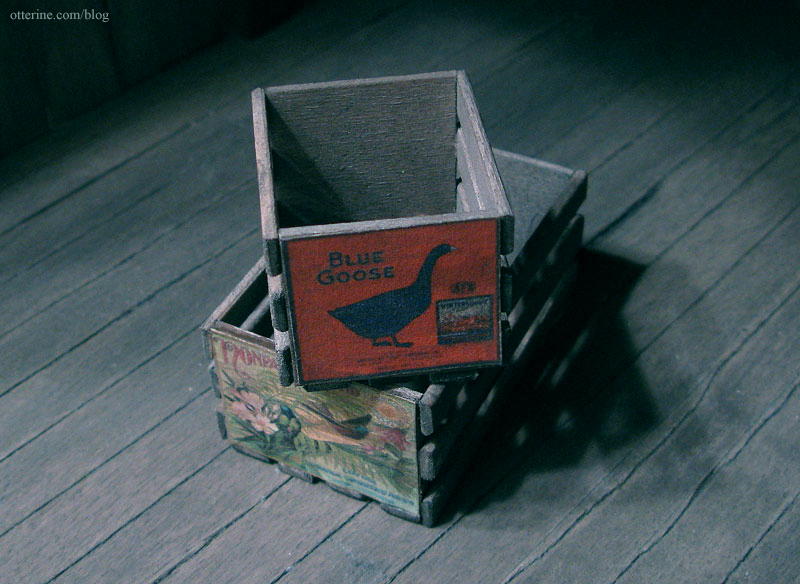
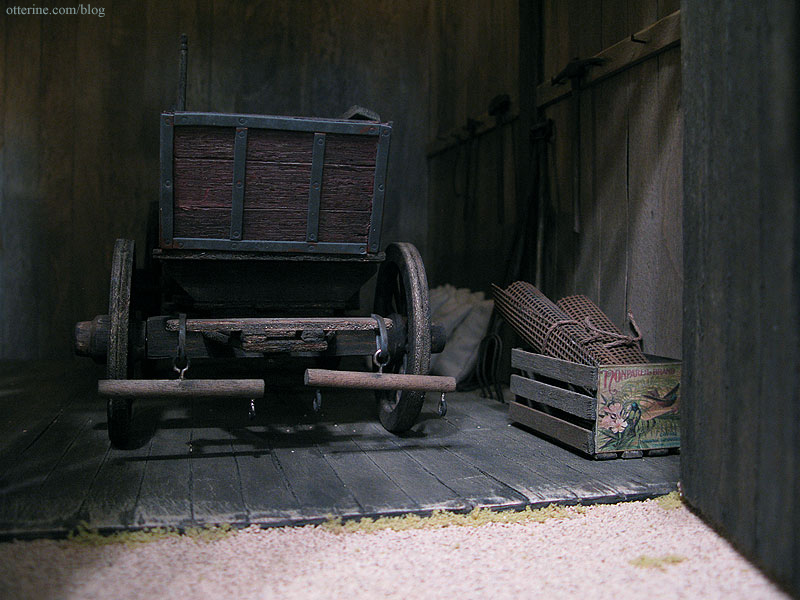
The crates are made from strip wood and skinny sticks, aged with a black and brown paint wash. I found these vintage labels online and printed them on parchment paper. They, too, have a light wash of black and brown paint to age the paper. I had planned to make more of these, but with all of the other things in the barn, I didn’t need a lot. The Blue Goose image is from thelabelman.com; I don’t recall where I got the other.
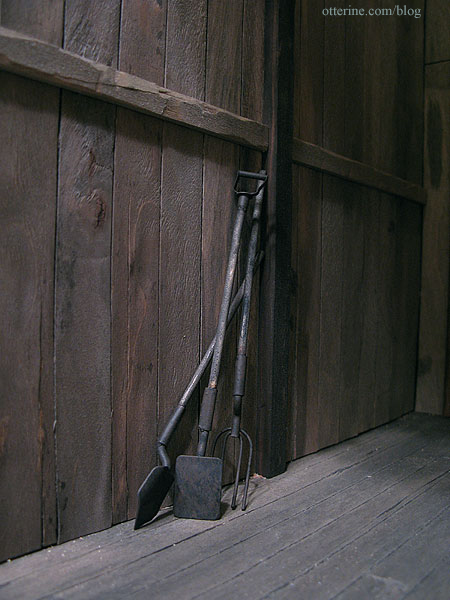
Most of the metal tools and accessories were made from unpainted pewter miniatures. I first sprayed them with a coat of Testors flat black and then used regular acrylics to detail them. To hang the tools along the beam, I found something I never knew existed. I was looking for scale railroad spikes on the internet and found these Mini RR Spikes for 5th String Capo meant for banjos. Who knew?!
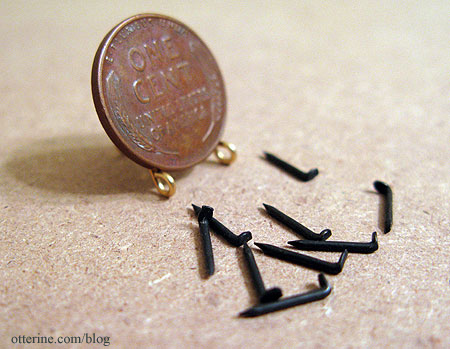
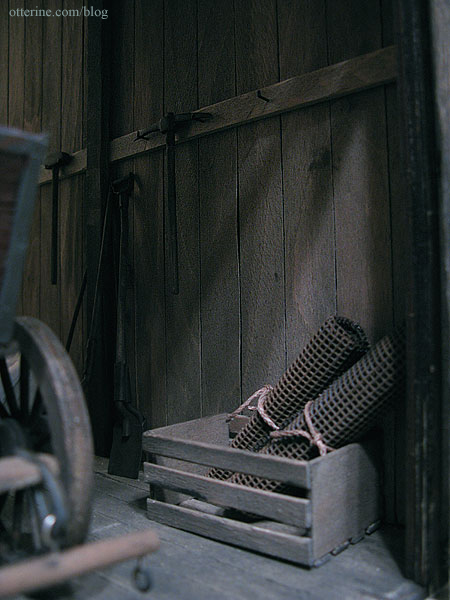
I’m not sure if they are exact to scale, but they work wonderfully and don’t look out of place. I drilled pilot holes into the beam and then pressed the spikes in place. They worked perfectly for holding tools on the wall. The rolled up fencing is actually a piece of flat metal mesh called Hannah’s Helper scour screen that I found in the cleaning aisle of Jewel. I painted it brown, cut it in half and tied the rolls with leftover rope from the bed kit.
These tools were originally shiny silver with red metal accents.
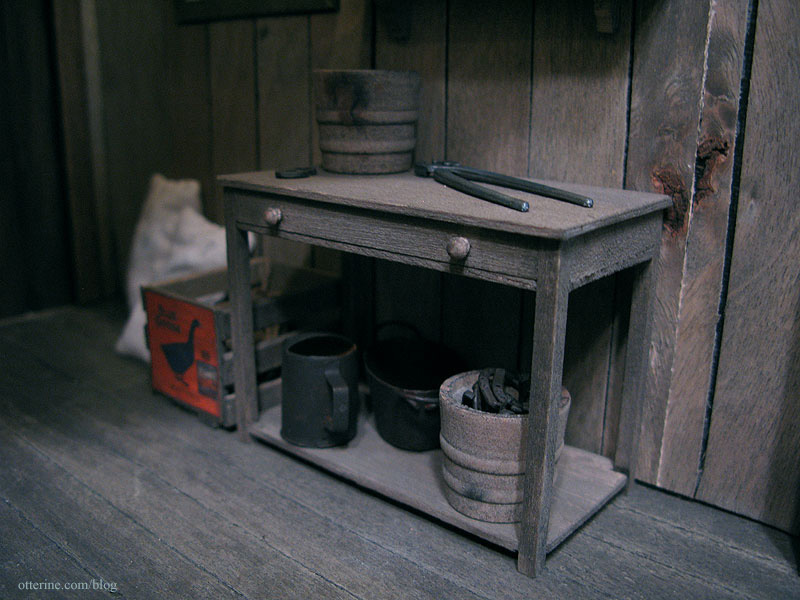
The table was based on a pattern in the book Finishing Touches by Jane Harrop, though I made mine a bit larger to fit the space in the barn better. The shelf above it was made from pieces in my scrap wood bag.
I made a false back wall from black foam core board and applied the same aged birch siding used throughout the build to this board. When propped up behind the open back, the structure looks whole when the front doors are open.
Categories: Baslow Ranch
May 31, 2010 | 0 commentsBaslow Ranch – Landscaping
I mounted the structure on a 20″ x 28″ piece of 1/2″ plywood and sealed it with a base coat of beige house paint I had on hand.

I did a test patch of landscaping on a piece of scrap plywood since it was my first time working with Woodland Scenics materials. I used Aleene’s clear gel tacky glue, brushing it on thickly and pouring the ballast over the wet glue. I then tipped the board to remove the excess. I used the same process on the ground cover. The natural field grass was glued on in clumps afterwards. The grass wasn’t the easiest to work with, so I planned to try a few more methods of adhering it before working on the actual base board.

The landscaping process was quicker and easier than I thought it would be. I loosely taped the bottom edges of the structure to keep from getting glue on the outer walls. I poured on the glue and then used a large brush to spread it around, keeping it thick and uneven for a more realistic ground texture.

I used a spoon to generously apply the ballast, letting it set a bit before brushing off the excess back into the bowl. Here it is after application but before removing the excess.

Once completely dry, I vacuumed the excess from the board. Wherever there were blank spaces, I brushed on glue and applied the ground cover. After it dried completely, I brushed what excess I could from the board into a bowl and then vacuumed the remaining loose pieces just as I had done with the ballast.
The last part of the landscaping was the field grass. I did a bit of sleuthing online and found that many people prepared the grass material by securing small clumps of it with a bead of glue at the end.

I did a test sample this way. Once dry, I drilled a small hole in the base board and glued the clump in place, adding ballast and ground cover around the bottom to disguise the hole. Much easier, faster process and better results.
After adding the forty or so tufts of field grass I had made the first time around, I decided I liked it so much I made seventy more – using up the rest of the package. After the glue dried, I vacuumed again and then I glued more ground cover at the bases of the grass tufts to hide the holes. The Woodland Scenics materials were awesome to work with, and I highly recommend them.
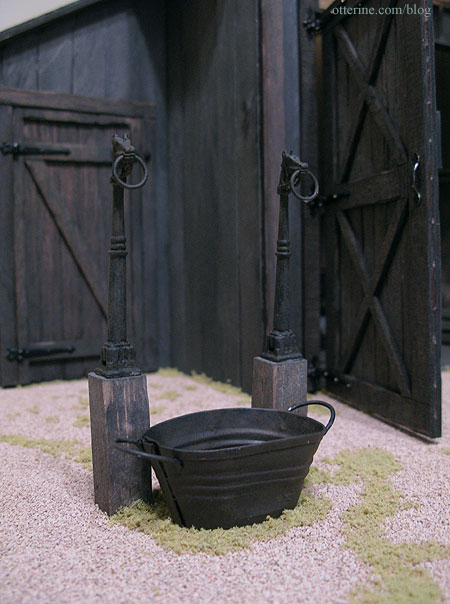
I didn’t want to clutter the front of the barn too much, but I had bought a few unpainted metal miniatures that I thought would add to the overall feel. These I painted with Testors flat black and then “rusted” with various acrylics.
I aged some balsa scraps with the same paint wash as the exterior and glued the metal hitching posts on top. I glued them a bit askew to make it look like they’ve been there awhile and tugged on a bit by ornery horses. The metal tub was silver, but I beat it up to dent it and then painted it to make it look old and rusted (here is a photo before the field grass was added).
The other piece I added was the water pump. I made the base from balsa, battering the edges of the wood slats and using my awl to add nail holes before aging it with a paint wash. I glued a bit of the ground cover material to make it look as though plants were growing through the boards. The metal bucket was silver metal when I bought it.
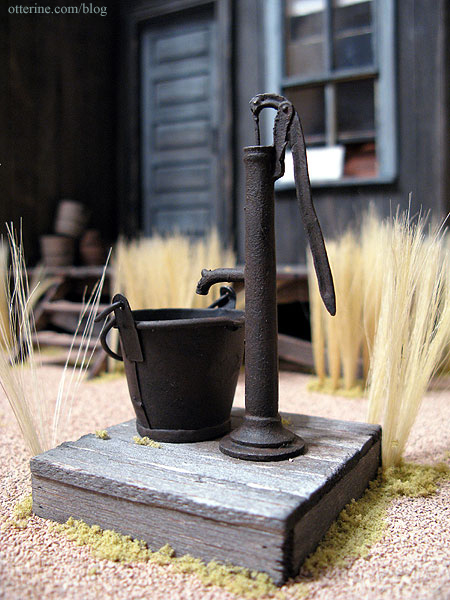
This was my first time landscaping, and I had a lot of fun with it.
Categories: Baslow Ranch
May 31, 2010 | 0 commentsBaslow Ranch – Exterior details
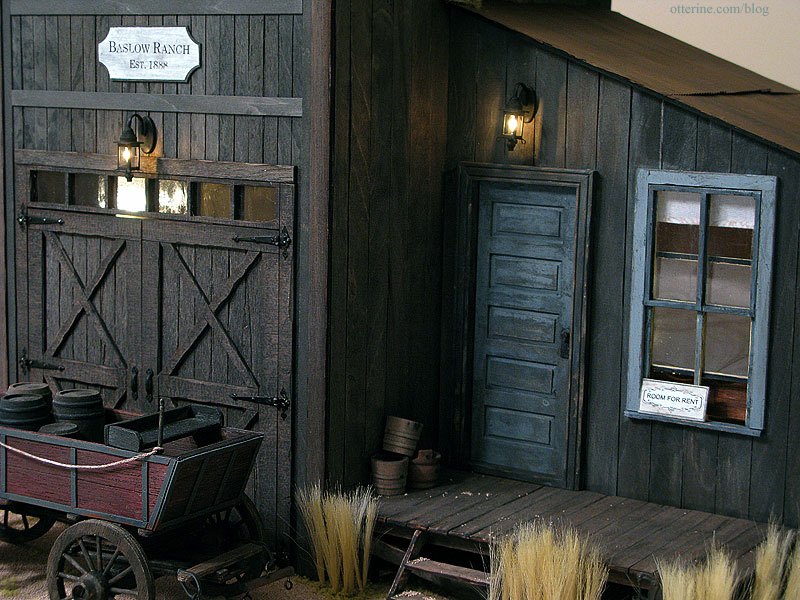
The doors and windows provided with the original kit offered some nice details but I wanted to go a step further. I found an image of a fraternity house in the ghost town of Elkhorn, Montana that had some very nice lines on the front. I used cardboard and a large circle punch to create similar arches and cut strip wood to complement the design. I used the punch to create the sign, too.
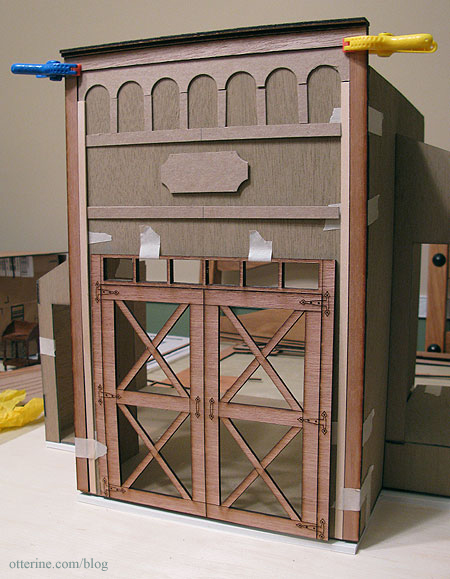
Once I had the layout I wanted, I used the cardboard pieces as patterns to cut pieces from bass wood. In the end, it turned out just as I had hoped.

The siding application was an involved process. I first primed all the plywood pieces with black acrylic paint, pressing the pieces under weights to keep them flat. I glued on 3/4″ birch siding strips by Corona Concepts, leaving a little give between the planks. I pressed the boards again as the glue dried. I used Aleene’s quick dry tacky glue and was careful not to get any on the faces of the boards since I planned to stain them.
For the exterior walls, I used a wash of black, brown and grey paint – heavy on the black. For the interior, I used a wash of black and brown – heavy on the brown. I wanted the exterior to look more weathered. I had to press the walls each time I added a wash.
For the main facade, I cut the 3/4″ strips in half lengthwise to better accent the arch trim I had made.
It might not be the way to normally assemble a kit, but I prepared all of the walls first and then assembled the structure. I kept dry fitting during the siding and staining process to make sure I had the siding adhered in a way that wouldn’t interfere with the tab and slot assembly. I also had to prepare the walls in groups since I had limited space for pressing.
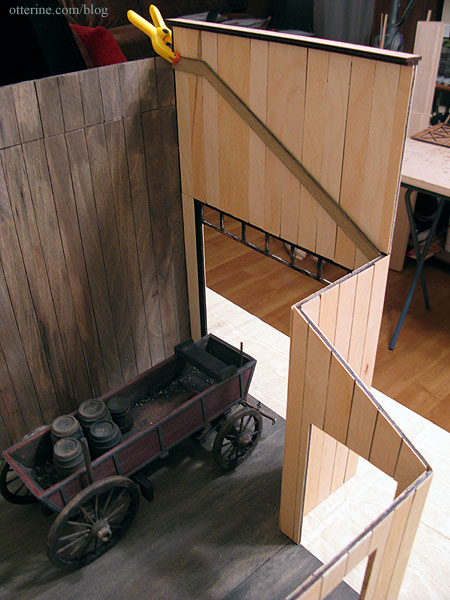
I tried the siding/painting process start to finish on the side room first, figuring if it ended up being a disaster, I could still use and assemble the garage kit on its own.

Here are some of the pieces during the siding process:

I replaced the two side windows with Houseworks dormer windows and used a Houseworks five panel interior door for the front door. All required very little adjustment to the size of the openings, but they had too much depth for the 1/8″ thick plywood walls. For the front door, I used the outer trim that came with the kit to line the doorway, cutting away the excess to sit flush along the edges of the Houseworks door. I also flipped the opening direction of the door (see my earlier blog entry). For both windows, I created a frame using 1/8″ strip wood under the outer frame.

To create the aged front door and window trim, I kept washing on Slate Grey paint by Americana, wiping it off, using crackle medium and repeating until it looked the way I wanted.

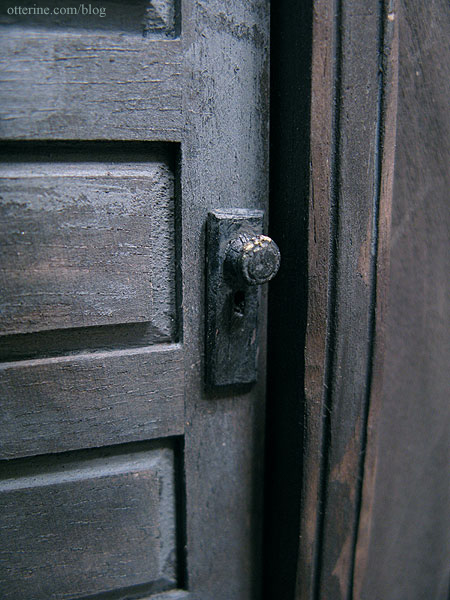
The doorknob is an unfinished pewter piece that I painted to match the door.
For the garage main doors and side door, I did an extensive amount of cutting, scoring and general beating the tar out of the wood with whatever tools I had within reach. I even put in a wide gap between the mock boards of the left door. Forgive the dirty nails – that’s what spending a week using black and brown paint washes will do to your hands!
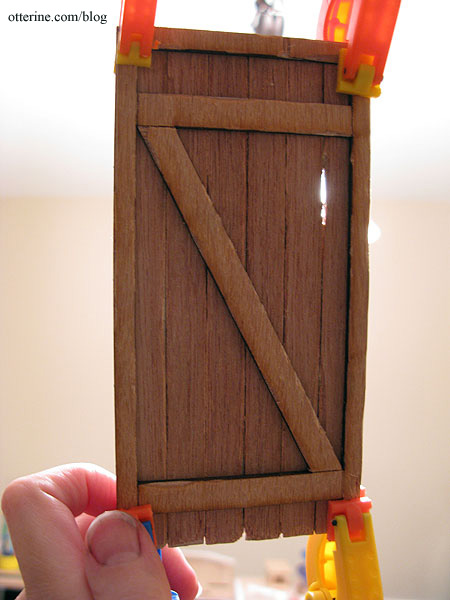
Though only the exteriors of the doors were laser scored in the original kit, I measured and carried that pattern over to the reverse sides.

I used working hinges for the garage doors, dabbing black paint to cover the brass nails. I also used black paint to color in the original laser etched hinges since my working hinges didn’t cover them completely.
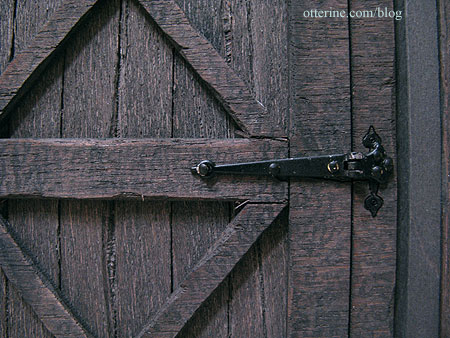
I attached the metal hinges before the walls were assembled so I could lay them flat and get the proper fit. I had to do some altering of the lower edges of the doors and the front edges of the floor after assembling the structure, but it worked out better in the long run.
To get a firm fit when attaching the room addition to the main structure, I glued strip wood to act as a brace under the floor and to support the ceiling board to create an attic. I left space between the boards to run wiring (you can see the channel I made with my rotary tool).

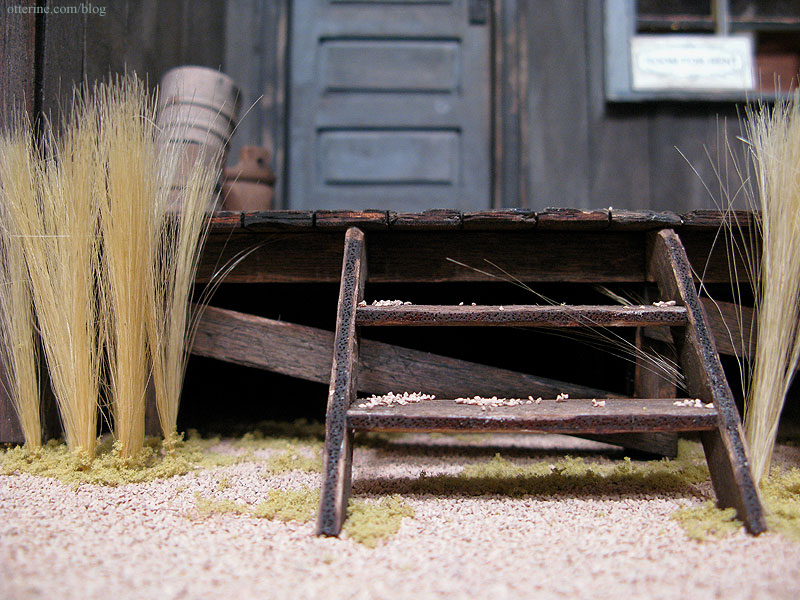
The porch construction was exceptionally easy and might be one of my favorite parts of the kit. I again cut and pounded the boards to create an aged look.

I used an awl to puncture nail holes along the boards and a tiny drill to simulate bolts on the lower support beams.

I especially beat up the edges of the boards and exaggerated the laser scored lines and cuts along the front edge.
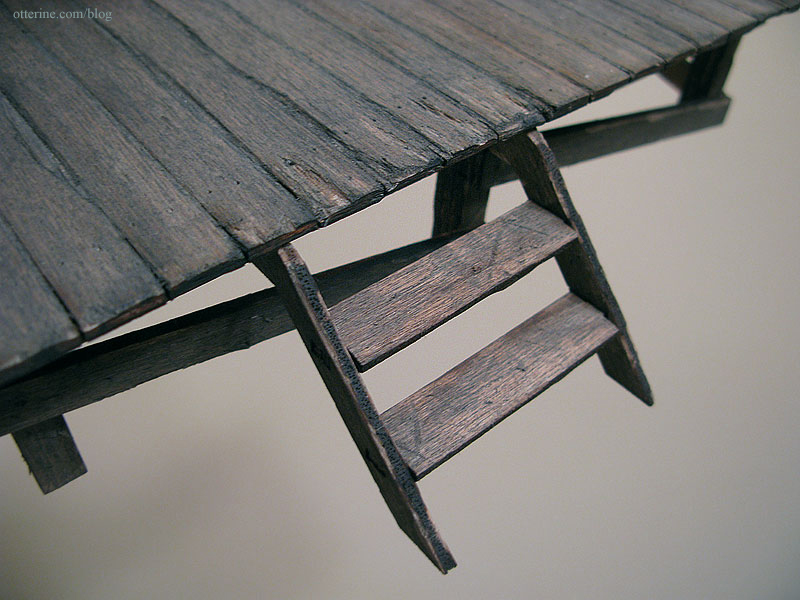
This created a really nice walking wear pattern at the top of the stairs.

I made the stool using a pattern in the book Finishing Touches by Jane Harrop. It, too, was aged with the black and brown paint wash.
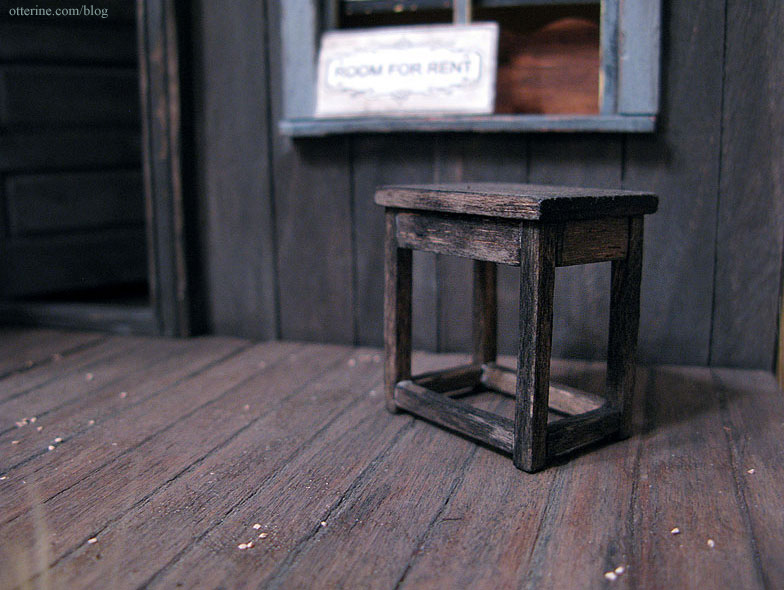
Categories: Baslow Ranch
May 31, 2010 | 0 commentsBaslow Ranch – Tin Roof
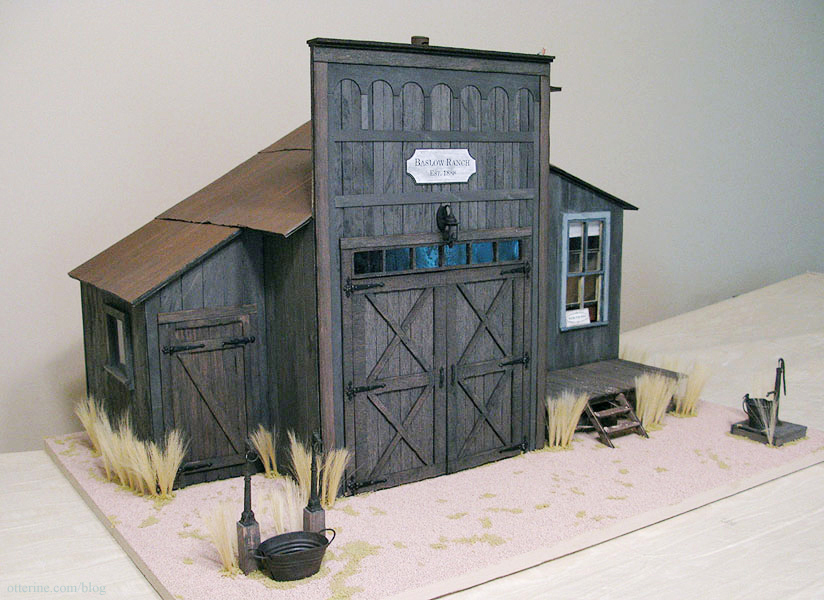
My initial idea for the roof was corrugated cardboard painted to simulate tin since I’ve seen that done before with good results, but I found two items that allowed me to go for an even more durable finish. The first was a pack of 12 metal sheets with an adhesive backing. Each sheet measured 4″ x 12″ and the pack was very reasonable in price – $5 at Hobby Lobby. I then bought a paper crimper by Fiskars to turn 4″ x 6″ pieces of the metal sheet into corrugated tin roofing. :D
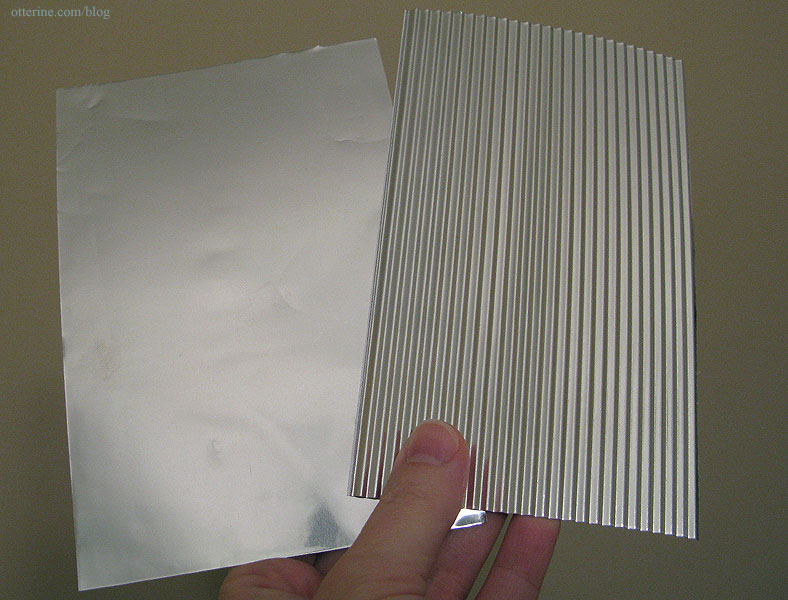
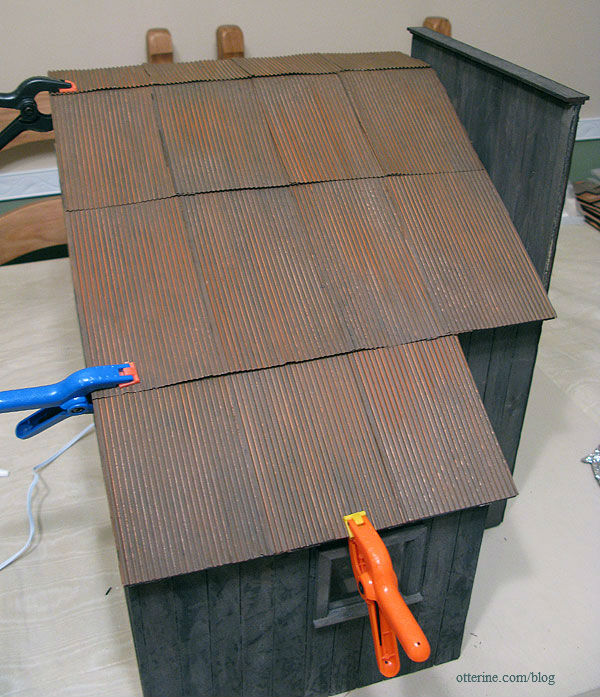
I taped the layout onto the roof with masking tape to figure out what would look best.
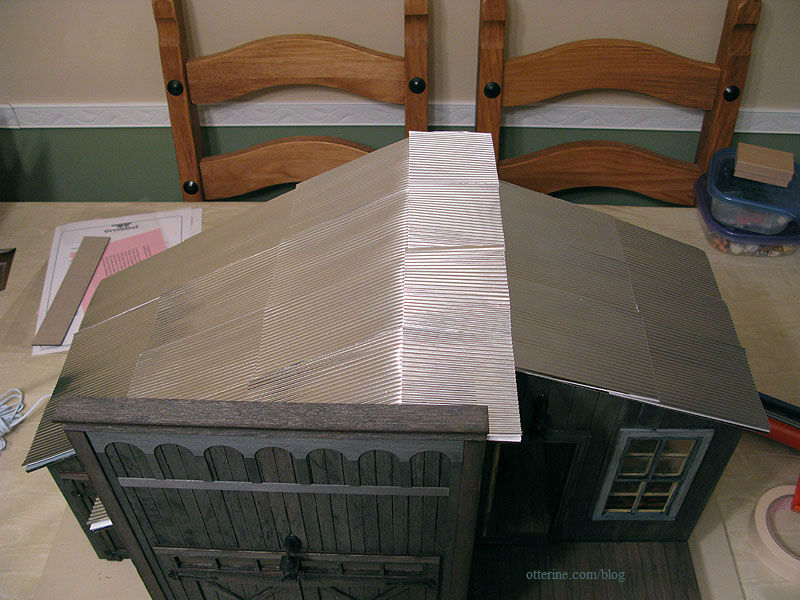
After transferring the pieces onto a foil covered board, I sprayed them with a thin coat of Testors flat black spray paint.

Once the black paint was dry, I started layering different colors of paint using a stencil brush. I used Bittersweet Chocolate by Americana, Coffee Bean by Folk Art and Terra Cotta by Americana. Once I had a good base of brown and rust colors, I used a watered down wash of the Terra Cotta paint to smooth the surface. Here is the final look.
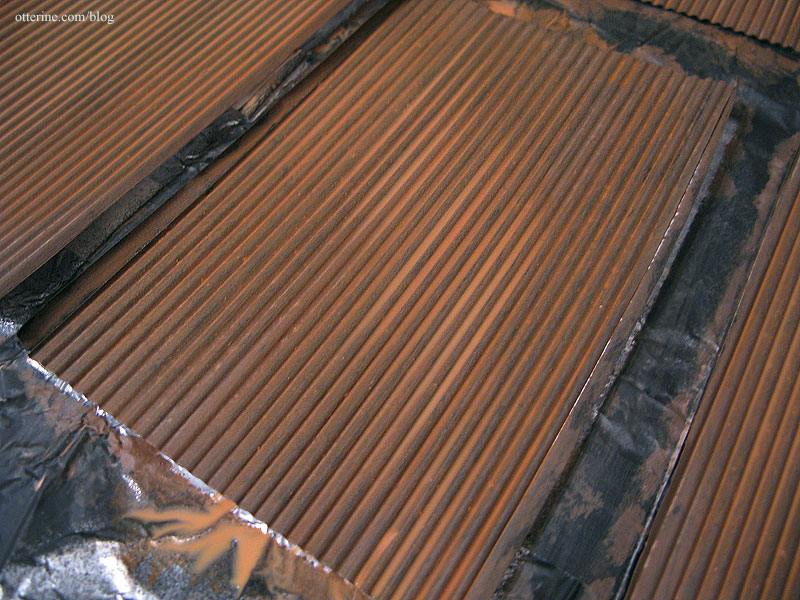
The metal had an adhesive backing, but I added some tacky glue after peeling away the backing to affix the pieces to the roof.

Some of the edges lifted as the glue dried, but that only added to the worn effect.
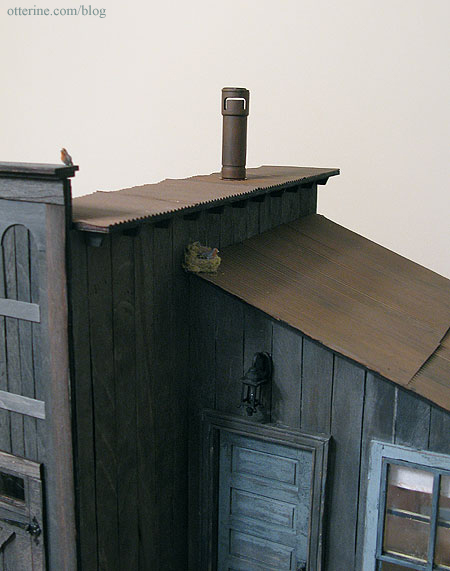
The chimney was made from spare bits and bobs. I glued the pieces together and then sprayed with Testors flat black. I “rusted” it with paint and glued it to the roof. (I didn’t make a connecting pipe inside the barn due to lack of time.)
The birds nest was made using an online tutorial as a starting point, but I used what I had on hand: jute twine and some leftover Woodland Scenics ground cover. It made sense to me that a bird would make use of the materials growing in the environment, so I wanted it to match the plants I had put around the building.
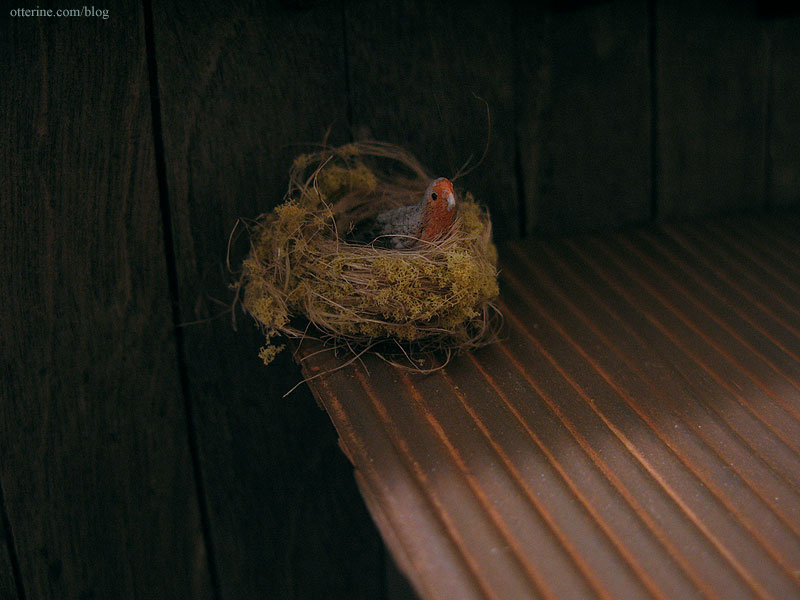
I placed one bird in the nest below the eave of the upper roof and the other bird on the top of the facade. The birds are by Falcon Miniatures.

Categories: Baslow Ranch
May 31, 2010 | 0 comments
NOTE: All content on otterine.com is copyrighted and may not be reproduced in part or in whole. It takes a lot of time and effort to write and photograph for my blog. Please ask permission before reproducing any of my content. (More on copyright)


