
Mice on holiday
Since we were already going to be in Denver for a friend’s wedding, my boyfriend and I spent a few days in the Rocky Mountains to celebrate my birthday. We attended a Japanese tea ceremony at the Denver Botanical Gardens. We “climbed” the 14,000ft Mount Evans (well, the 1/4 mile trail from the parking lot to the top), where we saw goats and marmots. In the Victorian village of Georgetown, we rode an open air steam train and toured a silver mine. And, to top it all off, we generally ate a ton of great food! :D
But, what’s a vacation without minis? ;] While in Georgetown, we stopped into Rocky Mountain Miniatures, where I ended up with only two small purchases even though the store had a ton to choose from.
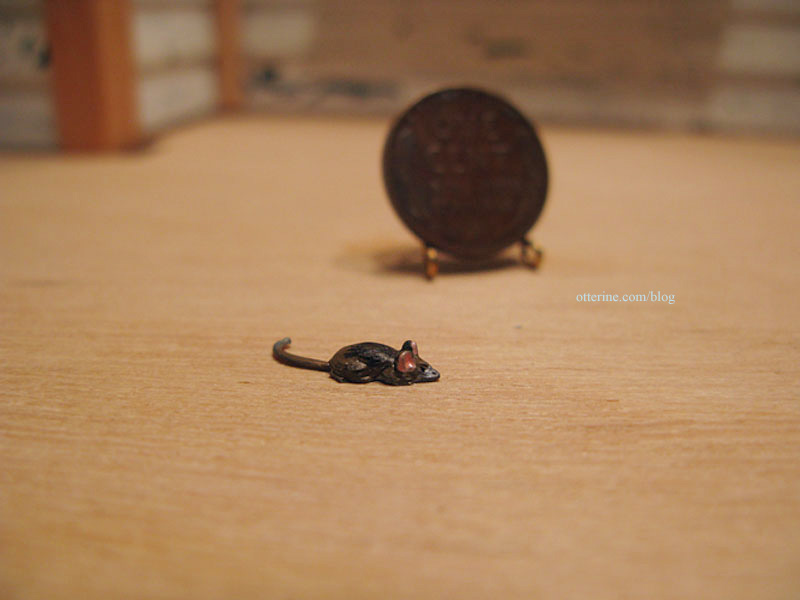
First, a rather realistic (and very tiny) mouse for the haunted Heritage.
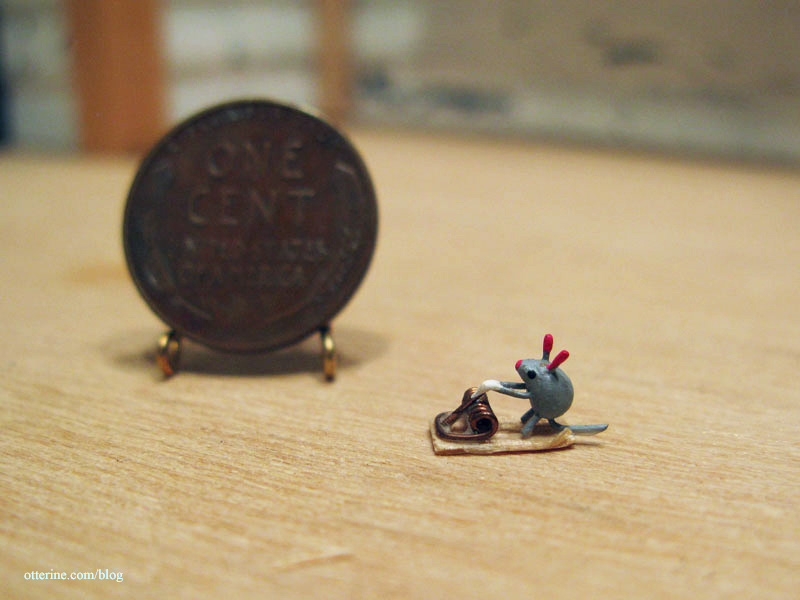
And second, an amusing little mouse stealing the cheese!!!! :D This one is just too stinkin’ cute!
Categories: Animals and birds
August 18, 2011 | 0 commentsSaltwater aquarium in 1:12 scale
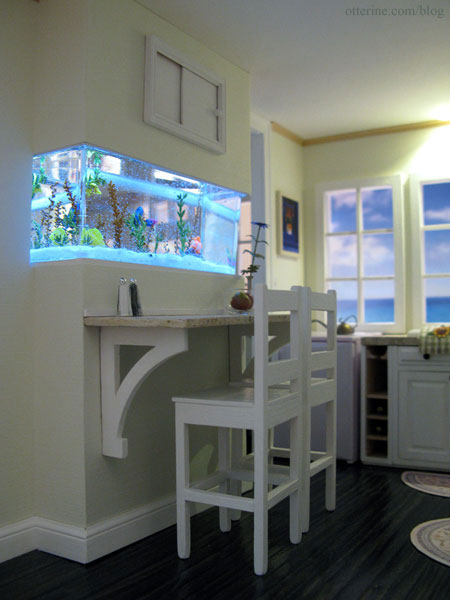
One of the main features of Baxter Pointe Villa is the saltwater aquarium room divider. This post shows the process I followed for my test tank and this final tank below.
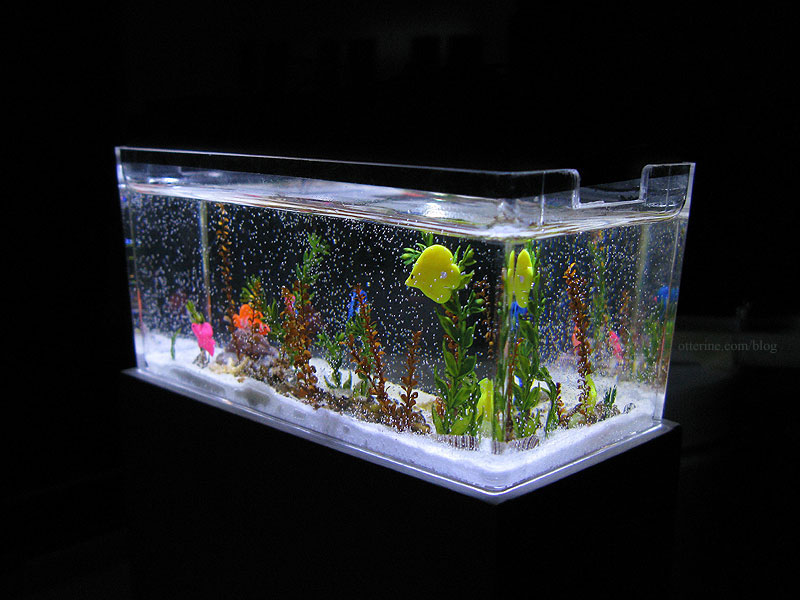
There are several miniature aquariums on the market, some with lighting. In fact, I had one in my childhood dollhouse, though I lost track of it a long time ago. Additionally, there are miniaturists out there who have made their own fish tanks. There’s a wonderful tutorial on the Greenleaf forum for just such a tank.
I wanted to go one step further and make an elaborate saltwater tank with bright, vibrant fish and custom lighting. My inspiration for the overall size and feel of the aquarium came from various real life tanks where the aquarium is mounted in the wall and often serves as a room divider. Very posh. (For real life examples, see Fish World.)
While I did have a few smaller acrylic boxes on hand, I wanted a larger tank…something that would be better suited as a room divider than a fish tank in the corner. I found these boxes, the original purpose of which was to display diecast cars. They measure approximately 4″ L x 2″ H x 2″ D each, though the usable area is shorter since there is a noticeable lip around the top that would detract from the illusion of a real life sized aquarium. Ten dollars for five tanks gave me five attempts to get it right, though I think if it had taken me five attempts I’d have given up around three in a fit of tears and curse words.

It probably would have been better if I had a tank that were tall instead of short and more straight-sided, but I think it works well for what I intended.
Interestingly enough, the bases seem very well suited to aquarium hoods when turned upside down. Remove the knobs on top (or not), add a quick coat of paint, and you’re all set. They even have pre-drilled holes if you wanted to add lighting.

Since I had never worked with resin water before, I decided to do a test tank. I started with white sand I bought at the dollar store. I figured I would need to glue everything in place before adding the resin water, so I experimented with several different methods for gluing the sand in the tank.
I used a mixture of sand, glue and paint. For the gravel, I used gemstone beads that I smashed with a hammer into finer bits. I used the same glue/paint/sand techniques to attach the gravel to see which worked the best. Here’s the result of those multiple techniques.

I ordered some tiny, tiny, TINY shells from Ronni at Marco Island Shells, and in my package she included a bunch of slightly imperfect shells. I dipped a few in glue and pressed them into place. Actually, these aren’t the smallest she carries…she has micromini shells, too!!! :D

Look at all the intricate detail! Isn’t the natural world a remarkable thing? :]

I found some great plastic plants from A Little More in Miniatures at a local mini show. I cut them into varying lengths and used clear glue to attach them to the tank floor.


For the larger stones, fish and other live creatures, I used polymer clay. Since this was a test tank, I didn’t put a whole lot of effort into the sculpts before baking. Some were baked attached to rocks, while others were glued in place after baking. I love Sculpey Bake N Bond! Just a dab really holds so you don’t mar your creations by pressing them together.

I bought two sea urchin polymer clay molds from Tina at Beadcomber. These were cast from actual urchins and they have wonderful details.

I used the smaller one to create a flat sea creature…sort of a mix between coral and urchin. :] I dusted it with pastels before baking.

The blue fish was painted with metallic Testors paint; the rest were formed of colored clay. The rock the blue fish is on was painted with regular craft acrylic paint. As a final touch, I painted eyes on all the fish with Testors black paint using a sewing pin. The fish were all glued in place with Aleene’s clear gel glue before I added the resin.

I sealed half of the urchin creature with acrylic sealer and added a couple of non-plastic plants just to see how the resin would react with these materials.
Of course, my test tank was looking better with everything I added. Isn’t that always the case? Now, I was worried about ruining it with the resin. But, there was no turning back!

I bought Acrylic Water from Walmart since others who have made these tanks recommended it. It was also way cheaper than other casting resins on the market. It was super easy to use, but I must say finding measuring cups was not easy. Sure, I could have ordered them online, but really…a craft store that sells resin kits should have plastic measuring cups. I ended up buying a pack of 9oz. Chinet cups from Target and made my own measuring cups. :D
The test tank took 6oz. of resin mixture. I filled it to the line around the top to make it less obvious.
The directions said to mix the epoxy with the hardener and stir “until clear.” Well, it was clear but it had streak-like formations in it that I didn’t notice until after it was poured into the tank. I don’t know if that meant I didn’t stir it long enough or if that was just the nature of the resin.

During the first few minutes, some large bubbles rose to the top and popped. Using a toothpick, I dislodged a few that were stuck as well. There were some tiny bubbles left in the resin, but I liked the look of them. That sort of aeration is similar to what a real tank has.
After 48 hours, the resin had hardened and looked good for the most part.

Most of the streaks had disappeared, but there was a halo in the area where I had painted a rock with acrylic paints. Though I wasn’t sure it was a reaction with the resin, I figured it was best to eliminate those paints in the next trial just in case.

Had I intended to display the tank in a cabinet with a backdrop, the halo wouldn’t matter since I could likely disguise it…but I wanted to be able to see it from both sides and the streak ruined the illusion of real water. Still, not bad for a test tank.
For the second and final tank, I skipped the sea urchin creature and instead added two starfish, also from Ronni at Marco Island Shells.

I put in more plants as well as taller plants. I spent a bit more time sculpting the fish and added a bit more detail to them.

I also stirred the resin for close to ten minutes to make sure it was as clear as I could get it before filling it up to the side openings along the rim to take advantage of all the usable space available. I got a few more bubbles this time – probably from too much stirring, but I think it turned out fabulous!
To place it in the wall, I built a base that fits just around the tiny lip on the bottom (shown with the test tank).

I used square posts in the corners for stability.

I built the soffit in the same manner, cutting notches for the thin room divider near the ceiling and adding a brace across the inside to glue it in place. Here it is shown without the back, which was put on after installation.

I bought two cool white LEDs from Evan Designs to light the tank. To diffuse the lighting at bit, I used a recycled report cover with a lined texture to finish the inside of the topper.


And, here is the final tank set in the wall. I love it! I especially love the way the lights pick up the bubbles in the resin.
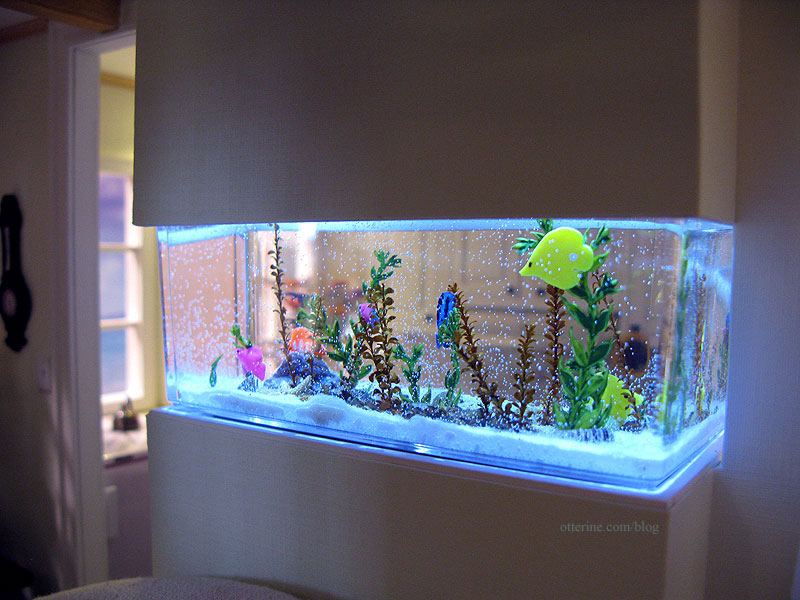
There is a door on the kitchen side of the aquarium soffit that allows access to the tank. I hardwired the lighting, so it’s meant only as a means for the residents to feed the fish! :D
Note: any resin used will likely yellow over time, so use at your own discretion. The resin for the tank made in this post is now very dark yellow.
Categories: Animals and birds
July 3, 2011 | 0 commentsWhooooo’s a cutie?!
One of my favorite animals is the owl, and I especially love the Burrowing Owl. I have a printout of an image of a Burrowing Owl chick on my wall at work. It makes me smile. :D
I’ve been so inspired by the work of Anya Stone and Kerri Pajutee, two amazing artisans who make the most realistic miniature animals I’ve ever seen. I’ve wanted to make a Burrowing Owl for some time now, so I decided to just hop to it! Kerri has two great tutorials on CDHM: one for sculpting a bird and another on flocking and feathering. I used those as a basis to start my mini owl.
I decided to make an adult Burrowing Owl.

image by Nature’s Pic’s Online I was lucky to find a good photo of the back of the owl, too (see photos by Ecobirder).
I sculpted my bird using white polymer clay, though it got fairly dirty as I worked with black wire to make the legs and feet. The feet look a bit big, but it was the only wire I had and the flocking and feathering will add weight once applied. To get the bird to stand while baking, I tied some wire around the ceramic tile I use for baking clay.

After baking and cooling, I painted the whole piece with light tan acrylic paint. I also painted the eyes and beak before feathering. Caution: naked birdie below…

I bought two types of feathers, using the darker ones for the tail feathers and back and using the lighter ones for the breast. I used embroidery floss to make the flocking. I cut all but the spotted and striped portions from the feathers. I followed Kerri Pajutee’s tutorial for placement for the most part but tried to use the natural patterns of my feathers to mimic those of the Burrowing Owl.

Here are some photos of my owl as the feathering progressed…


And, finished! :D

I love him!!!!! I don’t think I did half bad my first time around if I do say so myself.
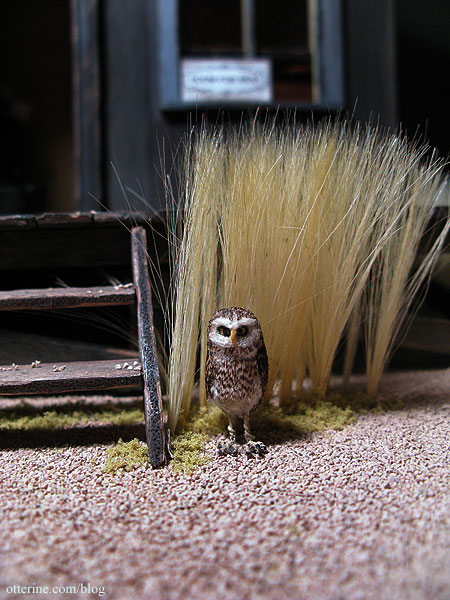
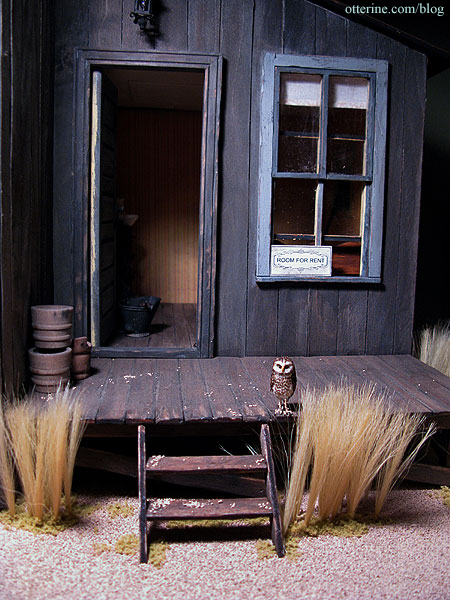
And, he looks right at home on Baslow Ranch! :D
Categories: Animals and birds, Polymer clay
August 20, 2010 | 0 comments
NOTE: All content on otterine.com is copyrighted and may not be reproduced in part or in whole. It takes a lot of time and effort to write and photograph for my blog. Please ask permission before reproducing any of my content. (More on copyright)
Categories:

Sam
I have a new mini bird in my life, but this one I didn’t make.
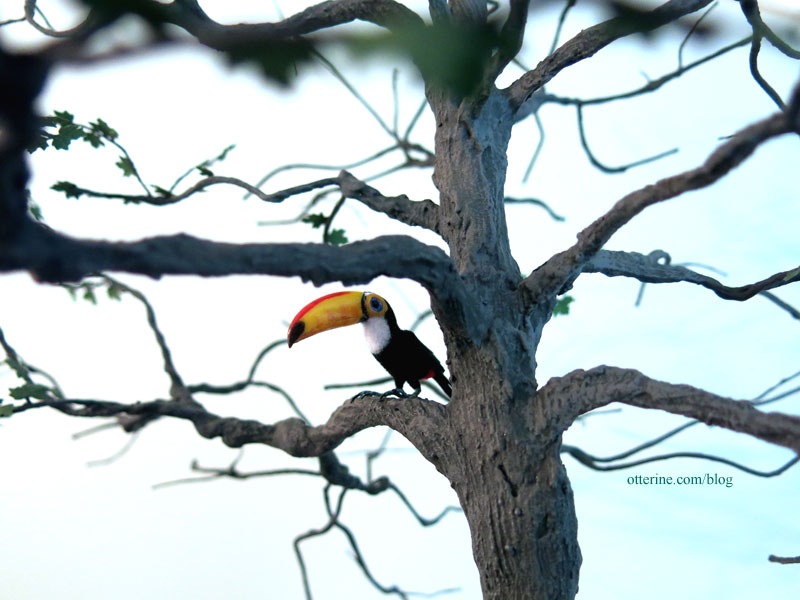
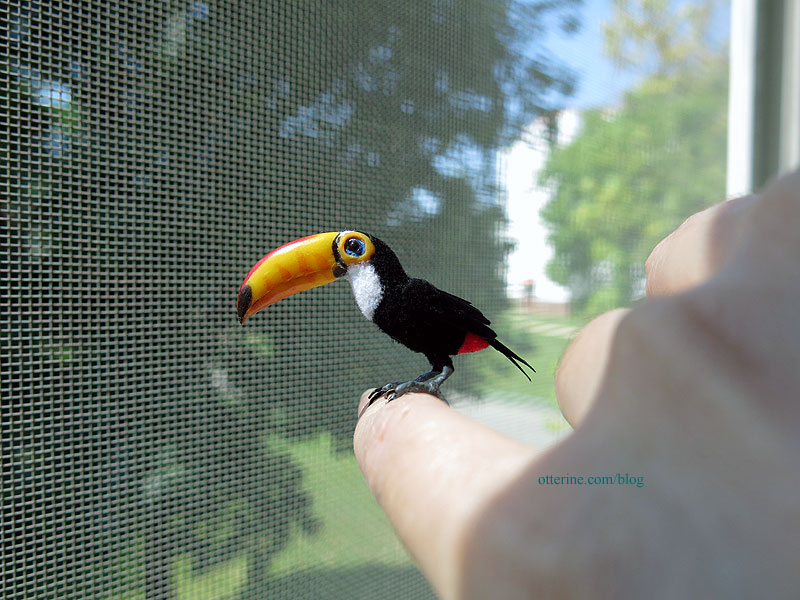
I’ve named him Sam, though his beak is true to life rather than cartoonish like the one of his namesake Toucan Sam. Man, I haven’t had Froot Loops in a long time!
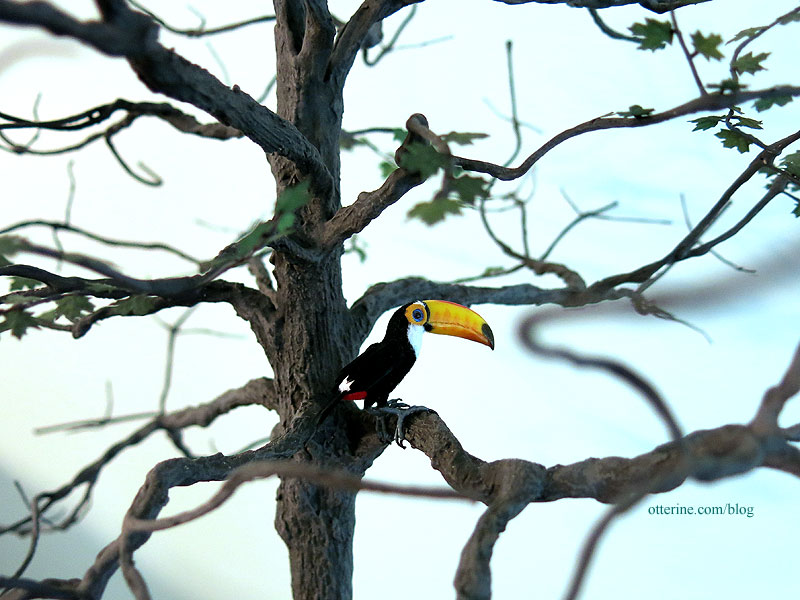
Sam is a gorgeous Toco Toucan made by Katie Doka of FairiesMiniatures on etsy. He’s quite perfect. In fact, he’s so lifelike I half expect him to blink and fly about the house! Birdie wanna go outside?!!
Categories: Animals and birds
June 25, 2016 | 0 commentsHappy Groundhog Day 2016!
It’s Groundhog Day, but I think Woodrow is still making up his mind whether there will be an early spring or six more weeks of winter.
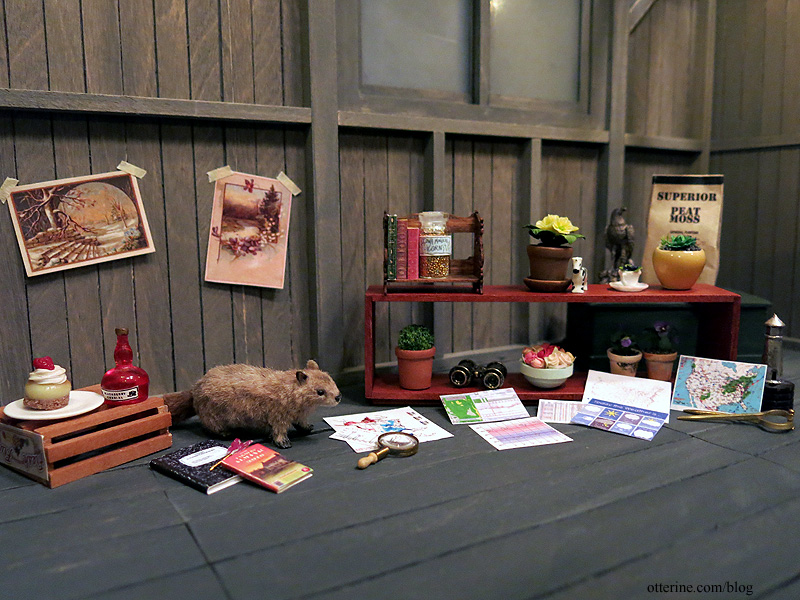
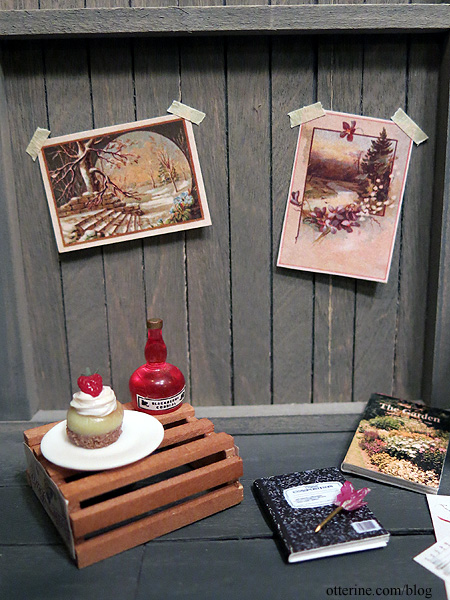
Woodrow is supposed to be impartial, but his surroundings suggest a hankering for gardening. Still, he looks all scientific with his almanac, charts and graphs.
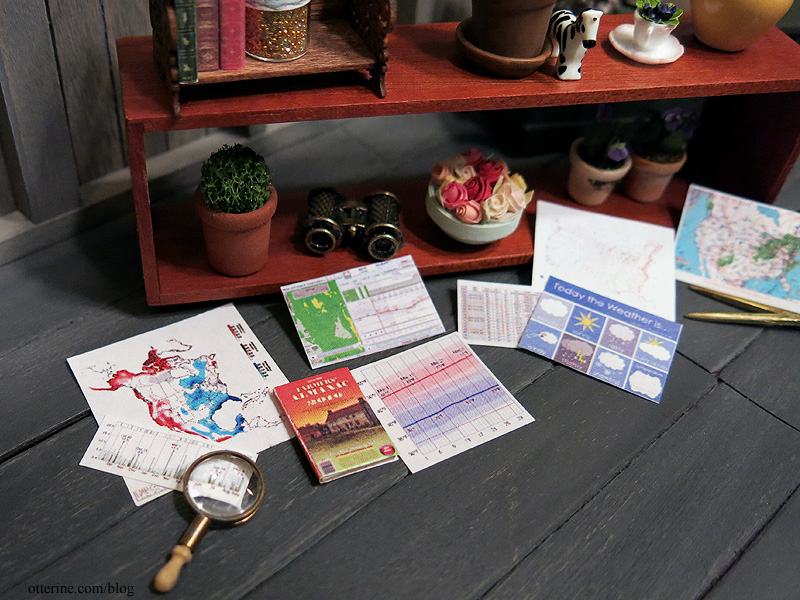
It’s not like I am lacking in mini projects to keep me busy…but it would be nice to have the windows open.
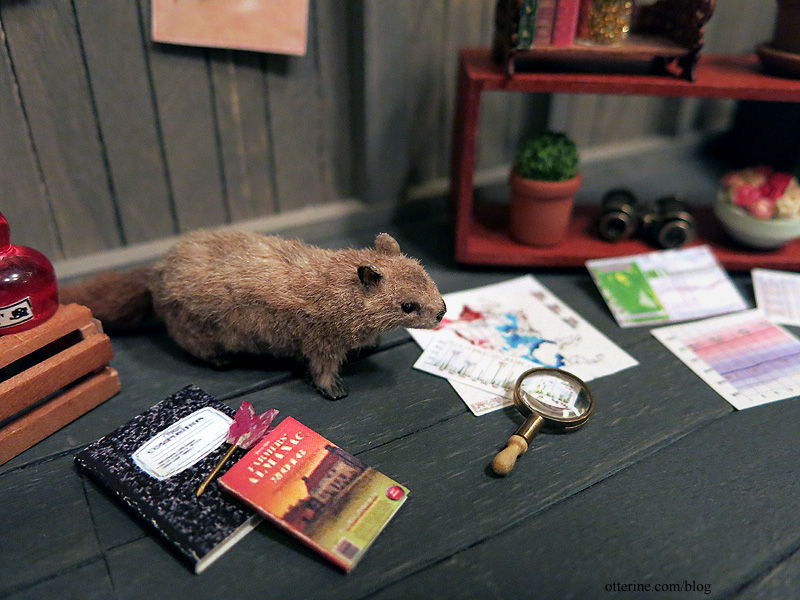
I spy a dart to throw at those winter and spring posters if research and study fail to help. No matter what the outcome, I’m all for his plan of having dessert and a cordial. :D
——
Woodrow by *reve*. Yellow pot with succulents and zebra from April. Pansies and violet plants from Debora. Jacobean book rest kit from Cynthia Howe Miniatures. Winter and Spring images from The Graphics Fairy. Magnifying glass and calipers from Bill. Dessert from MiniFanaticus.Categories: Animals and birds
February 2, 2016 | 0 commentsTinysaurus Rex
Ages ago, I saw a Tinysaur T-Rex that April had assembled. I put off getting one of my own, which is always a mistake. If you like something for a future project, it’s better to get it and store it. When I finally got around to looking for them, they had vanished like the actual dinosaurs during a mass extinction! :O
I persevered, and they finally arrived…the T-Rex and the Stegosaurus. I ordered mine from The Evolution Store back in 2013, but you can now find them at Everything Tiny.
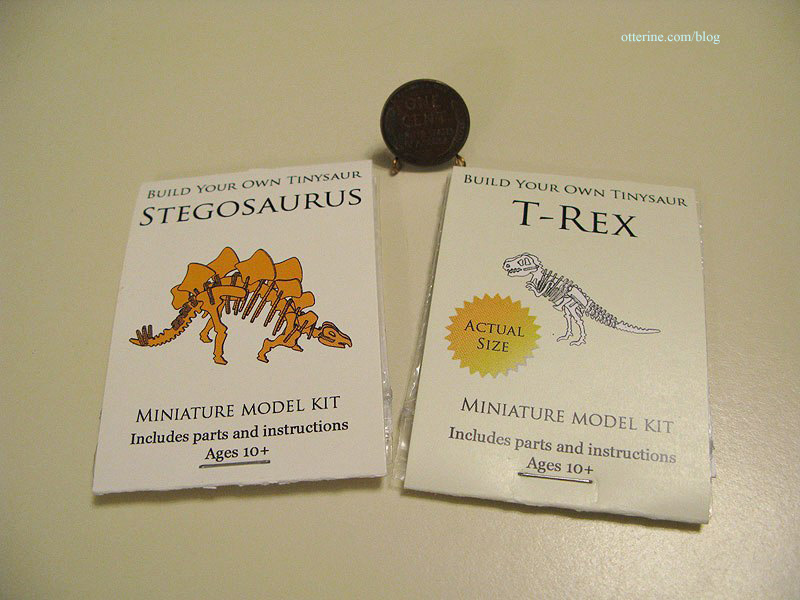
Look how small the T-Rex head is, and then notice there are a lot of parts even smaller!!! :O
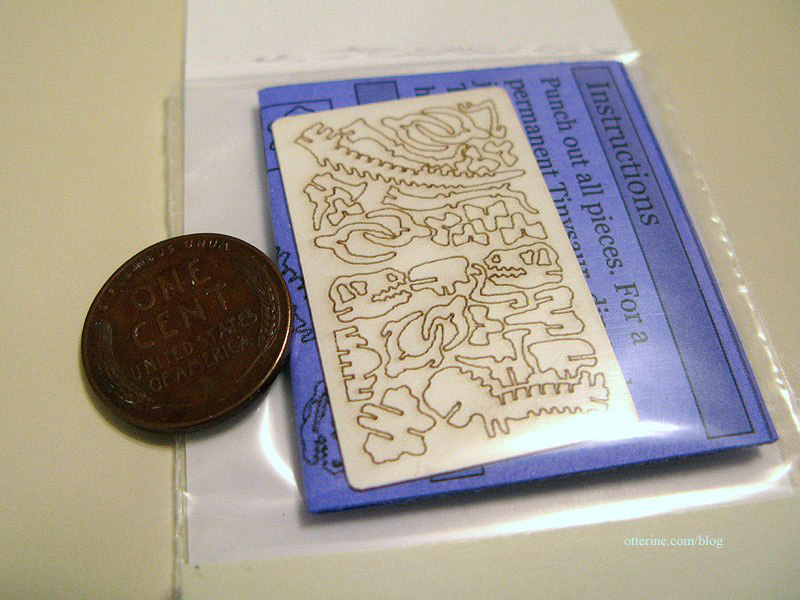
I had started this model in 2013 for my Christmas scene that year but never got back to it until now.
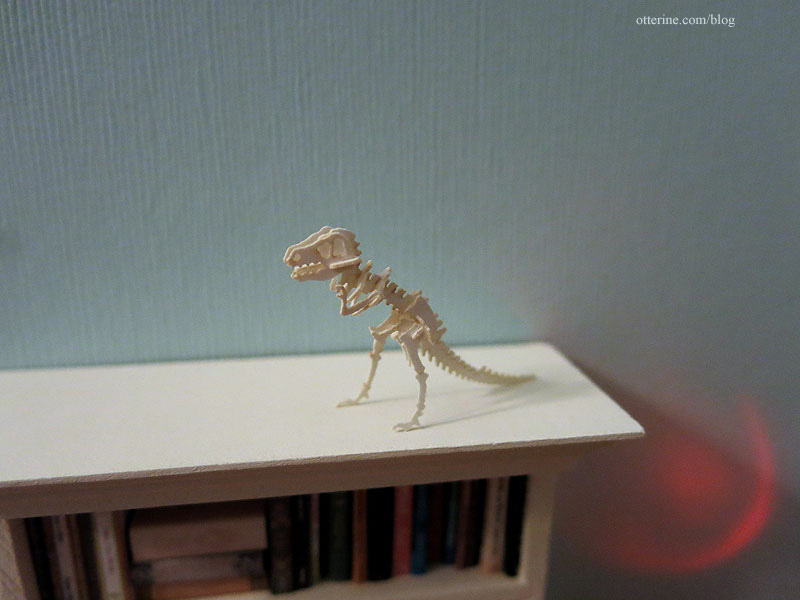
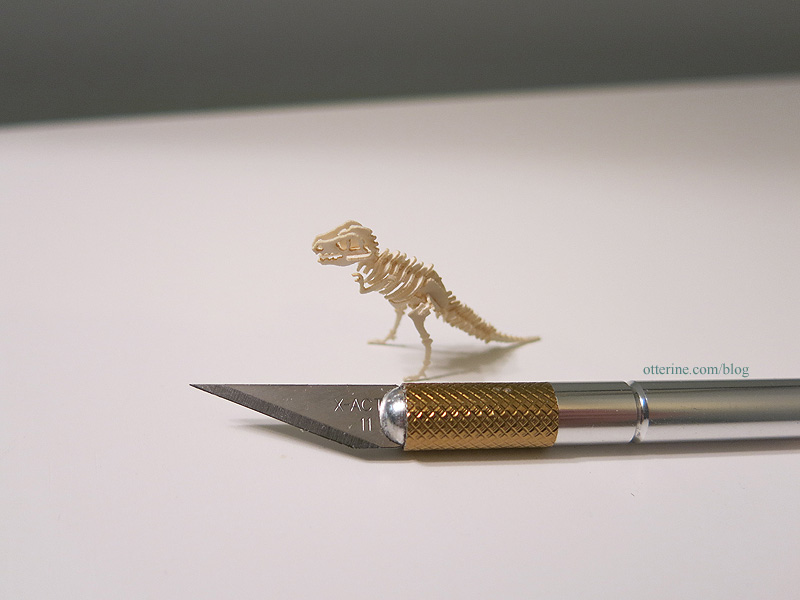
My X-Acto blade was huge in comparison. Nothing but super sharp, out of the box blades for this work. Separating the pieces took a lot of patience. I recommend working in an area with no breeze, no small spaces for flying parts to fall into (I’m looking at you, keyboard) and no loud noises. No deep breaths or sneezing, either!
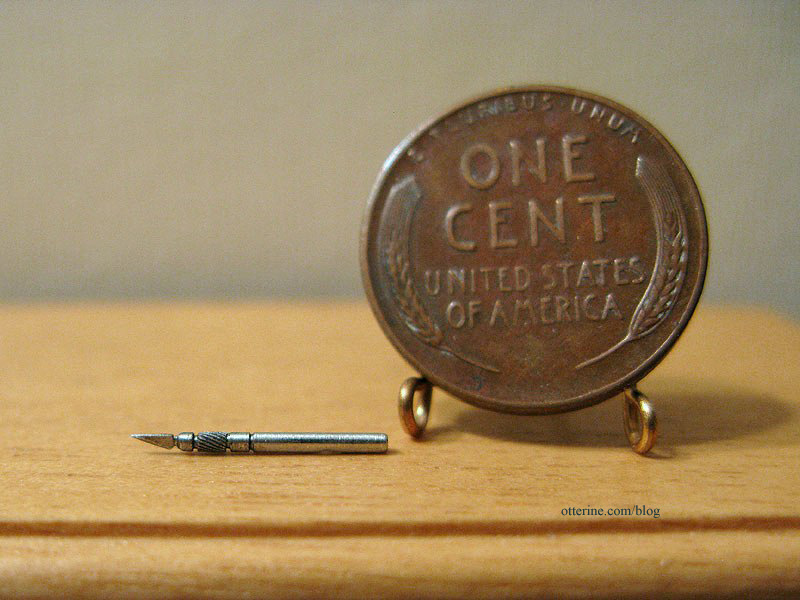
Maybe if the tiny X-Acto by Ulus Miniatures truly worked, it would have been easier. :D
I glued my model together, though I did a dry run on all the parts each step of the way. There would be no way to take it apart if a gluing error occurred. I used tiny tip tweezers for the parts and bent tip tweezers to hold the model.
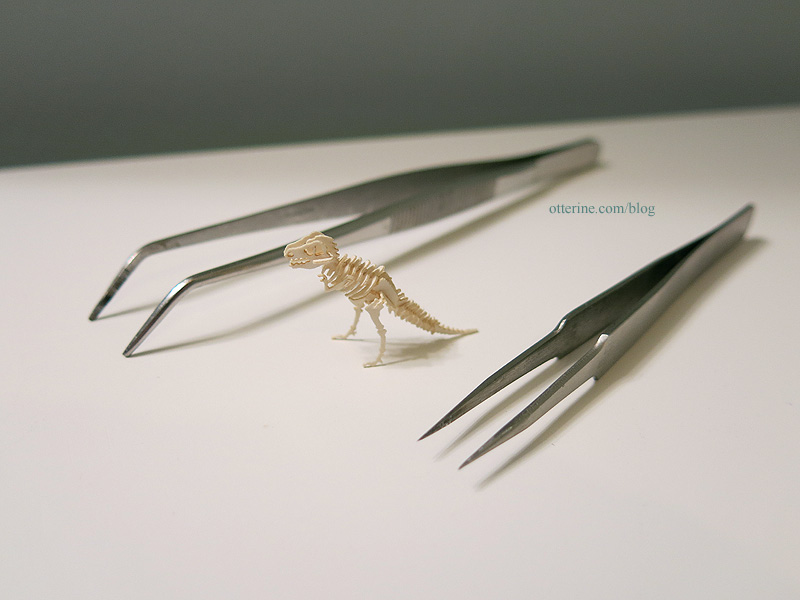
So wee!!! :D I tell you, the pieces look substantial in this photo…they are not.
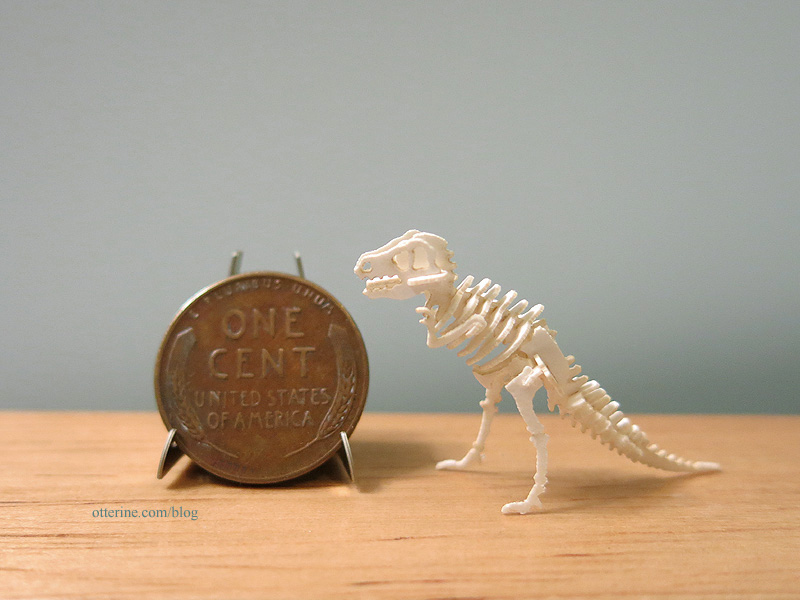
I put together one of the regular size wood models back when I was young, so it’s nice to have a mini one for my mini houses. Plus one of my inspiration photos for Otter Cove had a wood dinosaur model in it (and a round window on a white brick wall). Meant to be!
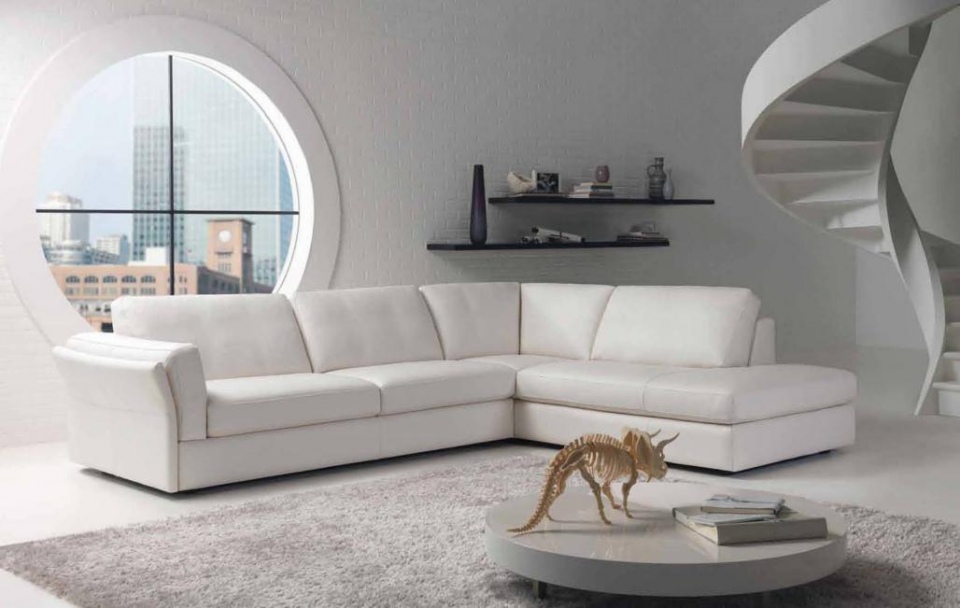
no discernible source found for this image since there were over 1,500 instances of it in a google search Categories: Animals and birds
December 10, 2015 | 0 commentsIsabeau
There’s a new mini kitty in my collection. :D
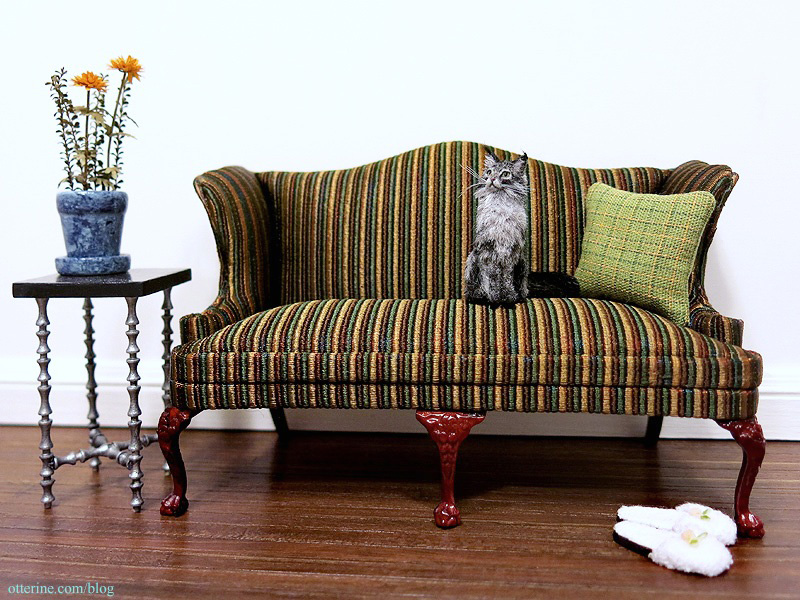
Isabeau is a beautifully made Maine Coon cat by Maya Schippl.

Isabeau is slightly smaller than the other cats I have when shown in comparison, like Ophelia here, but they both fit perfectly in 1:12 scale. :]

So pretty, so bewitching.

Her small stature reminds me of a real life kitty from my past. I worked at Save-A-Pet one summer and took care of the incoming cats. This was a room with individual cages for quarantine before the animals could be integrated into the general cat room. My responsibilities included cleaning the incoming cat room cages as well as those of the “sick” cat room where the vet oversaw more intense cases.
One incoming cat the staff named Howard was about the size of a 10 week old kitten when he came in. He was so ill. He had a terrible respiratory infection and was sick for quite awhile. When I would clean his cage, he would lie limply around my shoulders like a scarf. He had so little energy from fighting the infection that the vet wasn’t sure he would ever get any bigger. He would spend his adulthood at the size of a 10 week old kitten. I fell in love with that cat in the time we spent during his recovery, but my parents didn’t allow animals in the house so adopting him myself was out of the question. He was adopted one busy Saturday later that season, and the staff came to get me to break the news. The people adopting him let me hold him as they filled out the paperwork, and he fell asleep in the hustle and bustle around us. Sweet little kitty. I always wondered how his life turned out. :]
Categories: Animals and birds
October 27, 2015 | 0 commentsThe Wee Sisters Three
A group of friends went in together and sent me the most adorable trio of mice for my birthday (from CozyMilArt). These three wee sisters are Daisy, Poppy and Fleur. While they each have their own personality and vary in looks, I still might have to make bracelets for them so I can keep them straight.
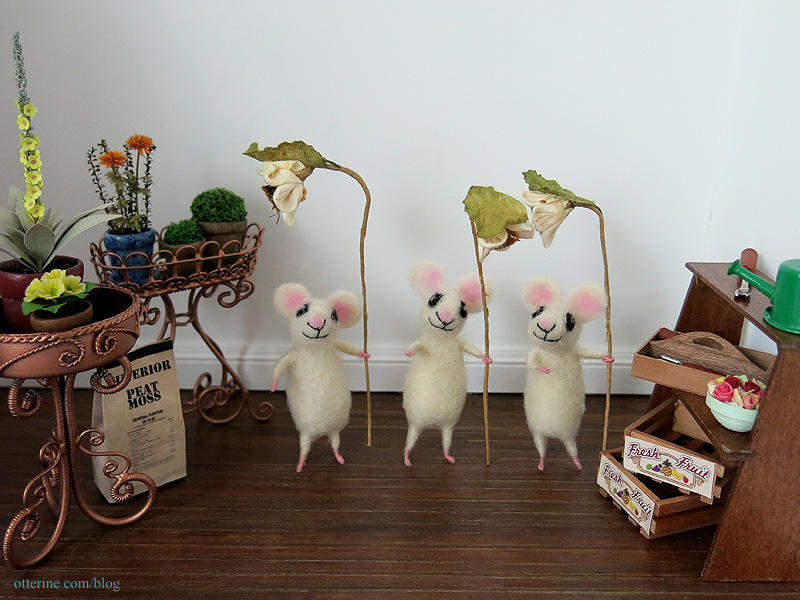
The included flowers are removable, but they can stand on their own without them. They can even hold other things.

They found the toy chest! Wheeeeeeeeeee!

As you can see, they are good for child size in 1:12 scale, though they could work as adult sized mice in half scale. Thank you so much, ladies!! I love them! :D
Categories: Animals and birds
August 10, 2015 | 0 comments
NOTE: All content on otterine.com is copyrighted and may not be reproduced in part or in whole. It takes a lot of time and effort to write and photograph for my blog. Please ask permission before reproducing any of my content. (More on copyright)


