
Clyde
Clyde is a handsome Hoopoe bird by Katie Doka of FairiesMiniatures.
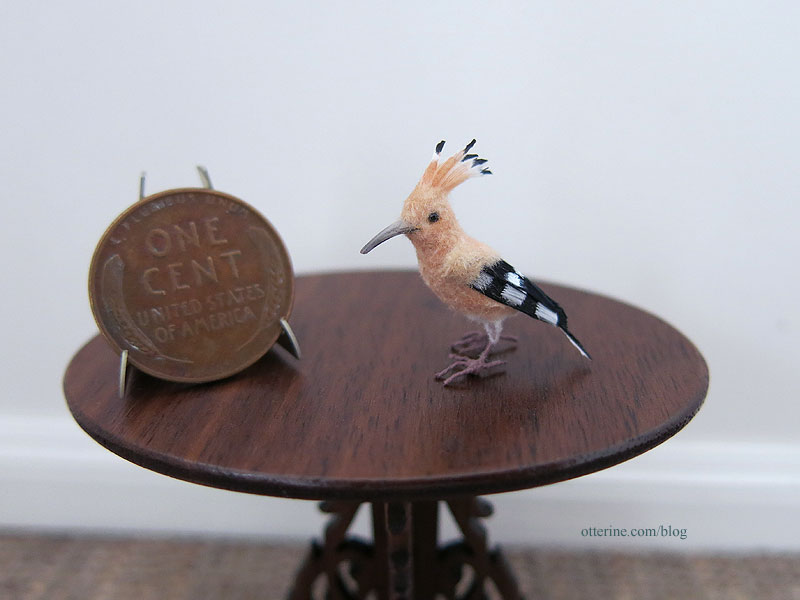
She’s captured the plummage beautifully. Be sure to check out pictures of them flying…so interesting! :D
Categories: Animals and birds
September 1, 2016 | 0 commentsSam
I have a new mini bird in my life, but this one I didn’t make.
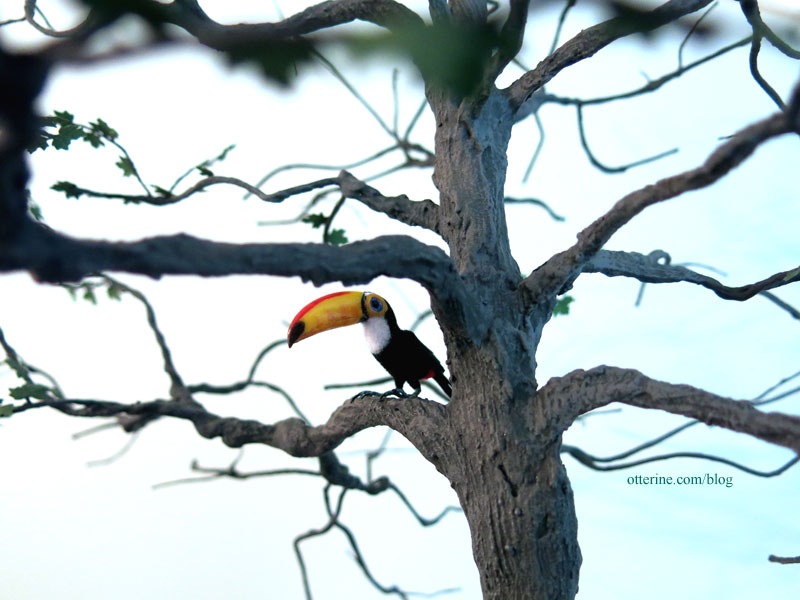
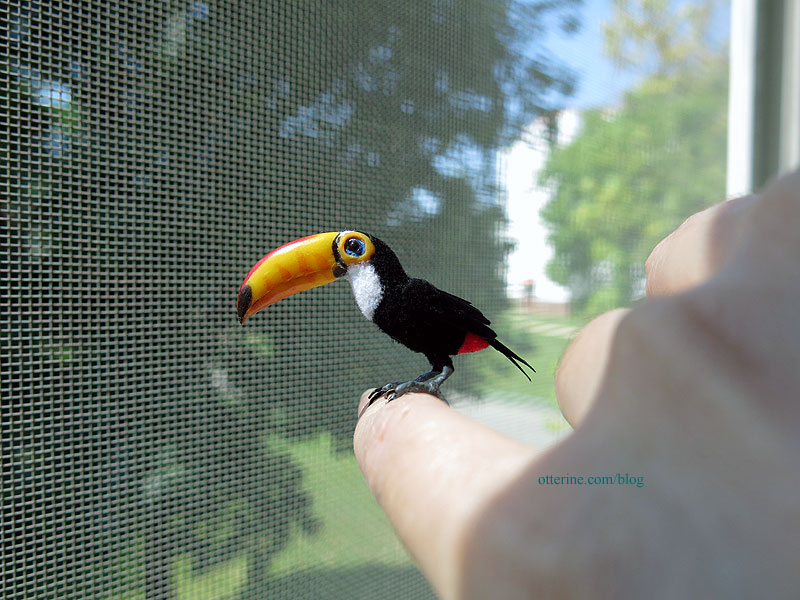
I’ve named him Sam, though his beak is true to life rather than cartoonish like the one of his namesake Toucan Sam. Man, I haven’t had Froot Loops in a long time!
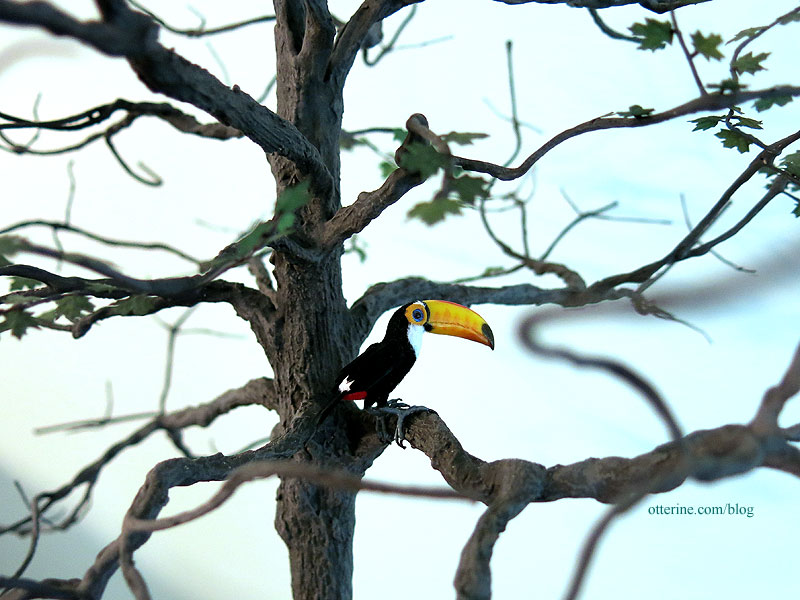
Sam is a gorgeous Toco Toucan made by Katie Doka of FairiesMiniatures on etsy. He’s quite perfect. In fact, he’s so lifelike I half expect him to blink and fly about the house! Birdie wanna go outside?!!
Categories: Animals and birds
June 25, 2016 | 0 commentsHappy Groundhog Day 2016!
It’s Groundhog Day, but I think Woodrow is still making up his mind whether there will be an early spring or six more weeks of winter.
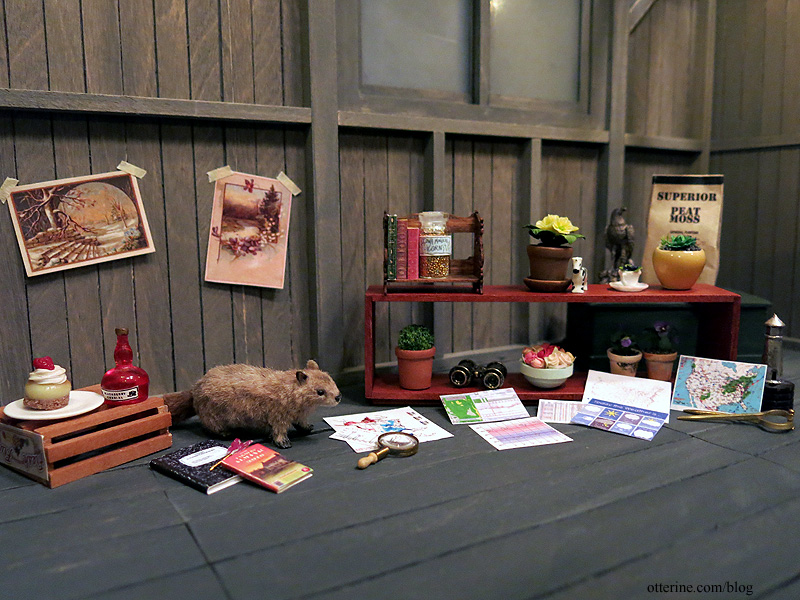
Woodrow is supposed to be impartial, but his surroundings suggest a hankering for gardening. Still, he looks all scientific with his almanac, charts and graphs.
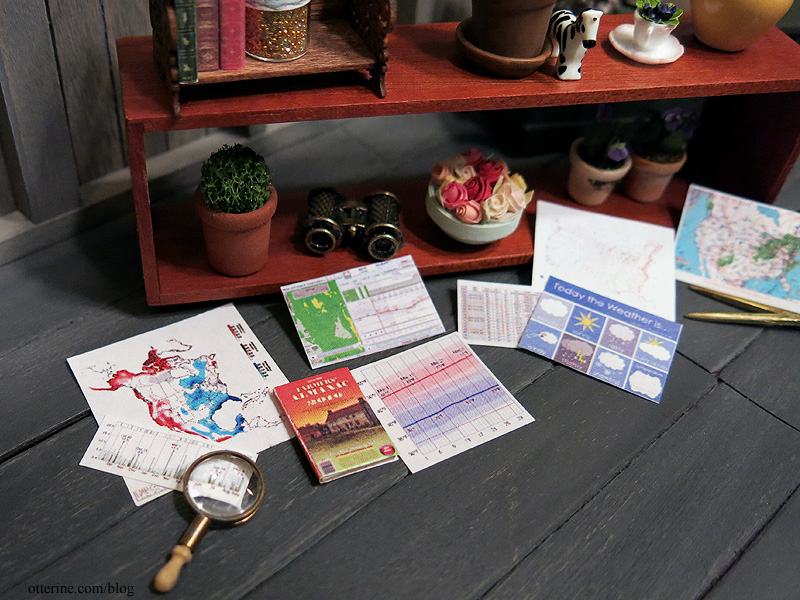
It’s not like I am lacking in mini projects to keep me busy…but it would be nice to have the windows open.
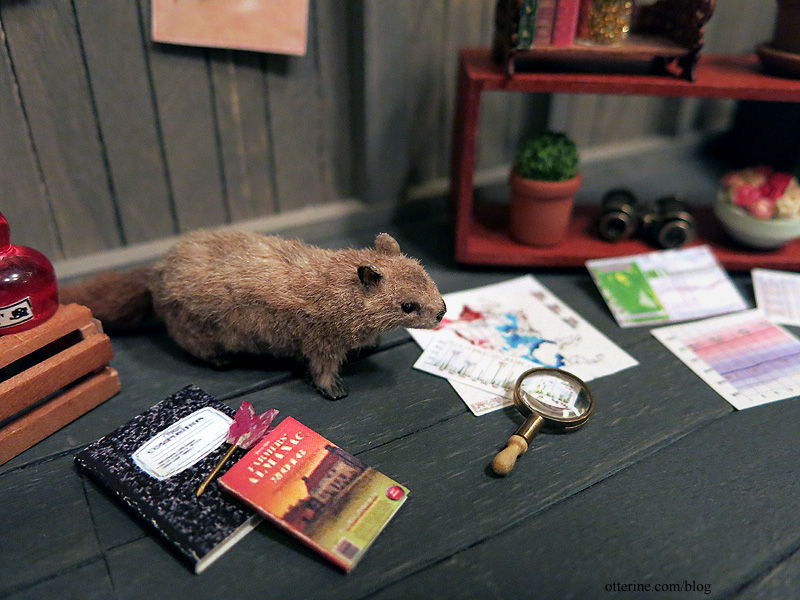
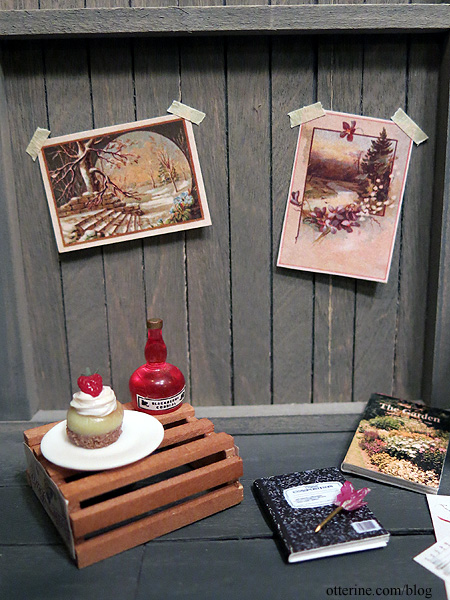
I spy a dart to throw at those winter and spring posters if research and study fail to help. No matter what the outcome, I’m all for his plan of having dessert and a cordial. :D
——
Woodrow by *reve*. Yellow pot with succulents and zebra from April. Pansies and violet plants from Debora. Jacobean book rest kit from Cynthia Howe Miniatures. Winter and Spring images from The Graphics Fairy. Magnifying glass and calipers from Bill. Dessert from MiniFanaticus.Categories: Animals and birds
February 2, 2016 | 0 commentsTinysaurus Rex
Ages ago, I saw a Tinysaur T-Rex that April had assembled. I put off getting one of my own, which is always a mistake. If you like something for a future project, it’s better to get it and store it. When I finally got around to looking for them, they had vanished like the actual dinosaurs during a mass extinction! :O
I persevered, and they finally arrived…the T-Rex and the Stegosaurus. I ordered mine from The Evolution Store back in 2013, but you can now find them at Everything Tiny.
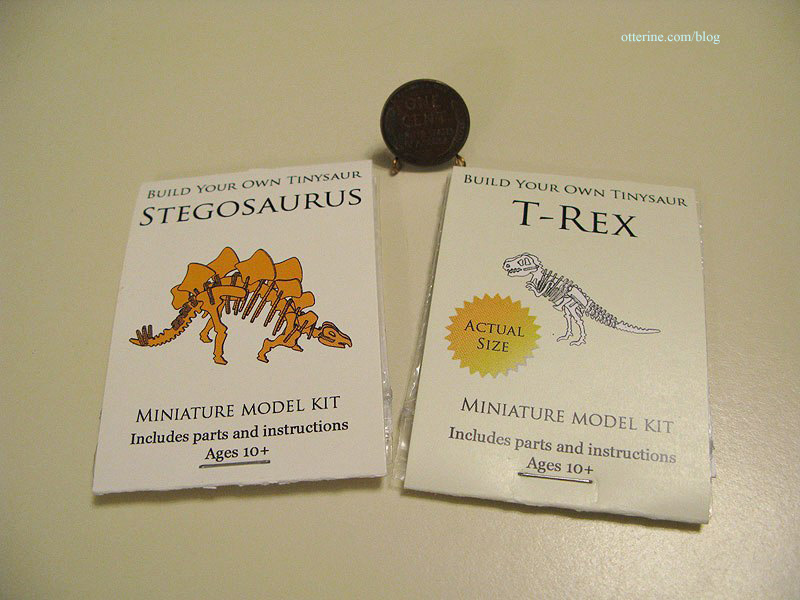
Look how small the T-Rex head is, and then notice there are a lot of parts even smaller!!! :O
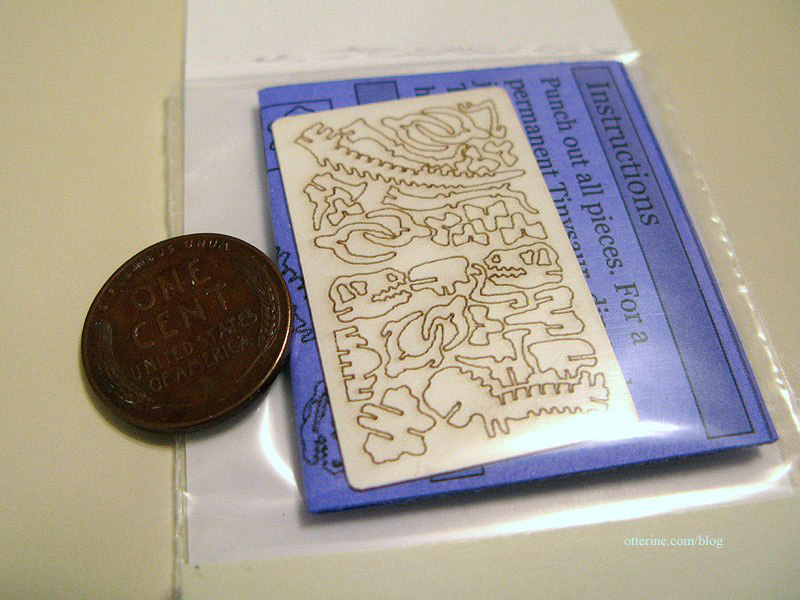
I had started this model in 2013 for my Christmas scene that year but never got back to it until now.
My X-Acto blade was huge in comparison. Nothing but super sharp, out of the box blades for this work. Separating the pieces took a lot of patience. I recommend working in an area with no breeze, no small spaces for flying parts to fall into (I’m looking at you, keyboard) and no loud noises. No deep breaths or sneezing, either!
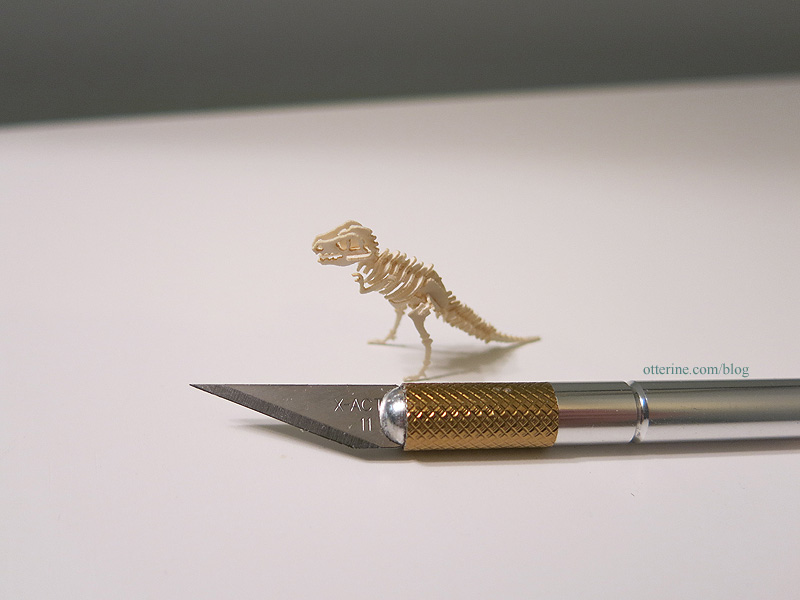
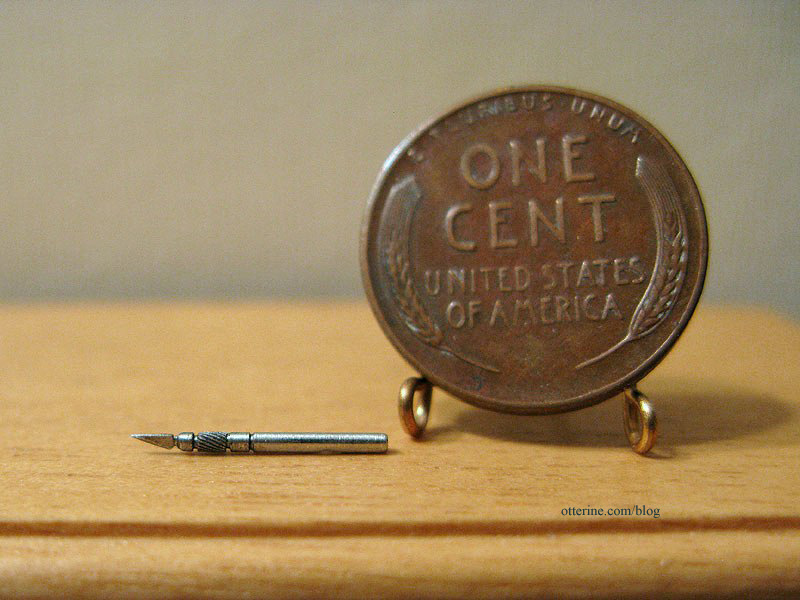
Maybe if the tiny X-Acto by Ulus Miniatures truly worked, it would have been easier. :D
I glued my model together, though I did a dry run on all the parts each step of the way. There would be no way to take it apart if a gluing error occurred. I used tiny tip tweezers for the parts and bent tip tweezers to hold the model.
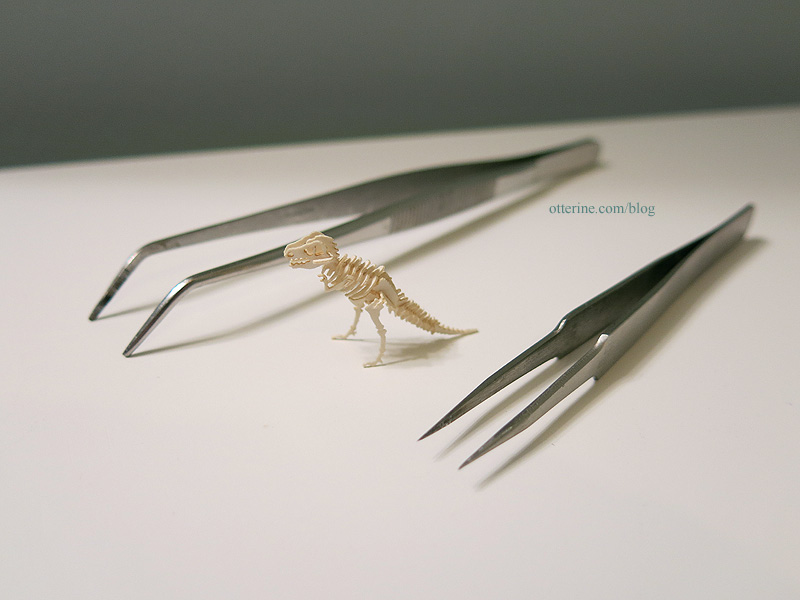
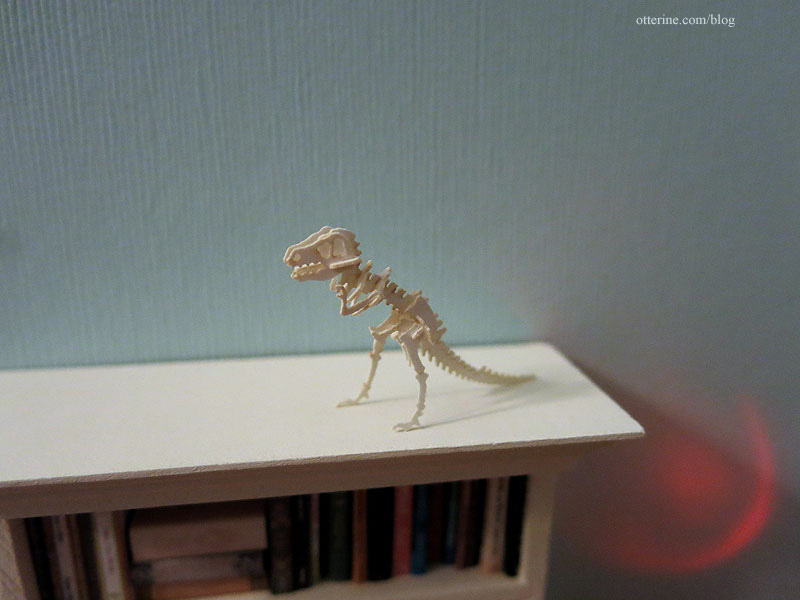
So wee!!! :D I tell you, the pieces look substantial in this photo…they are not.
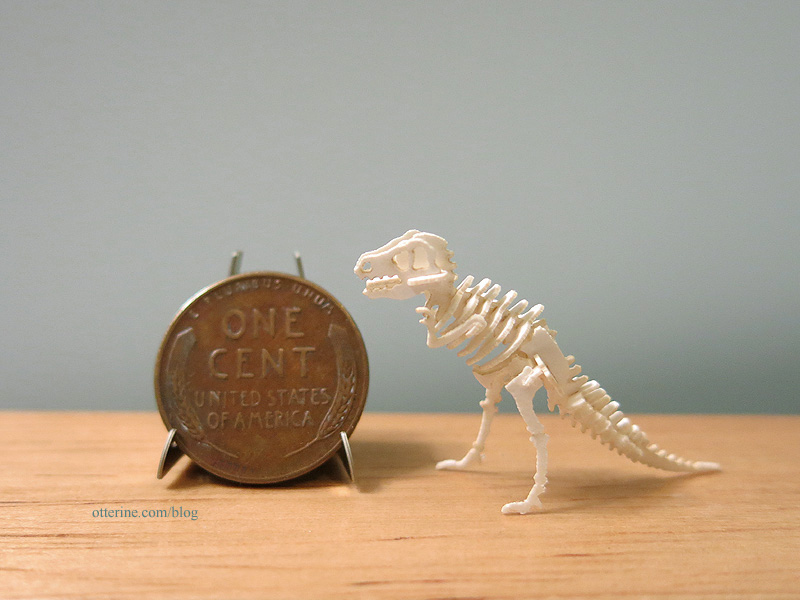
I put together one of the regular size wood models back when I was young, so it’s nice to have a mini one for my mini houses. Plus one of my inspiration photos for Otter Cove had a wood dinosaur model in it (and a round window on a white brick wall). Meant to be!
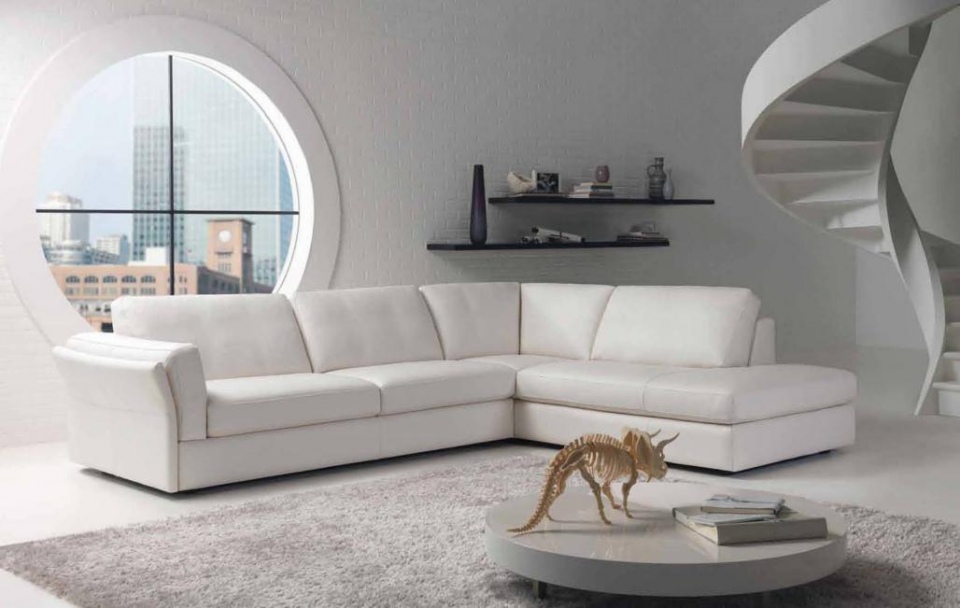
no discernible source found for this image since there were over 1,500 instances of it in a google search Categories: Animals and birds
December 10, 2015 | 0 commentsIsabeau
There’s a new mini kitty in my collection. :D
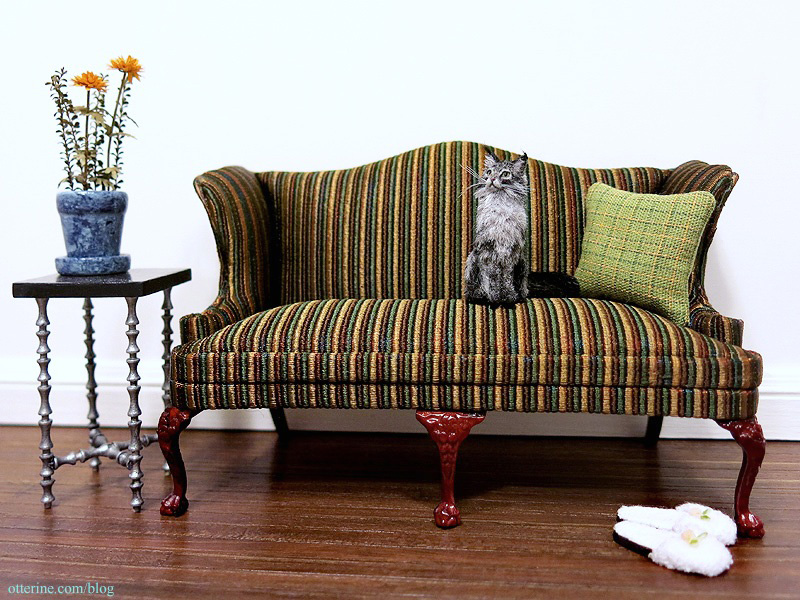
Isabeau is a beautifully made Maine Coon cat by Maya Schippl.

Isabeau is slightly smaller than the other cats I have when shown in comparison, like Ophelia here, but they both fit perfectly in 1:12 scale. :]

So pretty, so bewitching.

Her small stature reminds me of a real life kitty from my past. I worked at Save-A-Pet one summer and took care of the incoming cats. This was a room with individual cages for quarantine before the animals could be integrated into the general cat room. My responsibilities included cleaning the incoming cat room cages as well as those of the “sick” cat room where the vet oversaw more intense cases.
One incoming cat the staff named Howard was about the size of a 10 week old kitten when he came in. He was so ill. He had a terrible respiratory infection and was sick for quite awhile. When I would clean his cage, he would lie limply around my shoulders like a scarf. He had so little energy from fighting the infection that the vet wasn’t sure he would ever get any bigger. He would spend his adulthood at the size of a 10 week old kitten. I fell in love with that cat in the time we spent during his recovery, but my parents didn’t allow animals in the house so adopting him myself was out of the question. He was adopted one busy Saturday later that season, and the staff came to get me to break the news. The people adopting him let me hold him as they filled out the paperwork, and he fell asleep in the hustle and bustle around us. Sweet little kitty. I always wondered how his life turned out. :]
Categories: Animals and birds
October 27, 2015 | 0 commentsThe Wee Sisters Three
A group of friends went in together and sent me the most adorable trio of mice for my birthday (from CozyMilArt). These three wee sisters are Daisy, Poppy and Fleur. While they each have their own personality and vary in looks, I still might have to make bracelets for them so I can keep them straight.
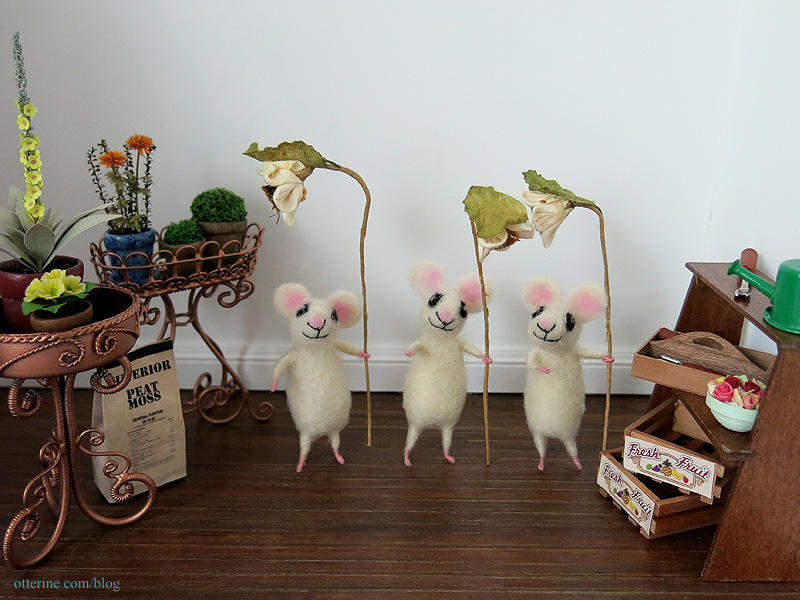
The included flowers are removable, but they can stand on their own without them. They can even hold other things.

They found the toy chest! Wheeeeeeeeeee!

As you can see, they are good for child size in 1:12 scale, though they could work as adult sized mice in half scale. Thank you so much, ladies!! I love them! :D
Categories: Animals and birds
August 10, 2015 | 0 commentsGustav, the learned otter
I just received this clever little otter from Rustles from the Meadow, and he is inspiring all sorts of ideas for a future fantasy build like Roland’s Retreat. :D I’ve chosen the name Gustav.
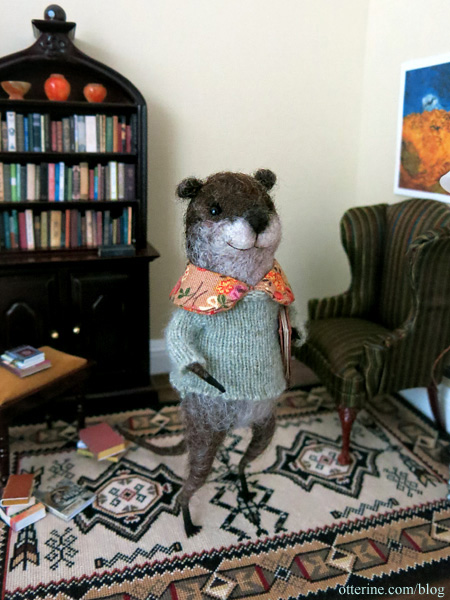
Johana makes the most adorable animals. (Mom gave me a set of her sleeping mice awhile back.) She included a tiny journal so he can jot down his ideas.
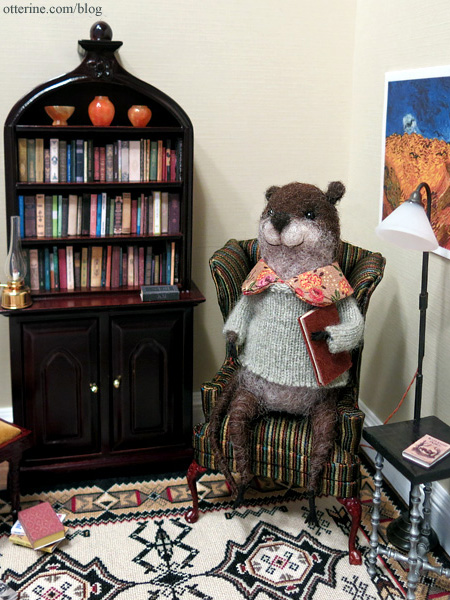
Oh, the ideas!

Categories: Animals and birds
July 17, 2015 | 0 commentsPresto!
I’m channeling my inner Bullwinkle and working some mini magic!
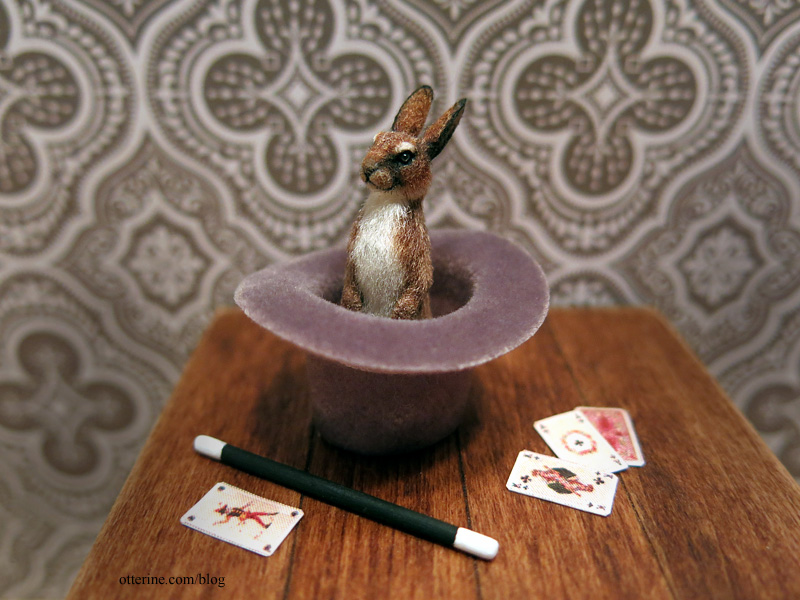
I made a few playing cards from this free printable on Wings of Whimsy. I sanded down a thin wooden dowel and painted it to look like an old fashioned magic wand. The top hat is by Heidi Ott. I chose a grey hat since it’s easier to keep the dust away in photos. Friedrich is ready to amaze you.
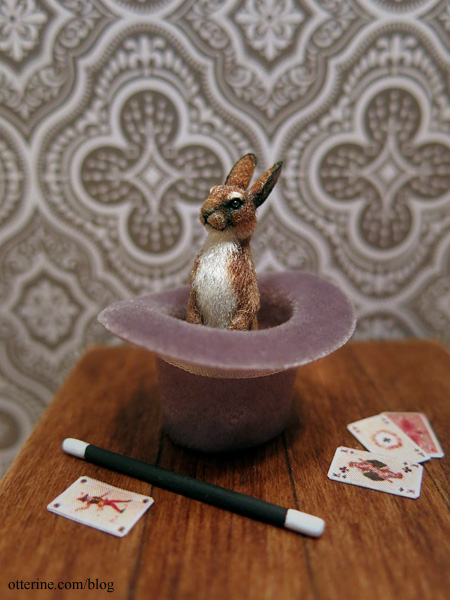
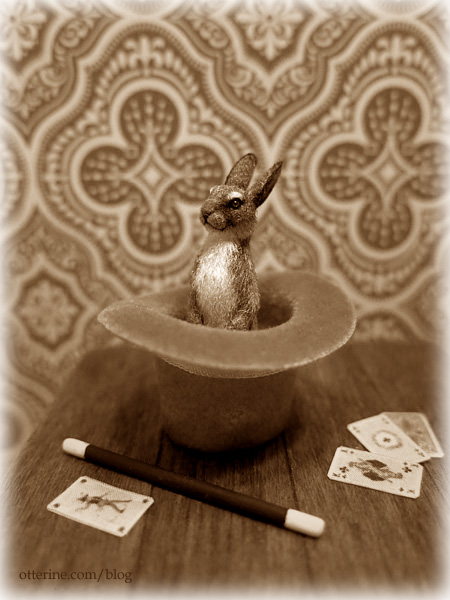
Presto! :O Whoa…we’ve gone back in time. :]
Categories: Animals and birds, Miniatures
June 4, 2015 | 0 commentsTeddy bears just want to have fun
This settee from Sandy McHenry at the 3 Blind Mice show kept calling my name since I have the 1:12 scale version in the Heritage attic. This one is half scale and the perfect size for a couple of buddies to enjoy. :D I bought it before I even knew how I would use it.
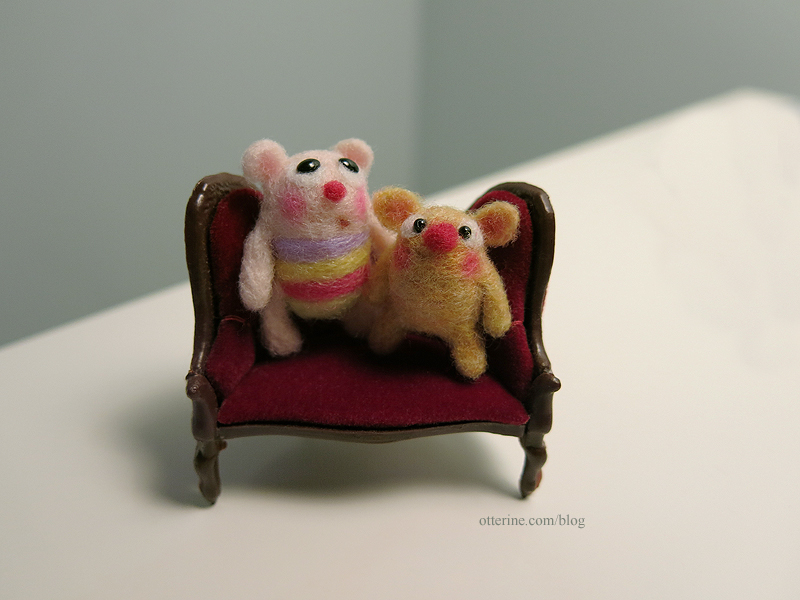
Wally and Boo have settled in nicely, but, oh, the non-stop giggling! :D
Categories: Animals and birds, Furniture
April 21, 2015 | 0 commentsMiles
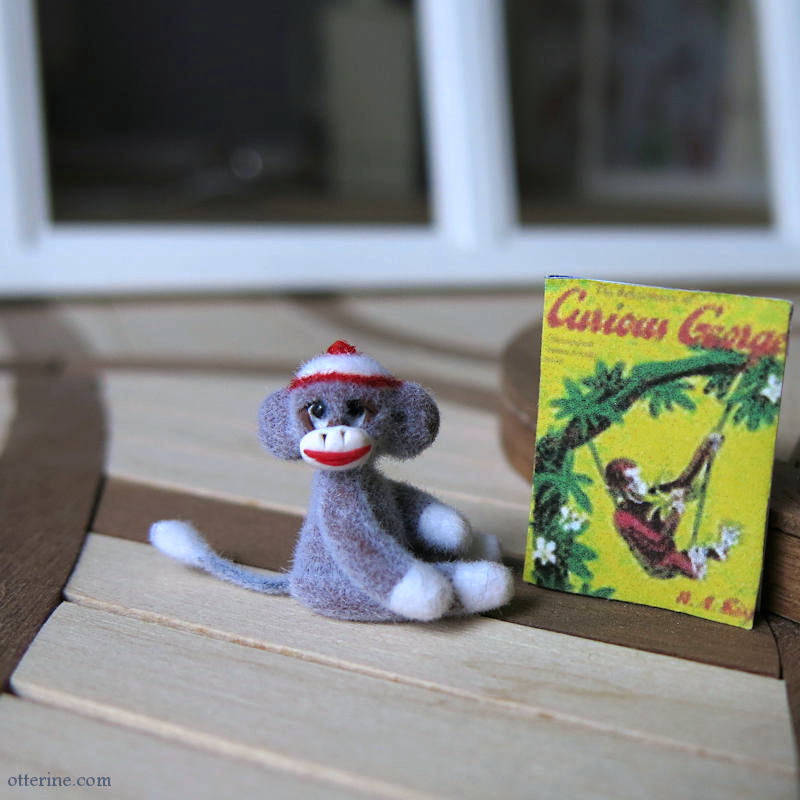
This cutie is a sock monkey made by the talented Cheryl Brown. He’s brought along his favorite book.
Categories: Animals and birds
April 3, 2015 | 0 commentsFriedrich
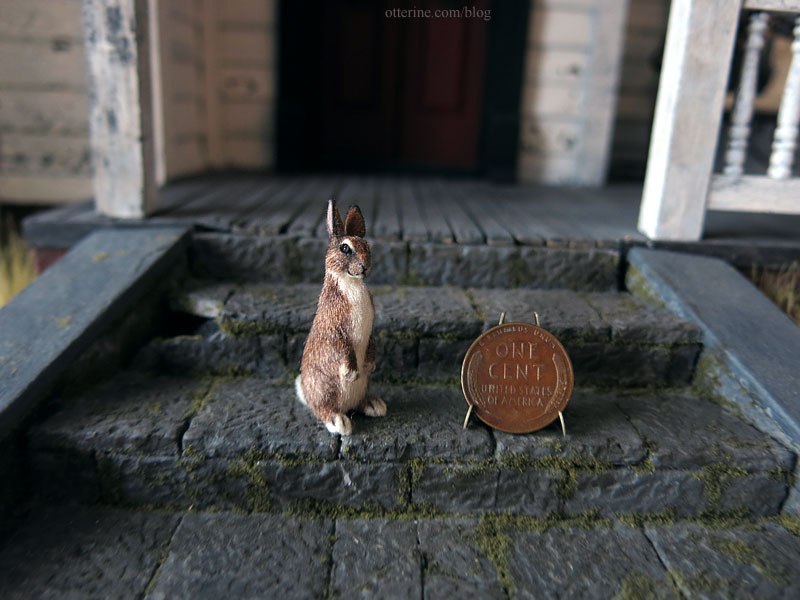
This is Friedrich, and he will live on Milo Valley Farm, though he appears to be on holiday right now since that build isn’t ready.
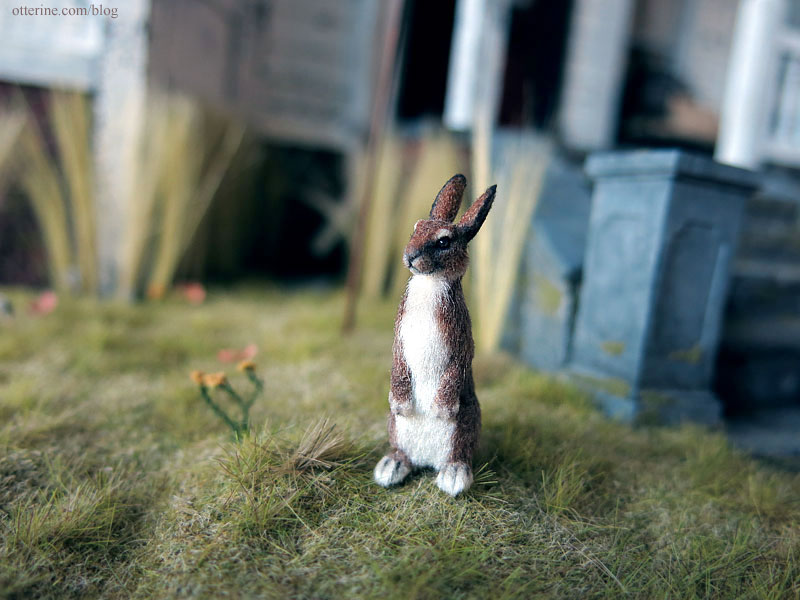
This rabbit is incredibly realistic, made by the talented Michal Gvir. I love his little bear pose. :]

Look at that cute cotton tail!

I love that slight tilt to his head.
Categories: Animals and birds
March 12, 2015 | 0 commentsEndora
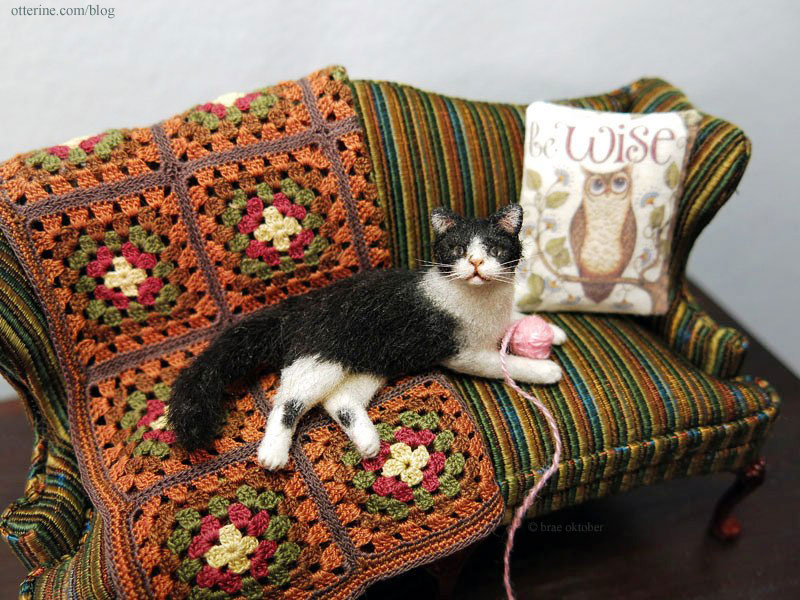
Endora is a beautiful black and white cat from agzr*studios. Here she is resting on a custom afghan by Woodland Miniatures draped over a Bespaq striped sofa. The wise owl pillow is from Katie Arthur.
Categories: Animals and birds
June 1, 2014 | 0 comments
NOTE: All content on otterine.com is copyrighted and may not be reproduced in part or in whole. It takes a lot of time and effort to write and photograph for my blog. Please ask permission before reproducing any of my content. (More on copyright)

Horse Harness – part 1
Maybe that should read, “Putting Jebediah to work, part 1.” As you know, I’m using a Breyer thoroughbred horse for my mail wagon. I found it interesting that at least one pacer (harness racing horse) pulled a mail wagon in real life.
 Mail Wagon Horse Mon, Jan 19, 1914 · The Star Press (Muncie, Indiana) · Newspapers.com
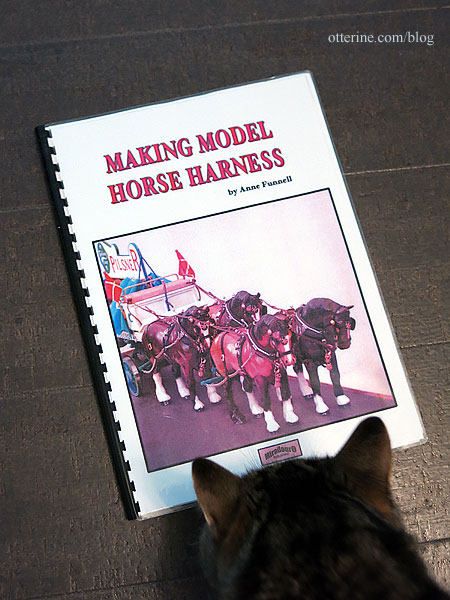
After finally getting my hands on the marvelous book Making Model Horse Harness by Anne Funnell, I started reading the material and doing more sleuthing online. Anne’s business is no more, so I am doing my best to scout Rio Rondo for the things I need. They seem to be well-stocked, so I am making a shopping list while I work on a mockup.
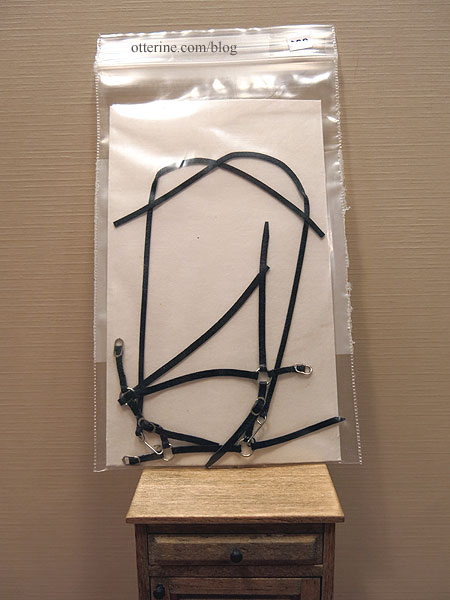
I bought this bridle from Texas Tiny at the local mini shows this past spring.
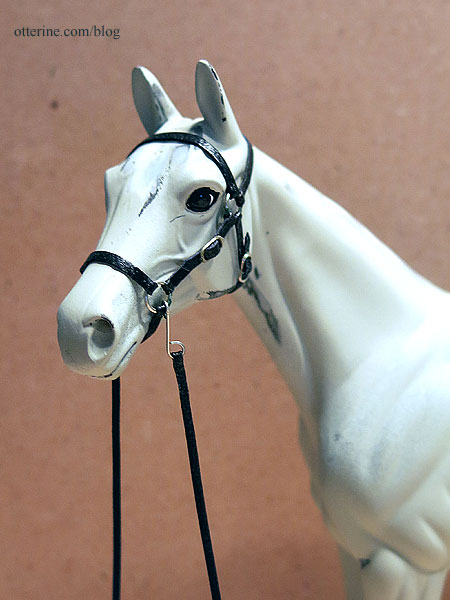
I fitted it to Jebediah to see. Yeah, it was a pain. I can see there will be more swearing in my future as I make said harness. But, it fits perfectly and is very well made. I’m not sure if I will be able to modify this one (the reins are not long enough, there’s no simulated bit and there are no blinders), or if I will have to use this as a guide to make my own with the harness.
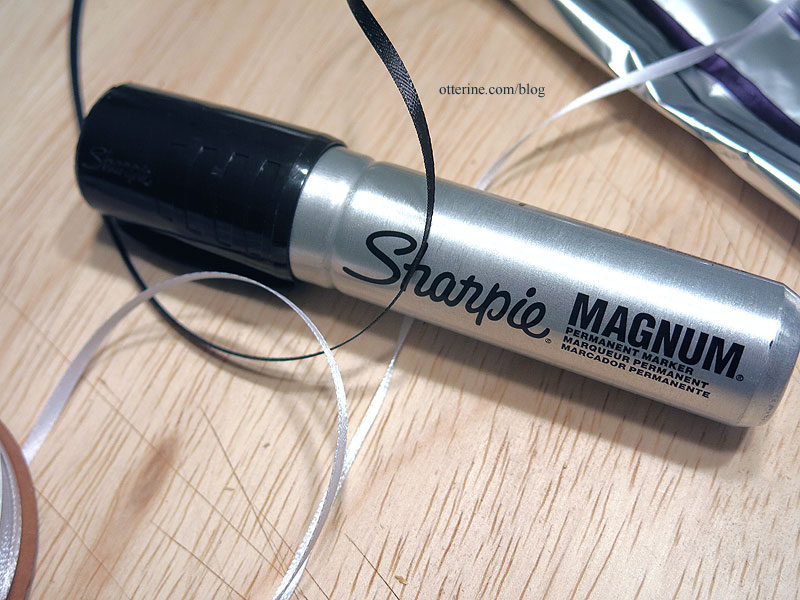
I had the idea of doing a test run with ribbon before diving into the leather and custom hardware. This would give me a feel for the parts and lengths/widths of the tack. Michaels is always hit or miss in the supplies department, but it was the closest store while out to lunch. I bought 1/8″ wide white ribbon – the two colors missing from the stock of plain 1/8″ ribbon were brown and black. I colored the white ribbon with a permanent marker and let it dry overnight. I had 1/4″ black ribbon already at home. These aren’t the precise widths I’ll need, but they are a good approximation.
I didn’t get very far, since one part really depends on another, but it was worth a shot. I need to just get the materials and start to work – trial and error. But, this attempt did help me study the drawings in better detail and estimate the amount of leather I will need. I also kept a tally of the various hardware components since the book doesn’t have a detailed listing of items with sizes. The book appears to be a companion to the kits and hardware sold by Anne Funnell, so that is understandable. If you have the kit, you need only the part number – not the size. The kit itself would have likely had a parts list with sizes and lengths noted.
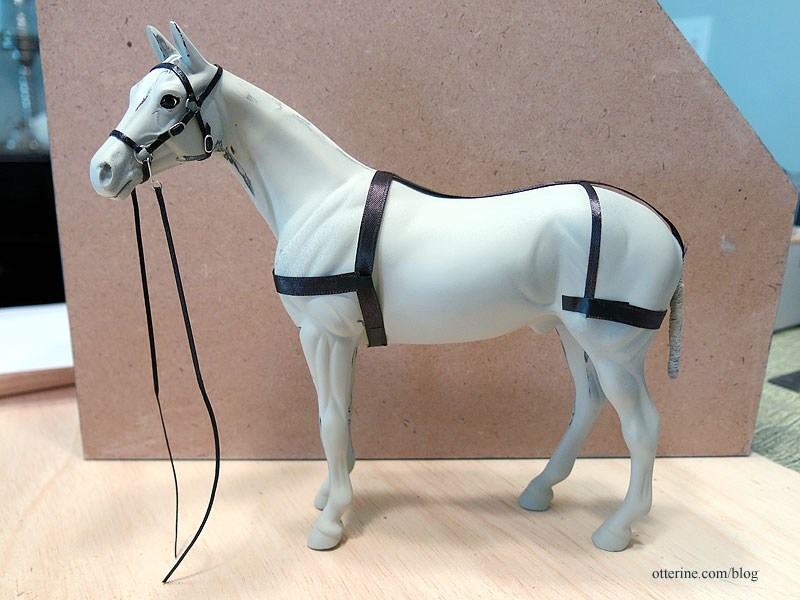
I am reconsidering adding flocking to Jebediah in seeing how much handling needs to be done when attaching and tightening the buckles. I know I can get a good approximation of hair on the body with paint, and the mane and tail will no longer be plastic to help drive the realism.
Categories: Animals and birds, Ivy Hollow RFD
September 14, 2019 | 0 commentsMaking a 1/12 scale horse – part 4
Continuing work on the 1/12 scale model horse. Once the putty set, the tail seemed pretty solid so I sanded the putty areas lightly with 320 grit to smooth it further. I then covered the eyes with Winsor & Newton Masking Fluid since I want to protect them during the painting process.
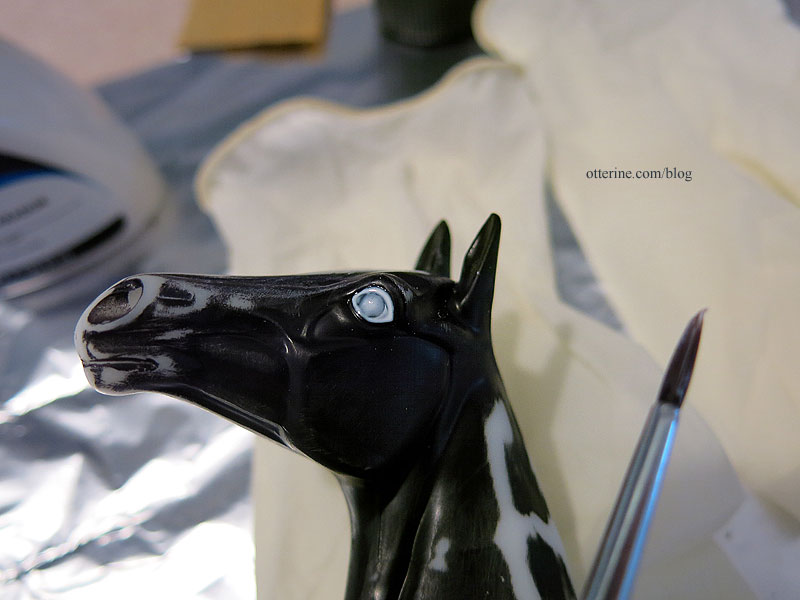
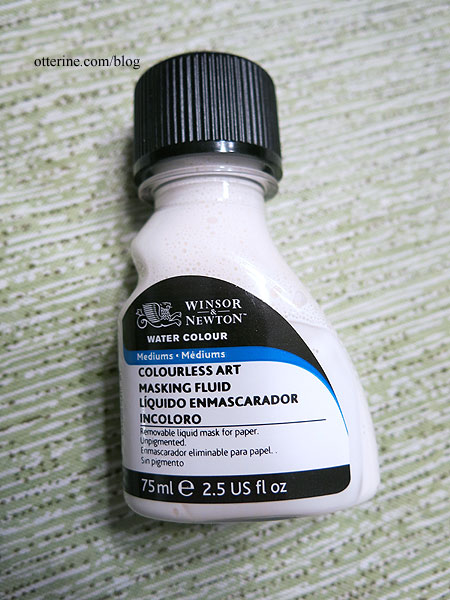
This is a pricey fluid used for watercolor painting; it covers any space you want to remain white on a painting. You use an eraser to remove it from the paper after the paint has dried. I used a 50% off coupon at Michaels. It’s a good crossover product that will work on other things beyond paper.
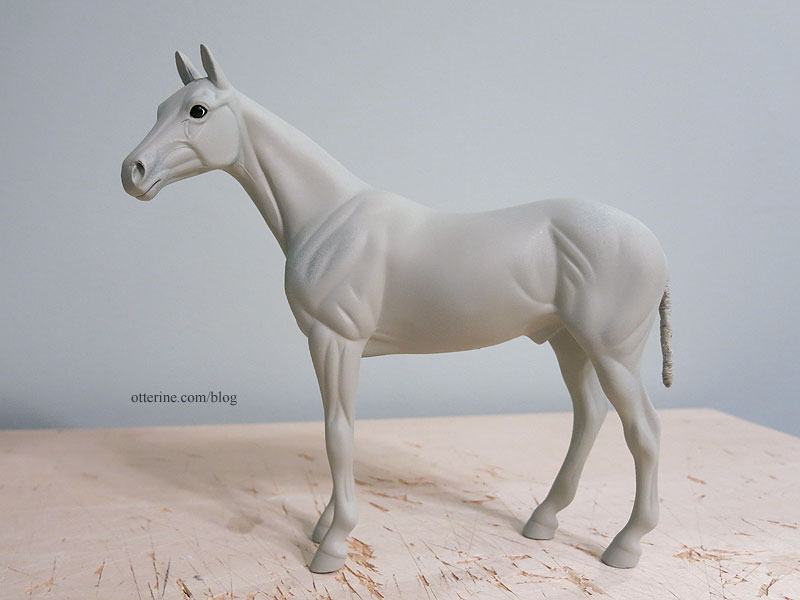
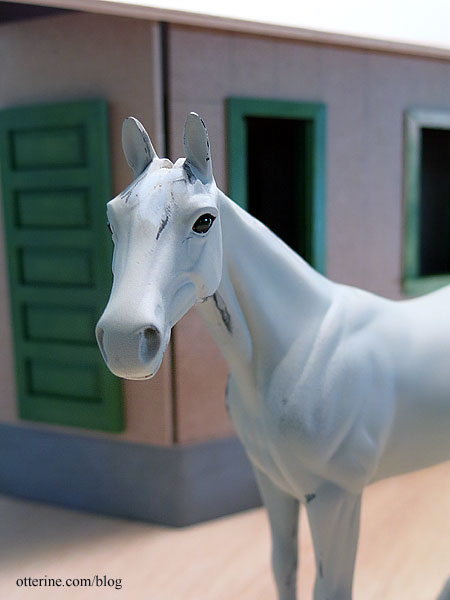
I sprayed the horse with Testors Flat Light Aircraft Grey to have a light primer coat to start. Priming brings out any flaws that were unnoticeable before, so I will sand those once the primer cures.
I’m making a grey/roan horse, so I looked online for reference photos. I’ve never mastered the airbrush, but I am pretty good with a regular brush. The next part will involve painting the base details. Even though I plan to add fur, the color underneath will show through so I couldn’t leave it black and bare white plastic. I’ve removed the masking on the eyes just in case leaving it on a long time caused issues; I can always add more when I paint the face detailing.
I also have some good leads on tack, which will need to be made before fur is added so I don’t mar the final finish. I want to be able to just buckle any tack onto the horse for pictures and remove it immediately. So, it might be awhile before you see the horse again. I’ll update on the tack as I work through it.
I also chose a name for my horse: Jebediah McCants. Maybe I’m wrong, but I doubt anyone guessed it. I looked up the meaning of Jebediah, and it means “beloved friend.” McCants is some distant ancestral name, and I thought the names sounded good together. I’m figuring our RFD carrier is Mr. McCants, since the carriers were charged with supplying their own transportation, therefore caring for their own horses. Jebediah looks eager to get on with things, no?
Categories: Animals and birds, Ivy Hollow RFD
February 25, 2019 | 0 commentsMaking a 1/12 scale horse – part 3
Continuing work on the 1/12 scale model horse. I found a great tutorial about removing the tail and building up with Apoxie Sculpt, though this technique ends with a sculpted tail instead of fiber. This site directed me to two additional tutorials on Rio Rondo – one for adding a tail and one for hairing (these links are no longer active as of 2024). The hairing for this example does not drill holes for the mane, so I will be on my own for that, but it is good to see the prep work involved.
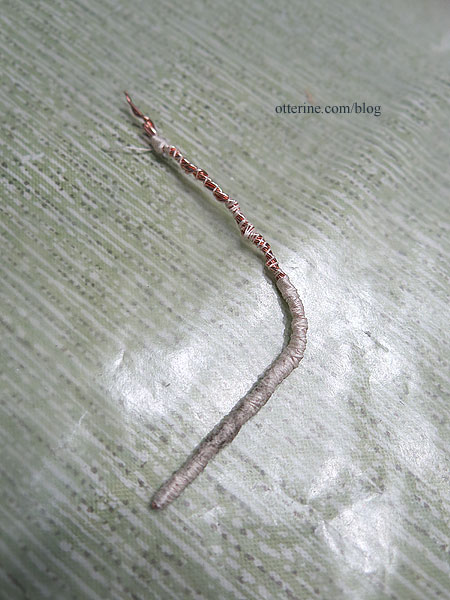
I ended up going with the wrapped wire tail from the second tutorial using 18 gauge copper wire (as an Amazon Associate, I earn from qualifying purchases).
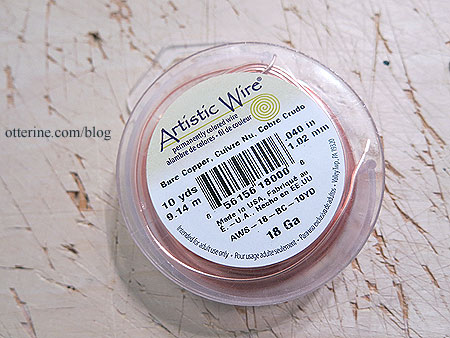
I followed the tutorial, but mine ended up looking a little different.
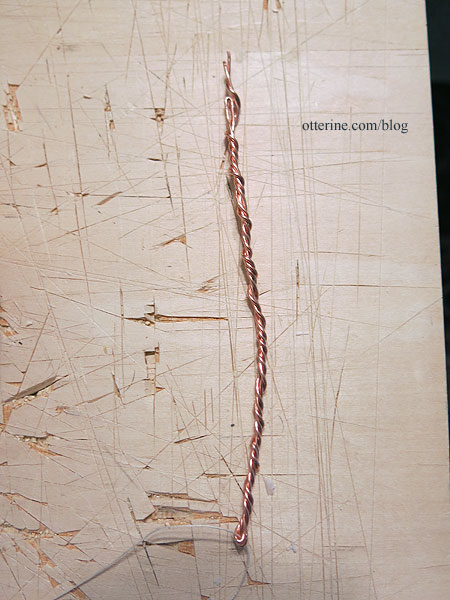
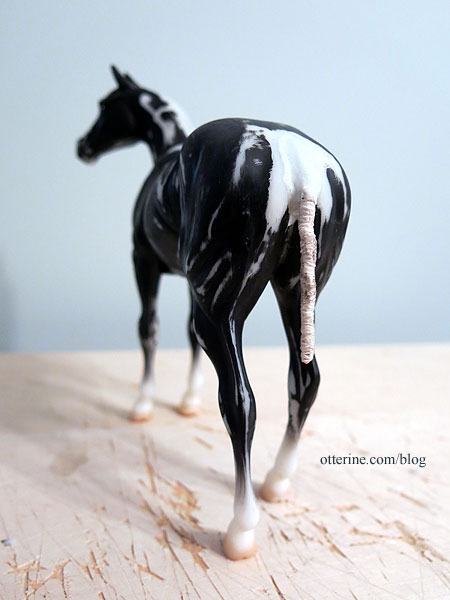
I wrapped the wire with DMC cotton using Weldbond adhesive.
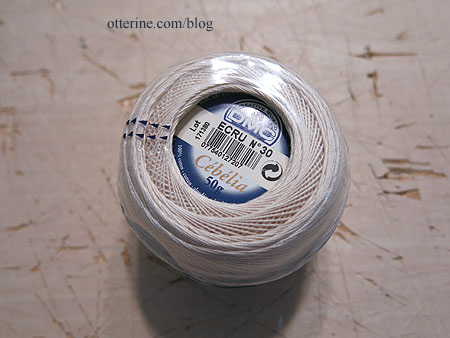
I left it long since the horse body is partially hollow, and I thought the added length would be good for stability. When I inserted the wire, I added Weldbond and super glue gel to the top since it would likely come in contact with the body inside. Every bit helps.
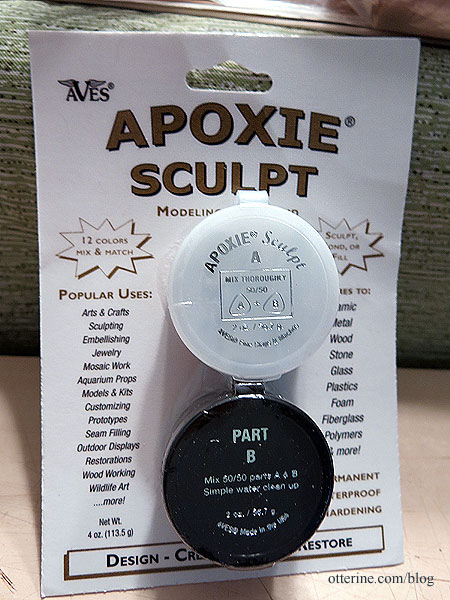
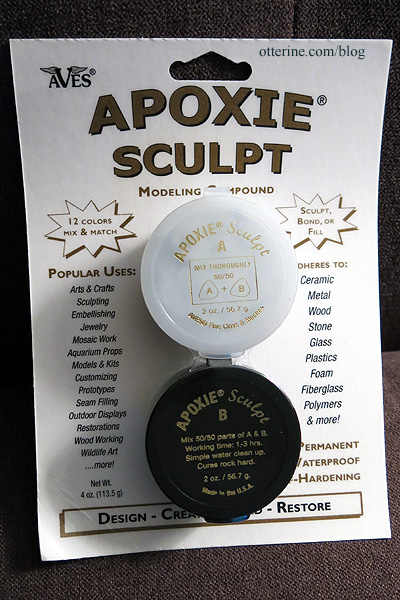
I used Apoxie Sculpt for the next part (as an Amazon Associate, I earn from qualifying purchases).
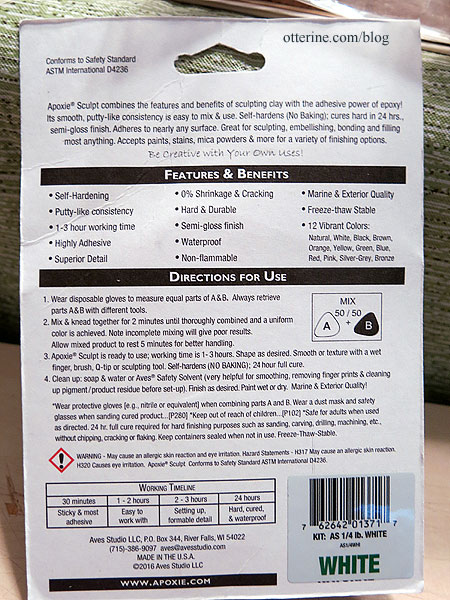
Some of the attributes listed on the back are promising: highly adhesive, 0% shrinkage and cracking, 1-3 hour working time, and 24-hour full cure. There’s a nifty table showing how the putty changes over the working time. It also comes in colors, which is less of an issue for me since I plan to paint the whole horse anyway. I’m using white putty.
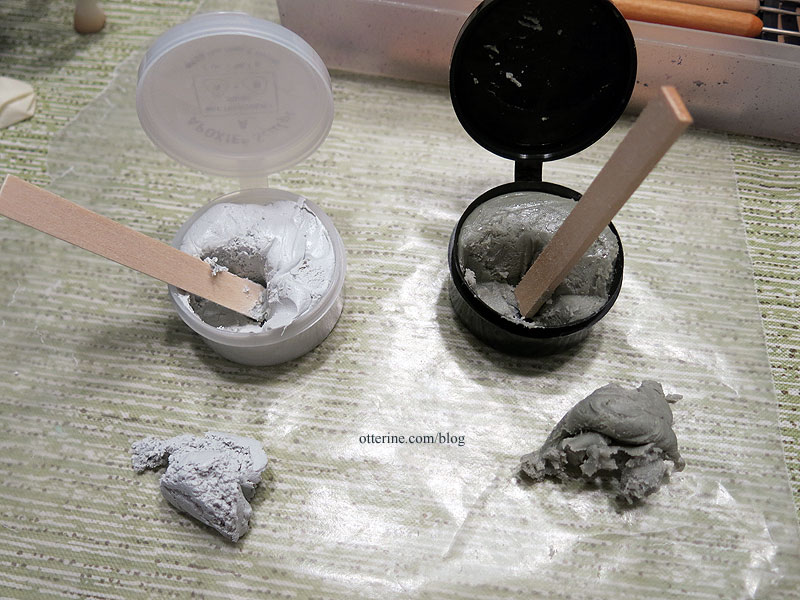
Part B was very stiff and sticky coming out of the cup, but it mixed easily. (Yes, I made way more than I needed, but I didn’t want to have to start over if I needed more.) I did use latex gloves while mixing but used my bare hands when working the putty into place. You can use water to smooth it, and the website recommends freezing unused portions to extend the life.
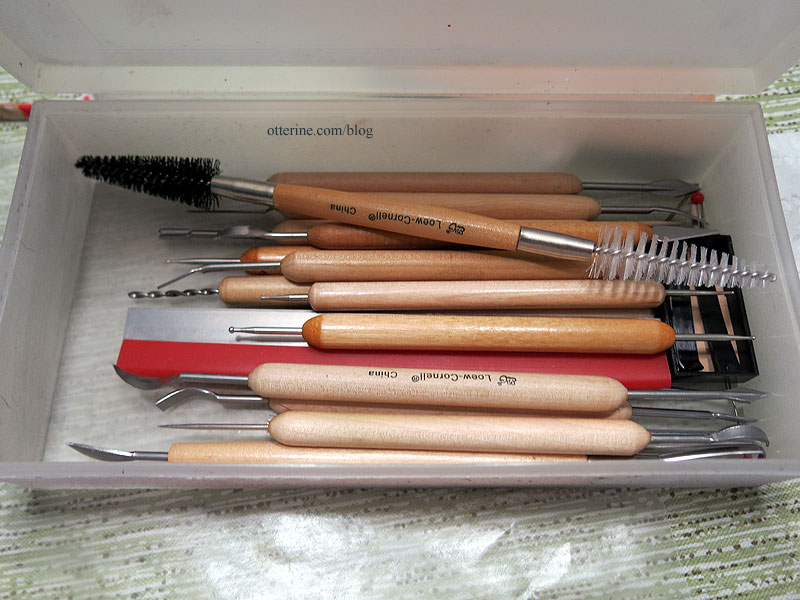
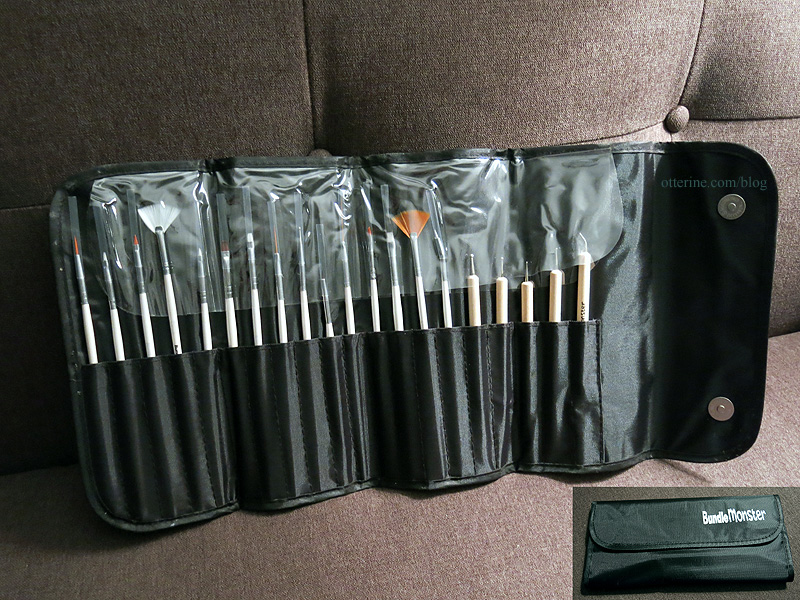
I also have a good set of sculpting tools from way back in my art days. :]
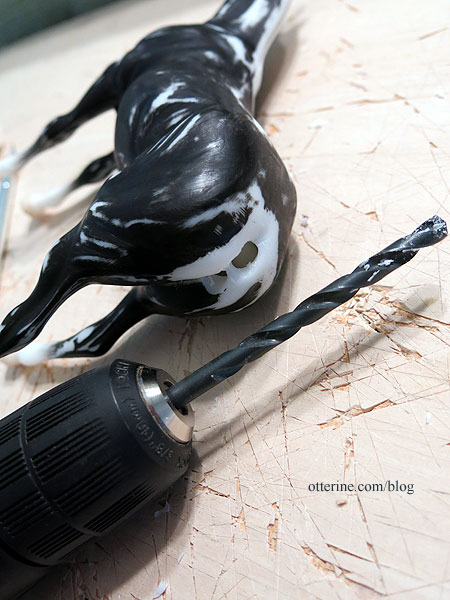
Using a 1/4″ drill bit, I drilled a hole for the wire, making it large enough to also add the putty. As you can see, I got the first hole too low. The drill bit wanted to slip on the smooth plastic.
I sculpted the tail definition from the body to the wire and plugged the extra hole. Mine looks different from the tutorial, but I think it will work just fine. You can sand the putty once it’s cured, so I will smooth it out even more later.
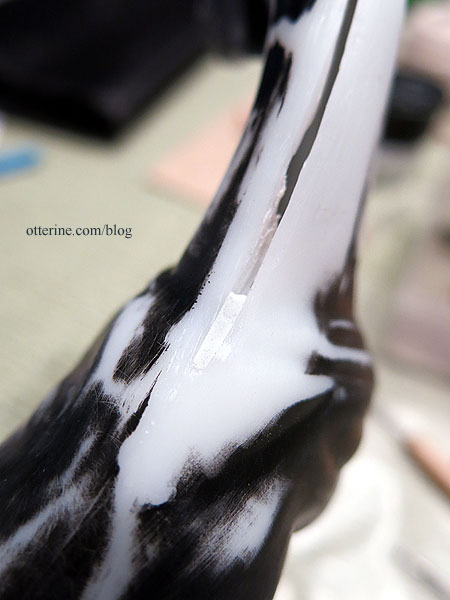
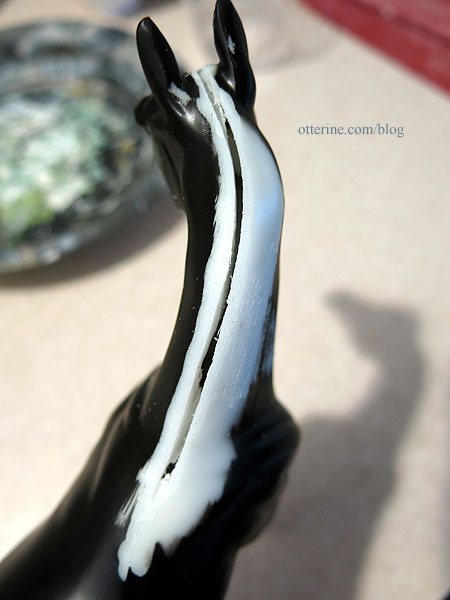
I used the same putty to fine tune the slit along the neck at the withers…
…and at the forehead.
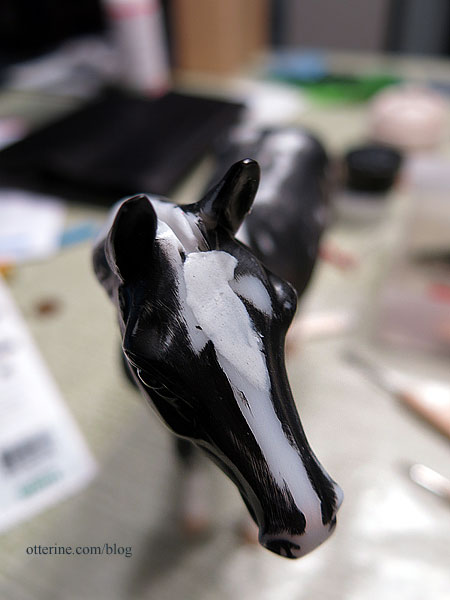
Now, I leave the putty to set.
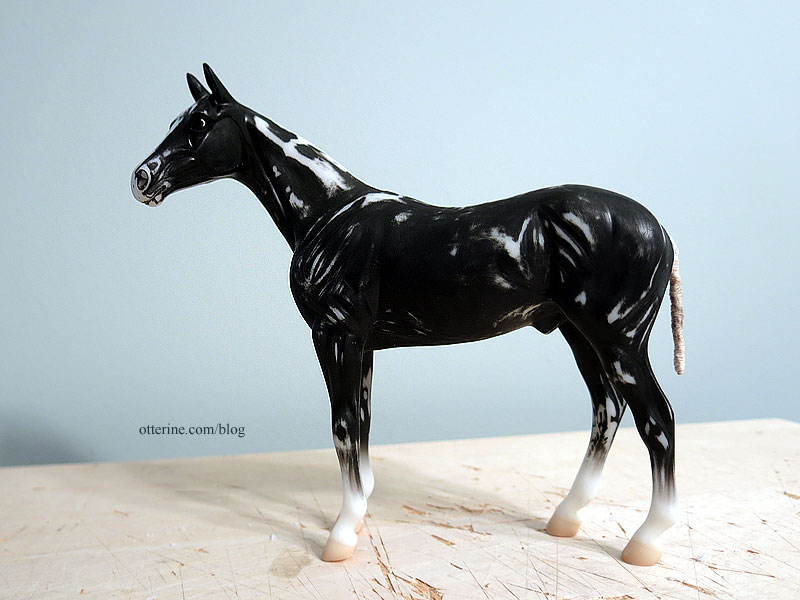
Categories: Animals and birds, Ivy Hollow RFD
February 21, 2019 | 0 commentsMaking a 1/12 scale horse – part 2
Continuing work on the 1/12 scale model horse. Once I removed the mane last time and saw the slit in the neck, I thought it might be easier to leave the slit to add the mane. I could glue the hair deeper into the body for a more secure bond. The slit does go to the top of the head, so I’ve cleaned it out and widened it to the withers.
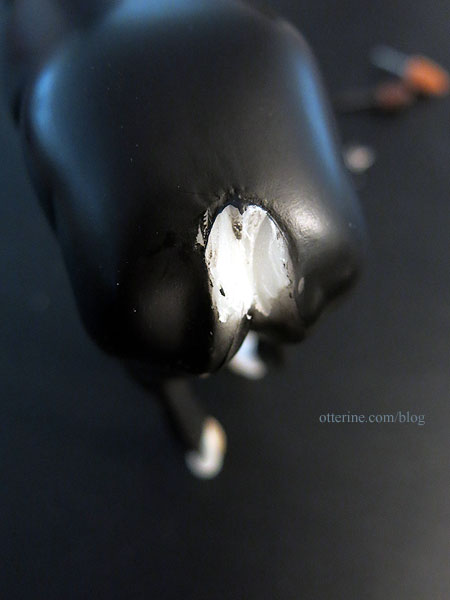
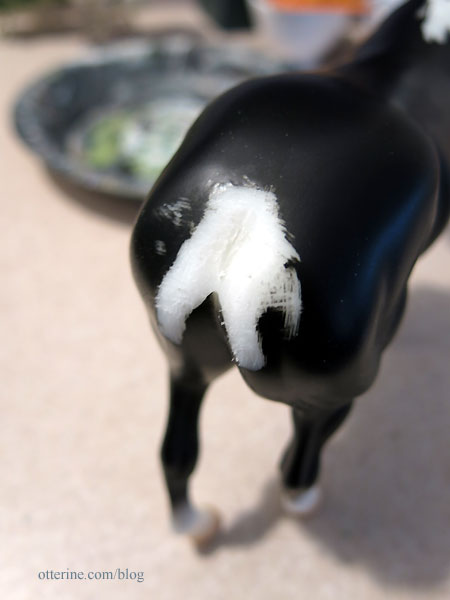
I used the Dremel to remove the tail nub left behind from breaking it off.
I then sanded the tail area. I’ll be repairing the area when I attach the tail support so I didn’t worry about the exact shape.
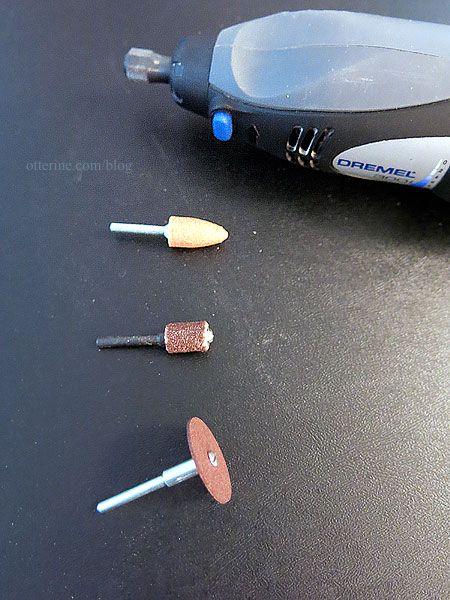
Here are the three bits I used in the process. The Dremel did melt the plastic as I worked, so I was sure to use protective glasses and a mask. I also made quick cuts and pulled the melted plastic as I worked.
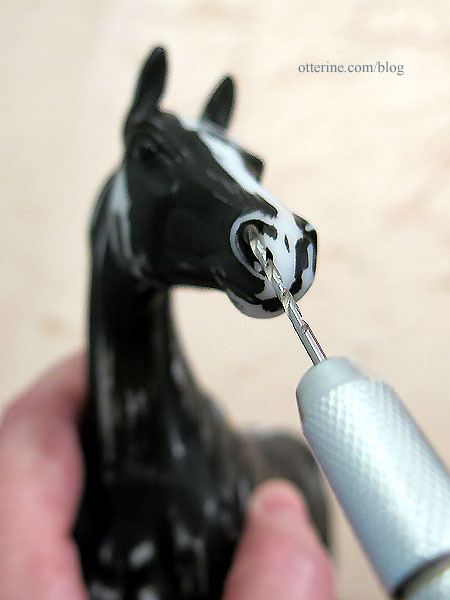
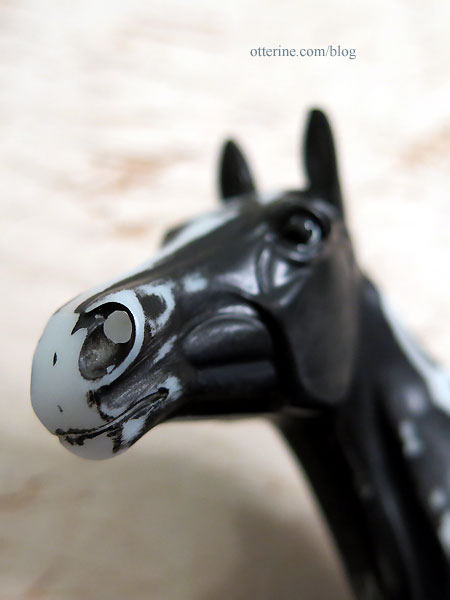
I drilled holes in the nostrils with a pin vise.
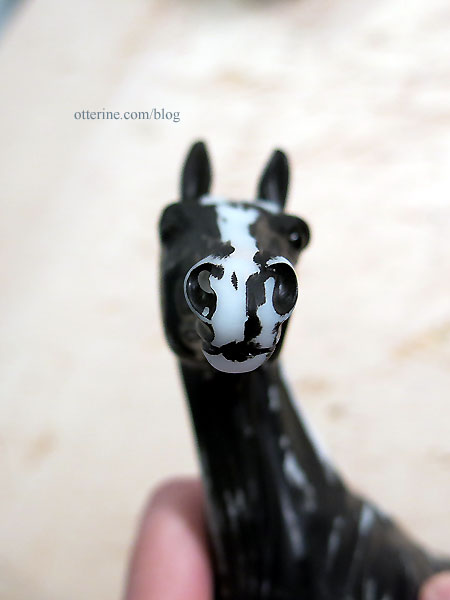
The one on the left has been drilled and the one on the right is original. You can already see a difference in the realism.
I fine-tuned the mouth with an X-Acto blade.
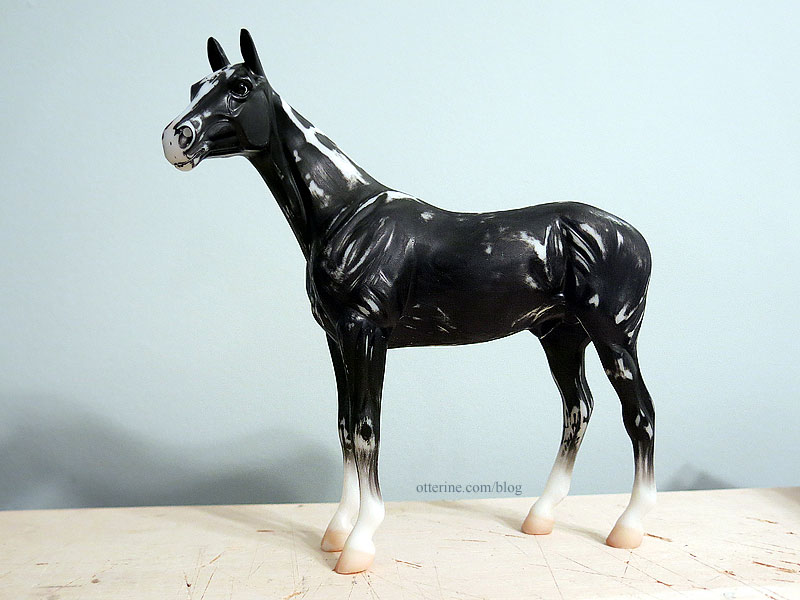
I sanded the few bad places from the deconstruction and then wet sanded the whole horse by hand with 320 grit. The finish on the plastic was very smooth and I wanted to make sure I had a good grip for the primer. I also removed the molded copyright from the inner thigh, random mold lines, and any other imperfections in the manufacturing process.
Categories: Animals and birds, Ivy Hollow RFD
February 11, 2019 | 0 commentsMaking a 1/12 scale horse – part 1
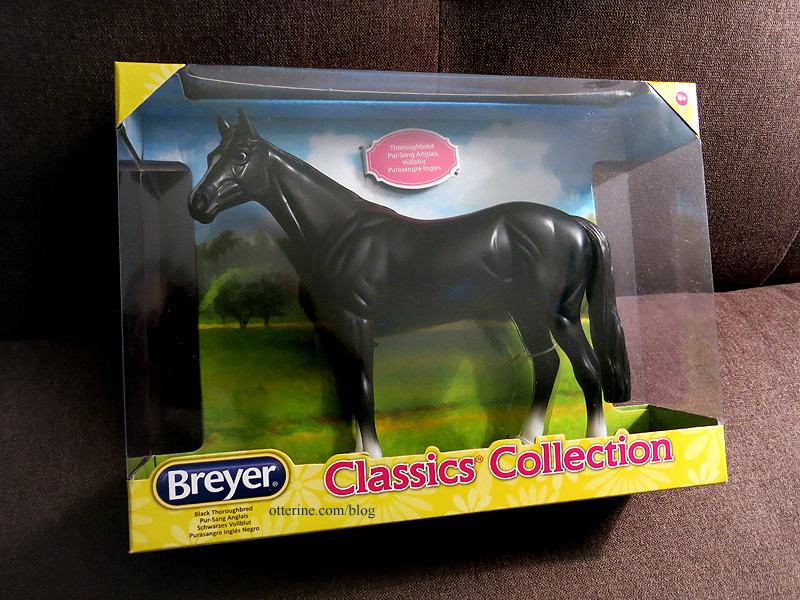
I’ll be starting with a 1:12 scale Breyer Thoroughbred. Adding flocking or fur adds bulk, so I thought I would start with the leanest horse model available. Of course, you can scrape down a model before flocking as well but I’d rather keep it as simple as possible.
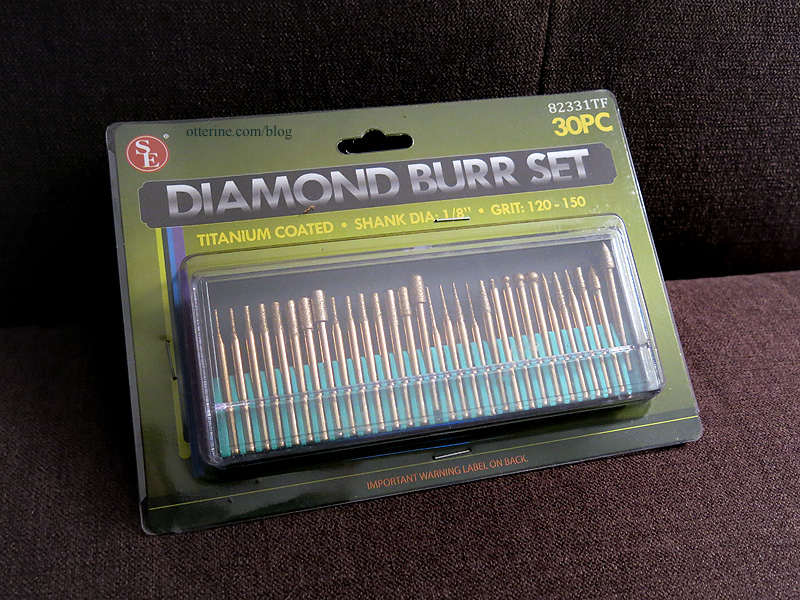
I picked up a set of diamond burrs for my Dremel to help with the deconstruction (as an Amazon Associate, I earn from qualifying purchases).
I found a great tutorial about removing the tail and building up with Apoxie Sculpt, so I picked that up as well even though I plan on having a mohair mane and tail (as an Amazon Associate, I earn from qualifying purchases).
After the deconstruction and any necessary remodeling, I will begin with painting. I’ve always had a fondness for roan horses, so I might give that a go. A friend sent me a fabulous set of brushes and clay tools called a Bundle Monster that will be invaluable here.
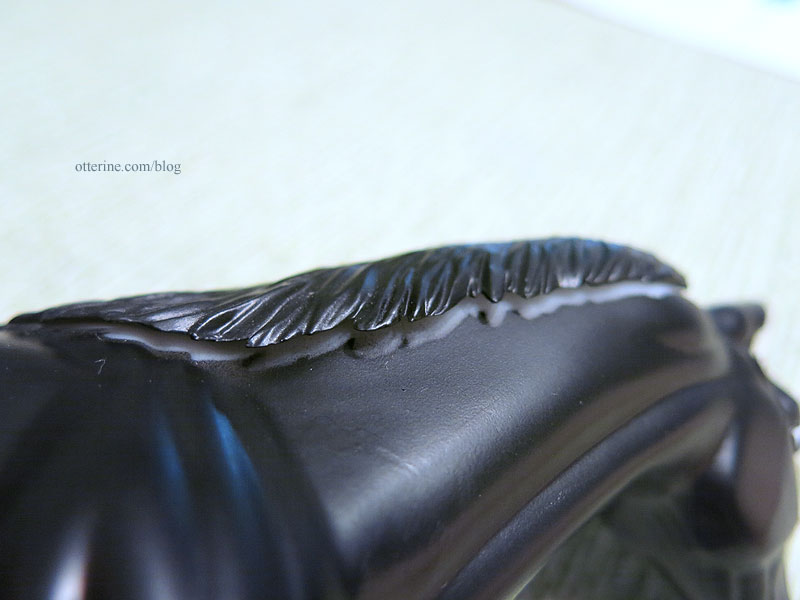
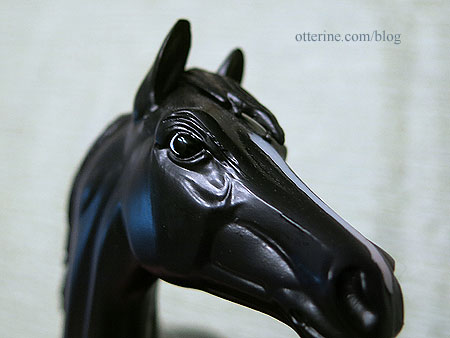
In the time since I bought the horse, the plastic mane had lifted from the neck. It made it easier to wedge in some pliers to pry off the mane.
One thing I didn’t like about the plastic mane from the beginning was that it was formed on the side away from the direction of the horse’s gaze. Removing it for a mohair mane means I can style the hair toward the side I prefer.
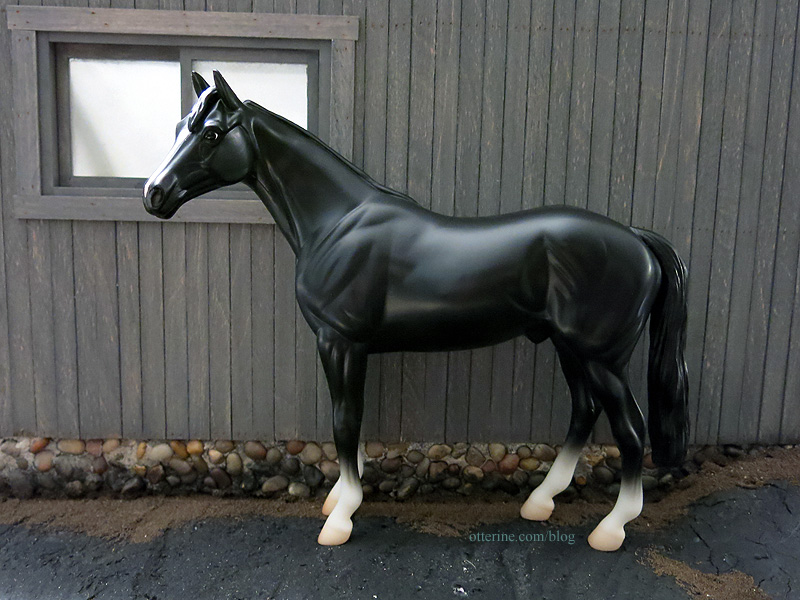
The nostrils might benefit from drilling in a deeper hole and the mouth could use some fine-tuning. I’ll need to sand the mold line on the tip of the snout.
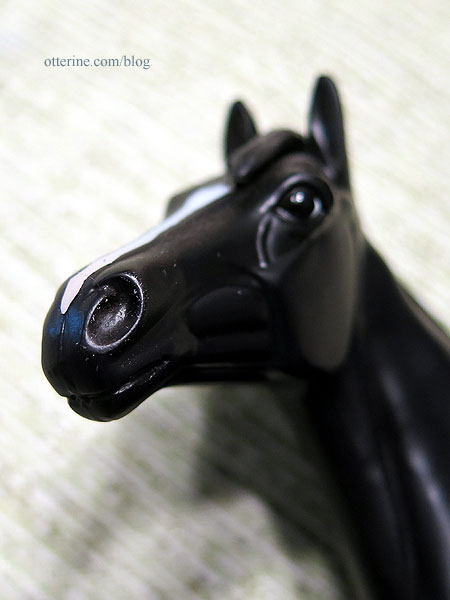
The eyes are great, so I will take care not to paint over those. The front mane has come detached from the small contact points as well.
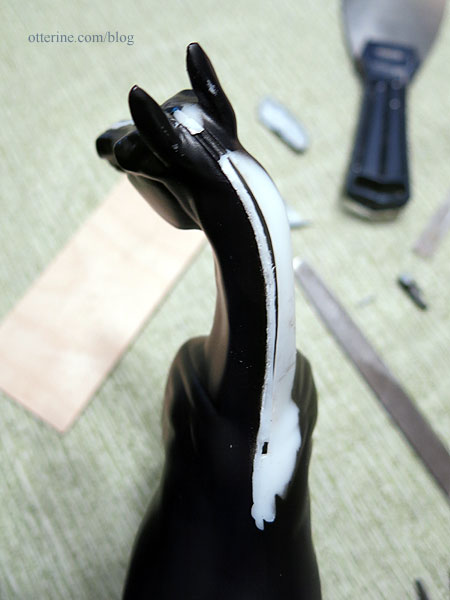
I cleaned up the spine with a utility blade and will fine tune by sanding. The gap will need to be filled, though it might be a good way to add the mane more securely. I’ll think on that a bit. I need to replace the putty I bought three years ago since I don’t want to take the chance that it has gone bad.
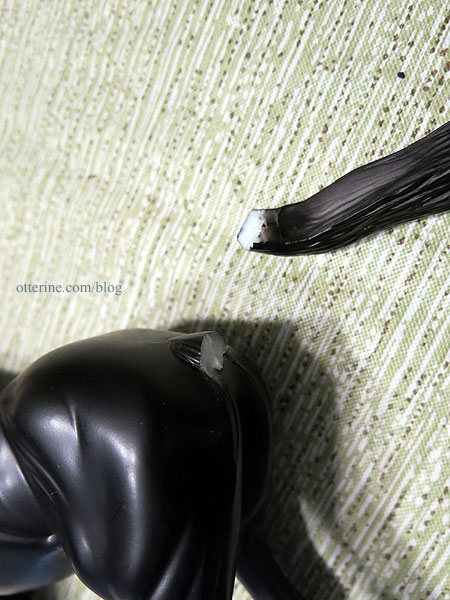
The tail was easy enough to lift and break off since it had no contact points with the legs. I’ll need the Dremel to cut away the remaining excess, but that’s for another day.
Categories: Animals and birds, Ivy Hollow RFD
February 4, 2019 | 0 comments
NOTE: All content on otterine.com is copyrighted and may not be reproduced in part or in whole. It takes a lot of time and effort to write and photograph for my blog. Please ask permission before reproducing any of my content. (More on copyright)


