
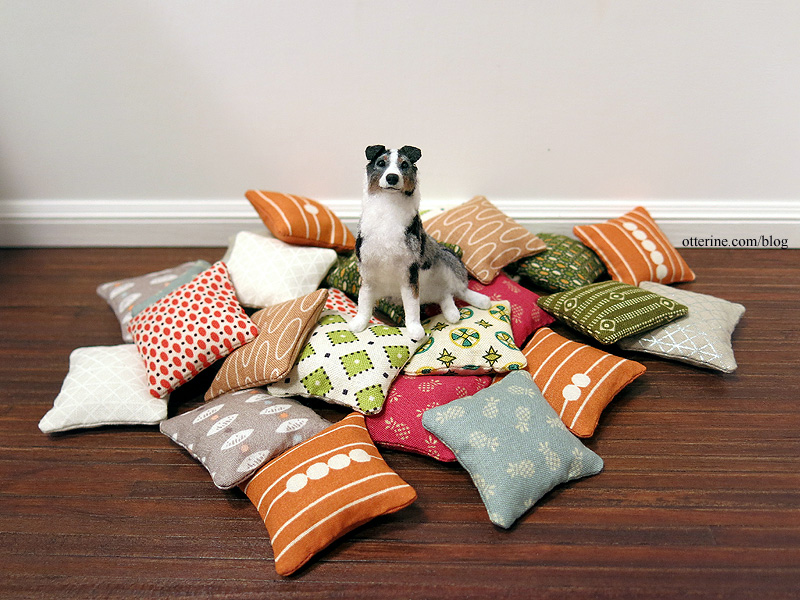
Dog pile!
Sherwood is a handsome model, no? Pillows available in my etsy shop.
Categories: Animals and birds, Miniatures
January 29, 2024 | 2 commentsCat mummies
Many moons ago, I bought a cat mummy kit from L Delaney. One thing I didn’t realize about the kit was that it contained air dry clay. It was hard as a rock, so I used Sculpey terracotta color polymer clay since I have a lot of it and you paint the mummies anyway. It’s also soft and easy to work with.
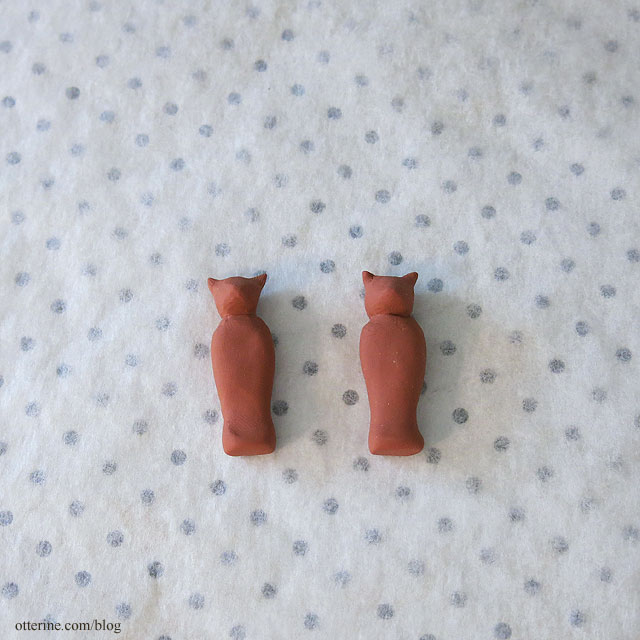
The paint included was also dry but I was able to reconstitute it with water. I made a swatch of it, so I could mix more of a similar color in the future. The kit comes with a lot of paper to use as mummy wrap, and you use 1/16″ wide strips. I could make a lot of mummies, but I started with a pair hoping to get at least one good one.
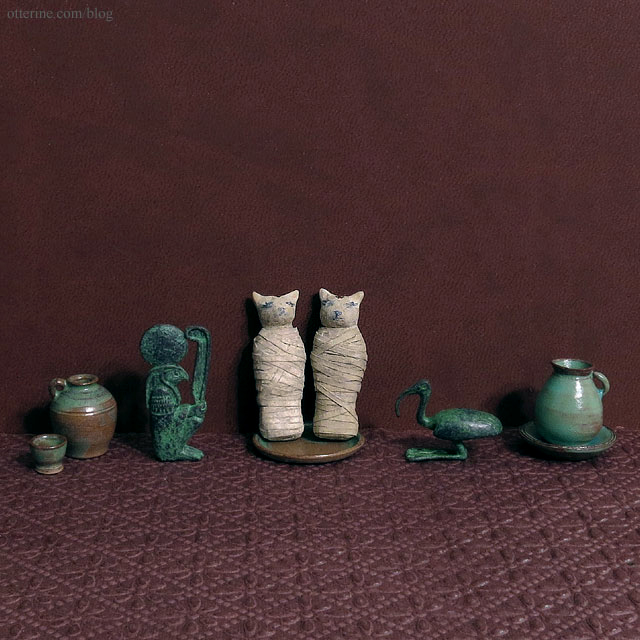
I ended up with two that complement one another well, don’t you think? :D
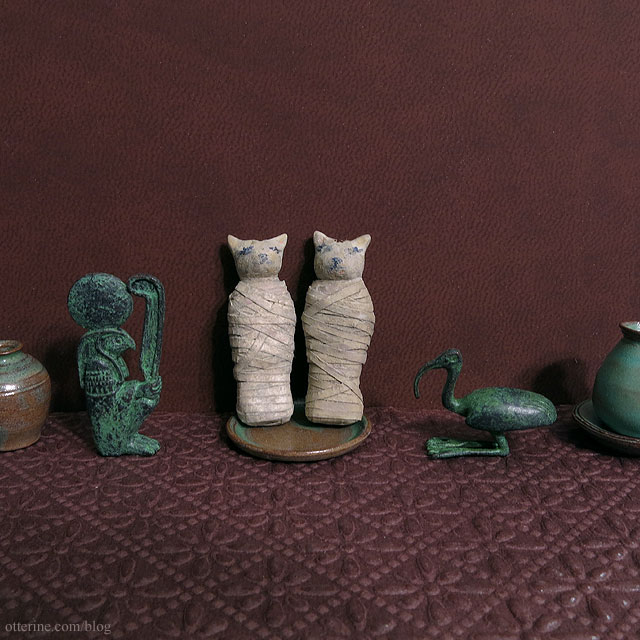
Ra and ibis statues by Neil Carter; ceramics by Carberlin Minis.
Categories: Animals and birds, Miniatures, Polymer clay
July 2, 2022 | 0 commentsA mini doghouse, part 2
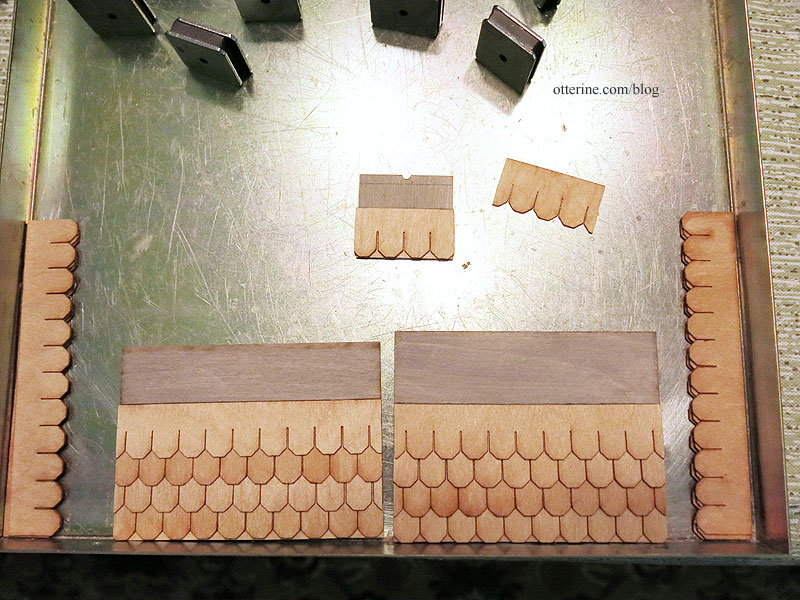
Continuing on the mini doghouse for Gus. There were no shingles in my kit, though they are mentioned in the instructions. Maybe I took them out to keep them from getting wrinkled, which seems like something I’d do, but I have no earthly idea where they would be. It was no worry since I had some suitable shingles in my stash of supplies. These are half scale speed shingles by Greenleaf.
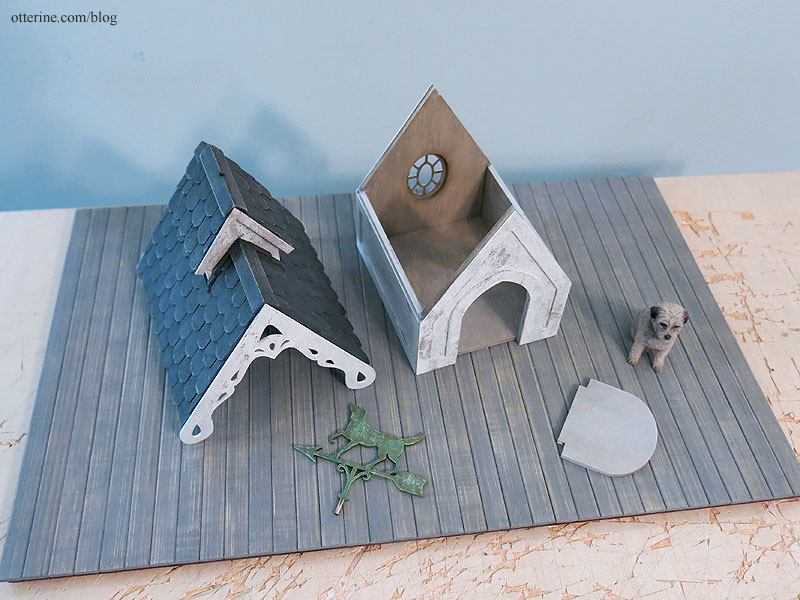
Considering the door is small, I wanted to see if I could keep the roof separate to access the interior more easily. A few extra steps, but I think it’s just better in the long run.
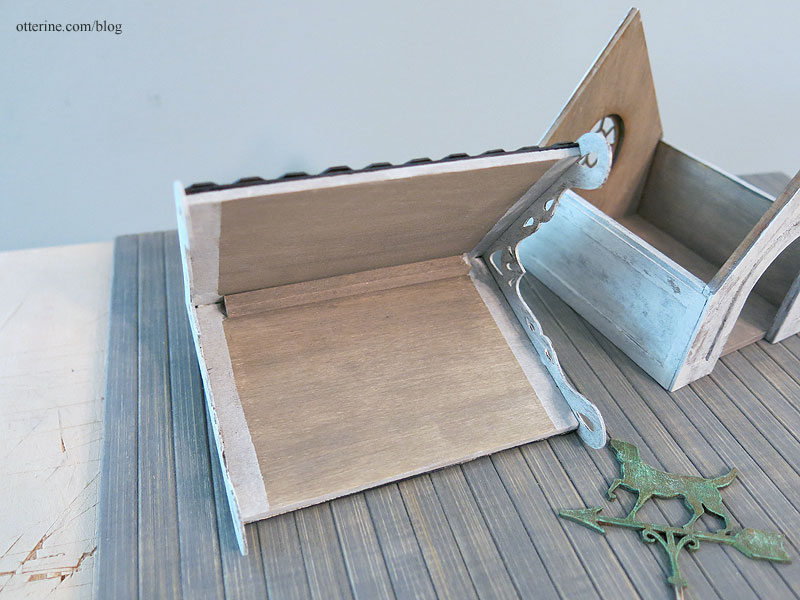
There’s an added beam inside to keep the roof from slipping out of place.
I painted the shingles a mix of black, brown and grey to start and then added some grey washes. For the house, I used crackle finish and off-white paint. The crackle finish was old, so it didn’t provide pronounced crackling, but that seems to work better for a smaller structure.
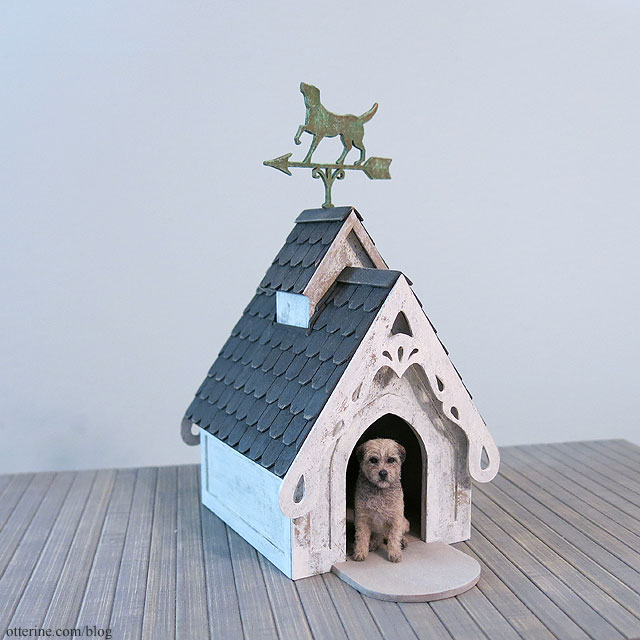
I still ended up with a nice aged finish.
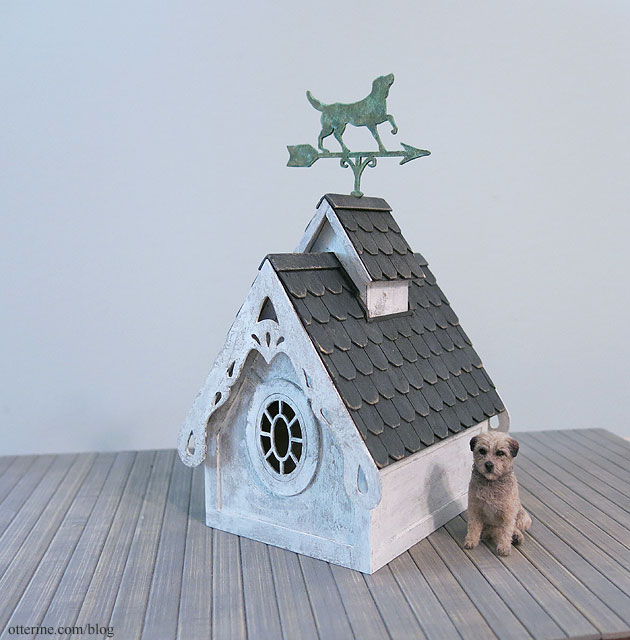
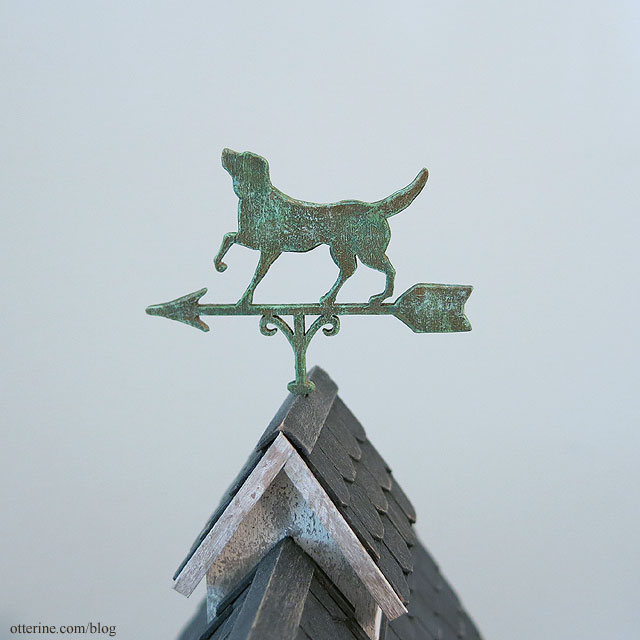
For the cupola, I added more trims to make it seem more realistic and more rain resistant. I painted the included weather vane to look like aged copper. It’s thin wood, so I worry about its longevity. I left it unglued for ease of removal in case I need to pack away the house or choose to replace it.
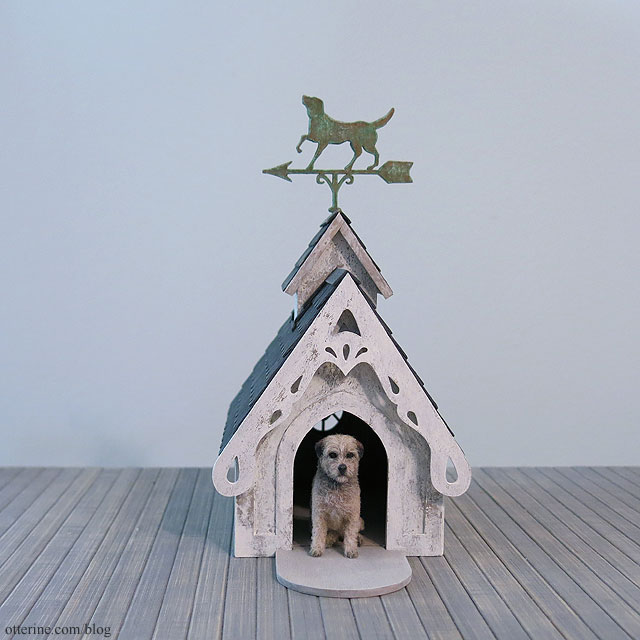
All that’s needed is a warm, comfy bed and some toys. :D
Categories: Animals and birds, Once Upon A Porch
June 26, 2022 | 0 commentsA mini doghouse, part 1
I’ve had this kit in my stash for some time now: Miss Lydia Pickett and her dog house.
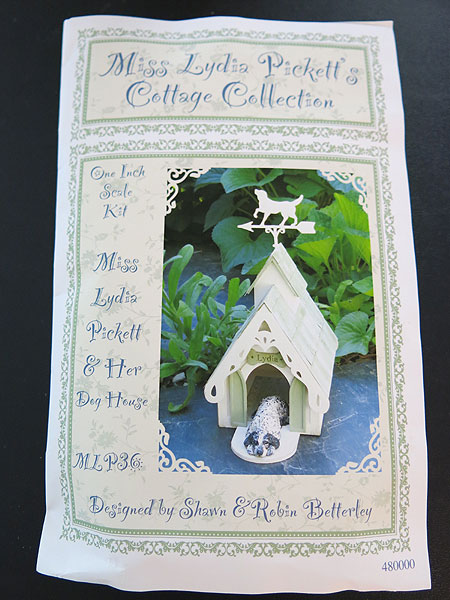
It comes with a resin dog for you to paint, but Gus seems to have his eye on the residence. :D
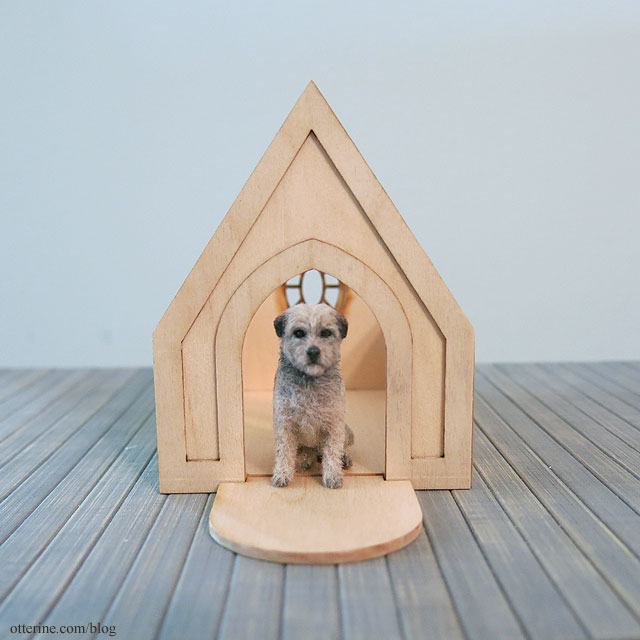
It’s a rather large house for Gus, but that just leaves room for more stuff inside.
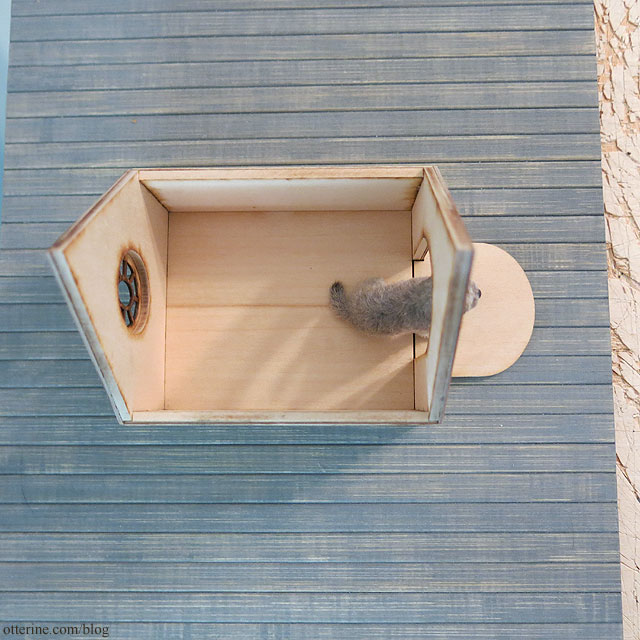
It’s very fancy, and I plan to keep the original details for the most part.
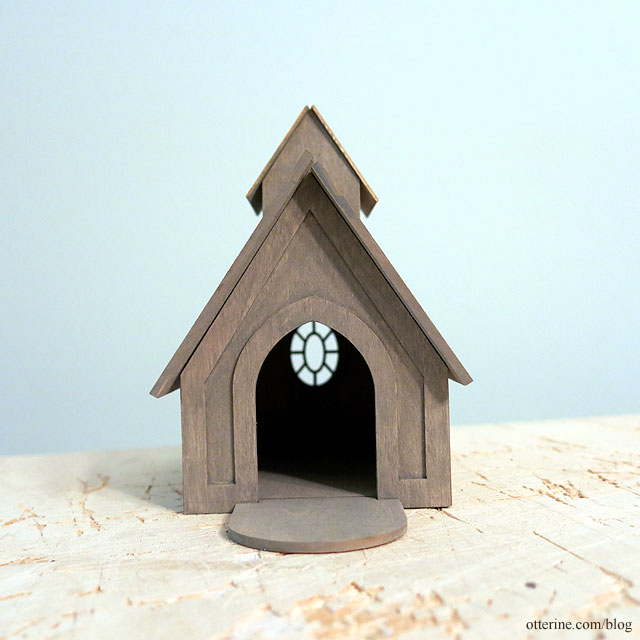
As for the finish, I wanted a more aged look. I started with a wash of silver grey.
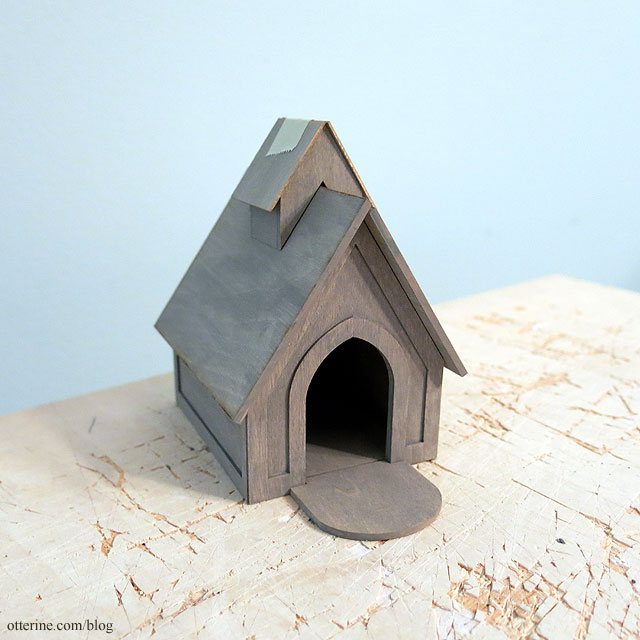
More to come….
Categories: Animals and birds, Once Upon A Porch
June 23, 2022 | 0 commentsBert – Robox coming to life
Even though you’ve likely seen Bert (my transformed Robox) in scenes here and there, I’ve not documented the process after dying the plastic. He’s also not been “finished” until this weekend when I was able to complete the final paint washes and add some other detailing. Here’s where we started: a Robox Canvas White action figure by 1000toys that I named Bert. :D
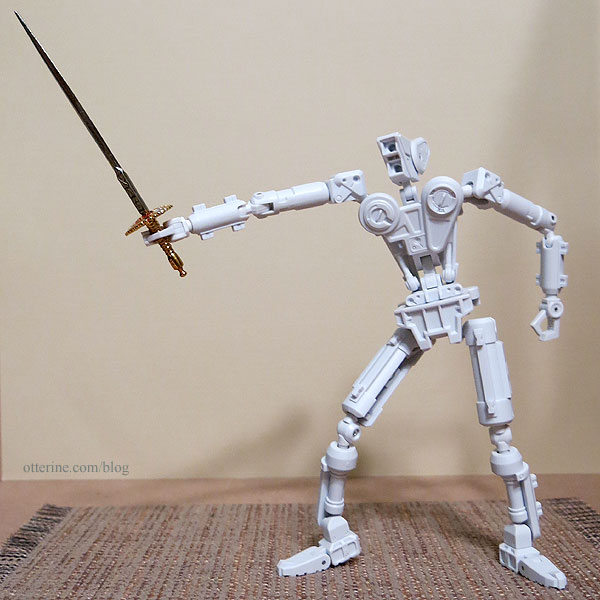
After dying the plastic, he ended up grey-purple, grey-brown and dark grey. Overall, the results were a great middle color for me to work on from there. In an unexpected but promising turn, the joints turned darker than the body and that would save me time trying to detail those. I ended up permanently gluing the chest plate in place on the torso since it would no longer stay in place. Bert will never revert to his folded up self, but I wouldn’t want to risk damaging the paint in the end anyway.

Next up, I used Privateer Press Formula P3 paint in Pig Iron, Thamar Black and Quick Silver, as well as their Armor Wash. From my research, this brand of paint was recommended by artists who repaint action figures. It’s not as durable as a spray paint, but there’s no way I would have been able to spray paint Bert effectively given that he was a fully assembled figure. There were places to separate the parts, but there were also rivets permanently keeping some areas together.
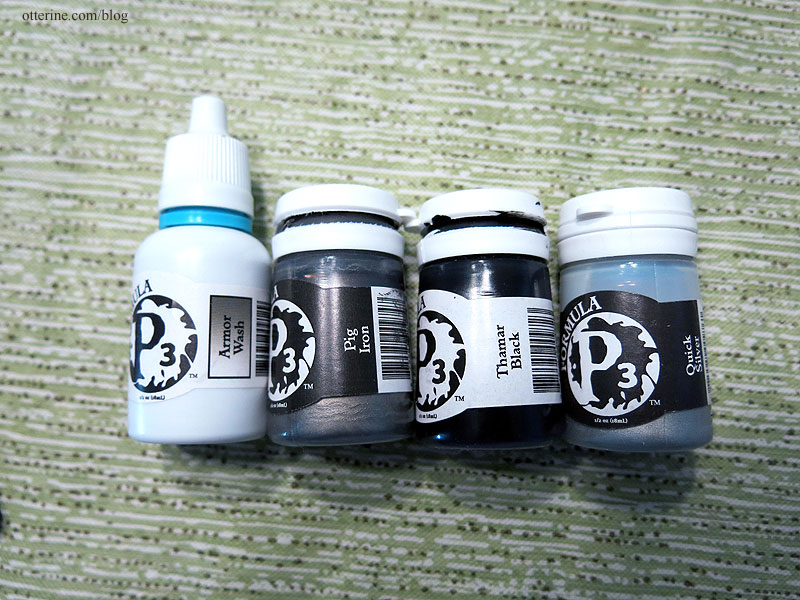
I started with the feet and worked my way up. The only place I used black was for the tread on the bottom of the feet. The rest is all Pig Iron except for the bars in the main body which are Quick Silver. I then used the Armor Wash over the top of the Pig Iron to give him a more aged appearance. It also settles into and emphasizes any detail lines.
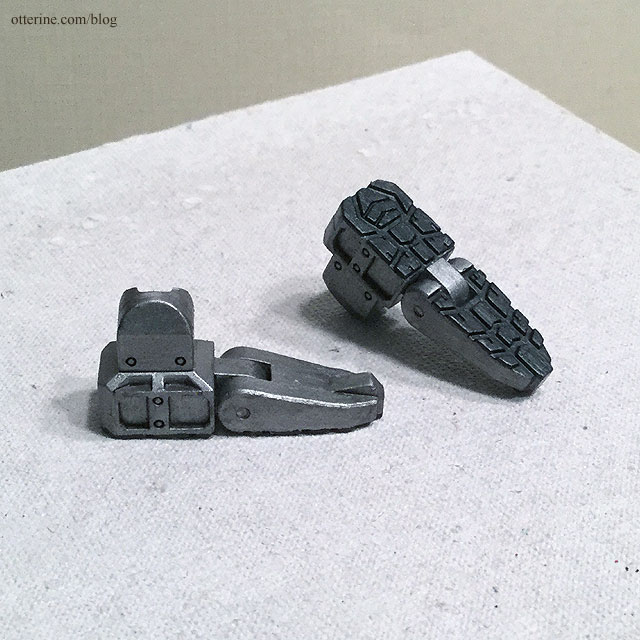
The metallic sheen of the Pig Iron is really nice, and the Armor Wash just darkens it a bit without removing the metallic sheen. Here you can see the difference from the plain dyed plastic to the aged metal.

Bert’s head had a moving back, which was a nice feature, but paint would never have survived the movement. I ended up permanently gluing that portion of the figure.

The “eyes” for the Robox were separate parts, which made them easier to customize. Well, I think one was an eye and the other a mouth, but I just refer to them as eyes and figure the speakers for talking are built in. :D I painted the outer rims black, leaving them on the sprue until I was ready to glue them in place.
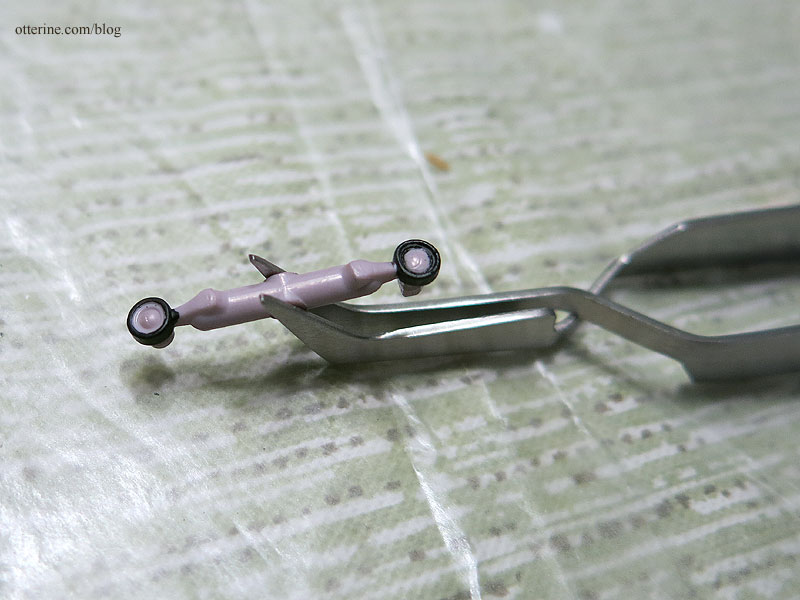
I had leftover parts from the RX-7 build, so I used some clear lamp covers to serve as lenses. I colored the backs and fronts with Sharpie markers to get saturated but transparent red and blue.

I painted the inner portion of the base with white to help sell the idea of there being light behind the colored lenses.
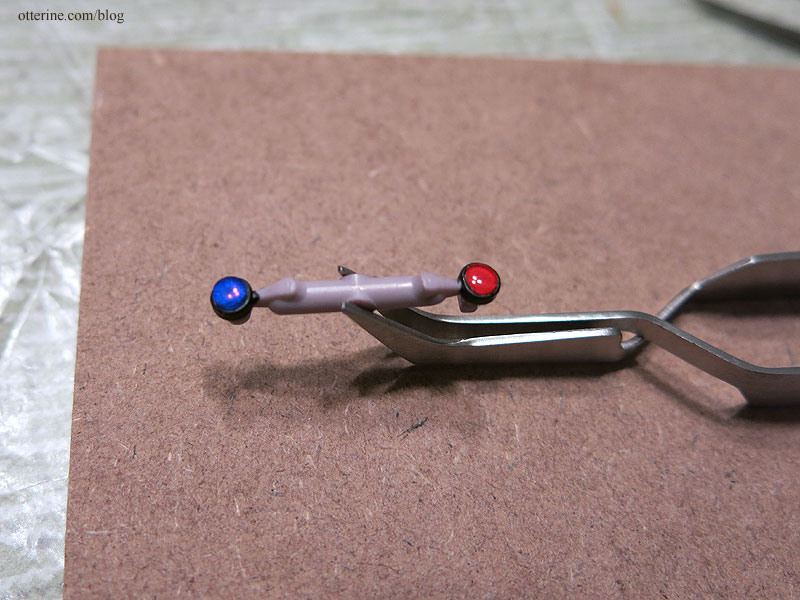
I think they suit him well. (Just as an aside, the head has the Armor Wash but the arms and torso do not in this picture.)
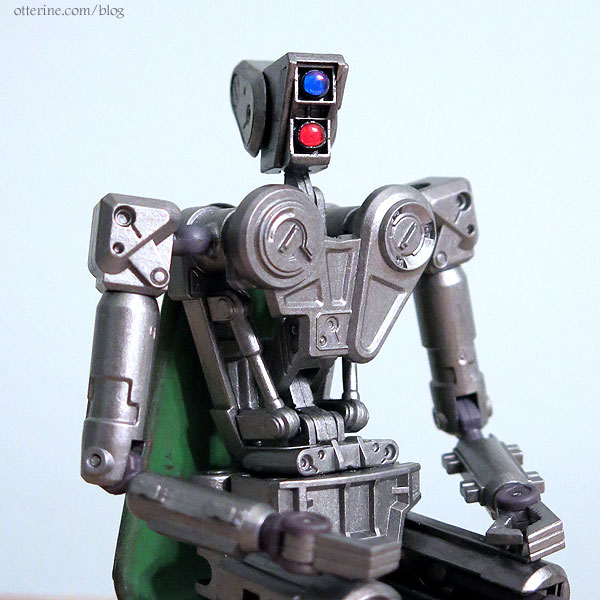
After getting the rest of Bert finished with the Armor Wash, it was time to address the joints. The dying process impacted the functionality slightly in that the ball joints ended up very tight (I suspect the heat impacted the two types of plastic differently). The rod connections ended up a little loose. So, enter Miraclekoo Silicone Pouring Oil and super glue gel.

The head was the only ball joint that was loose. Not wanting to overdo the correction, I added some mini hold wax to the joint. It allows for more stable positioning of the head and can be replaced as needed without permanently altering the joint.
For the loose rod connections at the wrists and lower legs, I added a thin layer of super glue gel to the rod. You have to let this dry completely before testing the fit so you don’t super glue the part in place. Once dry, I sanded the excess until the joints moved smoothly. Now the lower legs now stay in place better.
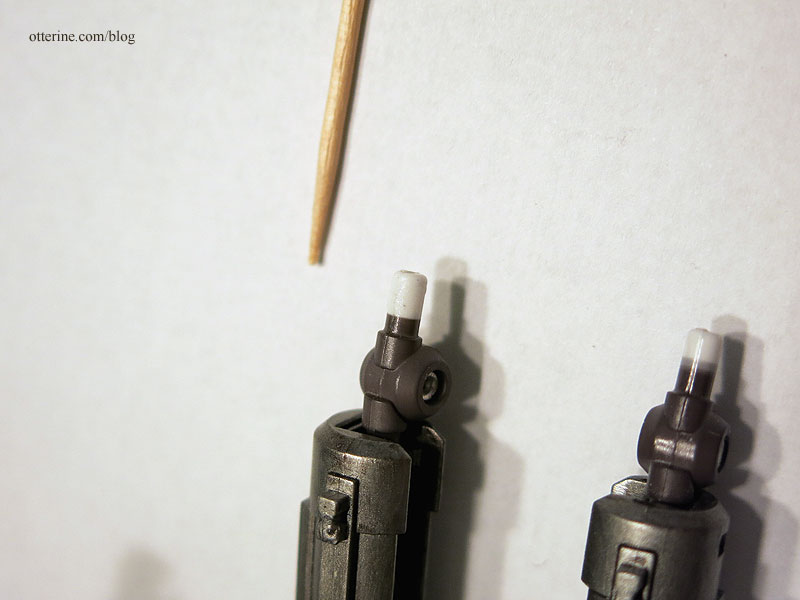
For the tight connections at the shoulders, elbows, hips, and inner thigh (these move the knees), I used a small amount of the silicone oil. I chose silicone oil so that it wouldn’t degrade the plastic over time. Still, I will be mindful of having Bert come in contact with any fabric furnishings going forward.
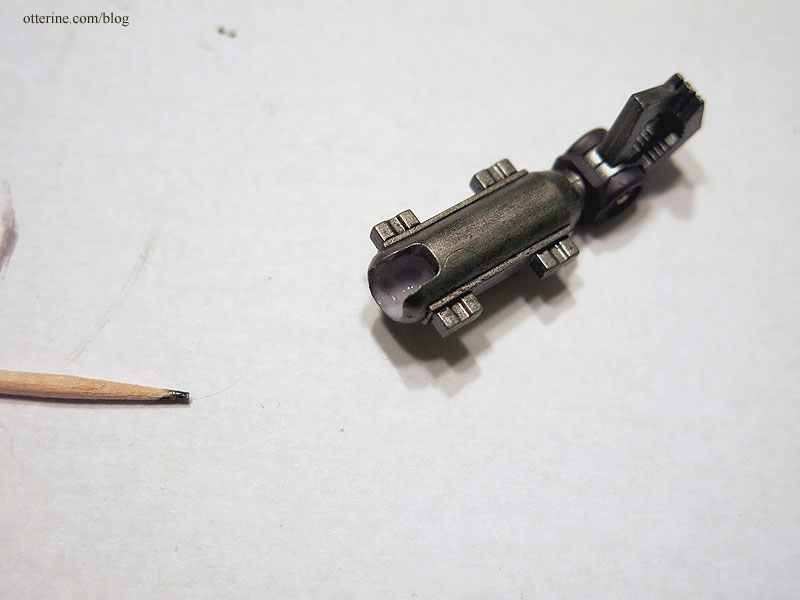
The joints aren’t as loose as they were before dying the plastic, but they are better and I no longer feel like they will break if I twist too hard.
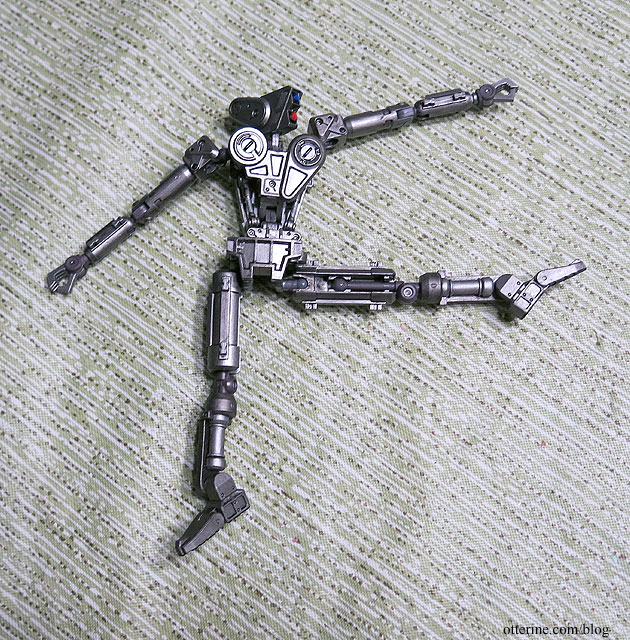
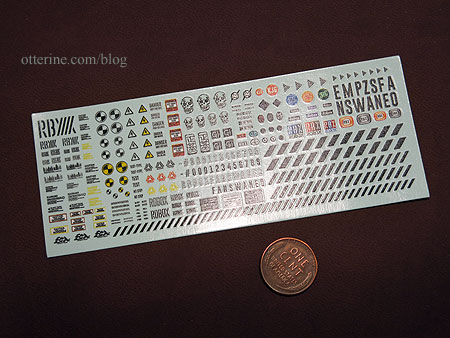
Bert’s already dashing, but let’s add some edge. Tattoos! :D The Robox did come with decals.
I also have a bunch of leftover decals from my years of building model cars. I opted for one Pennzoil decal since Bert is a fan.
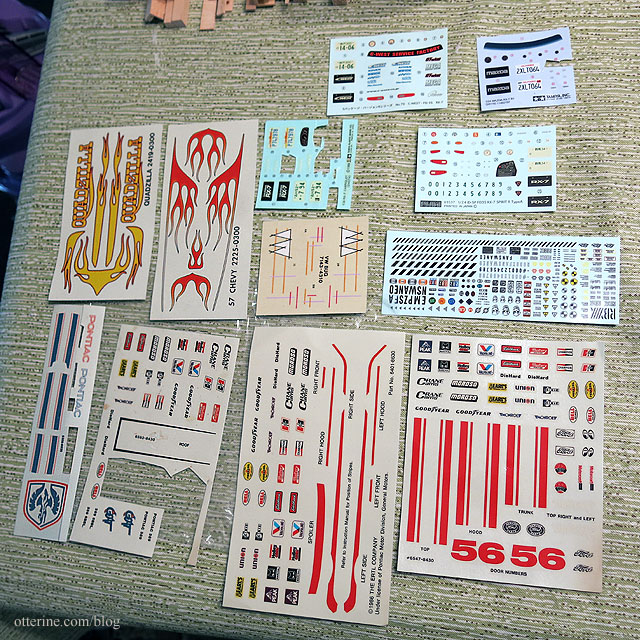
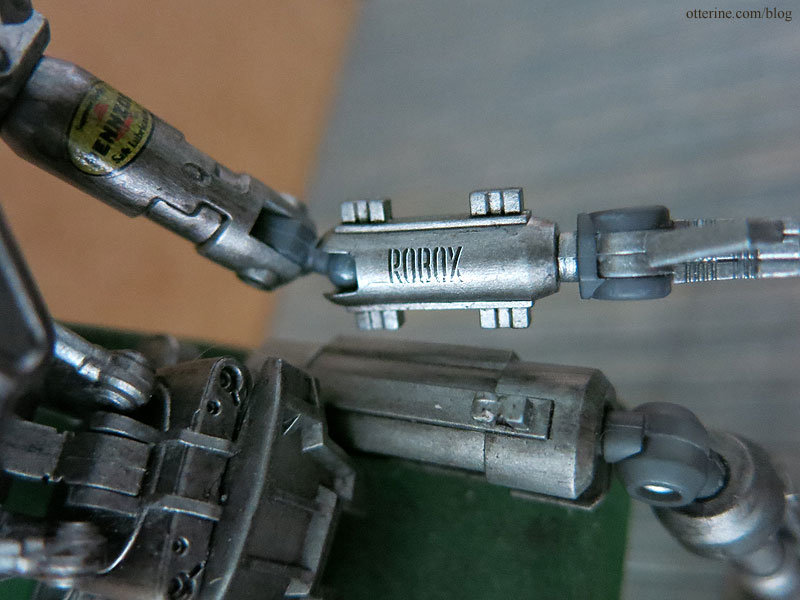
Only a few spoke to me, so I will keep an eye out for anything interesting in the future. The open spaces are minimal, but there is room for a few more. Here you see the one on the shoulder and the side of the head.

I used one of the Robox decals on the forearm, a number 8 on the chest and the Pennzoil on the bicep.
Gus thinks Bert is good at head pats. :D
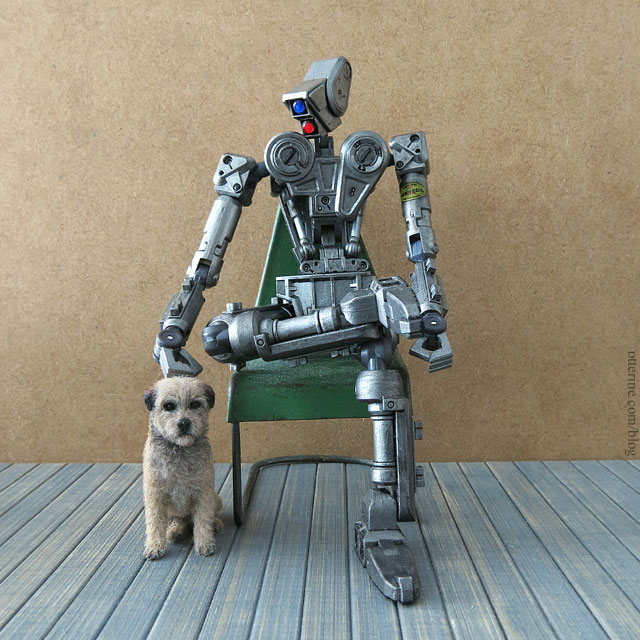
Added a bit of humor in Bert’s decal placement.

Keep those hands clear of Bert’s backside! :D

Categories: Animals and birds, Droids and Robots
June 19, 2022 | 0 commentsBishop Show April 2022
First time since 2019!!! So good to be there and see so many people again. Chicago International is running through tomorrow so there is still time to shop if you’re in the Chicagoland area.
Lamis Minis. I hopped right up to Pia’s table first, because I wanted bunnies! I was second in line, so after the first person shopped (not for bunnies), I was able to go just a bit bonkers.
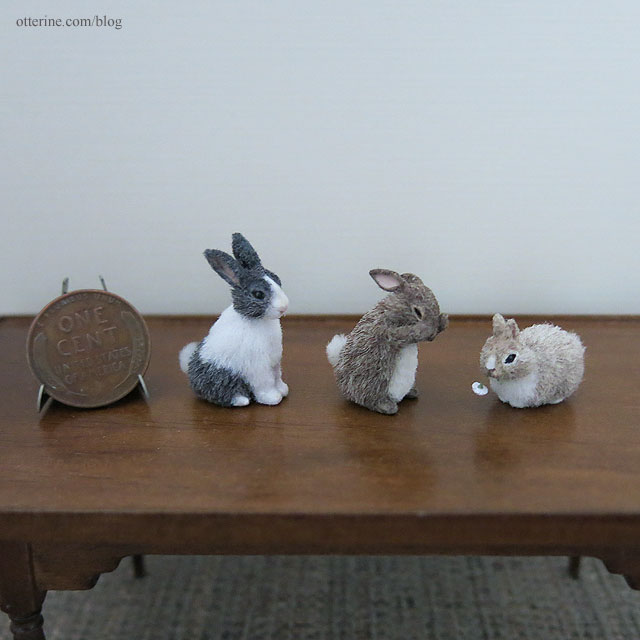
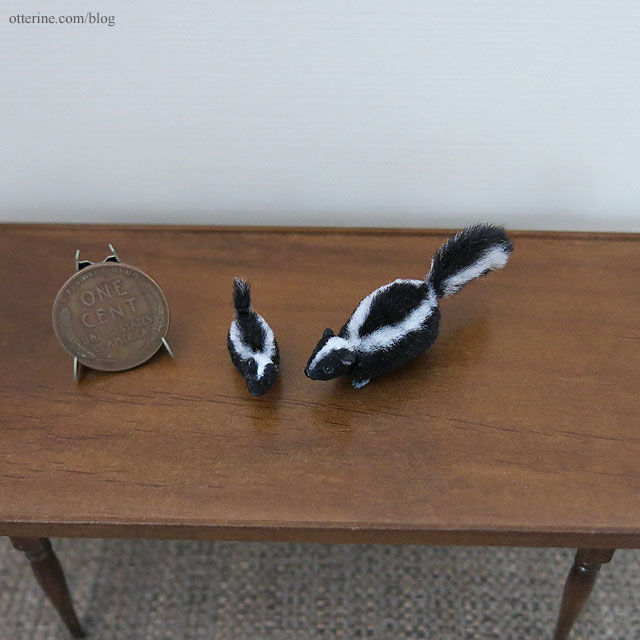
I picked up another skunk not shown here for a friend who could not attend the show and got the mom and baby for myself.
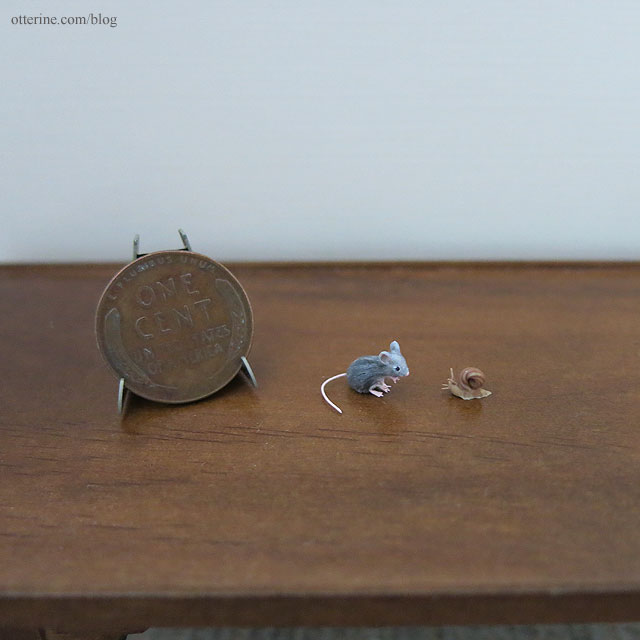
I also picked up a snail for another friend and got a mouse and a snail for myself. Poor Pia had to do a lot of rearranging after all that.
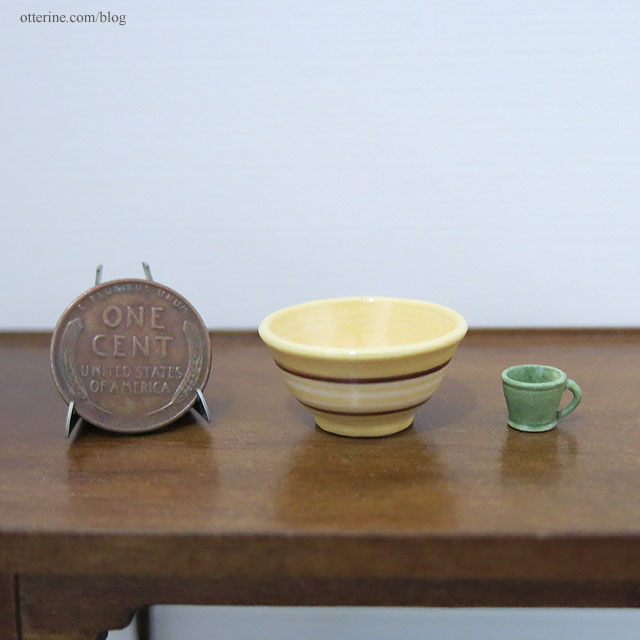
Jane Graber. I usually visit Jane’s table right away as well, but this time it was three people deep and all the way across. The booth looked like locusts had swept through. I did go back and was able to pick one bowl and mug.
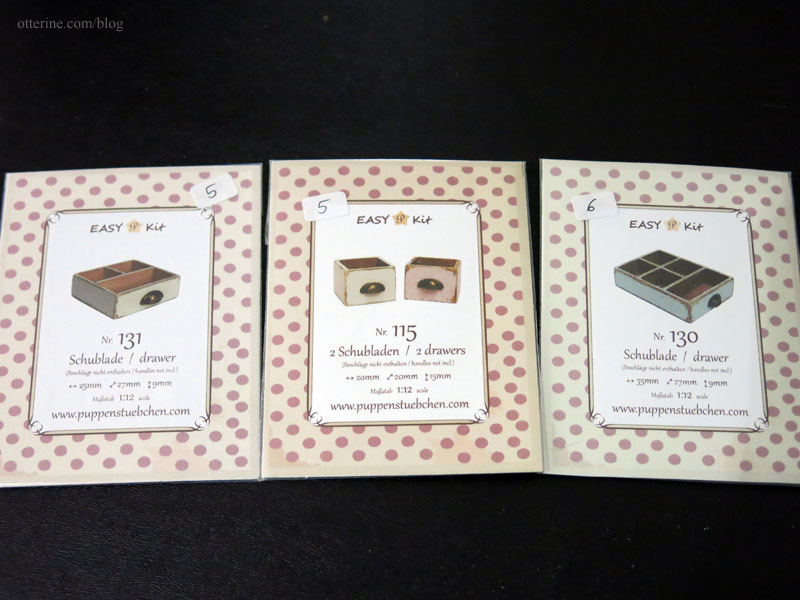
Puppenstübchen. Last time, they had a great deal more kits.
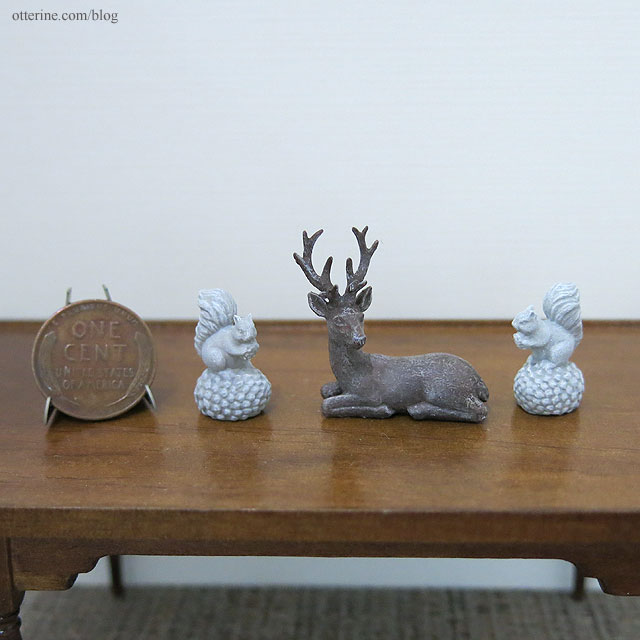
But, their finished accessories and furnishings are also lovely.
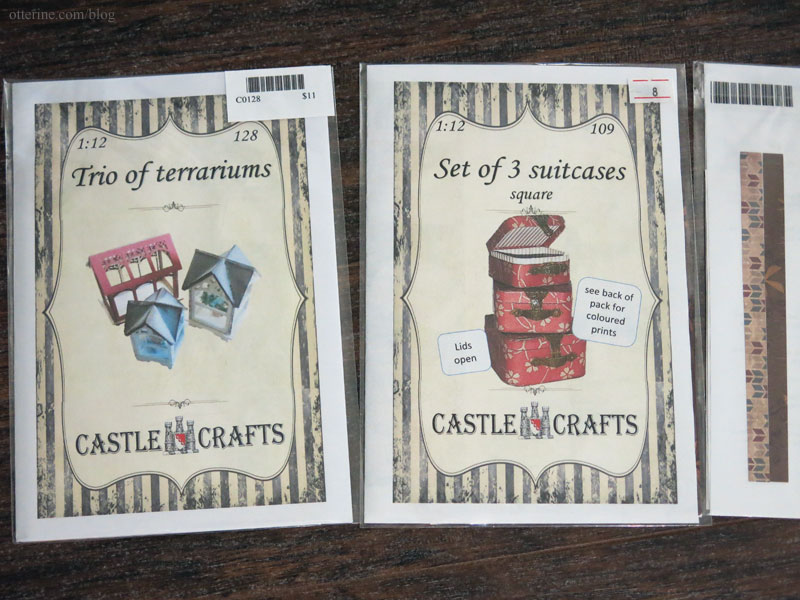
Castle Crafts. New kits here, but I also picked up some that I didn’t already have. The suitcases came in different colors, and the papers included were shown on the back. Very easy to go through and see what you’d like.
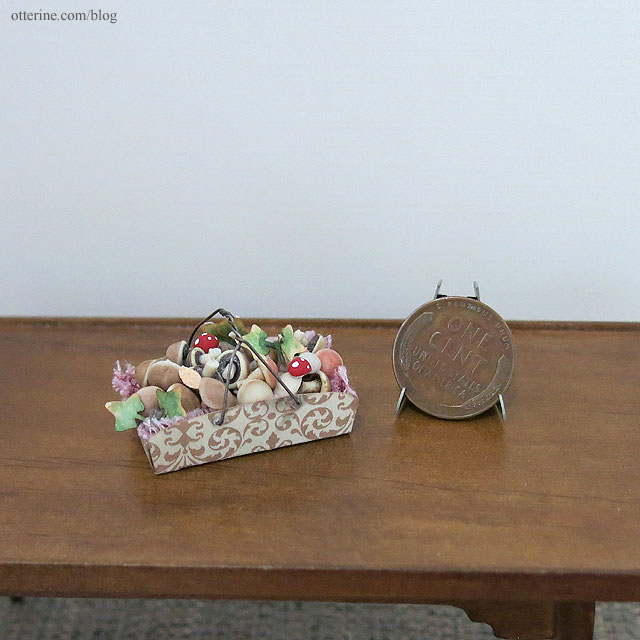
They also had these lovely baskets of mushrooms.
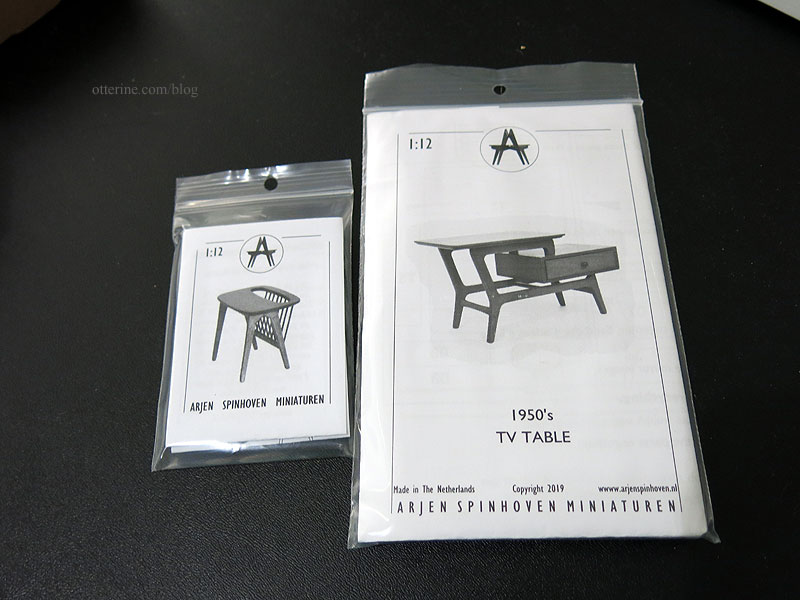
Arjen Spinhoven. I always enjoy seeing Arjen, and I believe this was his first time at the Bishop Show. I was happy to see his table was very busy every time I passed by.
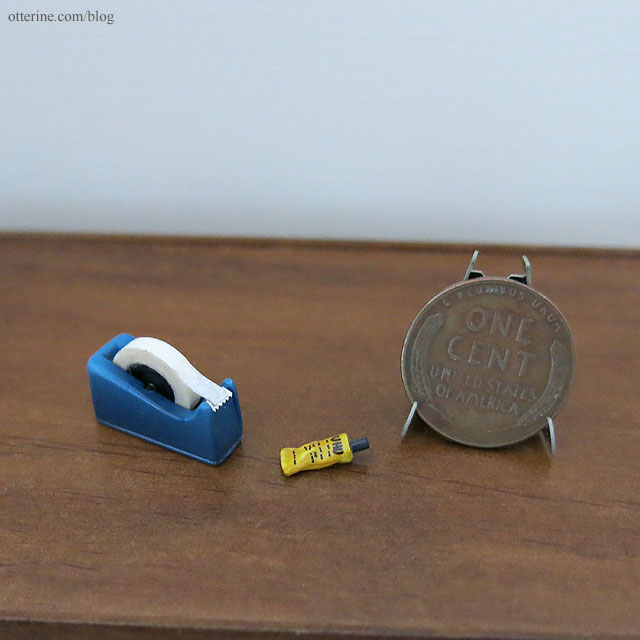
Ulus Miniaturas. Considering my real life purchase not long ago, the tape dispenser made the most sense. And where there’s tape, there’s glue.
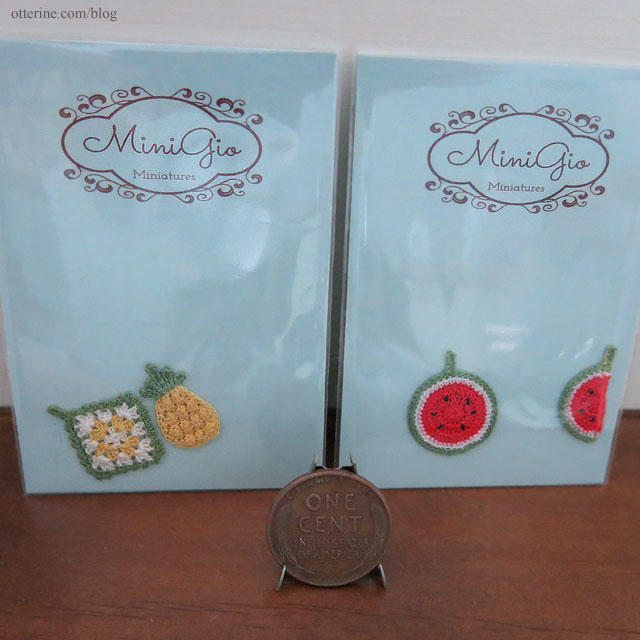
MiniGio. I bought the pineapple set awhile back but bought the watermelon set at the show.
Bindels Ornaments. Another vendor I always enjoy seeing. They have the best selection of bits and bobs as well as packaged kits and lots of examples on what you can make.
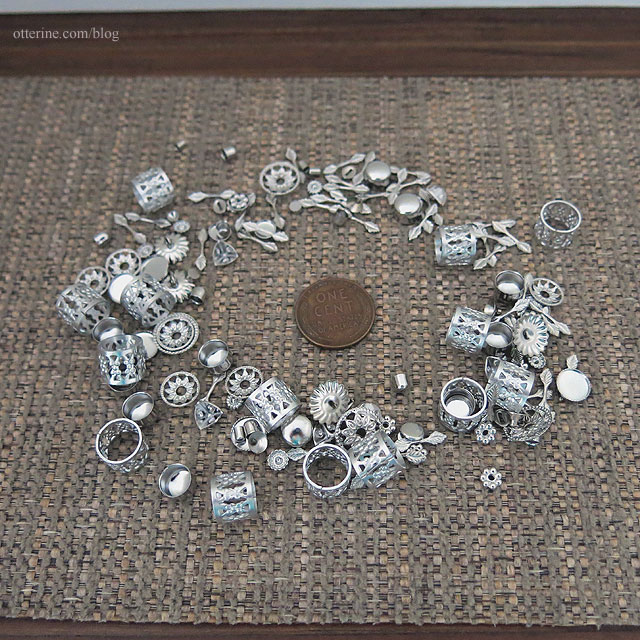
Oiseau deNim. I have known Peiwen through blogging for years, but this was the first time we’ve met in person. We giggled and hugged, and it was so wonderful! :D She makes the most amazingly detailed tiny miniatures and sells molds for you to make things yourself.
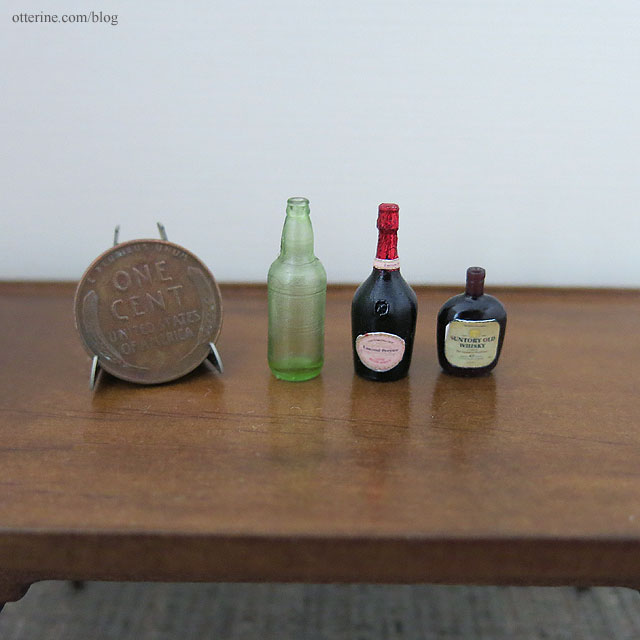
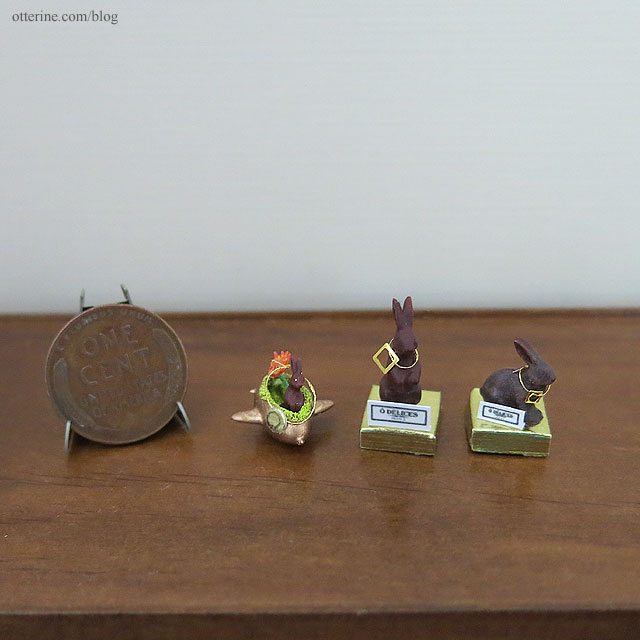
Creations by Lynette. Lynette is not only a talented ceramics maker but was a delight to meet!
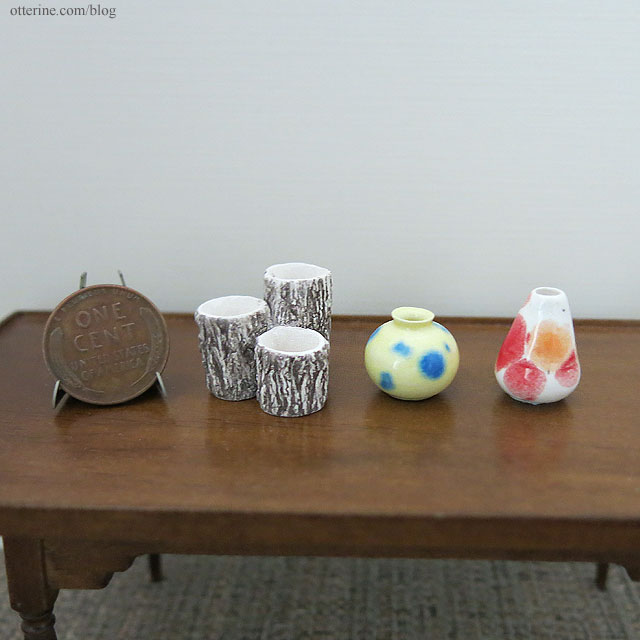
Chris Toledo Miniatures. Seeing photographs of his work is one thing, but if you ever can get to a show where he has his roomboxes, you must go. The attention to detail and wonderful finishes are top notch! What’s especially wonderful is you can purchase some of his fixtures as DIY. :D
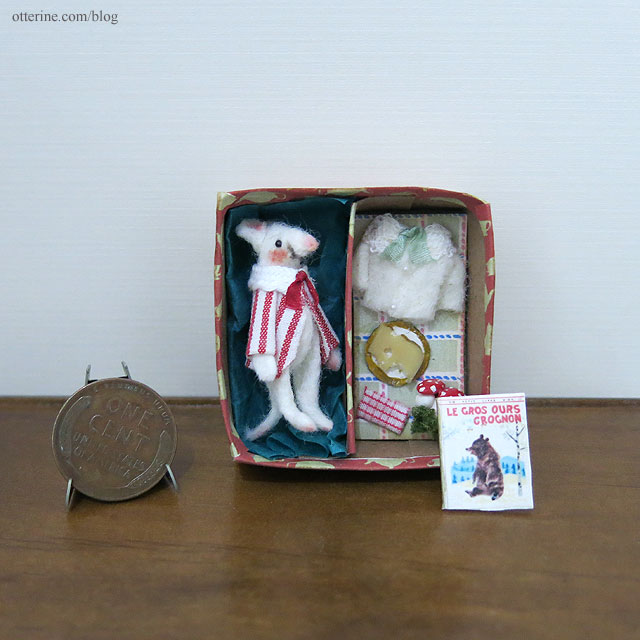
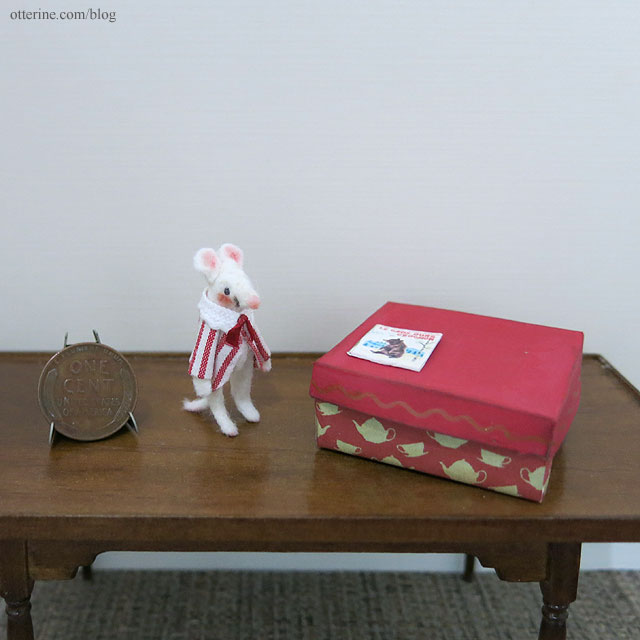
Véronique Lux. I love her storybook animals. :D
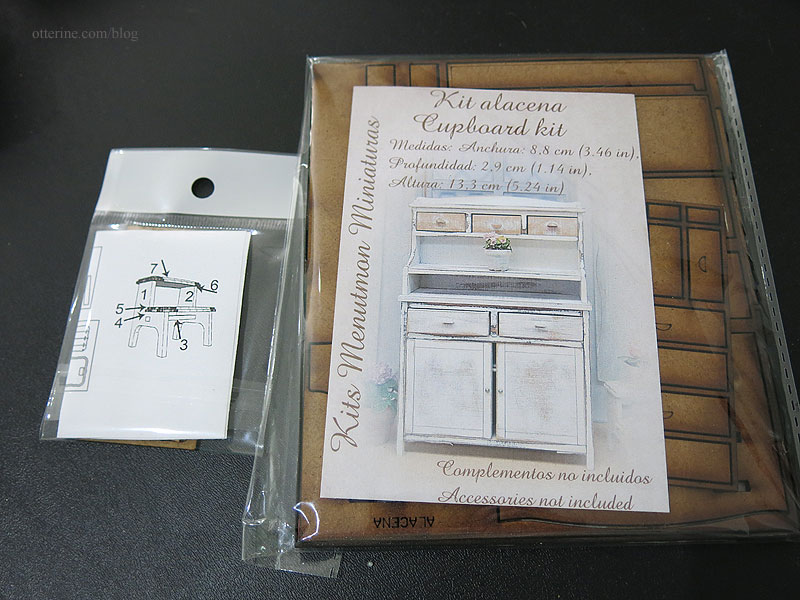
Menutmon Kits. They didn’t have many kits with them, though they are available on the website.
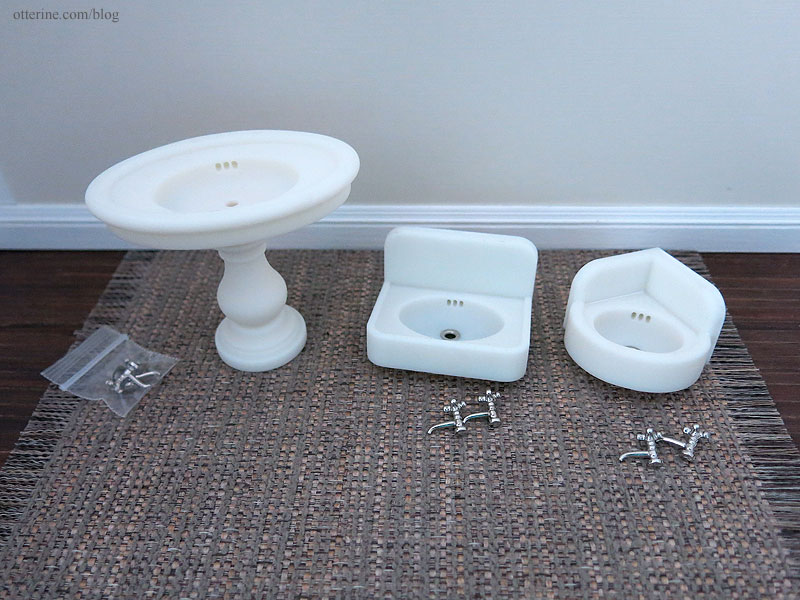
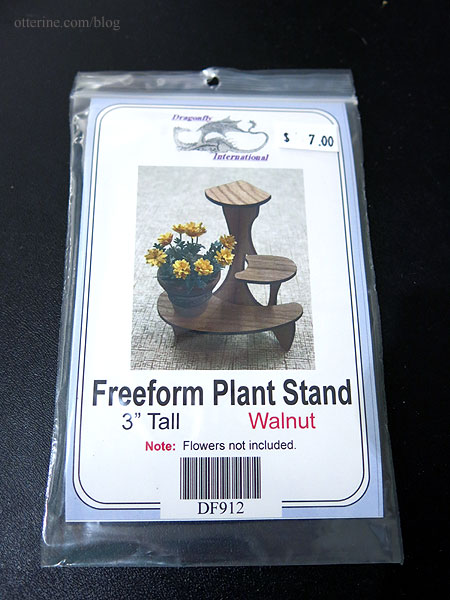
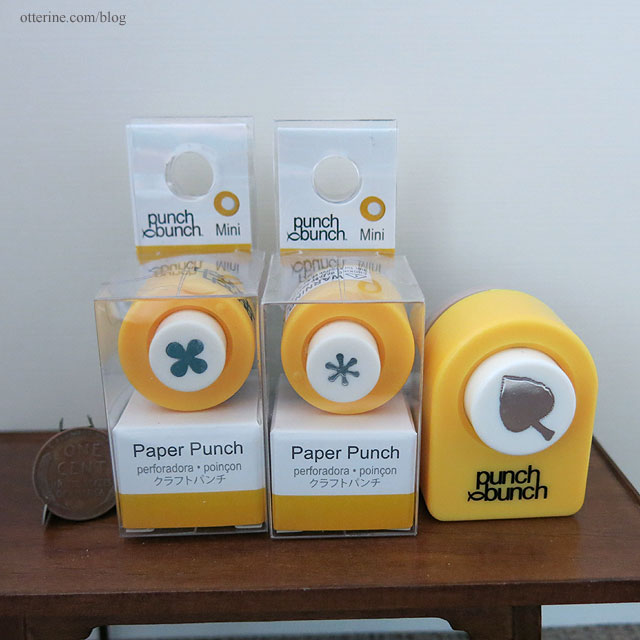
Dragonfly International. I always find goodies at this table.
Categories: Animals and birds, Miniature Shows and Shops
April 30, 2022 | 0 commentsHappy Halloween from Bert and Halo
Happy Halloween from the Haunted Heritage! Bert is reading Edgar Allan Poe to Halo and waiting on trick or treaters.
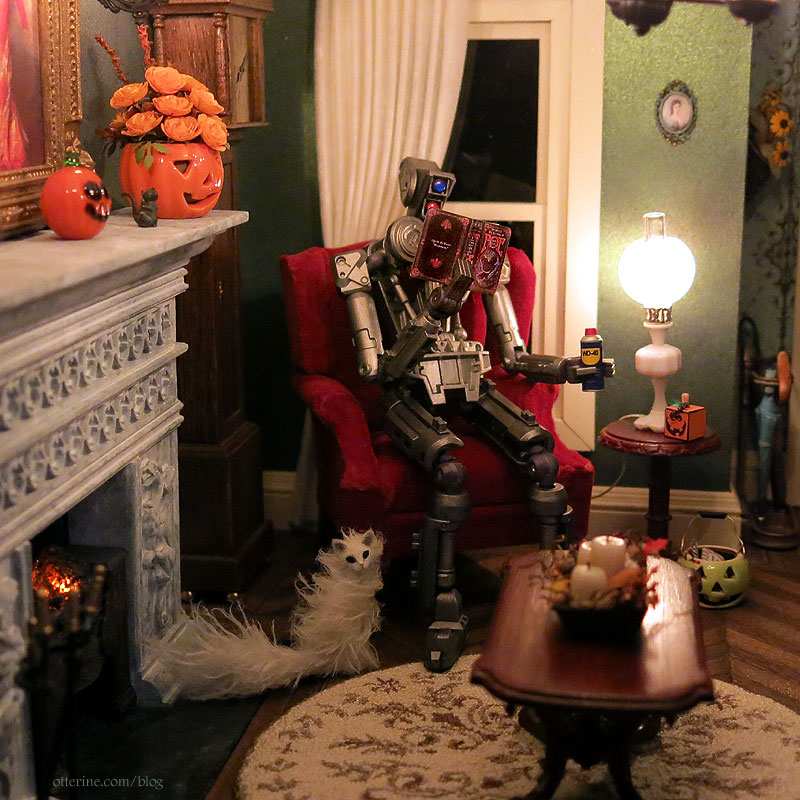
Bert is enjoying a refreshing cocktail.

Halo is waiting for her favorite story…The Raven.
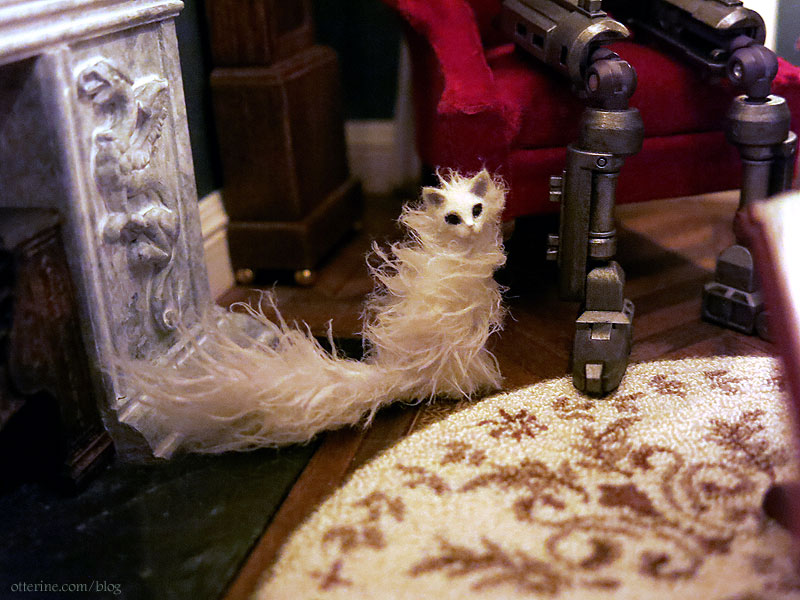
There’s a pumpkin bucket of full size candy bars if anyone comes around for a scare.

———
Halo by by Maya Schippl; ceramic pumpkin by Alex Meiklejohn; coffee table centerpiece by MiniFanaticus.Categories: Animals and birds, Droids and Robots
October 31, 2020 | 0 commentsGroundhog Day 2020
The best way to keep Woodrow from seeing his shadow is to keep him out late the night before! Come on early Spring! :D
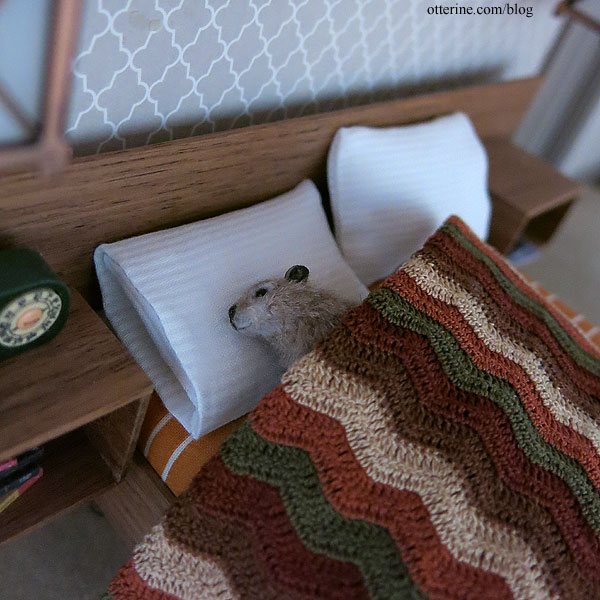
Oops, sorry, Woodrow…I’ll keep it down. Sleep is the best remedy, little buddy.
Categories: Animals and birds
February 2, 2020 | 0 commentsIvy Hollow – tiny stamps and a postal cat
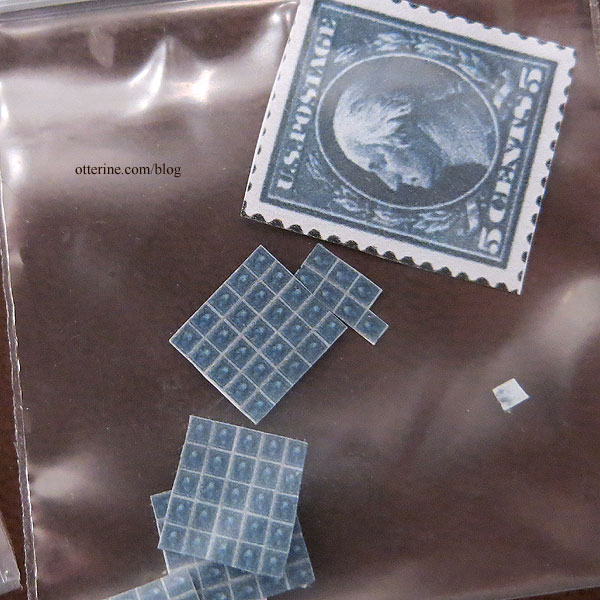
As I was building, the delightfully talented Anna sent me some mini stamps she made. She included real life size prints of the original inspirations as well.
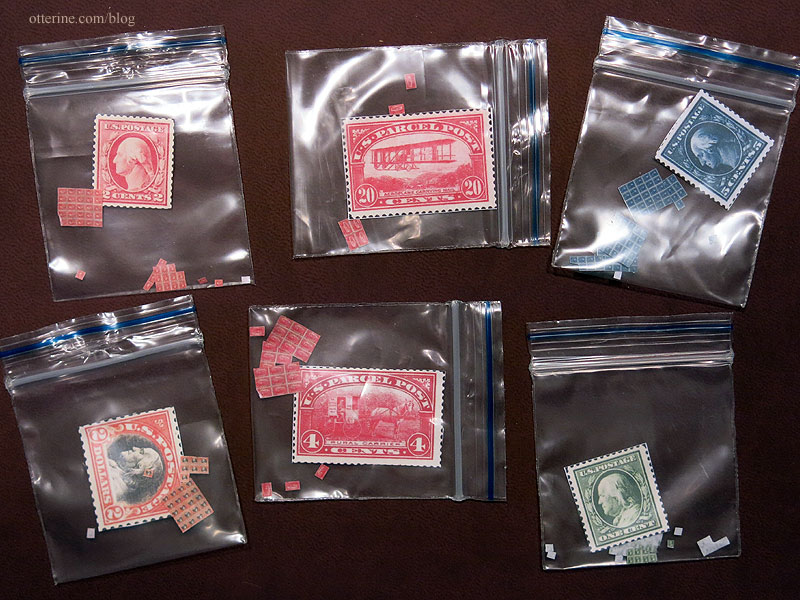
One has a biplane in honor of The Aero Squadron Lounge.
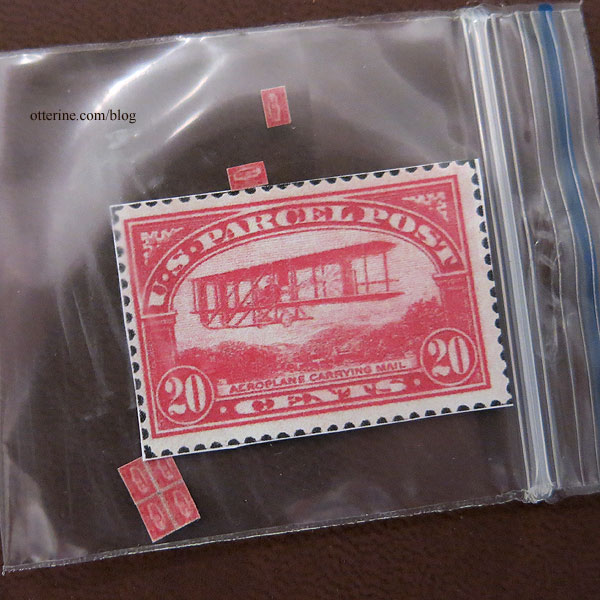
Another has an RFD wagon.
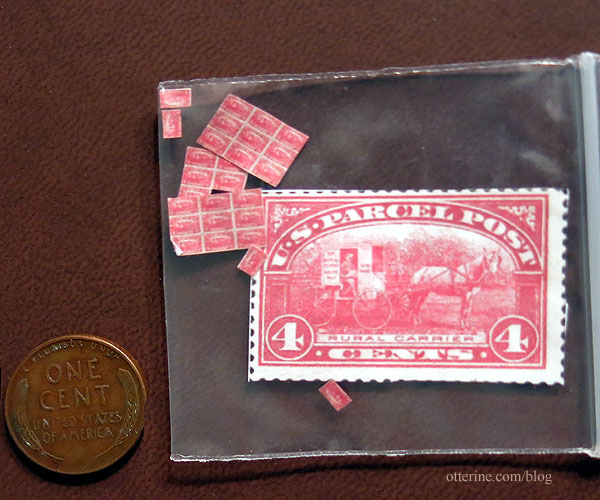
There’s even a book to keep them organized for the postmaster. :D
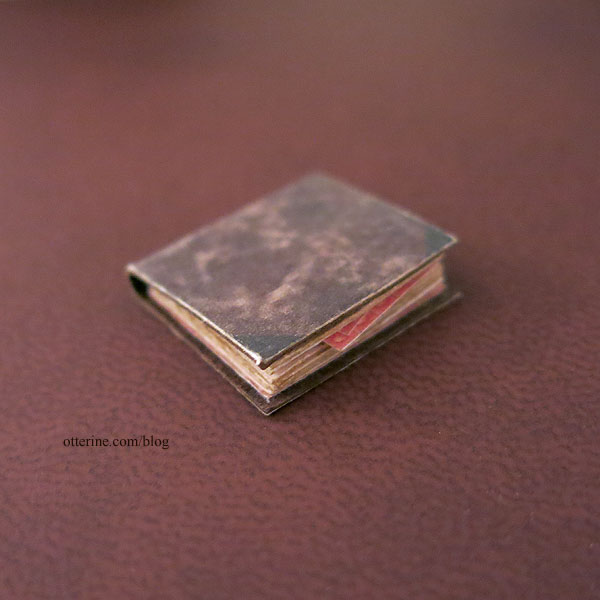
Thank you, Anna, for your wonderful and generous gift!
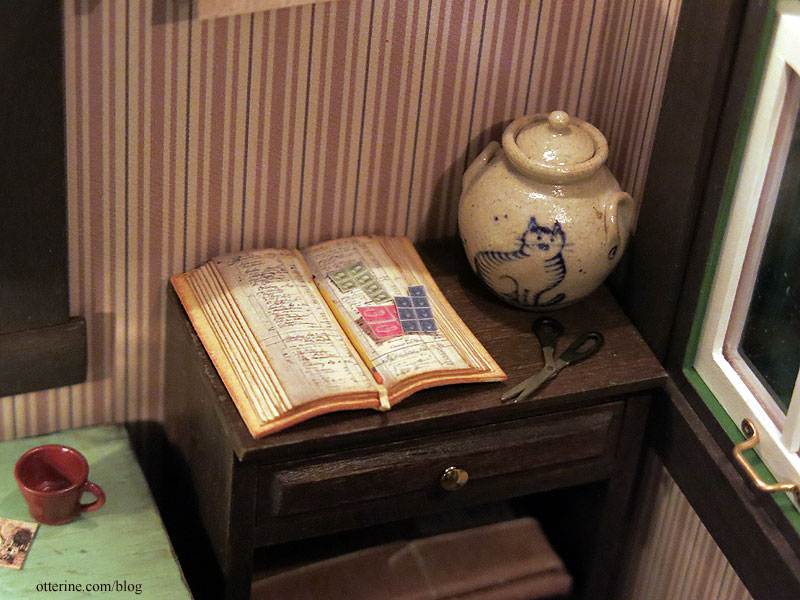
I’ve set a few on the ledger from Looking Glass Miniature. There’s also a cat food jar by Jane Graber for when Chester gets the munchies.
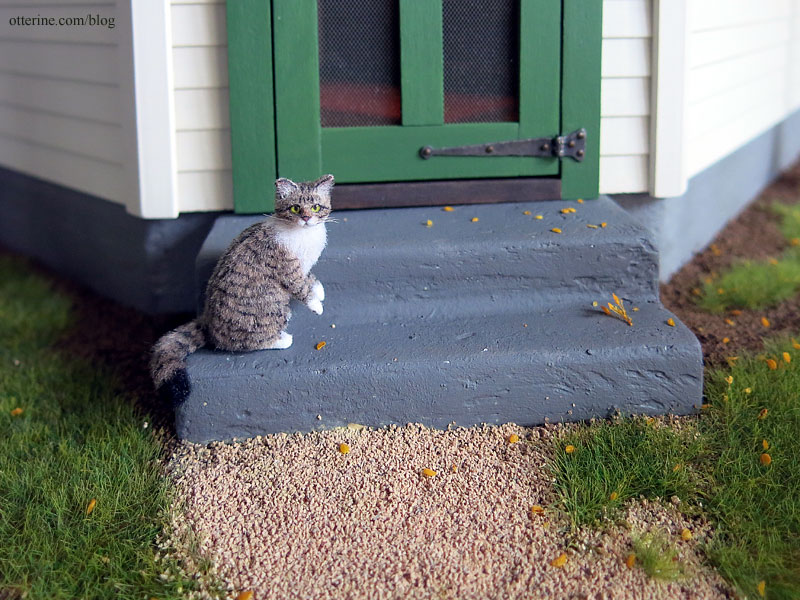
And, you know cats do! Chester was made by 2014erok. I had so much fun playing in the mini dirt this time around – the landscaping got to be a lot less manicured.
Categories: Animals and birds, Ivy Hollow RFD
December 19, 2019 | 0 commentsMaking a 1/12 scale horse – part 5
Continuing work on the 1/12 scale model horse. After the initial primer coat, I fine-tuned the body and then did a final primer coat.
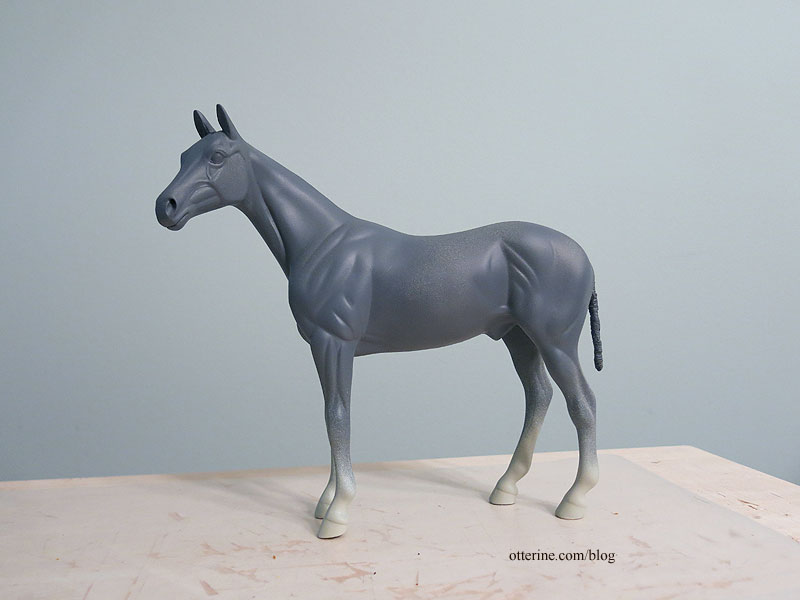
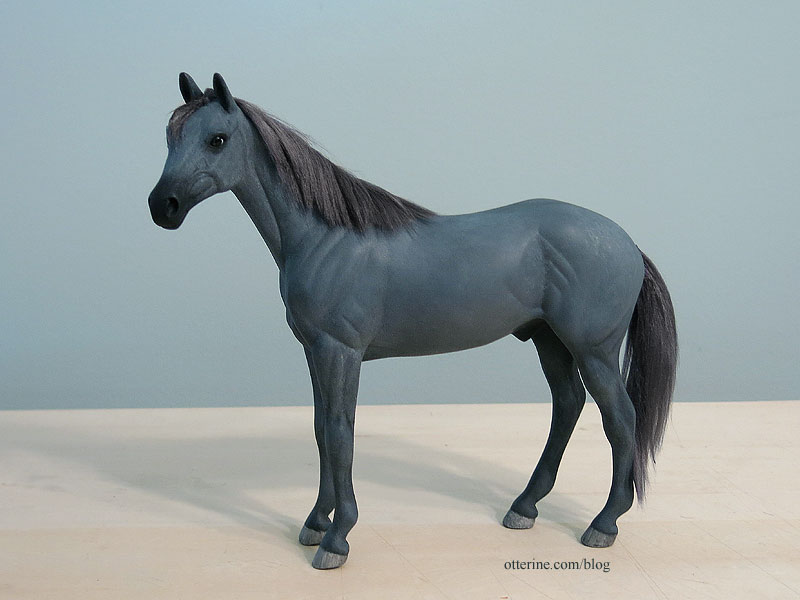
I started the final paint with some shadowing. I thought he looked like Batman right here.
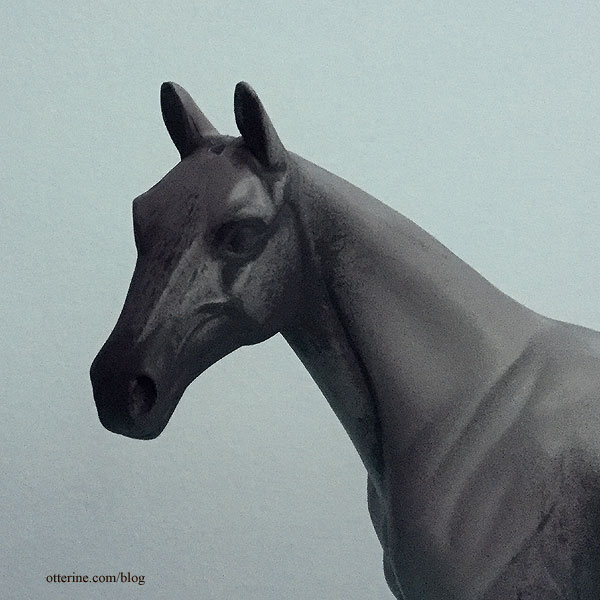
The hair was accomplished with multiple layers of paint using small and large brushes. I made a lot of it up as I went.
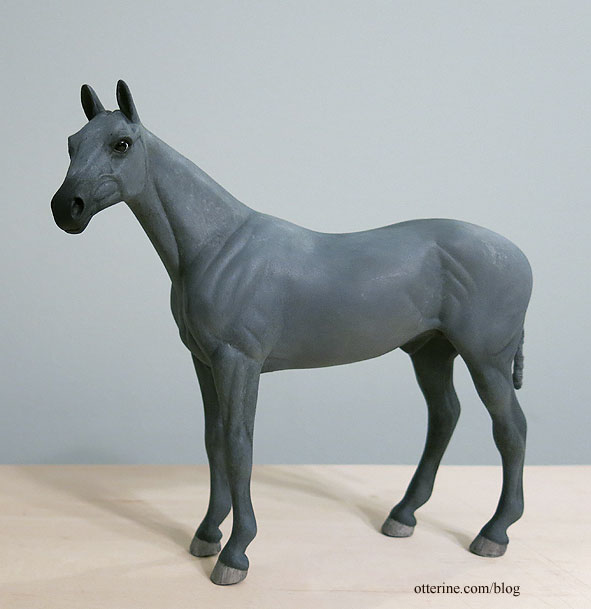
Some areas on the body turned out better than others, and I can always rework later…but I was pleased enough to move on. I do really like the face.
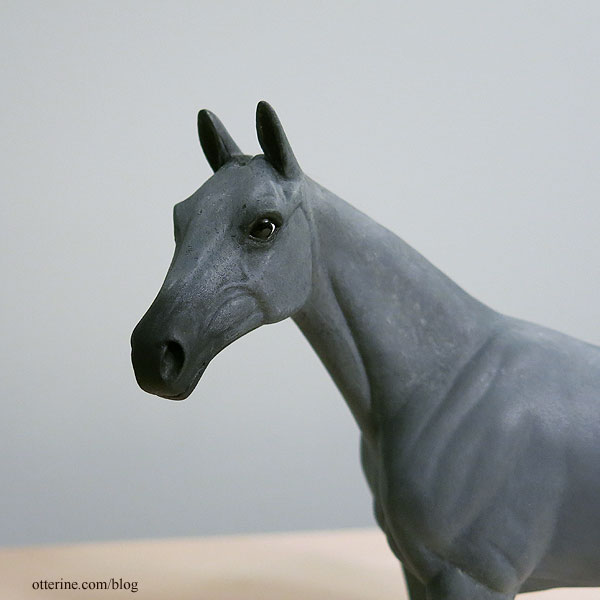
The mohair I bought photographs as muted purple, but it looks charcoal grey in person. Even with the mismatched color, I can see just how having the mane will transform the look overall.
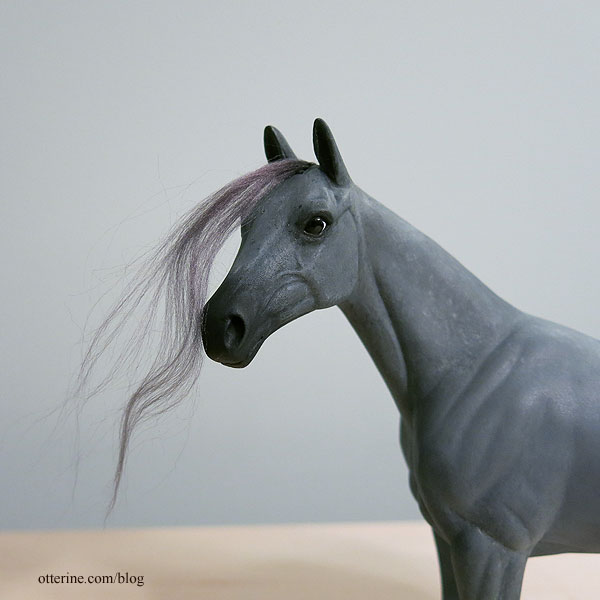
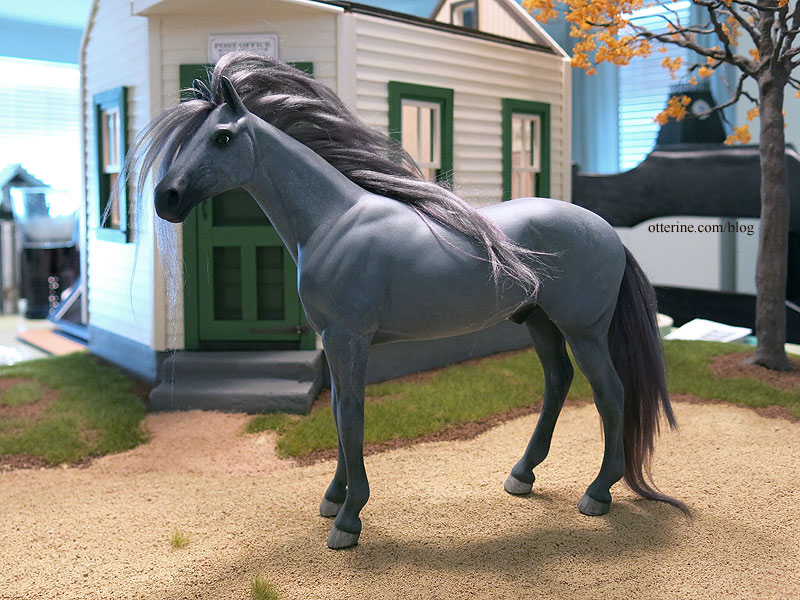
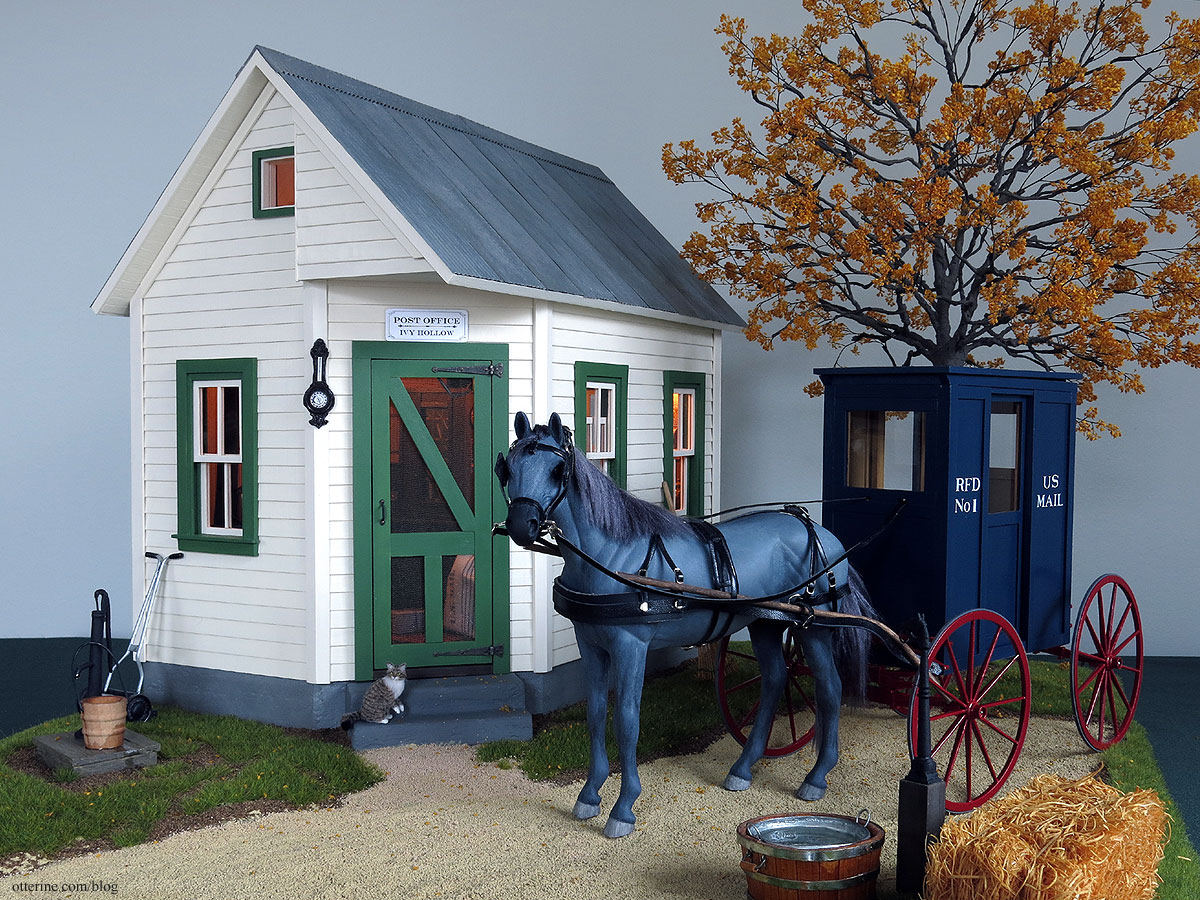
Since I was on a tight deadline, I completed Jebediah with the purple grey mohair, but I can always redo the mane and tail in the future. Here’s what he looked like right after the hair was applied.
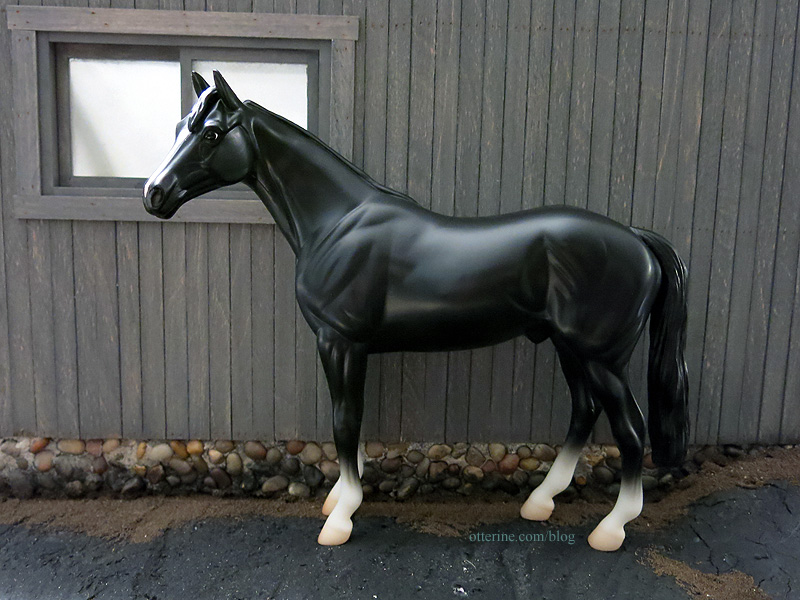
As a reminder, this is where I started – a 1:12 scale Breyer Thoroughbred.
The fibers curled a little when I wet them for styling and cutting, but they flattened out as it dried. It’s less wispy and artificial than it looked out of the package. I’m not a fan of the purple hue of the hair (below I’ve color corrected in PhotoShop, which is a pain), and I think a darker hair would look better overall. This was my first time hairing a horse, and I think it turned out pretty well. :]
Modeled with a driving harness by Tiki from Kulp Model Horse Store. I would like to make my own harness someday, but it is definitely an art that requires a good deal of study and practice.
Categories: Animals and birds, Ivy Hollow RFD
December 15, 2019 | 0 commentsHorse Harness – part 1
Maybe that should read, “Putting Jebediah to work, part 1.” As you know, I’m using a Breyer thoroughbred horse for my mail wagon. I found it interesting that at least one pacer (harness racing horse) pulled a mail wagon in real life.
 Mail Wagon Horse Mon, Jan 19, 1914 · The Star Press (Muncie, Indiana) · Newspapers.com
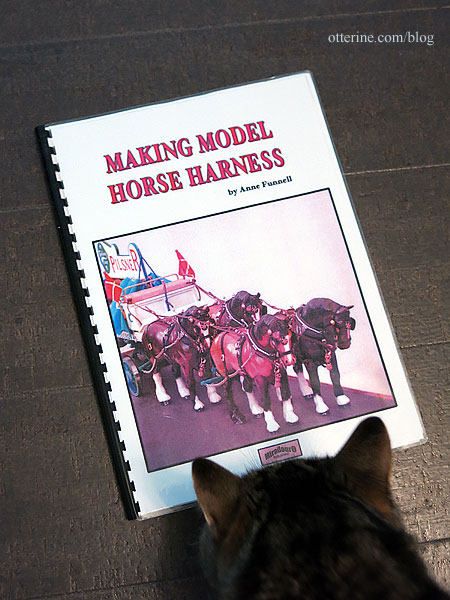
After finally getting my hands on the marvelous book Making Model Horse Harness by Anne Funnell, I started reading the material and doing more sleuthing online. Anne’s business is no more, so I am doing my best to scout Rio Rondo for the things I need. They seem to be well-stocked, so I am making a shopping list while I work on a mockup.
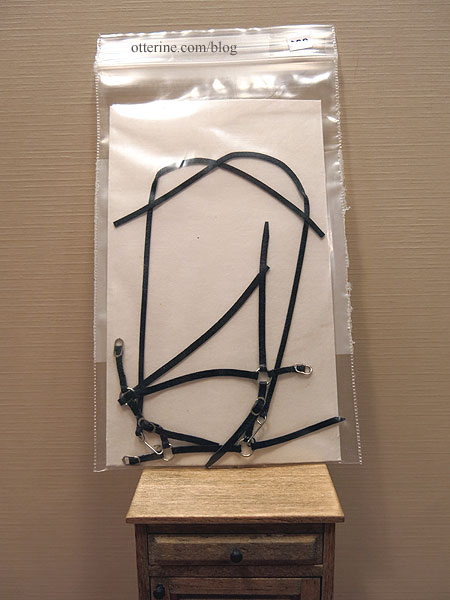
I bought this bridle from Texas Tiny at the local mini shows this past spring.
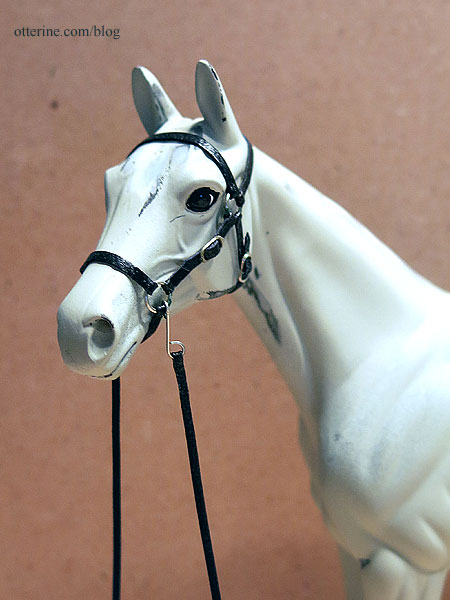
I fitted it to Jebediah to see. Yeah, it was a pain. I can see there will be more swearing in my future as I make said harness. But, it fits perfectly and is very well made. I’m not sure if I will be able to modify this one (the reins are not long enough, there’s no simulated bit and there are no blinders), or if I will have to use this as a guide to make my own with the harness.
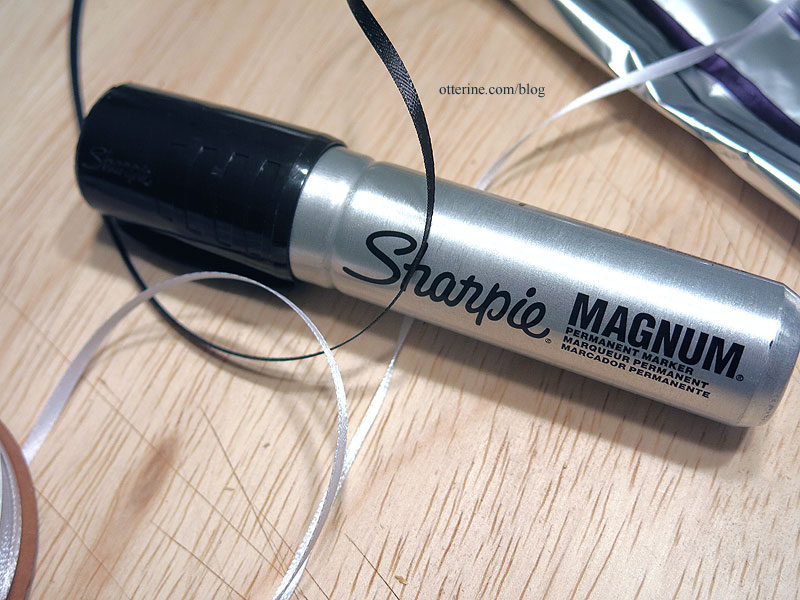
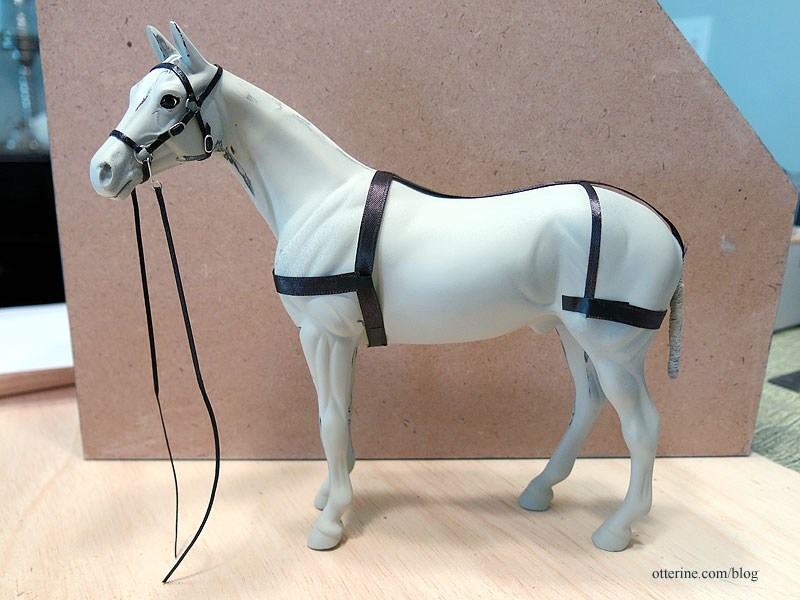
I had the idea of doing a test run with ribbon before diving into the leather and custom hardware. This would give me a feel for the parts and lengths/widths of the tack. Michaels is always hit or miss in the supplies department, but it was the closest store while out to lunch. I bought 1/8″ wide white ribbon – the two colors missing from the stock of plain 1/8″ ribbon were brown and black. I colored the white ribbon with a permanent marker and let it dry overnight. I had 1/4″ black ribbon already at home. These aren’t the precise widths I’ll need, but they are a good approximation.
I didn’t get very far, since one part really depends on another, but it was worth a shot. I need to just get the materials and start to work – trial and error. But, this attempt did help me study the drawings in better detail and estimate the amount of leather I will need. I also kept a tally of the various hardware components since the book doesn’t have a detailed listing of items with sizes. The book appears to be a companion to the kits and hardware sold by Anne Funnell, so that is understandable. If you have the kit, you need only the part number – not the size. The kit itself would have likely had a parts list with sizes and lengths noted.
I am reconsidering adding flocking to Jebediah in seeing how much handling needs to be done when attaching and tightening the buckles. I know I can get a good approximation of hair on the body with paint, and the mane and tail will no longer be plastic to help drive the realism.
Categories: Animals and birds, Ivy Hollow RFD
September 14, 2019 | 0 commentsMaking a 1/12 scale horse – part 4
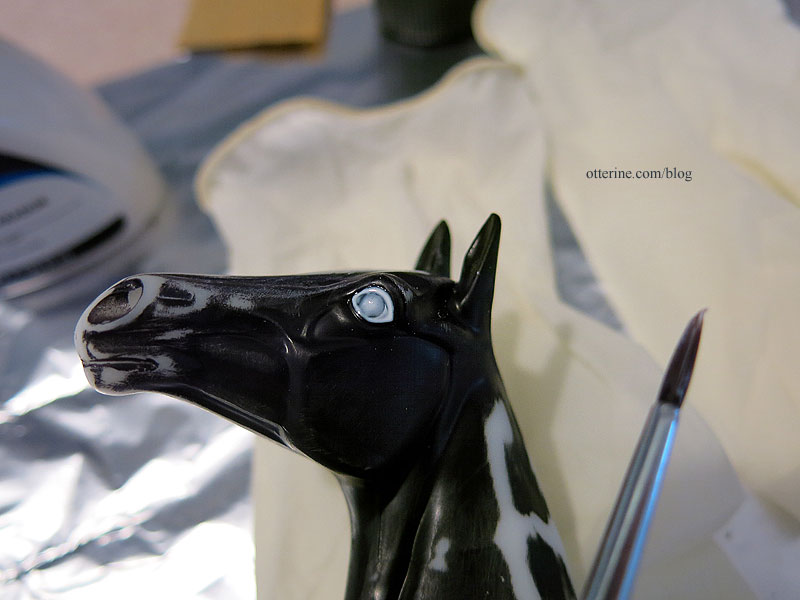
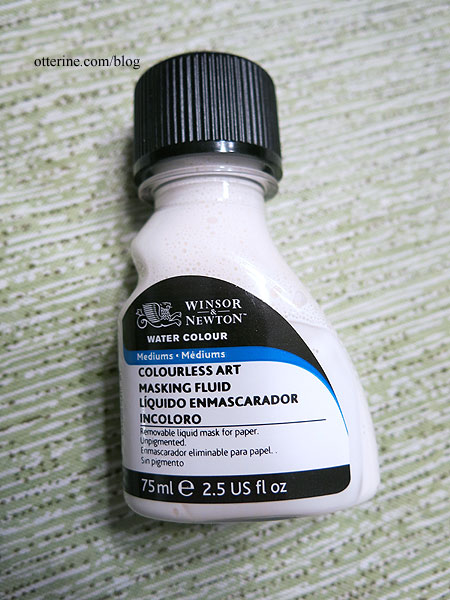
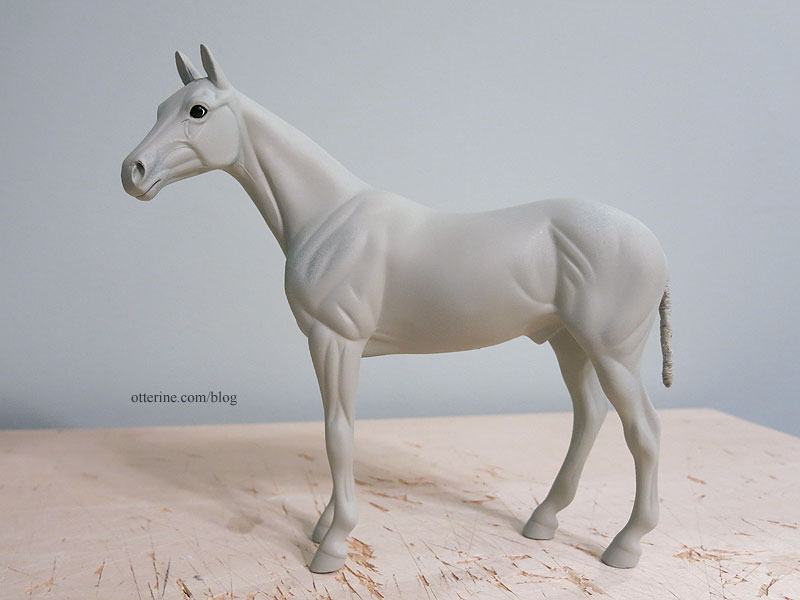
Continuing work on the 1/12 scale model horse. Once the putty set, the tail seemed pretty solid so I sanded the putty areas lightly with 320 grit to smooth it further. I then covered the eyes with Winsor & Newton Masking Fluid since I want to protect them during the painting process.
This is a pricey fluid used for watercolor painting; it covers any space you want to remain white on a painting. You use an eraser to remove it from the paper after the paint has dried. I used a 50% off coupon at Michaels. It’s a good crossover product that will work on other things beyond paper.
I sprayed the horse with Testors Flat Light Aircraft Grey to have a light primer coat to start. Priming brings out any flaws that were unnoticeable before, so I will sand those once the primer cures.
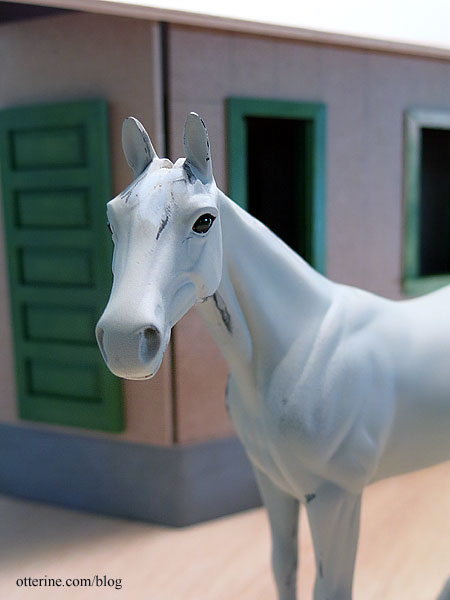
I’m making a grey/roan horse, so I looked online for reference photos. I’ve never mastered the airbrush, but I am pretty good with a regular brush. The next part will involve painting the base details. Even though I plan to add fur, the color underneath will show through so I couldn’t leave it black and bare white plastic. I’ve removed the masking on the eyes just in case leaving it on a long time caused issues; I can always add more when I paint the face detailing.
I also have some good leads on tack, which will need to be made before fur is added so I don’t mar the final finish. I want to be able to just buckle any tack onto the horse for pictures and remove it immediately. So, it might be awhile before you see the horse again. I’ll update on the tack as I work through it.
I also chose a name for my horse: Jebediah McCants. Maybe I’m wrong, but I doubt anyone guessed it. I looked up the meaning of Jebediah, and it means “beloved friend.” McCants is some distant ancestral name, and I thought the names sounded good together. I’m figuring our RFD carrier is Mr. McCants, since the carriers were charged with supplying their own transportation, therefore caring for their own horses. Jebediah looks eager to get on with things, no?
Categories: Animals and birds, Ivy Hollow RFD
February 25, 2019 | 0 comments
NOTE: All content on otterine.com is copyrighted and may not be reproduced in part or in whole. It takes a lot of time and effort to write and photograph for my blog. Please ask permission before reproducing any of my content. (More on copyright)

Dog pile!
Sherwood is a handsome model, no? Pillows available in my etsy shop.

Categories: Animals and birds, Miniatures
January 29, 2024 | 2 commentsCat mummies
Many moons ago, I bought a cat mummy kit from L Delaney. One thing I didn’t realize about the kit was that it contained air dry clay. It was hard as a rock, so I used Sculpey terracotta color polymer clay since I have a lot of it and you paint the mummies anyway. It’s also soft and easy to work with.

The paint included was also dry but I was able to reconstitute it with water. I made a swatch of it, so I could mix more of a similar color in the future. The kit comes with a lot of paper to use as mummy wrap, and you use 1/16″ wide strips. I could make a lot of mummies, but I started with a pair hoping to get at least one good one.

I ended up with two that complement one another well, don’t you think? :D

Ra and ibis statues by Neil Carter; ceramics by Carberlin Minis.
Categories: Animals and birds, Miniatures, Polymer clay
July 2, 2022 | 0 commentsA mini doghouse, part 2
Continuing on the mini doghouse for Gus. There were no shingles in my kit, though they are mentioned in the instructions. Maybe I took them out to keep them from getting wrinkled, which seems like something I’d do, but I have no earthly idea where they would be. It was no worry since I had some suitable shingles in my stash of supplies. These are half scale speed shingles by Greenleaf.

Considering the door is small, I wanted to see if I could keep the roof separate to access the interior more easily. A few extra steps, but I think it’s just better in the long run.

There’s an added beam inside to keep the roof from slipping out of place.

I painted the shingles a mix of black, brown and grey to start and then added some grey washes. For the house, I used crackle finish and off-white paint. The crackle finish was old, so it didn’t provide pronounced crackling, but that seems to work better for a smaller structure.

I still ended up with a nice aged finish.

For the cupola, I added more trims to make it seem more realistic and more rain resistant. I painted the included weather vane to look like aged copper. It’s thin wood, so I worry about its longevity. I left it unglued for ease of removal in case I need to pack away the house or choose to replace it.

All that’s needed is a warm, comfy bed and some toys. :D

Categories: Animals and birds, Once Upon A Porch
June 26, 2022 | 0 commentsA mini doghouse, part 1
I’ve had this kit in my stash for some time now: Miss Lydia Pickett and her dog house.

It comes with a resin dog for you to paint, but Gus seems to have his eye on the residence. :D

It’s a rather large house for Gus, but that just leaves room for more stuff inside.

It’s very fancy, and I plan to keep the original details for the most part.

As for the finish, I wanted a more aged look. I started with a wash of silver grey.

More to come….
Categories: Animals and birds, Once Upon A Porch
June 23, 2022 | 0 commentsBert – Robox coming to life
Even though you’ve likely seen Bert (my transformed Robox) in scenes here and there, I’ve not documented the process after dying the plastic. He’s also not been “finished” until this weekend when I was able to complete the final paint washes and add some other detailing. Here’s where we started: a Robox Canvas White action figure by 1000toys that I named Bert. :D

After dying the plastic, he ended up grey-purple, grey-brown and dark grey. Overall, the results were a great middle color for me to work on from there. In an unexpected but promising turn, the joints turned darker than the body and that would save me time trying to detail those. I ended up permanently gluing the chest plate in place on the torso since it would no longer stay in place. Bert will never revert to his folded up self, but I wouldn’t want to risk damaging the paint in the end anyway.

Next up, I used Privateer Press Formula P3 paint in Pig Iron, Thamar Black and Quick Silver, as well as their Armor Wash. From my research, this brand of paint was recommended by artists who repaint action figures. It’s not as durable as a spray paint, but there’s no way I would have been able to spray paint Bert effectively given that he was a fully assembled figure. There were places to separate the parts, but there were also rivets permanently keeping some areas together.

I started with the feet and worked my way up. The only place I used black was for the tread on the bottom of the feet. The rest is all Pig Iron except for the bars in the main body which are Quick Silver. I then used the Armor Wash over the top of the Pig Iron to give him a more aged appearance. It also settles into and emphasizes any detail lines.

The metallic sheen of the Pig Iron is really nice, and the Armor Wash just darkens it a bit without removing the metallic sheen. Here you can see the difference from the plain dyed plastic to the aged metal.

Bert’s head had a moving back, which was a nice feature, but paint would never have survived the movement. I ended up permanently gluing that portion of the figure.

The “eyes” for the Robox were separate parts, which made them easier to customize. Well, I think one was an eye and the other a mouth, but I just refer to them as eyes and figure the speakers for talking are built in. :D I painted the outer rims black, leaving them on the sprue until I was ready to glue them in place.

I had leftover parts from the RX-7 build, so I used some clear lamp covers to serve as lenses. I colored the backs and fronts with Sharpie markers to get saturated but transparent red and blue.

I painted the inner portion of the base with white to help sell the idea of there being light behind the colored lenses.

I think they suit him well. (Just as an aside, the head has the Armor Wash but the arms and torso do not in this picture.)

After getting the rest of Bert finished with the Armor Wash, it was time to address the joints. The dying process impacted the functionality slightly in that the ball joints ended up very tight (I suspect the heat impacted the two types of plastic differently). The rod connections ended up a little loose. So, enter Miraclekoo Silicone Pouring Oil and super glue gel.

The head was the only ball joint that was loose. Not wanting to overdo the correction, I added some mini hold wax to the joint. It allows for more stable positioning of the head and can be replaced as needed without permanently altering the joint.
For the loose rod connections at the wrists and lower legs, I added a thin layer of super glue gel to the rod. You have to let this dry completely before testing the fit so you don’t super glue the part in place. Once dry, I sanded the excess until the joints moved smoothly. Now the lower legs now stay in place better.

For the tight connections at the shoulders, elbows, hips, and inner thigh (these move the knees), I used a small amount of the silicone oil. I chose silicone oil so that it wouldn’t degrade the plastic over time. Still, I will be mindful of having Bert come in contact with any fabric furnishings going forward.

The joints aren’t as loose as they were before dying the plastic, but they are better and I no longer feel like they will break if I twist too hard.

Bert’s already dashing, but let’s add some edge. Tattoos! :D The Robox did come with decals.

I also have a bunch of leftover decals from my years of building model cars. I opted for one Pennzoil decal since Bert is a fan.

Only a few spoke to me, so I will keep an eye out for anything interesting in the future. The open spaces are minimal, but there is room for a few more. Here you see the one on the shoulder and the side of the head.

I used one of the Robox decals on the forearm, a number 8 on the chest and the Pennzoil on the bicep.

Gus thinks Bert is good at head pats. :D

Added a bit of humor in Bert’s decal placement.

Keep those hands clear of Bert’s backside! :D

Categories: Animals and birds, Droids and Robots
June 19, 2022 | 0 comments
NOTE: All content on otterine.com is copyrighted and may not be reproduced in part or in whole. It takes a lot of time and effort to write and photograph for my blog. Please ask permission before reproducing any of my content. (More on copyright)


