I have a separate detailed post on how I added area to the side addition room, which made the addition front wall continuous with the main structure front wall on the lower floor. But, the biggest change I made to the base kit of Baxter Pointe Villa was to replace the upper portion with a taller front wall to create a wraparound deck.
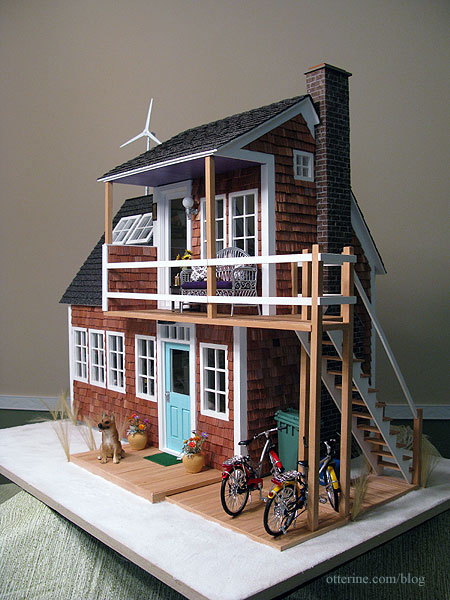
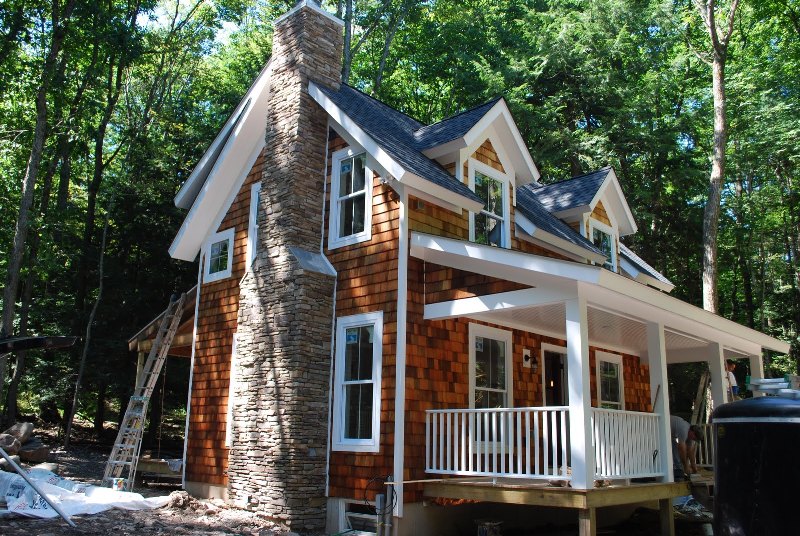
My inspiration for the deck came from a wonderful porch by designer Amanda Nisbet. In fact, her design inspired the cedar shake exterior as well. More on that later.
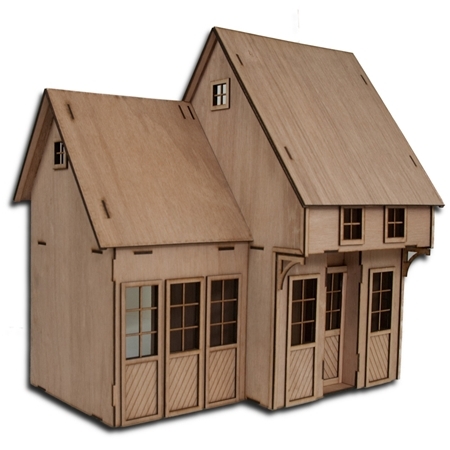
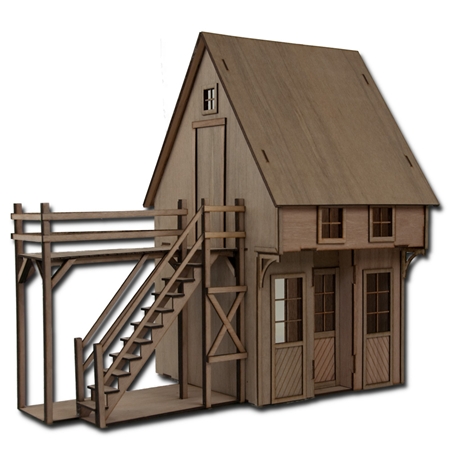
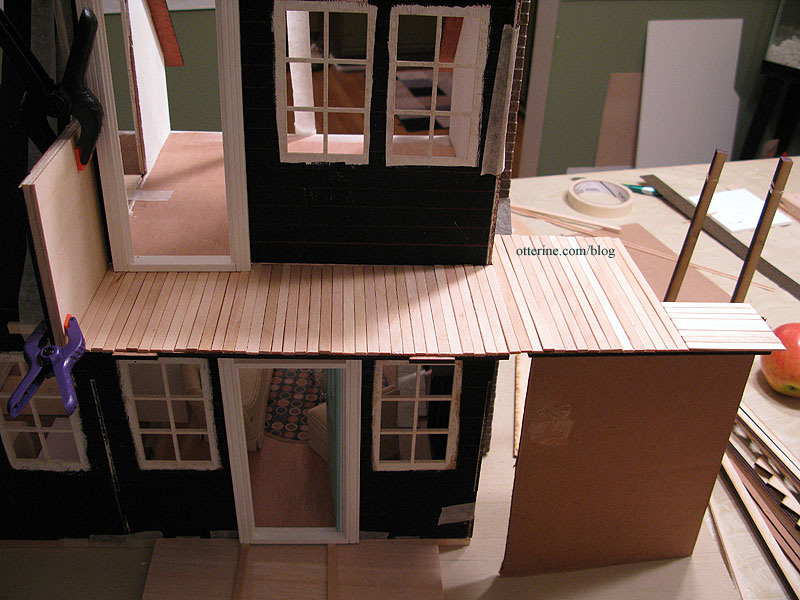
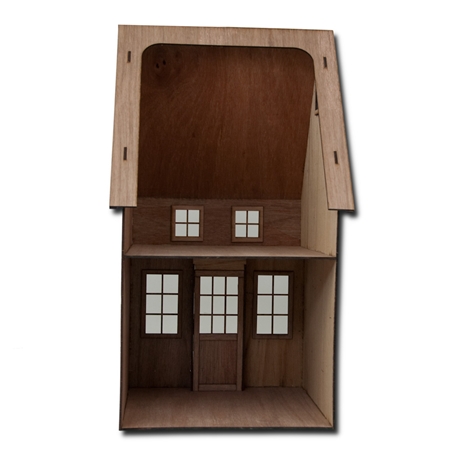
To get this porch in front of the second floor bedroom, it took a lot of kit bashing. Here’s what the kit and addition originally looked like:
I used the front wall of a second addition kit I bought to make a new front wall in the bedroom.

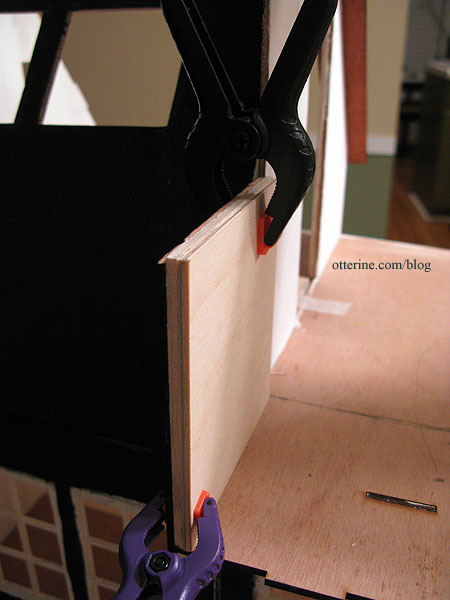
That change created enough room for a small deck. Here you can see how I sheared off part of the outer wall all the way to the floor, making it flush with the new bedroom wall.
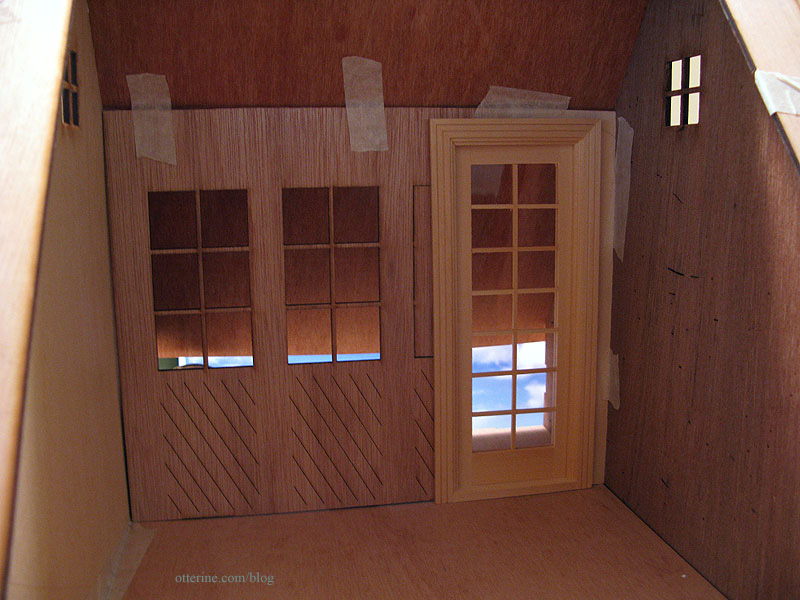
I had to piece the wall around the door since this originally had three window openings. I ended up leaving the mullions out of the French door since I wanted an unobstructed view of the beach.
On the end of the deck next to the addition, I cut off the top portion flush with the new bedroom wall and created a short wall just outside the added door. I had to leave some wall there since cutting it off to the floor would have caused problems with the roof line of the addition. I glued a triangle of wood near the front edge of the angled piece to create a square. I padded this low wall with two pieces of 1/8″ thick scrap wood to make it look more realistic in size.
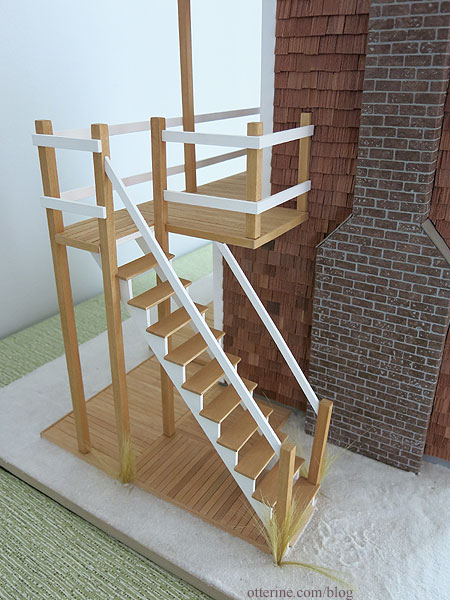
My stairs connected to the deck didn’t quite end up looking like the kit photo, either.
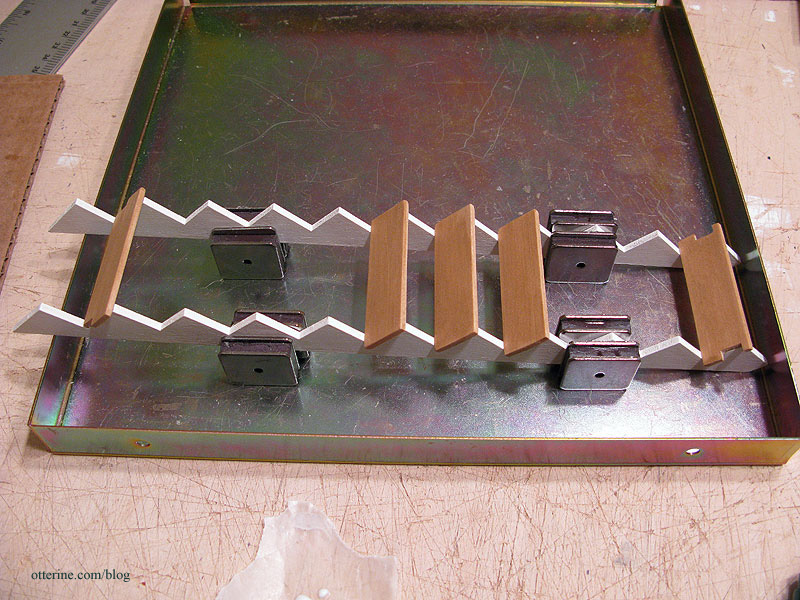
Where to start? I didn’t end up using the posts that came with the kit. I bought a bunch of 5/16″ x 5/16″ strip wood from Hobby Lobby and saved the laser cut wood from the kit for other projects.
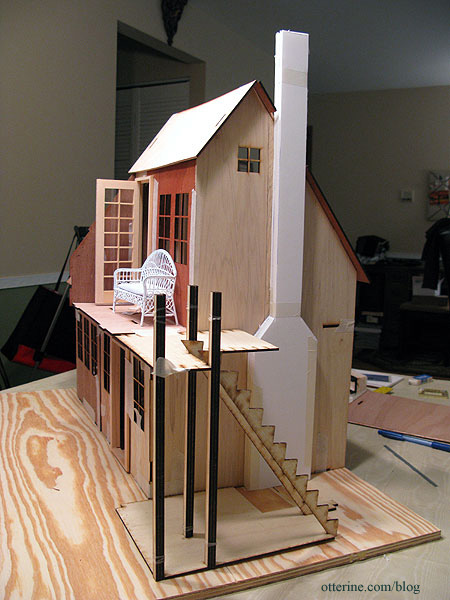
I had ordered the base kit plus two side additions, one left and one right, though I planned to use only one or the other — with the second one used for spare parts. I quickly opted for the addition on the left, but that presented an issue with what I wanted to do with the stairs. I needed them exactly the opposite of how they were designed, so I flipped the base and the upper deck upside down. Problem solved! Sort of….
The reason I couldn’t have the stairs next to the main house is that I wanted a chimney. But, even with flipping the stairs, the deck was too long. I cut off a portion of it in the back to clear the chimney and moved the whole assembly flush with the front of the new deck. This meant I couldn’t use the laser cut lines of the stair kit, but I wouldn’t have been able to match those with the new deck anyway.
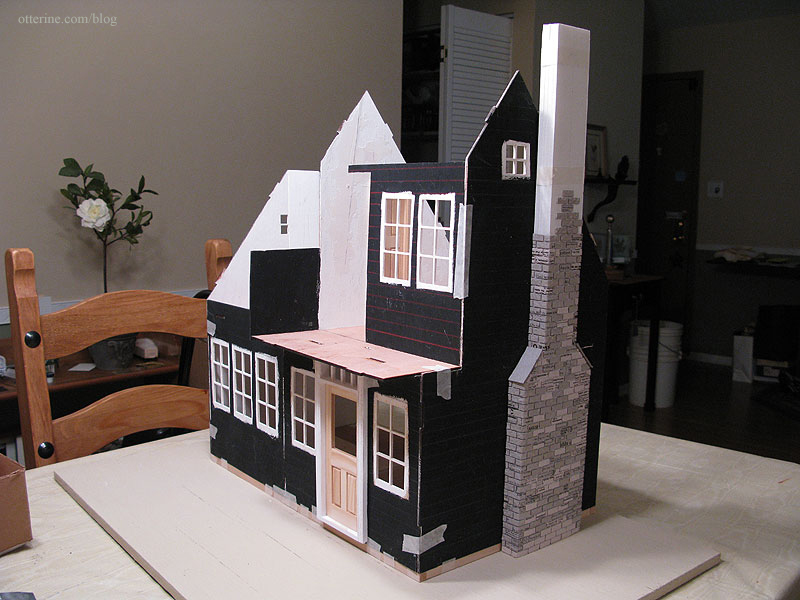
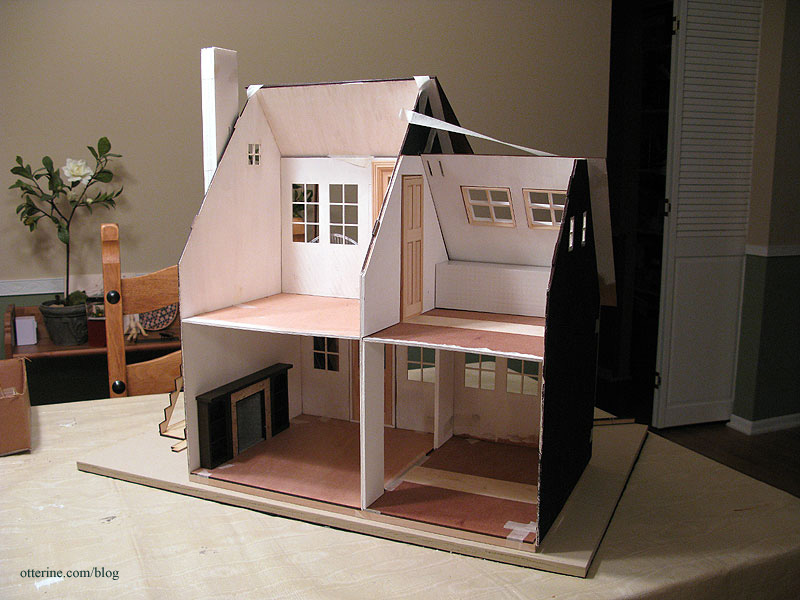
Here you can see my first chimney mockup and the short wall of the deck before I modified it. I used the original kit posts for planning purposes.
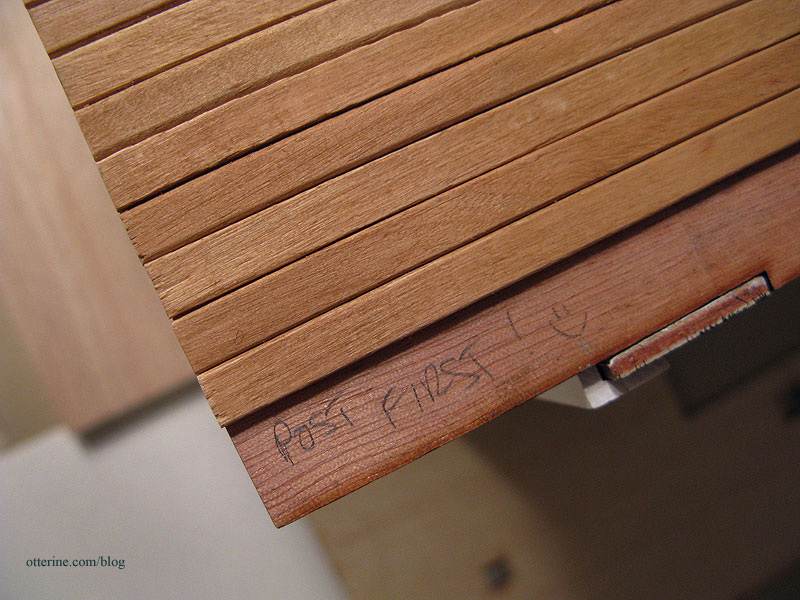
The porch boards were made from Woodsies skinny sticks stained with IKEA antique pine (shown here pre-stain). I followed a front to back direction until I reached the stairs, where I turned the boards the same direction as the stairs. I also flipped the opening direction of the French door to open in to the left instead of in to the right.
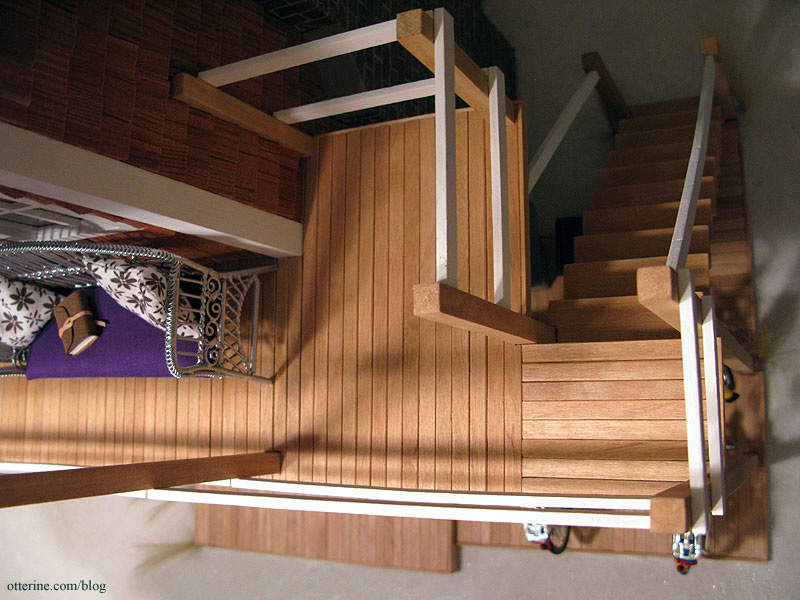
With all of these changes in place, this is how I managed the roof pieces. I used the original roof piece for the bedroom ceiling, cutting it off flush with the side walls from the peak to the top of the new front wall. I also cut it flush with the side walls. I then used 1/8″ thick plywood to make a new top roof and a flat soffit board for the porch that I later covered with strip wood and painted. The white pieces are foam core board cut to fill in between the original house and the new front porch roof line.
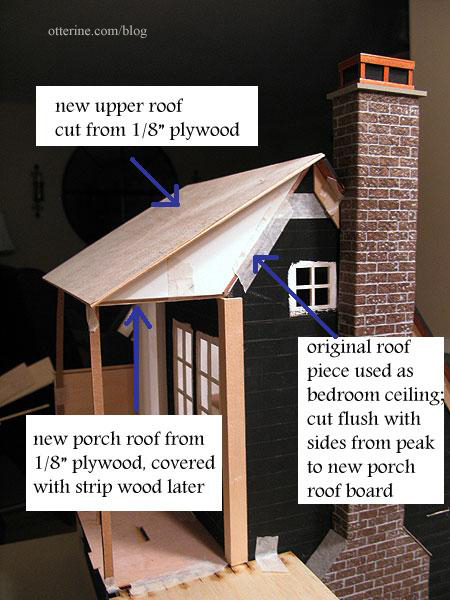
I then cut trim to follow the new roof line.
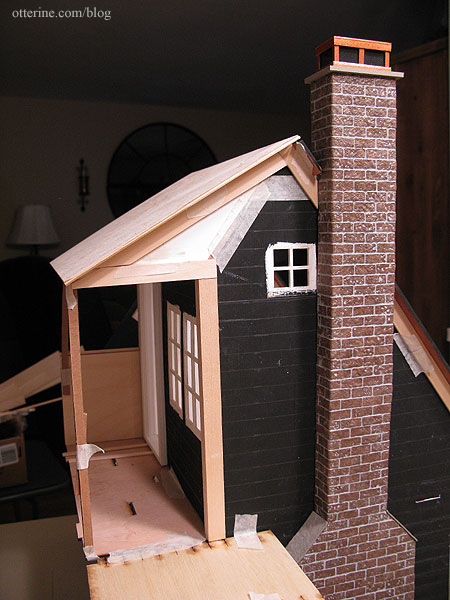
The porch soffit was made using strip wood. I didn’t use skinny sticks here since I wanted a cleaner look than I did for the porch boards. The floor gets more wear than the ceiling. I painted the ceiling Lilac Love by Folk Art. The porch light is a brass fixture I painted silver.
The posts are 5/16″ strip wood stained IKEA antique pine. Sometimes when I work late and get a little punchy, I have to leave myself notes to keep from doing things in the wrong order.
The stair stringer didn’t allow me to use an even number of skinny sticks for the stair treads, but I wanted them to match the deck in color and general appearance. I left off the kit stairs and replaced the treads with bass wood pieces cut using the original laser cut ones as patterns. I stained these with IKEA antique pine as well.
Since the stair stringer was laser cut plywood and the rest was light colored wood, I painted the stringers white. They would not have coordinated with the other stained pieces otherwise.
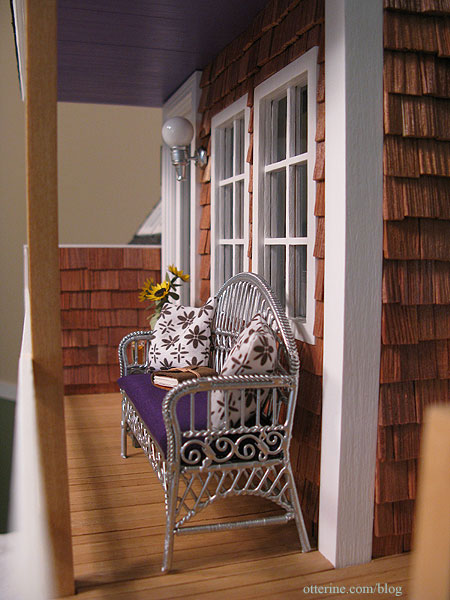
To keep with the white and natural wood color scheme, I used the existing kit laser cut railings and painted them white. I had to cut a few down to size and add some pieces that were meant to make the posts since my deck was a different configuration from the original. I didn’t bother adding the supports under the deck, either. I don’t know if it would pass a structural inspection, but I like the clean lines of my deck and porch. To hide the laser scored lines on the now underside of the deck portion, I used skinny sticks in the same fashion as I had on the top, continuing along the front entryway soffit.
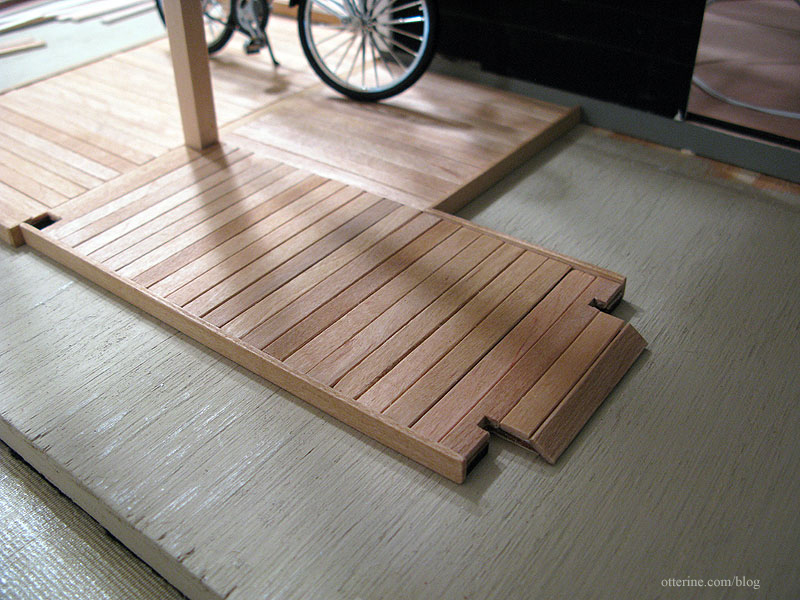
The front lower patio structure is a purchased frame. When I’m on a deadline, I love shortcuts that cost $1.49! I covered this with skinny sticks stained IKEA antique pine.

The lower side deck is made partially from the original Greenleaf stairs kit. In order to have the side deck meet up with the front deck, I added a piece of 1/8″ thick balsa wood to fill in the missing areas. I then continued the skinny stick coverage on the entire lower side deck. Since skinny sticks come in predetermined lengths, I used some strip wood to break the deck into areas and tried to create a nice pattern for the boards.
To finish off the front deck and lower side deck, I added strip wood stained to match along the outer edges and curved the last board down just under the first step (stairs obviously not shown here).
The end result is a light, airy staircase separating the upper and lower decks.
Bedroom
The changes noted above led to a completely revamped bedroom space as well.
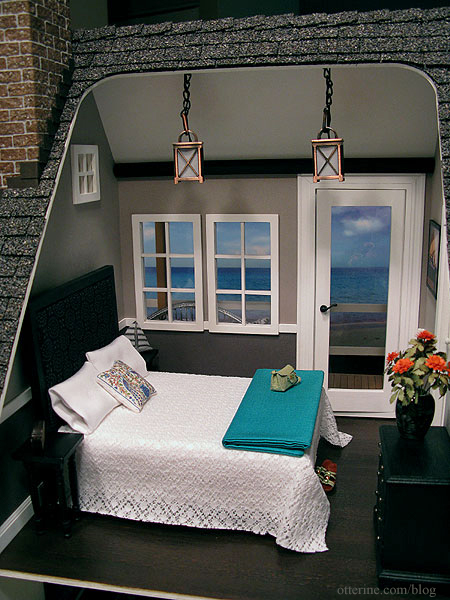
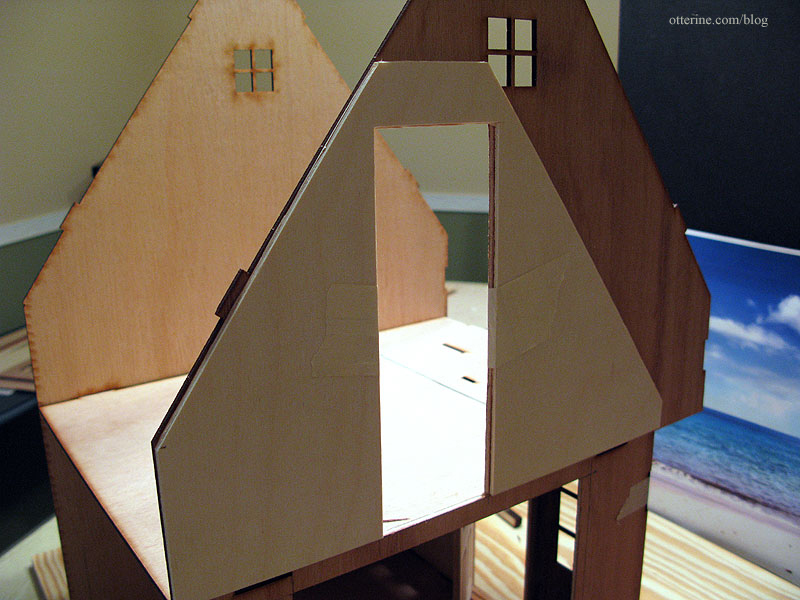
The original bedroom area was an odd shaped room. From the front, there were two small windows and a steep, long roof.
The adjustment in depth on the side addition allowed me to add a working narrow door to the bathroom, and I really like how that turned out.
There was still minimal usable room in this part of the structure because of the steep roofline in the back. I was able to put in a bed, two tiny side tables, a small dresser and not much else, but it was much better than the original layout.
Bathroom
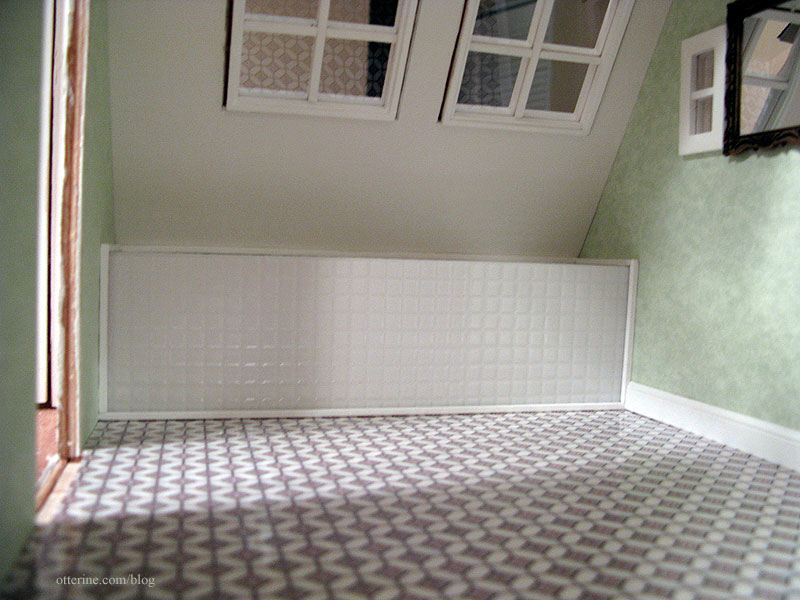
As much as I like to zoom in for realism, this house has some nice “dollhouse views” when you show the open back.
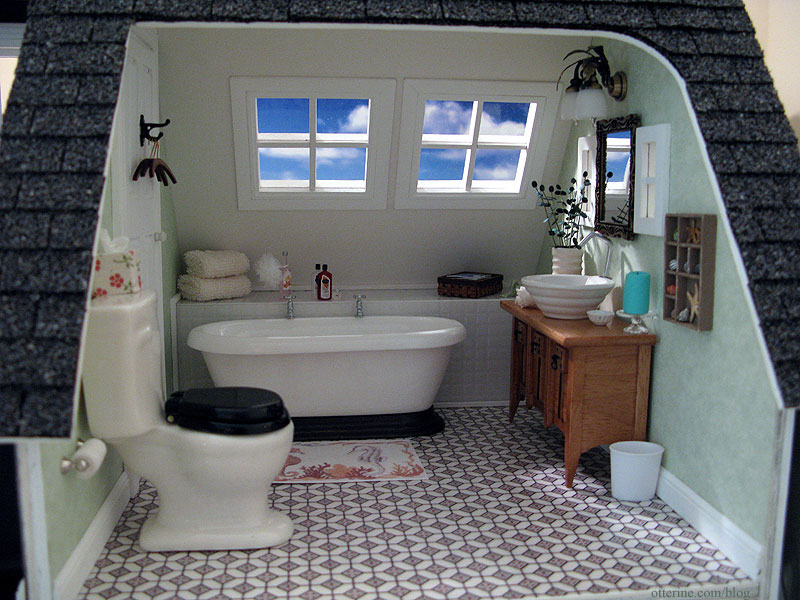
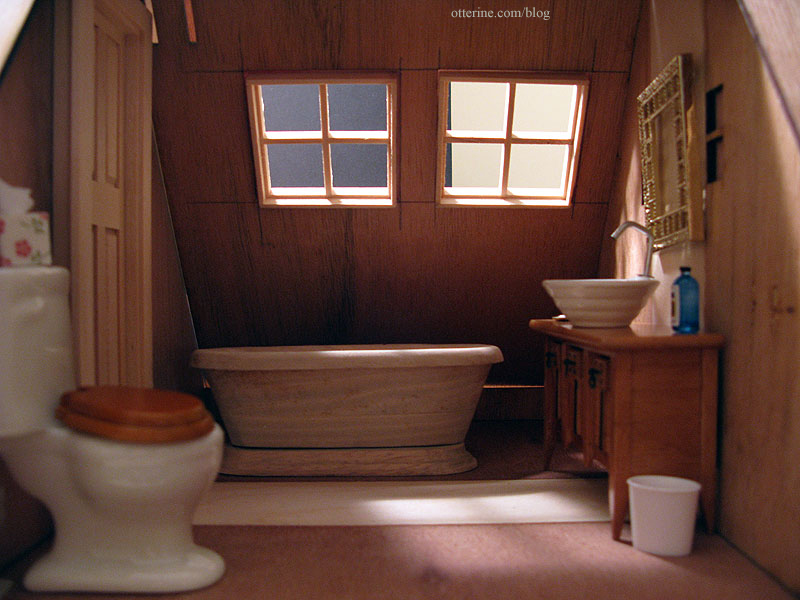
This was a tiny, dark room when I first started planning.
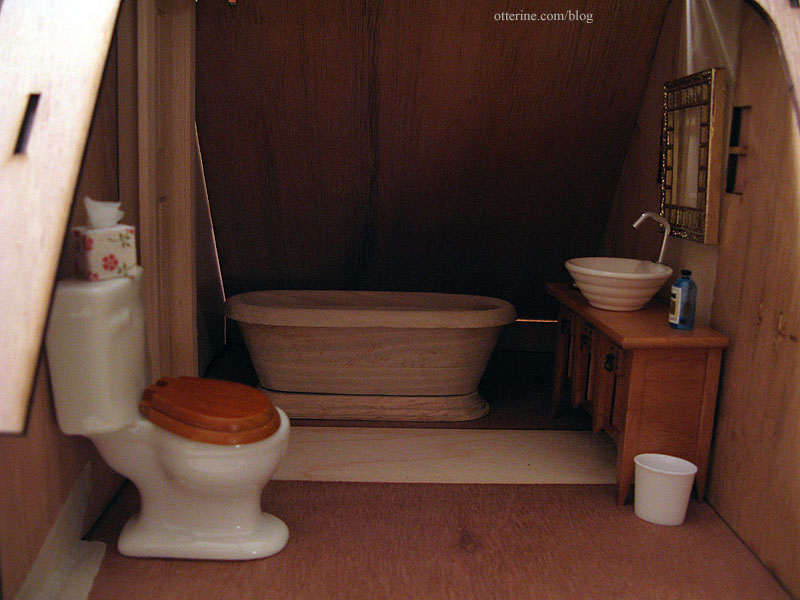
I cut out two skylight windows, which completely changed the feel of the room.
To install a working narrow door, I padded the wall separating the bedroom and bathroom with 1/8″ plywood to solve the problem of the wall being too thin for the ready-made door.
Because the room has a steep angle on the window wall, I built a wall shelf from basswood and foam core board that I then primed with white paint. I covered it with pieces of clear plastic tile sheet that had 1/4″ squares embossed in the surface. I used Krylon gloss white spray paint on the underside of the tile sheet and glued to the basswood base. I added tiny wood trim around the edges to finish it off and hide any gaps.
Exterior
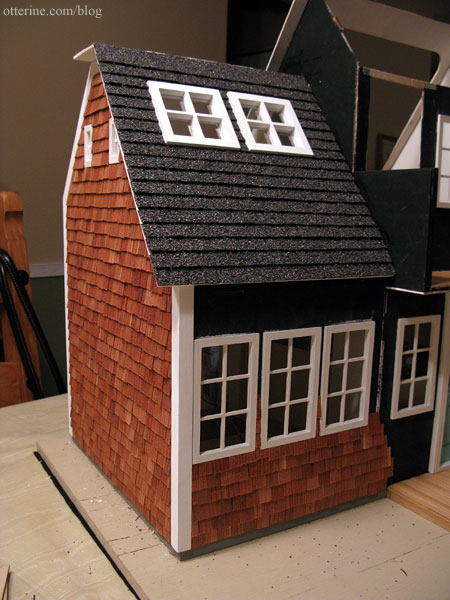
The cedar shake exterior with white trim was inspired by Catskill Farms. They have countless beautiful cottages on their blog that are perfect inspirations for miniature homes. I love the way the cedar shake exterior pops with the white trim and grey roof. I was sold!
Once upon a time, I had a Dura-Craft dollhouse that never got built and whose pieces were lost to a flood. Some pieces survived since they were stored elsewhere, and included in those miscellaneous parts was a huge bag of cedar shake shingles (say that phrase ten times fast). So, no need to buy materials for the exterior. I made a sample of the exterior finish on a piece of scrap board and positioned it next to the dry fit structure. Whoa! Those windows are a little Amityville Horror, no?
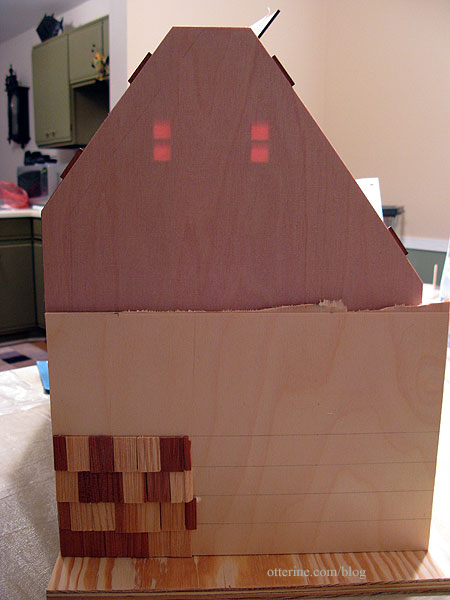
First, I didn’t care for the wide variety of shades in the cedar. It looked like a cedar polka dotted house. So, I spent my lunch hour one day at work sorting cedar shakes into three piles: light, dark and broken. It sounded like I was playing poker, counting out the chips! I used the darker shades since I planned to leave them natural.
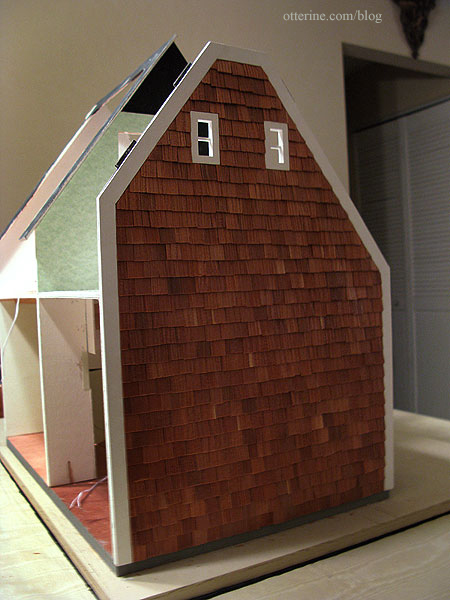
Second, I thought the shakes were too big for scale. I looked up the real life size of cedar shakes online and found them to be pretty close to exact 1:12 scale. But, for looks, it just didn’t work for me.
So, I commenced to splitting 1,700 cedar shakes individually by hand. I first split them lengthwise to a width of 1/2″ with an Easy Cutter, and it was easy. I then split them across the grain to a height of 3/4″ with the Easy Cutter, which was not easy. Even with a new blade, the shakes were hard to cut across the grain and were prone to splitting. But, the end result was a better scale match and well worth all the work. This is also one of the most forgiving finishes I’ve worked with so far. Unevenness in application and splits in the wood add to the realism instead of detracting from it.
In addition, it was easy to remove and then replace a section of shingles when I accidentally cut my wiring while installing the kitchen floor. With siding, I would have had to tear a lot more out than the 2″ x 3″ section that I did. After the repair, the new shingles just slipped right into place as though it had never happened. :]
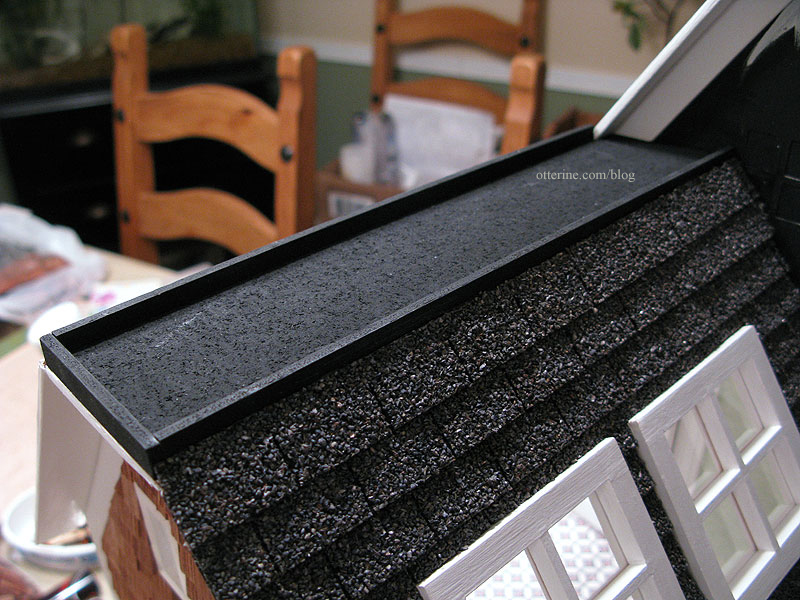
I put the roof of the addition on and shingled that with grey asphalt shingles by What’s Next before applying the cedar shakes on the adjacent wall. There are a number of cedar shake houses in my area, so I was able to see some real life examples of how to handle some of these structural challenges.
The back roof piece of the addition was a challenge. I don’t know if it was my alteration of the design or just a stubborn warp in the outer wall of the addition, but I could not get the main house roof, the new flat top roof I put in and the addition roof to square up. Finally, I just attacked it with duct tape, and that worked! There is still glue at the joins, but the duct tape is the main support for the bond.
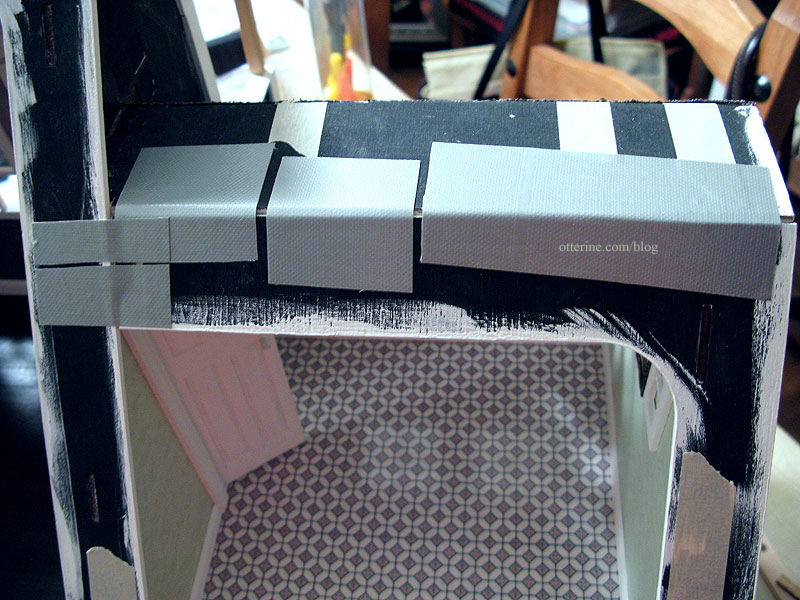
I then created a parapet on the flat top portion using some of the left over kit wood from the stair posts. Inside this wood frame, I painted a piece of cork sheet to simulate the tar and gravel covering. I used Quick Grip glue to attach the shingles and cork piece of the upper roof and had no problems with those things adhering, which was my only concern in using duct tape.
Now, I can’t take credit for even knowing what a parapet was…that was all mom’s influence. I had no idea how to finish this part of the roof until she came up with the idea. Hooray for mom!!! The wind turbine I added later is from ELF Miniatures.