

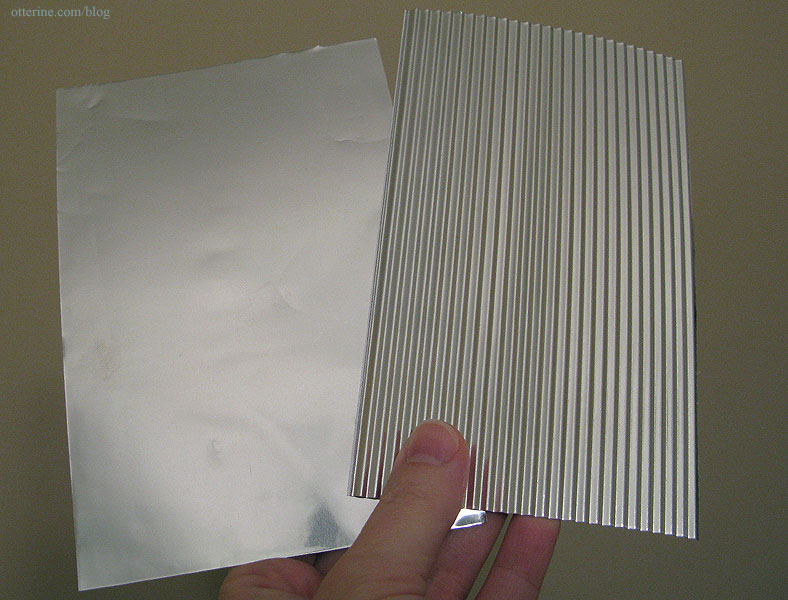
My initial idea for the roof was corrugated cardboard painted to simulate tin since I’ve seen that done before with good results, but I found two items that allowed me to go for an even more durable finish. The first was a pack of 12 metal sheets with an adhesive backing. Each sheet measured 4″ x 12″ and the pack was very reasonable in price – $5 at Hobby Lobby. I then bought a paper crimper by Fiskars to turn 4″ x 6″ pieces of the metal sheet into corrugated tin roofing. :D
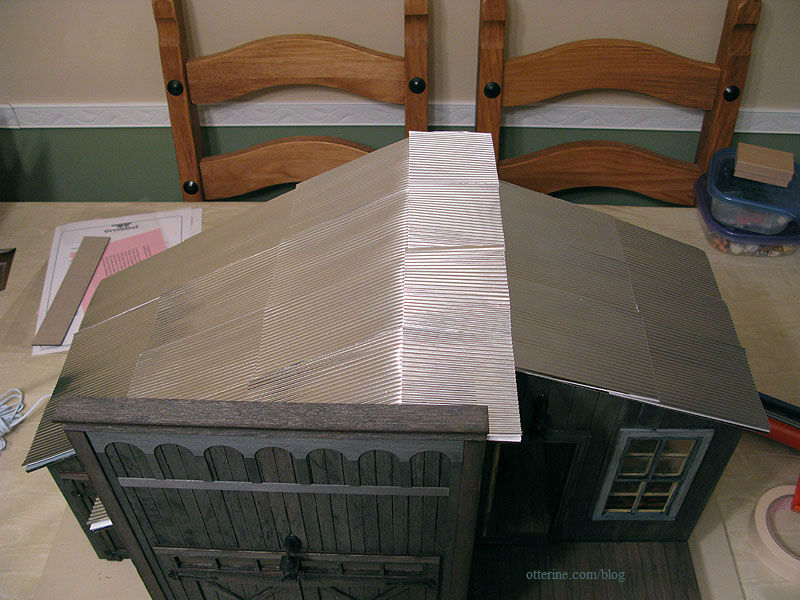
I taped the layout onto the roof with masking tape to figure out what would look best.
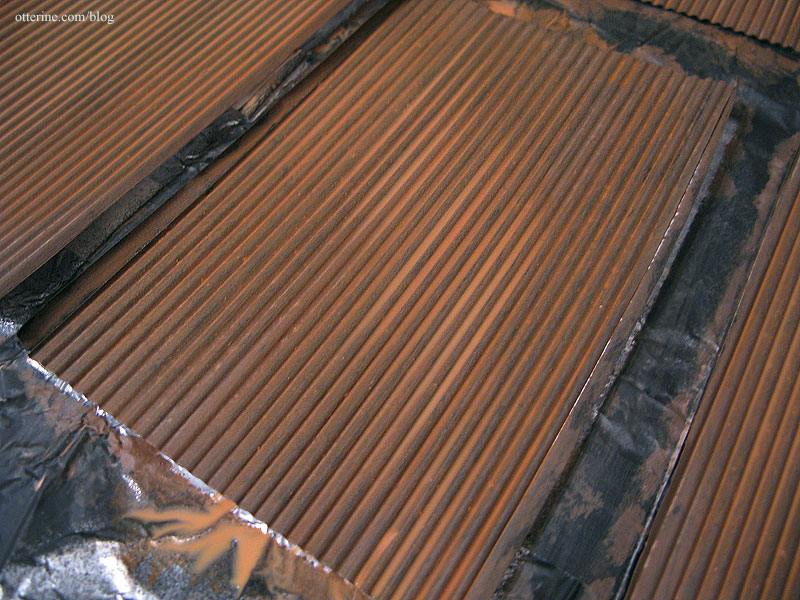
After transferring the pieces onto a foil covered board, I sprayed them with a thin coat of Testors flat black spray paint.

Once the black paint was dry, I started layering different colors of paint using a stencil brush. I used Bittersweet Chocolate by Americana, Coffee Bean by Folk Art and Terra Cotta by Americana. Once I had a good base of brown and rust colors, I used a watered down wash of the Terra Cotta paint to smooth the surface. Here is the final look.
The metal had an adhesive backing, but I added some tacky glue after peeling away the backing to affix the pieces to the roof.

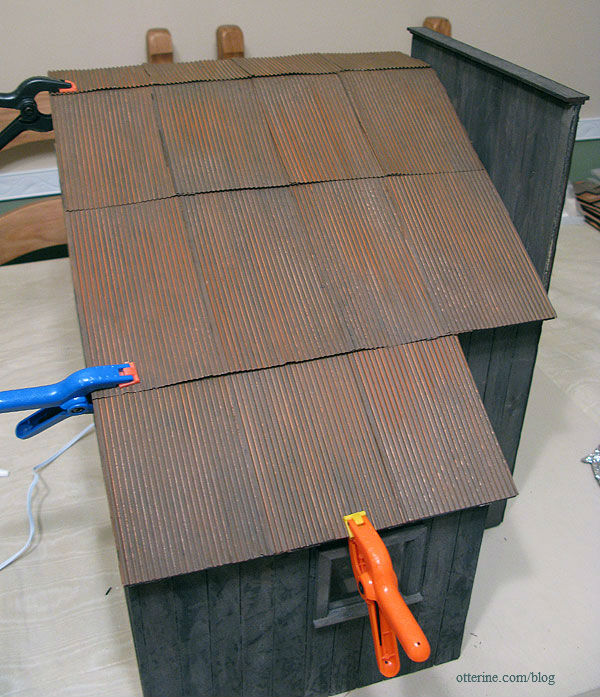
Some of the edges lifted as the glue dried, but that only added to the worn effect.
The chimney was made from spare bits and bobs. I glued the pieces together and then sprayed with Testors flat black. I “rusted” it with paint and glued it to the roof. (I didn’t make a connecting pipe inside the barn due to lack of time.)
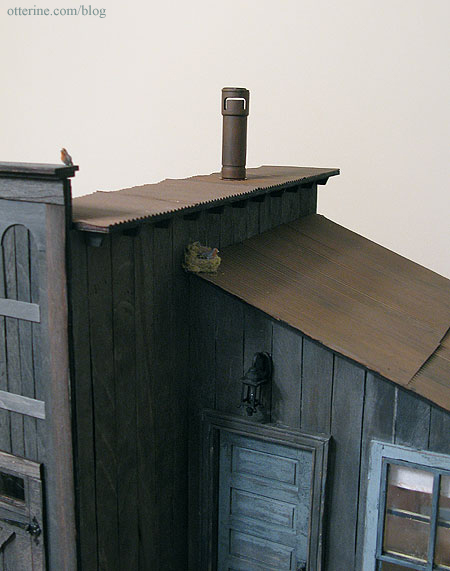
The birds nest was made using an online tutorial as a starting point, but I used what I had on hand: jute twine and some leftover Woodland Scenics ground cover. It made sense to me that a bird would make use of the materials growing in the environment, so I wanted it to match the plants I had put around the building.
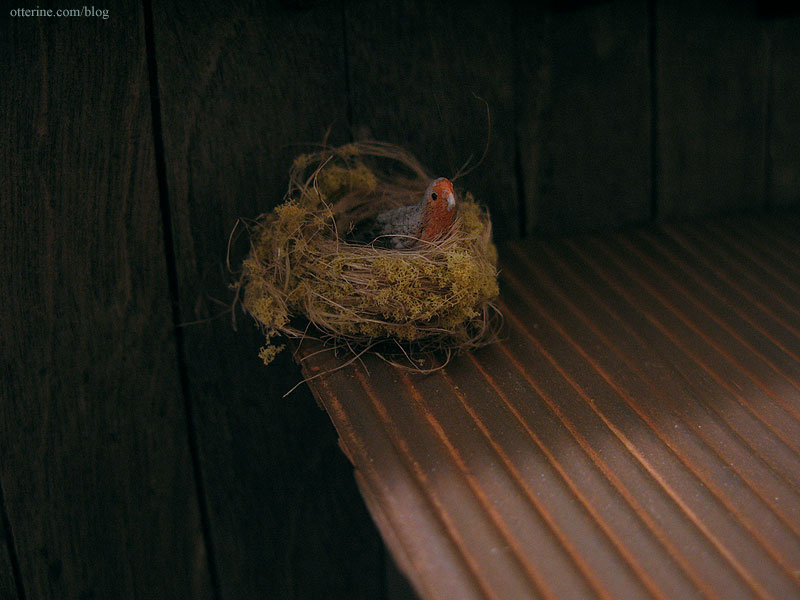
I placed one bird in the nest below the eave of the upper roof and the other bird on the top of the facade. The birds are by Falcon Miniatures.


