
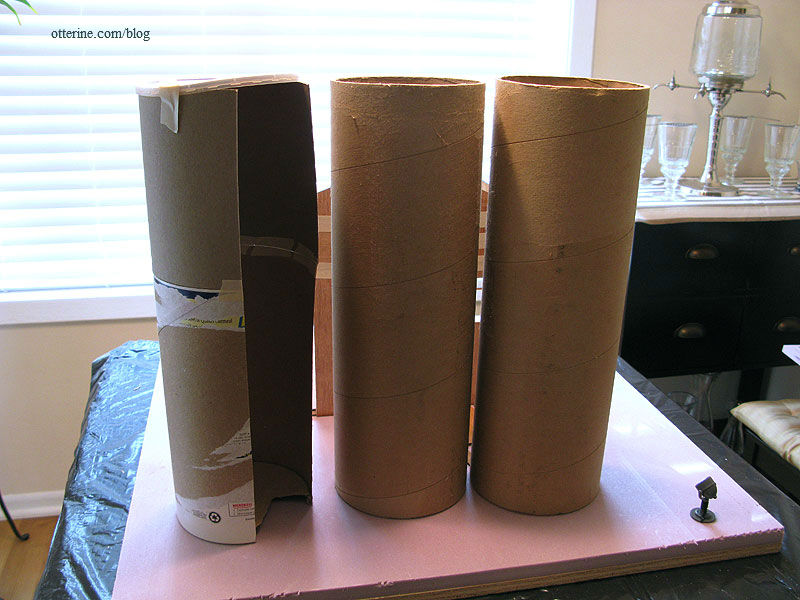
One of the aspects I liked most about the French farmhouses I found in reference photos was the tower. I thought it would be wonderful to add one to The Aero Squadron Lounge since the main kit building was a single room and lent itself well to the addition. The first tower I attempted was made from a large oatmeal container. Boy, did I ever eat a lot of oatmeal! :P No, I just transferred the contents into another container. :D
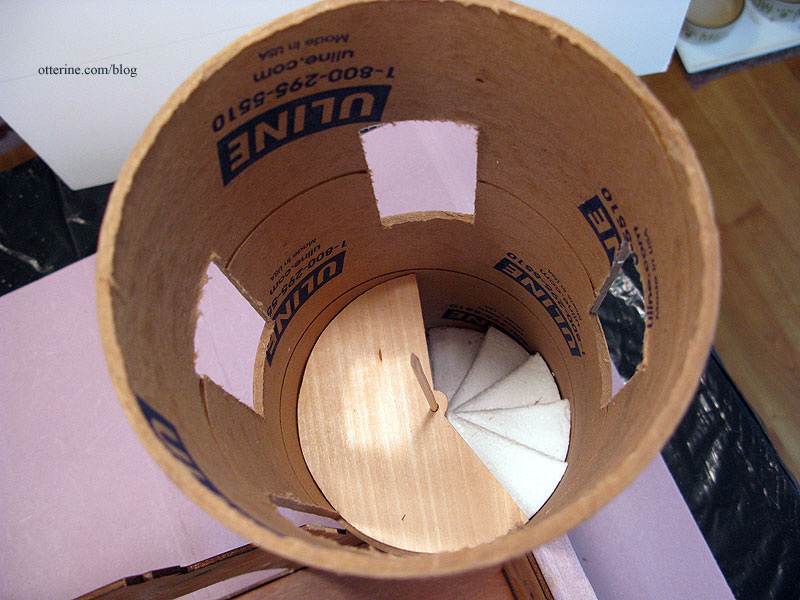
With a 5″ diameter, it was the perfect size, but it was too short. I attempted to add some cardboard to the top, but it was too flimsy. I was able to obtain a 31″ tall, 5″ diameter Uline mailing tube from Freecycle, and it was exactly twice the height I needed. I cut the tube into two 15.5″ lengths which gave me two attempts to get it right. I still have the second one left over.
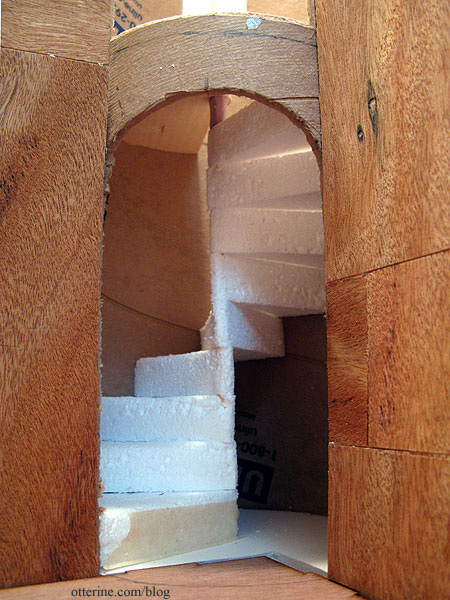
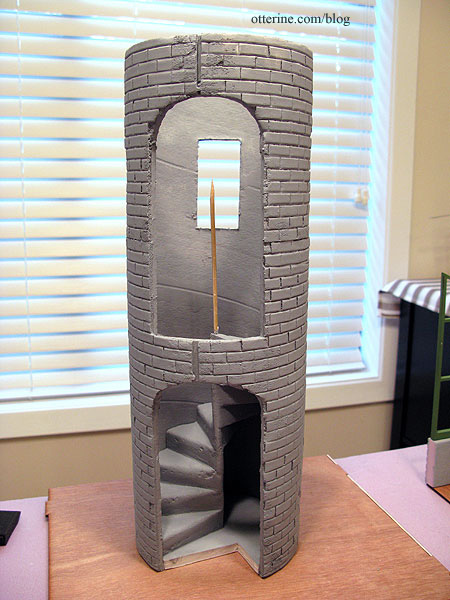
With my model on the balcony at the top of spiral stairs in the mockup tower, I was able to mark where the window overlooking the Sopwith Camel should be.
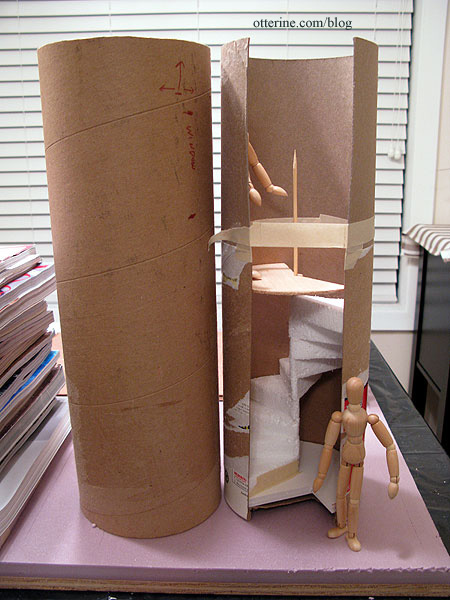
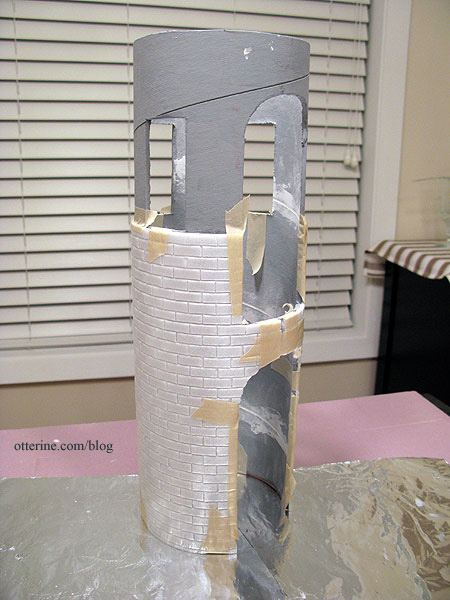
I measured and marked a line 1.5″ from the edge all the way around the top of the tube. This ring would stay intact and serve to hold the roundness of the tower in shape.
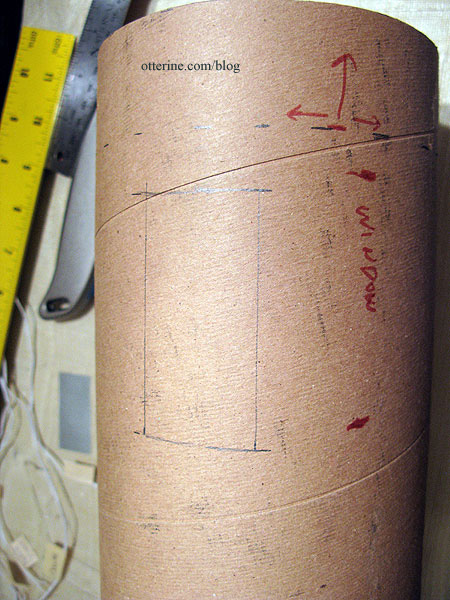
I cut the smaller 1.5″ x 3″ window openings before cutting the arched openings, because I had to press the utility blade into the thick cardboard with significant pressure and I thought having the large openings already cut would make the tube more likely to buckle as I pressed.
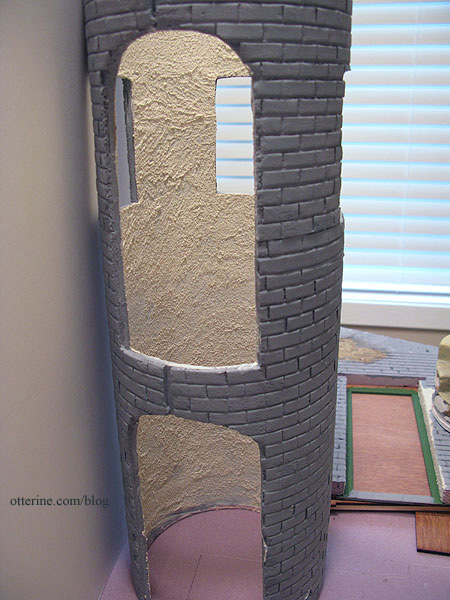
The arched openings join the side walls of the main room.
I drew the arched tops freehand, leaving another full band intact in the middle for stability.
Here you can see the three windows I cut.
I covered the exterior of the tower with Cellfoam 88. It’s white foam sheeting approximately 1/8″ thick. I bought a two-pack at Hobby Lobby with a 40% off coupon. The sheets measure 12″ wide by roughly 4ft long. I measured the amount needed to cover the surface of the tower, and then marked my stone lines 5/16″ apart on the sheet while it was flat and unattached to the tube.
I used a special adjustable X-Acto knife that allows you to cut into a surface at a controlled depth. You turn the knob to allow more or less of the blade to sink into the material. This kept the back of the sheet whole while allowing me to carve the stonework on the front.
After scoring the lines with the blade, I used a dull wooden pencil to indent the lines. It’s a small step that makes all the difference.

I used a carving tool from a set bought at Michael’s to press and cut the vertical lines forming the individual stone blocks. I thought I had a photo of it, but apparently not. Here’s the tool with the builders foam stone started (I’ll detail this portion in a later post). I just lined the blade up between the horizontal lines and pressed until it broke the front surface without cutting through the back. The bricks measure 3/4″ wide.
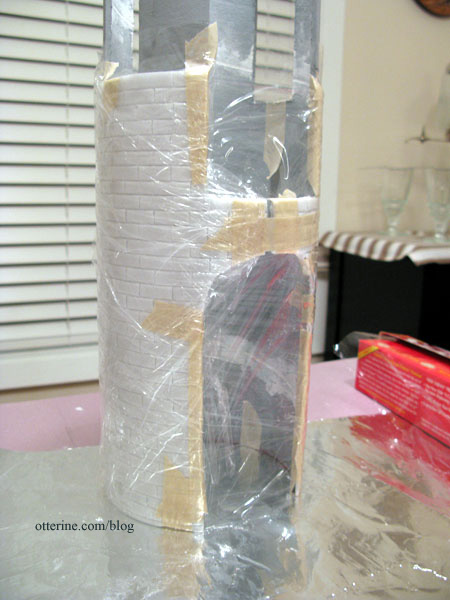
I used Weldbond glue to attach the carved stone sheet to the bottom of the tower tube, applying the glue to the tube and then pressing the sheet onto it. My measurement was a little off, so I had a gap over the arched opening, but this would be filled in with stucco besides.
The Weldbond glue held the sheet well enough to allow me cut the arched openings after the foam was attached. I then taped down the edges.
Since there was no way to press the foam flat on the tube, I wrapped it tightly with cling wrap and let it set.
In the meantime, I prepared the next sheet of foam needed to cover the remaining exposed tube in the same manner as the bottom sheet. I made sure the stone pattern continued seamlessly between the two sheets.
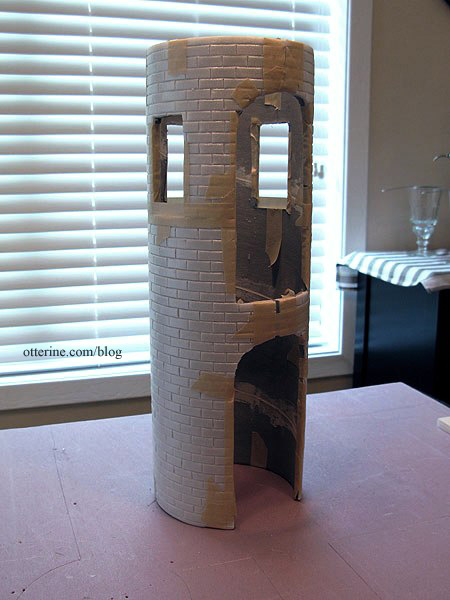
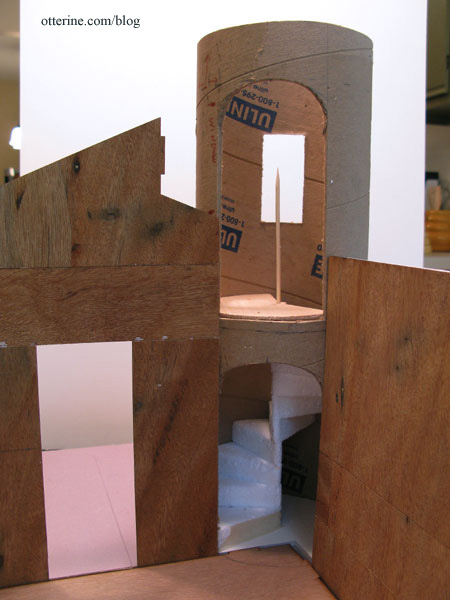
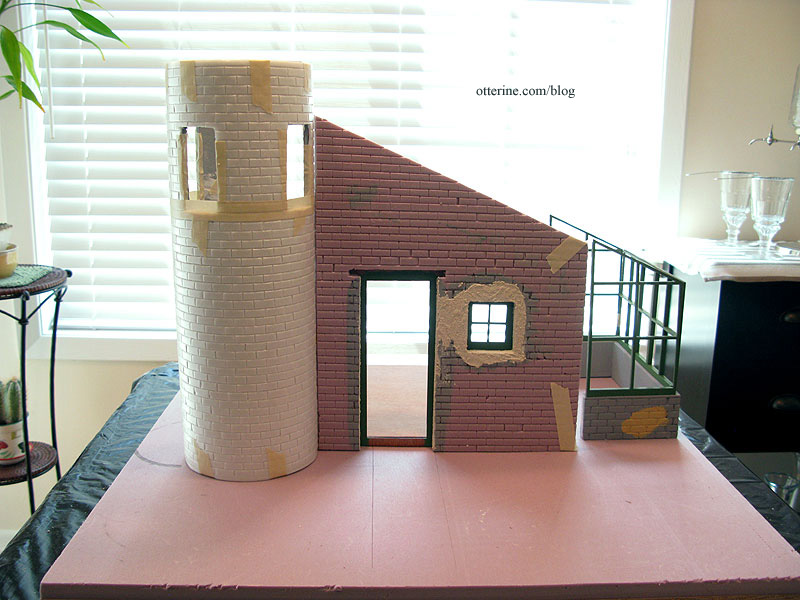
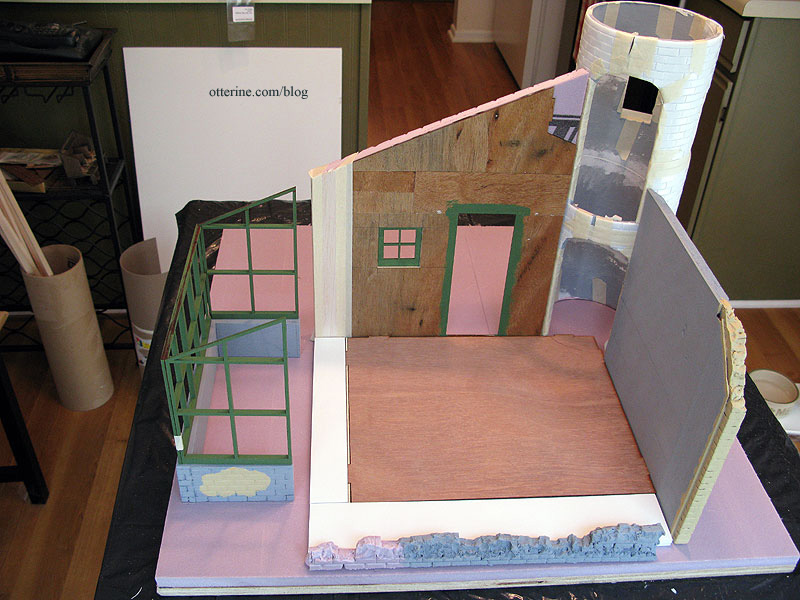
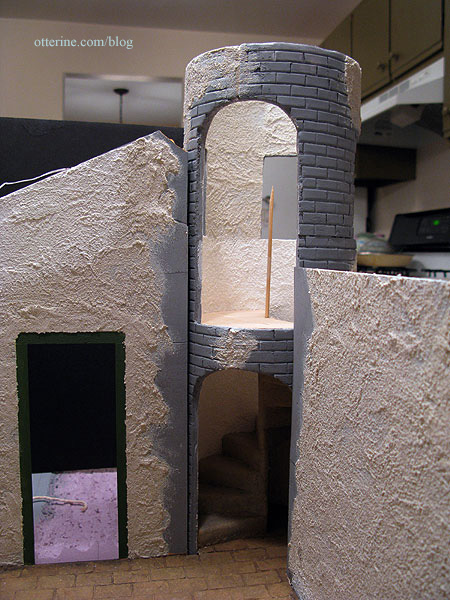
Here it is in place with the main room.
And, from the inside. Now you can see why I keep my kits in dry fit so long. I build parts, check the fit, and so on until I am ready to assemble all the pieces. Even when I am ready, I still usually wait a day to make sure I haven’t missed something. :D
I primed the tower inside and out with gesso to seal it.
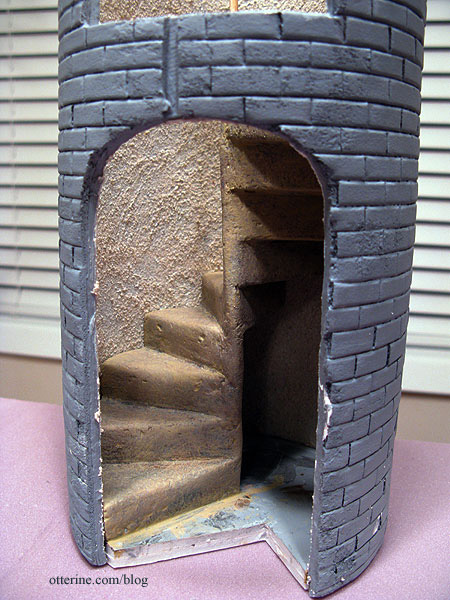
I covered the interior surface of the tower with stucco patch from Home Depot. Since the spiral stair base was a snug fit in the mailing tube, I made sure there was no stucco on that portion at the bottom. Once painted, you wouldn’t be able to tell the difference even if you could see that far into the tower.
Checking the fit of the spiral stairs after stucco application.
I painted portions of the tower Desert Sand by Americana. Once dry, I grouted with spackling compound.
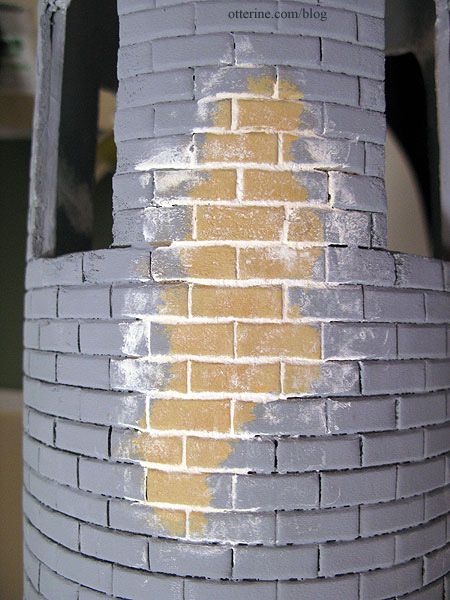
I layered on washes of browns and a little black to stain the grout and give the stone a natural mottled appearance. I then covered the exterior with stucco, leaving the painted stone areas untouched.
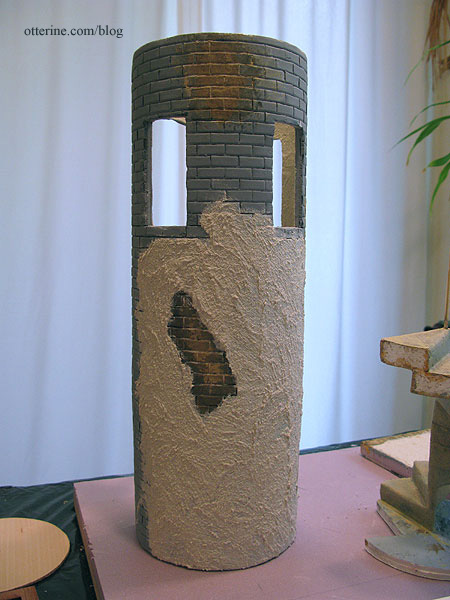
I also left the edges of the windows, the attachment points where the tower meets the main room and the arched openings uncovered. The stucco would be added later to those areas. Here the tower is still not glued in place.
Continued in part 2.


