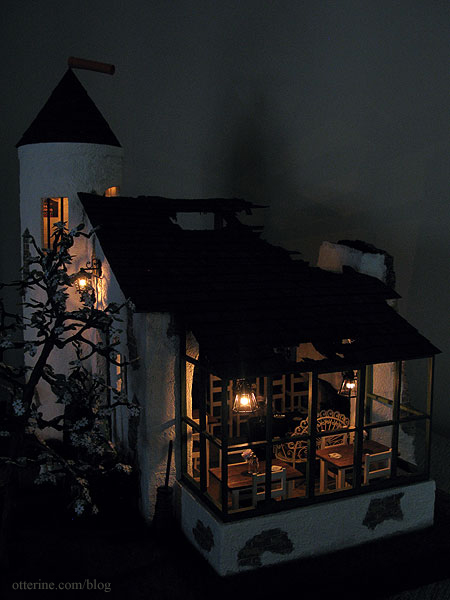
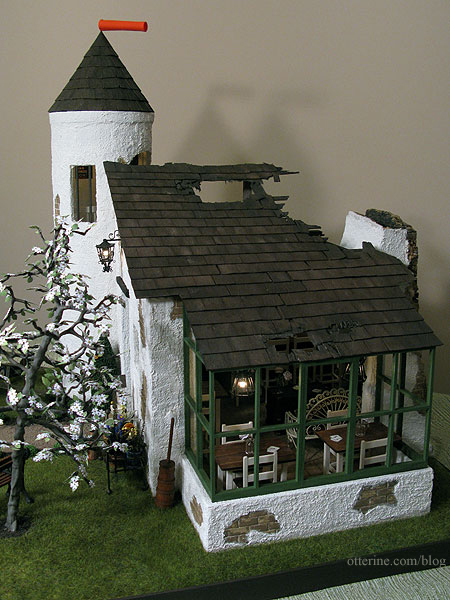
There aren’t a lot of exterior accessories on The Aero Squadron Lounge compared to the interior, but I tried to make what I did add to the outside count for a lot. I’ll detail the landscaping and construction changes separately, but here are some close-ups of the exterior details.
I used a WWI photograph to make the main Lounge sign. I tried out a number of colorations for the background and ended up liking the black and white “negative” version the best. The others seemed to either compete with the color of the front door or be too washed out.
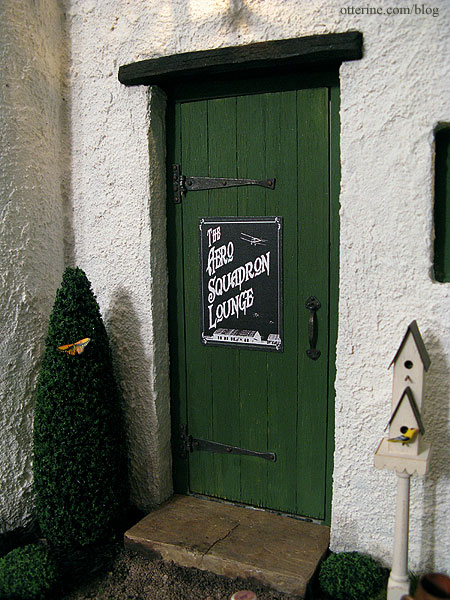
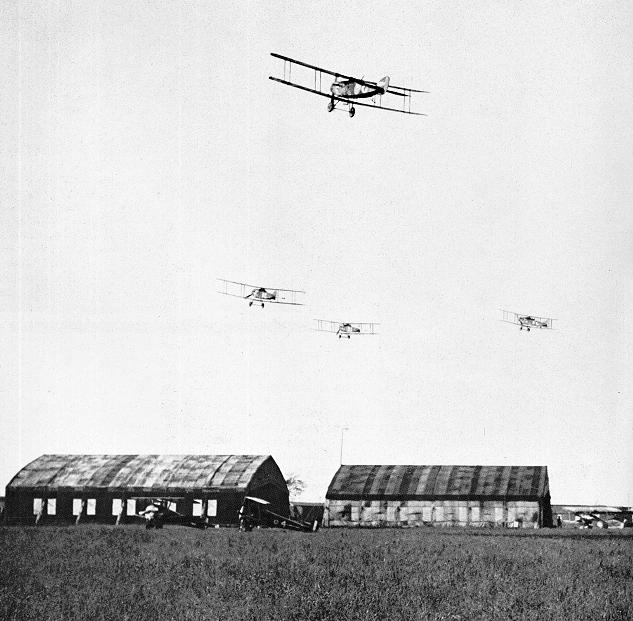
Here is the original photograph from 9thinfdivsociety.org.
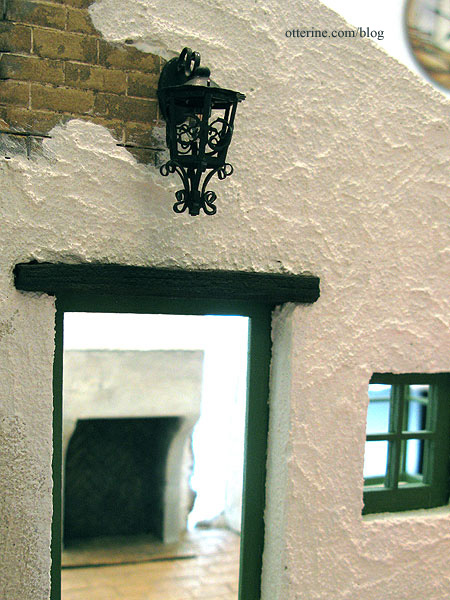
The overhead light is by Heidi Ott. It’s similar to the indoor lighting, but it originally had a shiny finish. I dabbed on black acrylic paint to tone down the shine and removed the plastic “glass” from inside the cage.
This lovely birdhouse was made from a kit by Twilla’s Tiny Treasures, the bird is from A
Little More in Miniatures.
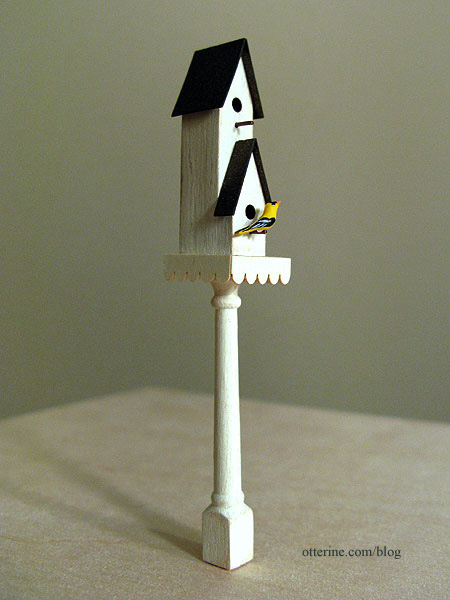
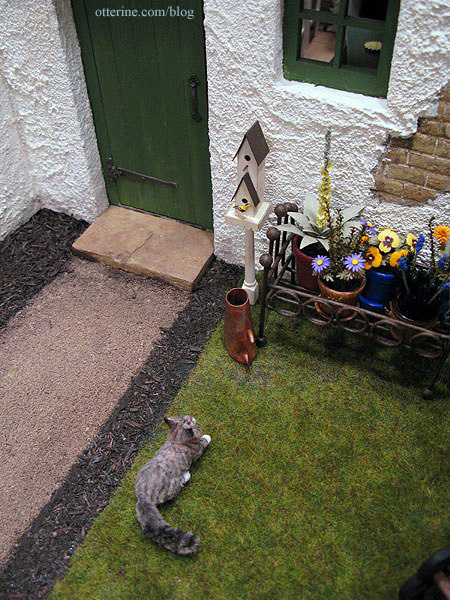
I used a small length of wire glued into the bottom of the post to hold it in place in the builders foam base. Uh, oh! Looks like a kitty has wandered over and spotted the birdie! :O
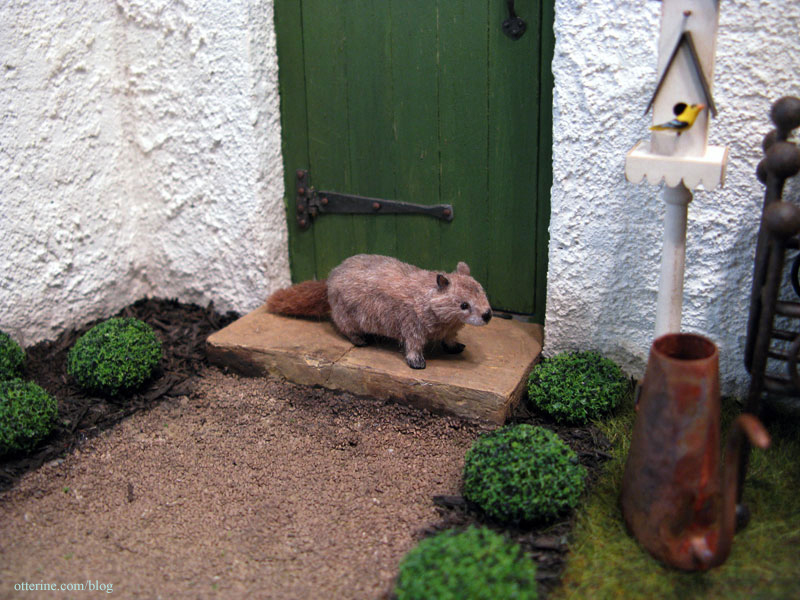
Woodrow also made an appearance as I was building, but neither of these critters will live at the Lounge permanently. :]
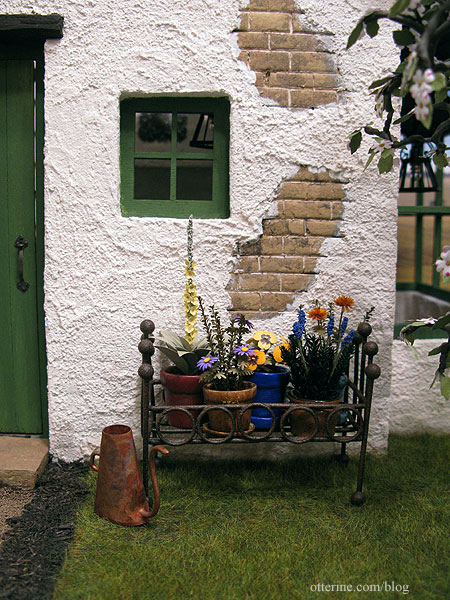
I also showed the planter and plants in earlier post, though I didn’t end up using one of the plants I made. I really like the way this small potted garden fills the space without taking over. The watercan is from Celtic Juju. The plants are made from a combination of kits from The Miniature Garden and Bonnie Lavish with added greenery from A Little More in Miniatures.
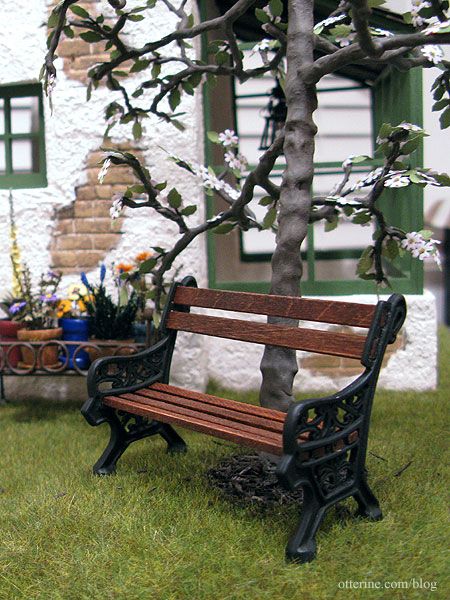
The bench was assembled from a Phoenix Models kit. The “kit” comes with two white metal bench ends that you can paint, and you supply the wood in whatever length you wish. It’s a perfect solution when you need a completely custom size bench. It’s a sturdy little piece once you manage to wrangle all the wood ends into place.
I used some leftover Dura-Craft trim wood for the seat slats and skinny sticks for the back rest, stained with Minwax English Chestnut. I cut the boards 3.25″ in length, so the seat ended up at 3″ wide — a perfect loveseat under a pretty tree. :D
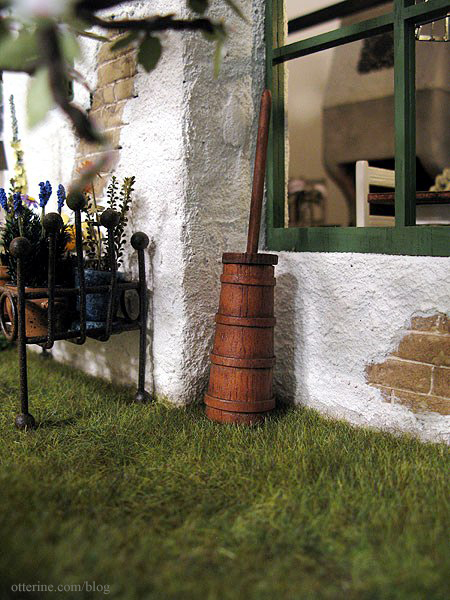
I bought this cheapy butter churn at the Bishop Show and added some black and brown washes to it. That subtle aging made all the difference; it looks like a high quality piece now. :D
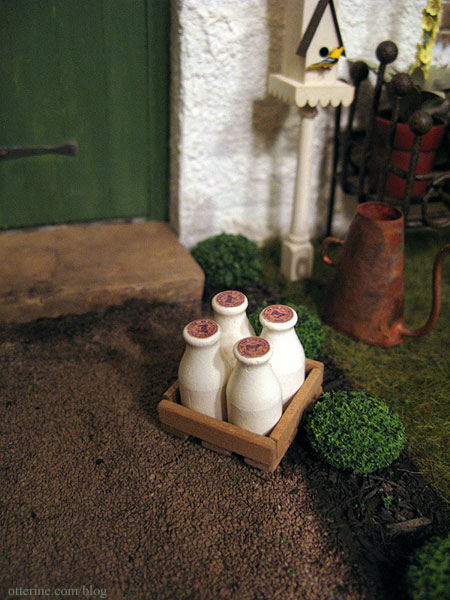
I purchased the milk bottles for I think a quarter each last April at the Bishop Show…or fifty cents each, some small amount. They were wonderfully painted. I added a light grey paint wash to tone down the bright white and printed vintage milk caps for the tops.

I made a quick milk crate from skinny sticks and placed them on the pathway. They would look great on the front stone step other than the fun fact that as soon as you opened the door, the milk would go flying. :\
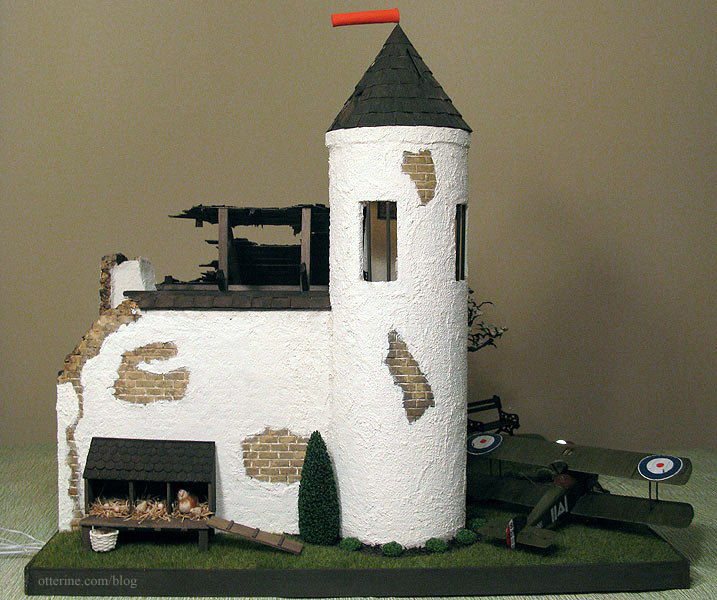
The henhouse is not easily seen in the overall build because of the tower, but I’m glad I included it. The breed of hens I’ve made are Faverolles, a French hen suggested by Teddi. I have a standing hen not yet completed.
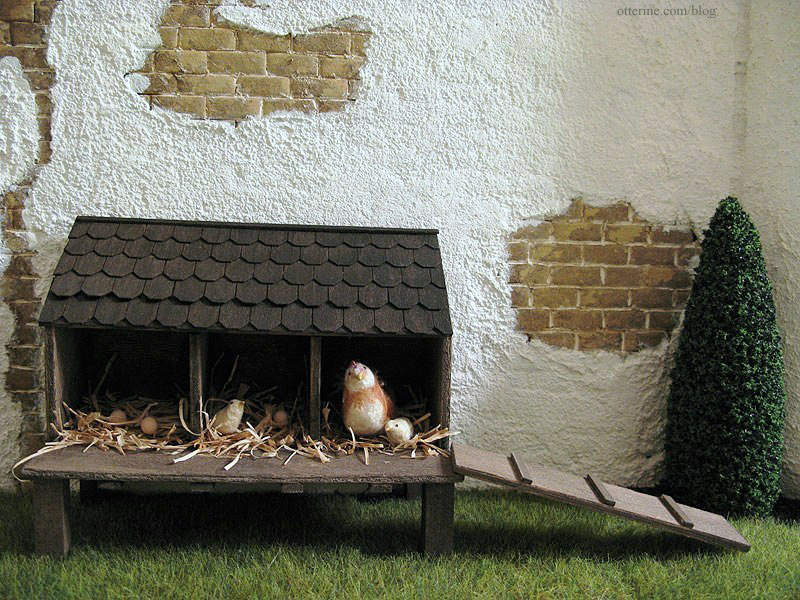
I’ve used a few of the eggs I made, too.
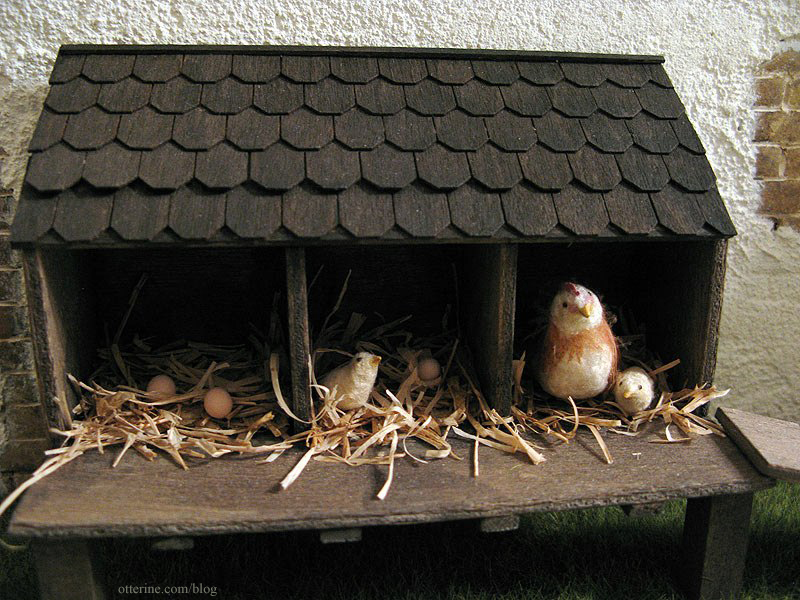
The henhouse is just what was needed to fill the open area on this side.
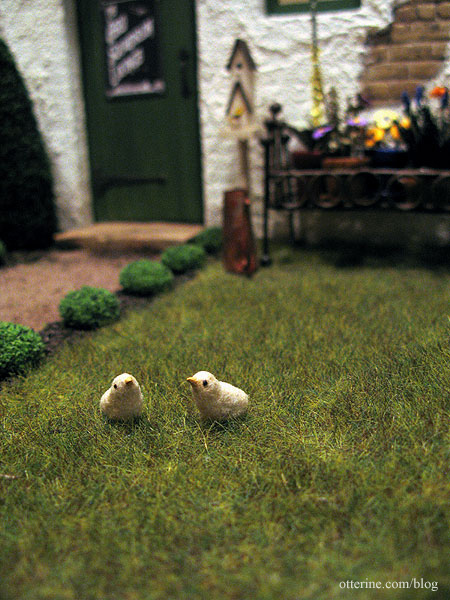
And, speaking of hens…there’s chicks on the lawn.
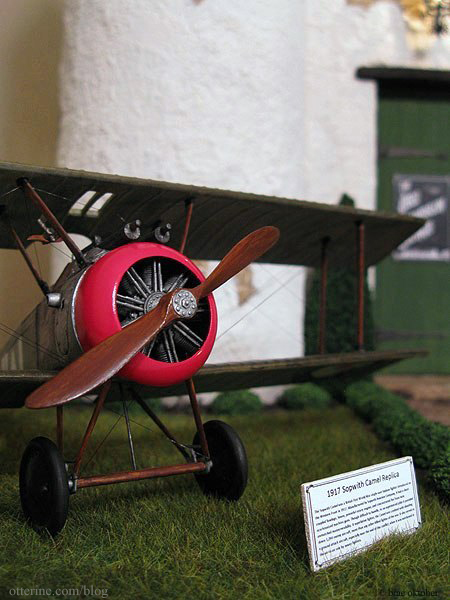
The full post on the 1:32 Scale Academy Sopwith Camel can be found here. The sign verbiage is taken from the Wikipedia article on the Sopwith Camel. I printed it on paper, pasted it onto a primed wood scrap and staked it into the ground with some wire.
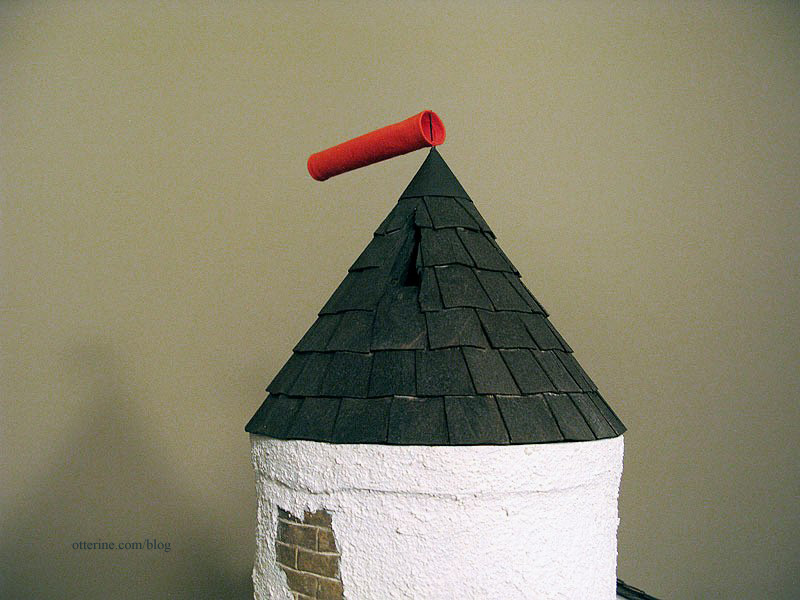
And, of course, the windsock that sits on top of the tower isn’t easily missed. ;D It’s a glued tube of orange cotton held in place with a head pin. Yes, it rotates, though it pretty much always falls back into the same place.
Stop on by for a nightcap.