
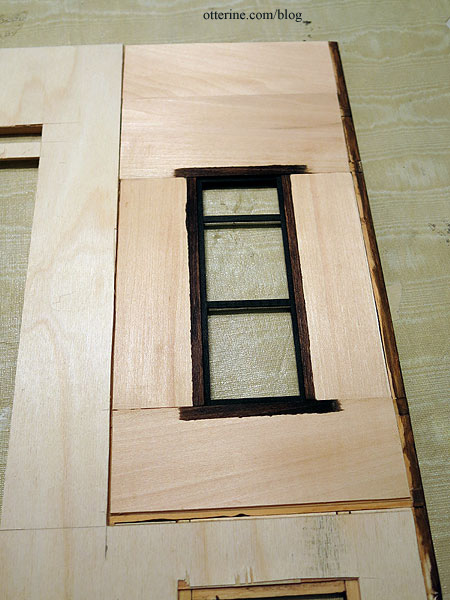
Continuing work on the bay window section. After assembling the front wall, I added the trim to the interior upper window.
It was then time to add the bay window section. I drilled holes along the front grid opening.
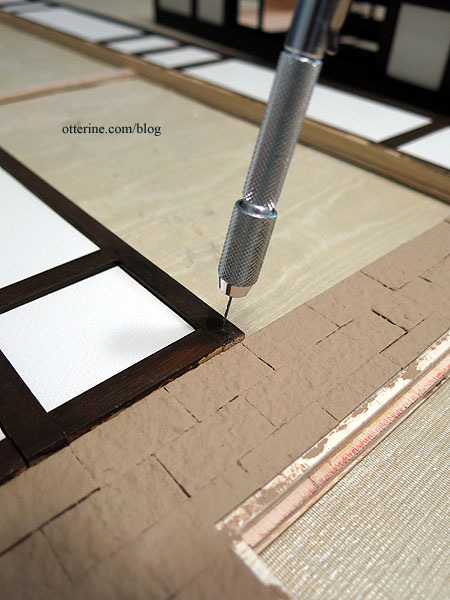
I used a drop of super glue gel to insert headless pins into the drilled holes.
These are meant to add stability to the joins as opposed to just gluing the bay section onto the front.
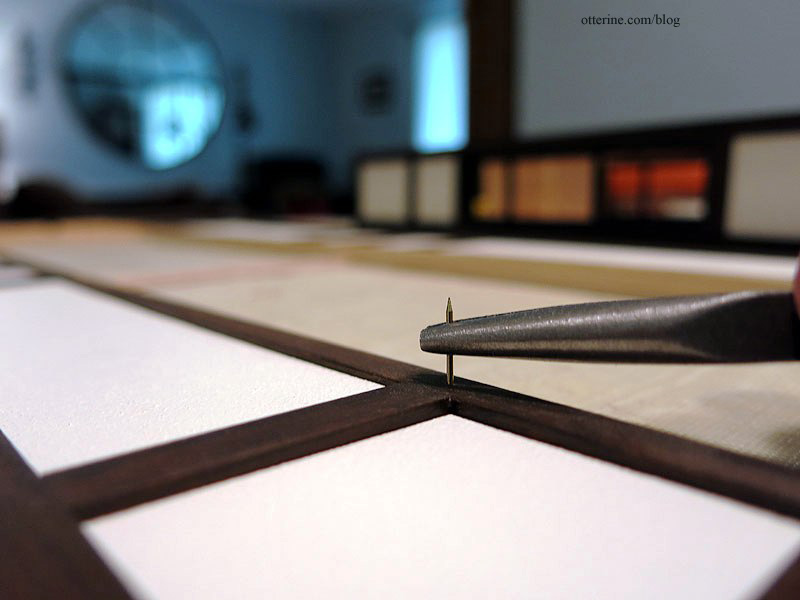
I lined up the bay window section to mark where pilot holes should be drilled in the opposite grid. After drilling the holes, I tapped it into place without glue in dry fit…but then it wouldn’t come back off. Haaaaaaaa! Well, it’s sturdy at least. :D
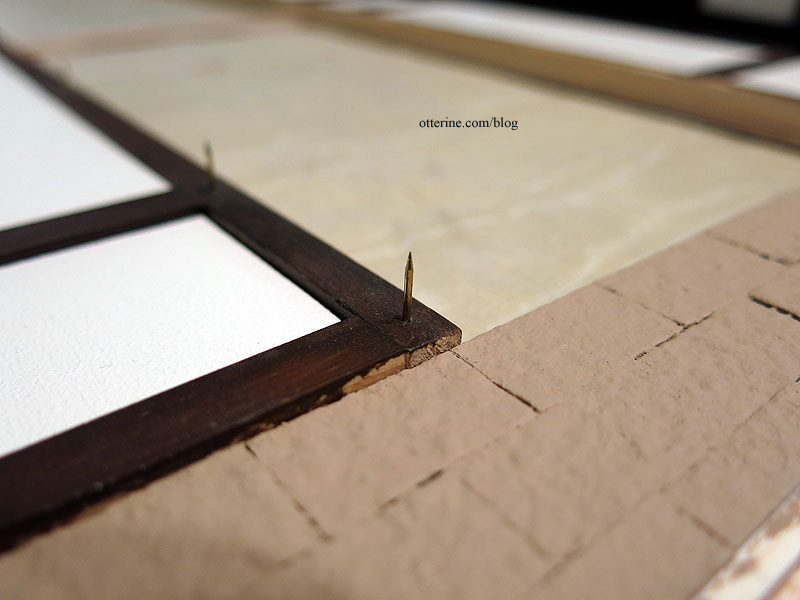
The front panel of the bay window popped loose in the process, so I had to glue that back in place. No biggie.
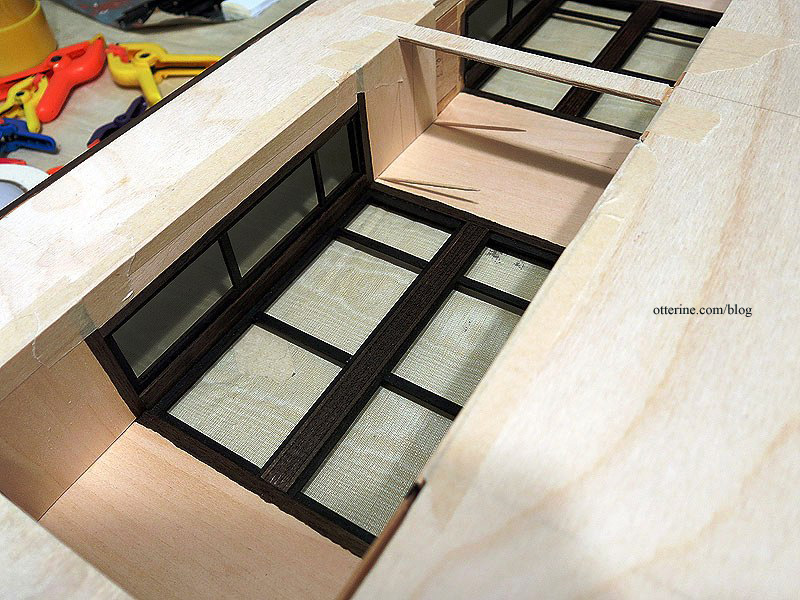
There was also one section where the bay window met the front wall that needed extra glue as well. Once the interior basswood padding is glued in place, any gaps between the two sections will be masked.
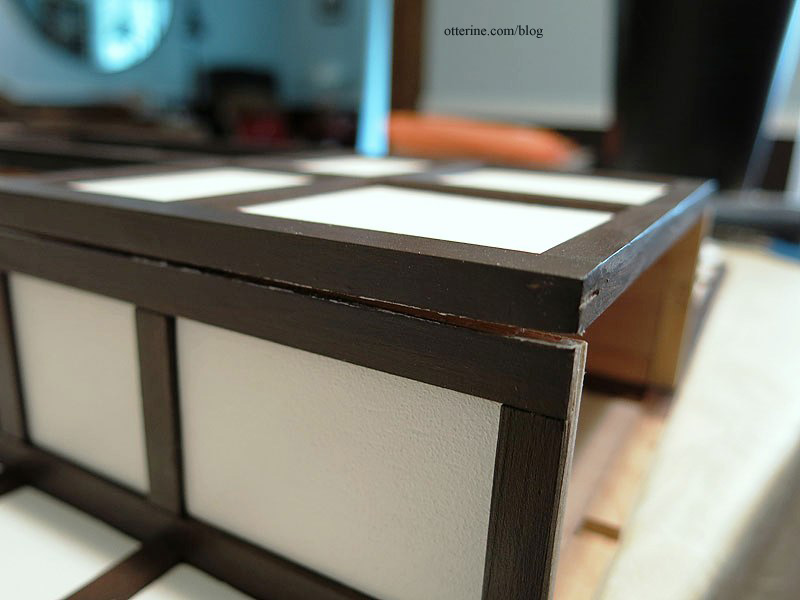
Some of the black window frame pieces popped out with the hammering and handling, not an unusual occurrence. I’m foreseeing a lifelong battle keeping these pieces intact.
I glued the interior window trim/padding pieces in place. This creates a solid, smooth surface for finishing later on in the build. :] I used toothpicks wedged into the corners to hold the boards in place while the glue dried.
Here’s the front wall with the side addition, front door and front steps propped in place.
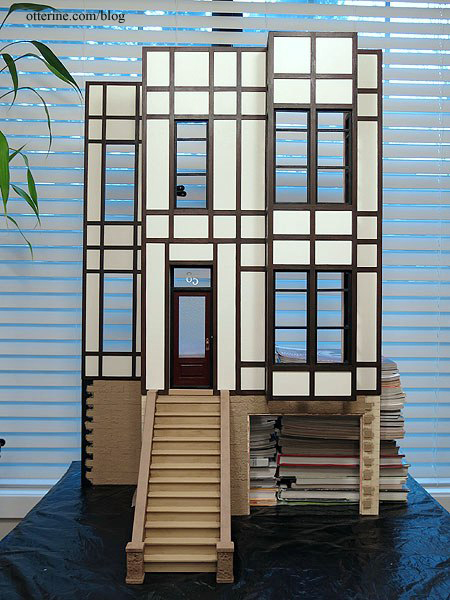
I think we’re getting somewhere! :D


