
Yeah, that’s some scary stuff, right there. :O bzzzzzzzzzzzzzzt
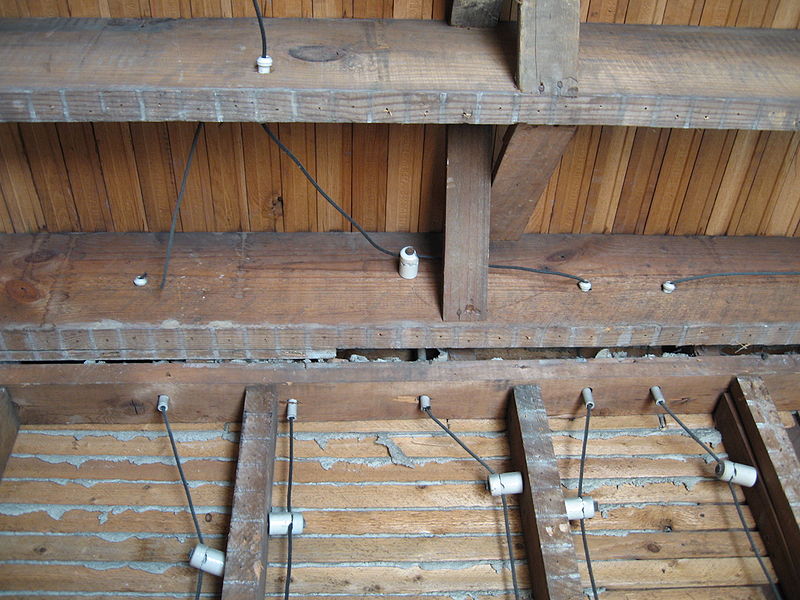
Knob and tube wiring is an old and outdated method of electrification, and if your home inspector finds it in your house, be prepared to spend a lot of money to remove and replace the electrical system. Here’s an excellent video on knob and tube from Edison Tech Center.
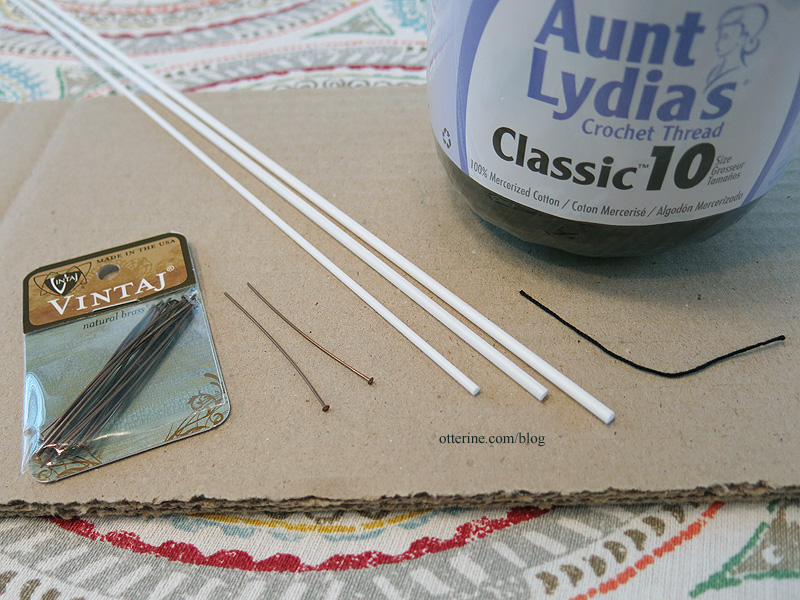
I have no idea when the barn on Milo Valley Farm was built. We’ll just say it’s way old since I don’t know when I will again have the chance to make this insanity in 1:12 scale. I have gathered crochet thread size 10, white plastic tubing in two diameters (I used only the smaller of the two), white plastic rod and copper colored head pins.
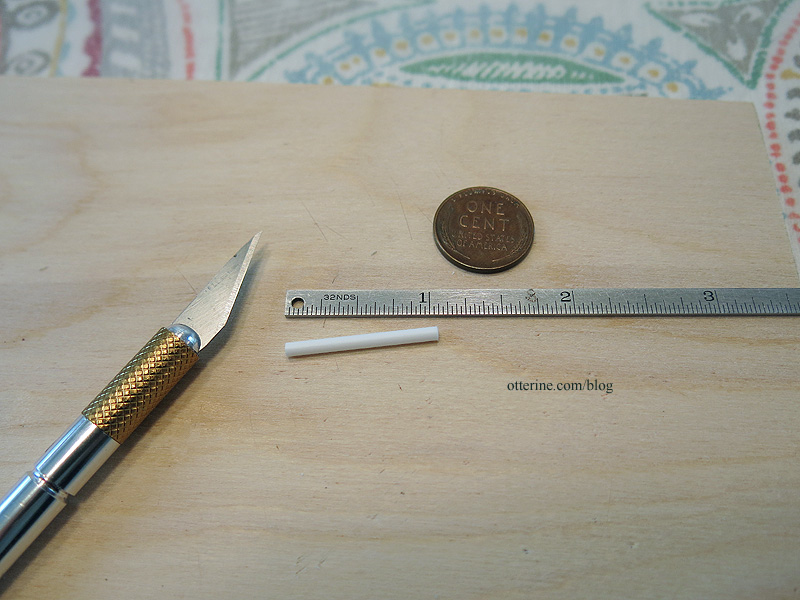
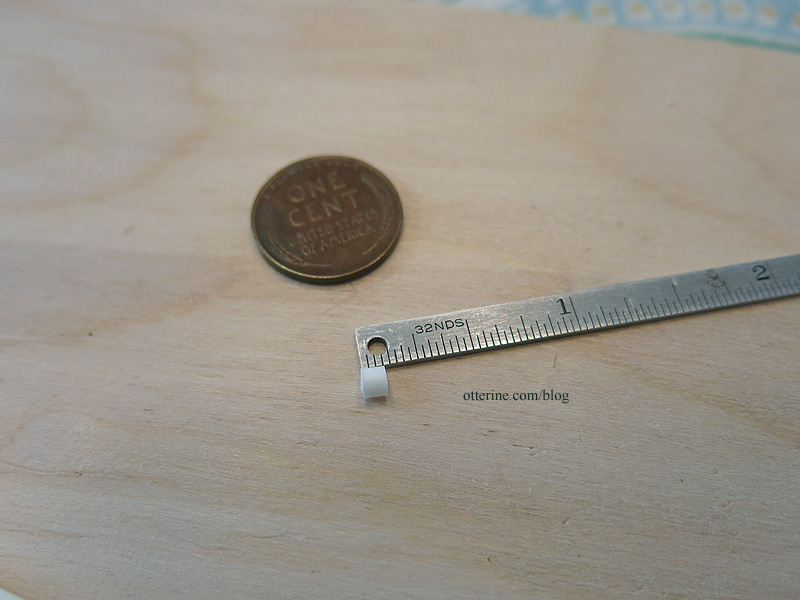
After some research, I was able to determine the dimensions for the knobs — just over 1″ wide and varying from 1.5″ to 2″ long with most being the longer measurement. Now, there’s true scale conversion and there’s just “getting the look” of something with proportional measurements. I’m going with the latter. To make the tubes, I cut 1″ lengths of 1/16″ plastic tubing. (The 1/16″ measurement would be 3/4″ in real life.)
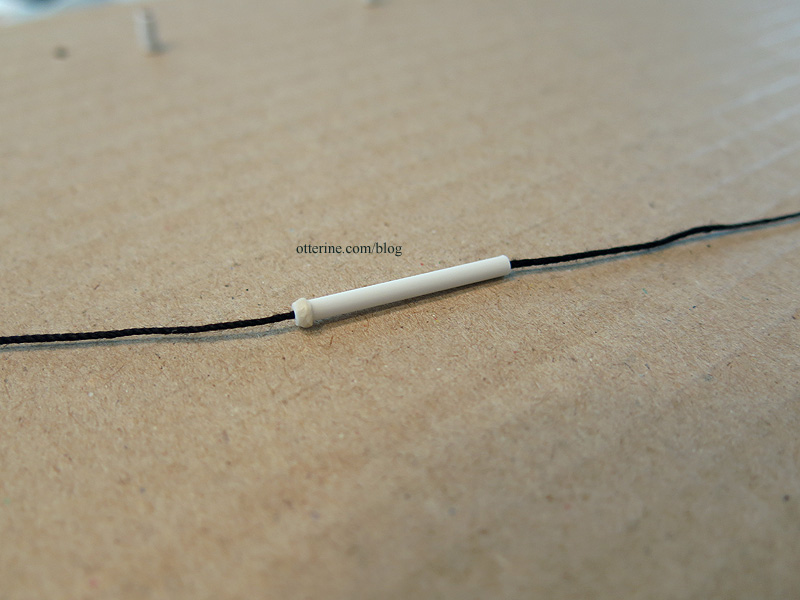
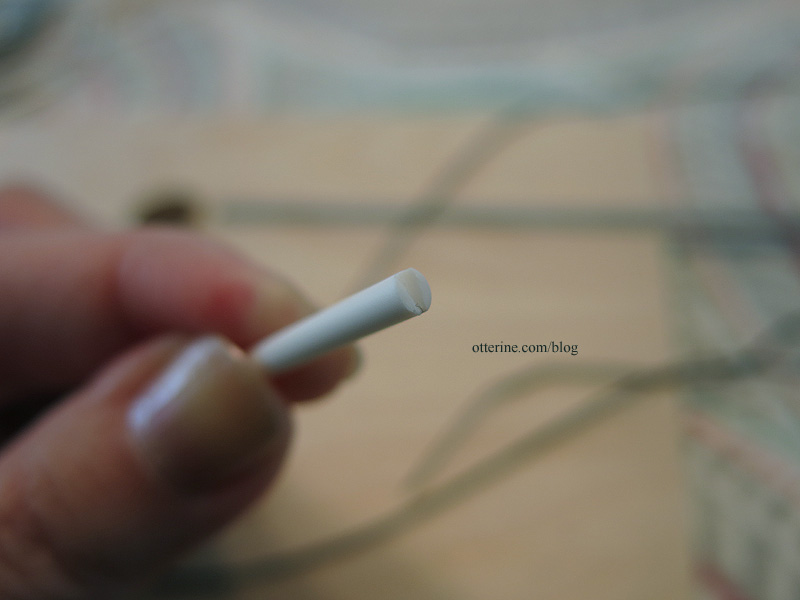
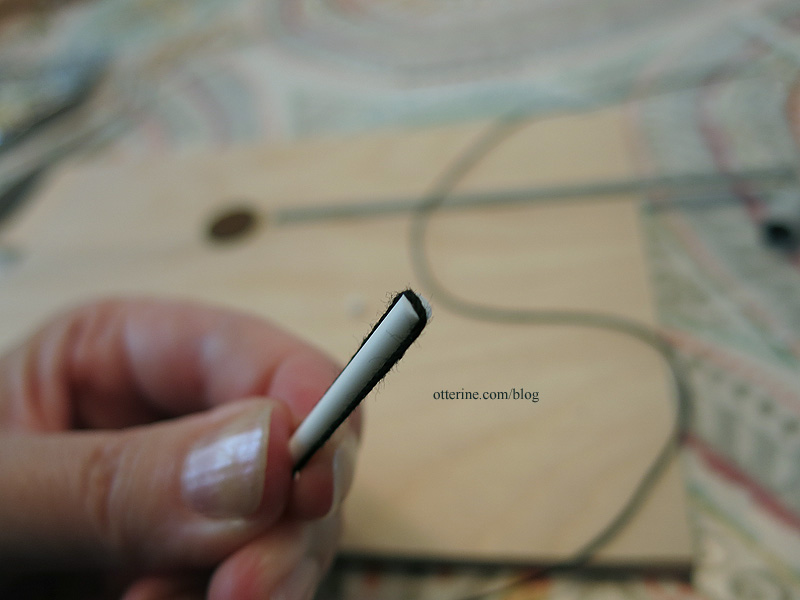
I applied Testors contour putty to the end with a toothpick and then shaped with my fingernail. The thread is fed through the tube. I applied glue to the thread end to make it stiff enough to go through the tube, but I might do this for the entire length when I install it since it makes it easier to handle and put in proper position. I will cut down the tubes to lengths needed to work in the various areas where I will install them.
To make the knobs, I cut two pieces of 1/8″ plastic rod — one 3/32″ long for the top and one 1/8″ long for the base. Here is the top.
I made a small channel on the top of the remaining length of rod to make room for the thread. It was easier to do this detailing while I was able to hold the length of rod in my hand. The real life examples have two channels to keep the wire from touching the nail holding the knob in place, but I am going to use the nail to secure the thread in place. In other words, I’d be causing fires and electrocuting people if I were a mini electrician. :O
I then cut the longer of the two pieces. I drilled holes in each knob set to make way for the headpins.
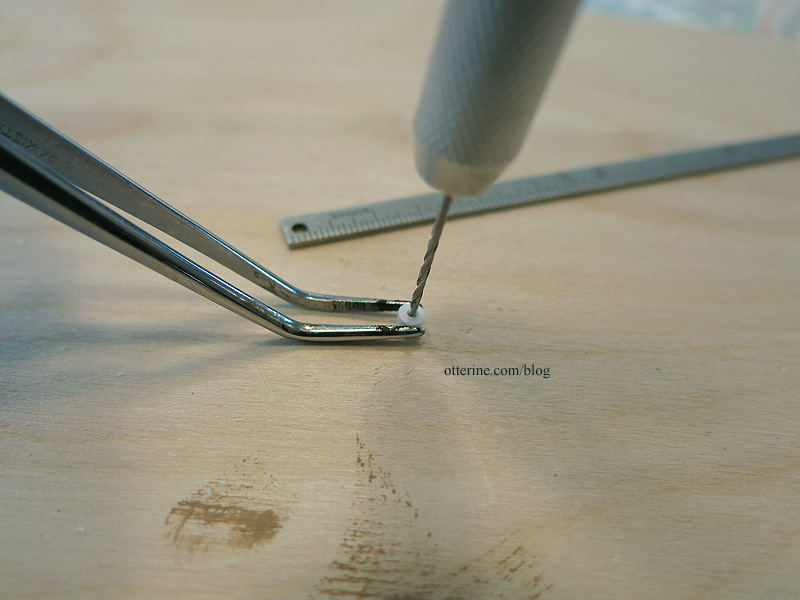
The reason I didn’t use open tubing for this is because I wanted a tight fit for the pins and the existing 1/8″ tubing had too large an opening. It was either fill in the open tubing or drill holes in the rods.
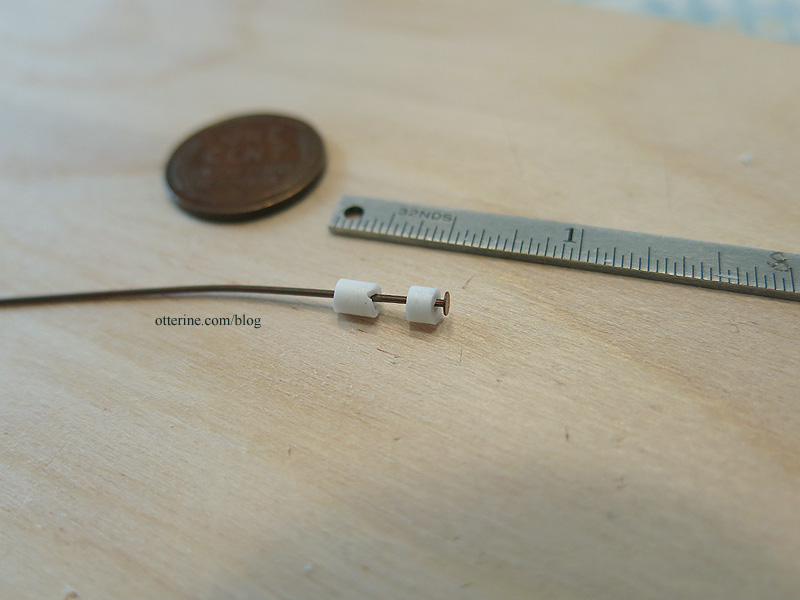
With a little give on the measurements, I ended up with a knob that would be 3″ long in real life.

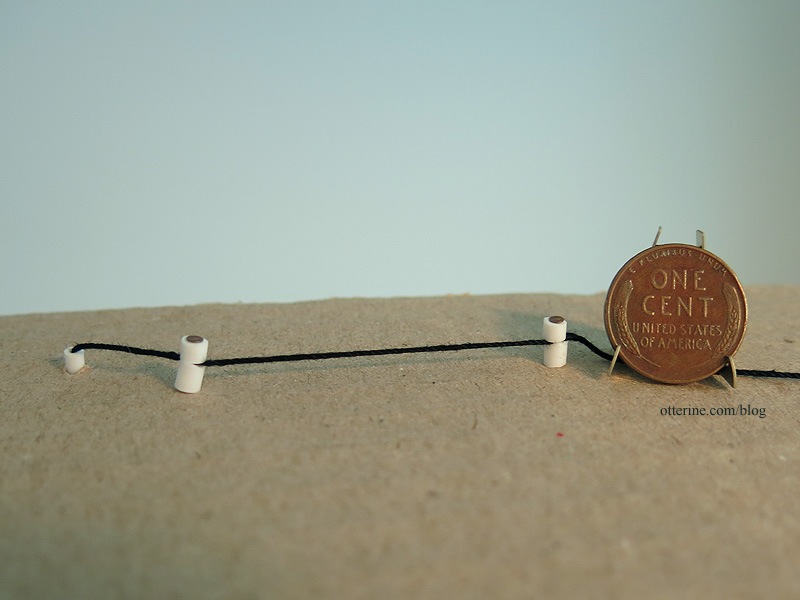
The tube goes through the wall to bring in the wire. I fed the headpin through the thread to hold it in place.

I then pulled it tight on the other side of the cardboard test board. When I install these, I will glue and drill holes into the beam structure of the barn. The prototype worked out well. :D
I don’t think I’ll bother painting these, even with the contour putty being a slightly different color. There won’t be more than a few tubes, besides. It seems a lot of hassle for very little return when they look good on their own.


